Let It Snow Holiday Pillow Tutorial
Hello Everyone,
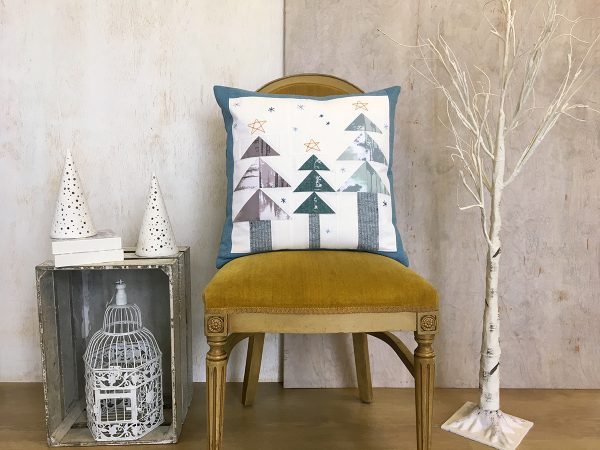
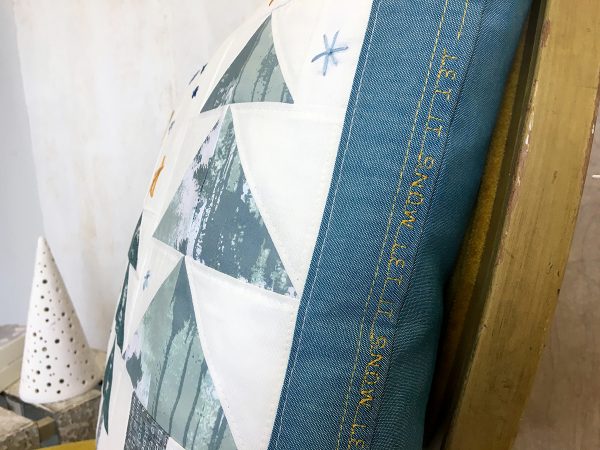
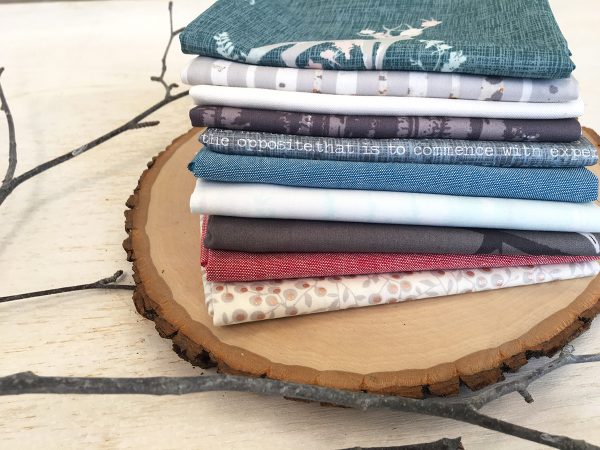
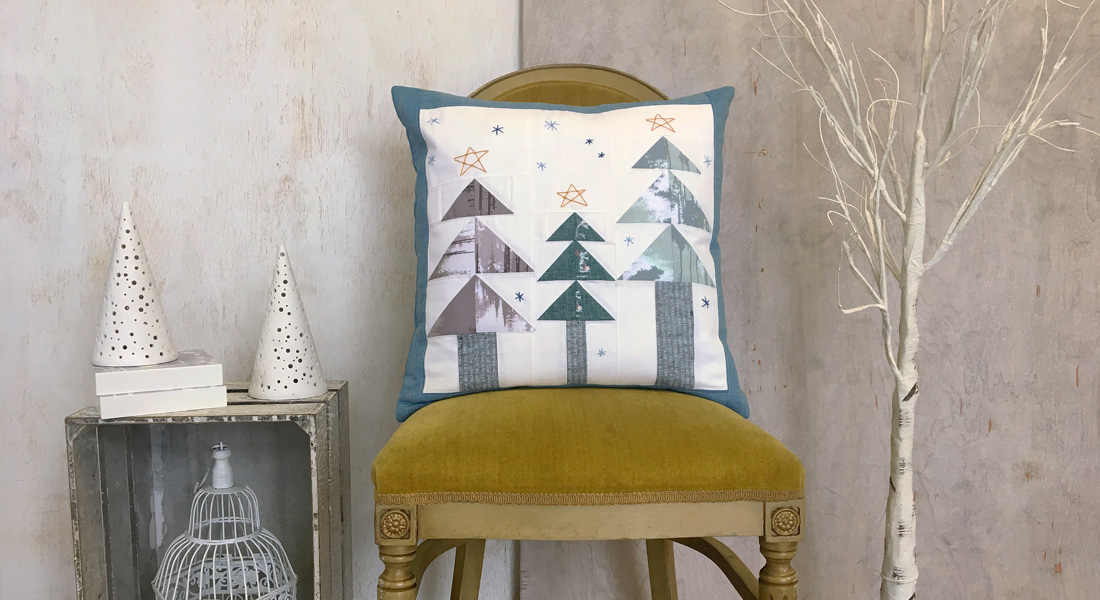
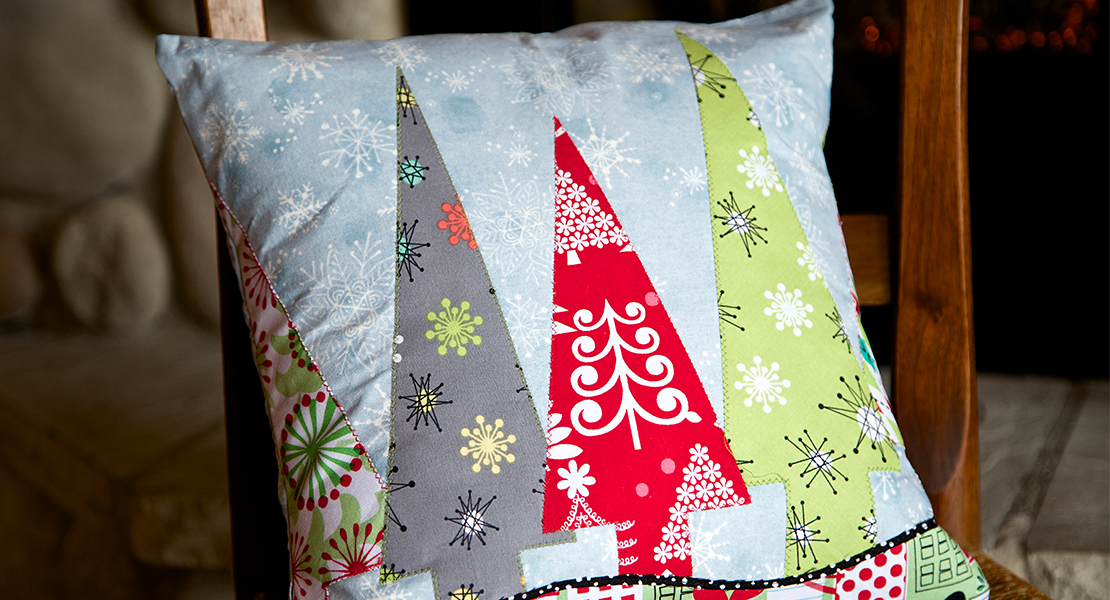
It’s December, AGF’s favorite month of the year! Holiday music is playing and we are full of happiness and cheer! For those of us that sew, we love to make handmade gifts for our friends and family because it makes our present extra special and one of a kind. We created the Let It Snow Pillow featuring Blithe fabric and our Outland Yarn Dyes. Anyone on your holiday gift list would absolutely love to receive this holiday themed pillow. The luxurious feel of our yarn dyes mixed with embroidery details and BERNINA’s stitched letters makes this pillow so fun to make and to display in your home!
Since there is nothing like receiving a homemade gift from the one you love, we wanted to have a FABRIC GIVEAWAY! See details at the bottom of this post, and good luck!
Finished Pillow Size: 20″ x 20″
Materials to make the Let It Snow Holiday Pillow
Fabric A– DEN-OYD-6004- 3/8 yd
Fabric B-DEN-OYD-6000- 1 1/4 yds
Fabric C-BLI-75601- 10″ square
Fabric D-BLI-85610- 10″ square
Fabric E-BLI-75602- 10″ square
Fabric F-BLI- 75610- 10″ square
Cutting Directions
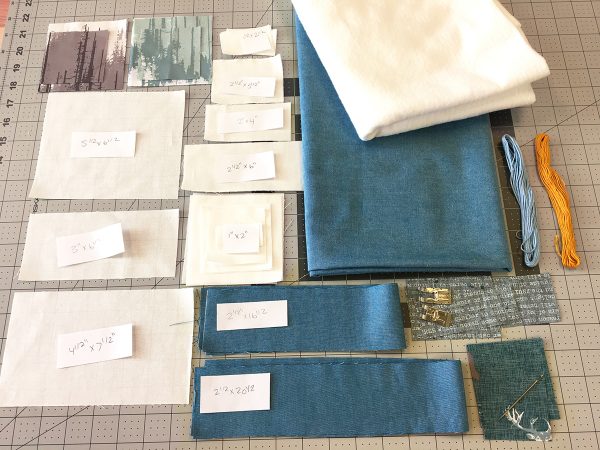
Two (2) 2 1/2″ x 3 1/2″ strips from Fabric A
Two (2) 2″ x 4″ strips from Fabric A
Two (2) 2 1/2″ x 6″ strips from Fabric A
One (1) 3″ x 6 1/2″ strips from Fabric A
Two (2) 3″ squares from Fabric A
One (1) 2 1/2″ square from Fabric A
Four (4) 4″ squares from Fabric A
Four(4) 3″ square from Fabric A
Four (4) 1 1/2″ x 2 1/2″ strips from Fabric A
Two (2) 1″ x 2″ strips from Fabric A
One (1) 5 1/2″ x 6 1/2″ rectangle from Fabric A
One (1) 4 1/2″ x 7 1/2″ rectangle from Fabric A
Two (2) 2 1/2″ x 16 1/2″ strips from Fabric B (top and bottom border)
Two (2) 2 1/2″ x 20 1/2″ strips from Fabric B (side border)
Two (2) 24″ x 20 1/2″ rectangles from Fabric B (backing)
One (1) 2 1/2″ x 3 1/2″ strip from Fabric C
One (1) 1 1/2″ x 4″ strip from Fabric C
One (1) 2 1/2″ x 6″ strip from Fabric C
Two (2) 4″ squares from Fabric D
One (1) 3″ square from Fabric D
Two (2) 3″ squares from Fabric E
One (1) 2 1/2″ square from Fabric E
Two (2) 4″ squares from Fabric F
One (1) 3″ square from Fabric F
Other Materials Used
- Sewing machine (we use a BERNINA 350 PE)
- Reverse pattern foot #1/#1C/#1D
- Open embroidery foot #20/#20C/#20D
- Walking Foot #50
- Fabric Marking Pen
- Clear Ruler with 45 degree
- Batting
- Embroidery thread and needle
- Aurifil Threads Used:
- #2021-Natural White
- #2132-Tarnished Gold
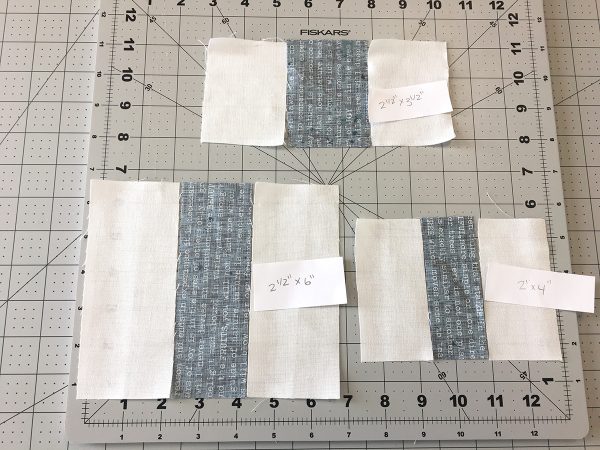
Note: We found it incredibly helpful to label our white yarn dye pieces to help with any confusion during the sewing process.
Step 1: Creating the Half Square Triangles
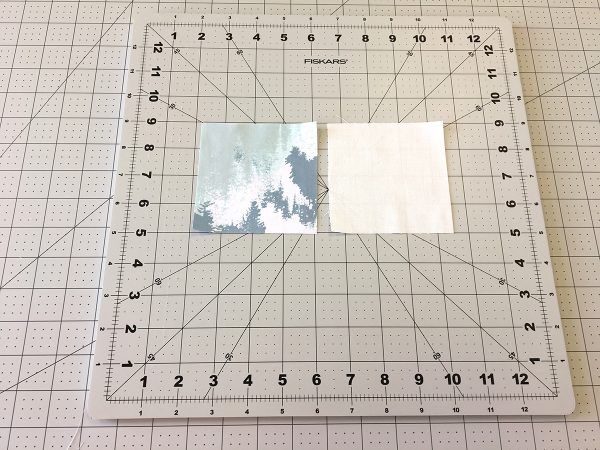
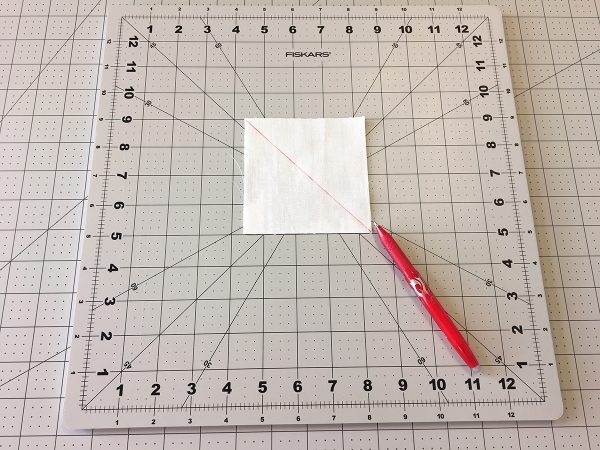
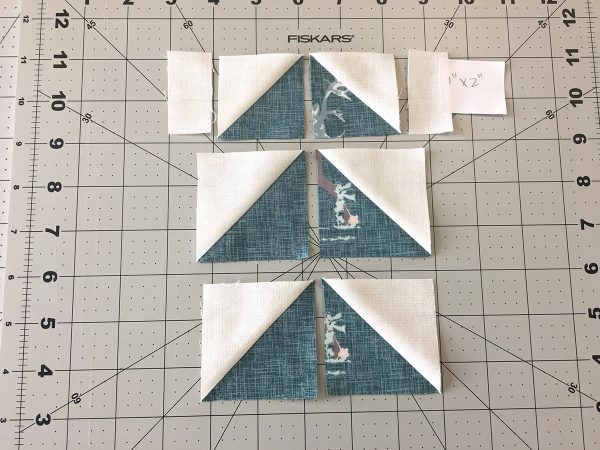
Take all of your square pieces cut in Fabric A and draw a diagonal line on the wrong side of the fabric from one corner to the other with a fabric marking pen. Match up all of your squares from Fabric A to the corresponding squares from Fabric D, E, and F. Place right sides together. Pin together if necessary.
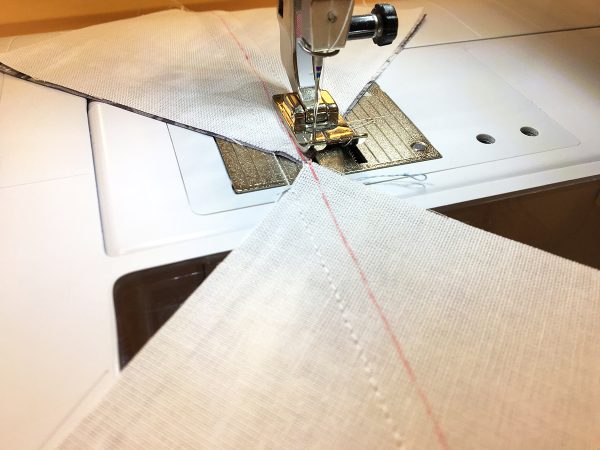
Sew 1/4″ on each side of the line chain piecing all your HST’s (half square triangles). Sew on one side of the line and then the other. Clip thread and press HST’s as desired.
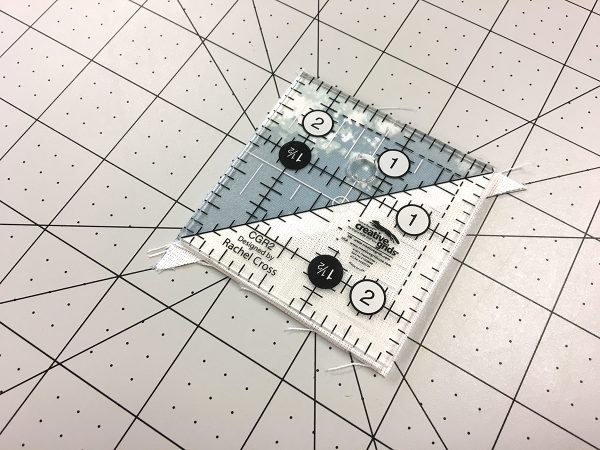
To square off your HST’s take a ruler with a 45 degree line and match the 45 degree line up with the seam line. Using a rotating cutting mat works great because you can trim two sides, then rotate the mat and trim the other two sides without moving your piece! Repeat this process trimming your HST’s to 2″, 2 1/2″ , and 3 1/2″.
Step 2: Assembling the Pillow
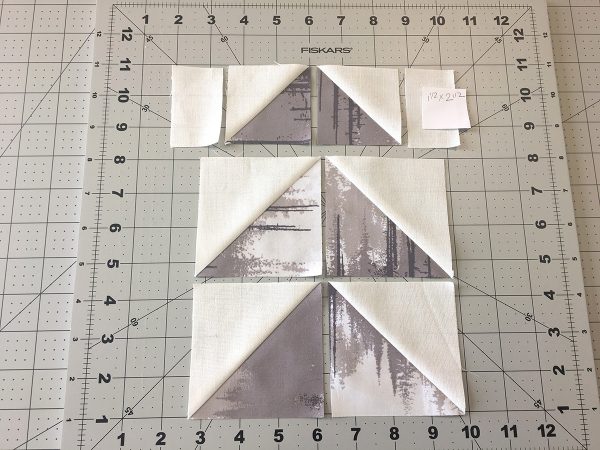
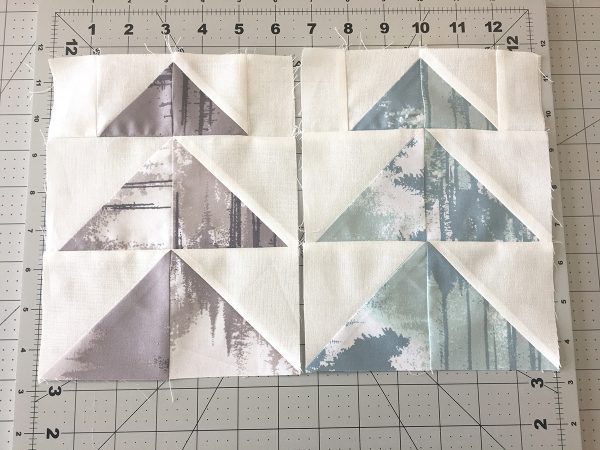
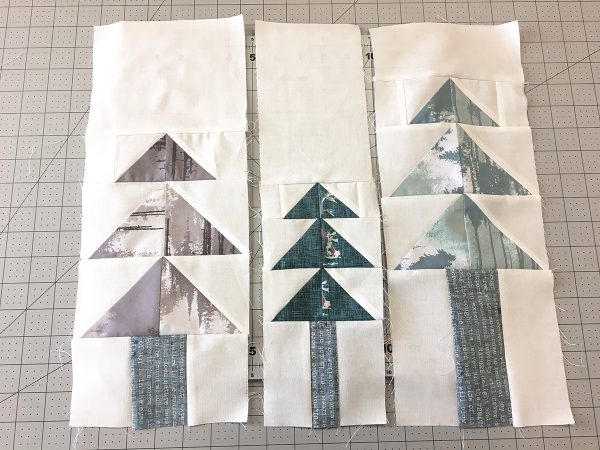
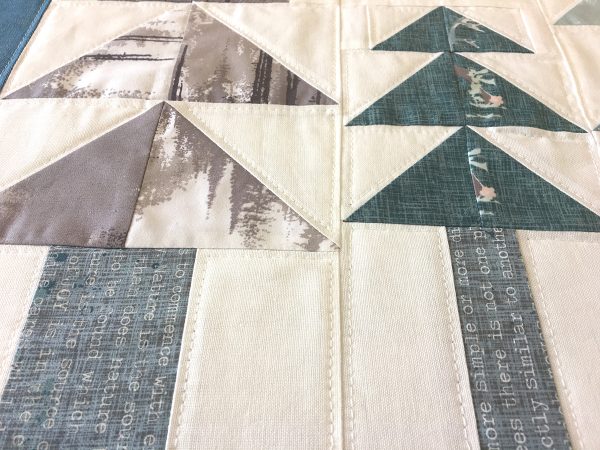
Sew two 2 1/2″ HST’s together and then sew on each side a 1 1/2″ x 2 1/2″ strip. Then sew two 3 1/2″ HST’s together for the second and three row of your first tree. (Follow picture below)
Repeat this same process with the other F/A HST’s and 1 1/2″ x 2 1/2″ strips from Fabric A to create another tree!
Repeat this same process with your HST’s from E/A and your 1″ x 2″ strips from Fabric A.
To create the tree trunks sew a 2 1/2″ x 3 1/2″ strip from Fabric A to each side of a 2 1/2″ x 3 1/2″ strip from Fabric C. Sew this trunk to your first tree. Sew a 2 1/2″ x 6″ strip from Fabric A to each side of a 2 1/2″ x 6″ strip from Fabric C. Sew this trunk to the third tree. Sew a 2″ x 4″ strip from Fabric A to each side of a 1 1/2″ x 4″ strip from Fabric C. Sew this trunk to the second tree.
Next sew a 5 1/2″ x 6 1/2″ rectangle to the top of your first tree, a 4 1/2″ x 7 1/2″ strip to the top of your second tree and a 3″ x 6 1/2″ strip to the top of the third tree. Sew all your trees together.
Sew a 2 1/2″ x 16 1/2″ strip from Fabric B to the top and bottom of your pillow then sew a 2 1/2″ x 20 1/2″ strip from Fabric B to the sides of your piece. Your pillow top is complete and now it’s time to add the hand-stitched embroidery and decorative lettering.
Step 3: Finishing Details
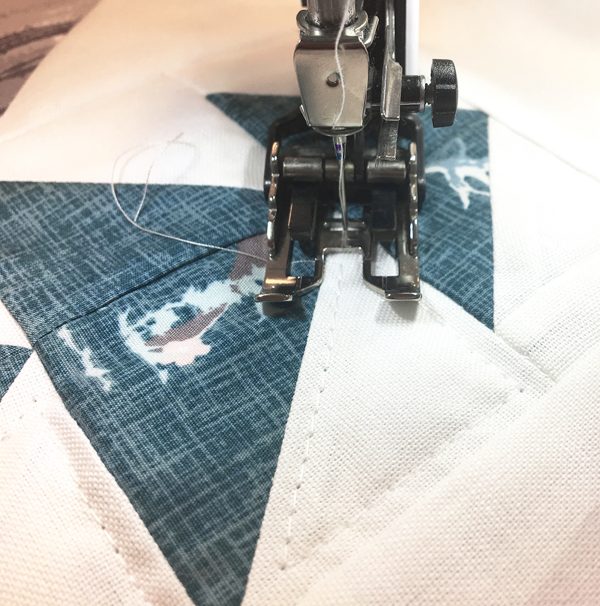
Place a piece of batting behind your pillow top and quilt as desired! We echoed the background pieces with coordinating thread. Using your walking foot works great for this part, it allows you to quilt over the batting and pillow top with ease.
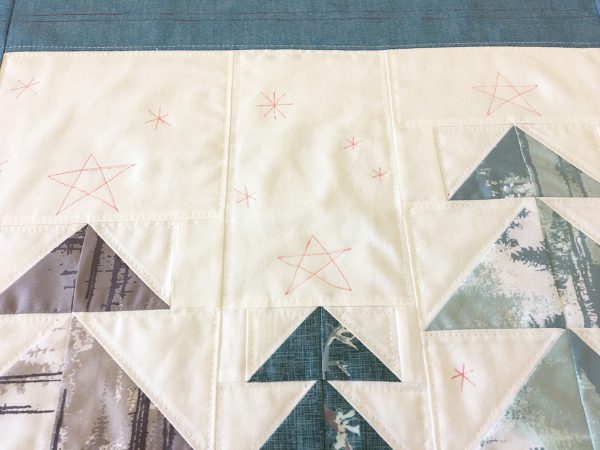
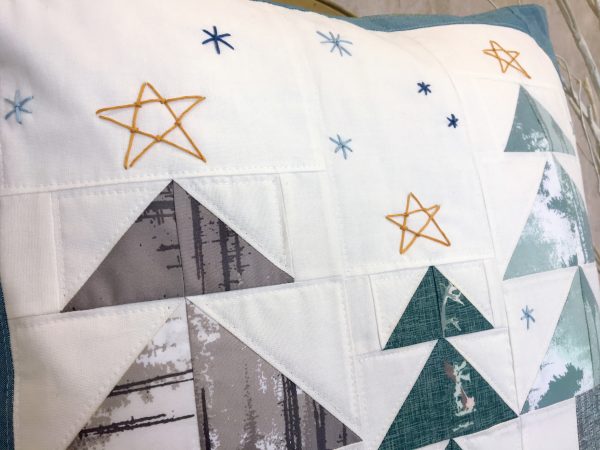
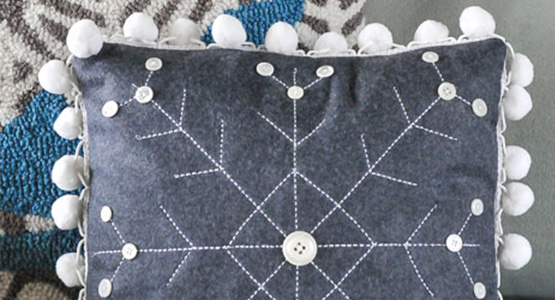
Draw big and small stars and snow flakes with a fabric marking pen. Following your hand drawn designs stitch using embroidery thread!
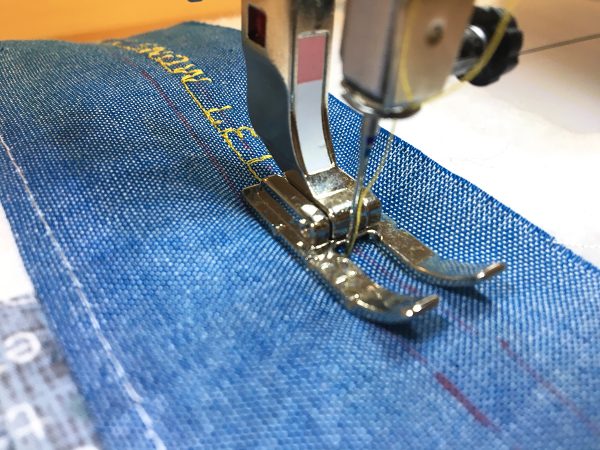
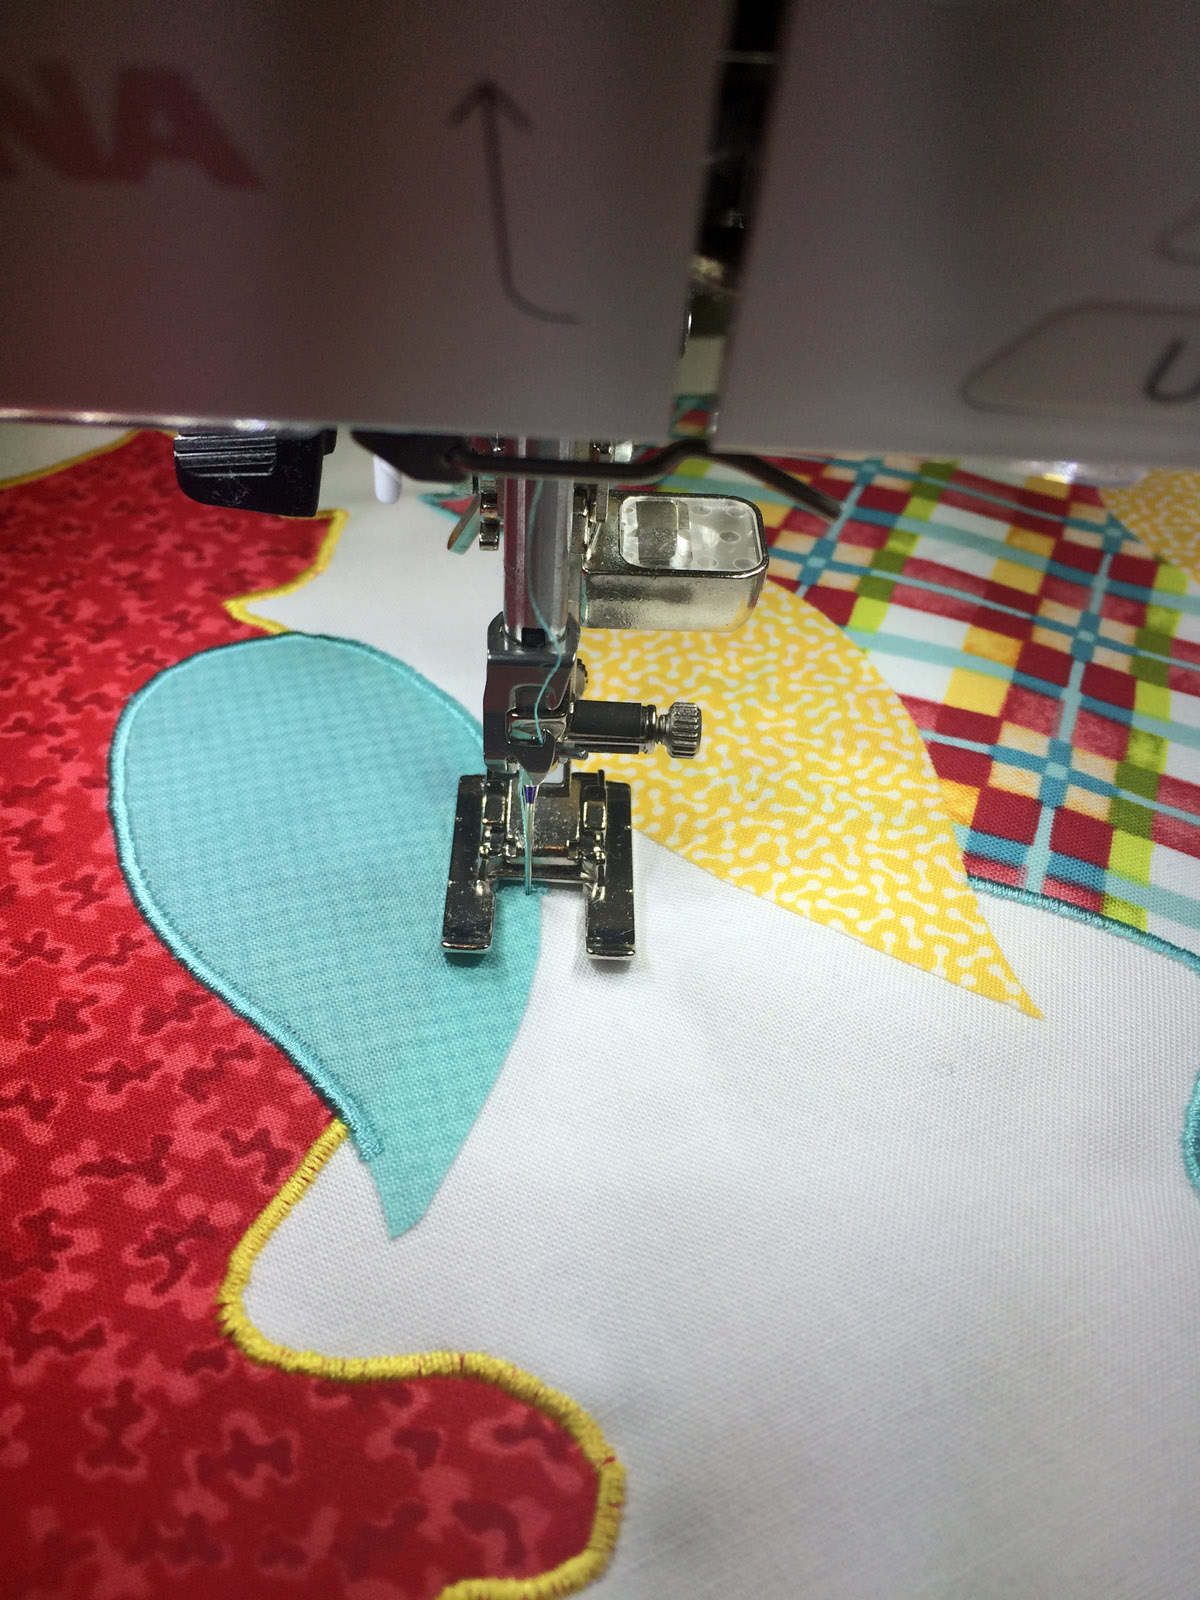
To program the letters you would like click here to learn how. We stitched “Let It Snow” but feel free to stitch any words or use any decorative stitches you would like! We like to use my open embroidery foot for this part.
Step 4: Envelope Backing
The last step is to take both 24″ x 20 1/2″ rectangles and fold in half with wrong sides touching and stitch two lines 1/4″ and 1/2″ away from the folded edges. Place both pieces right sides together on top of each other to the top of your pillow top. Stitch all the way around your piece at 1/2″ and clip corners at seam allowance! Flip your pillow through to the right side and place a 20″x 20″ pillow form inside!
Happy Holidays,
AGF
Art Gallery Fabric’s December 9 Gift for You
One lucky winner will receive a fat quarter bundle featuring Blithe fabrics and Art Gallery Fabric’s soft outland yarn dyes! Have fun creating this holiday themed pillow or other gifts to give away this holiday season with this bundle!
All you have to do is post a comment below answering the following question:
What is your favorite Holiday movie?
A winner will be chosen at random on December 10, 2016 and announced the following week!
Good luck!
The contest is open for comments until December 9 at 12:00 midnight Central Time. Click here for contest rules.
What you might also like
268 comments on “Let It Snow Holiday Pillow Tutorial”
-
-
My favorite Christmas movie is Nightmare Before Christmas!
-
I love to watch “Love Actually”. It’s filled with modern day people and situations and how we are all connected. There is joy, disparity, discovery and love.
-
-
Muppet Christmas Carol
-
It’s a Wonderful Life is my favorite!
-
It’s A Wonderful Life! I have seen it probably 200 times & can recite quite a bit of it. It displays the amazing power of love and inspiration.
To me there is no greater gift than when someone tells me how seeing my artwork or reading my book(s) have inspired them to try something new. We may never know just how many people we influence. -
My all time favorite Holiday movie is It’s a Wonderful Life”.
-
My favorite Holiday movie is “How the Grinch stole Christmas”!
-
Muppet Christmas Carol. 🙂
-
The one I can never get through the season without watching is “White Christmas” made in 1954. I love it!
-
White Christmas.
-
The Griswold’s Christmas movies. Home for the holiday and all the vacation trips I am Griswold (maiden). It is big laugh when we all get together. The pillow is very pretty in blues.
-
This is a beautiful winter collection of fabrics. Thank you for the chance to win.
-
White Christmas is my favourite movie.
-
My favorite Christmas movie is A Christmas Story.
-
My favorite Christmas Movie is “A Christmas Story.” Our whole family watches it together every year.
-
-
Love let it snow pillow
-
Christmas Vacation
-
My favorite holiday movie is Ernest saves Christmas. Can’t get too serious this time of year.
-
I enjoy all Christmas movies. They are usually pretty sappy but that is what I need to watch this time of year. BTW lovely pillow, but not for this year will have to save for next year. Not enough time!!
-
Love Actually! Thanks for the giveaway!
-
My favorite Christmas movie is any of the Hallmark movies. They are wonderful to watch on a cold evening with a fire going in the background.
-
White Christmas! I watch it every year, usually after the first significant snowfall of the season, and it just gets better and better. The Holiday comes in as first-runner-up…I’m a sucker for a good love story!
-
I done with decorating the tree. It’s time to decorate the house! This pillow is a beautiful start.
-
“White Christmas”
Wonderful songs, fantastic dancing, beautiful costumes, great stars, lovely setting. Sure the story line isn’t “deep”, but the movie makes you feel good and pays tribute to those who fought for our freedom, sacrificed to save the world from tyranny. -
I have two favorite Christmas movies. “It’s a Wonderful Life” is my all time favorite movie to watch during the holidays. I started watching “It’s a Wonderful Life” as a child and I haven’t missed it once. The “Christmas Story” is also a must watch for me. This movie was my grandson’s favorite and when he was young we watched together. We still do, him in spirit, and me with the sweet memories.
-
The Bishop’s Wife – the older version with Cary Grant
-
My favorite move for the holidays is It’s a Great Life
-
Charlie Browns Christmas
-
thanks for the contest… My favorite film is… Ta Da…. It’s a Wonderful Life! Isn’t it everyone’s?
-
My favorite holiday movie is “The Grinch Who Stole Christmas.” There’s a little bit of the Grinch in all of us, isn’t there? LOL!
-
I don’t have one favorite – I like almost all of them
-
My favorite holiday movie is probably How the Grinch Stole Christmas.
-
Christmas in Connecticut. The old version with Barbara Stanwyck. It is a classic.
-
My favorite movie is “A Charlie Brown Christmas,” and my favorite part is when Linus tells the Christmas story. Always reminds me to remember the true meaning of Christmas in the midst of the hustle and bustle of the holiday season.
-
Beautiful pillow and fabric. I love all Christmas movies, especially The Christmas Story and Scrooge with George C Scott.
-
Holiday Inn (or White Christmas) … love the music!
-
Favorite Christmas movie….”It’s A Wonderful Life” in Black and White!
-
Miracle on 34th Street.
-
What a great pillow and tutorial! I am a White Christmas fan when it comes to real people movies but when you throw in the animated films I can’t even to begin to make up my mind ; ) Thanks for the chance to play!
-
Favorite movie: The Christmas Story
Love this pillow, can’t wait to get started. -
I love “It’s a Wonderful Life”.
-
A Christmas Story!
-
I have no favorites….simply too many awesome ones!
-
White Christmas (1954)
-
I love “How the Grinch Stole Christmas” with Jim Carrey. The make-up job kills me and the story is classic!
-
Die Hard – I’m sure it’s a holiday movie… thanks for the contest offering
-
Overall my favorite Christmas movie is White Christmas. My favorite adult Christmas movie is Die Hard where the bad guys lose, the good guy wins and it ends as a happy Christmas. I just love this pillow in these fabrics. I hope Santa picks me to win.
-
All time favorite … The Grinch who stole xmas
-
Favorite holiday movie – It’s A Wonderful Life- a true classic.
-
My favorite Christmas Movie is the original “Miracle on 34th Street”. My second favorite is “A Charlie Brown Christmas”
-
Before answering, I checked a list of holiday movies. There are a lot I haven’t seen, so who knows. But I do really like an oldie that I found recently and that is “The Bishop’s Wife”. Guess I’m going to have to queue up some holiday movies soon and get up to date.
-
The Christmas Story
-
This is a great looking pillow cover! Once I get a large quilt done for a Christmas gift, I may start this as it’s perfect for the winter season. My favorite Christmas movie is one that makes me laugh every single year and it’s Christmas Vacation.
-
My favorite holiday movie will always be ” Miracle on 34th Street ” the 1947 edition although I like the 1994 edition too !
-
Charlie Brown’s Christmas. I love how genuine and heartfelt the story is.
My kids went to the same high school as Charles Schultz and every year we all exclaim “that’s our auditorium” -
Beautiful pillow! We just moved back to the mountains after living 10 years in the SW desert so I am making this to celebrate having mountains and trees again!? My favorite “holiday movie” is a classic – “Christmas Vacation” The Christmas season doesn’t start until I watch it.
-
One of my favorite Christmas movies is Elf.
-
It’s a wonderful Life is one of my favorites.
-
“It’s a wonderful Life” is one of my favorites.
-
-
A Charlie Brown Christmas
-
My favorite holiday movie is The Polar Express.
-
Can’t beat ‘ It’s a Wonderful Life’ Great story of redemption
-
I have this thing – I just cannot read a book more than once nor can I watch a movie more than once – often when checking out books, I read the first two or three pages and instantly know that I have read the book before – it may have been 30 years ago, but I can tell you the entire story. Therefore I have no “favorite” chirstmas movie – I do love watching all the new Hallmark movies each year.
-
My favorite movie at Christmas is” Grinch Who Stole Christmas”.
Love the look of the outland dyes. -
My favorite movie is “Its a Wonderful Life”!
-
The Sound of Music
-
“home alone” is my favorite.
-
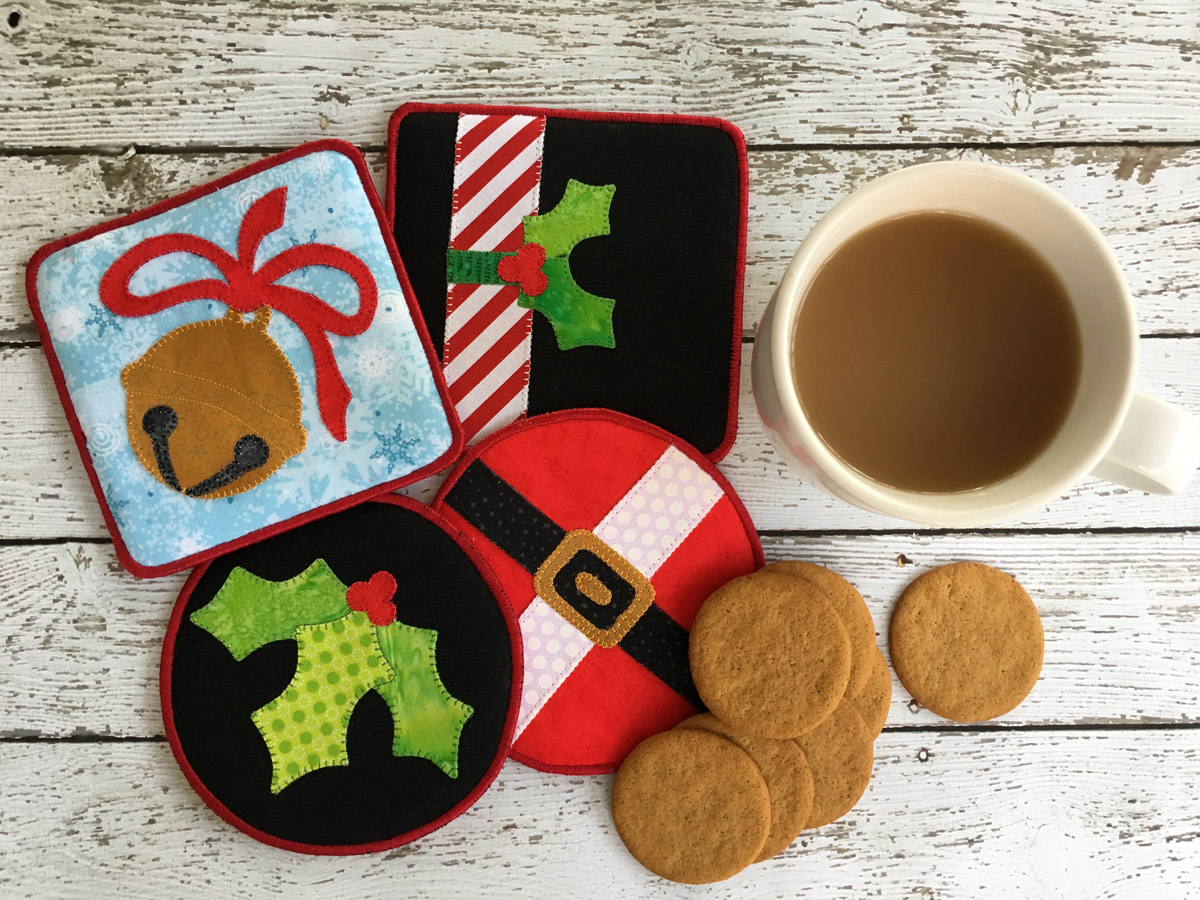
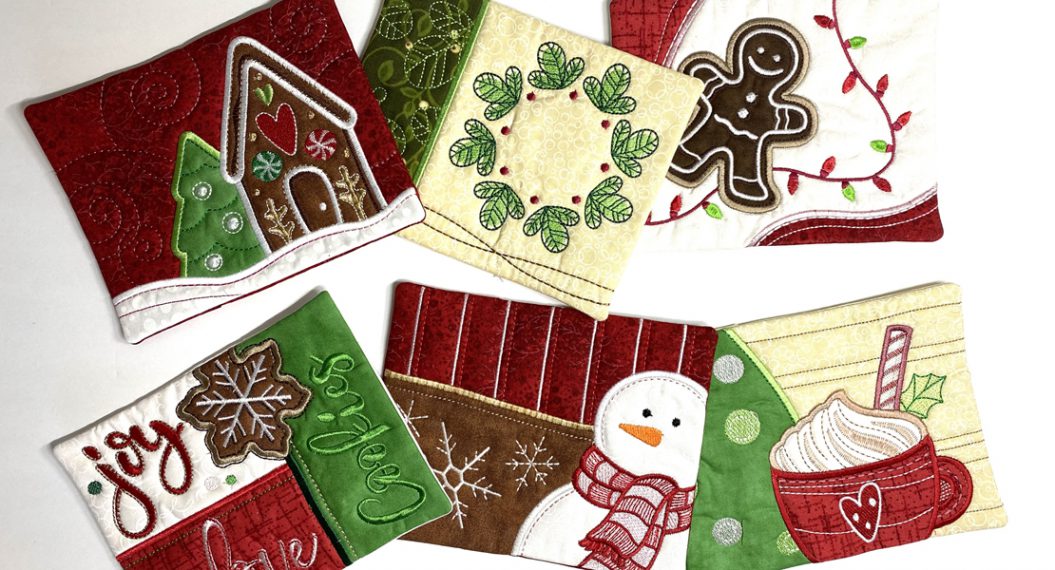
Love the different ideas. Make great gifts. Just finished making the coasters… Came out really cute
-
I enjoy all the classic holiday movies, but “White Christmas” is my favorite.
The Let it Snow pillow made in Blithe fabrics will make a lovely gift, maybe sewn while singing along with the White Christmas foursome! -
White Christmas… have to watch every year after the decorations are up… it’s a tradition ?
-
I like this pattern a lot. White Christmas for me.
-
Love an oldie, White Christmas, with Bing and Rosemary
-
Beautiful project! My favorite Holiday movie would have to be the classic 1947 “Miracle on 34th Street”.
-
I’m enjoying various movies on the Hallmark channel. I also think “Elf” is very cute.
-
It’s hard to pick just one movie! I am a sucker for the Hallmark Channel movies. Love “It’s a Wonderful Life”. And I find “Scrooged” with Bill Murray hilarious!
-
Of course, It’s a Beautiful Life with Jimmy Stewart has to be my favorite.
-
My favorite is “A Christmas Carol,” really all versions of it.
-
It’s A Wonderful Life
-
My favorite movie is Miracle on 34th Street!
-
Without a doubt, National Lapoons Christmas Vacation! Every year, my family watches this and we just laugh and laugh. I am known as a Grisswald for all the decorations I do! ?
-
The Christmas Story
-
Its a wonderful life
-
White Christmas w/ Bing Crosby. Great music.
-
Elf!
-
It’s a Wonderful Life
-
The funniest movie is “Christmas Vacation “! Thank you.
-
How can I pick just ONE movie! That would be like trying to pick ONE fabric that is my favorite….
These are my favorites:’The Polar Express,’ ‘We’re No Angels,’ ‘The Muppet Christmas Carol,’ ‘Joyeux Noel,’ ‘Gremlins, ‘The Santa Clause,’ ‘Bad Santa,’ ‘The Shop Around the Corner’ (1940), ‘Die Hard,’ ‘Love Actually,’ ‘The Bishop’s Wife,’ ‘The Nightmare Before Christmas,’ ‘Holiday Inn’ (1942)’, ‘A Christmas Carol,’ ‘National Lampoon’s Christmas Vacation,’ ‘Babes in Toyland,’ ‘Home Alone,’ ‘Christmas in Connecticut,’ ‘Elf,’ ‘White Christmas,’ ‘Scrooged,’ ‘Miracle on 34th Street,’ ‘It’s a Wonderful Life,’ ‘A Christmas Story’ -
Rudolph The Red-nosed Reindeer, don’t be afraid to let your little light shine, the world needs you! Cute trees, I am making a little tree quilt!
-
My favorite holiday movie is Its a wonderful life.
-
My favorite holiday movie is A CHRISTMAS Carol.
-
I love A Charlie Brown Christmas! It’s the best with the best music!
-
I think my very favorite Holiday movie is White Christmas. It just never gets old.
-
The Christmas Story with the Red Rider BB gun.
-
My favorite Holiday movie is the Santa Claus 🙂
-
My favorite Christmas movie is “It’s a Wonderful Life”
-
It’s a Wonderful Life
-
-
My favorite holiday movie is Mixed Nuts. The cast of characters keeps me laughing all through the movie!
-
My favorite is “It’s a Wonderful Life.”
-
My favorite holiday movie is The Sound of Music which is always shown during this time of year
-
A Christmas Story is my go to classic but Christmas Vacation still makes me laugh!
-
Christmas Vacation. Sooo funny!
-
My favorite Christmas is “It’s a Wonderful Life”.
-
What a gorgeous pillow. Christmas Story
-
Charlie Brown Christmas
-
My favorite Christmas movie is “Yes Virginia, There is a Santa Claus” . I absolutely love this movie and the message, Believe.
Great idea to sew the text around the border of the pillow. -
Thanks for the tutorial! I love The holiday and Love actually 🙂
-
My favorite holiday movie “How The Grinch Stole Christmas” I love the moral of the story, and Dr Seuss was ahead of his time.
-
I love “A Christmas Story.” However my absolutely favorite Christmas Eve watch is the PBS production of “A Child’s Christmas in Wales.”
-
We watch “Polar Express” every year.
-
I am a traditionalist. I like “White Christmas.” My sister and sing the Sisters song, as do my 2 daughters!!
-
My favorite grown up movie is “It’s a Wonderful Life”, and my favorite kid at heart movie is “How The Grinch Stole Christmas”. But they are all so much fun to watch with the ones I love!
-
How the Grinch Stole Christmas
-
My favorite movie is “Miracle on 34th Street”.. such a great classic movie! Love the pillow tutorial. I am just now getting around to making covers for the pillows on our couch for the holidays.
-
It’s a Wonderful Life is my favorite.
-
My favorite holiday movie is A Christmas Story.
-
I just LOVE when you all do the Christmas countdown- it is my favorite time of the year and I just love the creative projects!!! You give me such great inspiration and creativity!!!!! Fav holiday movie is “Love Actually” and thank you for all you do for us year round!!!
-
A Christmas Story – what else?
-
I enjoy watching The Polar Express with all 17 of my grandchildren We pop a big bowl of popcorn, toss pillows on the floor, then watch with young and old alike.
-
My first favorite movie was Miracle on 34th Street. Then it was The Polar Express. Now I watch Love, Actually over and over!
-
I love ” It’s A Wonderful Life” and I always manage to cry every time I see it.
-
My favorite is “Its a Wonderful Life” though I usually enjoy any one that I take the time to watch.
-
My favorite Christmas movie is the Grinch Who Stole Christmas.
-
My favorite Christmas movie is “It’s A Wonderful Life”.
-
White Christmas is my very favorite.
-
I like to watch “White Christmas” each year.
-
A Christmas Story is my favorite movie.
-
Polar Express
-
Oh, it has to be “It’s a Wonderful Life”. Thanks for the give away and the great tutorial.
-
The Snowman. It’s an oldie, but I still love it.
-
My most favorite Christmas movie is “A Christmas Carole” starring George C Scott. Got to watch it every year. Thanks for the opportunity to win!
-
White Christmas! Love the music.
-
White Christmas with Vera Ellen and Rosemary Clooney. They’re clothes are divine. In fact, I think I’ll watch it tonight.
-
My favorite holiday movie is Home Alone. A close second is A Christmas Story. Always make me laugh!
-
I love them all but White Christmas is my favorite!
-
Absolutely–A Christmas Story! Complete with a Major Award leg lamp and a Red Ryder pellet gun!
-
It’s a Wonderful Life!
-
Elf!
-
The Christmas Story
-
Elf is my favorite family movie because it cracks my kids up, and I love watching them laugh! (And they’re adults!)
-
I really like White Christmas!
-
White Christmas and It’s a Wonderful Life
-
Every year I work through a pile of Christmas movies — while I’m baking for friends and neighbors, wrapping gifts, writing Christmas letters in our cards. I love so many — but I guess I’d have to pick White Christmas — as it is the one Mom, my sisters and I would stay up after Christmas Eve service to watch on TV. We knew Christmas morning started early with kids, and all that had to be done to host the extended family of 30 or so folks. But every year, we stayed up to watch it again. Now I have it on DVD and also can watch it on Netflix, so it’s whenever I’m in the mood for my holiday tradition.
-
Charley Brown’s Christmas. I think someone special made Linus his balnket. Did you notice when he was reading the Christmas story he drops his blanket after he says “Do not be afraid…” This movie reminds me of the true meaning of Christmas.
-
How the Grinch stole Christmas, the original animated one!
-
I know its Christmas when I am watching White Christmas. !Sisters
-
My favorite holiday movie is “Muppet Christmas Carol.” Love the characters and music.
-
My husband, four children and I watched Christmas Vacation in a very small hotel room one Christmas Eve while visiting London many years ago. For sure, that special evening and hilarious movie will never be forgotten. Your Let It Snow Pillow is beautiful, using that gorgeous fabric allows you to use the pillow through February.
-
Christmas Vacation
-
My favorite is White Christmas!
-
My favorite is How The Grinch Stole Christmas. This is a great pillow, thanks for the tutorial.
-
I have to say The Christmas Story just squeaks by over It’s a Wonderful Life.
-
The Muppet Christmas Carol is my favorite. And this pilllow design is great.
-
Winter Wonderland.
-
My favorite holiday monie is Rudolph the Red Nose Raindeer
-
My absolute favorite movie is Miracle on 34th Street! I absolutely love this tutorial and will definitely will be making this pillow:-) Thanks,
LauraT -
It’s really hard to top It’s A Wonderful Life or The Christmas Story!
-
A Christmas Story. Love it every time I see it, and that’s a lot of times!
-
I look forward to watching “It’s A Wonderful Life” in black and white.
-
Charlie Browns Christmas is a favorite every year!
-
It’s a Wonderful Life. A classic
-
Friendly Persuasion. I love this movie all year.
-
White Christmas is the grownup answer. The kid in me enjoys Elf.
-
My favorite movie is A Charlie Brown Christmas
-
My favorite is still a Christmas Story. The pillow is lovely thank you so much for the tutorial.
-
I love the classic, White Christmas.
-
Oh what a great time of the year for good Christmas movies; I watched my fav last night: It’s a Wonderful Life. What a classic
-
I love “Rudolph the Red Nose Reindeer” since it was first shown in 1965 I believe. I decorate my Christmas Tree every year watching this movie. My little tradition for the last 50 years.
-
The original “Christmas Carol”.
-
Charlie Brown’s Christmas
-
There are just some projects that spark the holiday spirit and “Let It Snow Pillow” sure sparked my holiday creative spirit. This project really spoke to me. Thank you! 🙂
-
My favorite movie is “it’s a wonderful life.” I love the message!
-
Nightmare Before Christmas or The Grinch
-
It’s a Wonderful Life!!! Let it snow. Great tutorial, thank you.
-
A Christmas in Connecticut with Barbara Stanwick.
-
That’s tough because there are so many good ones! It’s a Wonderful Like or Christmas Carol are probably top of the list.
-
The Santa Clause … !
-
Miracle on 34th Street
-
What a sweet pillow! My favourite holiday movie is It’s A Wonderful Life. Thanks!
-
I love them all but my most favorite is Elf!
-
The Polar Express
-
The Holiday with Jude Law a great love story/comedy
-
I do love Home Alone
-
It’s a Wonderful Life
-
It’s a Wonderful Life.
-
It’s a wonderful life!
-
I think Love Actually!
-
My favorite Christmas movie is “White Christmas”.
-
My all time favorite, that I watch every year starting on Christmas Eve is:
**A CHRISTMAS STORY** -
A Christmas Story
-
The 2016 HALLMARK movies at to die for!!! I was really disappointed the last couple years, but haven’t seen a poor script yet!
-
It’s a Wonderful Life!
-
My favourite holiday movie is Miracle on 34Th Street (the original), and my other favourite show is The Grinch Who Stole Christmas.
-
My favorite holiday movie is “The Santa Claus” but “Scrooged” is right up there too.
-
Holiday Inn! I love all the big production numbers and romantic music!
-
It’s a Wonderful Life close second White Christmas
-
Home Alone is my favorite with the kids and Rudolph is my all time favorite.
-
I watch The Christmas Story and Elf!
-
Rudolph The Red Nose Reindeer!
-
I love the old Scrooge movies.
-
I love nothing better than to watch “Elf” with my grandkids and all laugh throughout the movie.
-
I love the Gorge C Scott version of Dickens’ A Christmas Carol. it is a great reminder that friends and family matter most at this time of year – not commercial stuff. It is one of the reasons I like to sew and make one of a kind gifts. The pillow is gorgeous – I am looking forward to making it.
-
Charlie Brown Christmas and White Christmas
-
Memories of my childhood — I love HEIDI with Shirley Temple. Kinda dates me, yes?
-
Have to watch White Christmas and beg someone to watch Rudolph with me!
-
White Christmas is probably my favorite. However, I love everything associated with the Christmas season. However, our focus for Christmas should always be the birth of Christ.
-
My fav,….ITS A WONDERFUL LIFE!
Love the colours in your pillow! ? ? -
My family loves “A Christmas Story”. Every scene reminds us of our childhood…my daughter doesn’t remember being dressed for snow so she couldn’t move but she remembers her younger brother in that same situation!
We laugh tears all through the movie. -
Christmas Vacation. Always good for lots of laughs and sharing.
-
My favorite Holiday movie is “A Christmas Carol”. There are many good ones, however, so my favorite may change if I see a new movie on Hallmark channel.
-
I love to watch the marathon of Christmas movies on Hallmark. Nothing beats watching Chevy Chase in Christmas Vacation to relieve the stress of the holidays.
-
My all time favorite Christmas movie is A Christmas Carol…the old ones, the new ones, any of ‘em!
-
I love Sleepless in Seattle.
-
HOLIDAY INN
Christmas is the best time of the year! -
My first favorite is “It’s A Wonderful Life” then “The Bishop’s Wife” then “Rudolph” then “A Charlie Brown Christmas” then “White Christmas” then “A Christmas Carol” need I go on? There are more and some of you have mentioned several of them. The oldies are my favorites because of the simplicity of the message. This pillow is simple and it tells the story simply.
-
It’s got to be the original Home Alone movie.
-
I always get that good feeling when I watch Miracle on 34th Street. On the other hand my husband’s favorite is Bad Santa.
-
A Christmas Story because even as adults our sons still laugh aloud at the bb gun adventures.
-
Rudolph is my favorite!!
-
“It’s a Wonderful Life” first among many others.
-
I enjoy Christmas movies, and I would have to say “White Christmas” with Polar Express in close second. Just purchased my Bernina 350 and am looking forward to making a project ?
-
White Christmas is my very favorite!
-
I love “The Nightmare Before Christmas” — something a little different, and a happy ending!!
-
Miracle on 34th Street
-
My favorite Christmas movie is Christmas in Connecticut, with Barbara Stanwyck, Dennis Morgan, Sydney Greenstreet, and the wonderful S.Z. Sakall. A great cast and a heartwarming story, it has become a family tradition to watch on Christmas Eve, before we open gifts.
-
My favorite holiday movie is “White Christmas”. Warms my heart every time.
-
Elf is our family favorite for kids. Great pillow idea! Love the words added to it.
-
As the mother of two sons, _A Christmas Story_ is the hands down winner at our house. Now in their 30s they both still love to watch this movie each year and still laugh out loud.
-
Has to be Its a Wonderful Life.
-
The Grinch! My other half tells everyone that he is the Grinch! We have ornaments and stuffed animals that stay out all year!!
-
A Christmas Story is my favorite movie.
-
My very favorite Christmas/winter movie is ‘The Snowman’; also has great music to play.
-
My favorite Christmas movie is A Christmas Carol – almost every version.
-
Miracle on 34th Street and Bad Santa. Thanks and Merry Christmas to everyone at We All Sew
-
The Holiday!!!
-
The Holiday.
-
Miracle on 34th Street
-
Definitely, my all-time favorite movie is “It’s a Wonderful Life.”
-
It’s a Wonderful Life and my favourite modern Christmas movie is Love Actually.
-
It’s a Wonderful Life
-
Christmas Vacation with Chevy Chase. It is our family favorite.
-
I’ve come to appreciate “It’s A Wonderful Life “ as I get older and wiser and to be thankful for all our blessings. But I also like “Miracle on 34th St” that shows the true spirit of Christmas is loving, accepting, and trusting each other.
-
My favorite is The Little Match Girl.
-
Miracle on 34th Street. Always has been a family favorite.
-
I love watching “The Family Stone” during the holidays.
-
I love watching Polar Express with the grandchildren – it never gets old!
-
My favorite movie It’s aWonderful World.
-
Oops. It’s A Wonderful Life.
-
There are so many great movies for Christmas it is hard to choose just one, but it would not be Christmas without watching “It’s A Wonderful Life”. You post such wonderful projects. Thank You.
-
My favorite movie is Home Alone.
-
So many great Christmas movies but I think my favorite is It’s a Wonderful Life, followed by A Christmas Story, Miracle on 34th Street (with Natalie Wood, of course!) The sound of Music and all the versions of A Christmas Carol. We love having friends over for Christmas movie night in December! We usually look at least one new one every year but always love the oldies but goodies.
-
Our favorite is The Ref with Denis Leary. Very edgy and a lot of fun!
-
White Christmas
-
“The Gathering” , with Ed Asner
-
White Christmas.
-
It’s a Wonderful Life
-
Elf! We watch it every year.
-
White Christmas is my fav.
-
A Charlie Brown Christmas. Beautiful pillow!
-
I love Muppet’s Christmas Carole always first one on the watch list?
-
My all time favorite movie is Miracle on 34th Street. But there are so many great movies.
-
Muppet Christmas Story. I love it! Makes me smile everytime I watch it
-
Every Easter we watch “Ben Hur – A Story of the Christ.” I know it is not a Christmas themed movie, (I have plenty of Those movies I love, too), but I think that Easter is also an important holiday. And this movie, in my opinion, is certainly one of the greatest ever made!
-
I love “It’s a Wonderful Life” and watch it every year.
-
Christmas Vacation
-
It’s a Wonderful Life.
-
No doubt: A Christmas Story. Love Ralphie!
Leave a Reply
You must be logged in to post a comment.



I love watching The Polar Express.