Embroider-along Part 12: How to Embroider on Pet Screen
Welcome back to my Embroider-along: Part 12. Hi, my name is Sue O’Very, BERNINA Ambassador and machine embroidery expert. Today I’m going to show you how to embroider on Pet Screen and make an In the Hoop Zipper case. Read more about embroidering sheer fabrics in Part 8.
Sheer Fabrics Stabilizers, Needles and Threads
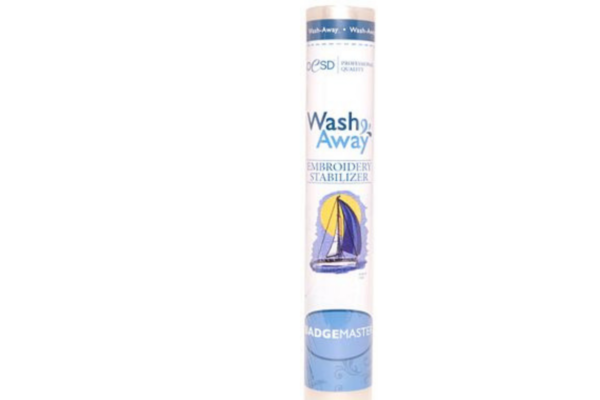
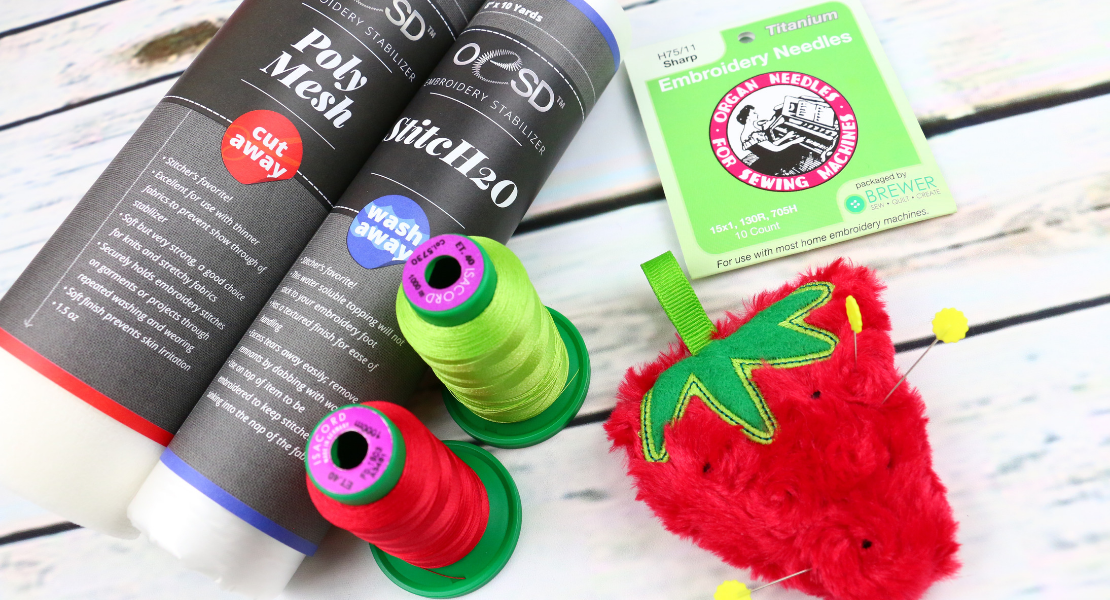
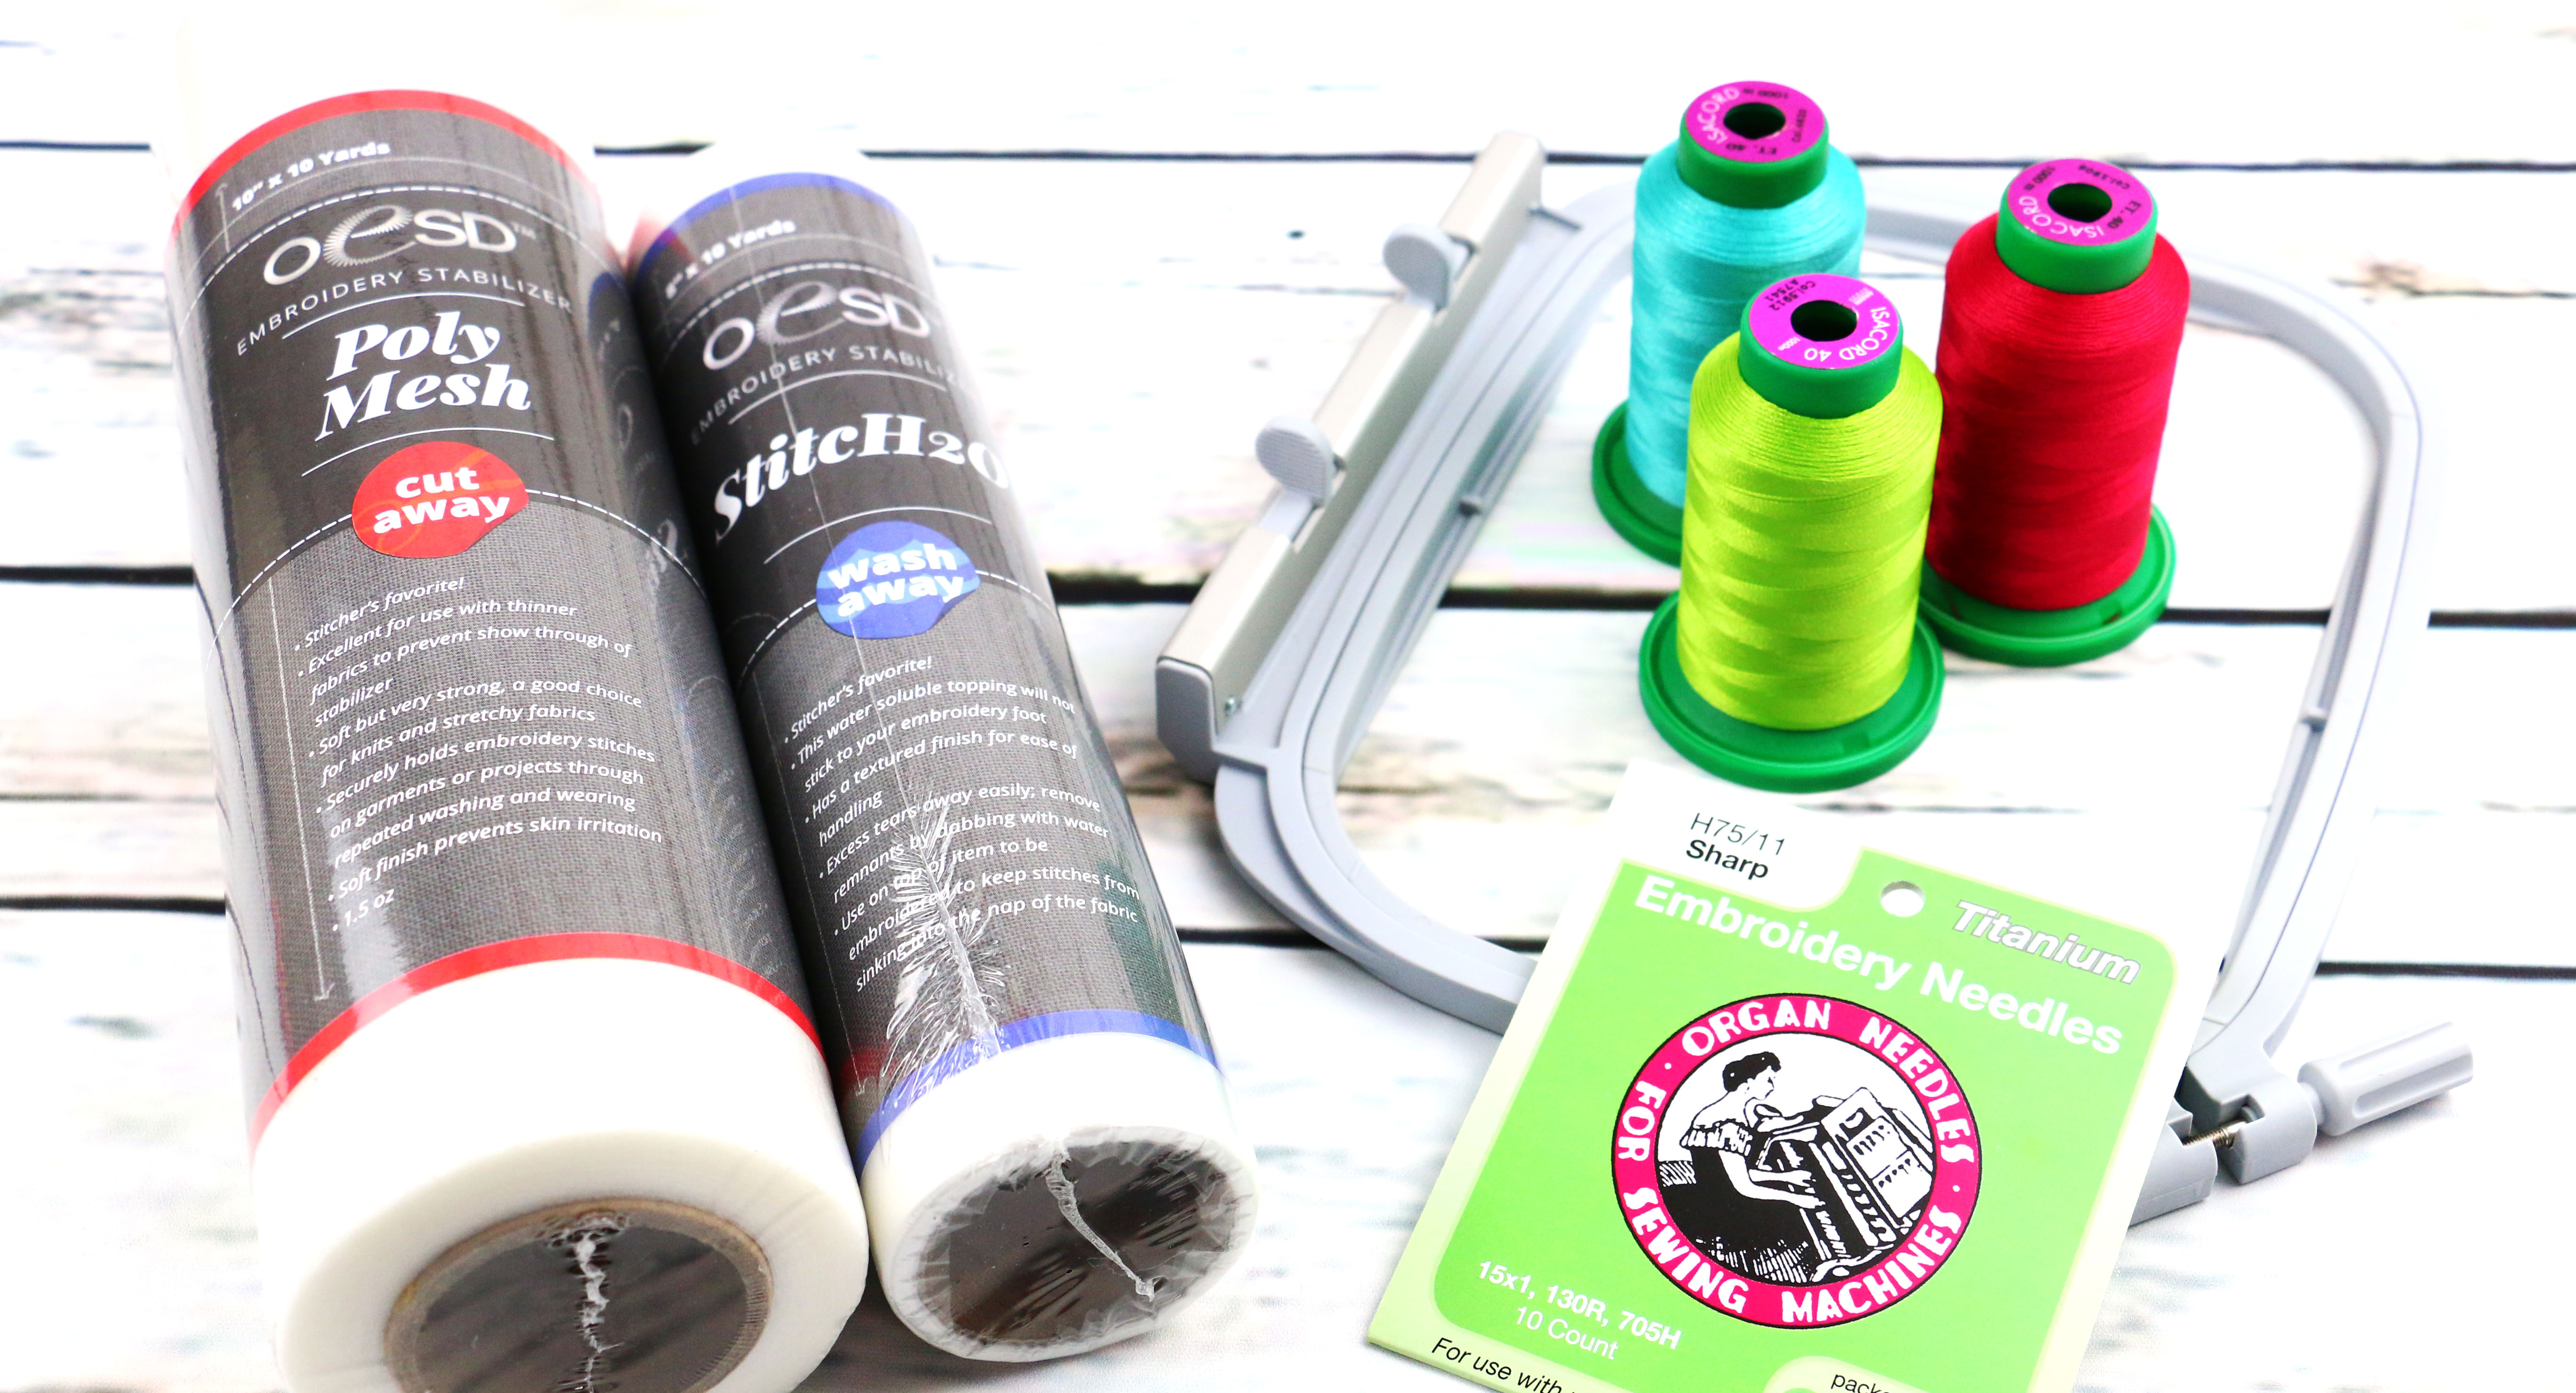
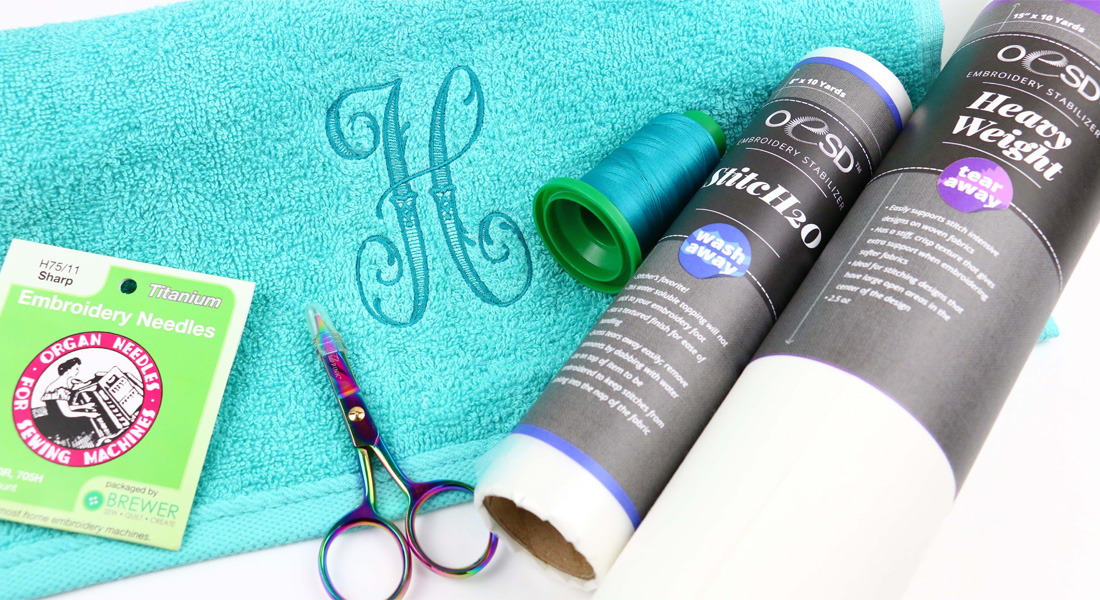
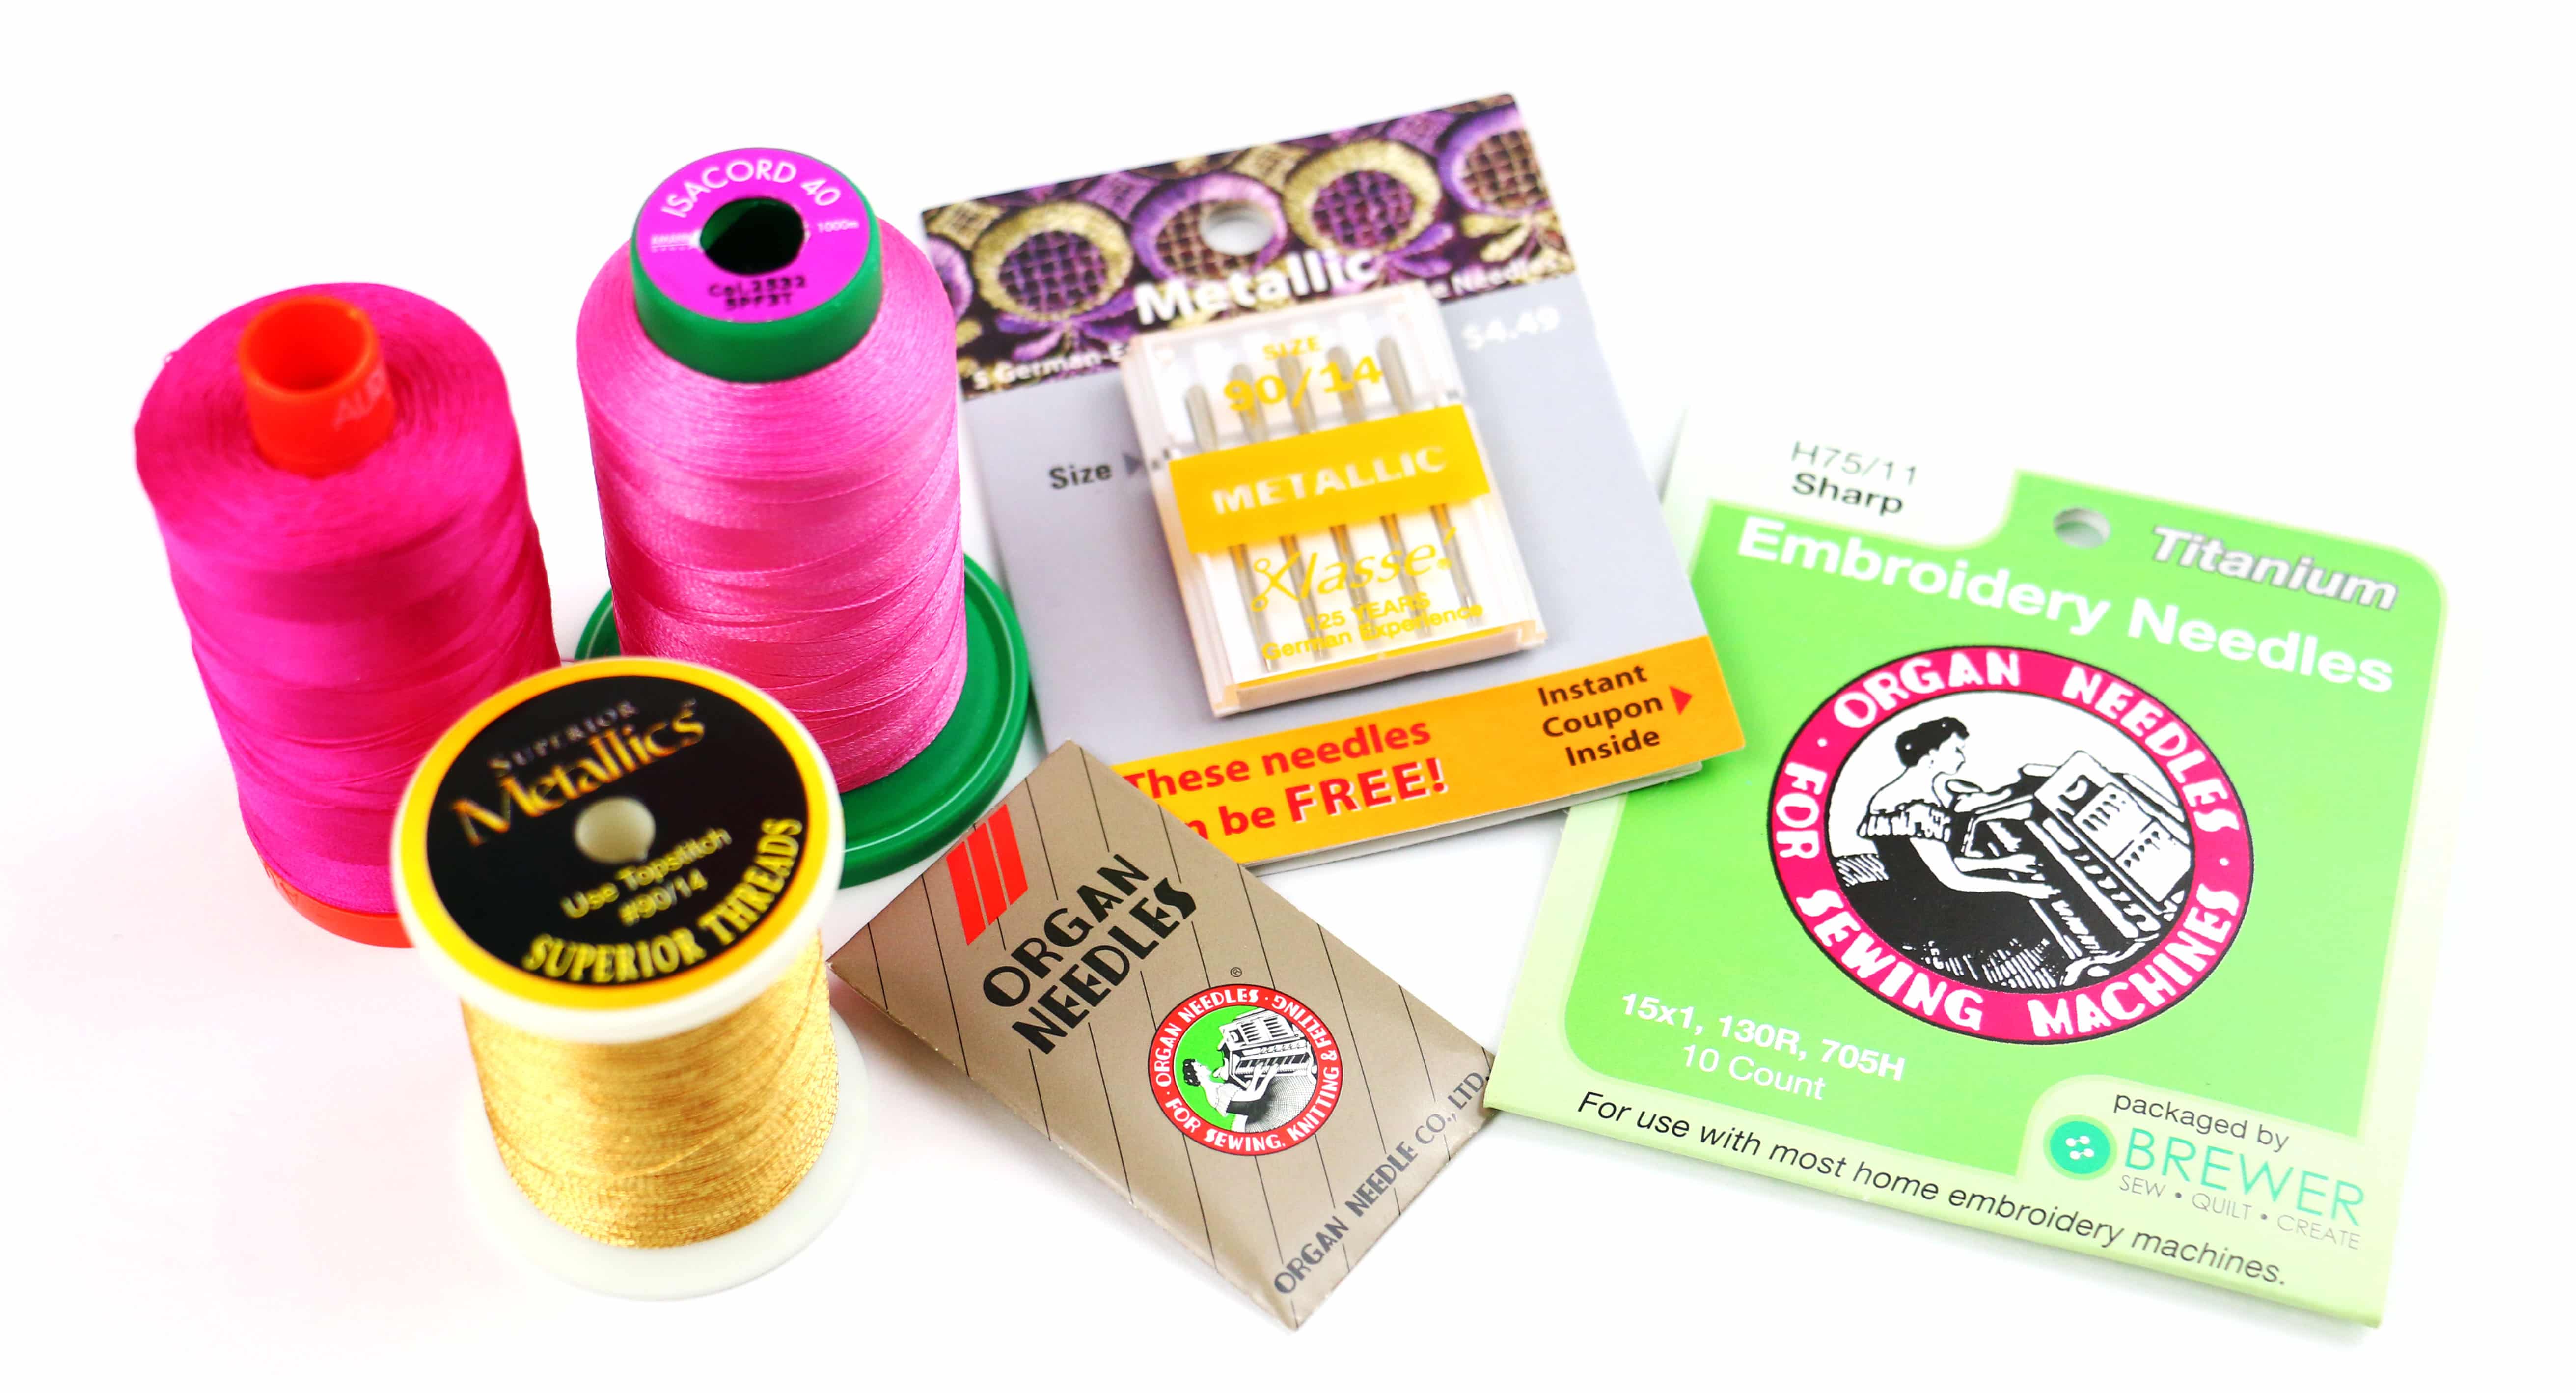
As covered in Part 8 there will be special stabilizers for each type of sheer fabric. With the pet screen you will want to use Badgemaster, a heavyweight wash away stabilizer. Use an embroidery size 75/11 needle and thread is totally up to you. However I would suggest sticking with a 40 weight Polyester. It will show up better over the varied texture of the pet screen. A thinner thread could get lost.
In the Hoop Notion Case
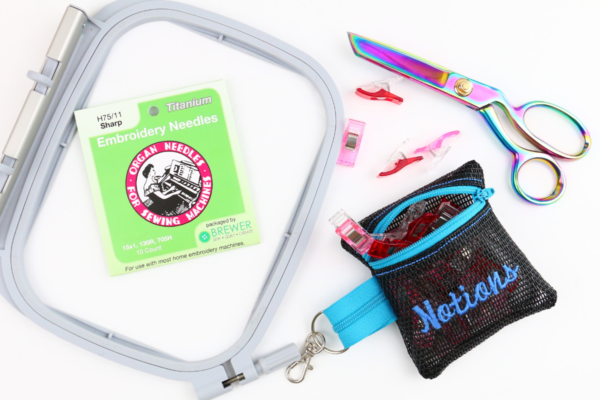
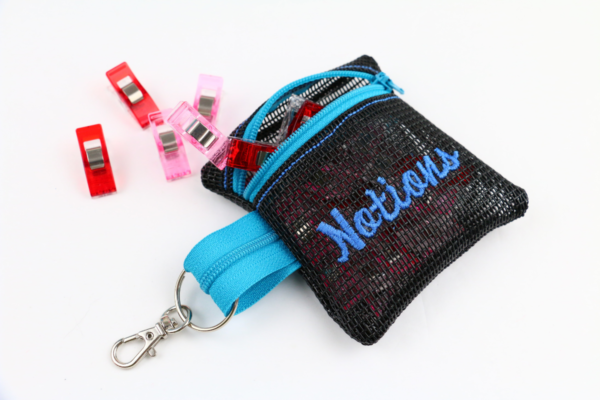
Today’s In the Hoop project features Pet Screen to create an adorable Notion zipper case. When this project is complete there is no extra sewing required. Just cut, turn and use. These tiny zipper cases stitch up fast and easy. You can add a key ring and lobster hook to easily clip to your sewing tote bag for going to class.
Supplies and Materials
Here is a complete list of supplies and materials needed for the Pet Screen Notion Case.
- Download the Notion Zipper Case embroidery design files here
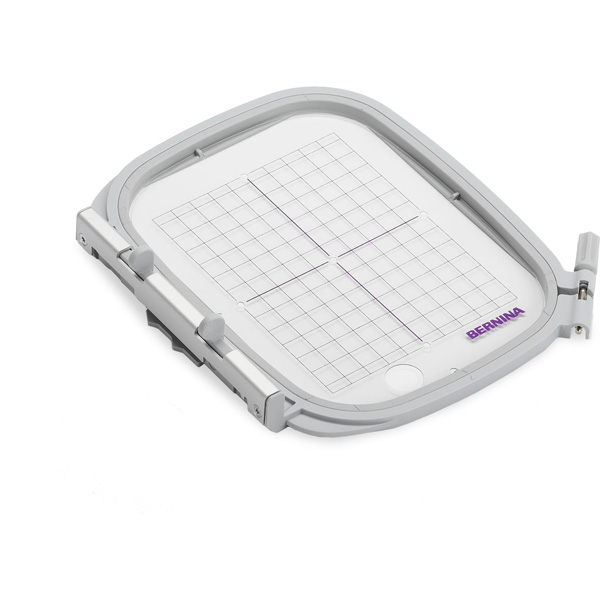
- Hoop (I am using the BERNINA 790 plus medium hoop)
- 6″ or shorter sharp scissors
- Thread:
- 40 weight Polyester (Blue for the decorative stitching)
- Aurifil 50 wt cotton with matching bobbin (Black for construction)
- Badgemaster
- Embroidery 75/11 needle
- Point turner
- Tweezers
- Clear tape
- Materials:
- 3mm nylon Zipper cut to 8″ (use extra zipper for loop – 2″-4″ long)
- Pet Screen:
- Front top: 5″ x 2″
- Front bottom: 5″ x 4″
- Back: 5″ x 5″
- Key ring and lobster
Embroider on Pet Screen In the Hoop Notion Zipper Case
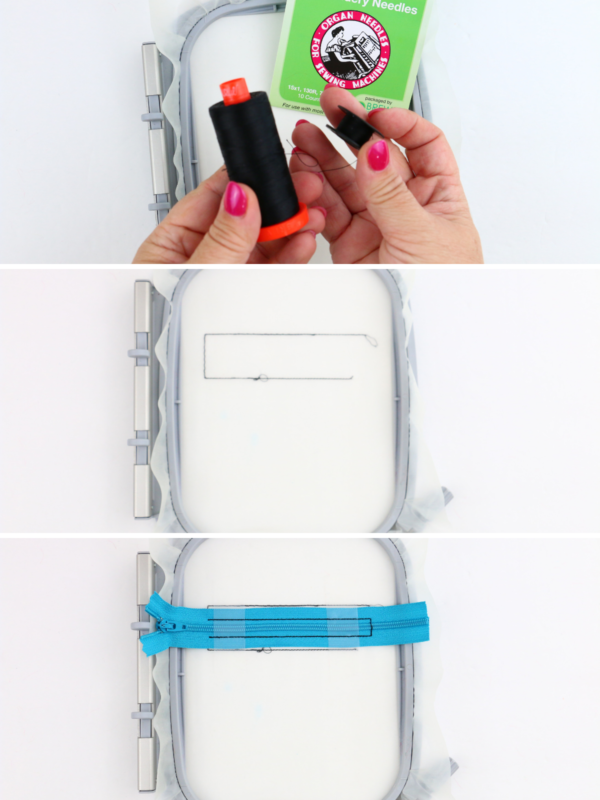
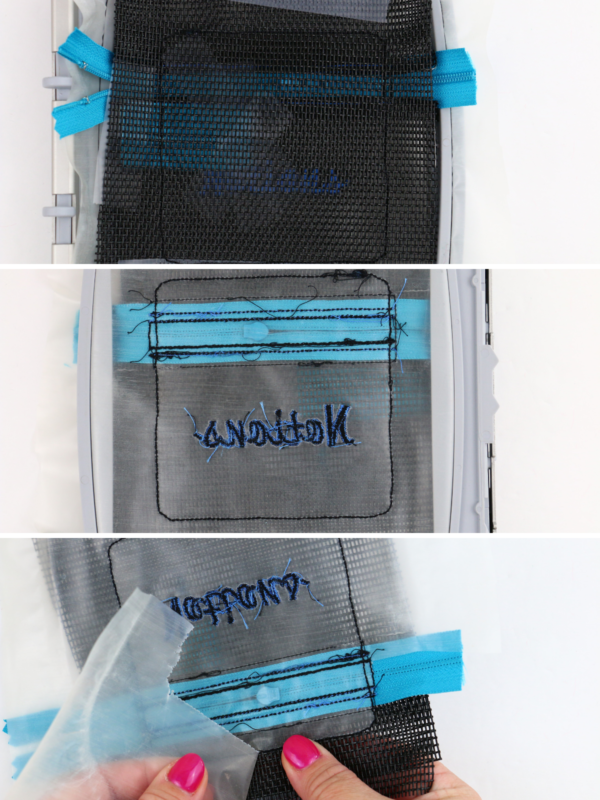
Insert brand new needle, 50 weight Aurifil cotton bobbin, thread top of machine with black Aurifil. This is excellent sewing thread and does a great job when constructing In the Hoop projects. Hoop Badgemaster stabilizer. Insert hoop into machine and sew the stitch #1, the zipper placement stitch. Remove hoop from machine and place on a flat surface. Place the zipper right size up with zipper pull to the left about 1″ past the placement stitch. Secure 2-3 times with clear tape. Insert hoop into machine and sew stitch #2, the zipper secure stitch.
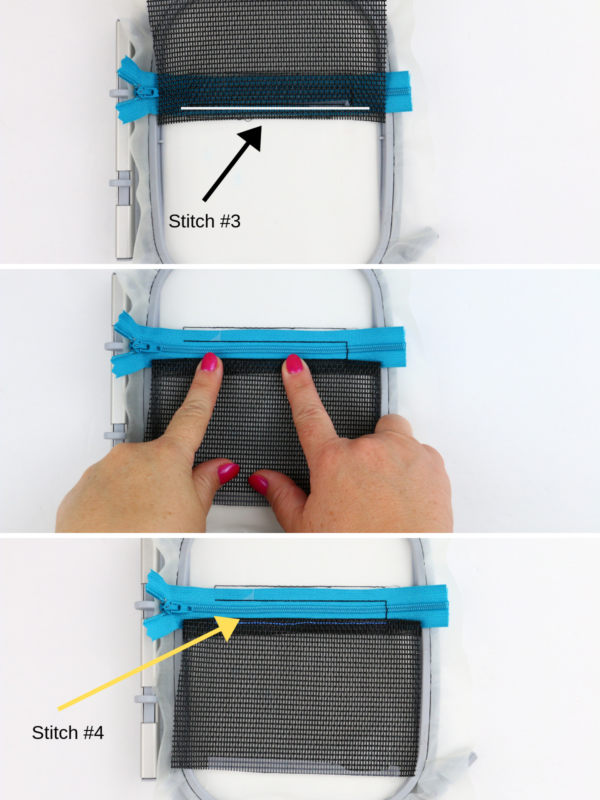
Change thread to blue embroidery for the decorative stitching and text. Remove hoop from machine and place on a flat surface. Place the Front Bottom right sides down with one edge along the bottom edge of the zipper tape. Secure with tape. Insert hoop into machine and sew stitch #3. Remove hoop from machine. Fold the Front Bottom toward the bottom of the hoop. Finger press flat. Insert hoop into machine and sew stitch #4.
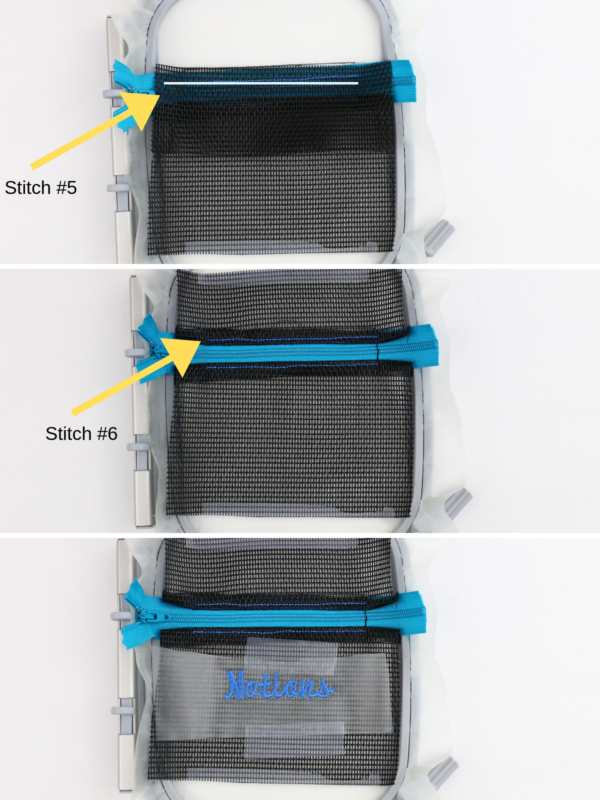
Remove hoop from machine and place on flat surface. Place the Front Top right side down with edge along the top edge of the zipper tape. Secure with tape. Insert hoop into machine and sew stitch #5. Remove hoop from machine and fold the Front Top toward the top of the hoop. Finger press flat. Insert hoop into machine and sew stitch #6, the top secure stitch. Place a piece of Badgemaster over the Front Bottom piece for lettering. Sew stitch #7, the text “Notions”.
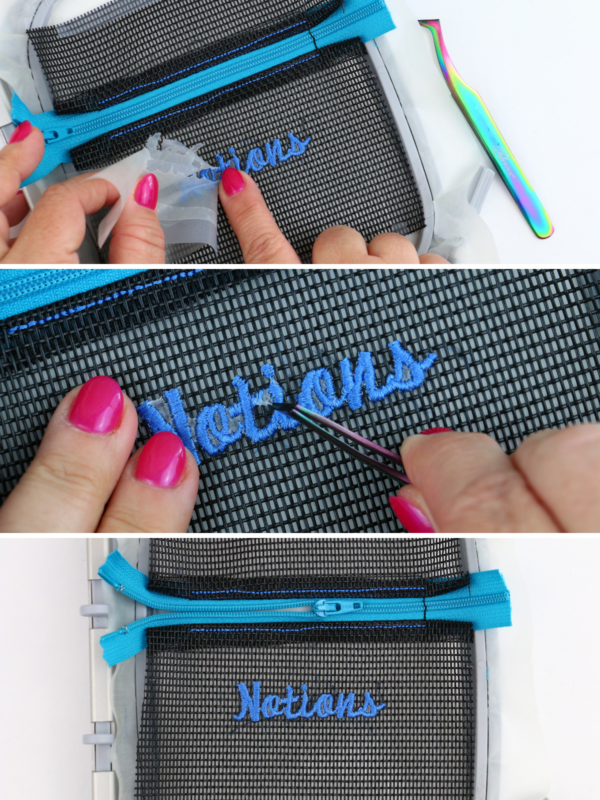
Remove hoop from machine. Use tweezers to remove any tiny pieces of the top stabilizer.
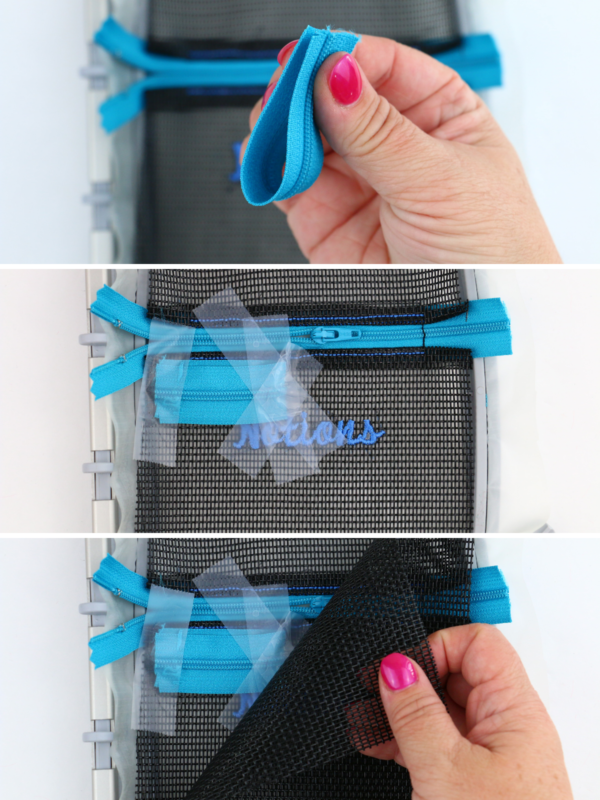
Fold the extra zipper wrong sides together to form a loop. Place the two raw edges along the raw edge of the Front Bottom piece just below the zipper. Secure with tape.
VERY IMPORTANT! Open zipper pull half way. This will allow you to turn the zipper case right side out once stitching is complete. Place the Back right sides together and tape along top and bottom to secure in place.
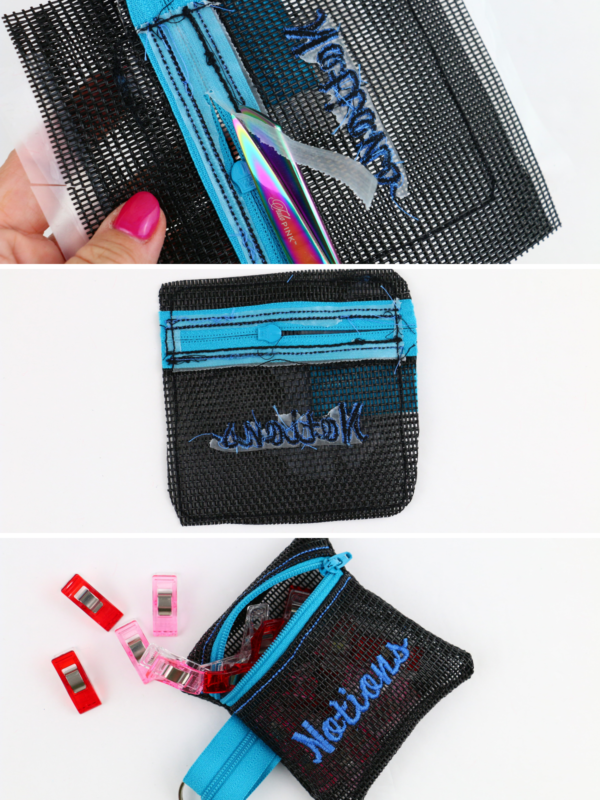
Change thread back to the black Aurifil cotton for final construction stitch. Insert hoop into machine and sew final construction stitch. Once stitching is complete, remove hoop from machine and materials from hoop. With sharp scissors cut around outside stitching leaving about 1/4″-1/2″ seam allowance. On the wrong side carefully remove stabilizer, trying not to distort stitches.
Remove all the stabilizer behind the zipper remove as well. If need be, use scissors so as to not distort the zipper stitching. Remove any extra stabilizer with warm water. Turn right side out and use point turner careful not to poke through the pet screen. Fill with wonder clips, needles or other tiny notions!
What is next?
Once you have read a good book you usually want to go back and re-read a portion so you can tie it all together, right? That is the same thing you will want to do with this series. Even though the Embroider-Along is over it will always be here. Click here and bookmark the main page so you can easily access all 12 parts.
Which was your favorite part of this Embroider-Along series? Let me know in the comments below and please ask any questions you might have about materials I haven’t covered. Be sure to keep following along here, you can also follow BERNINA on Instagram and Facebook to see the latest post!
Here is the Embroider-along schedule:
- Embroider-Along Part 1: Intro four most popular materials for machine embroidery
- Embroider-Along Part 2: Stabilizer and Materials
- Embroider-Along Part 3: Needles and Thread
- Embroider-Along Part 4: Placement and Hooping for Machine Embroidery
- Embroider-Along Part 5: How to Embroider on Knits
- Embroider-Along Part 6: How to Embroider on Woven Materials
- Embroider-Along Part 7: How to Embroider on Napped Fabrics
- Embroider-Along Part 8: How to Embroider on Sheer Materials
- Embroider-Along Part 9: How to Embroider on a Ladies T-shirt
- Embroider-Along Part 10: How to Embroider on a Pillow Case
- Embroider-Along Part 11: How to Embroider on Luxe Cuddle® Rose
- Embroider-Along Part 12: How to Embroider on a Pet Screen
Until next time I hope you have a creative day, bye-bye!
Sue
What you might also like
27 comments on “Embroider-along Part 12: How to Embroider on Pet Screen”
-
-
I’m so happy you have enjoyed yourself during this series!! Please share pictures with BERNINA and myself on social media! Love to see the finished project.
Sue
-
-
Thank you for all this great information!
-
My pleasure
-
-
I’m so happy you have enjoyed yourself during this series!! Please share pictures with BERNINA and myself on social media! Love to see the finished project.
Sue -
A very informative series, Sue! Will definitely bookmark it for future reference. Thanks for the cute project and tutorial. :o)
-
Thanks Terry!! I’m so glad you enjoyed it. So many things to learn in this sewing and embroidery world. Sue
-
-
I just purchased my embroidery module in December and this series has been so helpful. I haven’t been able to get to my classes because of snow but you have provided the perfect classes! Thanks so much.
-
Oh Sandy!! This totally makes my day! Enjoy getting to know your embroidery machine even more! Sue
-
-
Hi Sue, Loved this series ! Each sew along was jam packed with information, tips, and techniques and all of the projects could be enjoyed by beginners to the advanced sewers. The instruction with pictures to enhance and illustrate each step made the projects so easy to follow. I will keep this url in my project and technique computer bookmarks for future references. Thanks so much!! Gail
-
Hi Gail!! I just loved that you have enjoyed this series so much. Thank you for loyally following along and asking such great questions.
Sue
-
-
What is pet screen? Where can it be purchased?
-
Pet screen or Nylon screening comes in lots of different colors, many shops will sell it. I got my black from Home depot.
-
So is it the window screening?
-
Window screen is thinner and more Flexible. This is great or making purses, tote bags, beach bags, etc.
-
-
-
I ordered a large roll (84″ L x 36″ w) to make a hanging ruler organizer for a friend from Amazon. Read the reviews to be sure what you’re getting. Colors are a bit harder to find, but some sewing shops & craft stores carry it. Pet screening is stronger than regular fabric-type screening now found in many window screens & while it’s great for crafts, it is meant for widow screens. We had it installed on a storm door after our cats jumped on the screen & ripped it. Over time I imagine all our screens will be replaced with this heavier screening.
-
-
Sue,
By far one of the best and most useful Bernina series yet. Hope you will become a regular contributor since there are so many of us out here who what to learn how to make the most of our embroidery units.-
Wow, Thank you so very much!!! You just totally made my day. Please keep following along, there are lots of great topics always discussed here on the We All Sew blog and it has been a complete honor to contribute.
~ Sue
-
-
Hi Sue,
I make a lot of pillowcases and knowing how to embroider something on them was one of my favorite parts! It has all been good, how to embroider on T-shirts and Hooping and Placement were great for me also. I’ve made myself a book of tips to go back to over and over again! Thanks so much!! This is a series I’ll be visiting a lot while I hone my embroidery skills!-
Thank you so very much! I think we all need a place to reference. To go back and re-visit. Even I was asked the other day about a needle and you know what, I sent them here. It is nice to have a place to send folks and even for me to refresh my mind 🙂
~Sue
-
-
I am about to work my way through the series. The segments I have looked at assure me that the whole thing is worth while. Continue your good work!
-
Excellent!! Keep me posted on your progress. Sue
-
-
Hi Sue ?
This tutorial has inspired me to create a swimming bag from scratch!
Thank you!!
Joy.-
That is amazing!!! You have to share on social media. Be sure to tag both @BERNINAUSA and @SueOVeryDesigns so I get to see it too! Keep stitching! ~Sue
-
-
Sue thank you!!! This content very helpful to me. Most hardful part was #6 to me but I got it done.
Leave a Reply
You must be logged in to post a comment.




This series has been so jam packed with information that I will need to go back and re-read it! Thanks for doing this. I have just been working with pet screen for another project and was thinking “no, you can’t embroider on pet screen”, but here you have proved me wrong! Thanks so much for this tutorial and the in the hoop zipper case files. I can hardly wait to try this!