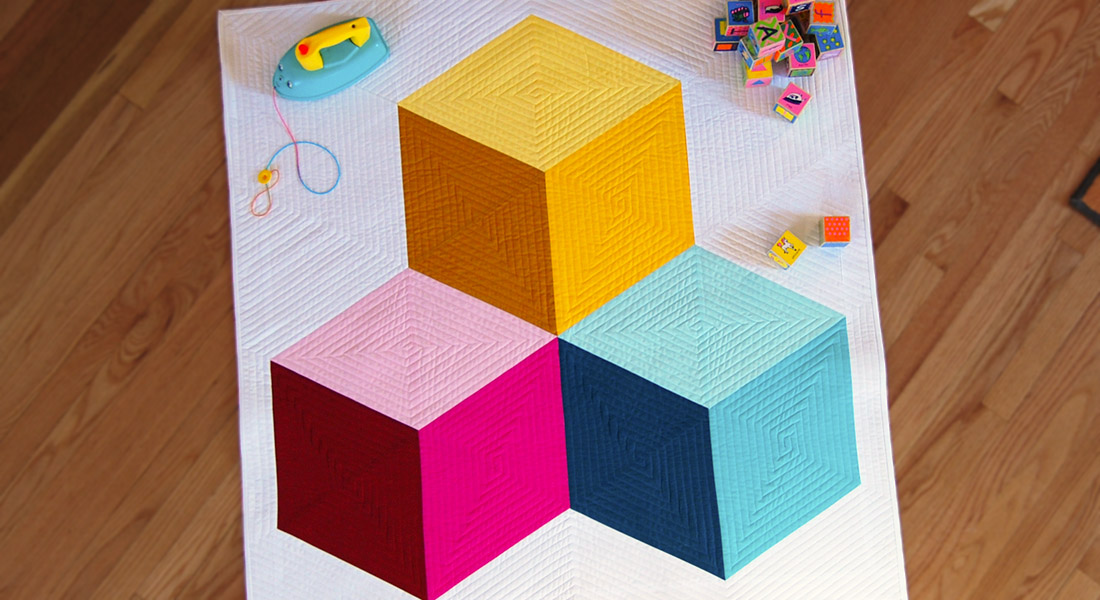
Colossal Blocks Quilt-Along Week 2: Cutting and Layout
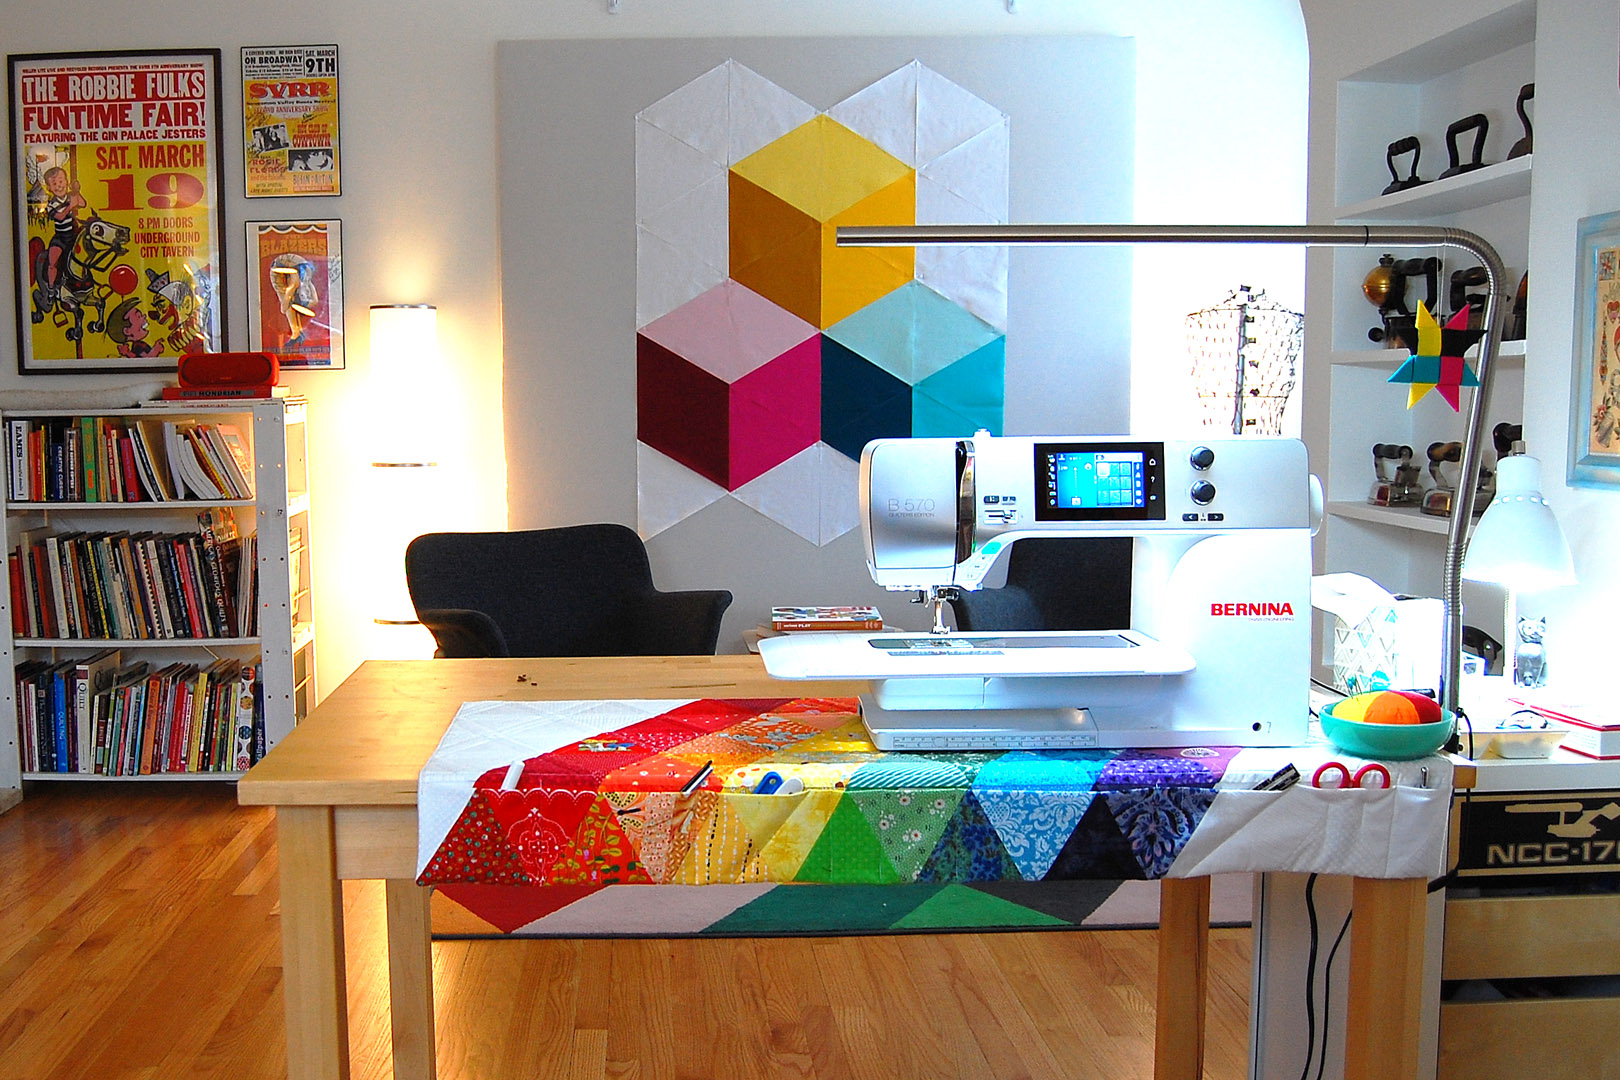
Welcome to Week 2 of the Colossal Blocks quilt-along!
Last week I shared a complete list of materials you’ll need to create this fun baby quilt. You can click here to visit the Colossal Blocks Quilt-Along Week 1 post to find out what you need. This week we’ll be cutting the pieces needed to create the large format tumbling blocks top.
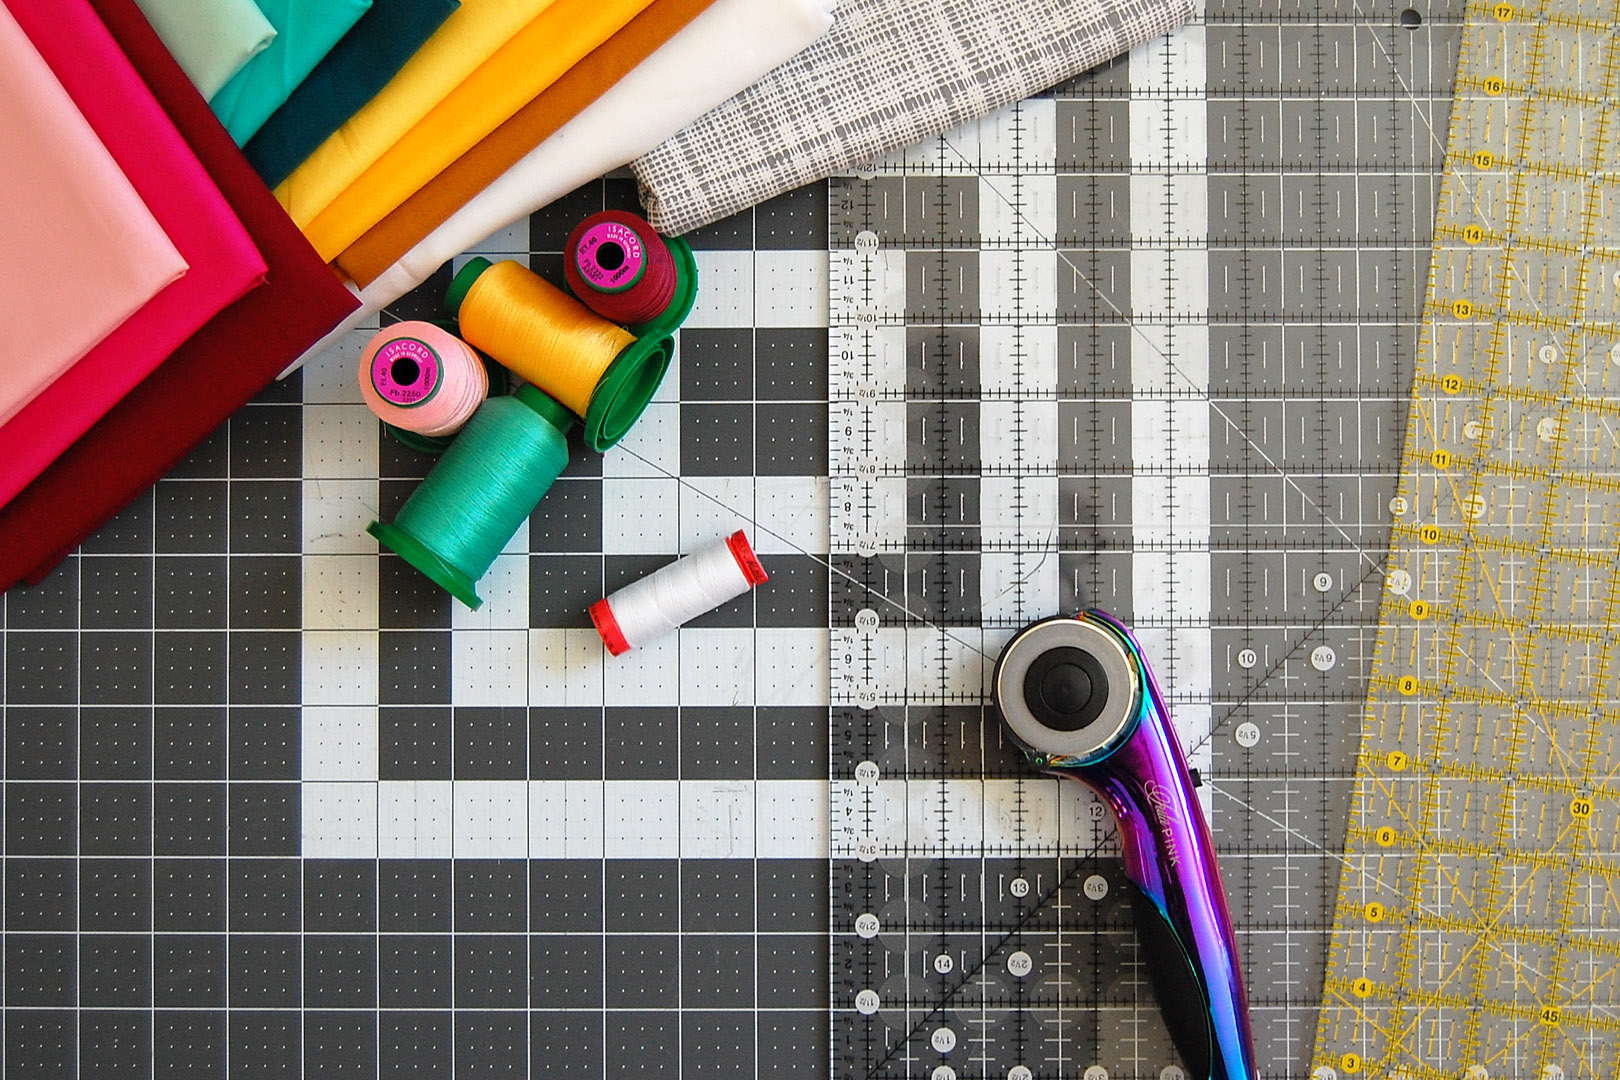
Cutting Blocks for the Colossal Blocks Quilt
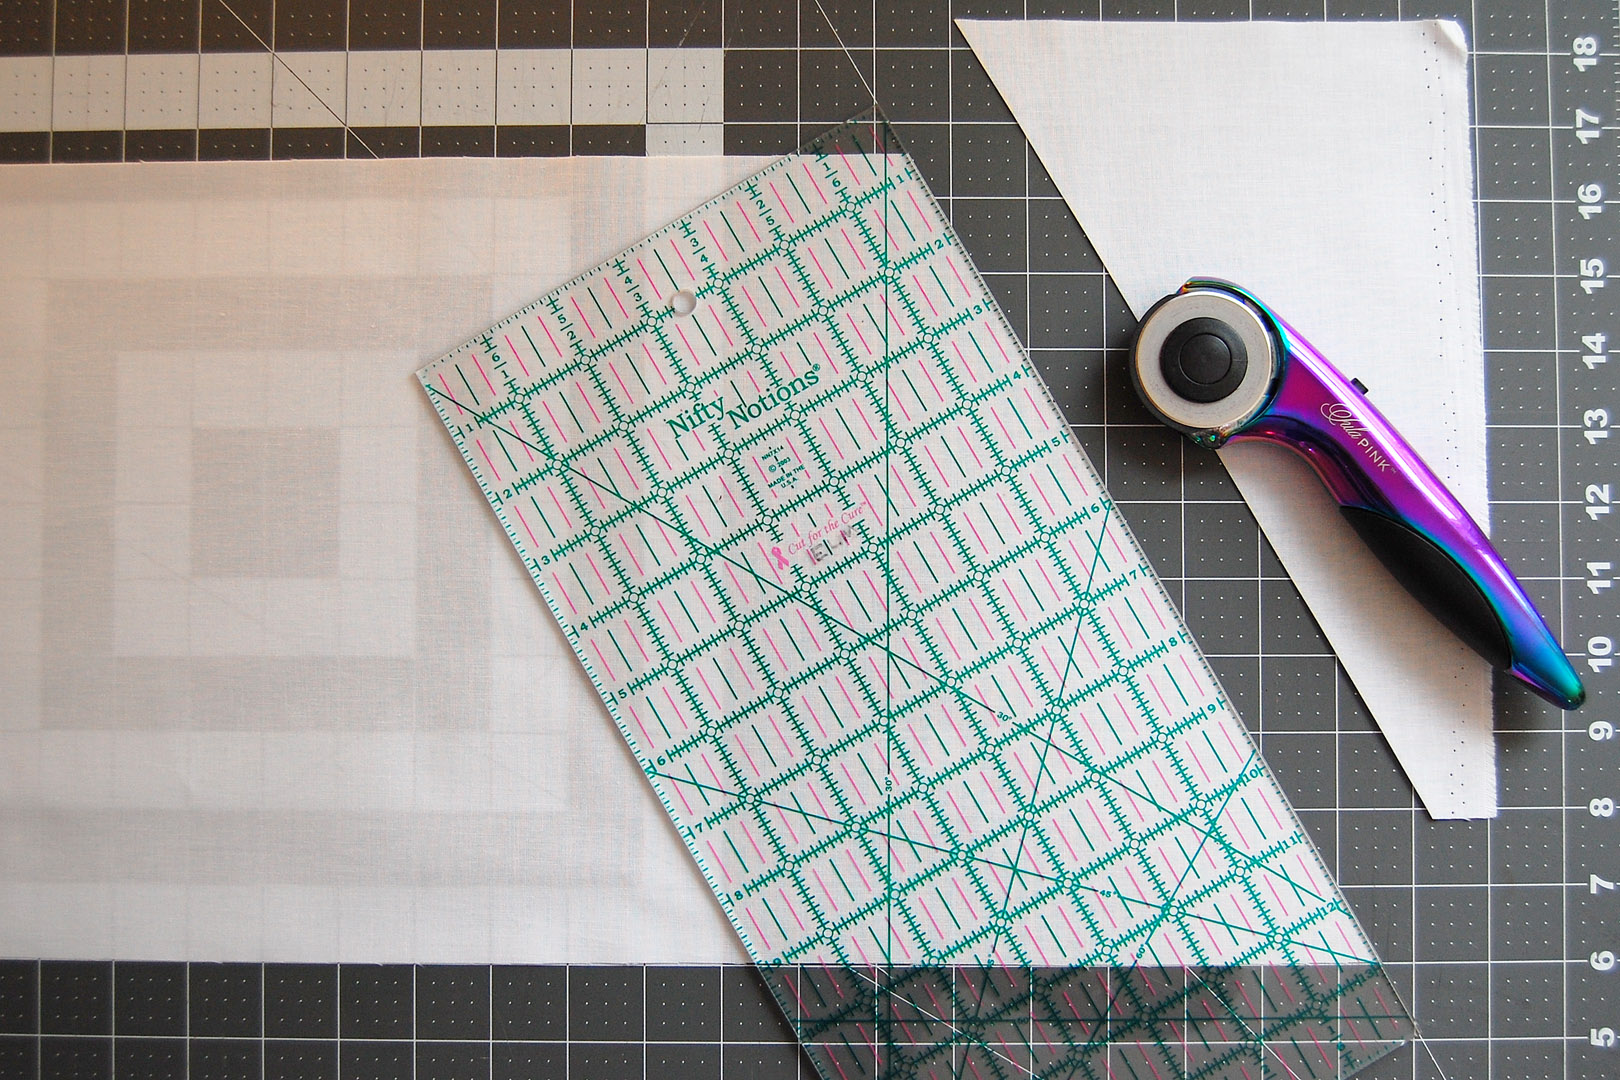
The individual blocks for this quilt are cut 10 1/2″ equilateral triangles. You can use an equilateral triangle ruler sized large enough to cut 10 1/2″ triangles, or you can use a large cutting mat that includes a 30° or a 60º angle marked on the mat. I’ll show you step-by-step how to cut equilateral triangles with your cutting mat.
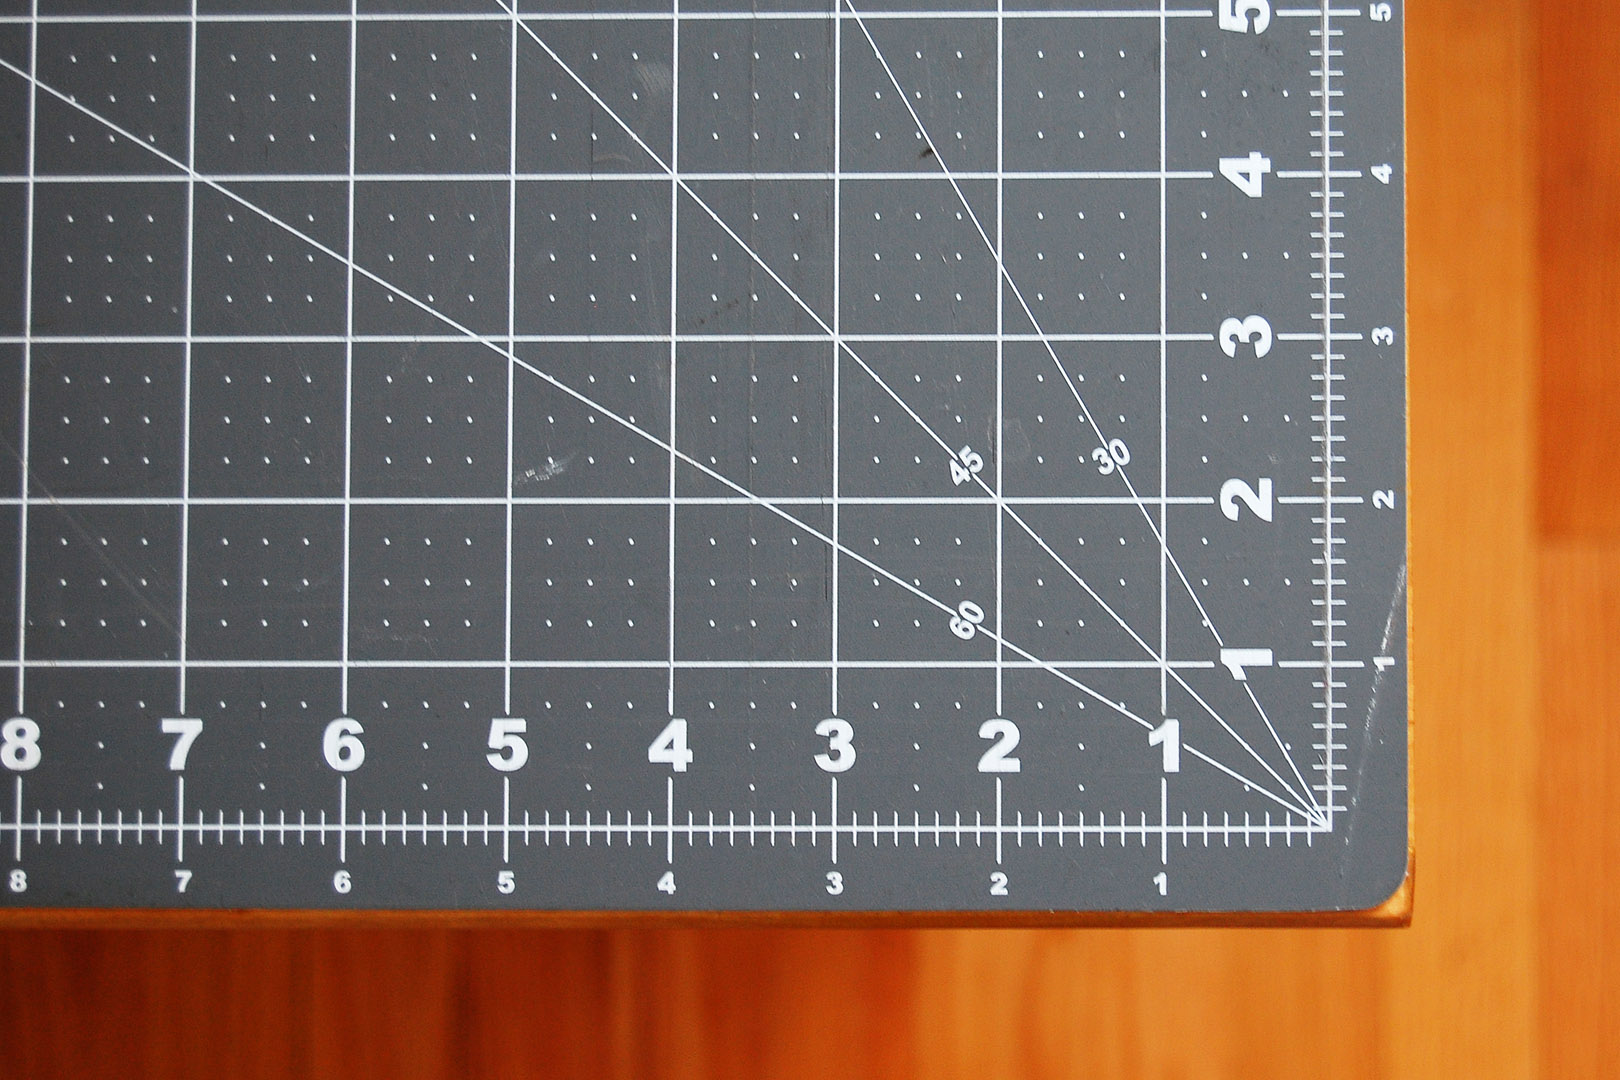
Identify the angles printed on your cutting mat. To cut perfect equilateral triangles with this method you can use either the 60º or 30º angles, as long as the angle you are using is the “top” angle when you are cutting. On the photo of my mat above, the 30º angle is at the top, and this is the angle I am using to cut the equilateral triangles. If you look closely at the angles on your mat, and you see the 60º angle at the top instead, use this angle.
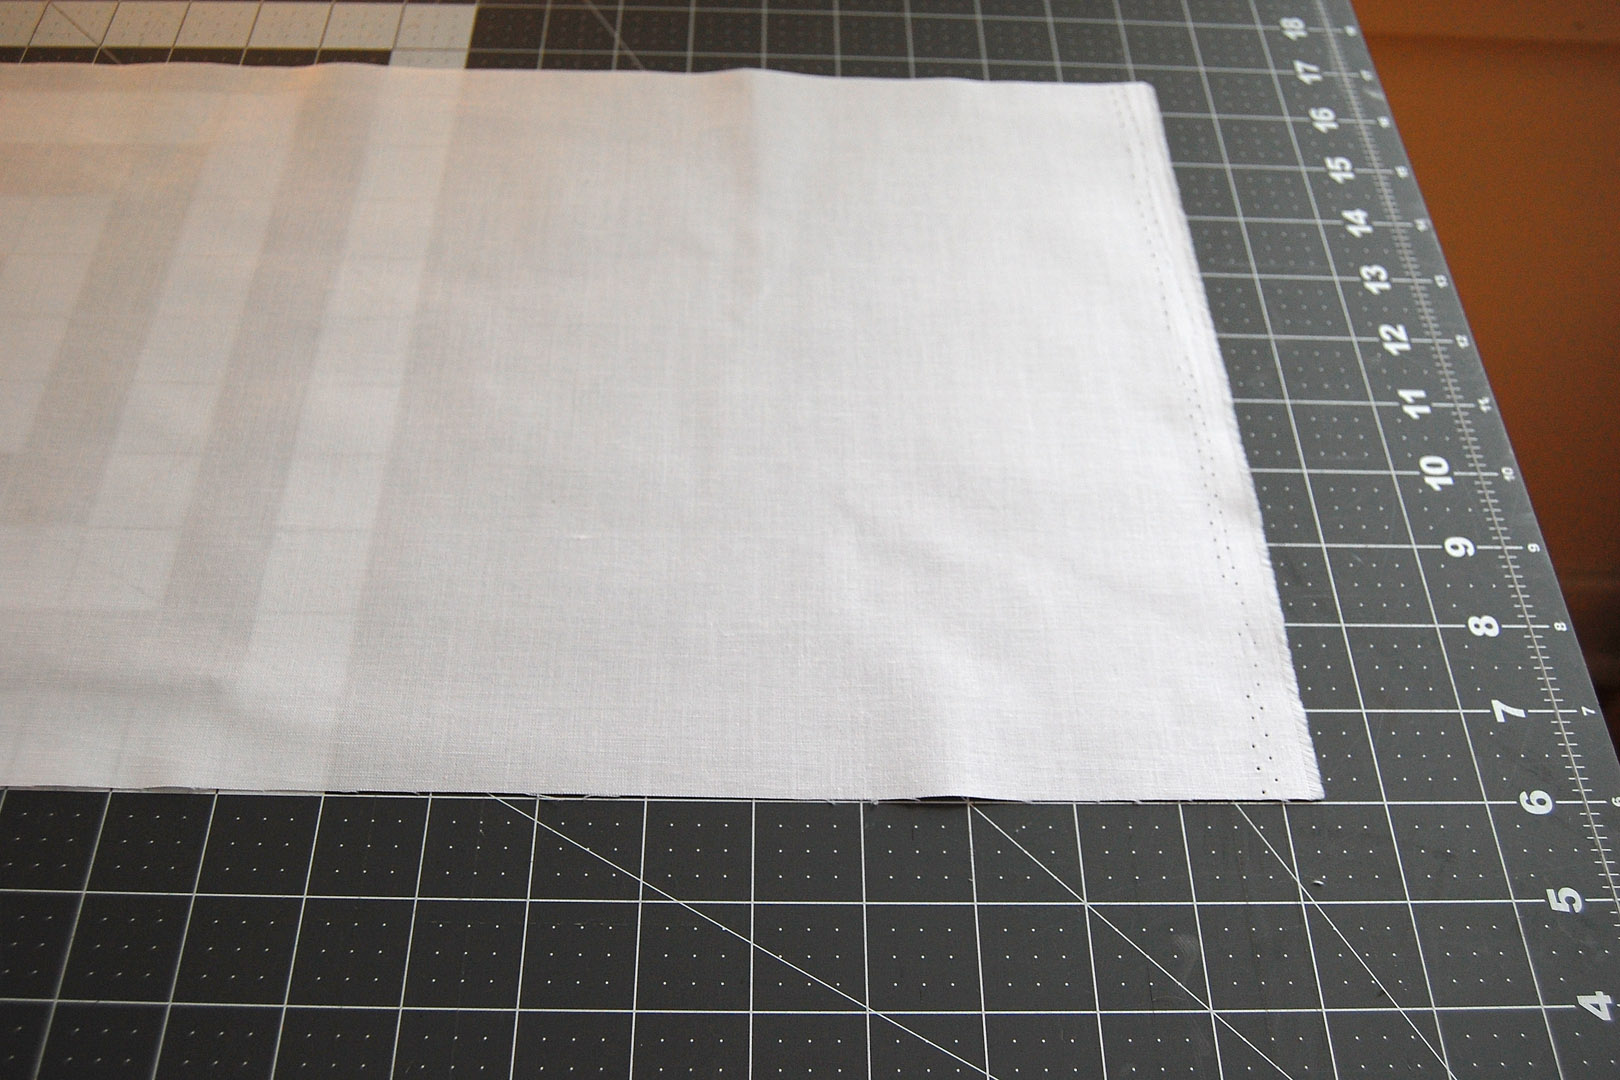
With your fabric pressed and prepared, your fist step is to cut the fabric piece to the size of the finished triangles. We need 10 1/2″ triangles, cut the fabric pieces to 10 1/2″ wide.
Align the fabric strip cut to 10 1/2″ wide horizontally on the mat. Notice the angle I am cutting is the top angle on the mat, and am placing the right edge of the fabric slightly to the right of the 30º angle. Align the bottom edge of the fabric even with one of the horizontal grid lines on the mat.
Carefully align your ruler edge with the correct angle (I am using the 30º line), and make your first cut.
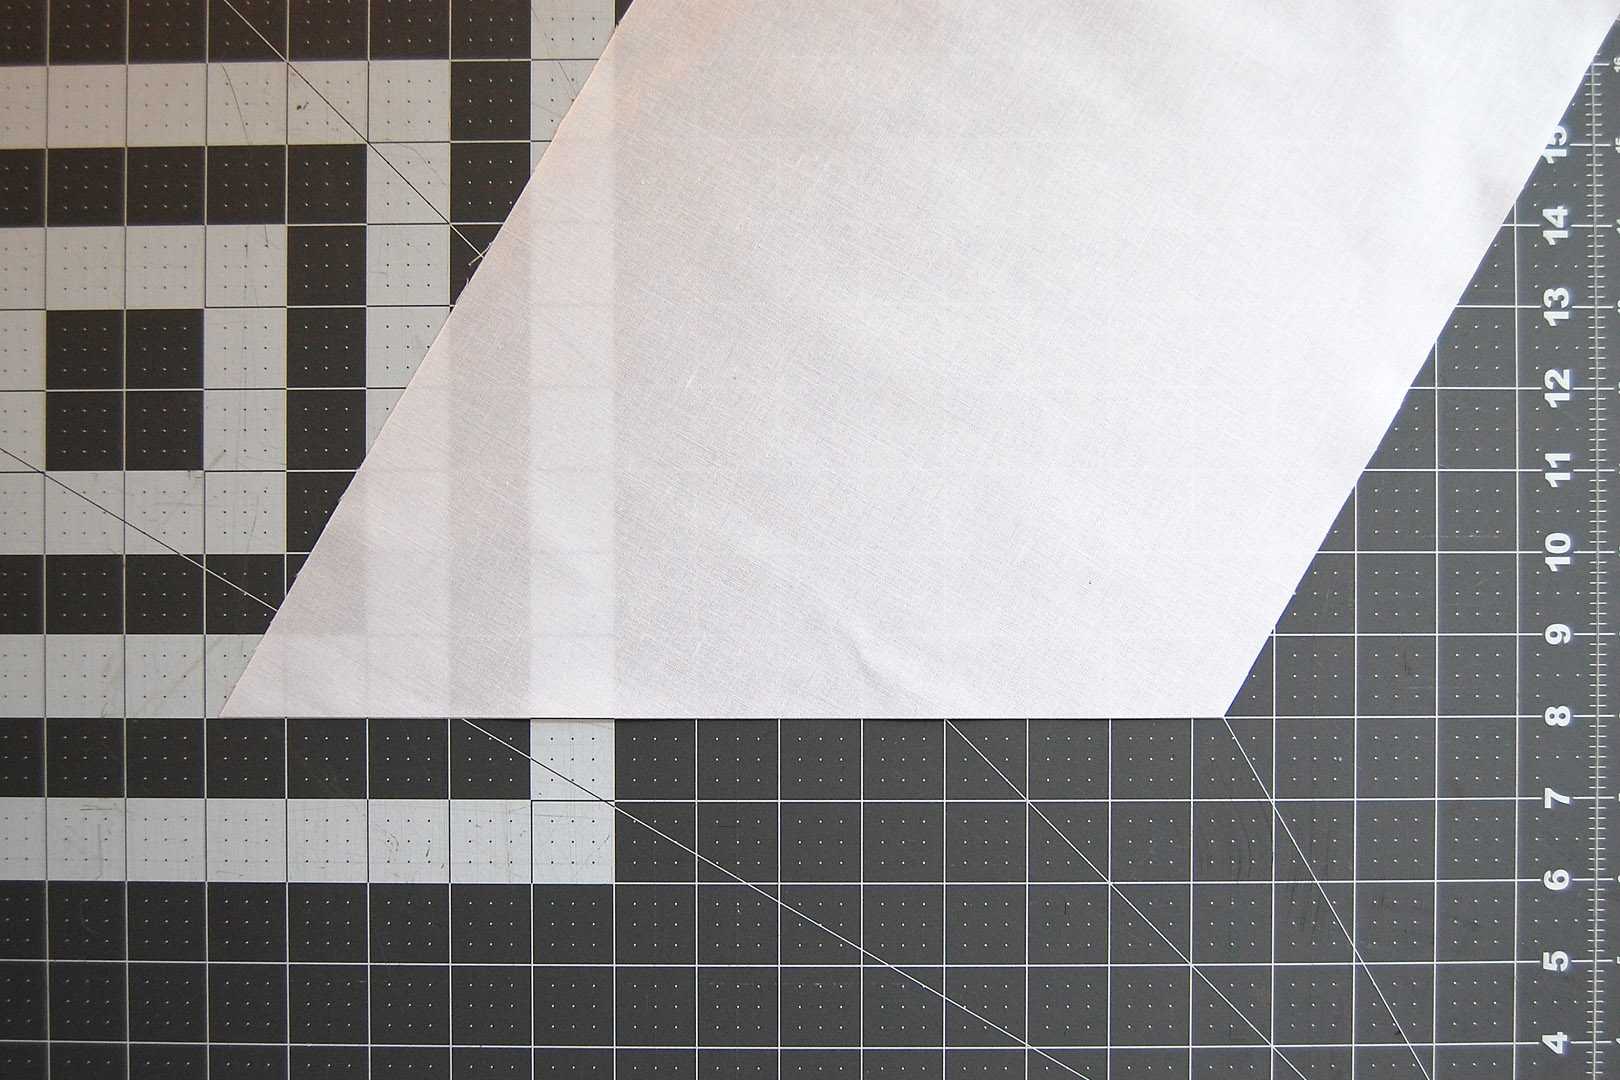
Turn the fabric so that the first cut now aligns with the horizontal grid on the mat, and the cut point matches perfectly with the angle (I am using the 30º line).
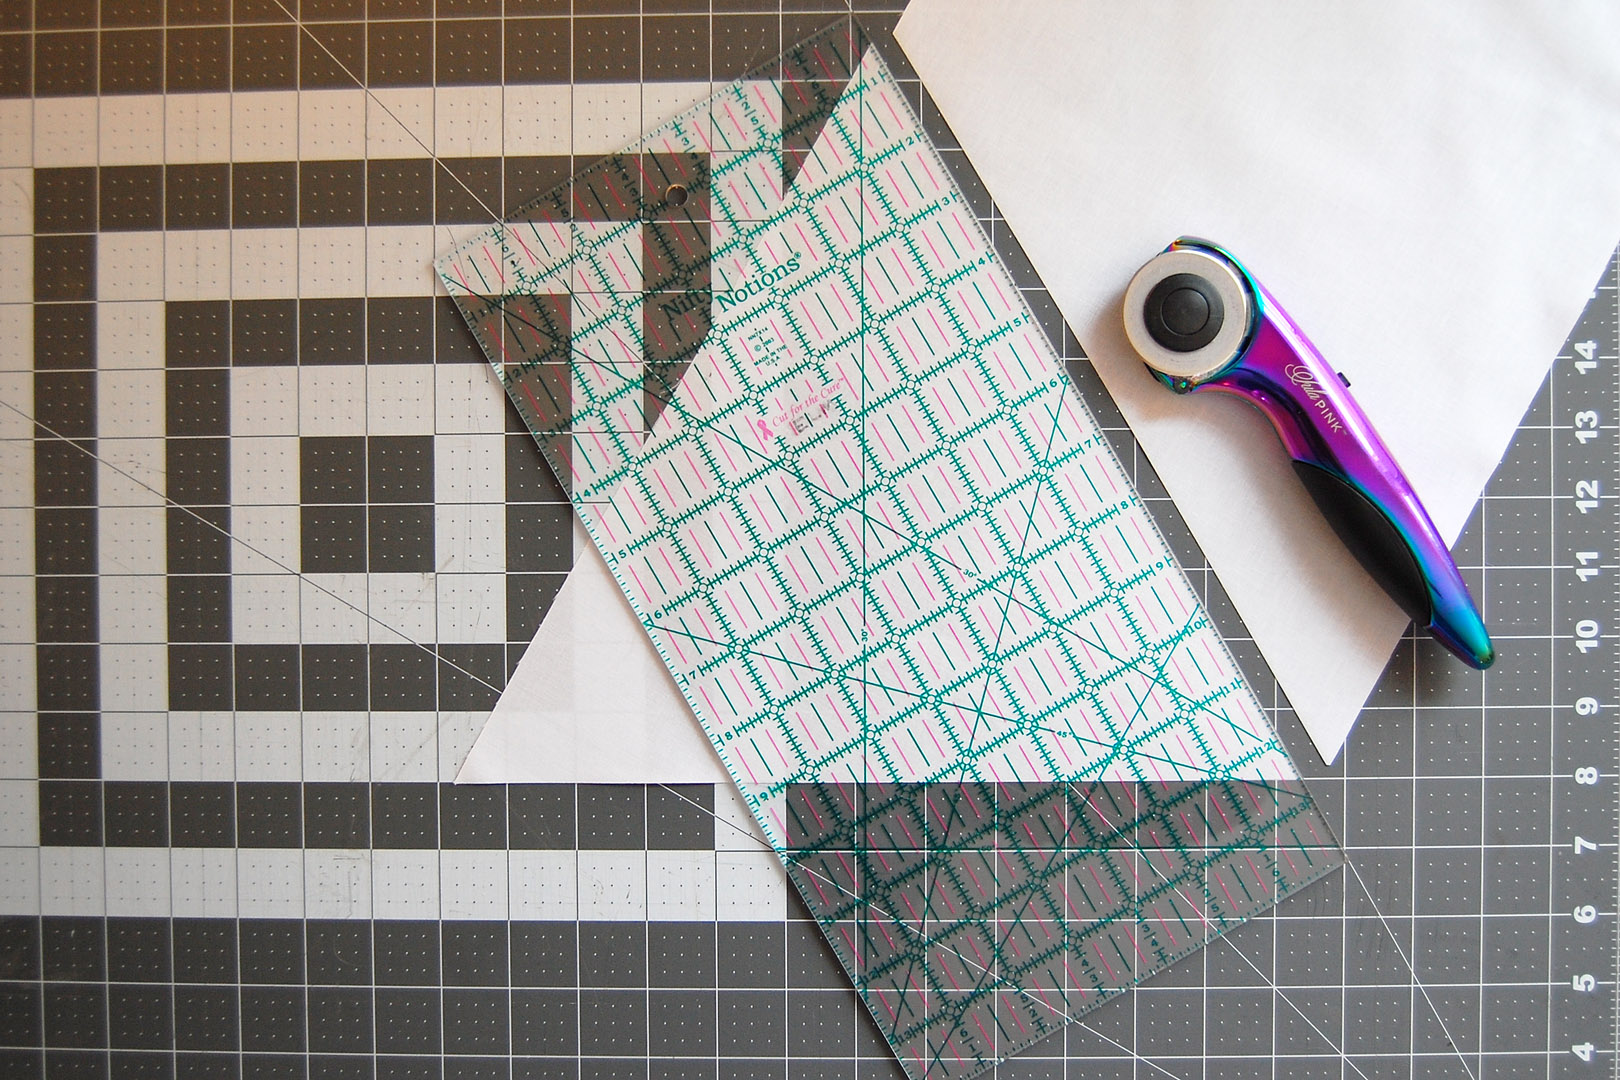
Align your ruler with the angle and make the second cut. You now have one 10 1/2″ tall equilateral triangle cut. Keep on moving the fabric to align with the grid work and angle on the mat to continue cutting triangles.
NOTE: measure the height of the triangle, and not along the base to find this measurement. If you want to triple-check to make sure your triangles are cut correctly, measure from the middle of each long edge to the top of the point to make sure it is 10 1/2″ tall in each direction. If one of the measurements is significantly off, try again! If the triangles are not all cut the same way, the pattern won’t fit together correctly when sewing the patchwork top together.
Cut the triangles as follows in the list below.
- Block A (I used yellow)
- Light color: cut 2 triangles
- Medium color: cut 2 triangles
- Dark color: cut 2 triangles
- Block B (I used pink)
- Light color: cut 2 triangles
- Medium color: cut 2 triangles
- Dark color: cut 2 triangles
- Block C (I used cyan blue)
- Light color: cut 2 triangles
- Medium color: cut 2 triangles
- Dark color: cut 2 triangles
- Background and binding fabric (I used white)
- Cut 14 triangles (you should have enough fabric left to cut border in next post)
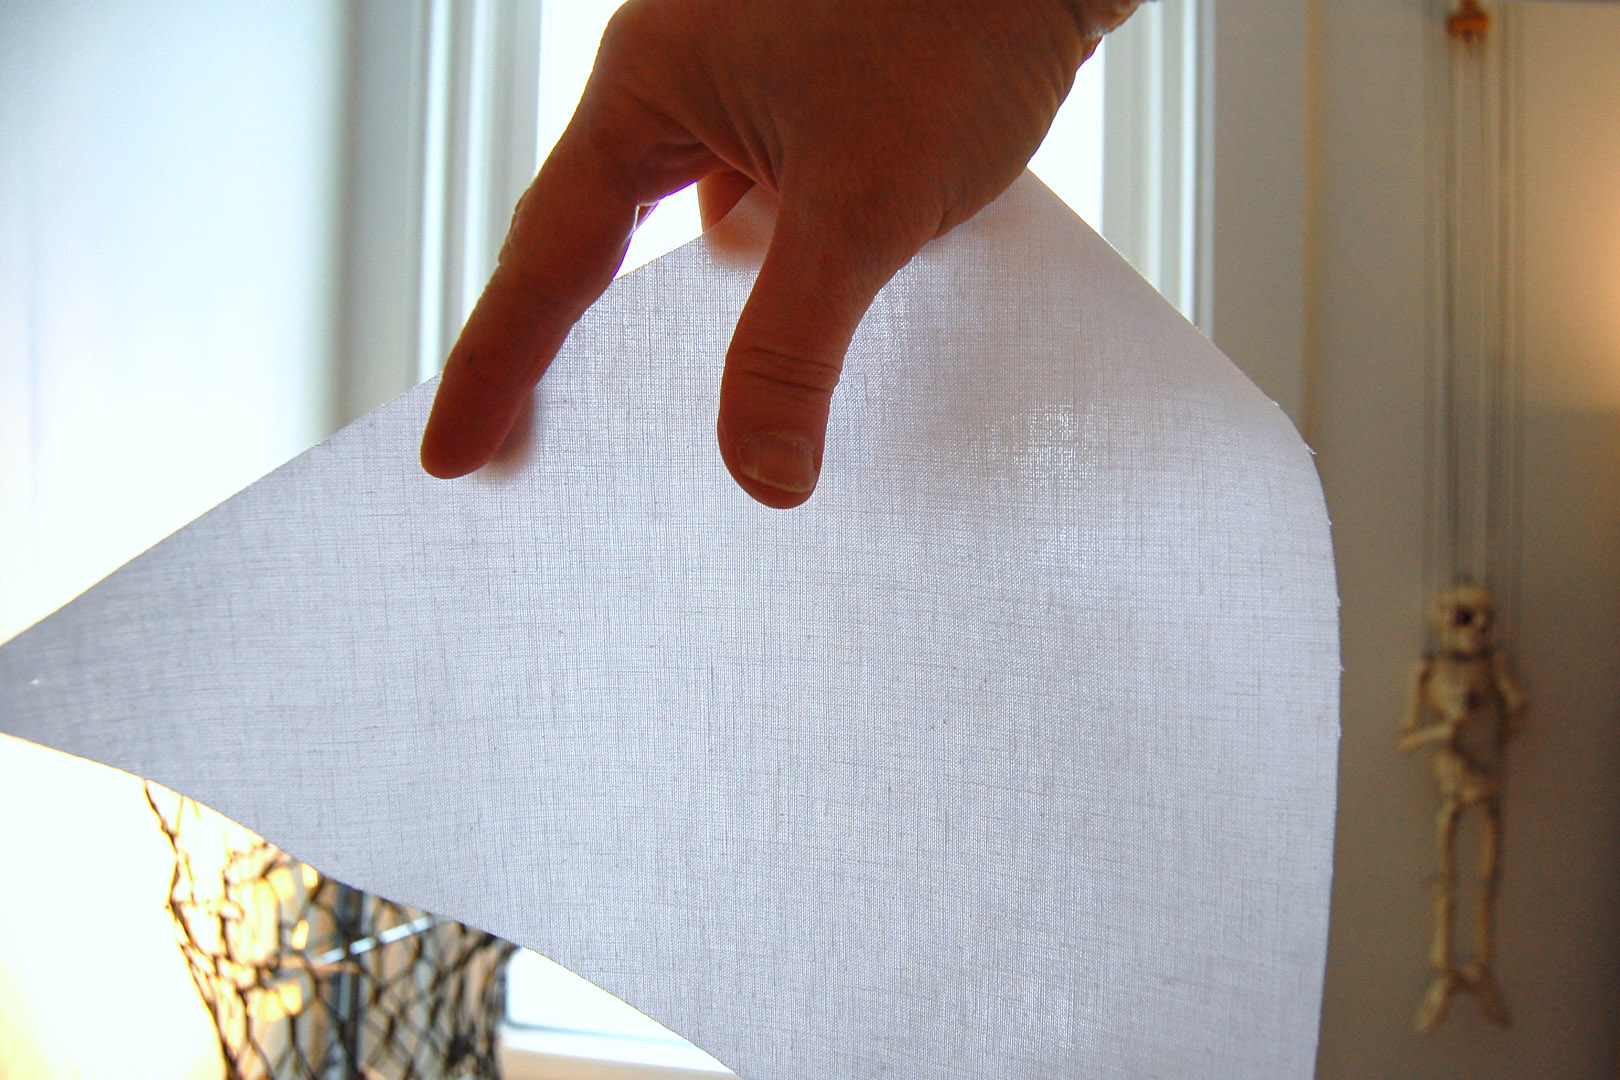
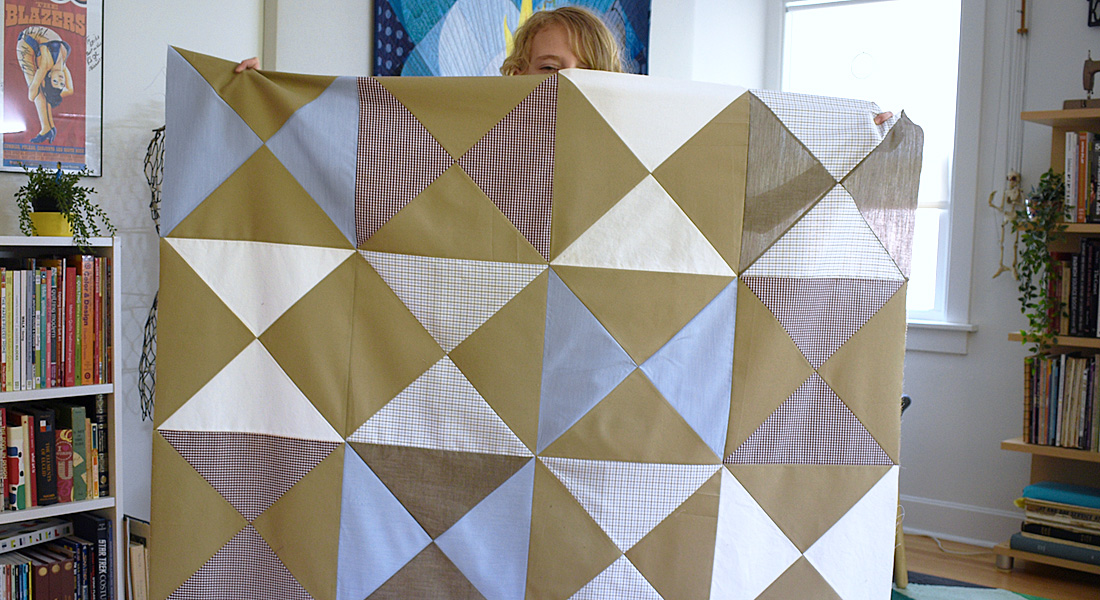
I checked the grain of my blocks during the layout steps, and made sure the grain is all going in the same direction. You don’t have to have all the blocks oriented in the same grain line to make this quilt. I prefer to match the grain when sewing with large blocks cut on the bias because it can help the patchwork sew together with less stretching or warping.
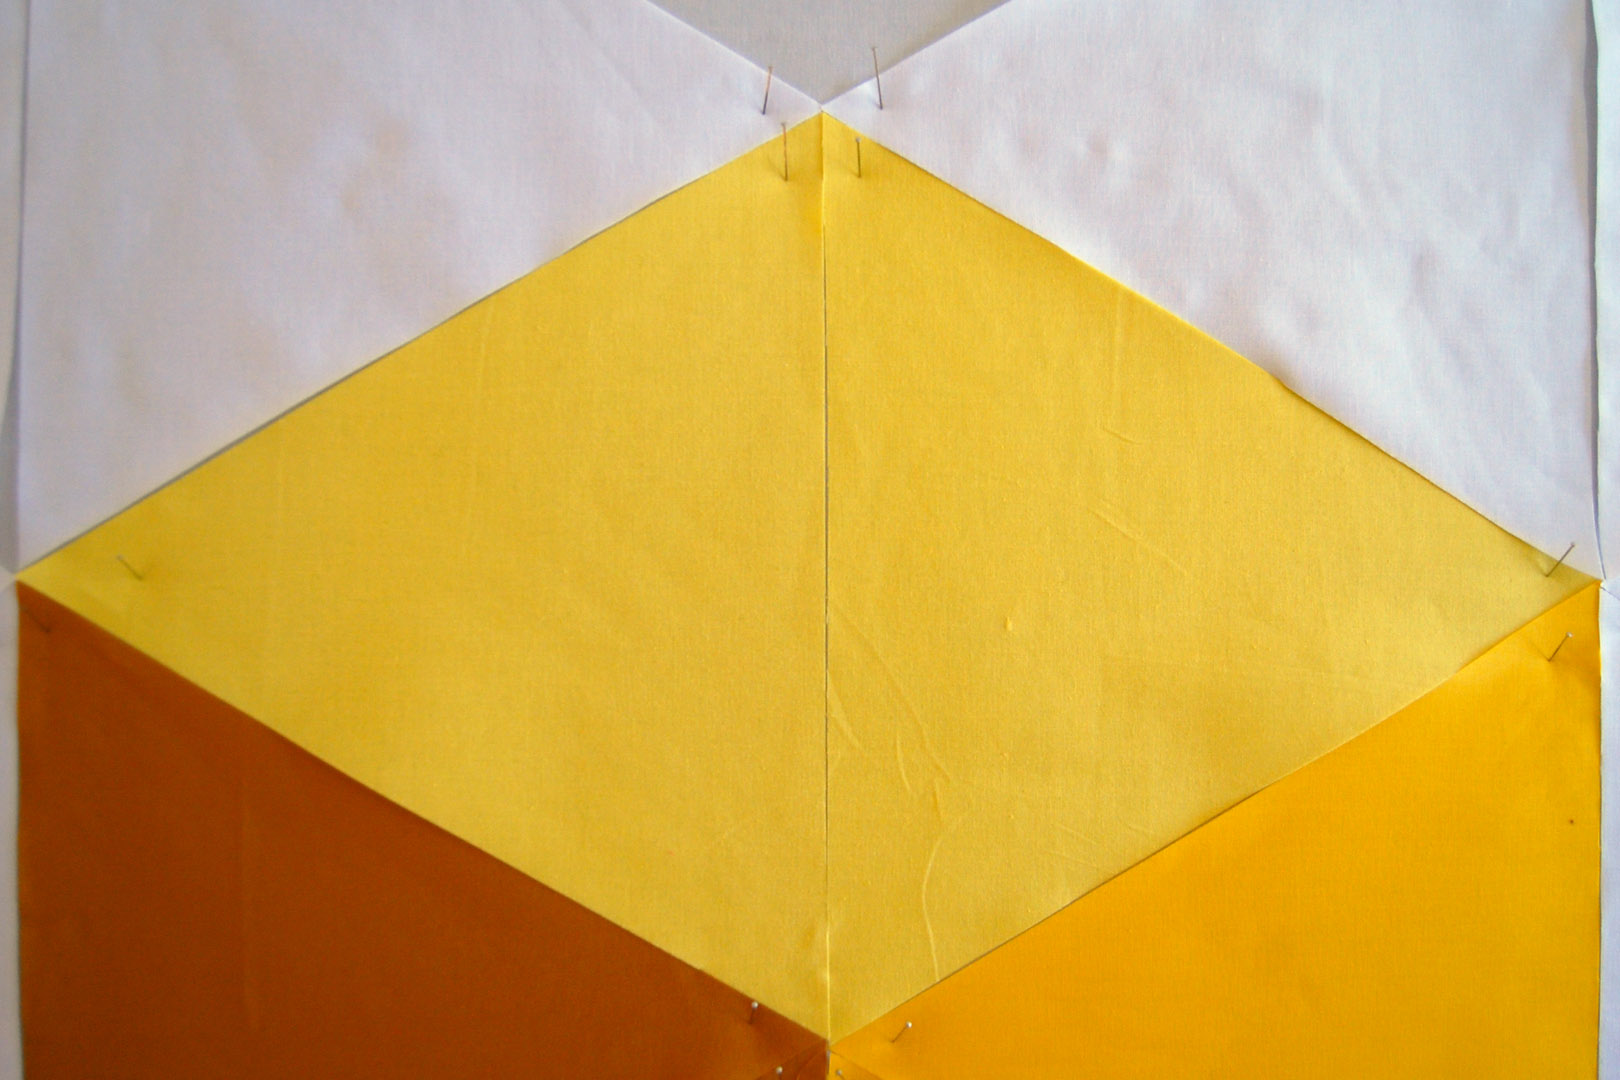
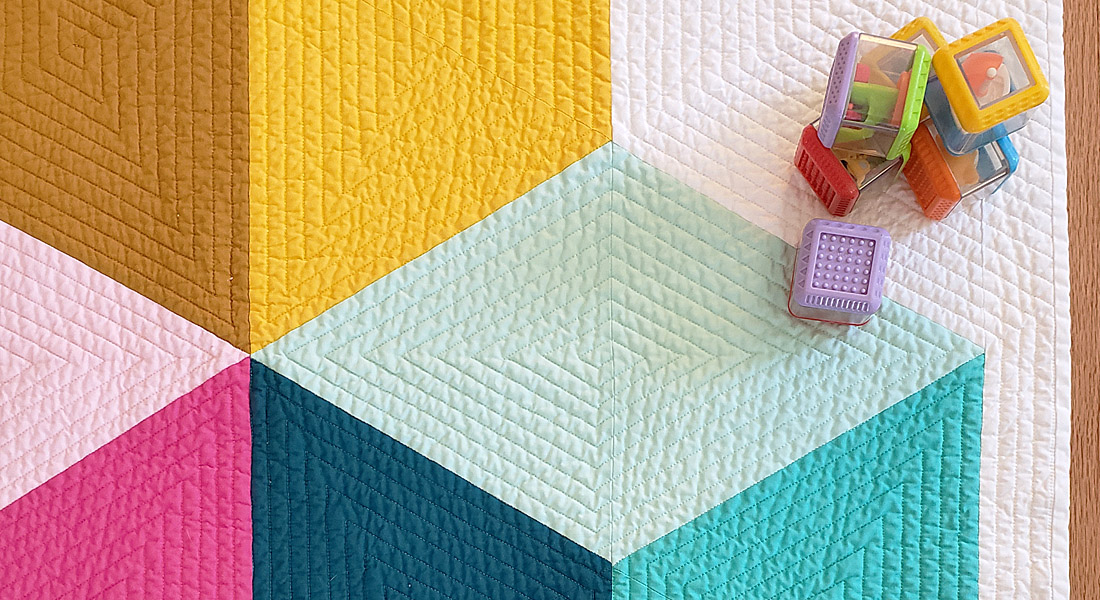
Begin laying out the triangles with the top of Block A (yellow), the two lightest triangles on top to create a horizontal diamond.
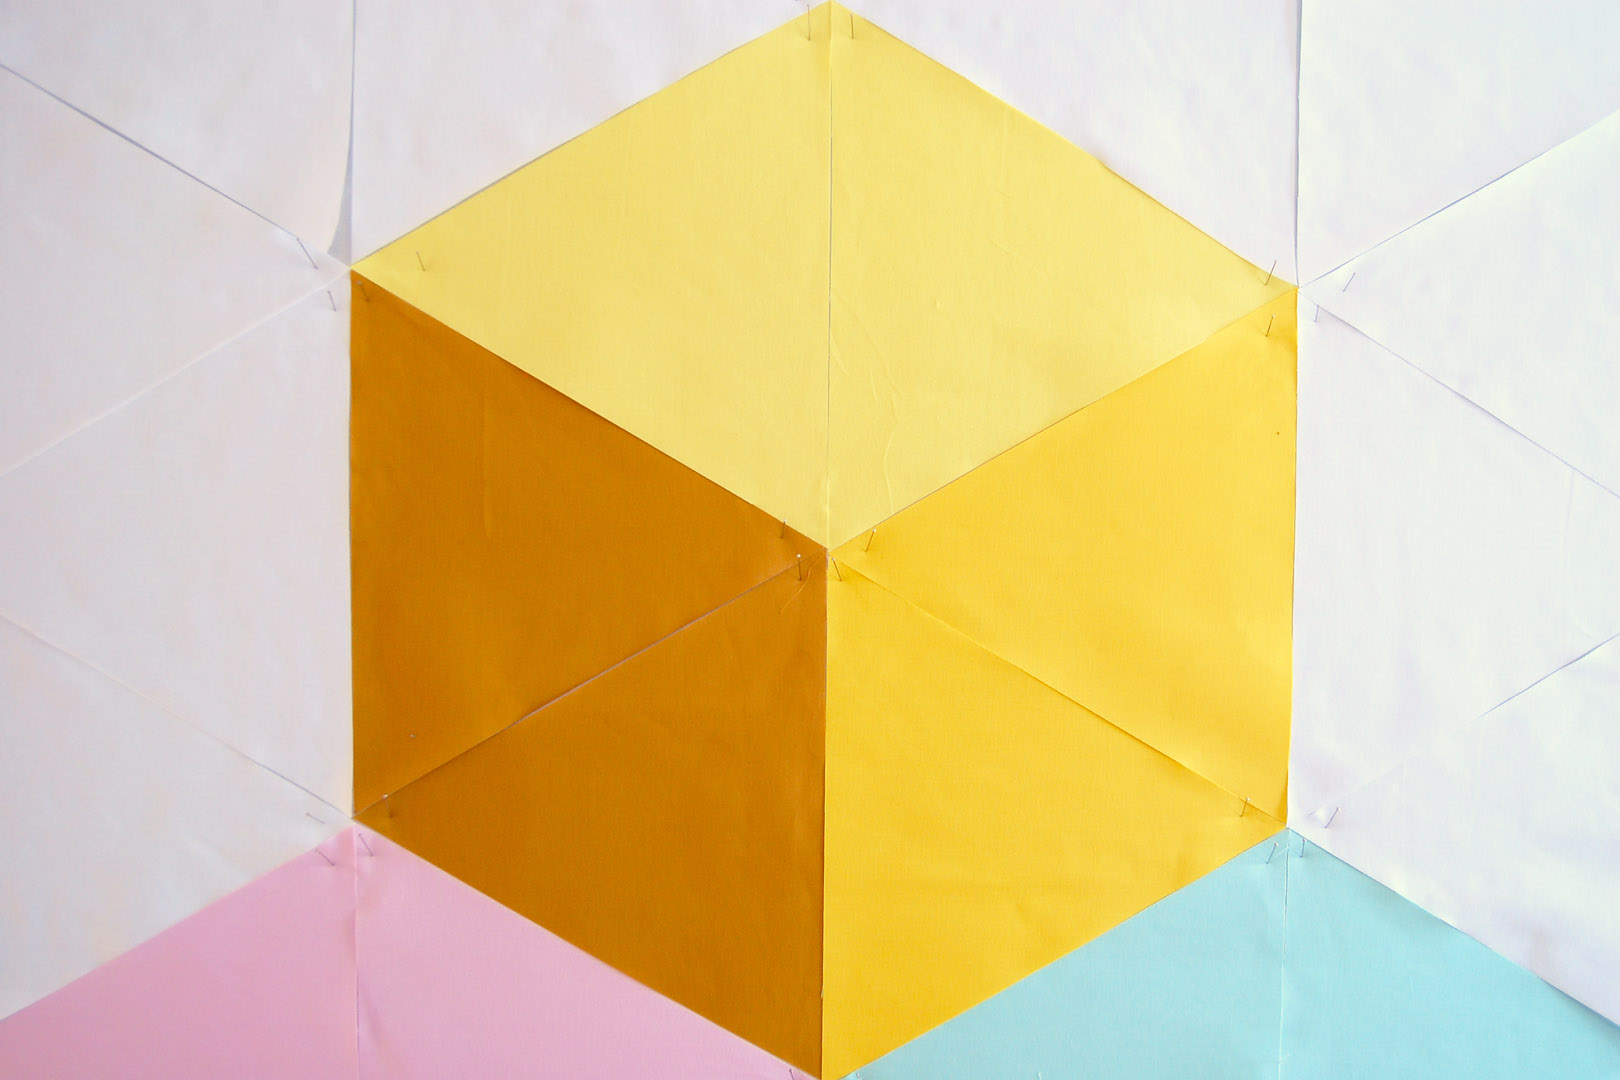
The two darkest triangles are placed below the top left triangle, and the two medium triangles are placed below the top right triangle.
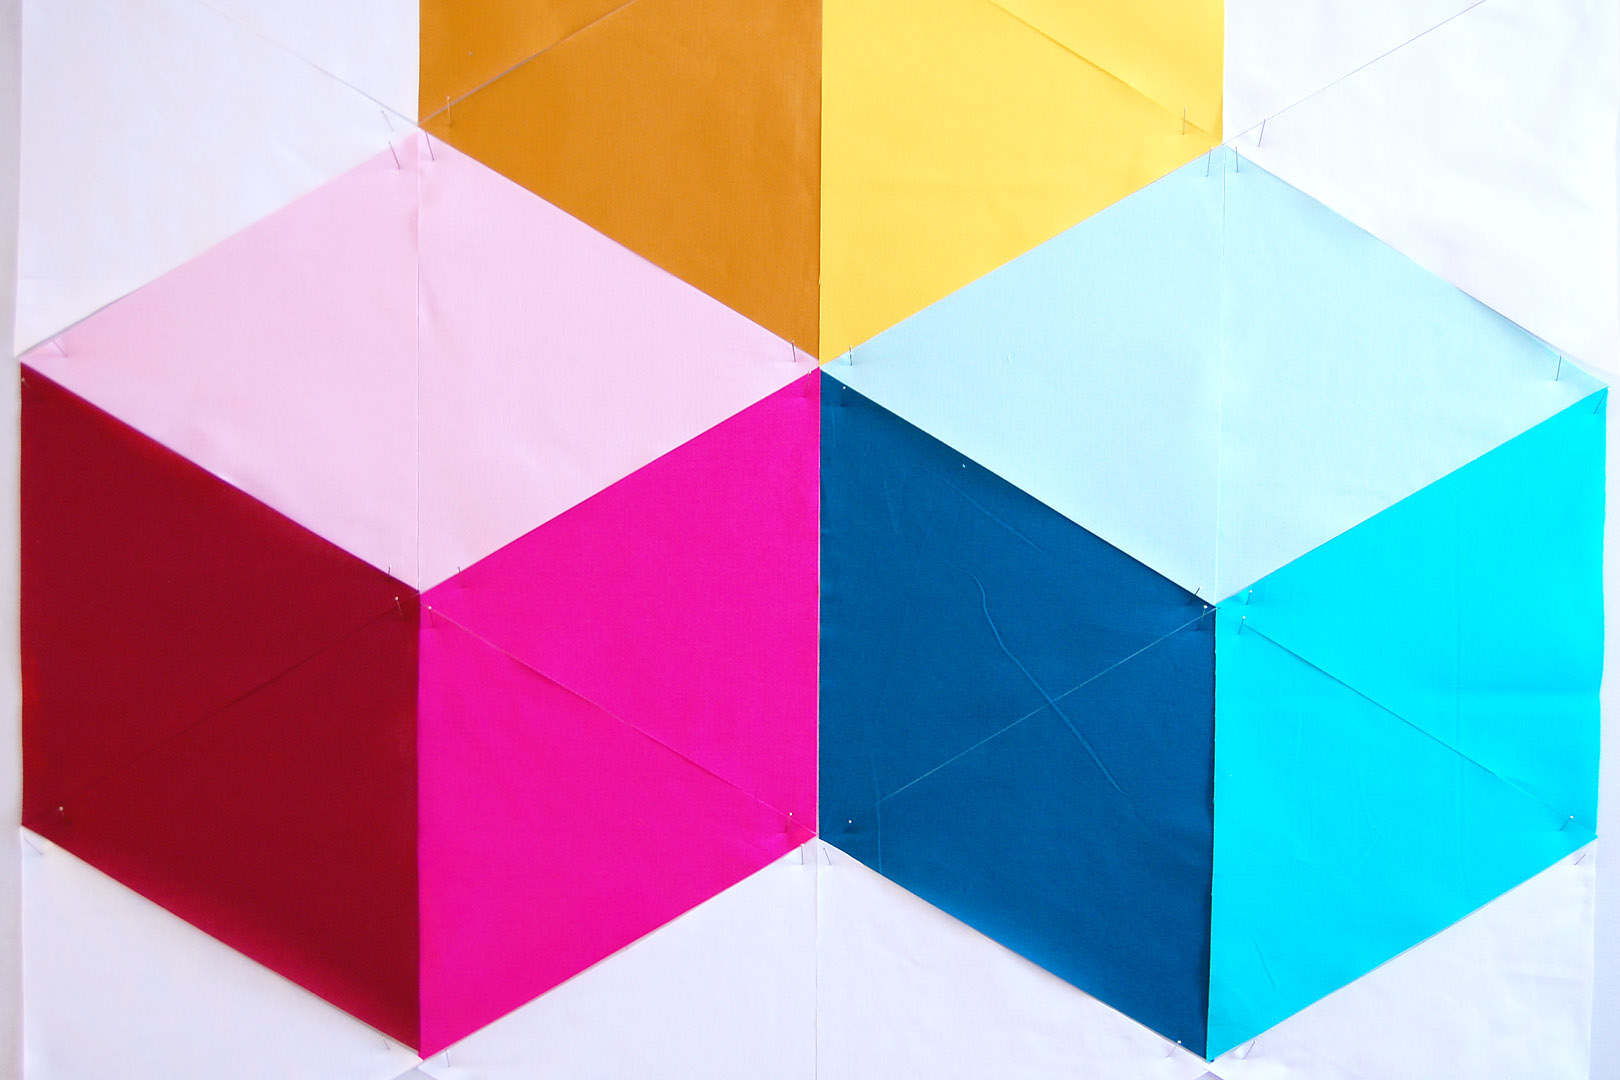
From there, move on to Block B (pink) and Block C (blue) in the same way. Just keep checking with these pictures if it gets confusing.
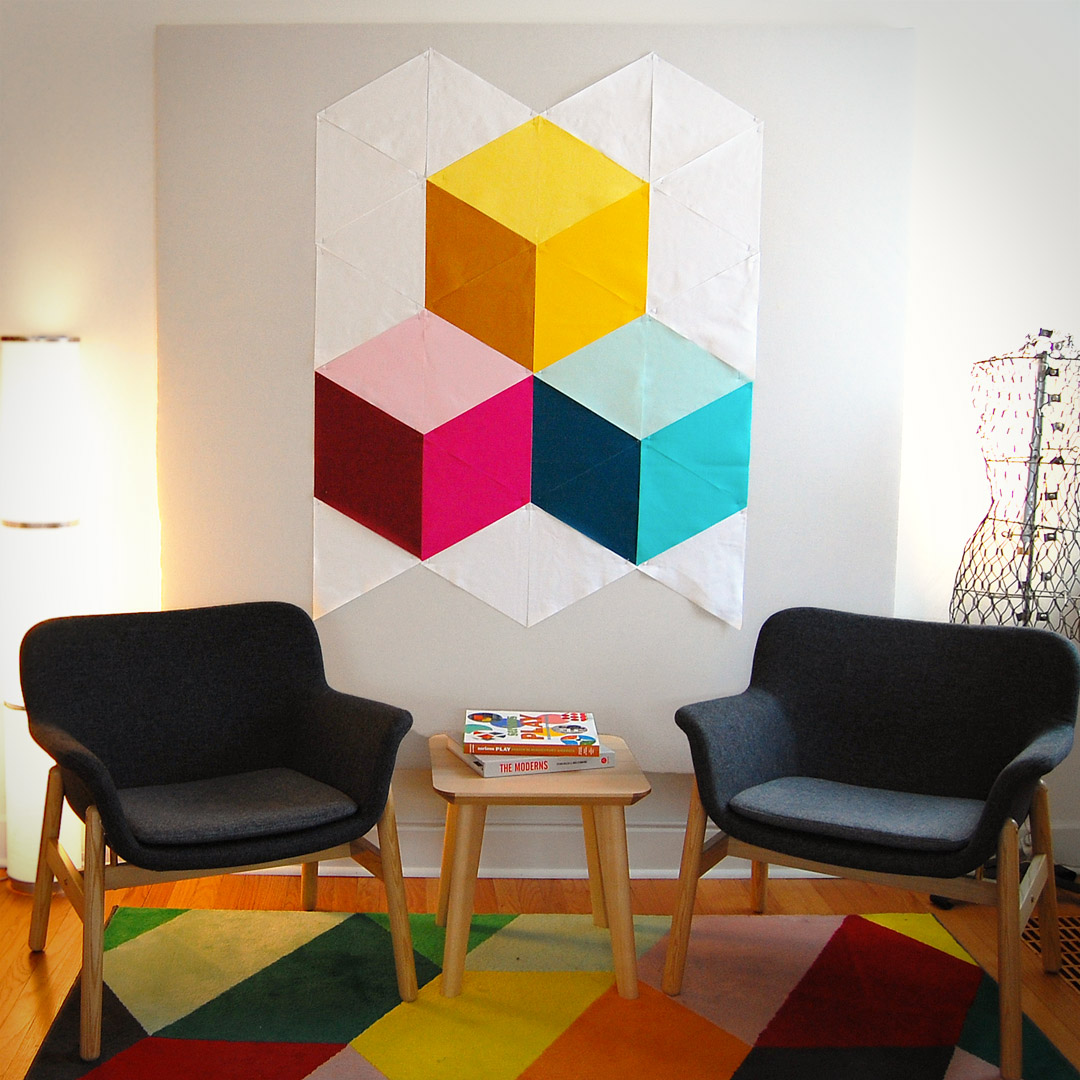
Fill in around the blocks with the white triangles to finish the layout! Next week we’ll stitch the top together, trim it, and add the borders before moving on to the final steps.
Used Products

What you might also like


8 comments on “Colossal Blocks Quilt-Along Week 2: Cutting and Layout”
-
-
When I put the colored triangles together it looks like a parallelogram and not a square.
-
Hi vhalgren, let’s see if we can find out what happened with your triangle patchwork. First, you can check to see if your triangle patchwork is cut into triangles with equal angles and sides. Each angle should measure exactly 60 degrees. If you have a 60 degree angle on your cutting mat, use this to measure your triangle patchwork. There are also 60 degree quilting rulers that work perfectly for helping to cut these triangles without issues.
When you begin to lay out the triangles, the two triangles of each color come together to form a diamond shape. These diamond shapes should fit together perfectly to form one block. The overall shape isn’t a square, but looks more like a six sided shape – a hexagon.
If your shapes are not coming together when you are laying out the triangles, chances are the triangles are cut in a different size or shape than a 10 1/2″ tall equilateral triangle with equal 60 degree angles on all sides. Going back to check these measurements and making sure triangles are cut correctly may help you with this part of the tutorial. Let us know how you are coming along with the quilt after checking the triangles. – Erika
-
Okay I think I’m good. I measured them and they’re all correct so I’ll go for it. Love the looks of the blocks. Thanks for your reply.
-
-
-
Thank you for explaining the placement of the rotary cutting ruler for this pattern and for making your technique instructions easy to follow. Piecing this quilt top is going to be “Colossal” fun! I’m new to your group and I came in on the 4th week, but I’m pretty sure I can whip this top up in no time at all. One of my 1st challenging quilt tops was the “Tumbling Blocks” pattern but on a much smaller scale, 4″ blocks. It was a doll quilt for my Chatty Cathy doll I’d received for Christmas. That was in 1966. I was 10 years old and wasn’t old enough to be trusted to use my mother’s sewing machine. My step-grandmother taught me to piece by hand, I can say with certainty that I could not have maneuvered the “Y” seams for my step-grandmother to teach me on her treadle sewing machine … grinning … I used leftover pink calico fabric (called “material” back in those days). My mother would not have justified buying new fabric for a hobby. It wouldve been considered too expensive, even if I selected fabric from the clearance bolts at the Ben Franklin store. If memory serves me correctly, discount cotton fabrics were about $.49 per yard. My background and backing fabrics were white muslin bed sheets that were unrepairable so they were destined to become patching fabric on the sheets that were still usable.
I’m looking forward to making this quilt top using your technique, because you used solid colors to make your triangles, and seeing your echo quilting pattern, the center seams will hardly be as noticeable.
Thank you for my “blast from the past” project. This time, I’ll be piecing my quilt top with new solid fabrics and using my sewing machine 🙂-
Hi @lazyquilter, thanks so much for checking out the Colossal Blocks Quilt-Along! I’m so glad you like the design and the tutorial. If you do create your own version please share photos with us at the WeAllSew Community section!
-
-
Hi Erica
Ref ” made sure the grain is all going in the same direction. ” I would like more detail on this comment as I do not understand what you mean.Kind Regards Mutsuko Beale
-
Hi Mutsuko! Fabric has a grainline, which means the directions that the fibers have been woven to create the fabric. You can see the fibers going through the fabric in the photo holding up the fabric in the light. I made sure that the fibers in the fabric that go across, the grainline, all run in the same direction when I cut and stitched the triangles together. You can learn more about fabric grainline with my post here at WeAllSew: https://weallsew.com/all-about-cotton-woven-fabric/
-
Leave a Reply
You must be logged in to post a comment.

I believe Kaye Wood’s Starmaker 8 is an equilateral triangle, but it is not quite 10 1/2″ tall.