Colossal Blocks Quilt-Along Week 4: Quilting and Binding
Welcome to Week 4 and the final installment of the Colossal Blocks Quilt-Along! Last week we completed the quilt top, and now we’re ready for quilting and binding. If you’d like to make a Colossal Blocks Baby Quilt, visit Week 1 to find a complete list of materials, visit Week 2 to learn how to cut and lay out the top, and visit Week 3 to find out how to piece the top together.
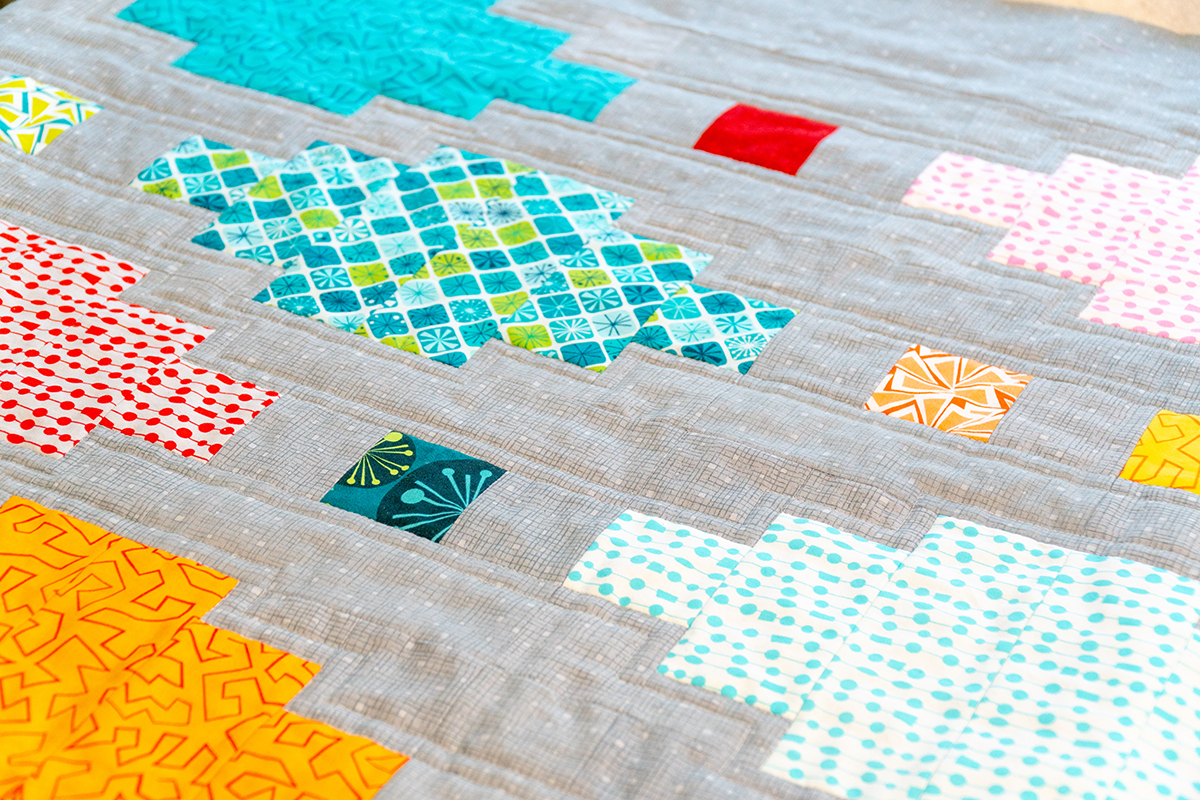
This quilt features a large format design, which means you have a nice choice of quilting choices that will look great on the finished quilt. I’ll share a few ideas with you and show you how I created a quilting design that echoes the large scale blocks.
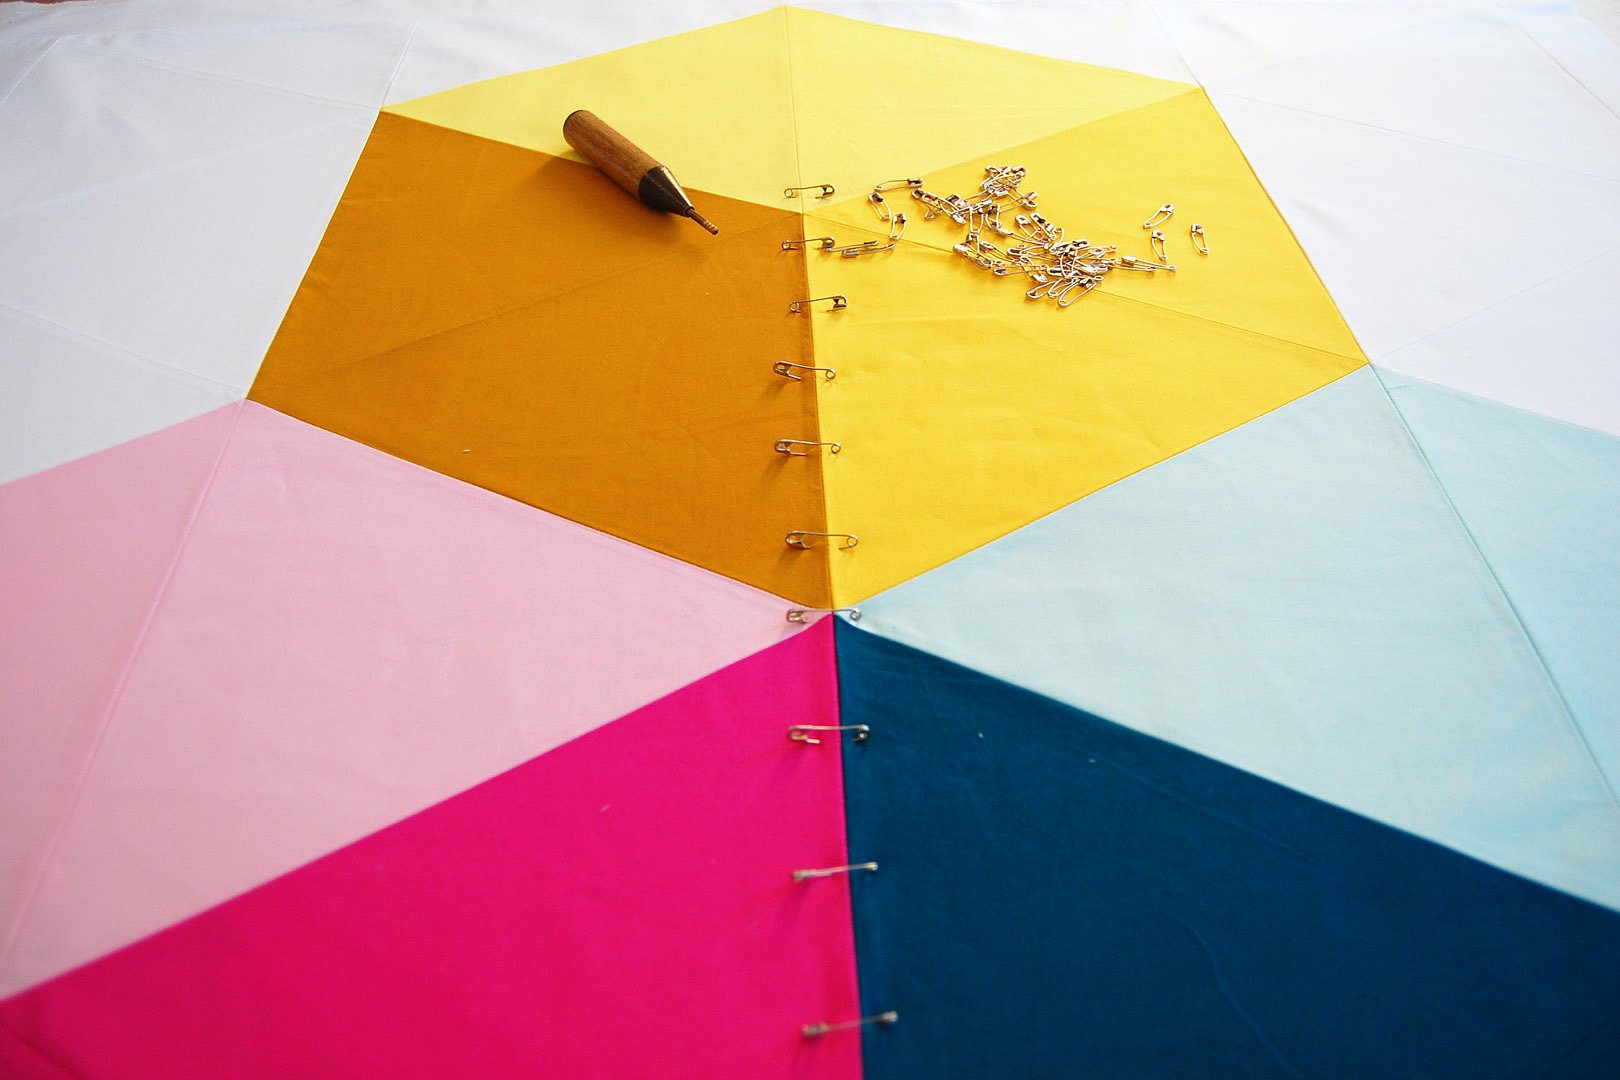
The first step in quilting is to create a basted quilt sandwich. I use the pin basting method, click over to read a full tutorial on this technique here.
To create your basted quilt sandwich, start with the backing fabric. The backing should be at least a few inches larger than the top in all directions. I was able to find a 45″ wide fabric that worked perfectly for this quilt. If your fabric isn’t wide enough to fully cover the back with a few inches all over to spare, you may need to sew two pieces together to make it happen. I use blue painter’s tape to attach the backing face-down on the floor, smoothing out any wrinkles carefully. After carefully layering the 100% cotton batting and quilt top, I get to pinning.
After your quilt sandwich is fully basted, it’s time to think about how you will add quilting stitches to your Colossal Blocks baby quilt.
Any all-over design will look great with this quilt because the design is at such a large scale. Check out these tutorials for creating easy all-over quilting designs below.
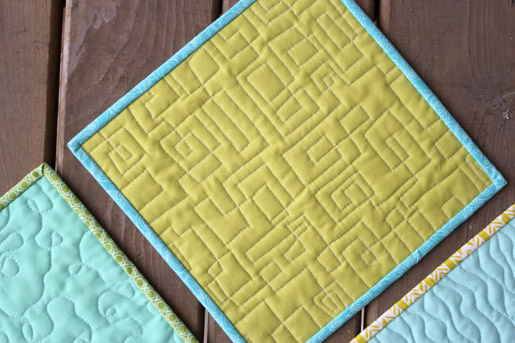
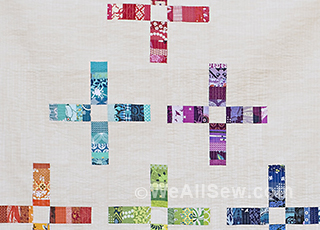
This fun squared design is easier to stitch than you might think. Click here to find the Squared free-motion quilting tutorial, and be sure to check out the other designs in the series (ripples, waves, and loops).
You could also apply a simple all-over design with the Walking foot #50 using this easy technique.
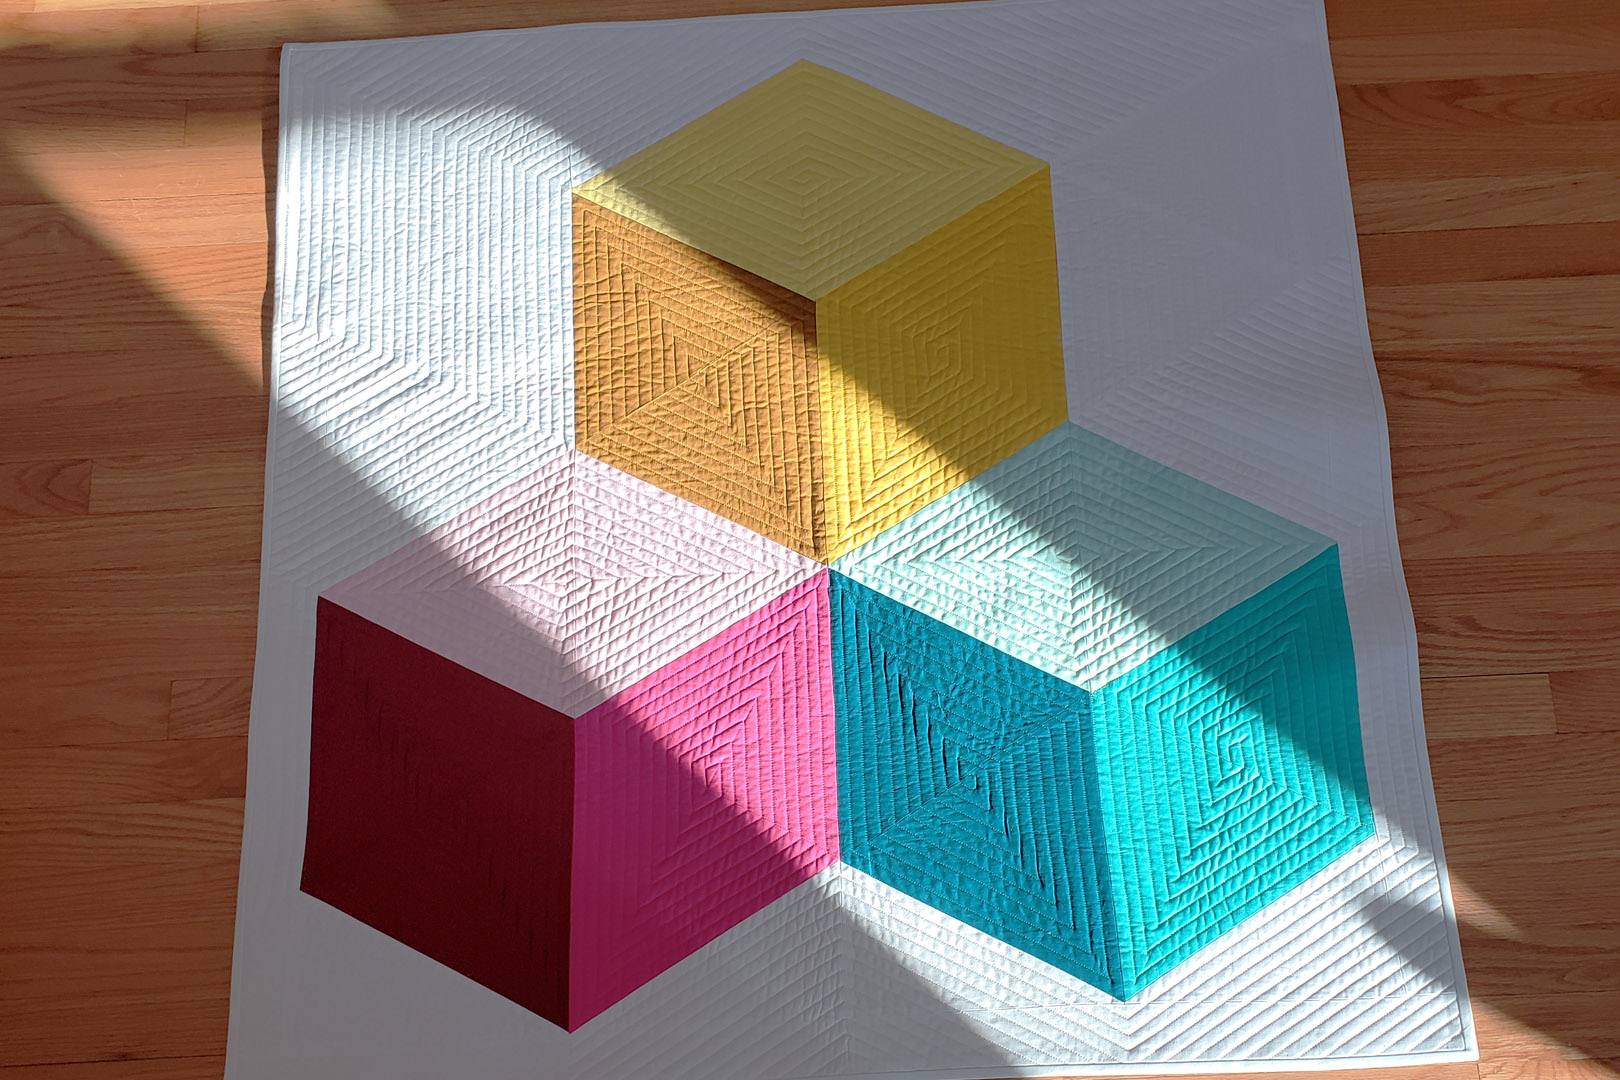
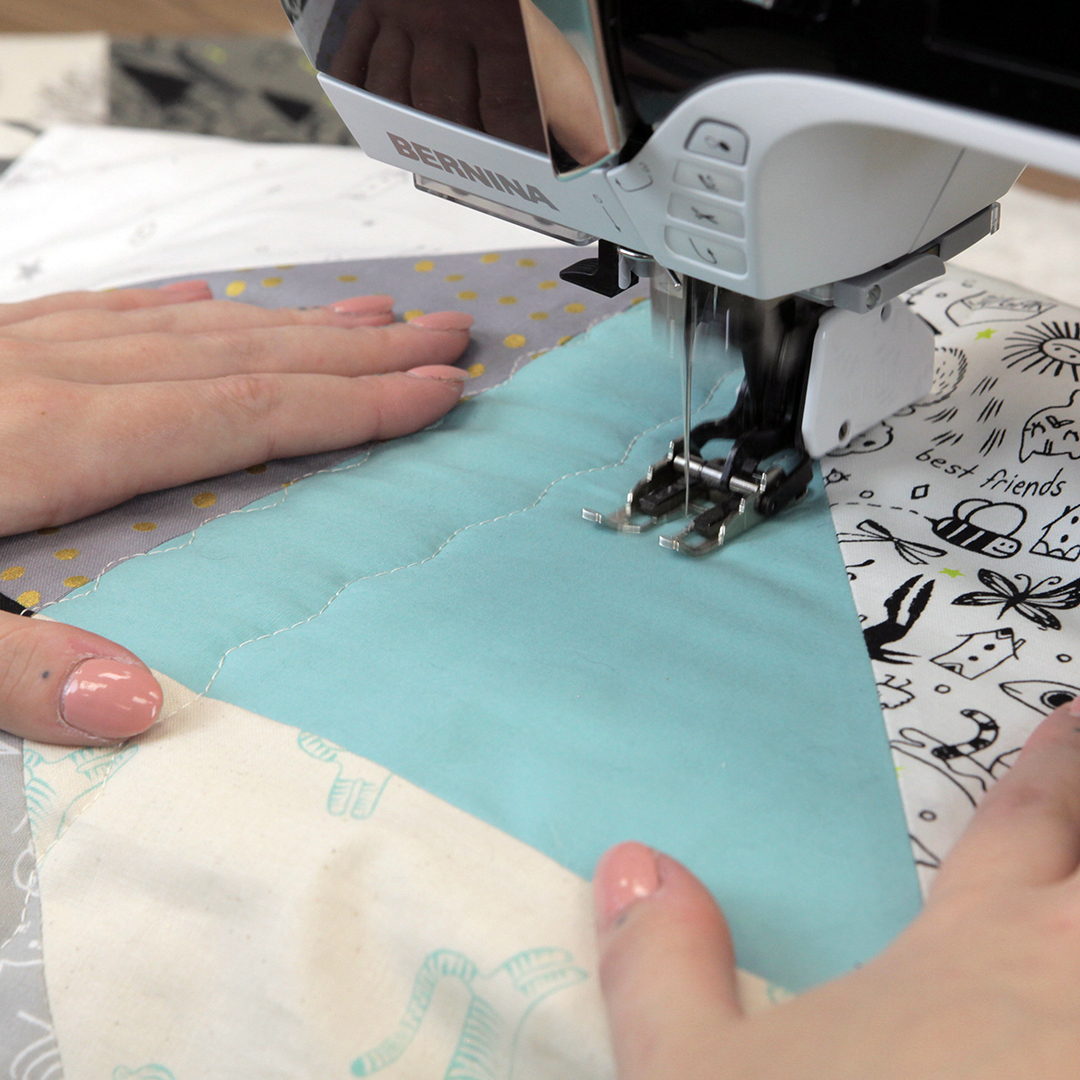
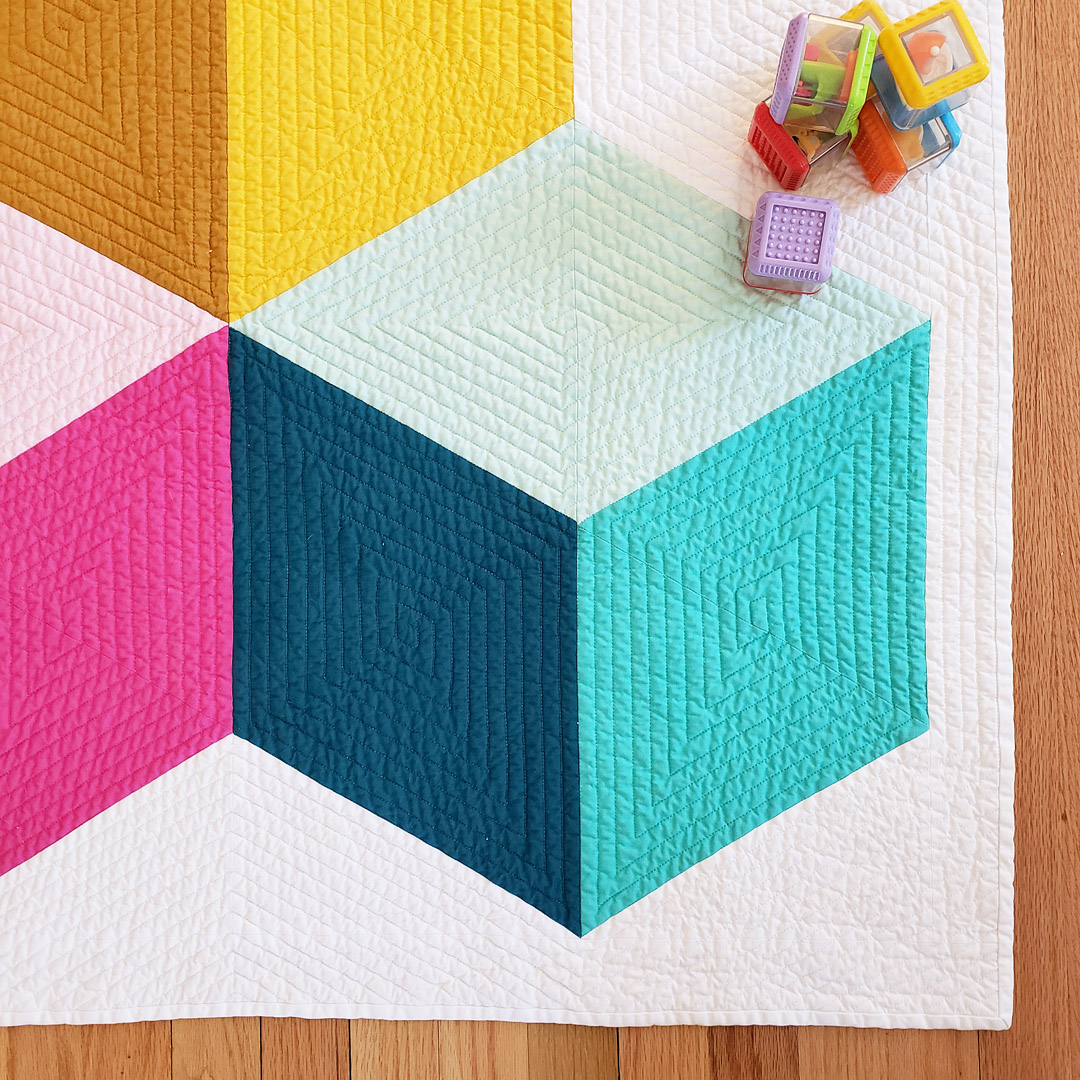
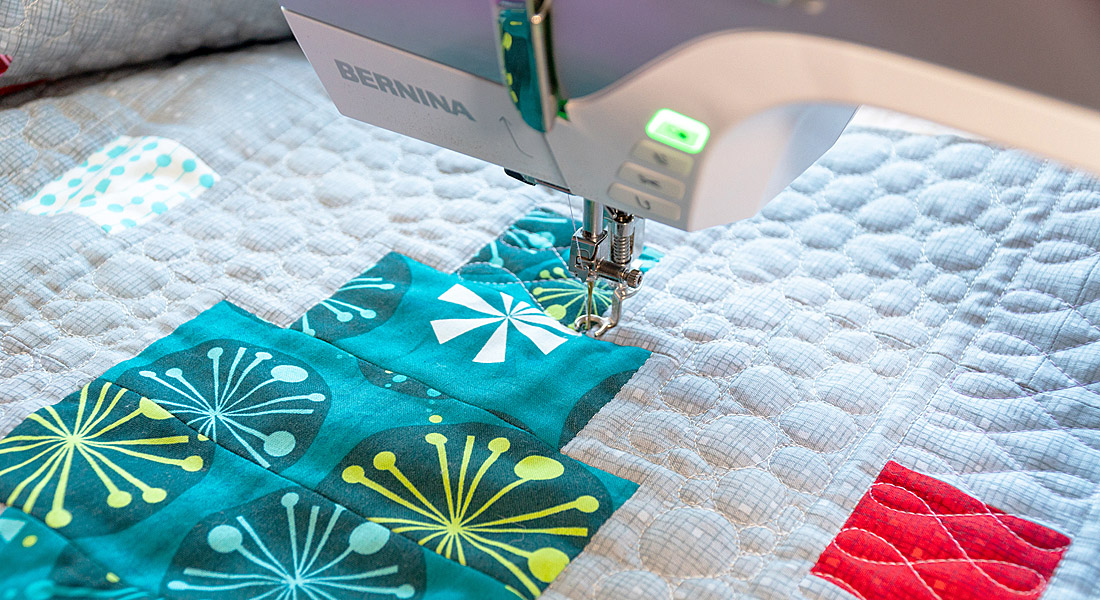
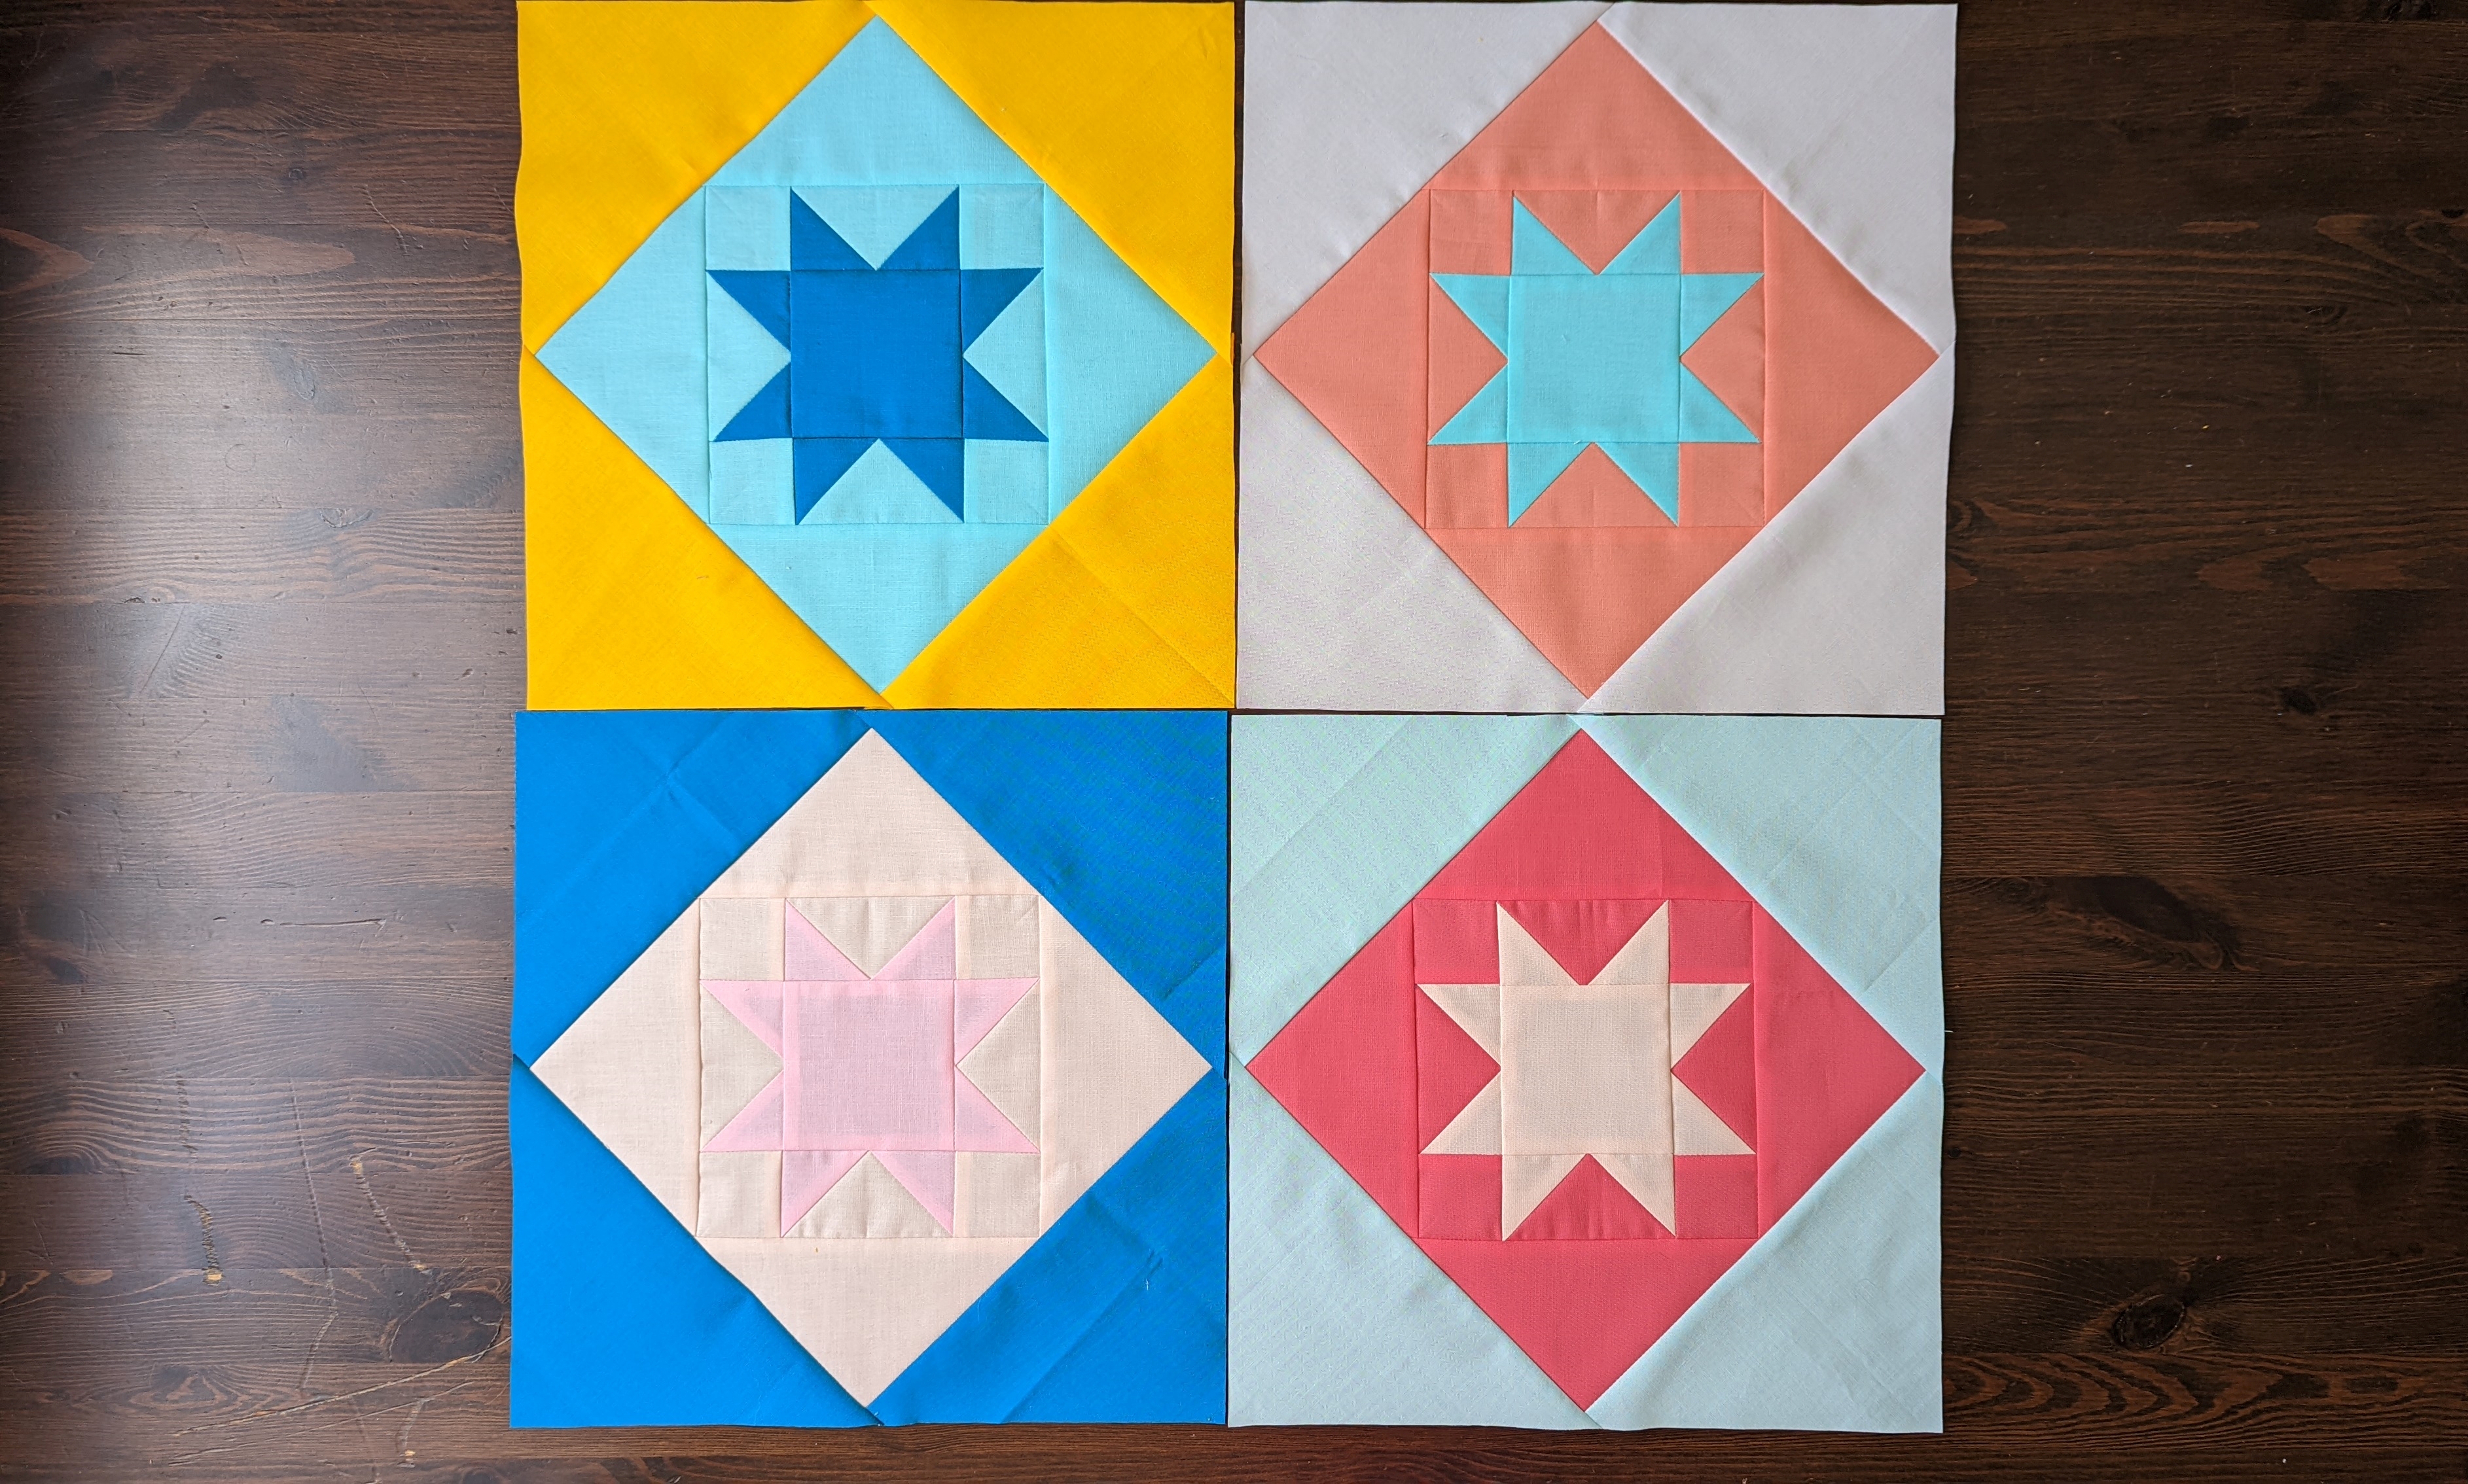
I used straight line quilting with the Walking foot #50 echoing some of the large shapes in the quilt. I’ll show you how step-by-step how I created this quilting pattern.
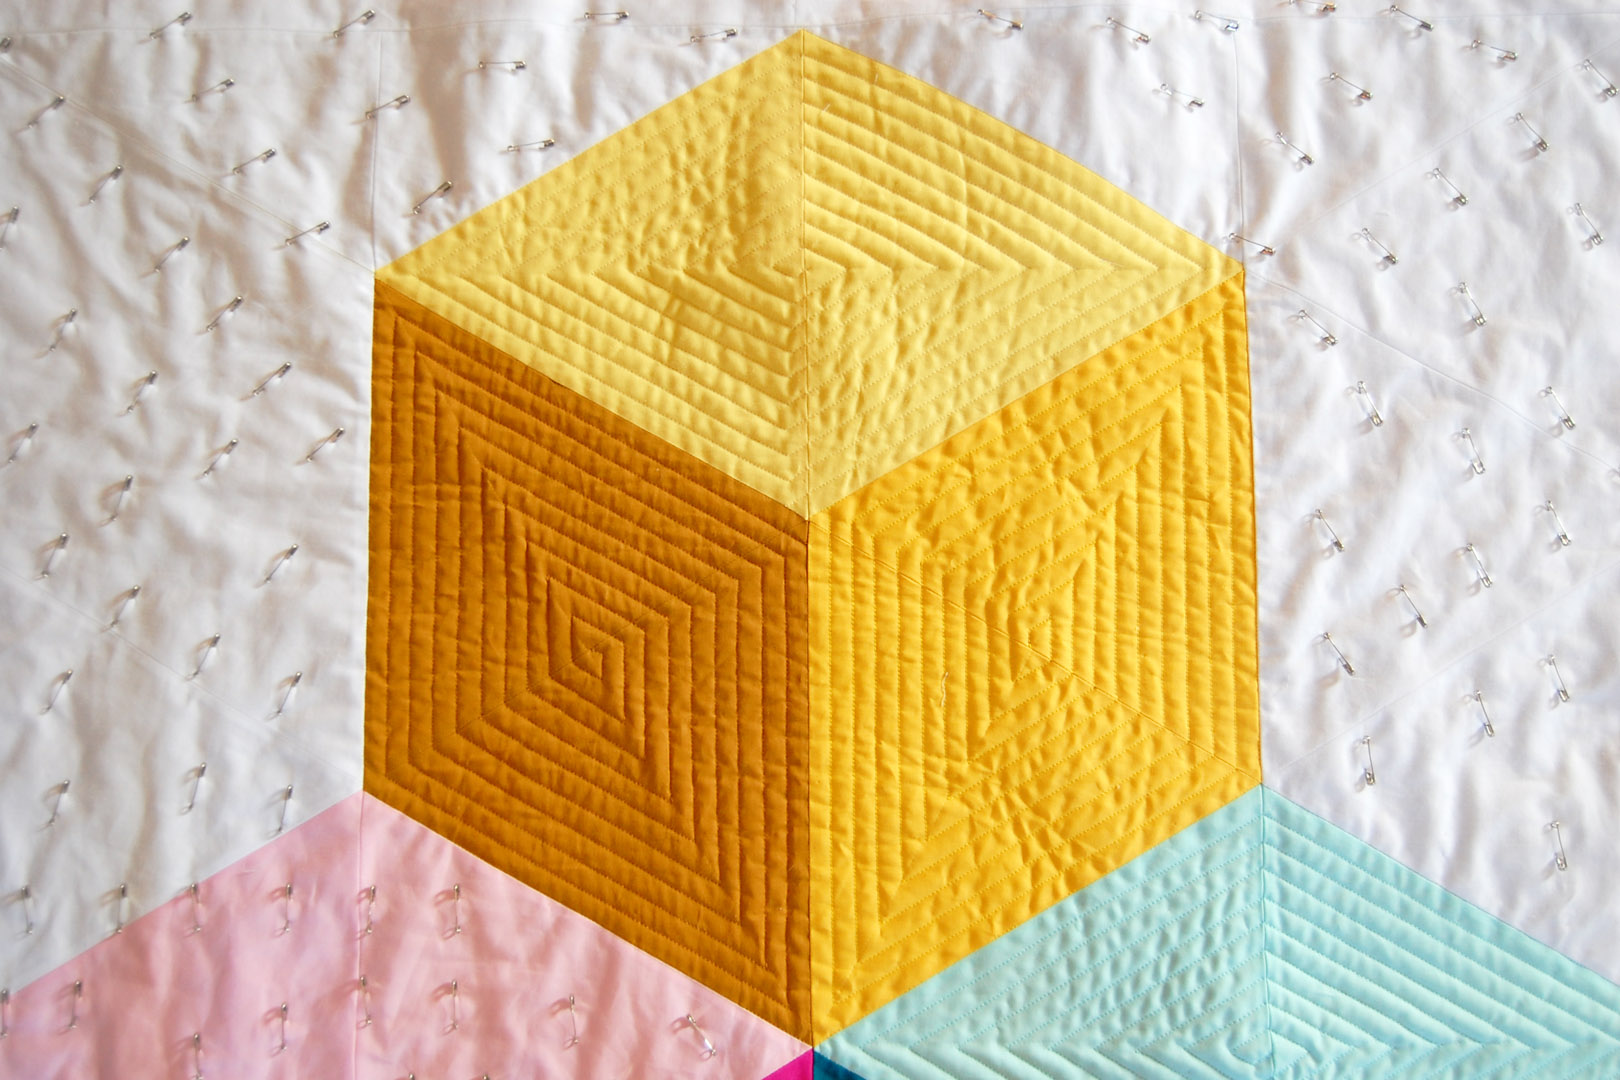
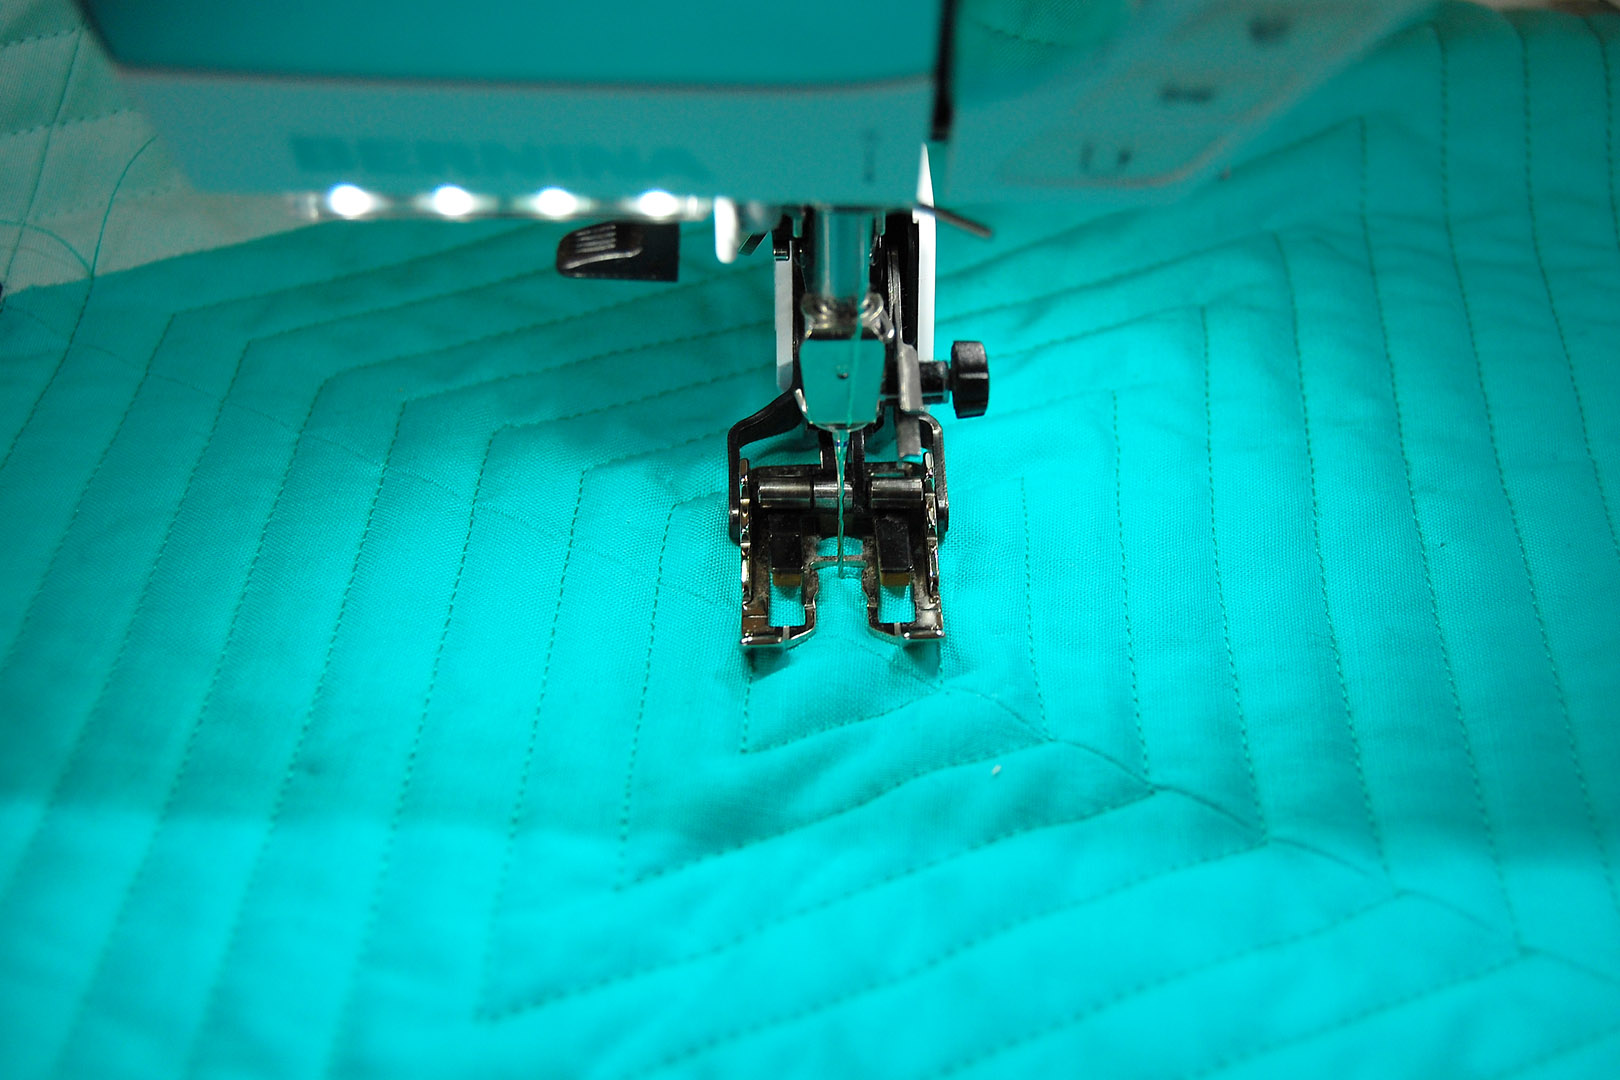
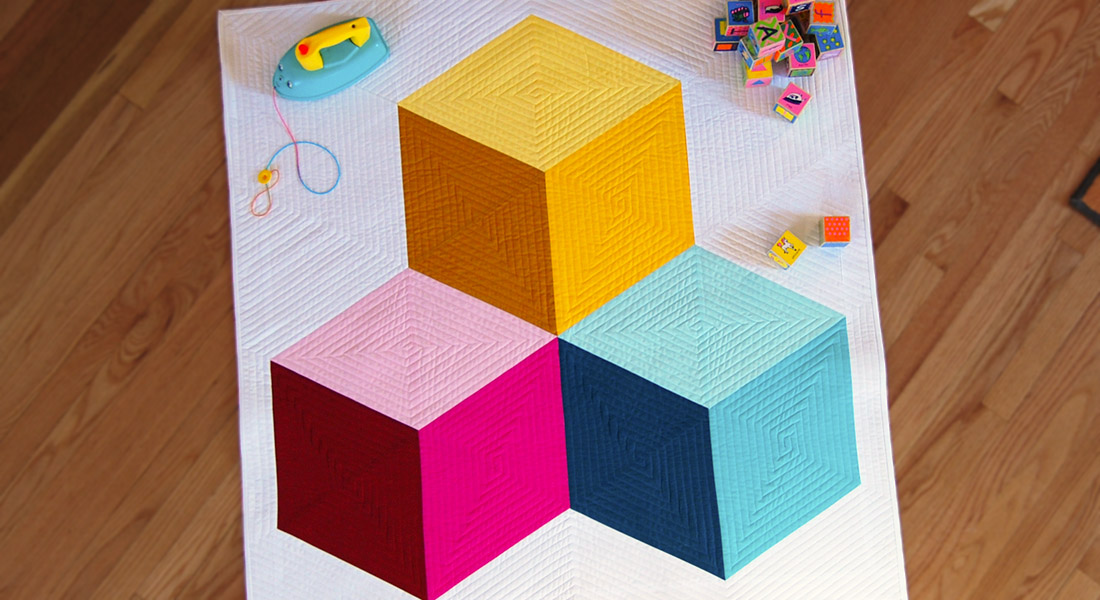
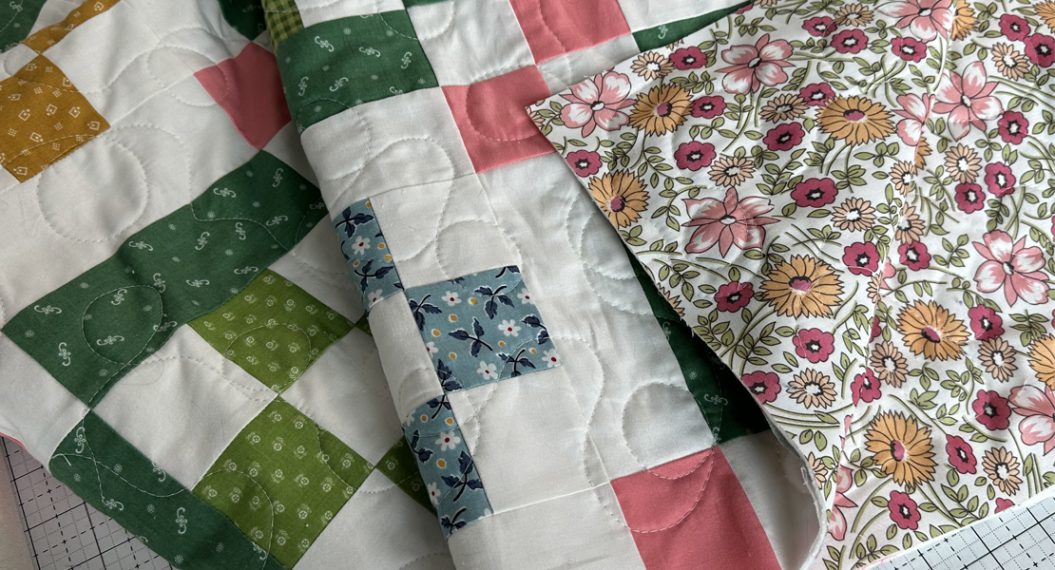
Take a close look at the quilting in the yellow block above. Each of the diamond shapes is filled in with straight line quilting that starts where the three shapes meet in the middle, and spirals around to the center of the shape.
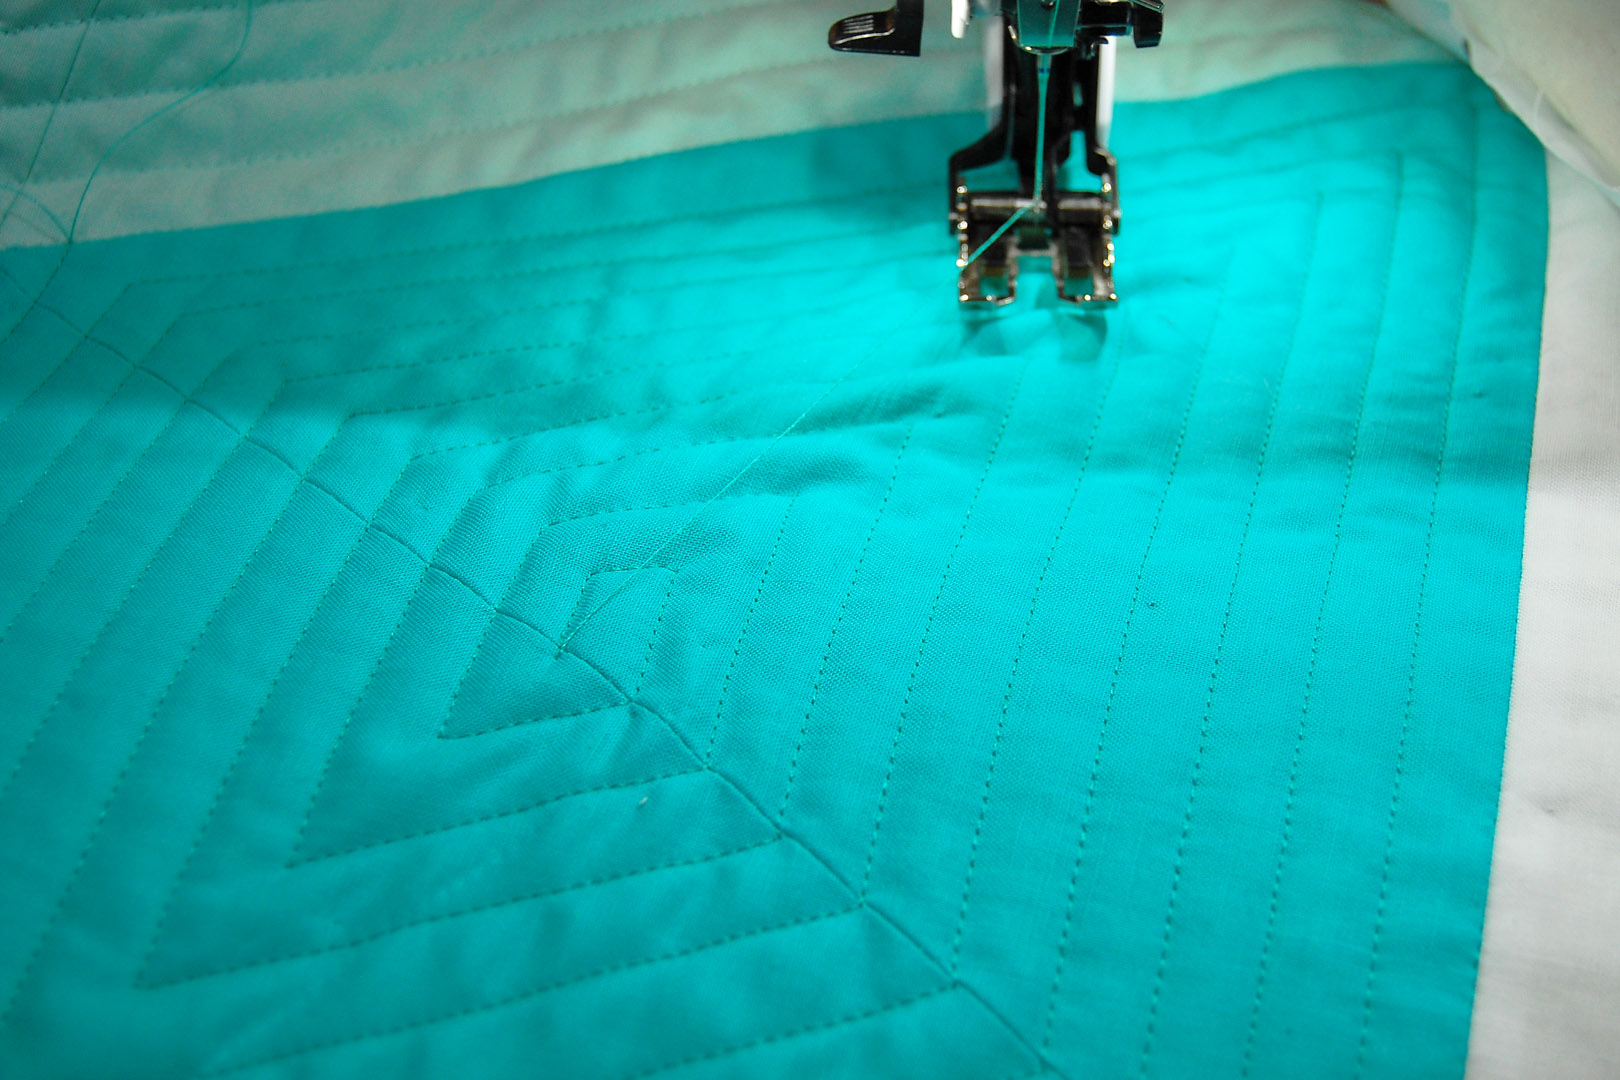
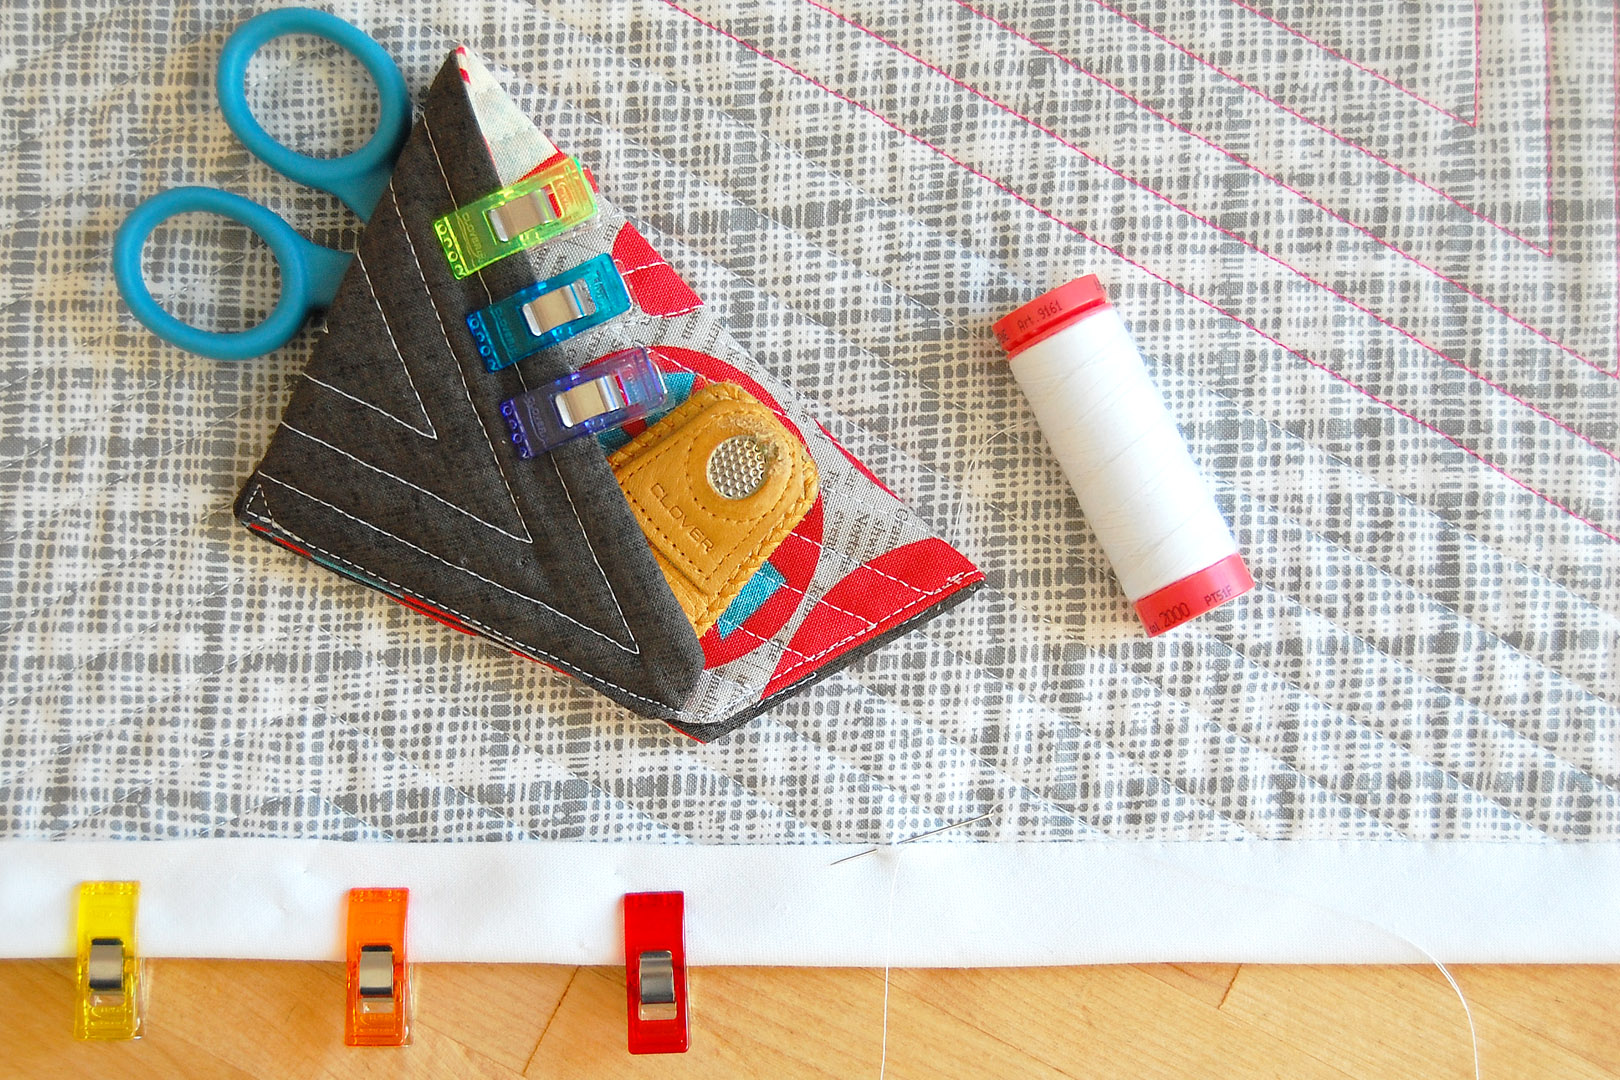
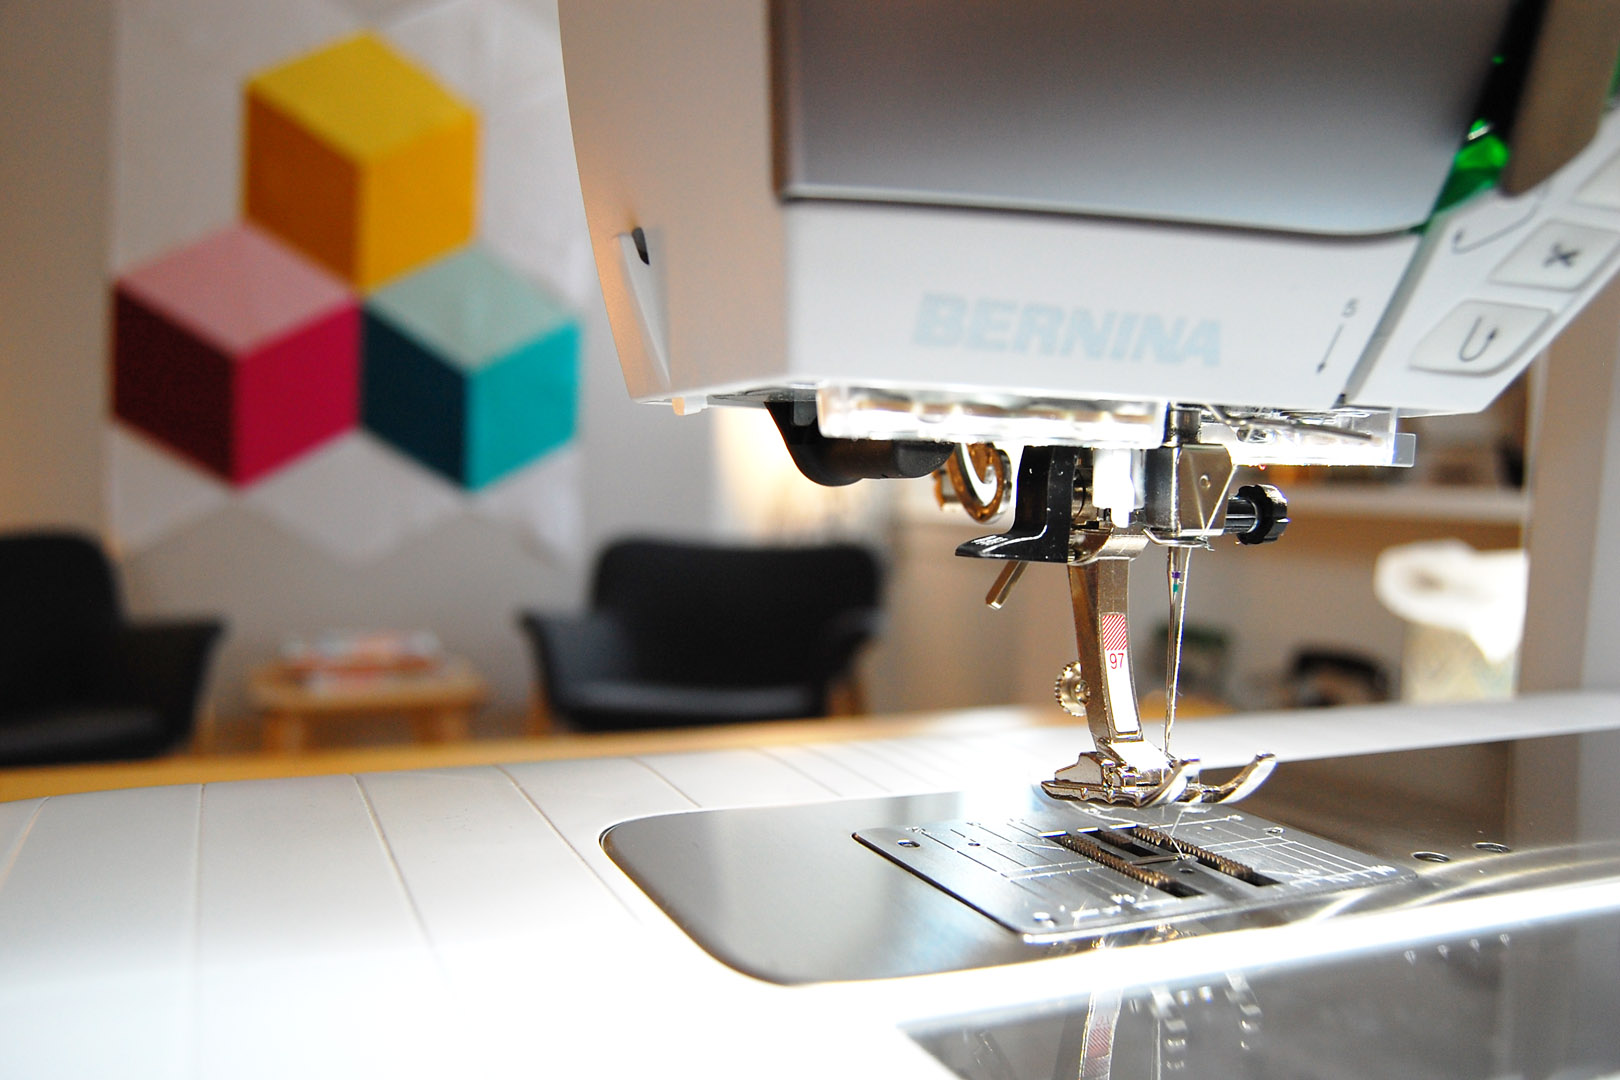
I’ll show you how I quilt each of these diamond shapes with this spiral straight line pattern. I am using the Walking foot #50 to create this pattern, using the edge of the foot to create 1/2″ spaced quilted lines. I am using Isacord 40 weight polyester thread in colors to match each of the diamond shapes. Let’s get started!
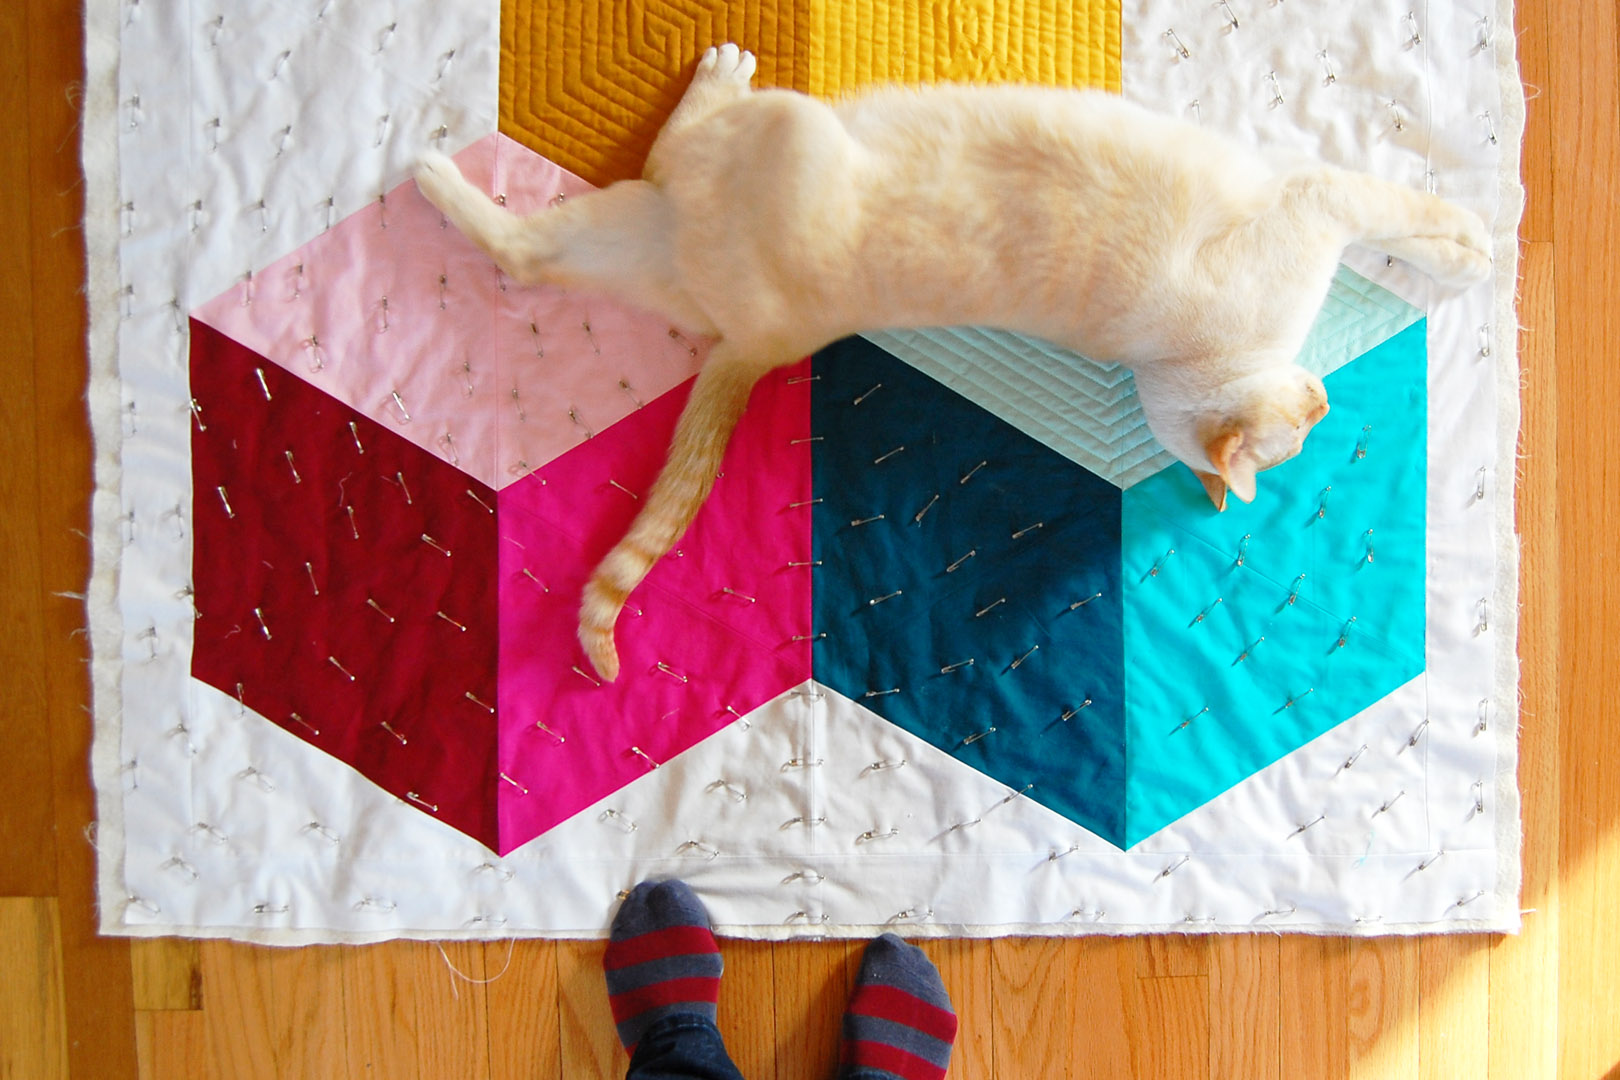
First, if you have an extremely dedicated helper as I do, you may need to remove them from your quilt!
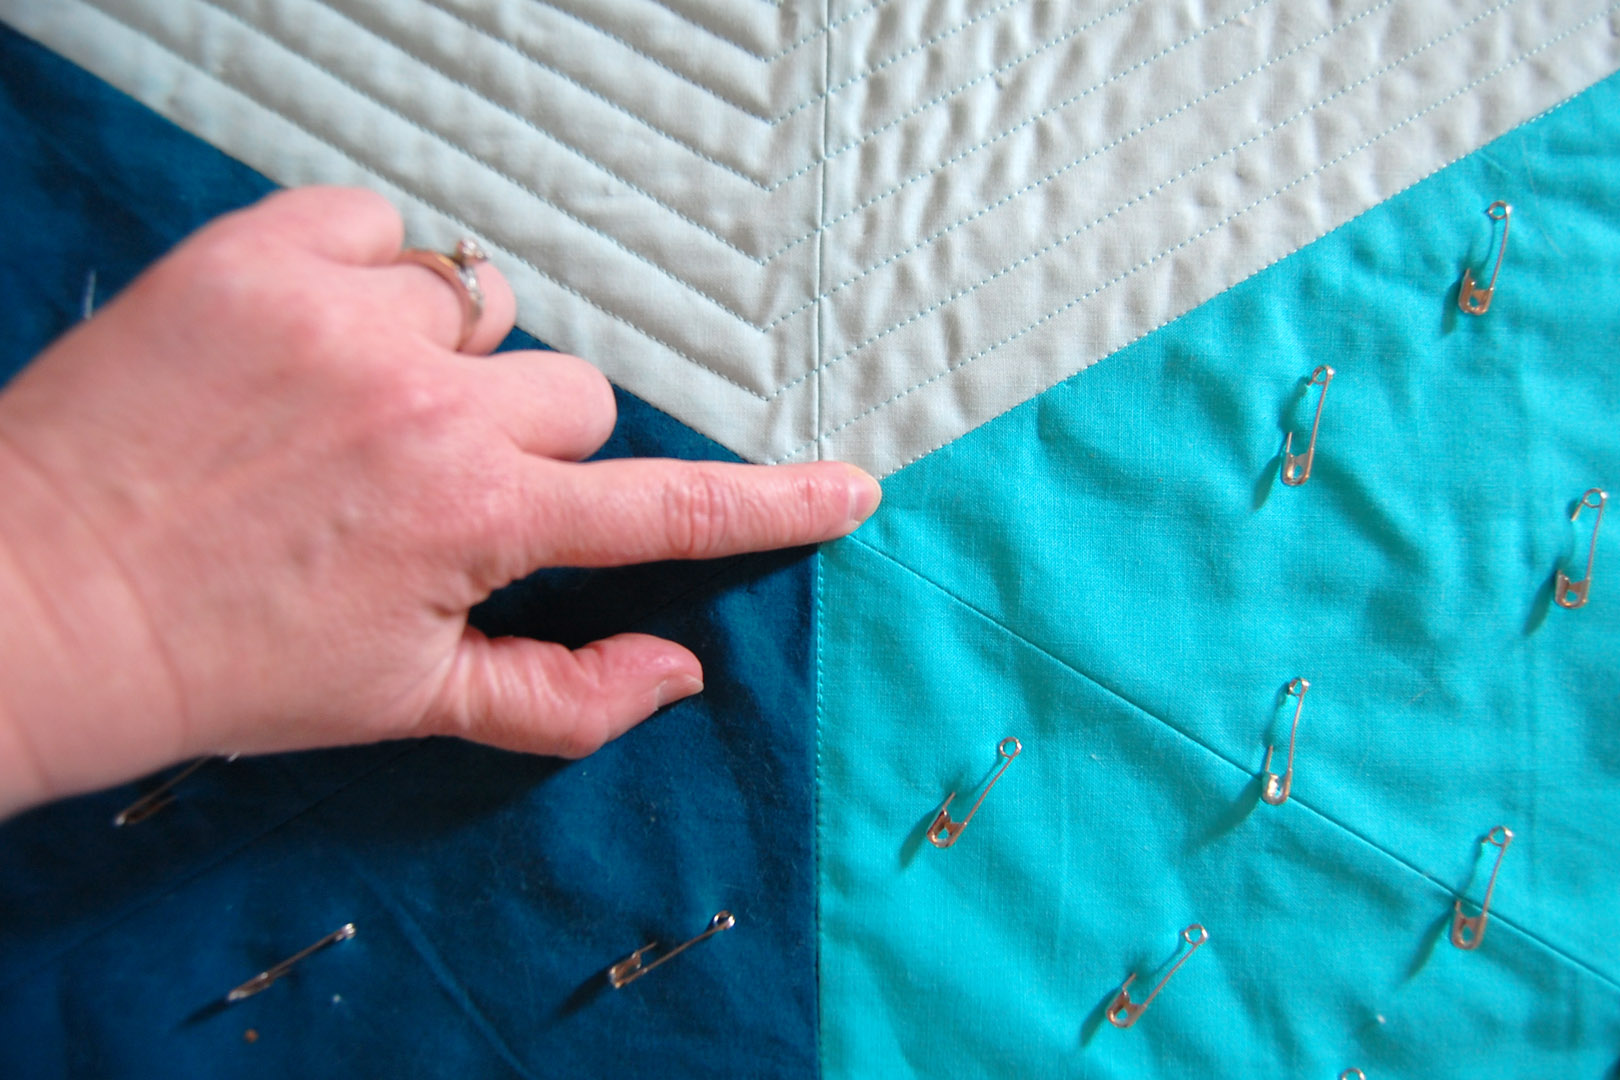
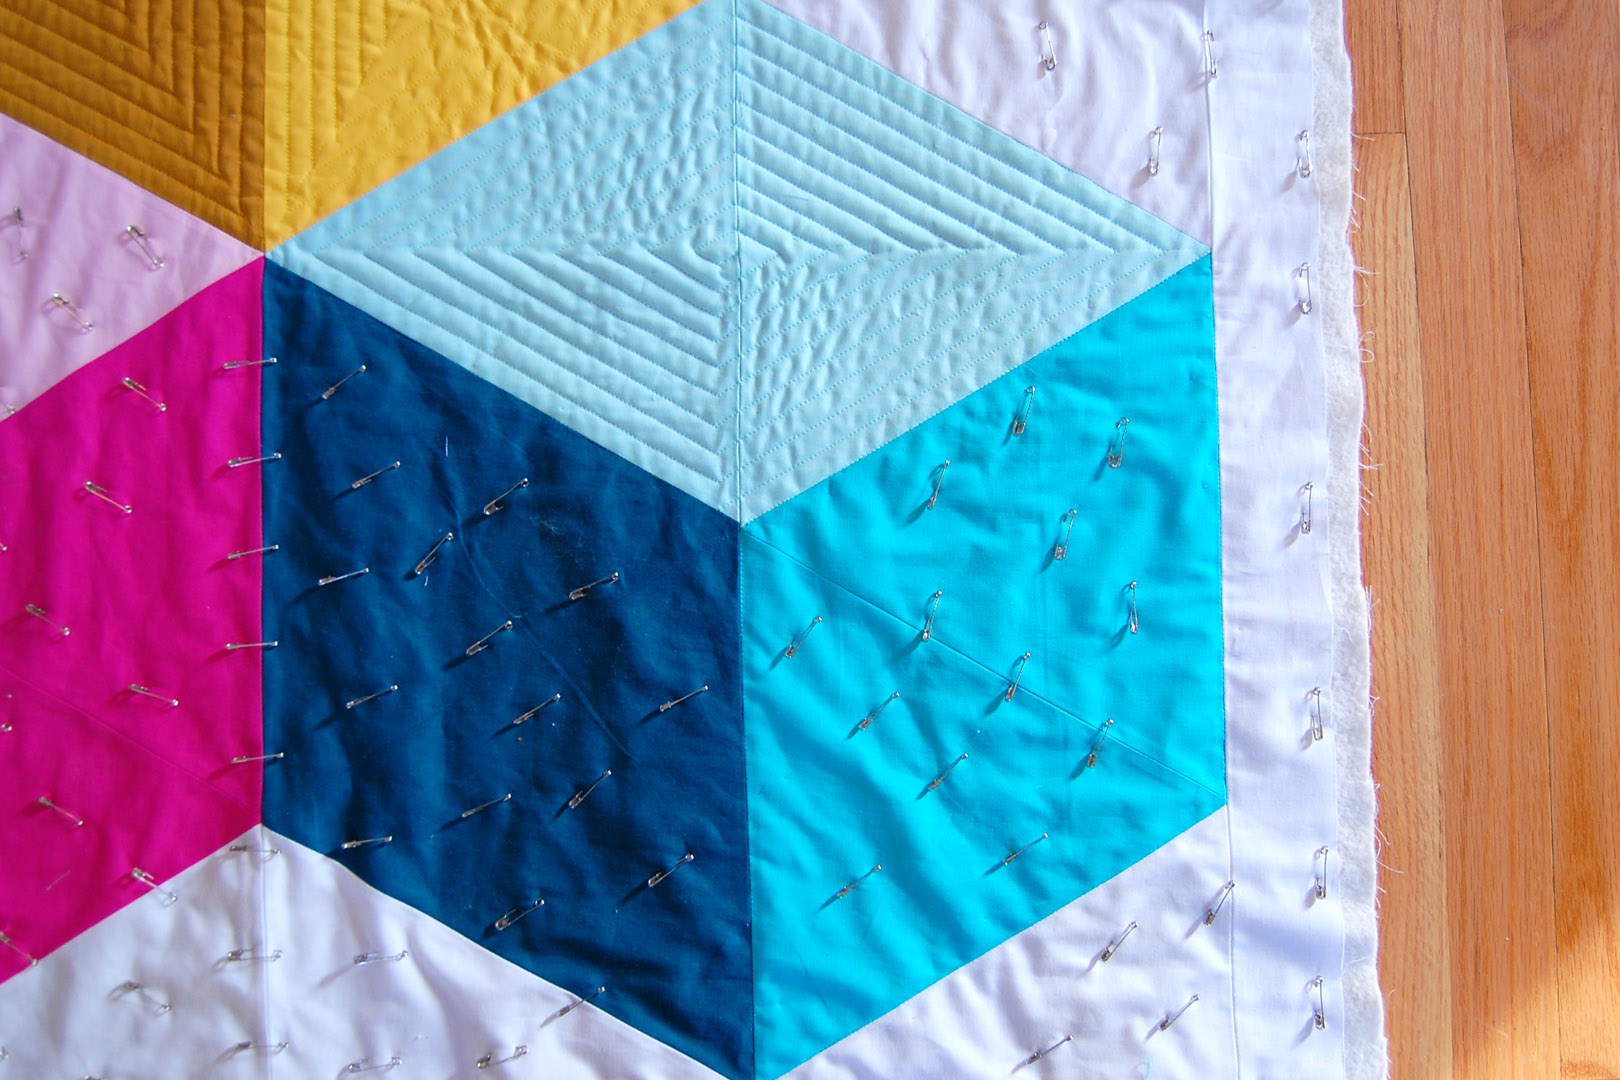
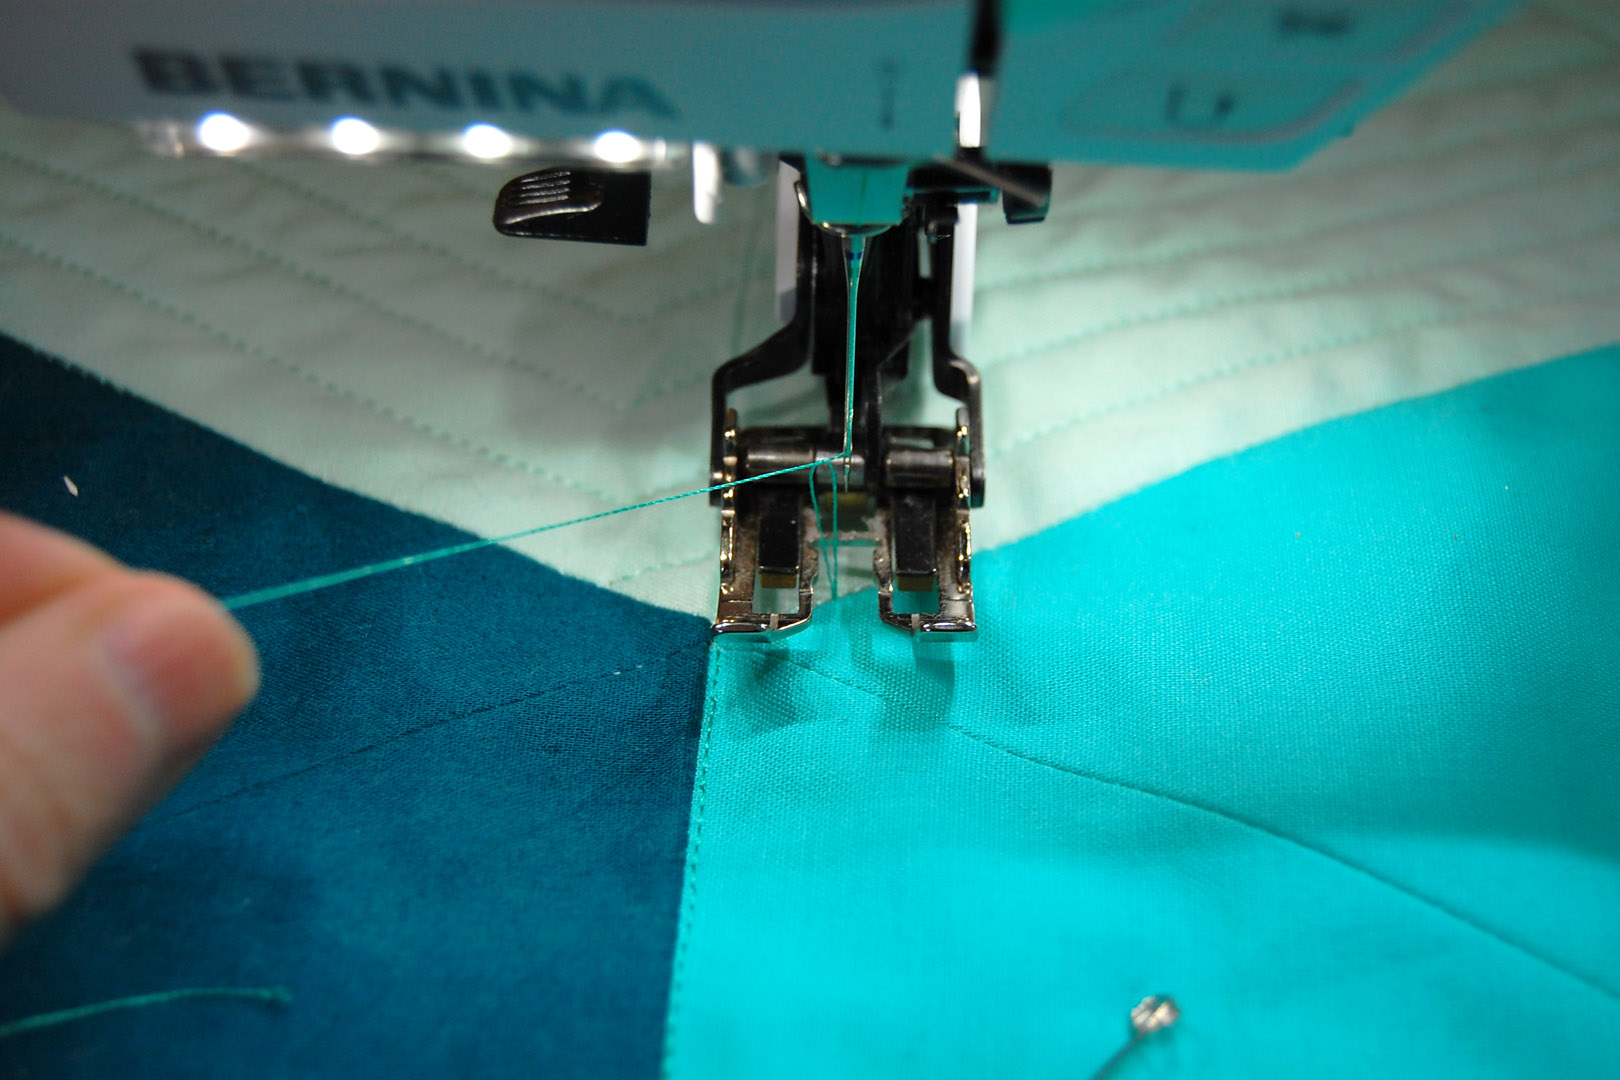
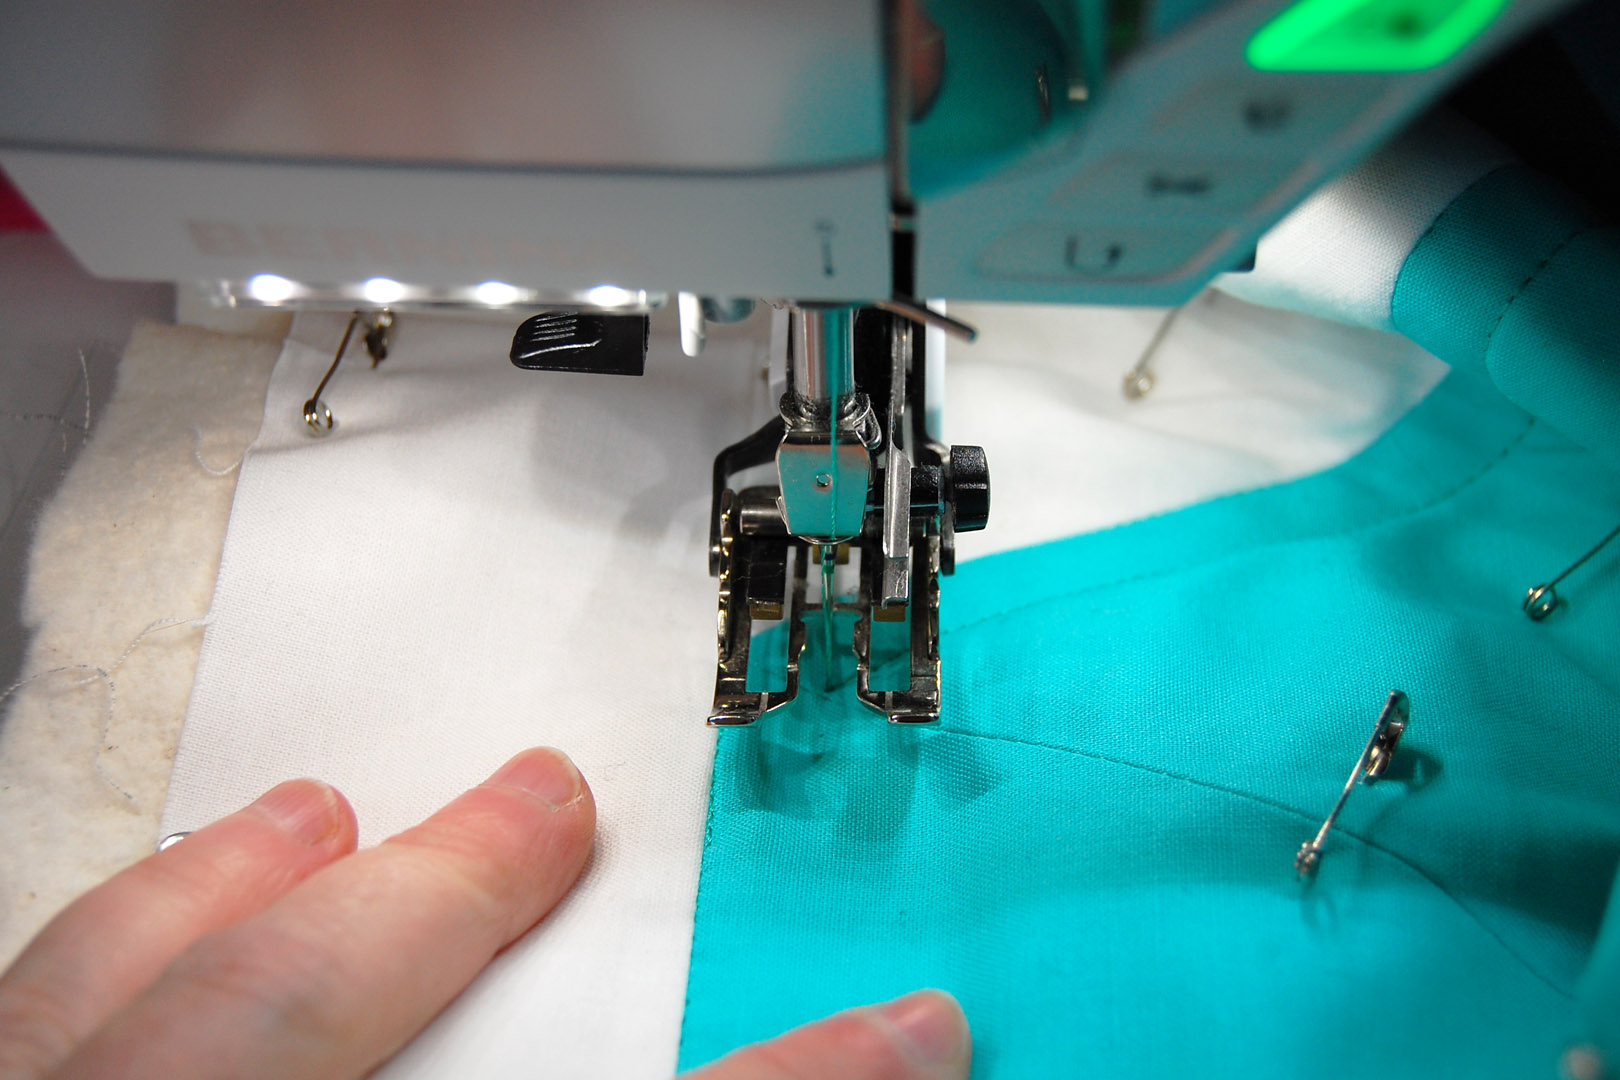
Decide where your starting point for the spiral in the diamond will be. I used a point near where the three diamonds of the same color family meet in the middle, exactly where I’m pointing to on the blue diamond above.
I begin by sinking the needle in at the start point to bring up the bobbin thread. I use the hand wheel to carefully lower the needle in the spot I will start stitching.
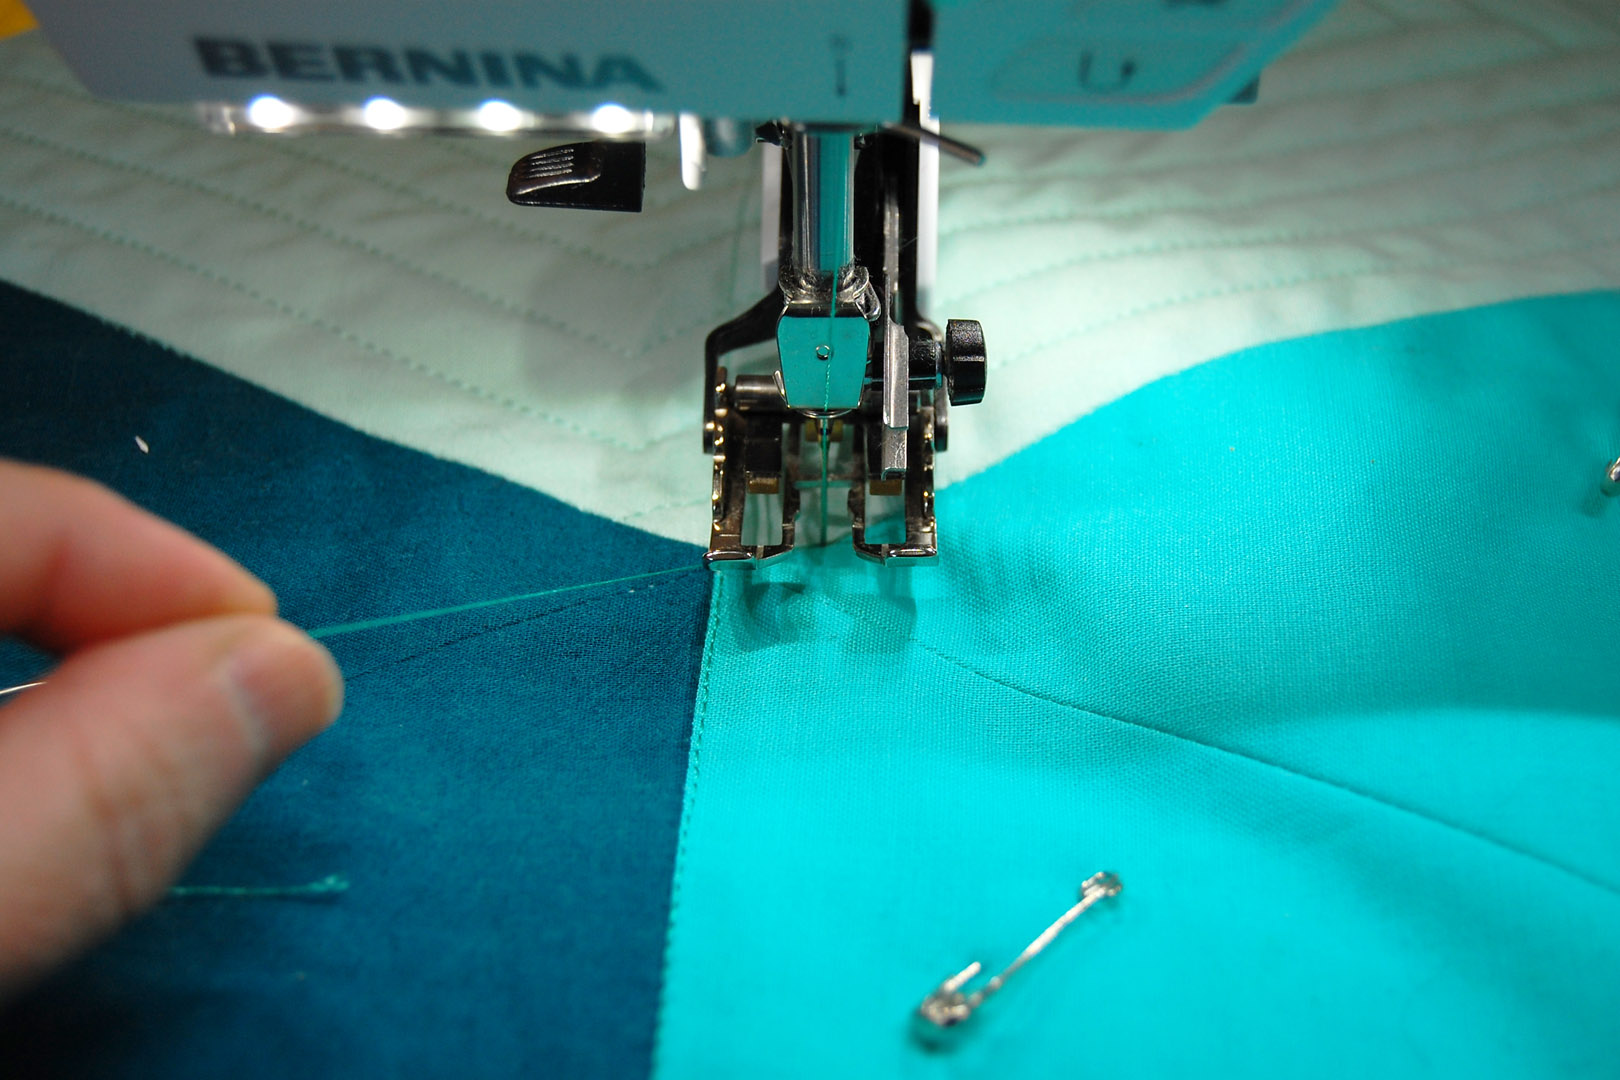
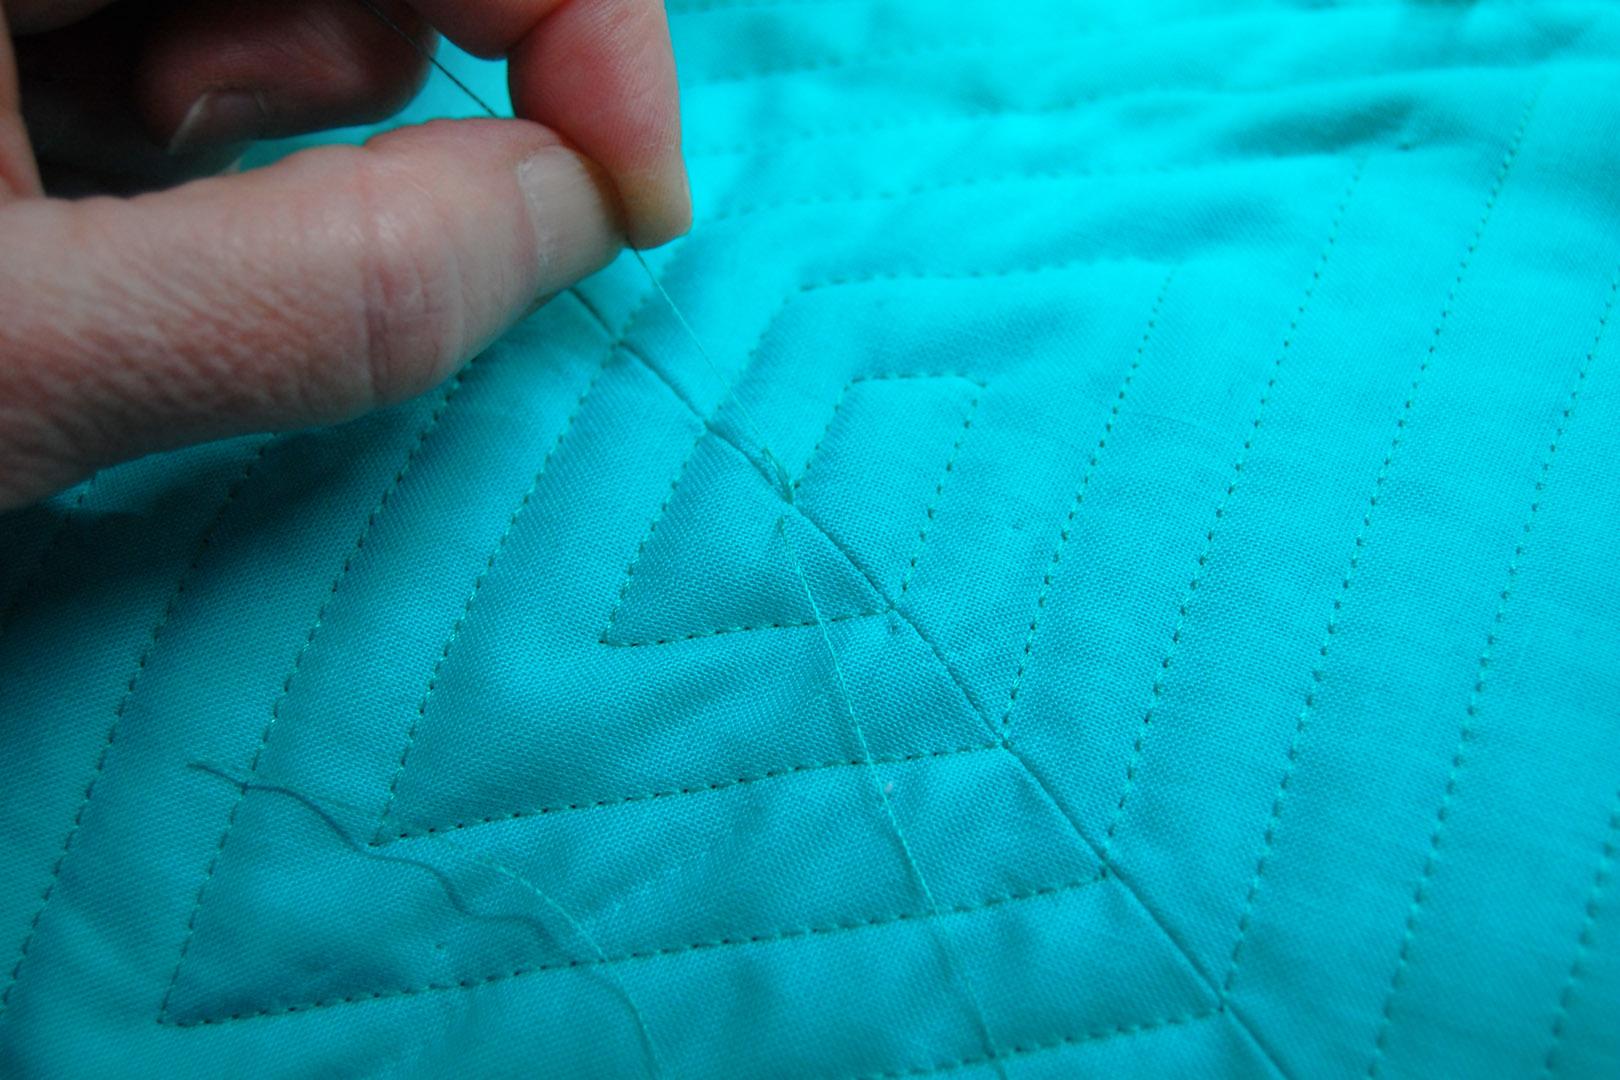
Next, I hold tight to the top thread as I bring the needle back up with the hand wheel.
When the needle is at the highest position, gently tug on the top thread to pull up the bobbin thread.
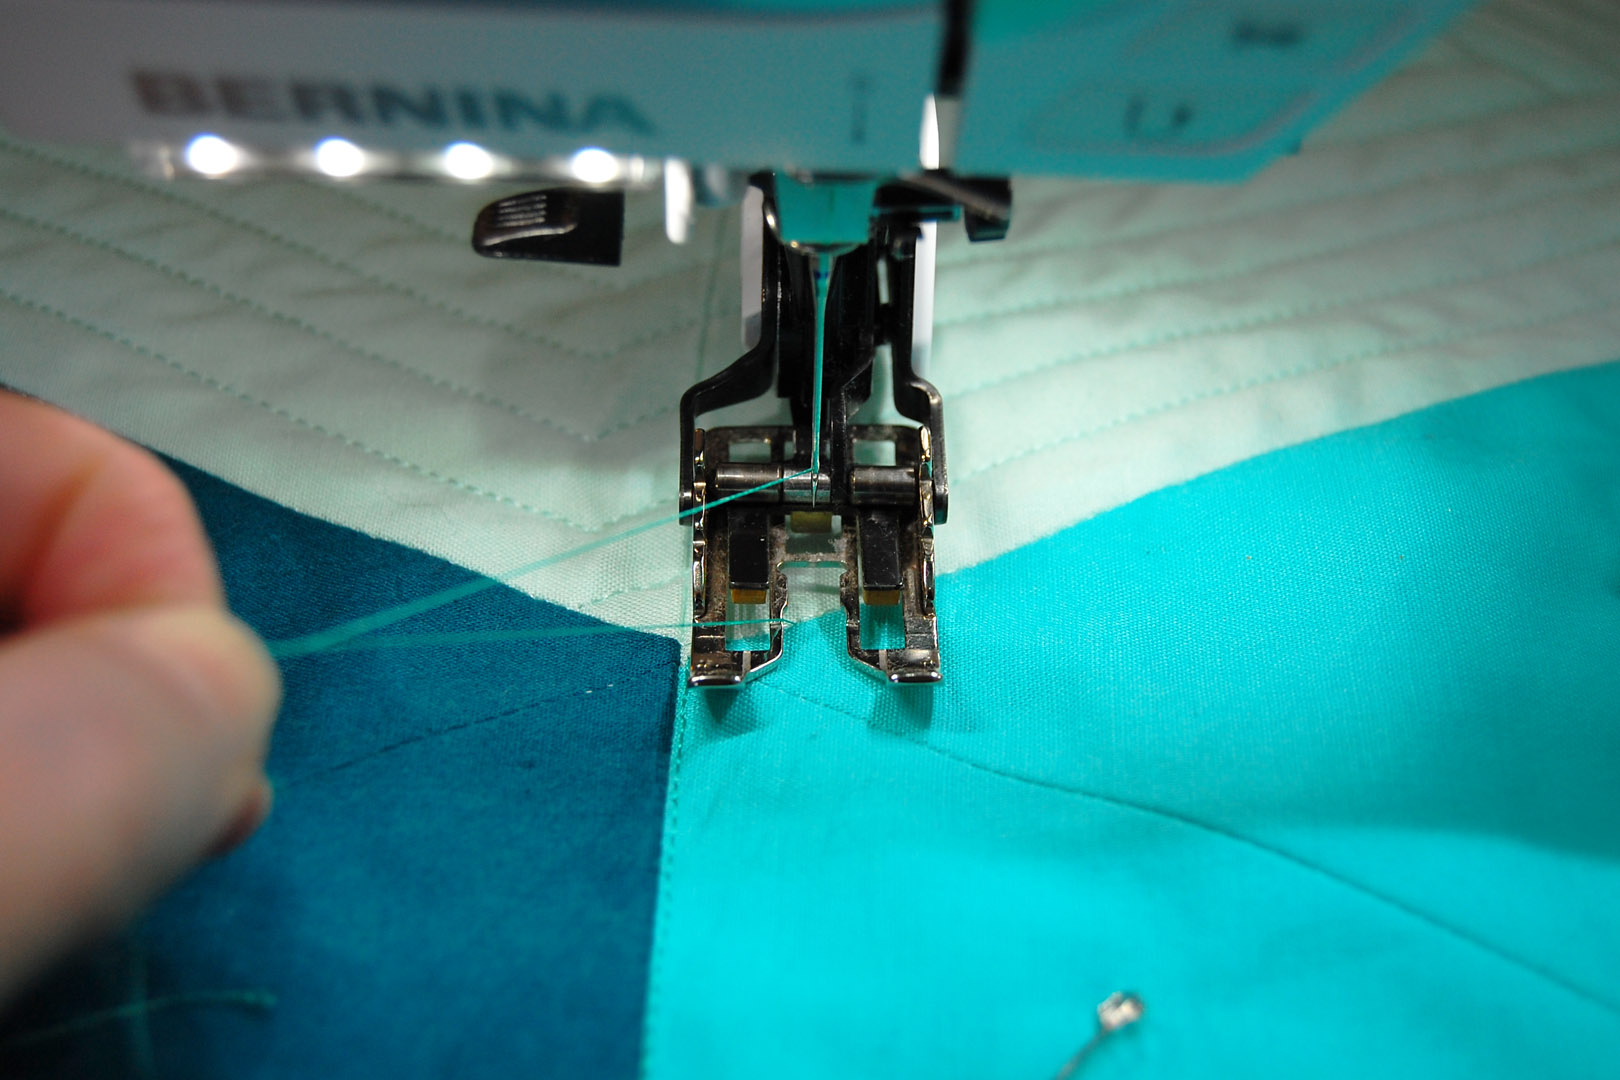
Grab the bobbin thread, and pull both out of the way underneath and to the back of the presser foot.
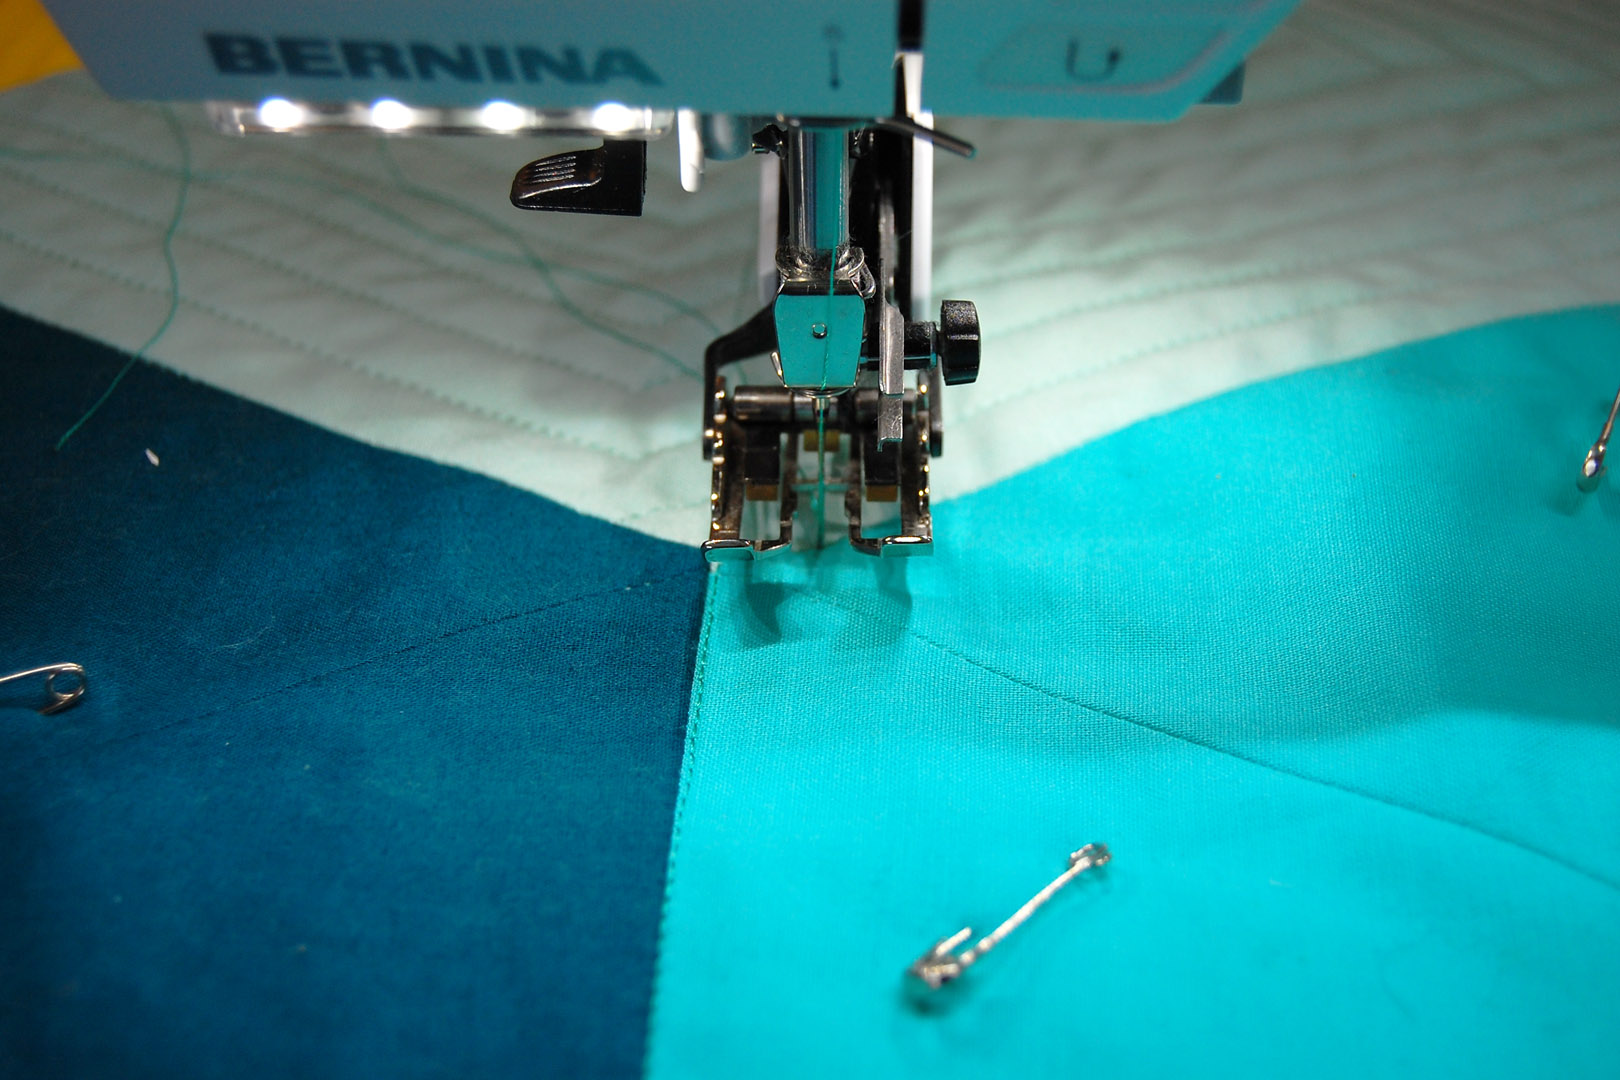
Here’s where I begin to stitch, and I’ll come back later to bury the thread ends into the quilt.
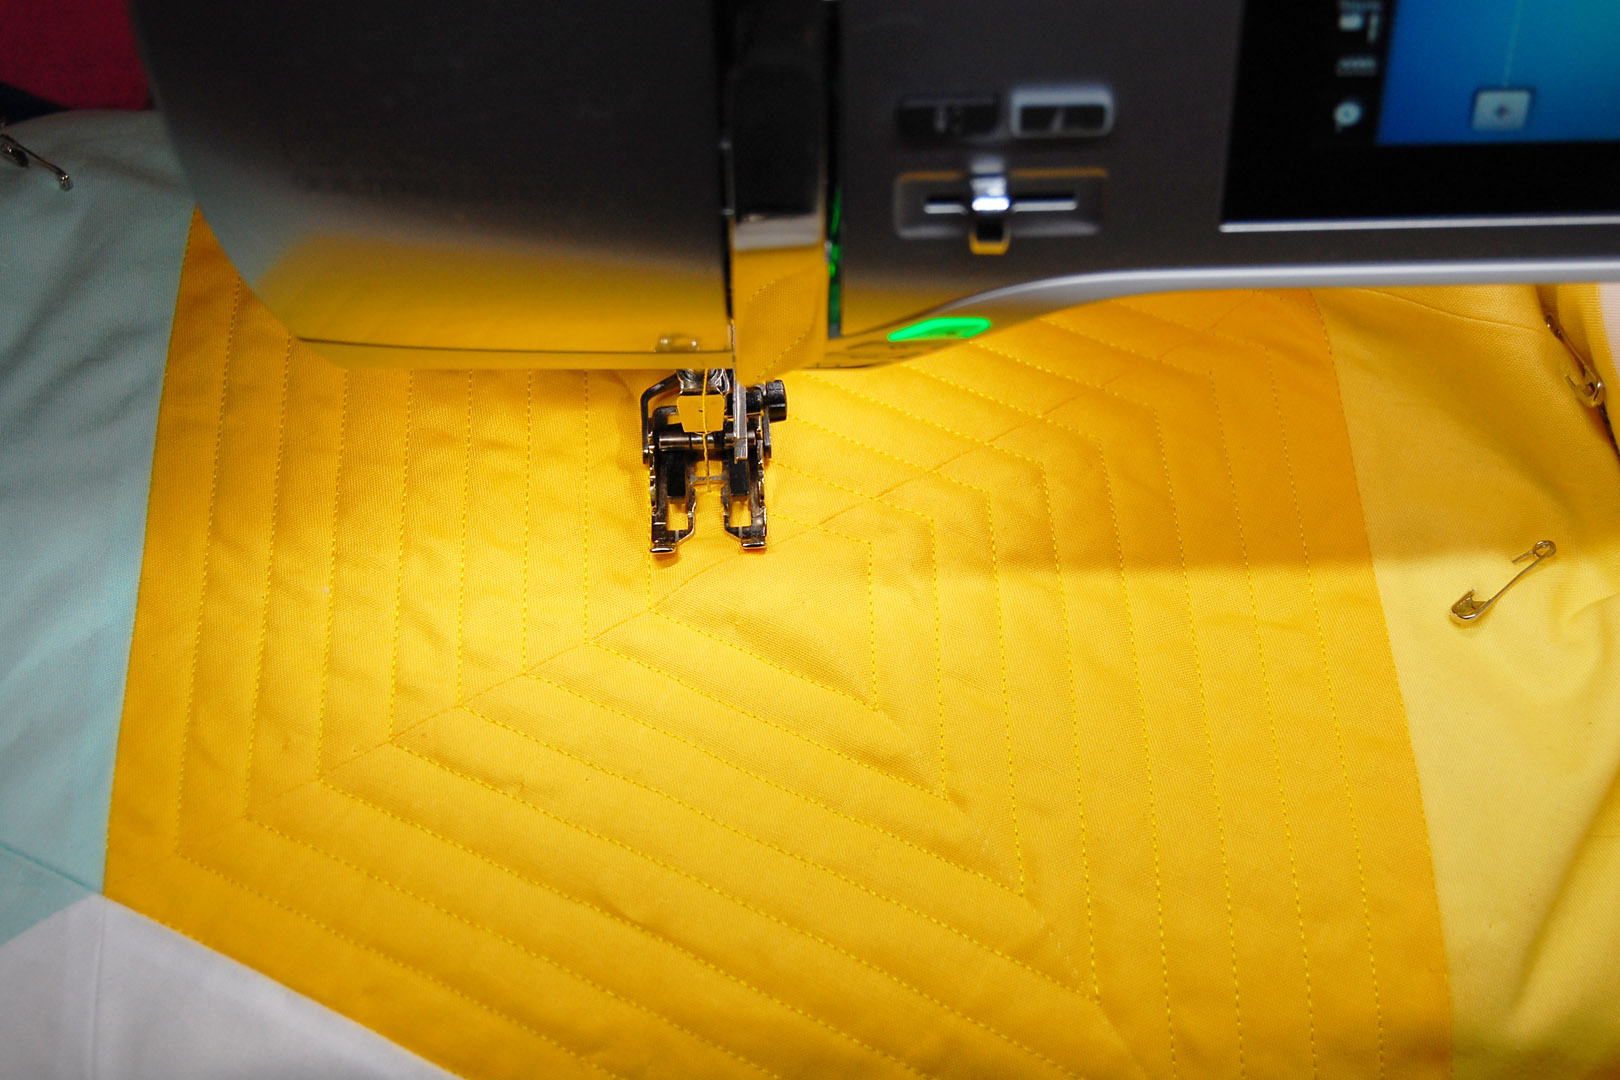
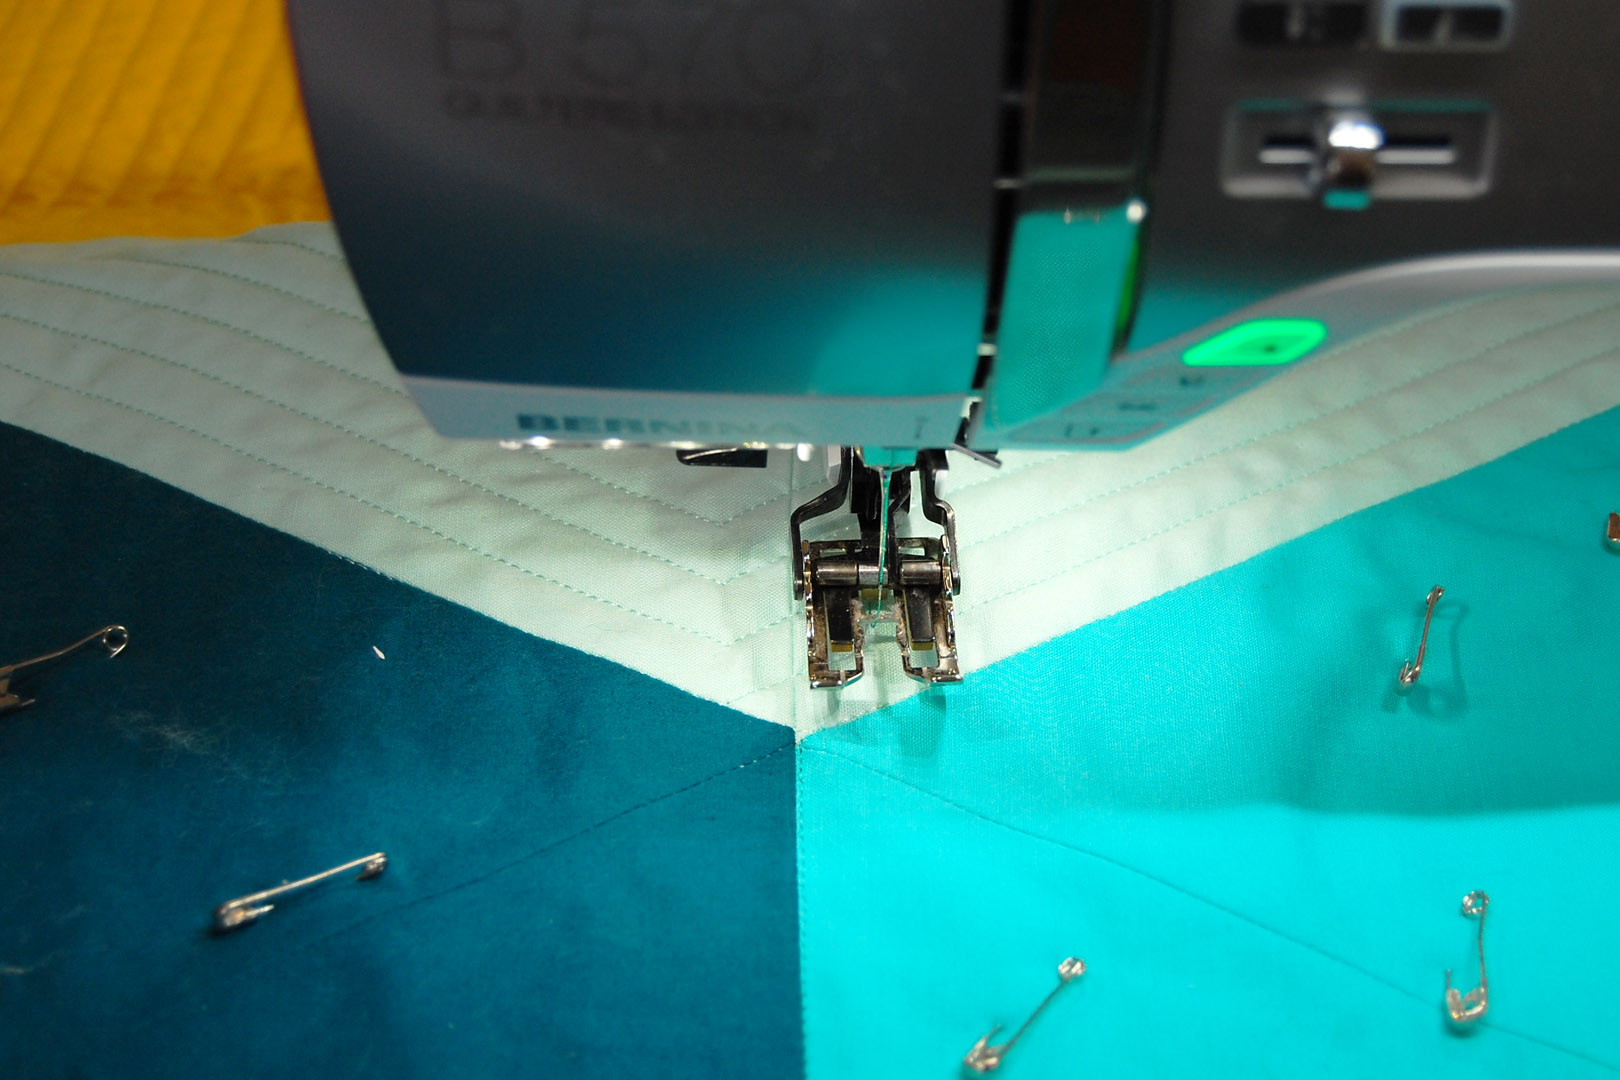
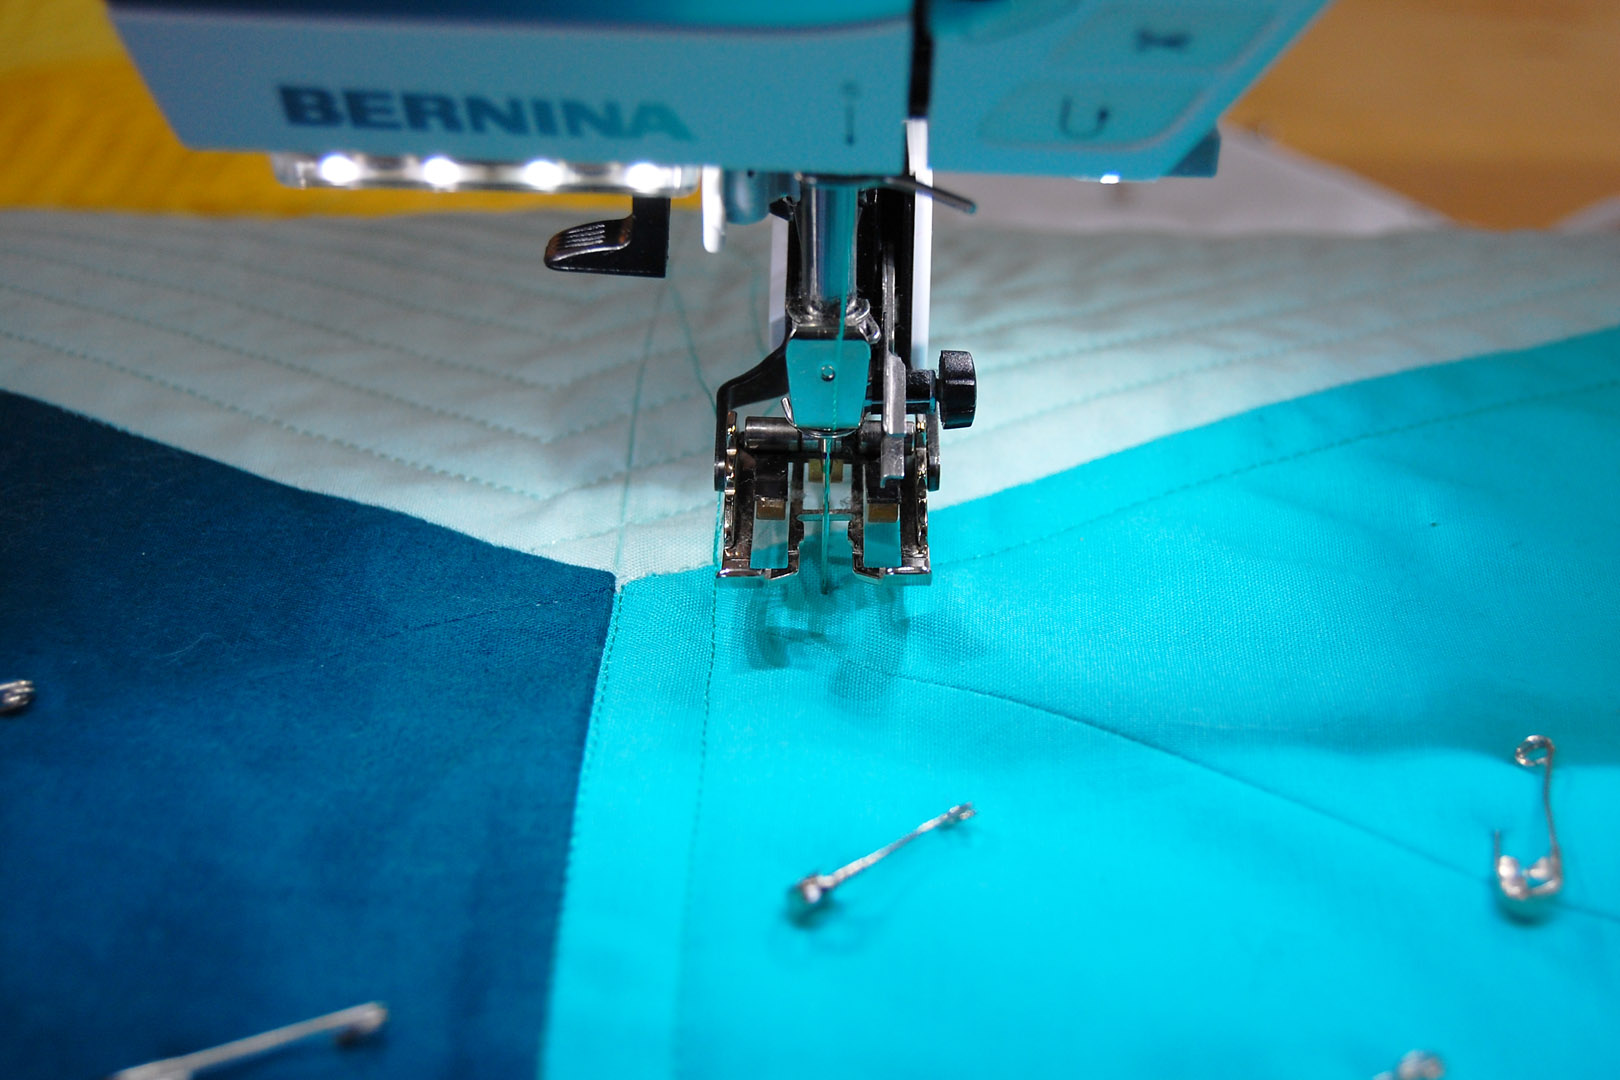
I use the edge of the Waking foot #50 to follow along the edge of the blue diamond, resulting in a nice 1/2″ spaced straight line.
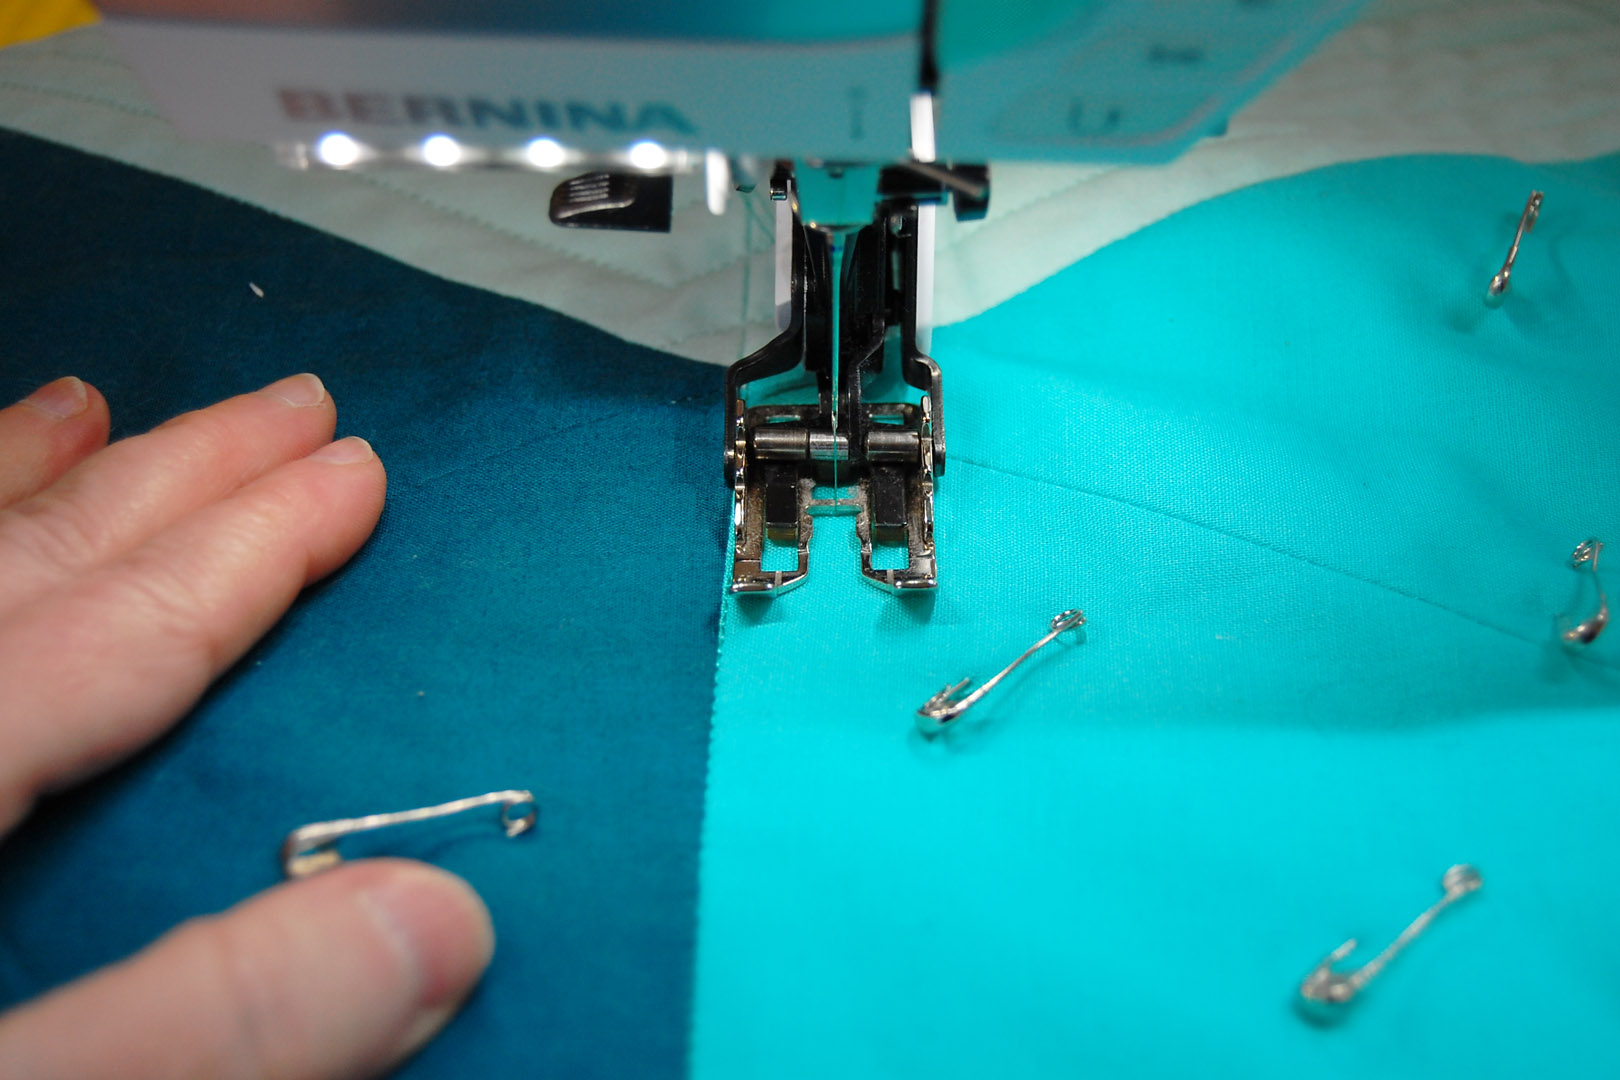
When reaching a corner, I leave the needle down in the quilt while raising the presser foot with the Free-Hand System to pivot in the corner.

And keep on stitching like this all the way around the diamond shape. When I return to the beginning stitches, I stop 1/2″ away from the stitching to pivot and sew along the first line of stitching.
And follow along with the edge of the Walking foot #50 with the previous line of stitching to create another line of 1/2″ spaced quilting.
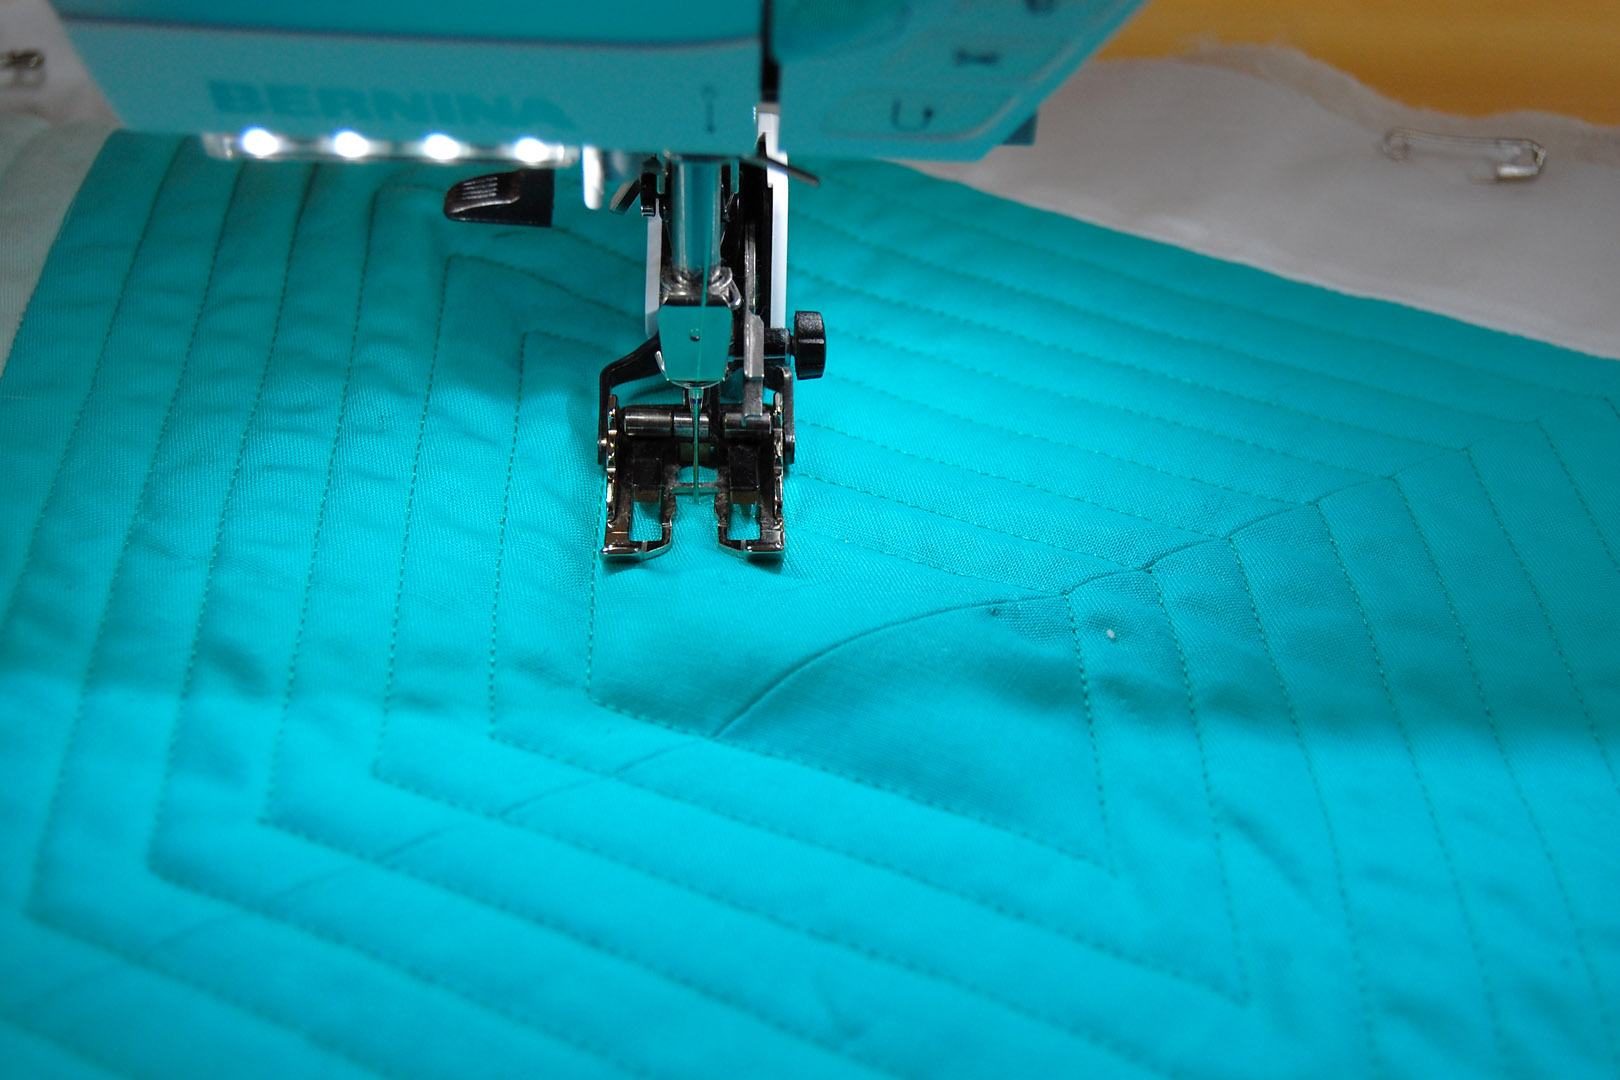
I keep on stitching with these same steps, pivoting in the corners and following the edge of each previous line of stitching with the edge of Walking foot #50.
When I reach the center of the block with the spiral quilting, I make sure to stop about 1/2″ away from sewing all the way to the other stitching.
Here’s where I lift the needle out of the quilt and pull several inches of thread out before cutting.
And now’s the time to secure and bury those thread ends in the quilt. Here’s a neat tutorial with a video snippet showing this method here (scroll to the bottom of the post). Then I continued with the same method to quilt each of the diamond shapes. The quilting on the background fabric is simply 1/2″ lines of straight quilting echoing the block shapes, again using the edge of the Walking foot #50 to create 1/2″ spaced lines.
Once quilted, the next step is to cut off any excess batting and backing, and to make sure your quilt is nice and squared up before applying the binding. I give my quilt a quick pressing before this next step to make sure it will lay as flat as possible during the trimming process. I use a large cutting mat on the floor, and carefully spread the quilt flat before beginning the process.

Using a large square ruler and rotary cutter, I begin by trimming the corners carefully.
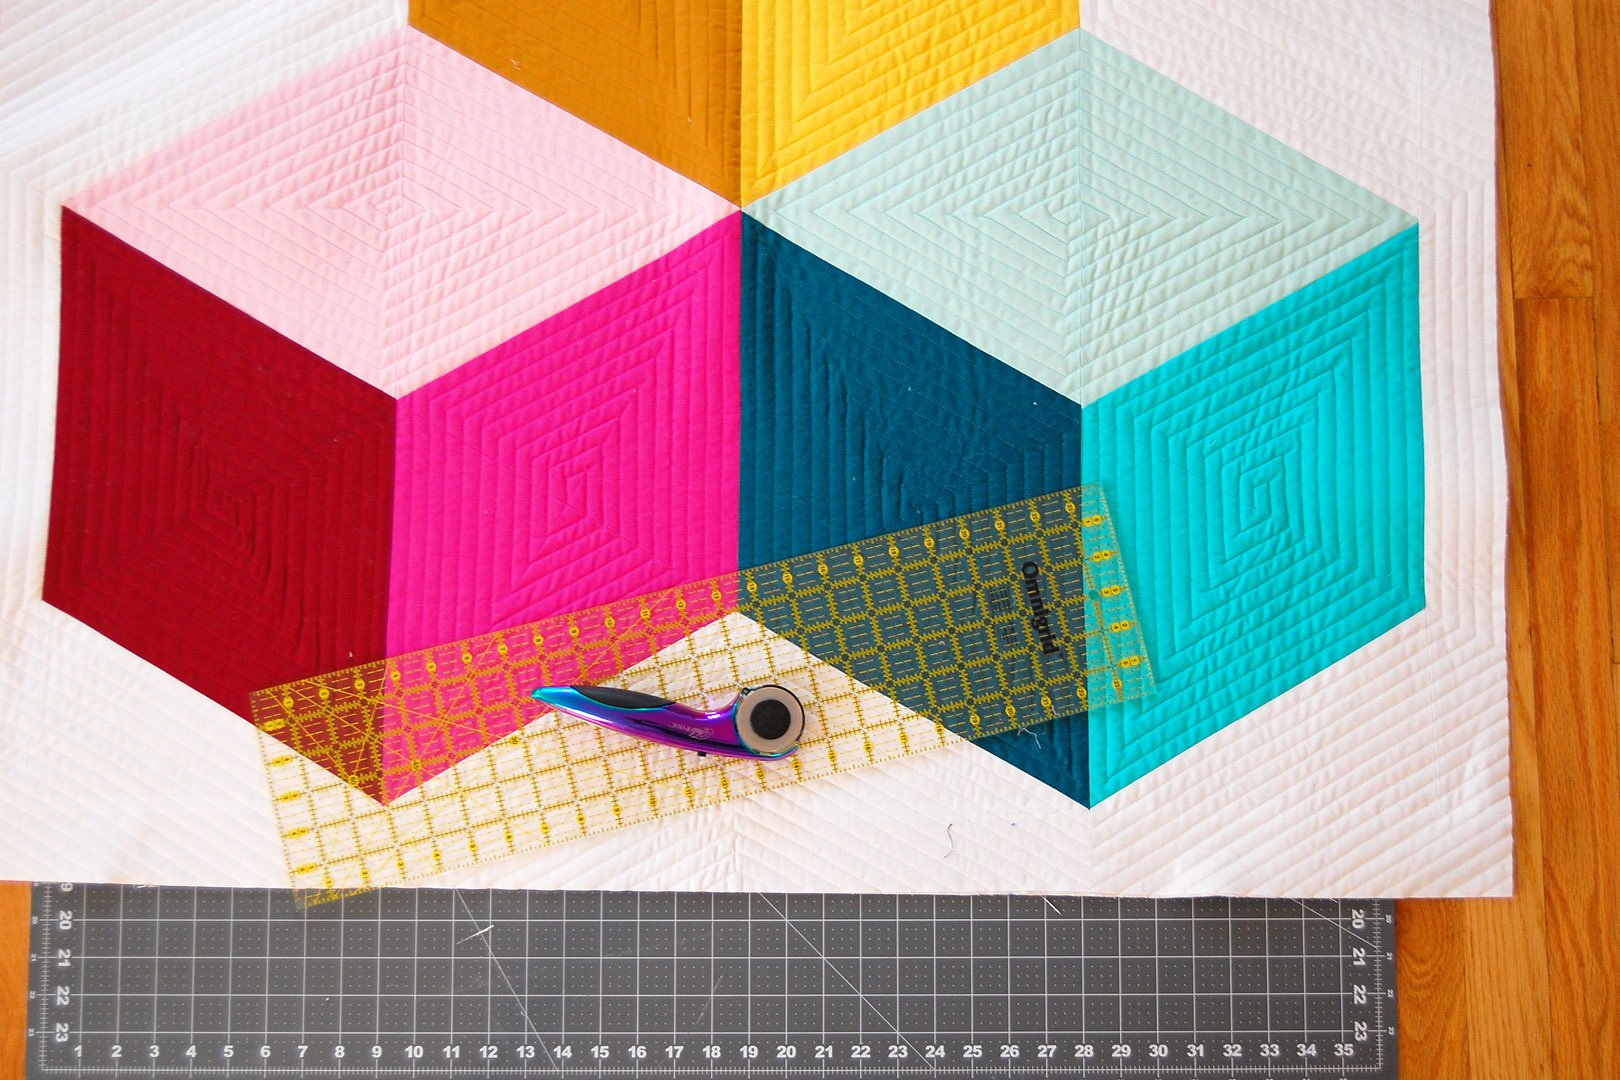
Then I use a longer ruler to trim down the sides.
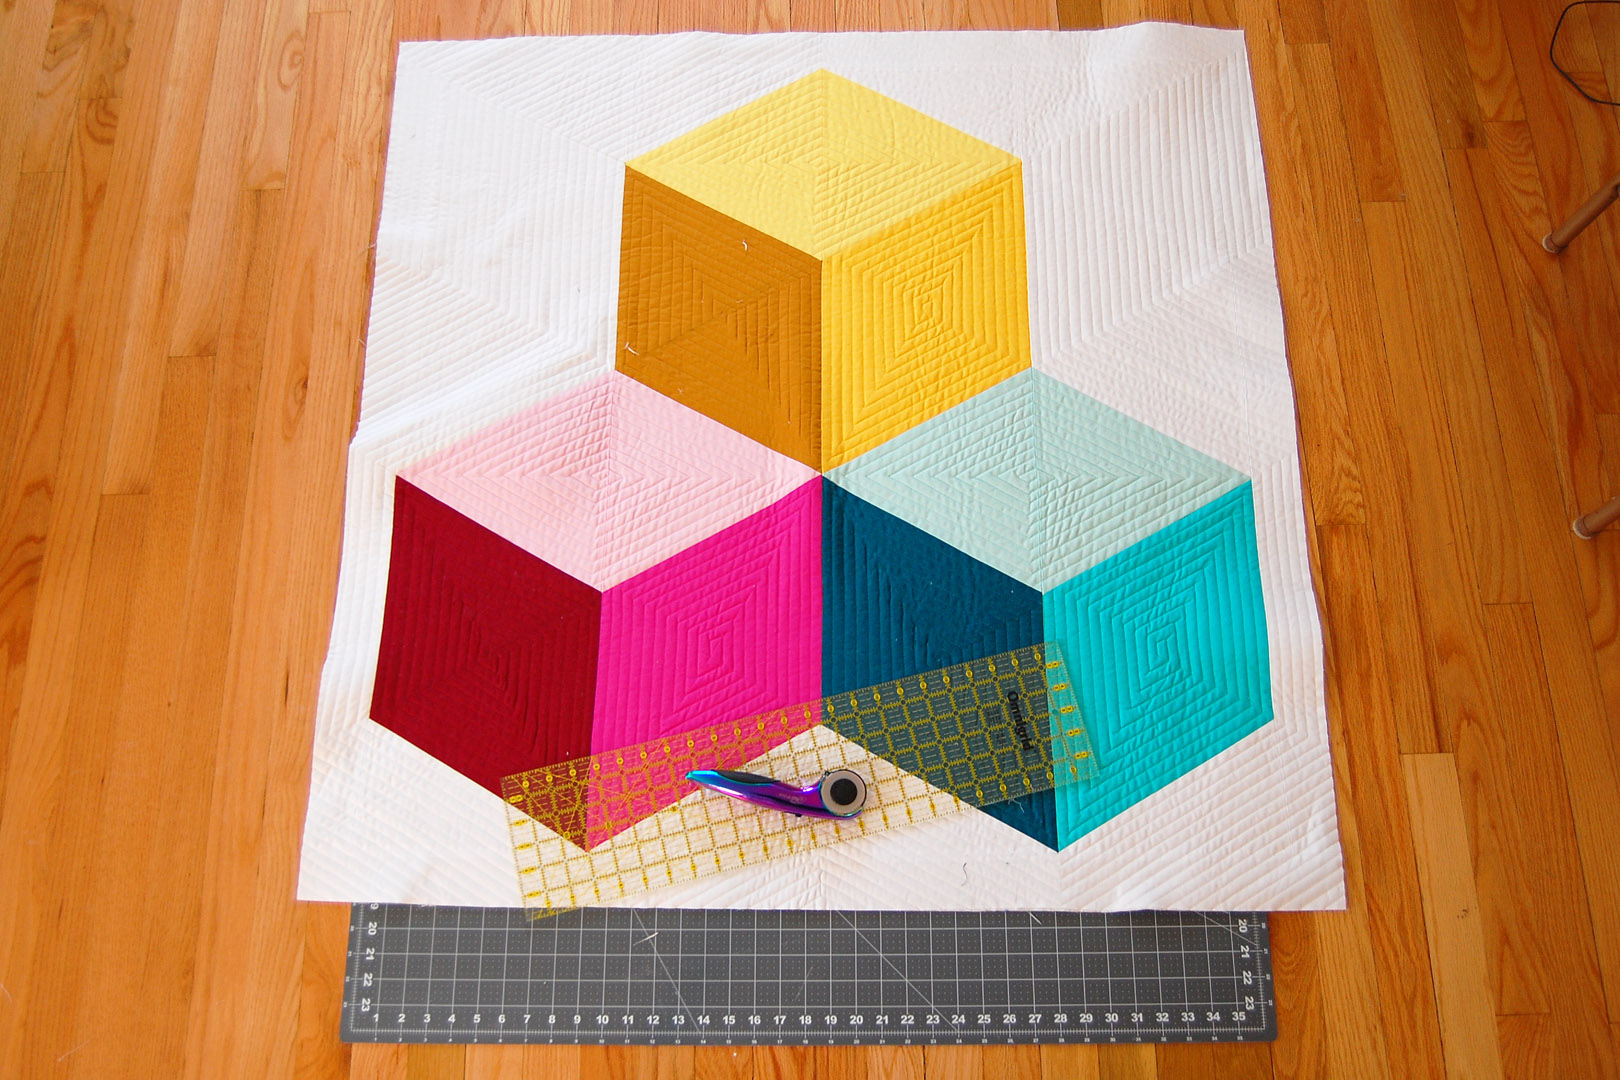
As a last step I may smooth out the quilt on the floor once more, looking for any edge that may not be trimmed straight. I also use the floor boards to help me line-up the quilt and look to make sure it isn’t really wonky or off-square.
When your quilt has been trimmed up and squared, it’s time to apply the binding. If you’re an experience quilter, use your favorite method to finish the quilt. You may also choose a different color or pattern to create your binding. I created a double-fold binding out of the background fabric to bind my quilt. If you’d like to follow this method, click here to find a fantastic step-by-step for the same method I used to sew on the double-fold binding. You should have enough background fabric to cut the binding on the straight grain (with the width of the fabric) to create double-fold binding.
Once the binding is stitched to the front of the quilt by machine, I attach it to the back with hand stitches. I use the same Mettler Metrosene for this process as I did to piece the quilt top.
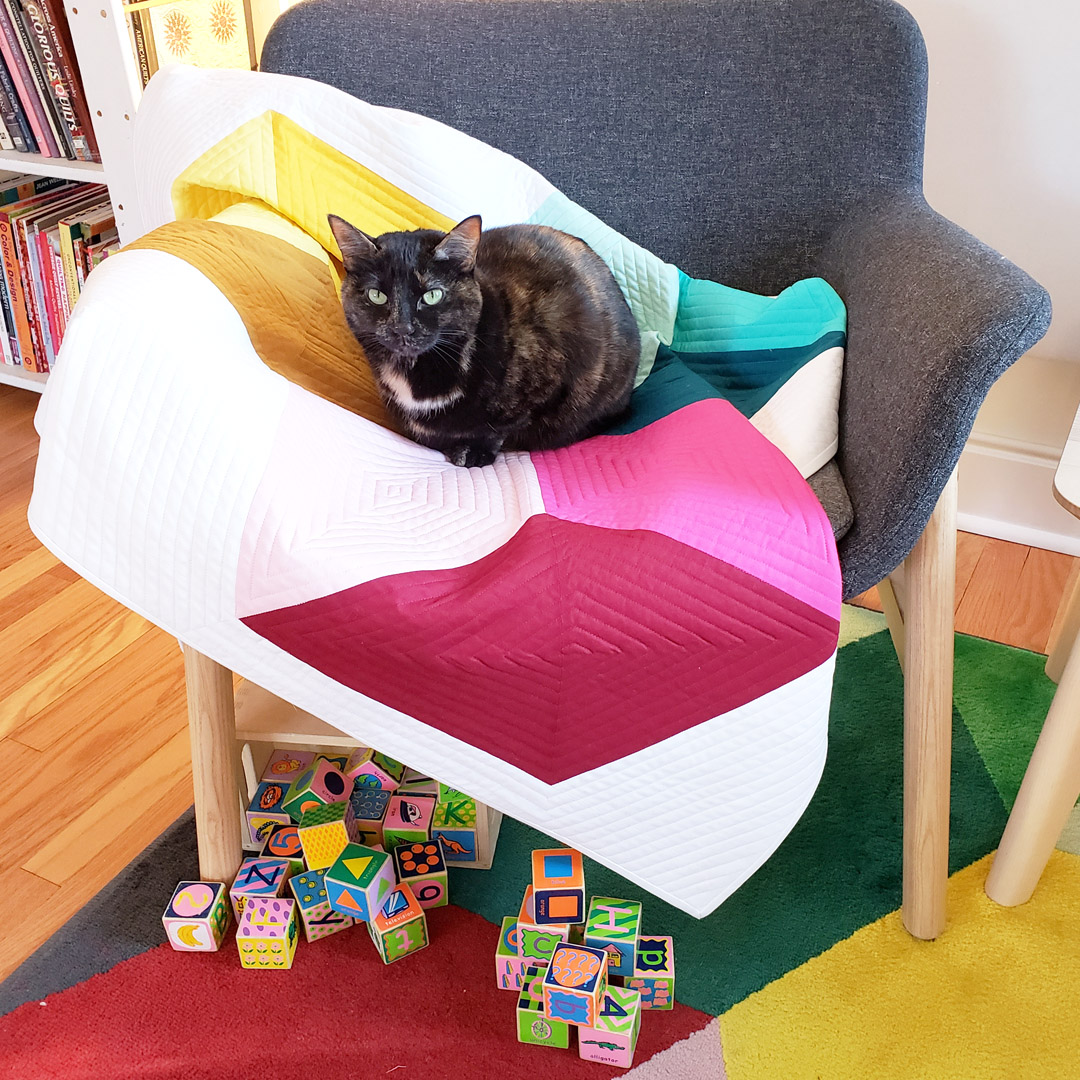
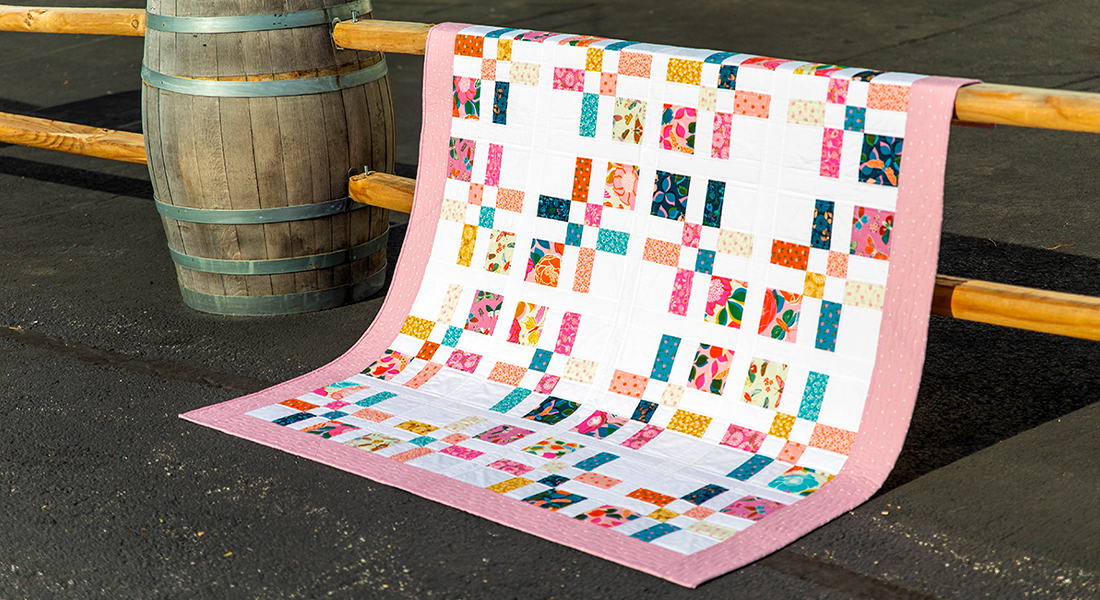
And there you have it, your own Colossal Blocks baby quilt! Yes, this quilt has also been cat-approved.
Tips for Washing the Quilt
When I gift a baby quilt I will pre-wash it to remove the starch I added in the process of making the quilt, and the chemicals used in the fabric manufacturing process. As mentioned throughout the quilt-along, I use sturdy polyester thread when piecing and quilting to add strength through multiple machine wash cycles. Here’s a few tips for pre-washing your Colossal Blocks baby quilt.

If I have any doubts about the color fastness of the fabrics (sometimes fabric colors can run in the first wash cycle and re-deposit on other colors in your quilt), I will use Synthrapol detergent in the wash. Synthrapol is specially formulated to keep any dye or coloring that comes off in the wash from re-depositing on the fabrics. I’ll also toss in a few color catcher sheets in the wash, these are laundry aids that are made to catch and trap any dye or coloring that comes off in the wash (SHOUT makes a Color Catcher and Carbona makes a Color Grabber).
I use the delicate cycle and wash with cold or cool water.

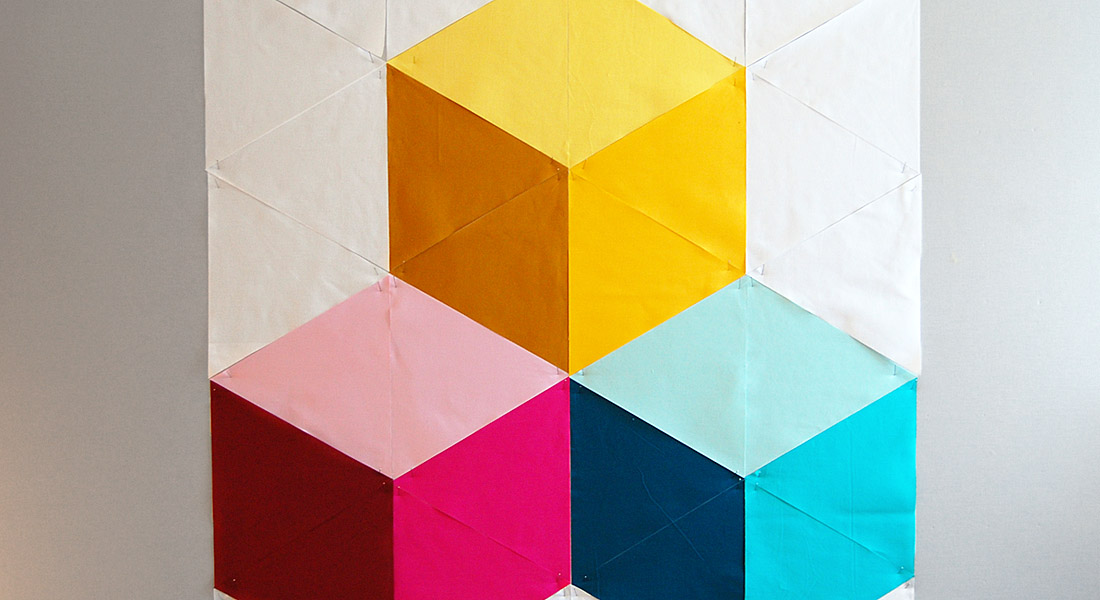
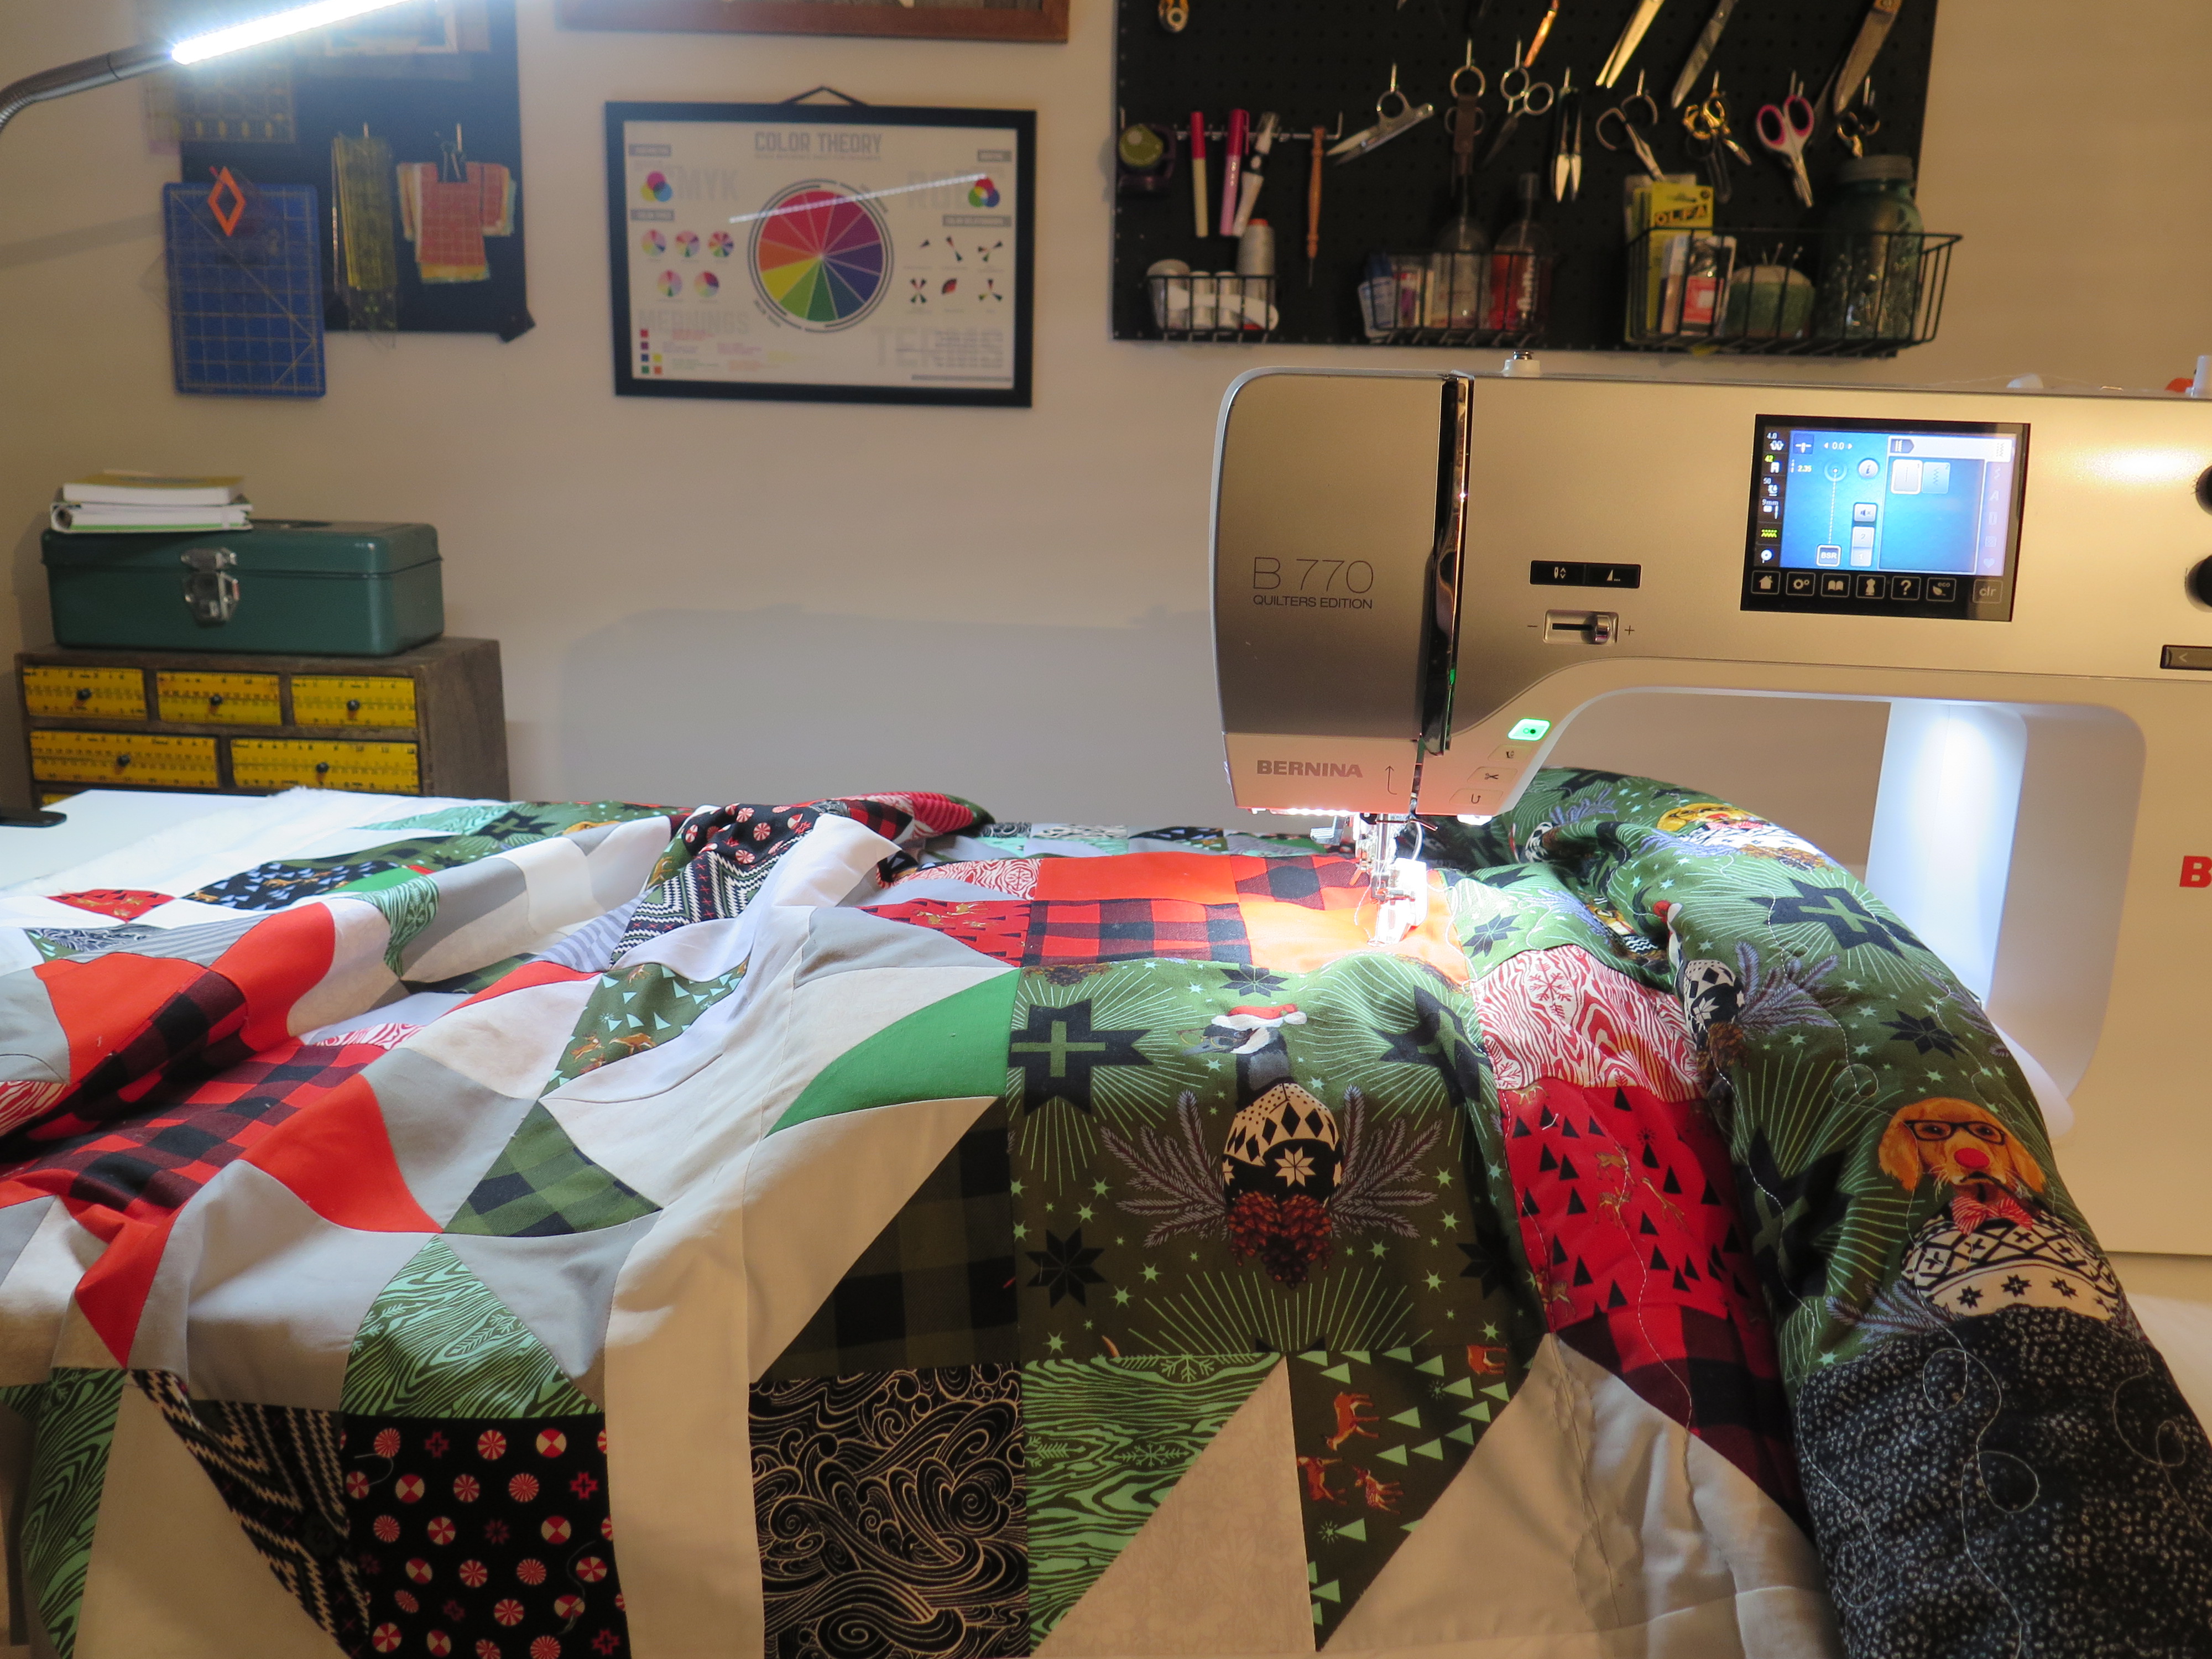
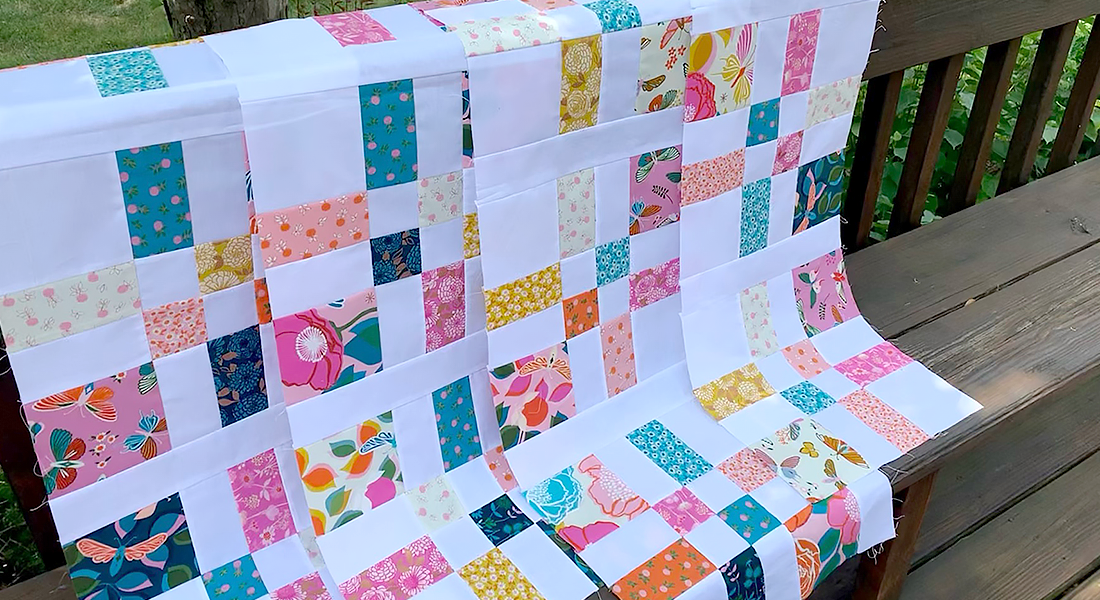
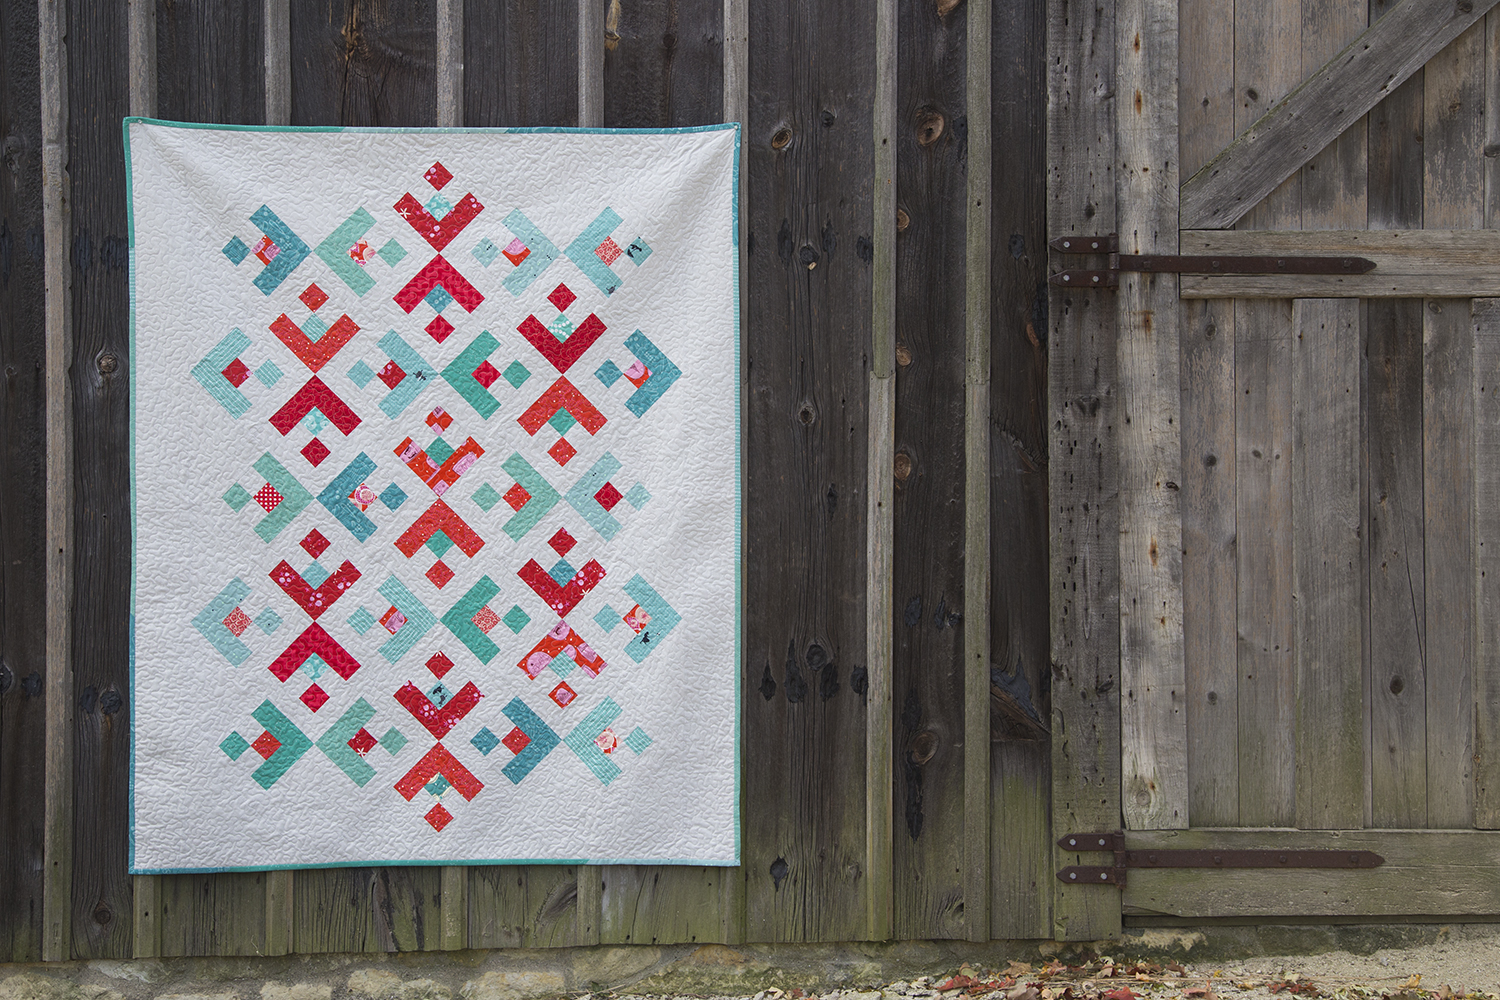
The dryer does shrink the cotton batting up, which will affect the overall look of the quilt. I really love the crinkly look of a well-washed quilt, so I always finish off the first wash of a gifted baby quilt by tossing it in the dryer. Above is the quilt right before washing, and below is after one trip through the washer and dryer. You can definitely see the crinkle effect from the shrinkage.
If you don’t want the shrinkage, don’t put your quilt in the dryer. You can lay the quilt flat to let it air-dry instead. Don’t forget the quilt label!
Used Products


What you might also like


4 comments on “Colossal Blocks Quilt-Along Week 4: Quilting and Binding”
-
-
Hello maillady, and thanks for following along with my Colossal Blocks quilt-along! I’m so sorry to hear that your corners aren’t coming to a point after sewing the blocks together. I can suggest double-checking to make sure you are sewing all the seams with a consistent quarter-inch seam. If you have already stitched the triangles together in columns, and you are sewing these long strips together, if your seam isn’t consistent then the points won’t look quite right. Try using a tool such as one of the BERNINA Patchwork feet in addition to a seam guide to help with consistent seams.
-
-
What a beautiful quilt with great instructions. I can’t wait to try this out. Question, it looks like the thread on the back of your quilt is a different color than that on the front. Did you simply put a different color in your bobbin?
-
Hi krazgrl0524 thanks so much! You have a good eye, yes, I matched the color of the quilting thread to each block on the front of the quilt and used the same color in the bobbin. So, from the back, you can see the quilting in each of those thread colors. You can feel free to use any color you wish in the bobbin! If you matched the backing fabric the quilting thread would not show up as much, but you also may see a bit of it peeking through with the quilting stitches on the front. Happy stitching! – Erika
-
Leave a Reply
You must be logged in to post a comment.

I followed your instructions to the tee.and the blocks dobt come to a point in the corners what have I done wrong?