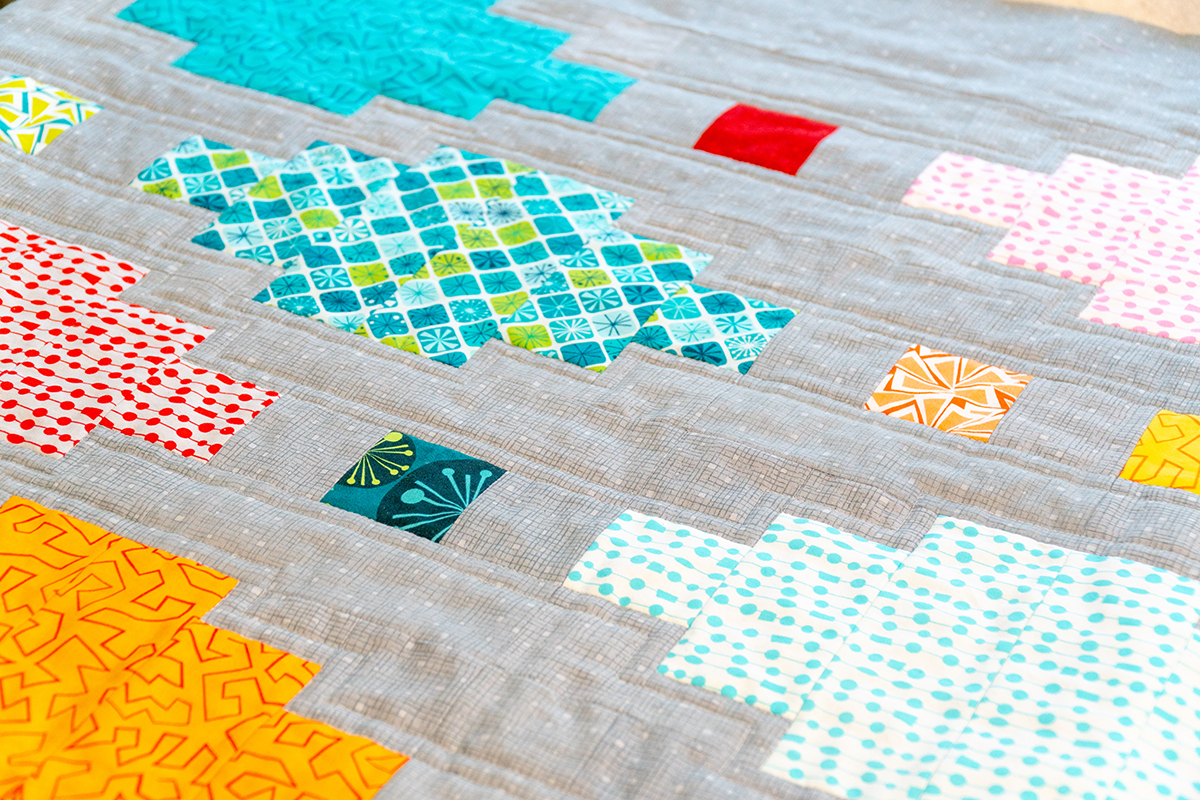
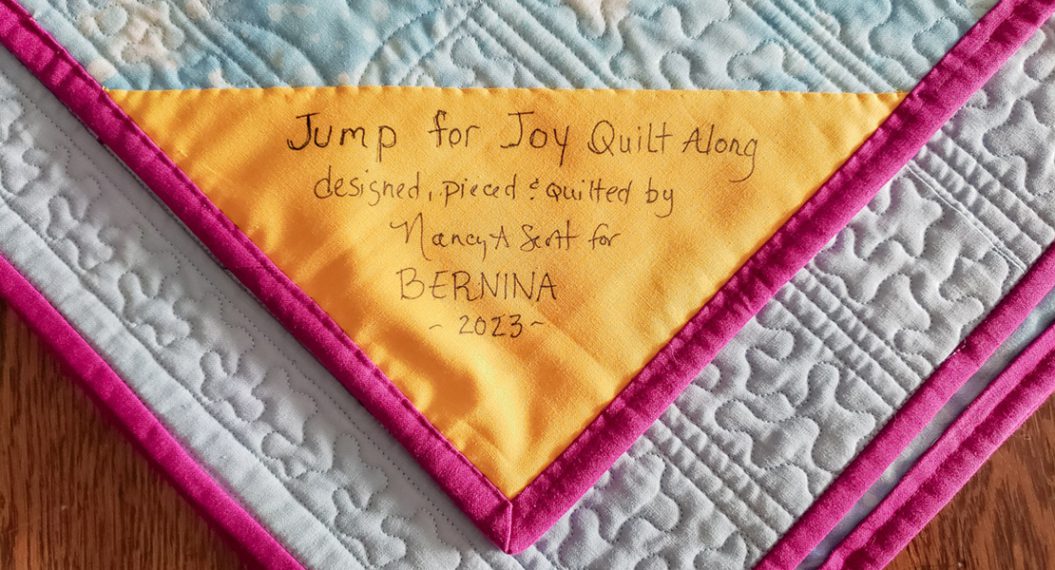
Beaded Lanterns Quilt Along Week 7 – Binding to Finish
Thanks for joining me on this fun quilt-making journey! Have you had a great time? If you’d like to see more fun and inspiring projects to make on your BERNINA, be sure to follow me over on my blog at ChristaQuilts.com. And don’t forget to check the end of this post for links to all of the Beaded Lanterns Quilt Along posts. This week, we will finish up our quilts by adding the binding. This is the same method I use for all of my quilts and it works great, every time!

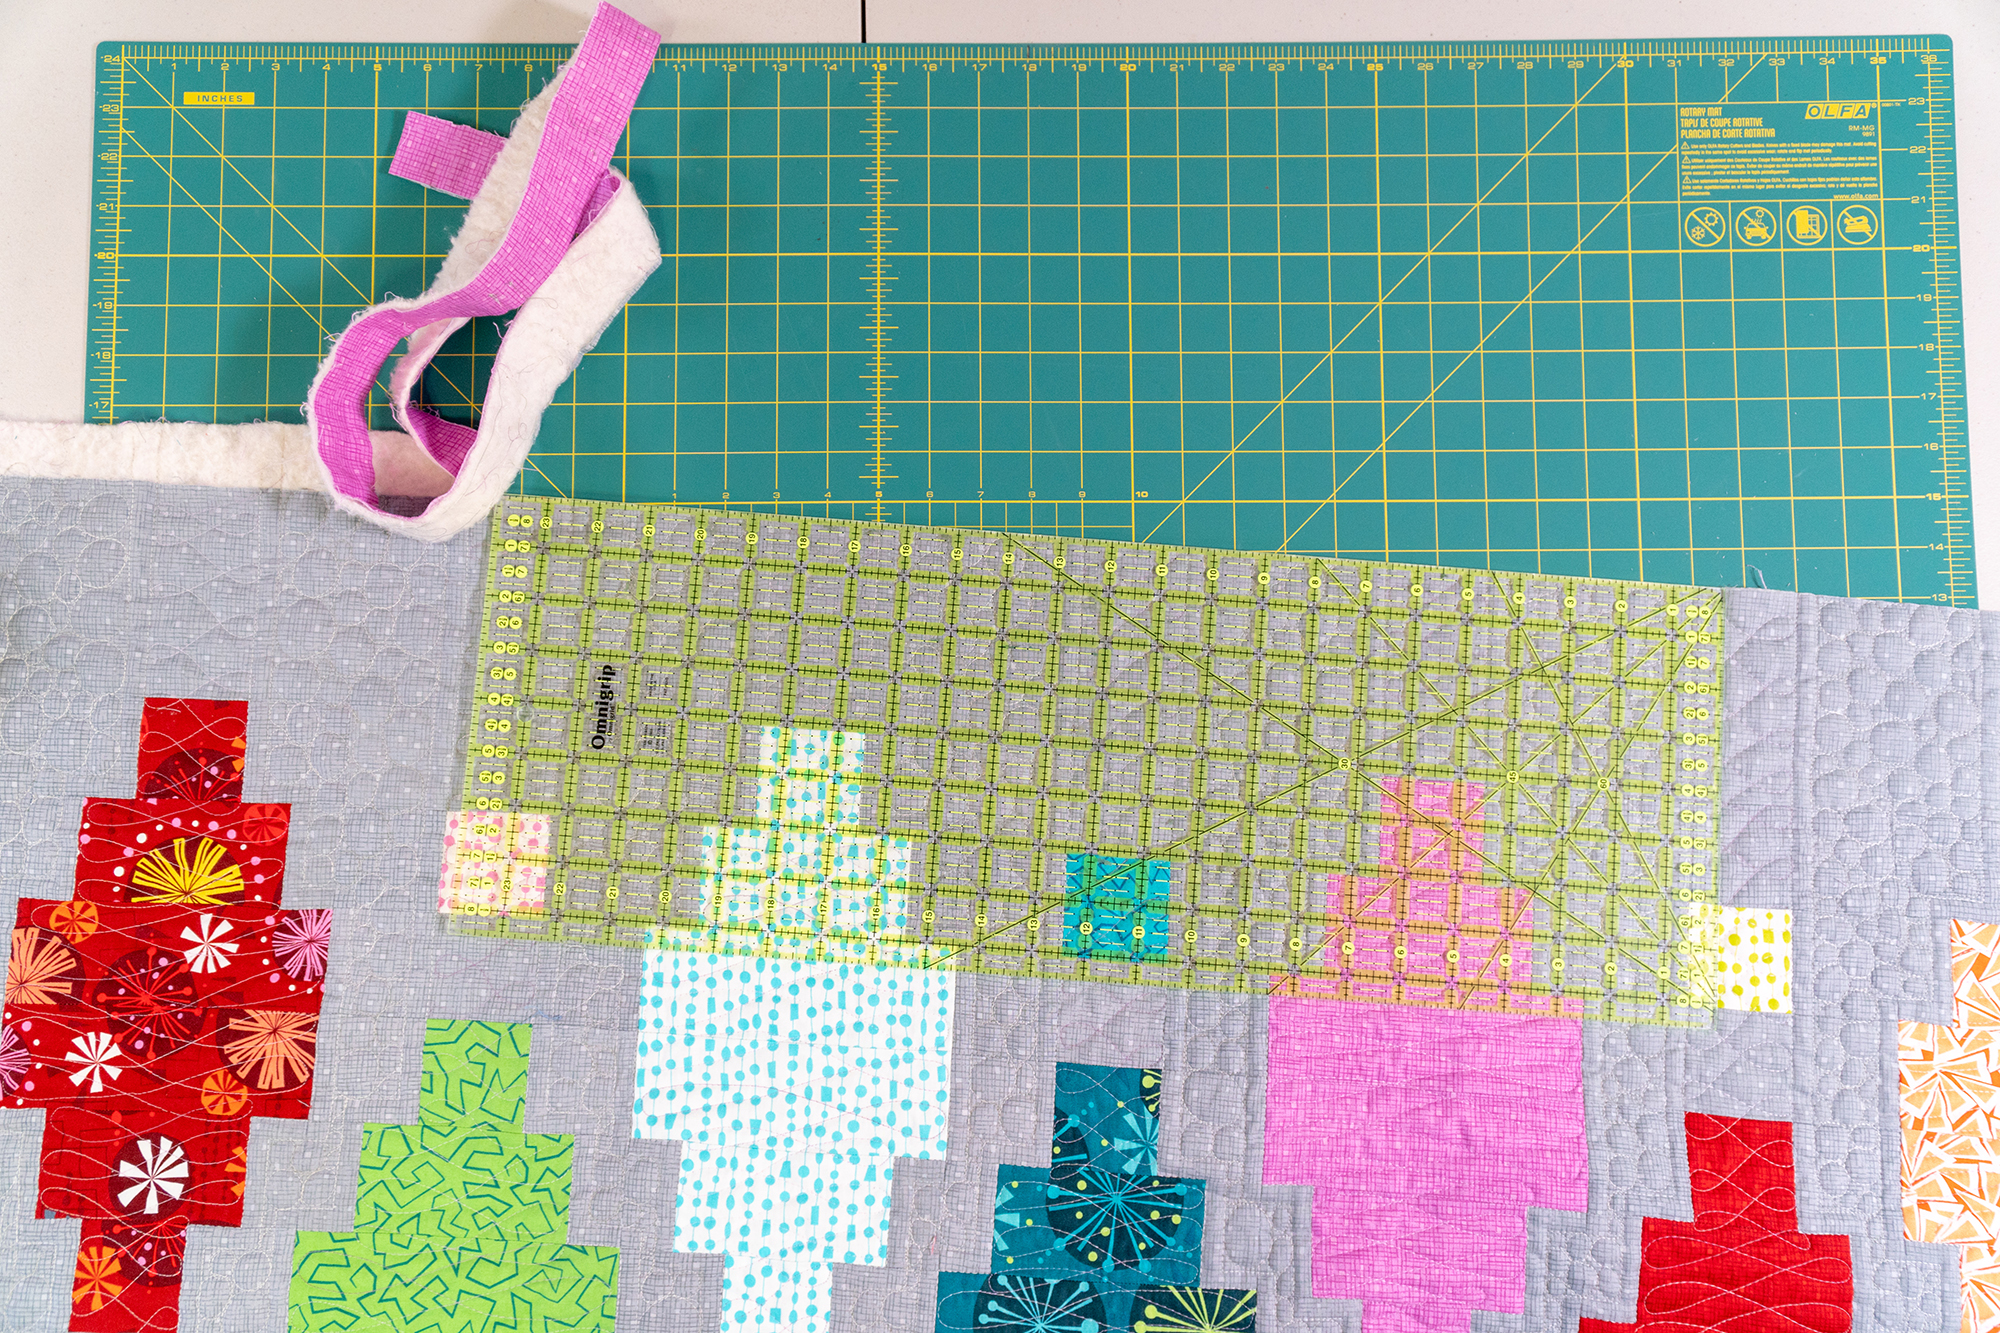
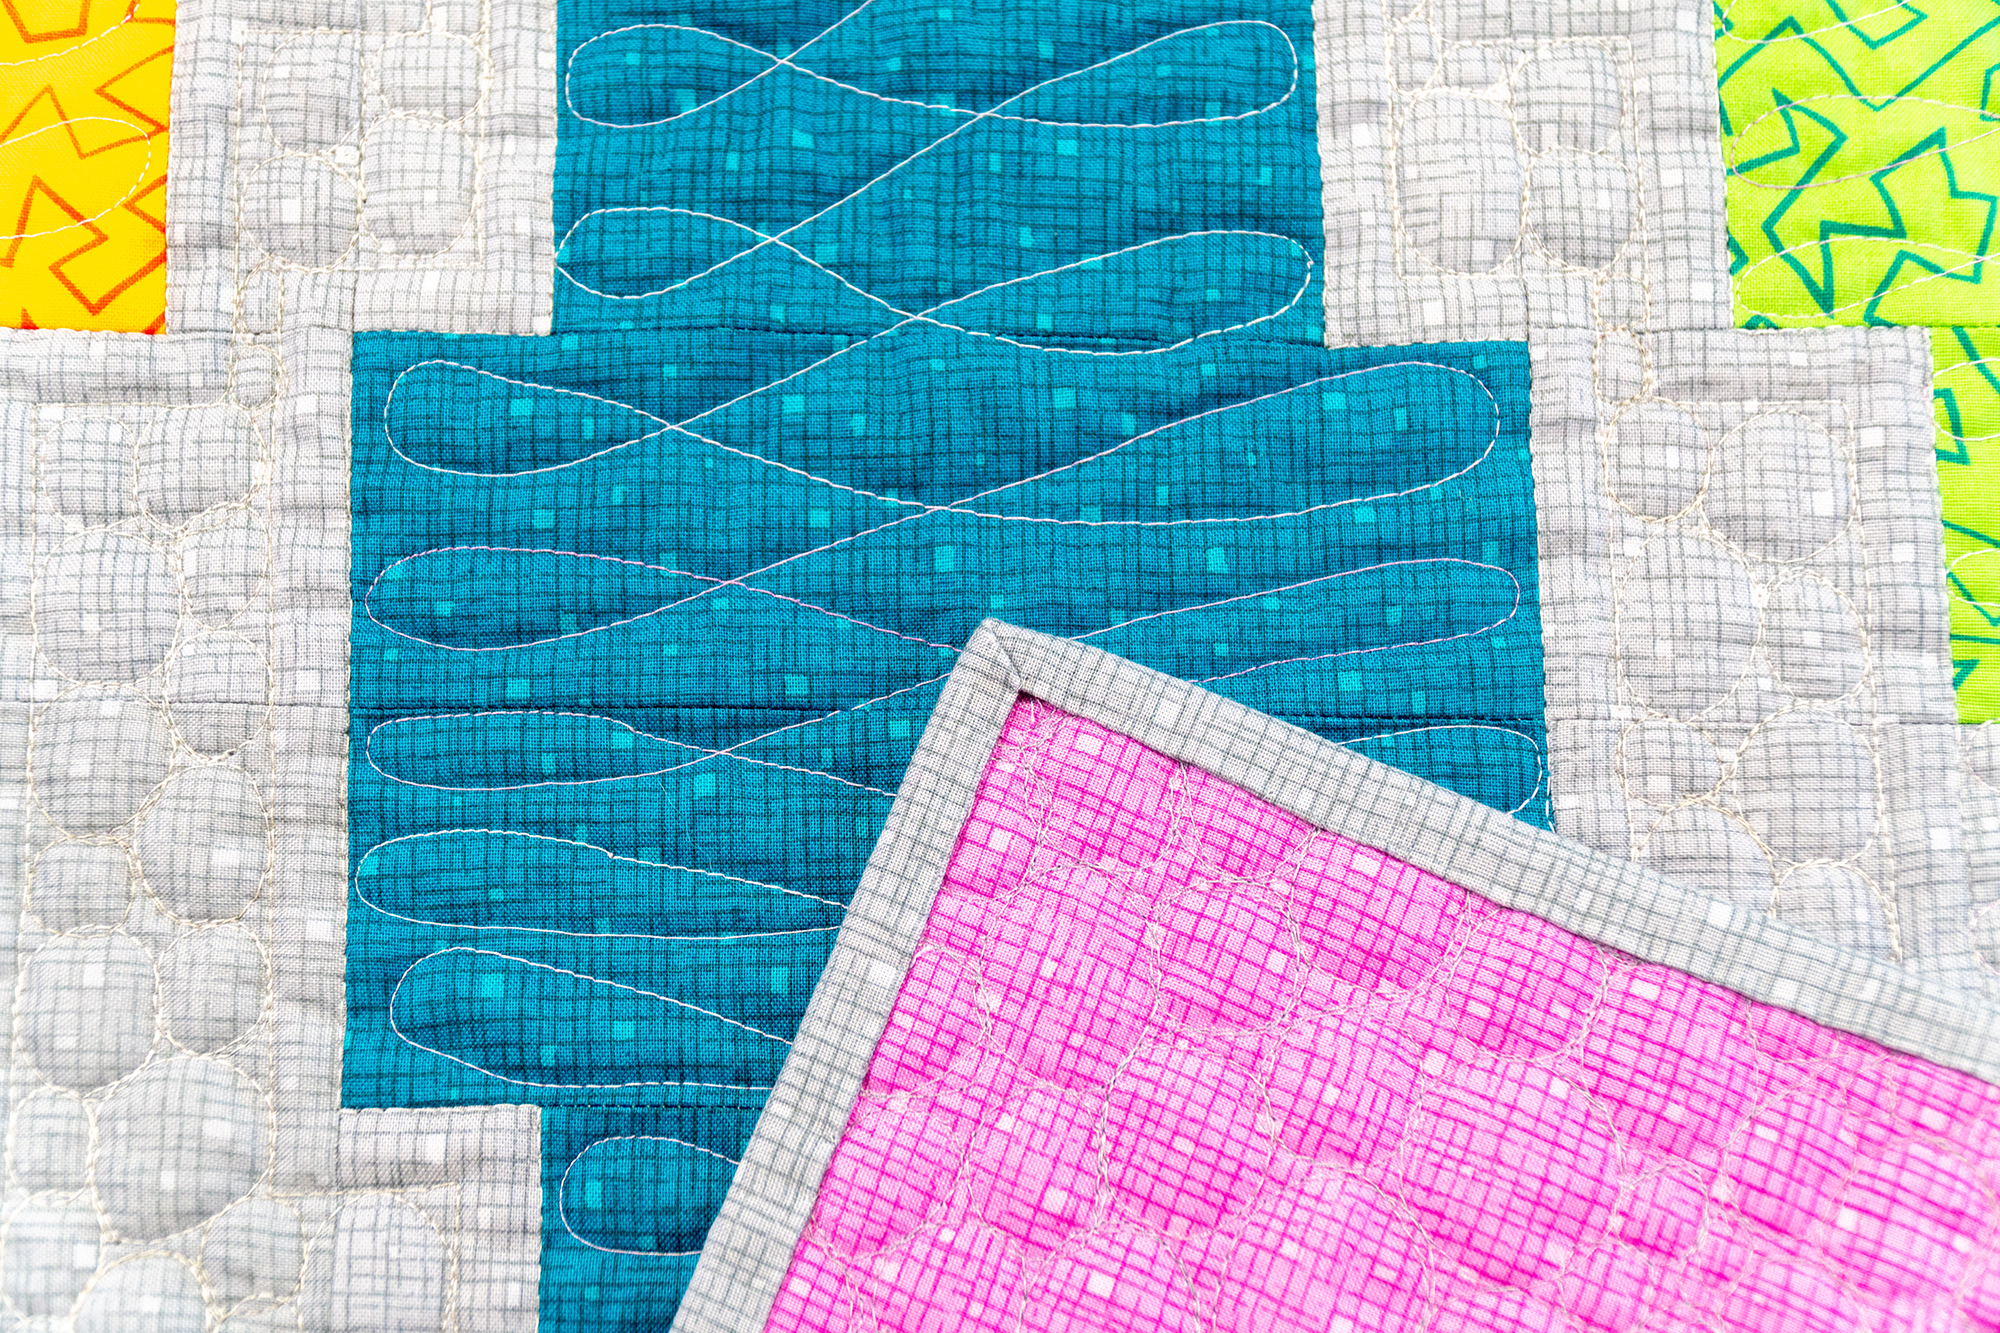
Step 1 – Trim the Quilt
Use a large square acrylic ruler to square up the corners of your quilt. I prefer to trim the excess binding and batting flush with the edge of the quilt. You can tug or block the quilt into shape a bit if needed before trimming.
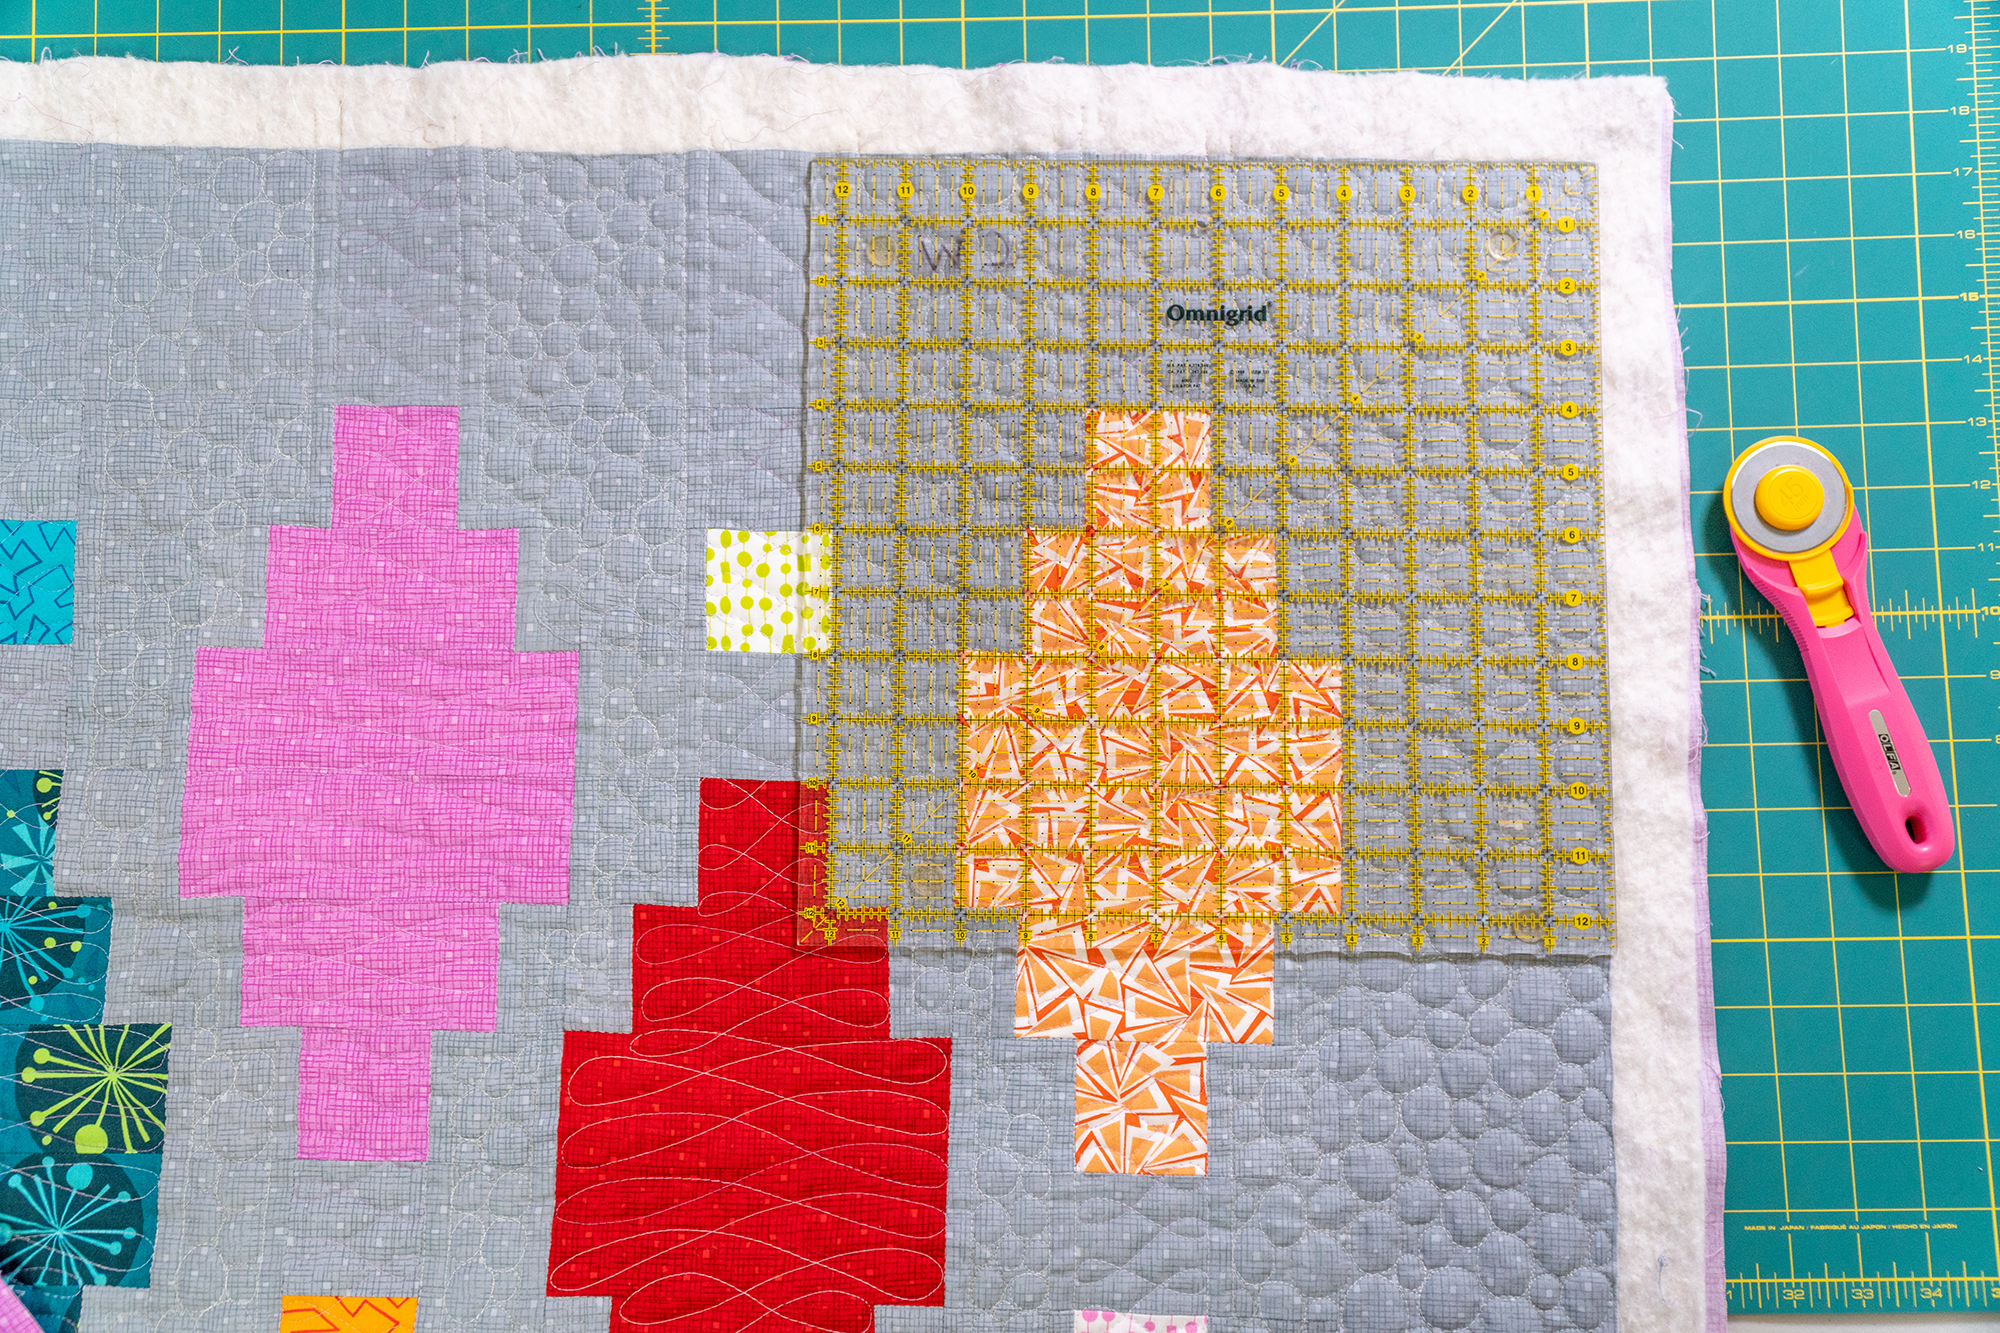
Trim the excess from all four corners before moving onto the sides.

Using a long acrylic ruler, trim away the excess on all four sides. Match up the previously trimmed edge with the edge of the ruler to ensure you are trimming all sides as straight as possible.
 Step 2 – Sew the Binding Strips
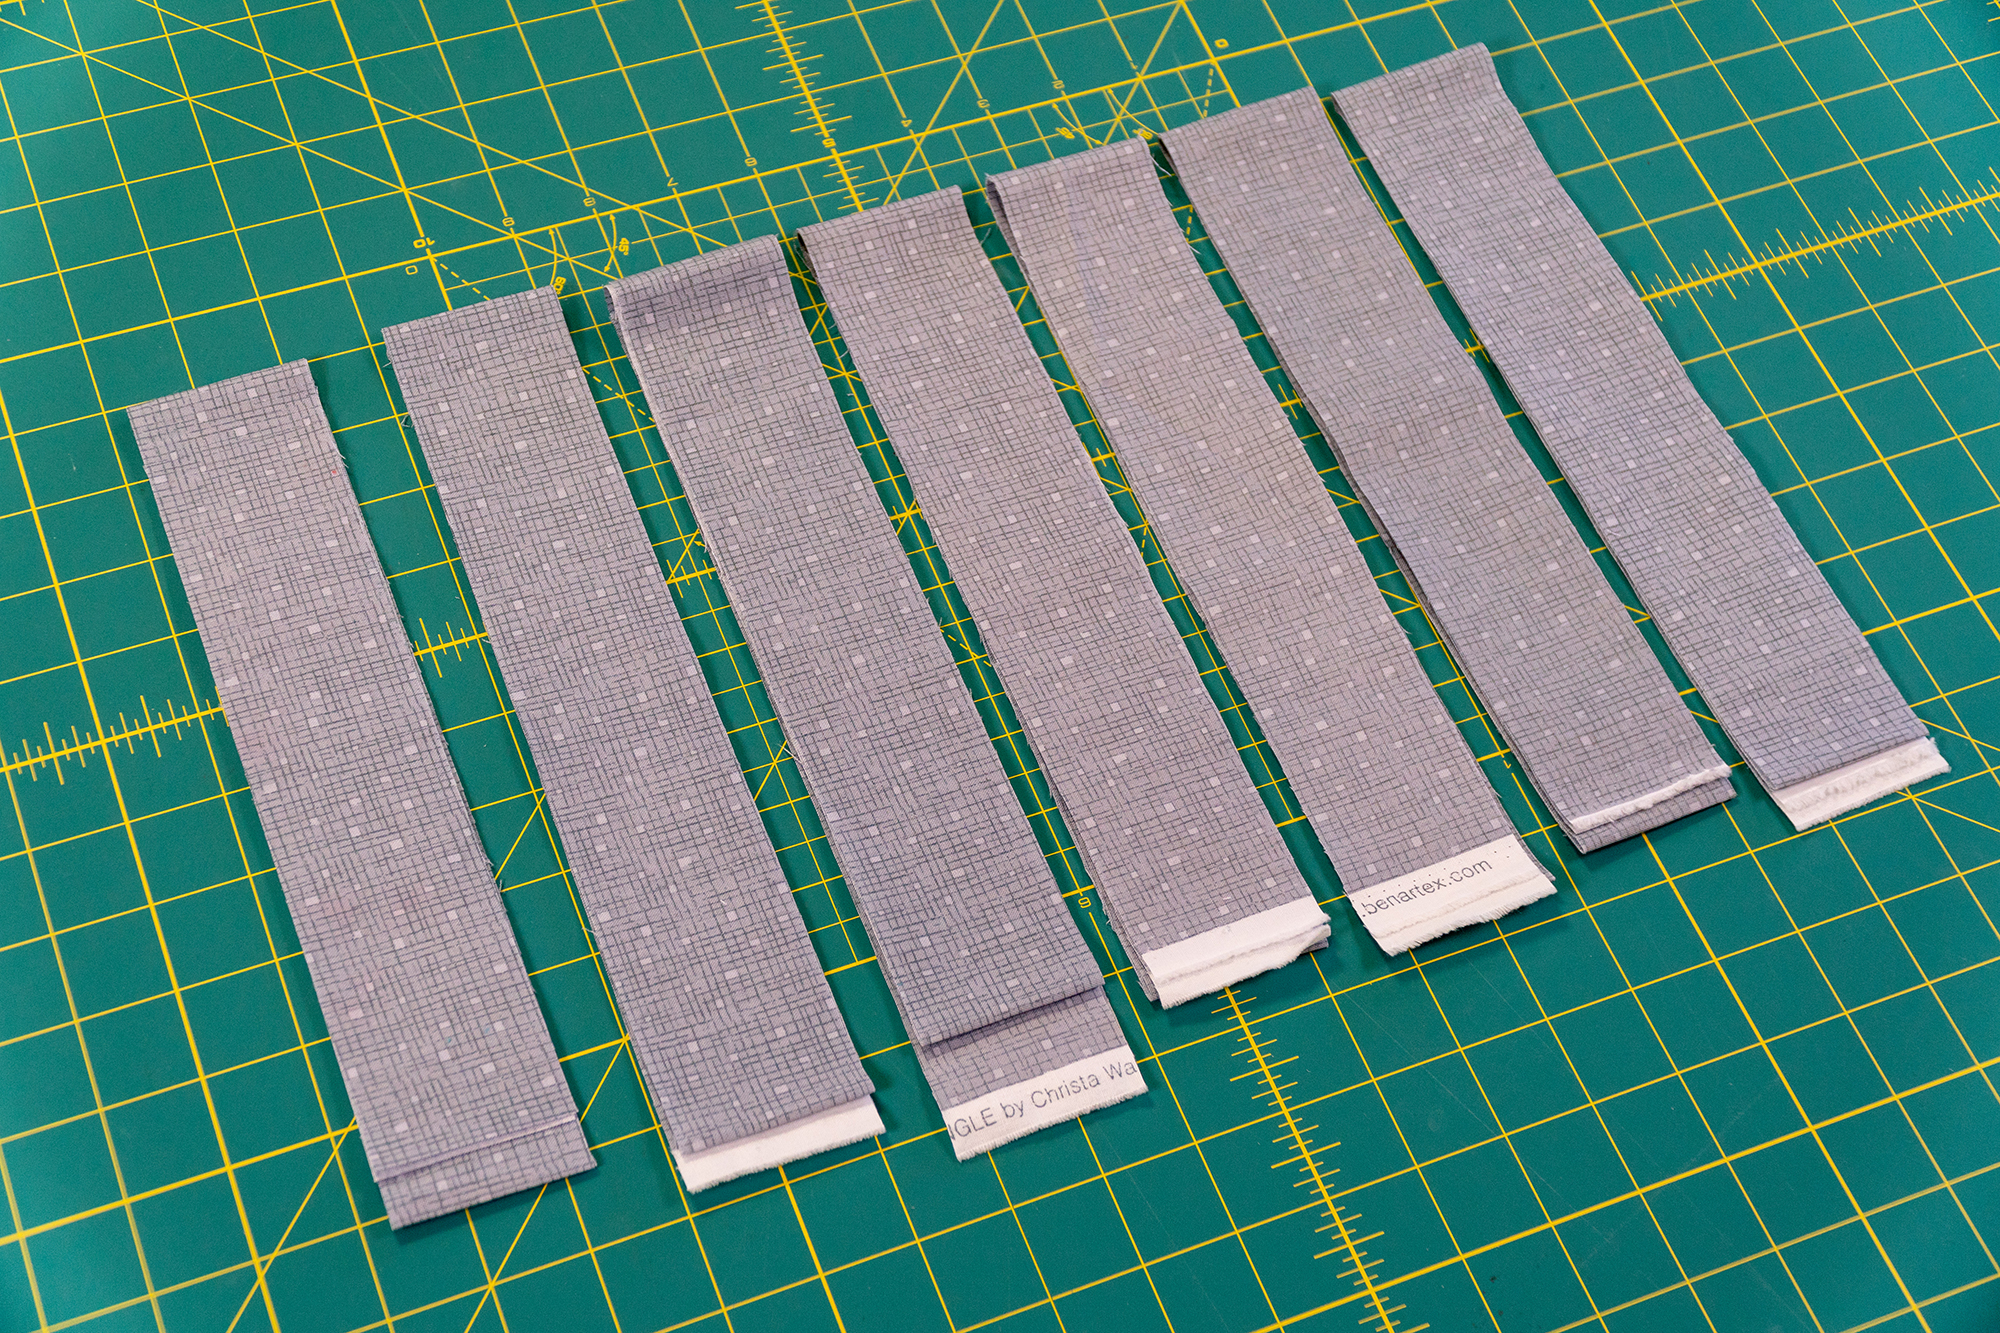
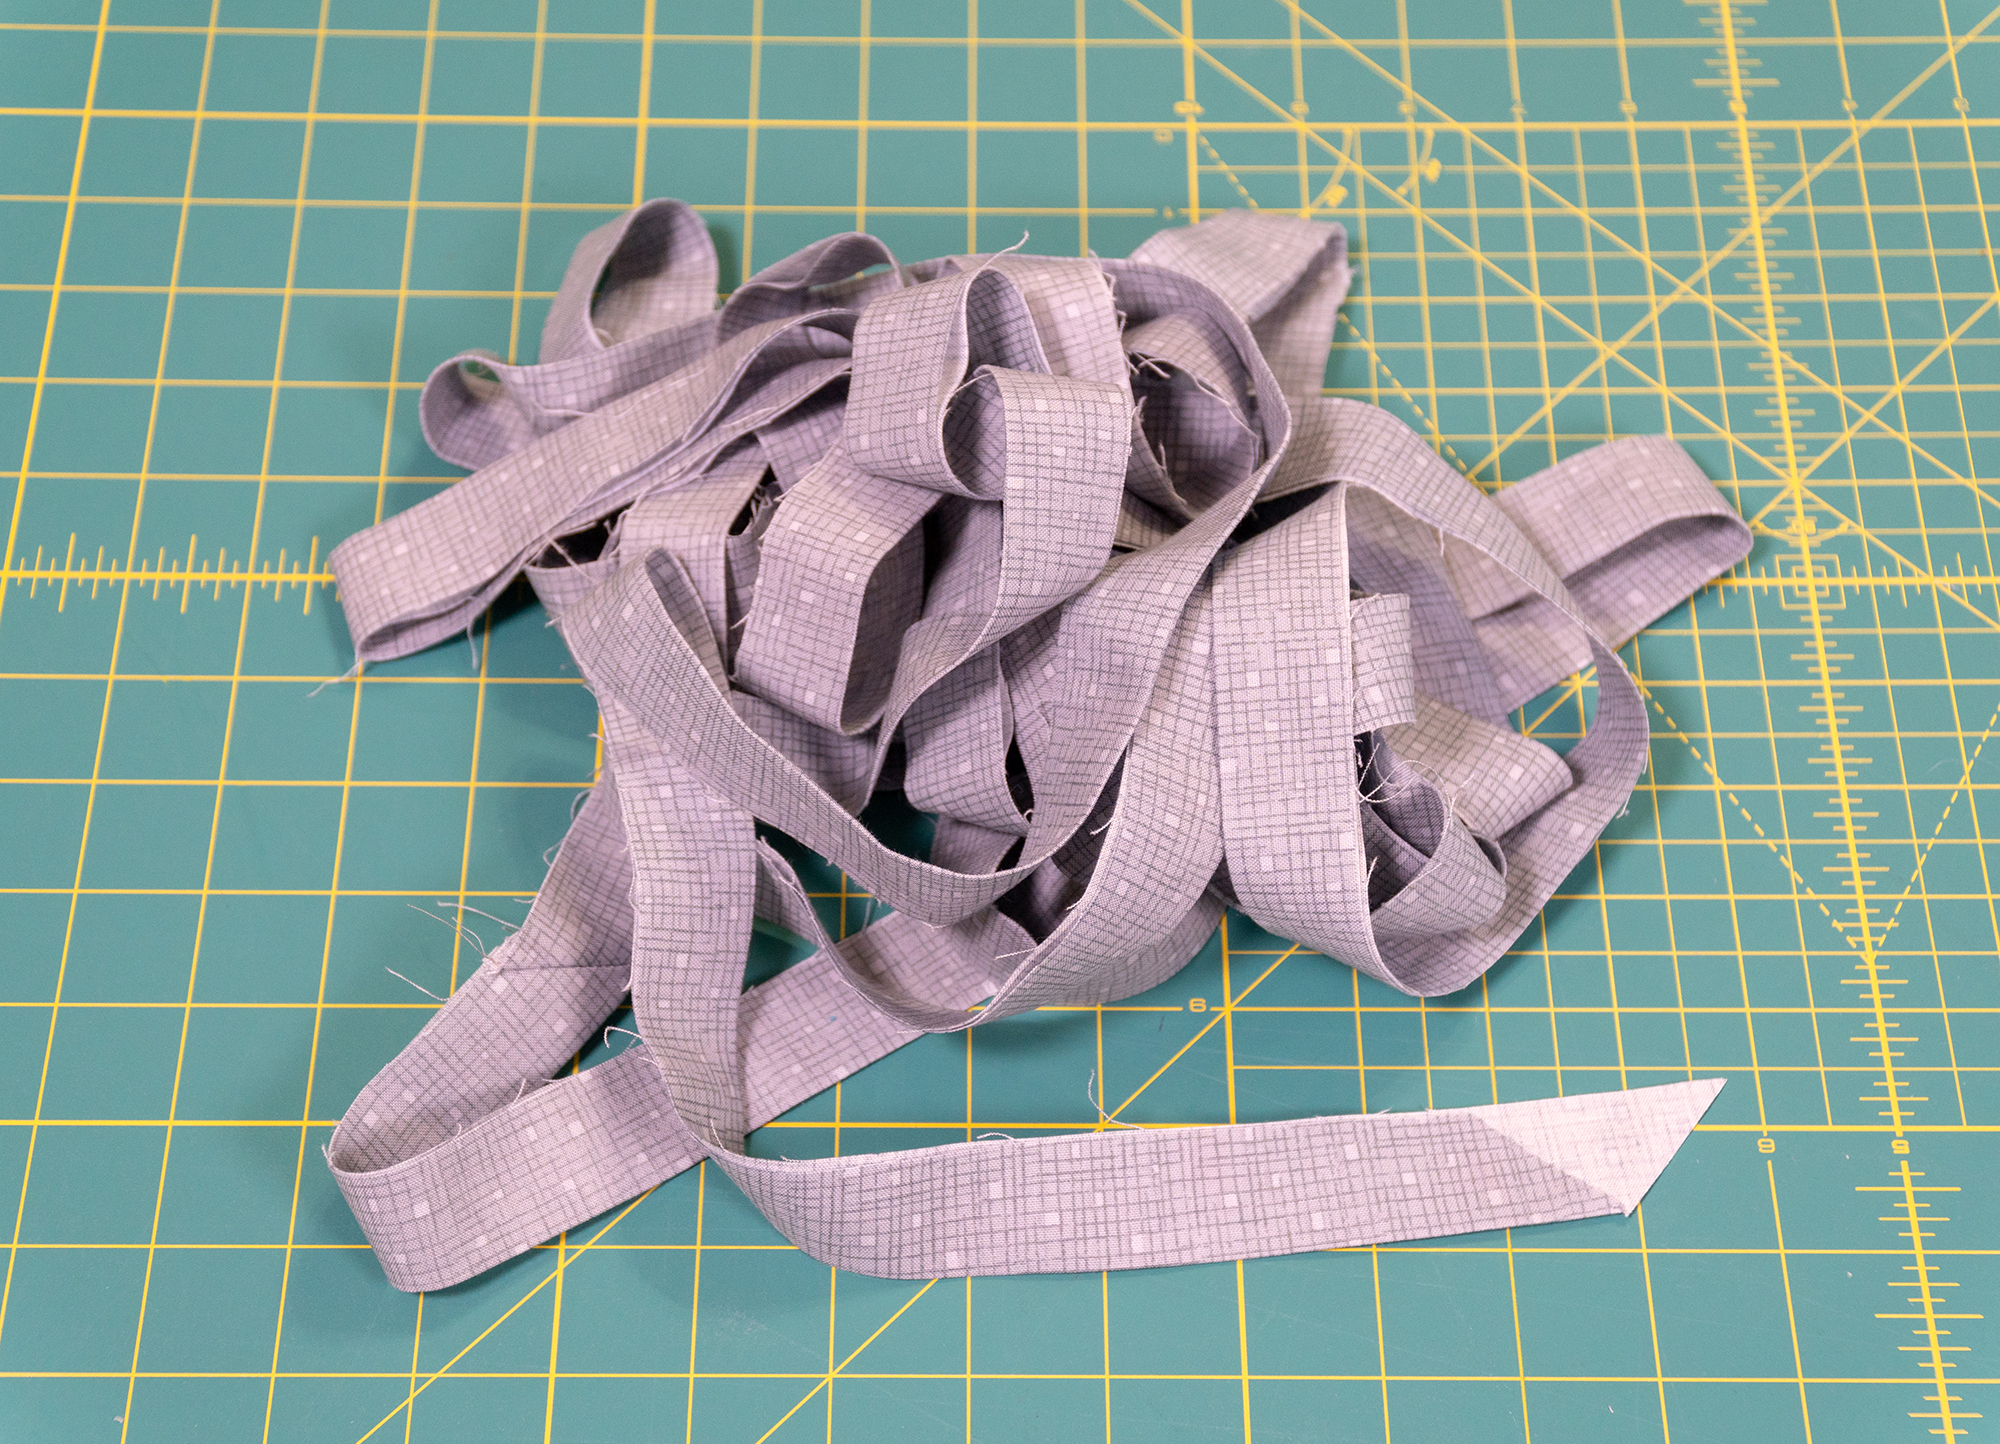
I prefer to cut my binding strips 2″ wide so that they finish at an even 1/4″ on both sides of the quilt. However, feel free to use whichever width of strips you prefer. To calculate how many binding strips you need, add 10″ to the perimeter of the quilt, then divide the total by 40″ (the width of fabric). For example, Beaded Lanterns measures 62″ x 80″ so the amount of binding needed is 62+62+80+80+10 = 294″. Divide that by 40 to get 7.35 strips, rounded up to 8 strips of binding needed.
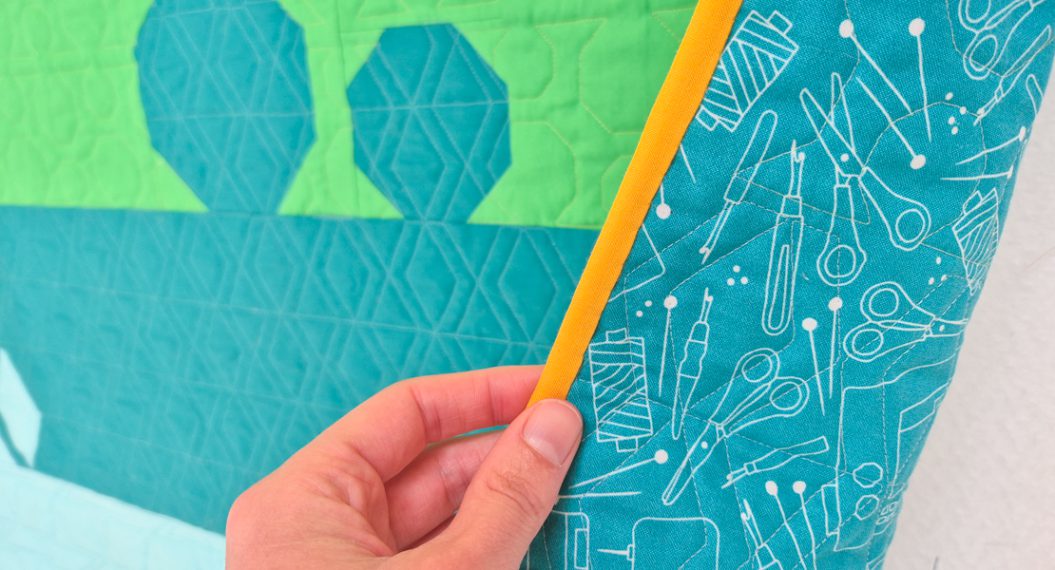
I’m using the same light gray fabric from my Fandangle collection to match the borders and background.
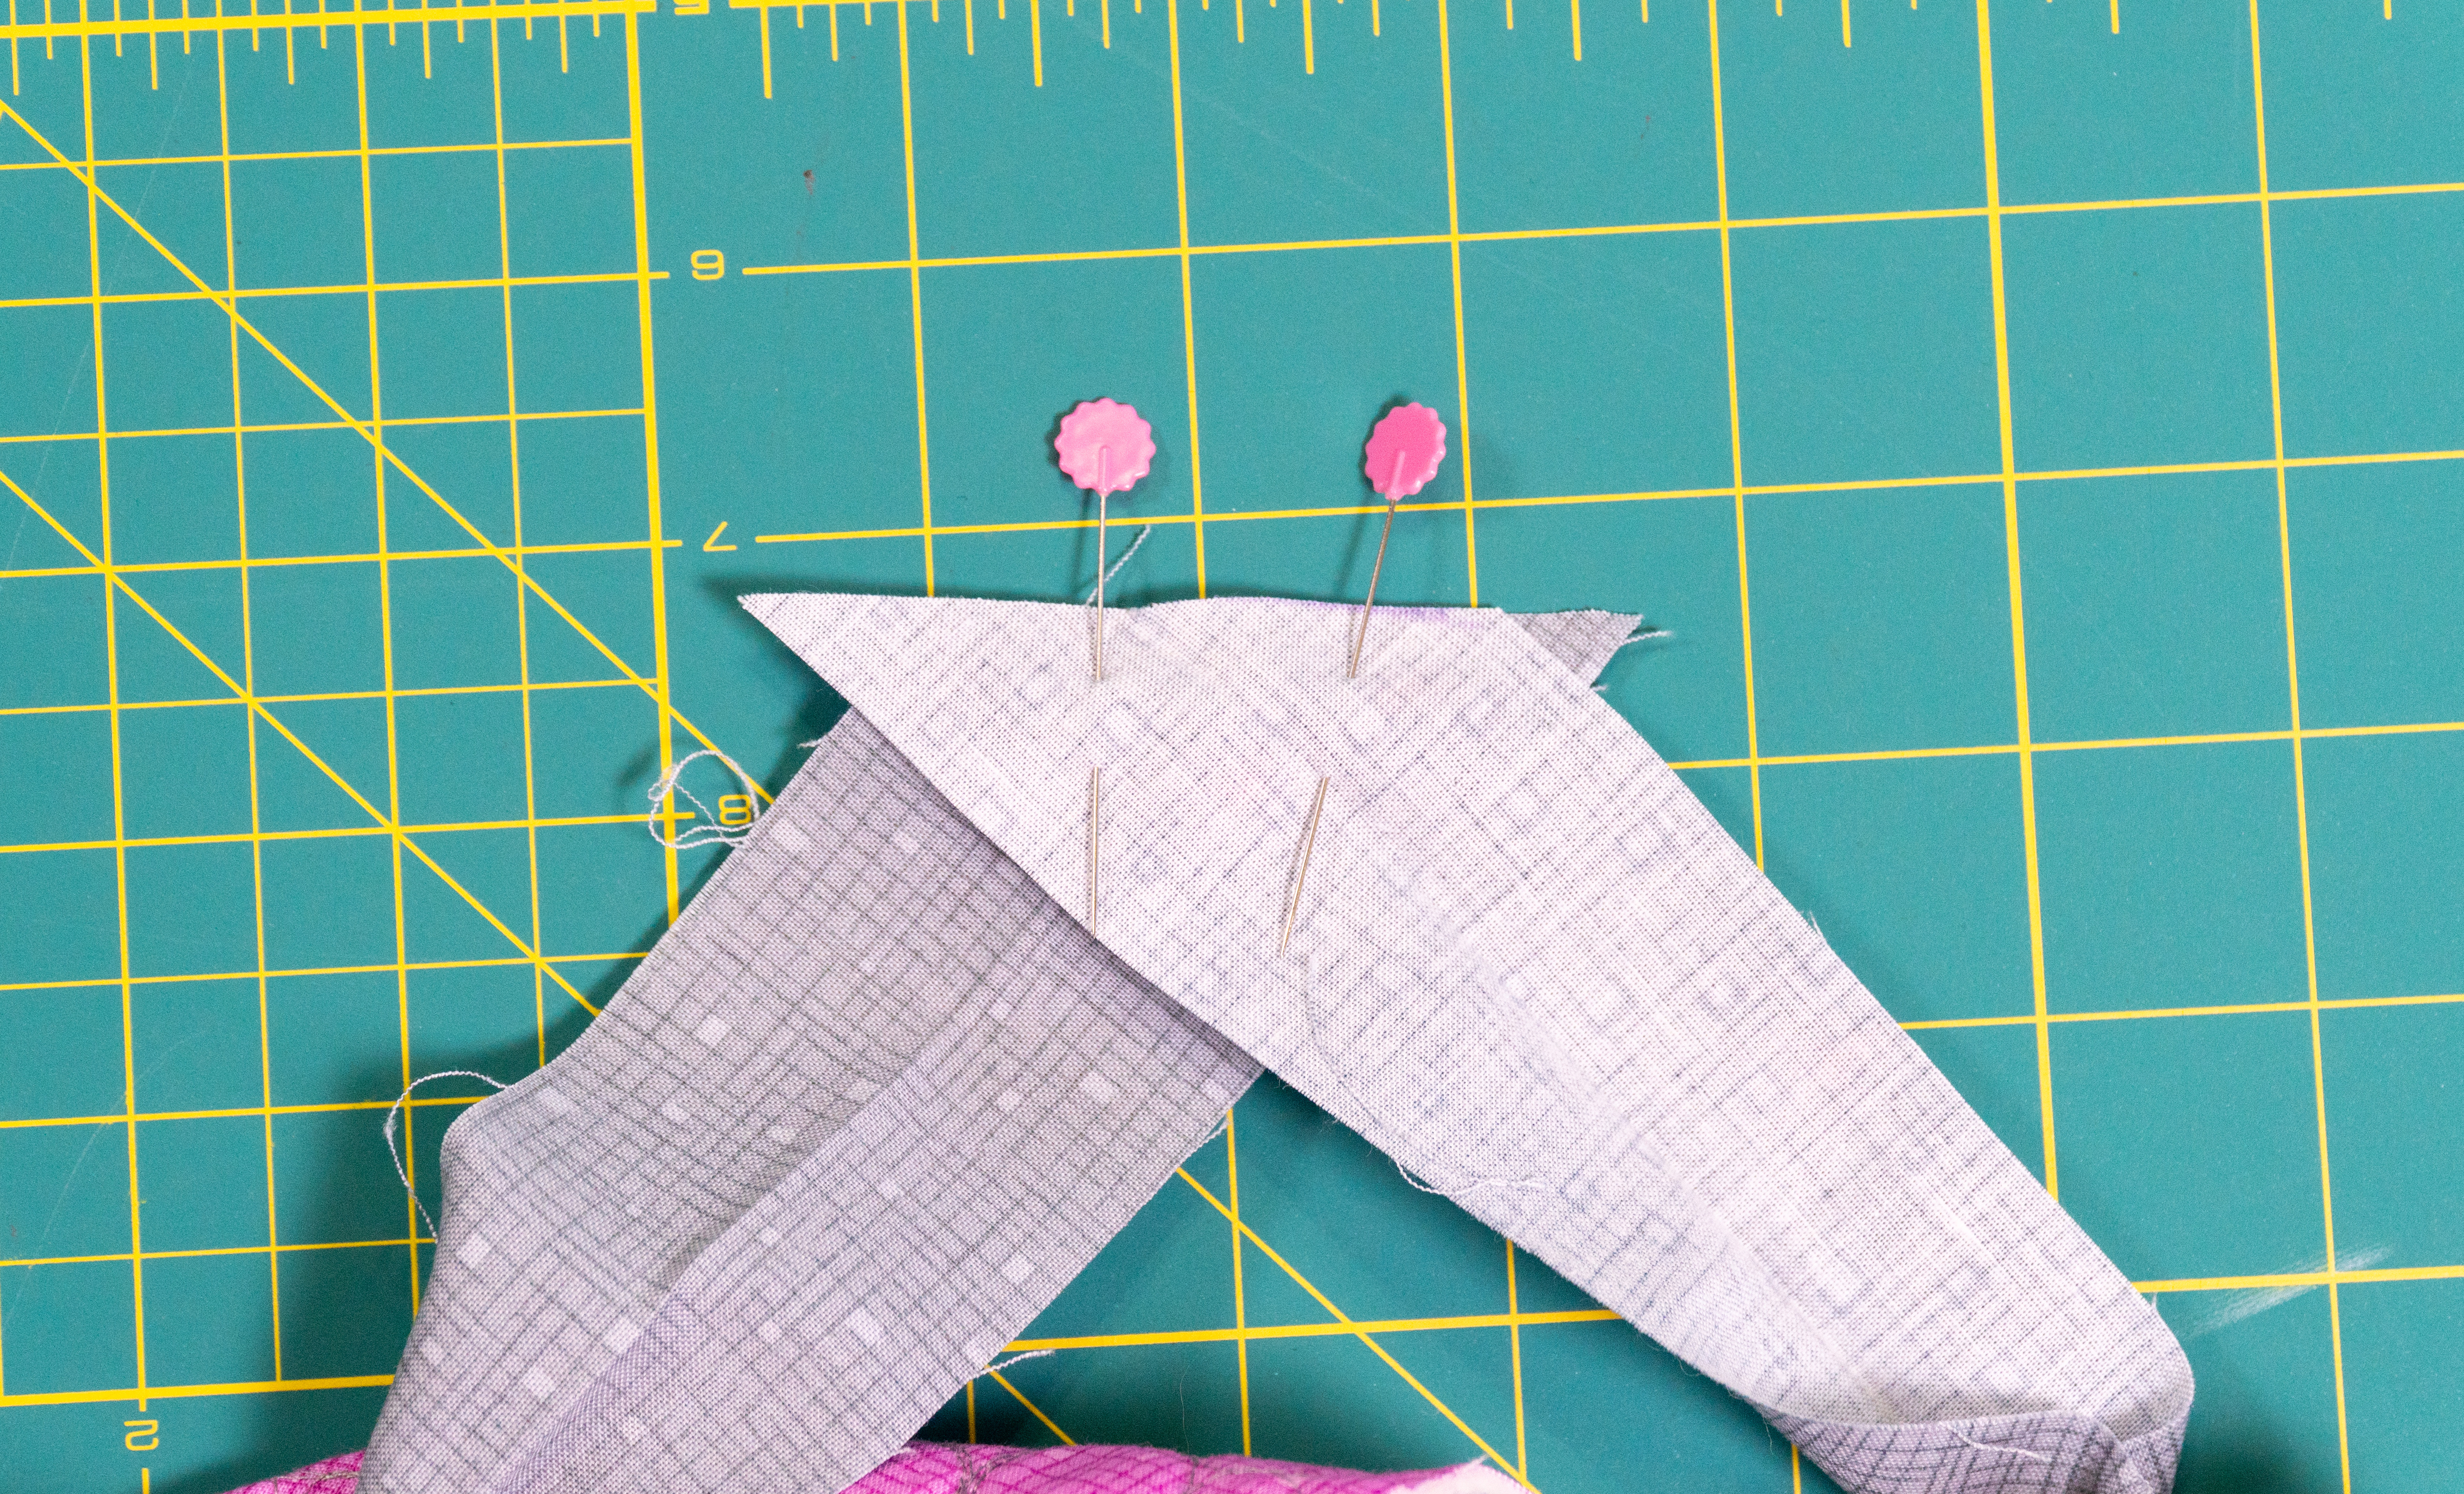
Join the binding strips with a mitered seam by placing them wrong sides together at a 90 degree angle. Sew from one corner to the other to join the seams. I can usually eyeball it, but feel free to mark the sewing line if you need to stay straight.
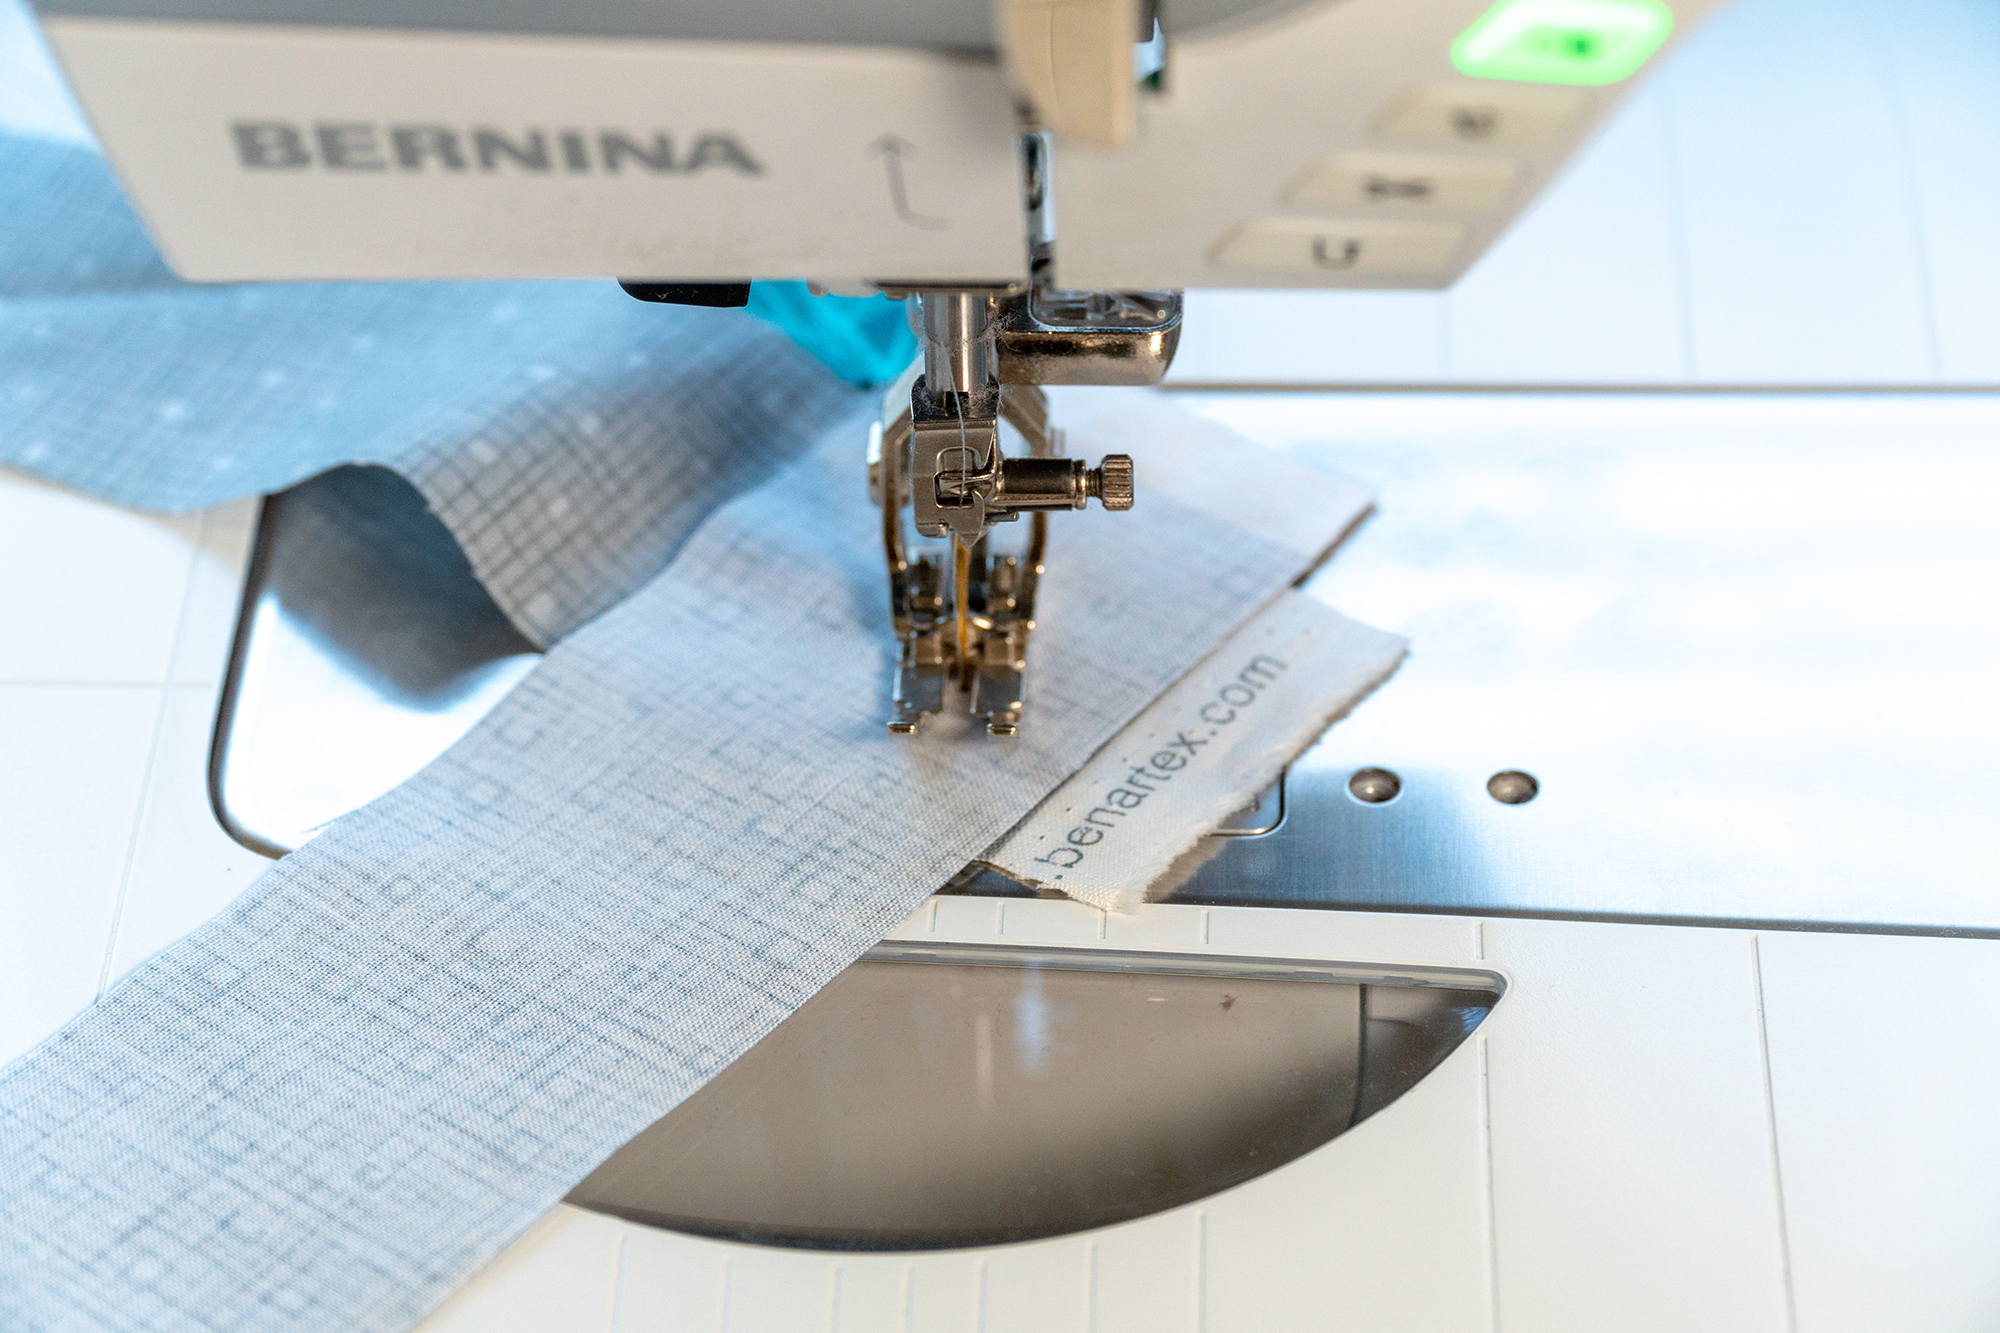
I’m using the Patchwork foot #37D to sew and attach the binding, with the Dual Feed engaged. Join all binding strips to create one continuous length. To chain piece (assembly line sew), I add each next strip as I go, flipping over the top strip so that I join them right sides together each time. Here’s what each join should look like, sewn from corner to corner:
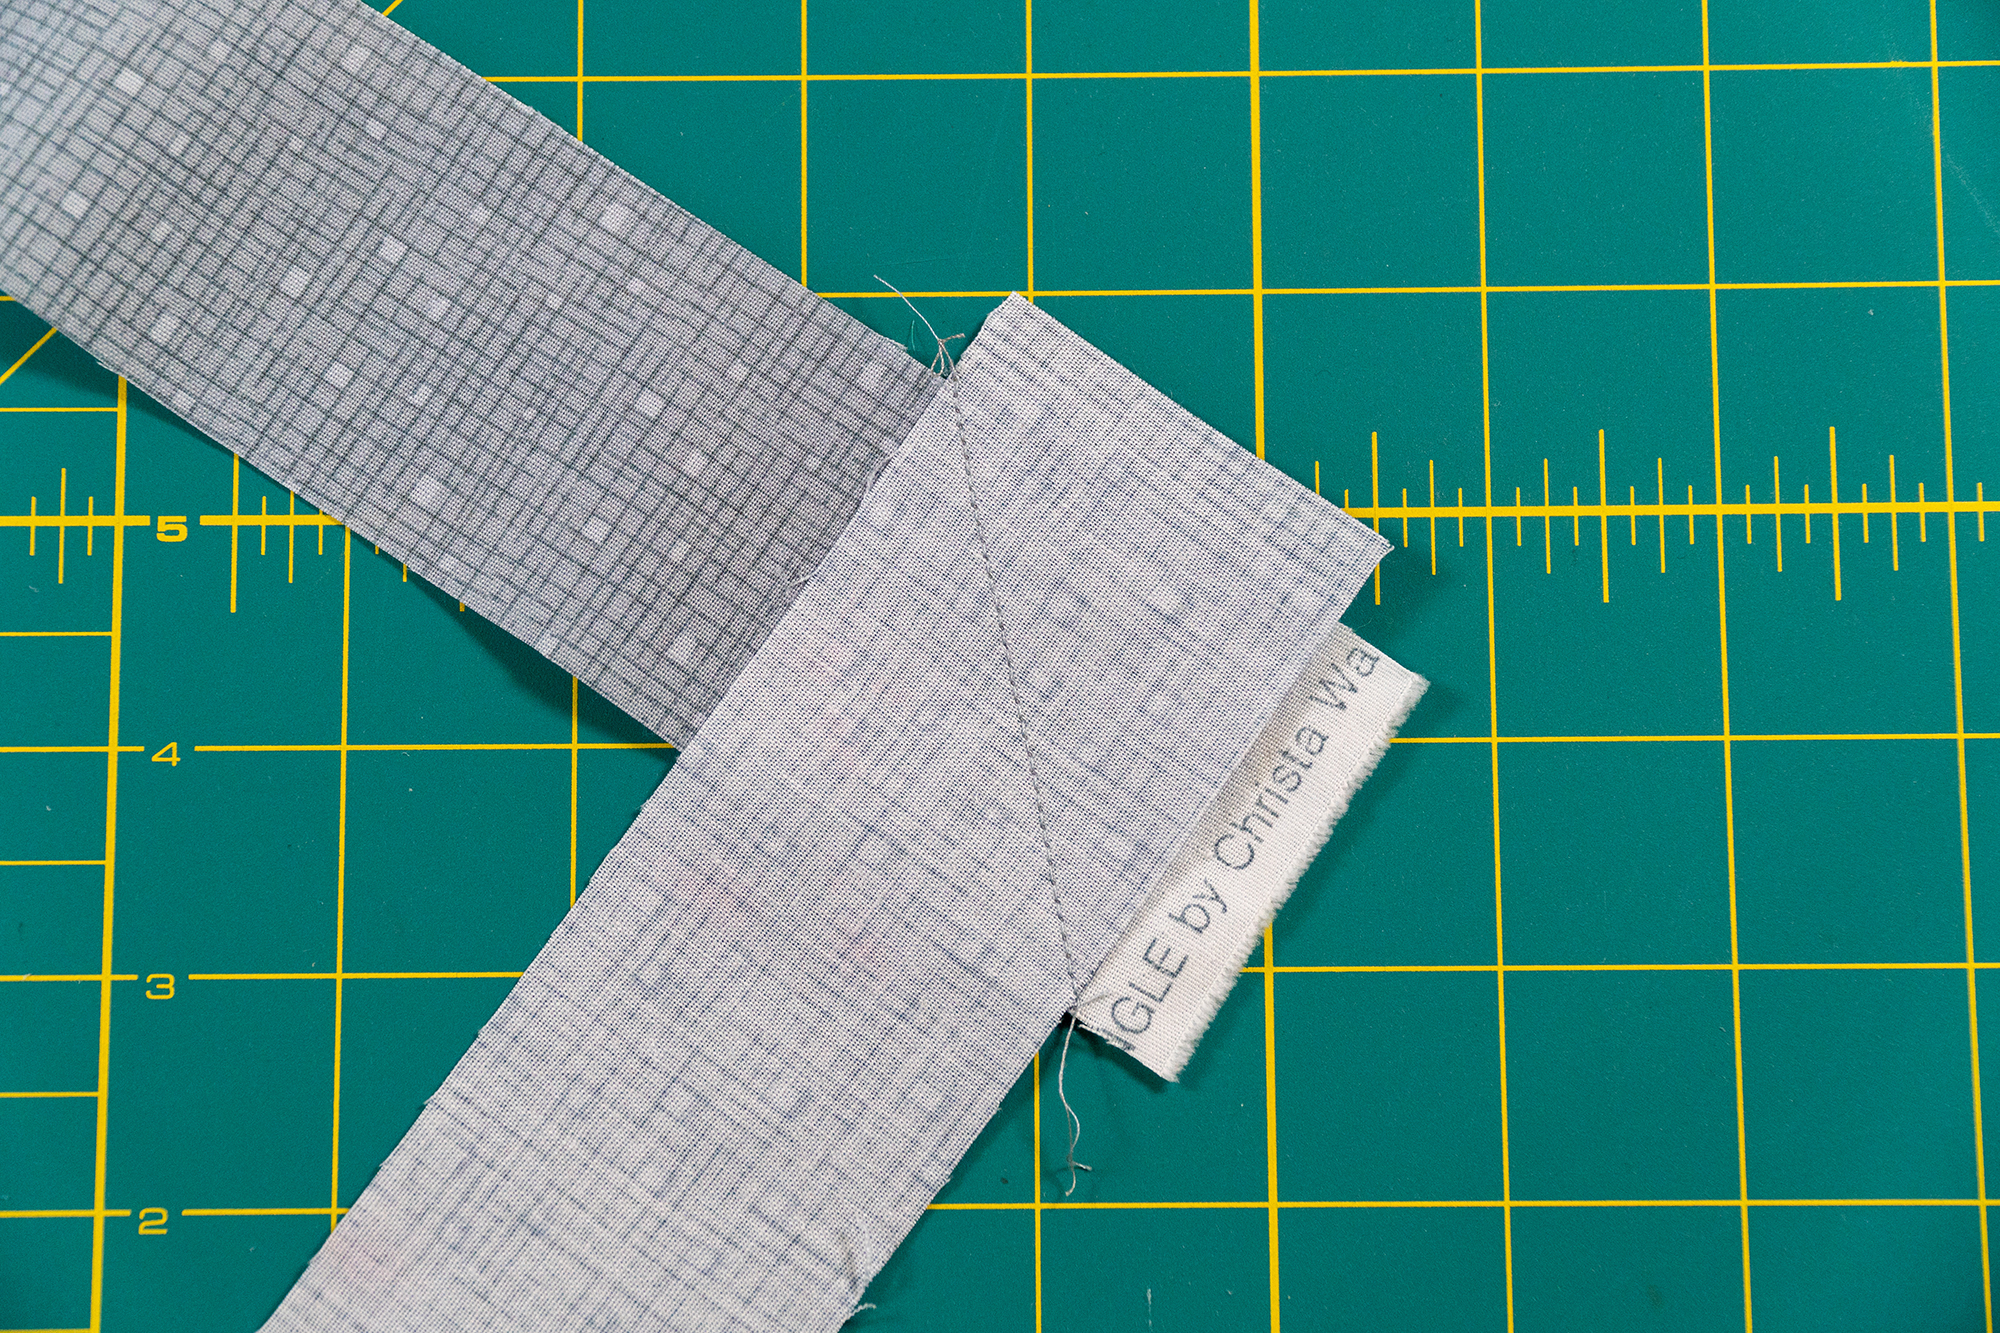
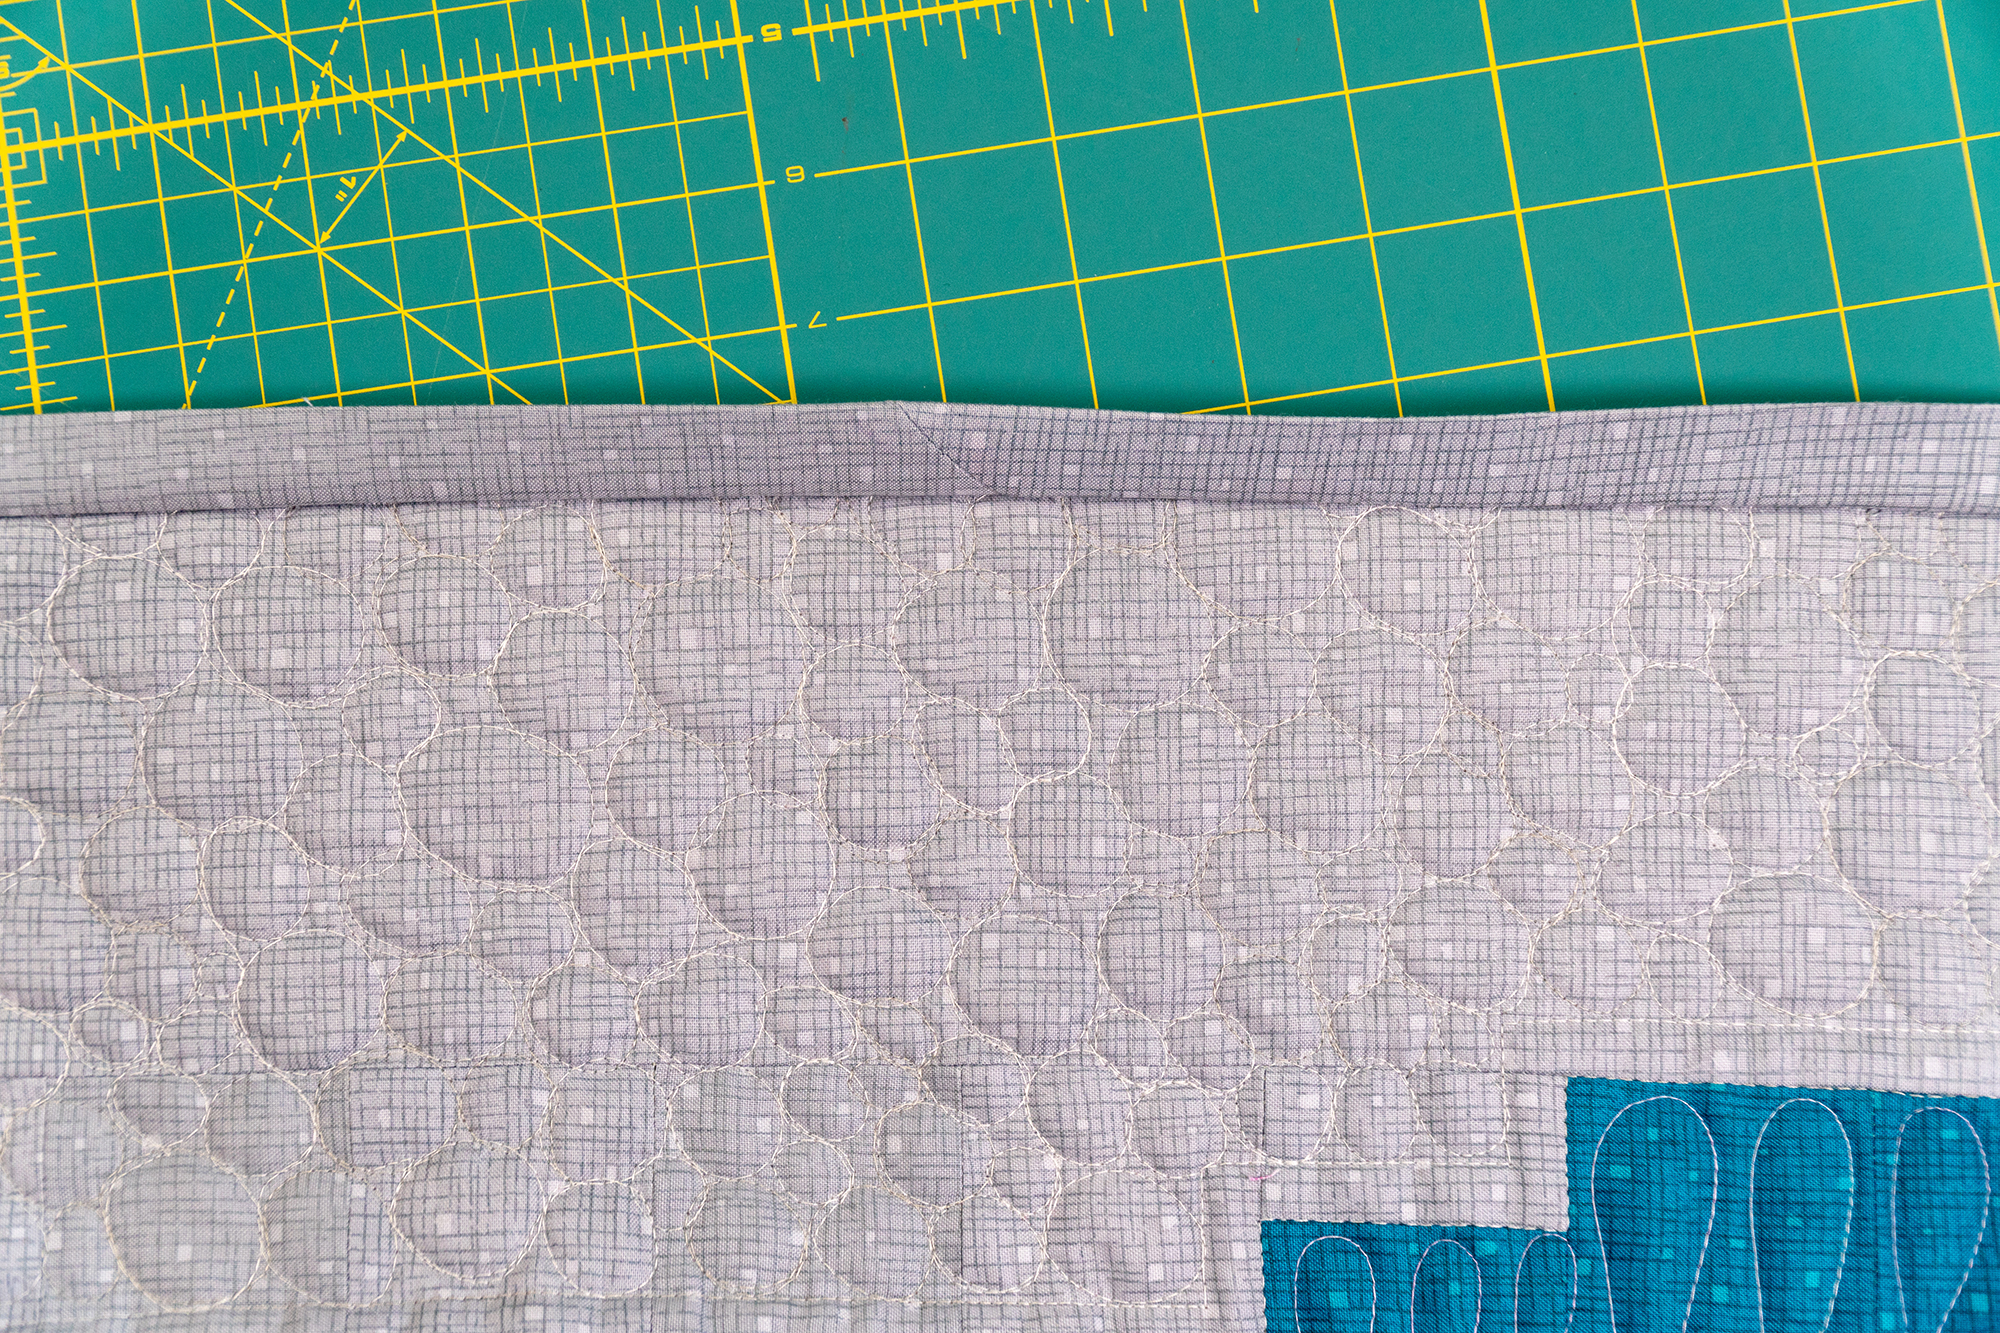
Once all of the seams are sewn, press them open and off the excess with 1/4″ seam allowance. When you’ve done this correctly, the edges are will be straight and smooth, and the binding will lie flat. When sewing, I use a thread color that matches the fabric and sew with a shorter stitch length (2.0 instead of 2.5) so that you won’t see the stitches peeking through the seams.

Trim off one end of the continuous binding strip at a 45 degree angle and press the entire binding in half along the length, wrong sides together. This will be the starting end of the binding. Now you are ready to attach it to the quilt.
Step 3 – Attach the Binding to the Quilt
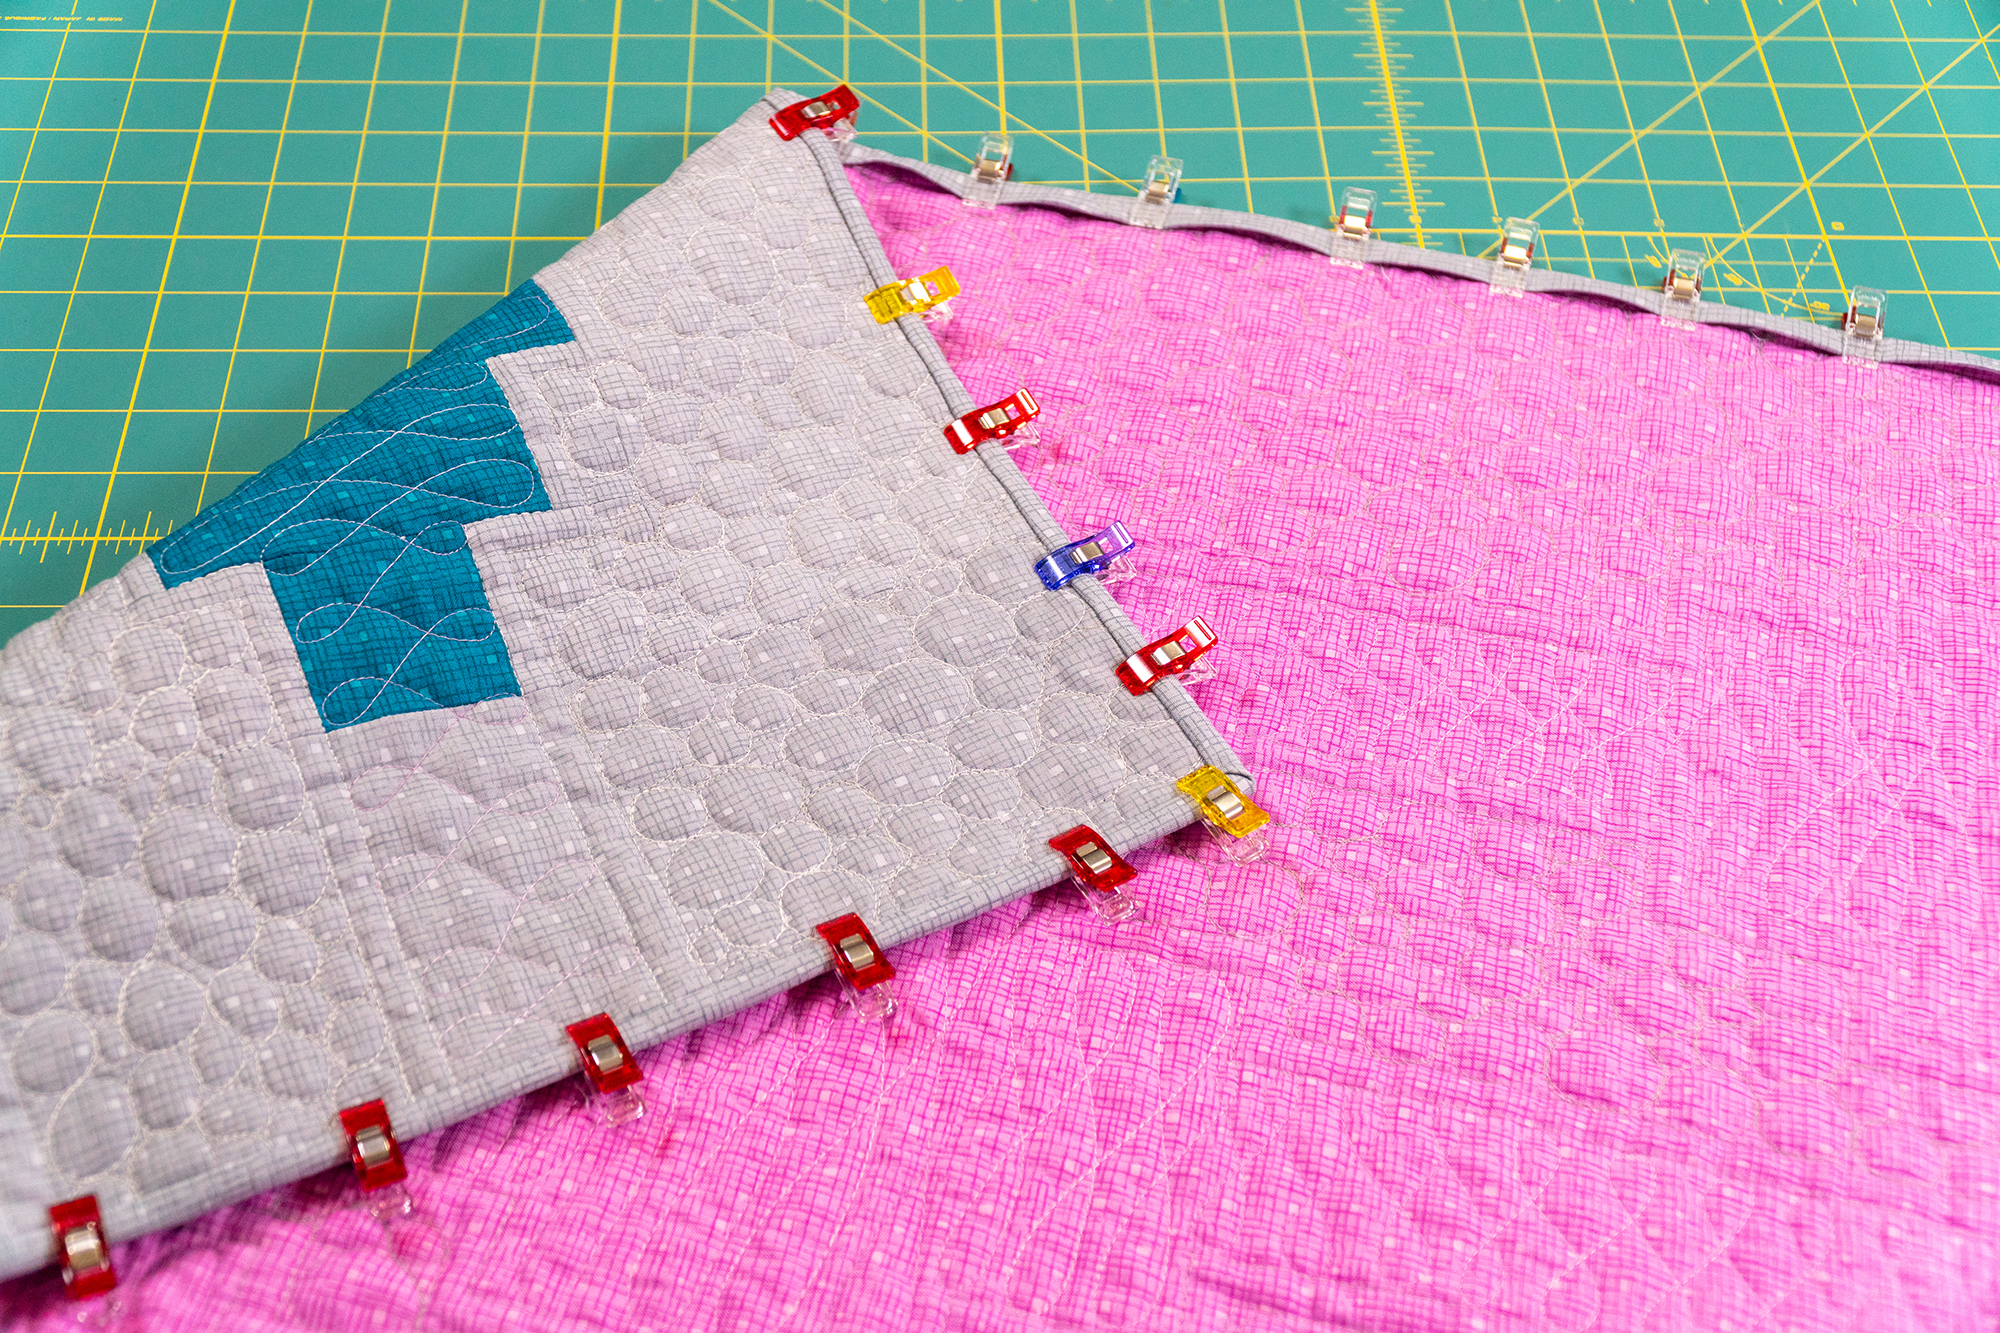
The pin below indicates where I will start sewing, leaving several inches free to join ends later. To ensure that you won’t have any seams ending up in the corner, pin the starting edge somewhere along the side with several inches hanging free. Quickly “walk” the binding around the perimeter of the quilt. If any seams are near the corner, move the starting end a few inches and try again until all seams are away from the corners. The folded edge of the binding should be facing the quilt, with the open ends of the binding flush with the edges of the quilt.

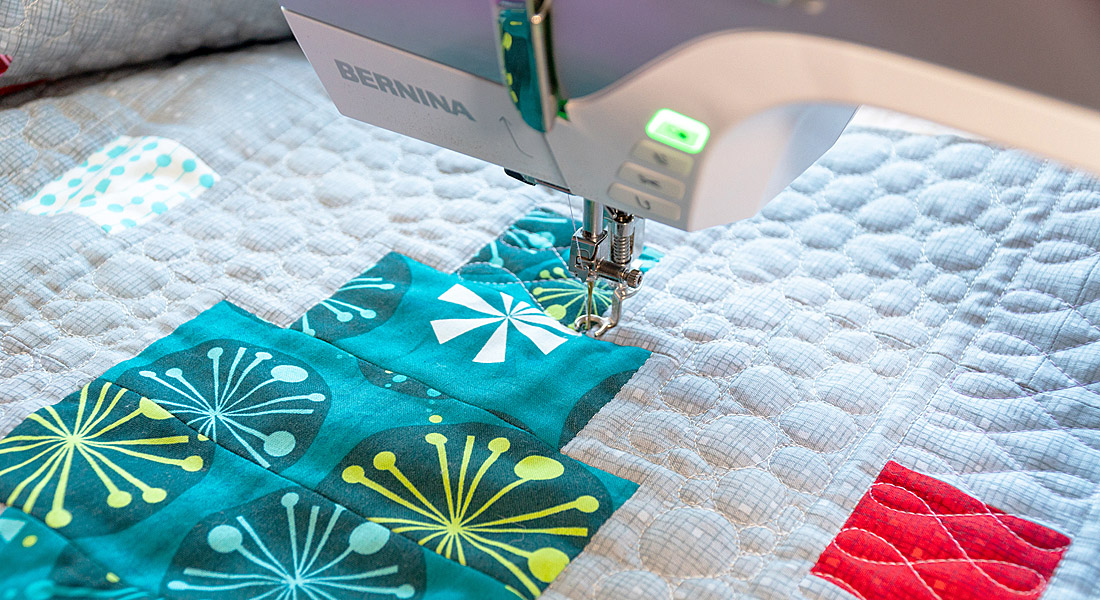
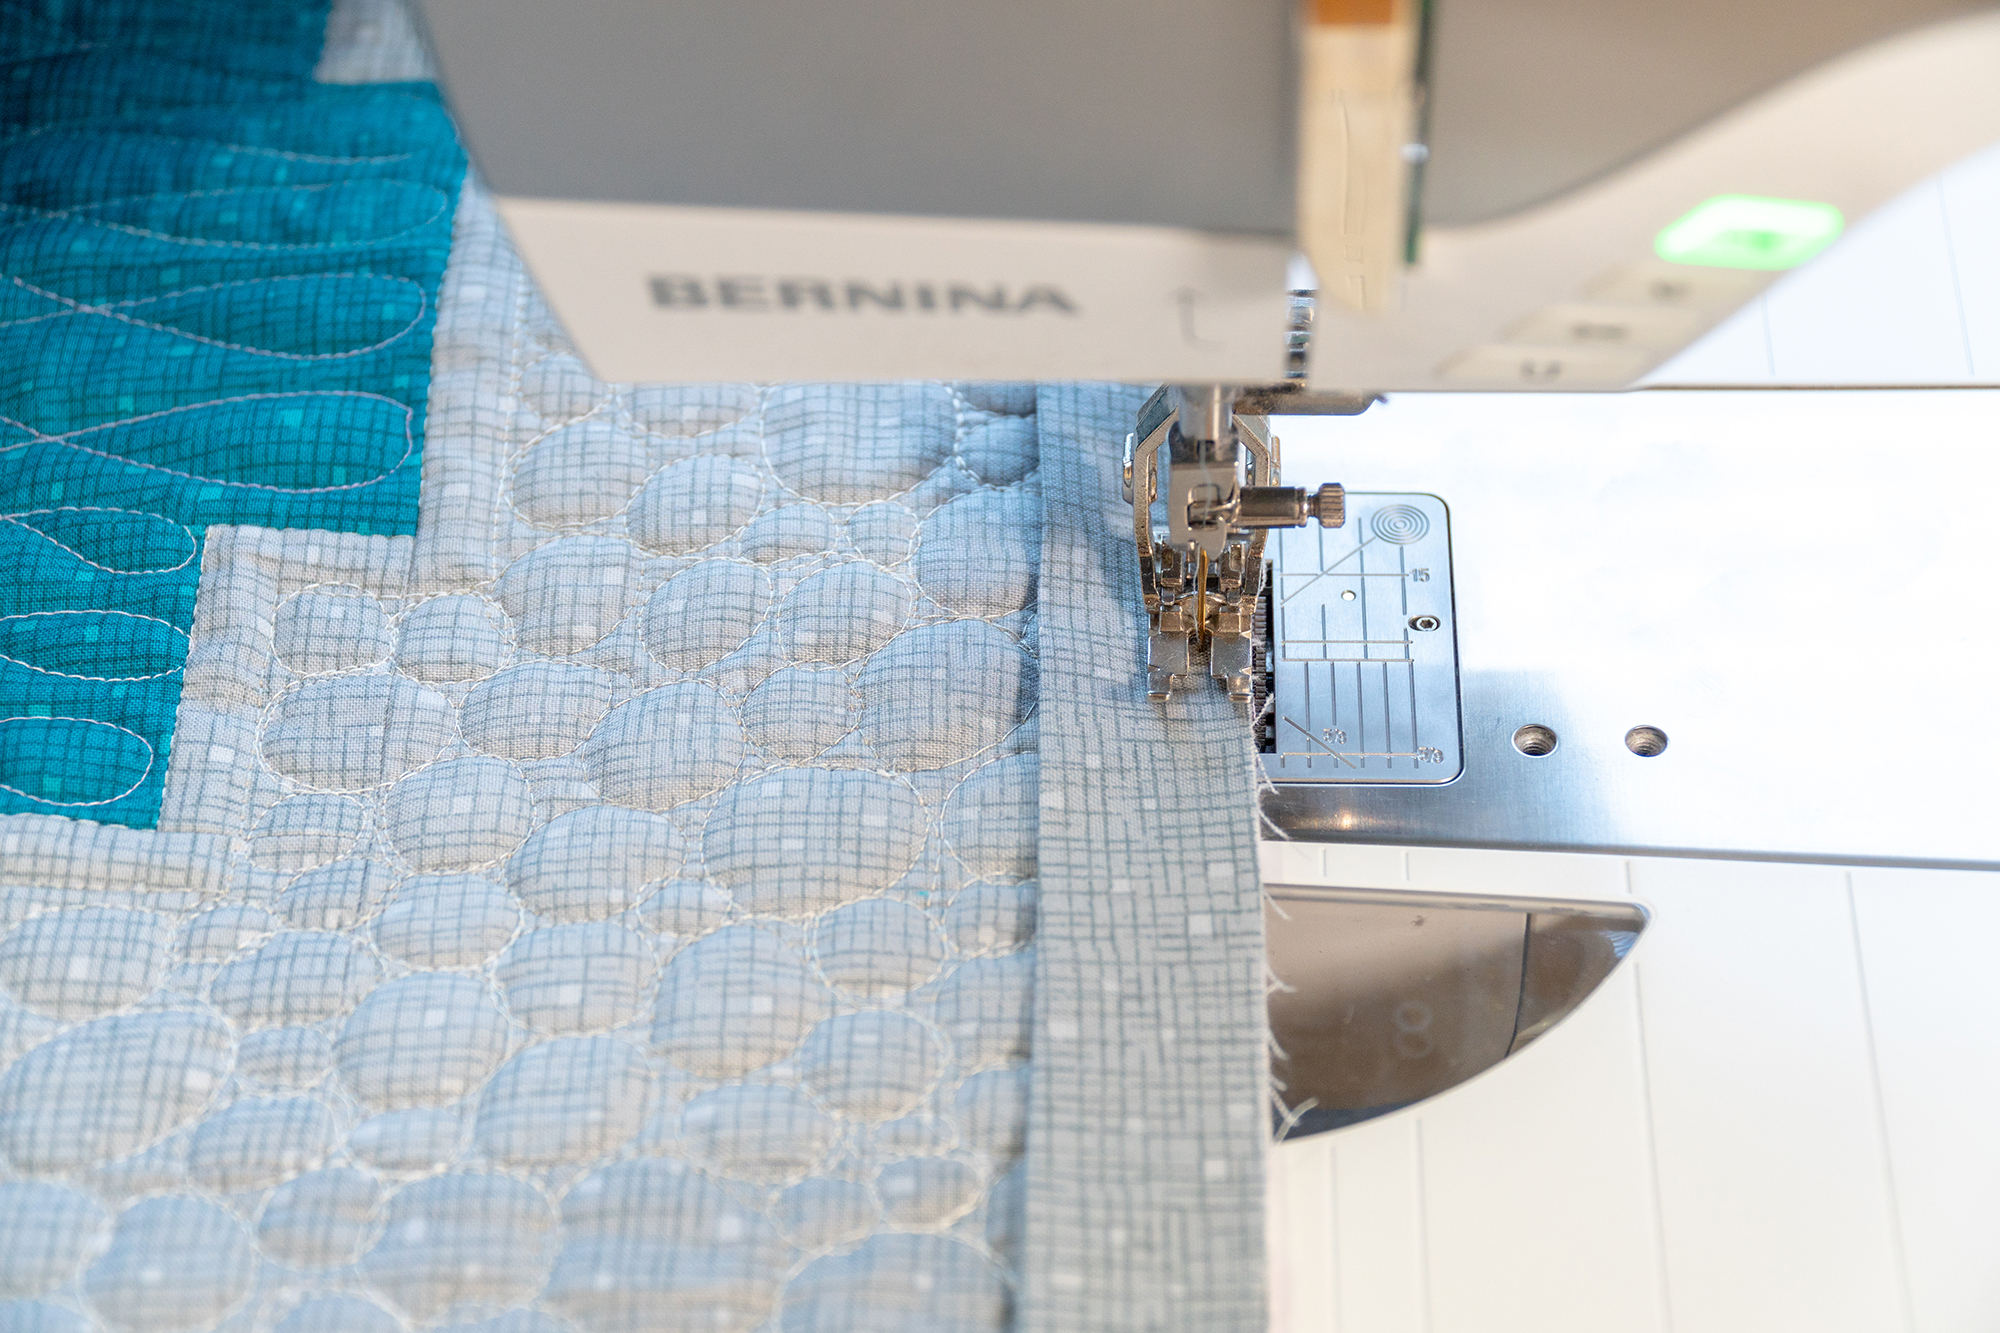
I’m using Patchwork foot #37D to sew the binding onto the quilt. Using the dual feed, this performs the same function as using a walking foot, meaning that the layers will feed through smoothly and evenly with no slipping. I prefer to use Patchwork foot #37D so that I can get a precise 1/4″ seam allowance. If you are sewing wider binding strips, use a slightly wider seam allowance.
Sew until you nearly reach the corner, stop sewing about 1/4″ away from the edge (or the width of your seam allowance), and sew off the corner. This will enable to you create a pretty miter on the front of the quilt.
Remove the quilt from the machine, rotate it and fold up the binding at the corner. Make sure the edge of the binding matches up to the edge of the quilt as shown in the photo below. This will ensure that everything lines up perfectly. Notice that a nice diagonal crease will form across the corner.
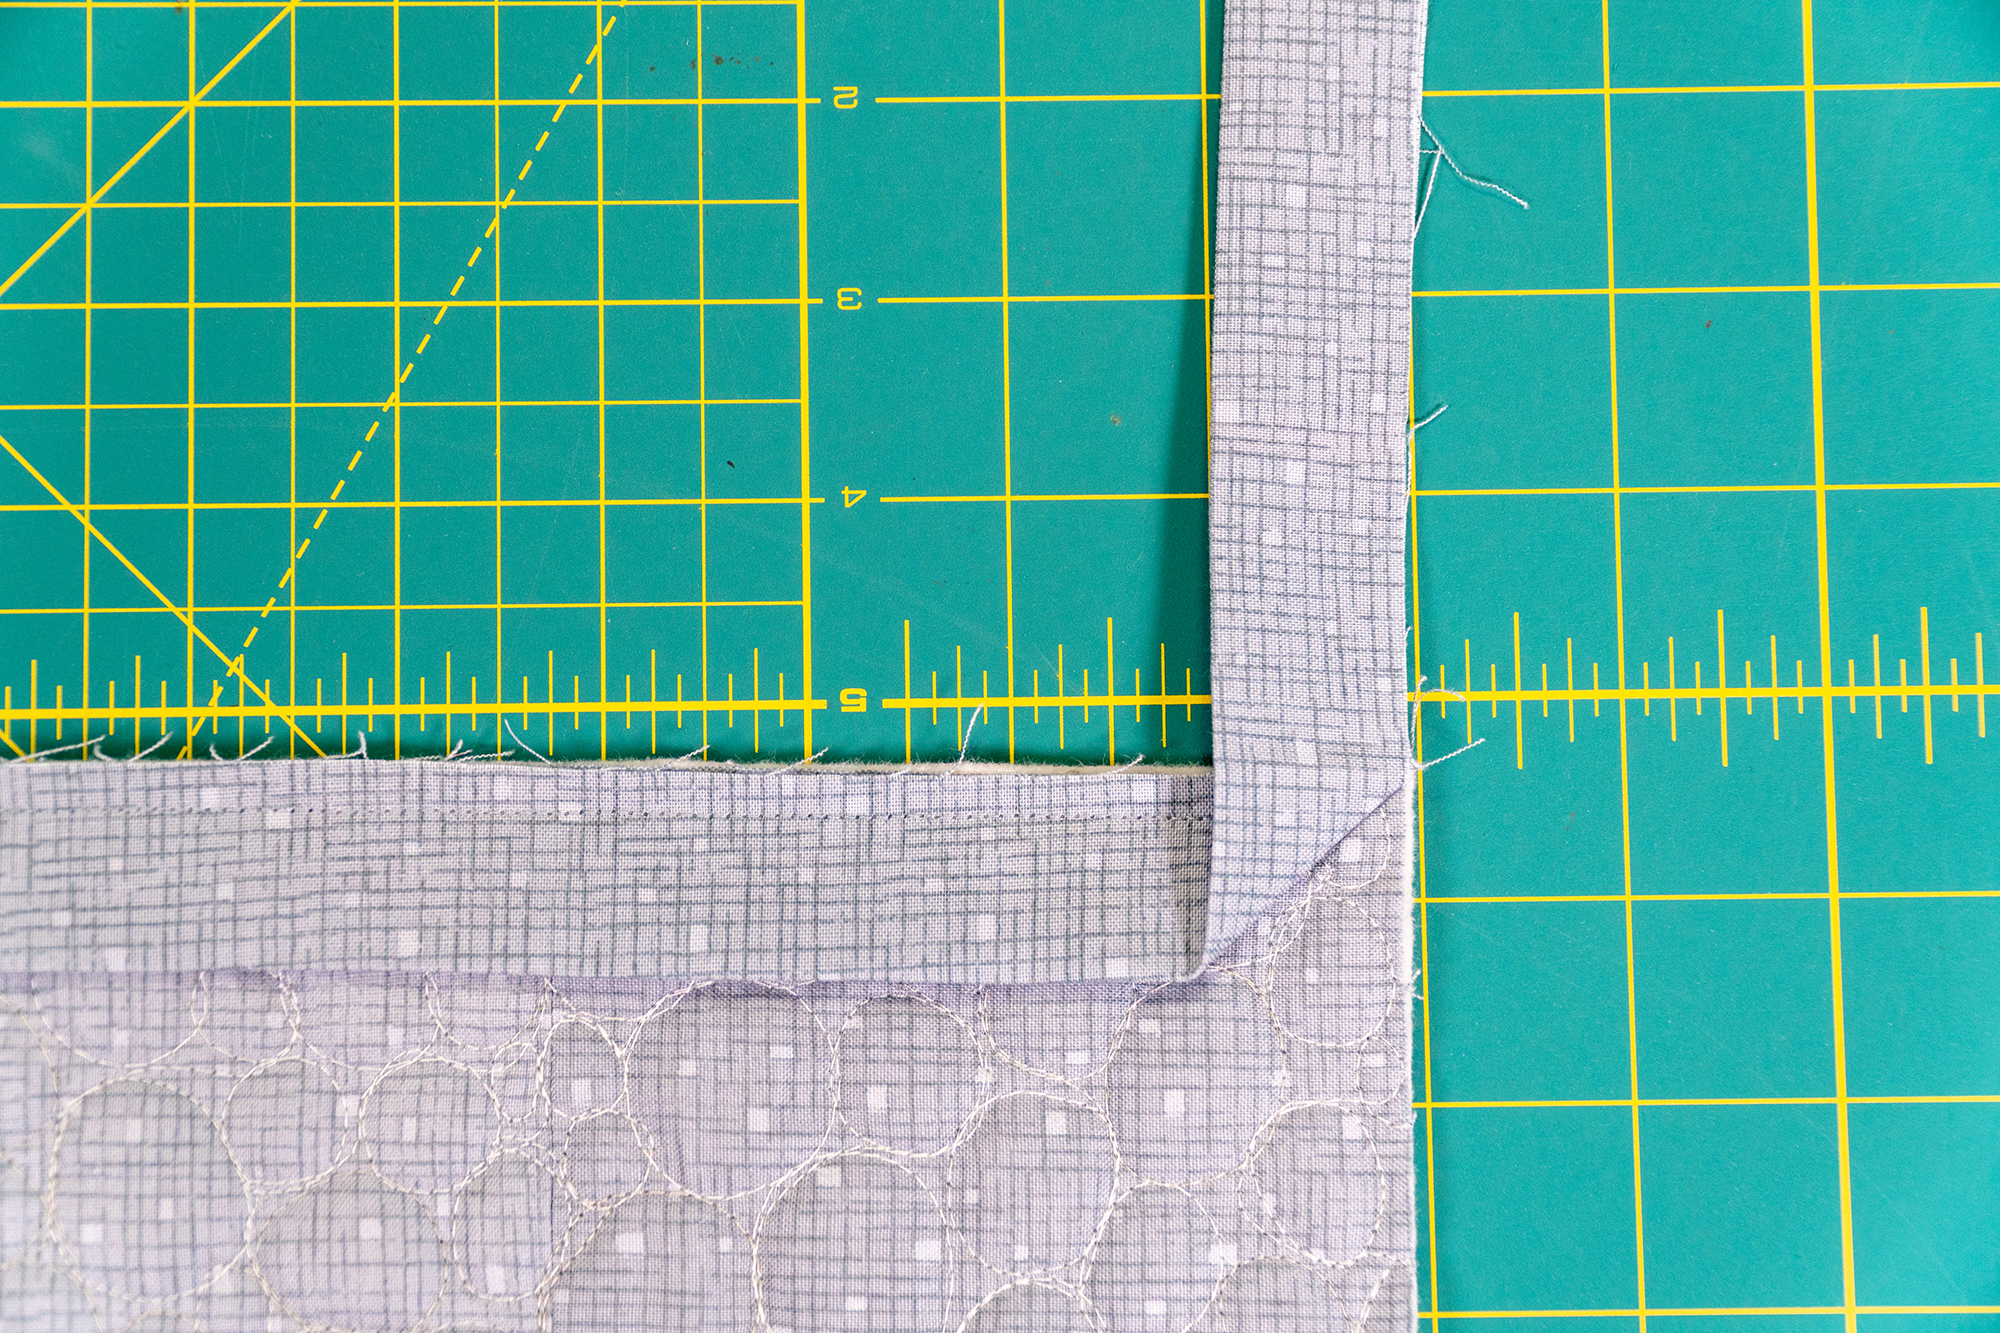
Fold the binding back down upon itself at the corner. (See photo below.) You want the top of the fold to line up exactly with the top of the sewn quilt with the side edges matching, too. This will ensure a nice crisp corner.
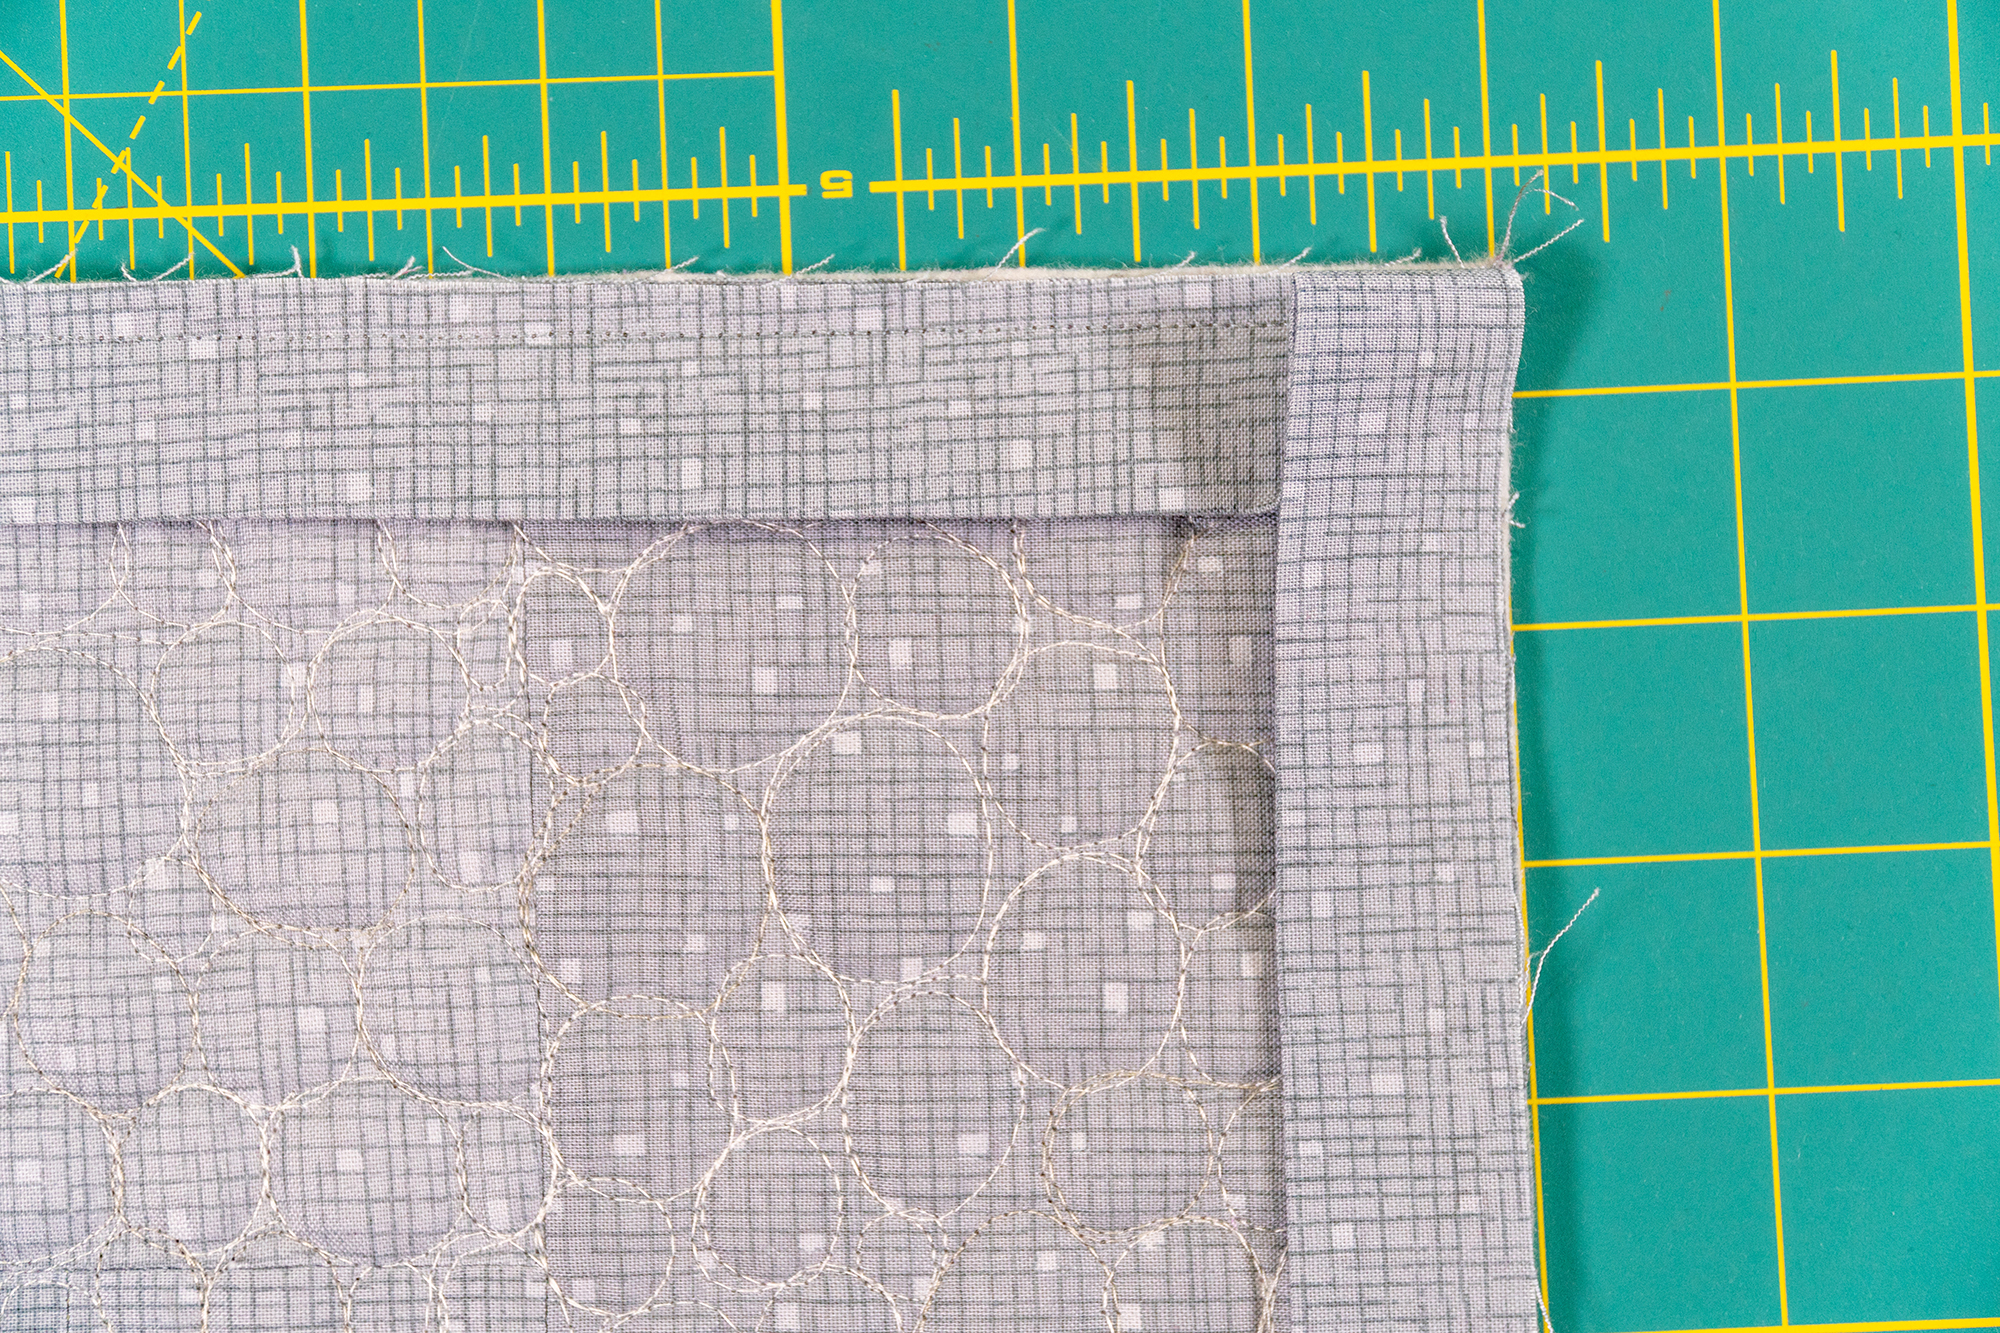
Continue sewing at the corner. You might need to grasp the starting threads because this will be a thick seam in the corners. Sew all 4 sides and corners in the same manner until you reach your starting end. Leave a few inches unsewn and trim the binding end so that it overlaps the start by a few inches. Notice the gap between the two ends below:
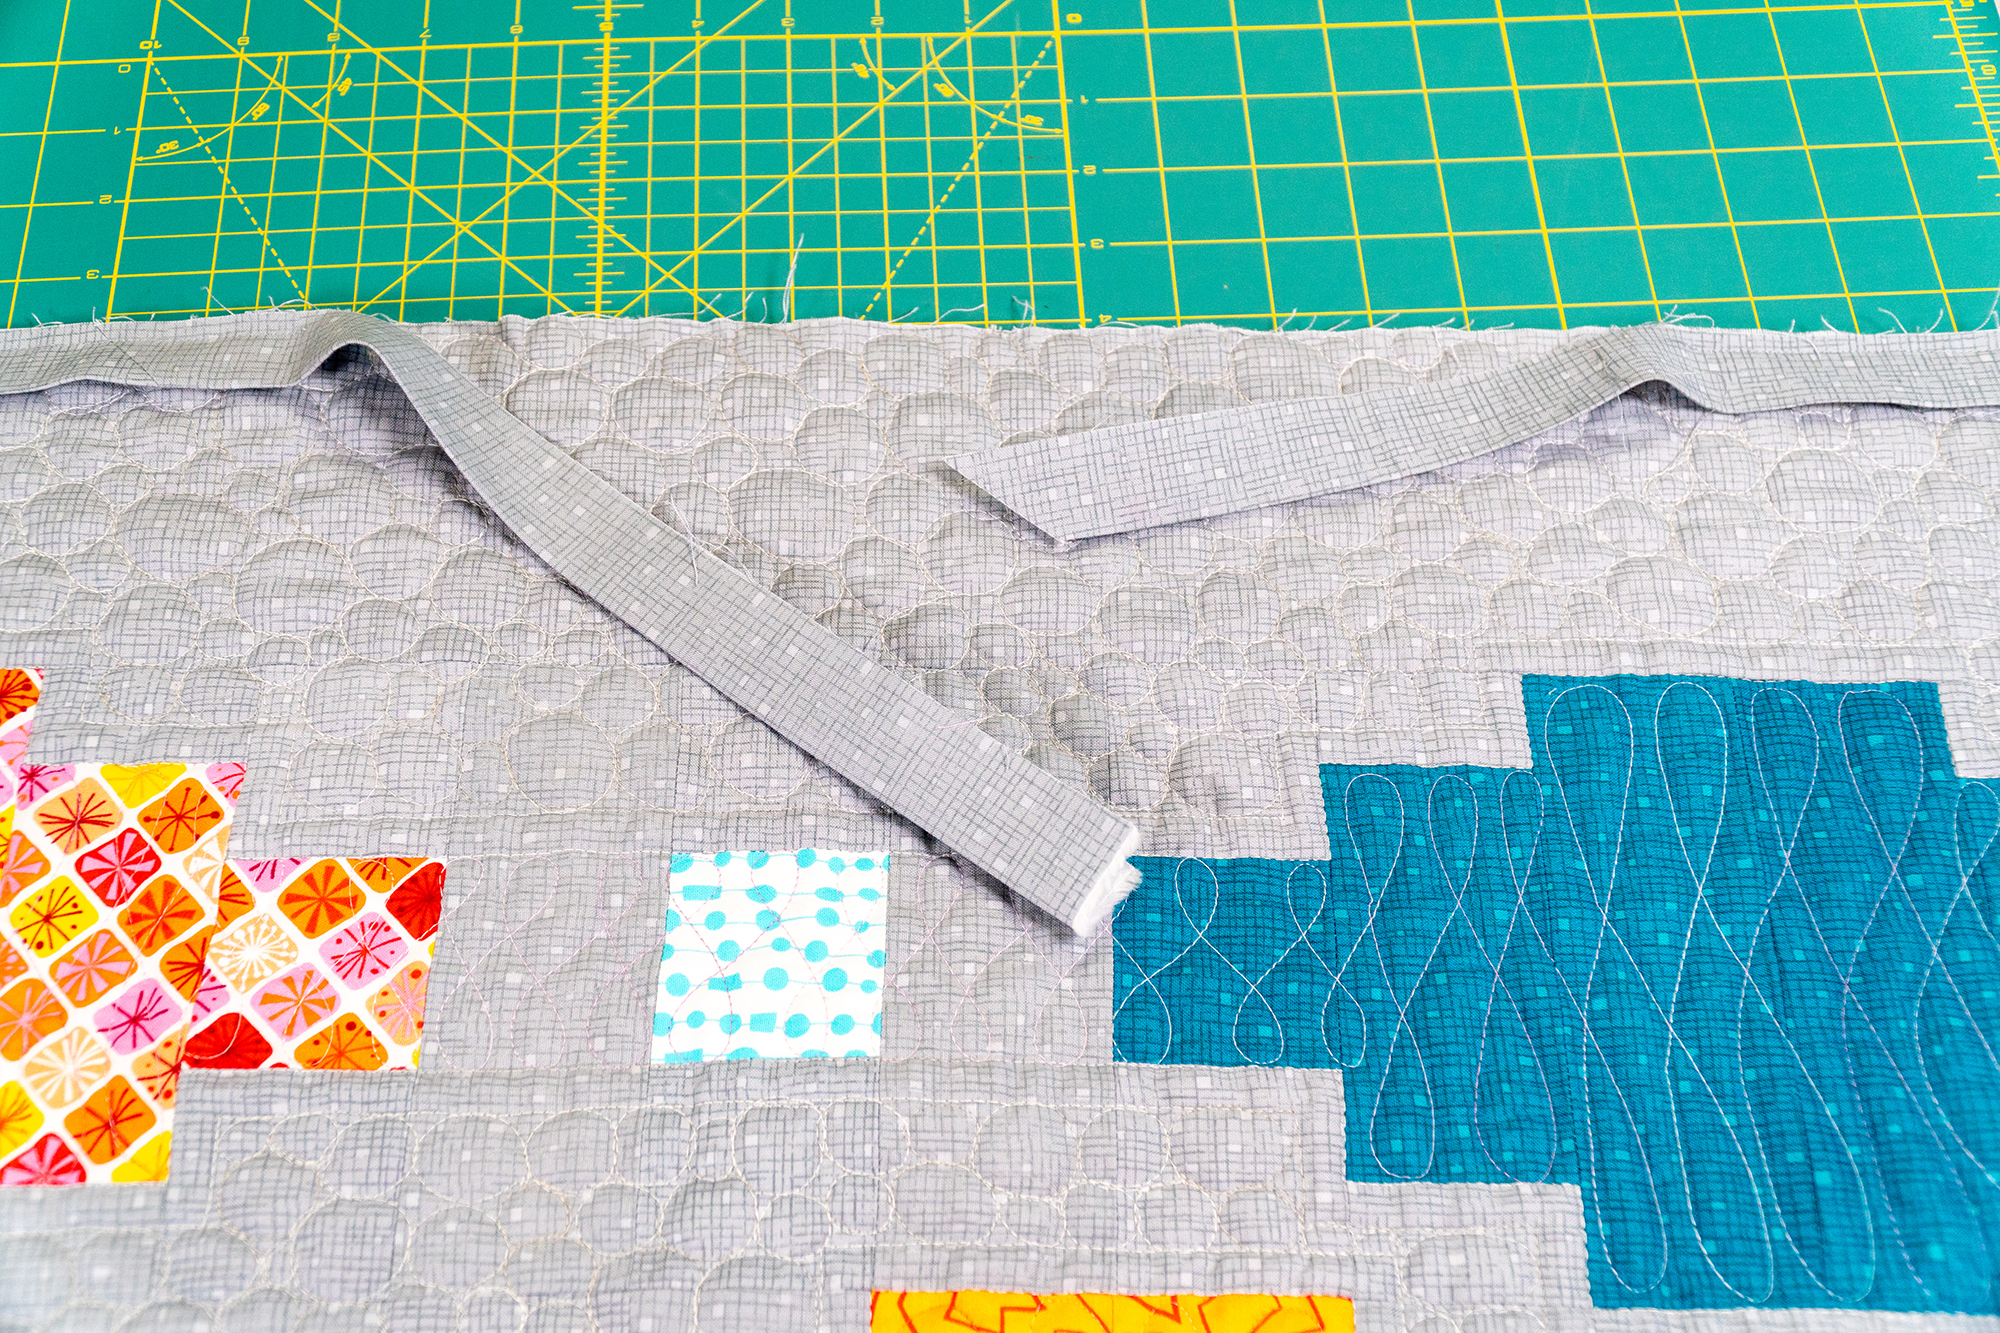
Step 4 – Join the Binding Ends
This method ensures the the binding will be flat and smooth with hidden seams and no lumps or bumps!
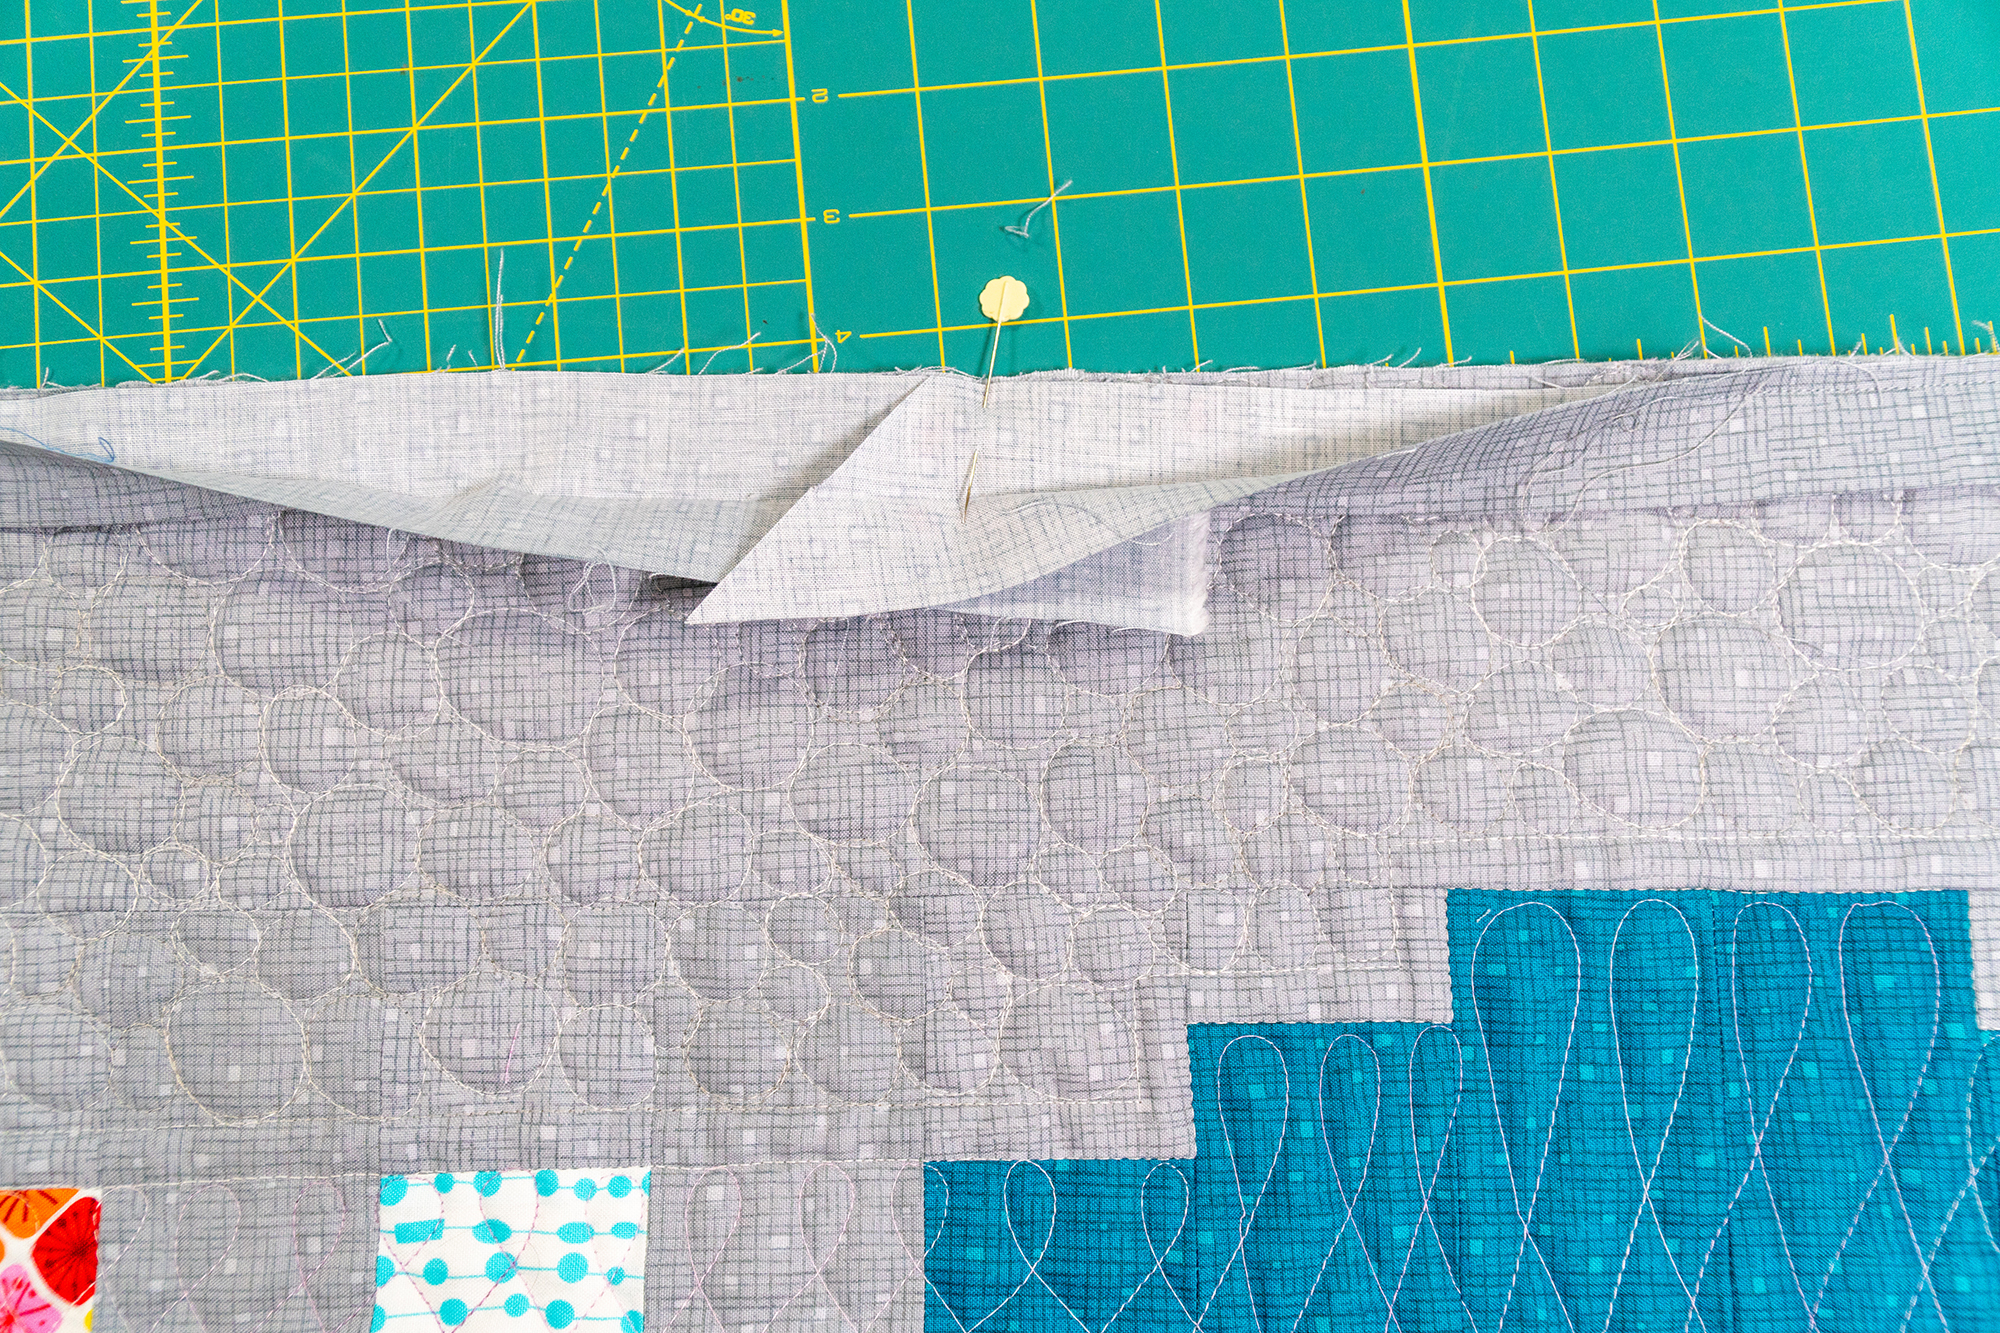
Place the angled beginning binding end inside of the straight end and mark the 45 degree angle where they meet exactly. I like to use a disappearing ink pen to mark the line.
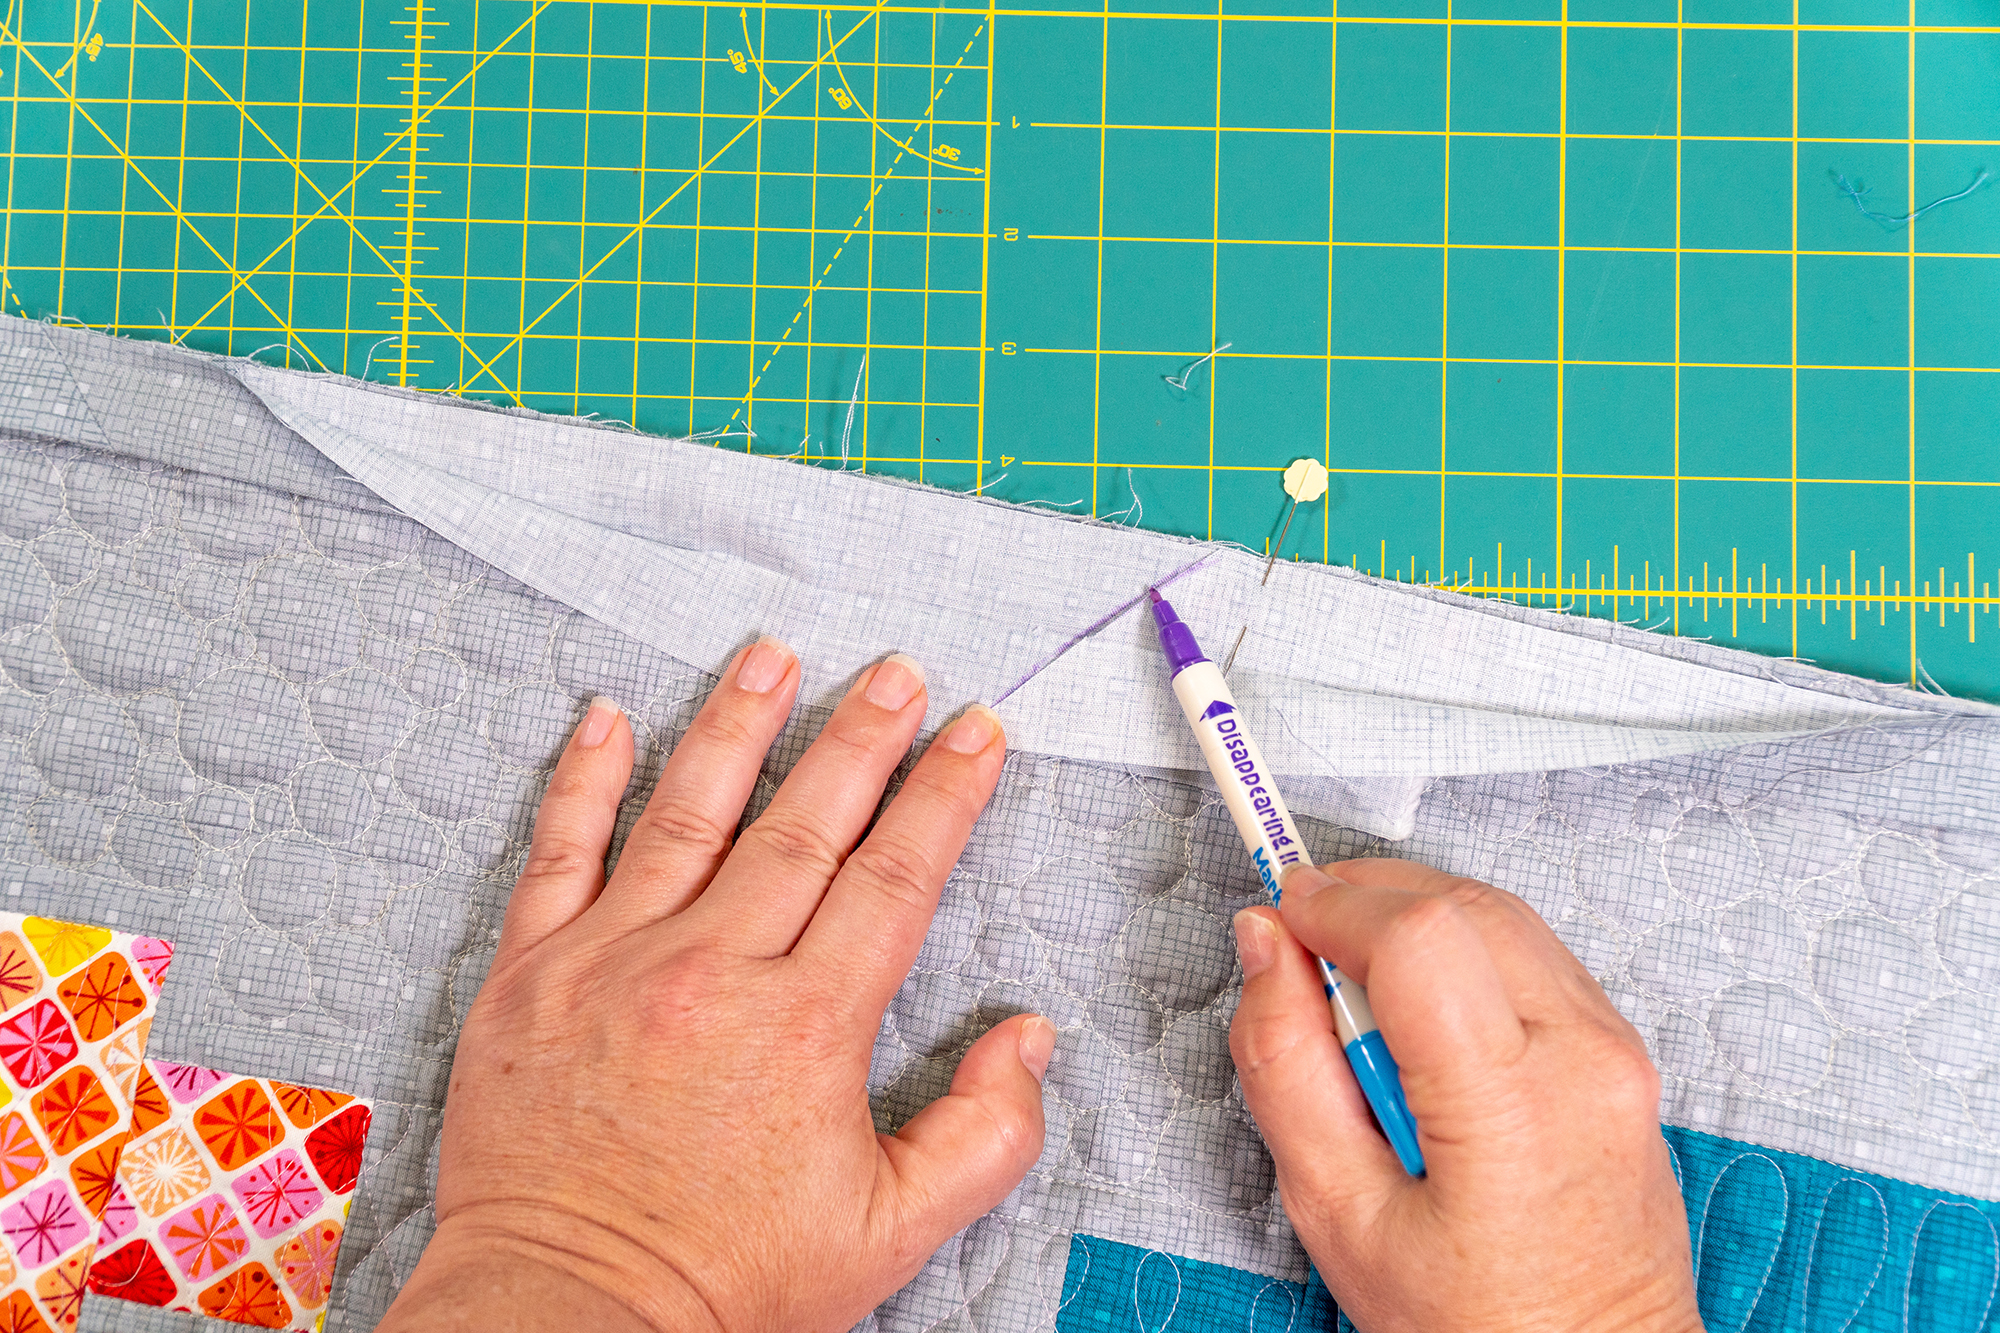
Add 1/2″ to this line for seam allowances and trim off the end at a 45 degree angle, using a small square acrylic ruler with a 45 degree line.
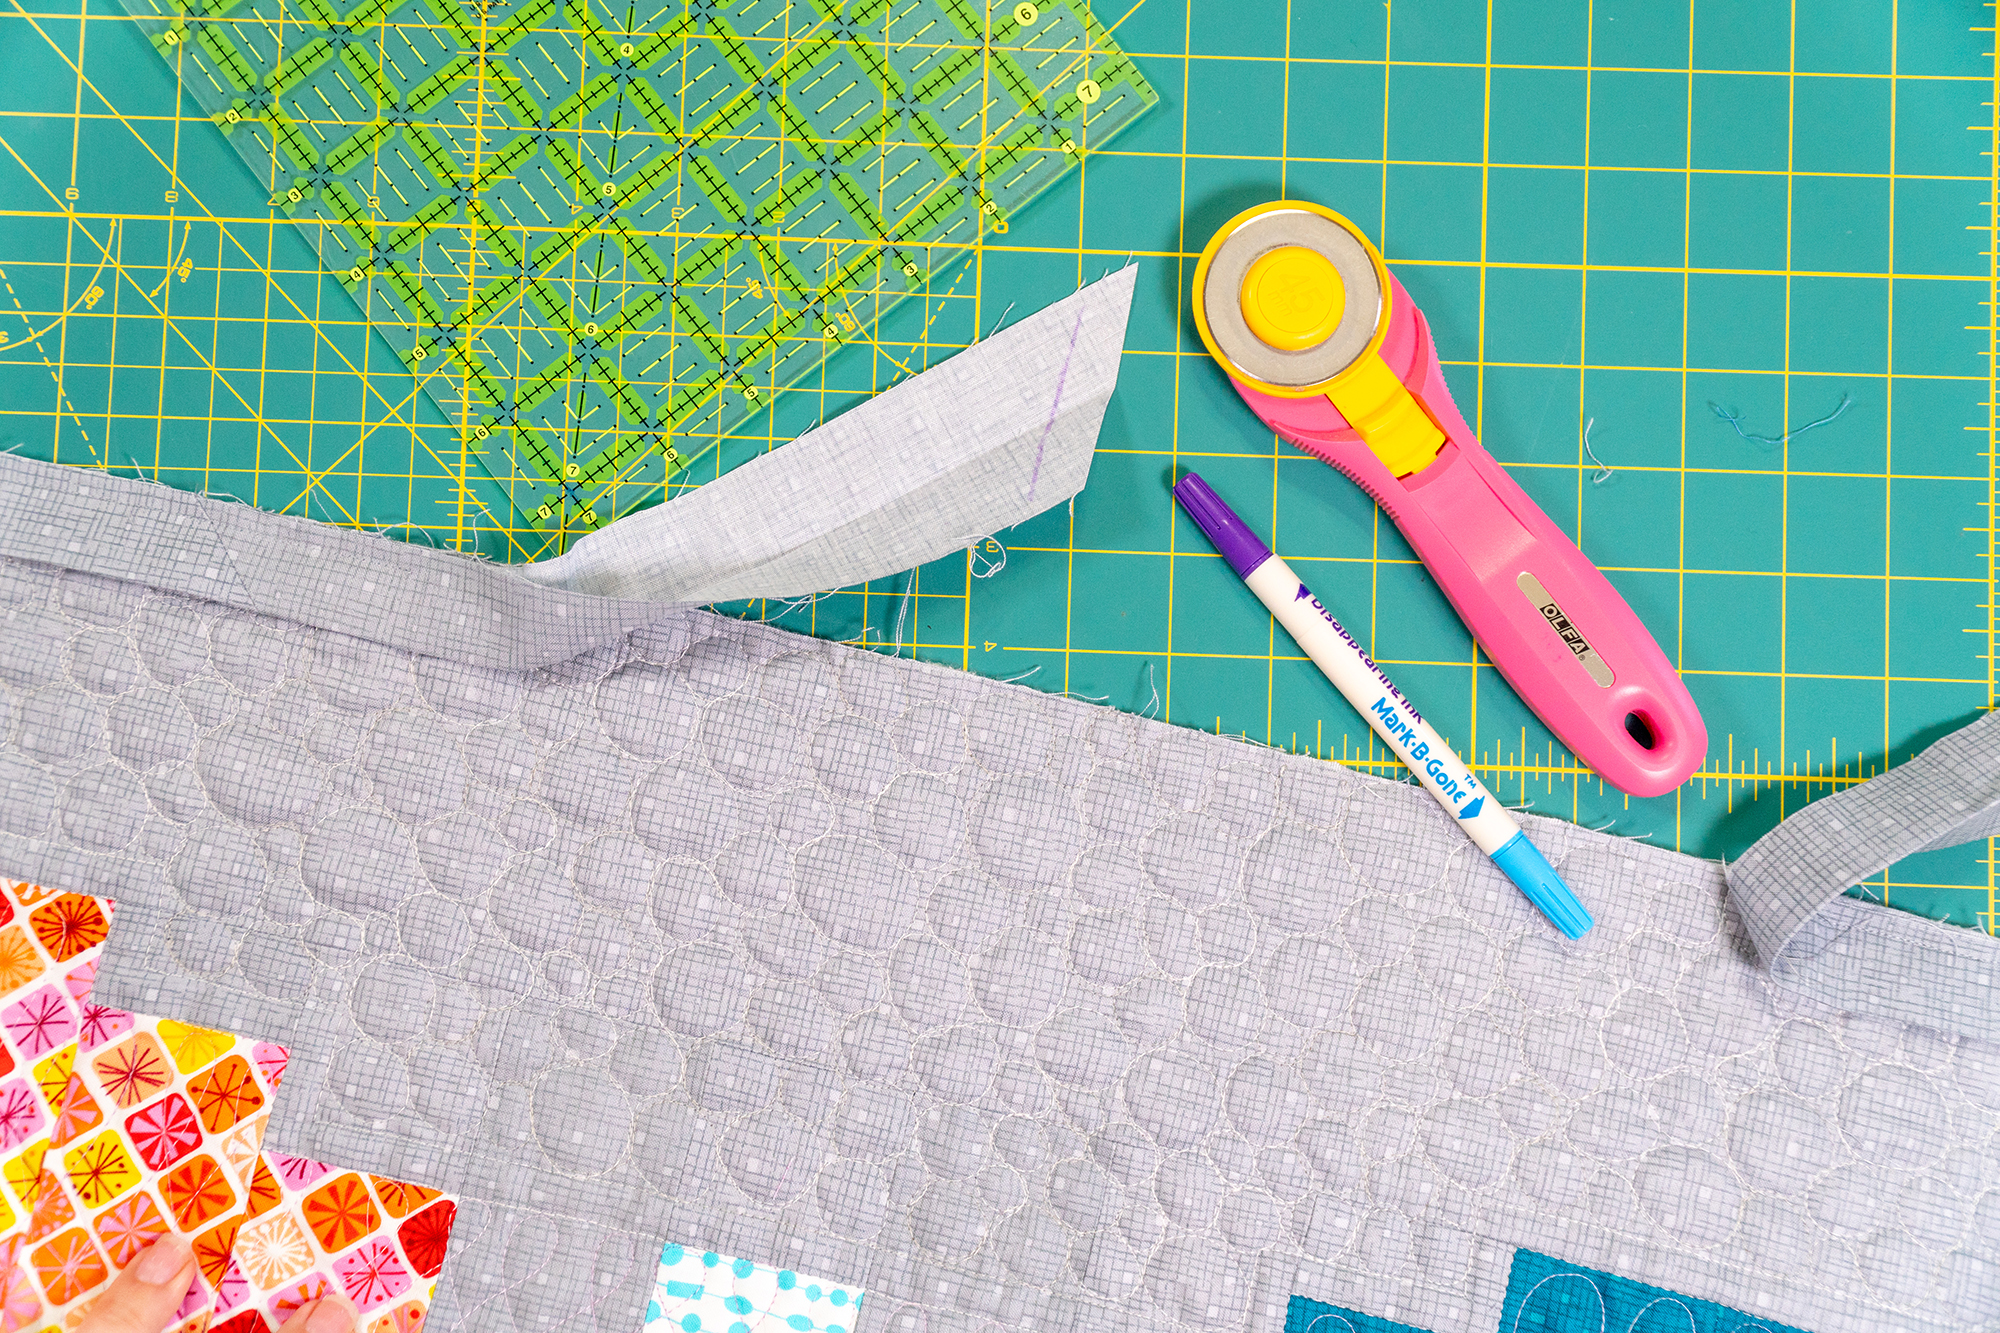
Match up the beginning and ending tails and sew them together with a 1/4″ seam. You’ll notice the triangle tips sticking off at each end. Press the seam open and trim off those tips, also known as “dog ears.”
Finish sewing the binding to the back of the quilt. If desired, flip the binding to the front and press away from the quilt to make it easier to fold over to the back.
Finally, fold the binding to the back of the quilt. Wrap it tightly and secure in place with pins or binding clips. I prefer to sew the binding to the back of the quilt by hand. However, if you prefer to finish by machine, check out my previous quilt along where I use a decorative stitch on my BERNINA 770 QE.
Click here for my machine binding tutorial on We All Sew.
Step 5 – Finish by Hand
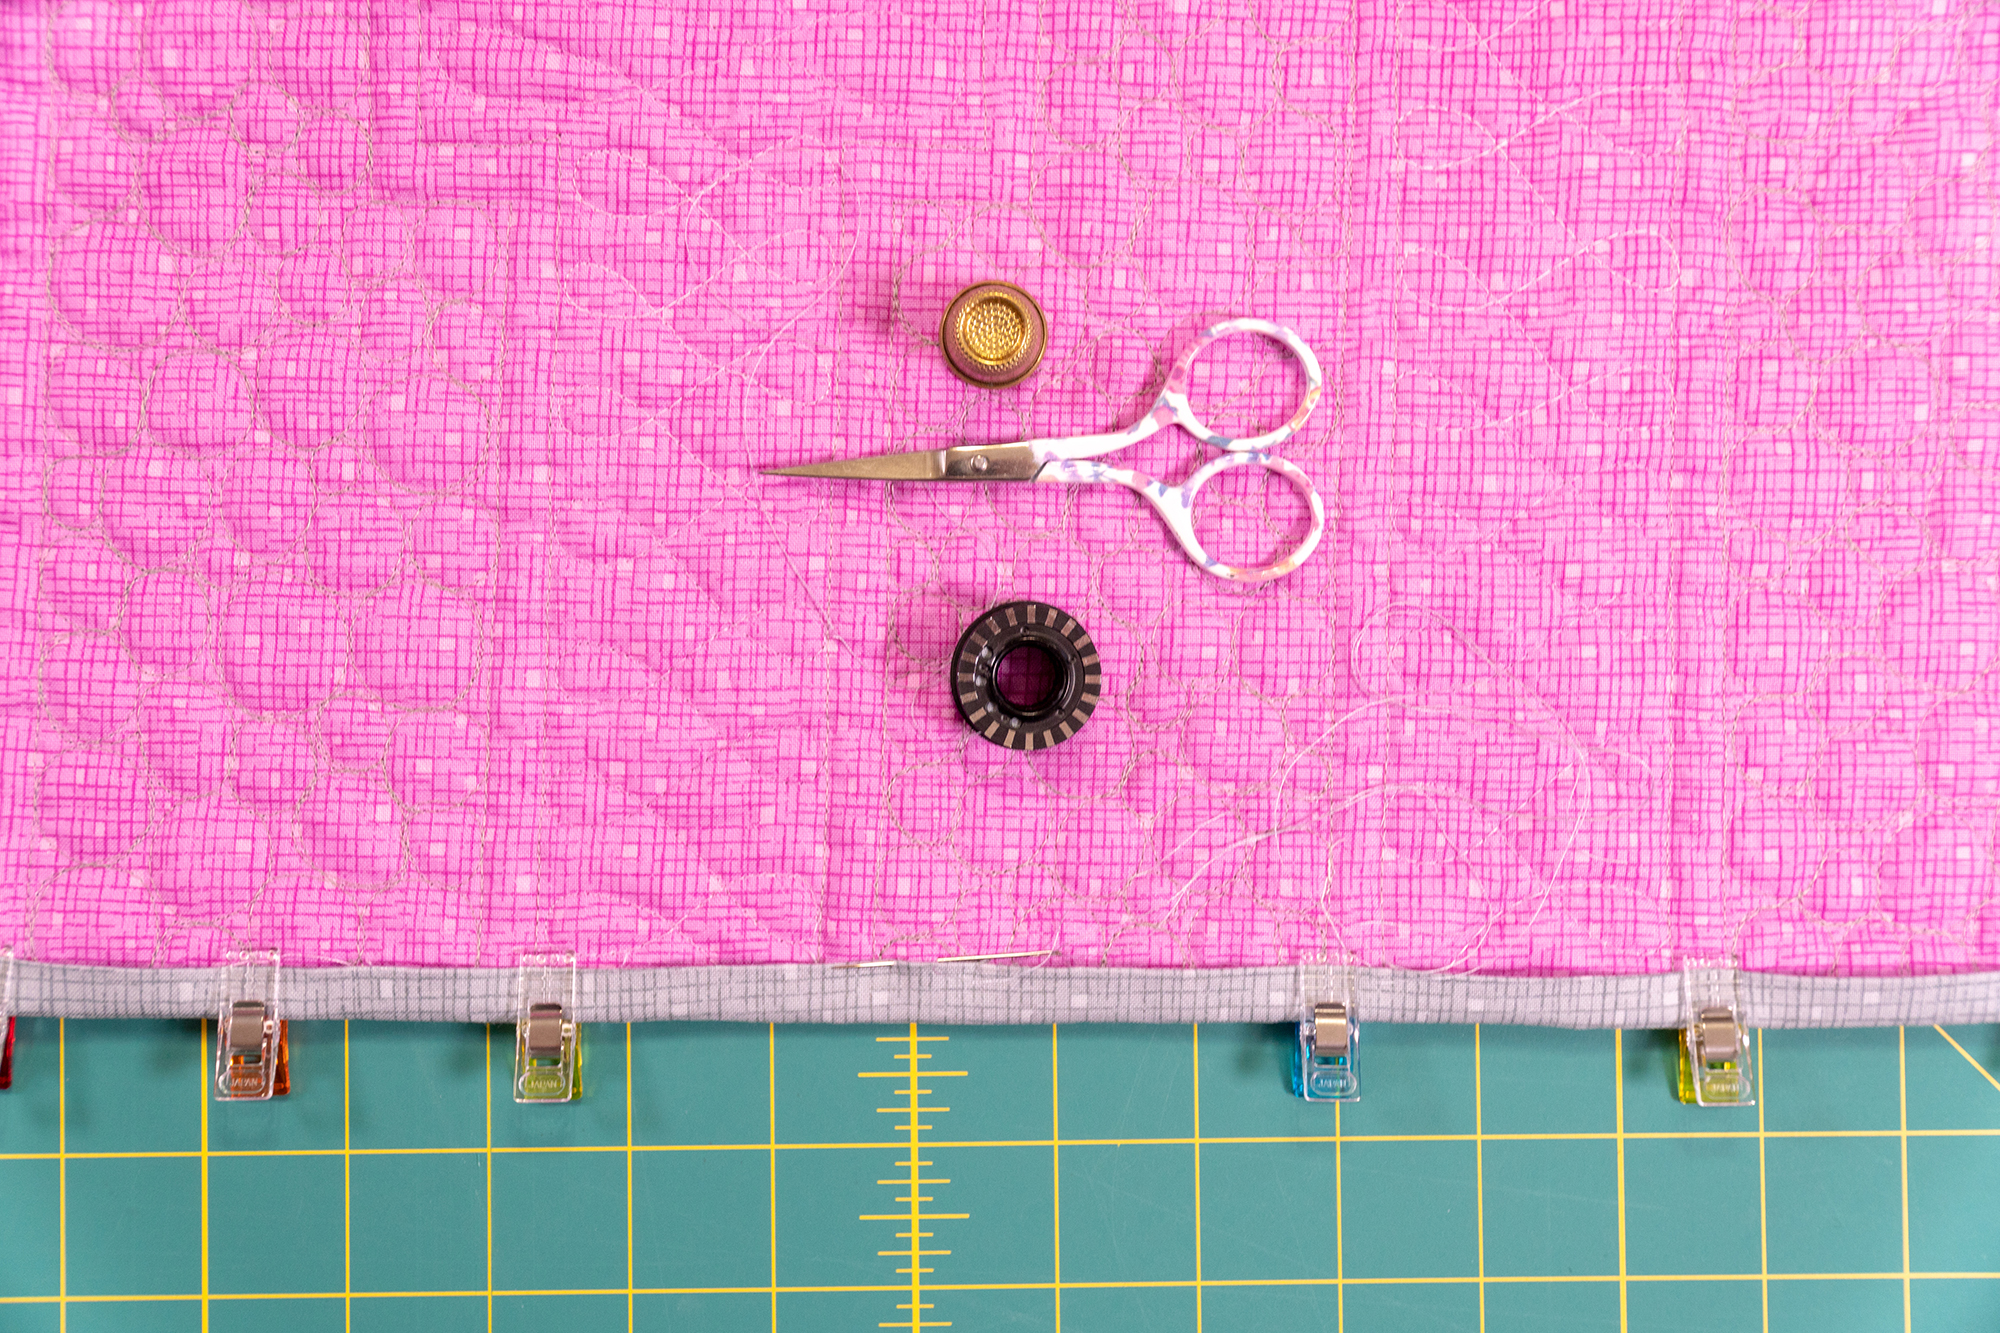
I like to use a blending thread color to secure my binding. I normally use whatever is leftover in the bobbin after I’ve attached the binding to the quilt. Thread a hand sewing needle with about 16″ of thread and knot one end. Slip the needle in between the binding and the backing, taking a little bite of each with each stitch and pushing the needle through with a thimble if needed.
Each time I take a stitch, I enter the needle behind the previous stitch and push it out ahead, spacing the stitches a little less than 1/8″ apart. When you into a good stitching rhythm, it can go pretty fast.
When your thread runs short, knot the end and hide it in the batting. Then cut a new length of thread and begin again. When you get to the corners, fold them over to create a miter. Fold the corners in opposite directions of how they are folded on the front to reduce bulk. Sew up both corners on front and back, slipping the needle through the quilt to get to the other side.
Continue hand sewing until the entire binding has been finished. I prefer to watch a movie or listen to an audio book while I sew to pass the time. The best part is snuggling under the quilt as I sew!
Enjoy your finished quilt!!
Quick Links to Previous Beaded Lanterns Quilt Along Posts
Week 1: Supply List
Week 2: Making the Blocks
Week 3: Sewing the Quilt Top
Week 4: Backing and Basting
Week 5: Walking Foot Quilting
Week 6: Free-Motion Quilting
Beaded Lanterns Quilt Pattern (free)
List of US shops that carry Fandangle fabric
More free patterns from Christa Quilts
Christa Quilts Blog