Beaded Lanterns Quilt Along Week 2 – Making the Blocks
Welcome to week 2 of the Beaded Lanterns Quilt Along! If you are just joining us, click here for last week’s post with the quilt along schedule and supply list.
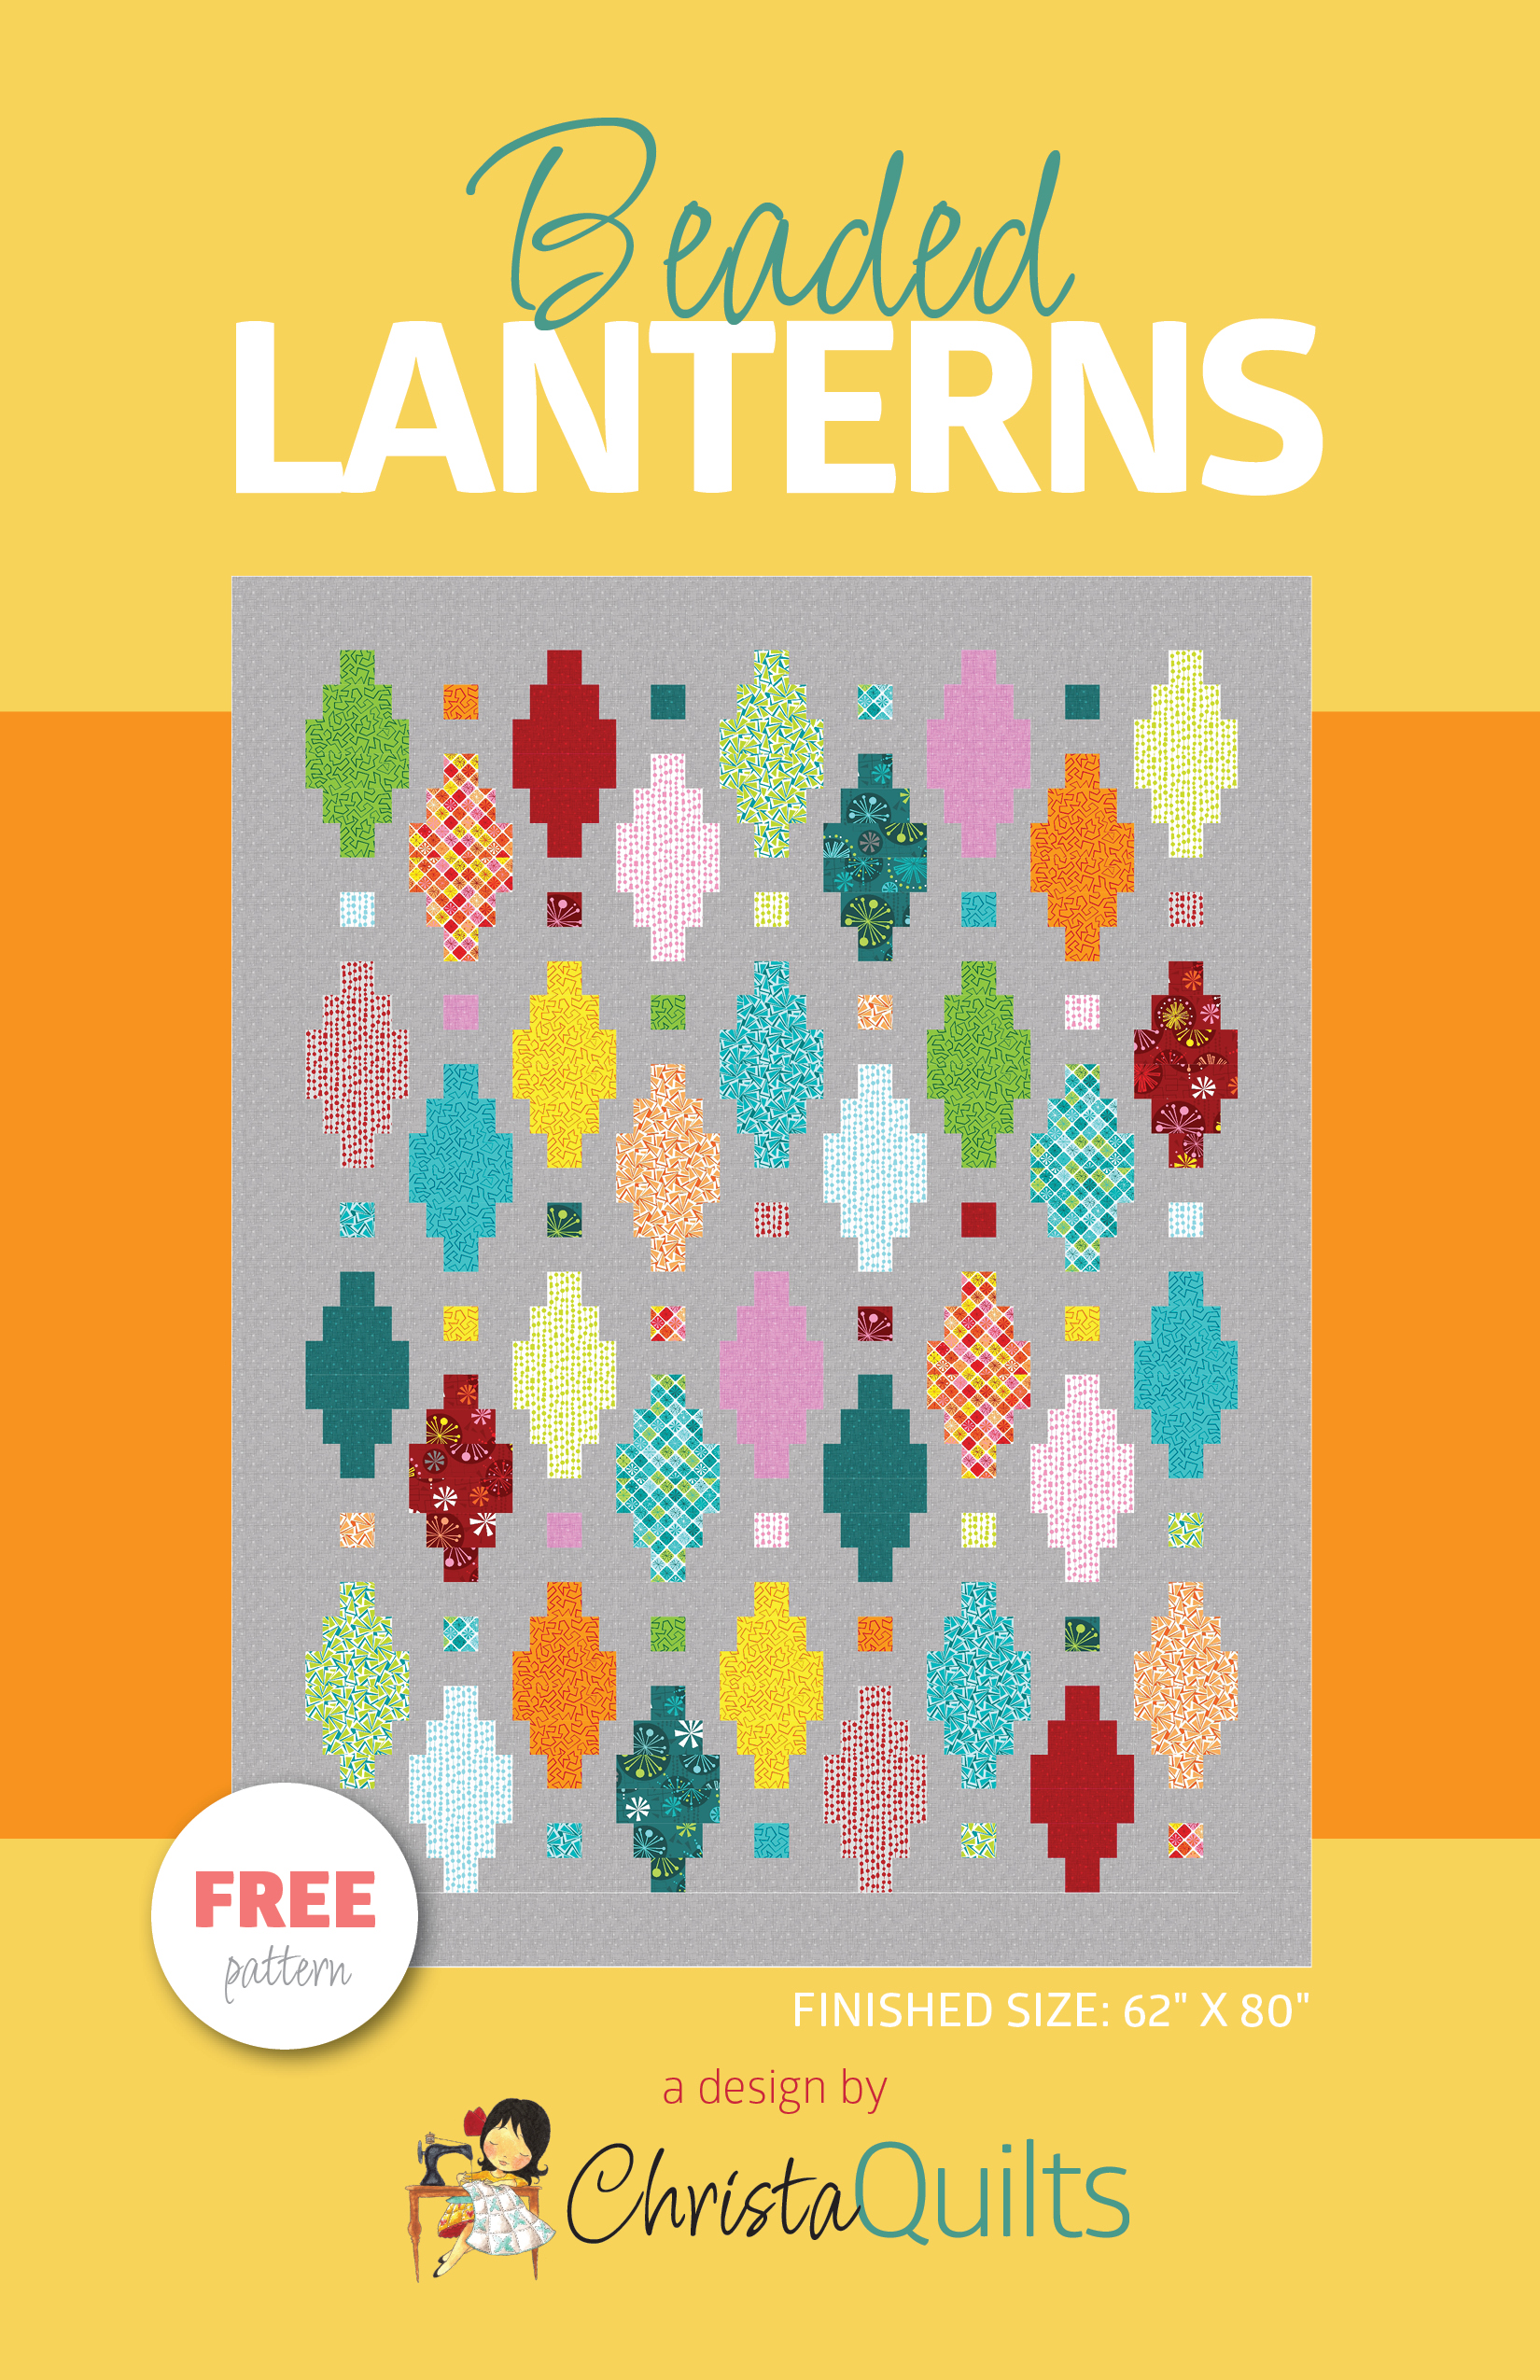
Click here to get the free Beaded Lanterns Quilt pattern.
Before we get started, here’s a little bit about this quilt:
Finished Size: 62″ x 80″
Finished Block Sizes: 6″ x 6″ and 6″ x 12″
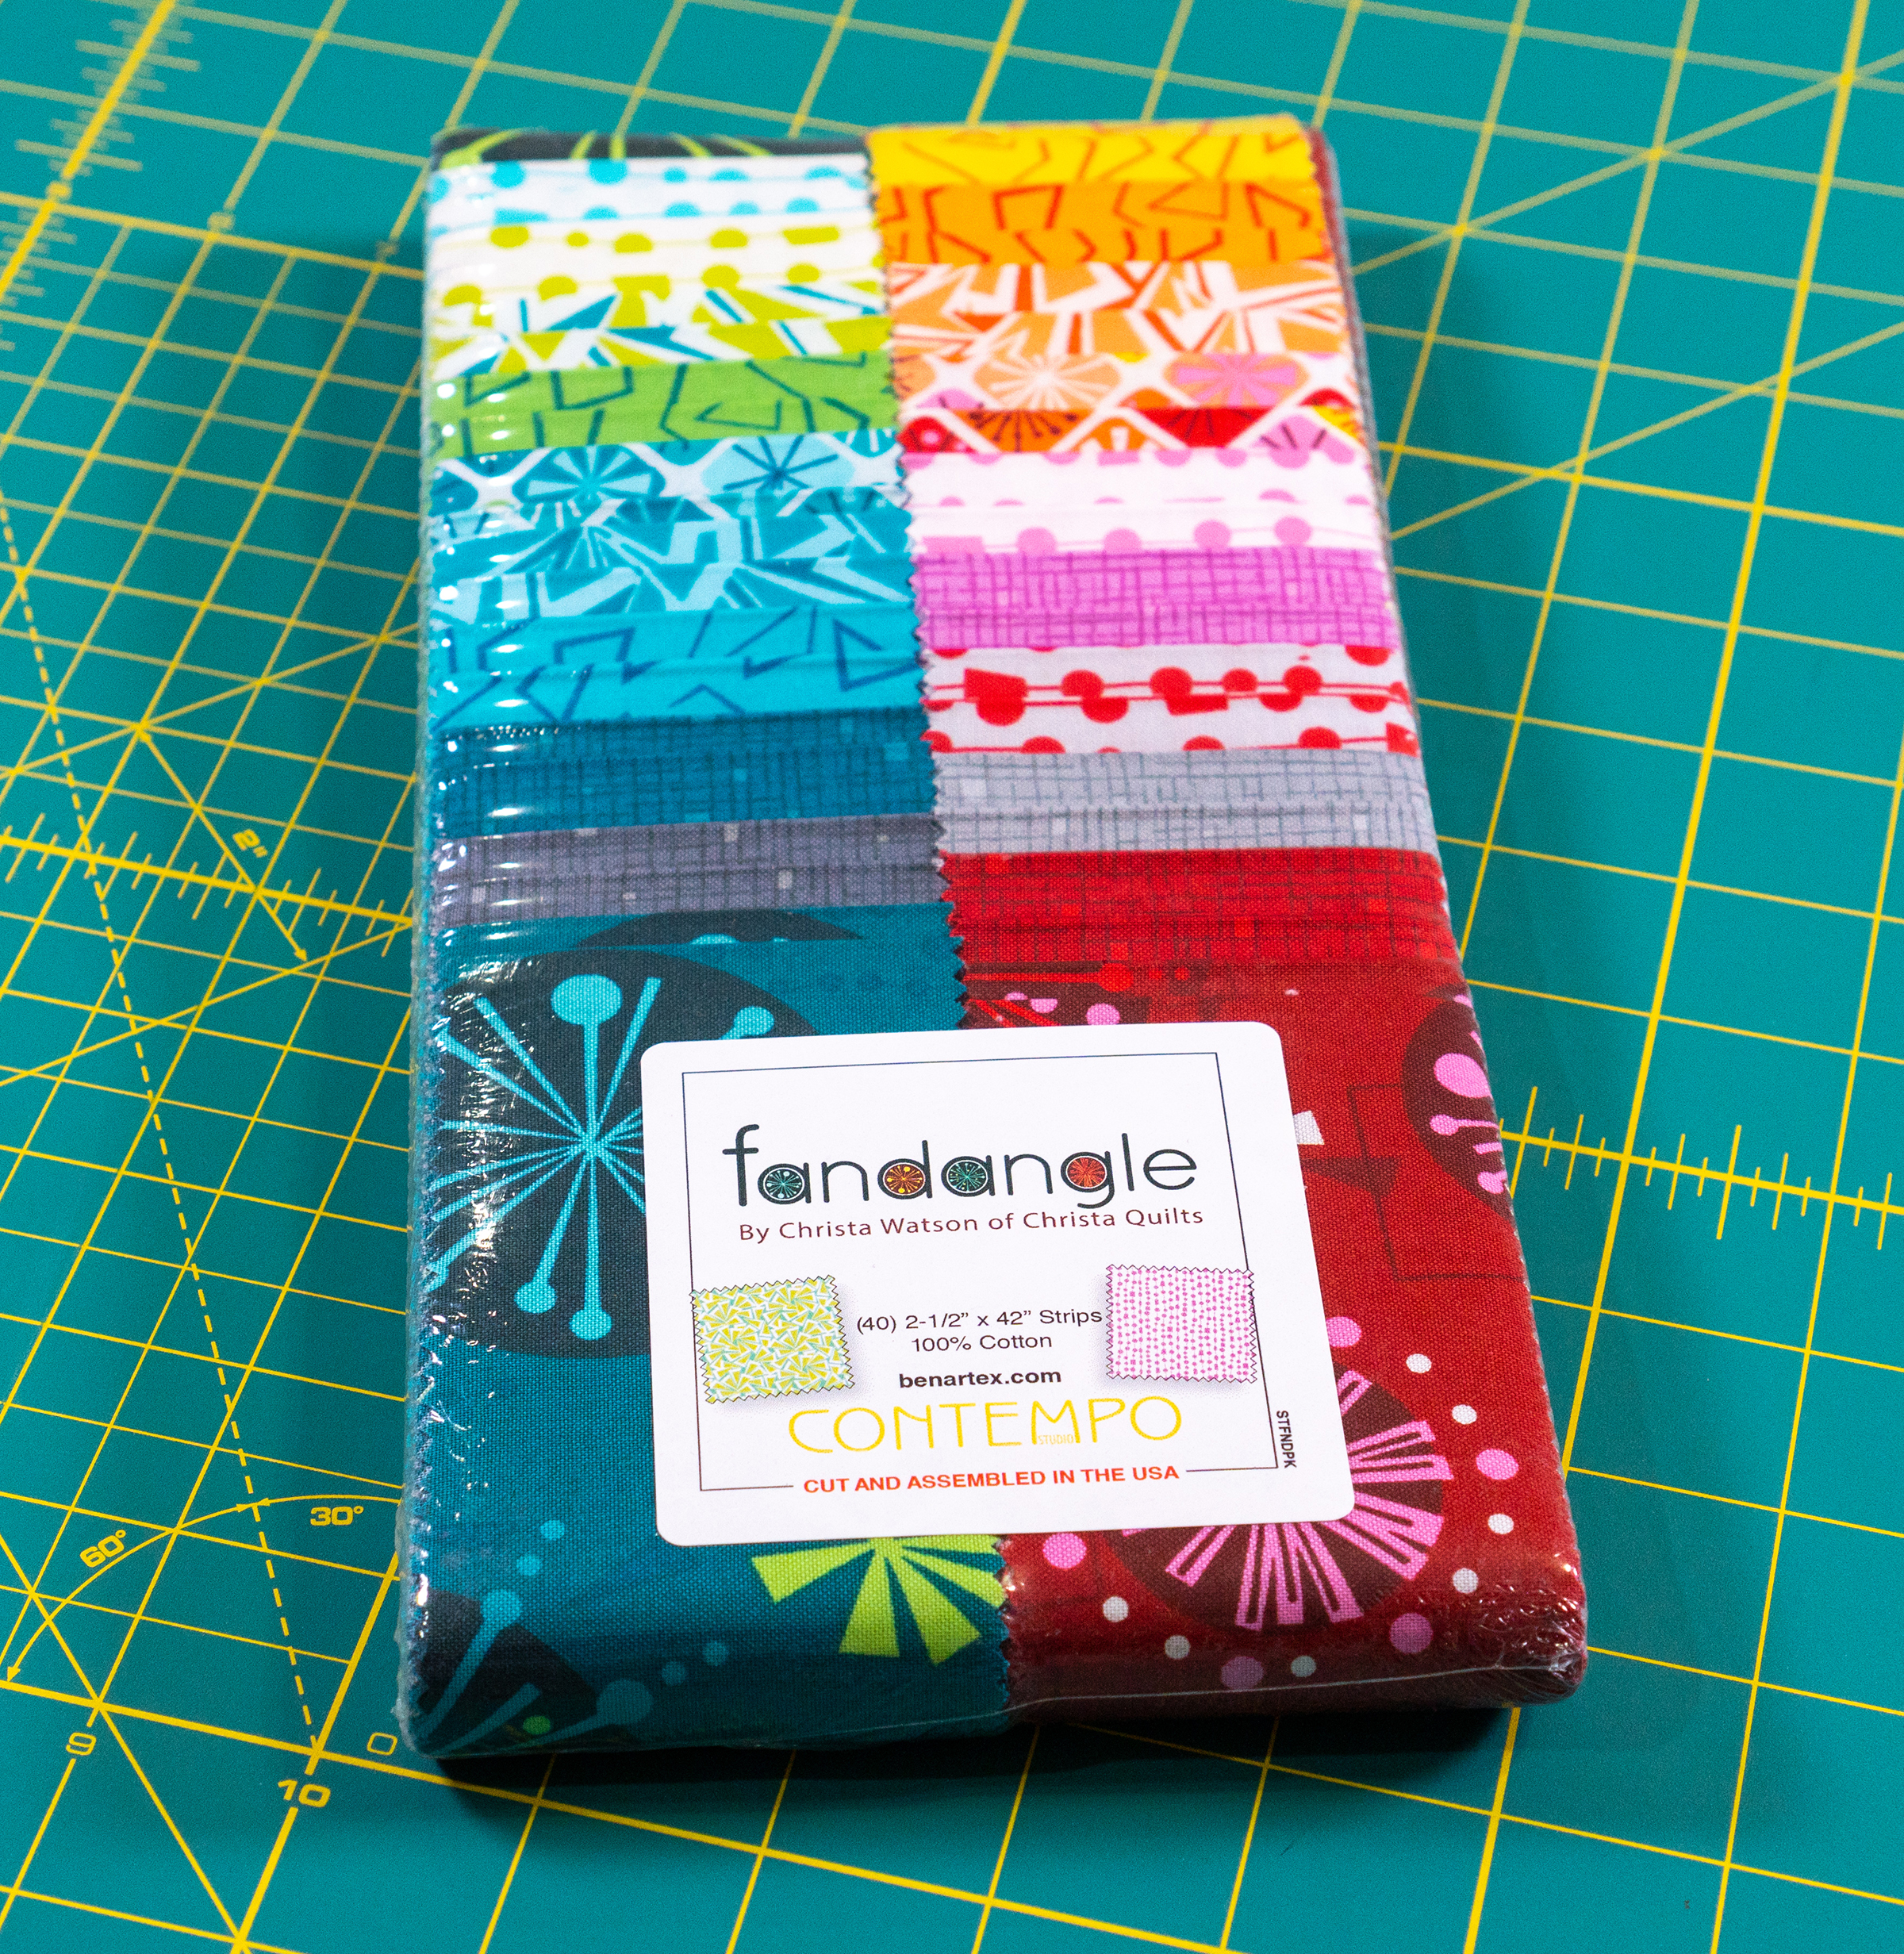
Fabrics Used: Fandangle Strip-pie (precut roll) by Christa Watson for Benartex Contempo Studio + light gray
Today we’ll get started by cutting out all of the pieces you’ll need, and sew them into blocks. Follow along in the pattern on pages 2-3 for bonus tips and diagrams.
Step 1 – Gather or Cut Your Strips
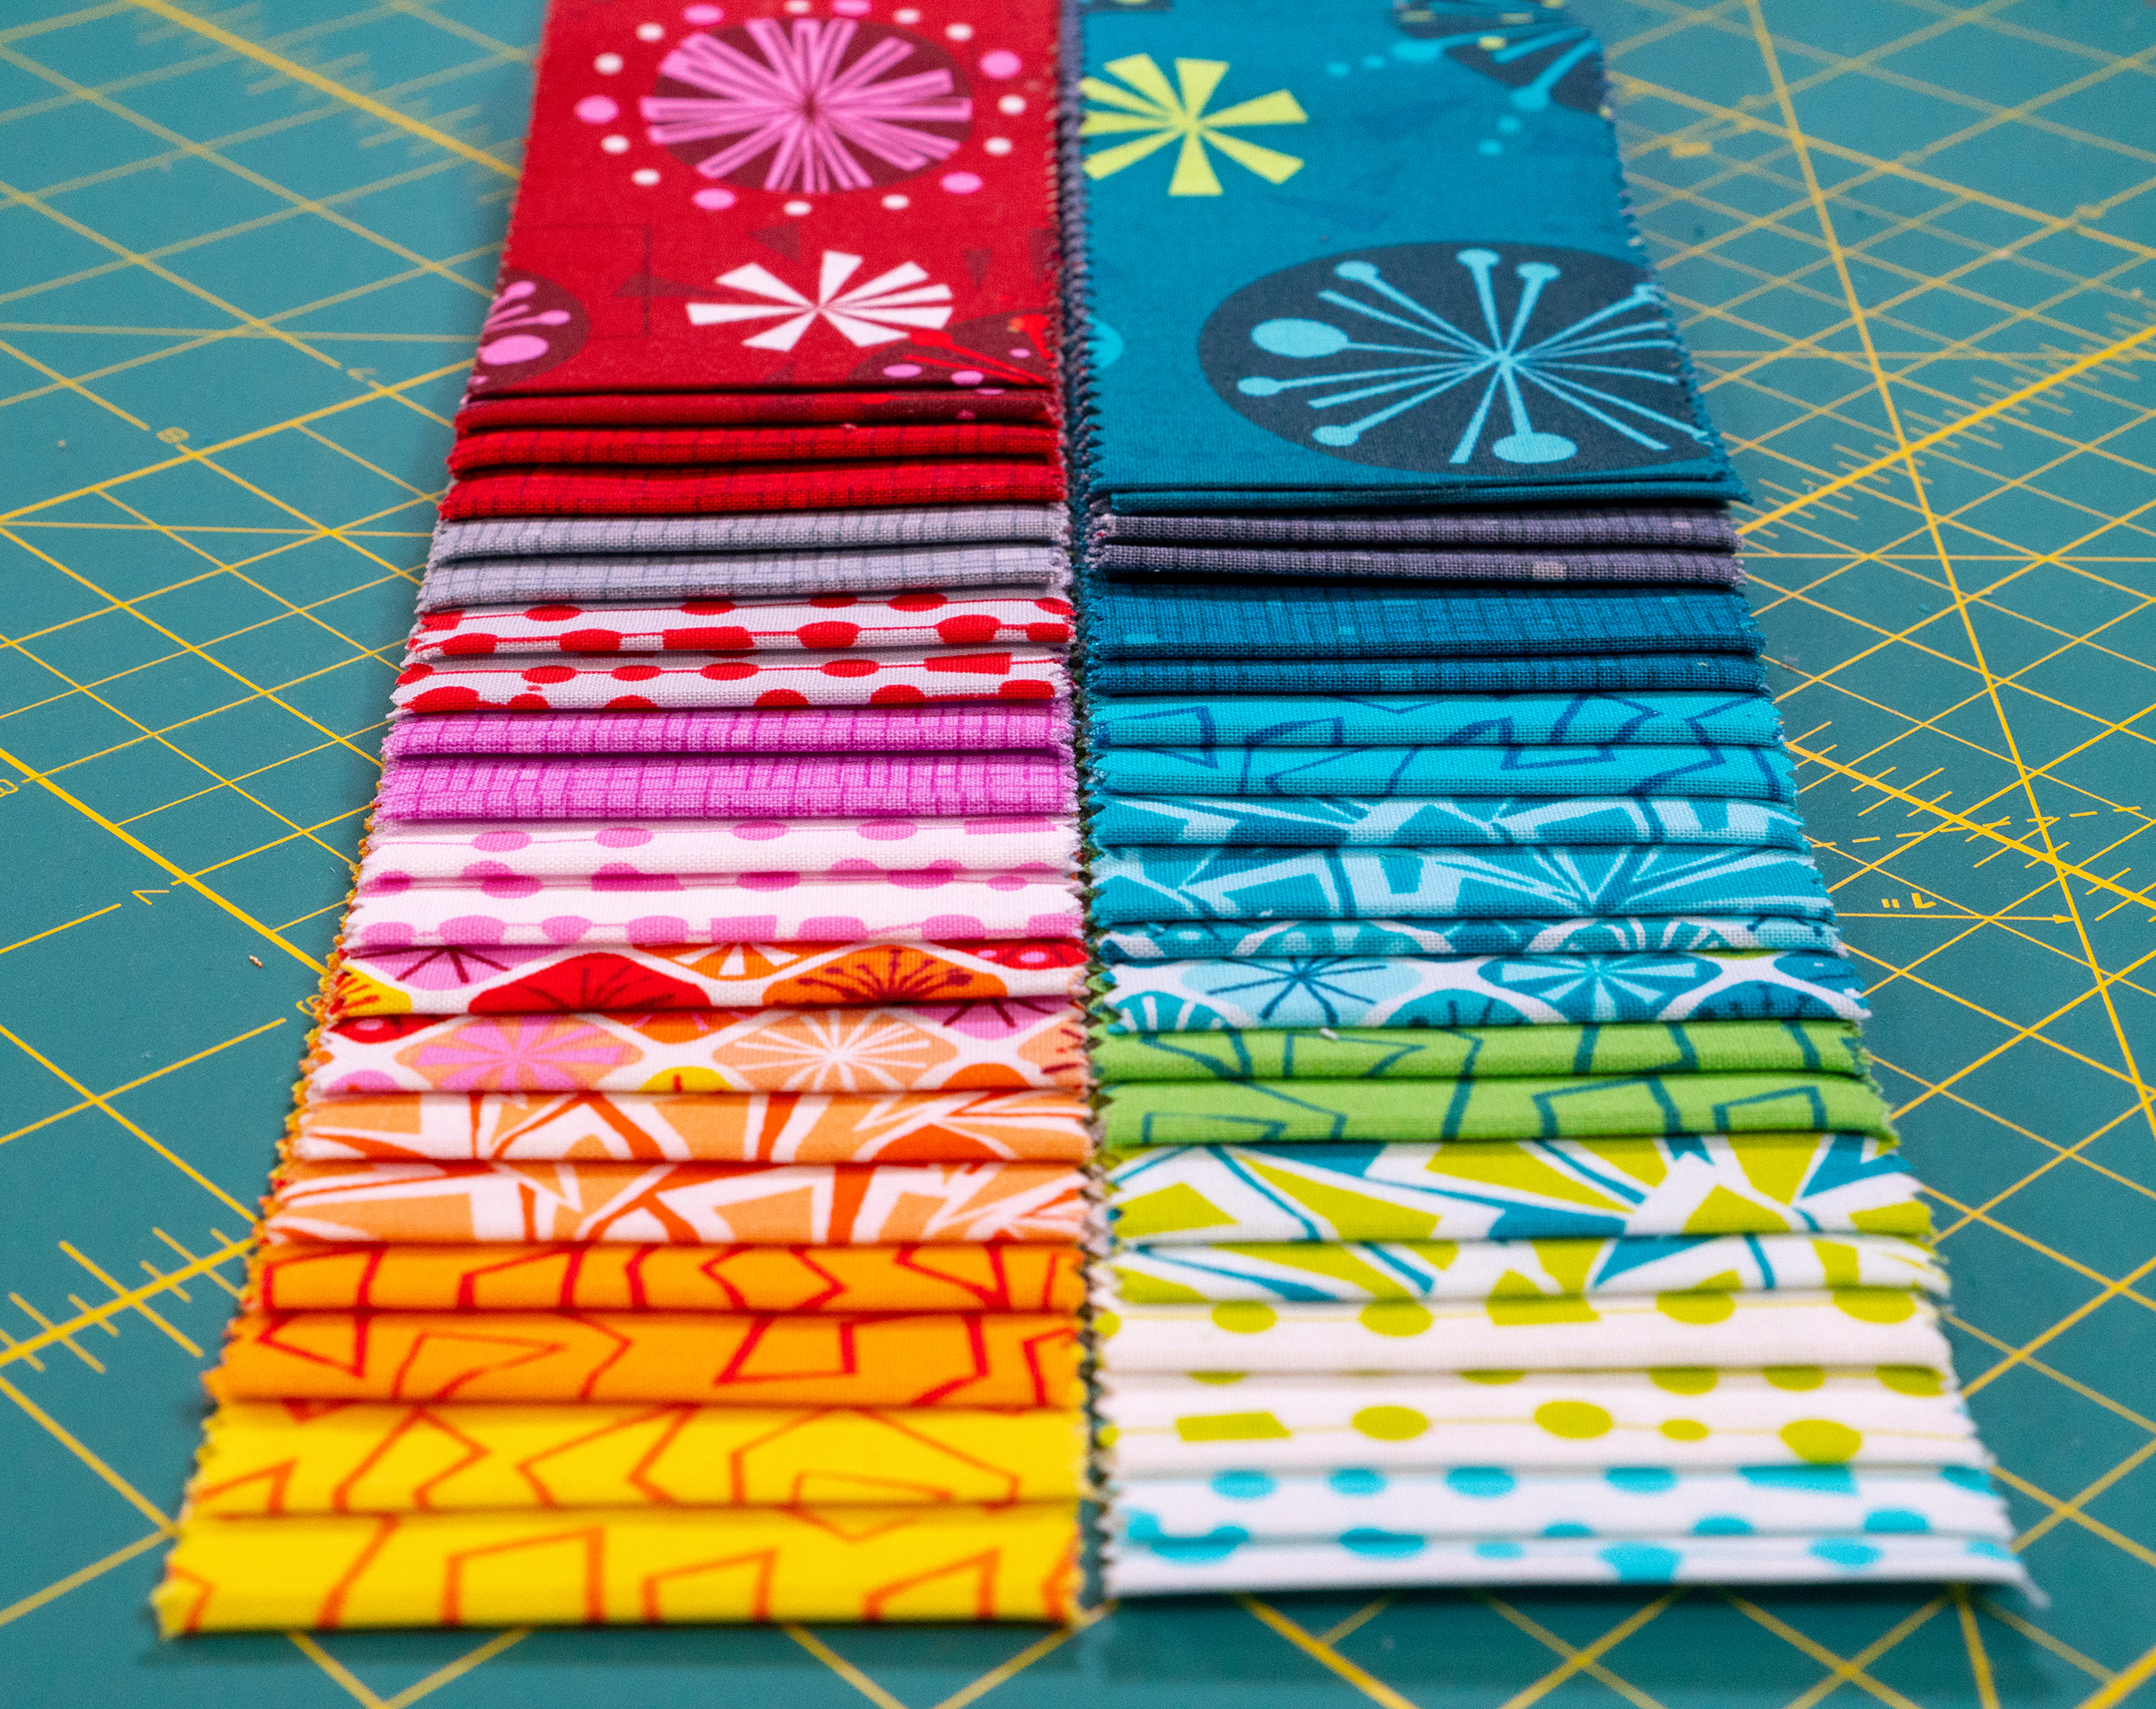
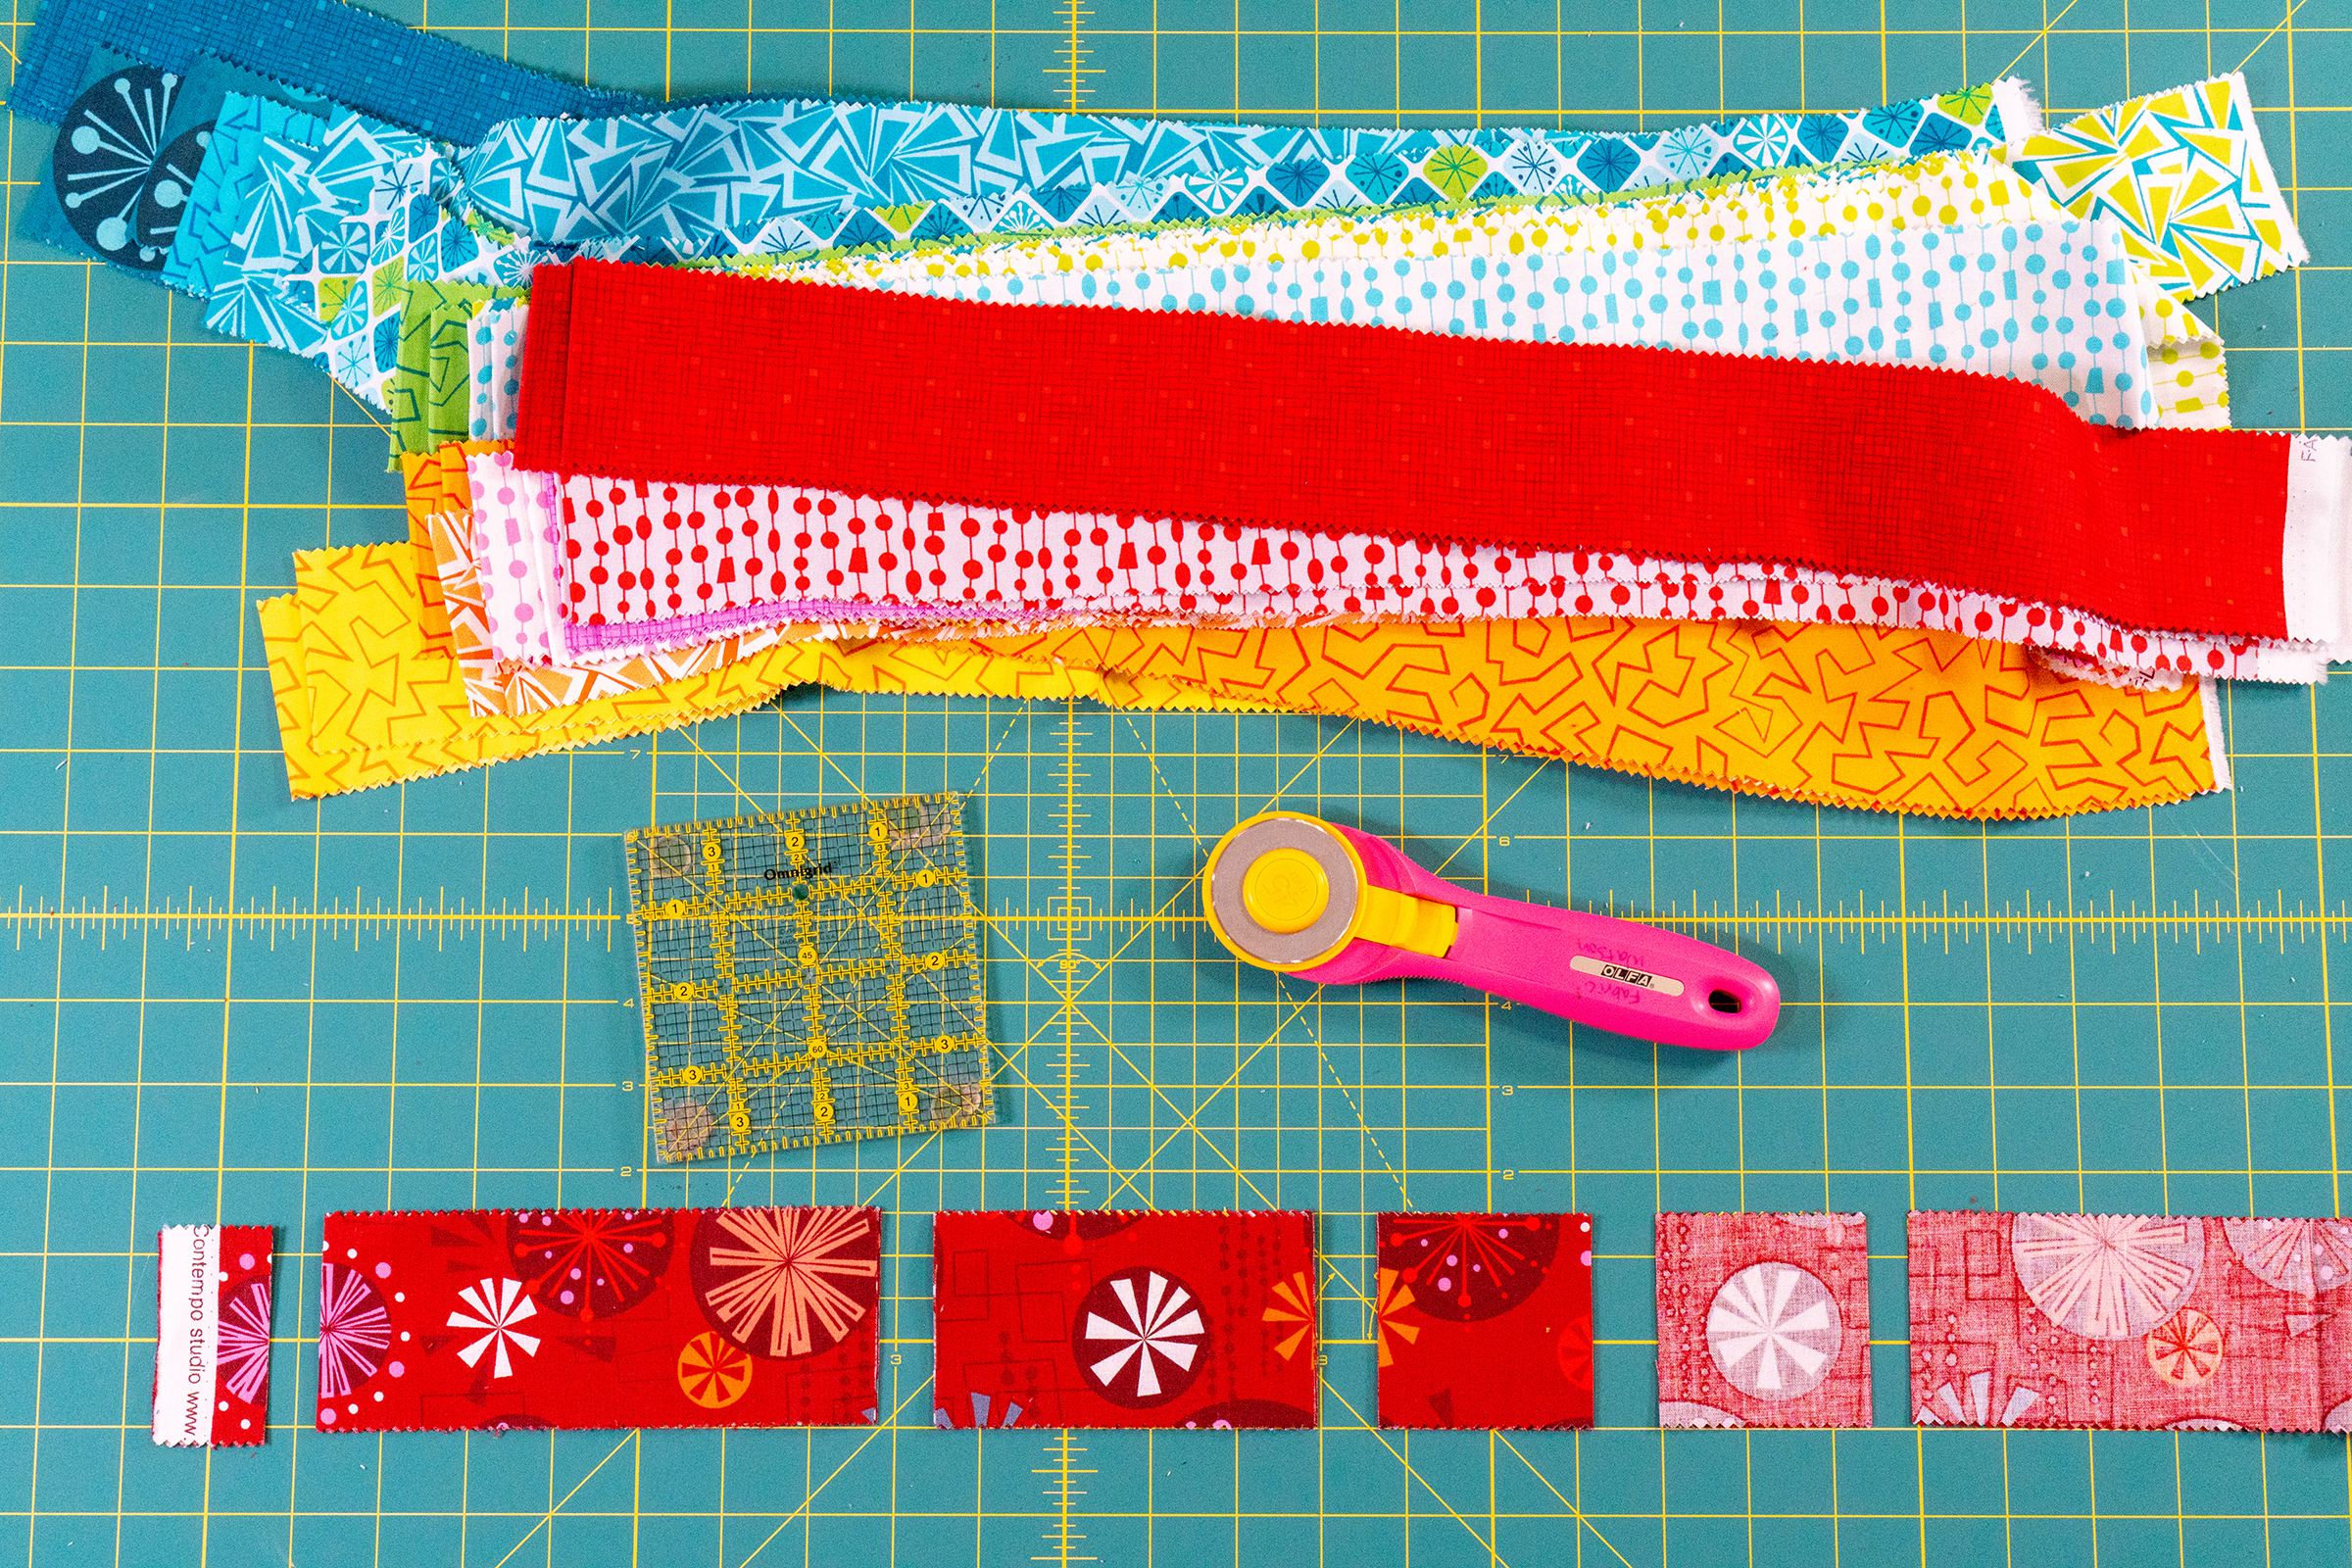
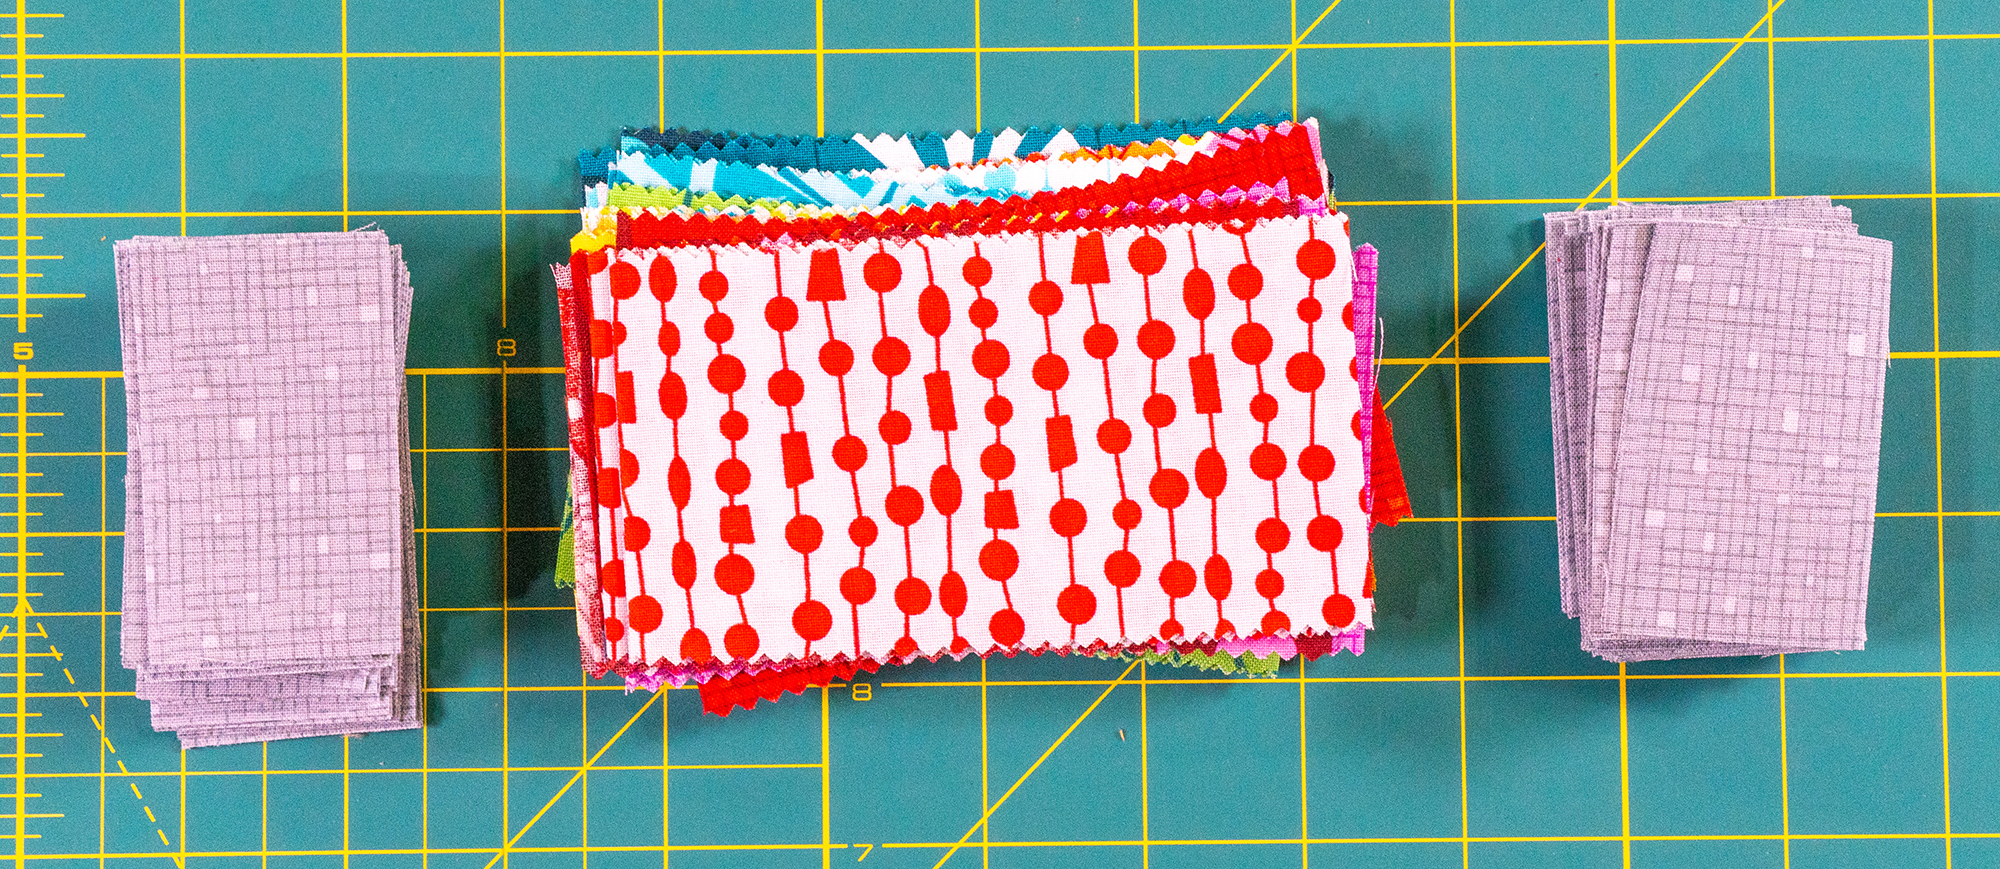
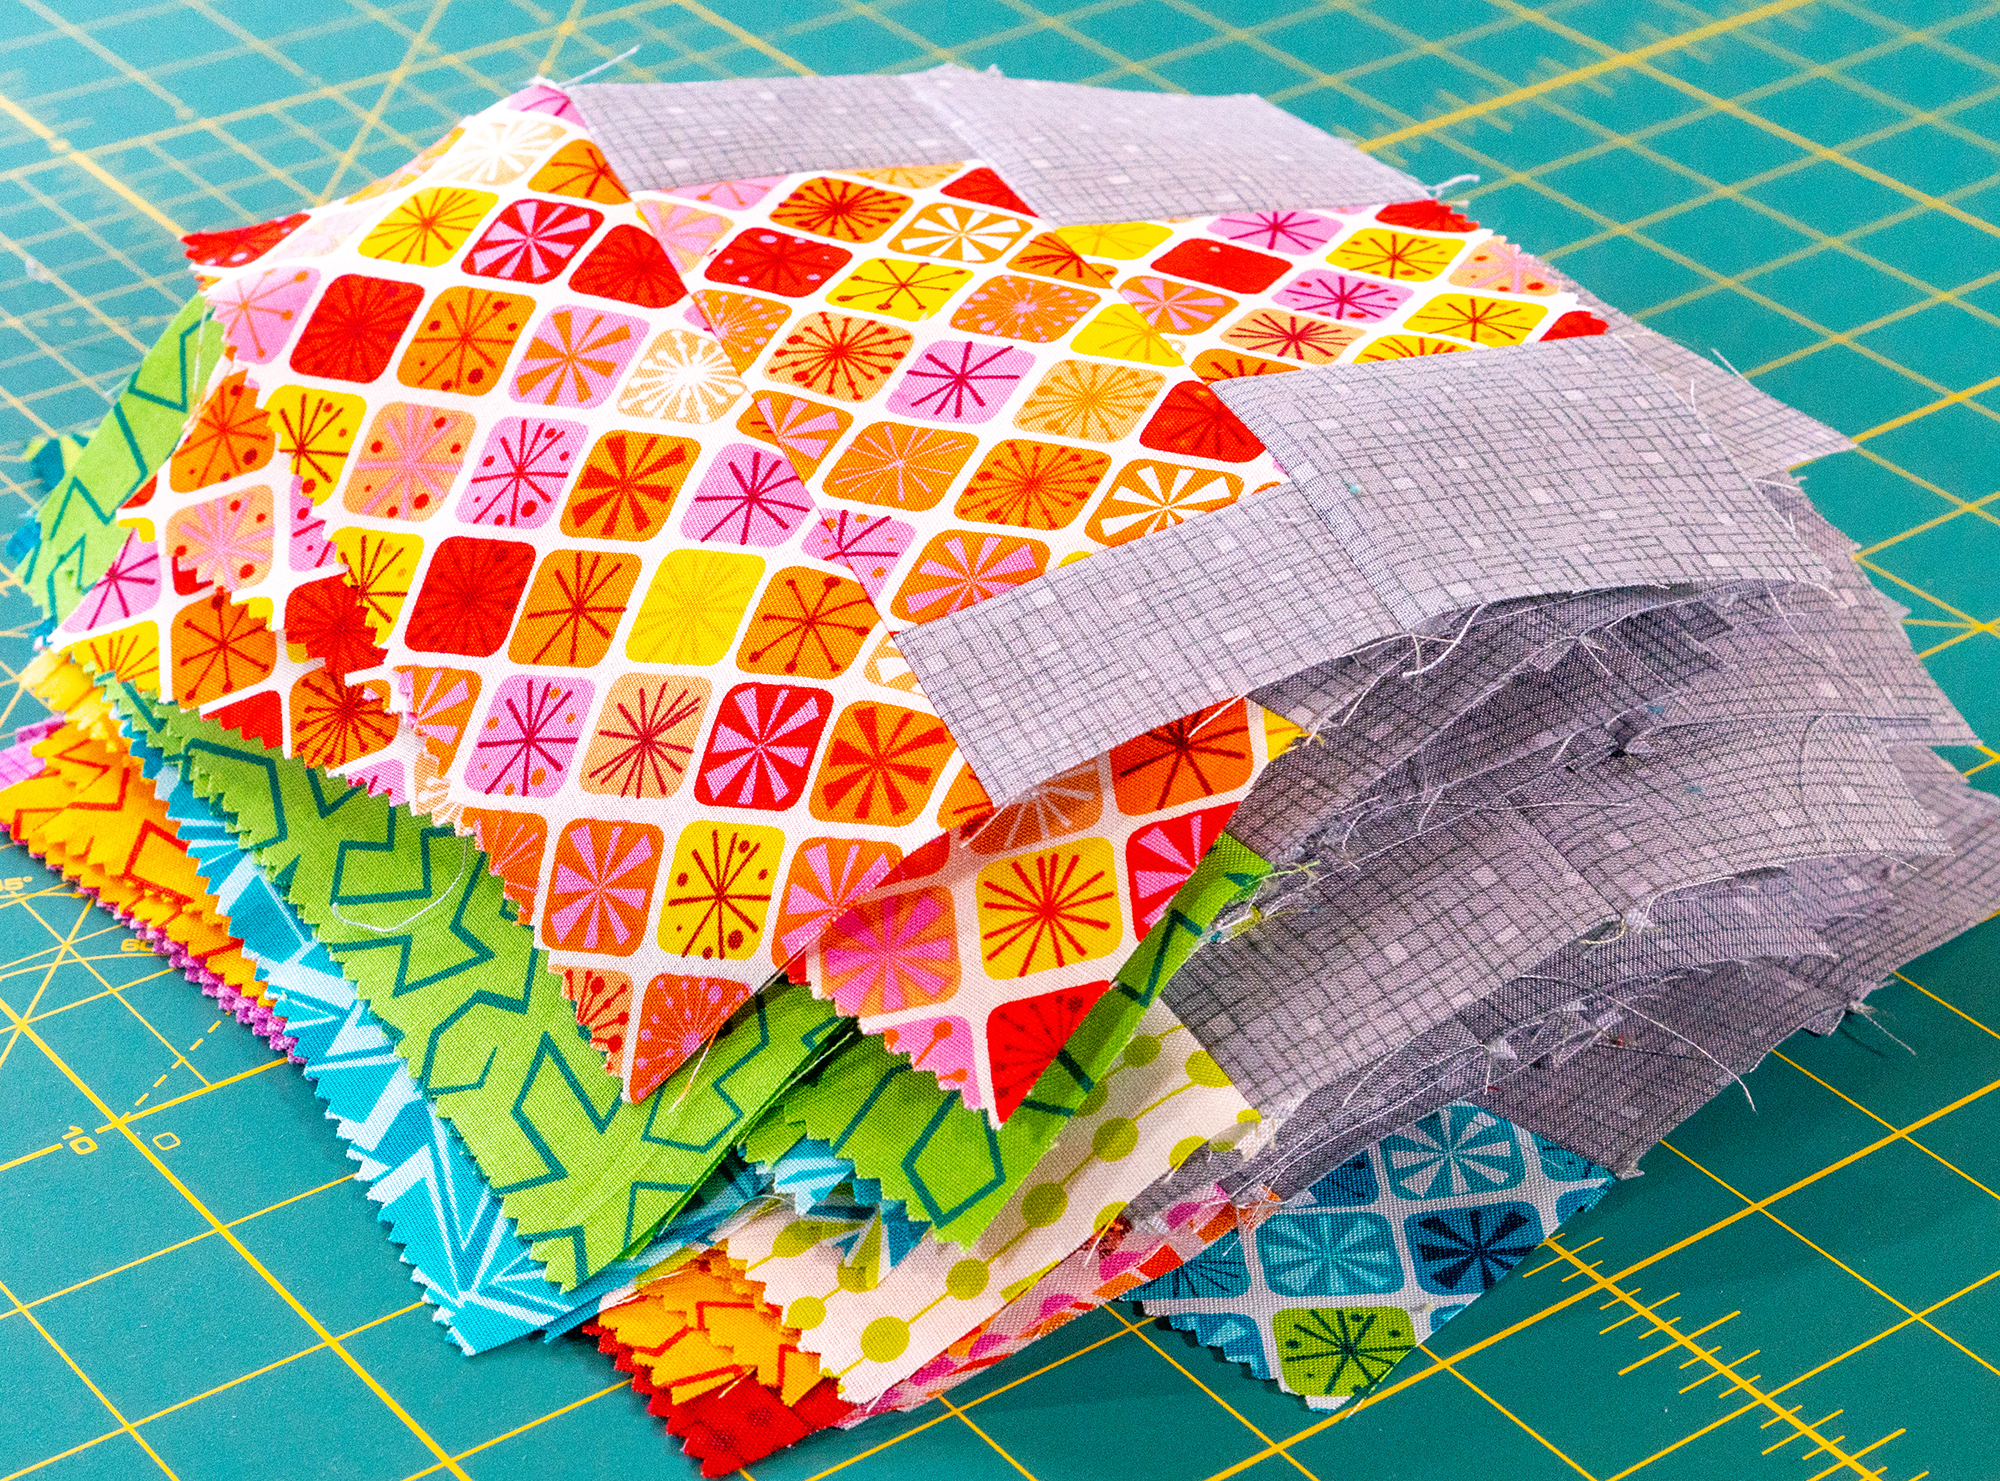
Gather a total of 36 assorted 2 1/2″ x 40″ strips. You can use a coordinated manufacturer’s bundle (jelly roll, pinwheel, strip-pie, roll-up, etc.), or you can cut your own from yardage or scraps. One strip will be enough to make one full Lantern block and one Bead block.
You’ll have enough strips in the bundle to make a total of 40 blocks, but since you only need 36, you’ve got some wiggle room on which fabrics you choose to omit. I took out the grays since I was using a gray background. If working with scraps, you can make each Lantern block from several different same-colored fabrics to create color coordinated scrappy blocks.
Next, cut a total of 32 gray strips 2 1/2″ x 40″ for the background. Cut an additional 8 strips for the binding, measuring between 2″ to 2 1/2″ depending on your preference. (I prefer a narrow binding that finishes exactly 1/4″ on both sides, so I’ll use 2″ strips, but you can always decide how wide you’d like to cut them later on.)
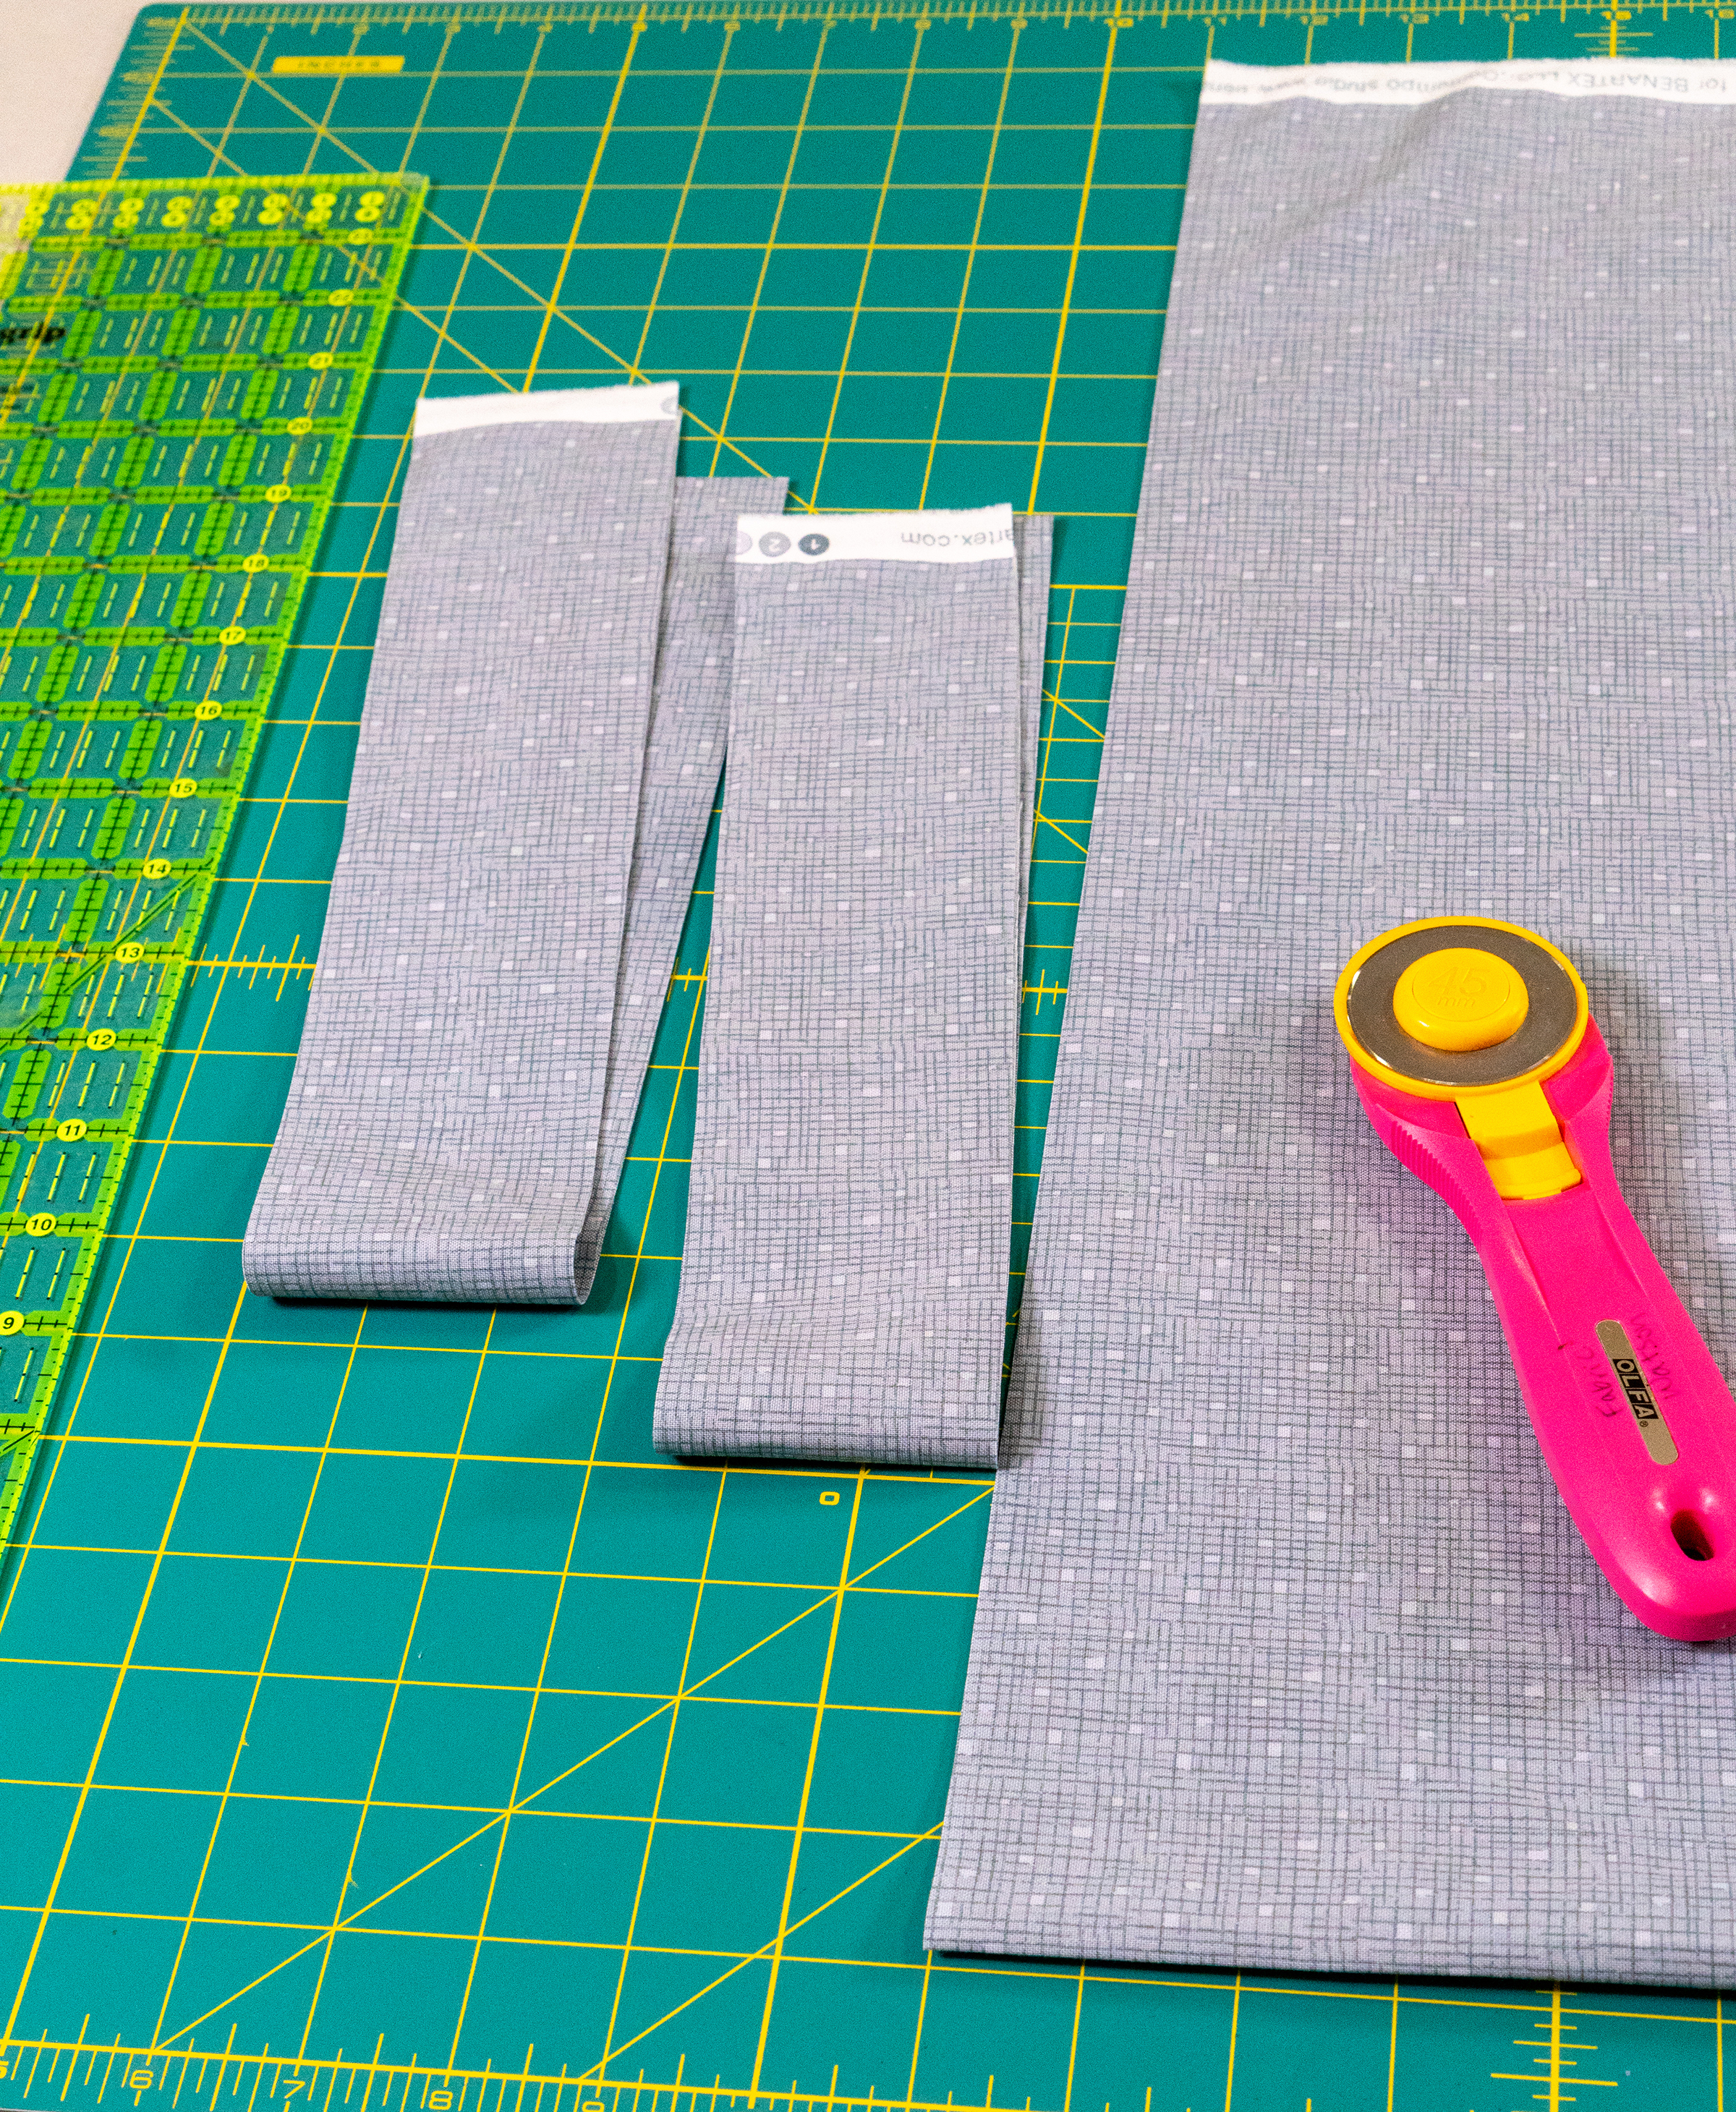
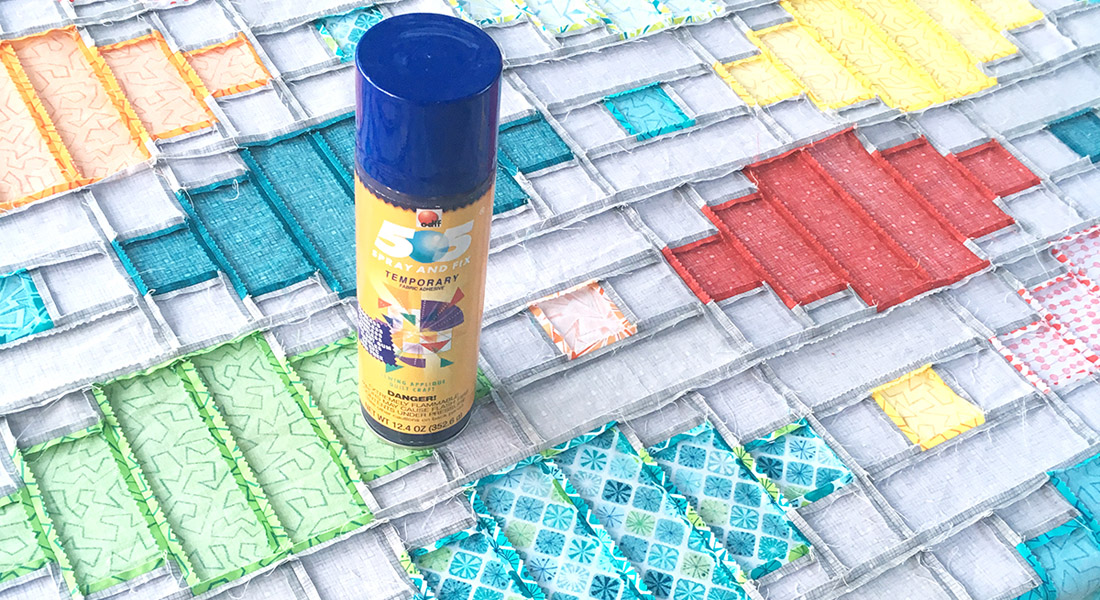
Here’s a tip: if you are using the Fandangle Strip-pie with coordinating grey yardage, you can get away with cutting fewer gray strips since they are already included in the precut bundle! When cutting, fold the fabric and match the bottom fold to one of the lines on your mat. Trim off the left edge of the fabric (or the right edge if you are left handed) and then use a long acrylic ruler and rotary cutter with a fresh, sharp blade. to cut long straight strips. Line up the ruler line to the line on the mat to ensure accuracy.
Cut 7 strips, 4 1/2″ x 40″ for the borders. You can use all of one fabric like I did, or you can mix it up and make it scrappy.
Notice that some of the strips have pinked edges and some have straight edges from cut yardage. It’s completely fine to mix precuts and yardage as long as they measure the same size. Measure the width of your precut strips to see if the 2 1/2″ width falls on the “peak” or “valley” and use that as your seam allowance.
Step 2 – Subcut the Strips into Smaller Units
Follow the cutting instructions on page 2 to subcut the units:
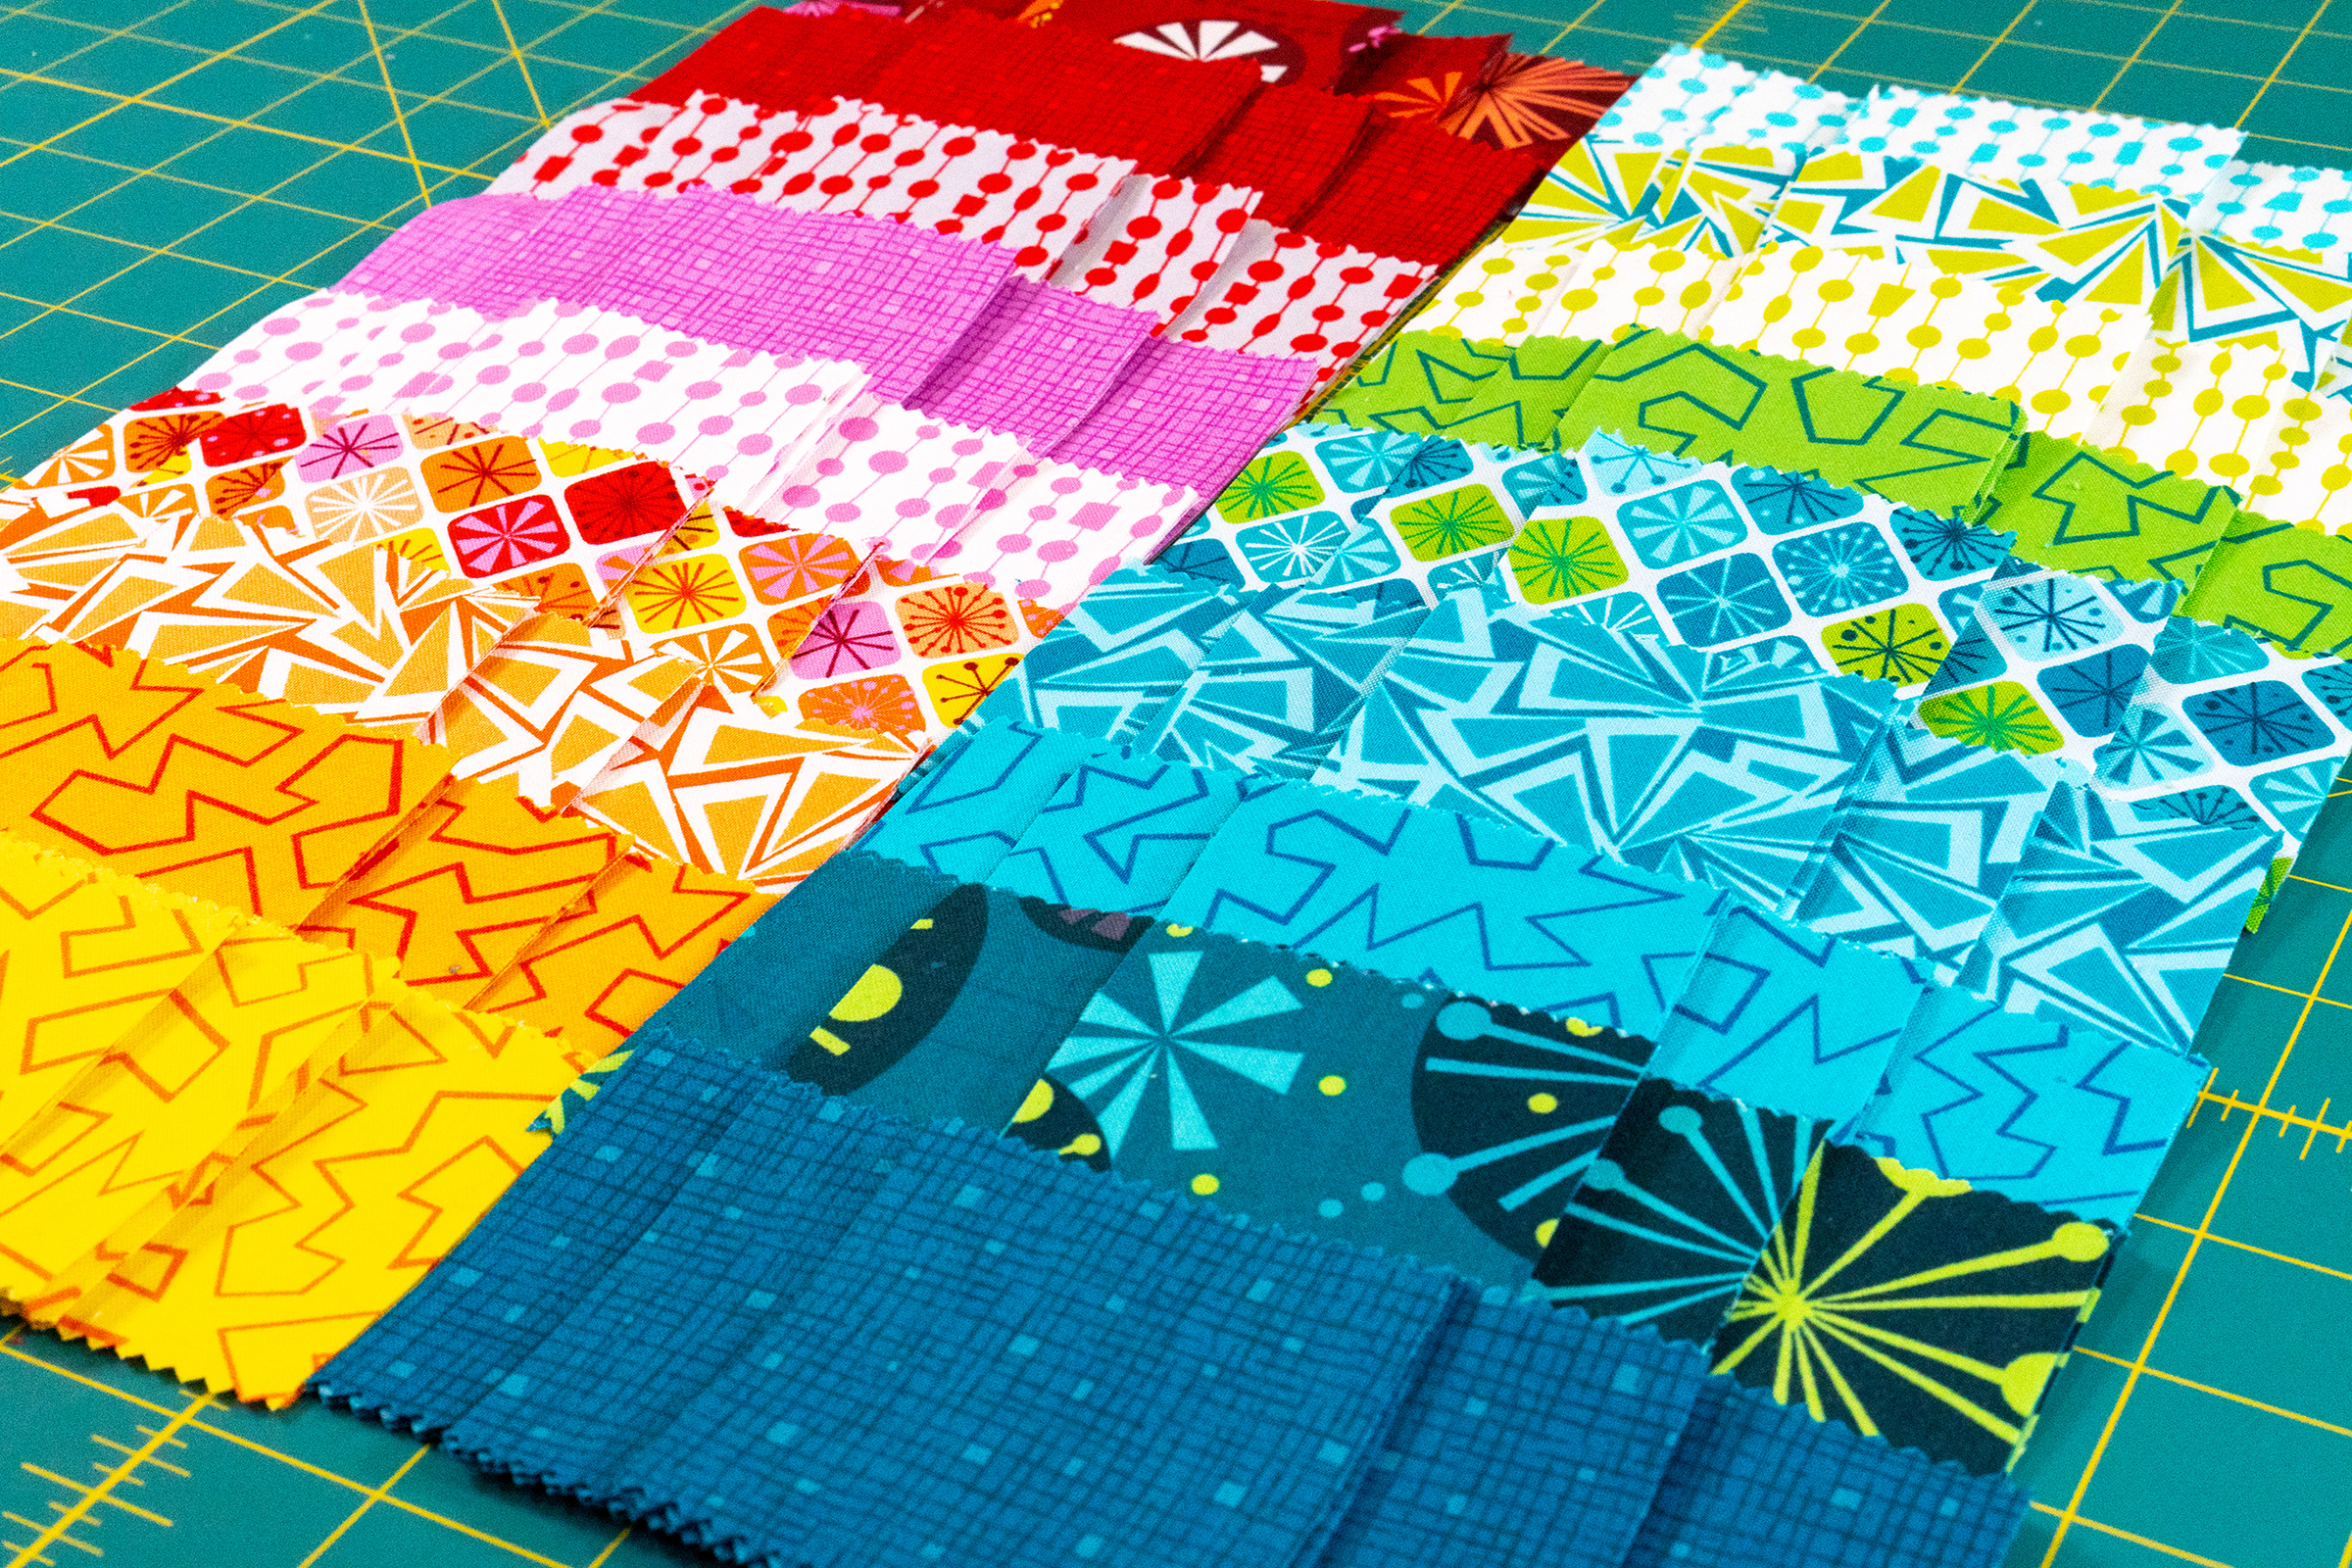
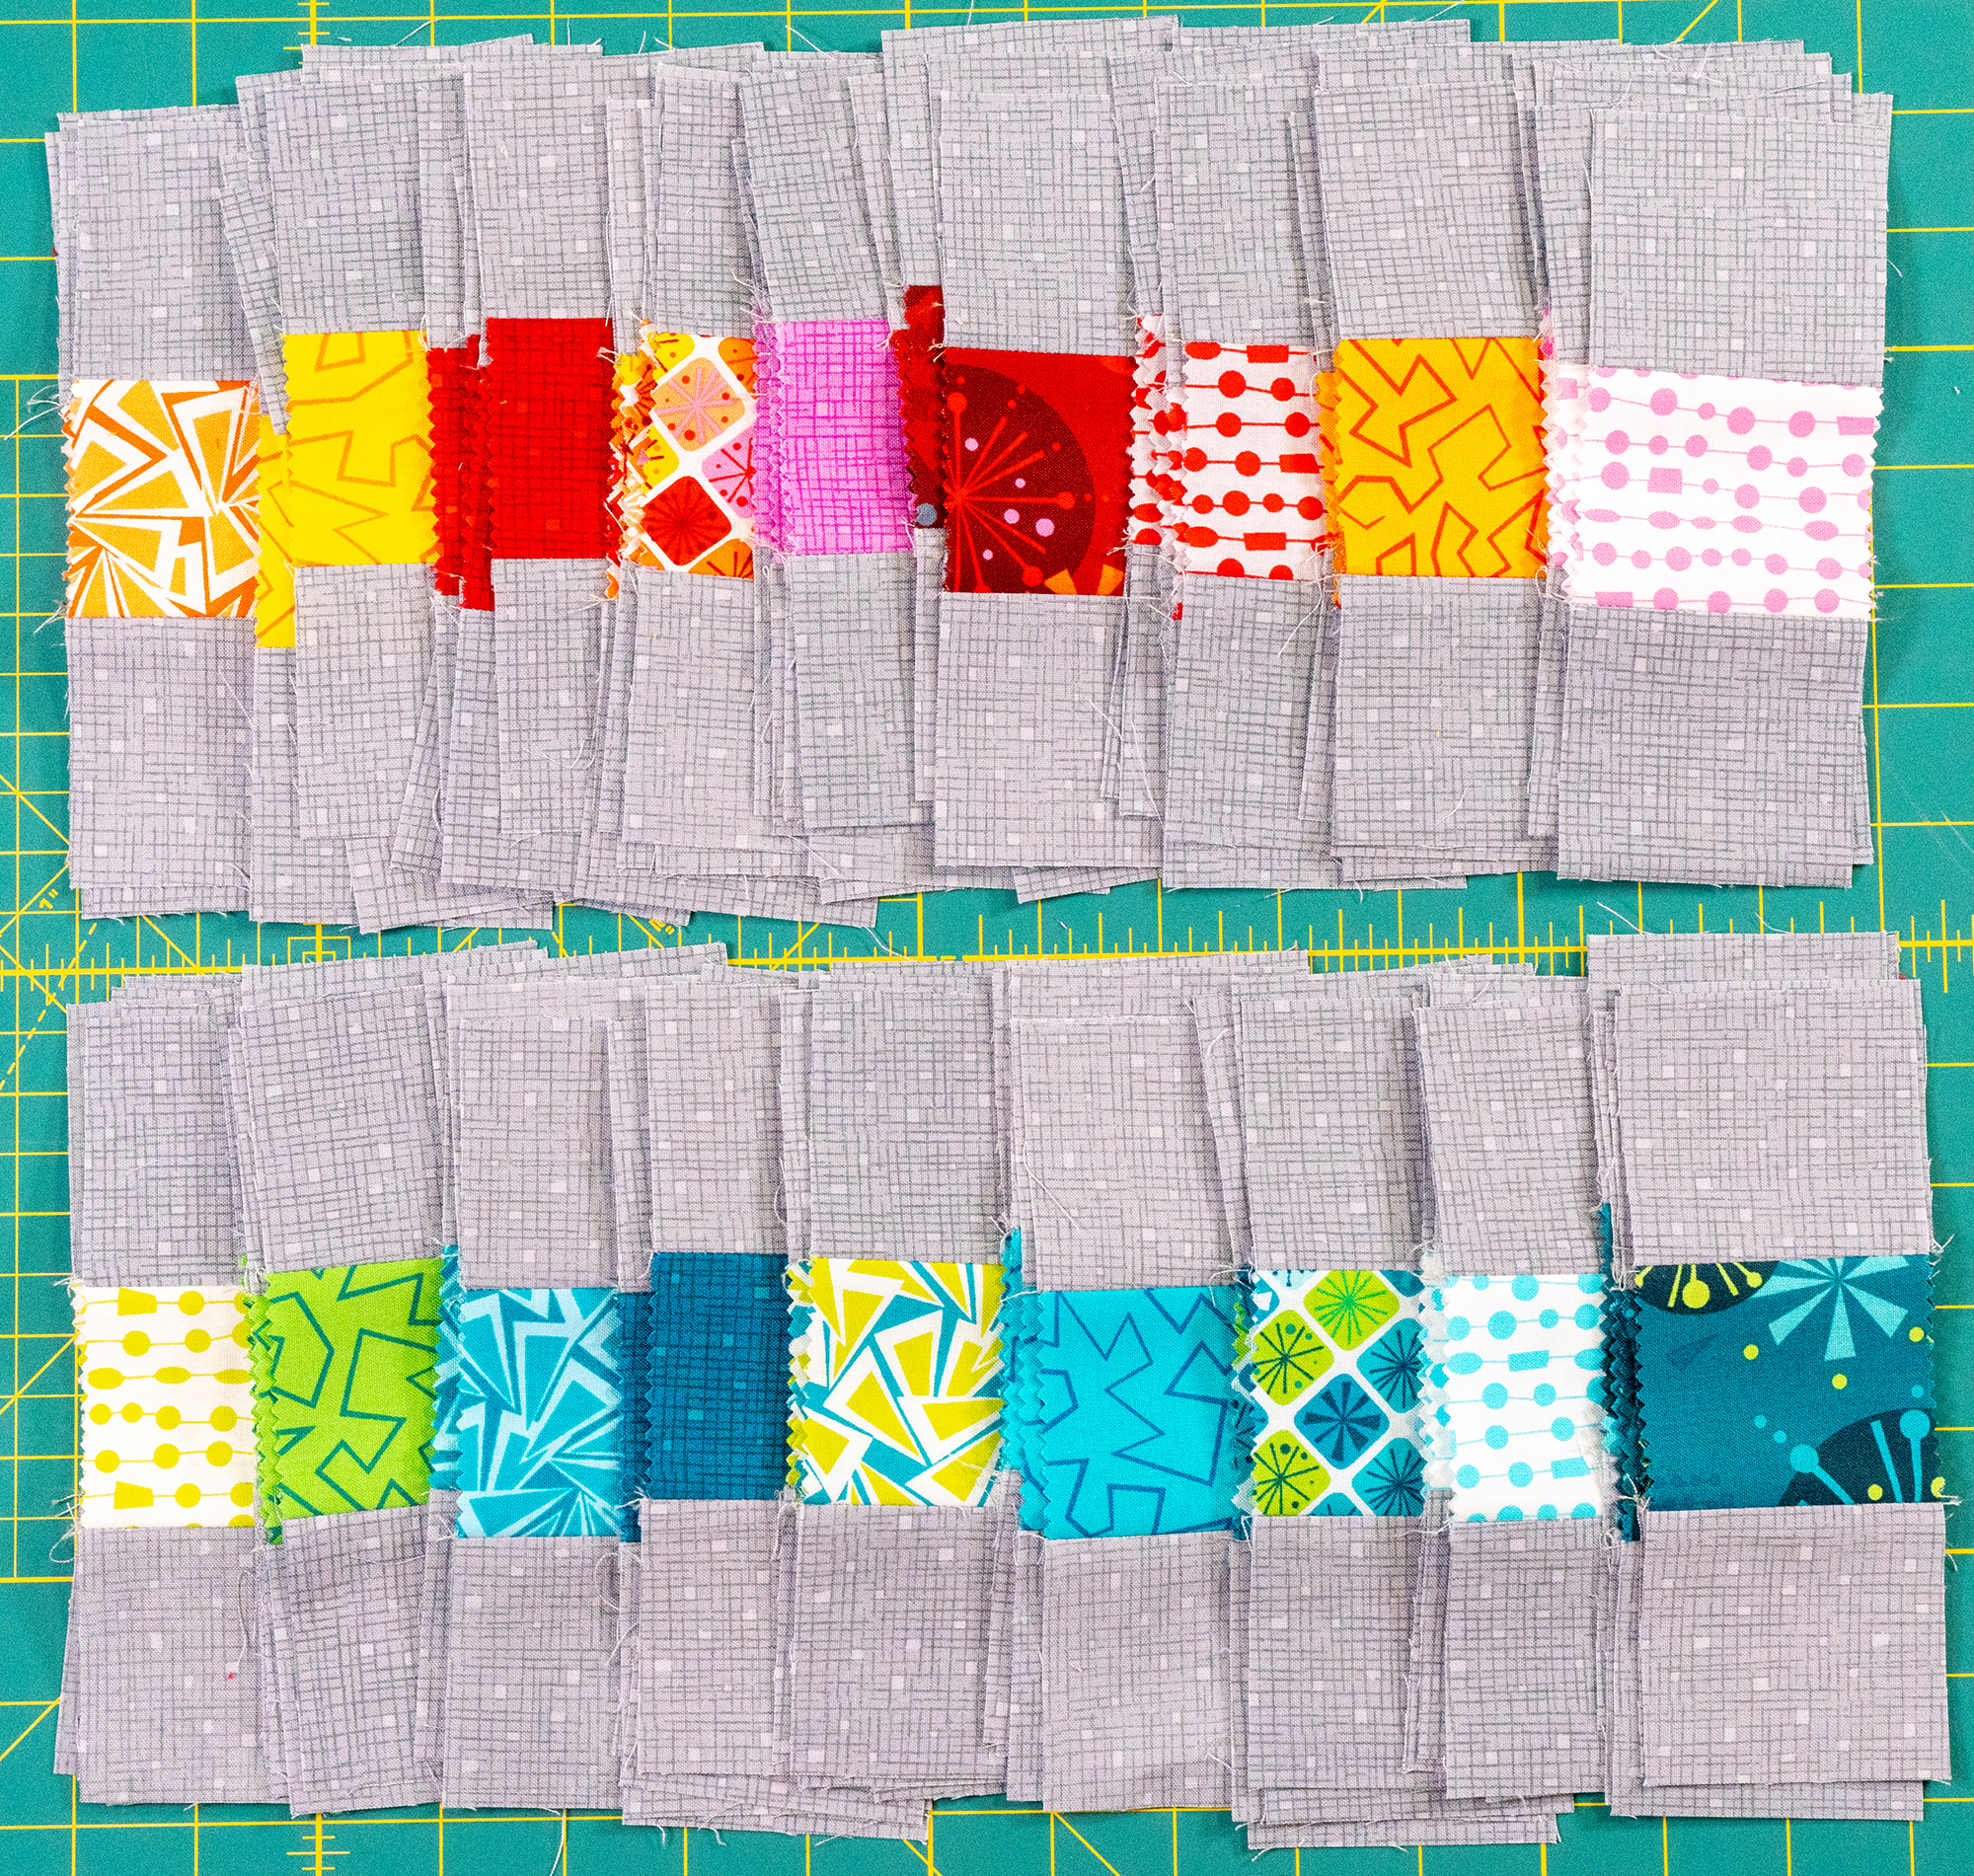
From each of the 36 print strips, subcut:
2 rectangles, 2 1/2″ x 6 1/2″ (72 total)
2 rectangles, 2 1/2″ x 4 1/2″ (72 total)
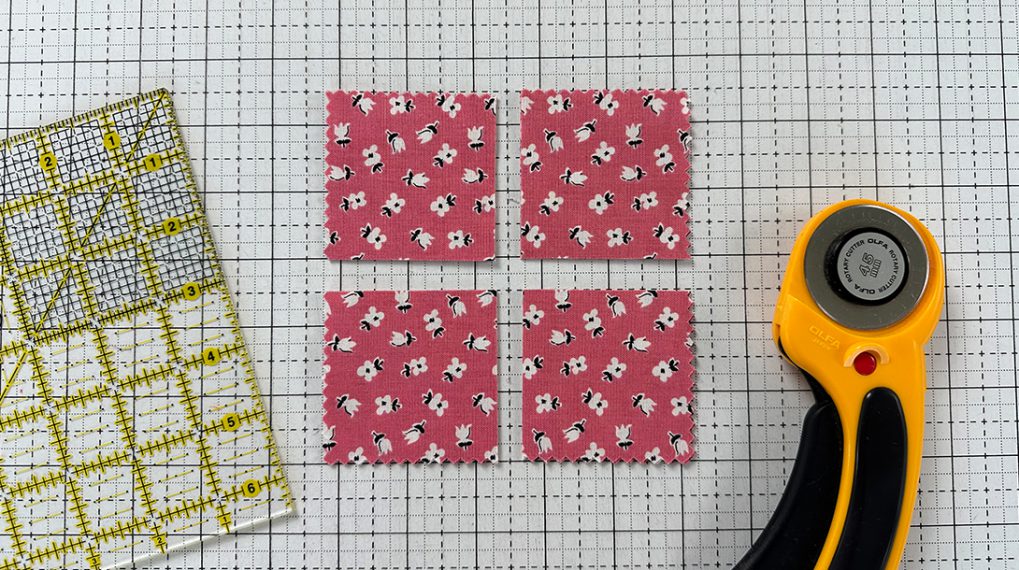
3 squares, 2 1/2″ x 2 1/2″ (108 total)
Tip: for faster cutting, leave strips folded and stack up 2 strips at a time so you are cutting through 4 layers. Use a small square acrylic ruler for easier handling and line up the edge of the ruler with the lines of your mat for accuracy.
Trim off selvages, then cut the 6 1/2″ length, then the 4 1/2″ and then the 2 1/2″. Open up the rest of the strip to cut the last 2 1/2″ square. You’ll have about 10″ leftover per strip, so throw it in your scrap pile, or use the leftovers to make some fun scrappy blocks for the back of the quilt!
Keep like fabrics together. If you are using exactly 18 print fabrics like me, each one will appear in 2 blocks. That means you’ll have a total of 4 rectangles of each size and 6 squares per fabric.
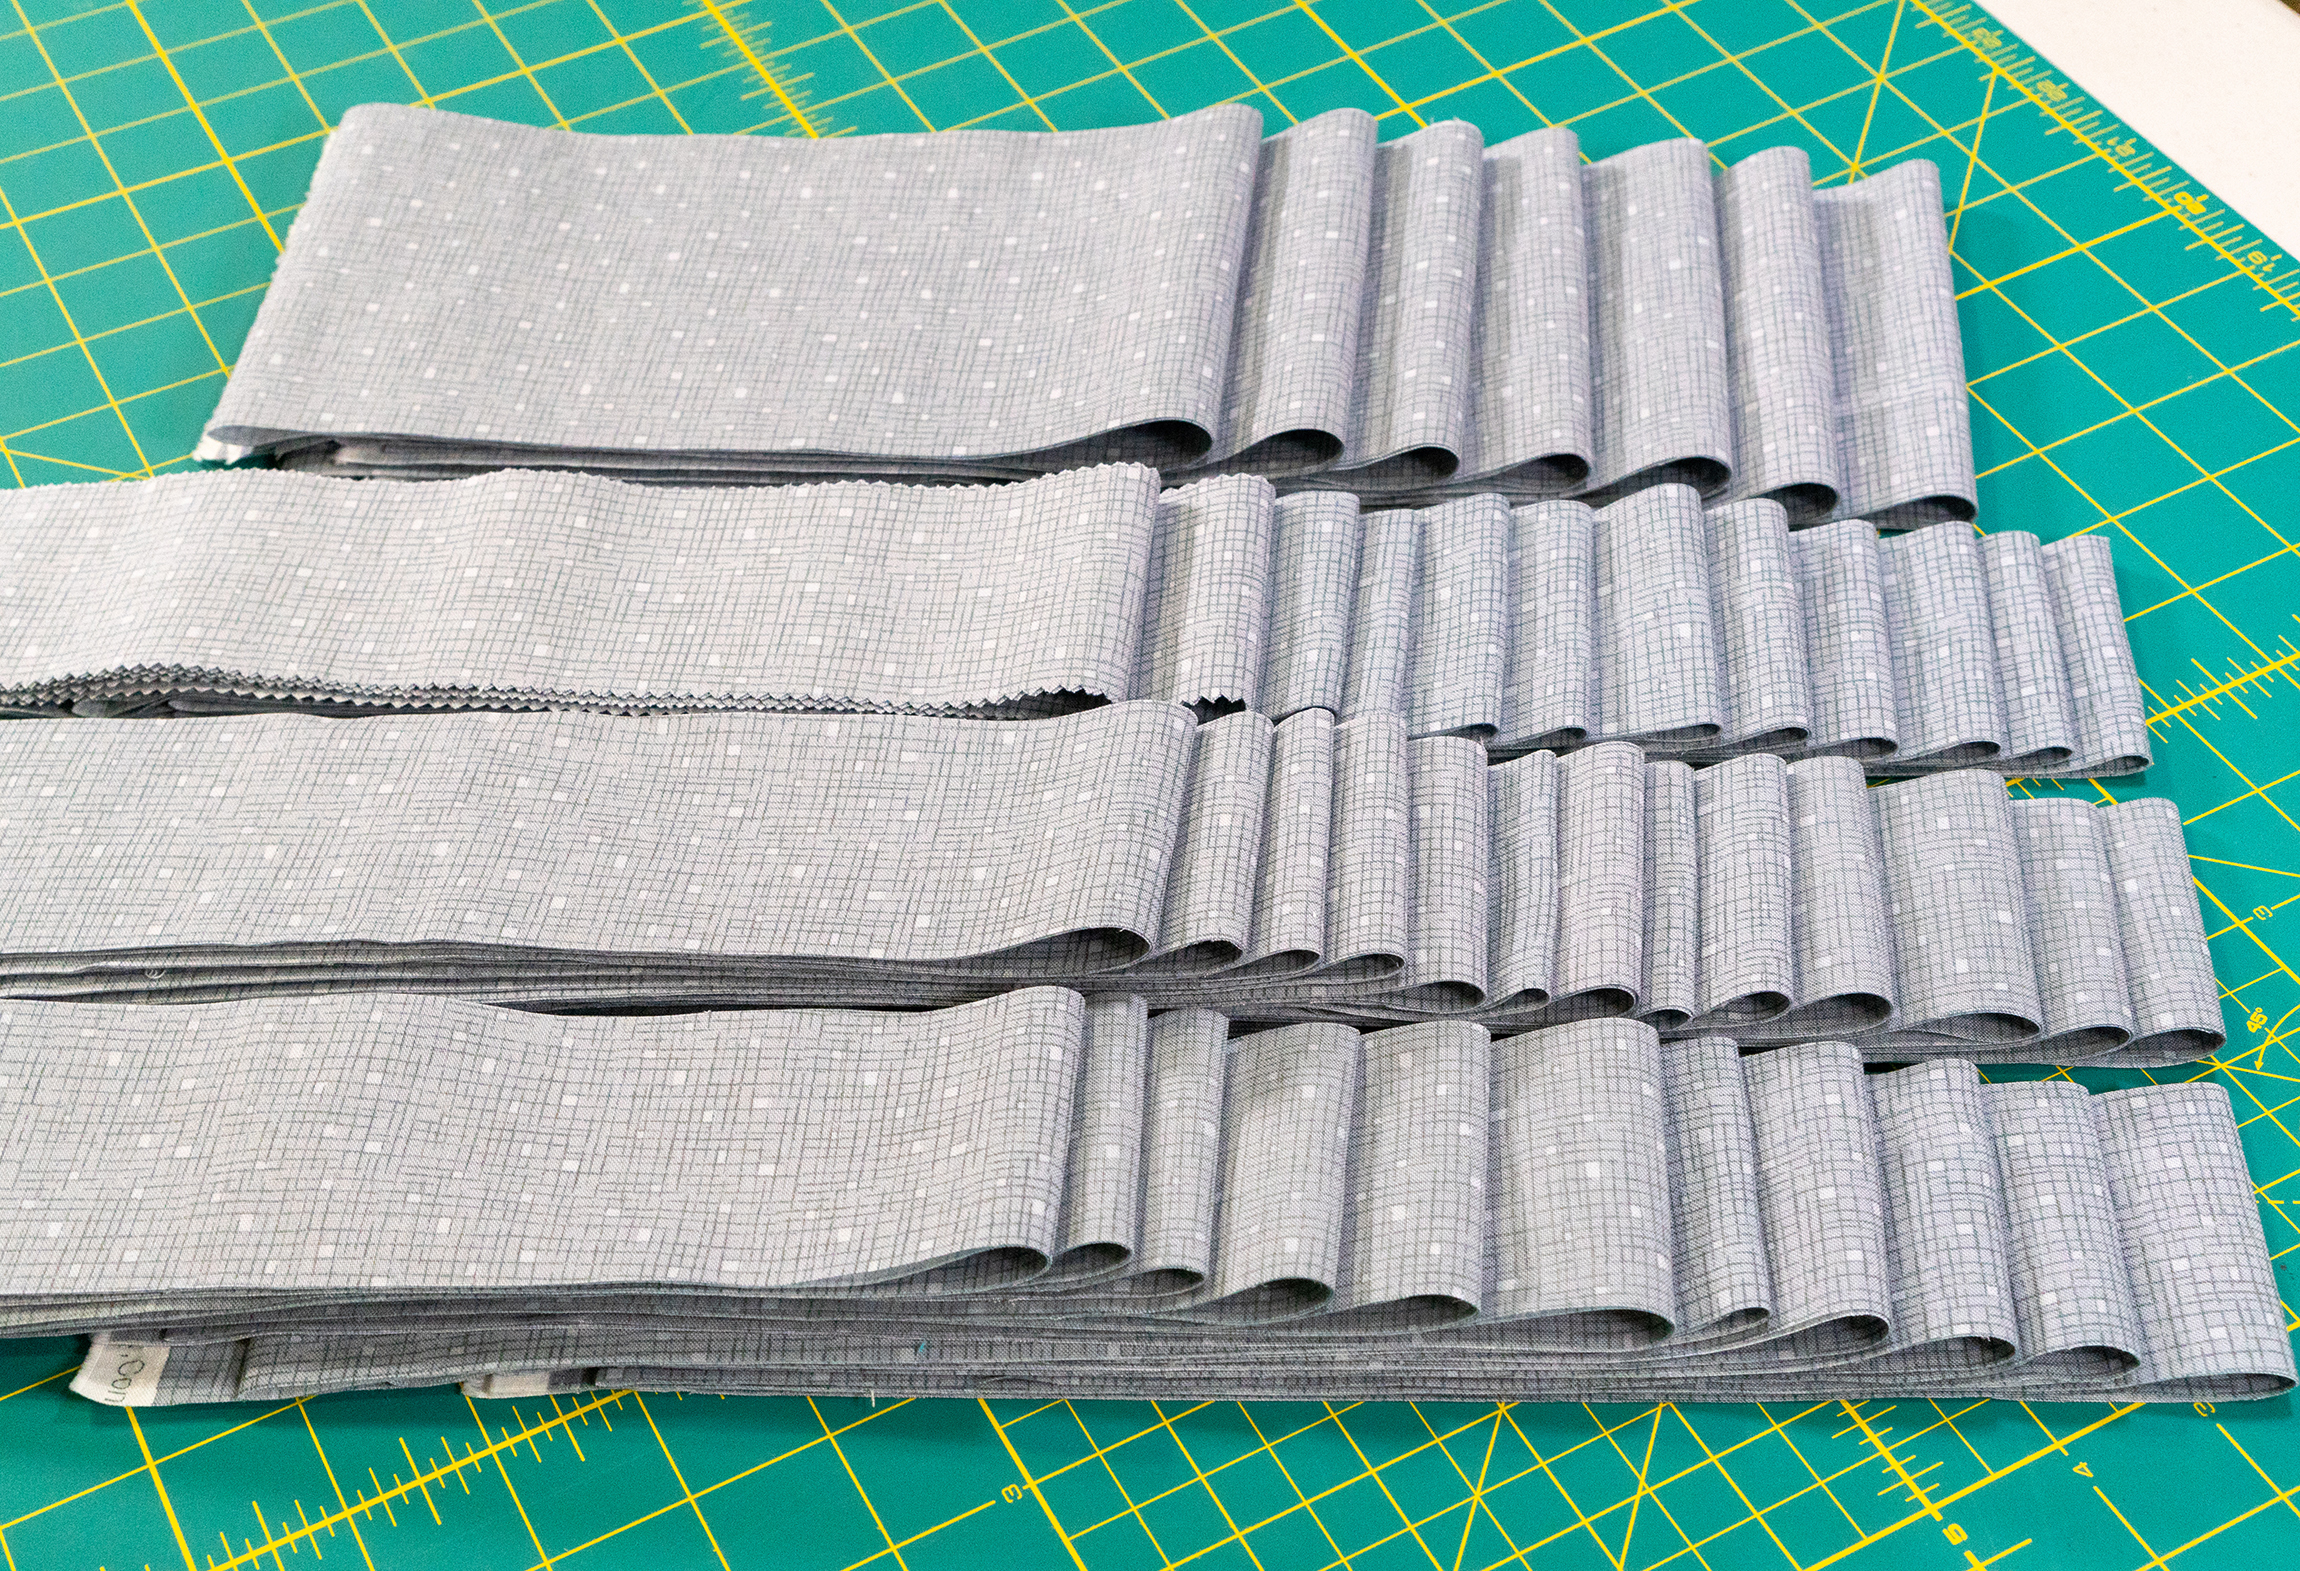
From the 32 background strips, subcut:
72 rectangles, 2 1/2″ x 6 1/2″
216 squares, 2 1/2″ x 2 1/2″
144 rectangles, 1 1/2″ x 2 1/2″
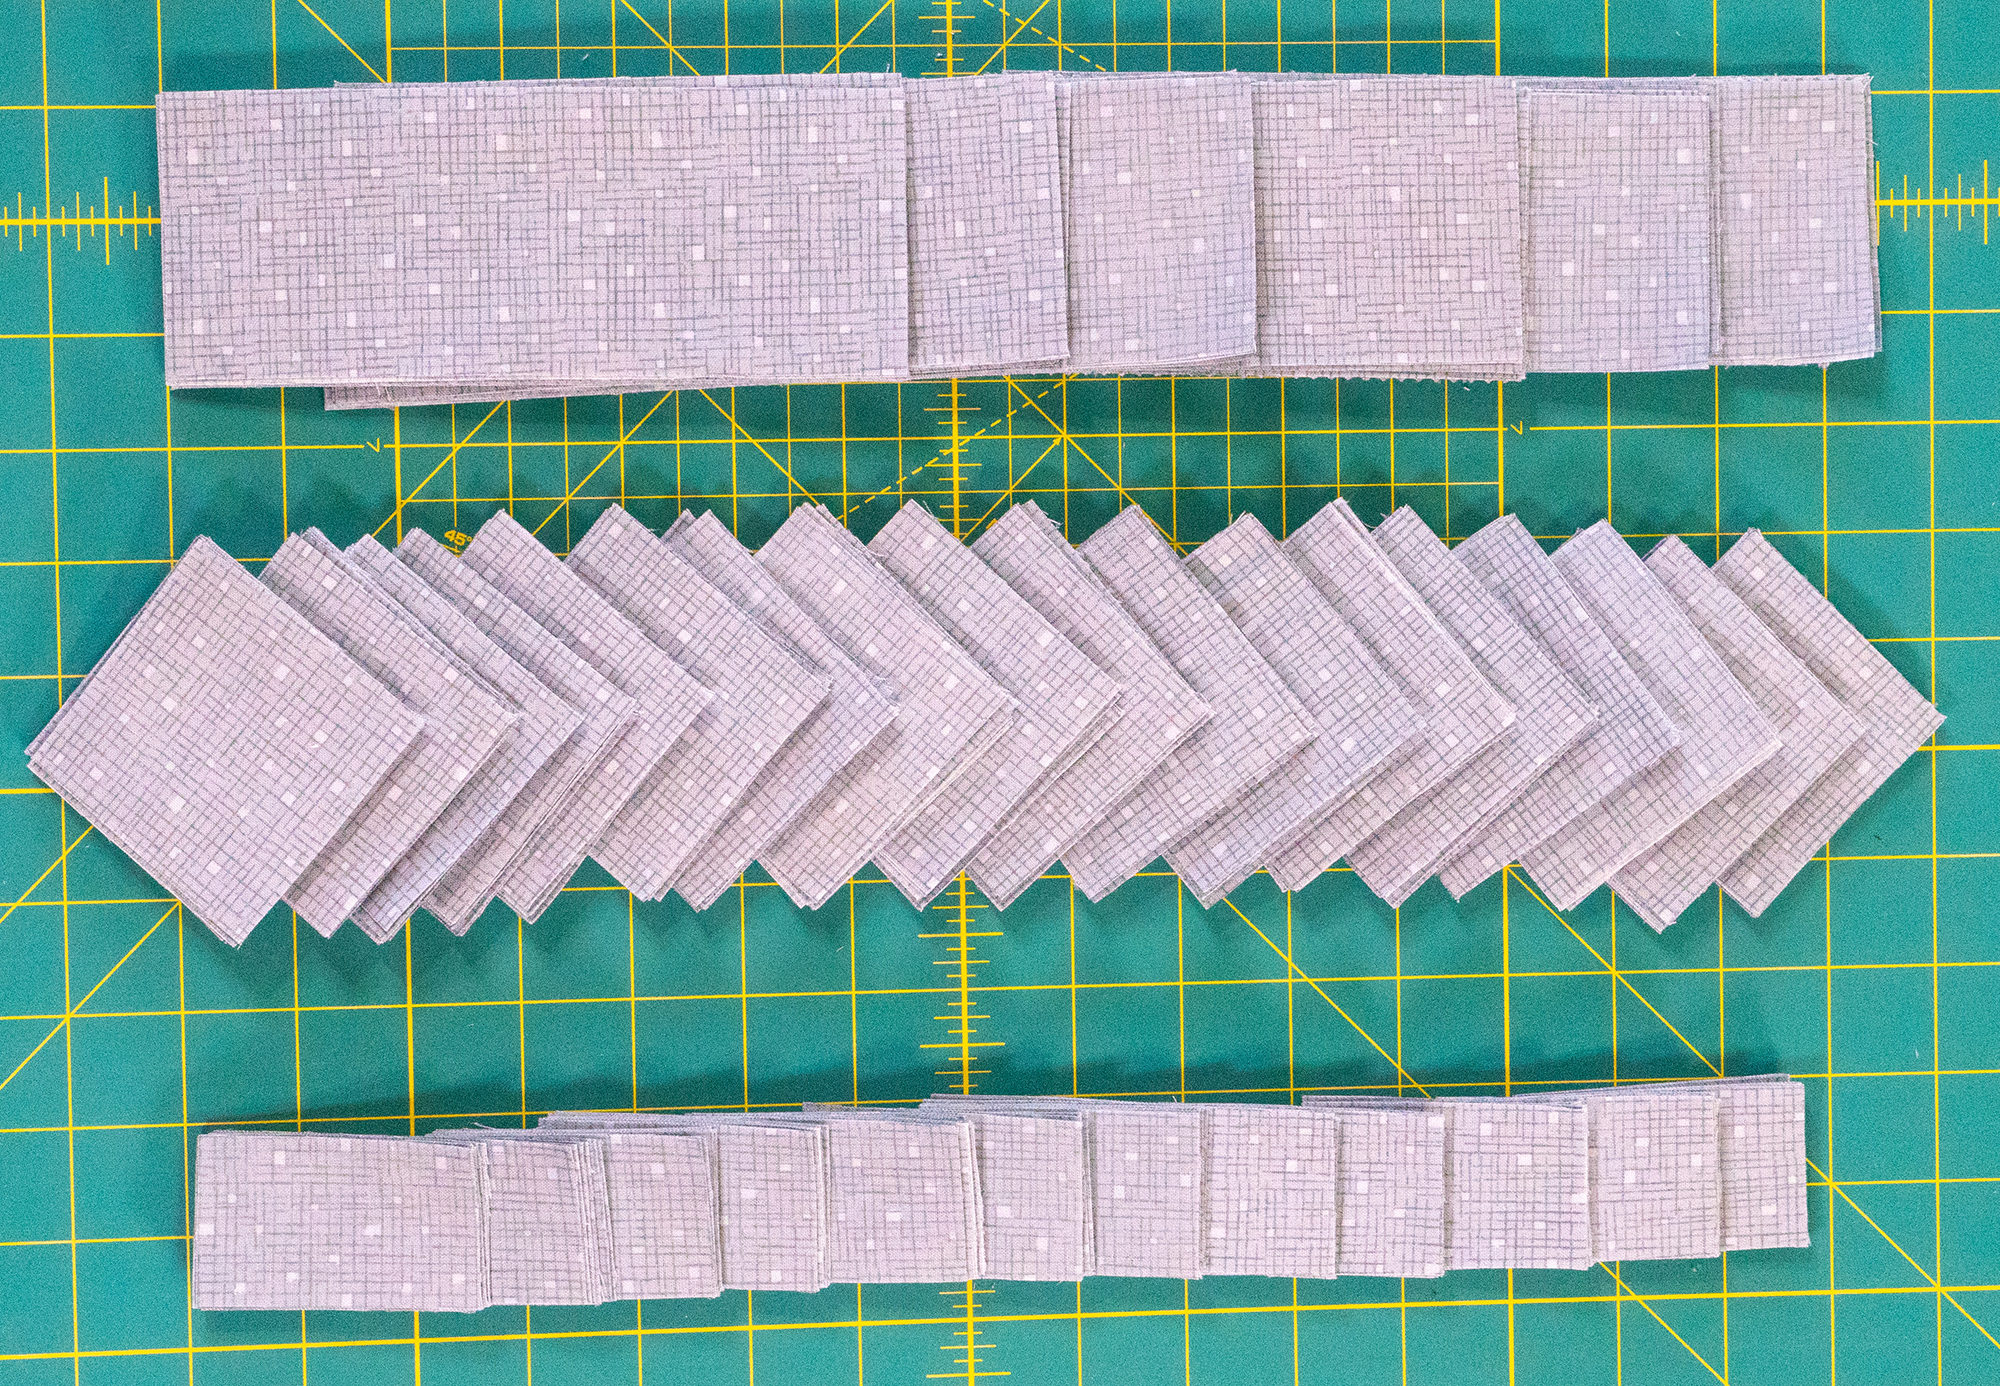
Tip: for easier counting layer them into stacks of 12.
I’ve cut mine into 6 stacks of long rectangles, 18 stacks of squares, and 12 stacks of smaller rectangles.)
General Piecing Tips
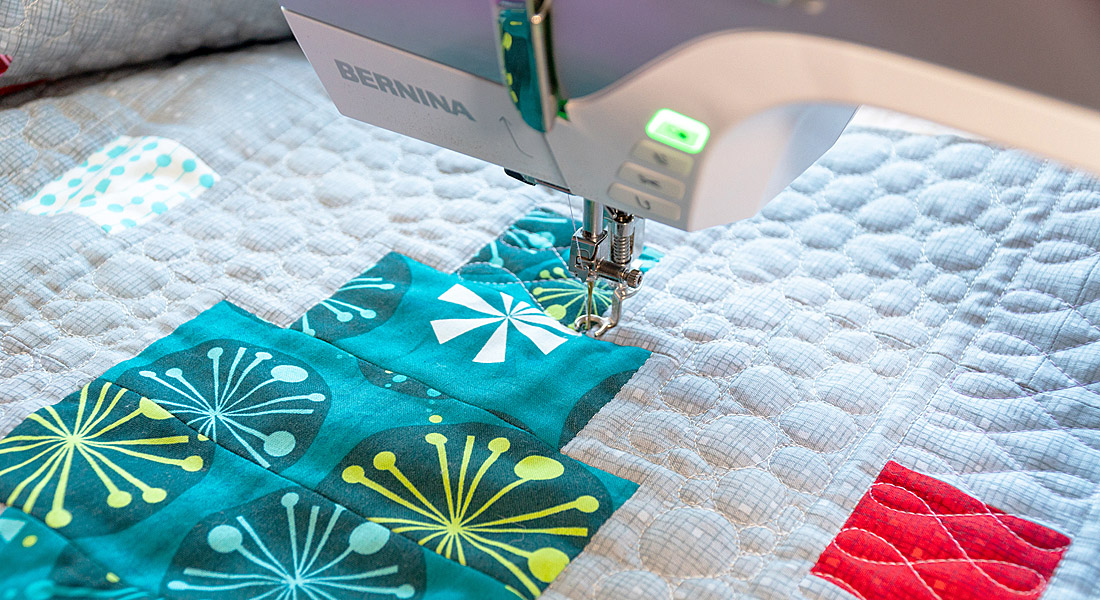
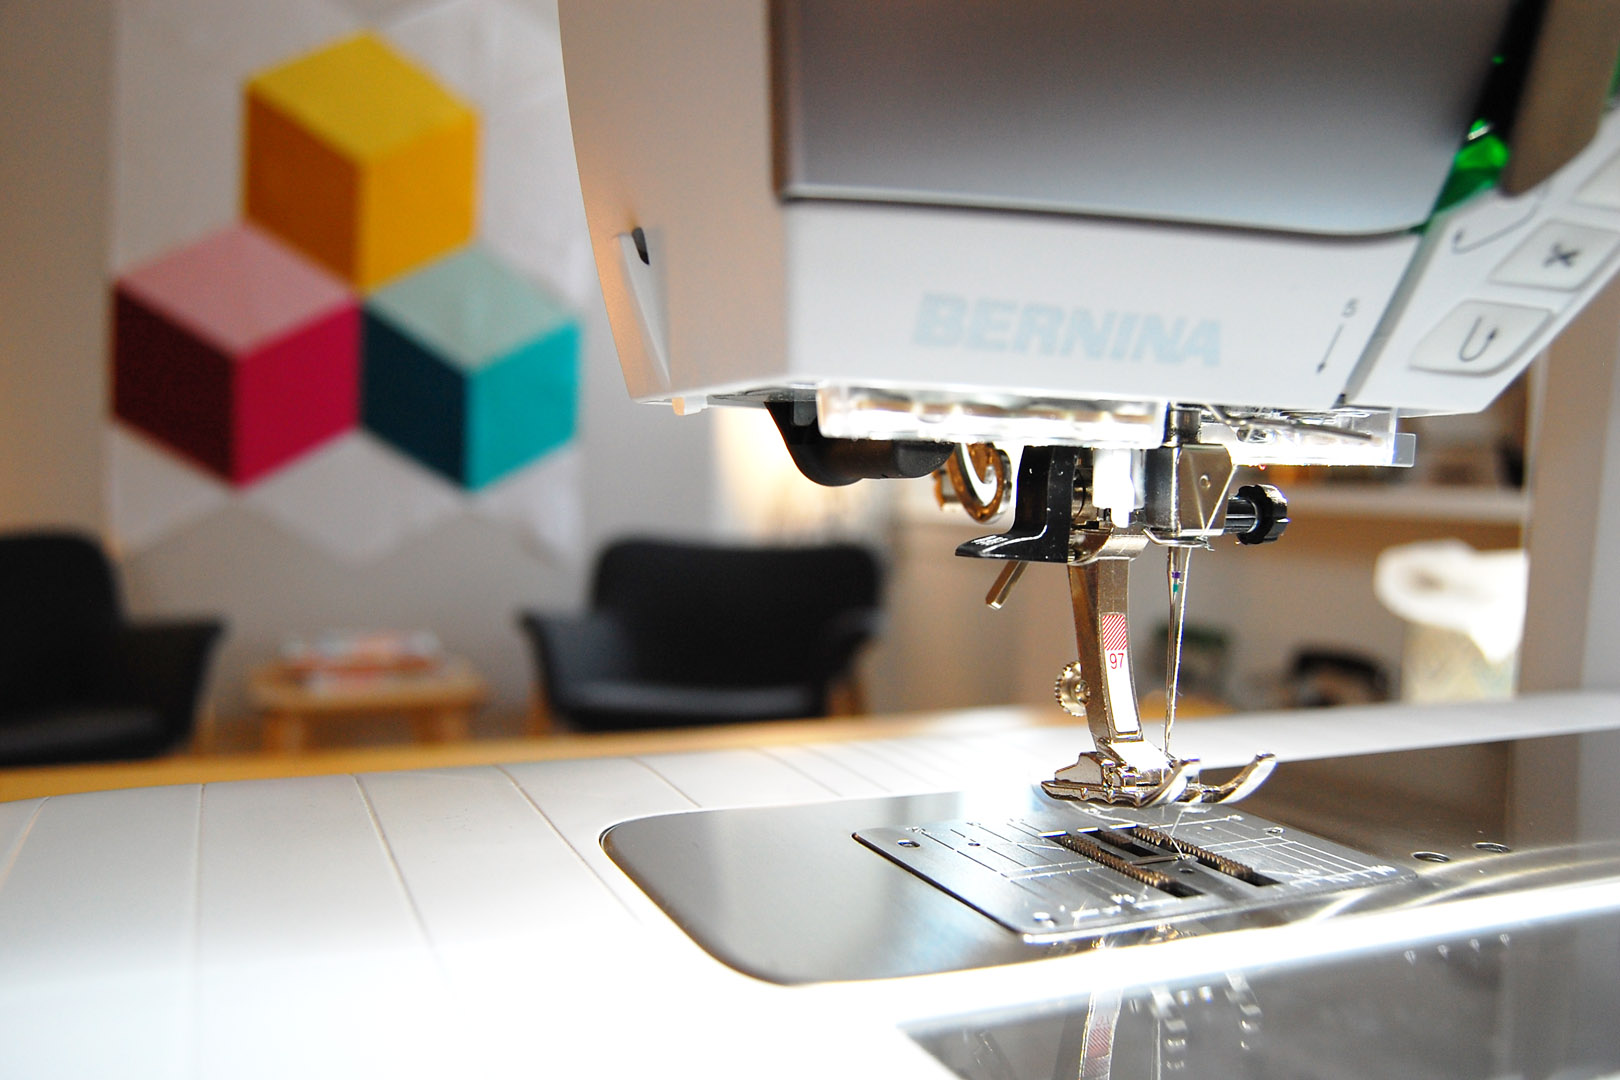
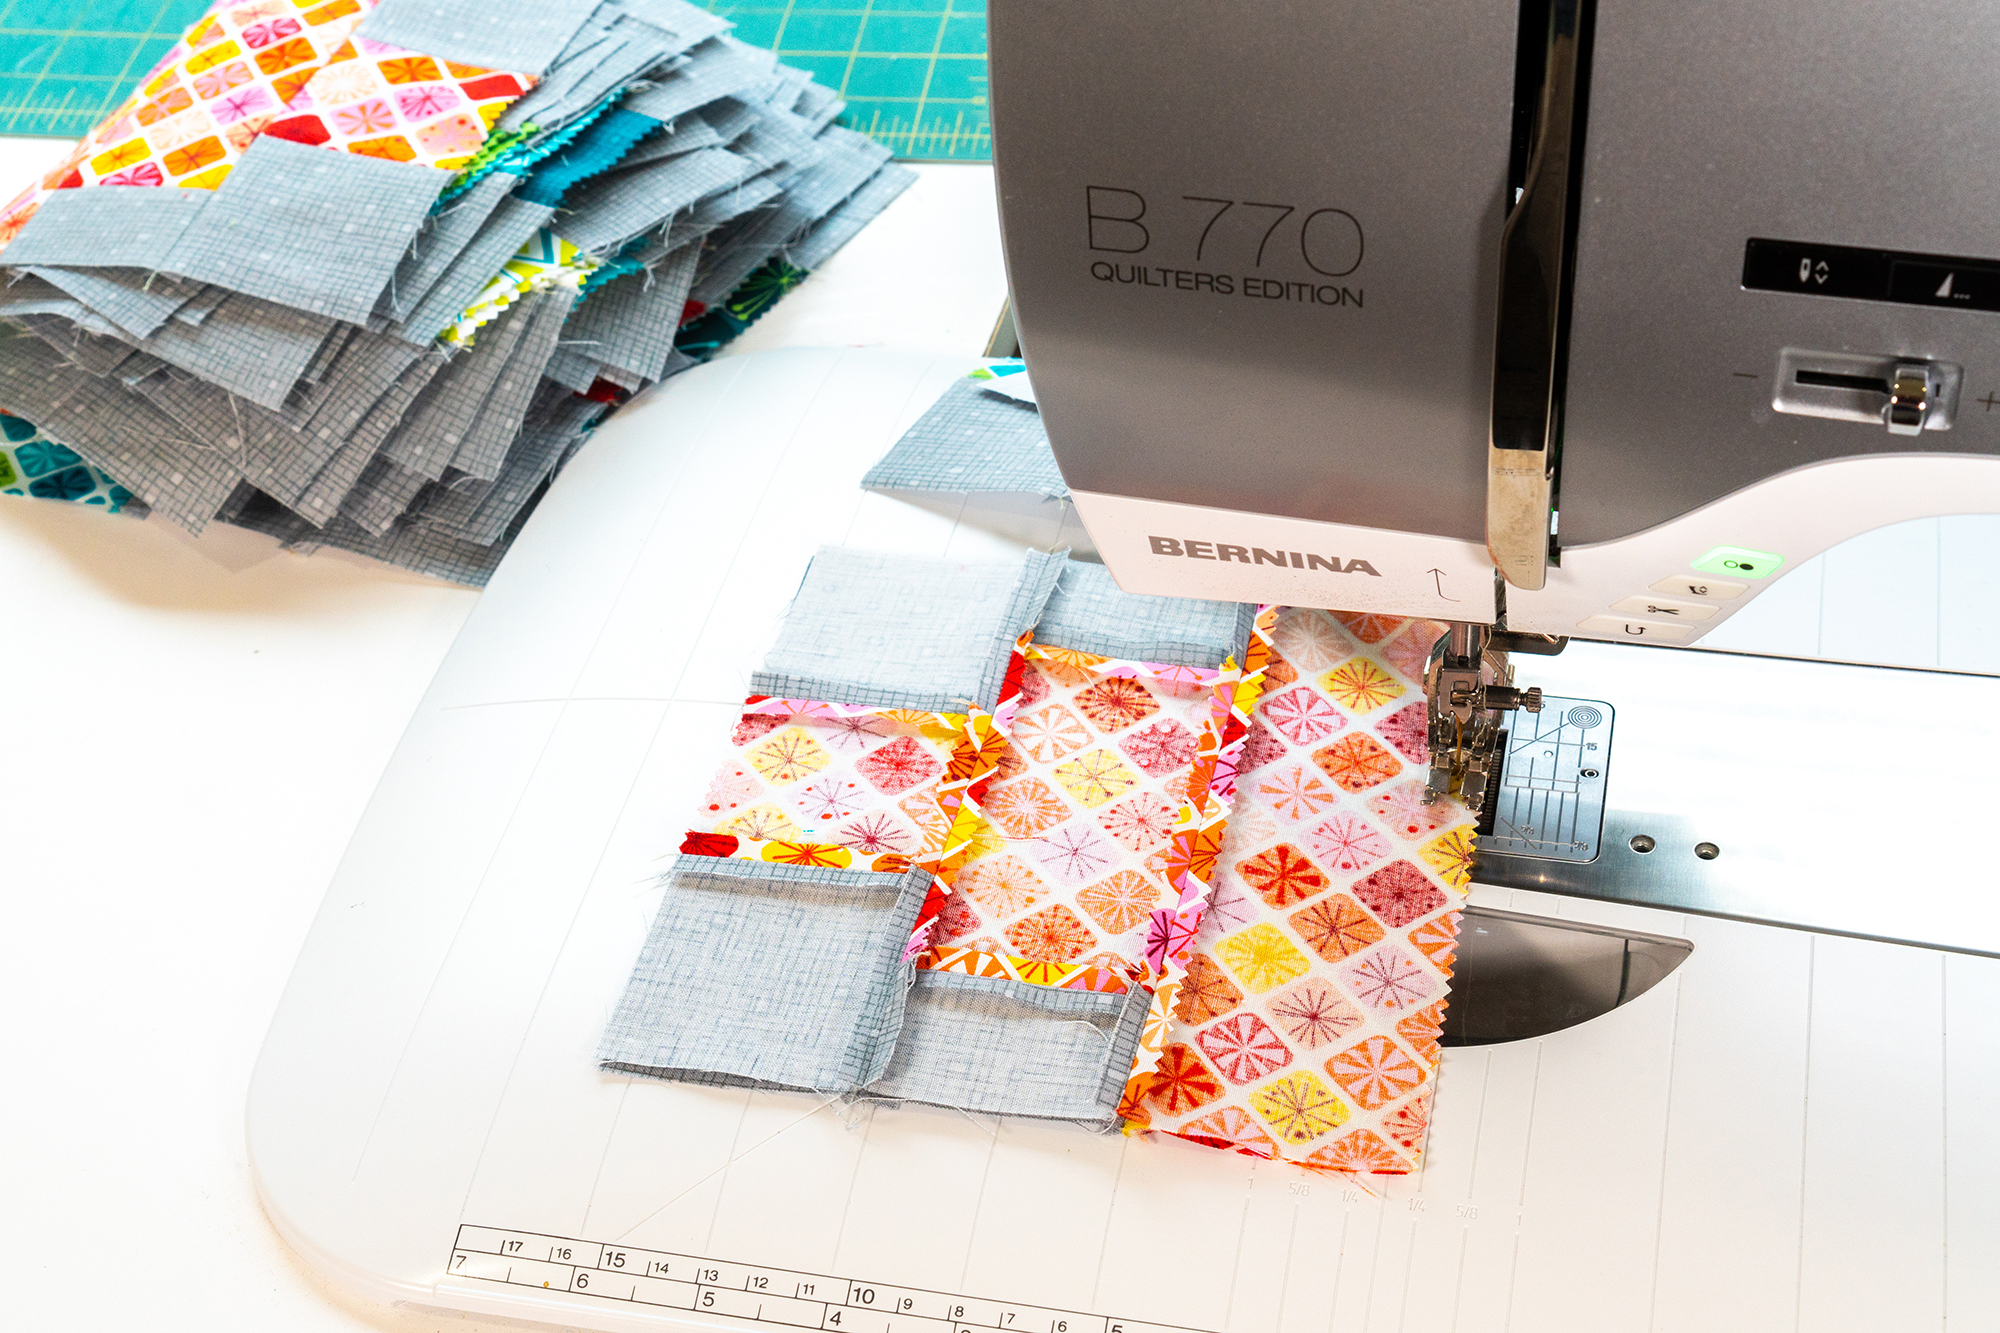
For accurate results, I sew with a shorter stitch length of 2.0 on my BERNINA 770 QE using my 37D foot – the quarter inch seam allowance patchwork foot with the the dual feed engaged. I piece with Aurifil 50 weight cotton thread in a neutral color for strong seams that don’t take up any extra width.
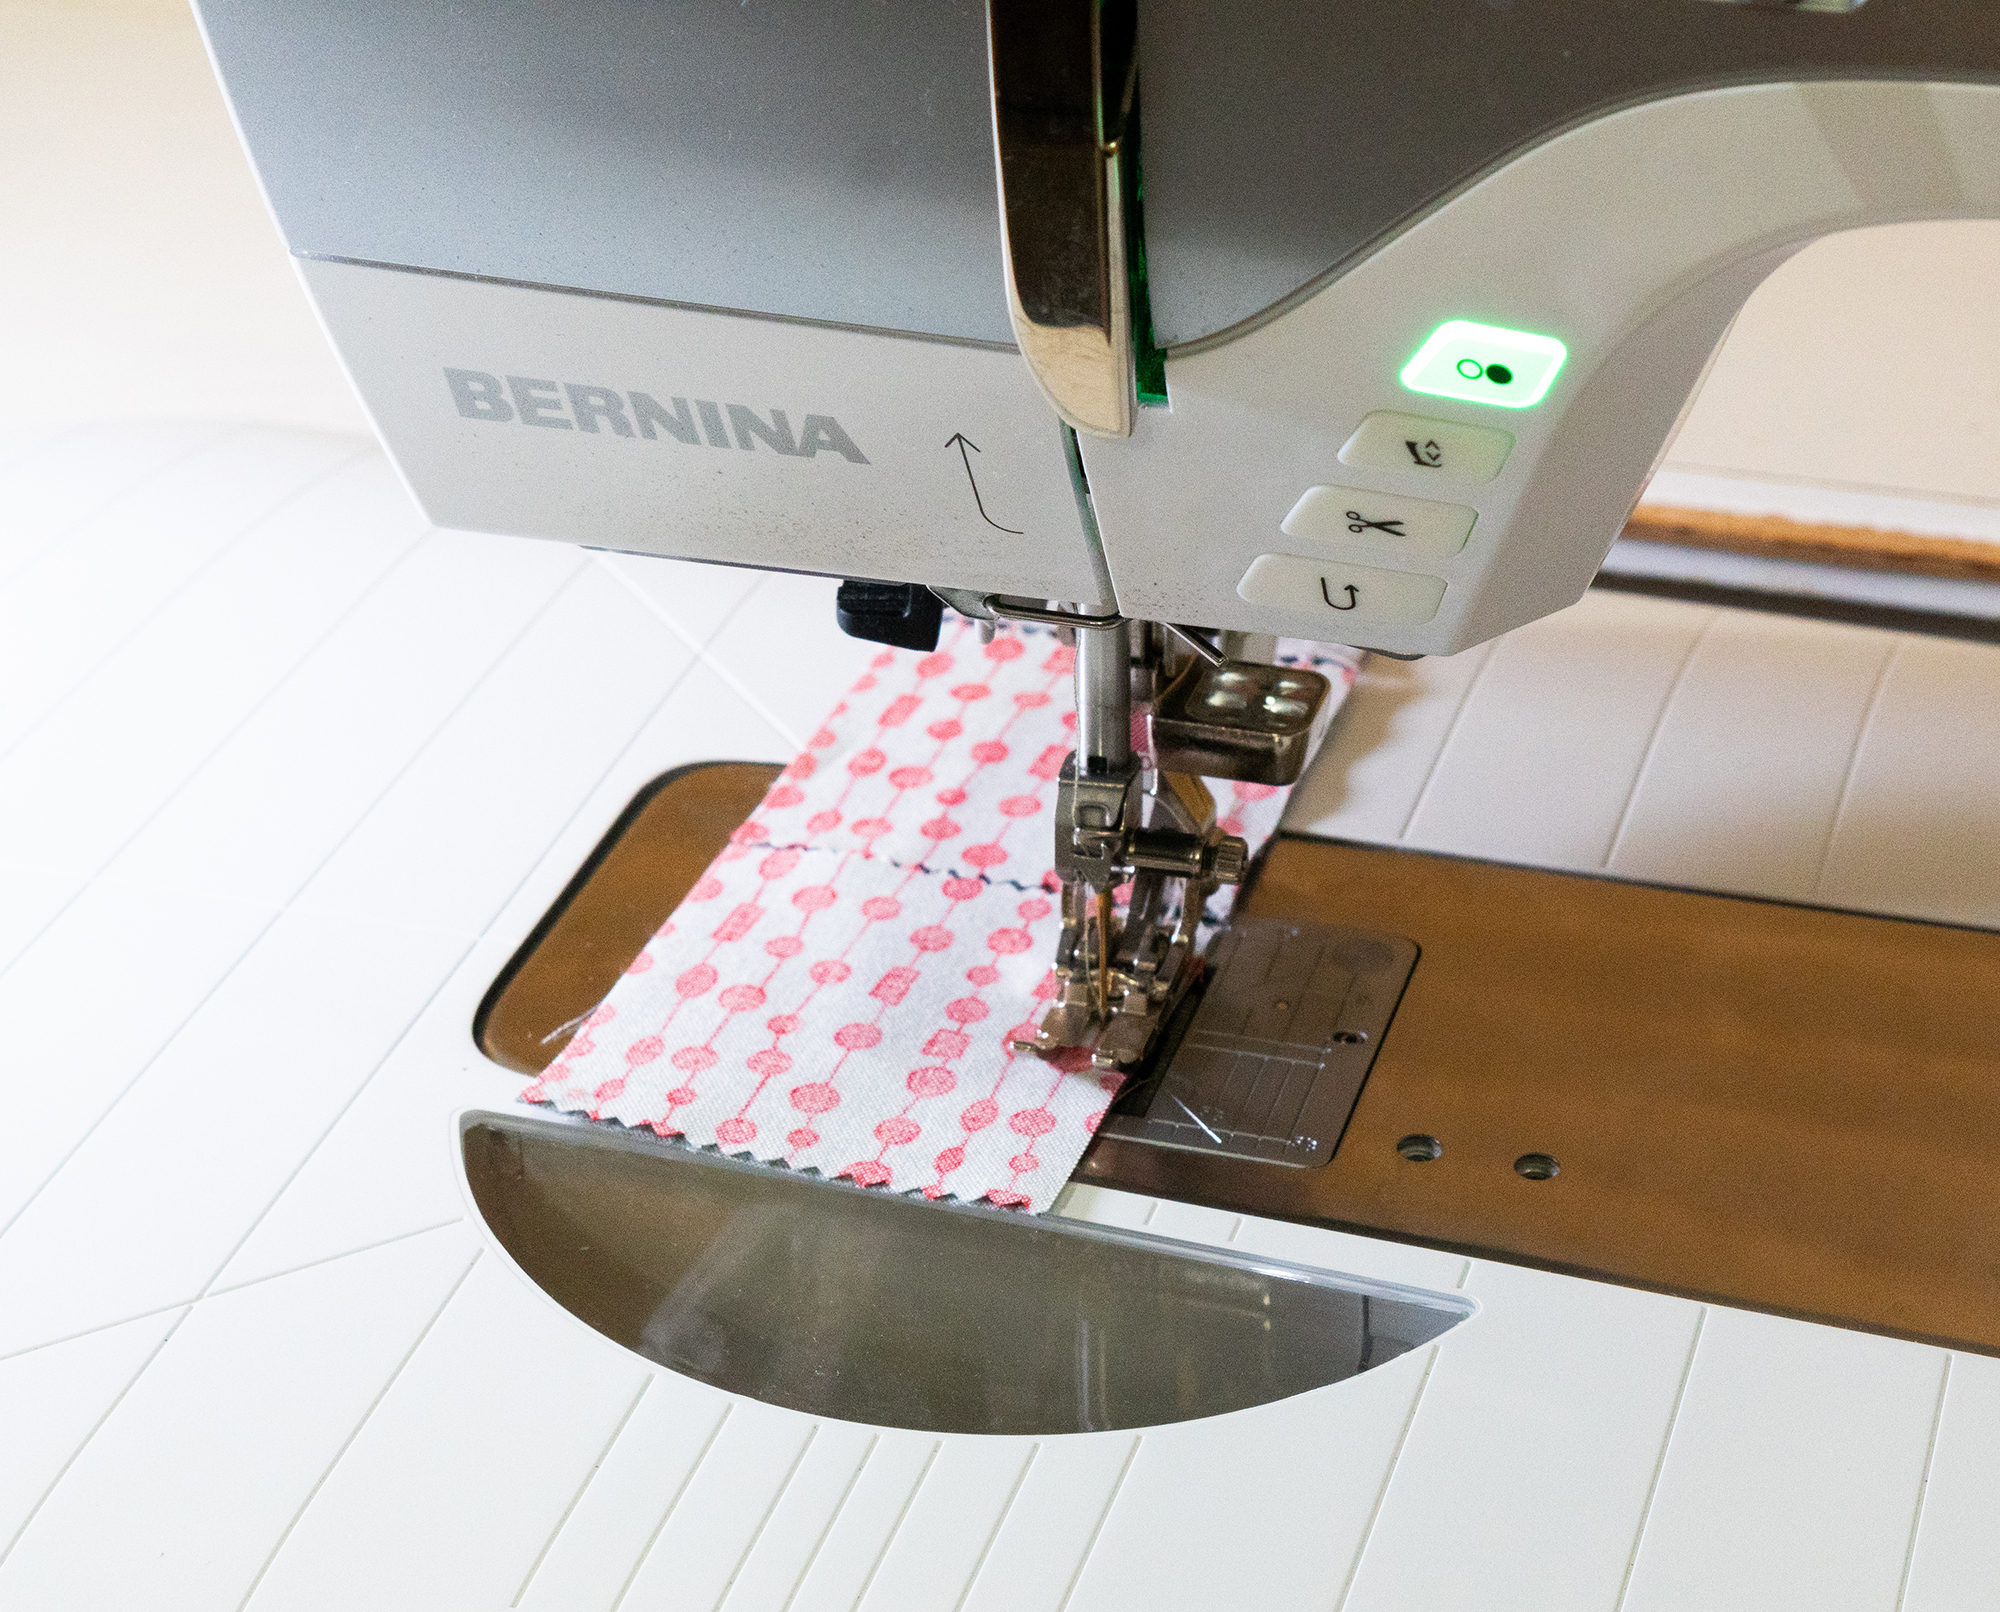
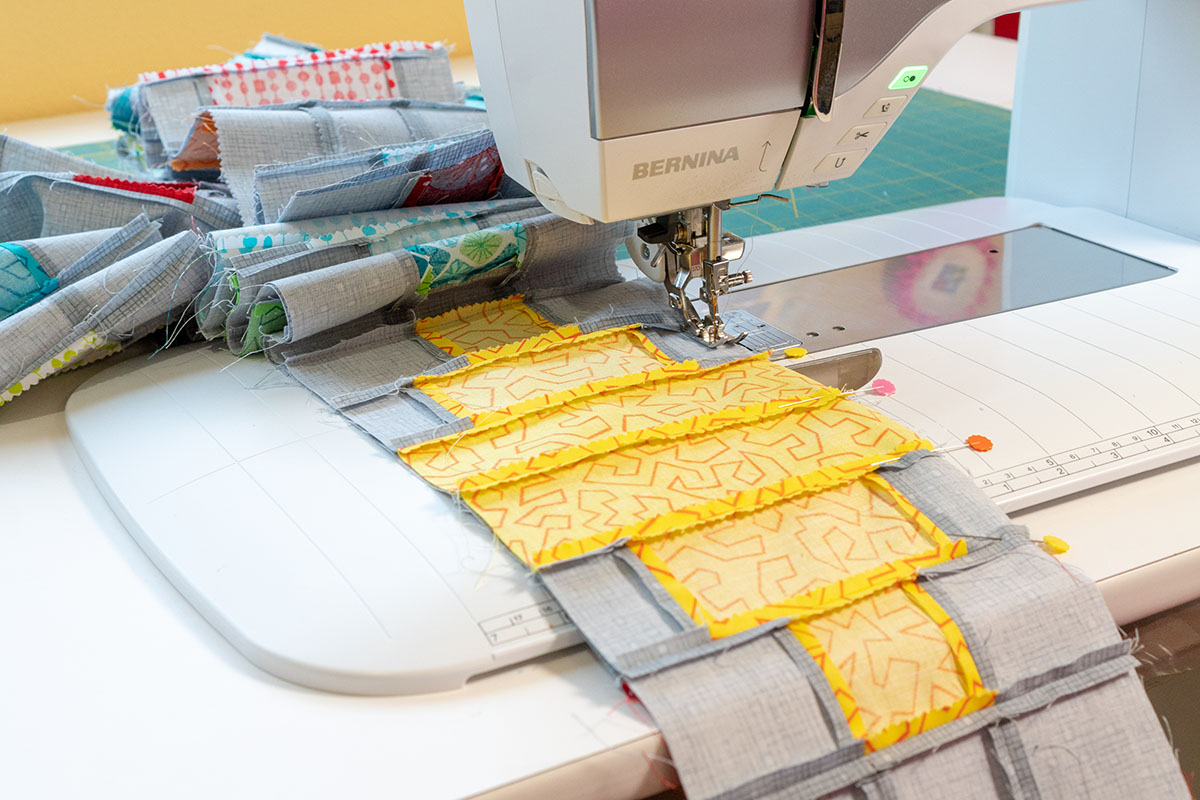
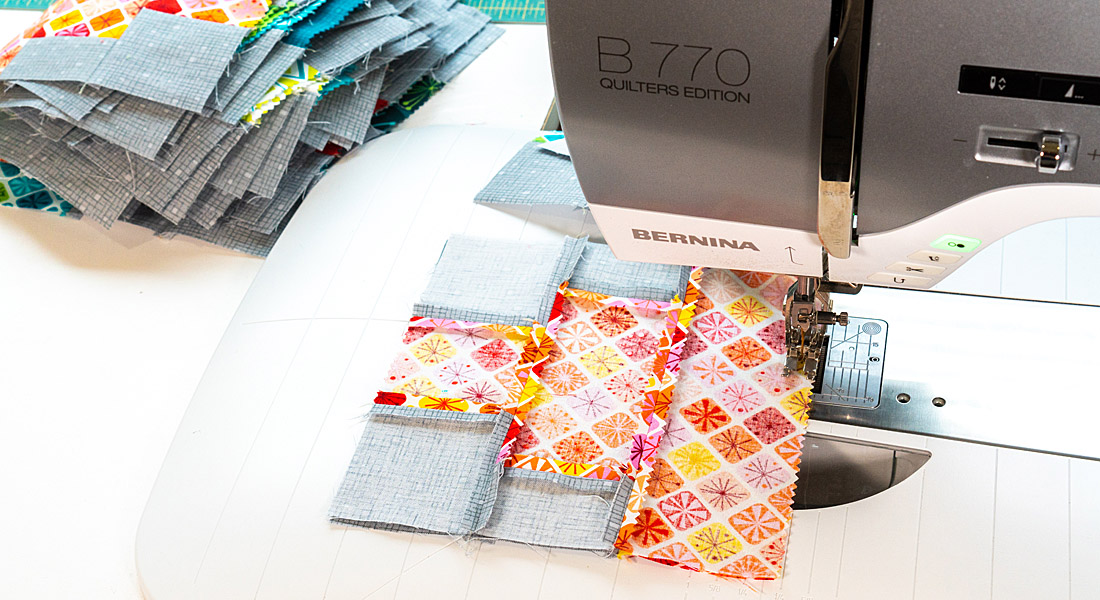
To make efficient use of time, I prefer to stack my pieces on top of each other and assembly line sew (chain piece) as much as possible. I always start with a small scrap of fabric called a “leader” and finish sewing with an “ender” so that my starting and ending thread tails don’t get all messy.
I press all of my seams open so that I don’t have to worry about which way to nest the seams, and I use pins to ensure that my seams will not shift while sewing. I use a hot dry iron with no steam. But remember, do what works best for you. As long as you are having fun and getting good results, that’s the most important thing!
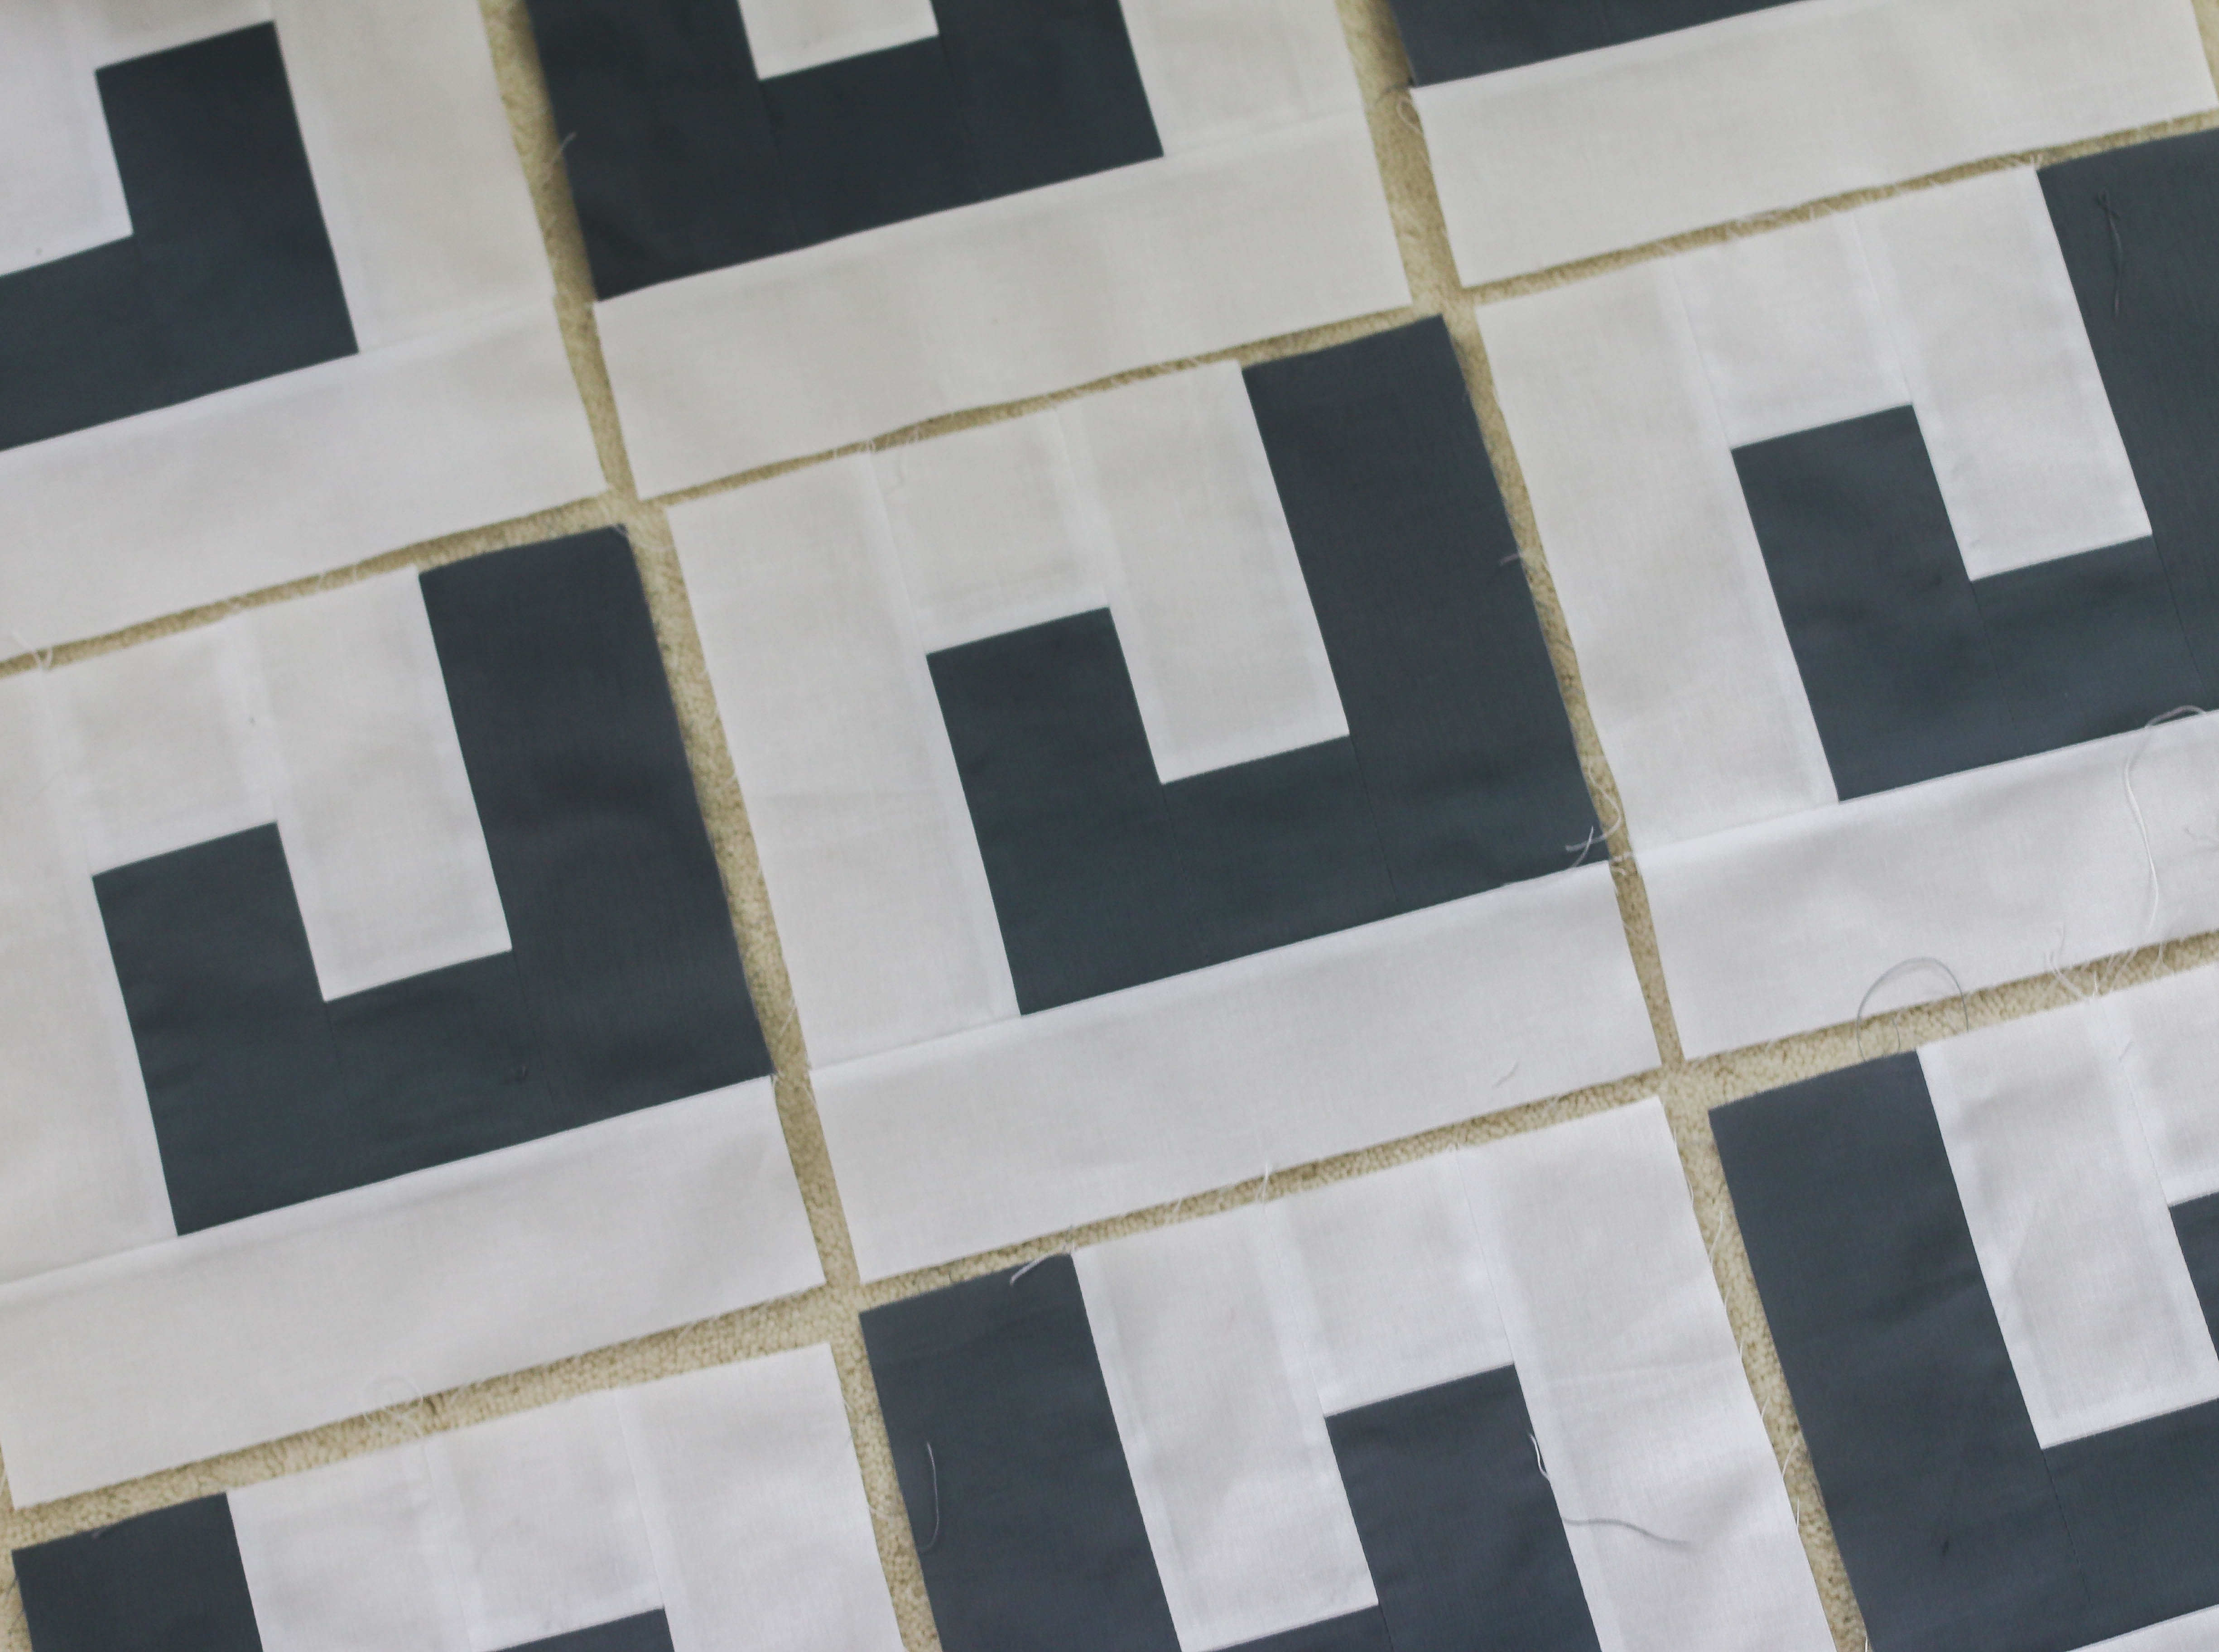
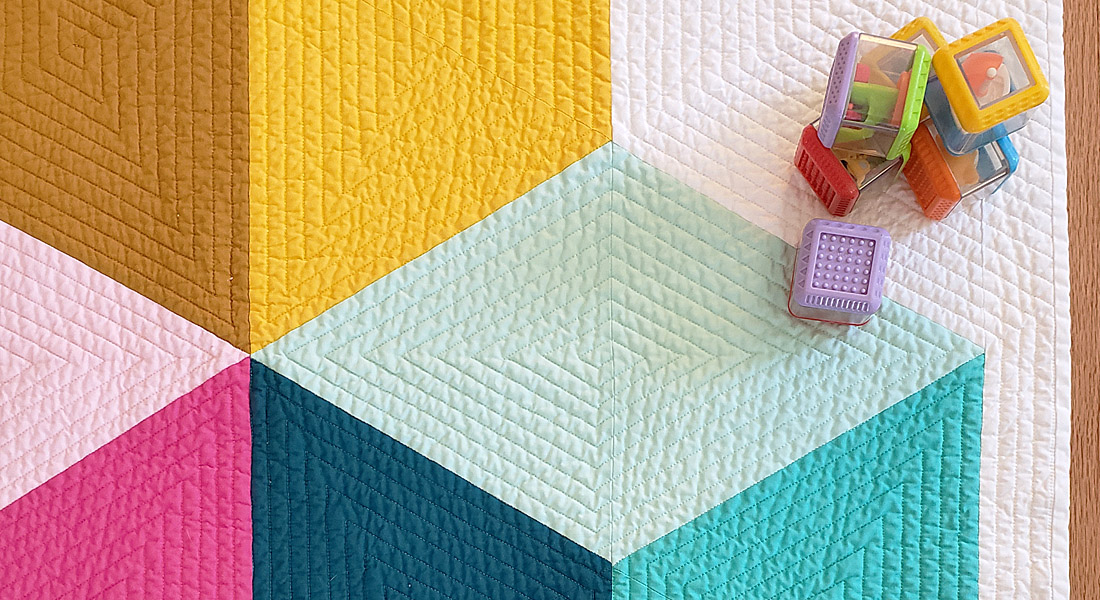
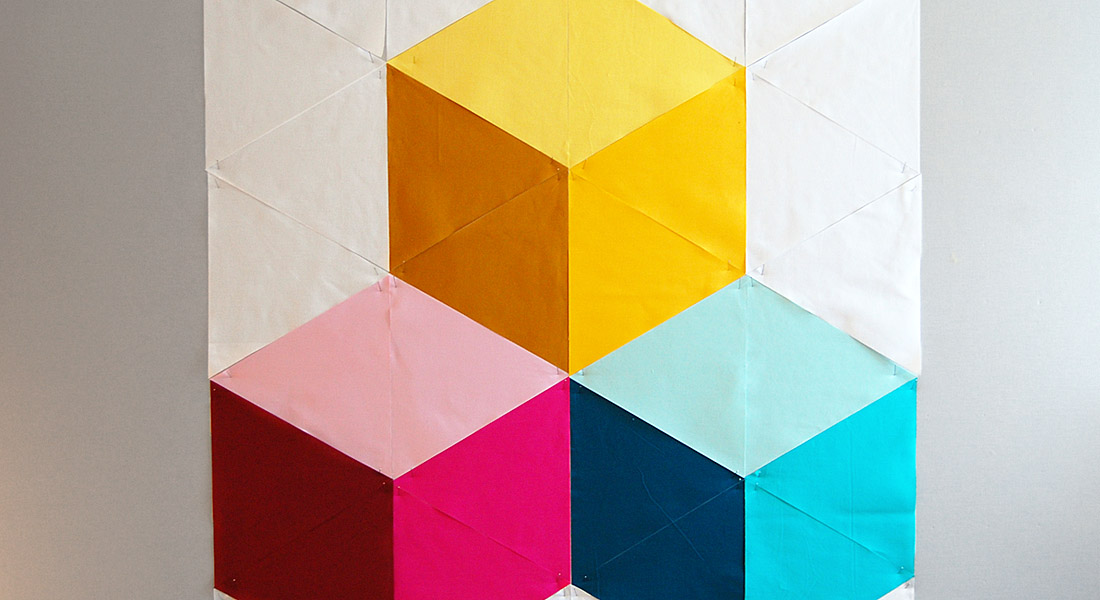
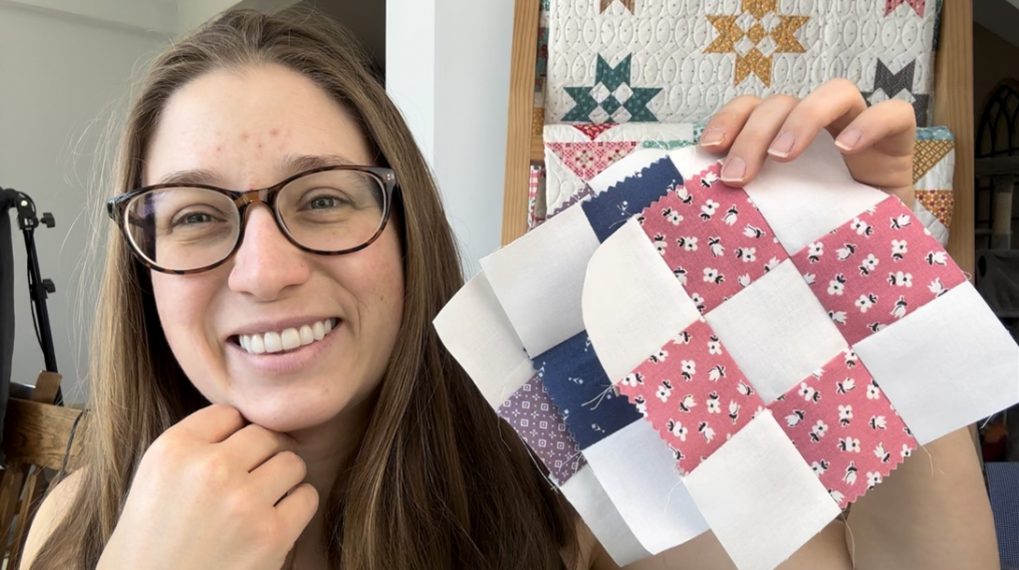
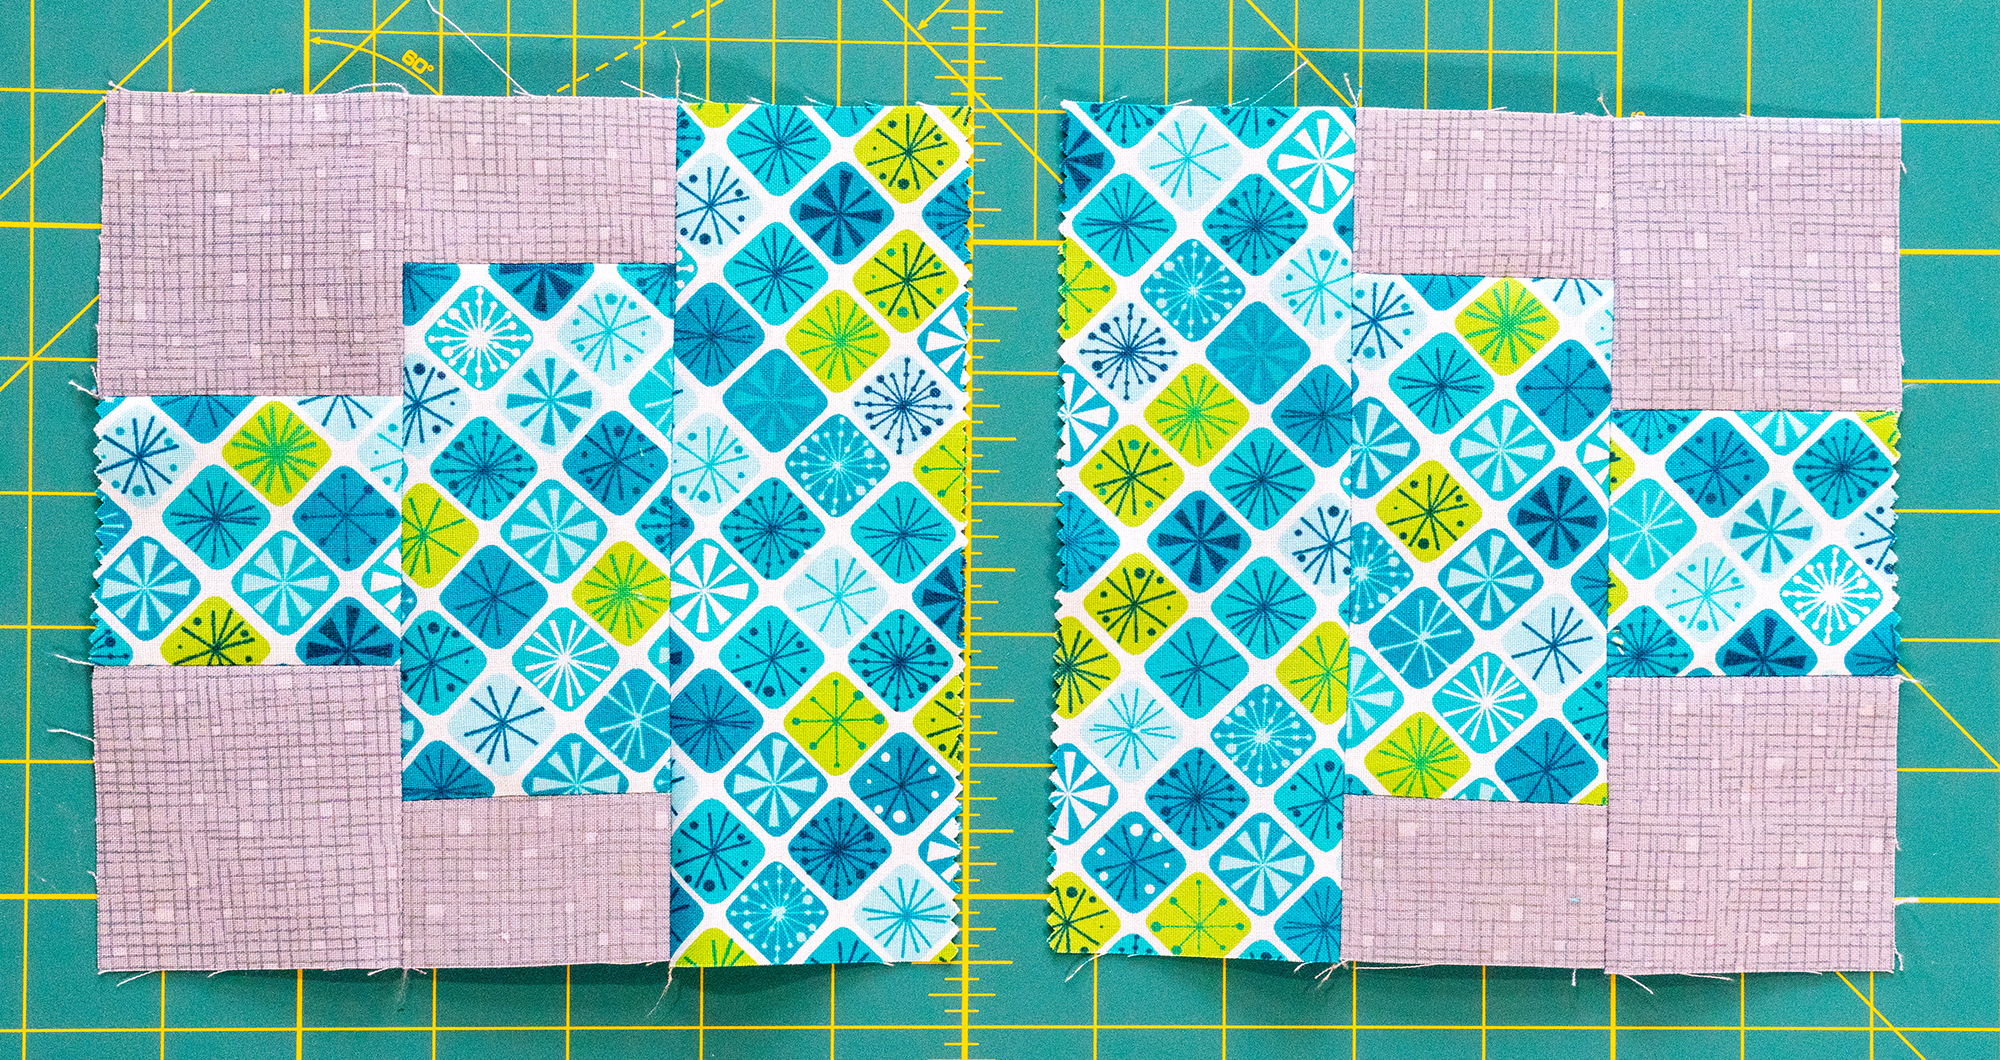
Step 3 – Sew the Lantern Blocks
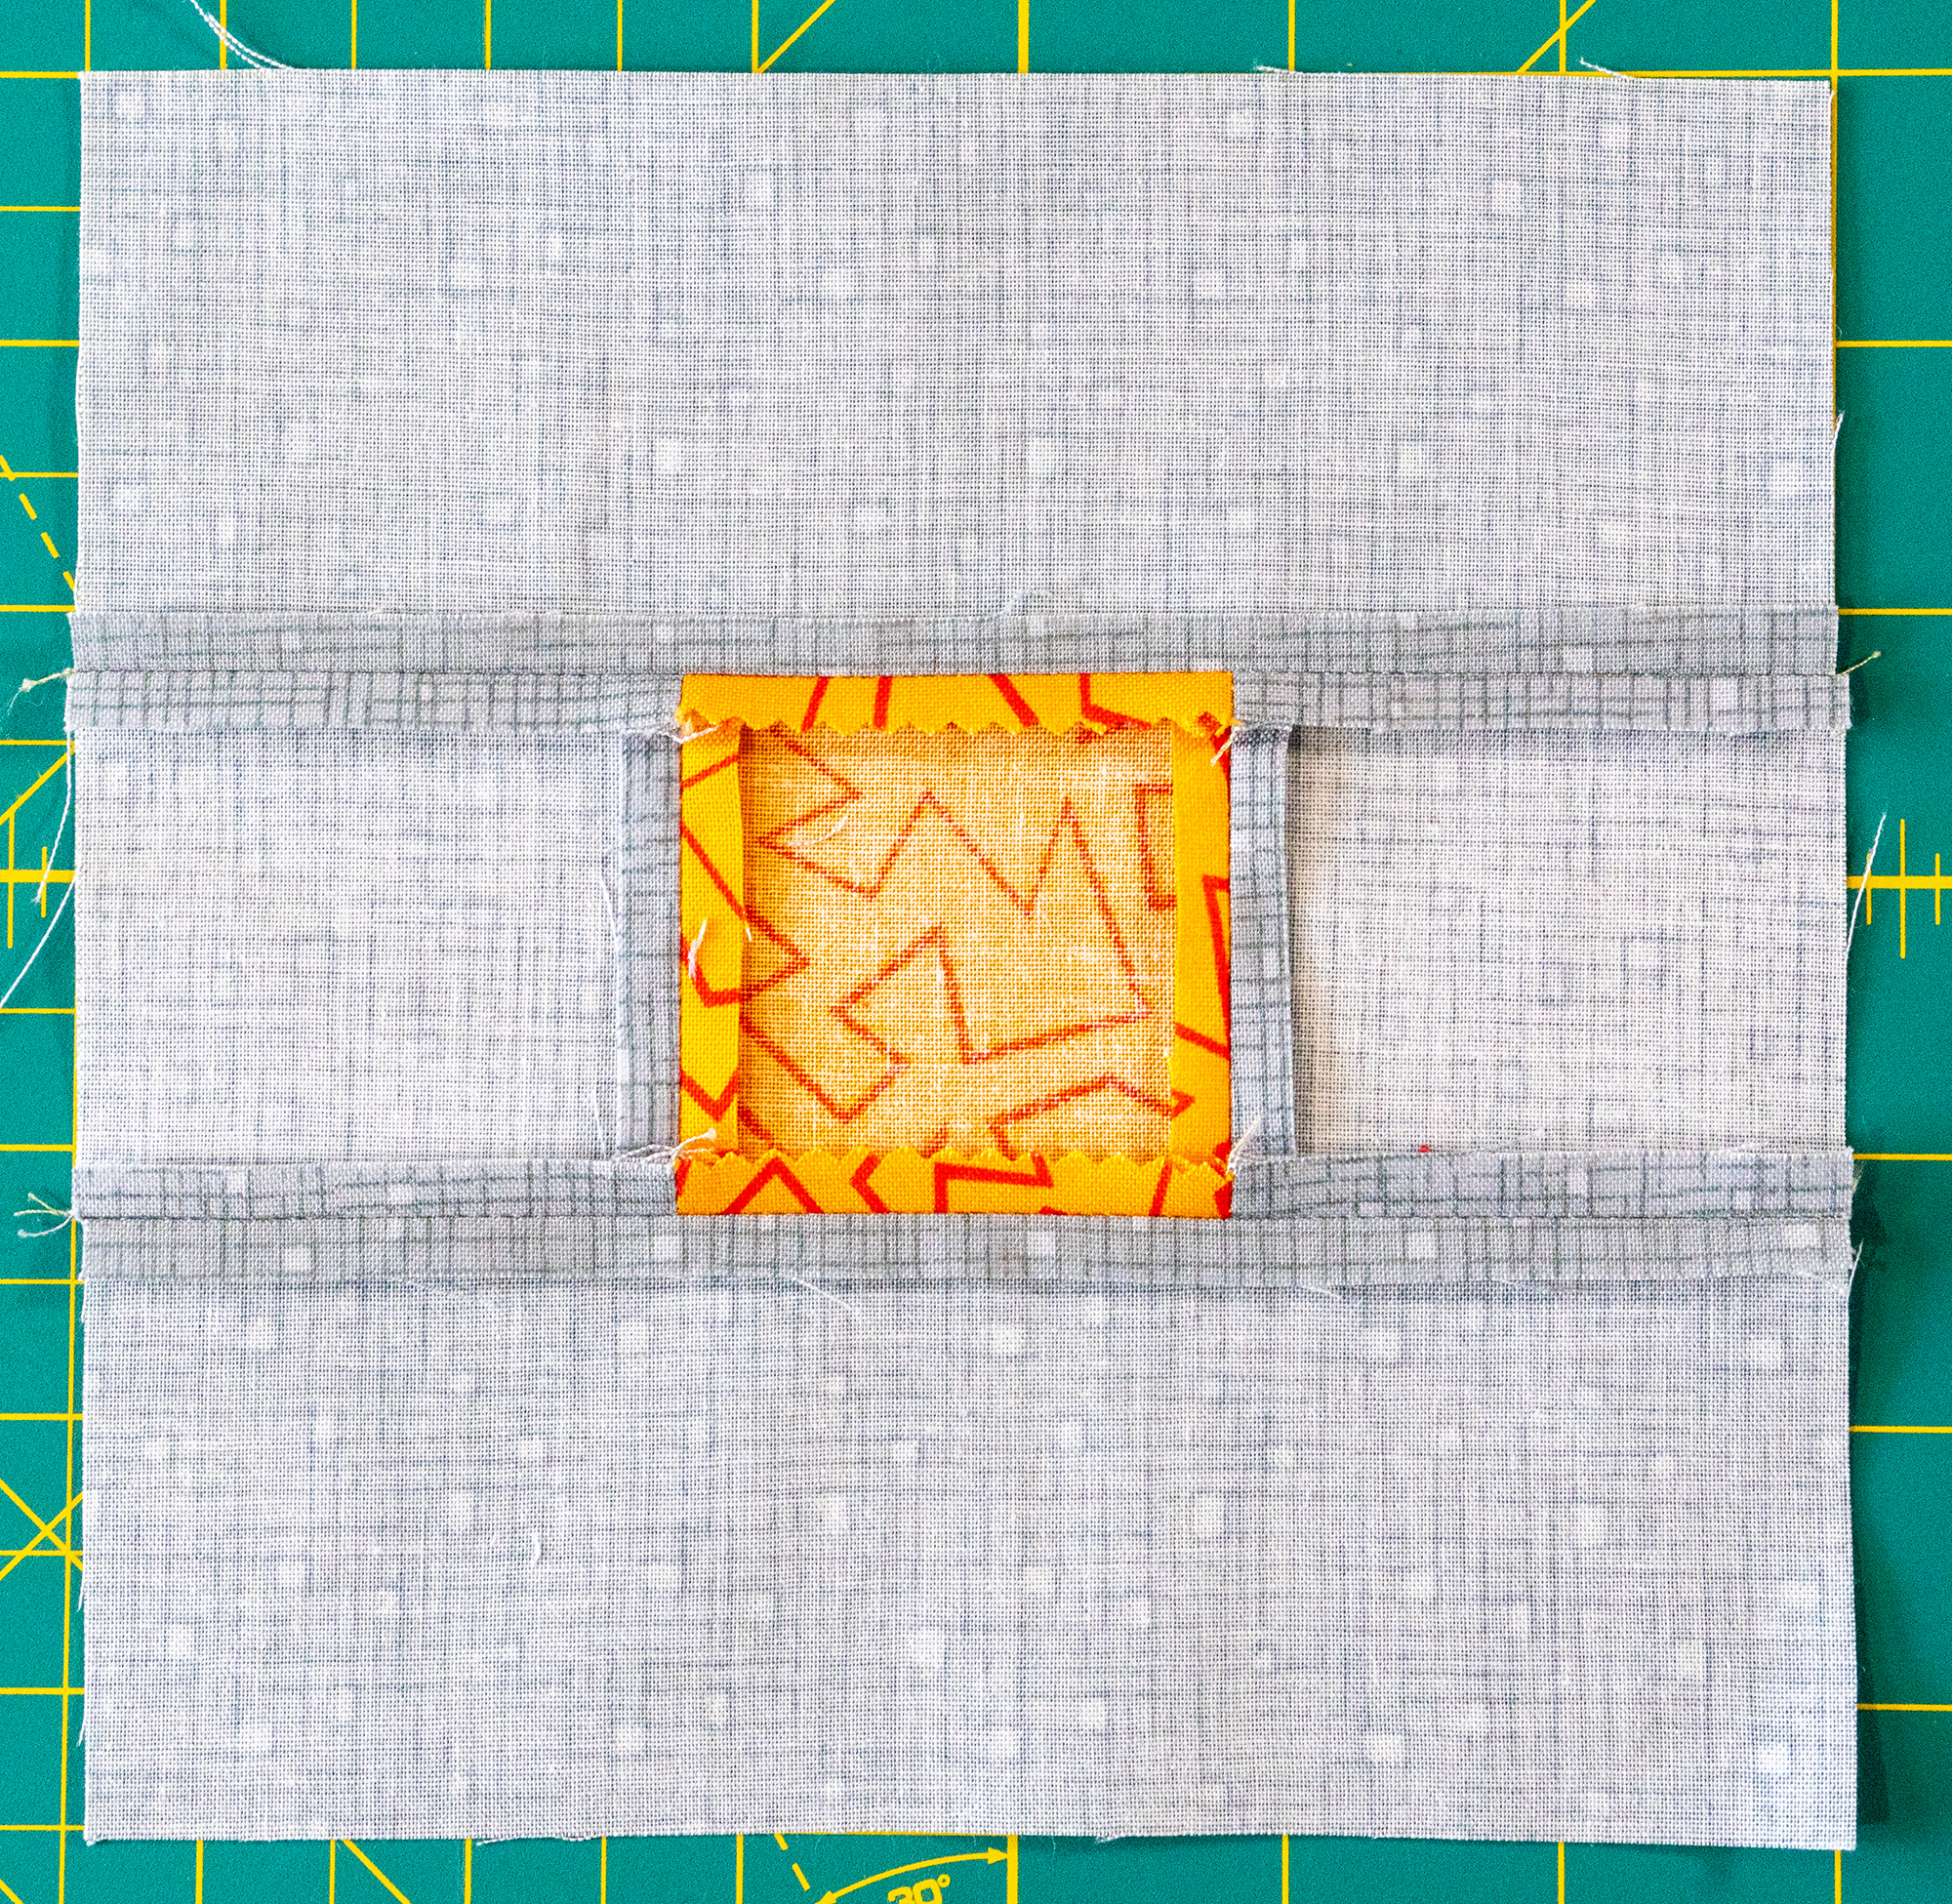
Bonus Step – speedy sewing!! To speed up the process, join two gray squares onto either side of one print square until you’ve sewn a total of 108 triple square units, If you’ve counted correctly, this will use up all of the 2 1/2″ squares that you cut. Press seams as you go.

This will give you enough for two triple square units per Lantern block and one per Bead block.
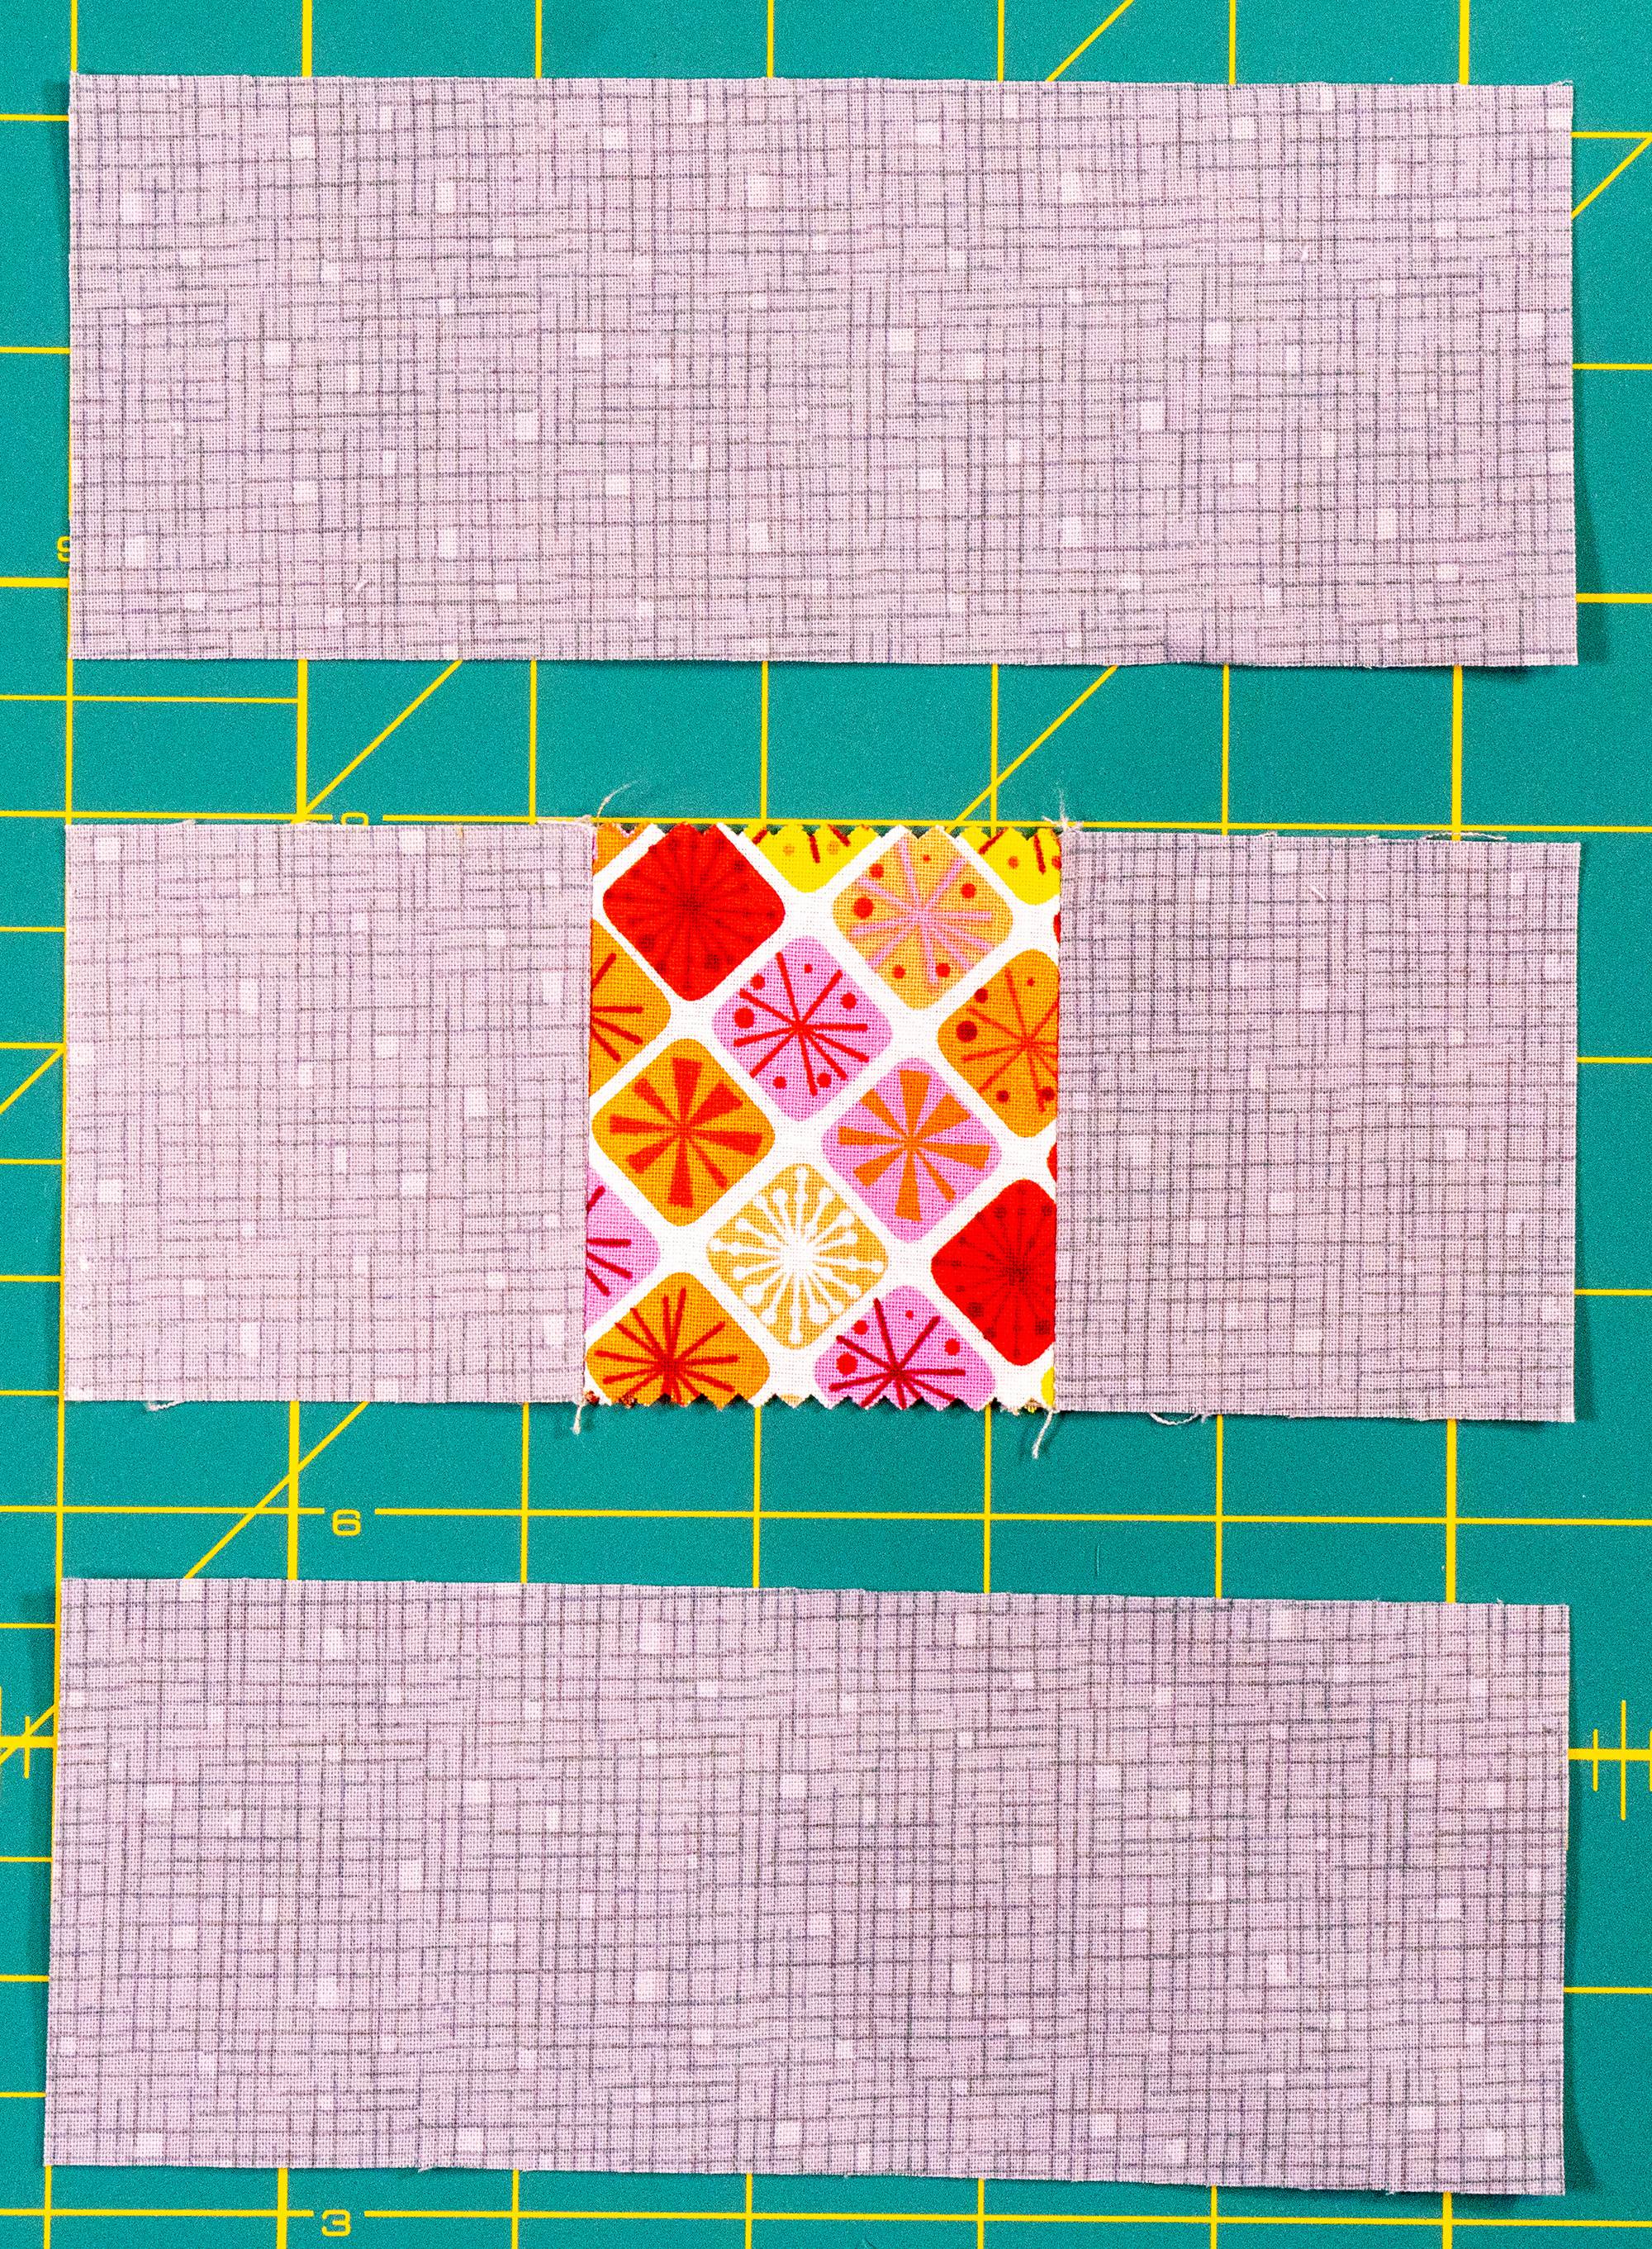
Tip: if you are working with directional prints, such as my “Beaded Curtain” print below, you may want to rotate the fabric so that the print runs in the same direction in all of the blocks.
Following the diagrams on page 2 of the Beaded Lanterns quilt pattern, lay out one triple square unit with two matching print rectangles and 2 smaller background grey rectangles.
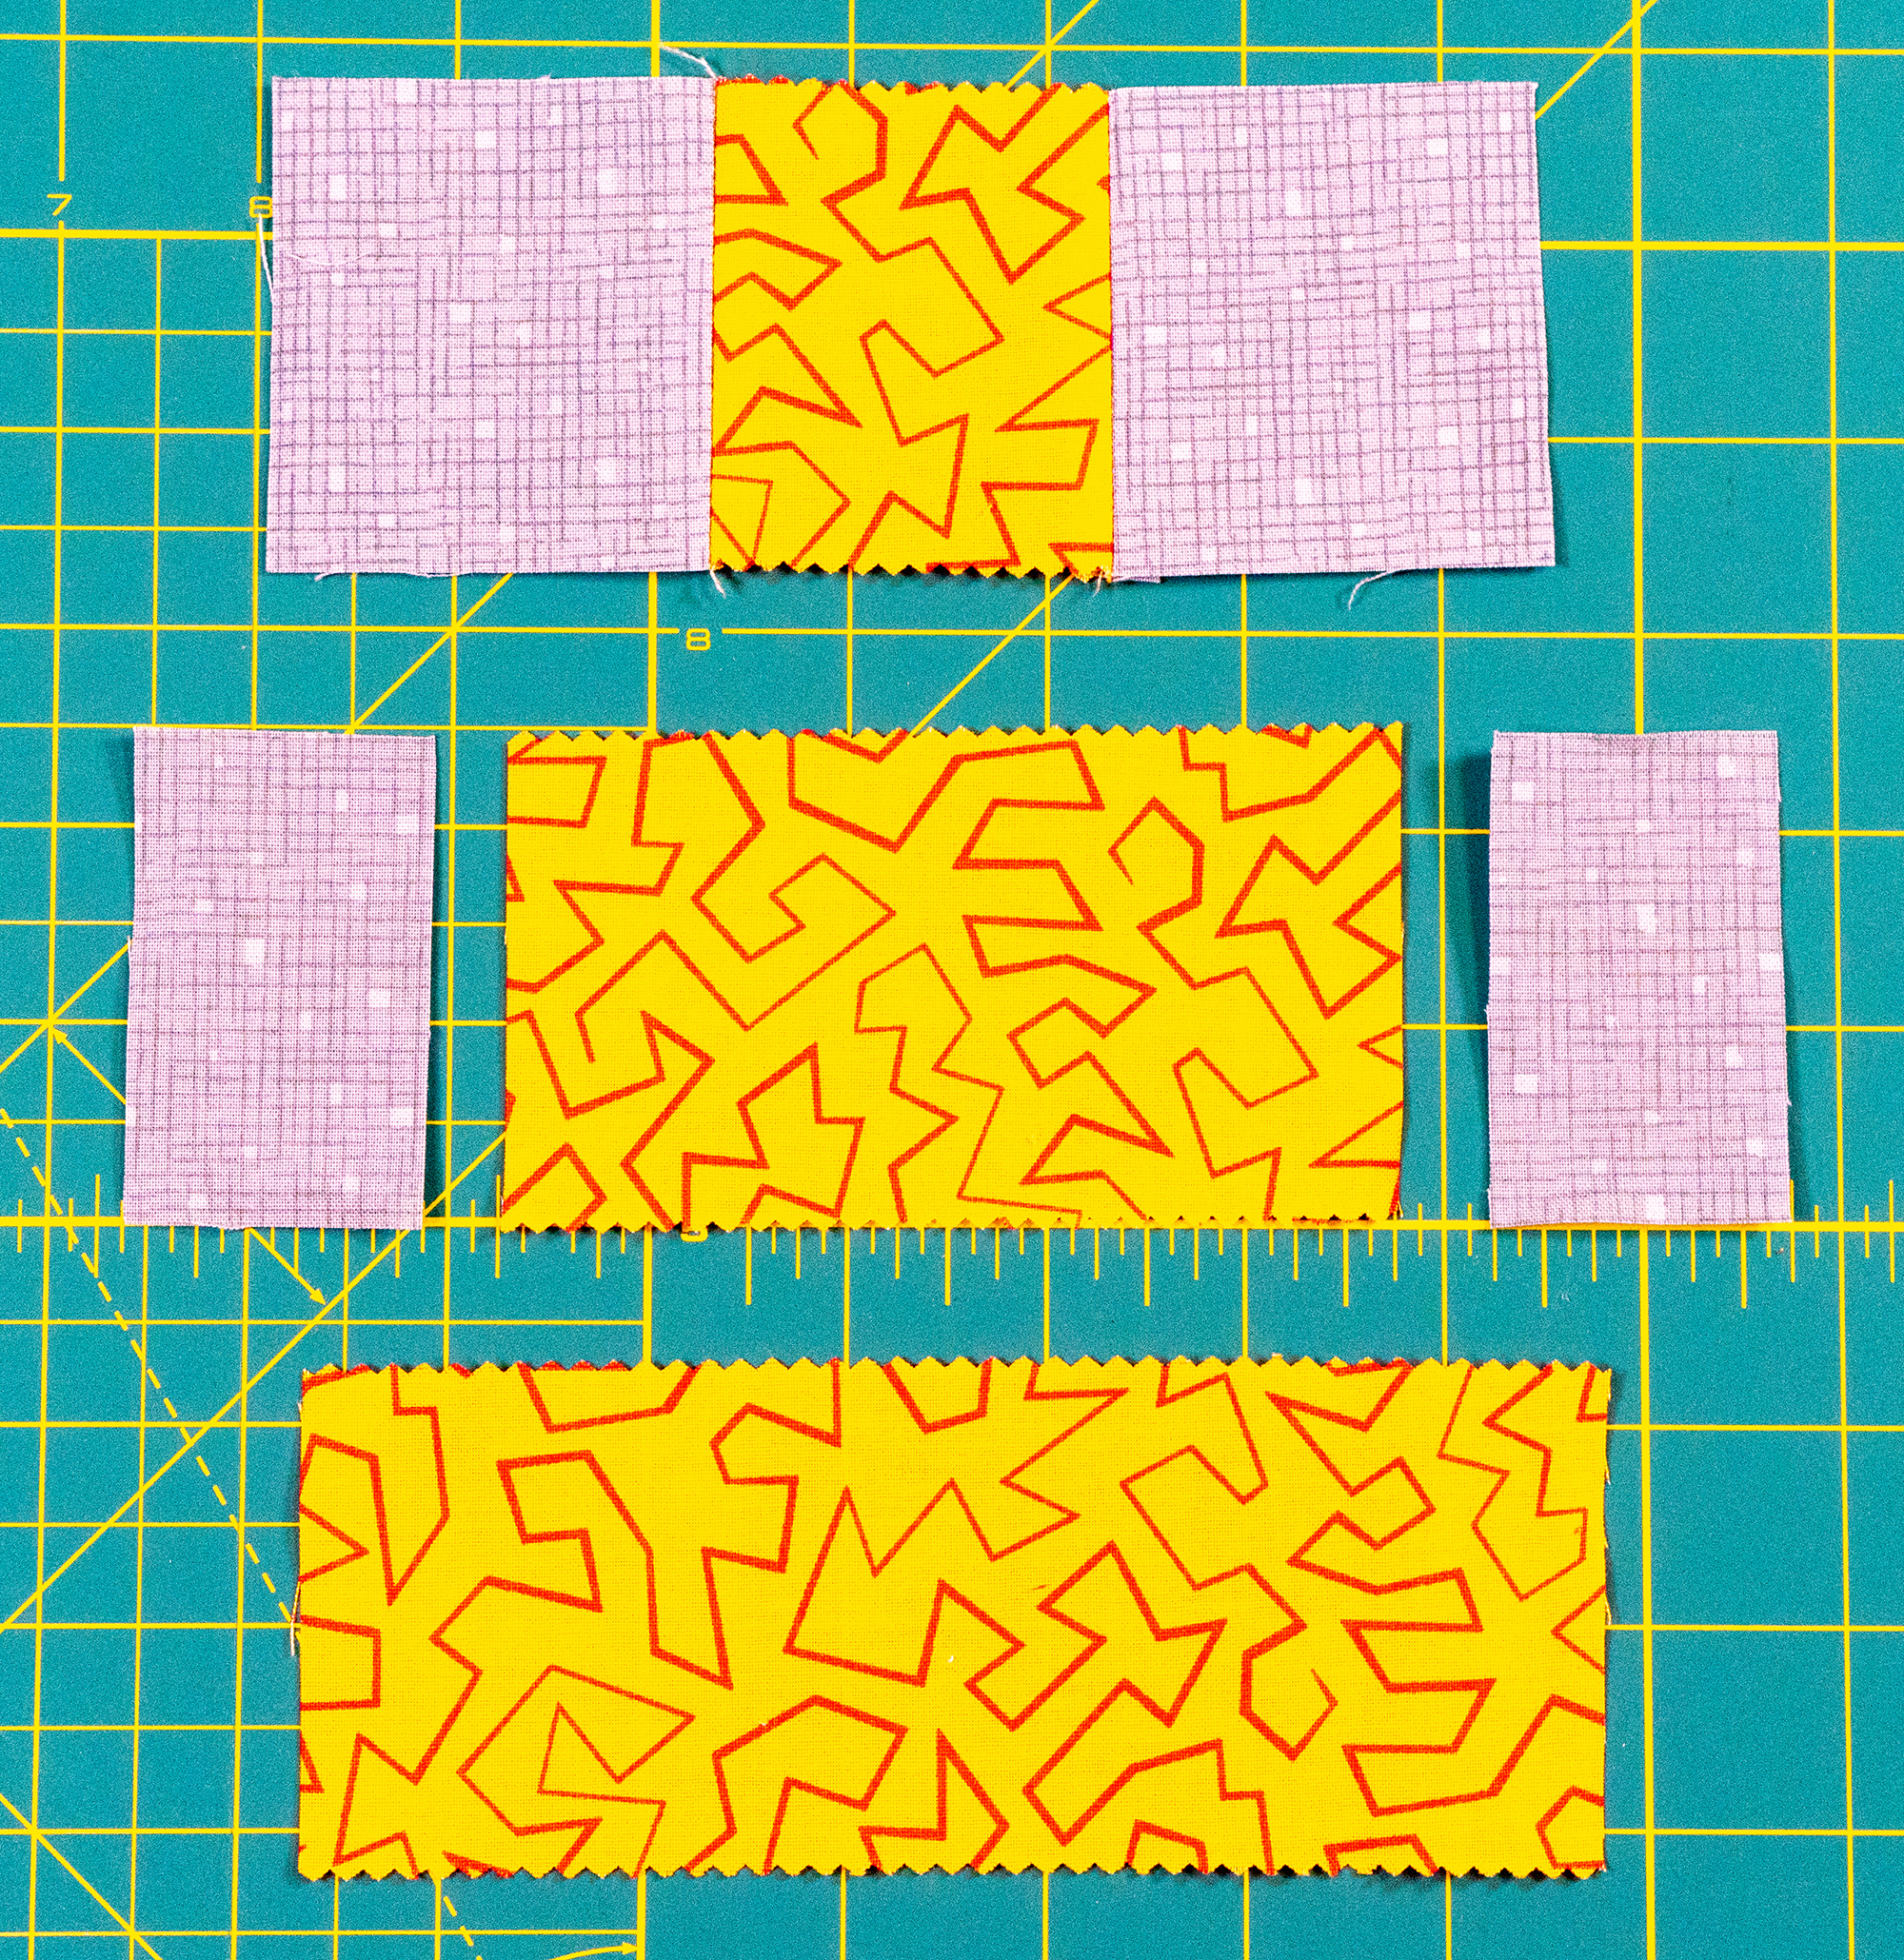
Sew the units into rows and sew the rows together to create one half Lantern block. Press seams as you sew.

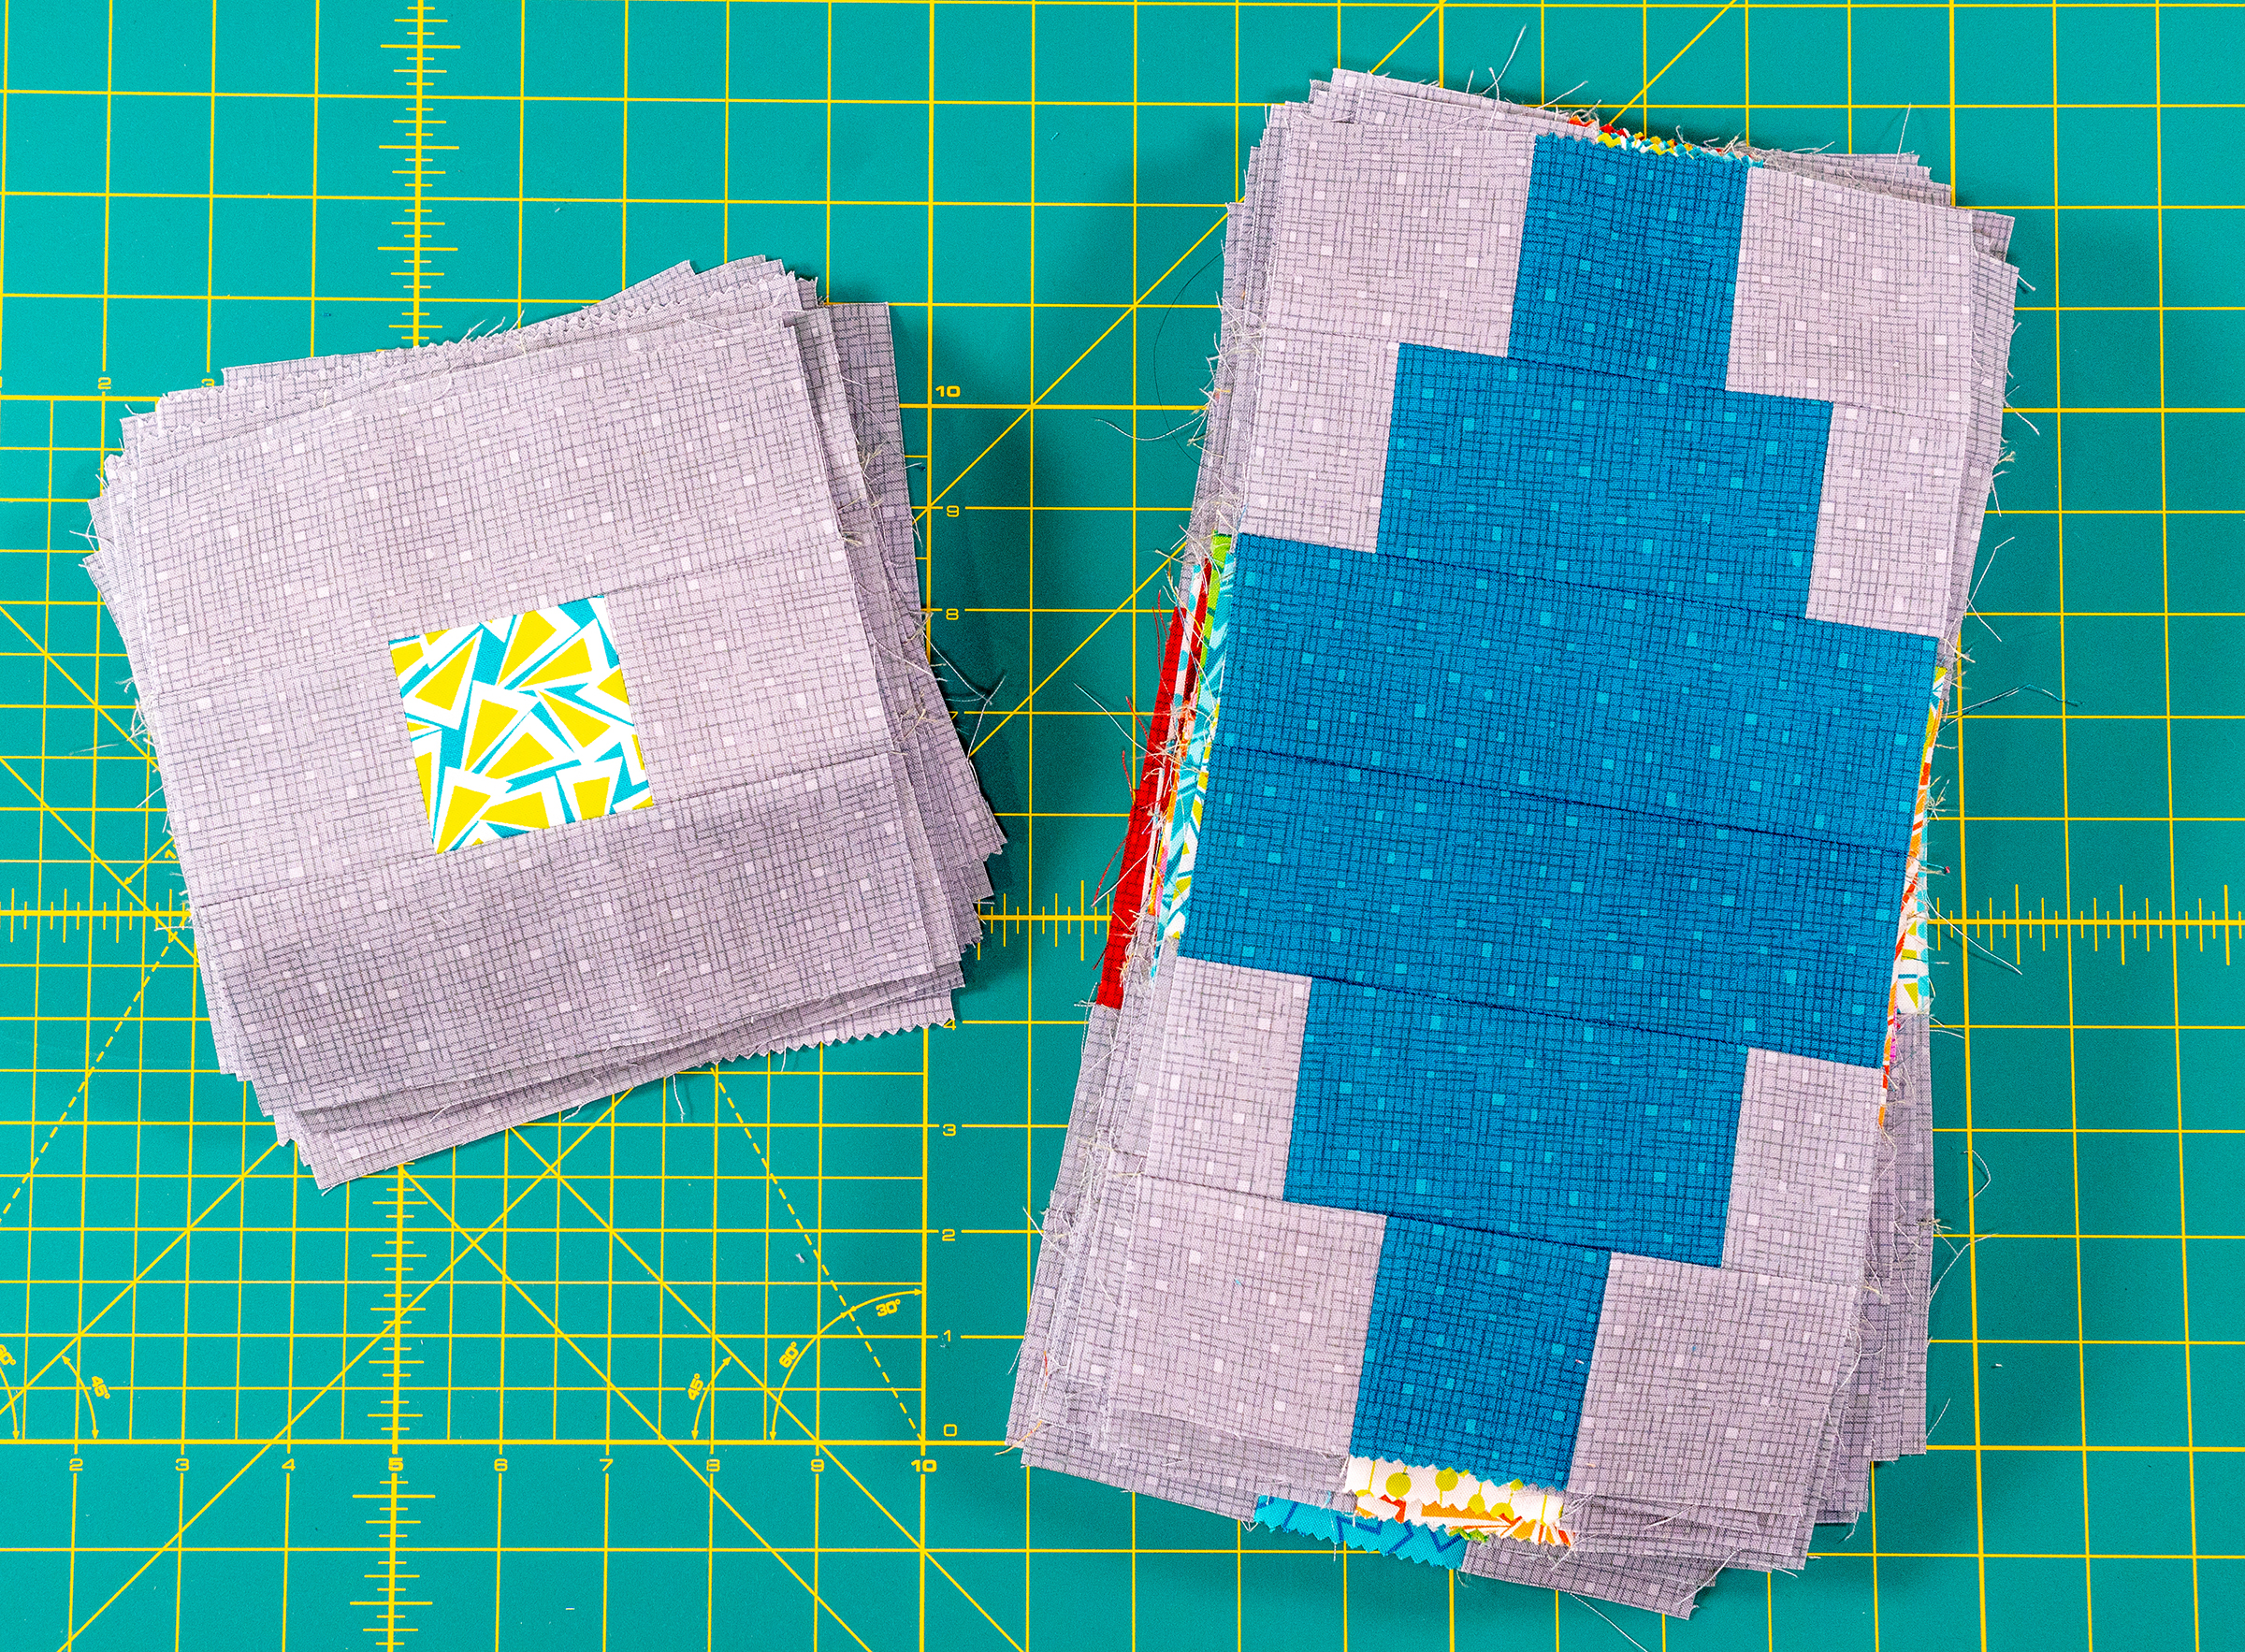
Sew a total of 72 half Lantern units in matching pairs of 2 and press seams.
Sew two matching half-lanterns together to create the finished Lantern block and press seams.
Tip: I like to stack up the freshly pressed units right next to my sewing machine so I can grab and sew!
Following the illustrations on page 3 of the pattern, join the half blocks together into a total of 36 full Lantern blocks. Pressing the seams open will ensure nice flat blocks which will be sooo much easier to quilt on a regular sewing machine.
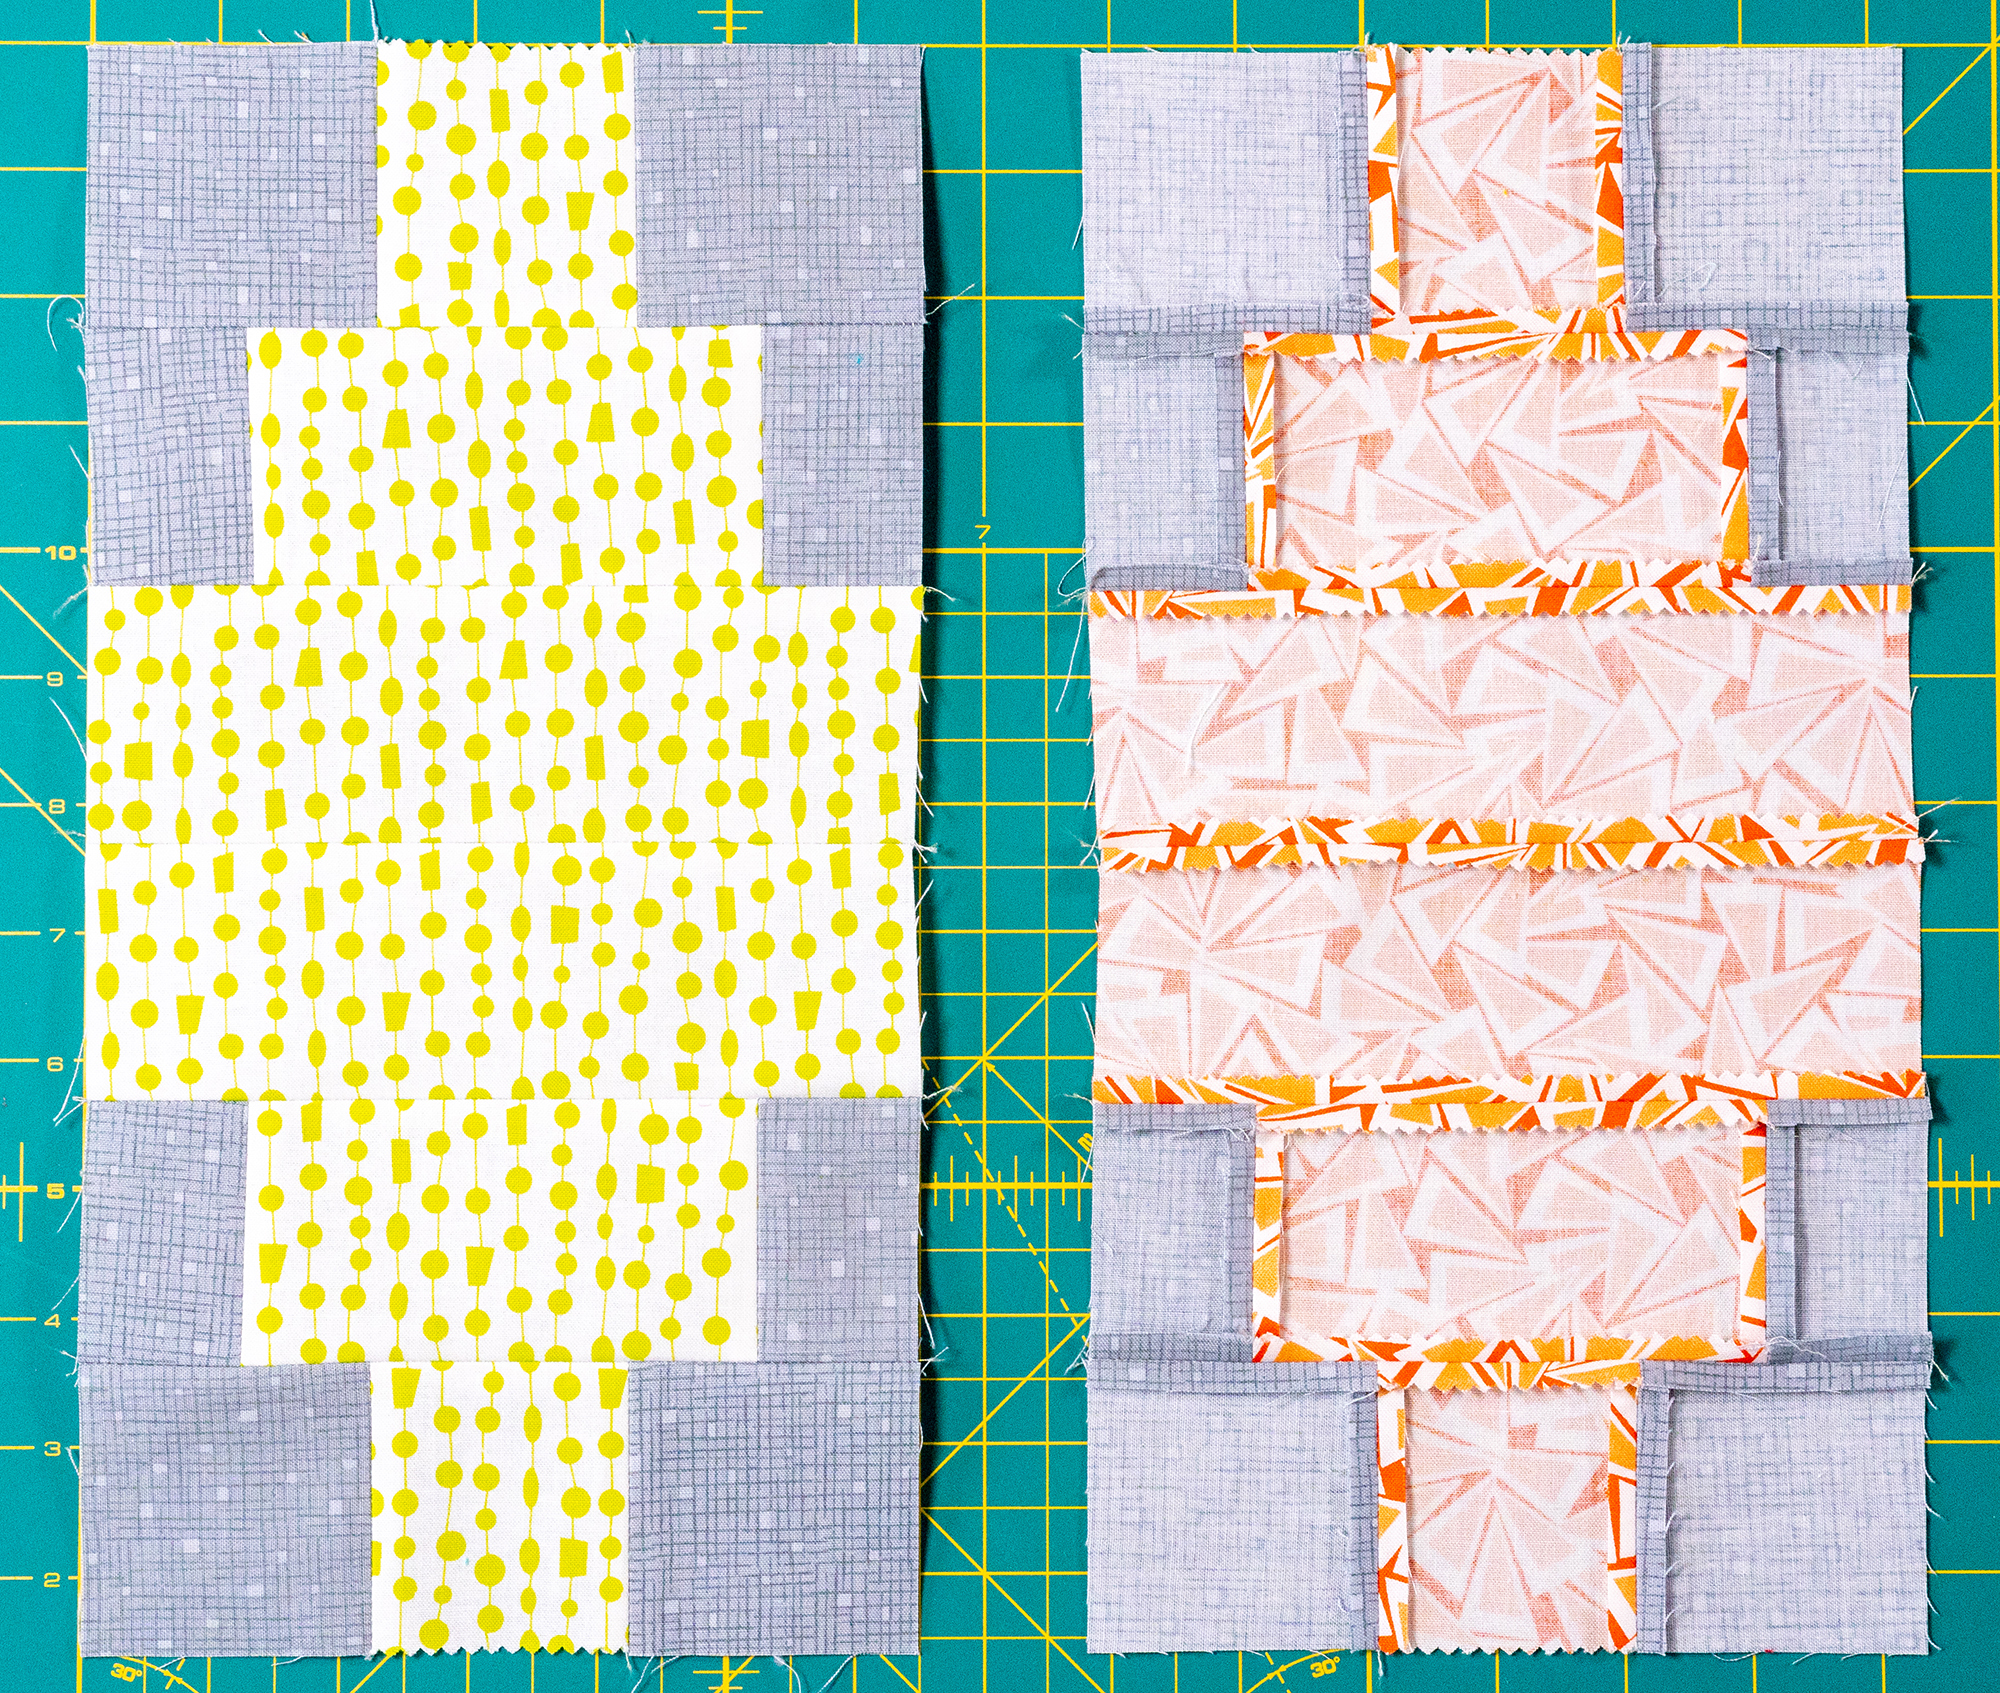
Step 4 – Sew the Bead Blocks
Following the diagrams on page 3 of the pattern, join 1 triple square unit and two gray rectangles to create one Bead block.
Repeat to make a total of 36 Bead blocks and press seams.

Homework:
Finish cutting everything out as stated above to sew 36 Lantern blocks and 36 Bead blocks. Once those are done, meet me here again next week to complete the quilt top. As you work on your blocks, be sure to share progress pics on the We All Sew community site and on social media with the hashtags #beadedlanternsqal and #berninausa. Don’t forget to tag me @christaquilts – I can’t wait to see!
Where to Find Fandangle
Fandangle fabric is from the Contempo Studio brand from Benartex. It’s sold by Benartex and most major distributors to independent quilt shops worldwide. If you can’t find it in a shop near you, please check my “where to buy” page on my website. I update the list regularly as more and more shops let me know they are carrying the line. Happy sewing!