Making a Memory Quilt: Cutting and Piecing
Welcome to part 2 of Making a Memory quilt! In this series you can learn how to create a simple memory quilt from recycled clothing. This week’s post is all about cutting and piecing the quilt top using a special quarter triangle ruler. In part 1 of the series, Preparing the Materials, we learned more about memory quilts and how to prepare items of clothing (like the shirts and pants used in this quilt) for making a quilt. In next week’s post I’ll show you how to baste, quilt, and finish the edges with a slim quilt facing.
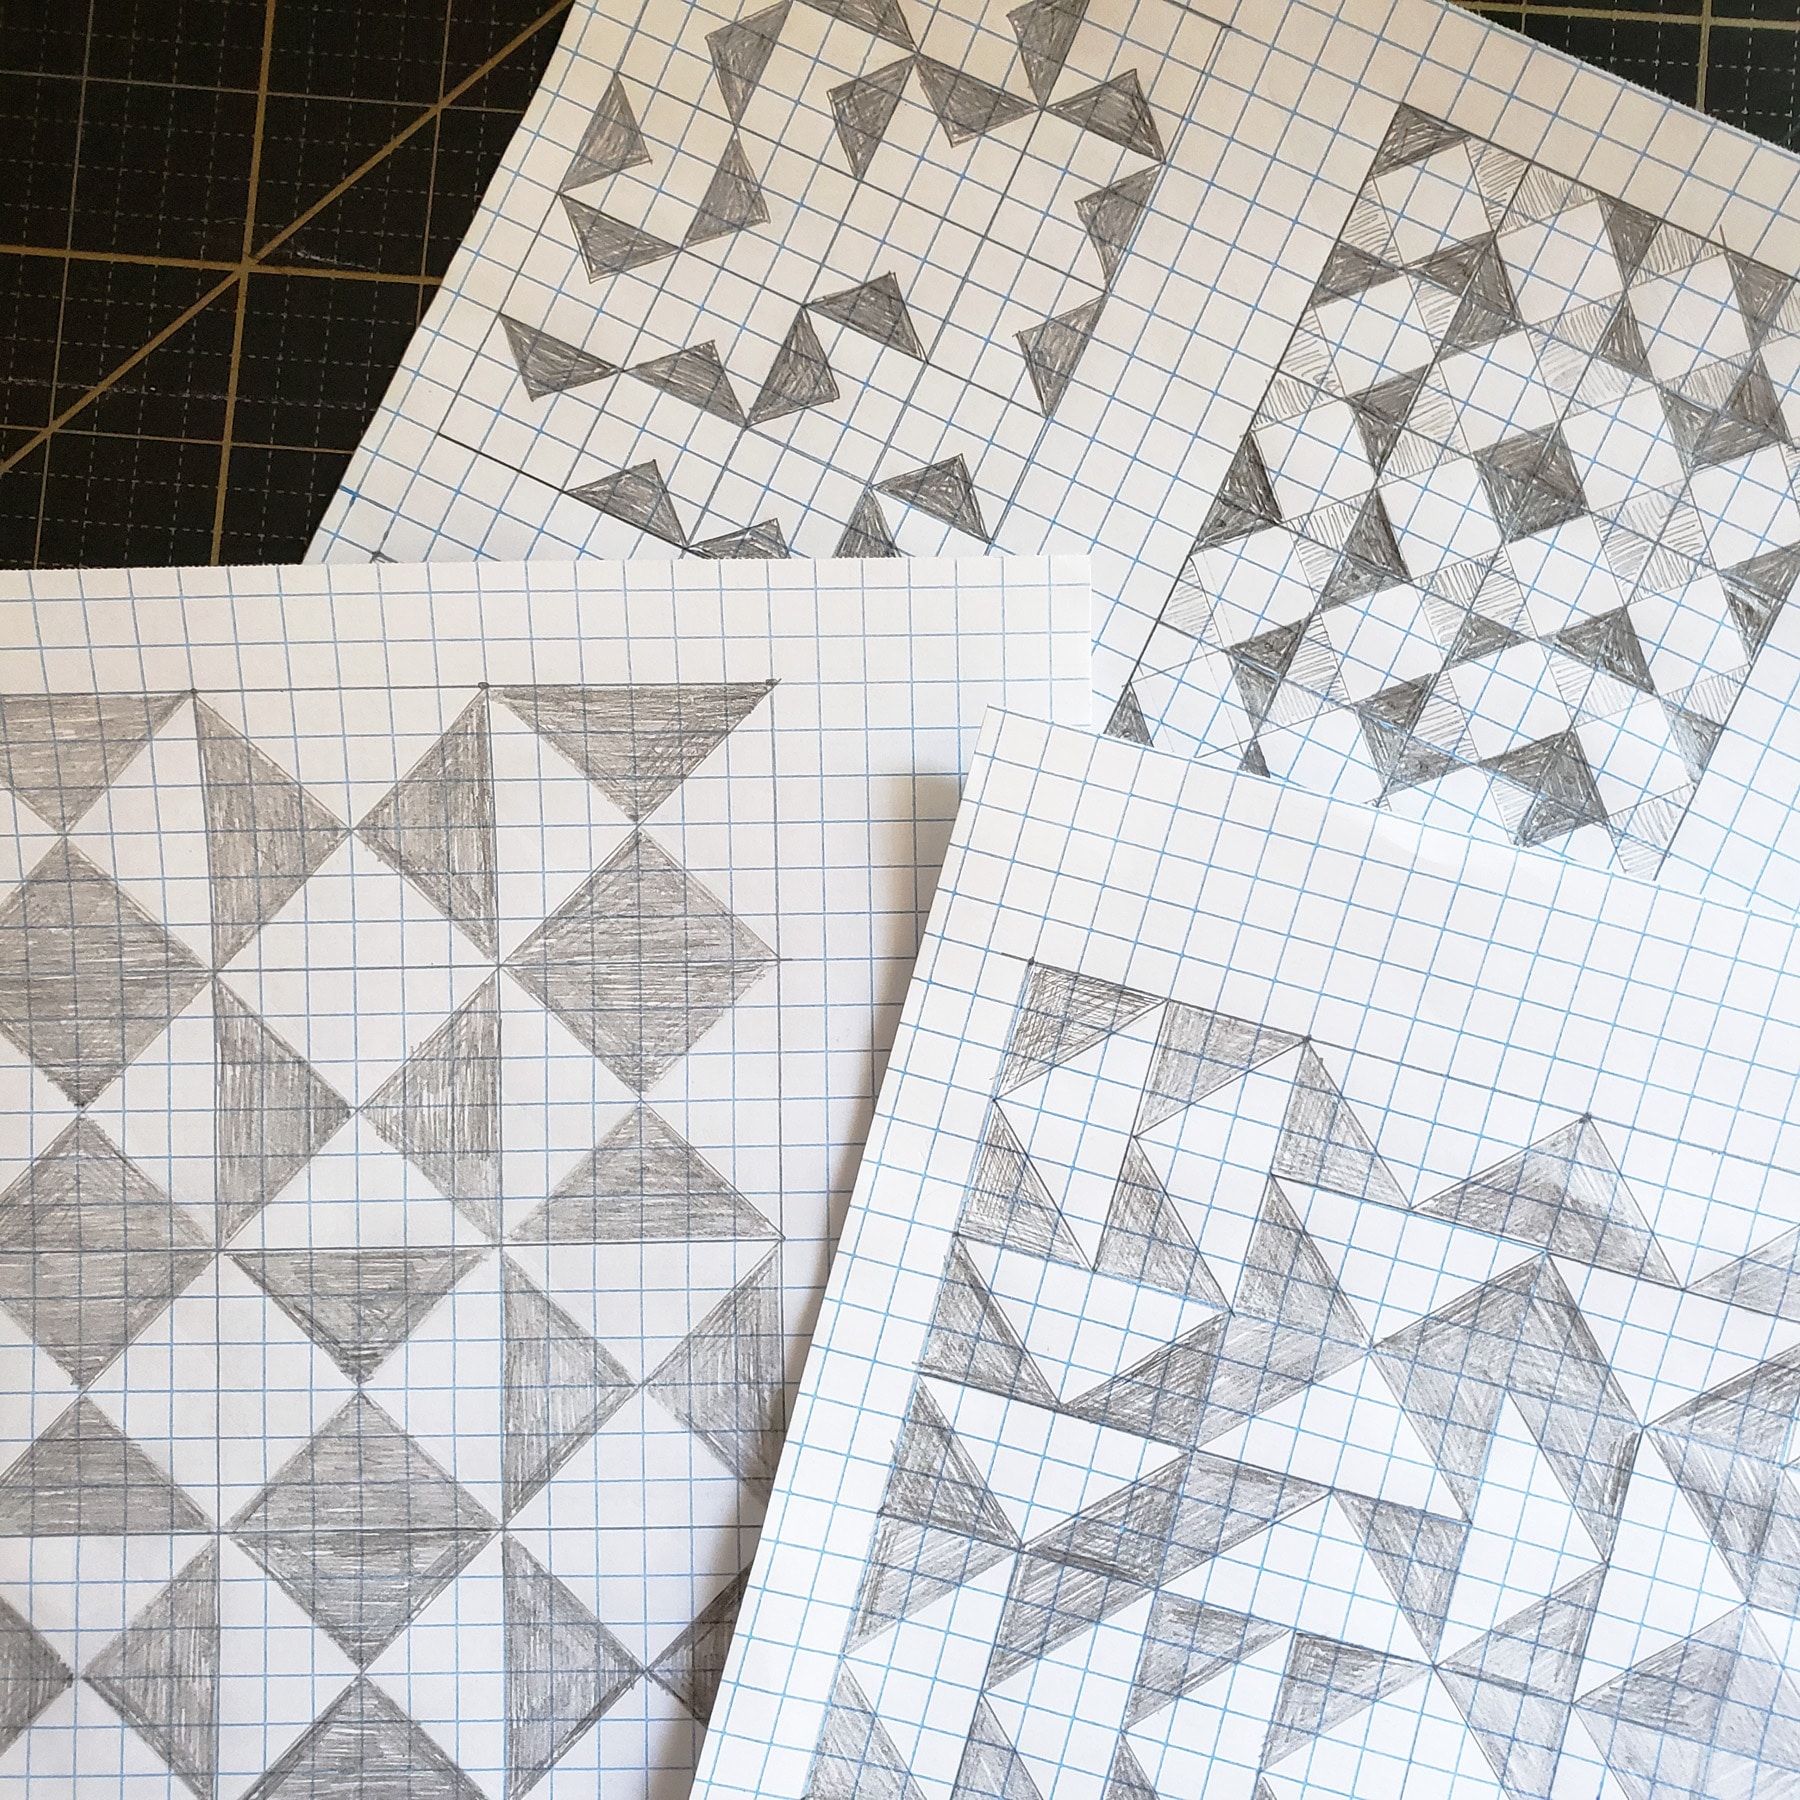
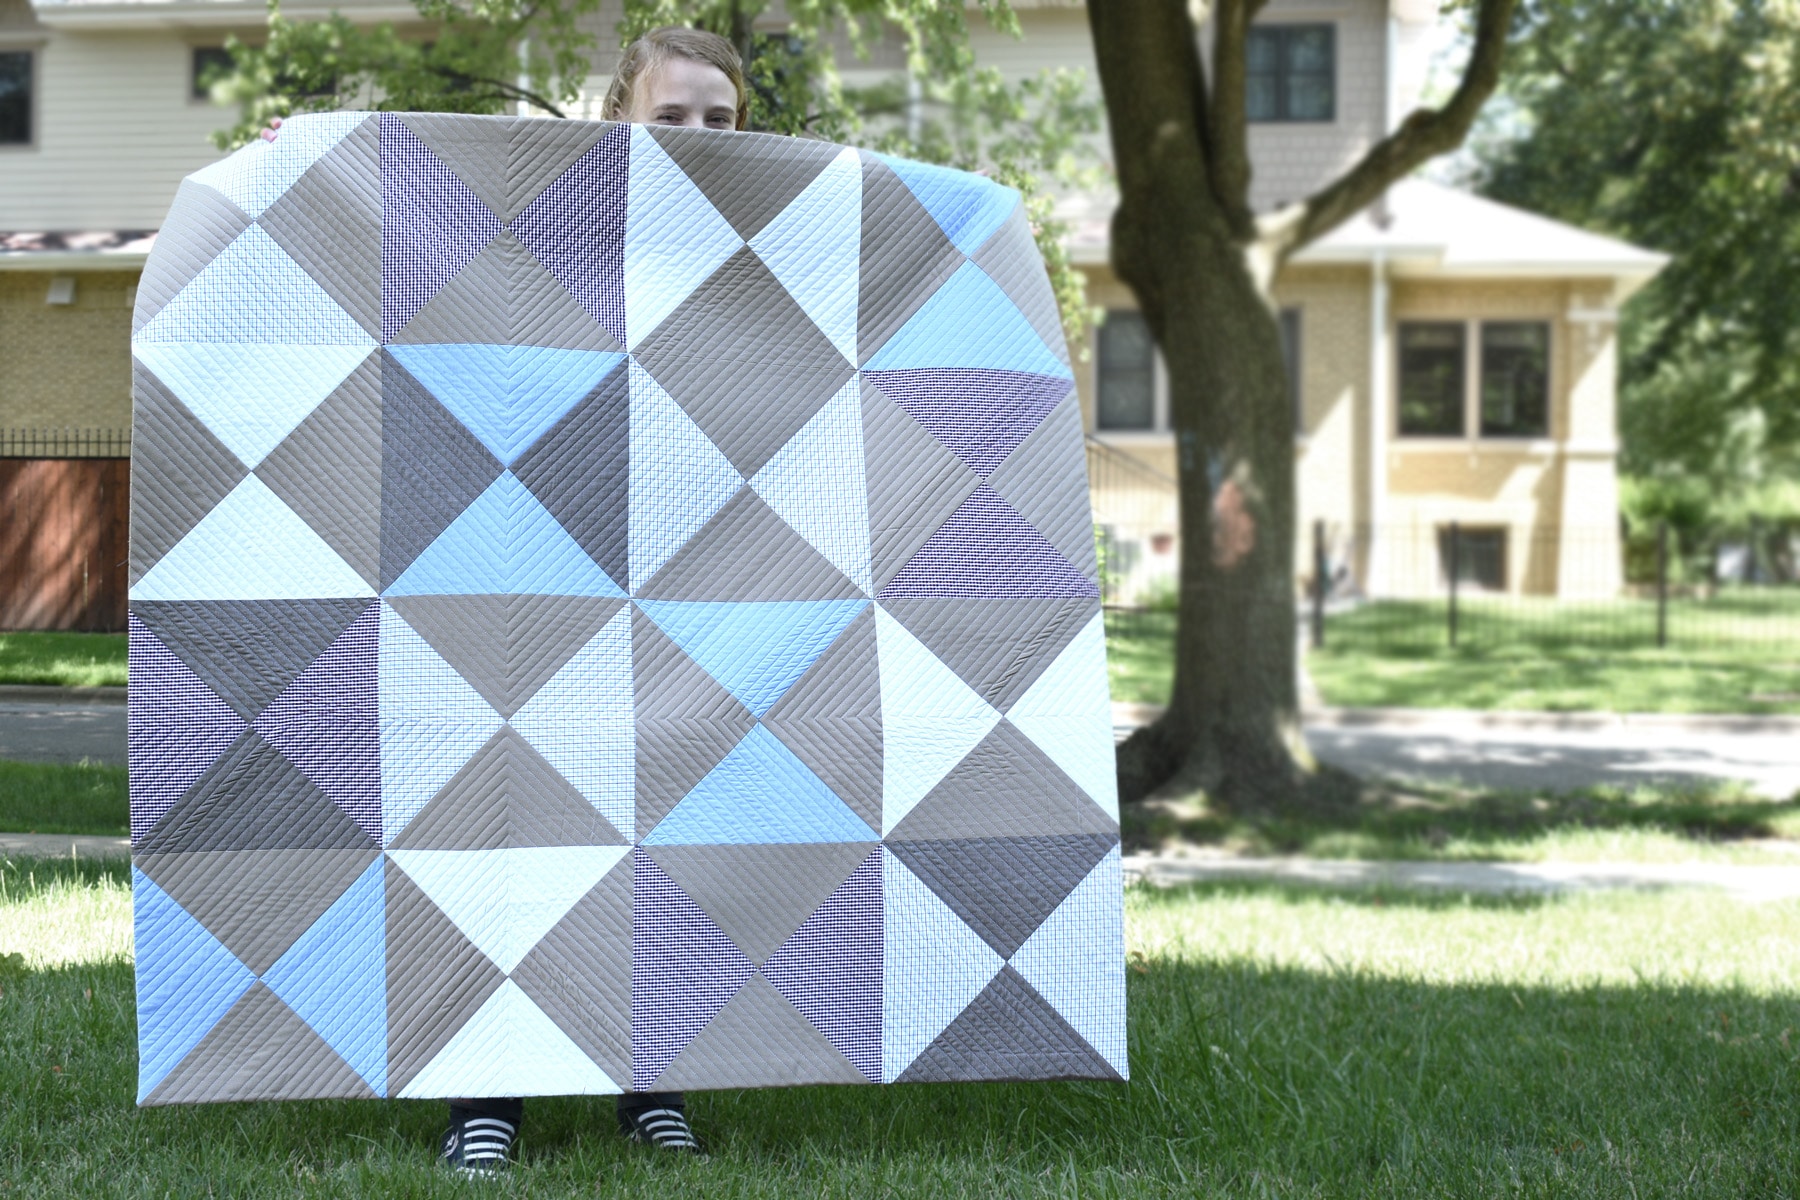
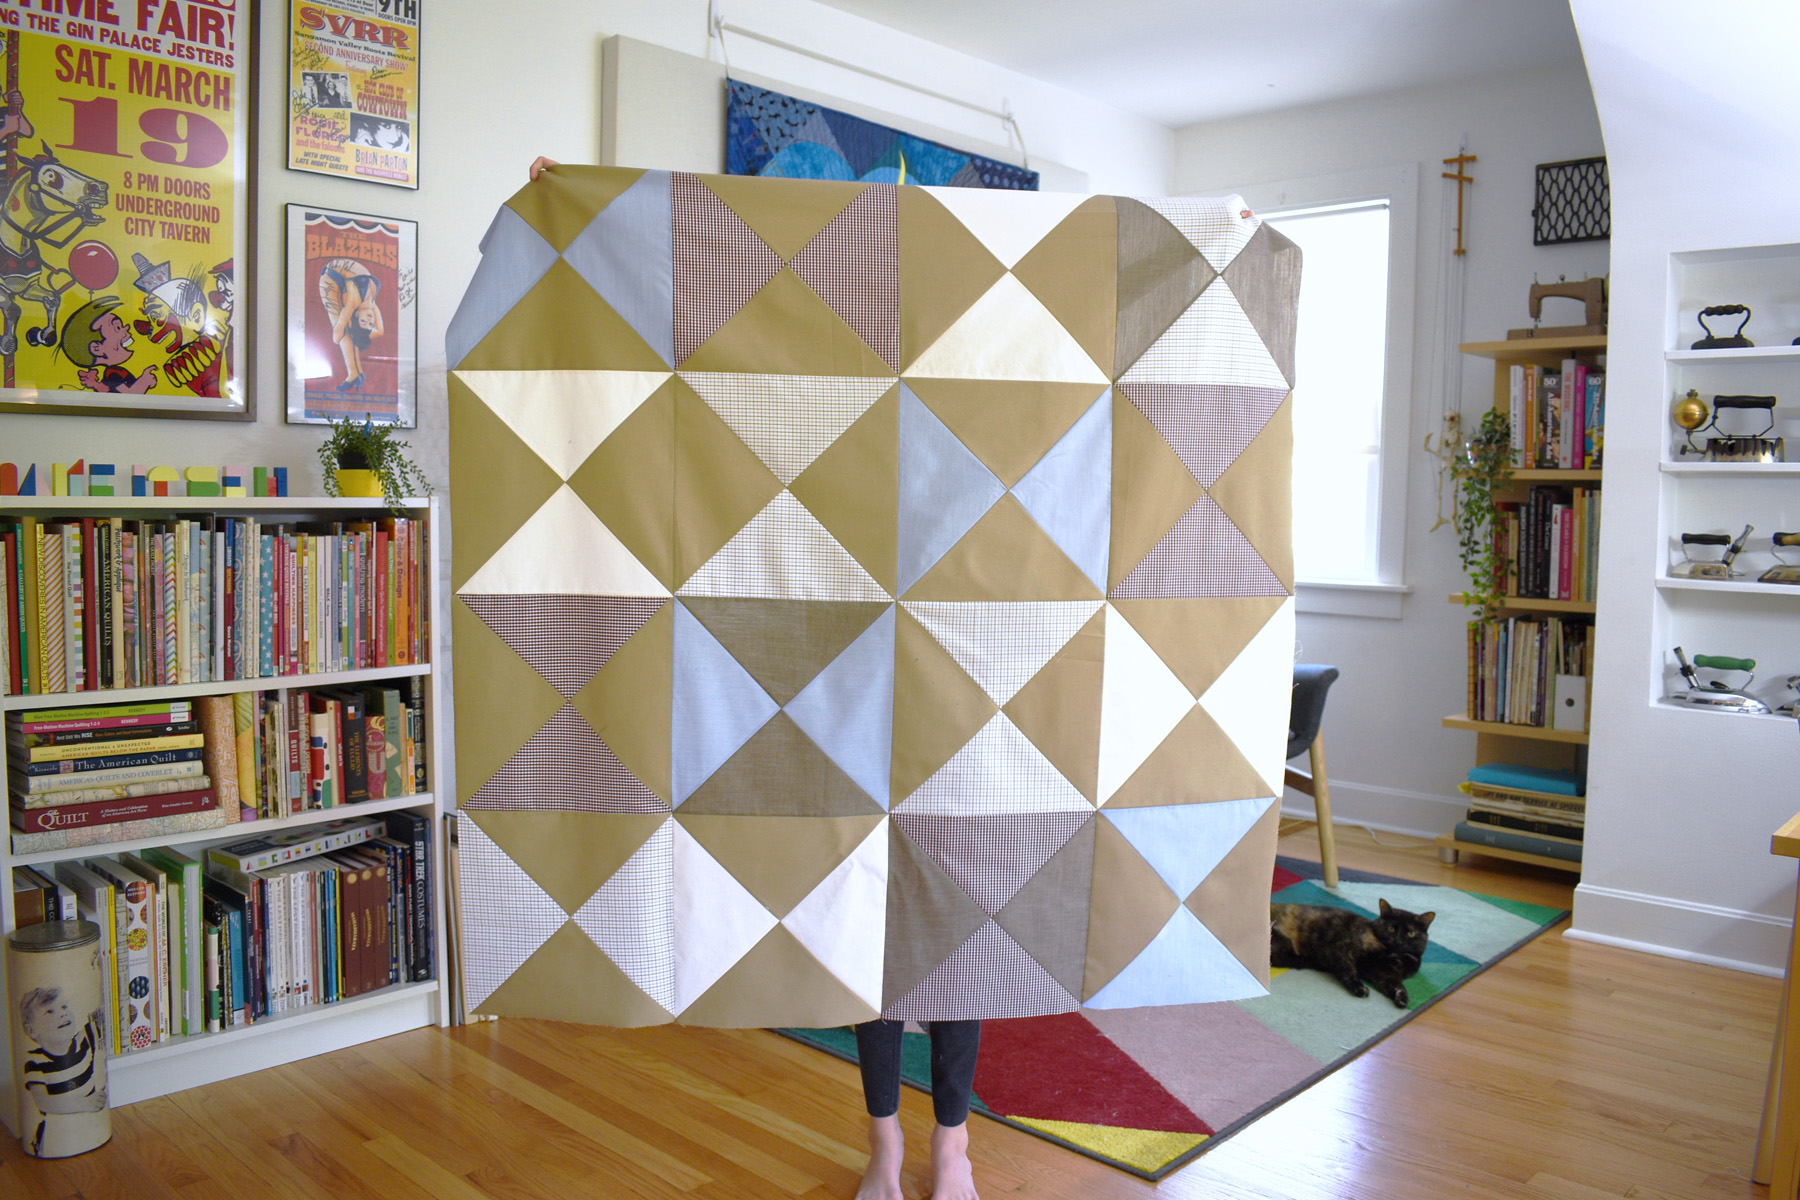
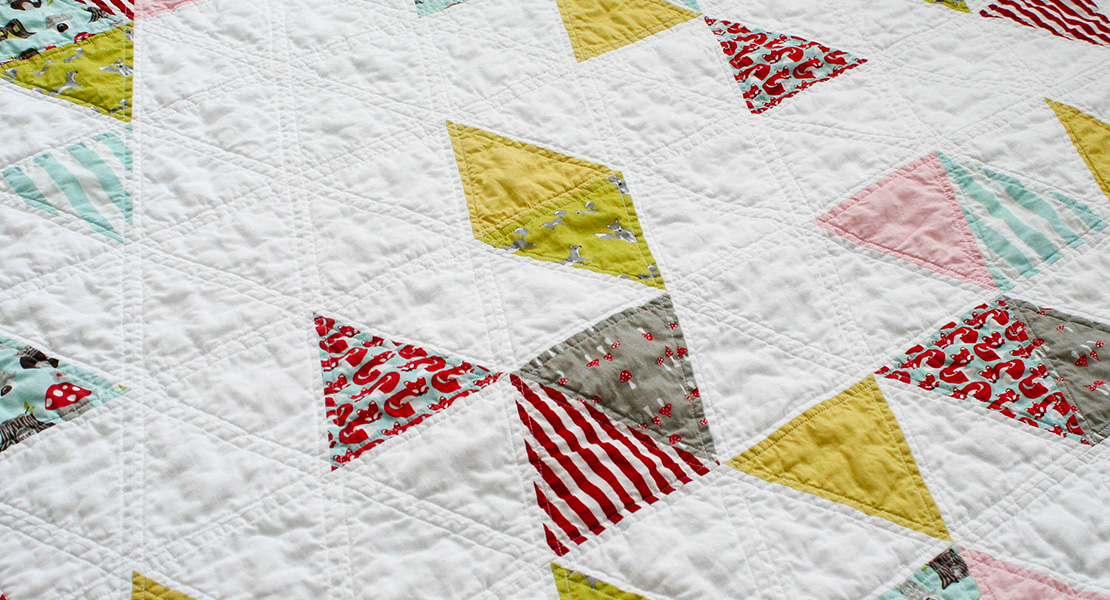
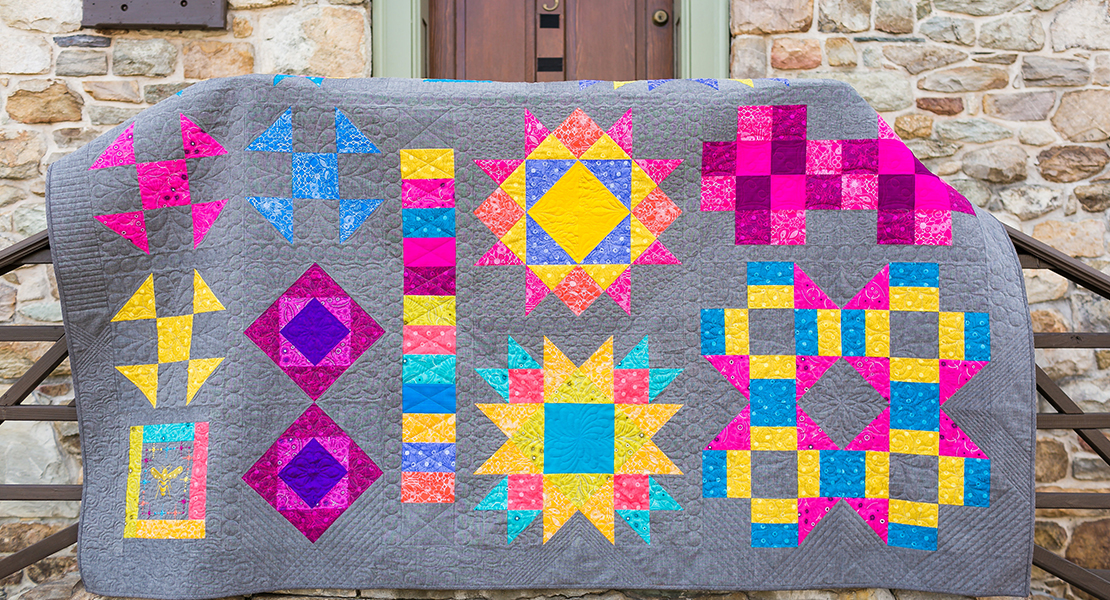
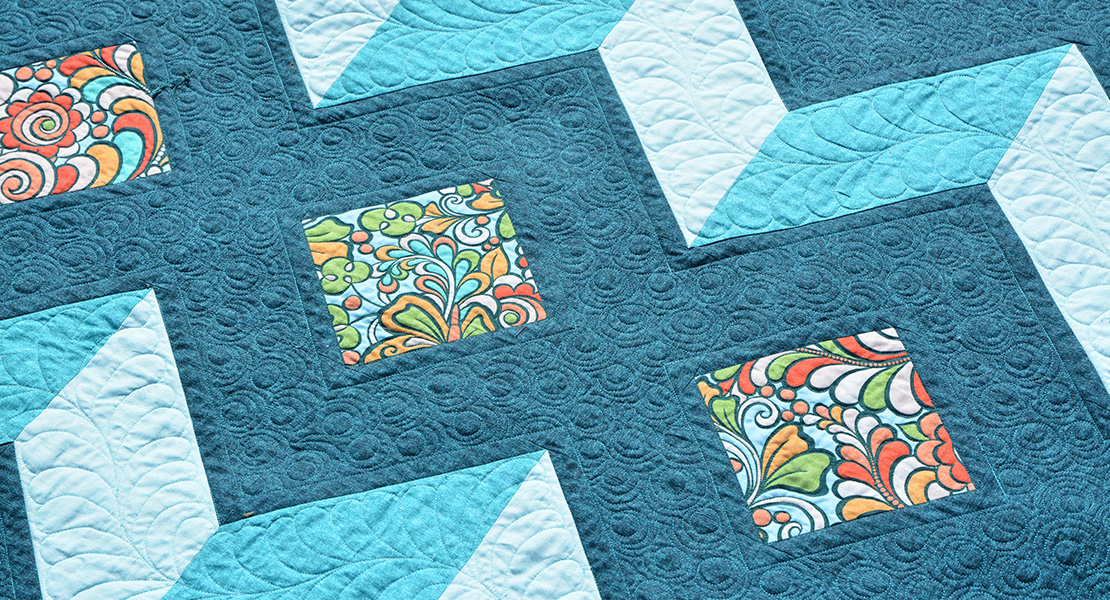
This quilt was made for my kiddo in remembrance of her grandfather from an assortment of his clothing. She selected a simple design after I sketched some ideas on graph paper, and picked out her favorite shirts from the pile of clothing. This basic quarter square quilt block finish at 12″ x 12″ which makes it easy to sew together a small cuddle quilt with a total of 16 blocks. Use just 9 blocks to create a quick 36″ x 36″ baby quilt, or use 25 blocks to make this a large 60″ x 60″ lap quilt for an adult.
The finished Memory Quilt cuddle size measures approximately 48″ x 48″
Materials to Make a Memory Quilt
Fabric Requirements

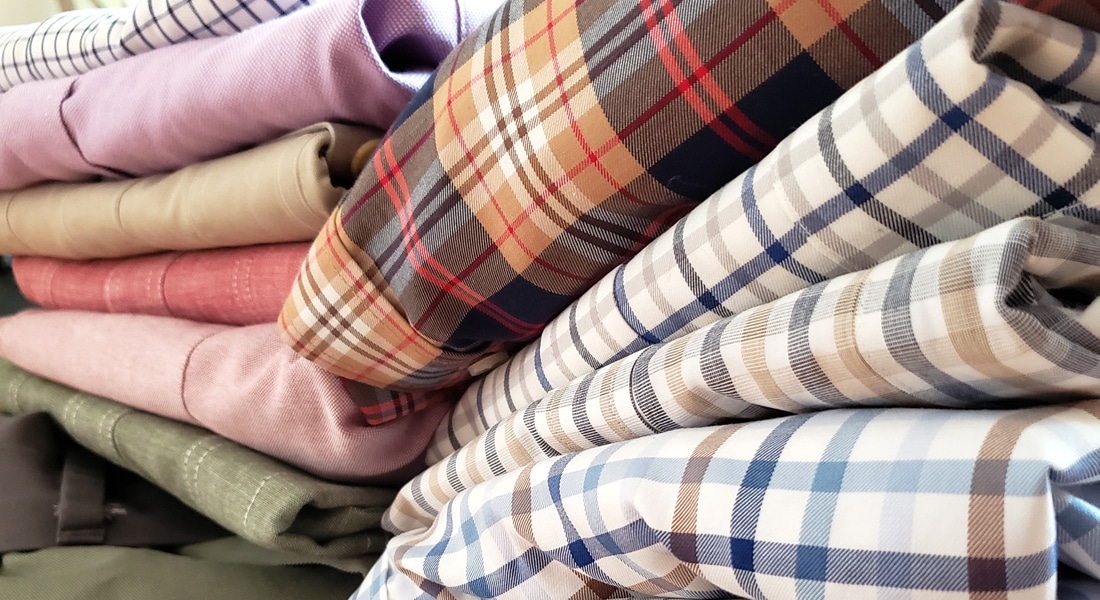
It can be difficult to estimate yardage when making a quilt with recycled clothing. Once you start cutting from a shirt or pants, you might find you’re a bit short on fabric. That’s when you’ll need to be resourceful and find similar fabrics at a thrift store, or through your local quilt store. Listed below are requirements for making this quilt with 44″ – 45″ wide cotton quilting fabrics, and an approximate use of clothing.
- Background or featured fabric used in each block (khaki color in this quilt)
- Cut 32 quarter squares, use either 1 2/2 yards 44-45″ wide 100% cotton quilting fabric, or cut from approximately 2 pairs of cotton/cotton blend pants or 2 men’s button down shirts
- Coordinating fabrics, 4 different colors or patterns (red check, small plaid, blue and white in this quilt)
- Cut 8 quarter squares of each of these 4 colors, use either 1/2 yard fabric each, or approximately one man’s button down shirt for each color/pattern
- Backing fabric (blue with white polka dots in this quilt)
- Minimum 54″ x 54″ square of fabric needed for backing. Use 1 2/3 yards of 54″ wide shirting or wider cotton quilt backing fabric, or piece the backing to size from approximately 4 men’s shirts
- Facing fabric, 4 strips needed each 3″ wide x 49″ long
- Cut from 1/2 yard 54″ wide shirting or wider cotton fabric, or cut and piece together from approximately one man’s button down shirt
Materials Needed
- 54″ x 54″ square of 100% cotton quilt batting
- Coordinating thread
- Quarter square quilting ruler
- 24″ x 6″ quilting ruler
- Long straight edge or 36″ long quilting ruler
- Rotary cutter and large cutting mat
- Straight pins
- Curved quilter’s safety pins (if pin basting in last step)
- Thread snips
- Blue painter’s tape 1″ or wider
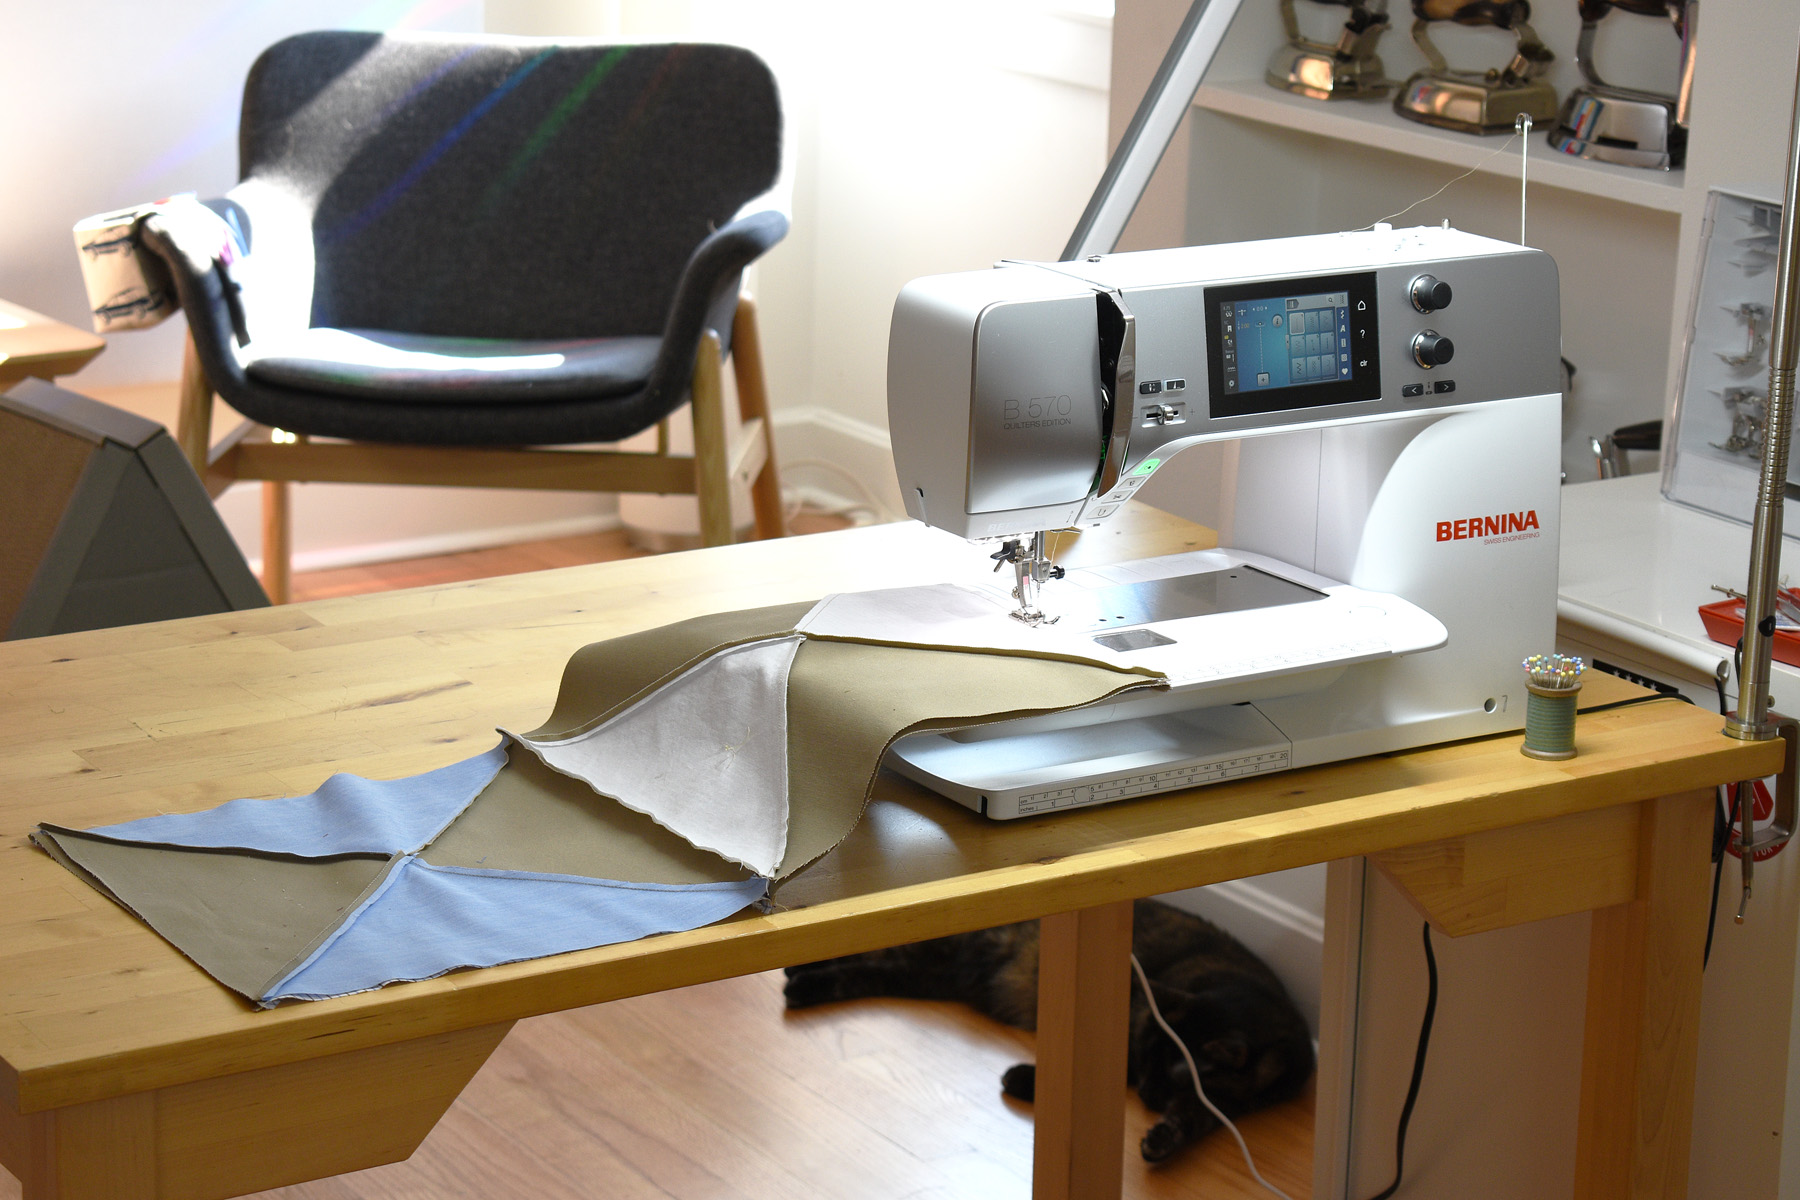
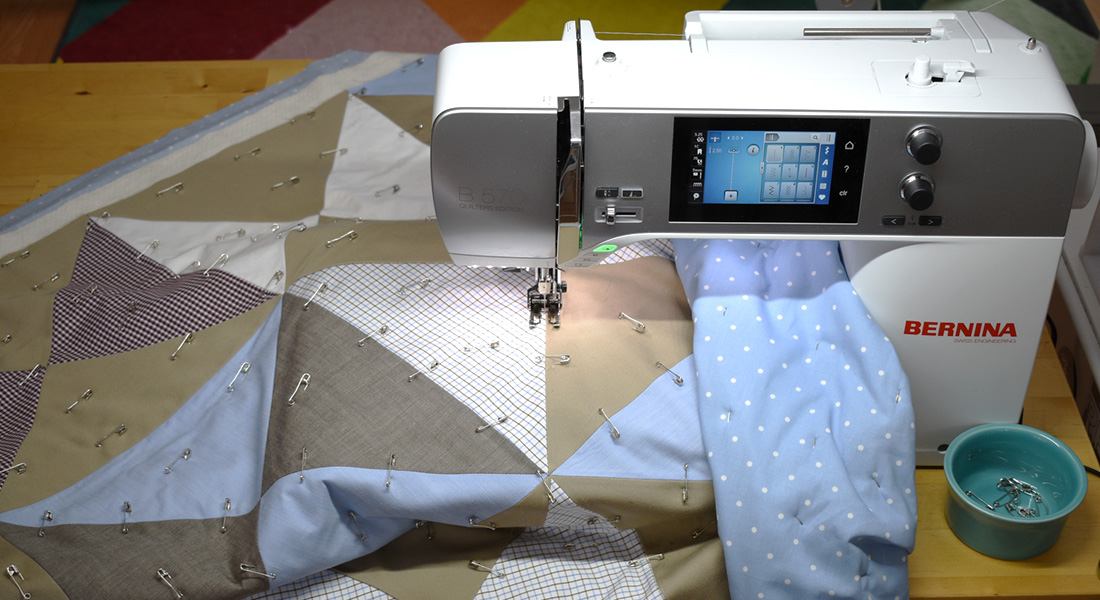
- Sewing machine (I use a BERNINA 570 QE)
- Patchwork foot (I use a Patchwork foot #97)
- Walking foot #50
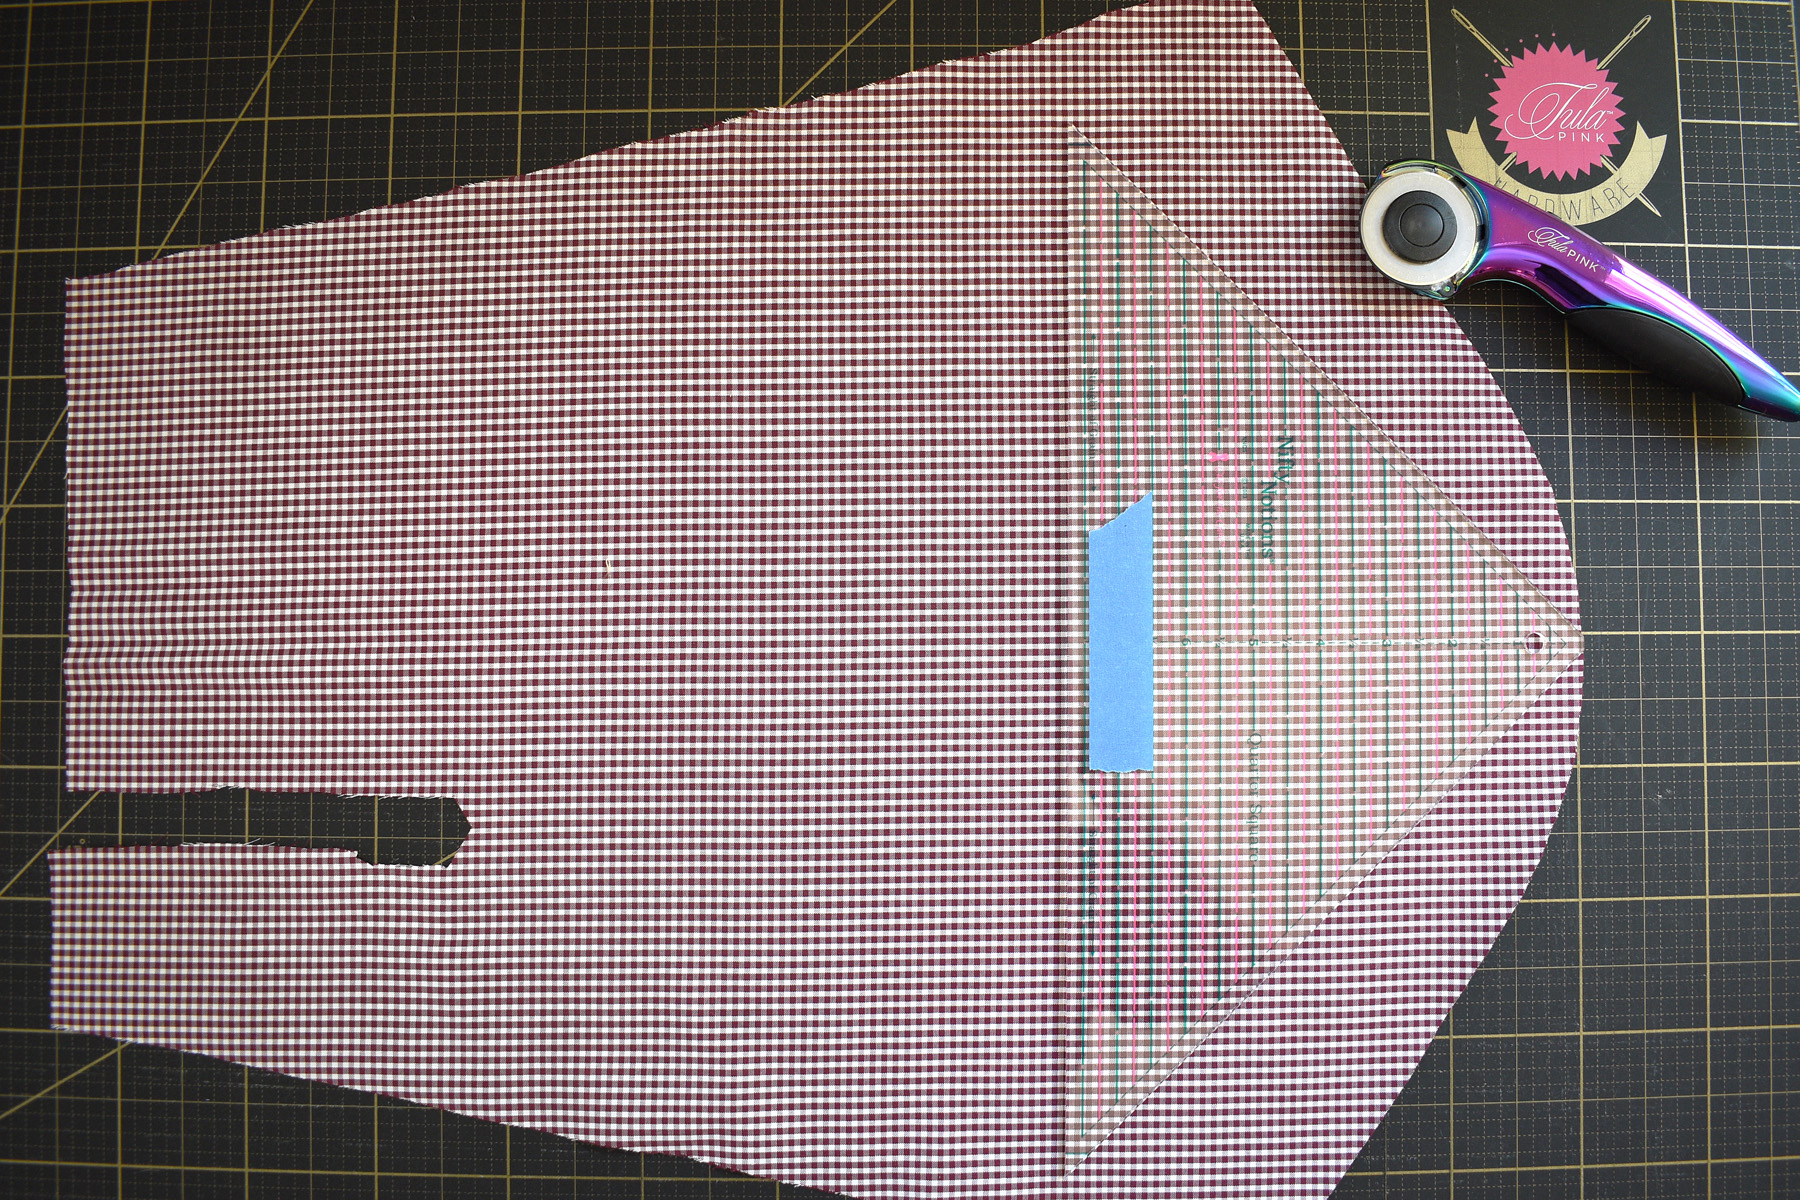
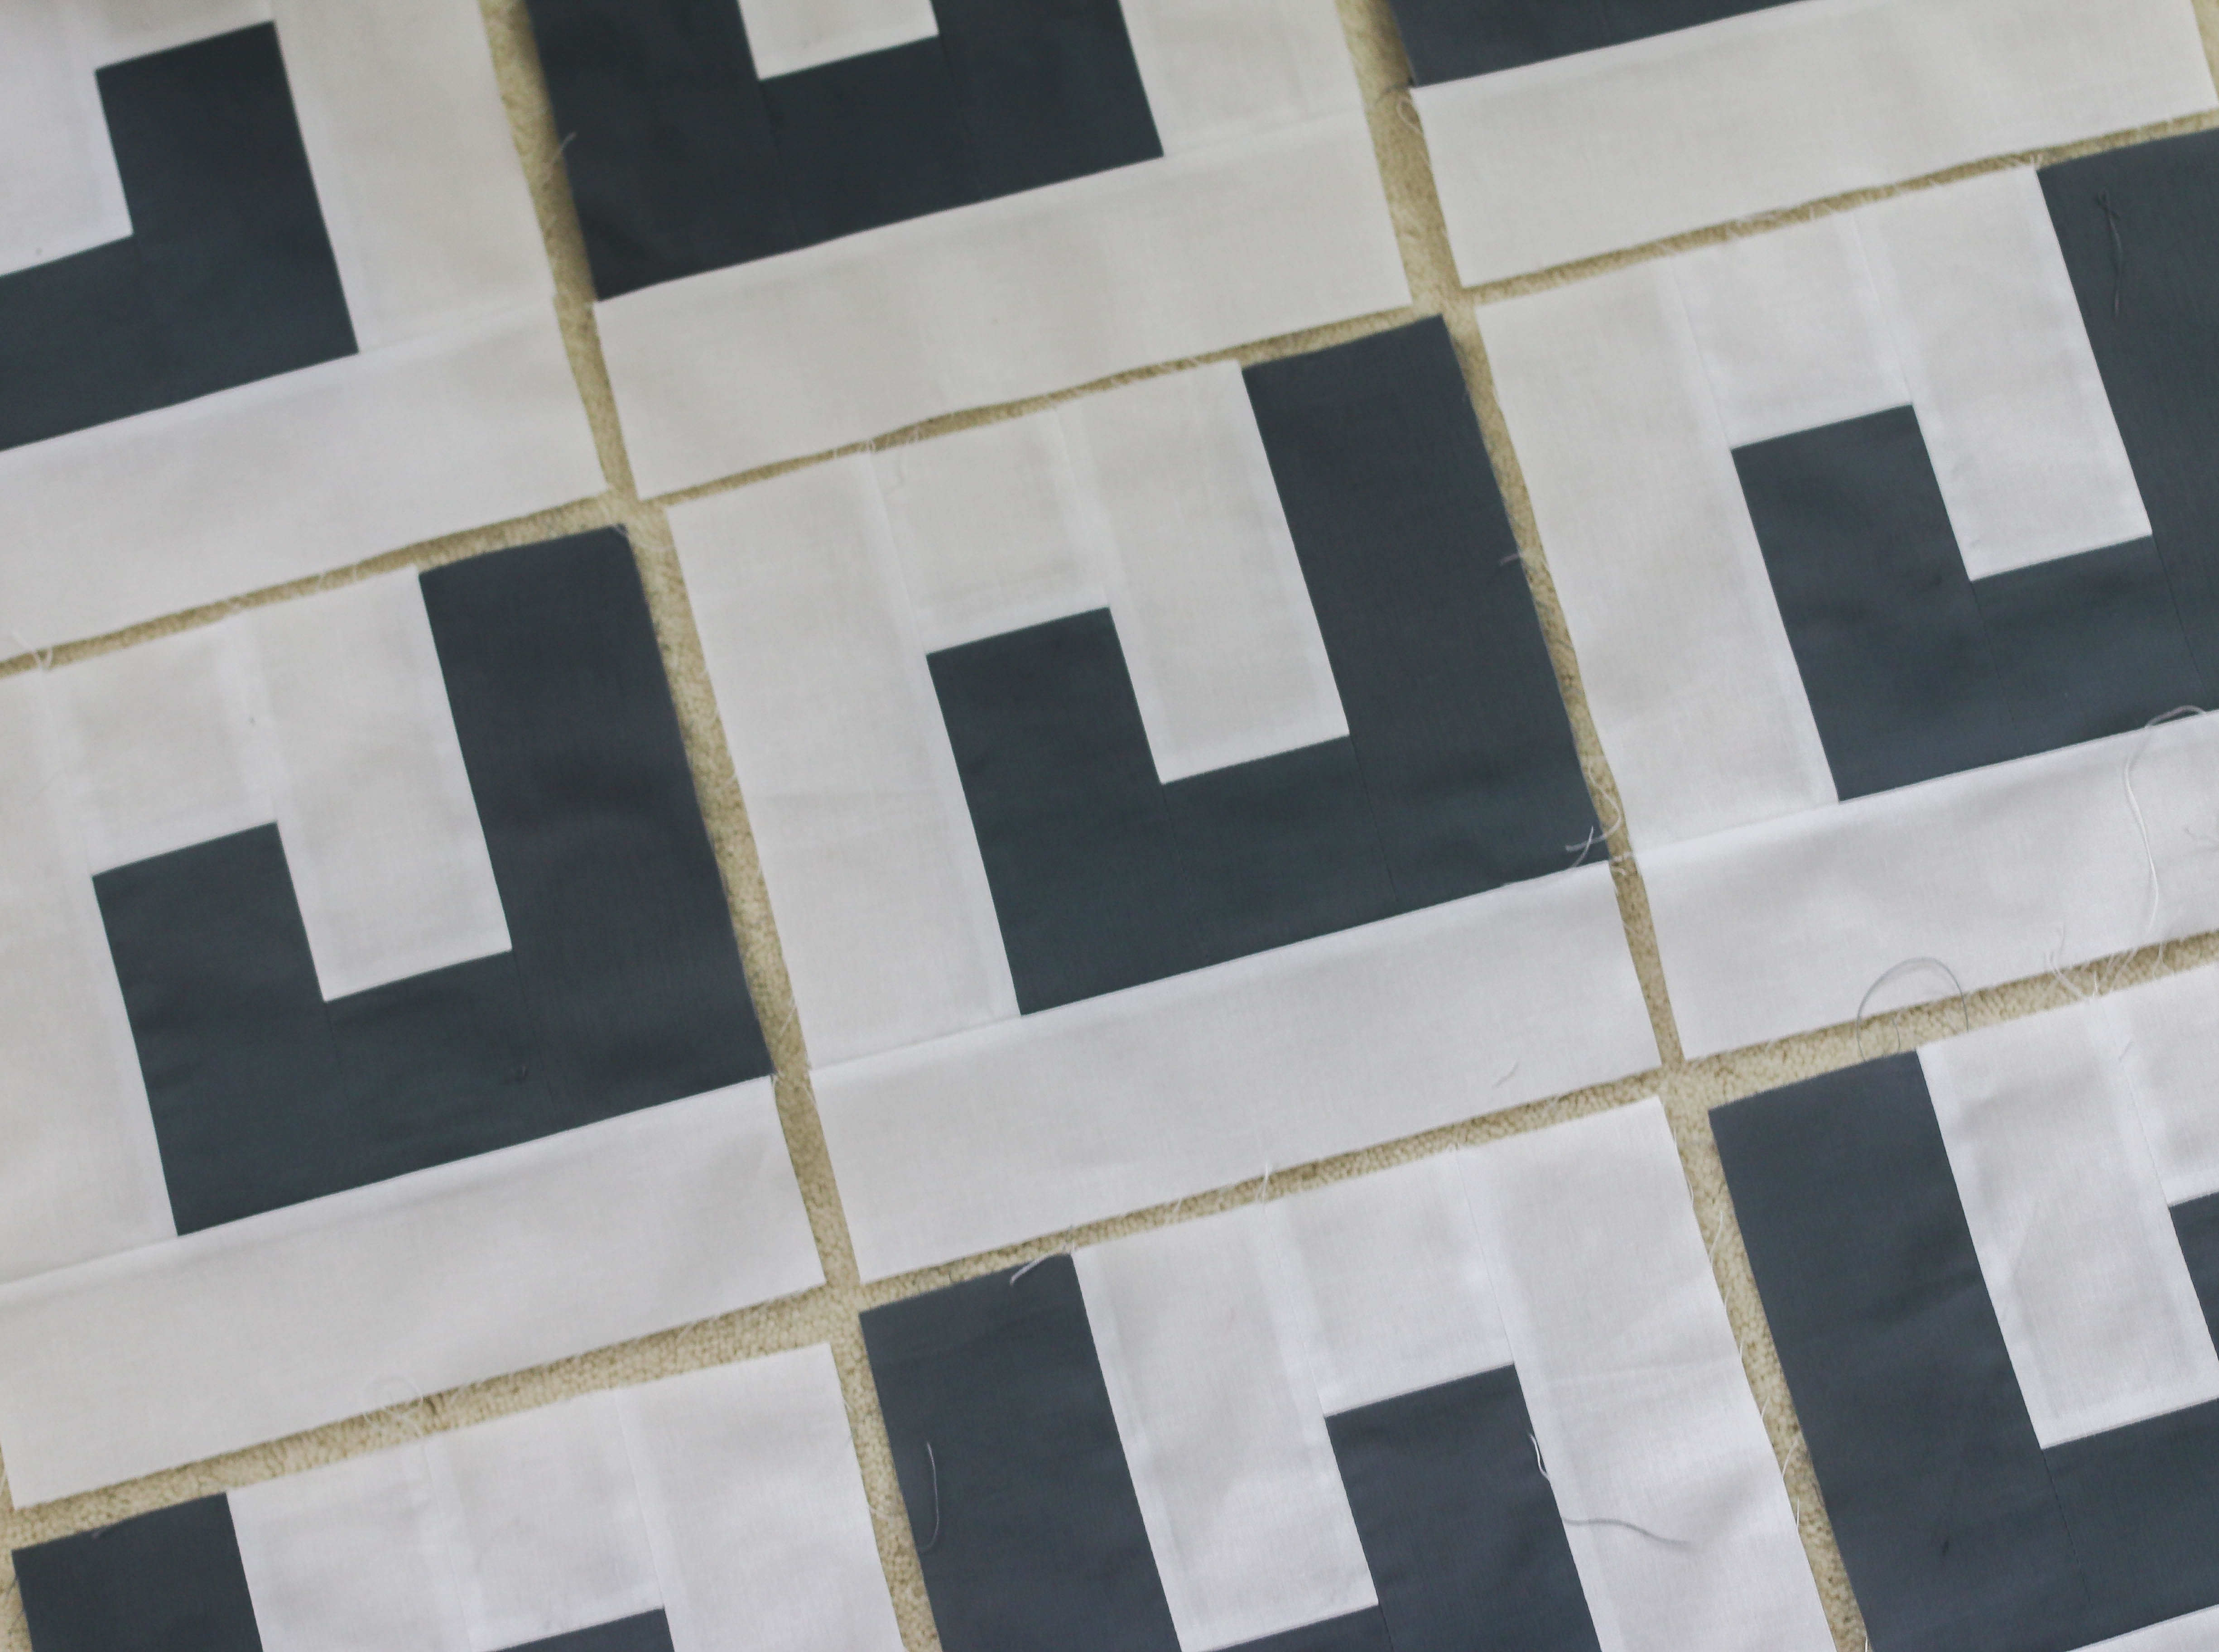
Let’s get ready to cut some patchwork triangles! Meet the quarter square ruler, which we’ll be using to cut all the patchwork for this quilt. The ruler features measurements down the center aligning with horizontal marked lines across the ruler.

The technique for using this ruler is easy, just cut strips of fabric the same width you want to cut your quarter square triangles. Then line-up the correct measured line with the bottom of the strip, and cut. We’re cutting 6 1/2″ quarter square triangles to create the finished 12″ blocks for this quilt. I’ll show you how!
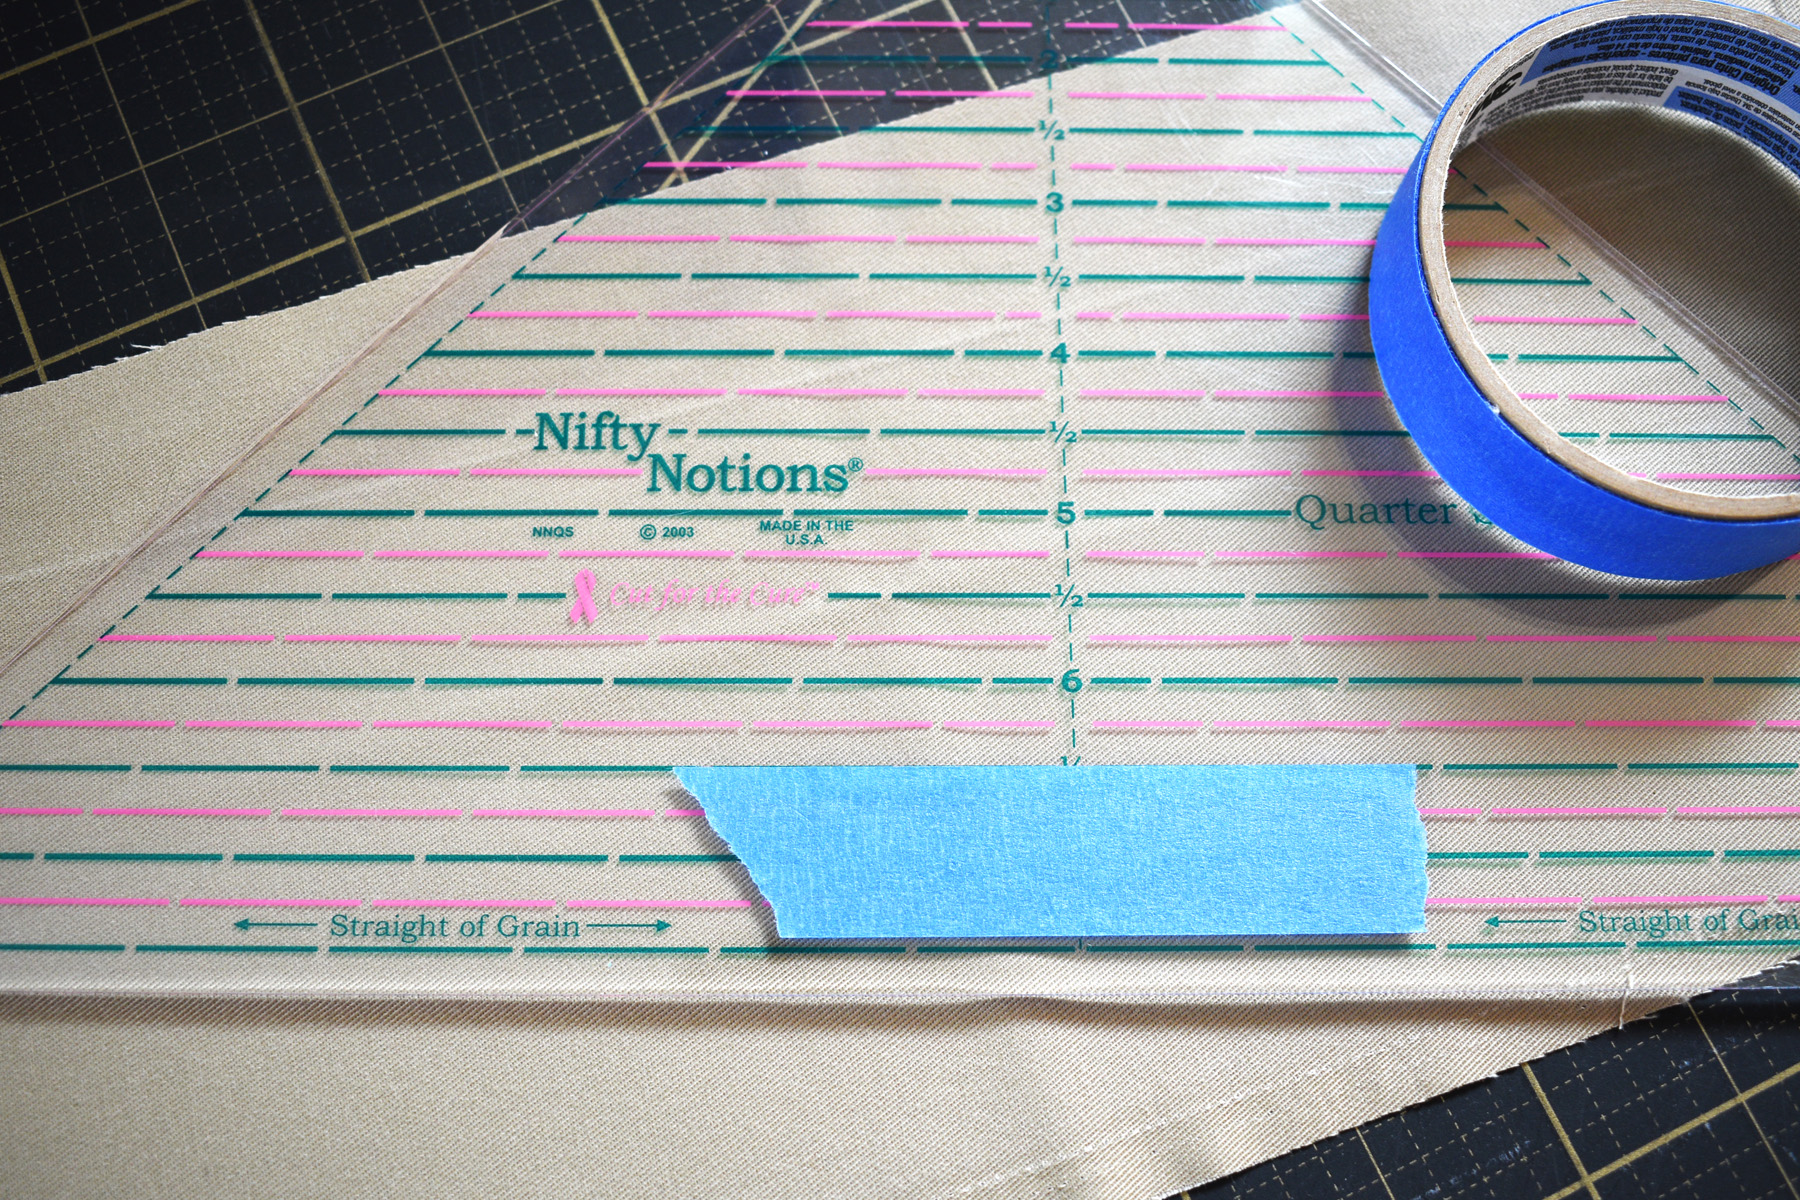
First, here’s a simple tip for working with this type of ruler. To make sure you’re always using the same measured line on the ruler each time you cut, mark the line with blue painter’s tape. The tape will stick to help you through the measuring and cutting process, but won’t leave any sticky residue when you’re ready to remove it.
The first step in cutting the triangles with the quarter square ruler is to cut the fabric into the correct sized strips, 6 1/2″ wide for this quilt. Use a long ruler for this process along with a rotary cutter and cutting mat.
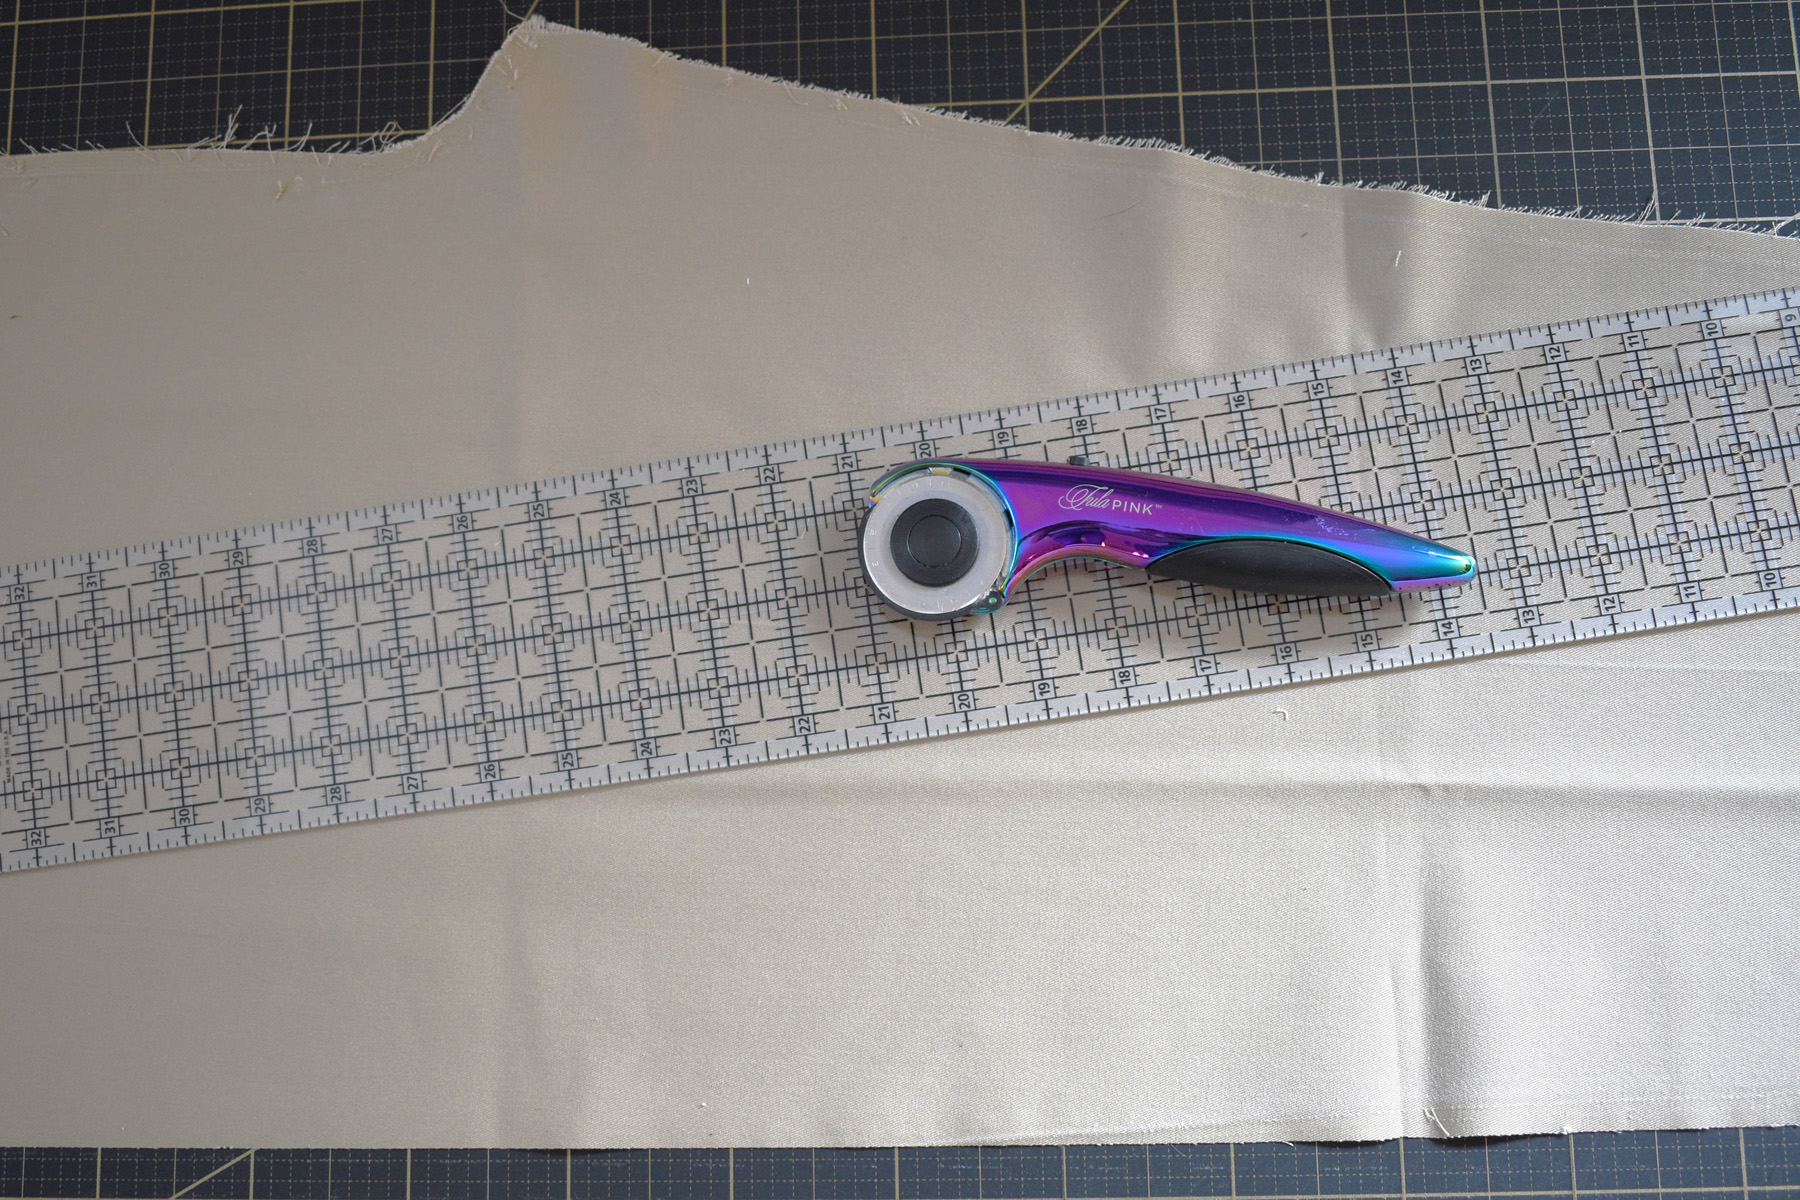
I’m trying to get as many triangles as humanly possible from these pants! First, I even out the bottom edge of the pant leg, shaving off the minimum amount to make a straight line.
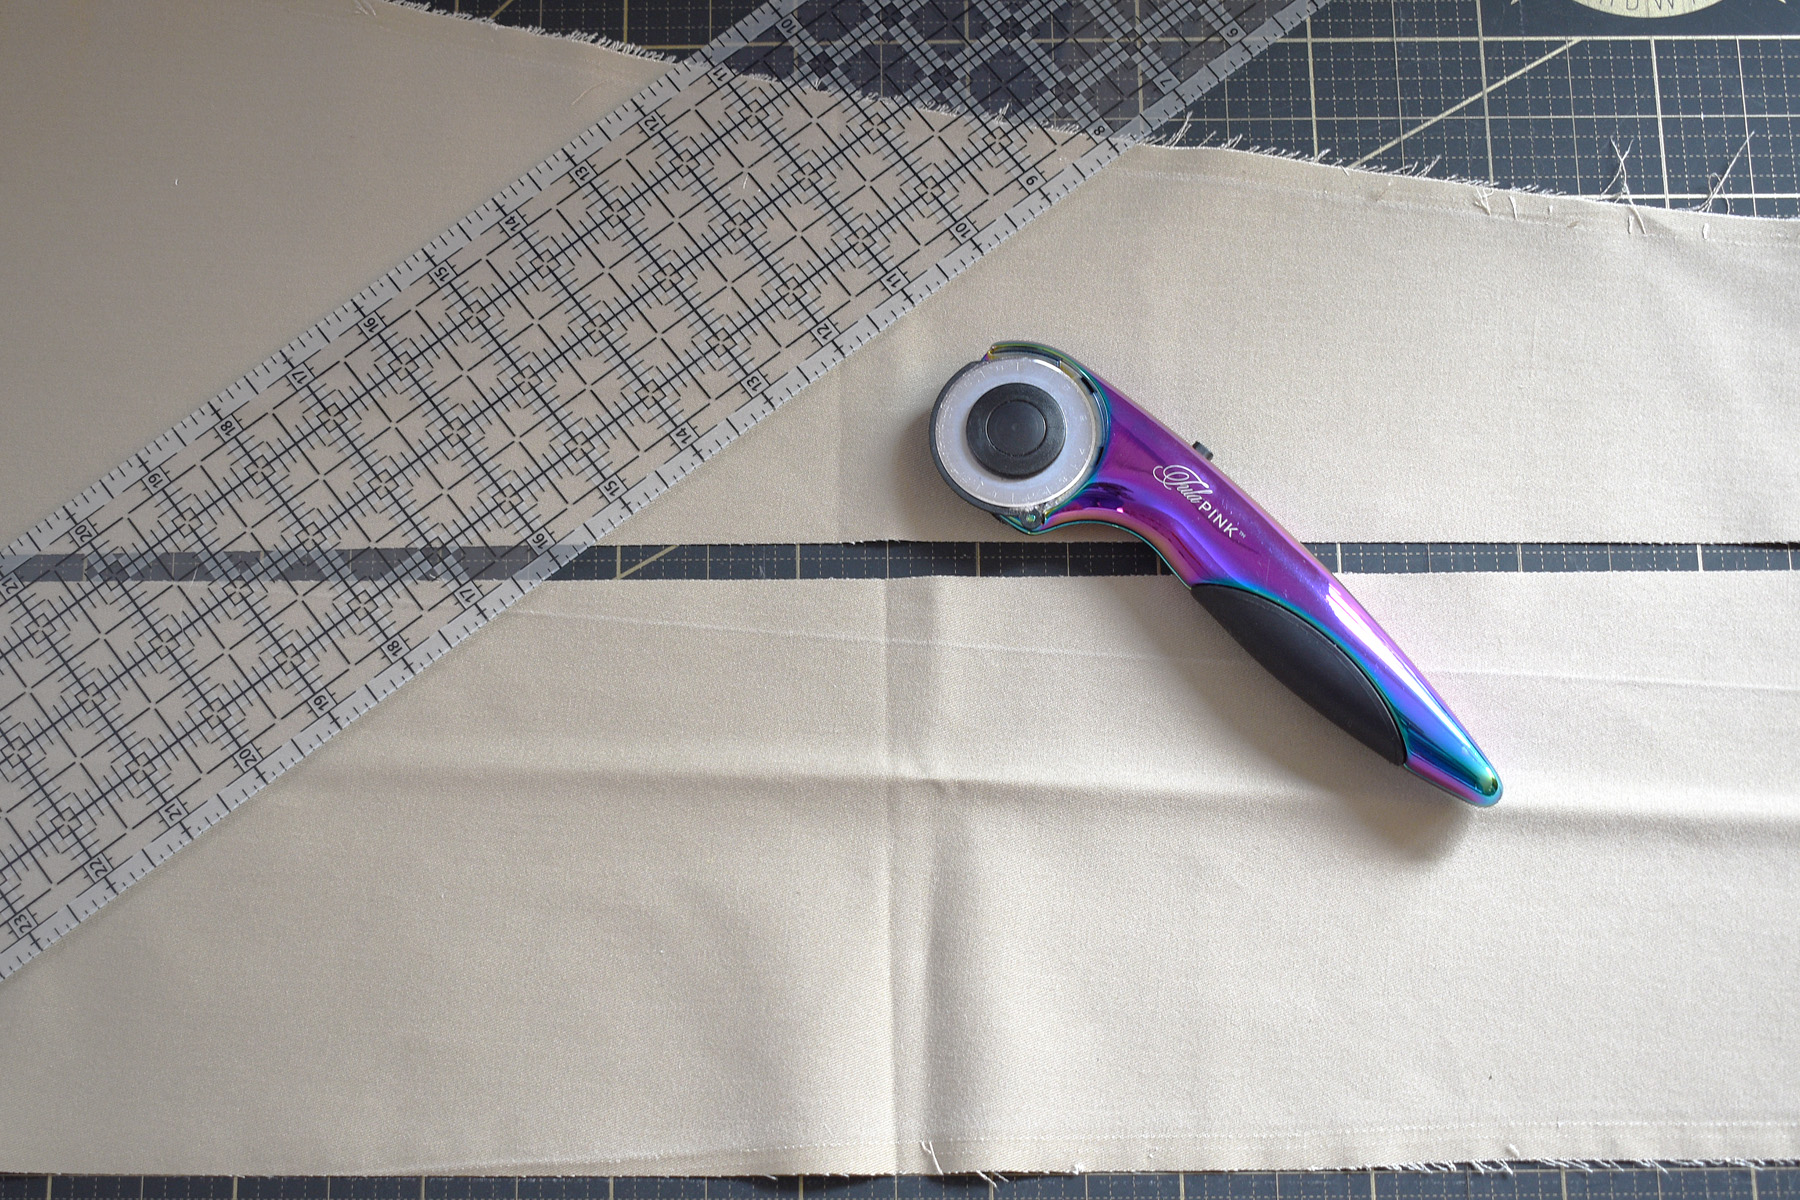
Next, I measure the 6 1/2″ strip with the ruler and cut. I also cut the remaining strip of fabric down to 6 1/2″, although some of it is too skinny to cut triangles with the ruler.
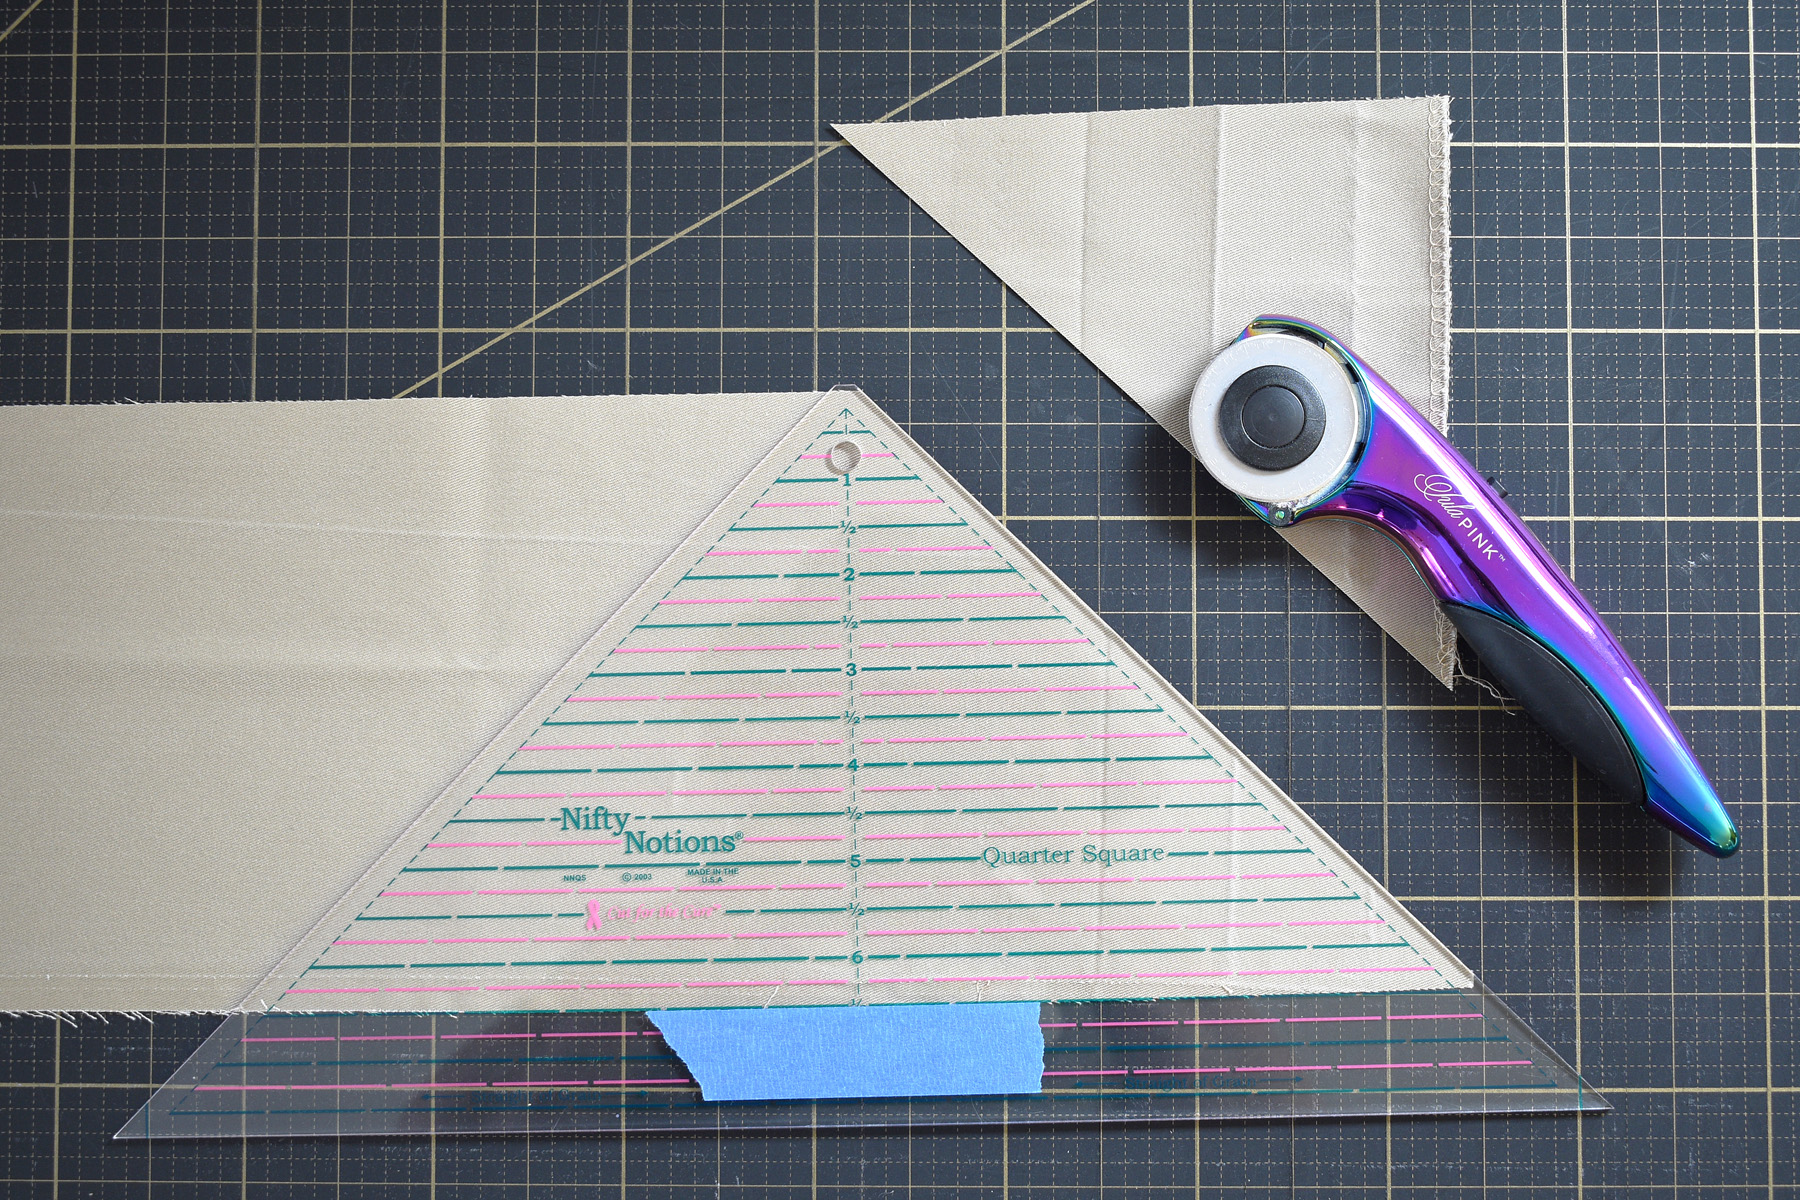
Start with one 6 1/2″ strip, and line-up the bottom edge of the quarter square ruler at the 6 1/2″ mark along the bottom edge. The top edge of the ruler should meet the top edge of the fabric strip. Move the ruler to one edge of the fabric strip to make the first cut. Then run the rotary cutter along the other edge of the ruler to create the first triangle.
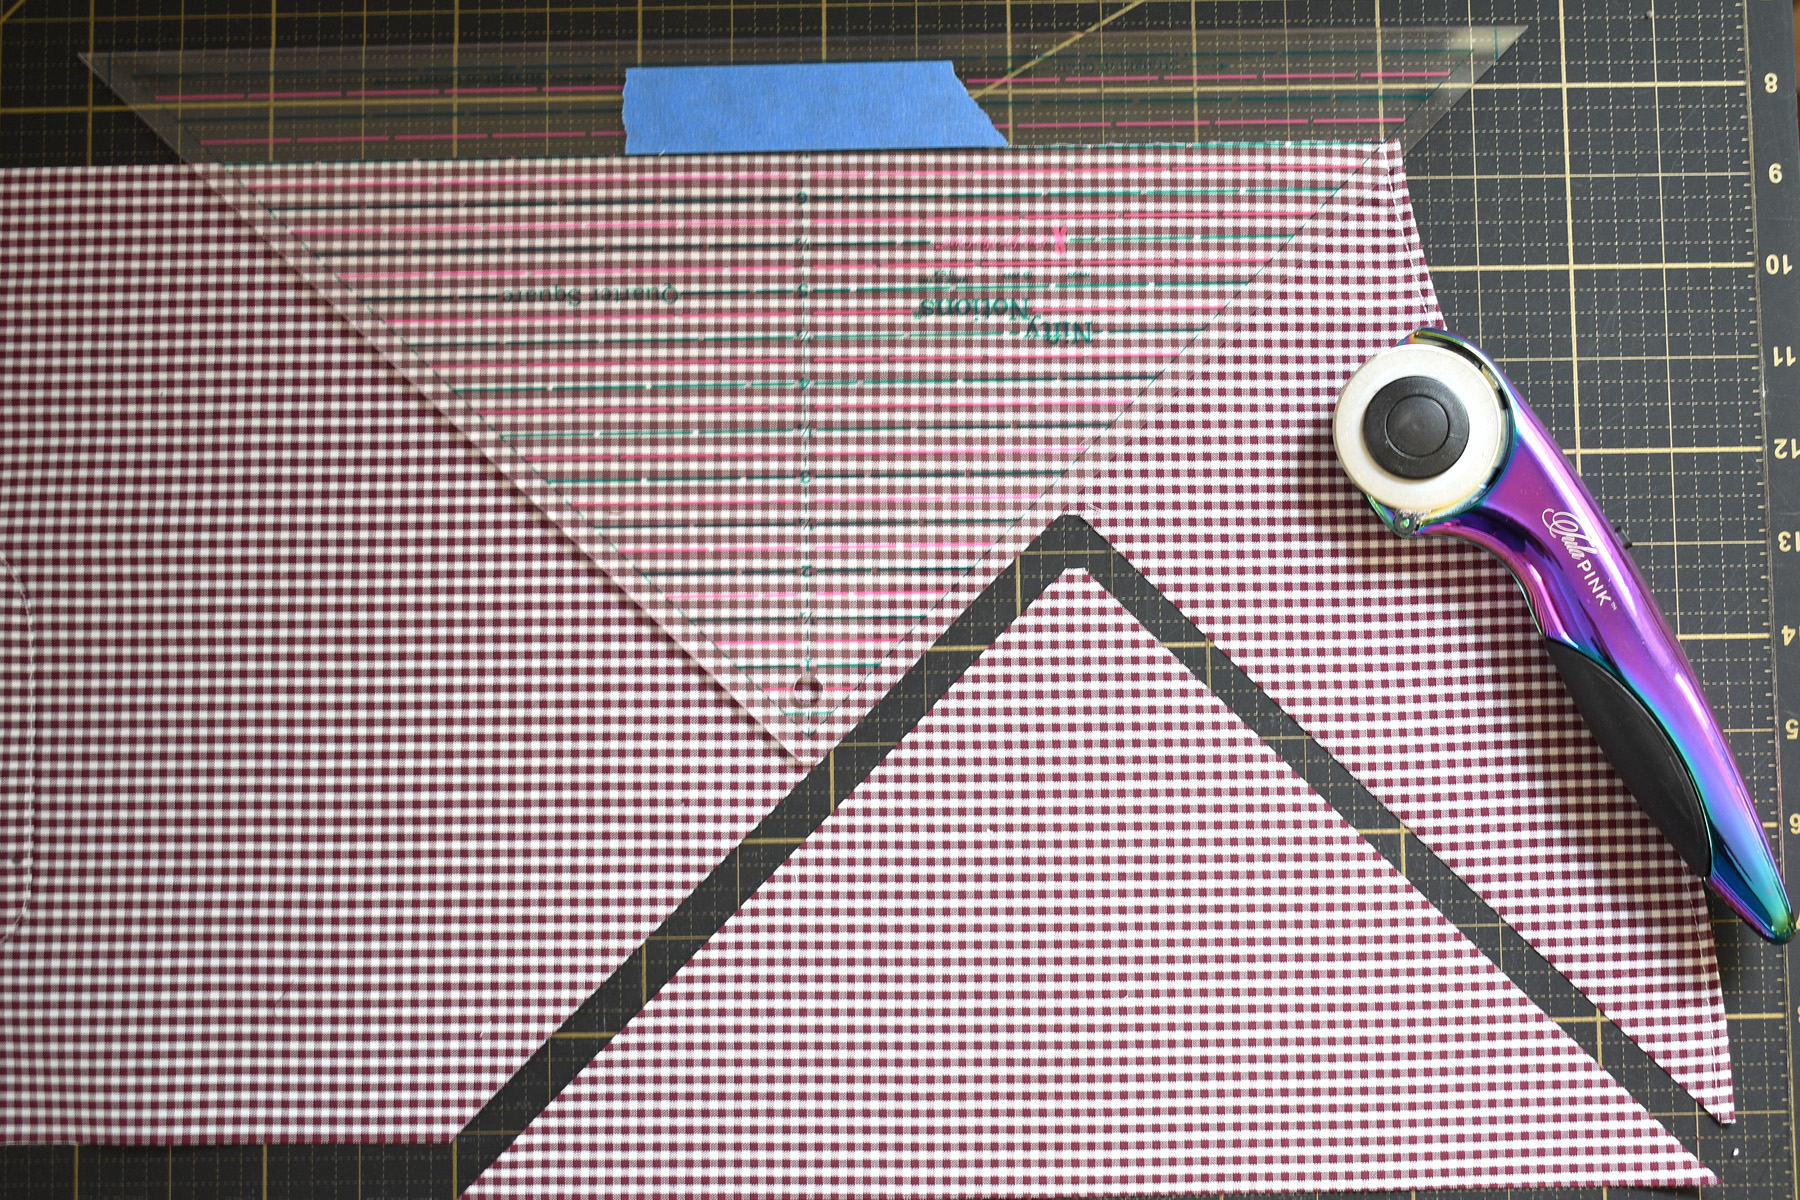
Nest step is to flip the ruler upside down and line it up again with both edges on the 6 1/2″ line, making sure the ruler is also aligned with the cut edge. Here’s where you may need to flip the piece of fabric around so it’s easier to cut with the ruler. Making the next cut will create another triangle.
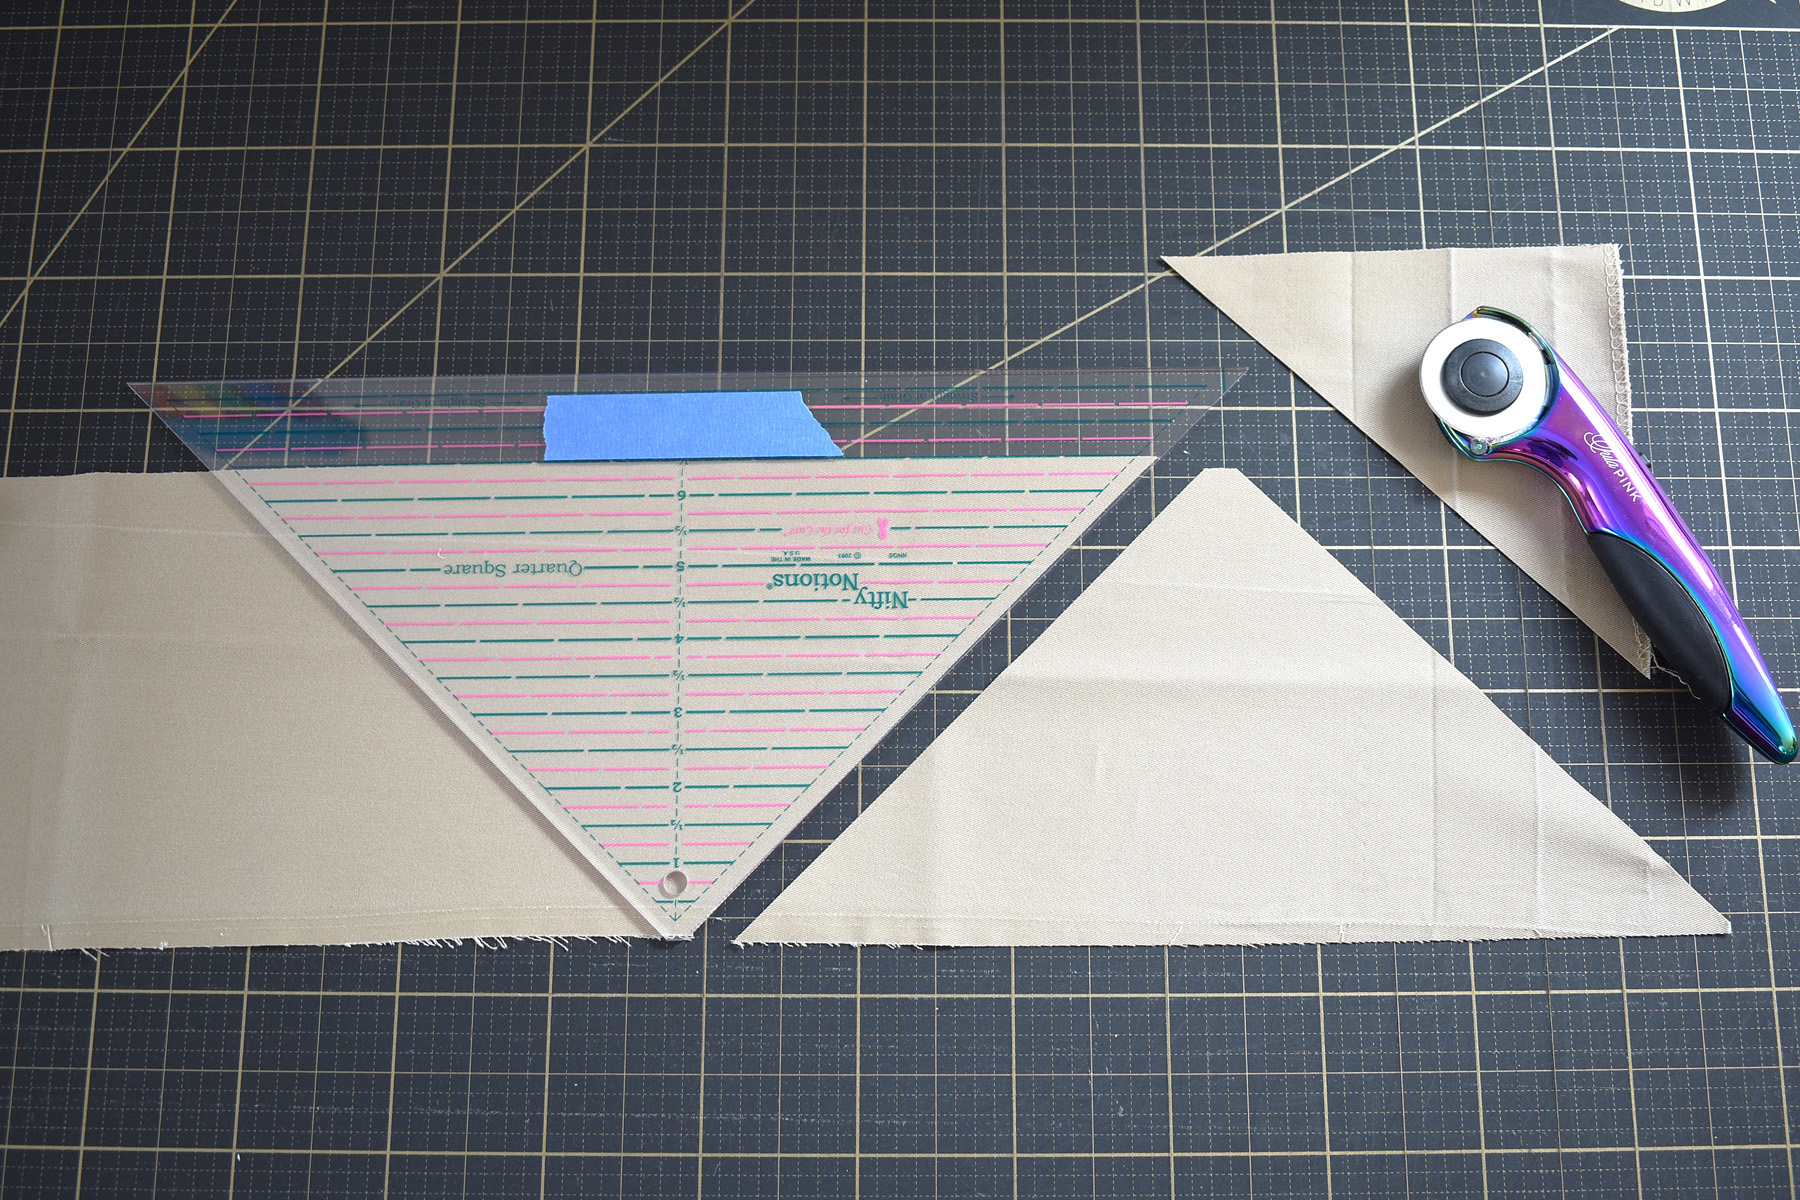
Continue flipping the ruler, lining up the markings carefully, and cutting triangles until there is not enough fabric left to cut a whole triangle. You will need to cut 32 of these triangles to complete this quilt.
Sadly, I ran out of this khaki fabric after cutting only 26 triangles! Here’s where I needed to dig a bit deeper in the bag of clothes to find a similar colored khaki shirt to cut the remaining 6 triangles. In my final quilt, 3 of the squares feature a very slightly darker shade of the khaki color, but it works withing the final design. Remember, the important part of a memory quilt is the memories, not creating a “perfect” quilt!
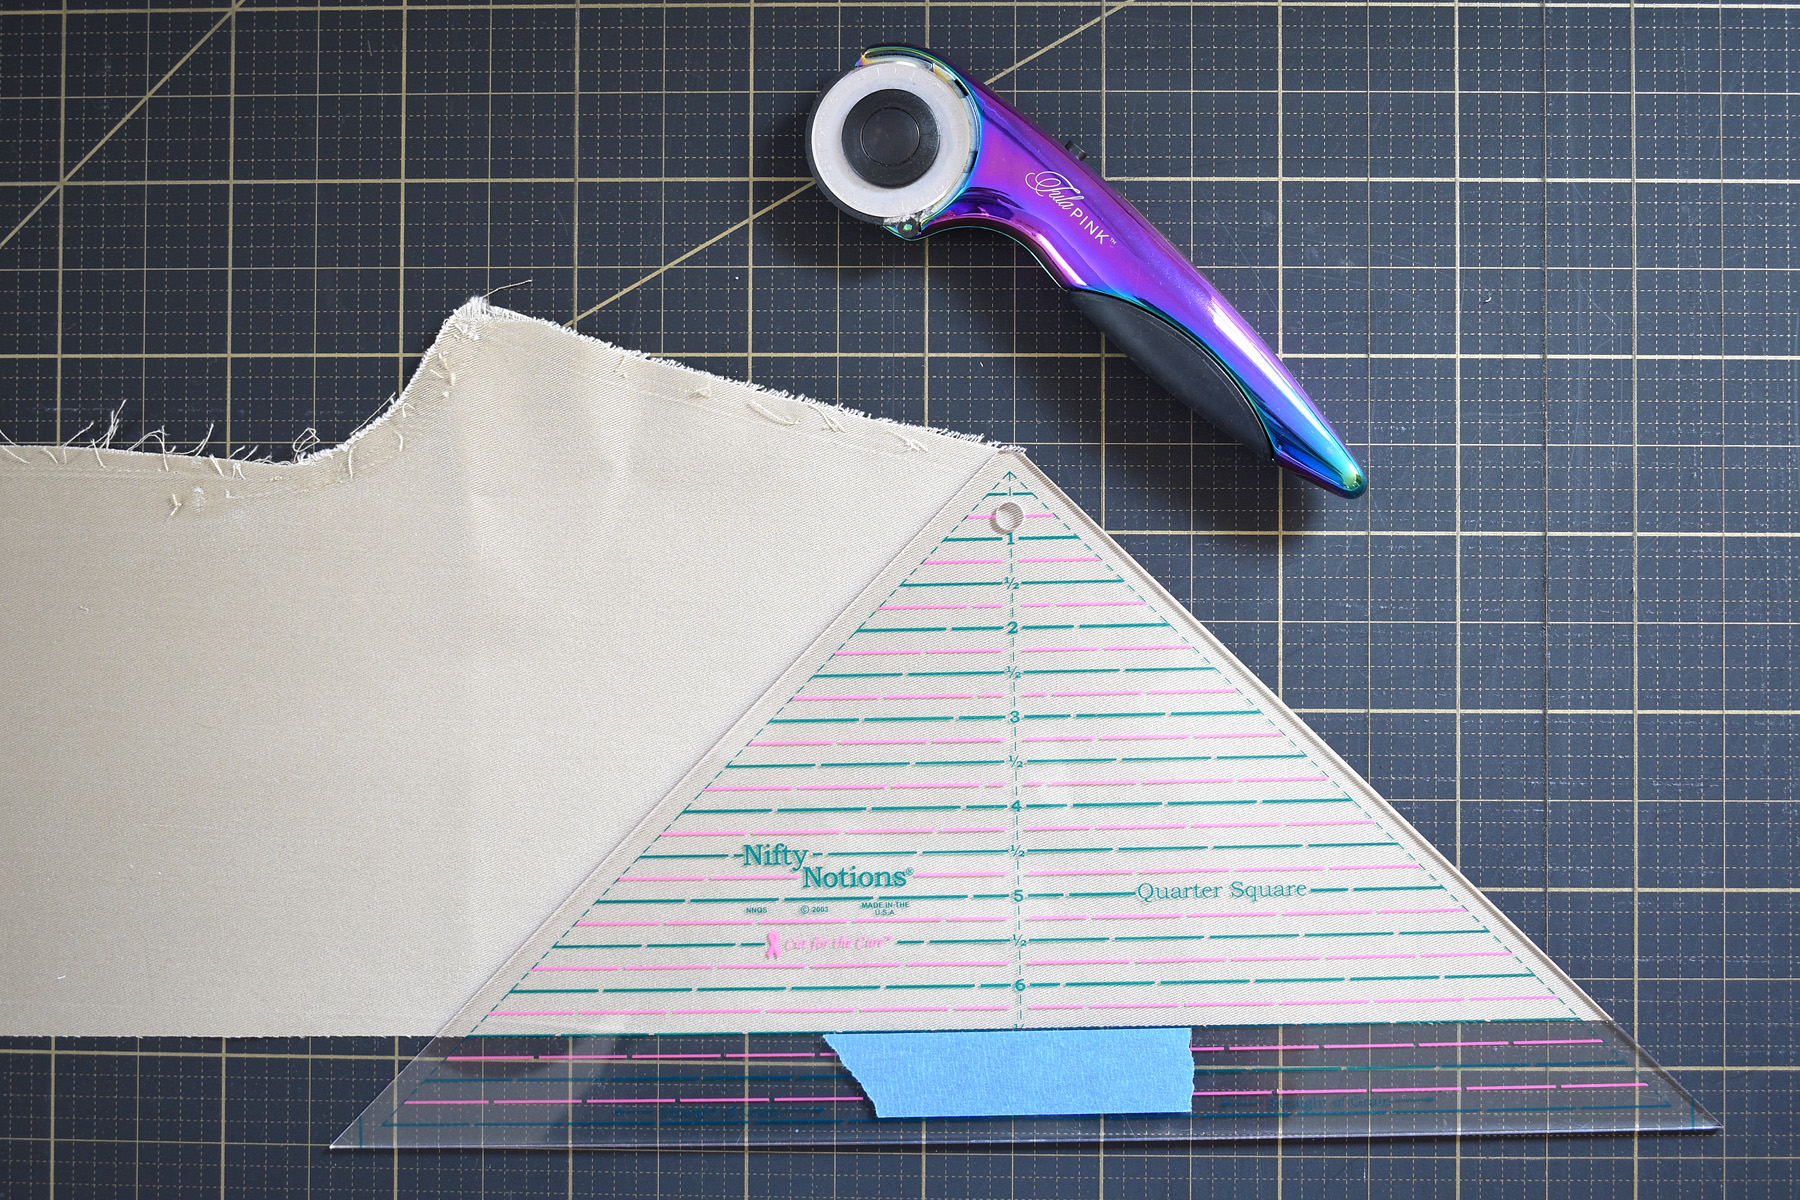
When it comes to using this ruler with oddly shaped pieces of fabrics, like a shirt sleeve, you may have to get creative with experimenting to see the possibilities. I discovered I could cut a slice off the top curve of the sleeve, then still get several triangles cut from the rest of the sleeve fabric.

I cut a 6 1/2″ strip across the top edge of the sleeve, then used the quarter square ruler to cut one triangle from this piece.
Then I could cut another 3 triangles out of the remainder of the sleeve, for a total of 4 triangles from each sleeve. Remember, you need a total of 8 triangles from EACH of your 4 contrasting colors for this quilt!

Here’s my final cut triangles for this quilt, a total of 32 on the left as the main fabric (here’s where you can see the few extras I needed to cut from that shirt), and 8 triangles cut from each of the 4 contrasting colors. With all your triangles cut you’re ready to start sewing.
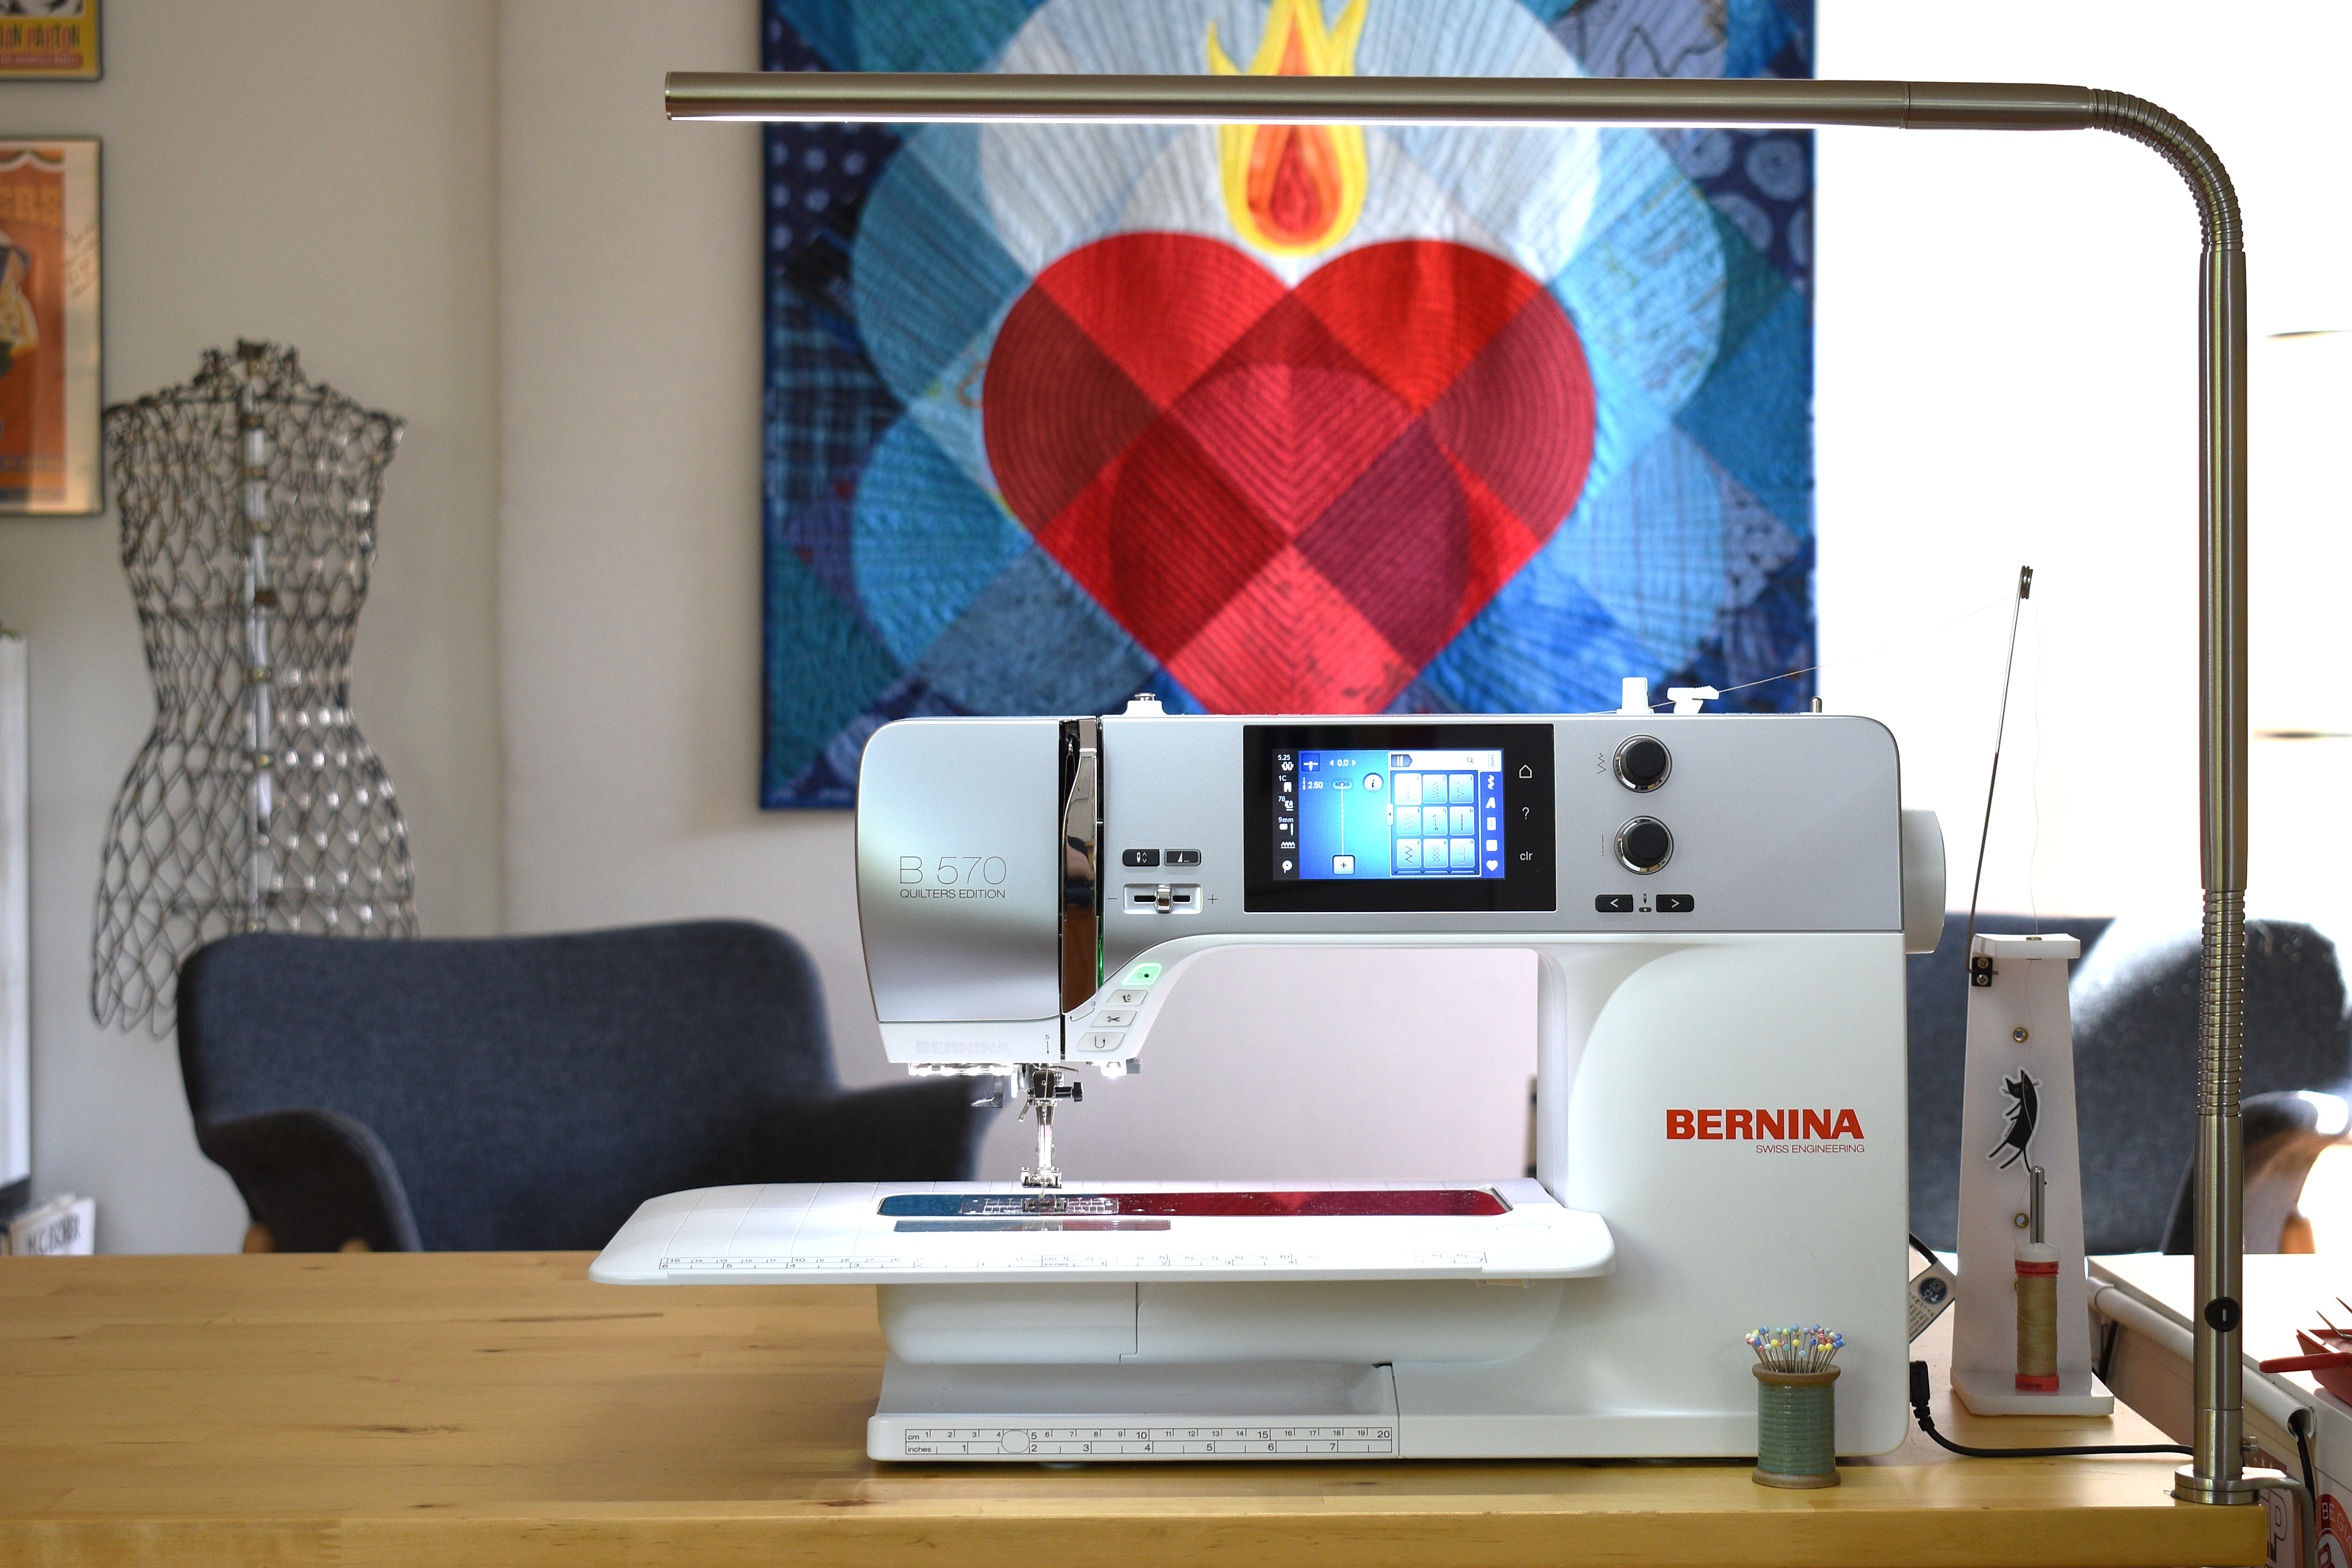
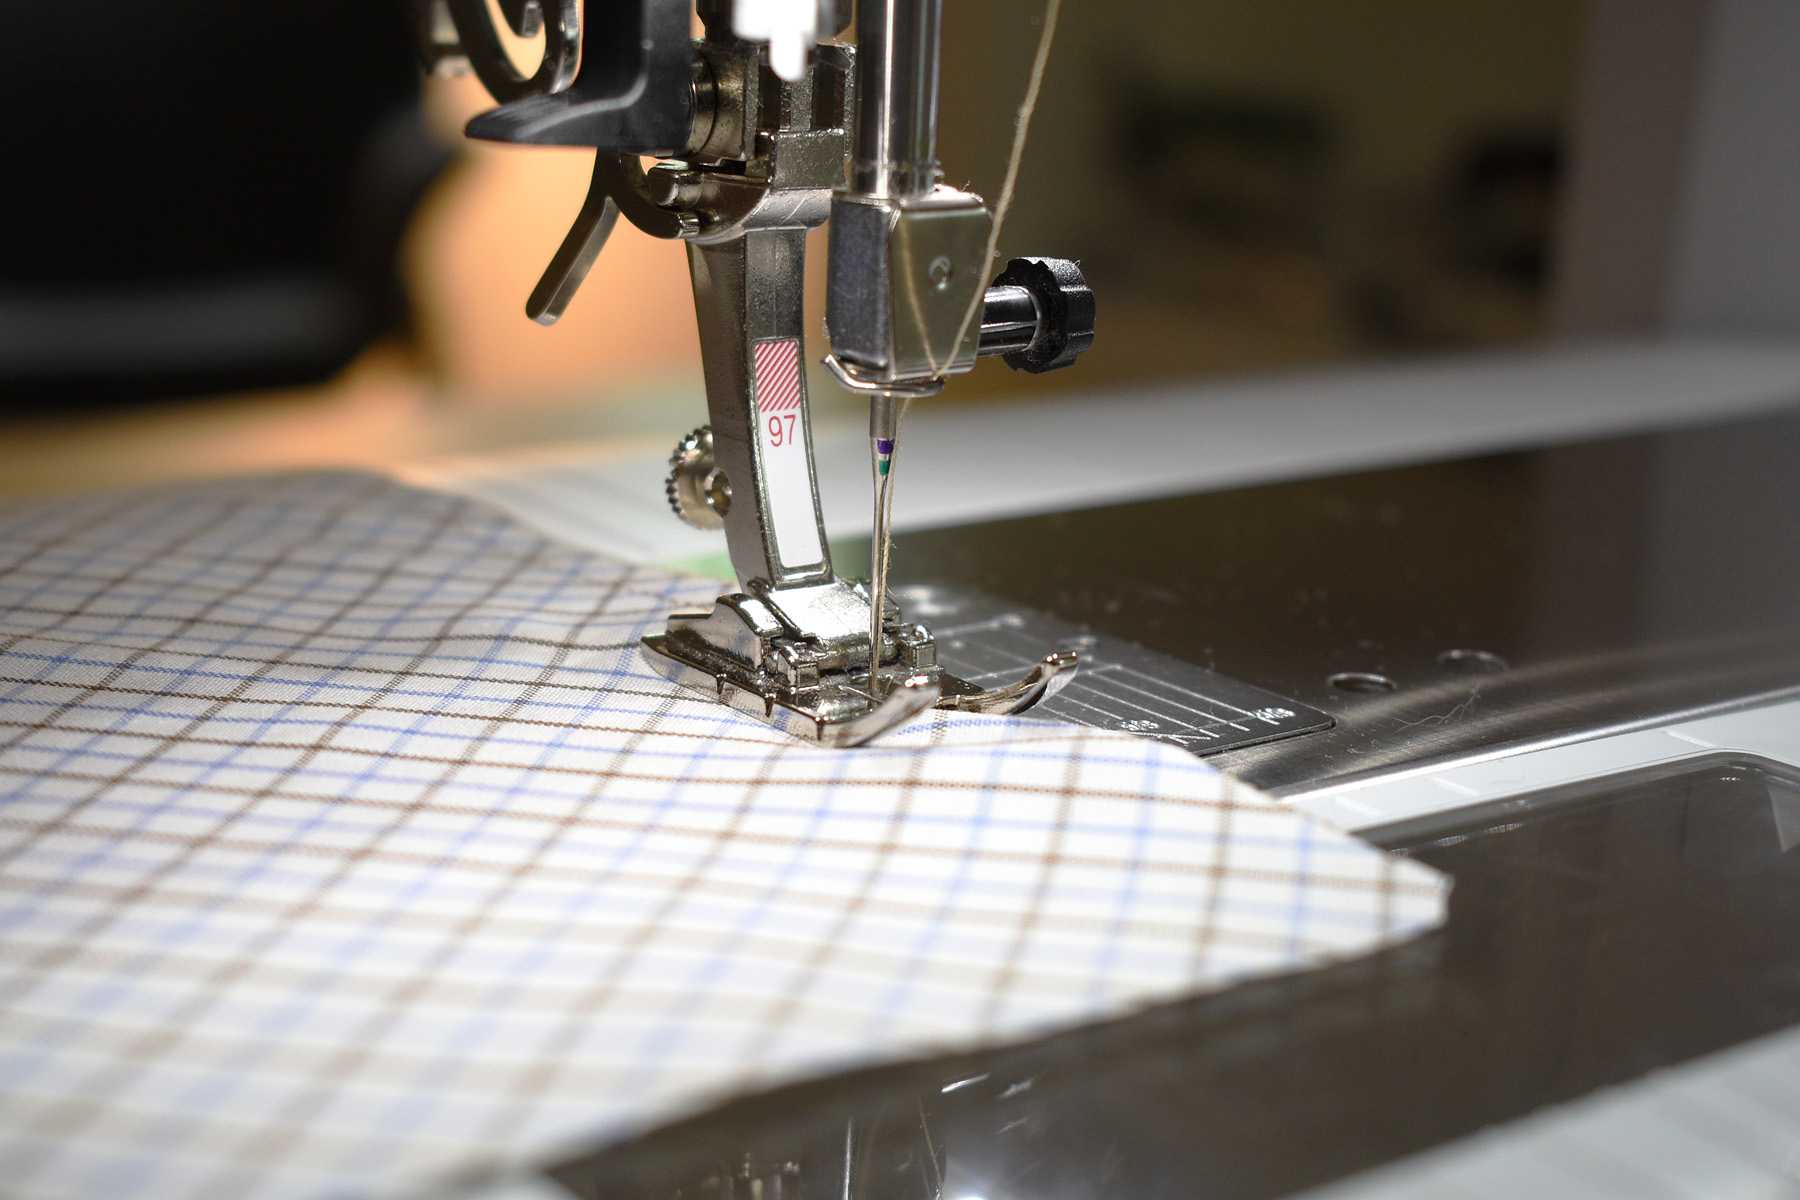
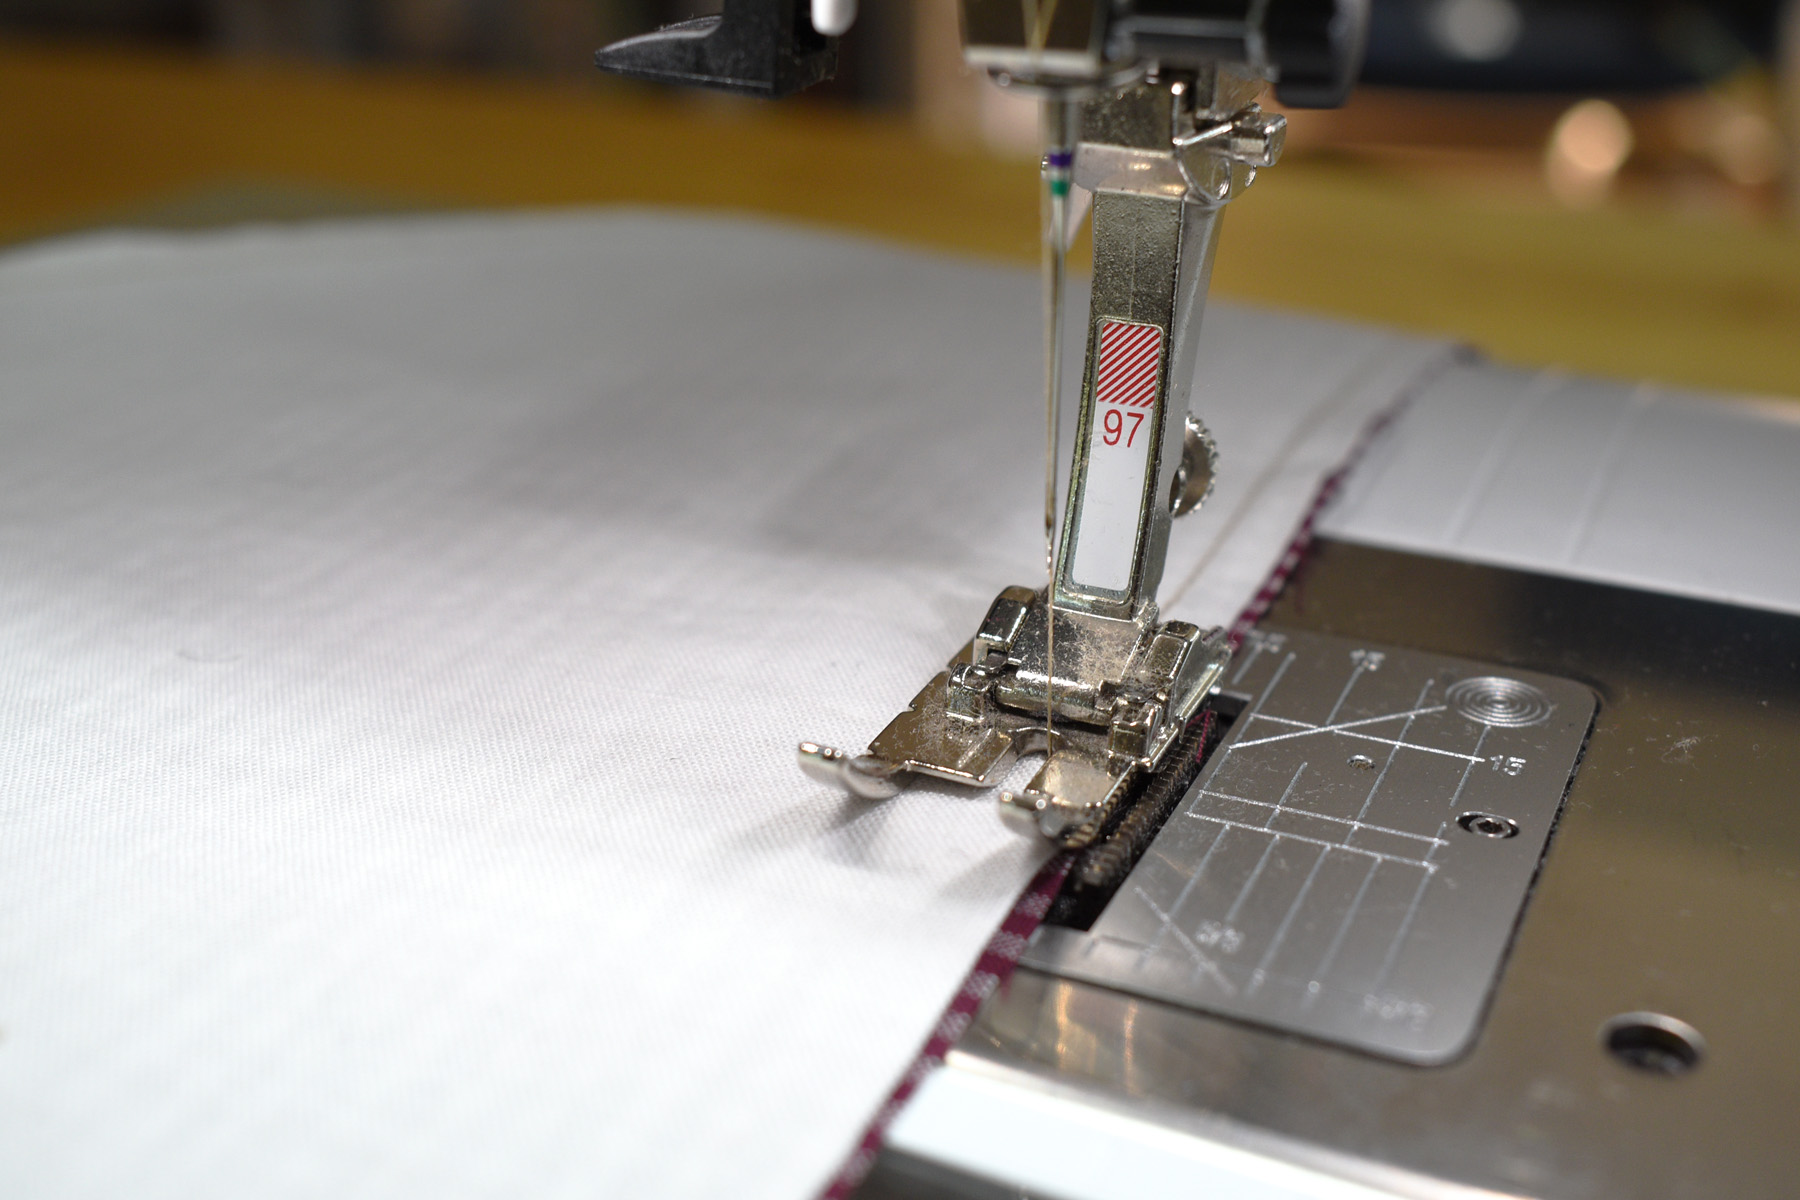
Set up your sewing machine to stitch the patchwork blocks. Starting a brand new project is a great opportunity to make sure your sewing machine is all cleaned and oiled. I clean out the bobbin area, clean the thread cutter, and give the B 570 QE a few drops of oil before getting started. Check your user’s manual if you’re not sure how to clean your machine, or get in touch with the friendly staff at your nearest BERNINA store for help.

Using a straight stitch presser foot or patchwork foot will help your machine stitch nice, even straight stitches. I use Patchwork foot #97 with my B 570 QE. I am sewing with a size 80/12 Sharp needle because of the tightly woven fabric in the cotton shirts. Choose a needle size that works best with the majority of the fabrics you are using, check this informative article here at WeAllSew to learn more.
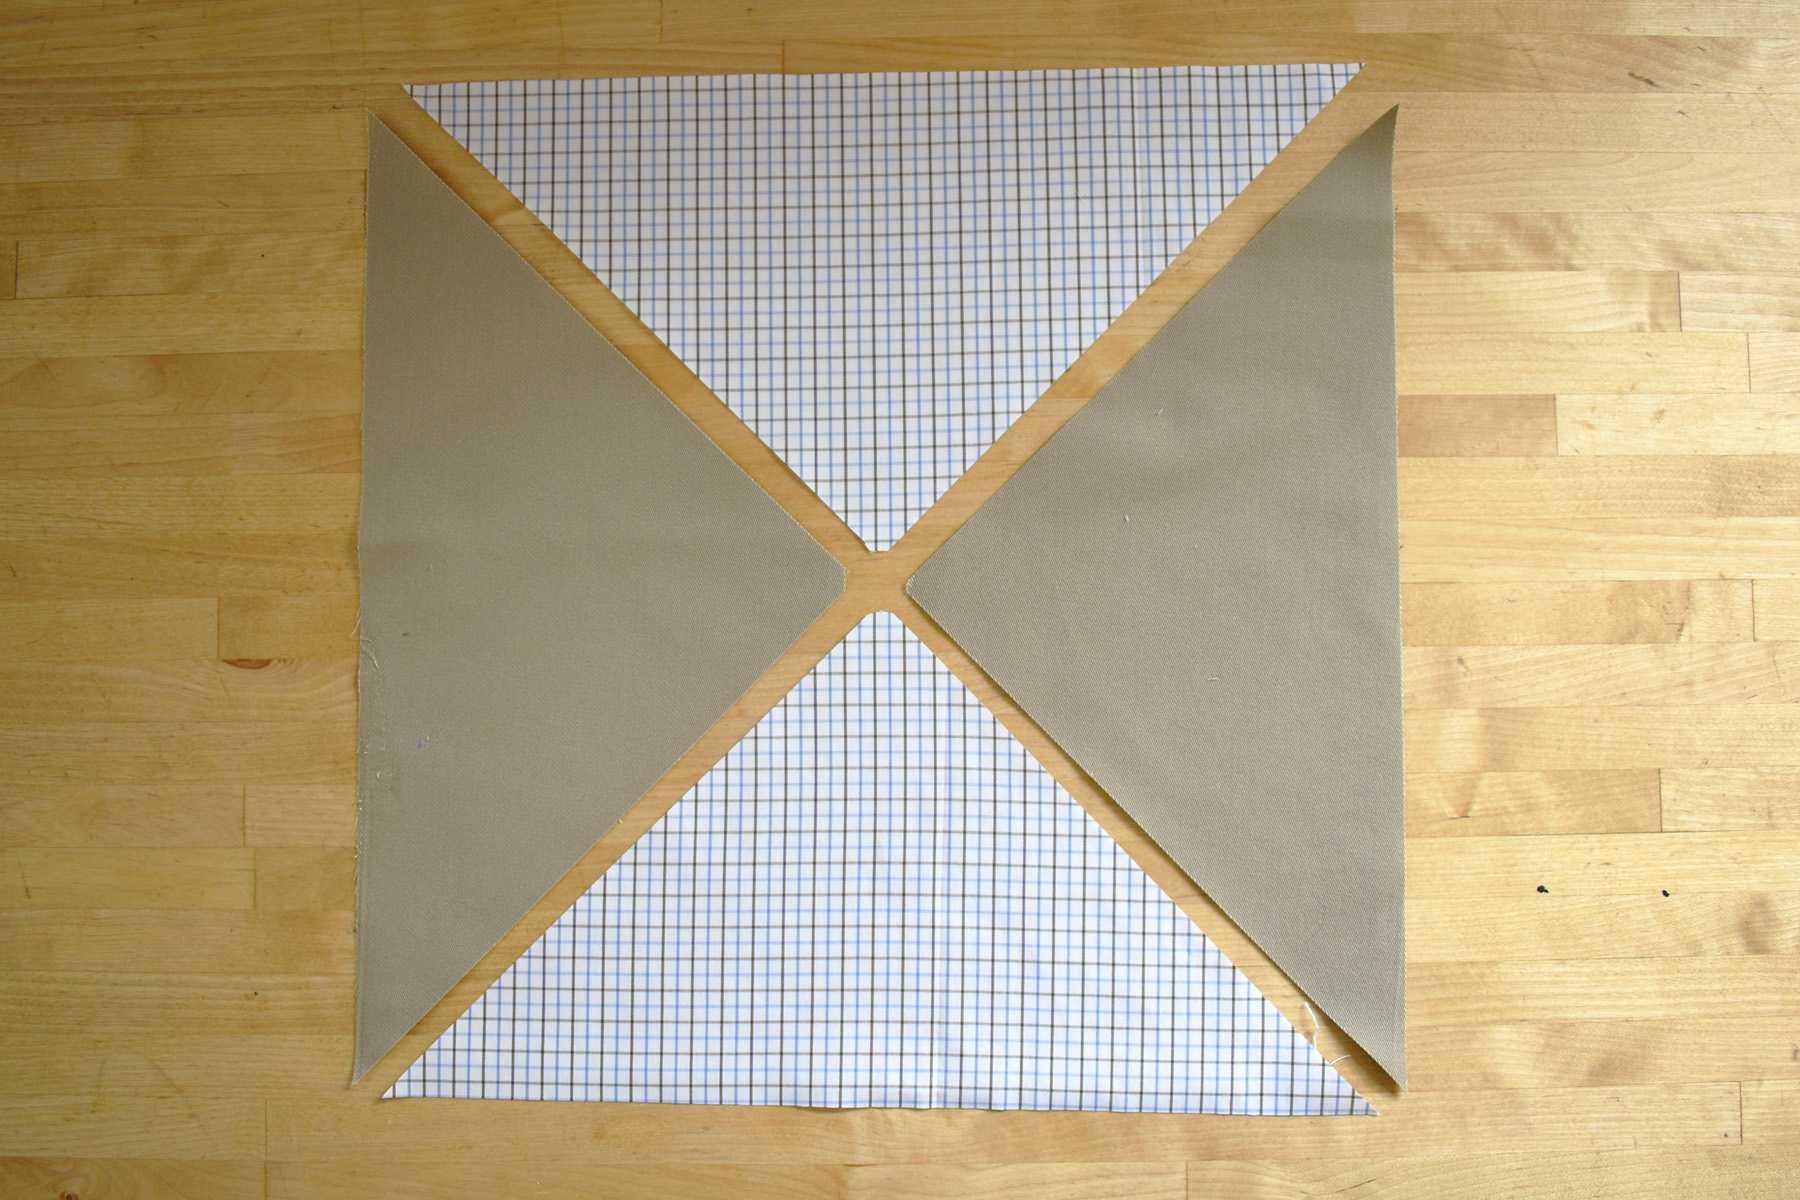
For each block, use two of the main colored triangles with two of the same contrasting triangles. Lay them right side up on your work table as in the photo above.
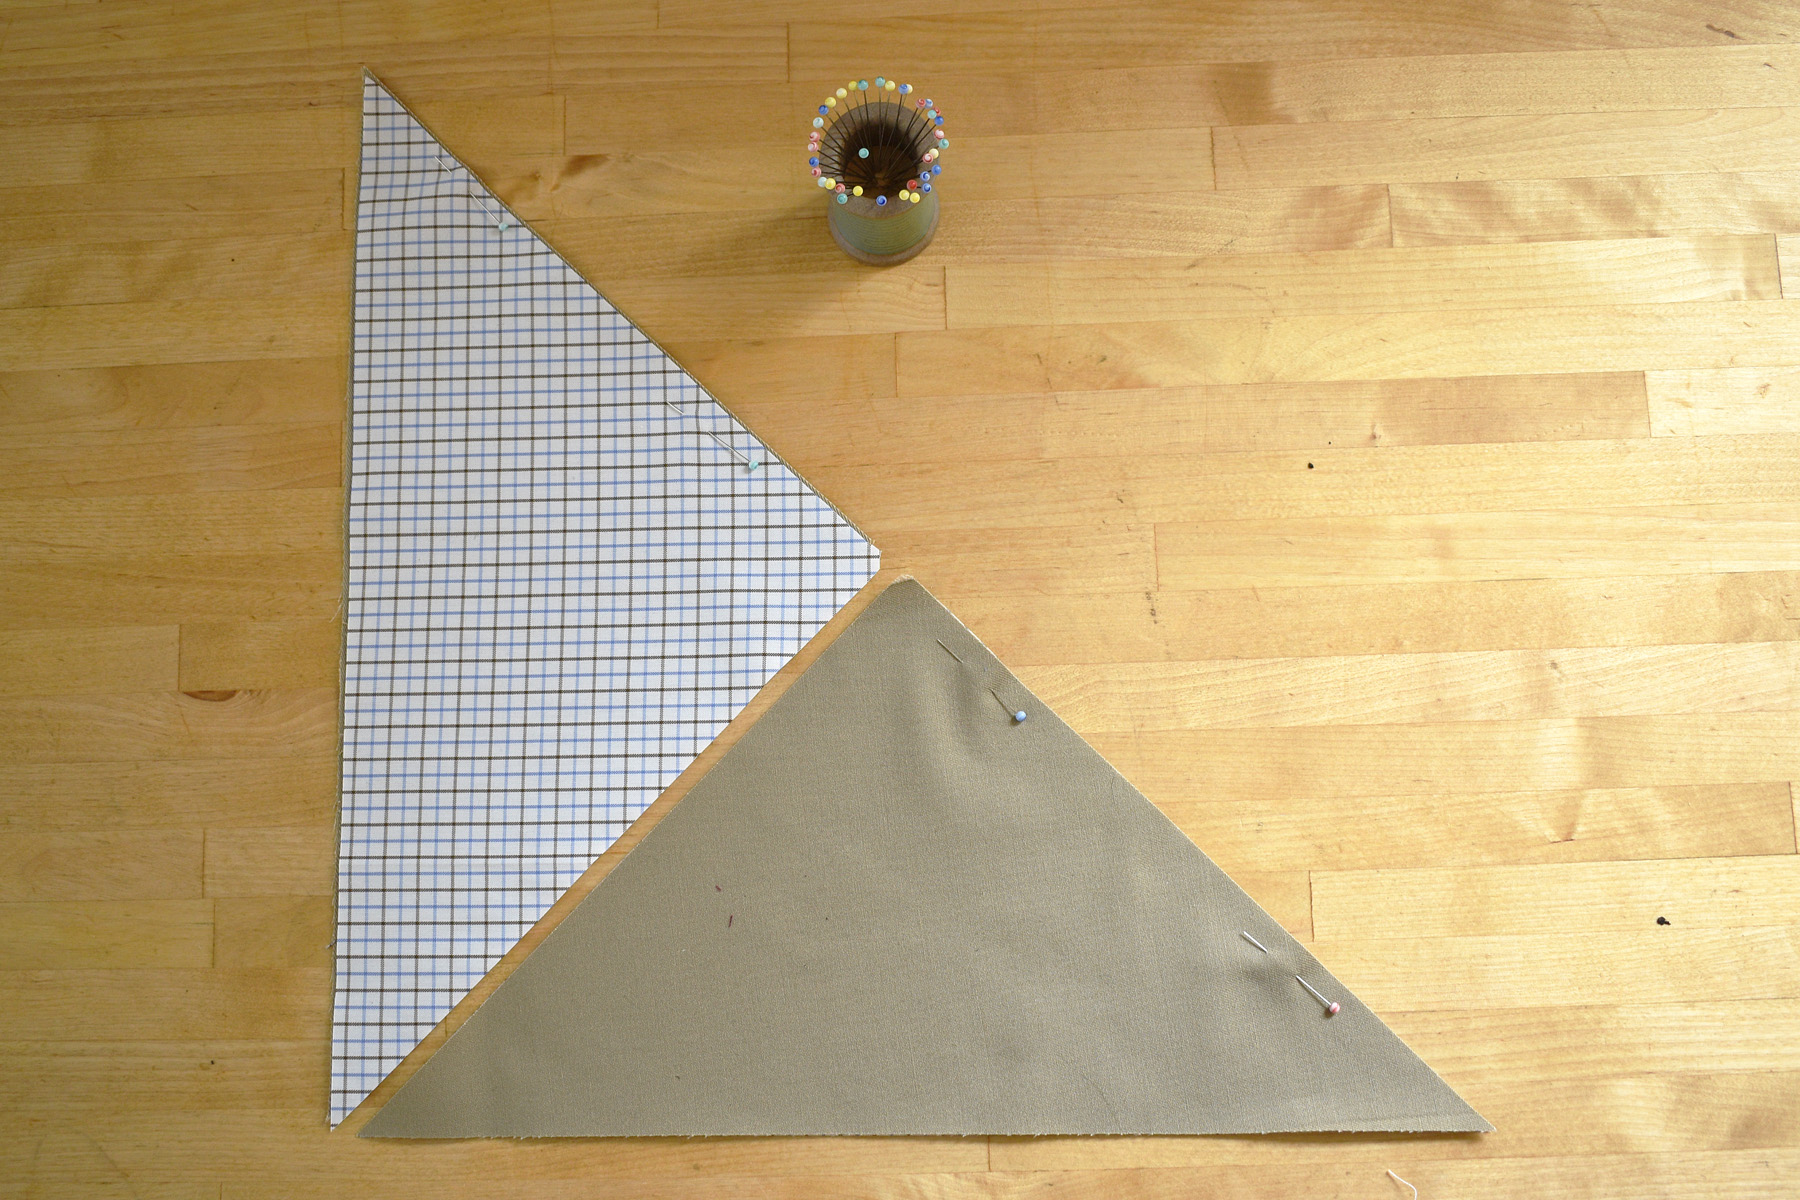
Flip the top triangle over the triangle to the left, matching the side seams, and pin. Then flip the remaining triangle over the bottom triangle in the same manner, pinning the side seam. Because the triangles have the same shapes on both sides, pinning helps you to remember which side you need to sew for the seams.
Stitch the first seams with a 1/4″ seam allowance.
Press the seams open, and press the seam allowance towards the darker fabric on the back side of the seam.
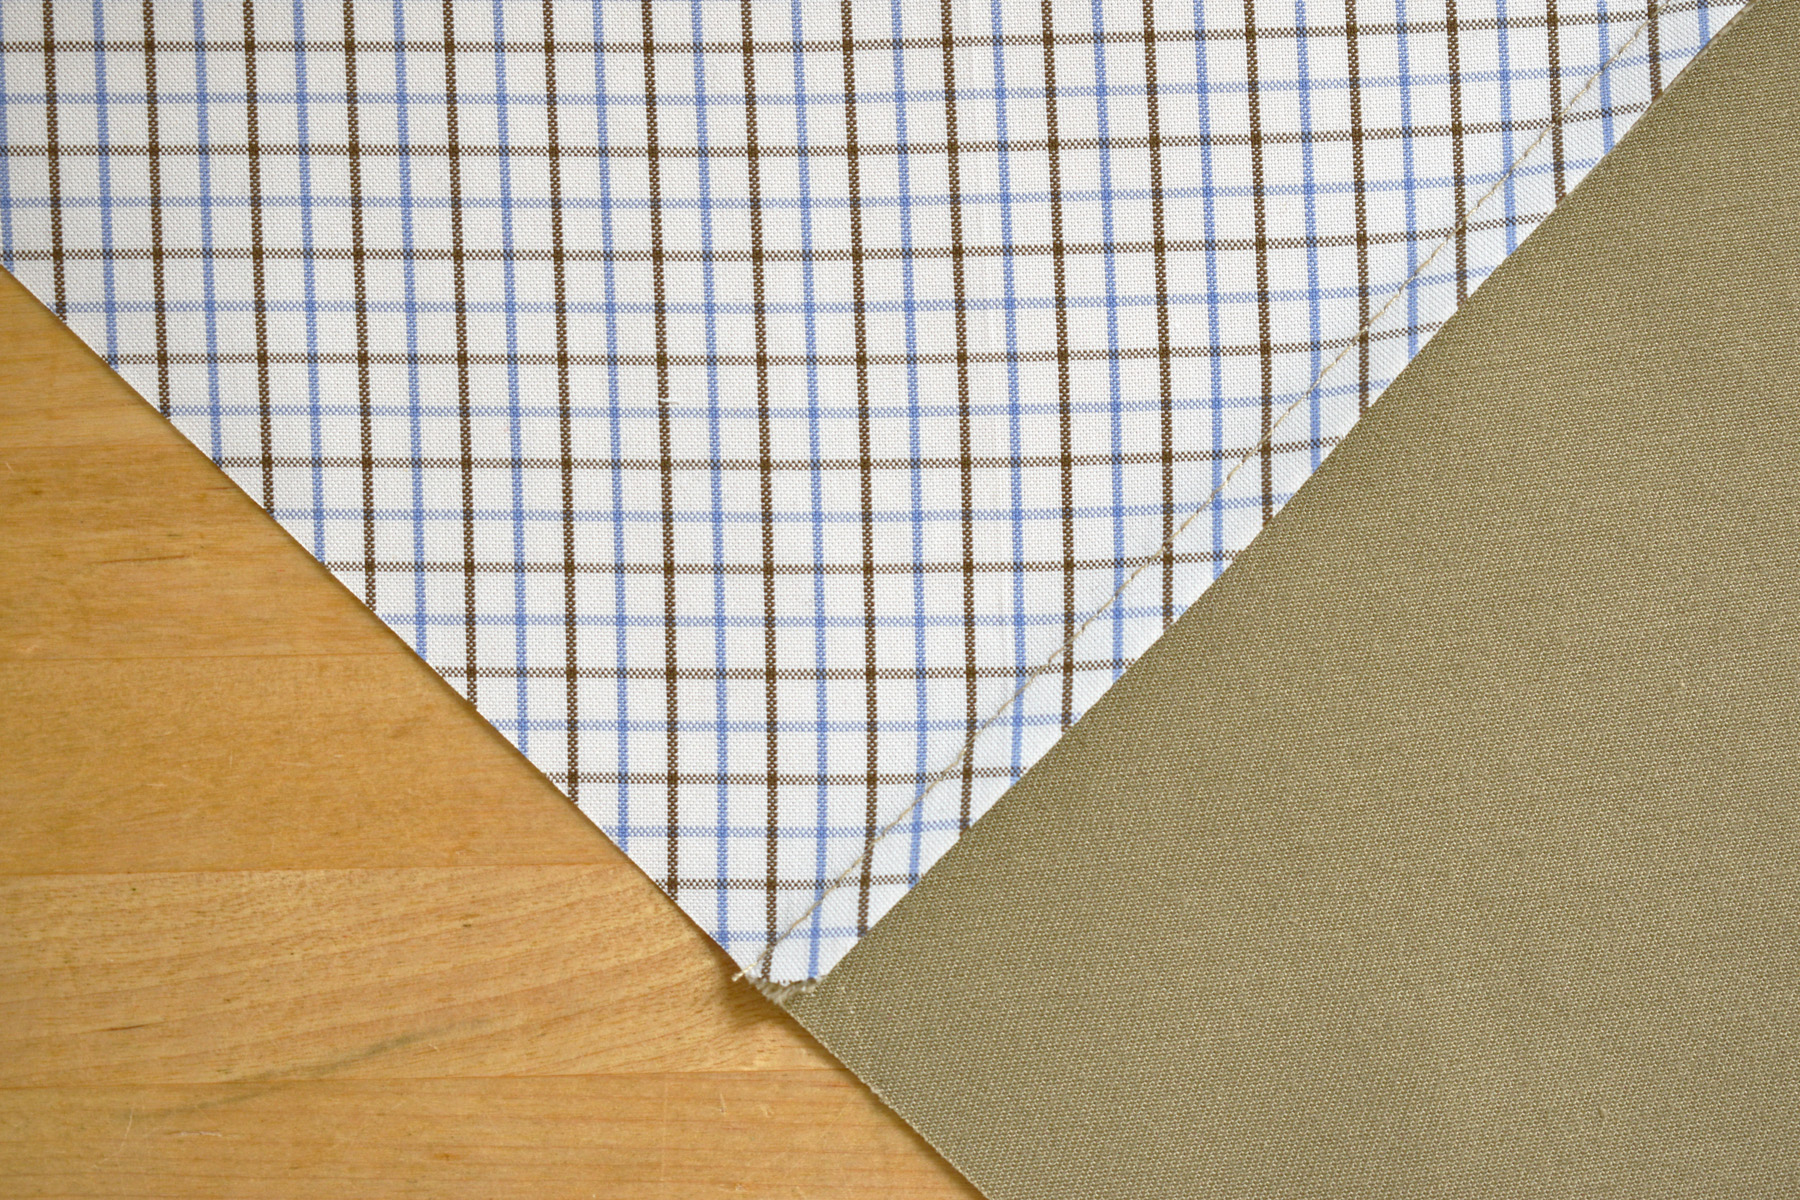
Return the two pieces to your work table. Match the seams in the middle, the seam allowance will fall to opposite sides of the seam as in the photo above. Pin in place. Stitch together with a quarter inch seam allowance.
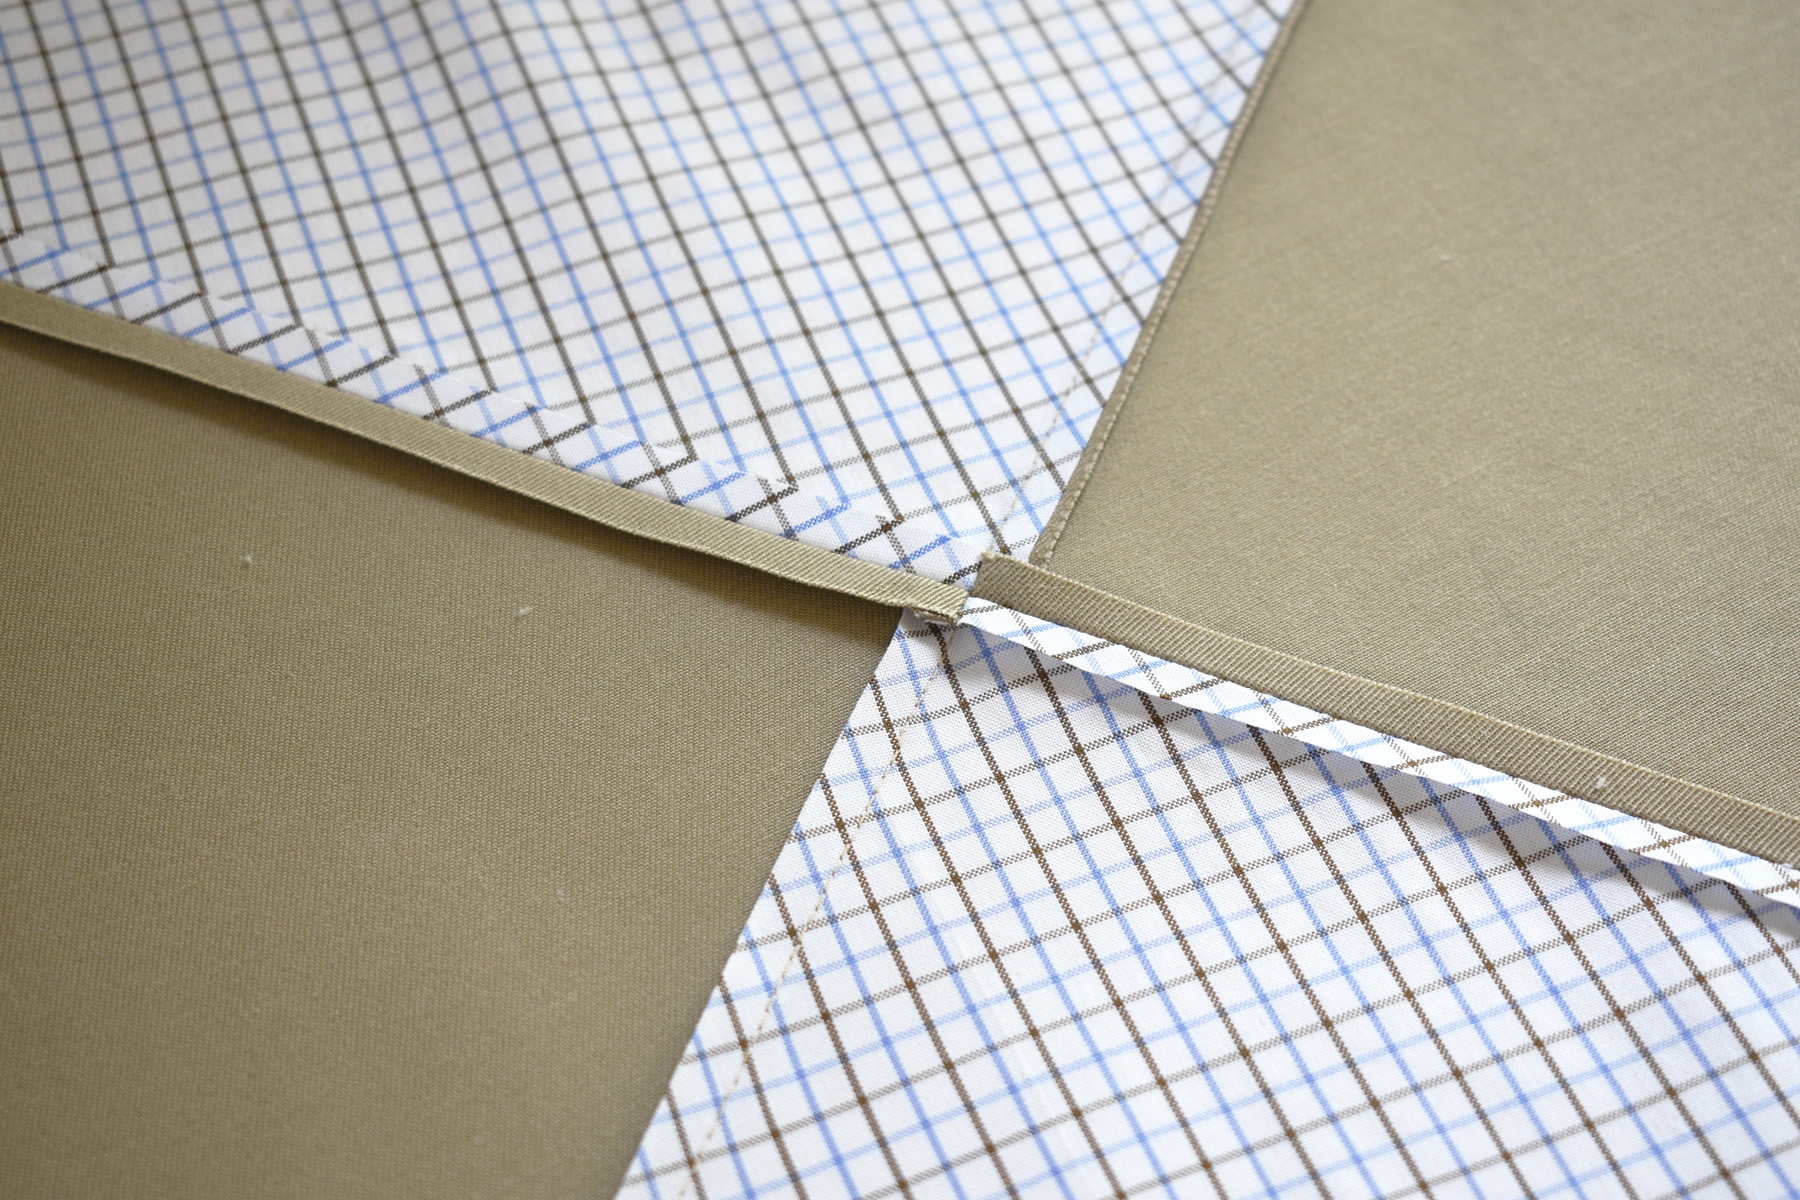
When you press the seam open, it’s okay to press the seam to one side or the other, or press it open. It’s simply whatever works best for you. I press open.
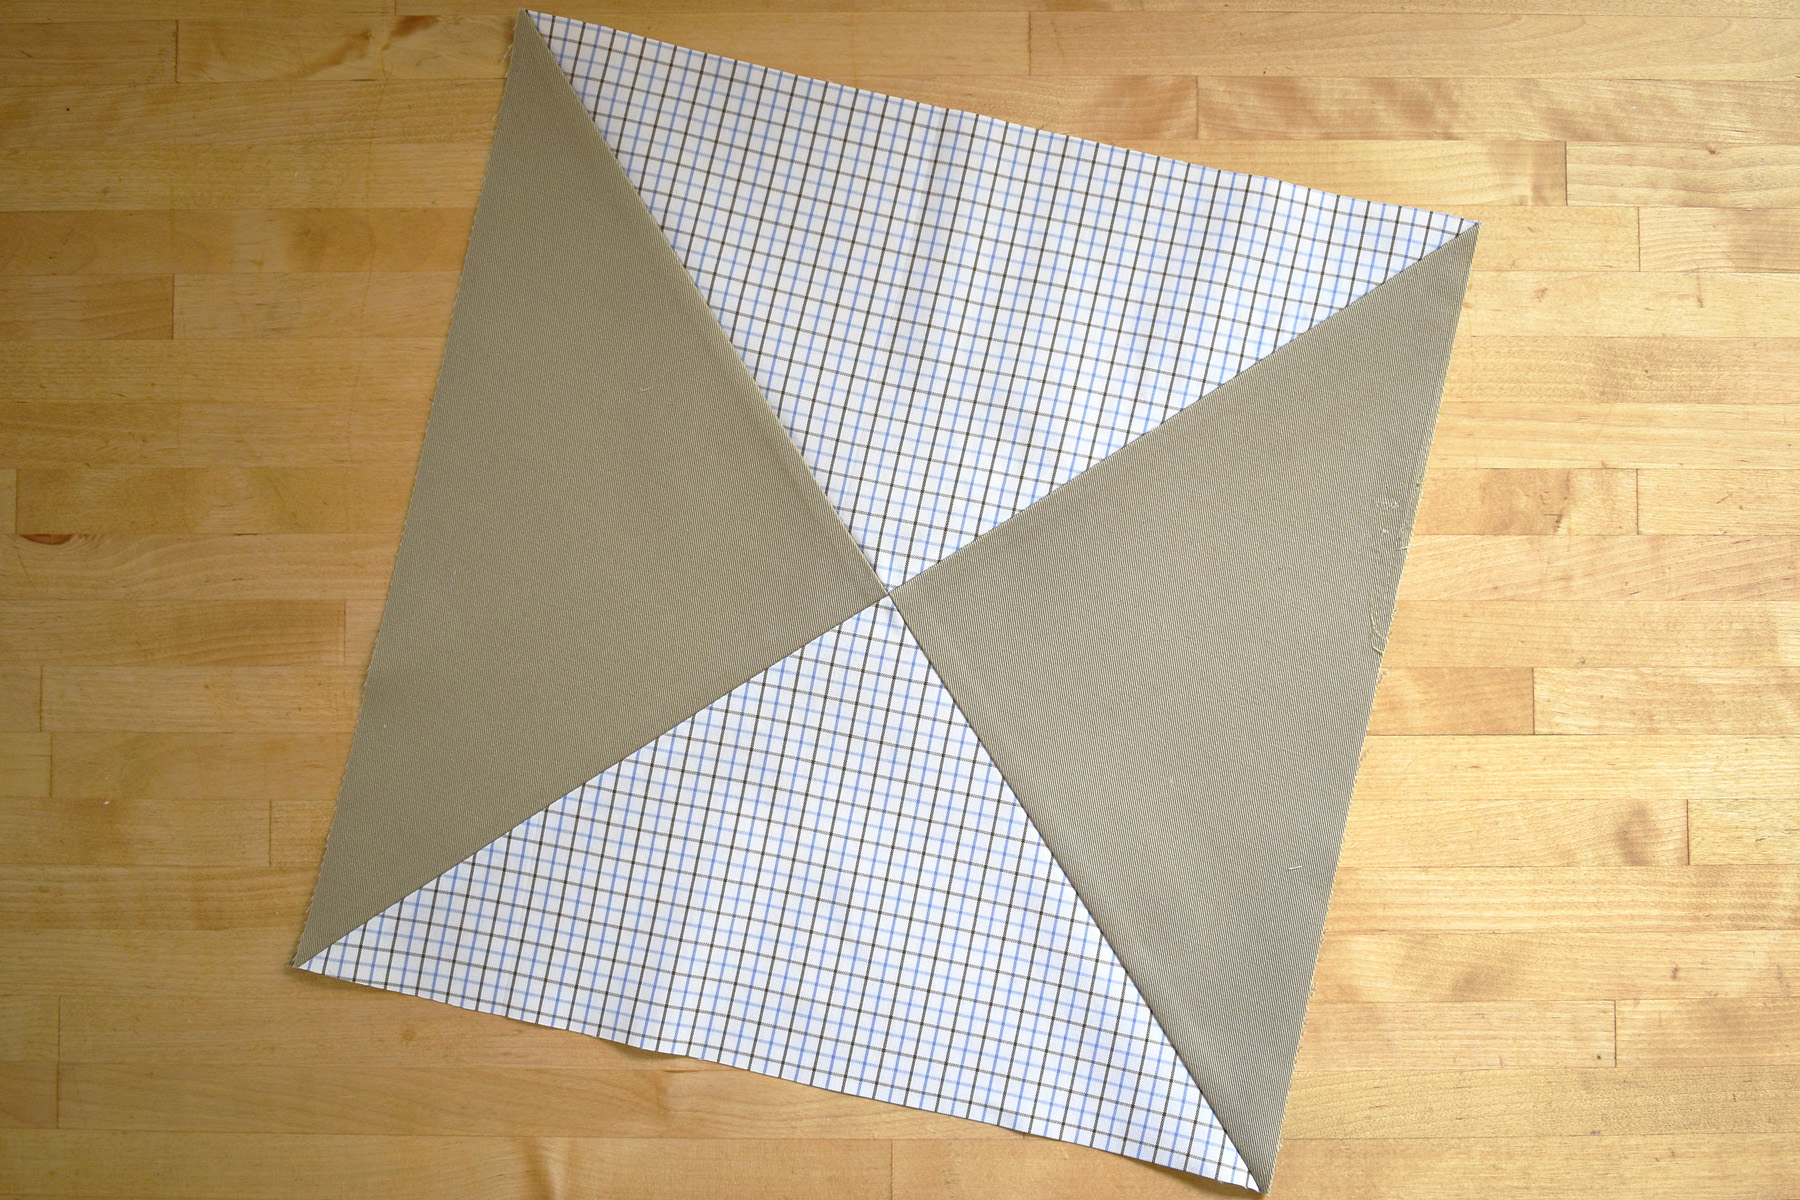
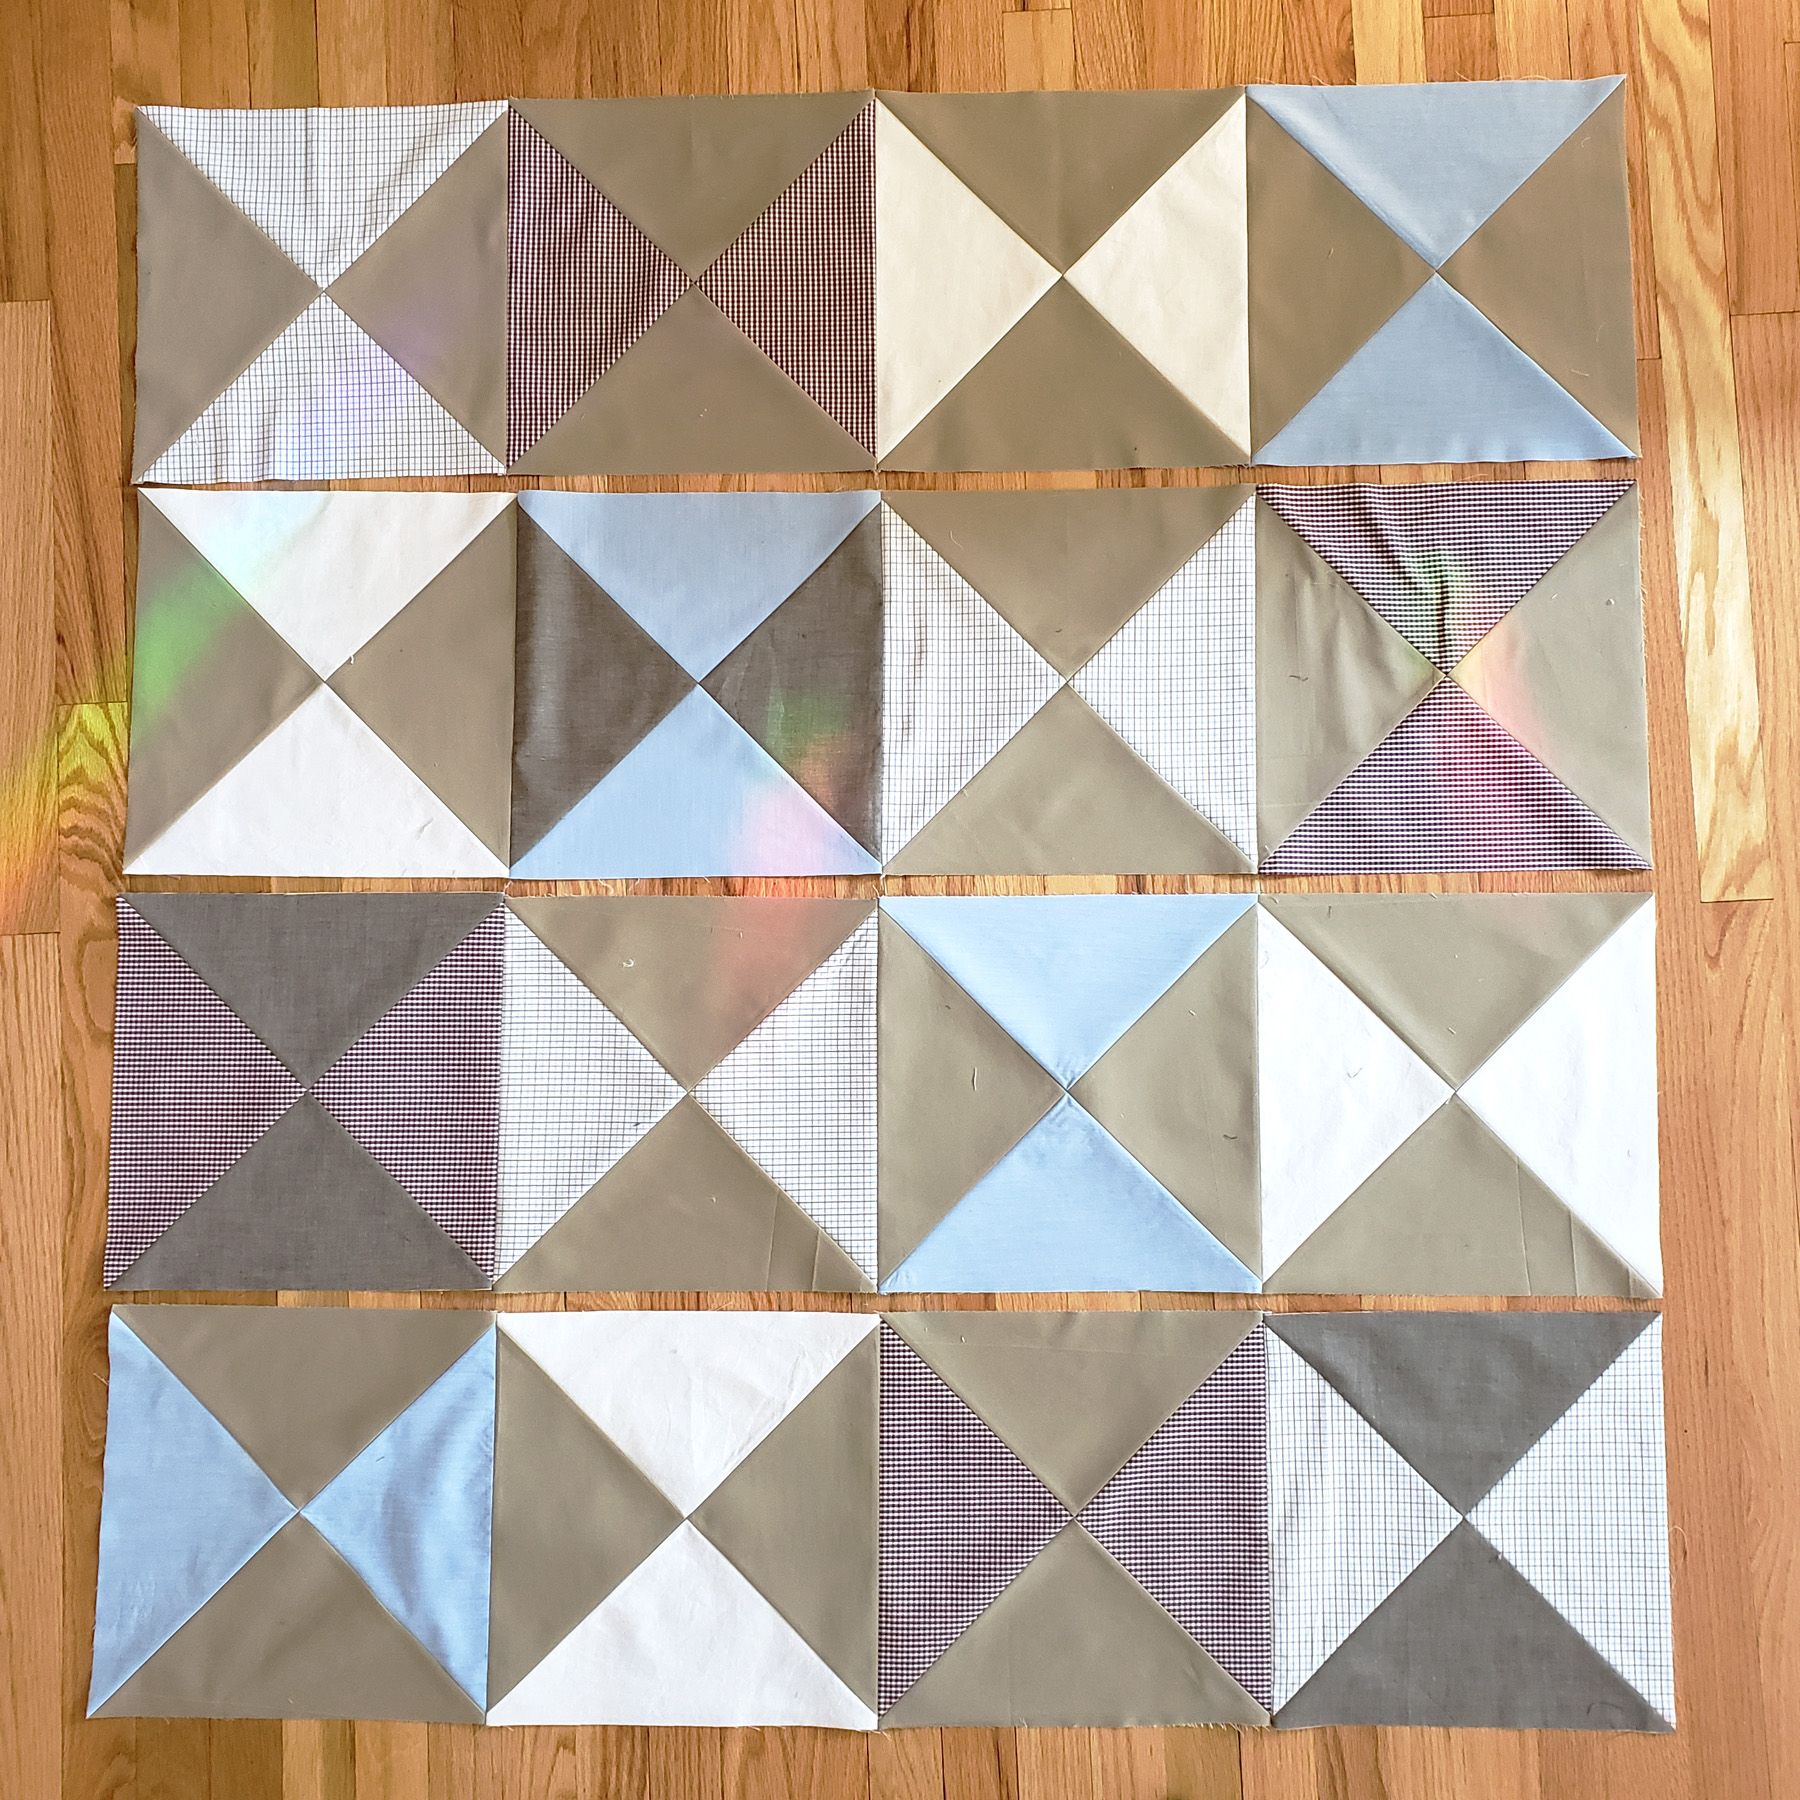
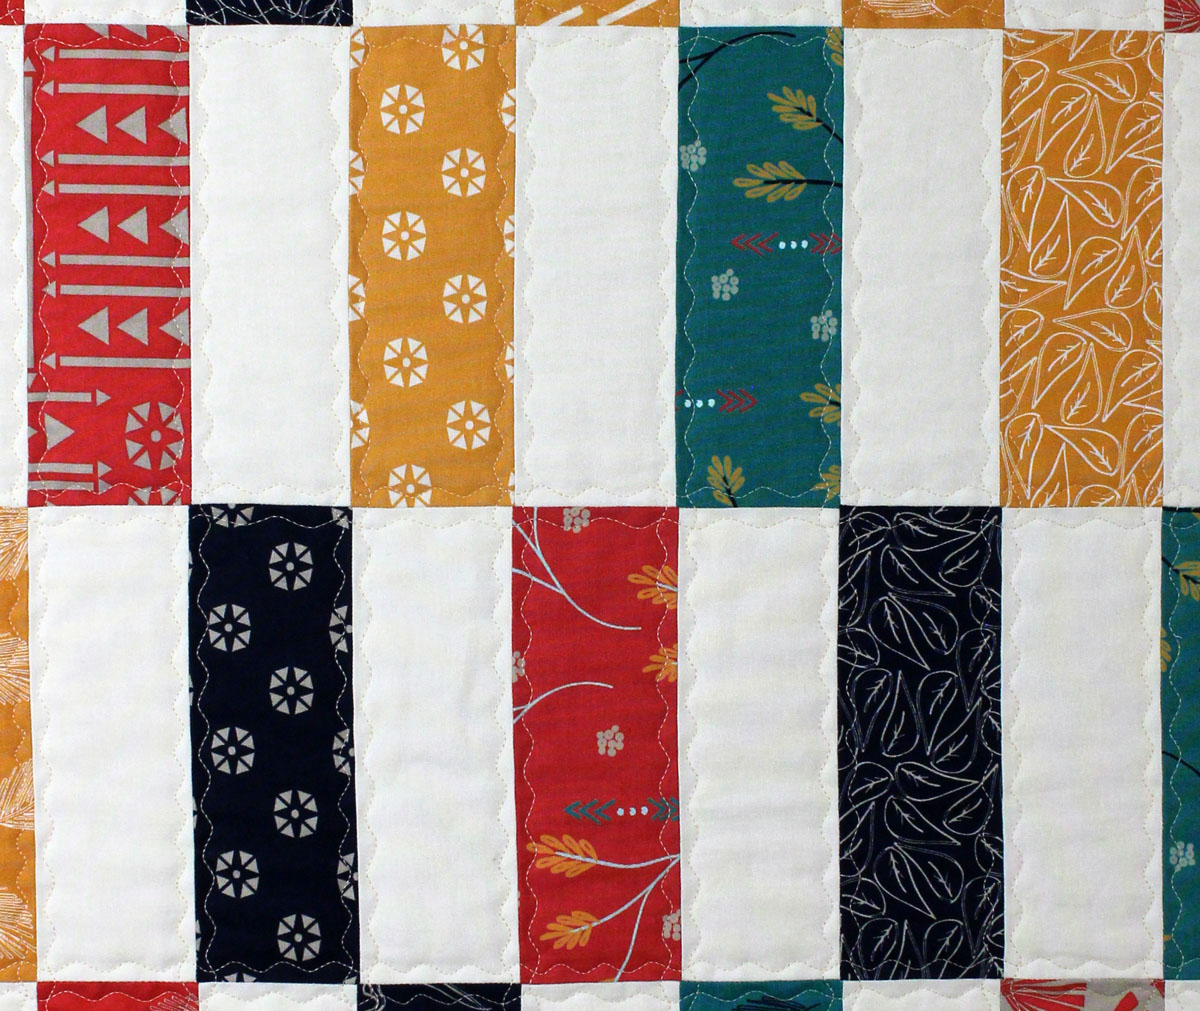
And that’s your first block completed! Follow the same steps to complete the other 15 blocks for the quilt. When all 16 blocks are finished, play around with the layout of the blocks.
You can, of course, create many fun patterns with this simple block. My kiddo liked the somewhat random pattern we created together, pictured below.
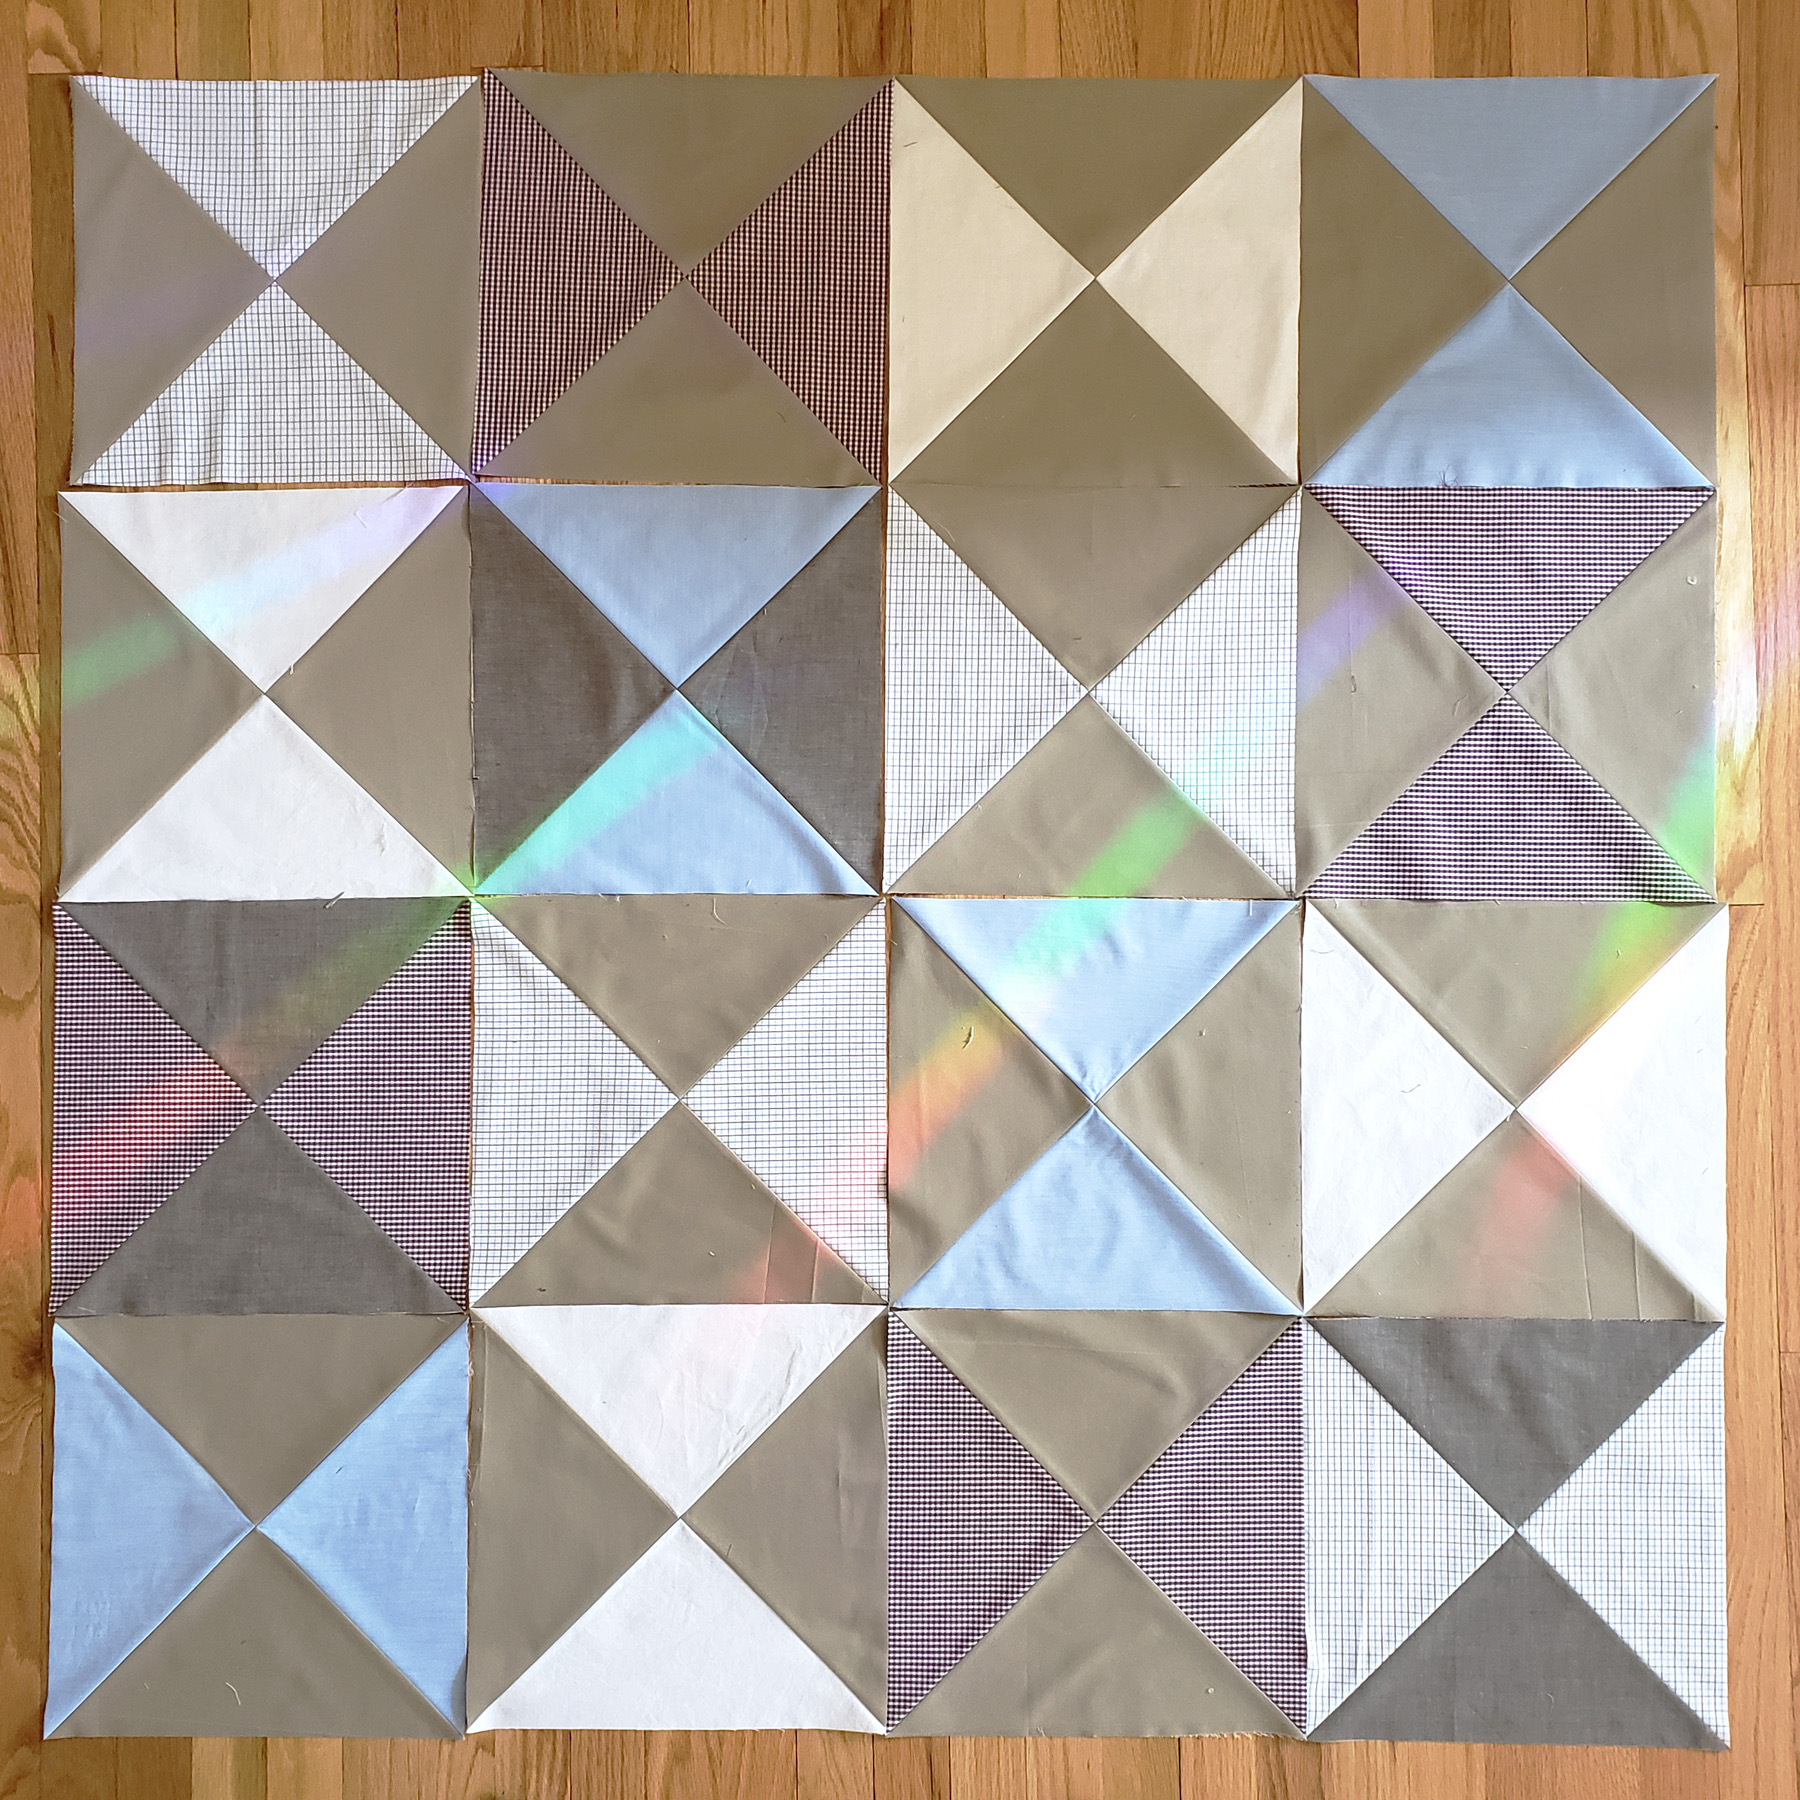
In this layout, we weren’t fussy about which way the blocks turned. I was fussy with making sure no two of the contrasting colors were right next to each other, and spent a few minutes moving blocks around to create this final design.
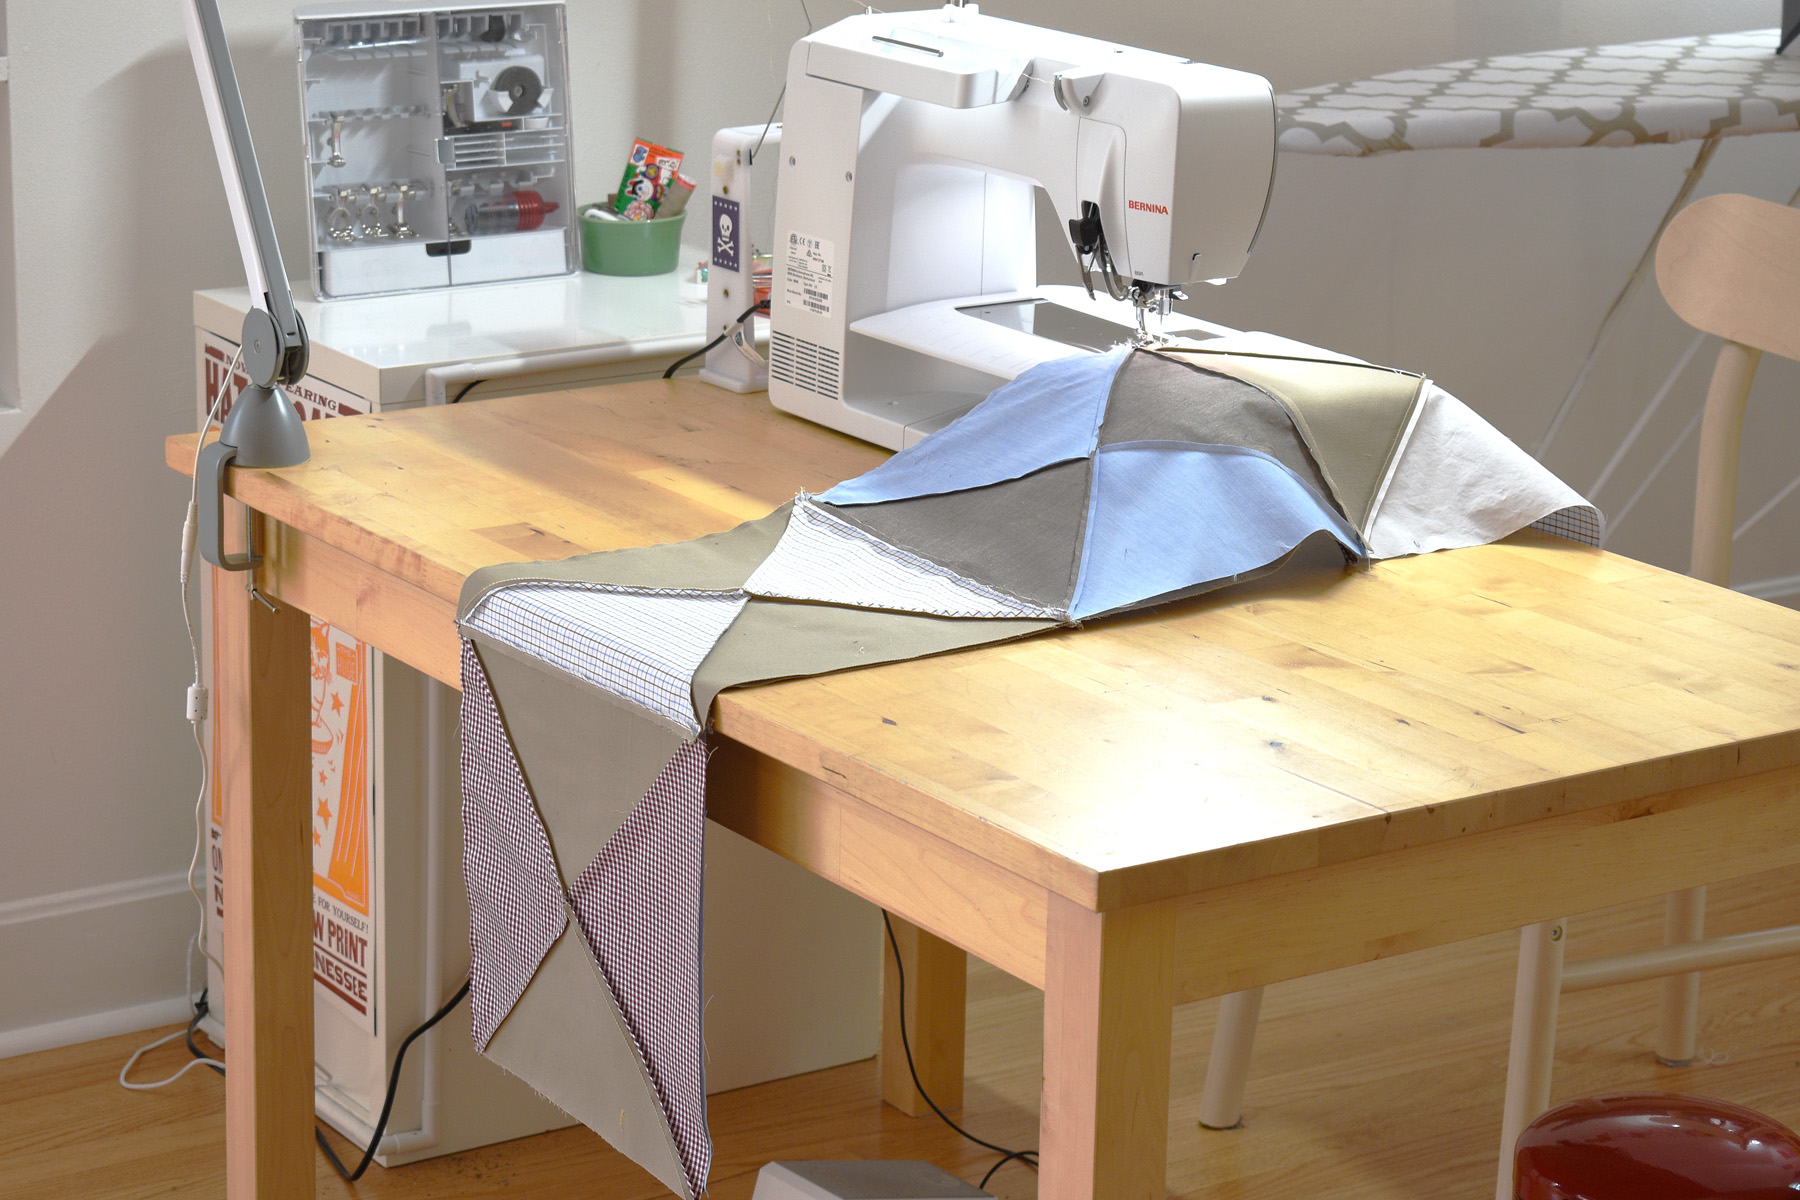
Once you’ve found a design that makes you happy, it’s time to start stitching the blocks together. I sew the blocks together across each row first.
Sew the blocks in each row together with a 1/4″ seam allowance.
I leave the blocks on the floor or design wall as I’m sewing them together. Once each row is stitched, I press the seams open. Press the seam allowance using your preferred method (to one side or open, either way will work).
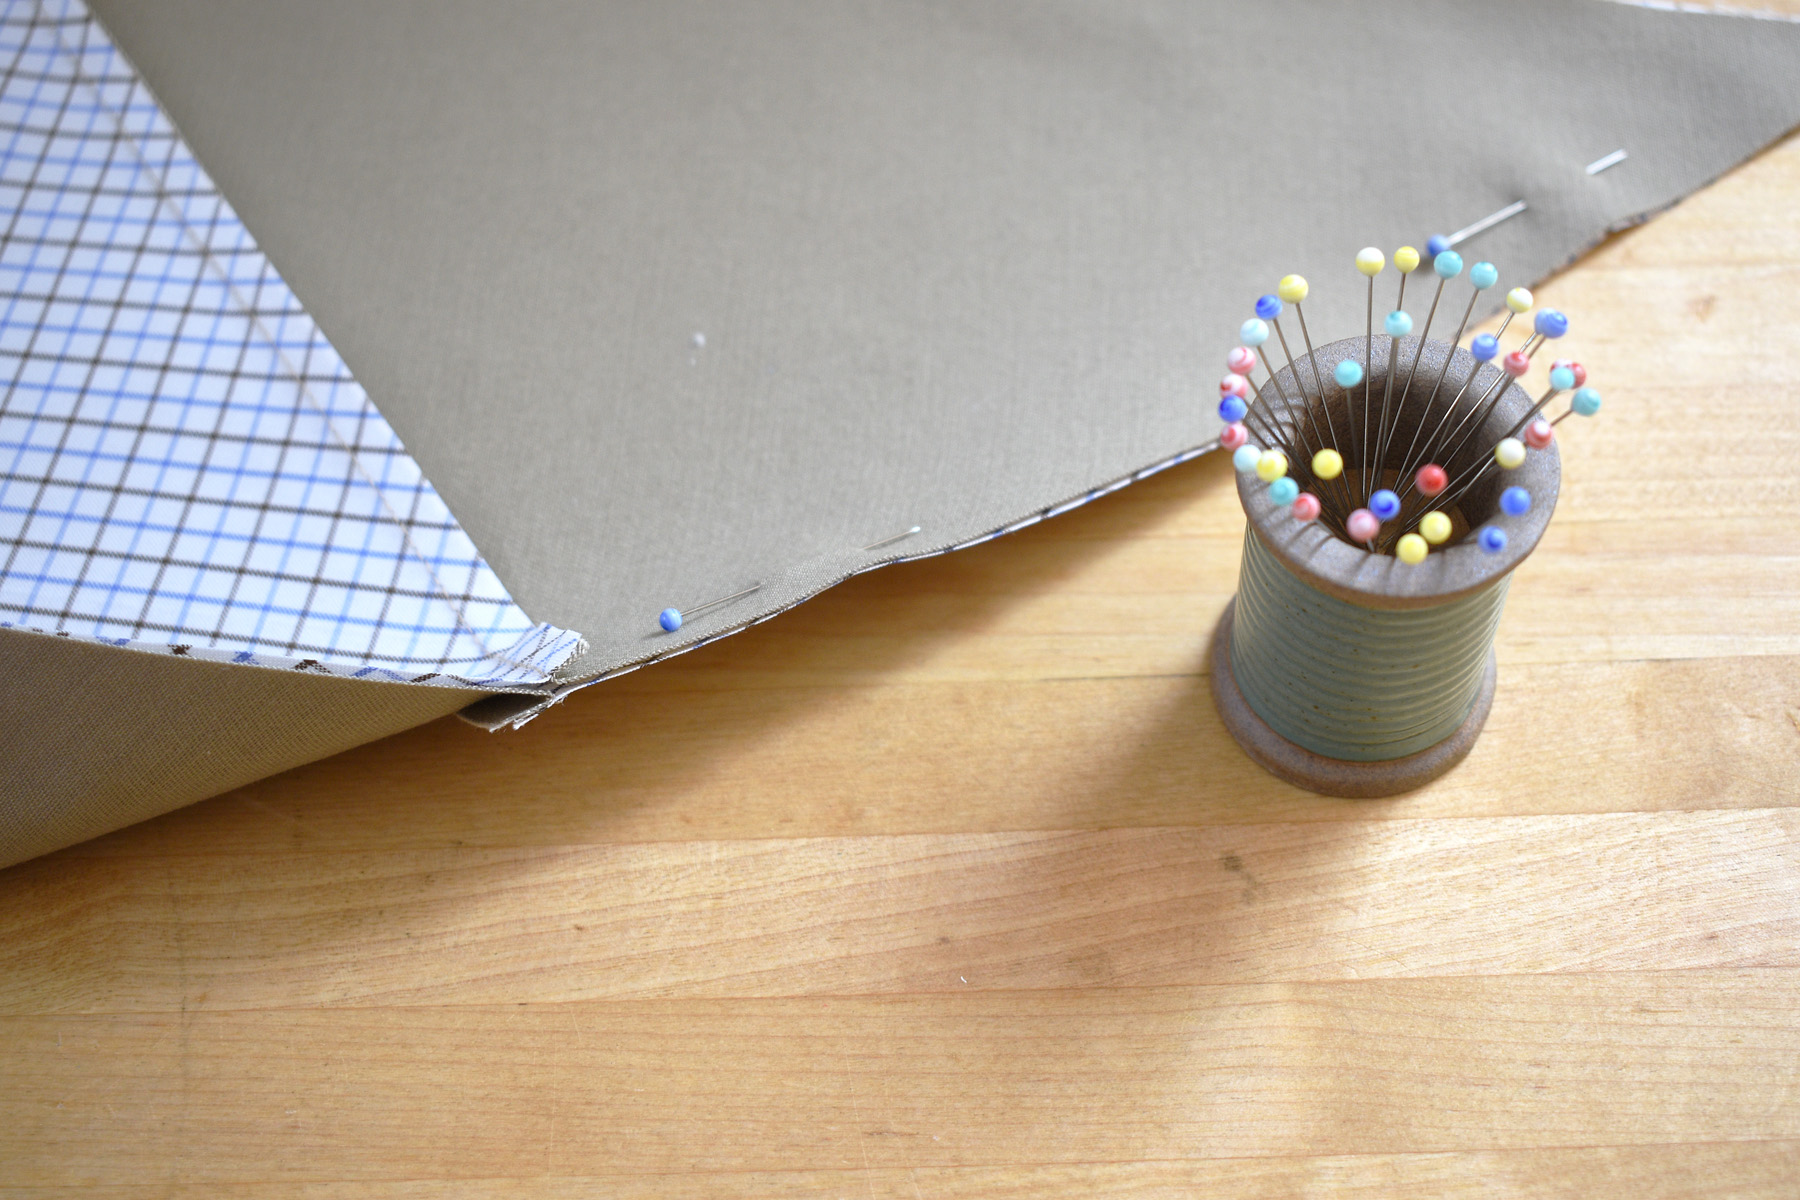
Once all the rows are stitched, move on to sewing the rows to one another. Start by matching the seams together and pin to hold in place. This will help hold it all together as you sew the long rows.
Once the top is sewn together, give it all a final pressing. That’s all there is to it!
Next week I’ll show you how to baste, quilt, and finish with a slim facing. And don’t forget the label! This quilt goes together so quickly, I hope you are enjoying making your memory quilt.
Used Products


What you might also like


3 comments on “Making a Memory Quilt: Cutting and Piecing”
-
-
Hi @leighs, thanks for checking out my project! The squares, after sewing the 4 quarter square triangles together, do measure slightly over 12″ square. Yes, the finished squares sewn into the quilt may measure slightly less than 12″ square. I’ve added an approximate finished size for the quilt at 48″ x 48″ because some folks may be sewing a more-or-less quarter inch seam when they create the project. Cheers!
-
Hey @leighs, thanks also for your personal note about looking for a quarter square ruler. My friends at Brewer Sewing Supply (the folks that supply your local BERNINA store with notions) have one that is available! I have updated the link in the Materials list to lead to the new ruler. You can ask for it specifically at your neighborhood BERNINA store. Best – Erika
-
Leave a Reply
You must be logged in to post a comment.

Hi I am about to start this and it says to cut a 6-1/2″ quarter square triangle. How does a 6-1/2″ qst become a 12″ square??? Quilt squares are 12″ finished, correct?