Making a Memory Quilt: Preparing The Materials
Memory quilts are made with personal items such as t-shirts, button down shirts, jeans, skirts, dresses, pillowcases, and even old blankets. There are lots of different ways to create a memory quilt, and many occasions they can celebrate. Memory quilts can be made in virtually any way – from a precisely pieced pattern to free-form, improvisational piecing. I’m making memory quilts for my family from clothing that belonged to my stepfather after his recent passing, and I’m sharing the process with you.
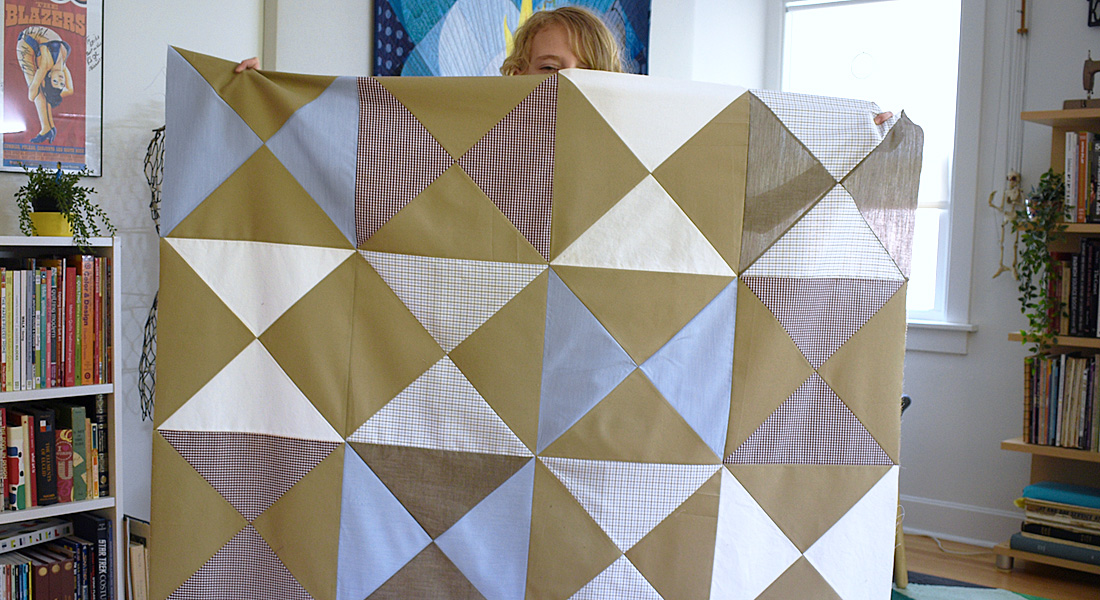
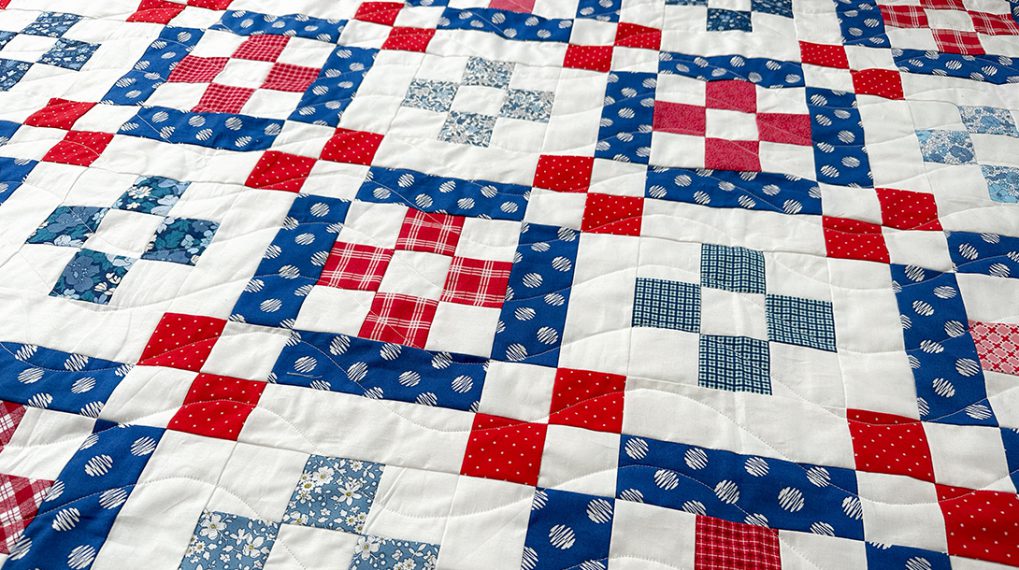
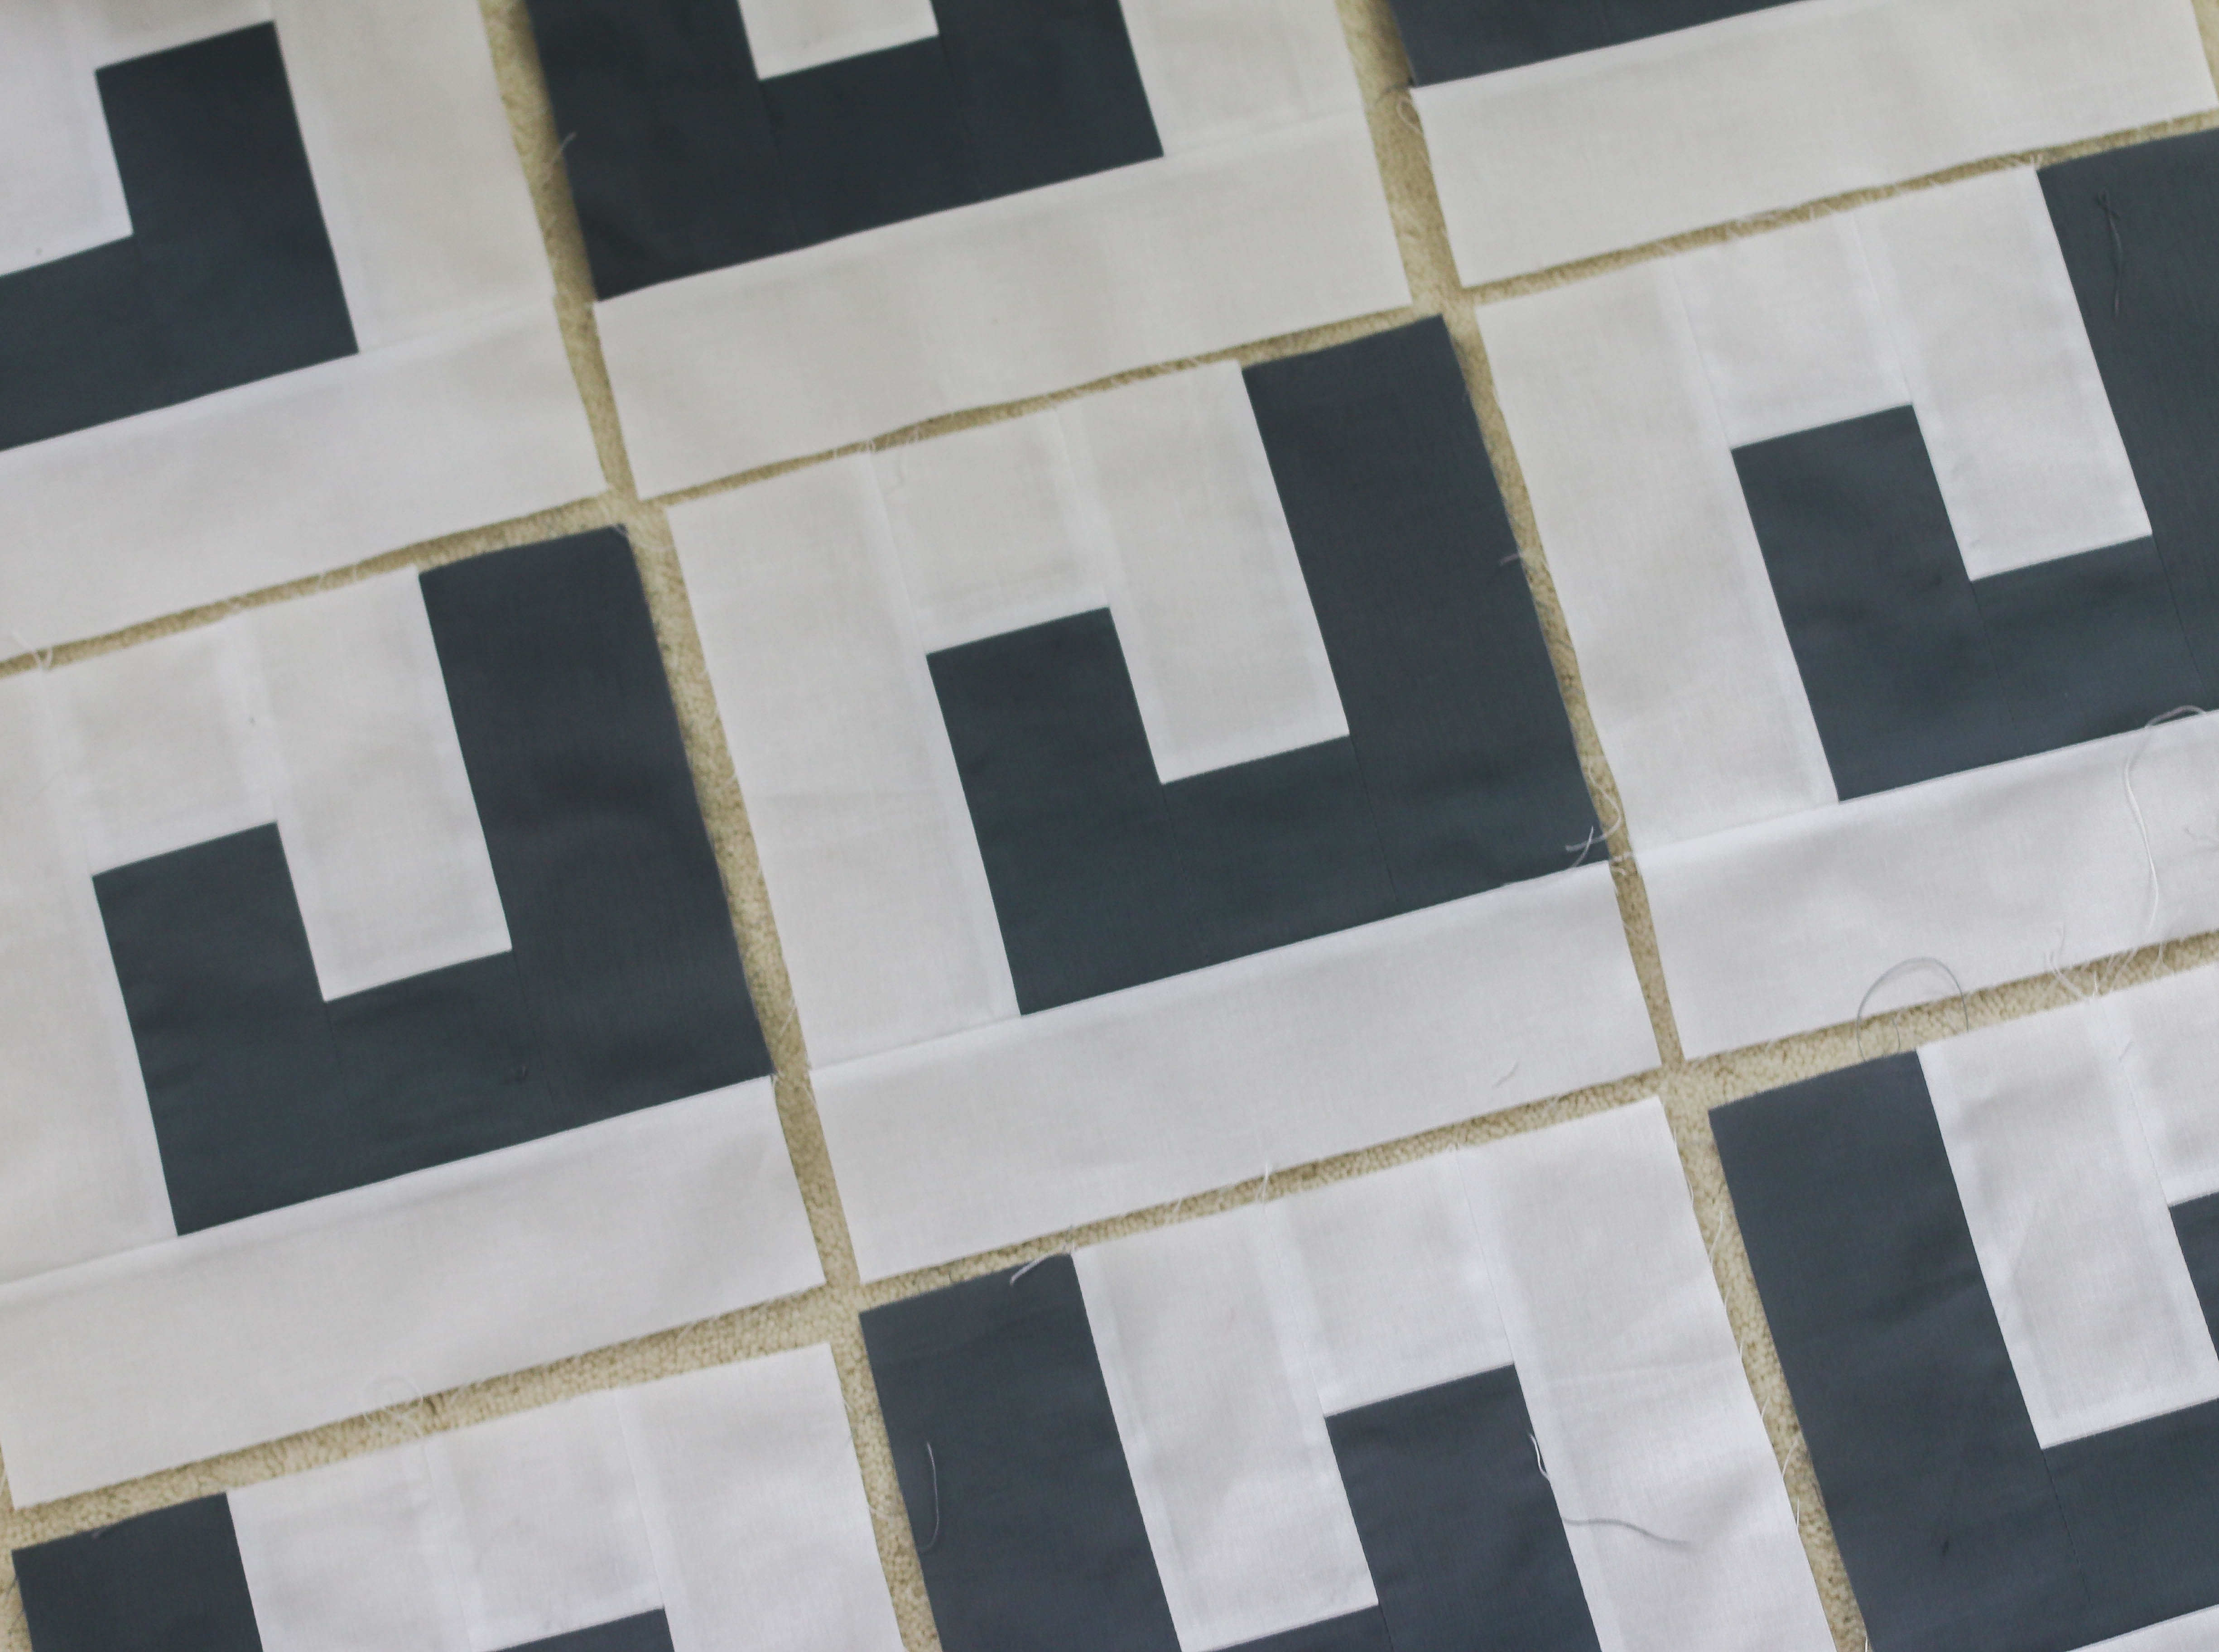
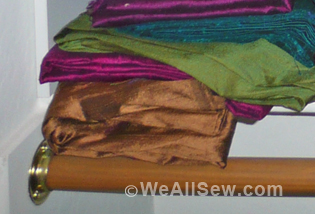
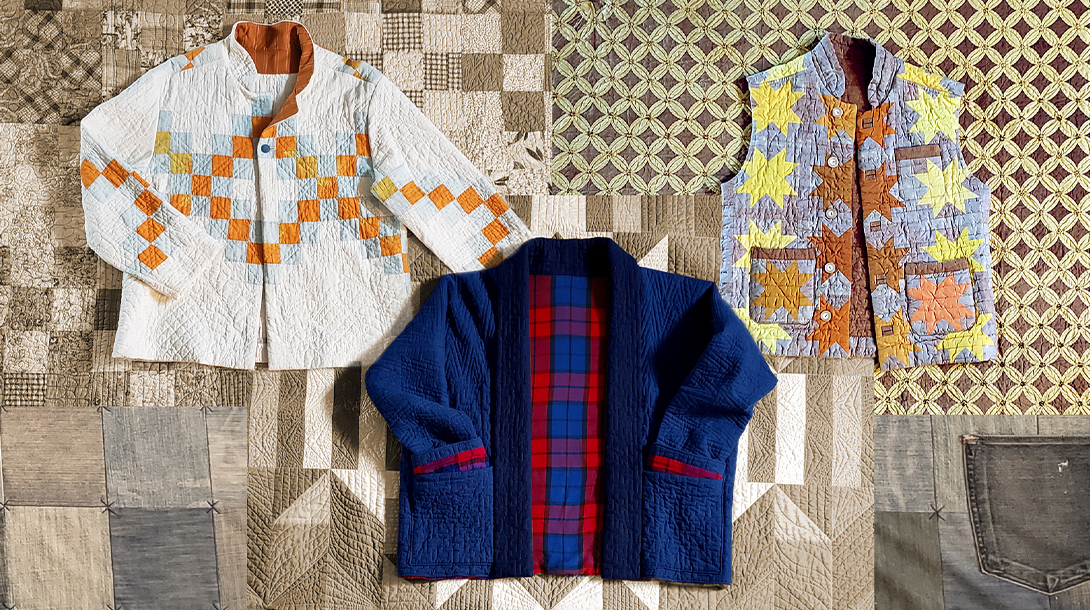
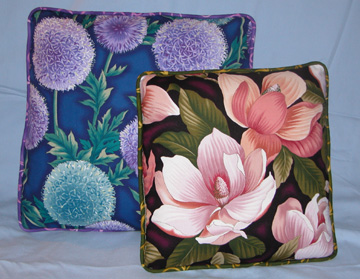
Before we get started let’s take a quick look at a few examples of memory quilts.
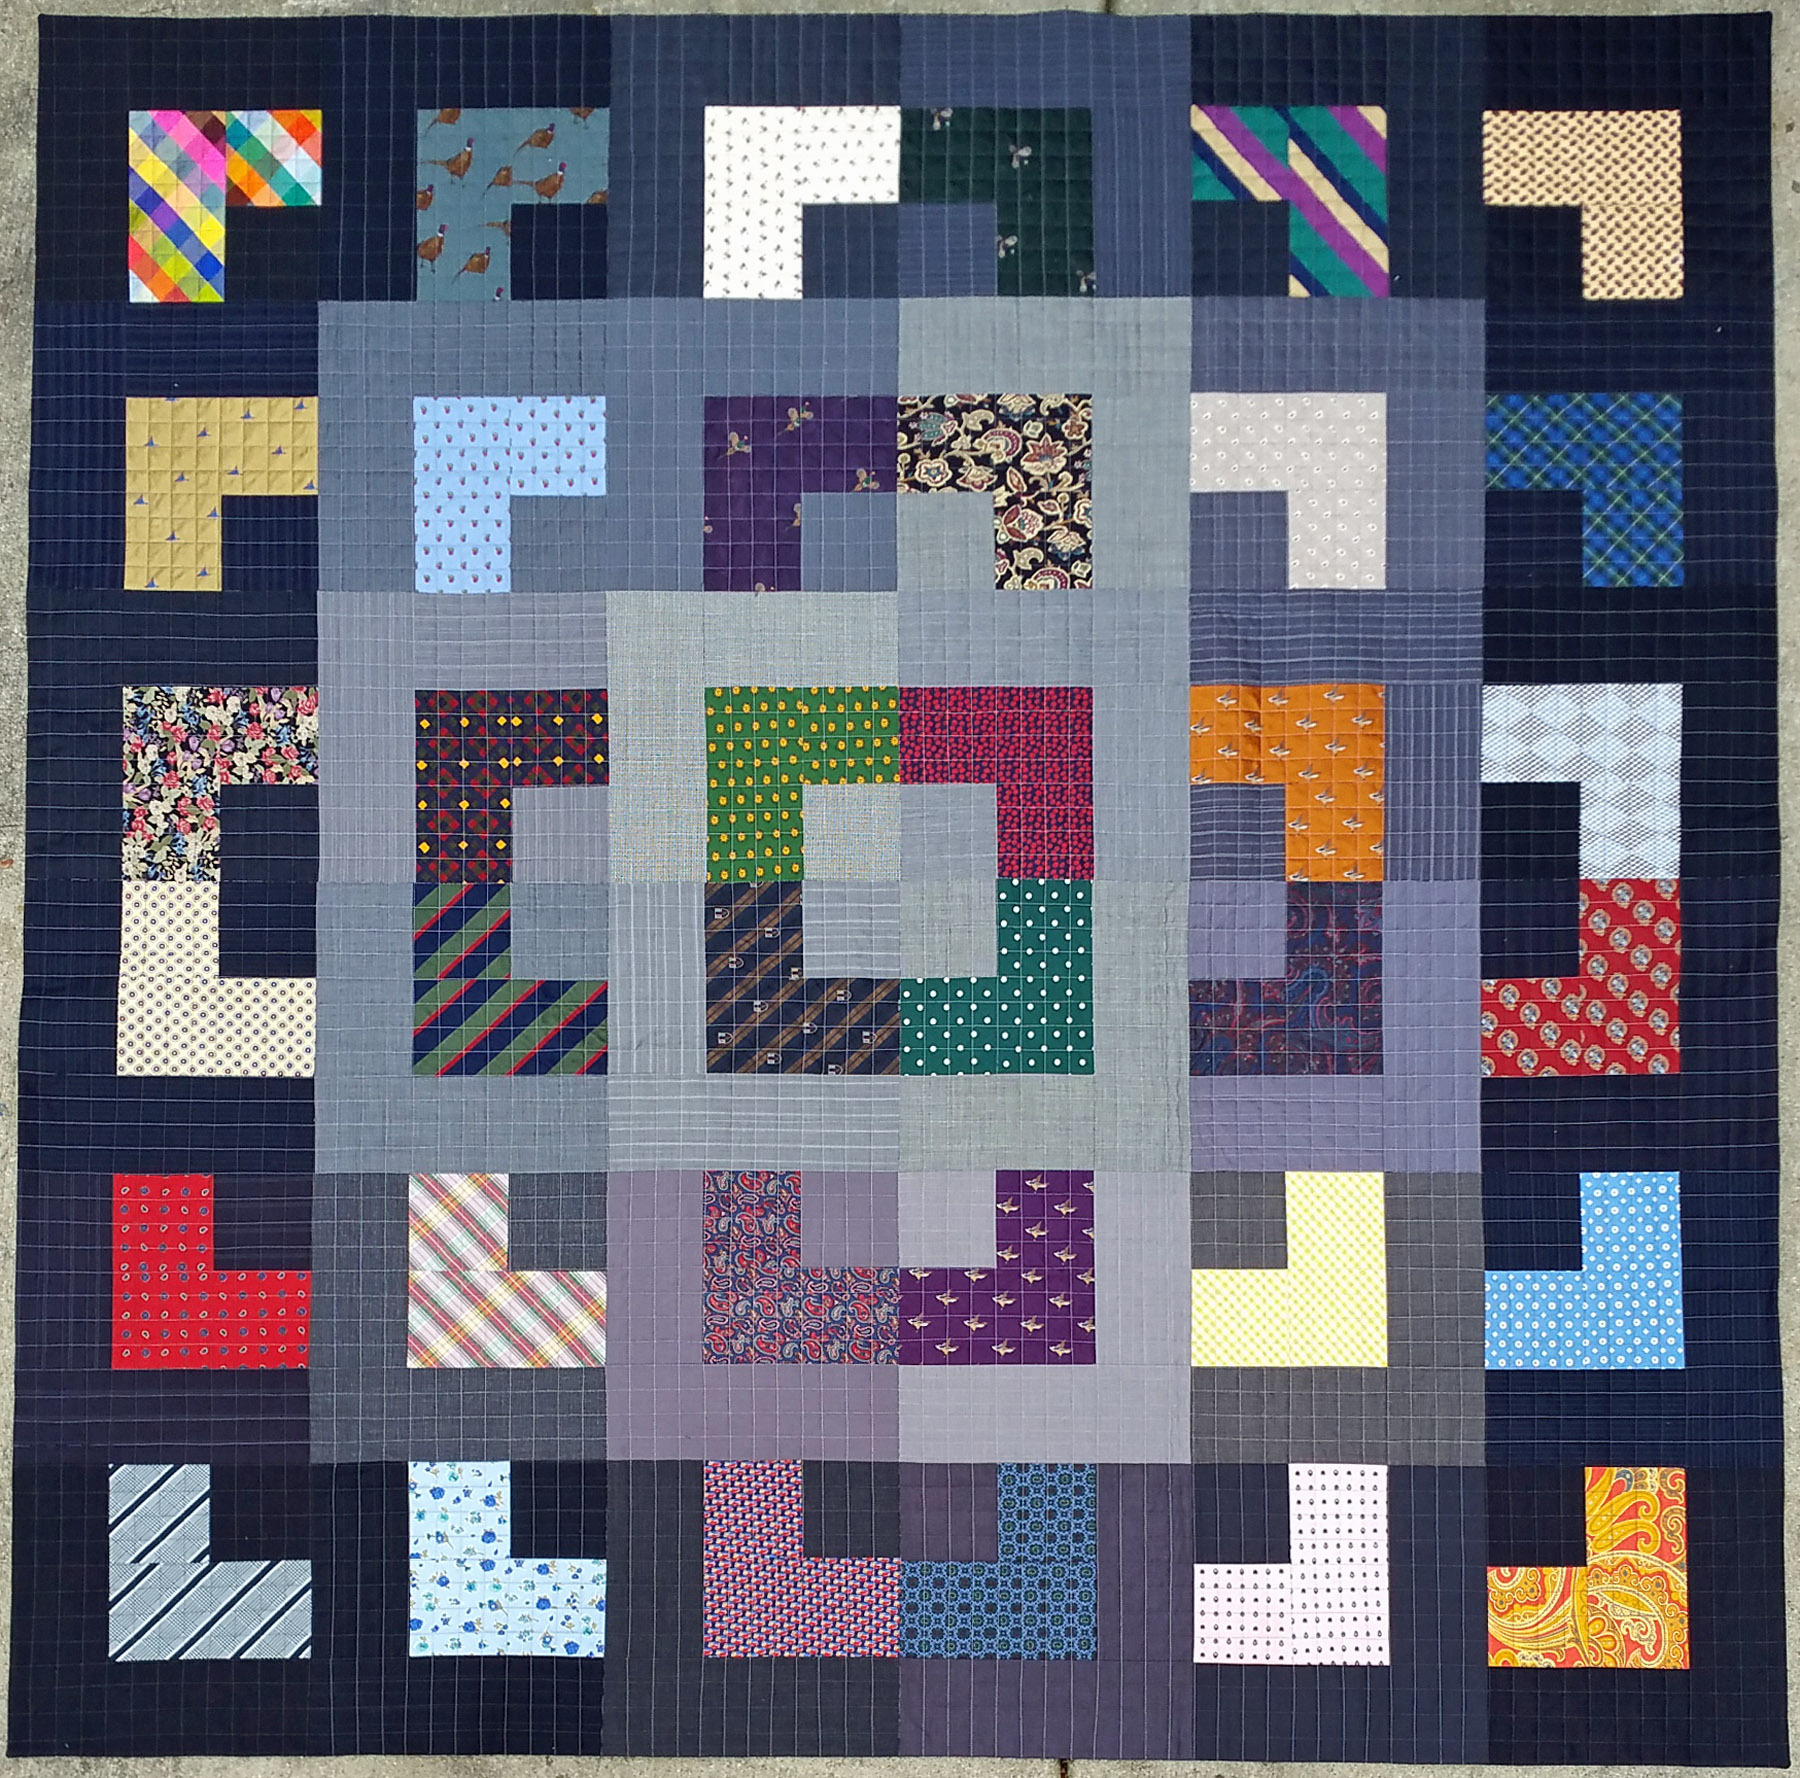
This is a memory quilt I made out of ties years ago for my stepfather to commemorate his retirement from professional work. I took a selection of his favorite ties mixed with wool suiting scraps, and he was able to enjoy some good memories every time he used the quilt while watching TV or reading a good book. I used one style of block for this quilt, and oriented the blocks in different ways to create the quilt pattern.
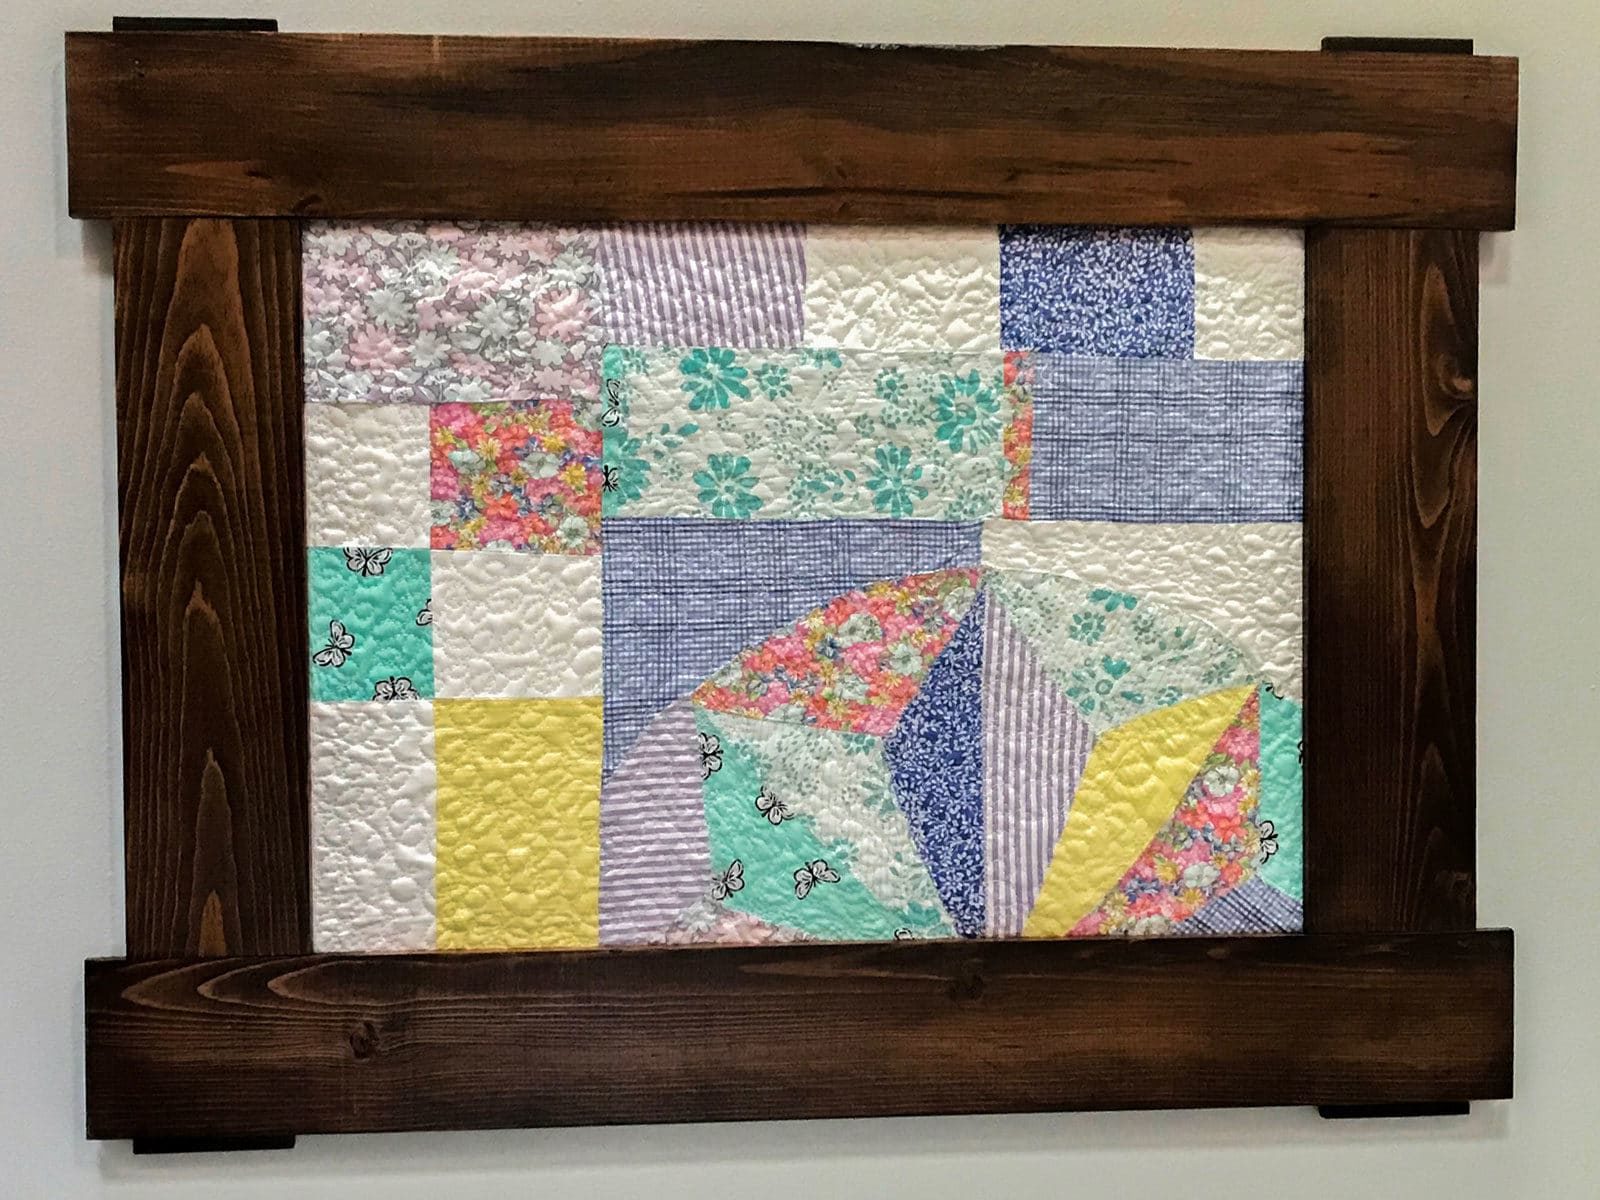
Shari Butler created a set of beautiful framed blocks to help a good friend remember a loved one. You can read more about Sheri’s memory quilt blocks here at WeAllSew, and find her free pattern for these beautiful memory quilt blocks.
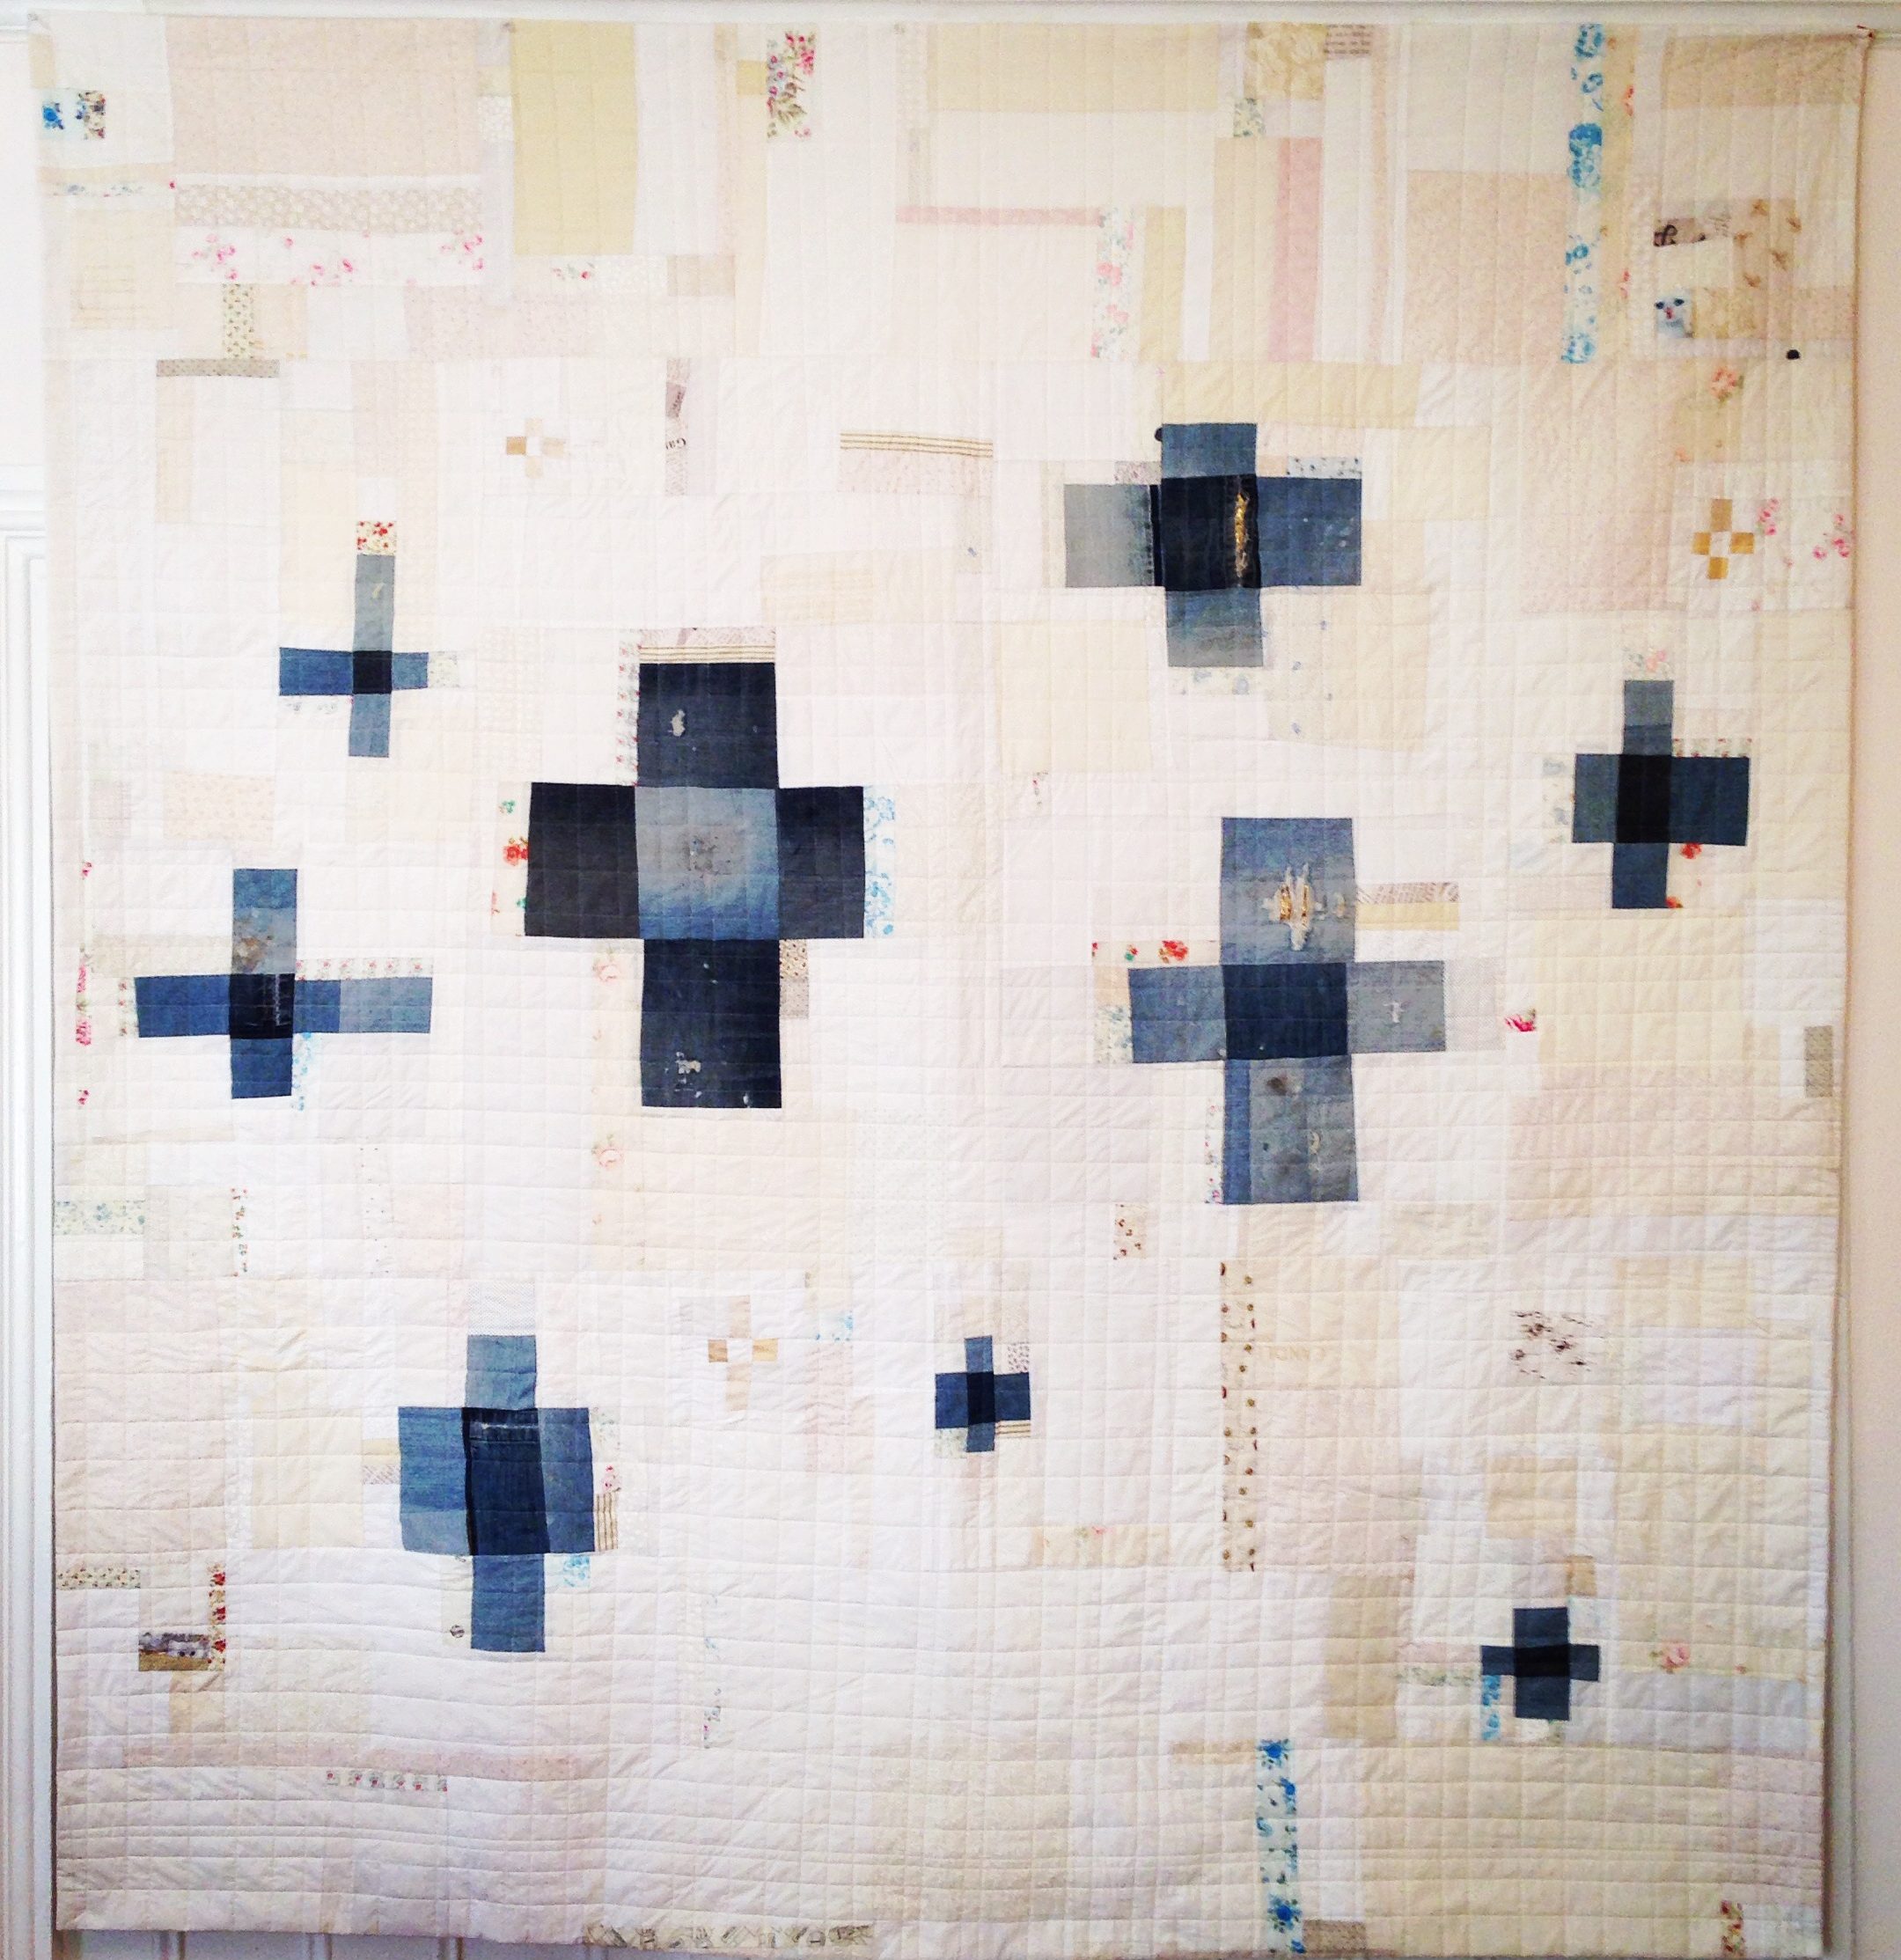
Artist Melissa Averinos shared a stunning memory quilt she made, My Brother’s Jeans, which won the Best in Show award at QuiltCon 2016. You can read more about Melissa’s quilt made in remembrance of her brother here at WeAllSew.
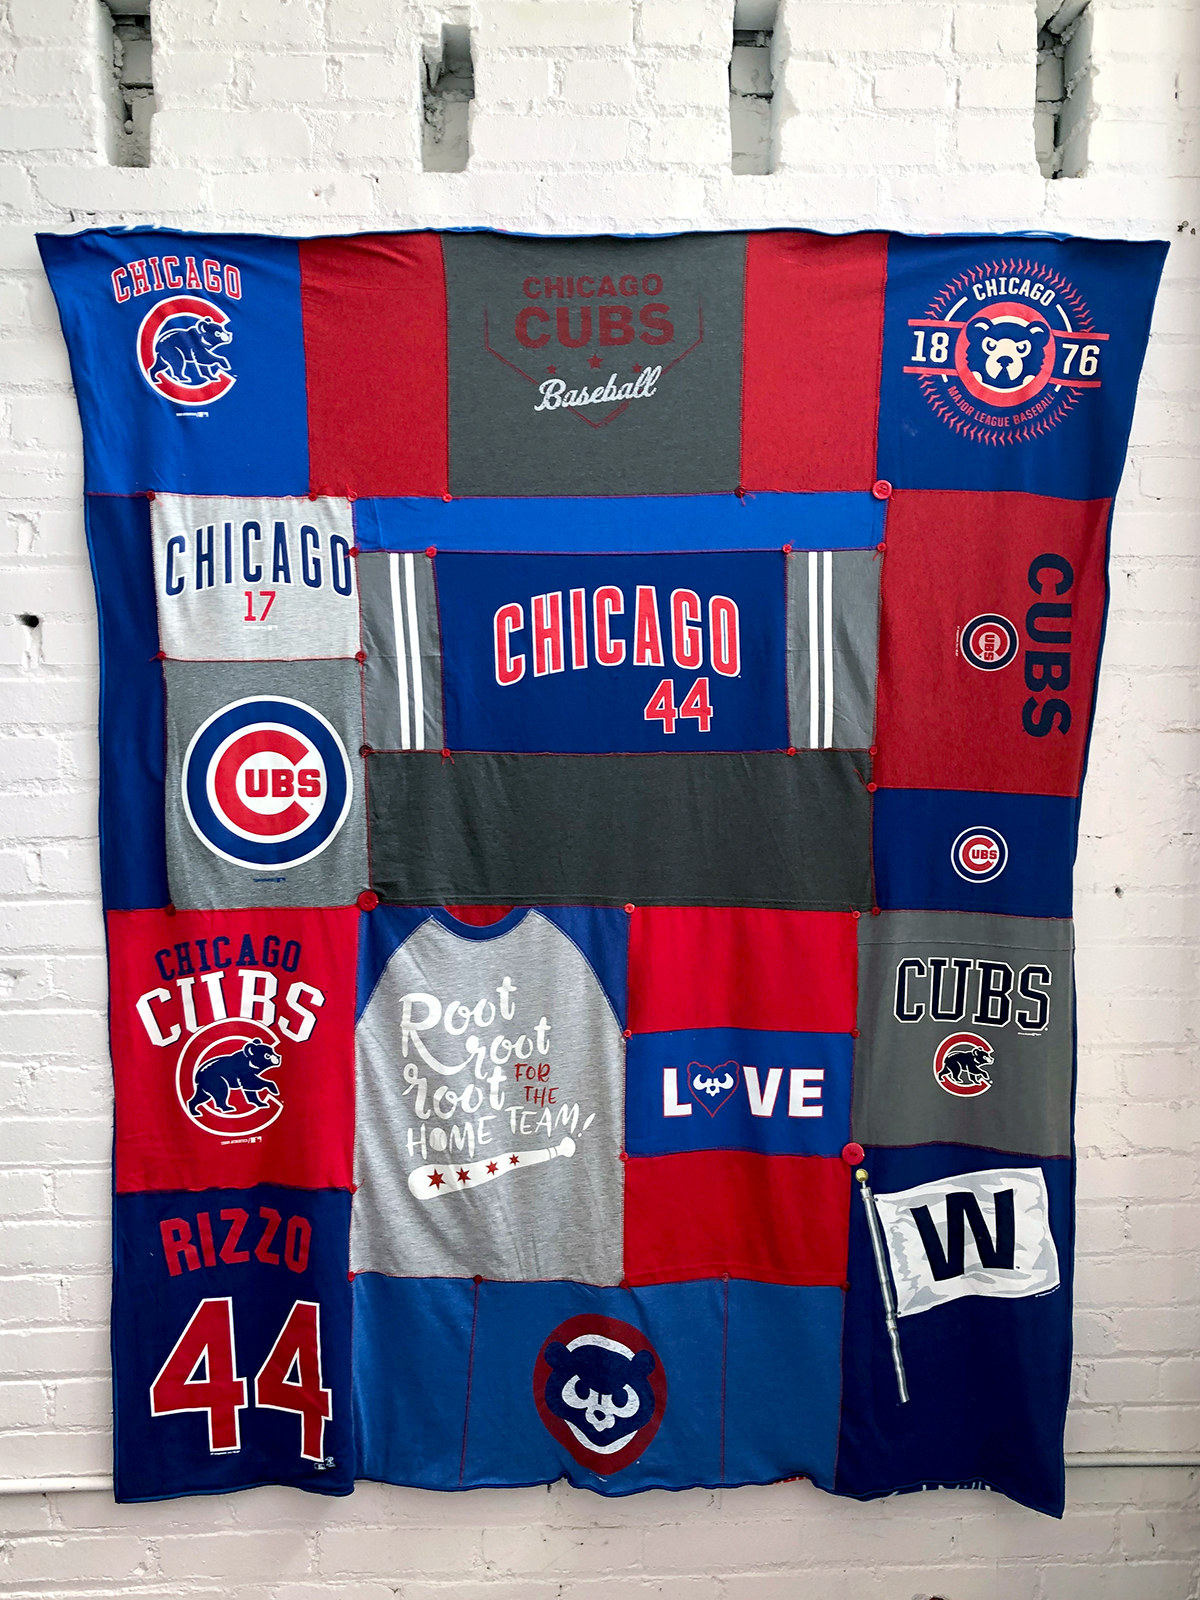
And finally, here’s a fun example of a t-shirt quilt made by Jaime David to memorialize a favorite sports team in jerseys and tees. You can find her quick serger tutorial to make your own version of her memory quilt here.
Ready to get started? Let’s talk about the materials and how to prepare them for making a quilt.
Fabrics Used to Make a Memory Quilt
The materials you may have to make your quilt will probably be varied, and that’s okay. You may have clothing or other items of different fiber content, styles, colors, and prints. What about all those different colors and patterns in the materials, you might ask? In a memory quilt, it’s okay if colors or patterns don’t always match or coordinate. After all, it’s the memories made with the materials that’s important! But, if you feel like there may be a color or pattern missing from the fabrics you have pulled together, no worries. Maybe you feel like you need a pop of a certain color, or more of a solid to hold the whole thing together. Whatever else you might need, you can always fill-in fabrics with a trip to a thrift store (look in the men’s shirts, or pick up a solid colored bed sheet) or look for cotton solids and prints at your local quilt shop. Here are some general tips to help you build a successful quilt with your recycled items.
- Fiber content: you’ve probably heard that most people recommend to sew a quilt with all cotton fabrics, but don’t worry if you have cotton blends or even polyester or rayon in with the mix. What you do need to pay attention to are the washing instructions for the items you have to work with.
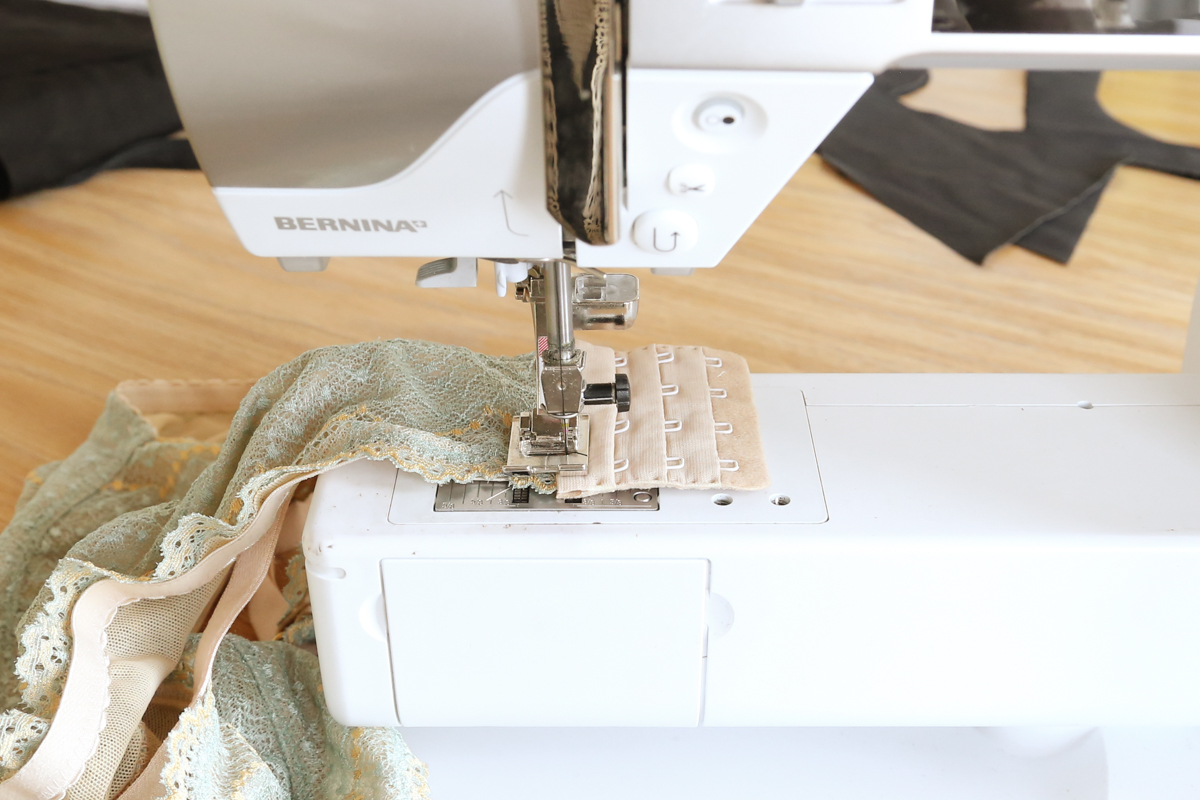
- Be sure to only including fabrics that can be washed. Stay away from anything that is dry clean only or extremely delicate (silk, acetate, lace, etc.). Look for washable fabrics like 100% cotton, cotton blends, or polyester and polyester blends.
- If you are sewing with jersey knits, aka t-shirt fabrics, you may want to apply a very lightweight fusible interfacing to the t-shirts before sewing with them. The interfacing will stabilize the jersey knits to keep them from stretching out too much, especially when adding in regular woven fabrics to the mix. There’s a great tutorial on how to do this here at WeAllSew.
- Pre-wash ALL the materials to be used in the quilt before getting started.
- Watch your iron settings for cotton blends or synthetic fabrics to avoid scorching or melting fabrics in the quilt.
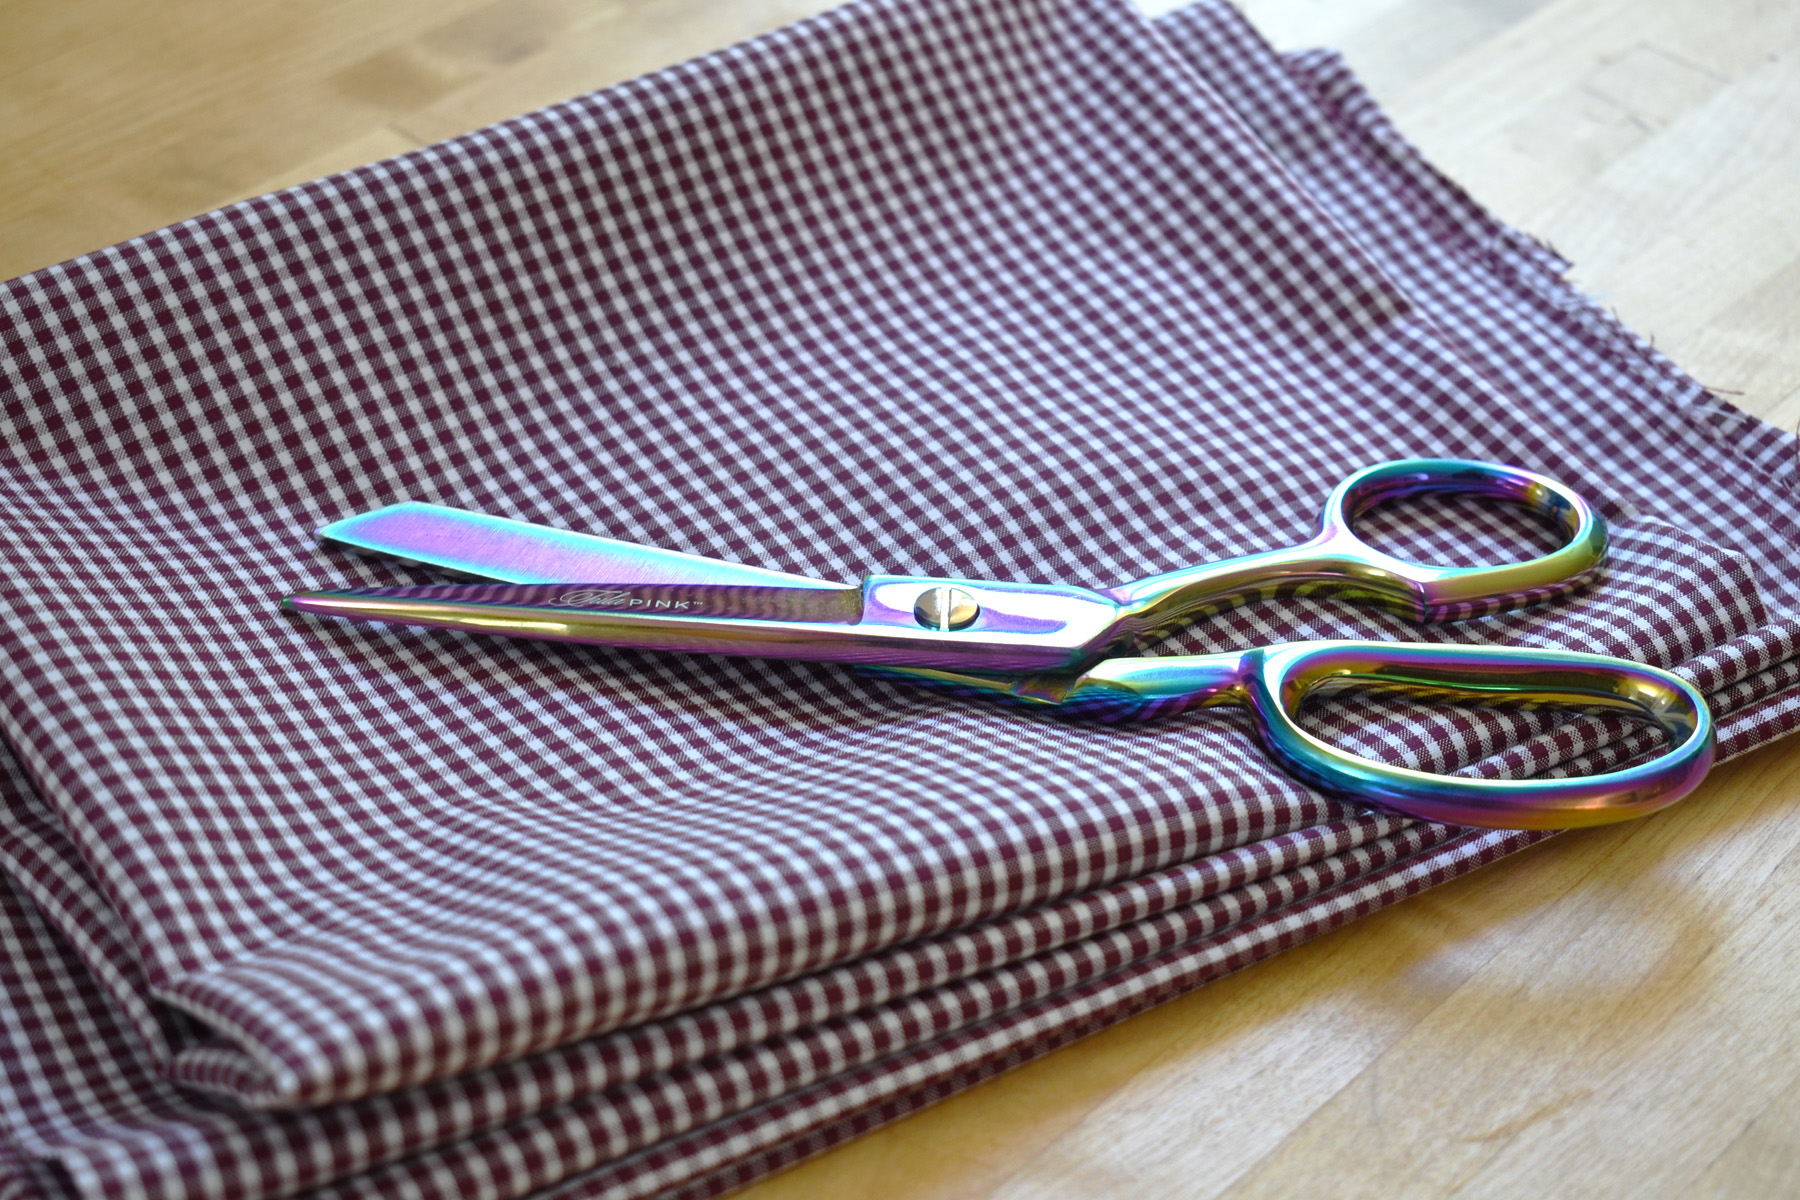
Tools to Prepare Your Fabrics
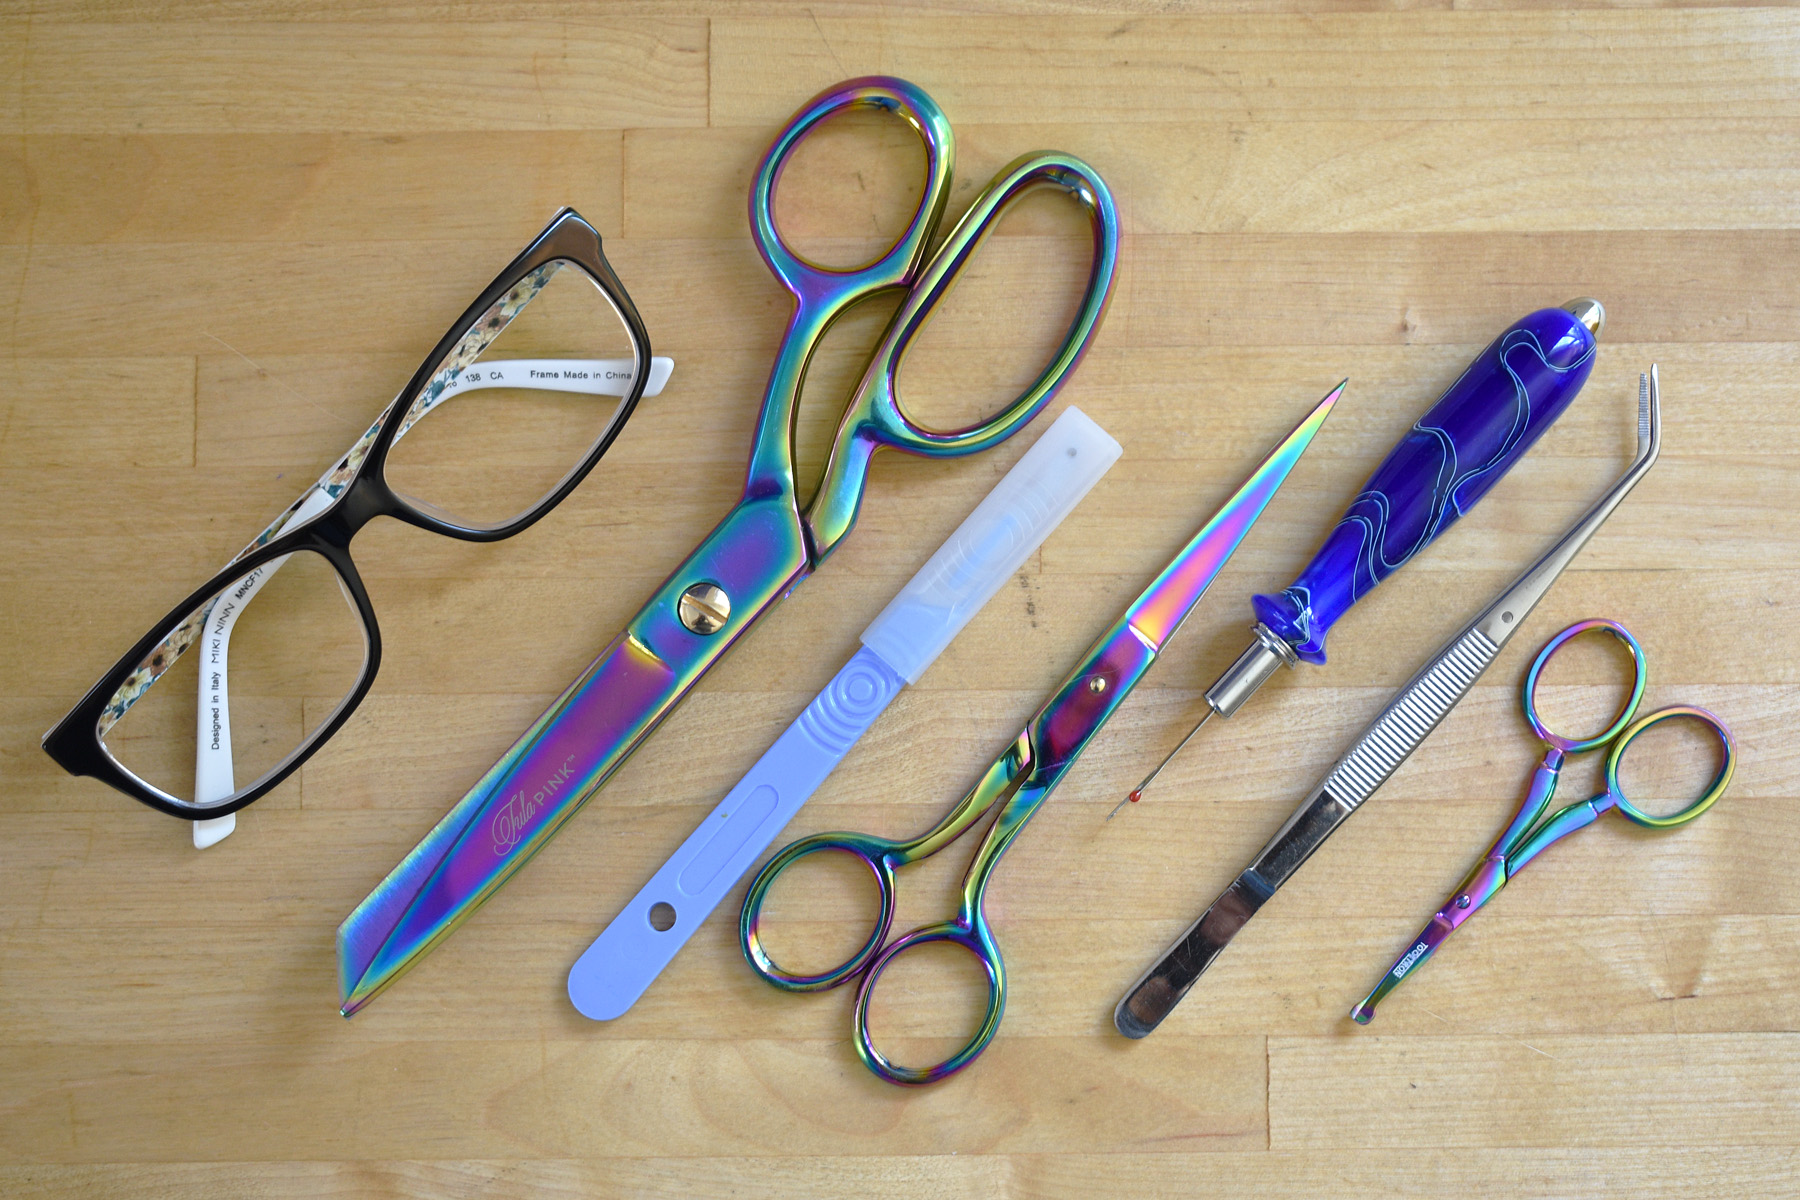
You have your pre-washed and dried materials at the ready, and now it’s time to prepare the items for quilting. Here are some helpful tools I use to deconstruct clothing items for quilting.
- Eyeglasses (if needed to help you see those little stitches and threads)
- 8″ seamstress shears
- 6″ scissors
- Small thread snips
- Forked seam ripper
- Curved blade seam ripper
- Tweezers
- Lint roller
- Iron and pressing surface
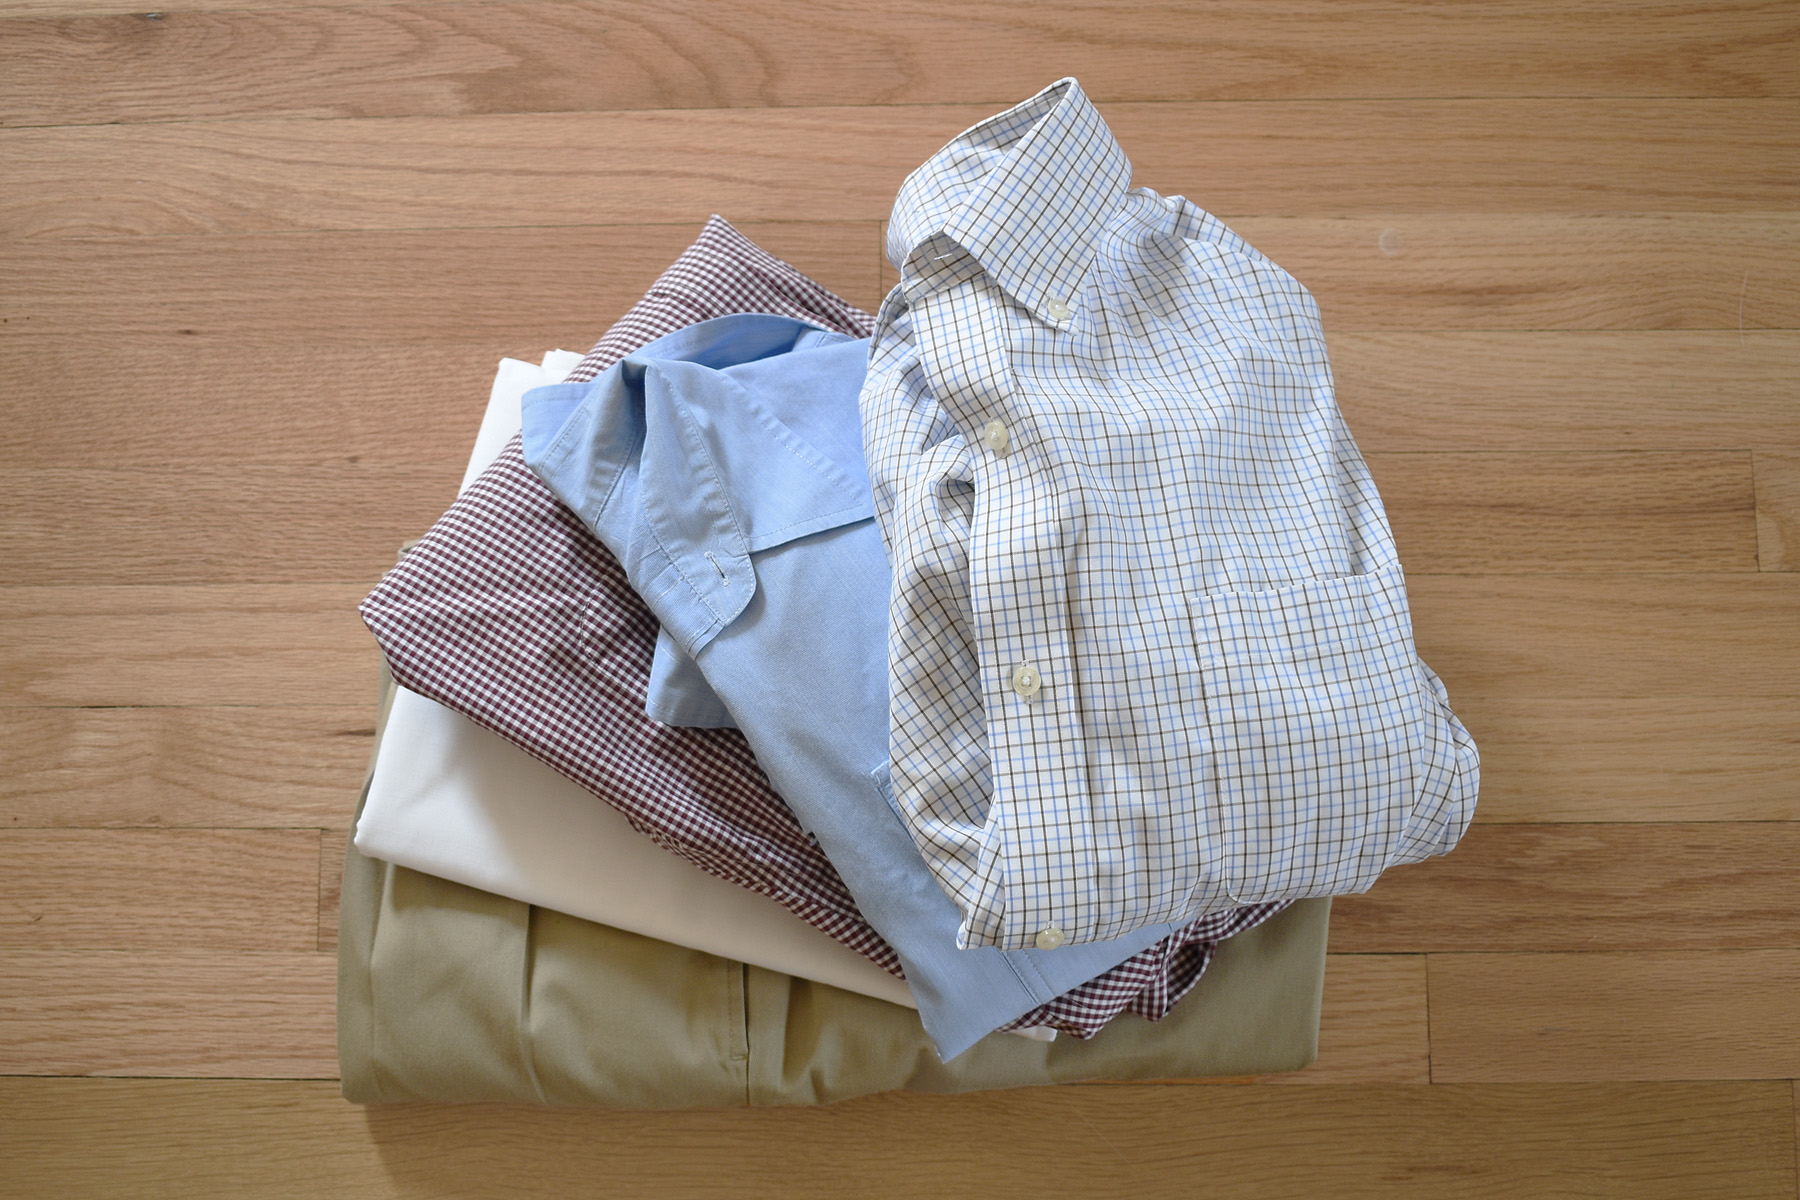
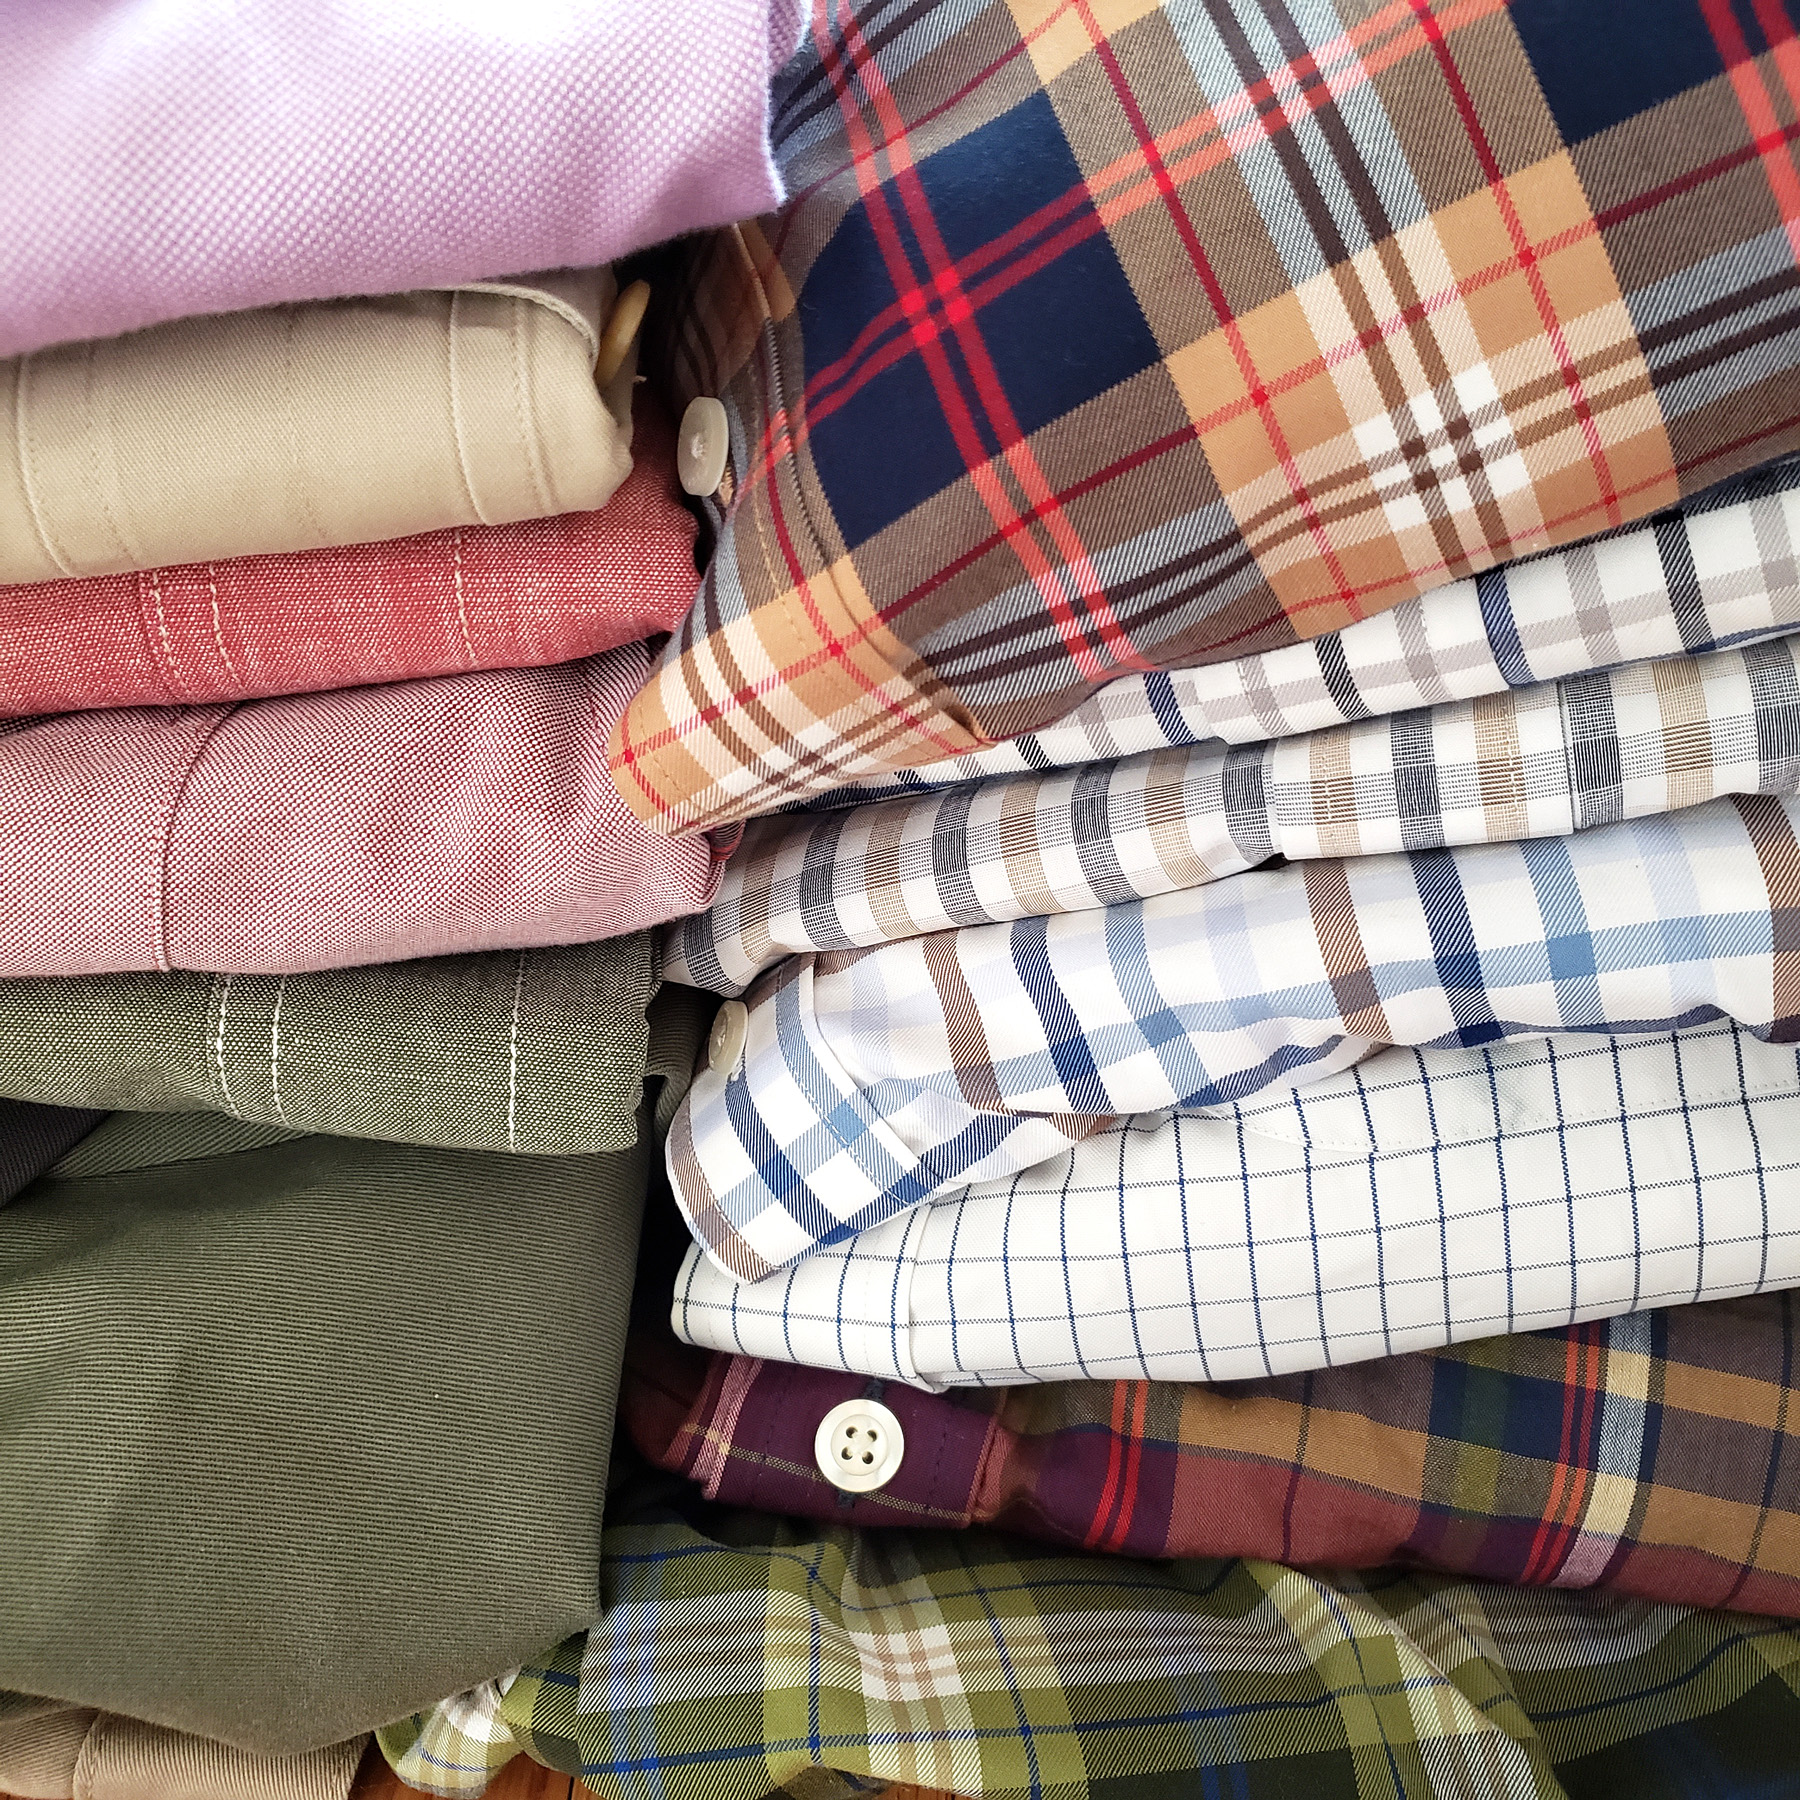
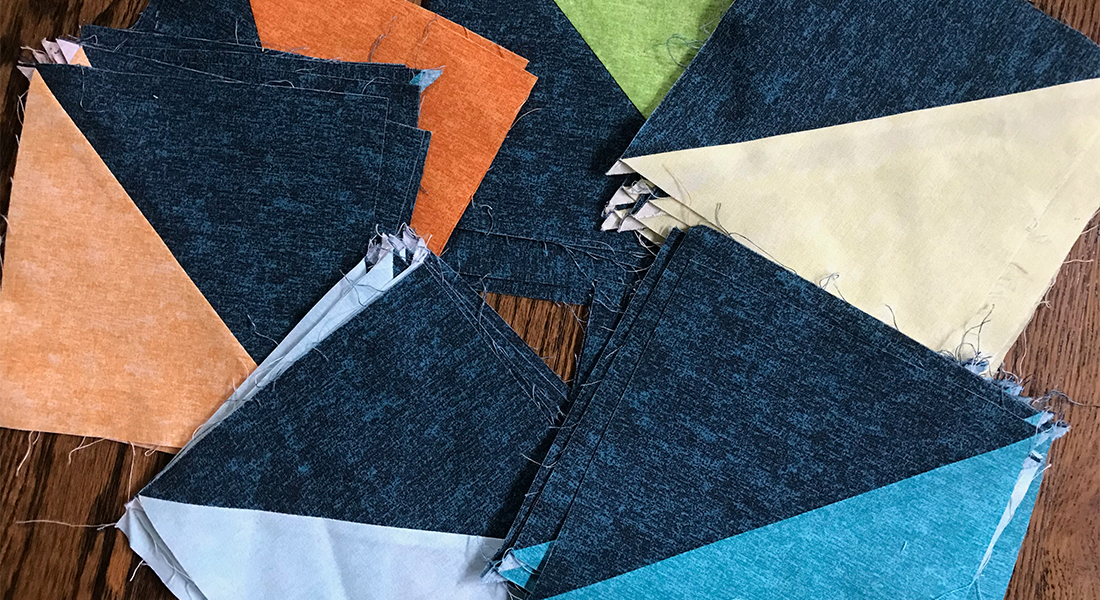
I’m creating a quilt for my daughter made from her late grandpa’s clothing, four shirts and one pair of pants. There are two main techniques for deconstructing clothing items, taking apart the seams and cutting apart the seams. I’ll show you both with some of these clothing items for my quilt.
To deconstruct a garment by taking apart the seams, use both a forked seam ripper, a curved blade seam ripper, dressmaking shears, thread snips, tweezers, a lint roller, an iron and pressing board. You can use this method for any kind of garment. Here is how I take apart a pair of cuffed pants.
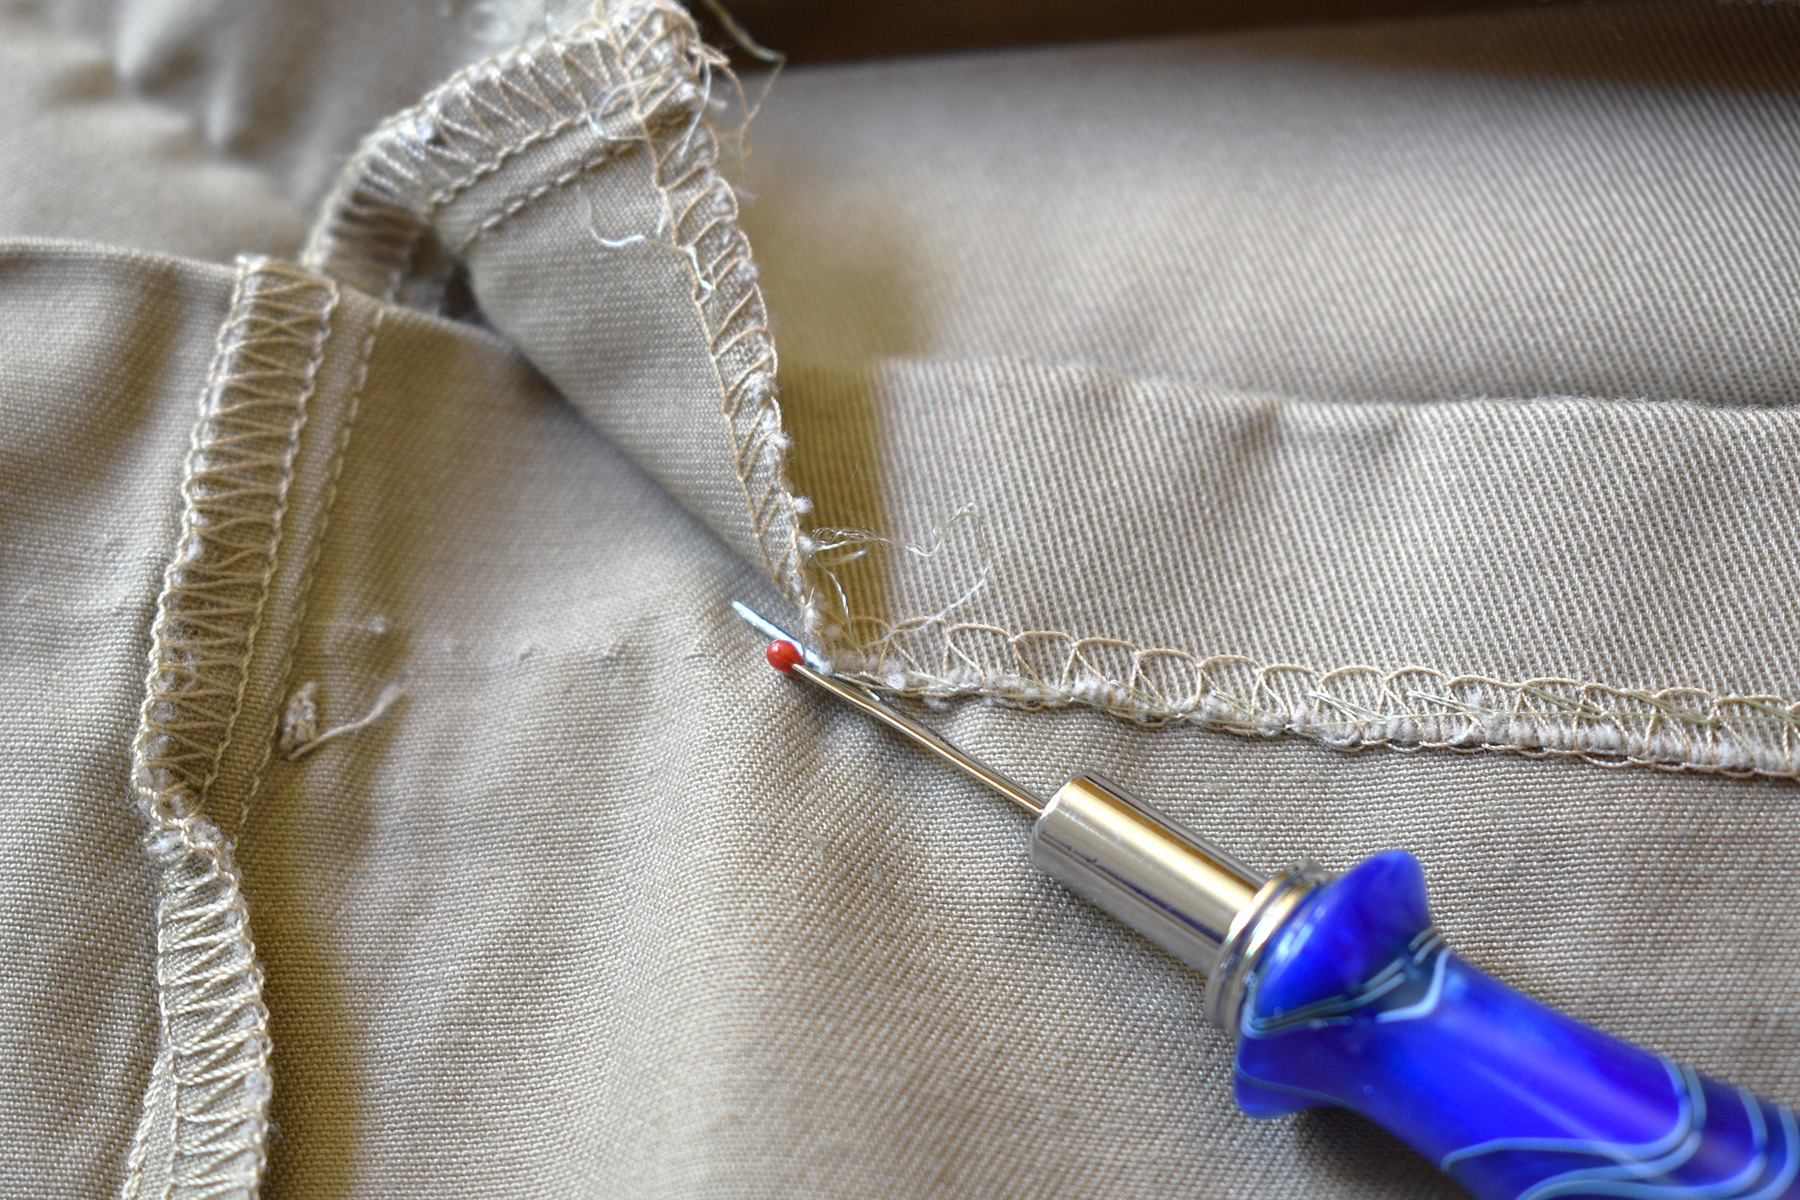
There’s a lot of extra fabric in the cuff of these pants, and I want to use every single bit of it that I can. So I’m taking the pant legs apart at the seams. I use the forked seam ripper to open up the cuffs at the bottom of the pants. This type of seam ripper has one very sharp end made to help you get underneath a single stitch. Be sure to work with the pointy end away from your body and hands.
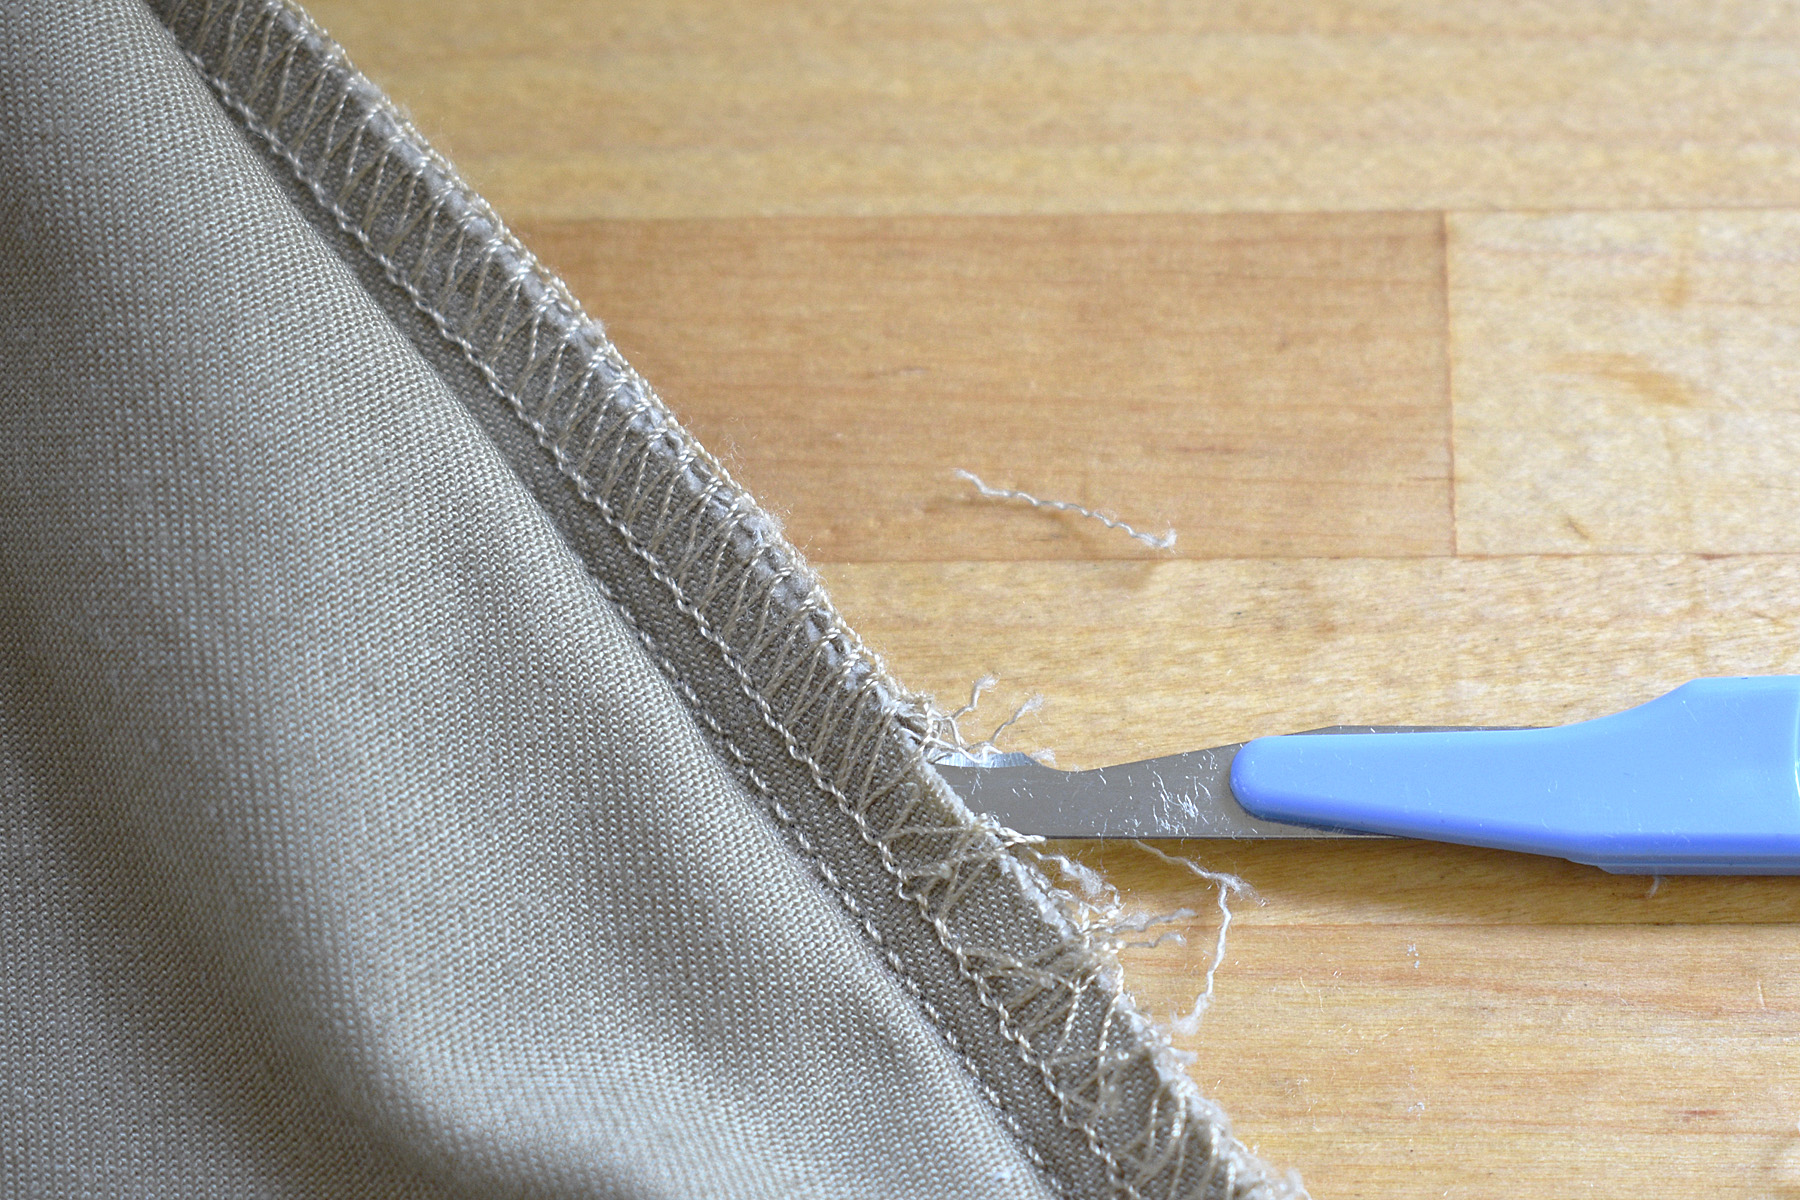
Once the hem is open, I take apart the side seams of the pants. The edges have been finished with an overlock stitch, which is easily opened up with a curved blade seam ripper. Be very careful to always work with an open blade seam ripper away from your hands and body. They are sharp!
Once the overlock stitches are removed, I remove a few inches of the side seam stitching at the bottom of the pant leg with my forked seam ripper. Sometimes the thread will rip easily for you, and I give this method a try by gently pulling apart the open seam. Just a few pulls and the seams pop open along the sides of the pants. I open up the inside seam in the same way, and then the back seam.
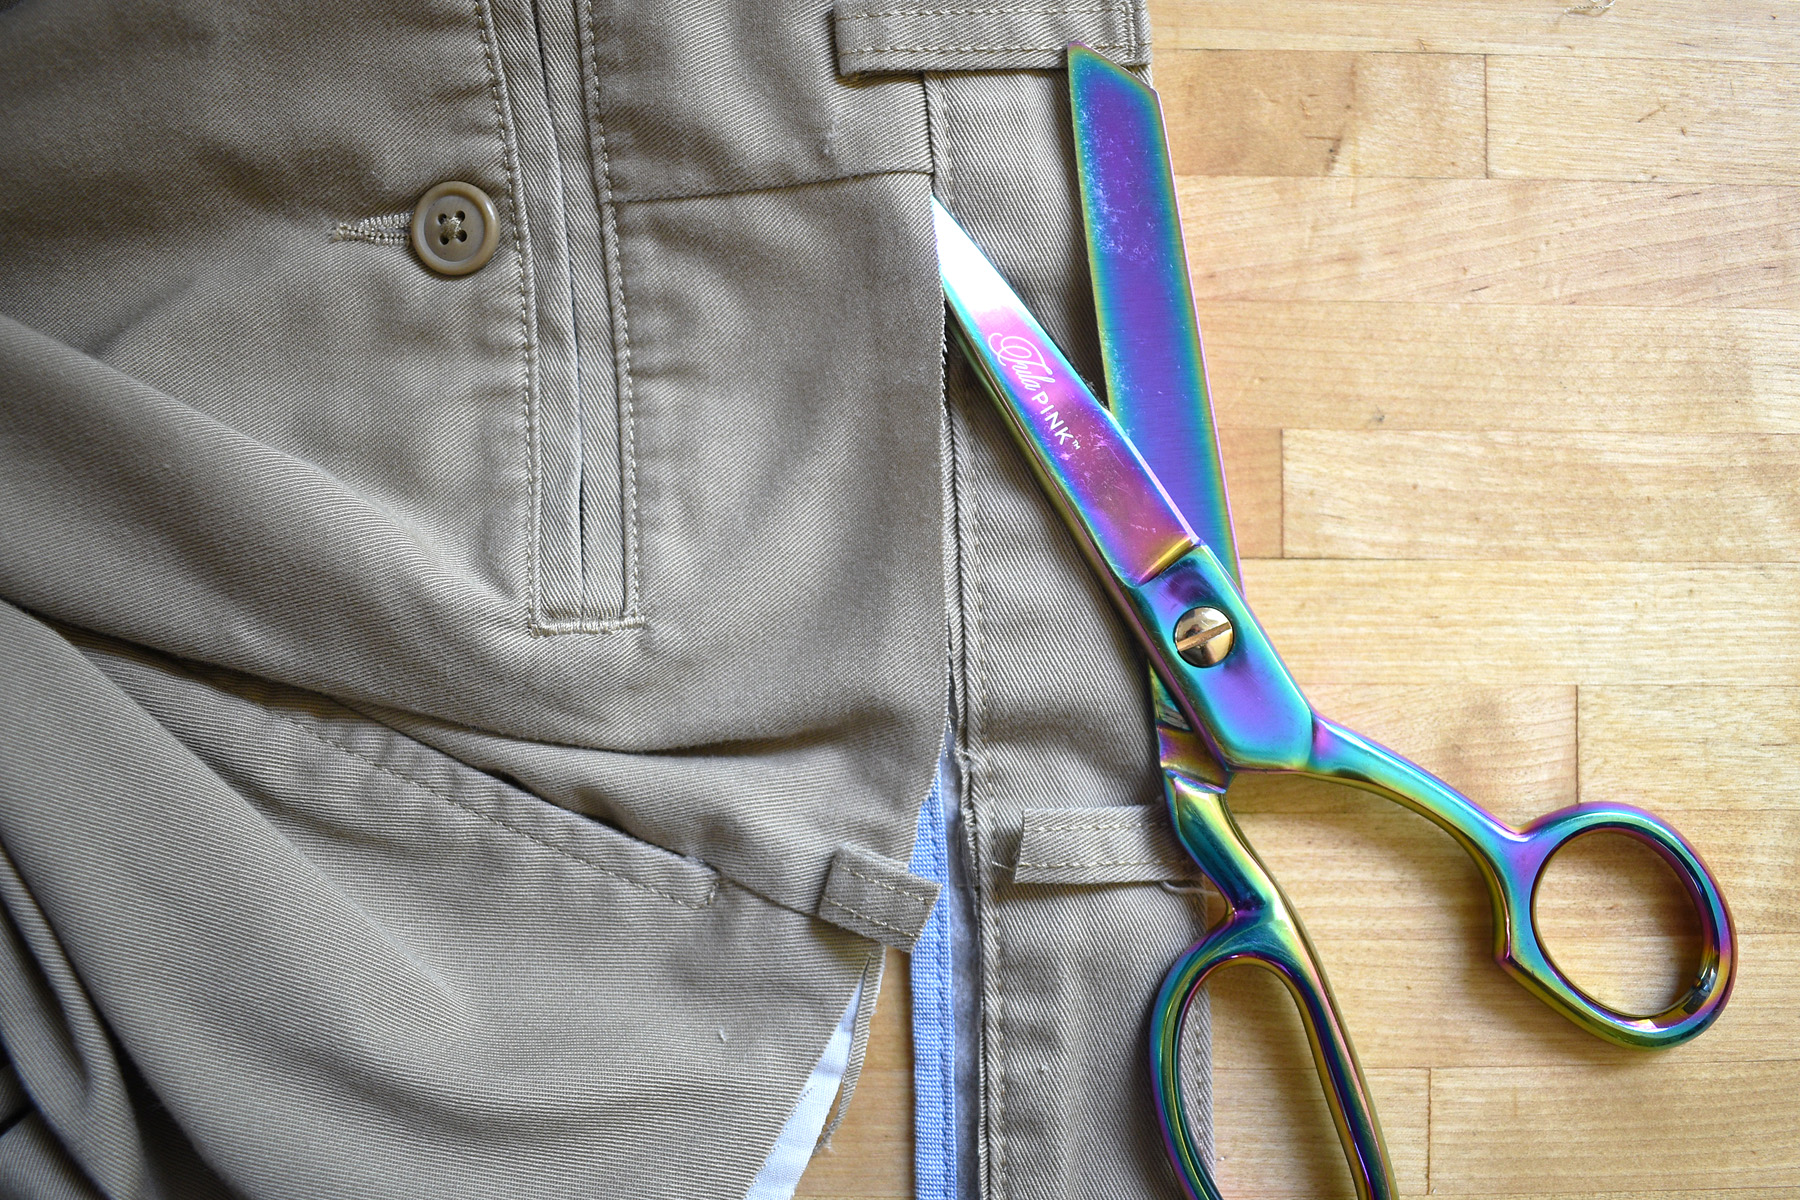
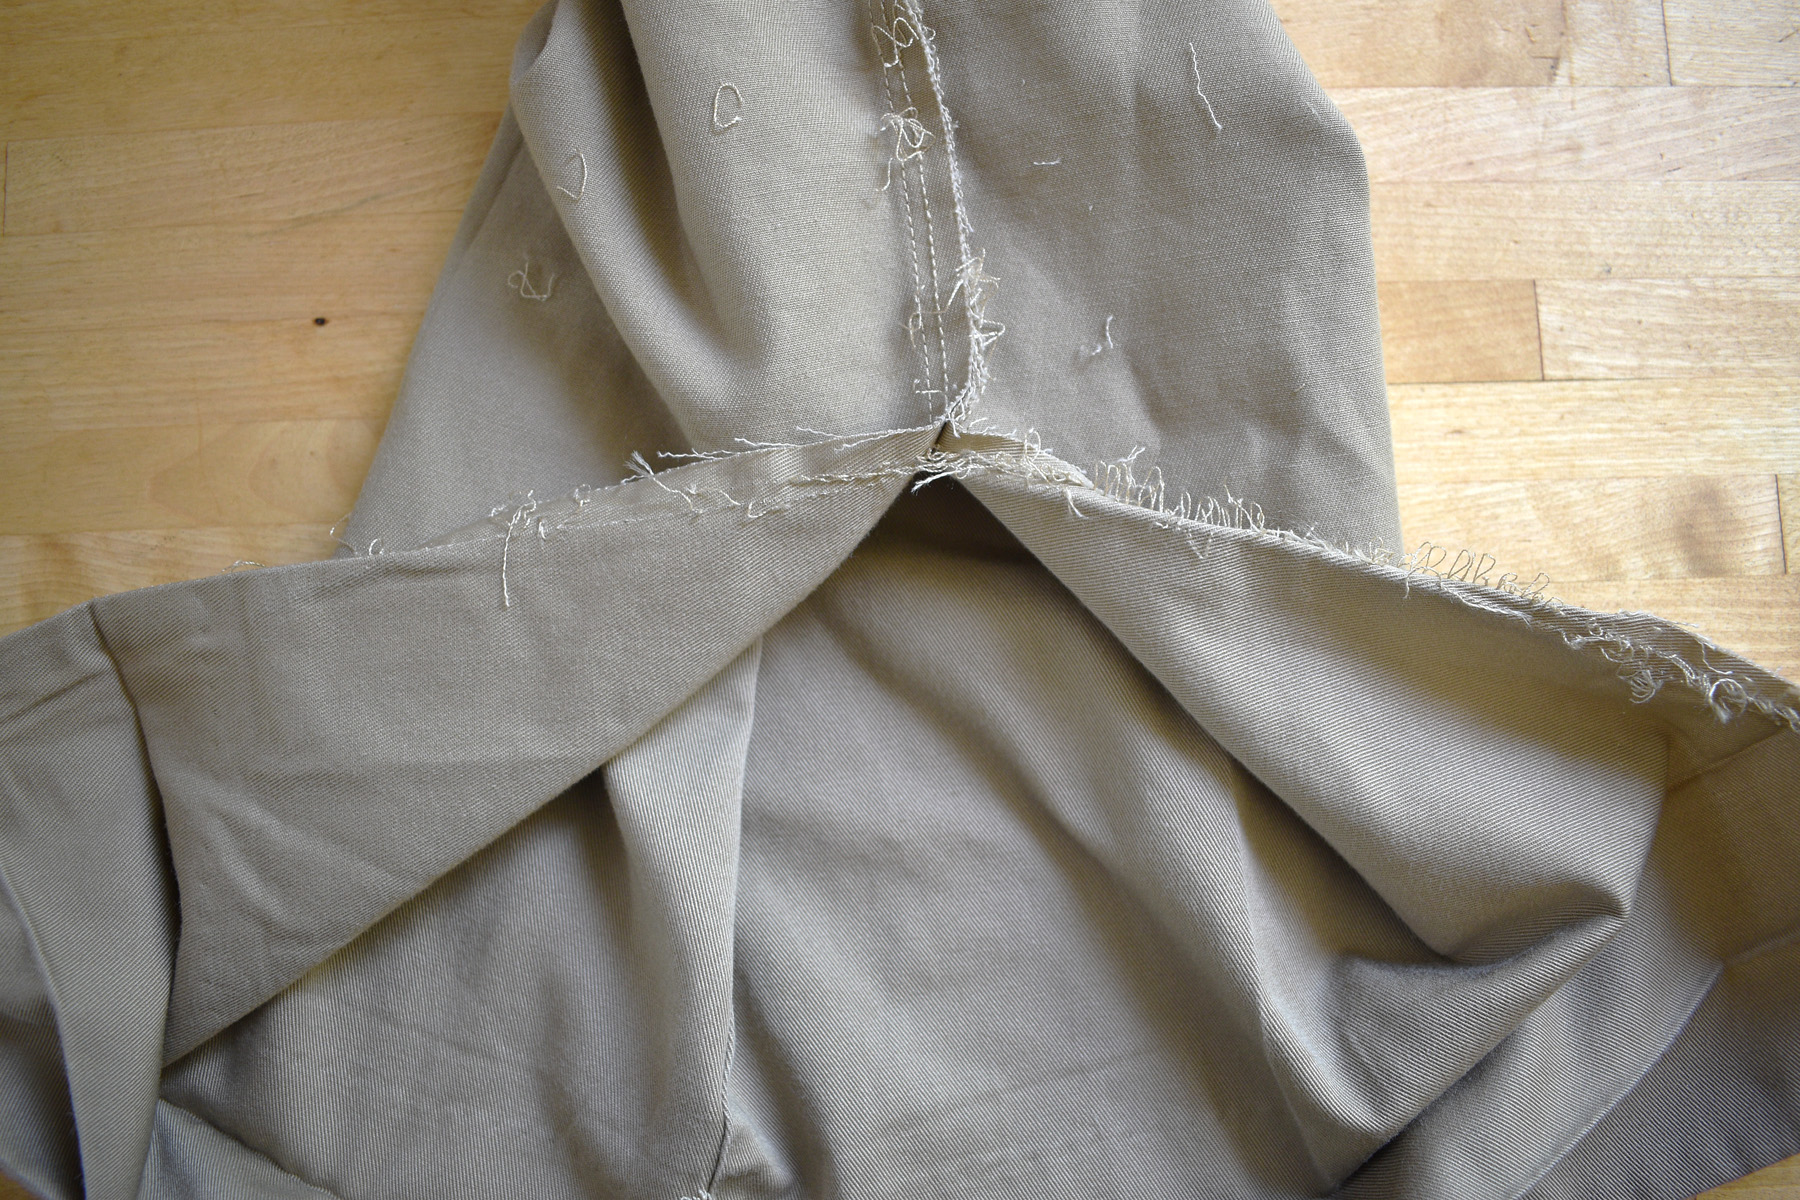
It isn’t going to gain me any extra yardage to try and pick out the seams of the waistband or the front zipper fly in the pants, and I cut these off close to the seams with my sharp dressmaking shears.
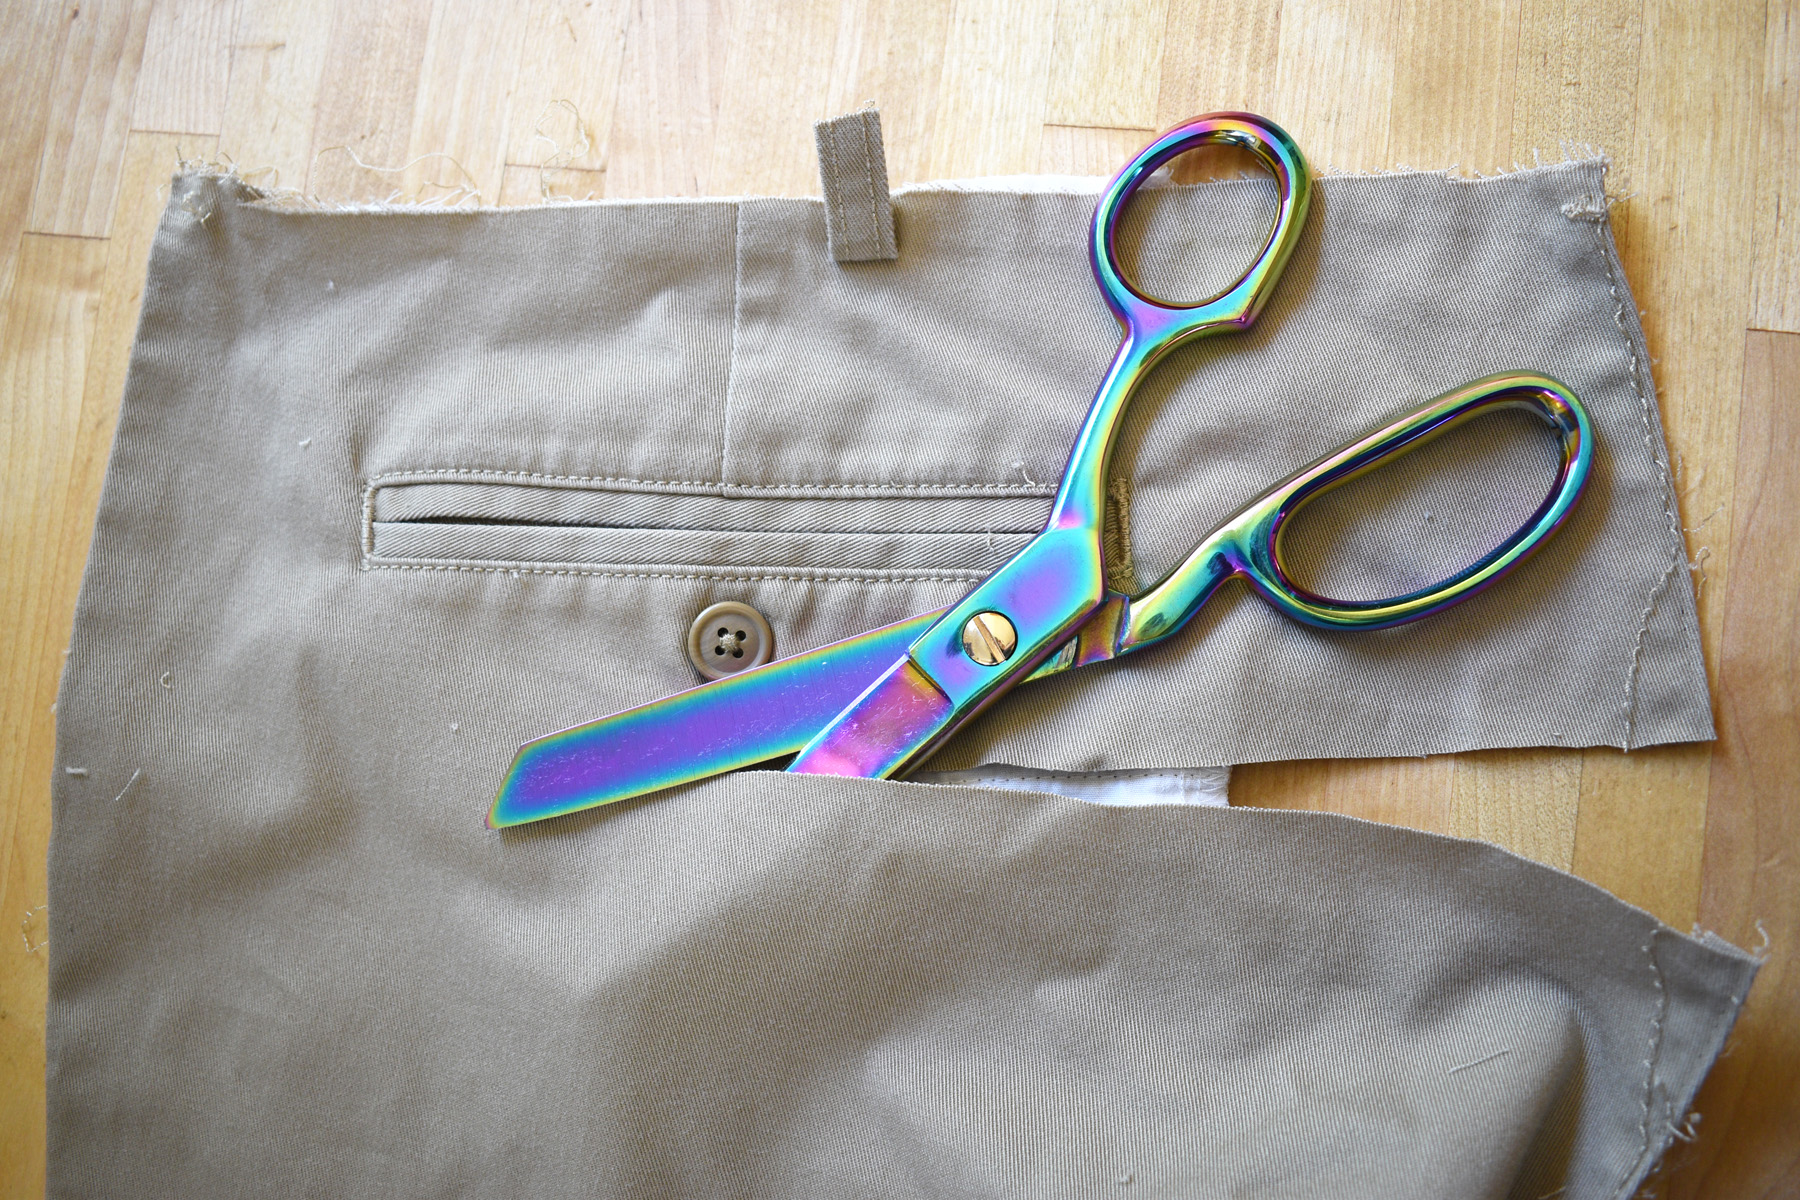
I decided that I wasn’t going to mess with picking out the welt pockets either, and cut them off. I’m left with four separate sections of fabric from the pants, and take these to my pressing board for a good solid ironing.
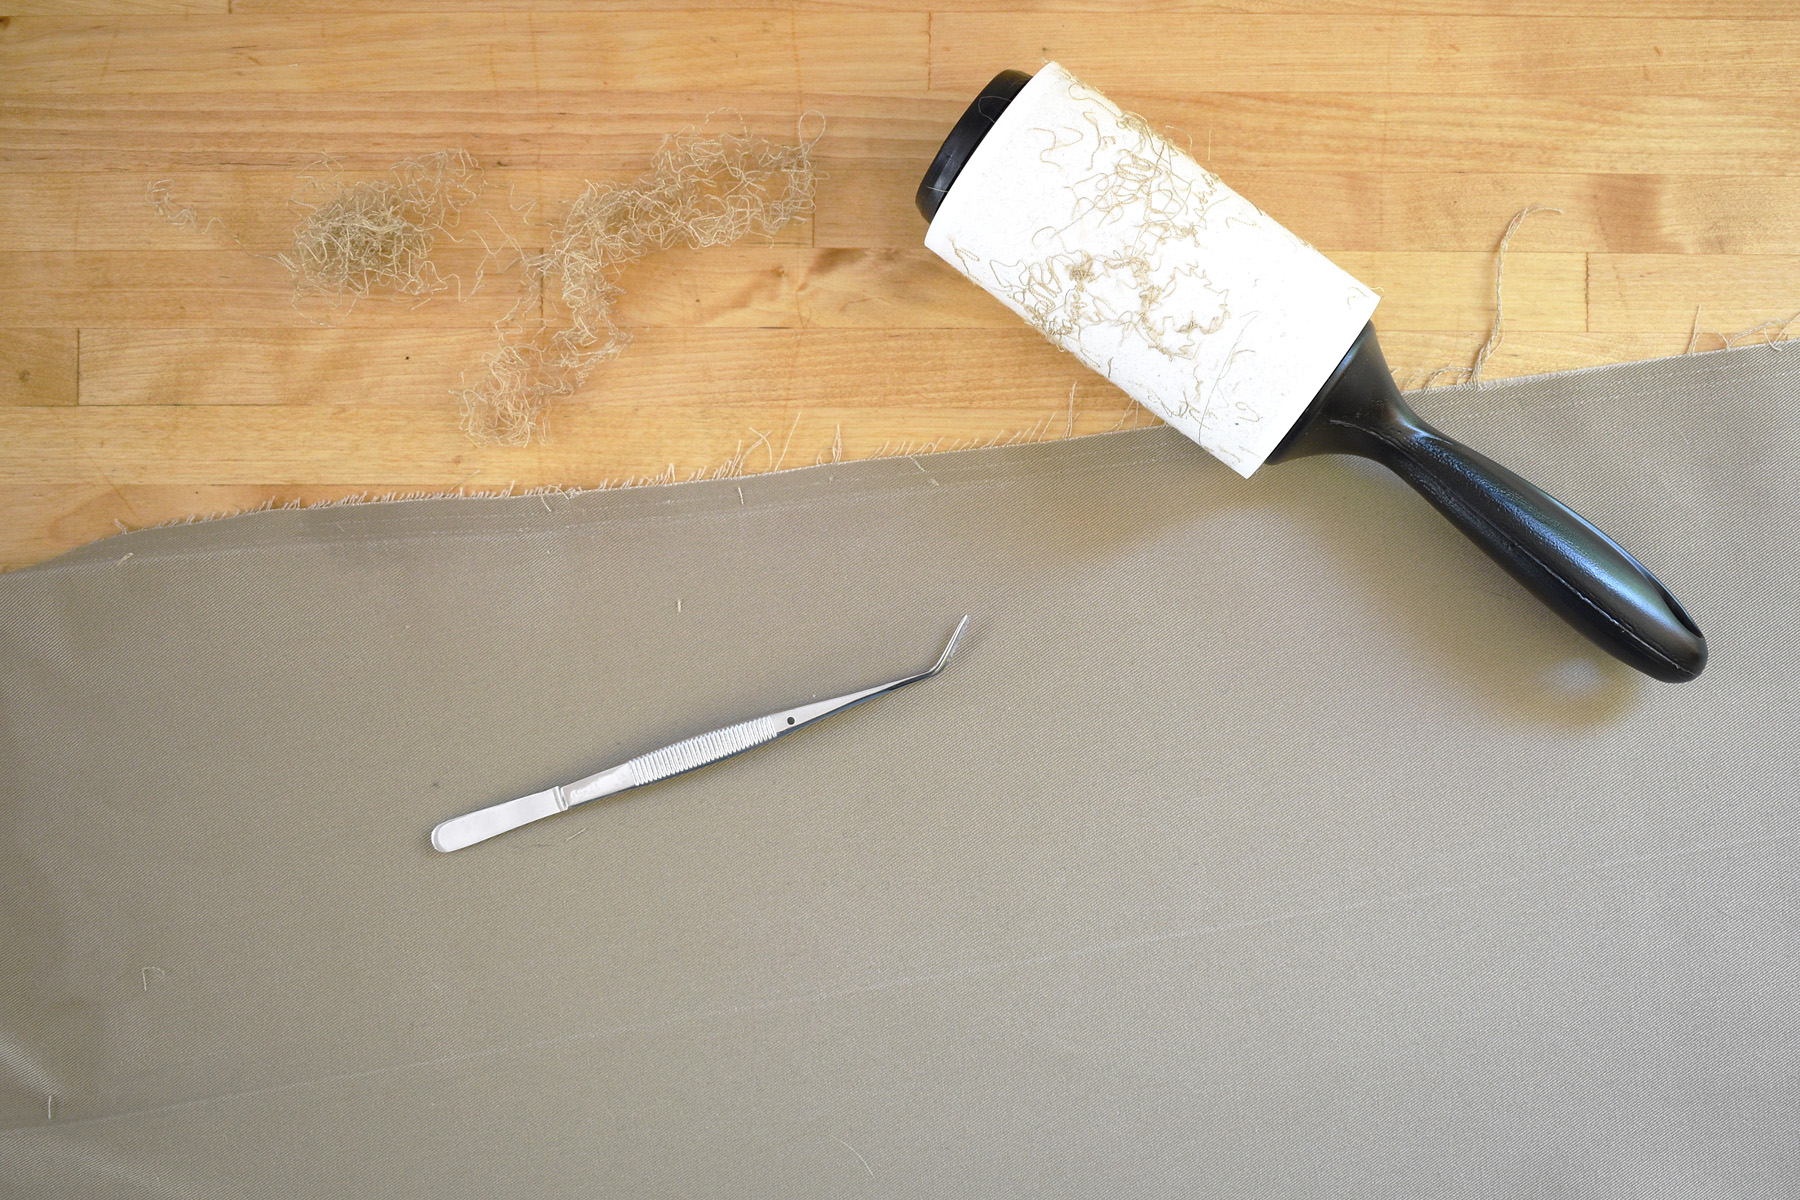
I use tweezers and a lint roller at the pressing board to pull out and clean up all of those little threads left over from ripping open the seams.
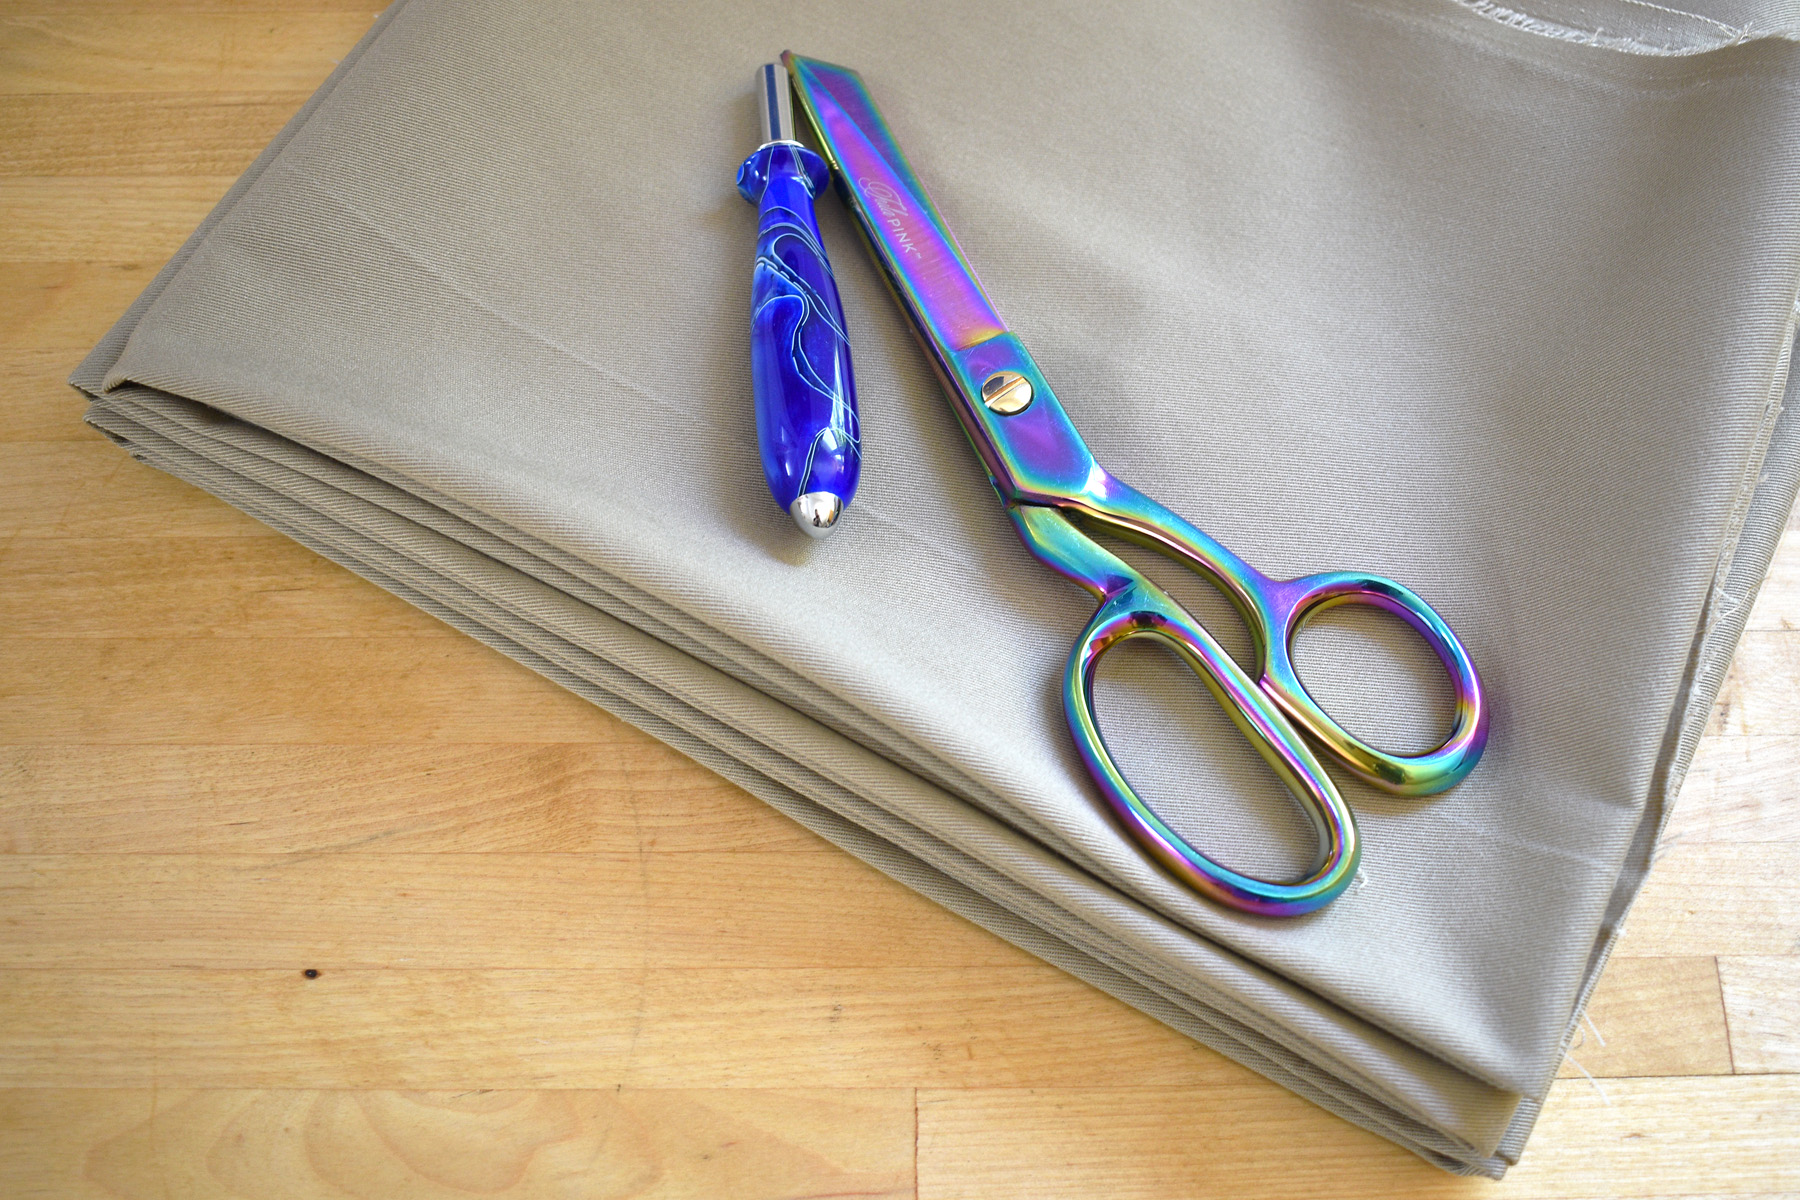
And what I’m left with is a good chunk of flat yardage to use in my memory quilt.
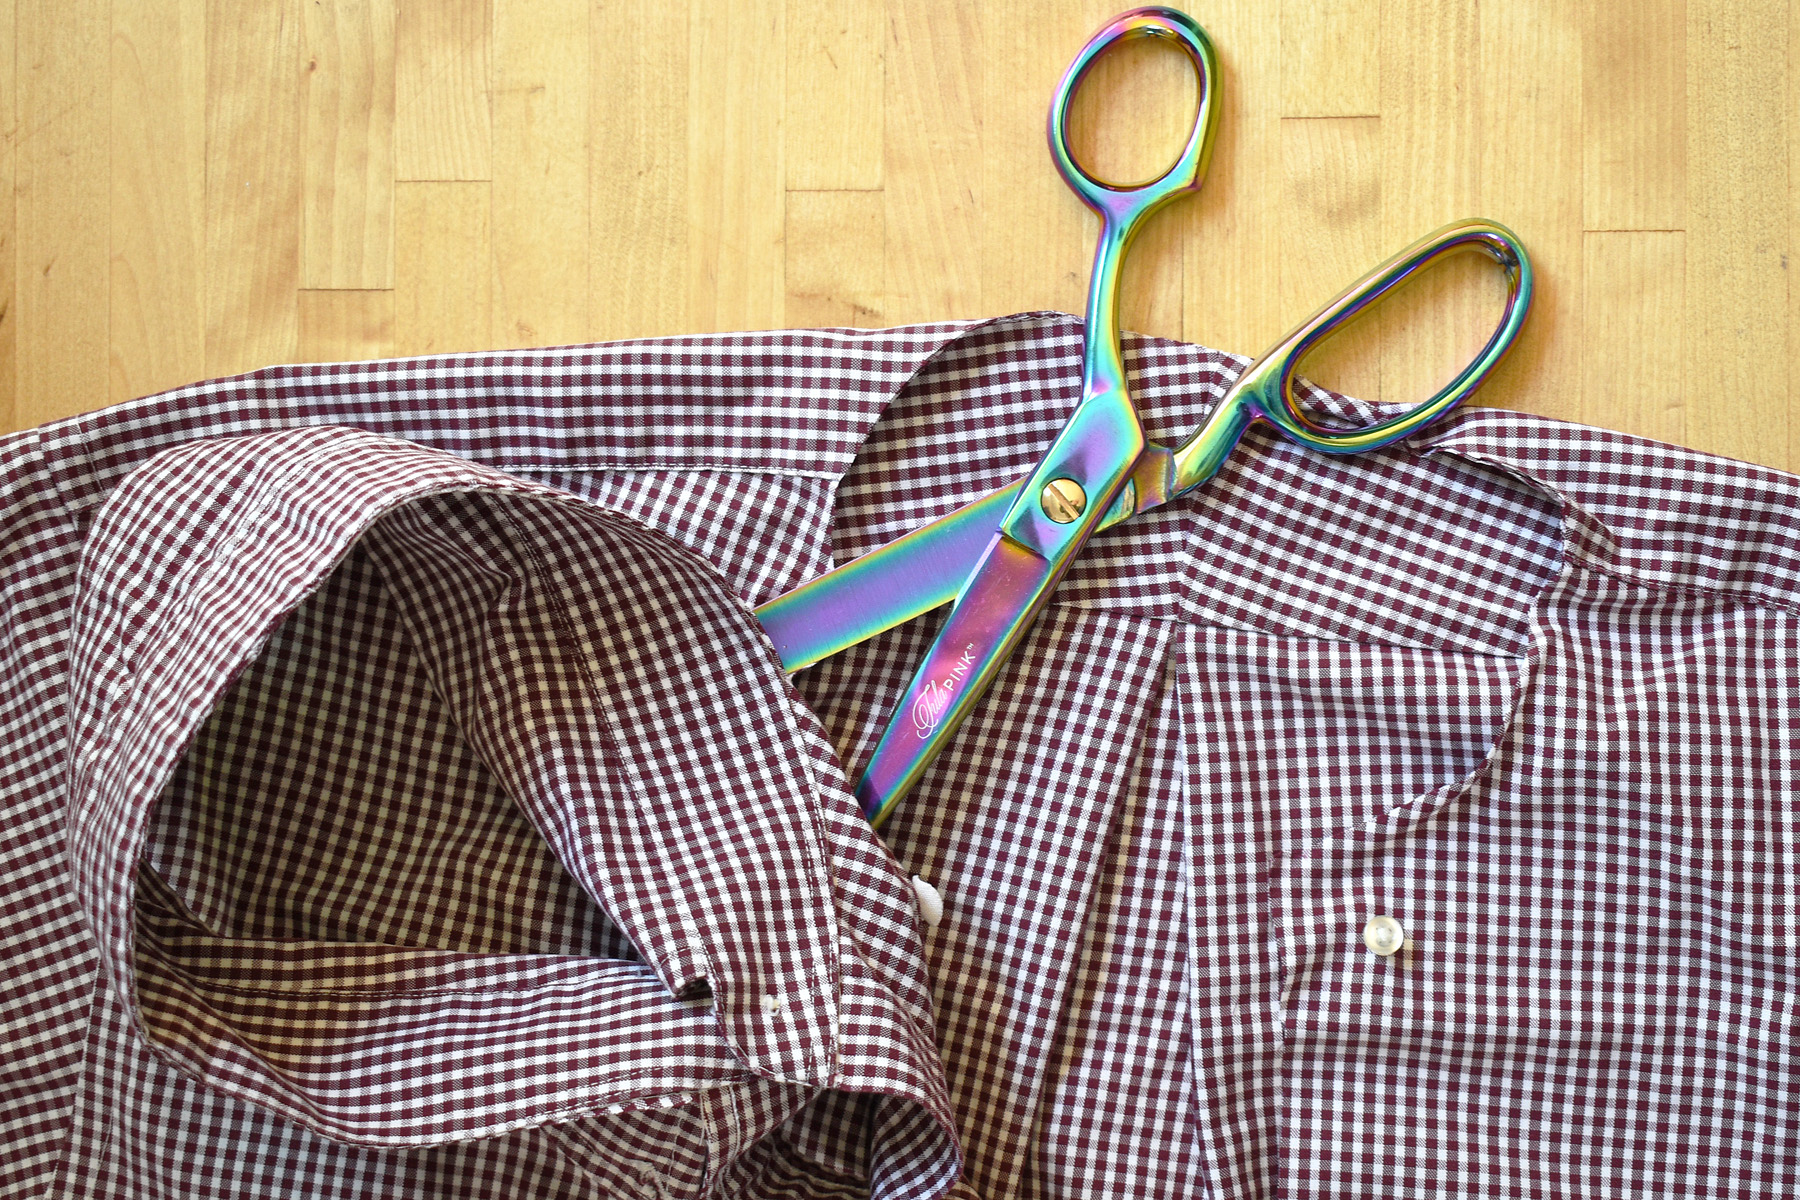
To deconstruct a garment by cutting apart the seams, use a large pair of sharp dressmaking shears, a smaller pair of scissors, an ironing board and pressing surface. You can use this method for any kind of garment. Here is how I take apart a long sleeved button down shirt.
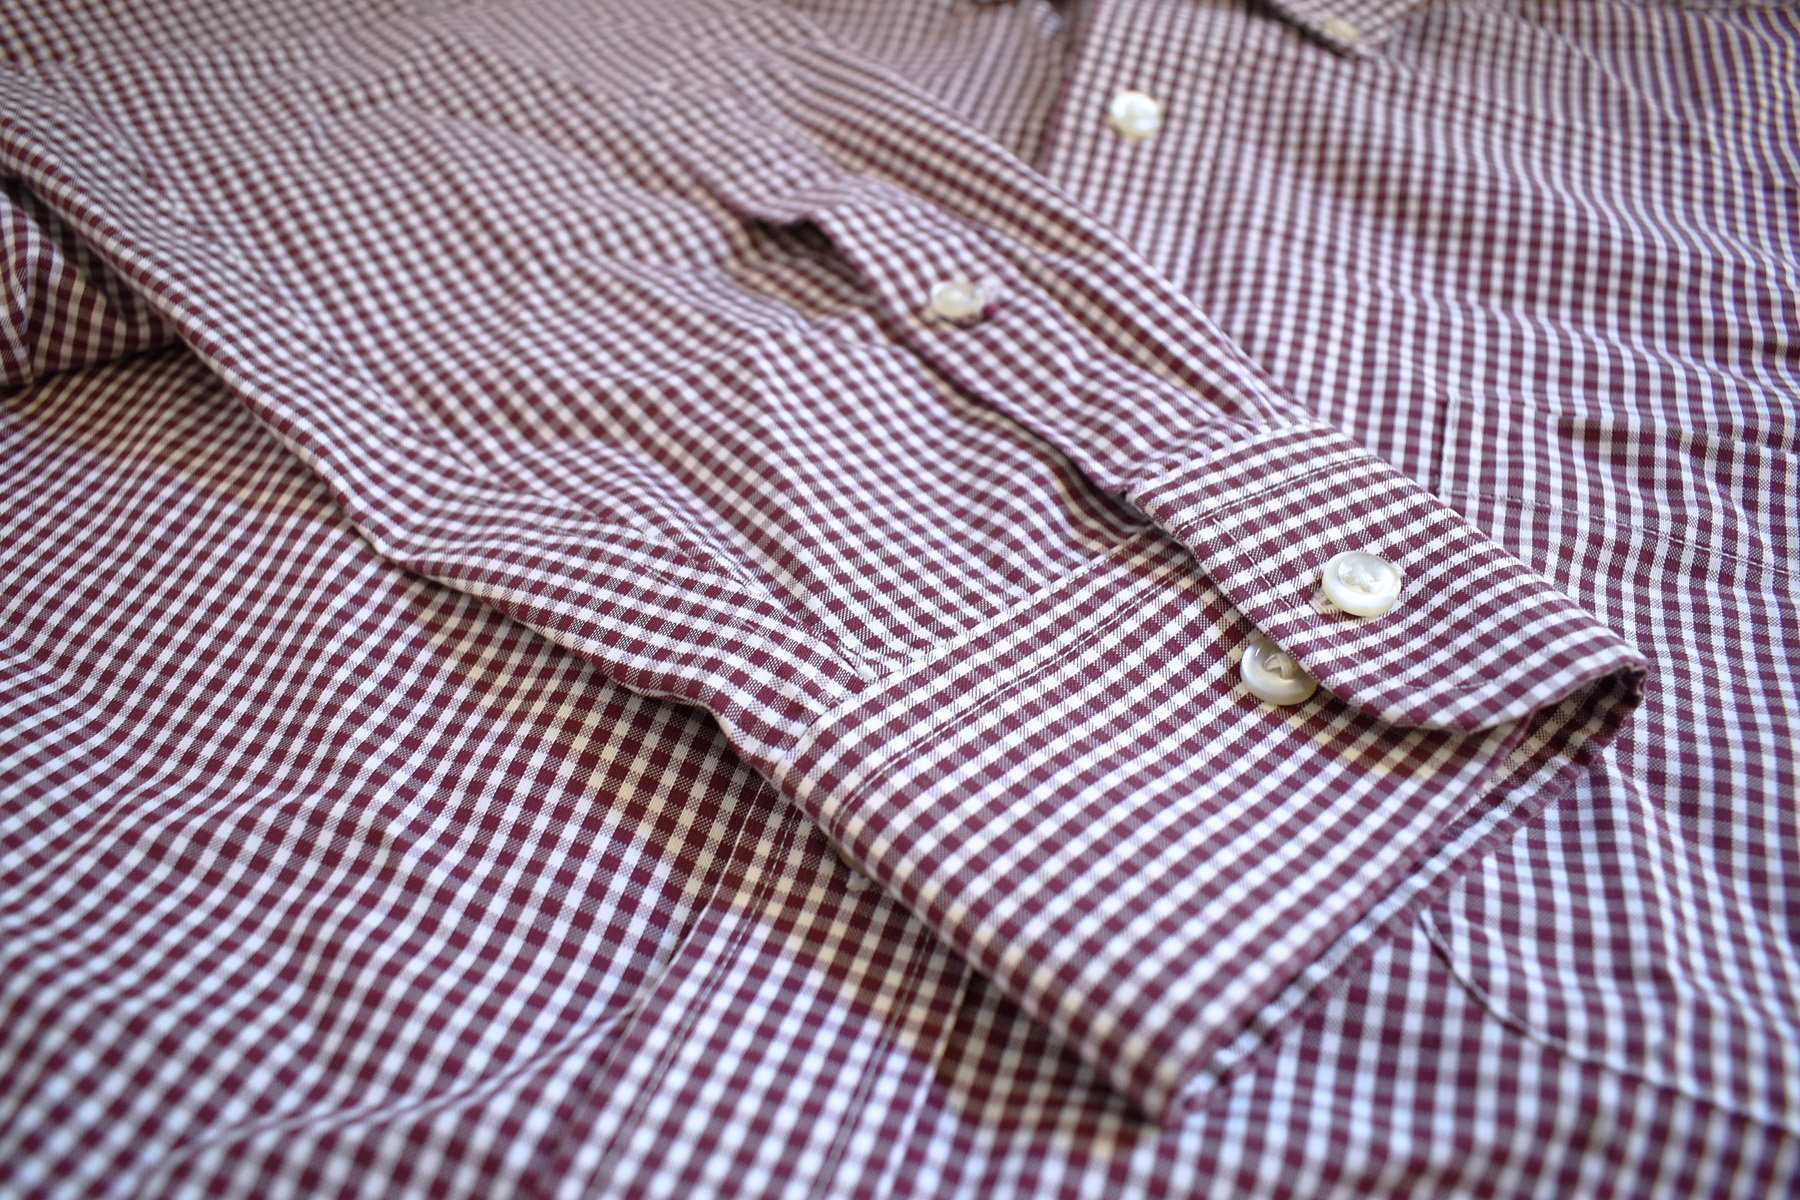
If you’re cutting apart a lot of garments, you’ll probably find a cutting method that works best for you. I’m cutting up several button down shirts for my memory quilt, and this is the method that works best for me. There really isn’t a right or wrong order in cutting a shirt apart.
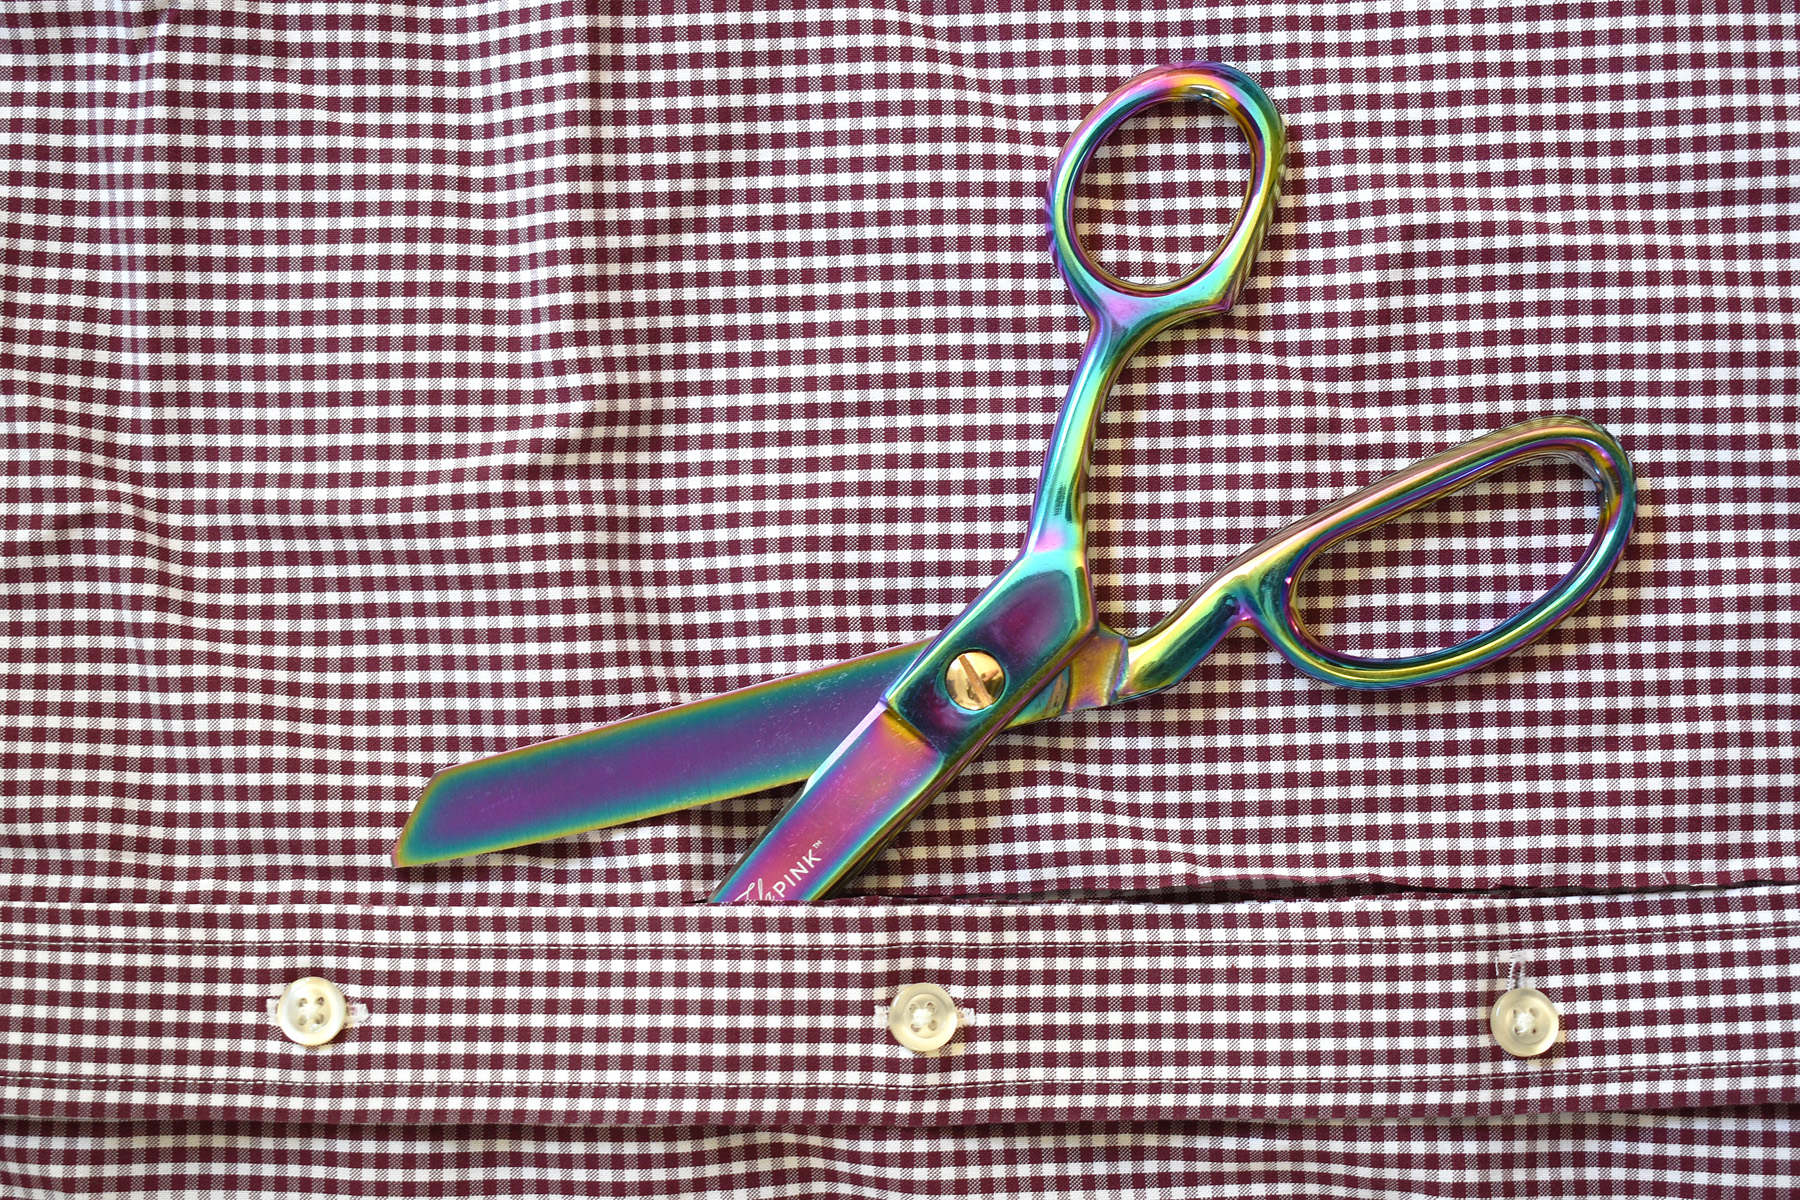
I like to start with the button plackets down the front of the shirt, cutting up each side all the way to the edge of the collar.
Then I cut the collar off.
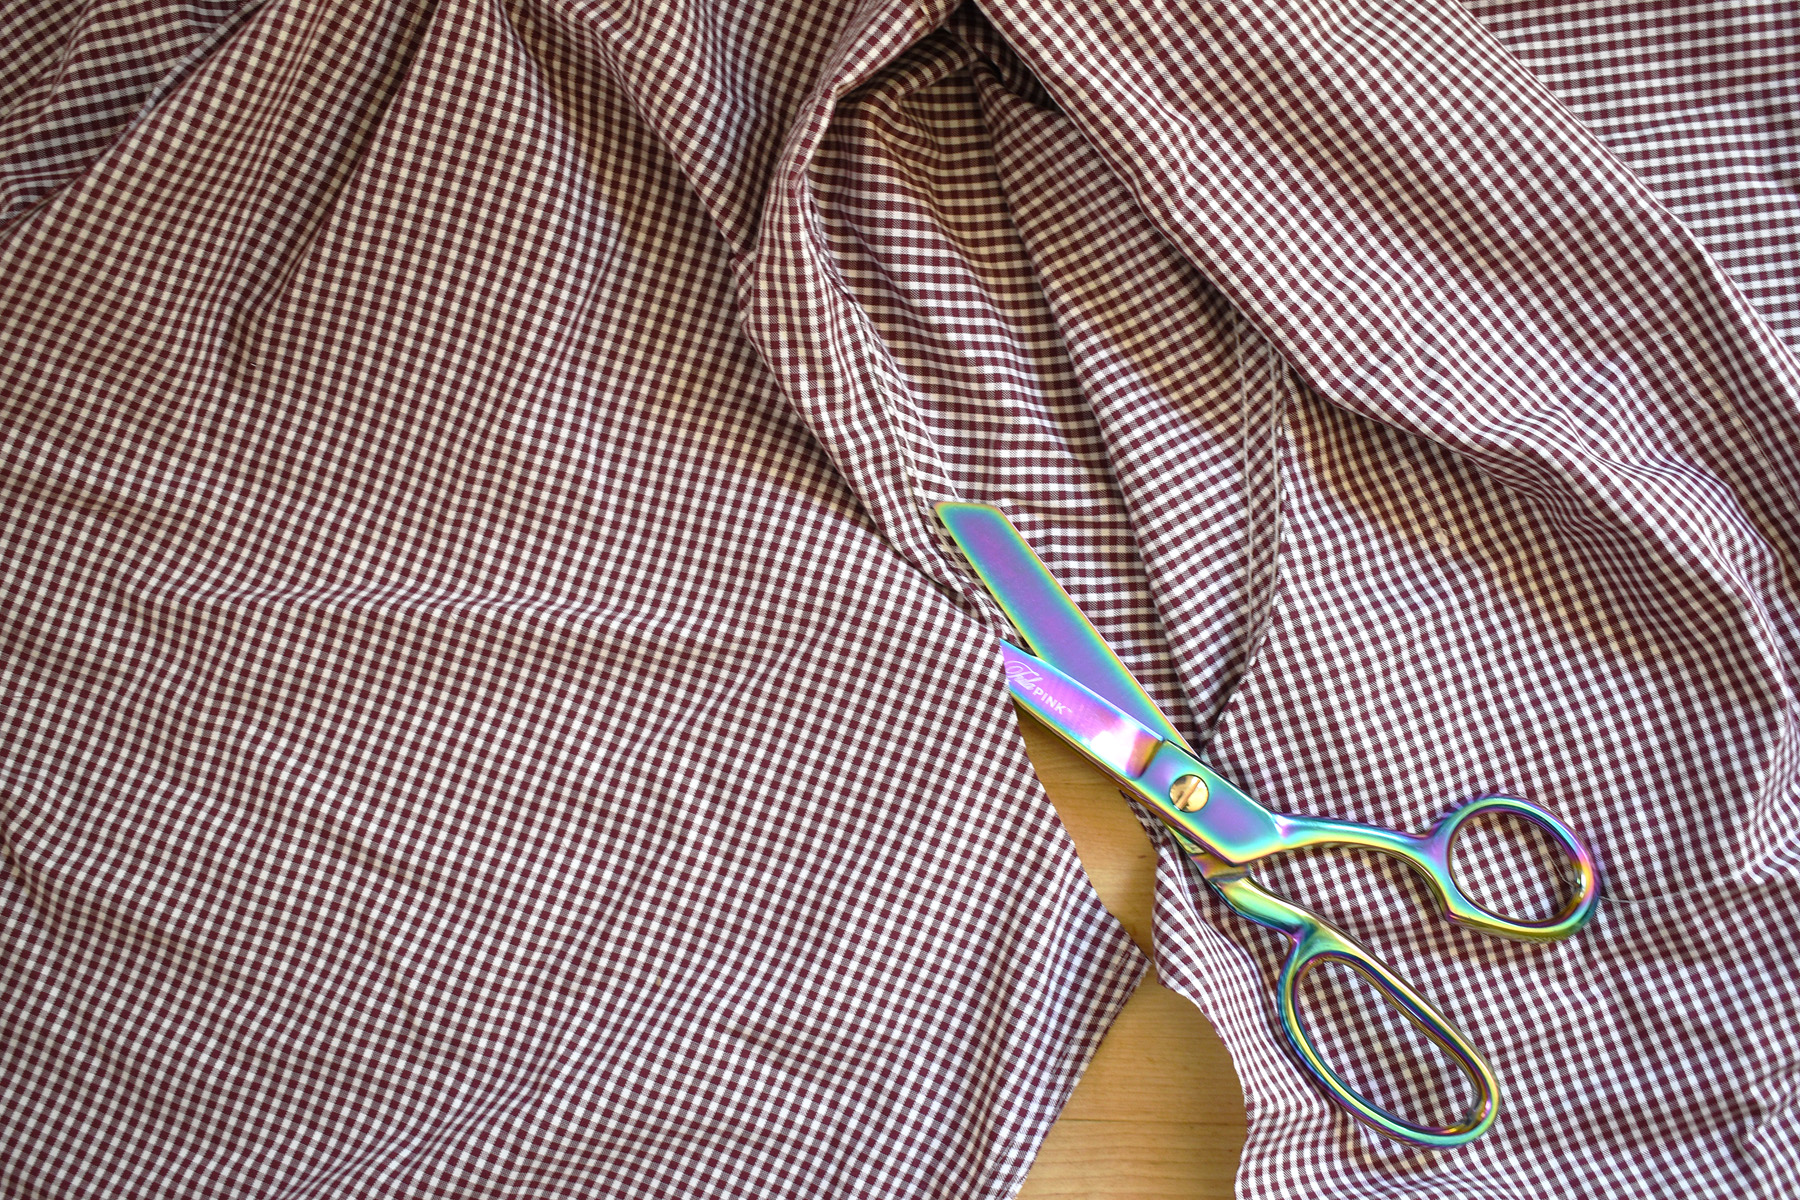
Next, I cut up the side seams of the shirt and around each arm hole.
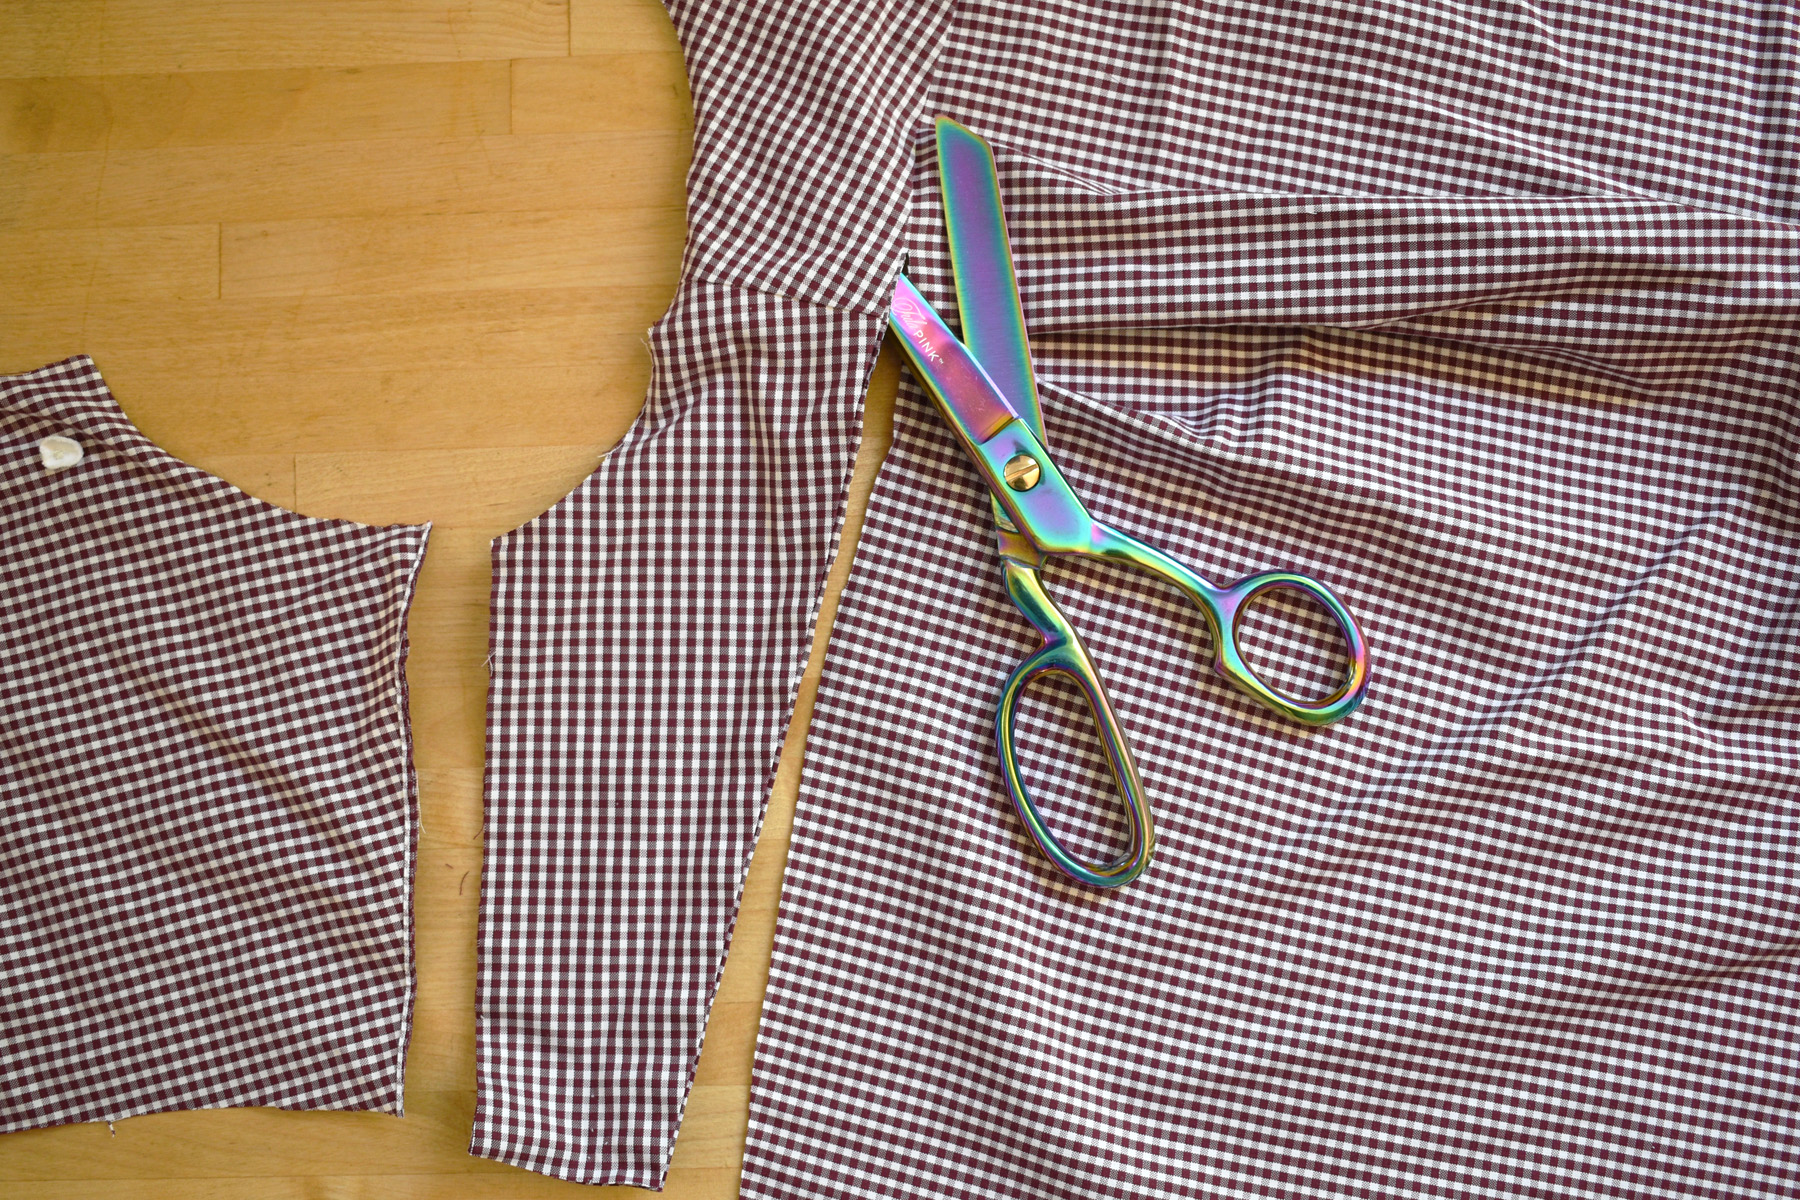
Next, I cut across the shoulder seam, and the back yoke if there is one. Then I move on to the sleeves.
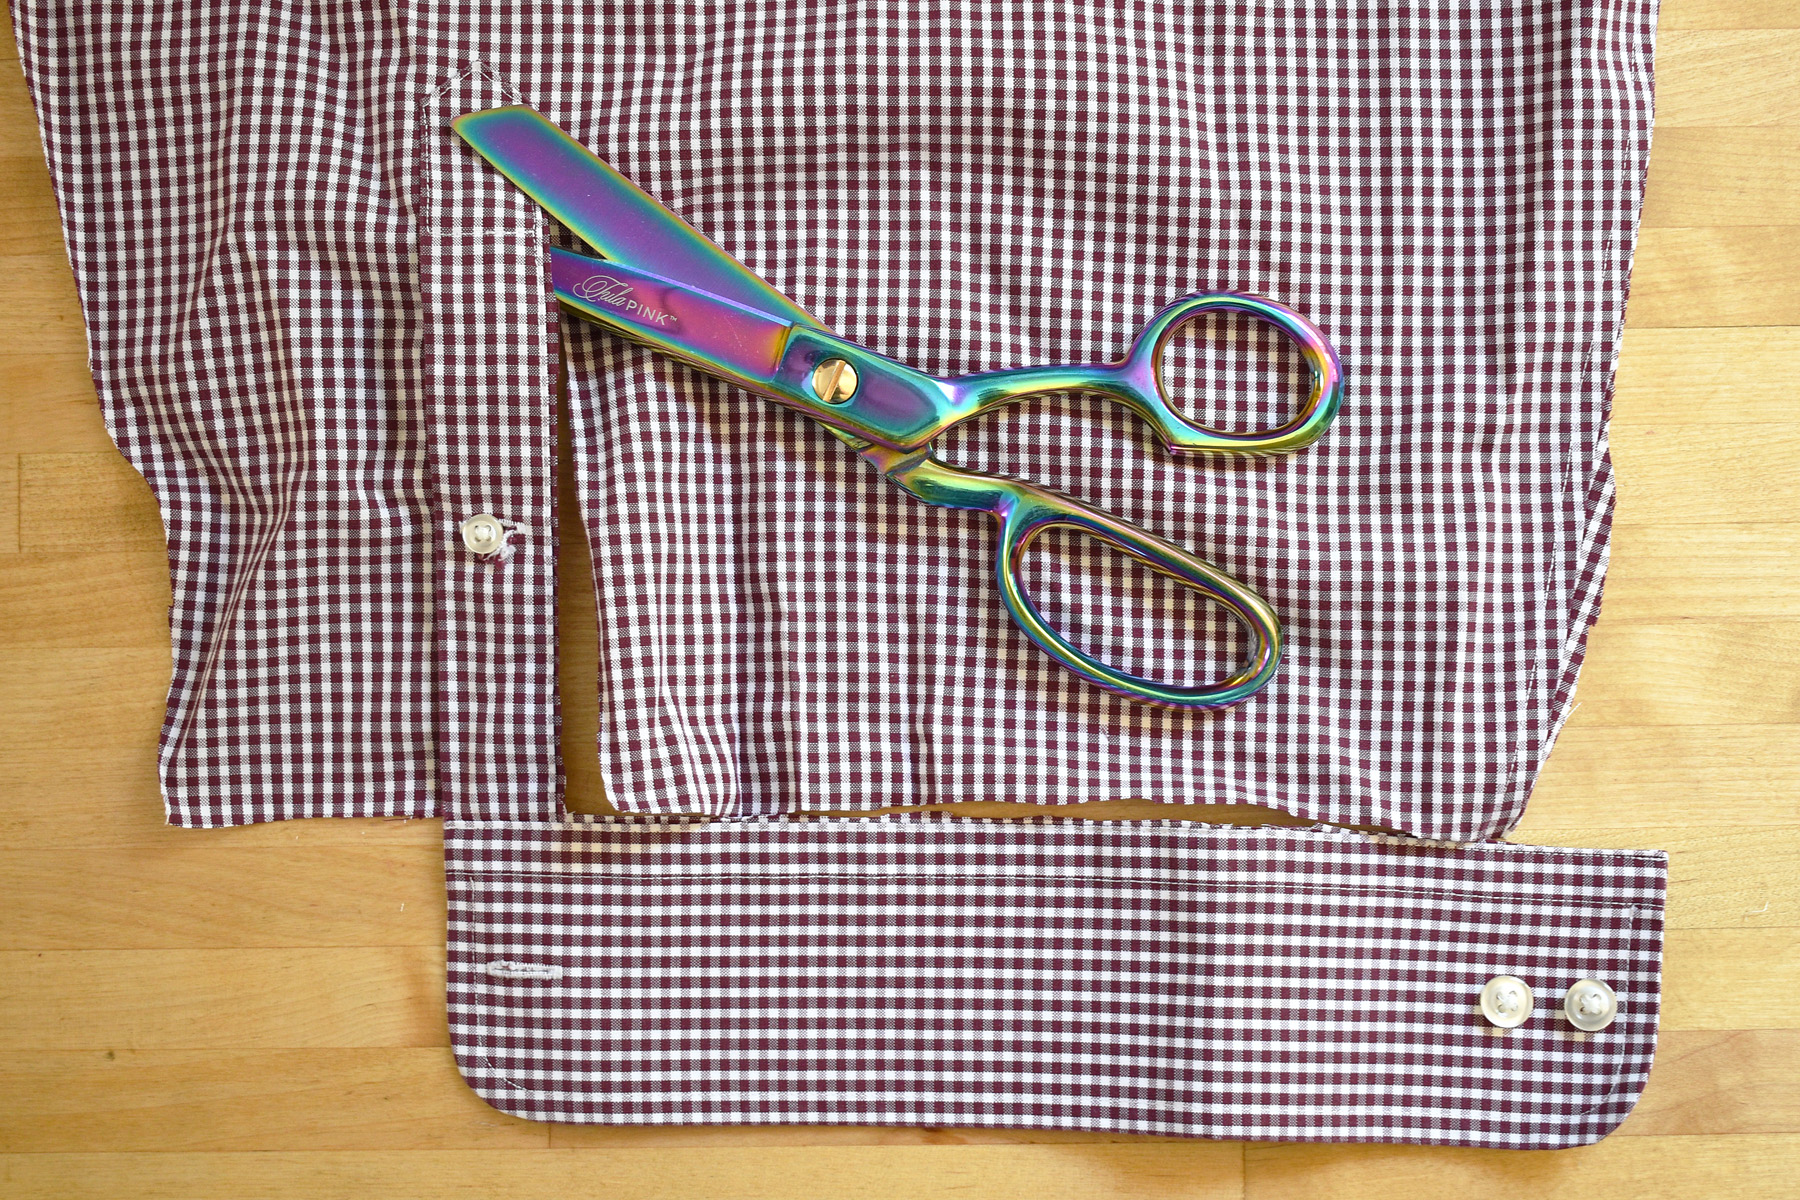
I cut up each sleeve side seam to open up the sleeves. Then I cut off the cuffs and placket. At this point I look closely at each flat piece of fabric to see if there are any buttons or pockets to remove. It’s up to you if you’d like to remove the pockets by using a seam ripper, or leave them on and cut around them for making a quilt. Or maybe you’d like to leave the pockets and include them in your design.
When I’ve removed any excess buttons, I give all the flat pieces of fabric a final pressing with the iron.
These button down shirts are fantastic for quilting because there are large areas of fabric you can gain from the back and front! And that’s all there is to gaining fabric for quilting from garments.
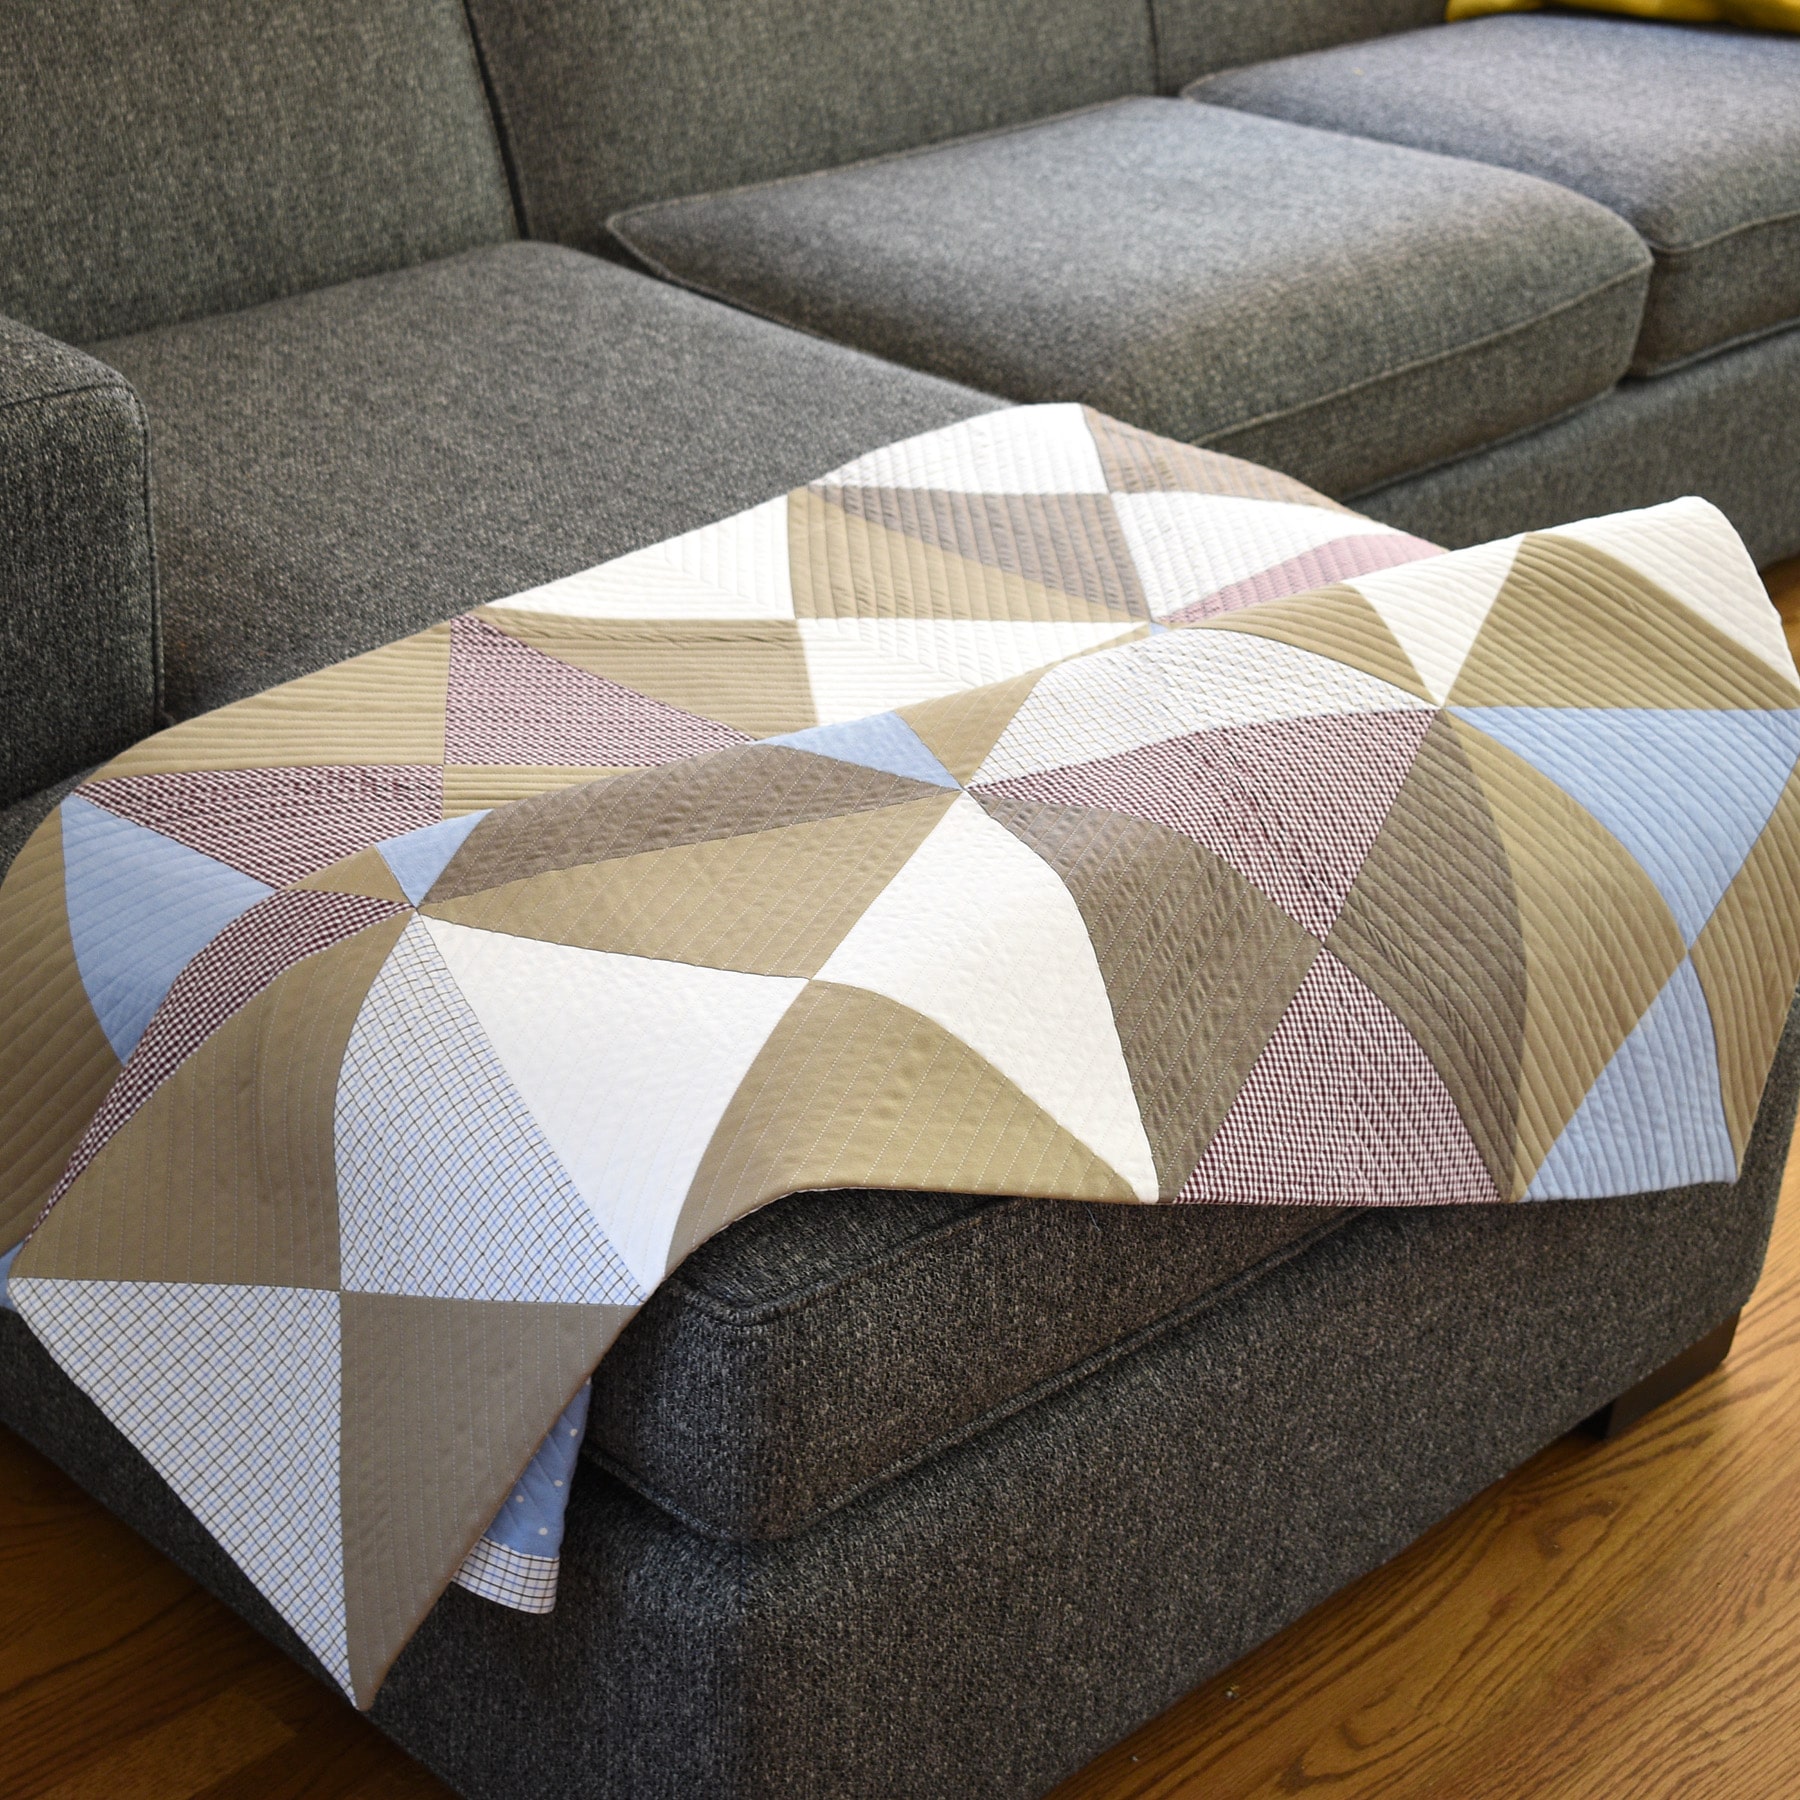
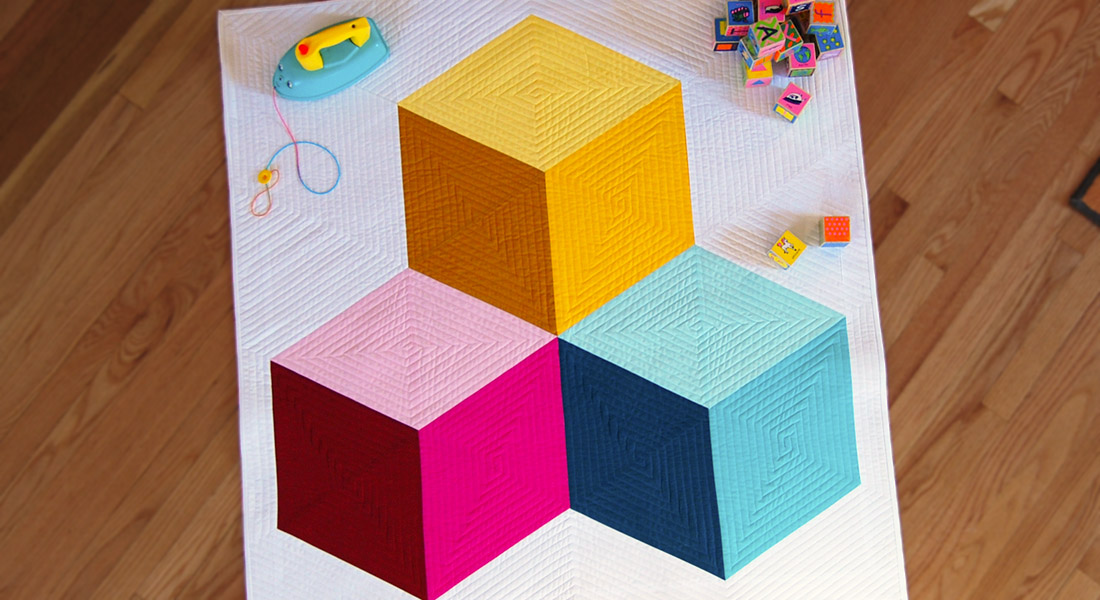
My fabric has gone into making a memory quilt for my kiddo. Join me next week when I’ll show you exactly how to make this cuddly memory quilt with your repurposed fabrics.
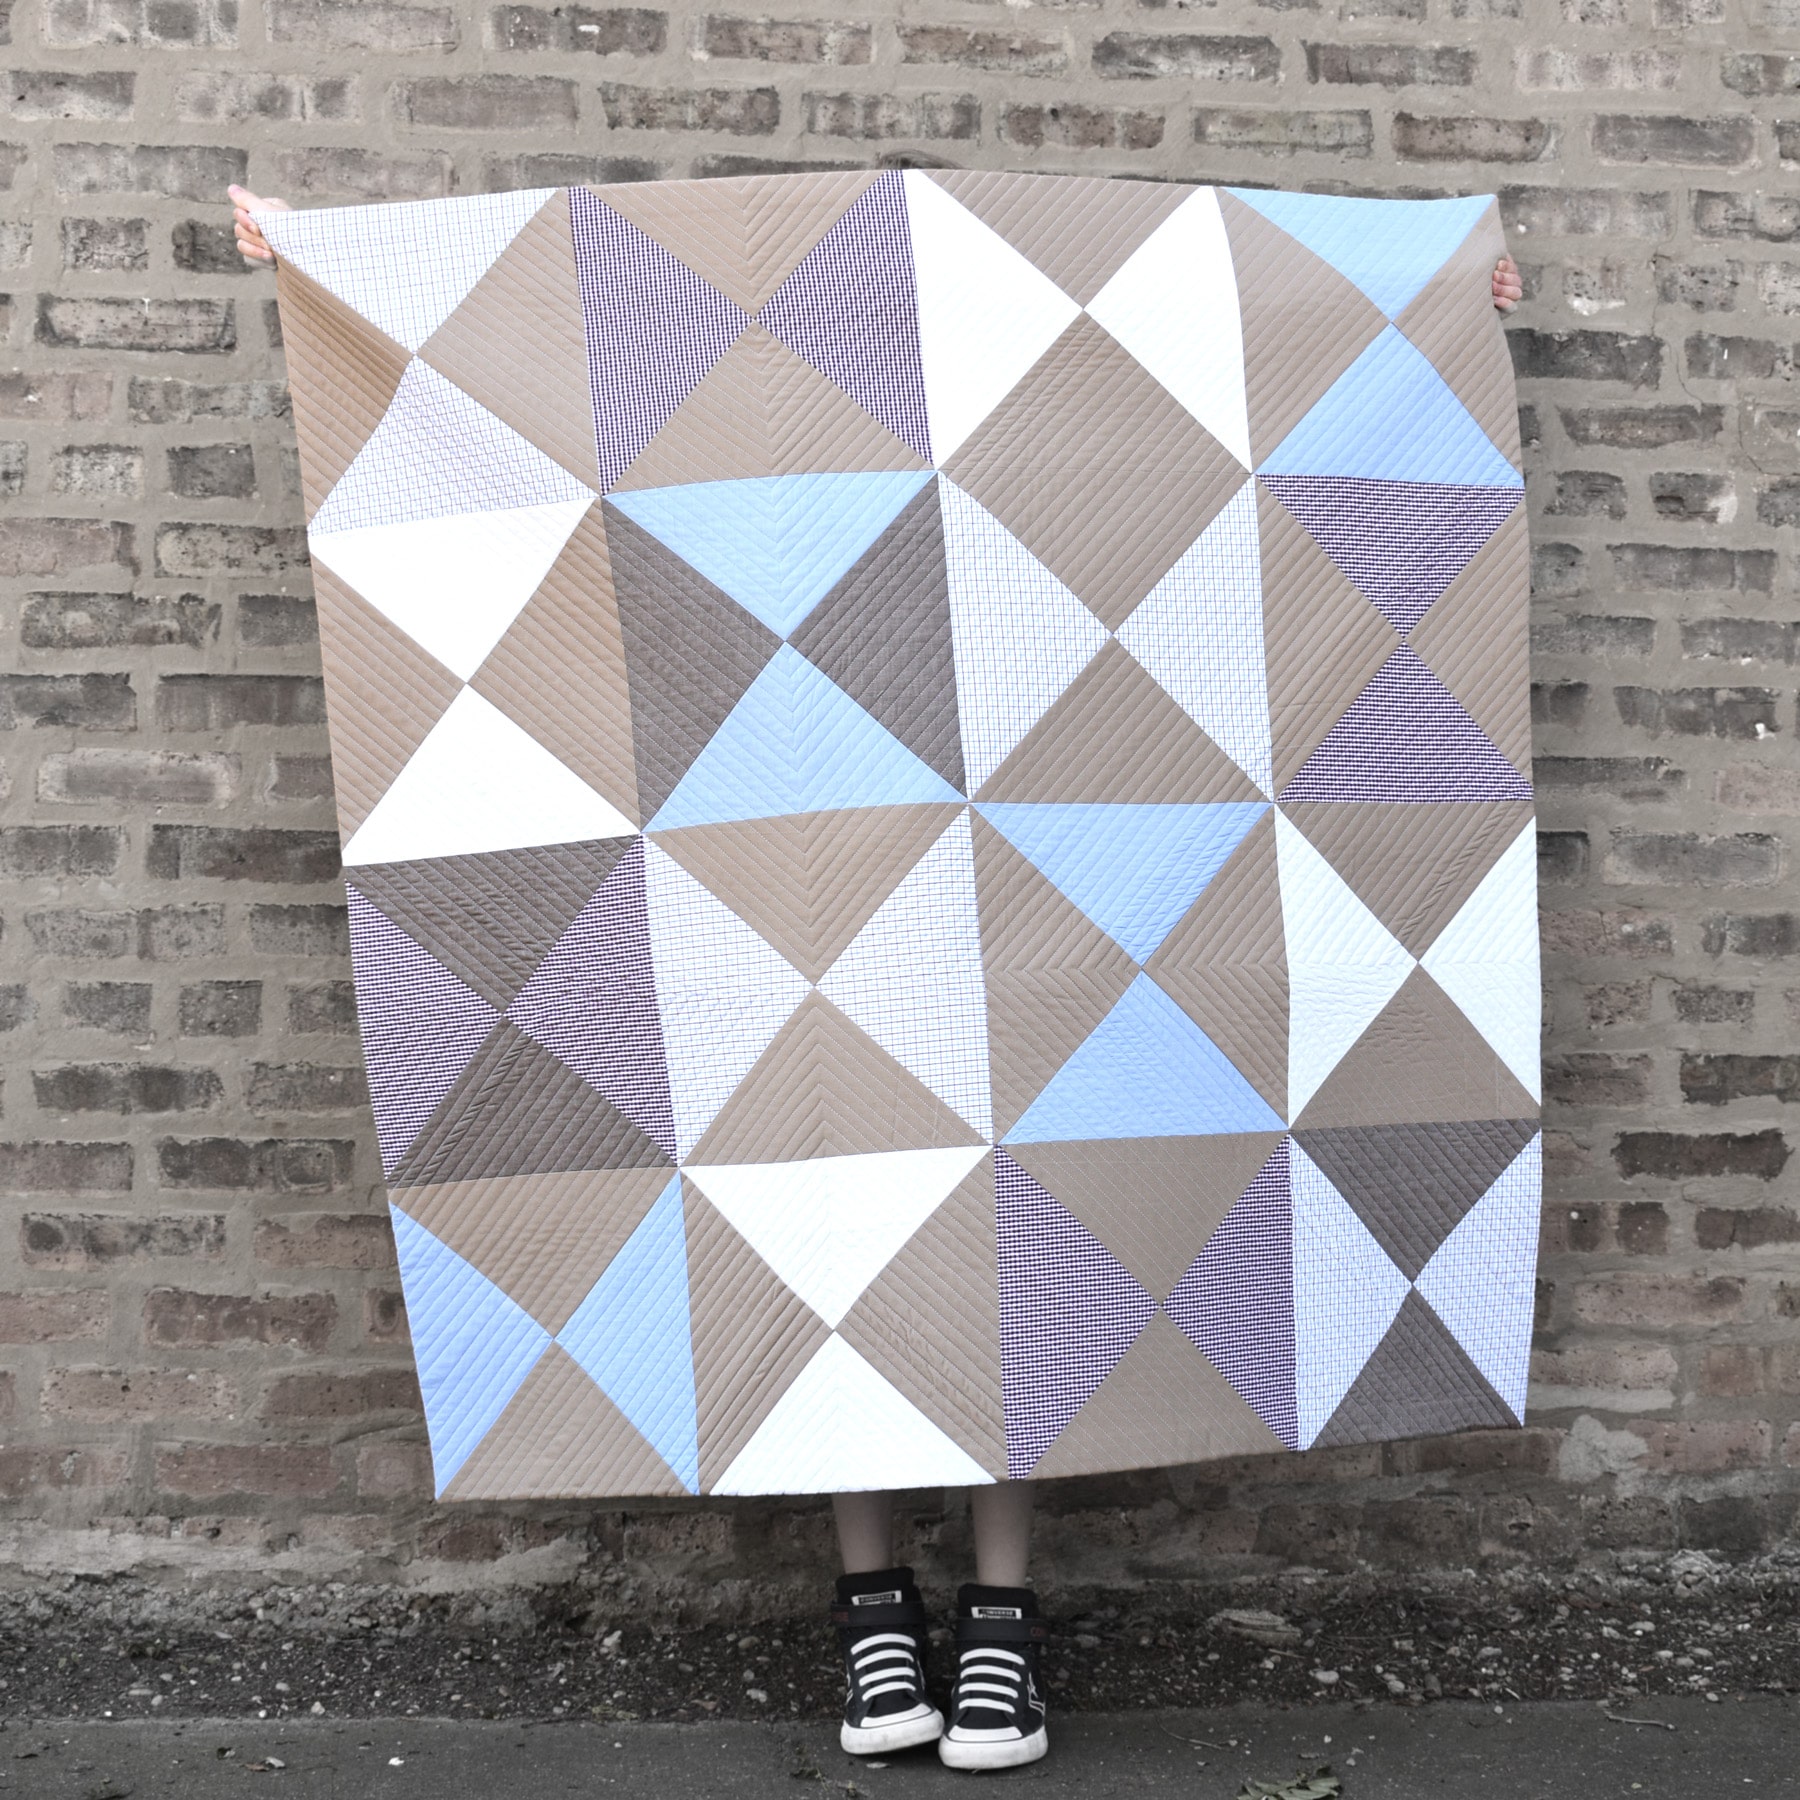
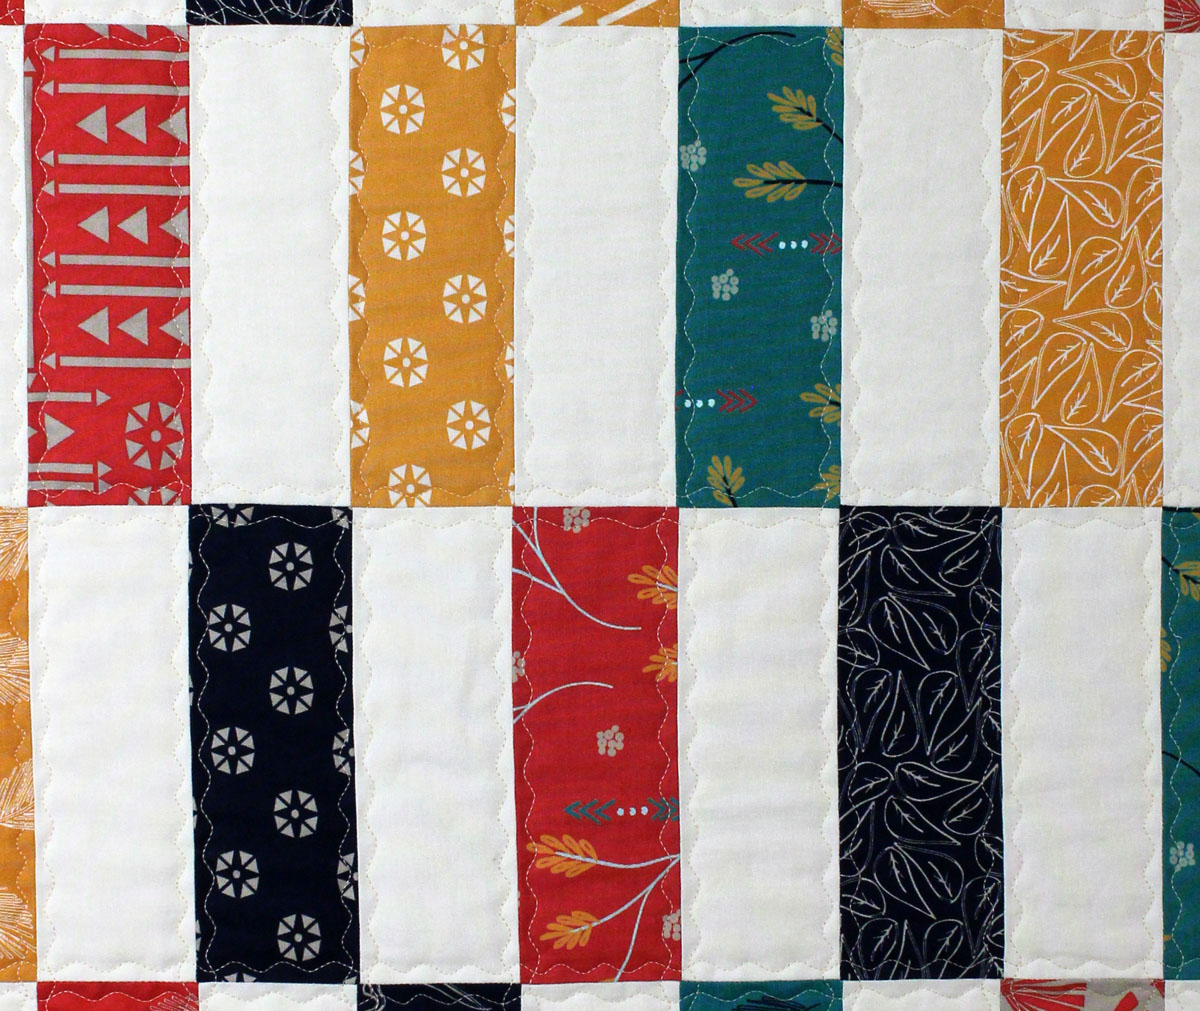
These large 12″ finished quilt blocks are made with a simple quarter square quilting ruler. These big blocks are fantastic because you can create a quilt very quickly. Plus, you can make so many different sizes with a 12″ block. You can use 9 blocks to make a 36″ x 36″ baby quilt, or use 16 blocks to make a 48″ x 48″ cuddle quilt (just like mine!). If you use 25 blocks to make a 60″ x 60″ quilt, the perfect size for an adult lap quilt.
Join me next week in part 2 of the Making a Memory Quilt series to learn how to make this simple cuddle quilt. I’ll show you how to use the quarter square ruler with your repurposed fabrics, and how to piece the blocks together. In part 3 of the series, I’ll show you how to baste and quilt your memory quilt, and I’ll show you a different way to finish off the quilt with a slim facing on the back.
Used Products


What you might also like


3 comments on “Making a Memory Quilt: Preparing The Materials”
-
-
I am currently making a memory quilt from my brothers shirts for his two grandchildren. I have 20 of his shirts so I am Praying that I will have enough fabric for 2 quilts! It takes awhile to deconstruct the shirts but with that behind me I am getting ready for the fun part. I am very glad I found this, so ladies “wish me luck”!!!
Kat
Keithville Louisiana-
It has been almost a year since I wrote in to the blog about the memory quilt I am working on and I have just a few more “Bear Paw” blocks to complete before adding my sashing etc. The process has been long but rewarding. Actually it has been like a healing process. I hope to set it on point but that is something I have not ever done. By the way,I had plenty of fabric from my brothers 20 flannel shirts.
I hope to finish this quilt top this year. I started out making two quilts but decided to just do one quilt for my sister-in-law.
-
Leave a Reply
You must be logged in to post a comment.

Erika I love the quilt you made with the big blocks and the quilting is beautiful! Cant wait to see how you created this. I have many shirts waiting to be used or layer cakes as well. Thank you