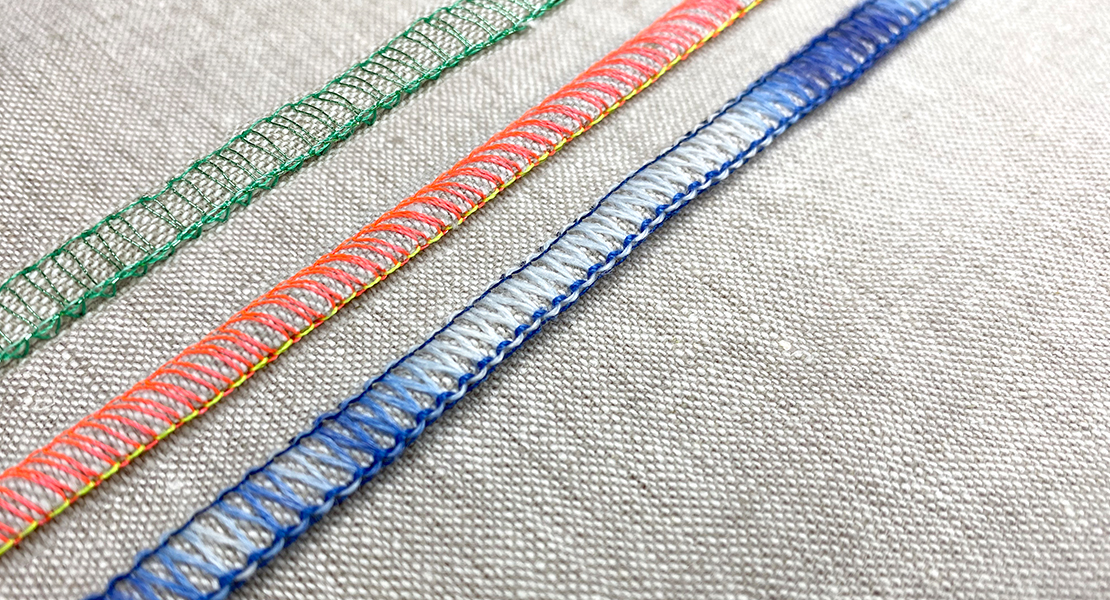
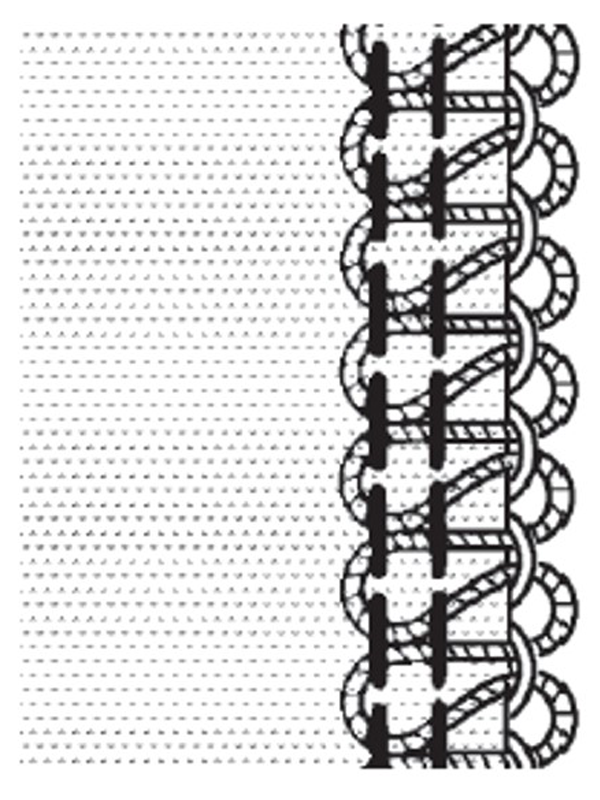
Overlocker Flatlock Stitch
The flatlock stitch is a fun and easy way to enhance your overlocker experience. This lesson will cover the variety of flatlock stitches that can be created using 2- or 3-threads, and the Right or Left needles. Discover how using the mtc (Micro Thread Control) function of the L 4 Series can aid in creating a perfectly flat stitch. Take these stitches a step further by adding decorative threads and changing settings like stitch length. Learn how this stitch can be used in many decorative ways, as well as a hem finish.

Supplies:
- BERNINA L 460
- Standard Presser Foot
- BERNINA L 460 Machine Manual (page 16, 21, 29, 49-50, 55-56)
- 12” x 12” cotton muslin fabric
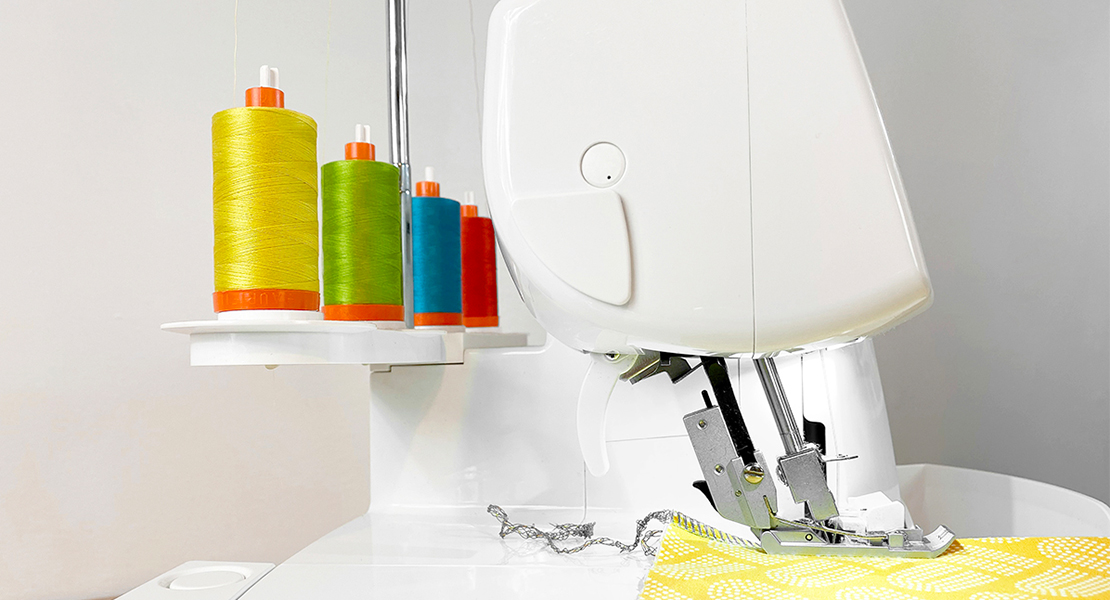
- Mettler Seracor thread (color order: yellow, green, blue, red)
- 80/12 Universal needle
- Micron pen or permanent fabric marker
Download the lesson handout here.
3-Thread Wide Flatlock (Left Needle)
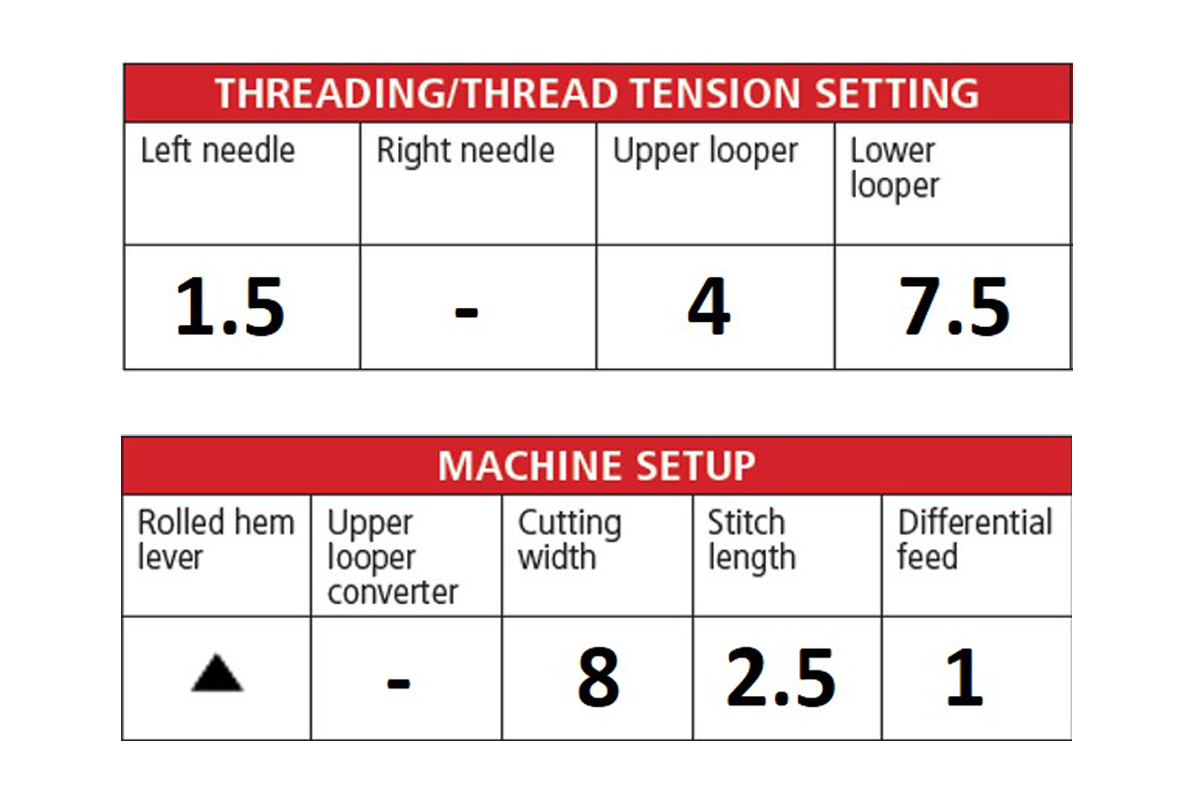
Start by setting the machine for a 3-thread wide flatlock.
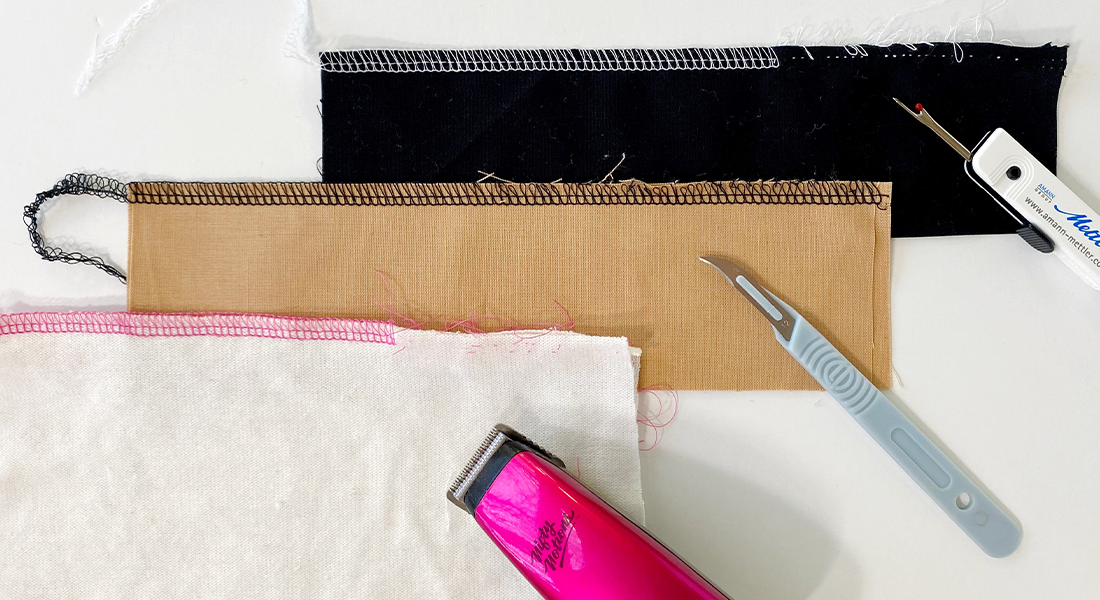
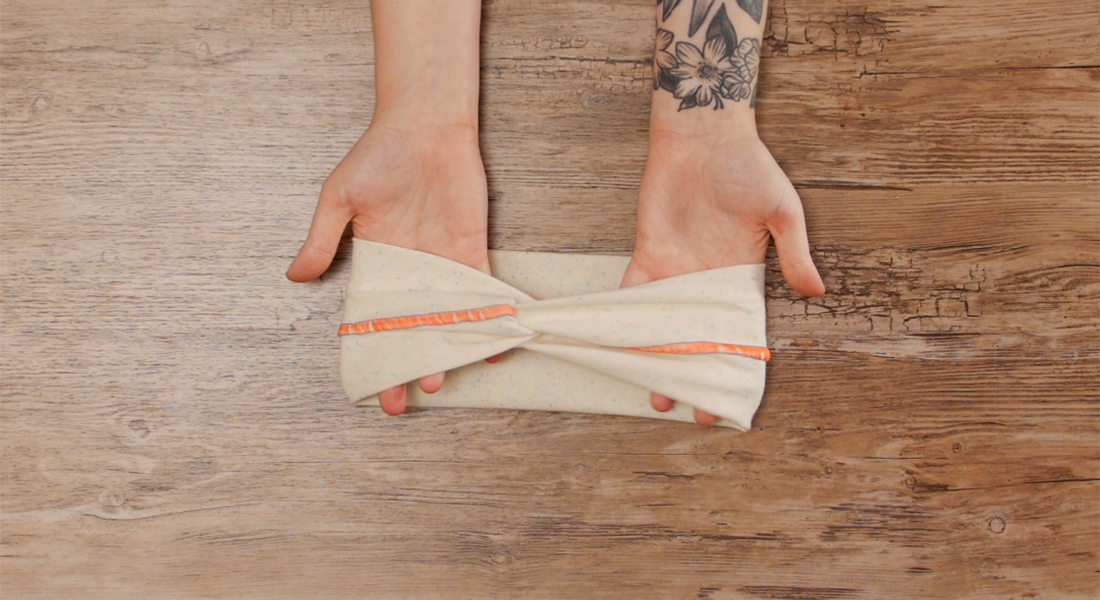
On the 12” x 12” muslin fabric, make a fold about 2” from the edge. Sew the flatlock, trimming off the folded edge.
Adjust the mtc (Micro Thread Control) to the “+” position to create more space in the loops at the fabric edge. This will make it easier to pull the fabric apart and lay flat.
Adjust the tension settings as needed until the desired stitch is achieved. Record these settings right onto the fabric sample with a micron pen or fabric marker.
Tip: Take the stitch plate off the machine to see how the stitch finger functions with the lever, as well as the mtc function.
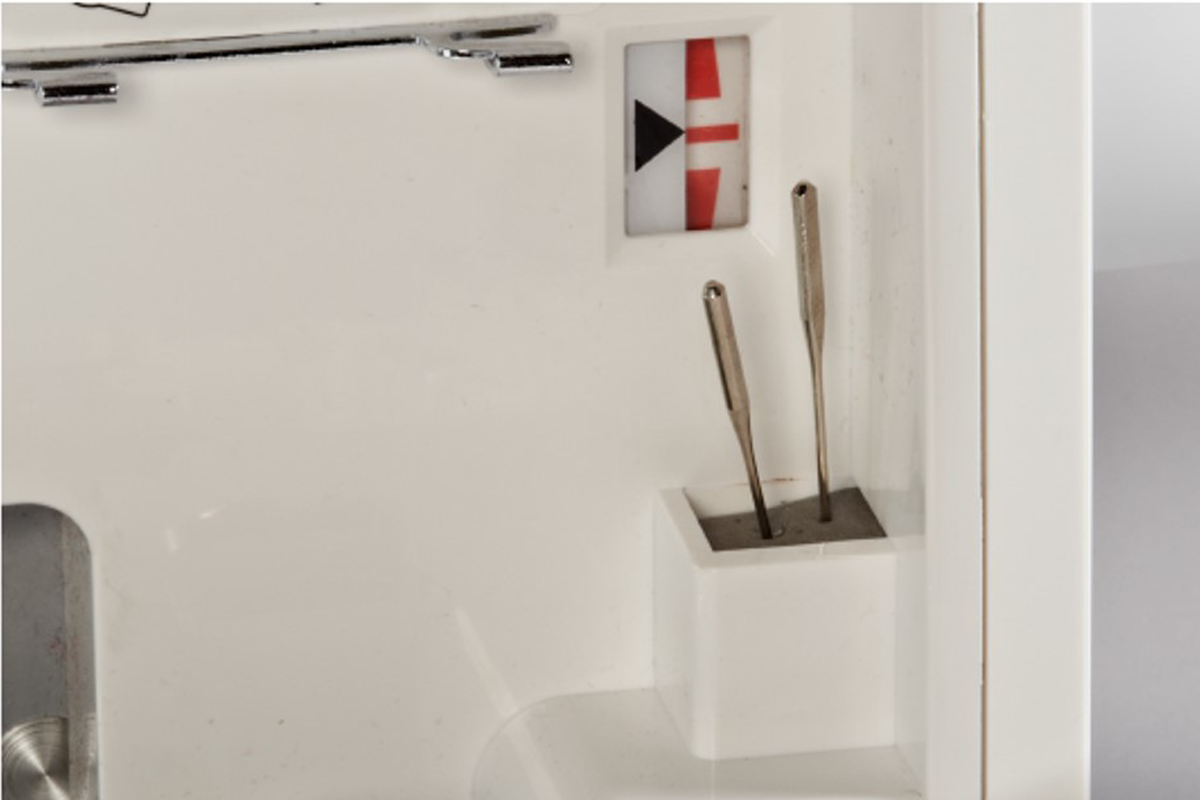
mtc (Micro Thread Control)
Adjust the mtc lever to the “+” position to create more space in the loops at the fabric edge. The mtc is most effective in the cutting widths of 6-8mm.
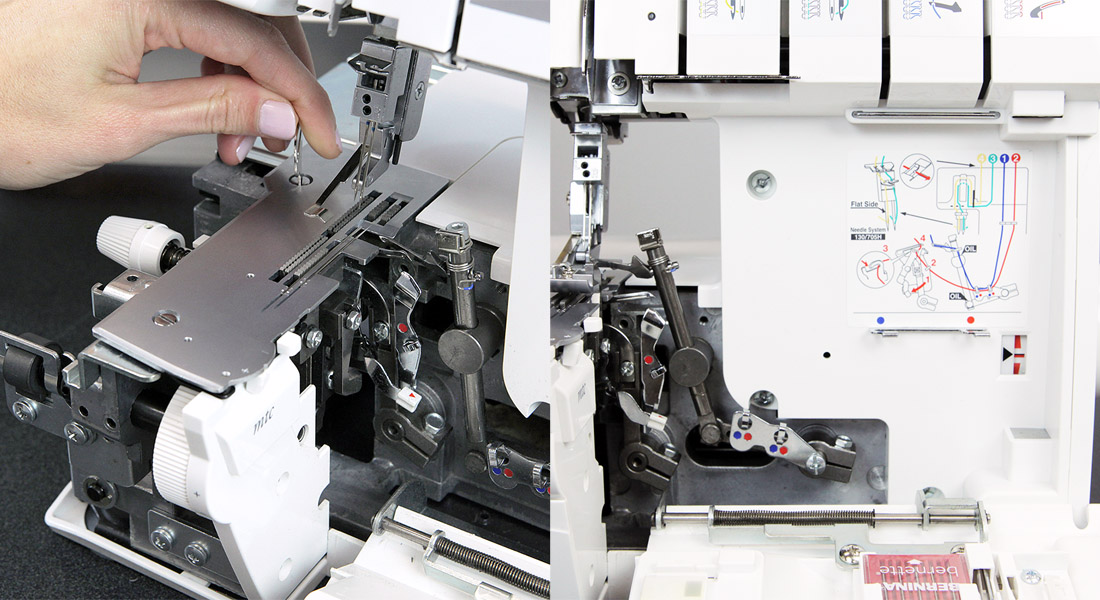
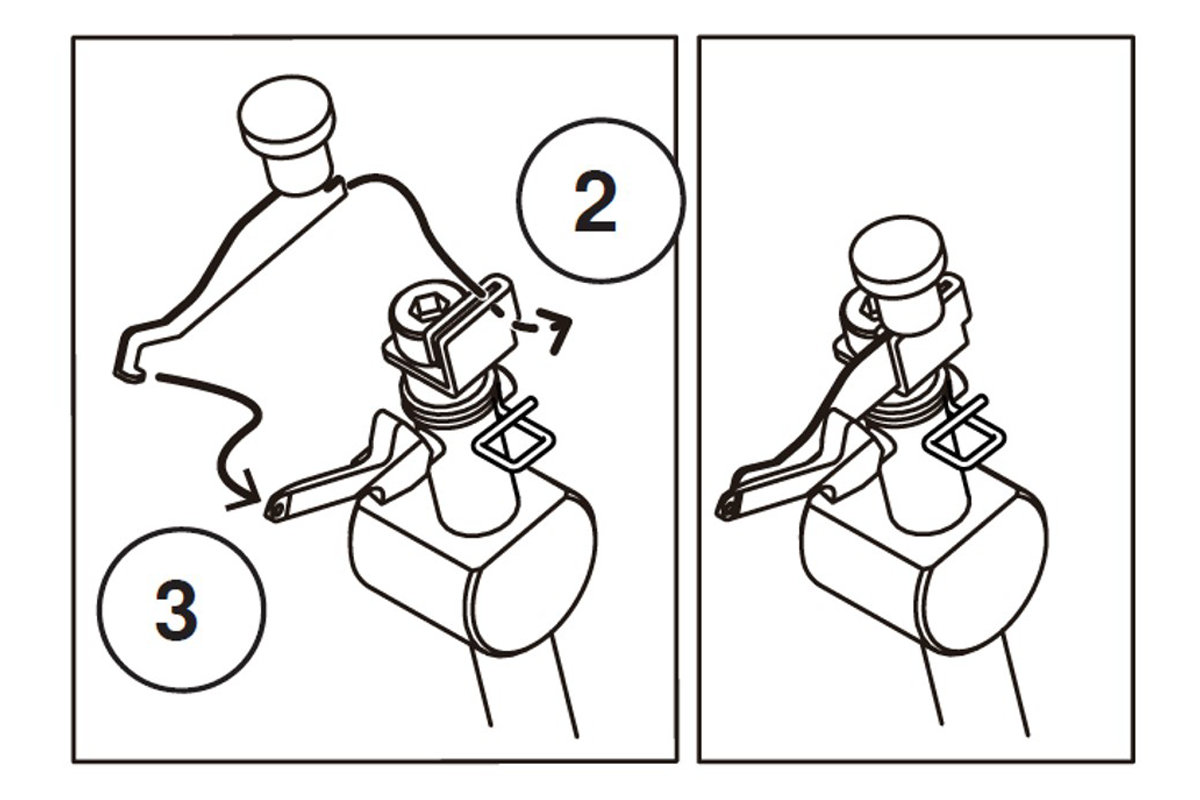
Needle Threader/Inserter Tool
Slide the needle inserter over the needle before loosening the set screw to avoid dropping the needle into the machine.
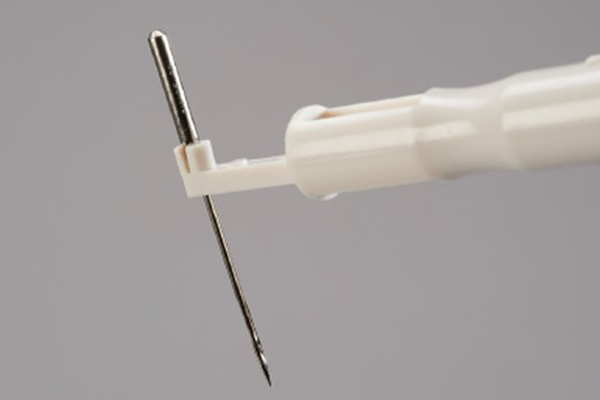
Use the needle inserter to hold the new needle in place while inserting and tightening the set screw.
Needle Pad
Use the built-in needle pad to store needles temporarily while they are not being used for the stitch. This is located behind the looper cover in the bottom right corner of the machine.
3-Thread Narrow Flatlock (Right Needle)
Now set the machine for a 3-thread narrow flatlock.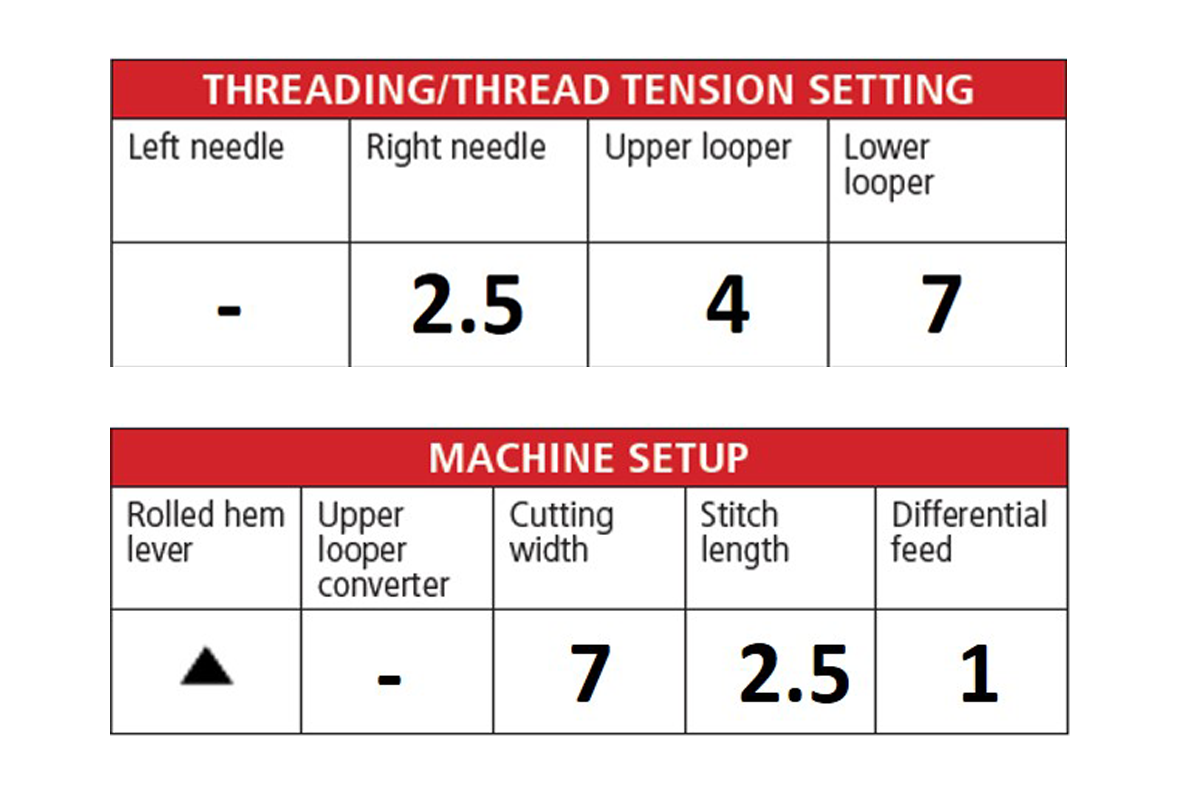
On the 12” x 12” muslin fabric, make a new fold about 2” from the last stitched edge. Sew the flatlock, trimming off the folded edge.
Adjust tension settings as needed until the desired stitch is achieved. Record these settings right onto the fabric sample with a pen or marker.
2-Thread Narrow Flatlock (Right Needle)
Set the machine for a 2-thread narrow flatlock.
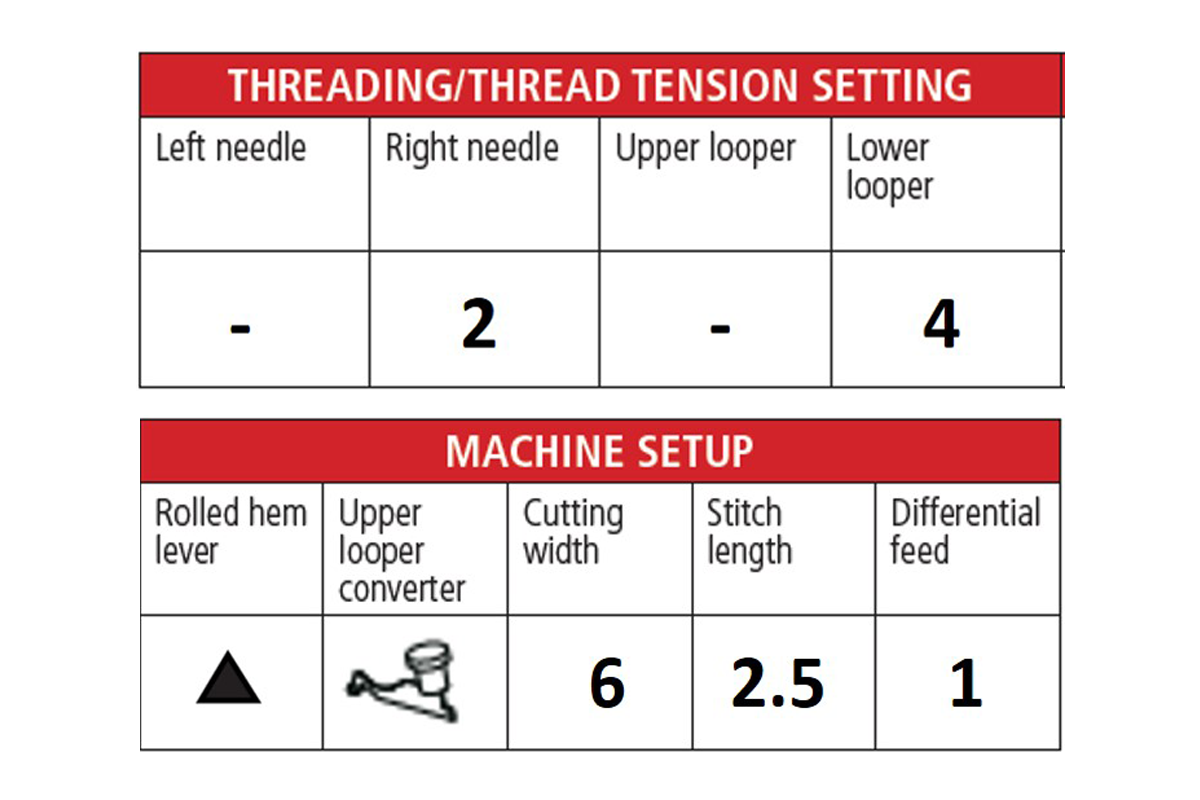
Install the looper converter to the upper looper, making sure that the lower looper thread is out of the way. Slide the converter into the bracket on the upper looper from right to left. Make sure that the converter is attached firmly and closes the upper looper eye.
On the 12” x 12” muslin fabric, make a new fold about 2” from the last stitched edge. Sew the flatlock, trimming off the folded edge.
Adjust tension settings as needed until the desired stitch is achieved. Record these settings right onto the fabric sample with a pen or marker.
2-Thread Wide Flatlock (Left Needle)
Finally, set the machine for a 2-thread wide flatlock.

Using the needle inserter, install the left needle back into the machine and thread the left needle thread path. Remove the thread and right needle from the machine. Store the unused needle in the needle storage pad. Adjust the settings, including the stitch length adjusted to 3.5.
Tip: Add needles first, then remove unused needles when installing needles back into the machine. It is easier to align the needle with the needle bar when a needle still remains in the needle bar.
On the 12” x 12” muslin fabric, make a new fold about 2” from the last stitched edge. Sew the flatlock, trimming off the folded edge.
Adjust tension settings as needed until the desired stitch is achieved. Record these settings right onto the fabric sample with a pen or marker.
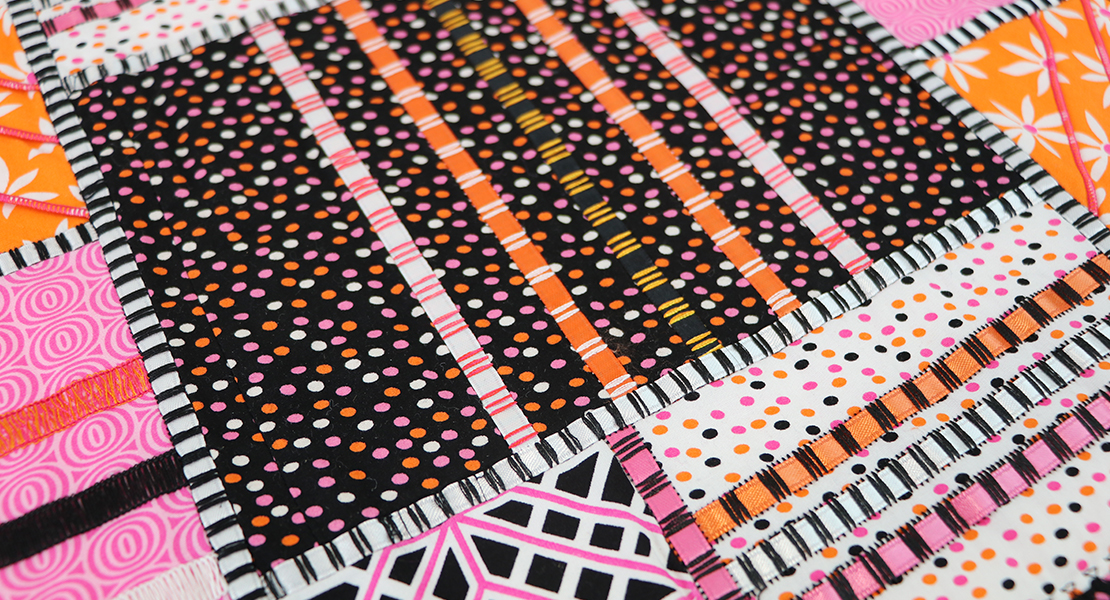
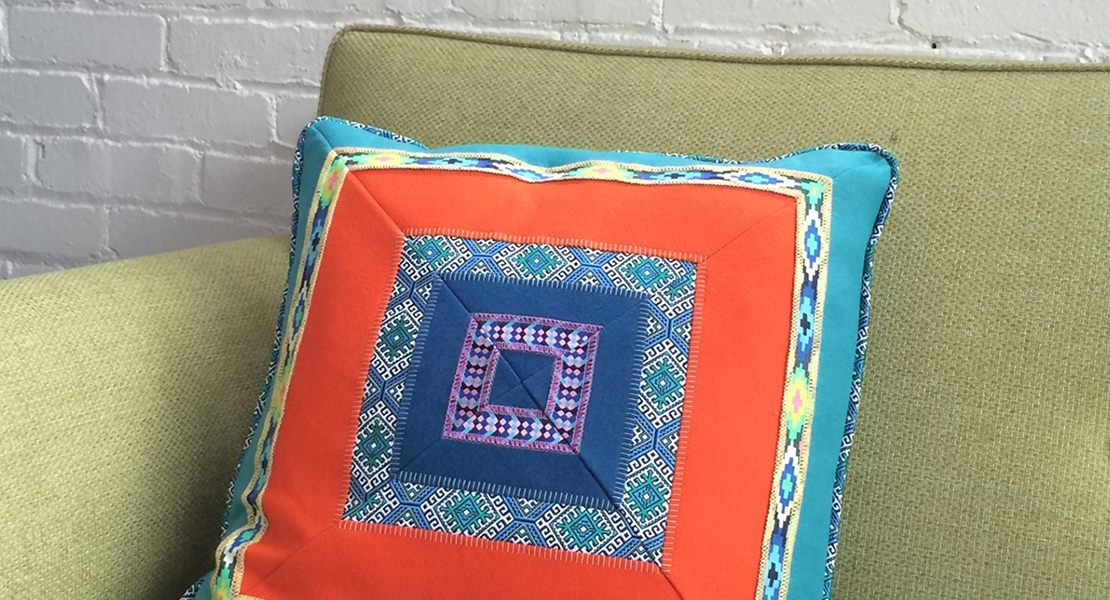
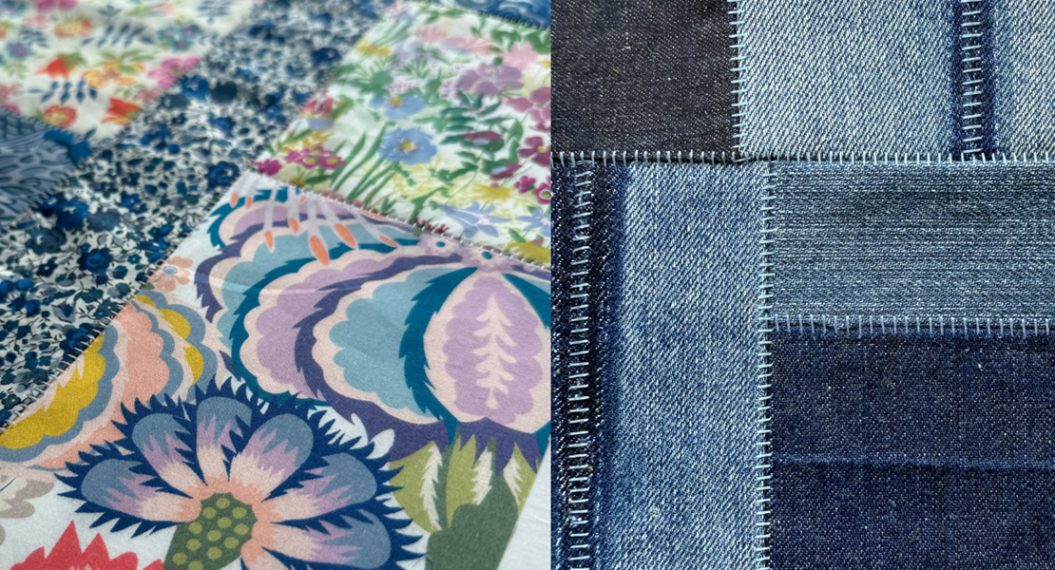
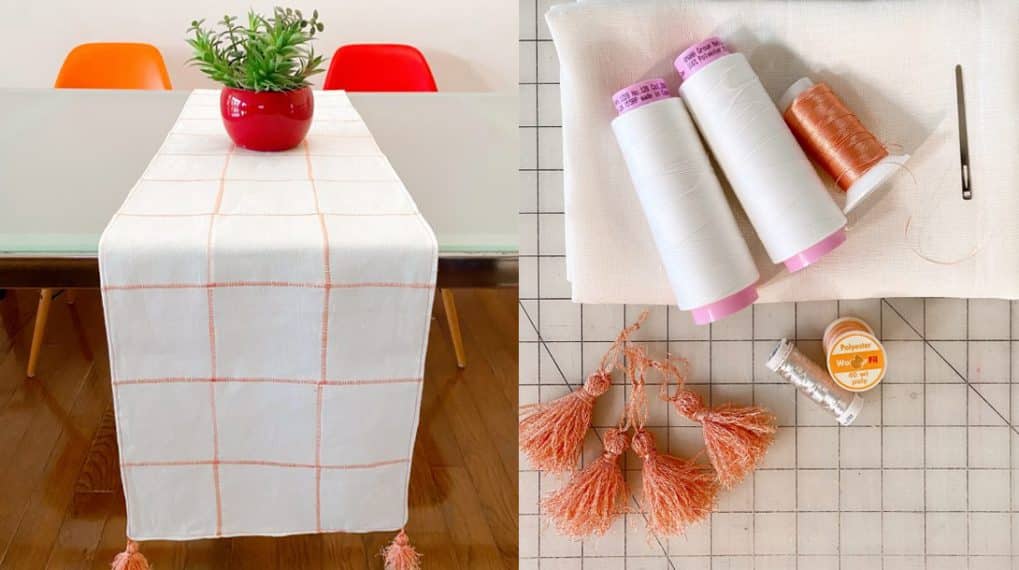
For more project ideas using variations of the flatlock stitch, check out: