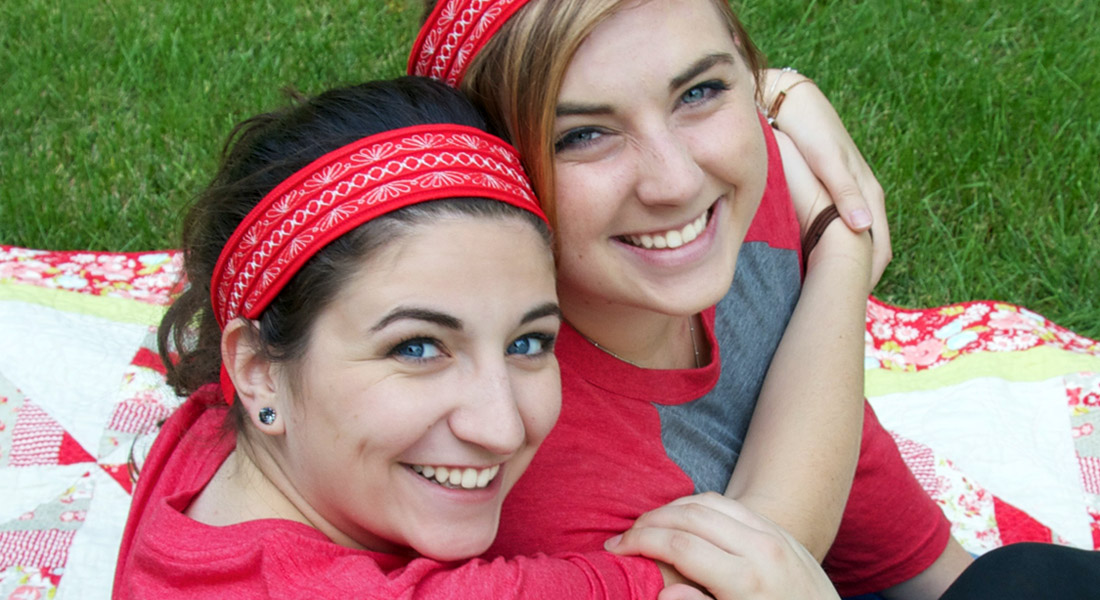
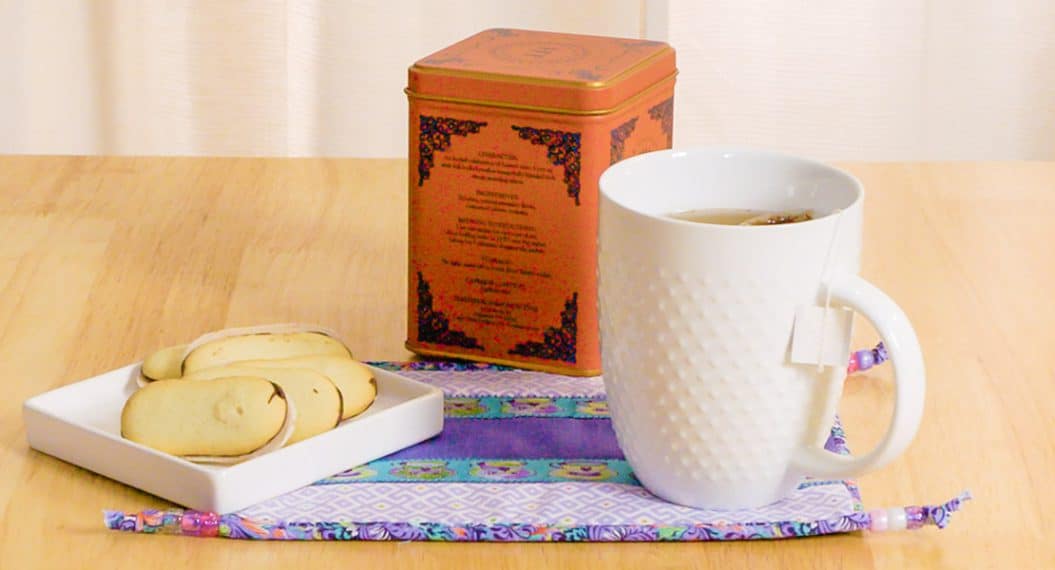
Fabulous Flatlock and Pintuck Placemat
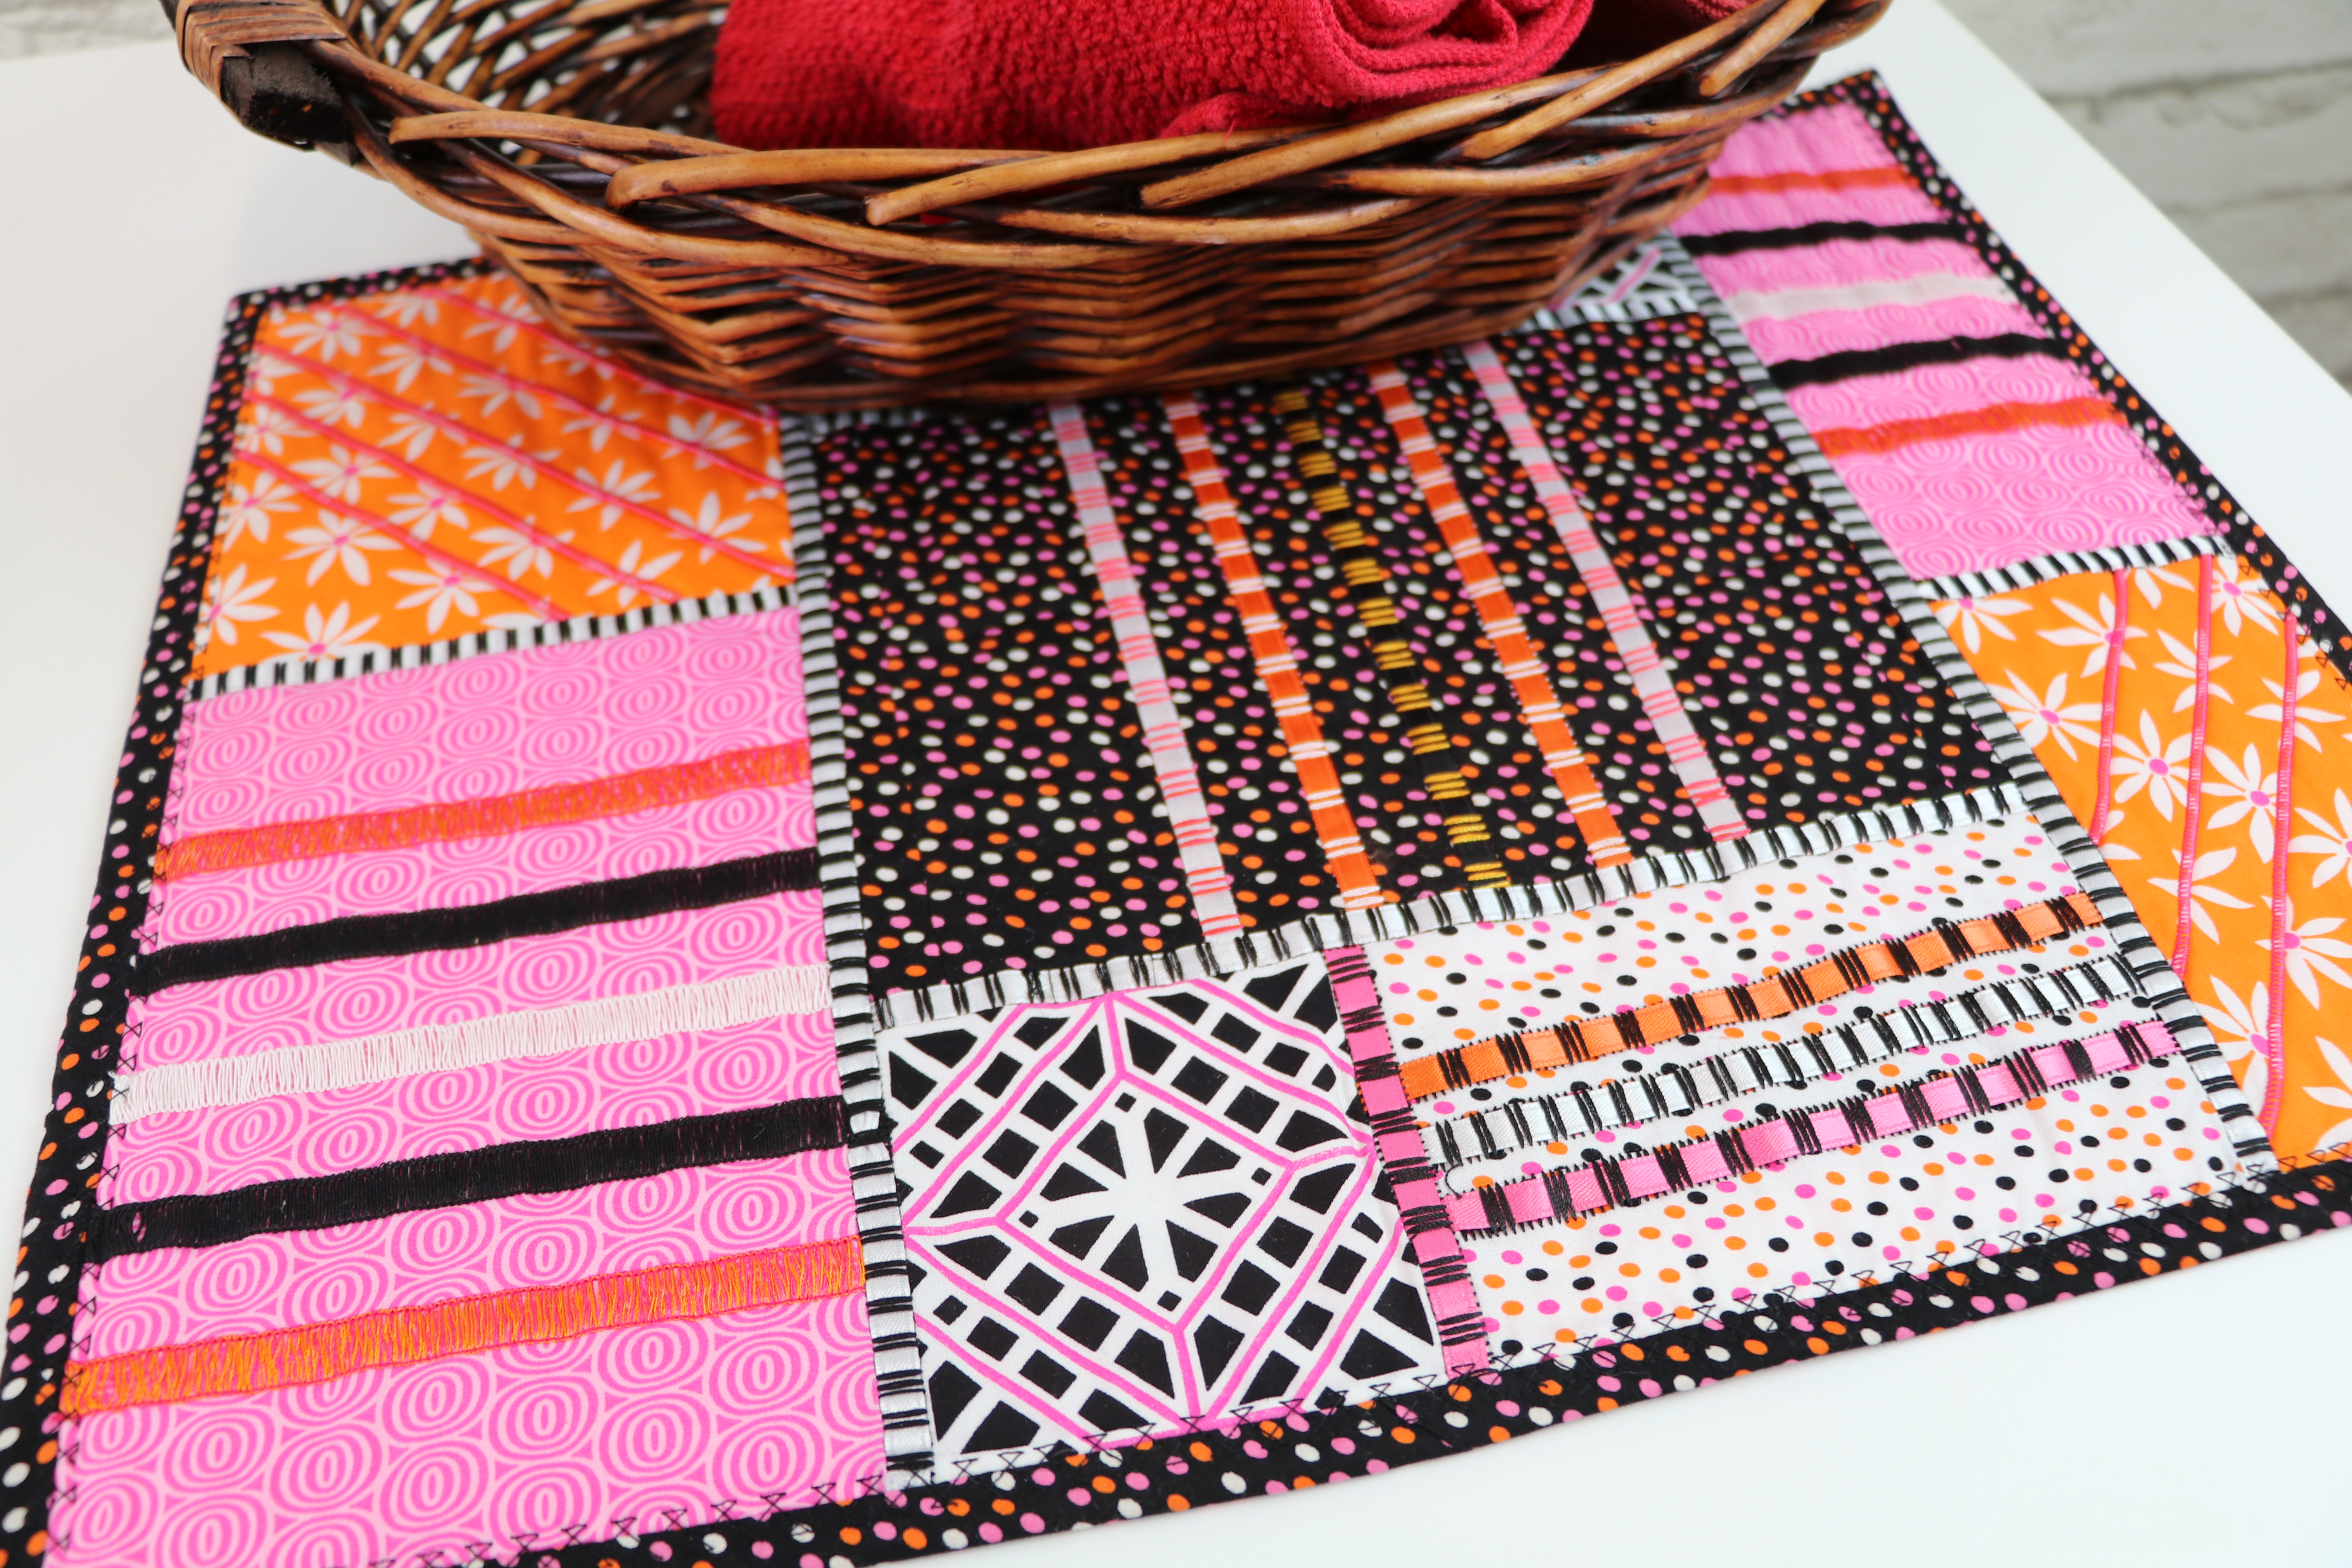
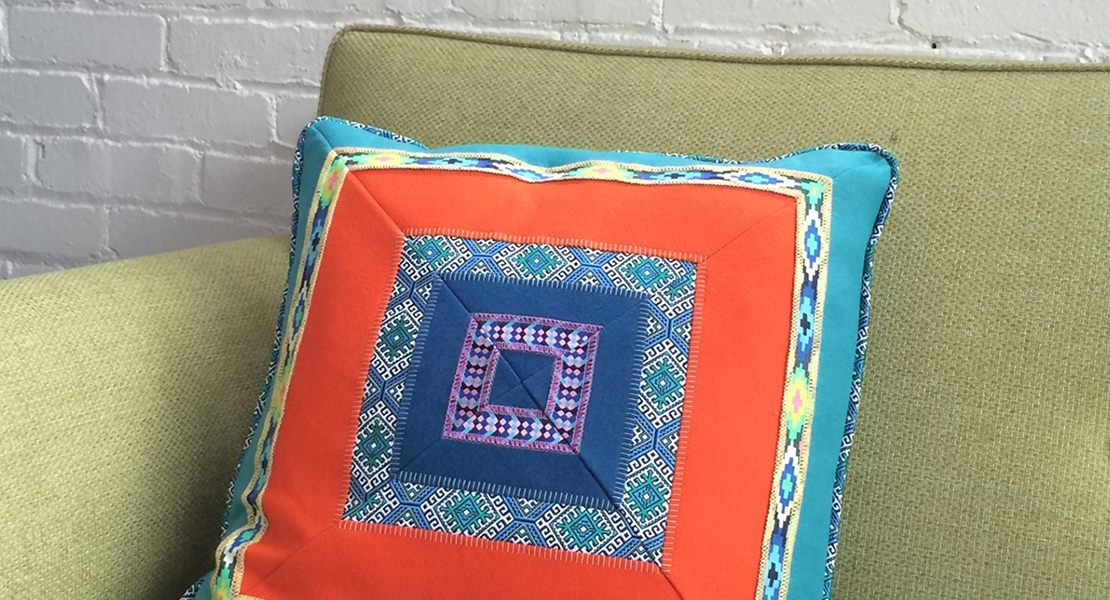
Welcome to the creative world of your L 850 overlocker! Have you ever wondered whether your overlocker can do more than just finish seams? Here’s a project to discover some of the amazing decorative stitches and embellishment techniques that will take your table décor and future projects to a whole new level. Add surface dimension with rolled hem pintucks. And the flatlock and reverse flatlock stitching do double duty as construction and embellishment stitches. Weaving ribbons through the reverse flatlock ladders adds visual complexity and beautiful definition to the stitching. You’re going to be blown away…so let’s get started!
Finished Dimensions: 14 inches x 18 inches (approximately)
Please read through all instructions before beginning. Test machine settings and thread(s) for each decorative stitch.
Note: Each block cutting dimension is larger than its finished size. Flatlock, reverse flatlock and pintuck stitching all “eat up” fabric length and/or width. After stitching is complete, you’ll trim each block to the designated dimensions. The larger dimension allows you to center your stitching too.
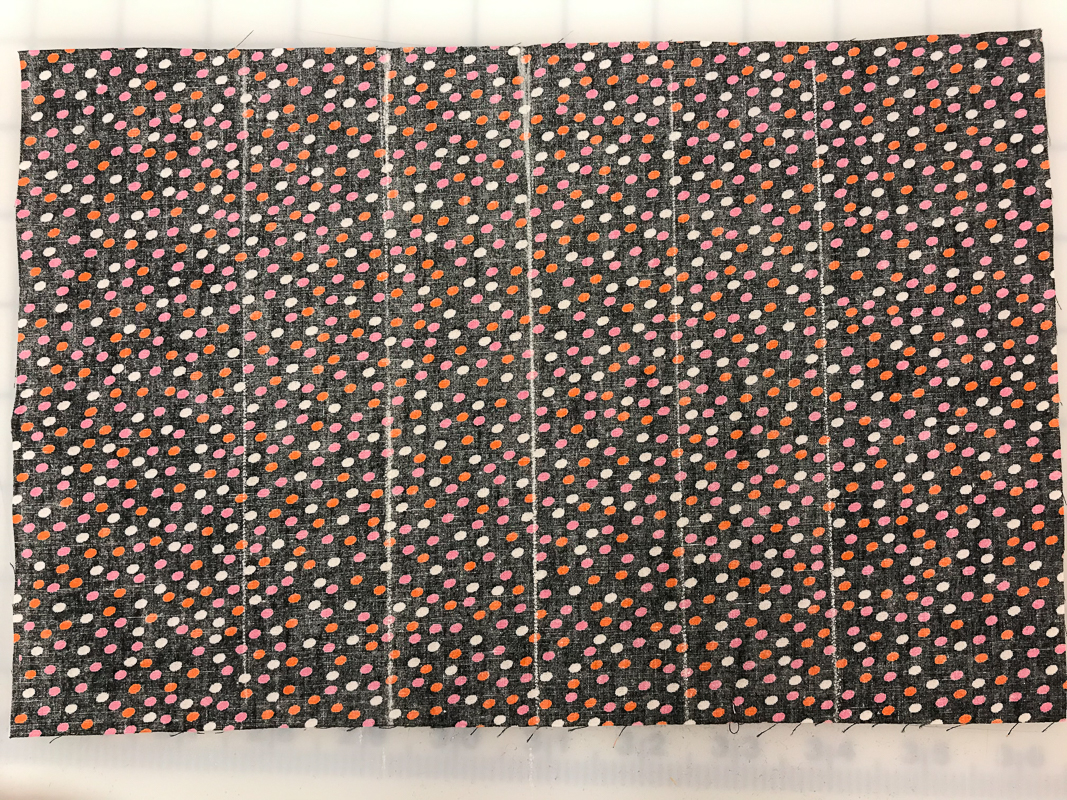
The placemat shown has six different fabrics (including the backing). You may use more or fewer for your placemat, so fabric yardage may vary accordingly. Directional prints may also require more fabric. The fabrics shown here are Benartex Kanvas Studio collection in Fruit Punch.
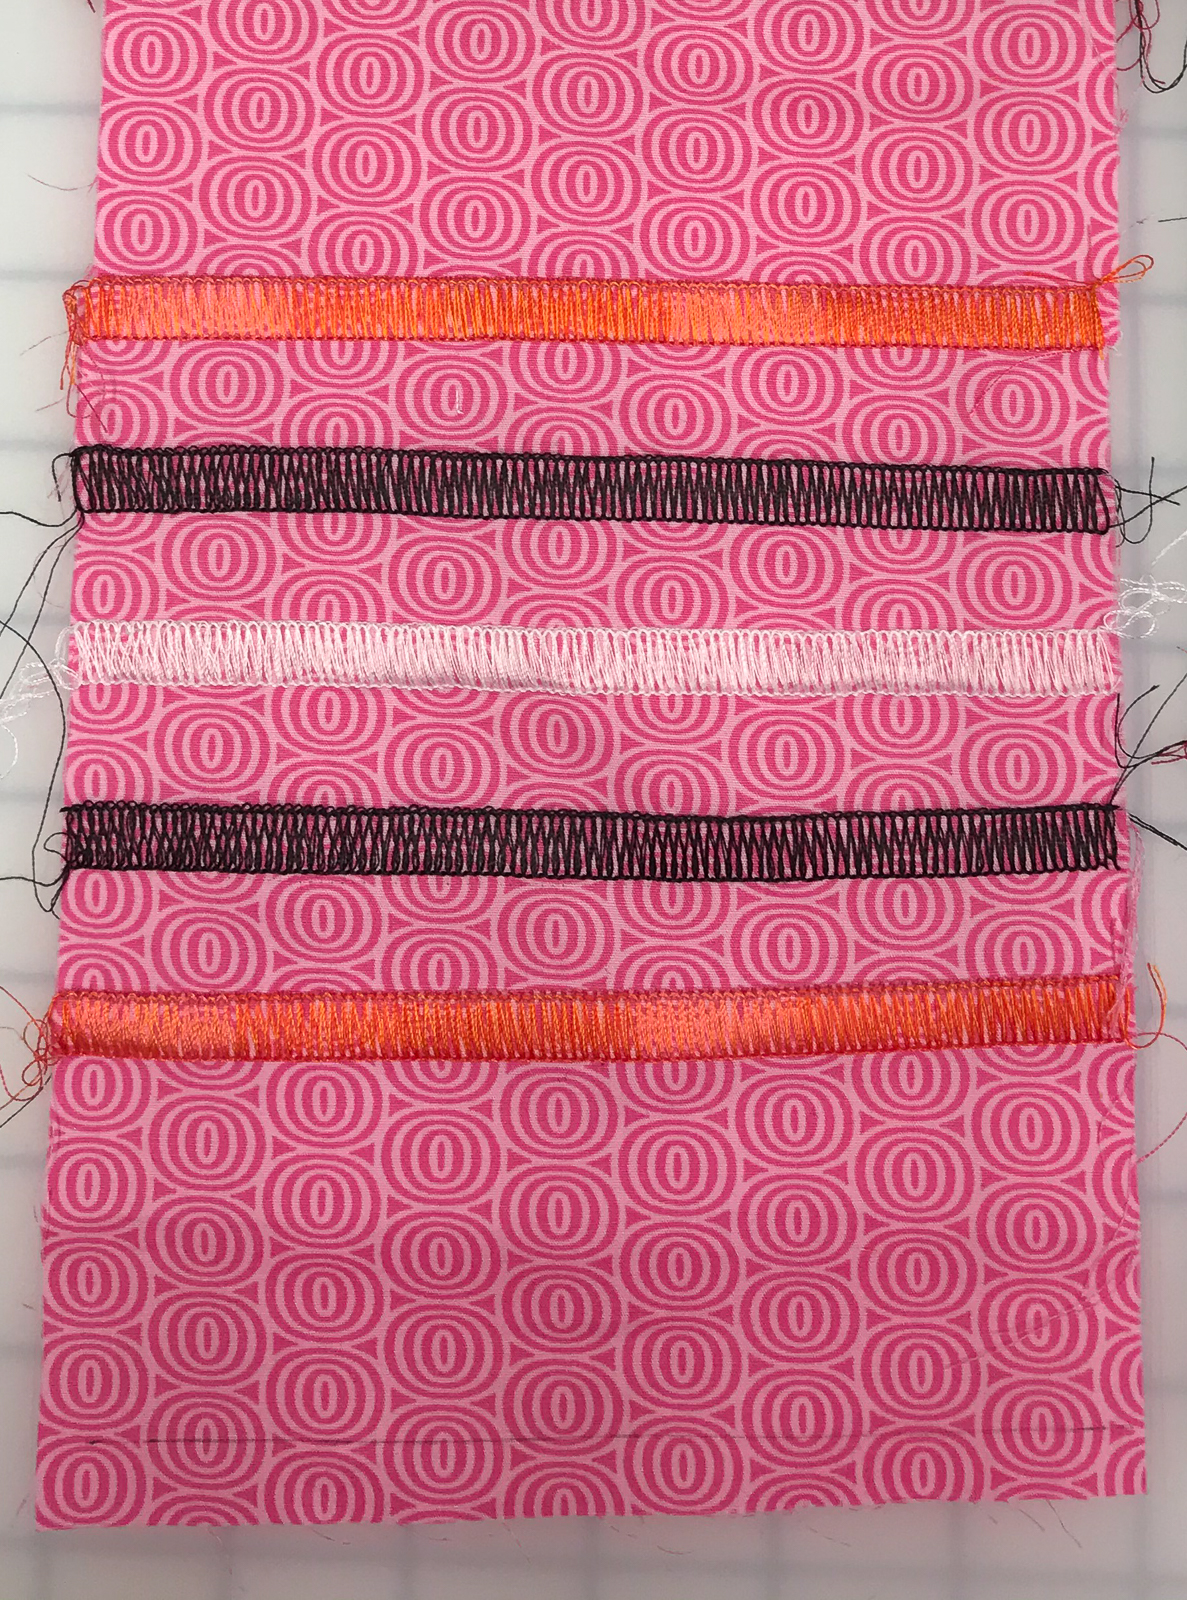
Four different color ribbons are woven through the reverse flatlock stitching. You can vary the number of colors or choose not to weave ribbons. Alternating various thread colors adds interest to flatlocking and weaving.
Materials to sew fabulous flatlock and pintuck placemat
- Fabric (6 quilting weight cottons): (A, B, C, D) = ⅜ yard each; (E, F) = ½ yard each
- Flatlock/reverse flatlock: 30 weight or 12 weight decorative threads; 3 or 4 different colors
- Pintucks: machine embroidery thread is a good choice
- 3 cones serger thread (coordinating color)
- Ribbon: 4 or 5 colors: ¼ inches wide 1 -2 yards each (optional)
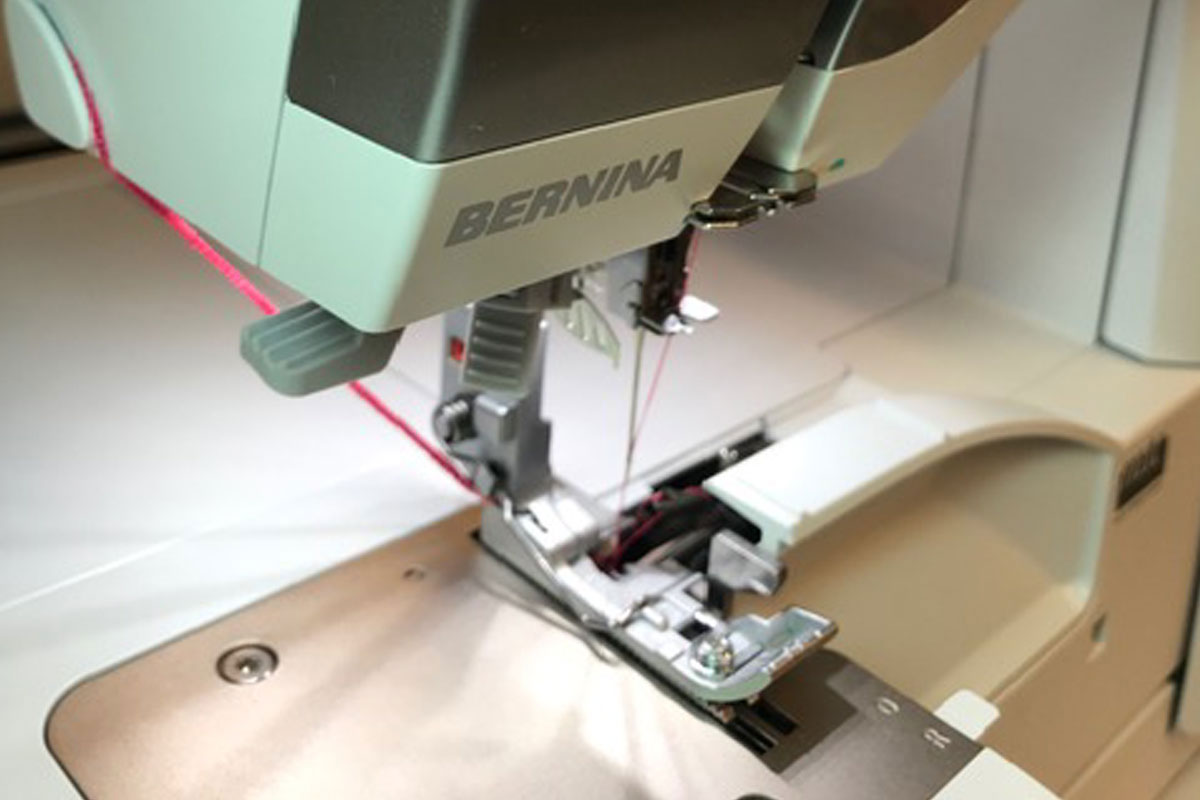
- 4-thread overlocker/serger
- Sewing machine (for binding)
- Low loft batting 15 inches x 19 inches
Notions to sew fabulous flatlock and pintuck placemat
- Marking tools: chalk, water/air/heat erasable marker,
- Topstitch needle: size 80/12 or 90/14
- Universal needle: size 80/12 or 90/14
- Bodkin, double eye needle or upholstery needle for weaving ribbons (optional)
- Temporary basting spray if using non-fusible batting
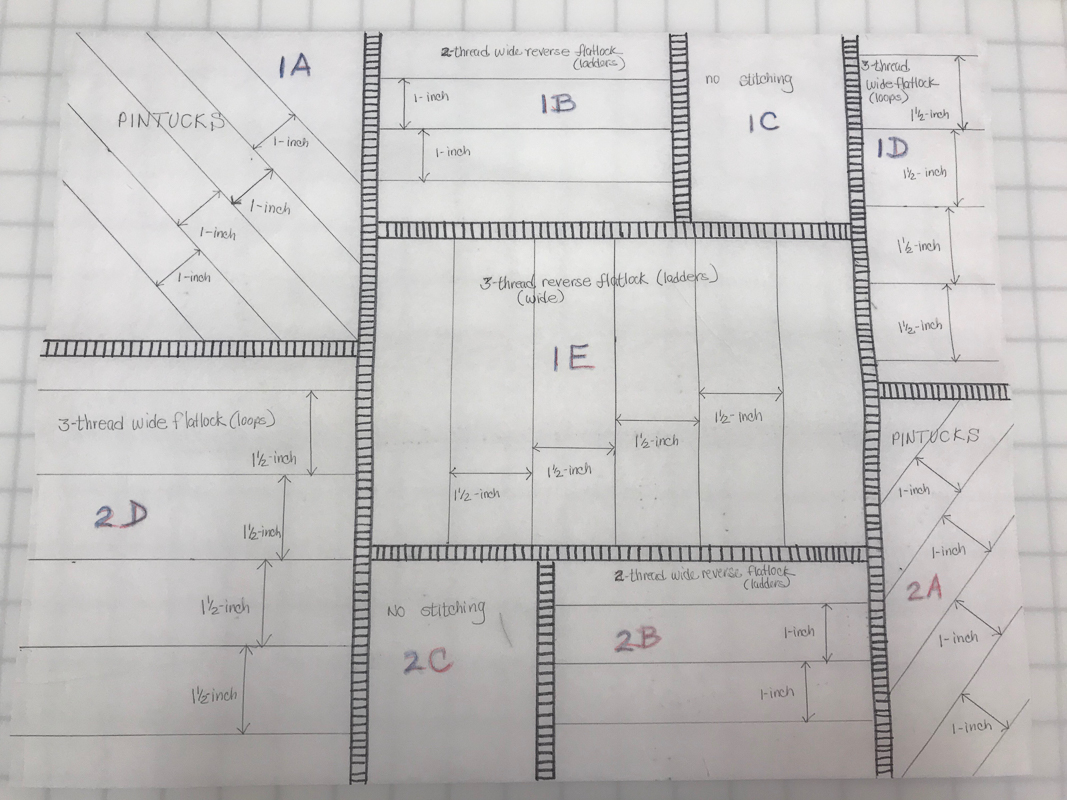
Cutting Instructions for fabulous flatlock and pintuck placemat
- 1A: 9-inch x 9-inch square 2A: 5-inch x 9-inch
- 1B & 2B: 6-inch x 7-inch
- 1C & 2C: 4 ¼-inch squares
- 1D: 5-inch x 9-inch
- 2D: 12-inch x 6 ½-inch
- 1E: 14-inch x 7 ½-inch
- E: Binding: 2 ½-inch x 72-inch
- F: 15-inch x 19-inch (Backing)
- Low loft batting: 15-inch x 19-inch
Construction for fabulous flatlock and pintuck placemat
Tips: For efficiency and to minimize changing needle positions, threads and machine settings, stitch fabric blocks that showcase the same stitch techniques. For example, 1A and 2A each have pintucks.
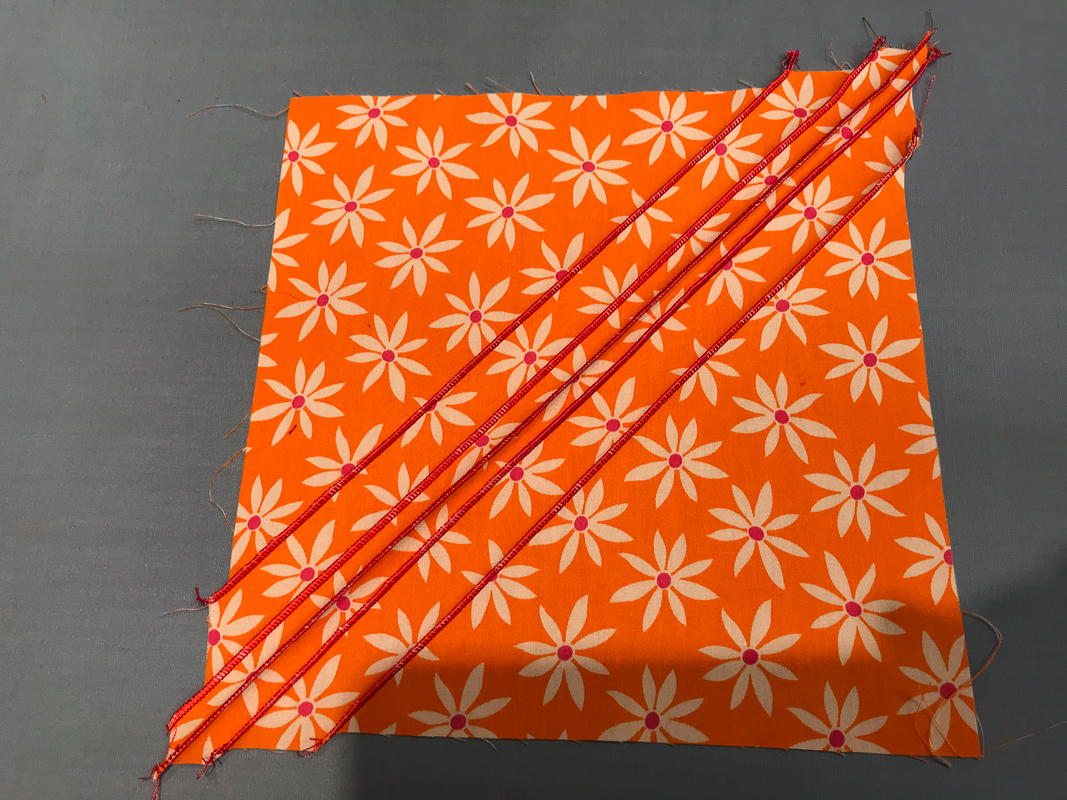
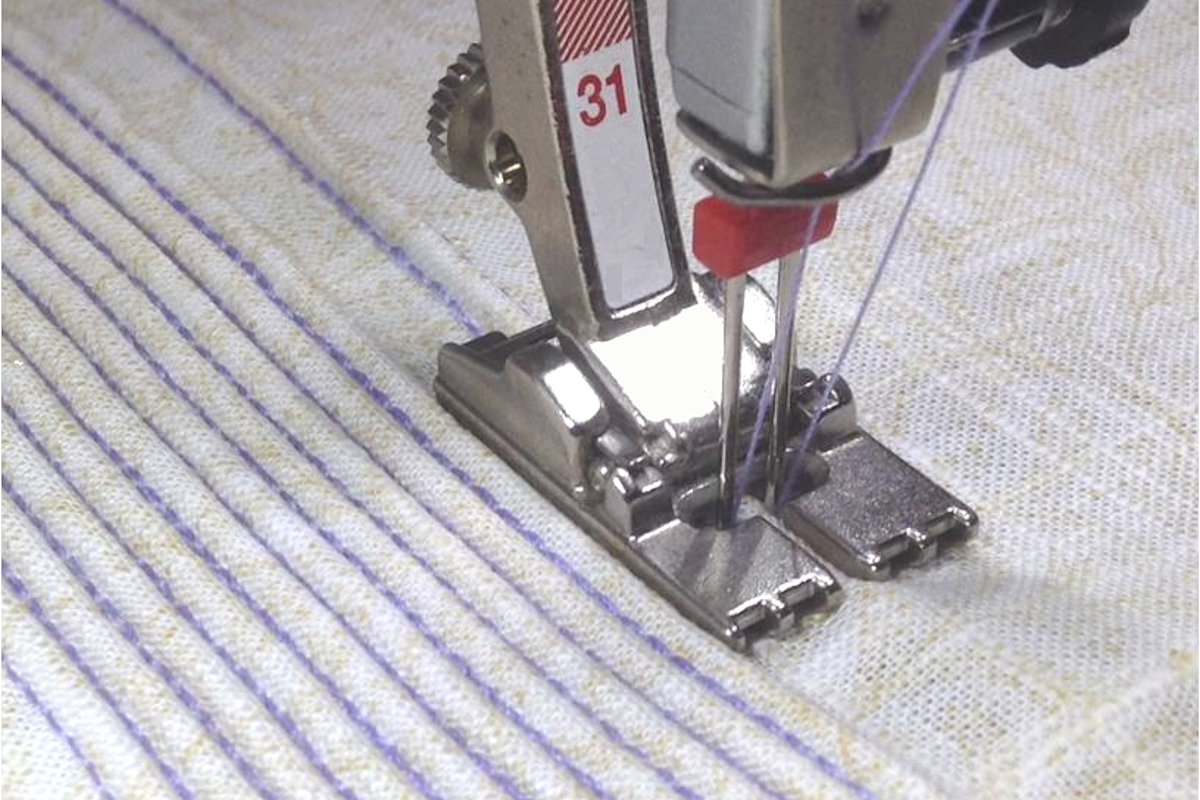
1A and 2A: Rolled hem pintucks
Machine set-up:
- R overlock needle: tension: 4.0 coordinating color serger cone thread
- UL: tension 4.0 machine embroidery thread
- LL: tension 6.0 (check owner’s manual) coordinating color serger cone thread
- Stitch length: 1.0
- Differential feed: 1.3*
*The differential feed setting is slightly higher because stitching on a diagonal grain line can cause stretching.
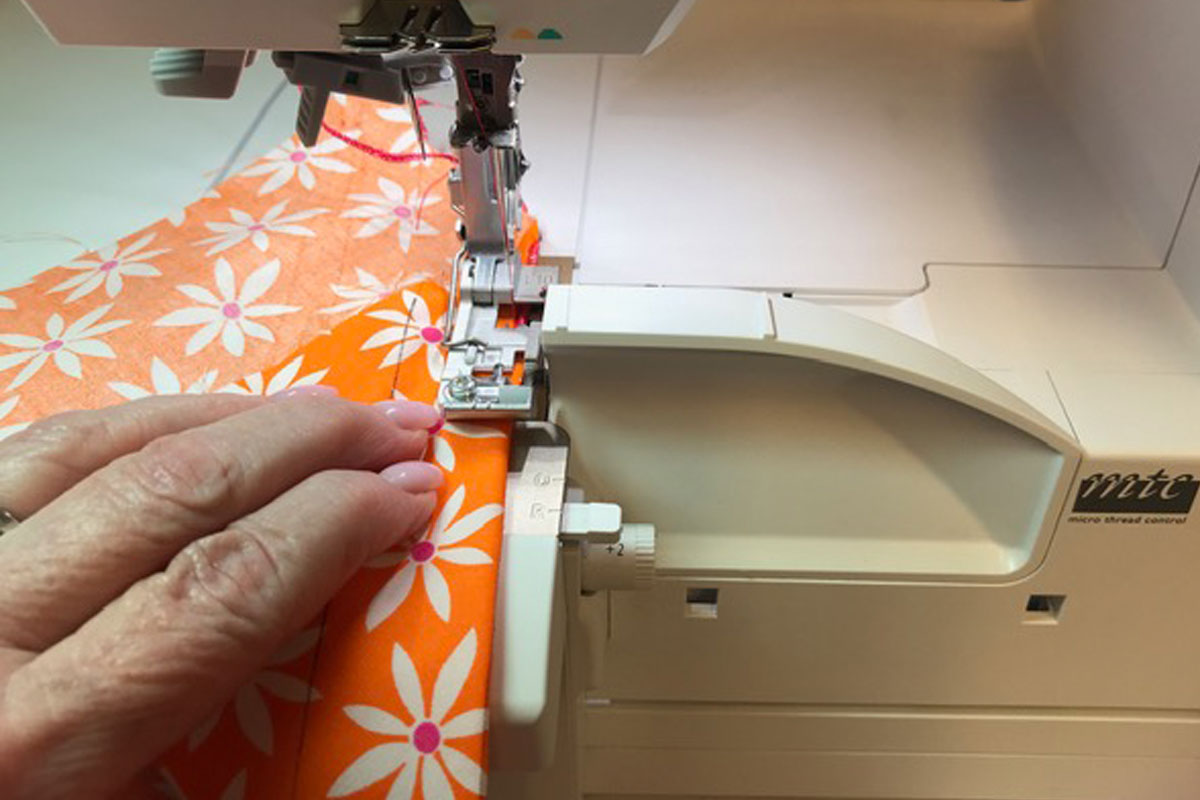
Tip: A rolled hem thread chain sometimes “pigtails” or curls. Chain off and cut the tail into the thread cutter, which will hold the thread in place while you begin each stitch.
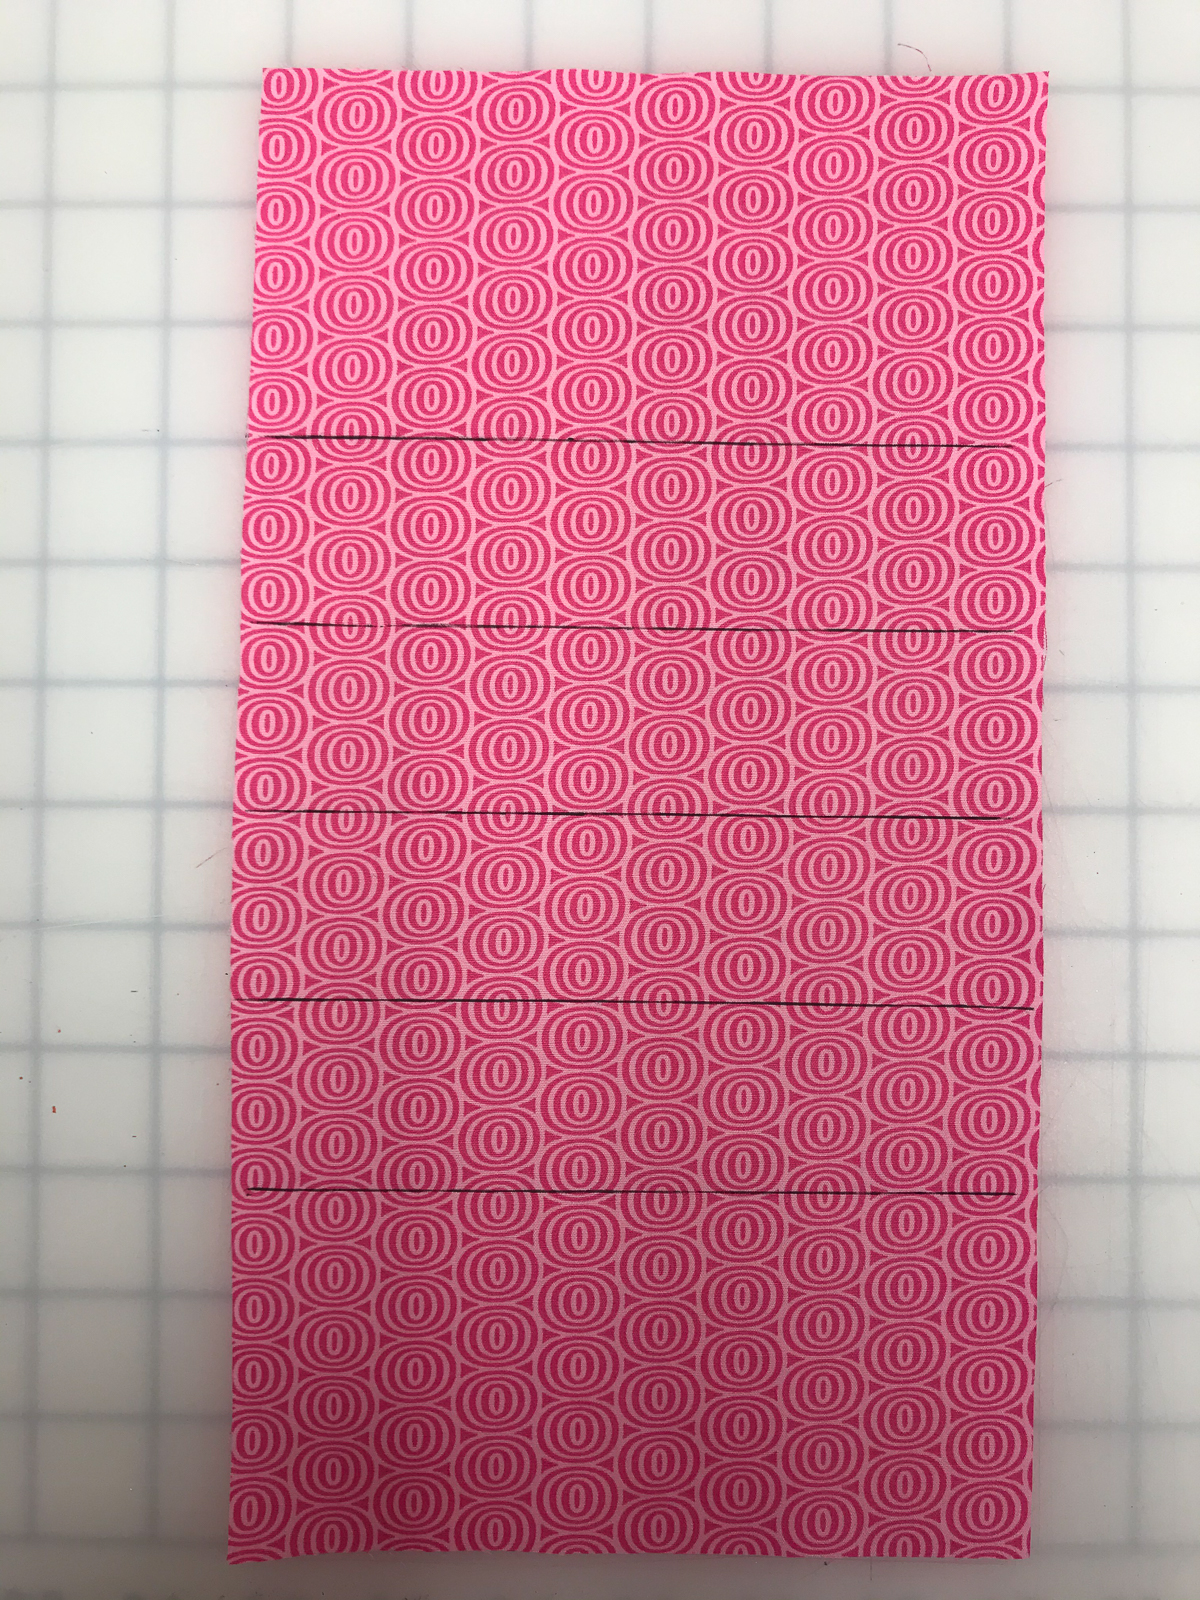
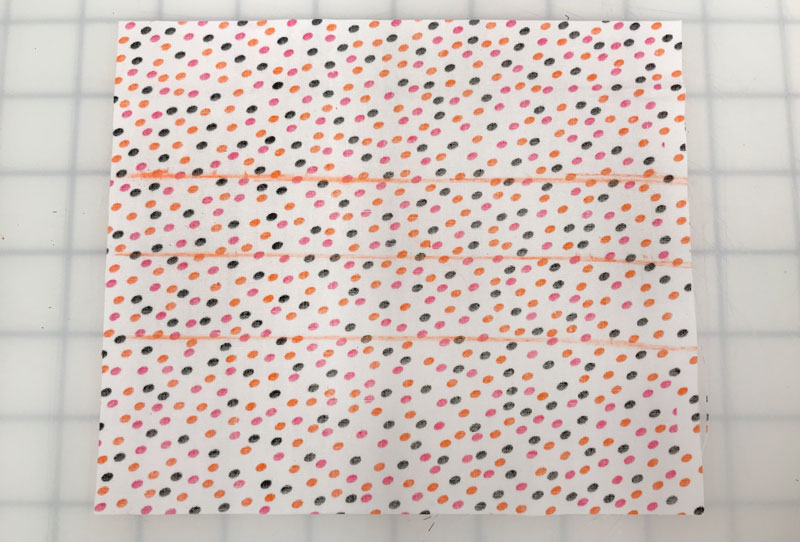
On the right side of the fabric, draw 5 diagonal lines 1 inch apart from each other. Finger press a crease along each line.
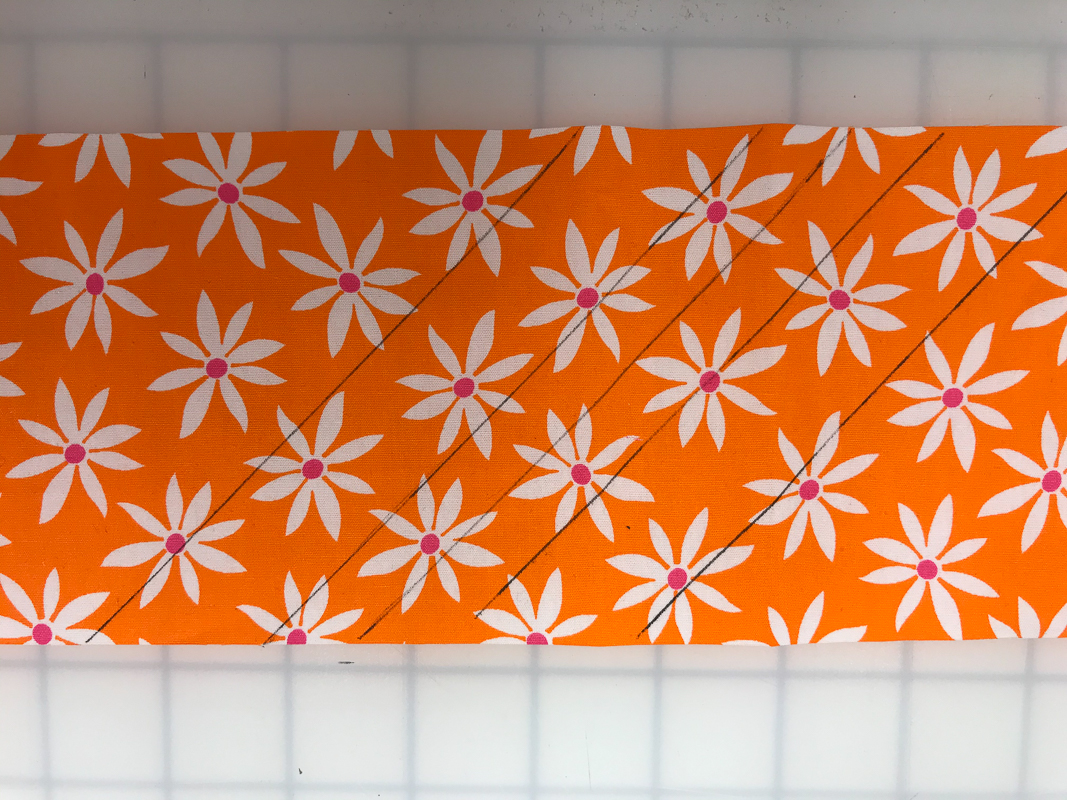
Begin stitching in the same direction for each pintuck.
Using a press cloth, press both right and wrong sides. Pintucks should be pressed in the same direction with the upper looper thread showing.
The fabric edges will be irregular.
- 1A: Trim to 6 ¾-inch (length) x 6 ¼-inch (width)
- 2A: Trim to 7 ¼-inch (length) x 2 ¾-inch (width)
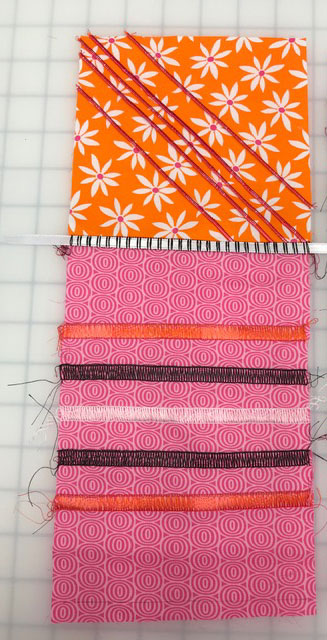
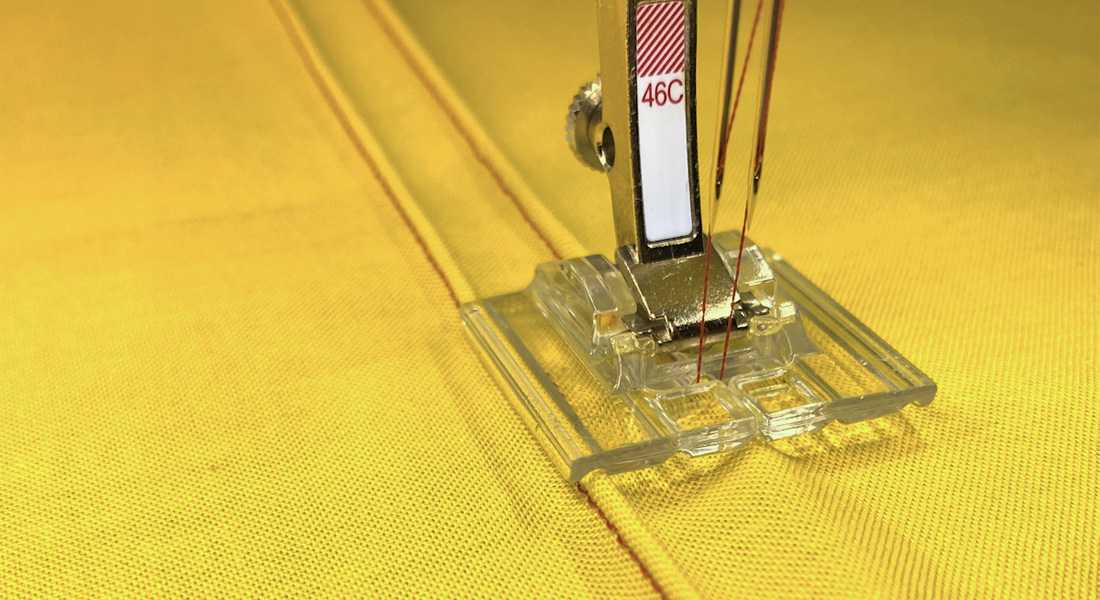
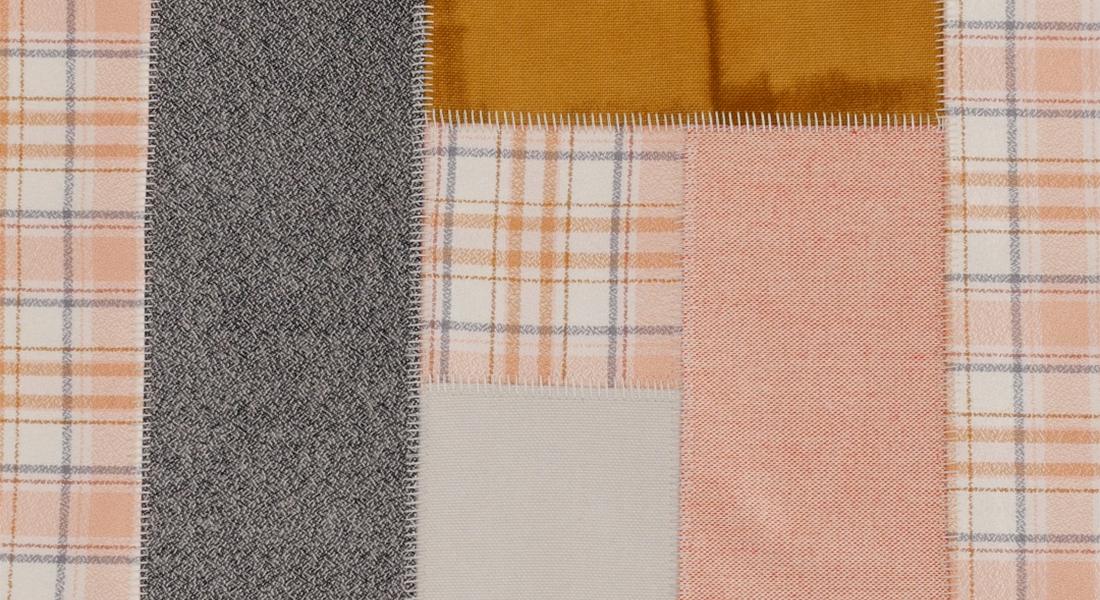
1D and 2D: 3-thread wide flatlock (loops)
Machine set-up:
- L overlock needle: tension: 1.0 (2) machine embroidery threads or 30 weight decorative thread
- UL: tension 4 machine embroidery thread coordinating color serger cone thread
- LL: tension 8.5 (check owner’s manual) coordinating color serger cone thread
- Stitch length: 1.5
- Differential feed: 1.0
From the center, draw 5 lines across the right side of fabric 1 ½ inch apart, as shown. Wrong sides together, fold the fabric along the first line. Position under the presser foot to allow the knife to trim off a scant ⅛ inch. Stitch. Begin each line of stitching from the same edge. Open the fabric and pull the stitching flat. Repeat steps for each stitching line. Press.
- 1D: Trim to 7 ½-inch (length) x 3-inch (width)
- 2D: Trim to 8 ¼ inch (length) x 6 ¾-inch (width)
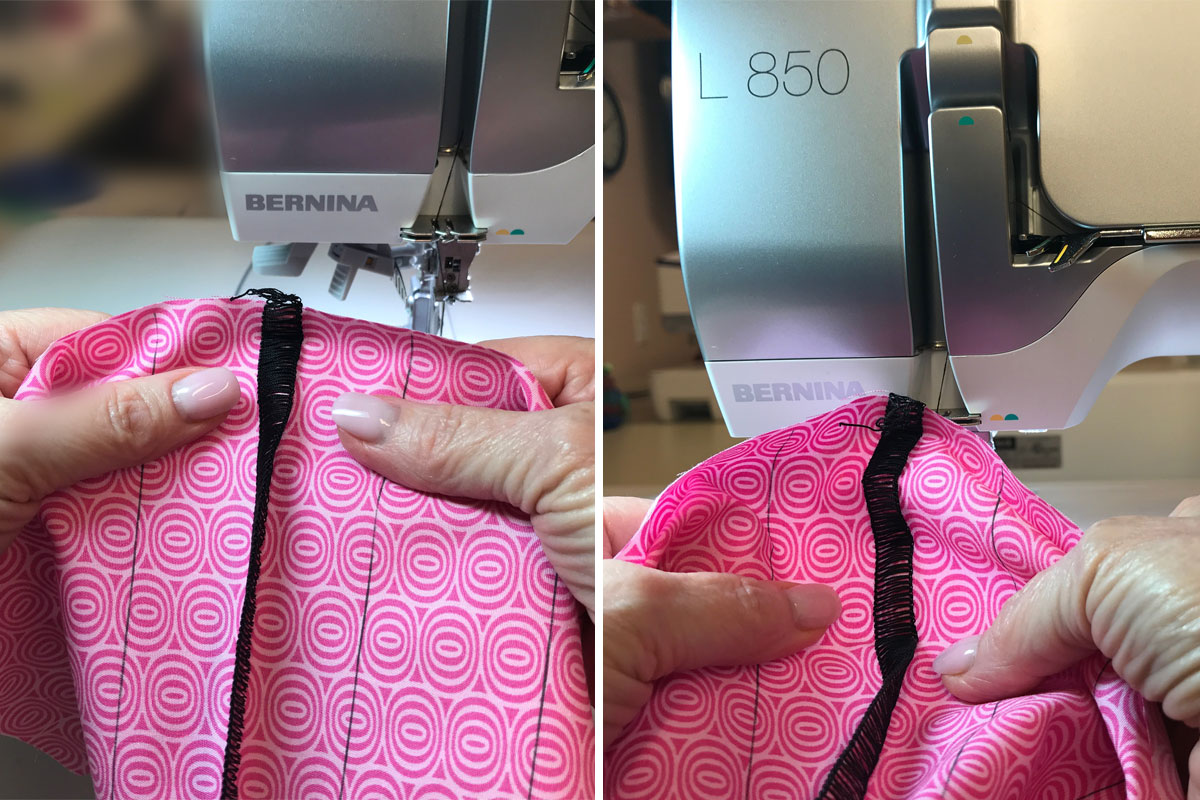
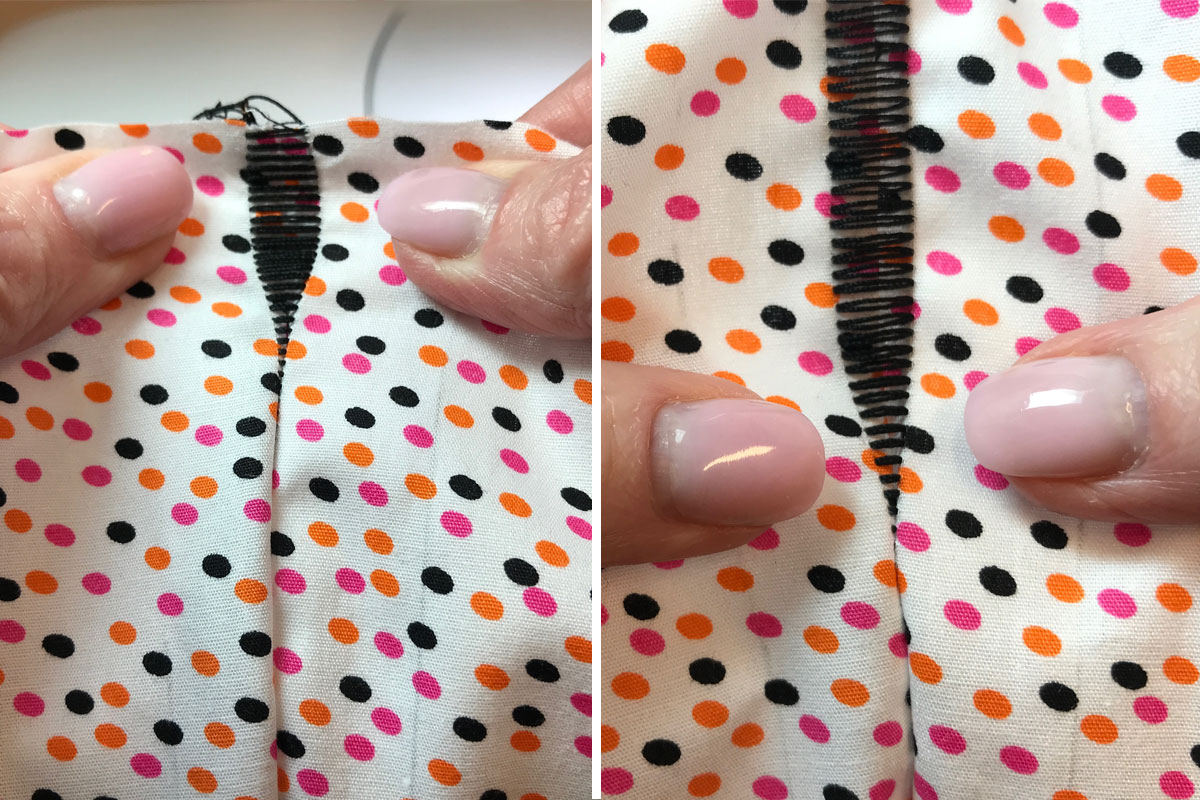
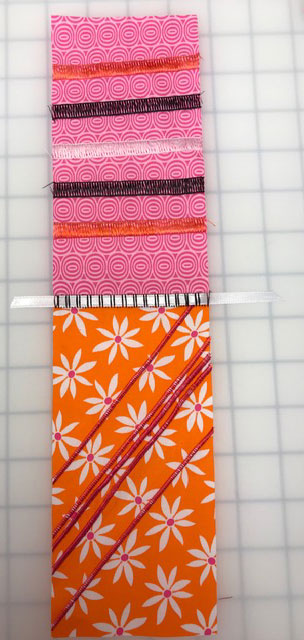
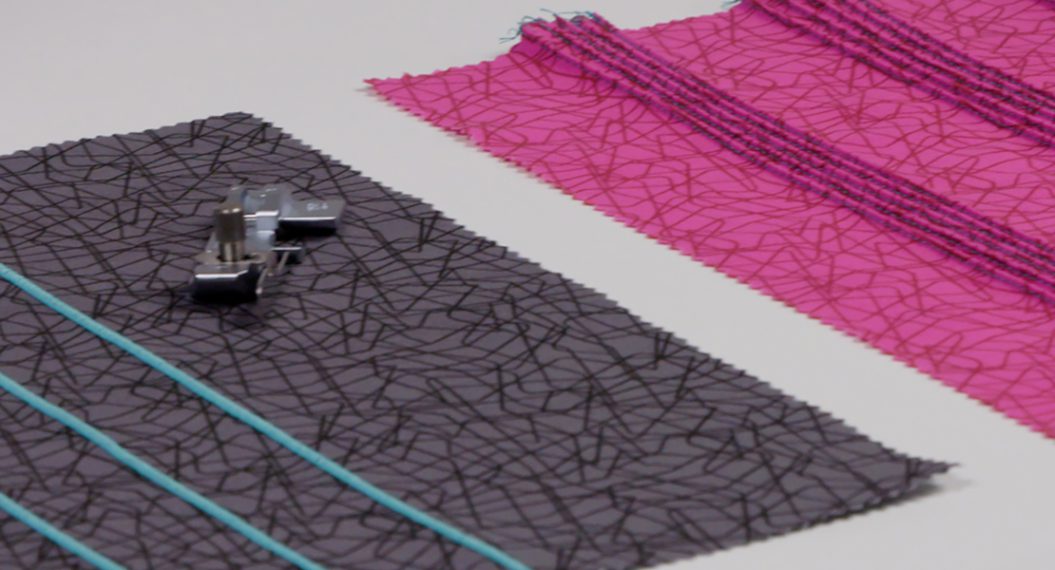
1B and 2B: 2-thread wide reverse flatlock (ladders)
Machine set-up:
- L overlock Topstitch needle: tension: 1.0 (use 12 weight thread or (2) 30 weight threads)
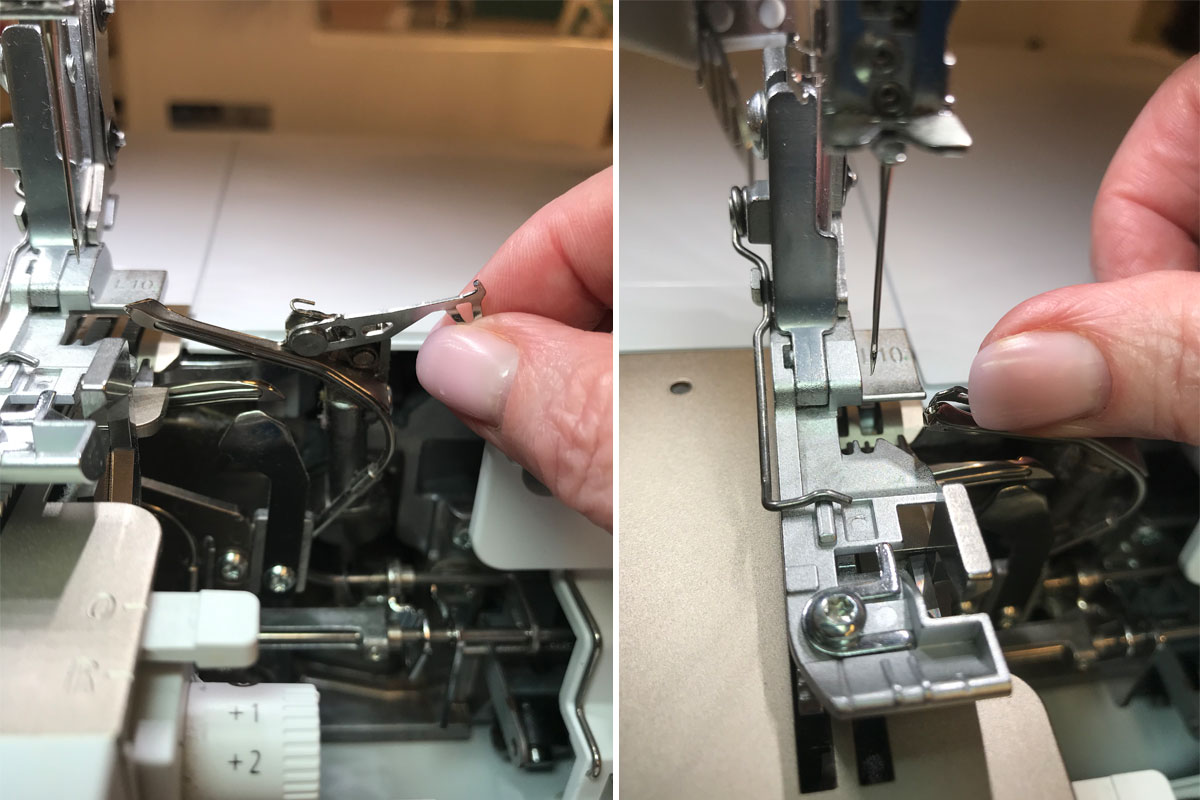
- UL: Engage upper looper converter
- LL: tension 9.0 (check owner’s manual) coordinating color serger cone thread
- Stitch length: 1.0
- Differential feed: 1.0
Engage upper looper converter.
Draw 3 lines 1 inch apart from each other as shown.
Right sides together, fold the fabric along the first line. Position under the presser foot to allow the knife to trim off a scant ⅛ inch. Stitch. Begin each line of stitching from the same edge. Open the fabric and pull the stitching flat. Repeat steps for each stitching line. Press.
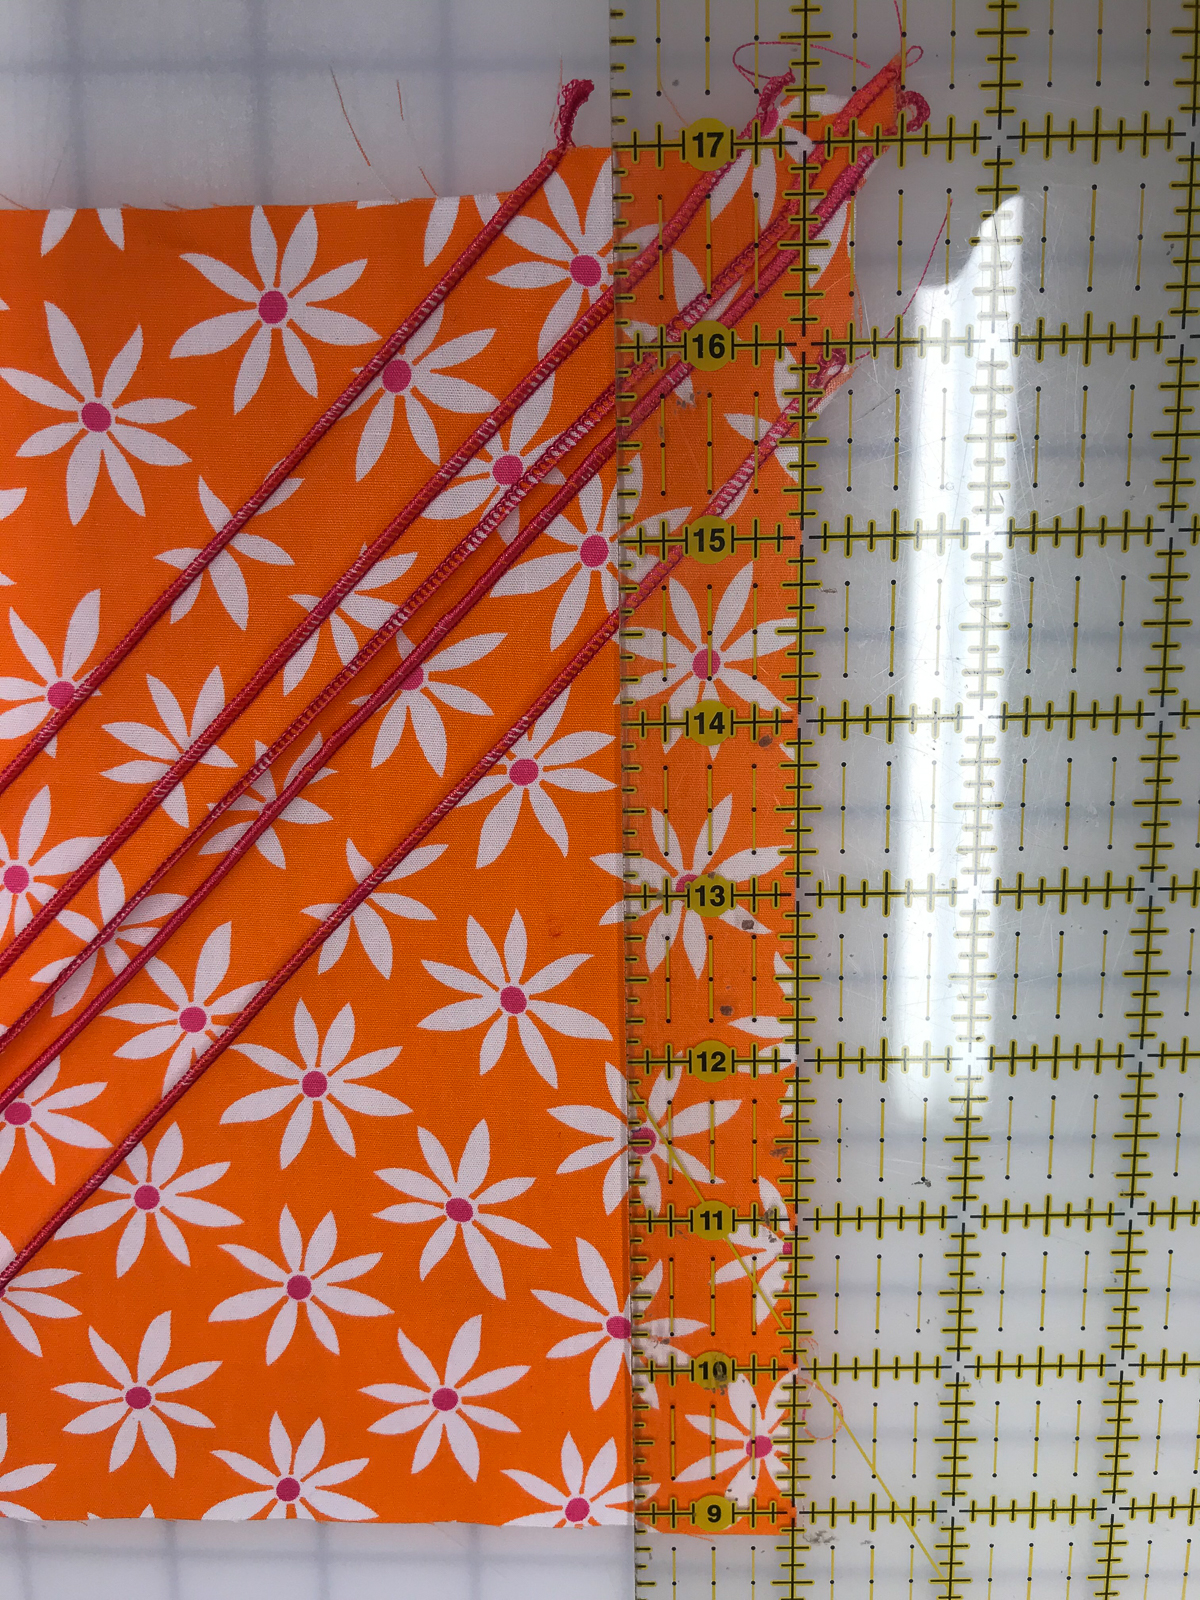
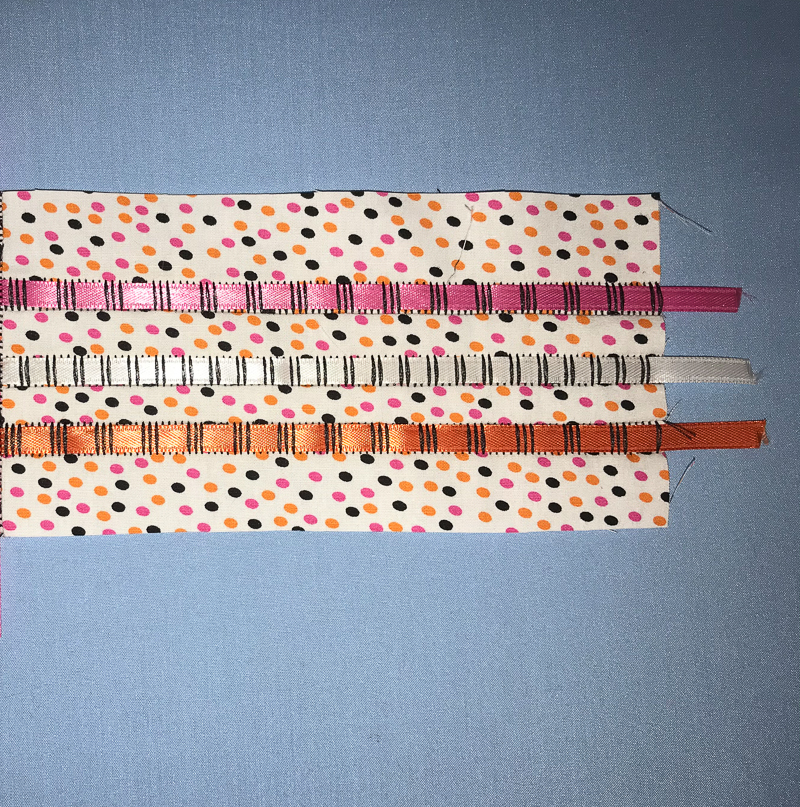
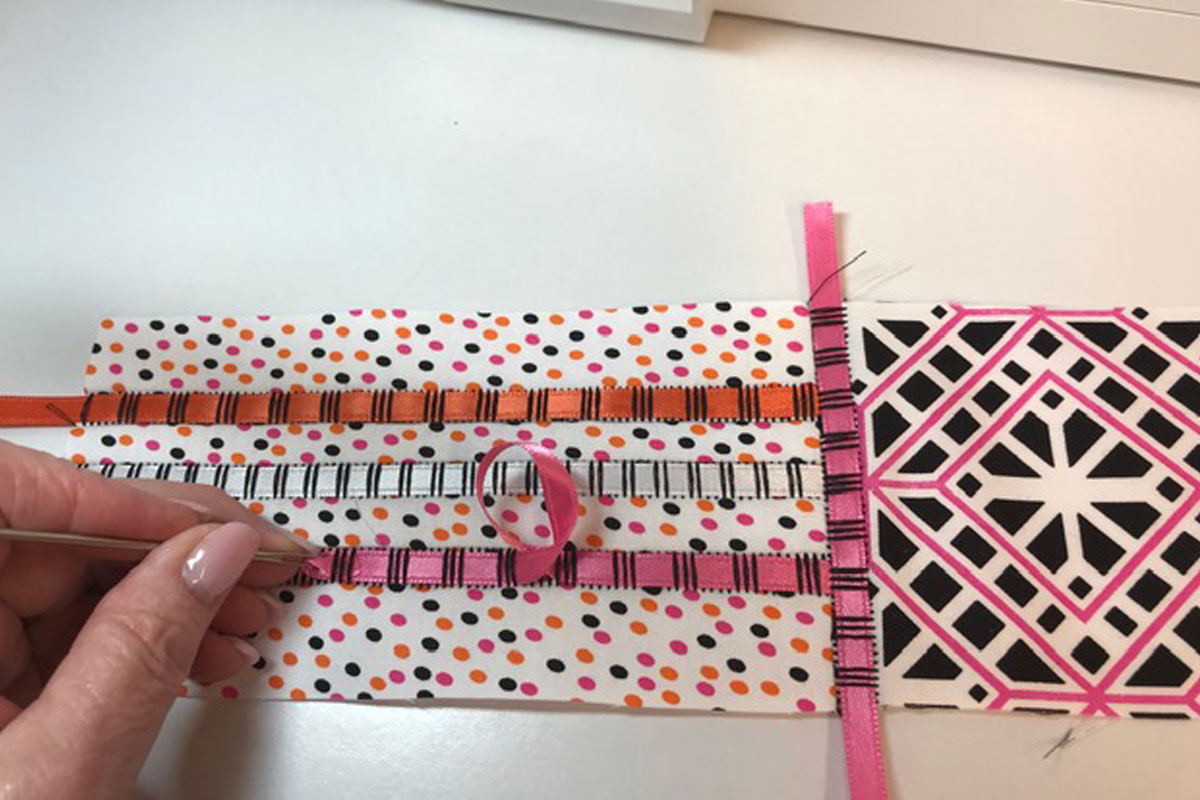
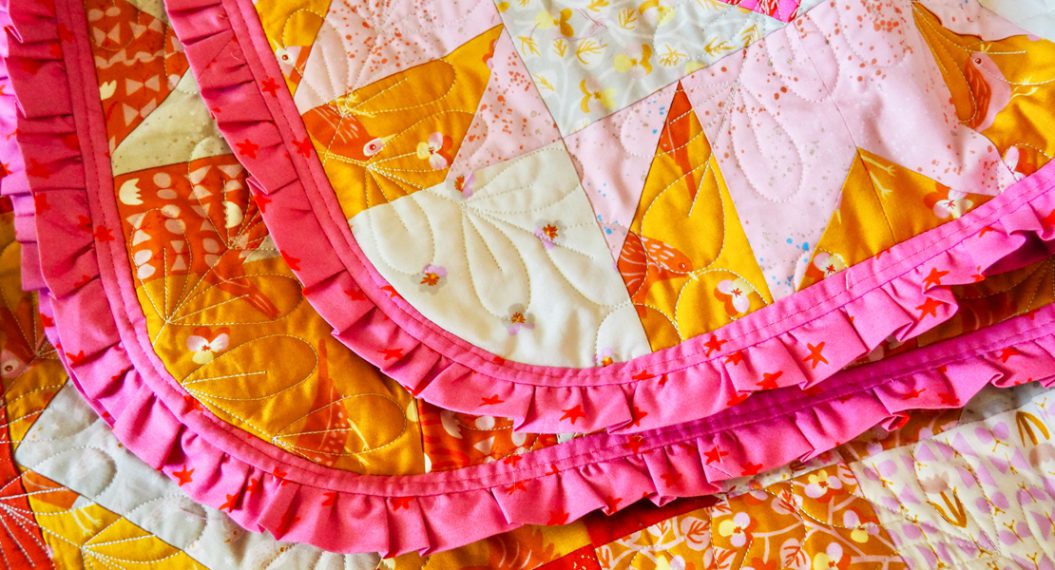
Weave ribbon through the ladders. Changing the weaving pattern through the center line of stitching adds interest and surface texture. As shown in the photo, ribbons were woven over 4 and under 3 ladders on the top and bottom rows. The center row was woven over 2 and under 2 ladders. Leave at least a 1 inch tail of ribbon on each end. They will be trimmed off by the knife when the blocks are joined.
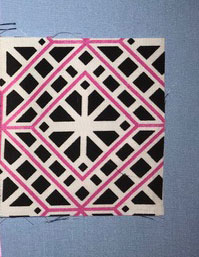
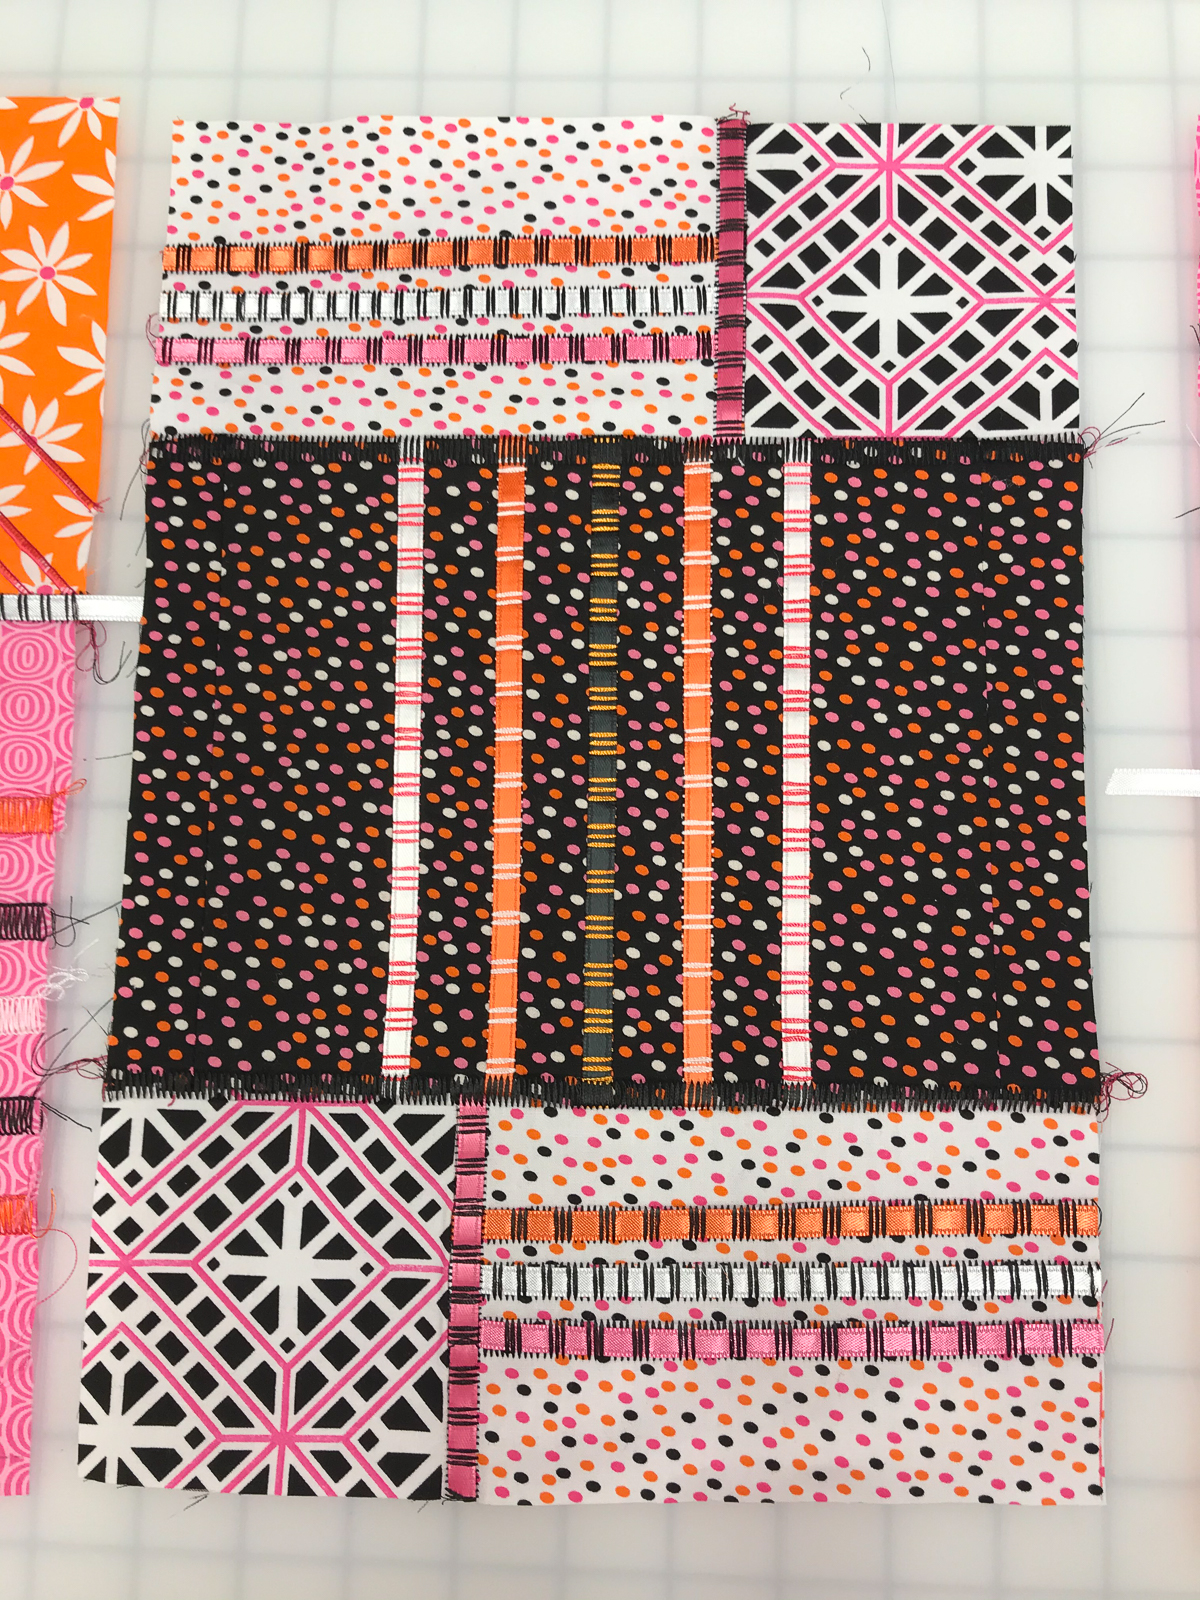
1E: 3-thread wide reverse flatlock (ladders)
Machine set-up:
- L overlock Topstitch needle: tension: 1.0 (2) 12 weight or 30 weight decorative thread
- UL: tension 3.0 machine embroidery thread coordinating color serger cone thread
- LL: tension 9.0 (check owner’s manual) coordinating color serger cone thread
- Stitch length: 2.5
- Differential feed: 1.0
Draw 5 lines 1 ½ inches apart from each other as shown. Right sides together, fold the fabric along the first line. Position under the presser foot to allow the knife to trim off a scant ⅛ inch. Stitch. Begin each line of stitching from the same edge. Open the fabric and pull the stitching flat. Repeat steps for each line. Press. Trim block to 9 ¼ inches x 6 ¾ inches.
Weave ribbon through the ladders. Changing the weaving pattern through every other line of stitching adds interest and surface texture. As shown in the photo, ribbons were woven over 2 and under 3 ladders on the right, left and center rows. The other rows were woven over 3 and under 2 ladders. Leave at least a 1 inch tail of ribbon on each end. They will be trimmed off by the knife when the blocks are joined. Trim to 10-inch x 6 ¾-inch.
1C and 2C: no decorative stitching
Construct the placemat
All blocks are stitched right sides together for reverse flatlocking. Position blocks under the presser foot to allow the knife to trim off a scant ⅛ inch.
Machine set-up for joining all blocks: reverse flatlock
- L overlock Topstitch needle: tension: 1.0 (2) 12 weight or 30 weight decorative thread
- UL: tension 3.0 machine embroidery thread coordinating color serger cone thread
- LL: tension 9.0 (check owner’s manual) coordinating color serger cone thread
- Stitch length: 2.5
- Differential feed: 1.0
Optional ribbon weaving
Leave at least a 1 inch tail of ribbon on each end to be sure the ribbons are secured by the stitching. They will be trimmed off by the knife when the blocks are joined. You will trim the tails on the outside edges as you square up the constructed placemat to the finished dimensions.
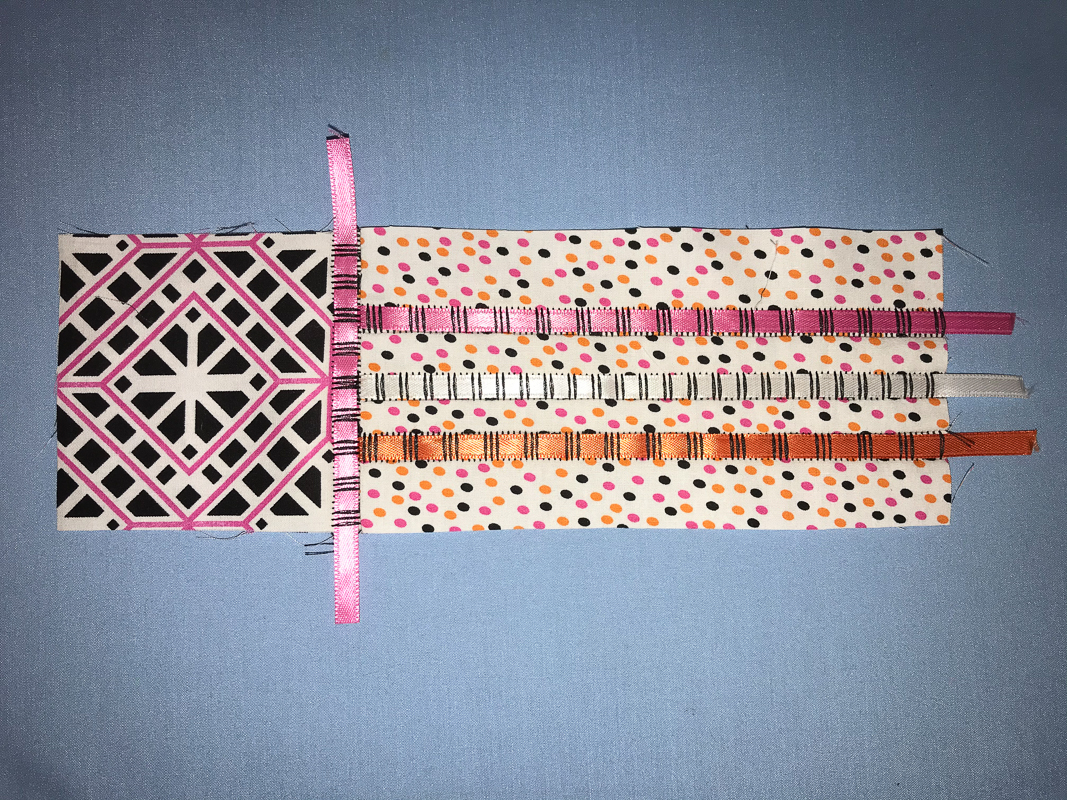
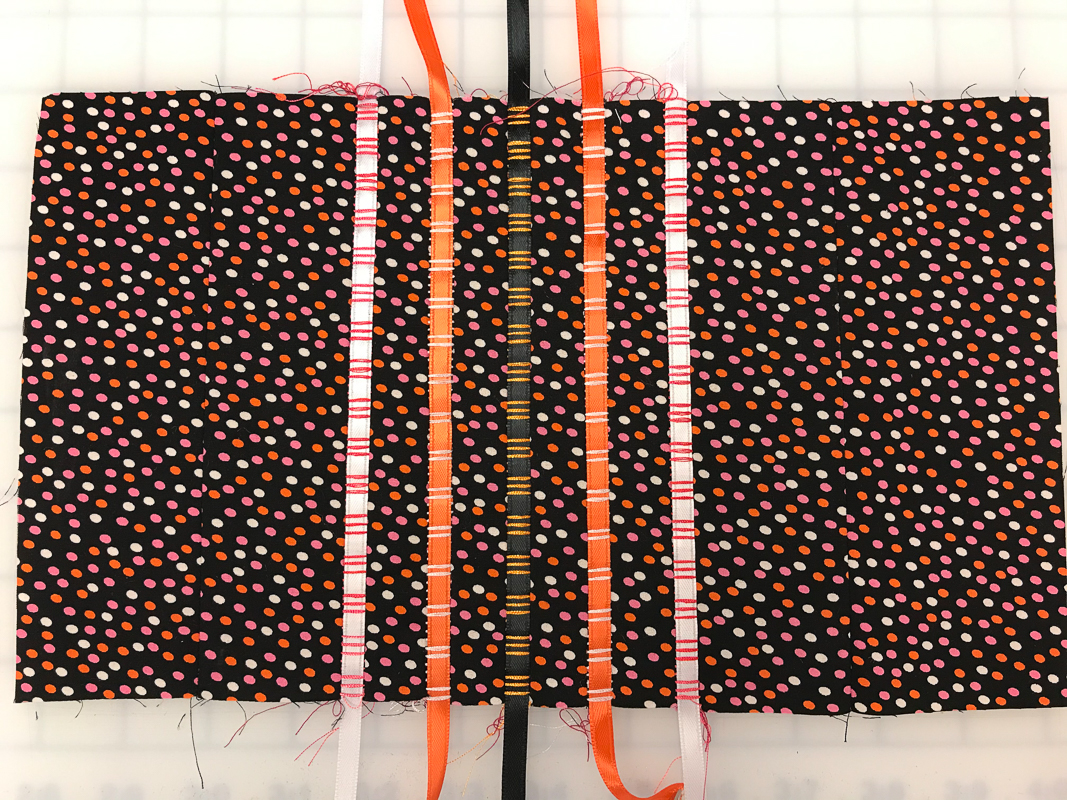
Join the short edges of pieces 1A and 2D right sides together. Position under the presser foot to allow the knife to trim off a scant ⅛ inch. Open the fabric and pull the stitching flat. Press. Weave ribbon through the ladders (optional).
Repeat steps to join the short edges of 1D and 2A.
Join one short edge of 1B to 1C. Repeat for 2C to 2B.


Stitch one long edge of (1B/1C) to the top of the center block (1E). Stitch one long edge of (2B/2C) to the bottom edge of the center block (1E). Open the fabric and pull the stitching flat. Press.
Weave ribbon through the ladders (optional).
Stitch (1A/2D) to the left edge of center panel blocks. Stitch (1D/2A) to right edge. Open the fabric and pull the stitching flat. Press.
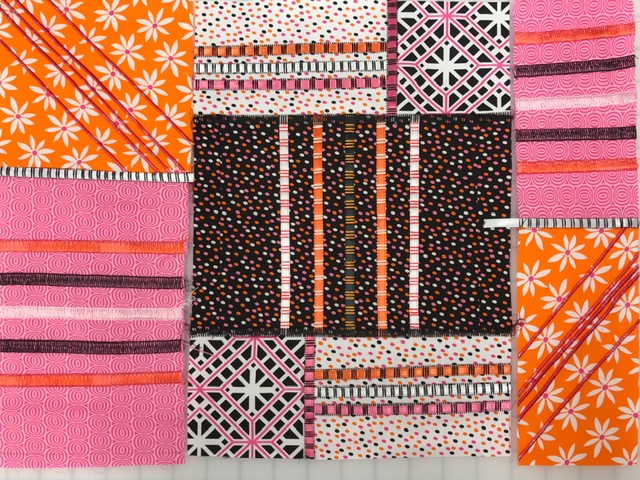
The placemat should measure approximately 14 inches x 18 inches. (If you trimmed off more than a scant ⅛ inch when stitching the blocks together, your dimensions may be slightly shorter.)

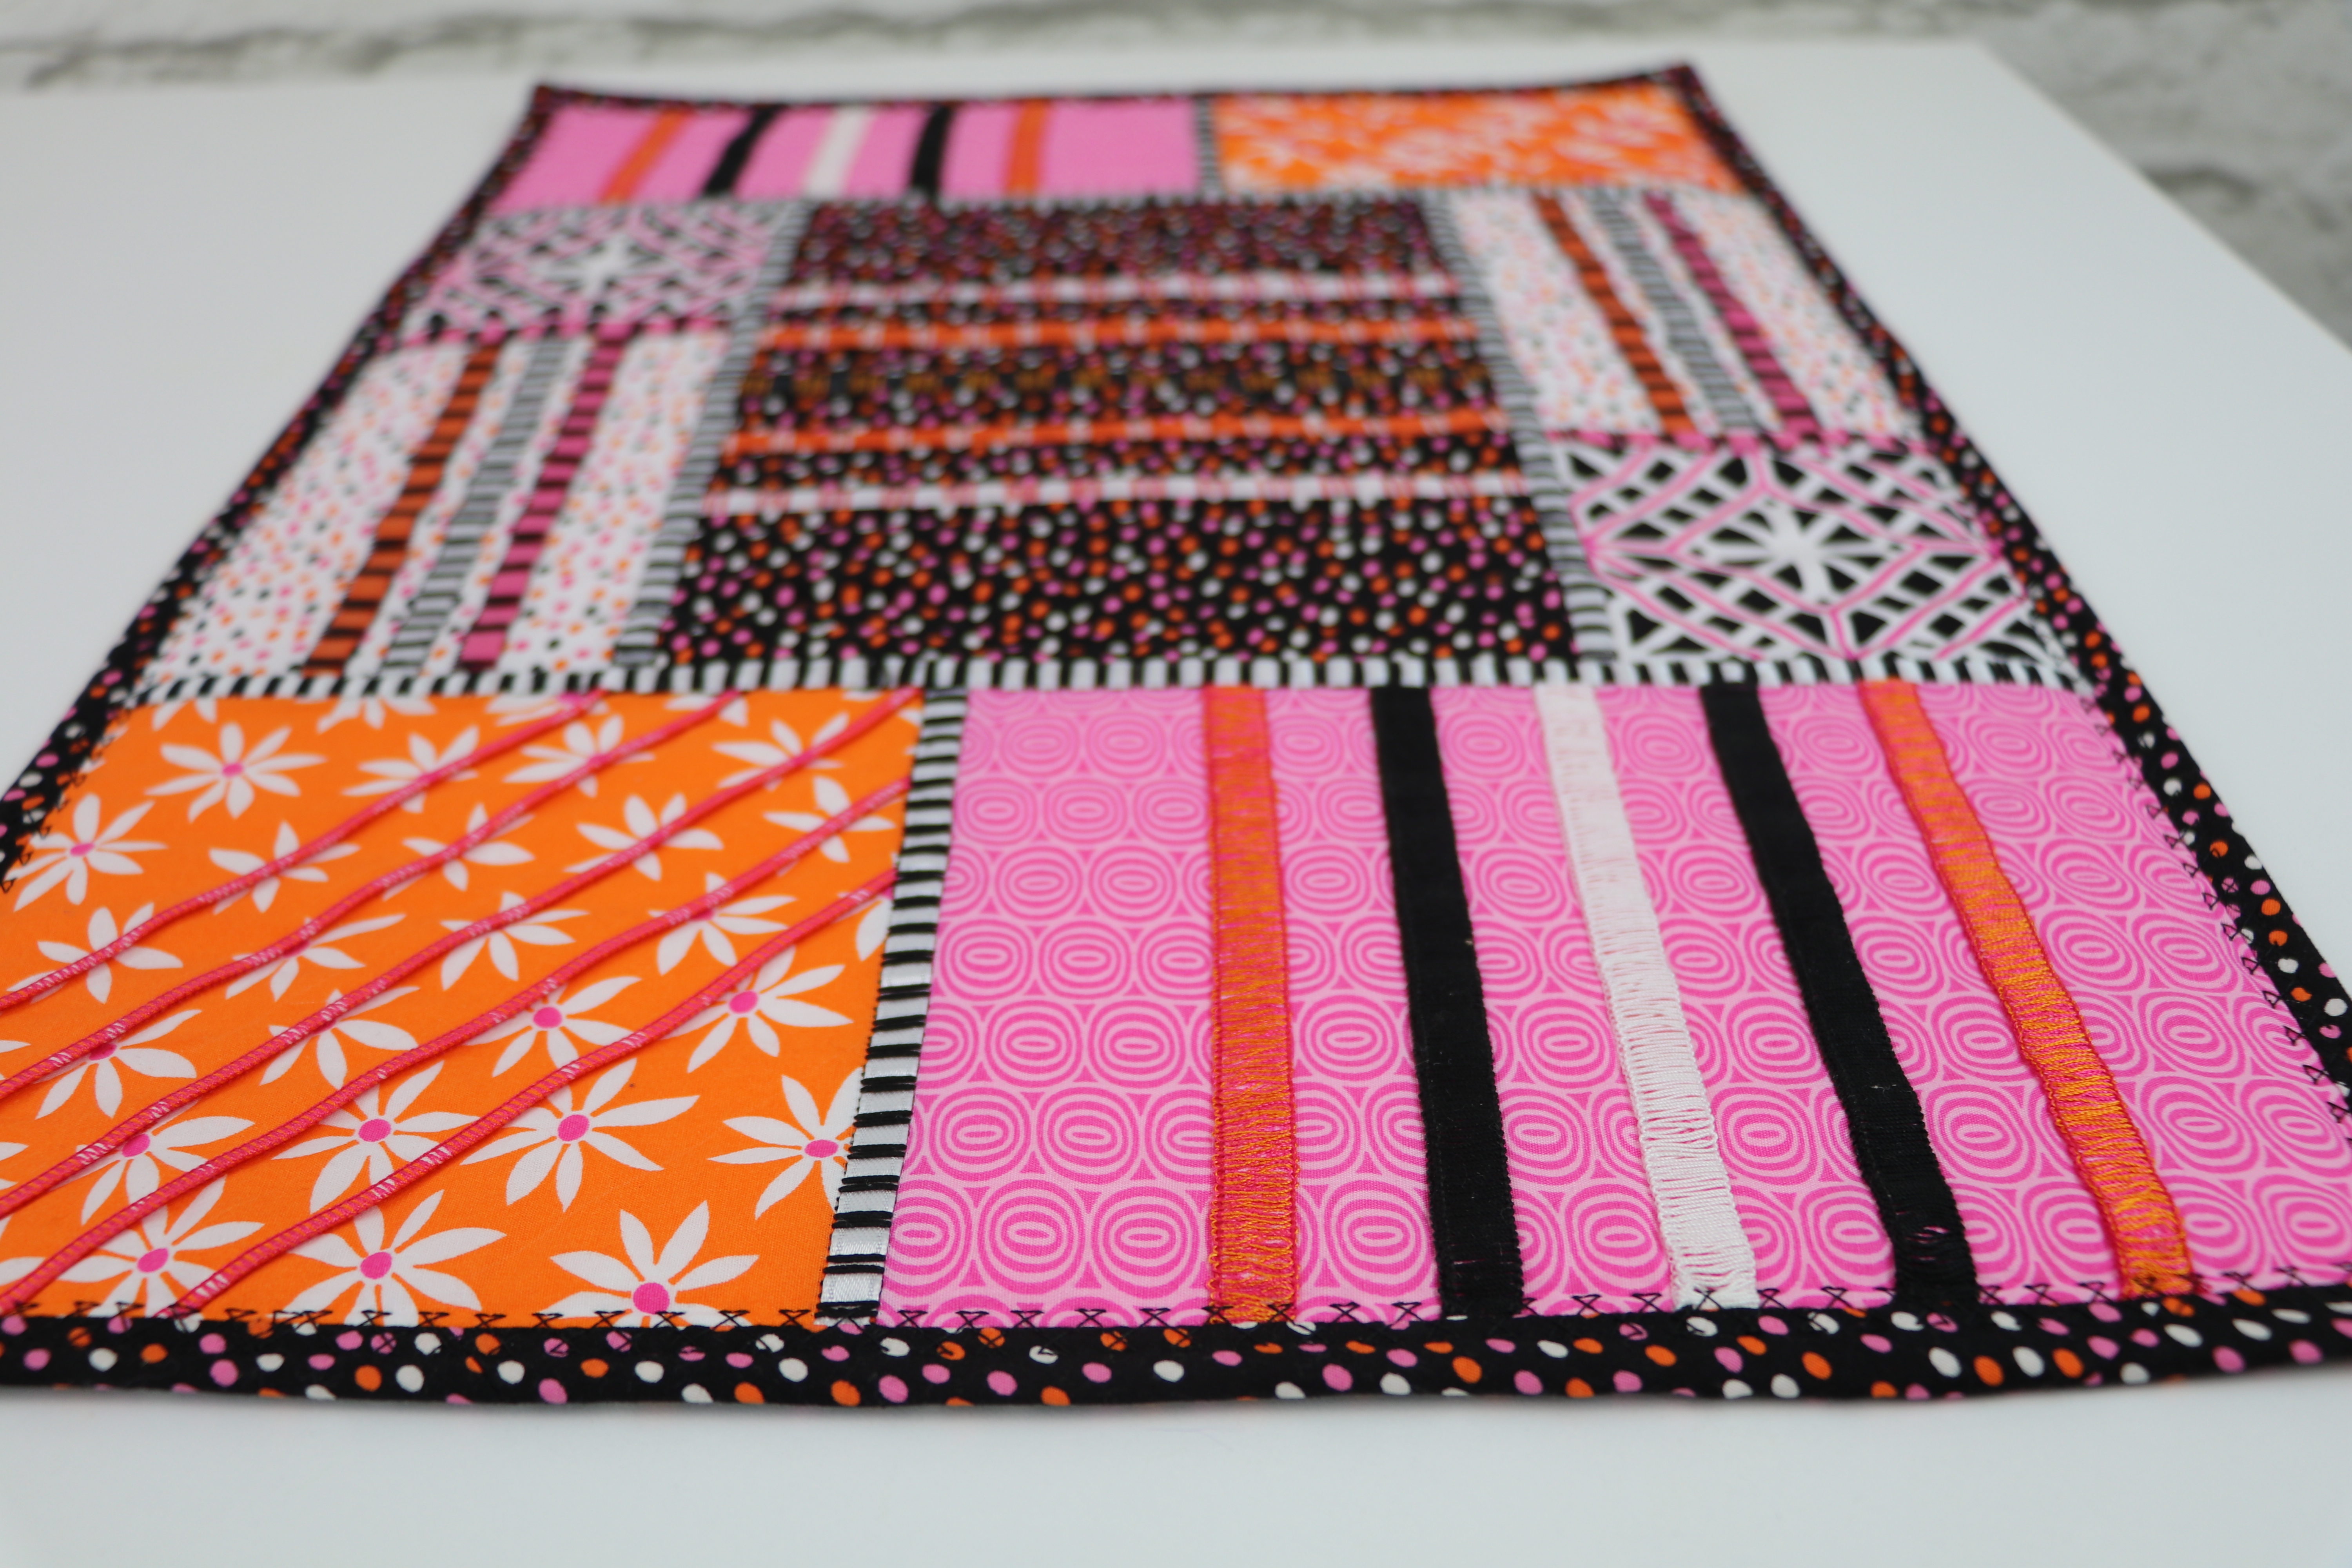
Sandwich a low loft batting between the placemat top and backing. Square up and trim to designated dimensions.
Join binding strips on your sewing machine. Use your favorite method to bind the placemat edges.
Used Products

What you might also like


2 comments on “Fabulous Flatlock and Pintuck Placemat”
-
-
I took a creative serving class a couple of years ago and the laid the old girl down and didn’t touch her again. I’ve been searching diligently for something like it again since I’ve moved many hundreds of miles away and there was nothing. Until I found you! This is precisely the type of thing I was looking for. A way to use decorative stitches from the serger in projects. Yay, and lucky me! I realize it’s February, but I know there are plenty of gifting opportunities to come during the year. Thank you!
Leave a Reply
You must be logged in to post a comment.

Great project! I’m a visual learner so I appreciate the great pictures.