Kids Shorts Tutorial Series Part I, The Basic Shorts
Welcome to the DIY Kids Shorts Mini-Series designed by Shauna Wightman of Shwin And Shwin: 1 Basic pattern, 2 alterations, 3 summer shorts.
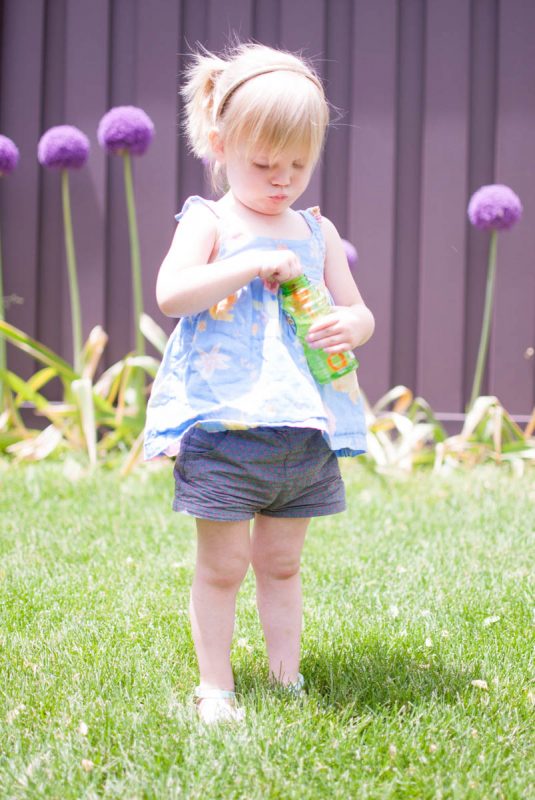
Summertime is the perfect time to make a wardrobe full of shorts. It’s easy to make several different styles of shorts by mixing up a few elements of the pattern. In this mini series I will show you how to take a basic shorts pattern, and create three different styles from it.
In Part I of this series we will cover how to sew a basic kids shorts, size 2T.
Materials:
- Shorts pattern, size basic 2T: BasicShorts2T_Pattern
- ½ yard fabric (chambray, linen, denim or cotton will work great)
- Your sewing machine. I sew on a BERNINA 380
- Basic sewing foot (e.g. the BERNINA Reverse pattern foot #1)
- 17″ of 1″ non-roll Elastic
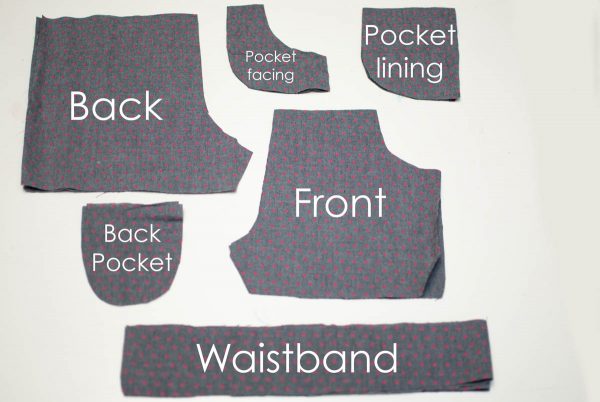
For the basic shorts (with pockets) cut out the basic shorts and pocket pieces from the pattern.
Step 1
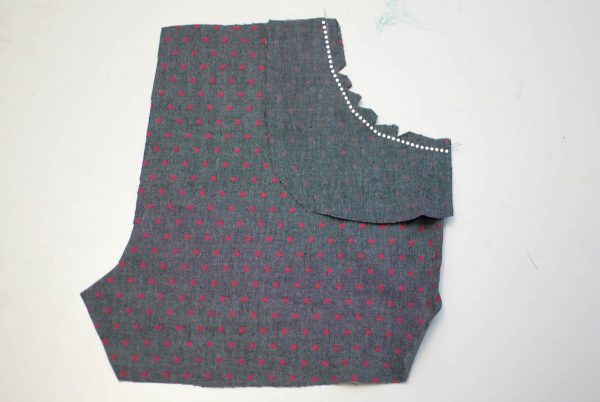
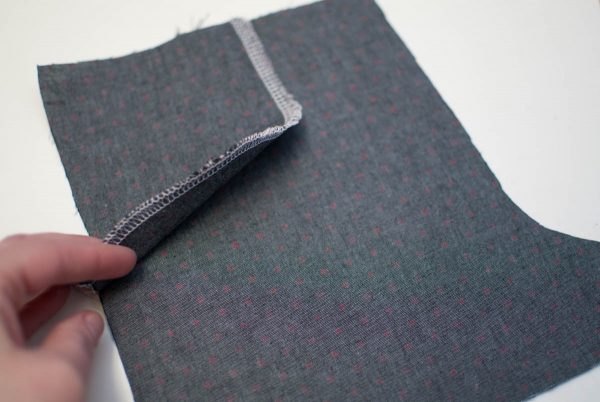
With right sides together, sew the pocket facing to the front shorts piece. Clip notches in the curve.
Step 2
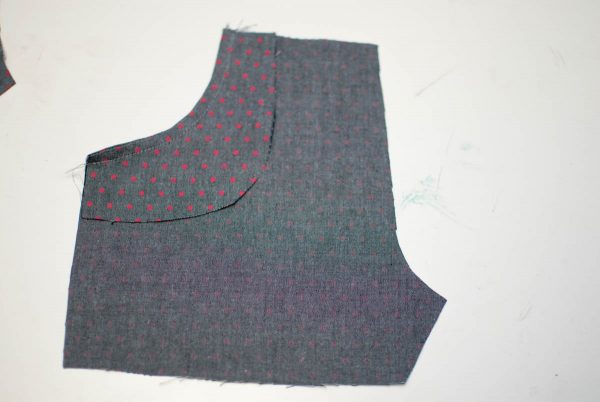
Turn the facing around to the backside and top stitch along the seam.
Step 3
With right sides together sew the pocket facing to the pocket lining. Finish seam as desired.
Now you have a front pocket sewn. Repeat with the other side so you have two front pieces.
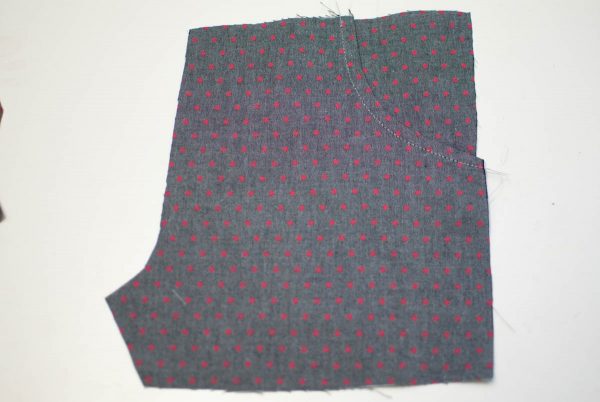
Step 4
With right sides together sew one front piece to one back piece along the side seam. Finish seam as desired. Repeat with other front and back pieces.
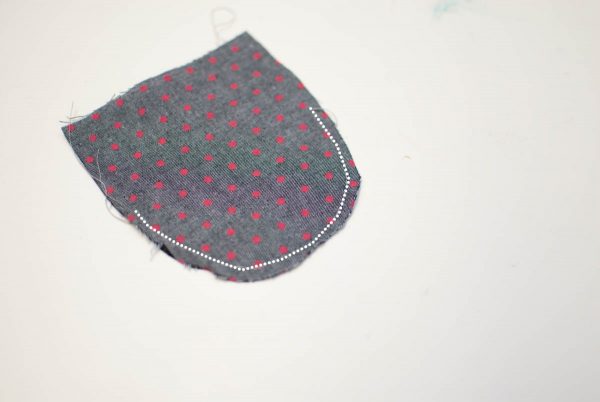
Step 5
For the back pocket, sew a basting stitch along the curved edge. Repeat with other pocket.
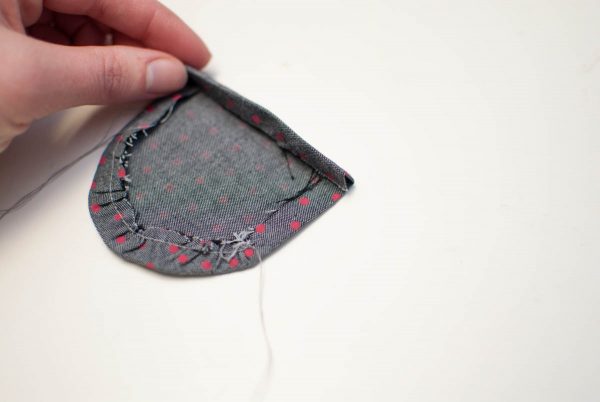
Step 6
Gather the basting stitch slightly while folding the edges of the pocket under. Gathering the will help you turn the curved edge under smoothly. Then fold the top edge under by ¼” twice and sew along the folded edge to secure the folds in place. Repeat with other pocket.
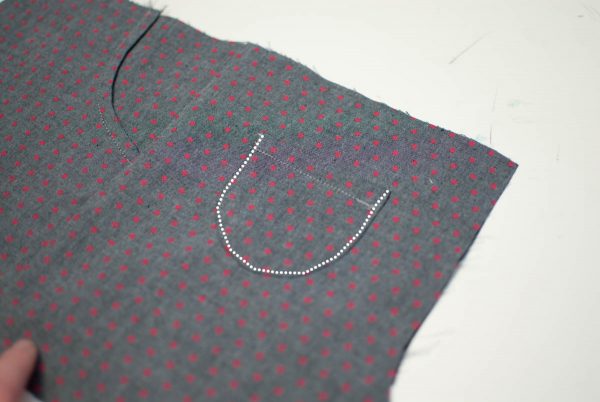
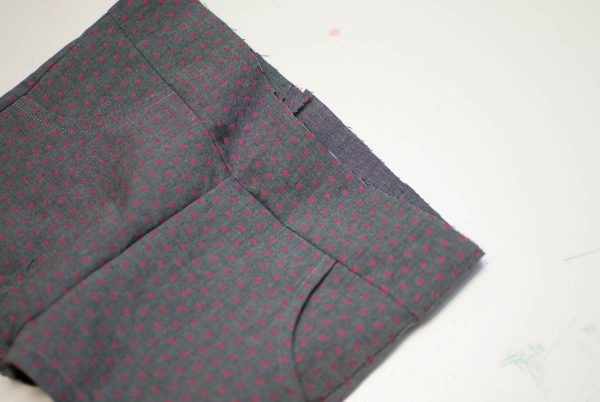
Step 7
Stitch the pocket in place following the guide on the pattern for placement. Sew along the sides and bottom to secure. Repeat with other pocket.
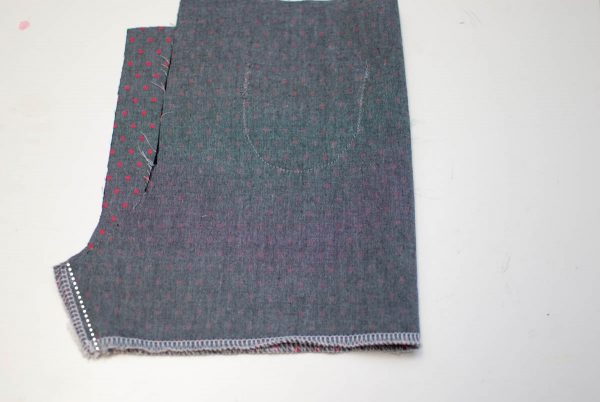
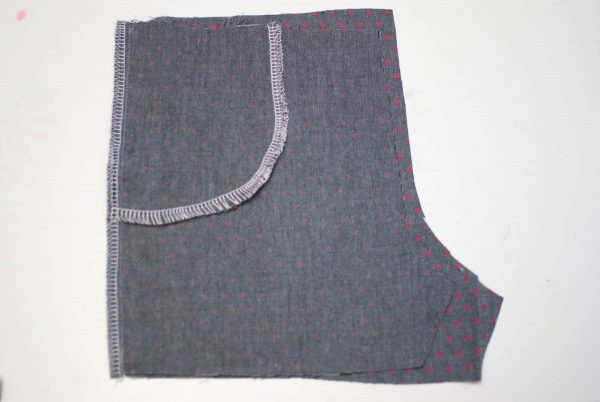
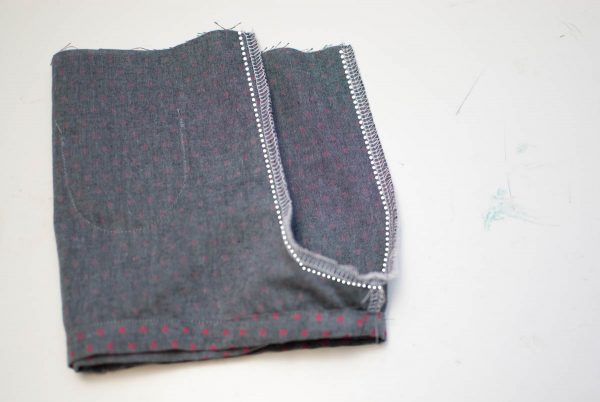
Step 8
With right sides together, sew the front and back pieces together along the inseam. Sew from the crotch down the leg. Finish seams as desired. Repeat with other front and back piece.

Step 9
Fold the bottom edge up to hem the shorts. Fold by ¼″ and then again by ½” and sew along the folded edge to secure. Repeat with other leg.
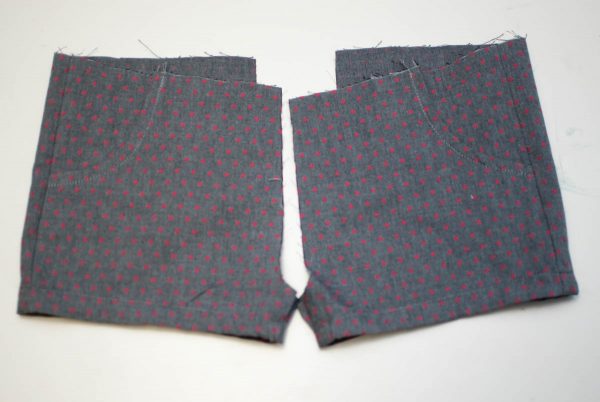
Step 10
Now you should have two sides of the shorts.
Step 11
With the legs right sides together (one inside out and one right side out and then matched up together) sew from the center front down through the crotch and up the center back. Finish seam as desired. Top stitch seam if desired.
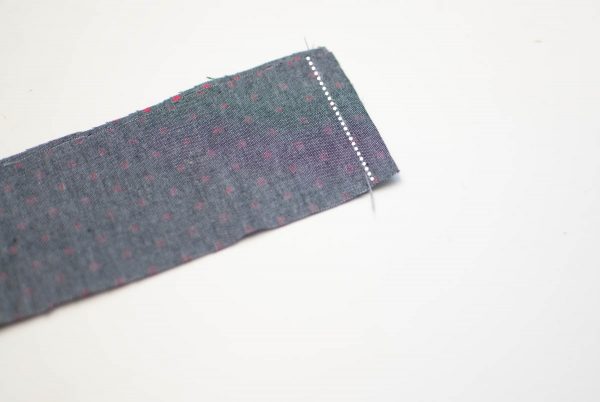
Step 12
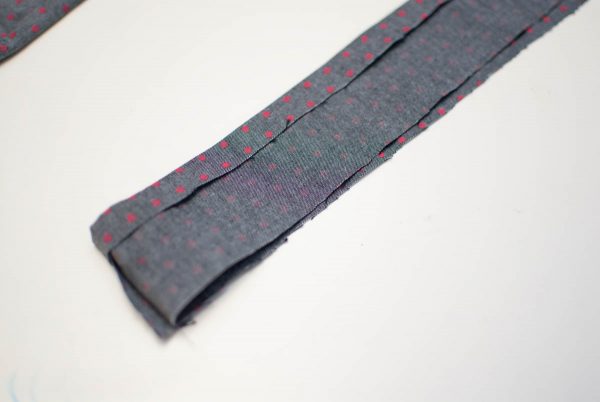
For the waistband, match the right sides together and sew the two ends together. Repeat with other waistband.
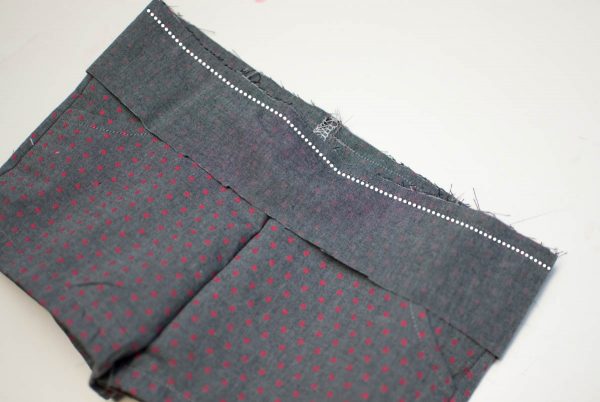
Step 13
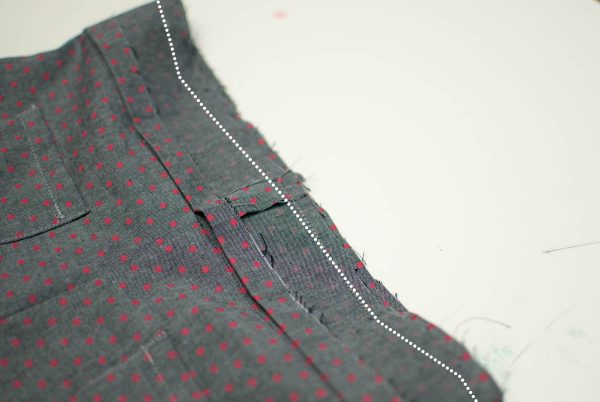
With right sides together, sew one waistband to the waist of the shorts, match the seam of the waistband to the center back seam of the shorts.
Step 14
Press waistband and seam upward.
Step 15
Take the second waistband and fold over the bottom edge by 3/8″
Step 16
With right sides together, match up the second waistband to the first waistband. You want the folded edge from the first waistband to run just along the seam line of the first waistband. Then sew along the top of the waistband to sew the two together.
Step 17
Press the second waistband and seam upward.
Step 18
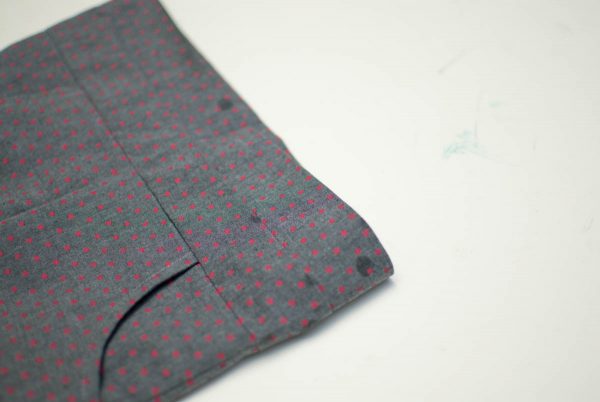
Fold the top waistband piece down so the folded edge just covers the first seam line. Then sew along the folded edge leaving an opening in the center back.
Step 19
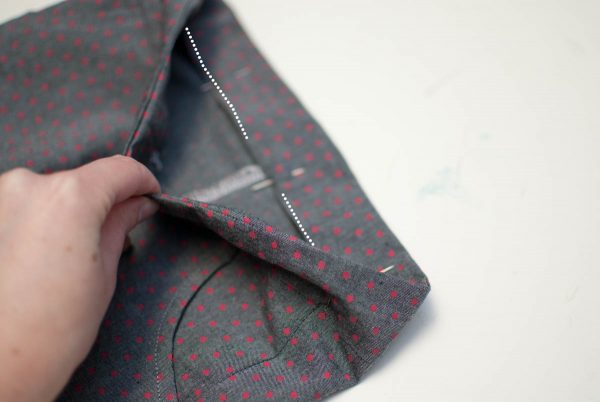
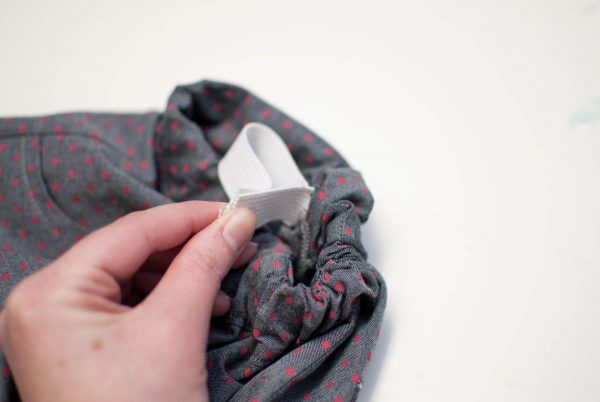
Slip the elastic in through the opening and feed it through the waistband. Then sew the ends together, and close up the opening in the waistband.
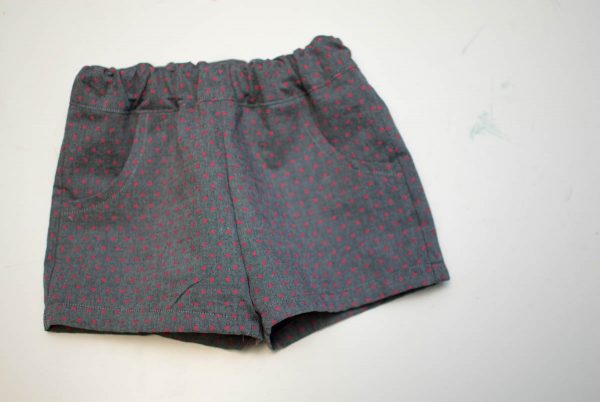
Then you are finished with some basic shorts.
Next, we will take this basics shorts pattern and alter it to a few different styles. Tomorrow we will create curved shorts.


8 comments on “Kids Shorts Tutorial Series Part I, The Basic Shorts”
Where can I get the basic short pattern in a size 4T?
I, too , would like 4T,
any response to other sizes?
Are there instructions to alter the size??
I sure would like to see patterns for a 10 year old. She could make them herself with a little help.
Having instructions to alter size at least for all toddler sizes (3T, 4T) would be very helpful. Thanks.