Easy Buttonholes with Embroidery
If you are anything like me as a sewist, one of the biggest stumbling blocks in making clothes is actually completing the garment. Those final finishing details, like hems and buttonholes can feel like such a hurdle, causing me to sometimes leave nearly wearable projects sitting for way too long! Any way that I can find to make that process faster, easier, or with better results makes me more likely to finish my projects. This tutorial checks all three of those boxes!
Adding buttonholes to a shirt placket can be a bit complicated. You have to make sure the buttonholes will actually fit your buttons, that they’re evenly spaced, perfectly aligned, and then sit and sew them out one by one. Using the tools on my BERNINA machine, for both sewing and embroidery, makes this process simple and foolproof.
Materials for Easy Buttonholes with Embroidery
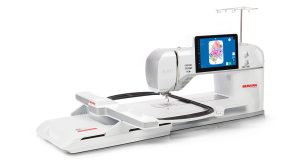
- BERNINA 990
- Embroidery Module XL with BERNINA Smart Drive Technology (SDT)
- Embroidery Foot #26L
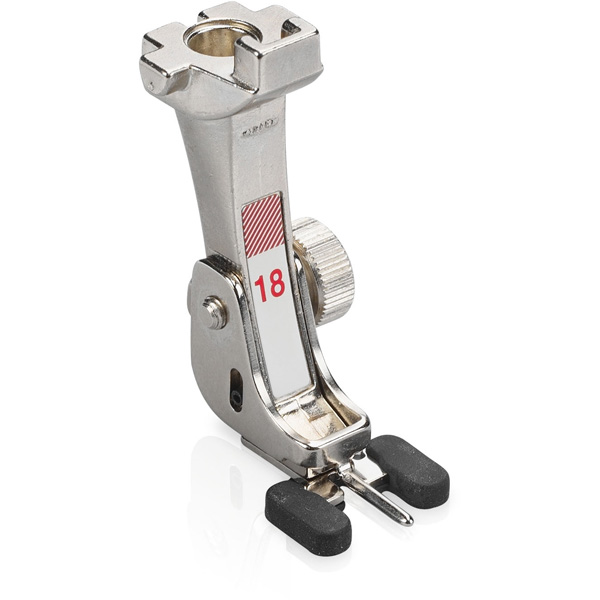
- Button Sew-on Foot #18
- Mega Hoop
- OESD StabilStick TearAway, 20” roll
- Fray Check
- Shirt buttons (approximately 10-15 mm diameter)
- Polyester thread
- Buttonhole cutter or seam ripper
- Fabric marking pen
- Pins
- Assembled shirt with button band/placket
Step 1: Sew Shirt
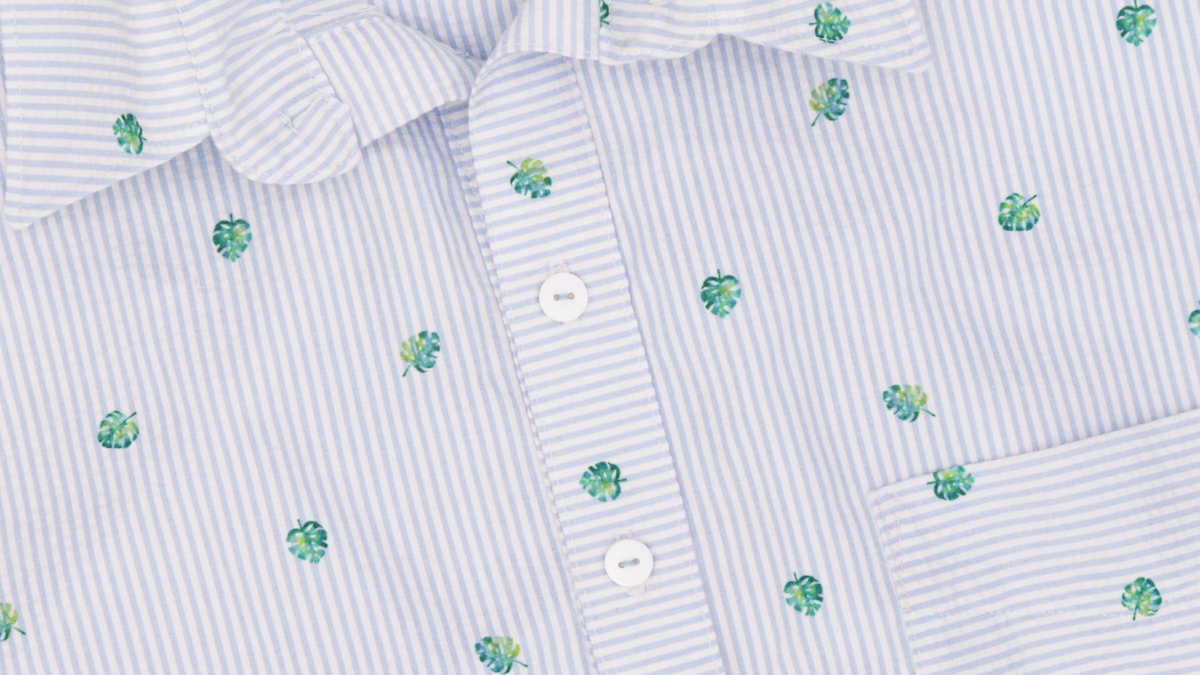
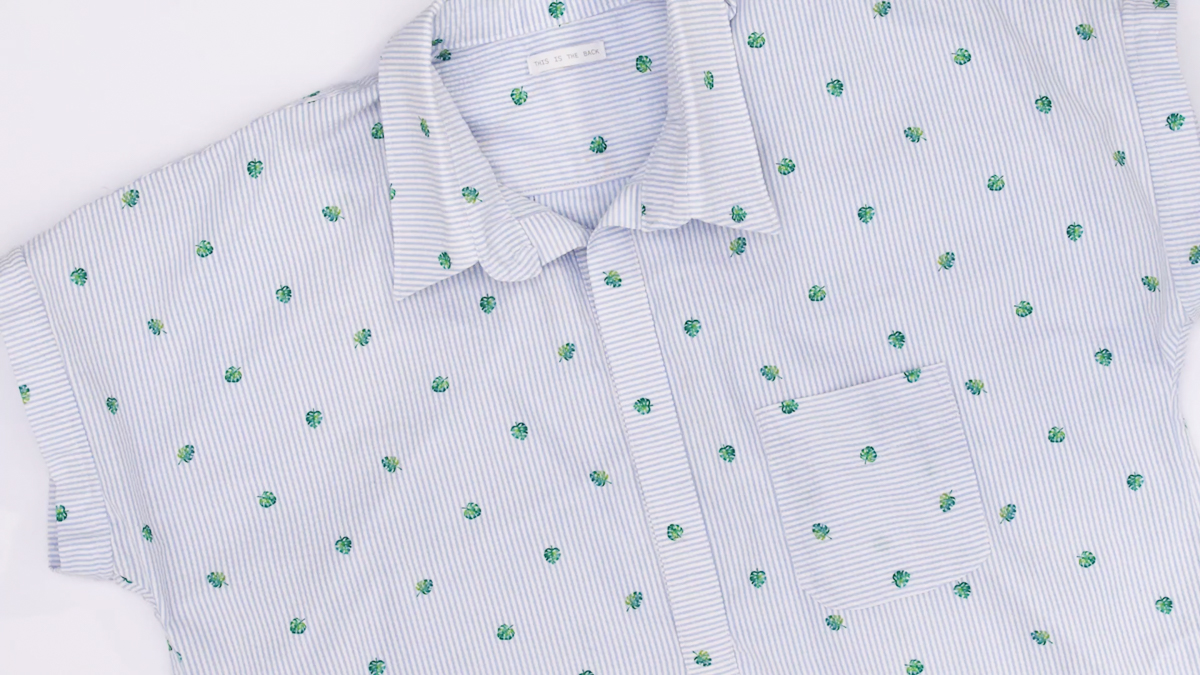
Sew your shirt according to the pattern instructions until the point where you need to add buttonholes. For some patterns, this may be in the middle of construction, but for others, the shirt can be finished entirely, aside from the buttons and buttonholes. For my Closet Core Kalle shirt, I could finish all the details and add the buttonholes and buttons as the final detail.
Step 2: Set Up the Buttonhole
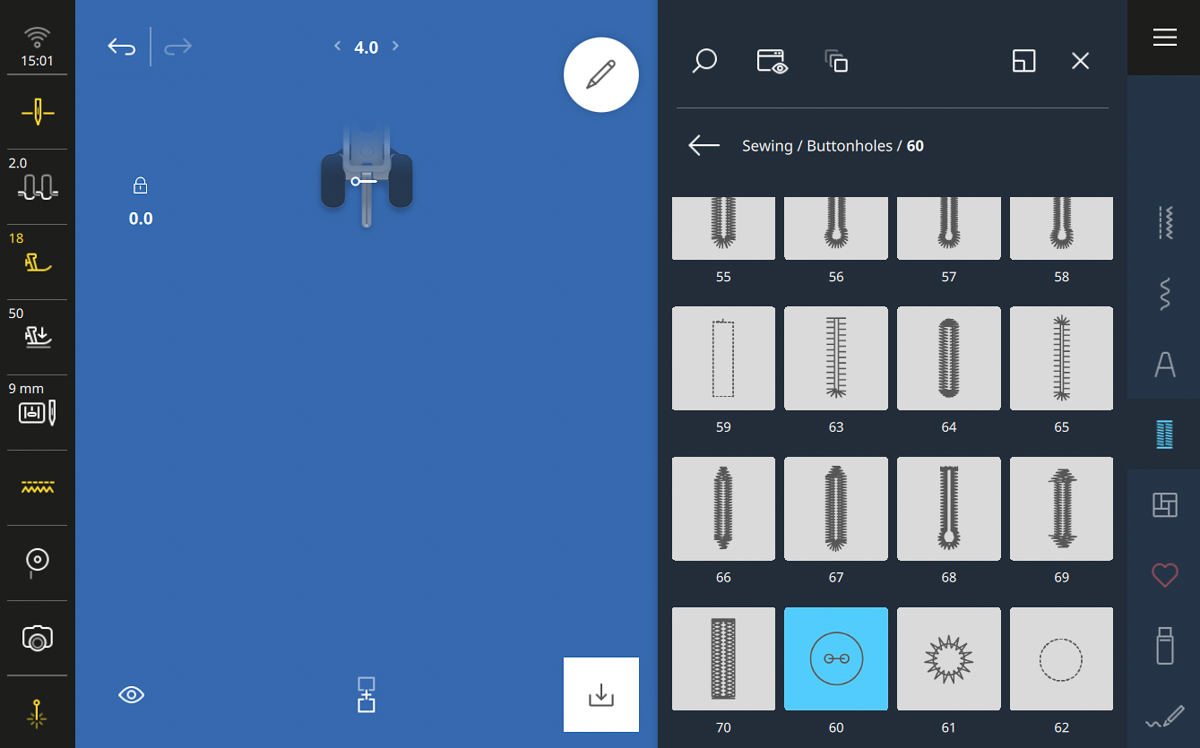
To create the perfect buttonhole for your shirt’s buttons, start by working in Sewing Mode on the BERNINA 990. Select Buttonhole Stitches in the File Manager and select your preferred style of buttonhole. For my shirt, on a medium-weight woven cotton, I used stitch #51, which is a standard buttonhole.
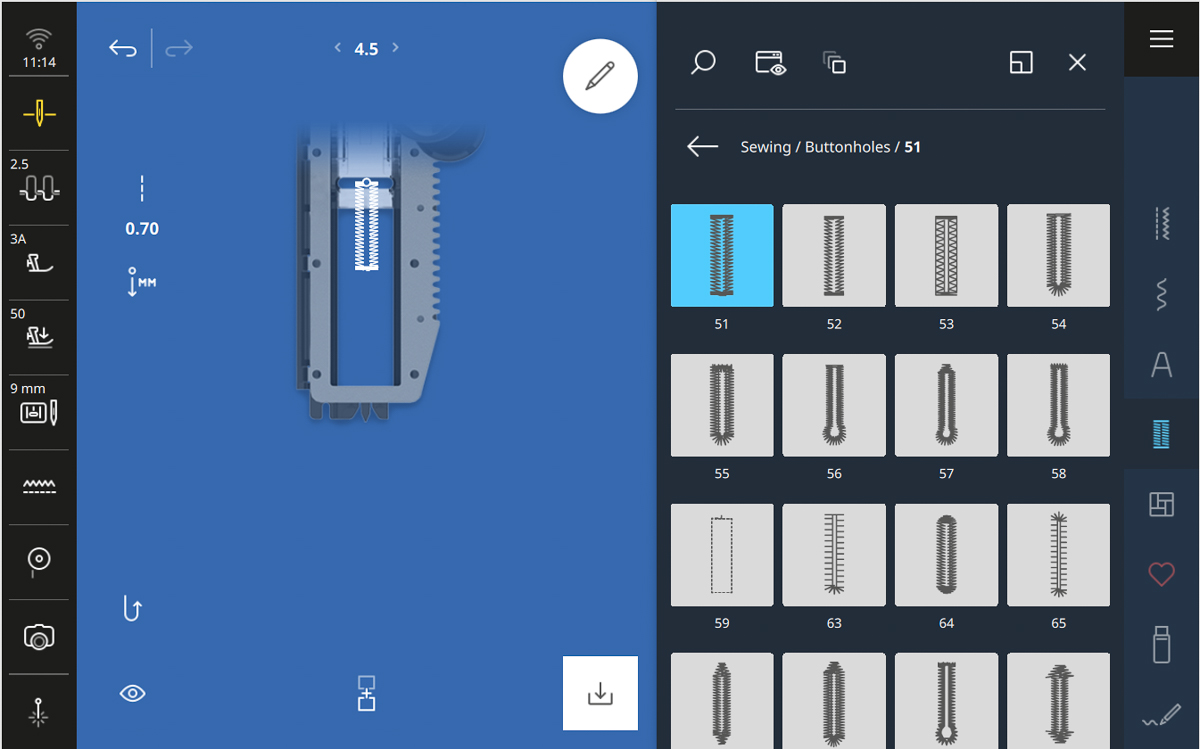
Open the Edit Menu. Under the Buttonhole Options submenu, select Length, then Auto Length.
BERNINA machines have several options for determining the size of your buttonholes, but the Auto Length is my favorite because it is so simple and foolproof. It doesn’t require remembering the button size you purchased (great news for me, with all my buttons tossed loose into a bag) or measuring and marking on your fabric. The machine does all the work.
Take one of your buttons and hold it up to the machine’s screen (where indicated) with your finger. Then, use either of the Multi-function Knobs to adjust the blue circle until it outlines your button.
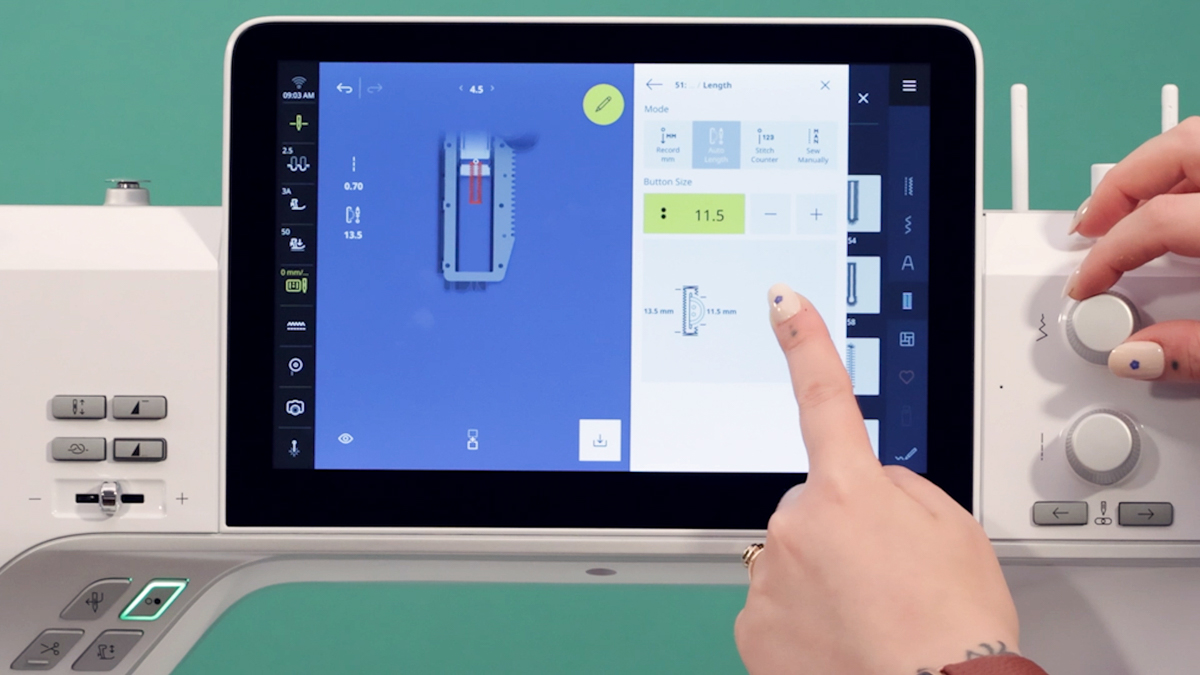
The machine takes the measurement of your button, adds a couple of millimeters to account for fabric thickness, and then sets up the perfect-sized buttonhole to fit the button you have on hand!
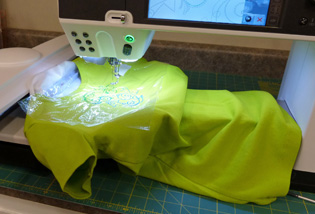
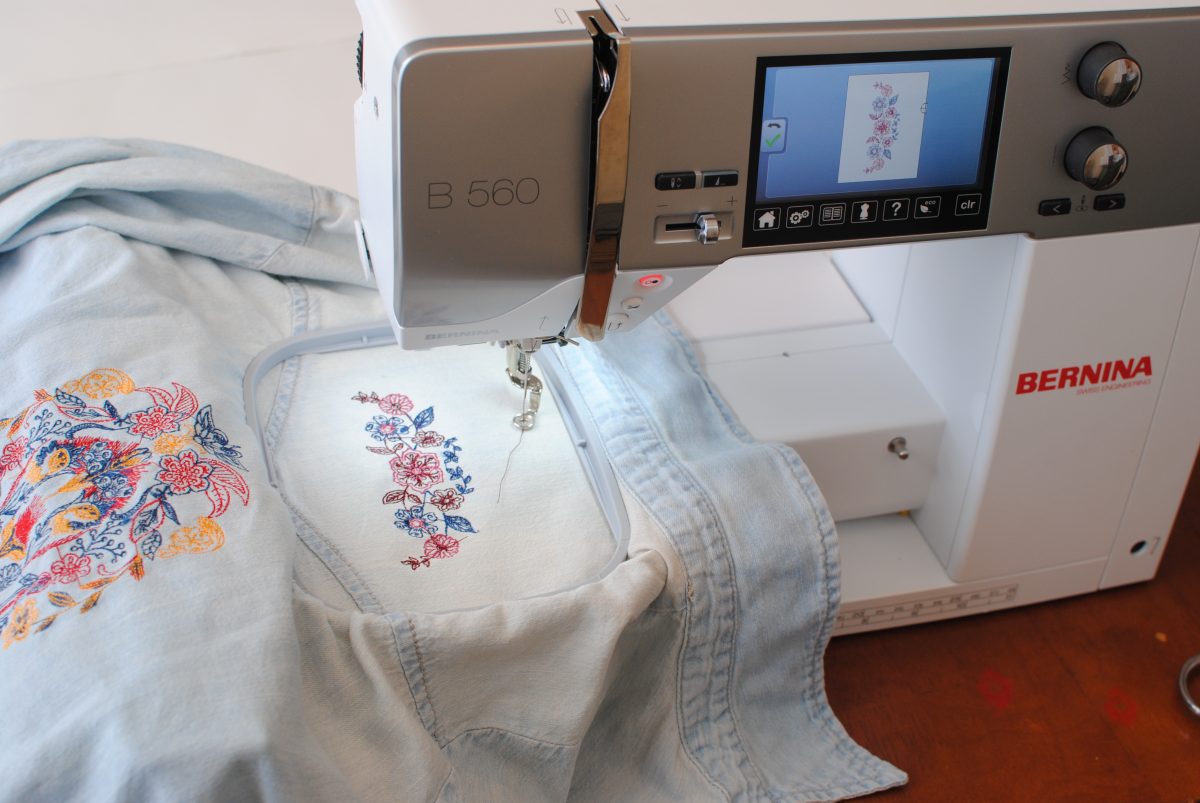
Step 3: Prepare Shirt and Embroidery Hoop
Before changing to Embroidery Mode, take a moment to prep and hoop your shirt.
Cut a piece of OESD StabilStick TearAway to approximately 9” x 20”. Hoop the StabilStick in the Mega Hoop with the glossy side facing up.
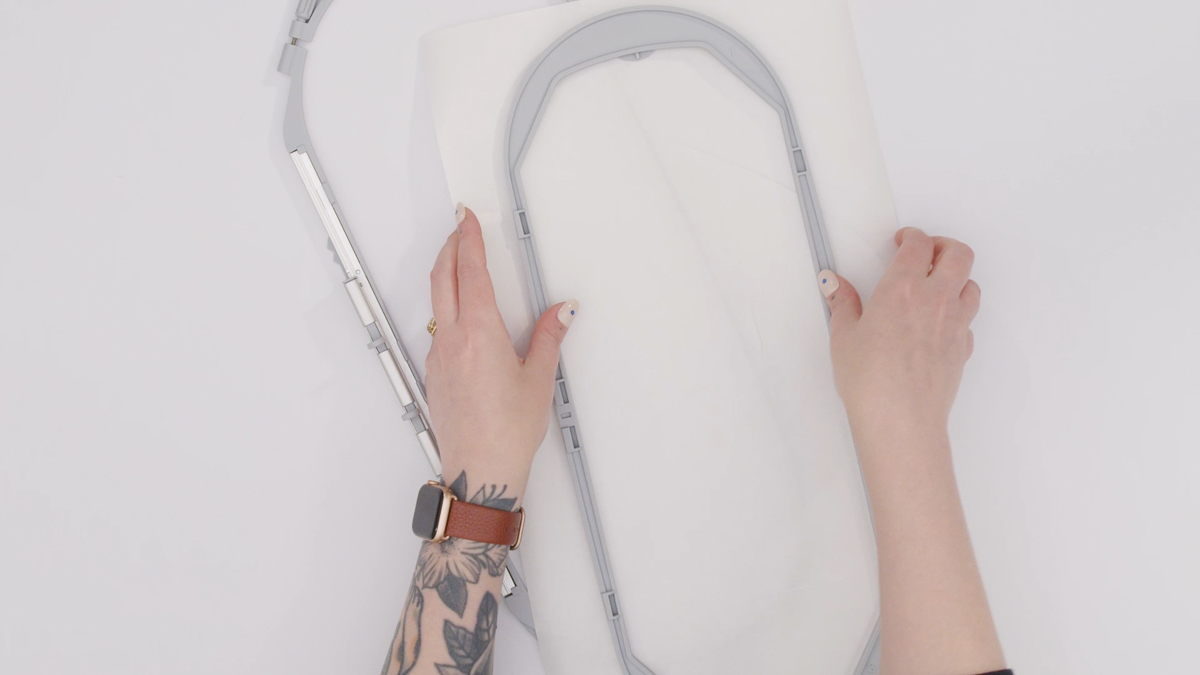
The Mega Hoop is my favorite hoop for this technique — it suits a button placket so well. The narrow hoop works great because we need little width for a button band, and at 15 ¾” in length, we can fit most (if not all) of a button band in a single hooping.
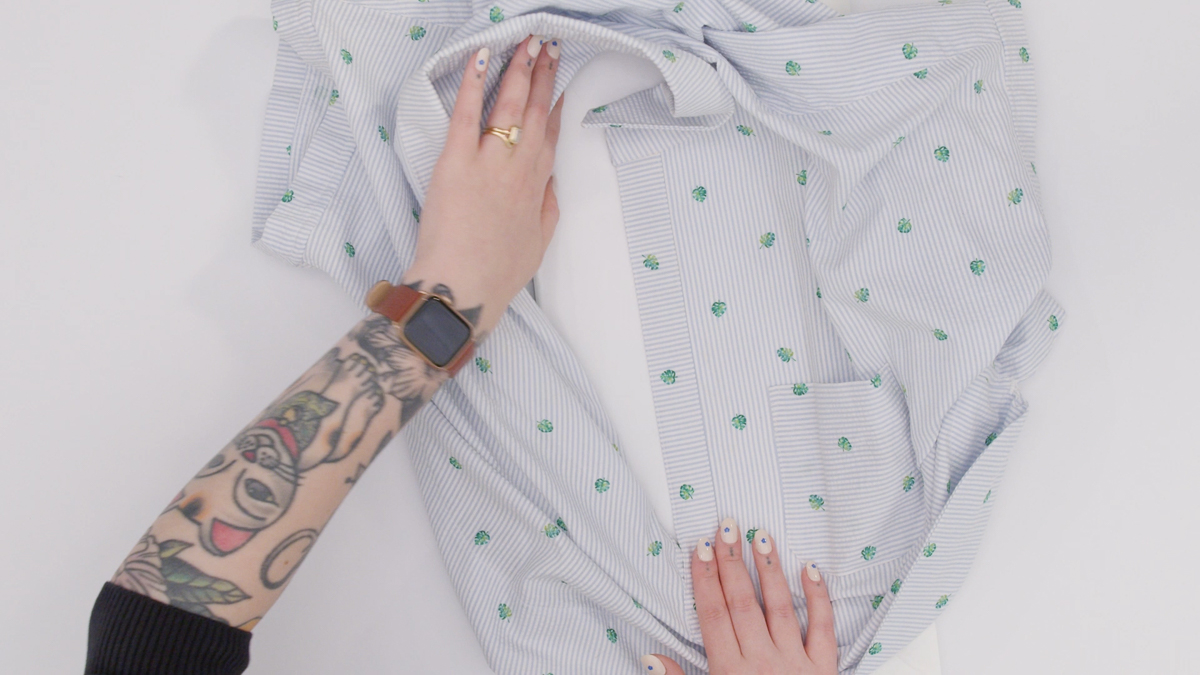
Score the glossy StabilStick paper and remove it to expose the sticky surface of the stabilizer underneath. Lay your shirt down in the hoop, taking care to center it as best you can and smooth out any wrinkles.
Step 4: Scan the Embroidery Hoop
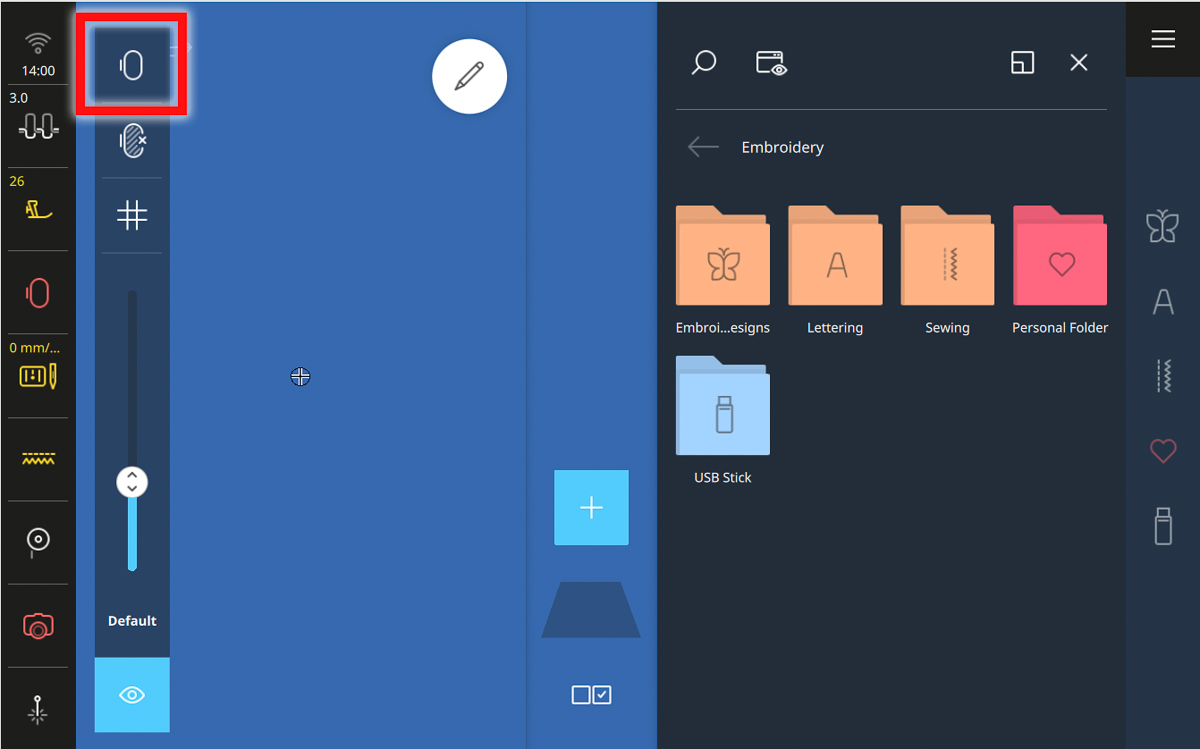
Navigate to Embroidery Mode by selecting the Main Menu, then select Embroidery.
Open the View toolbar and select Hoop Background. From the drop-down menu, select Scanned Image, then tap Scan Hoop.
Attach the hoop to the embroidery module when prompted. Be sure to keep loose parts of the shirt, like a collar or sleeves, secured out of the hoop’s stitching area. The machine will scan the hooped project.
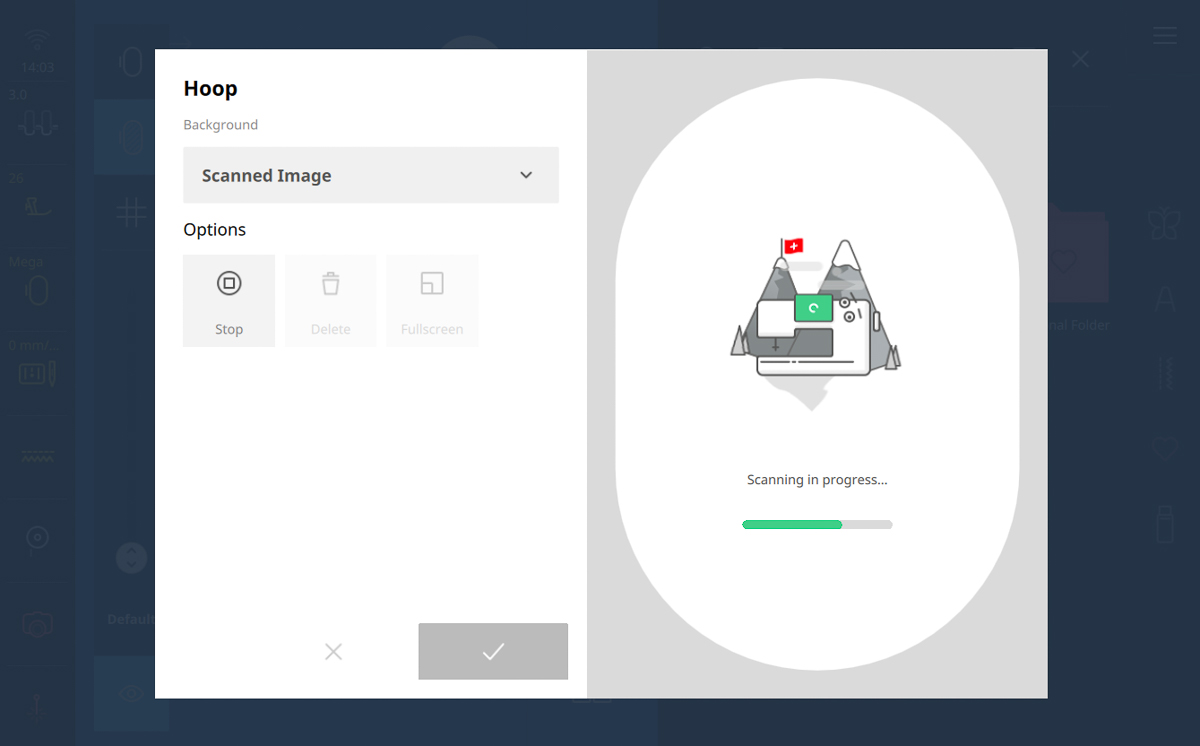
When scanning is completed, tap the green checkmark to close the Hoop Background menu, then close the View toolbar.
Now we can use the scanned image of our shirt to visualize and lay out our buttonholes in embroidery.
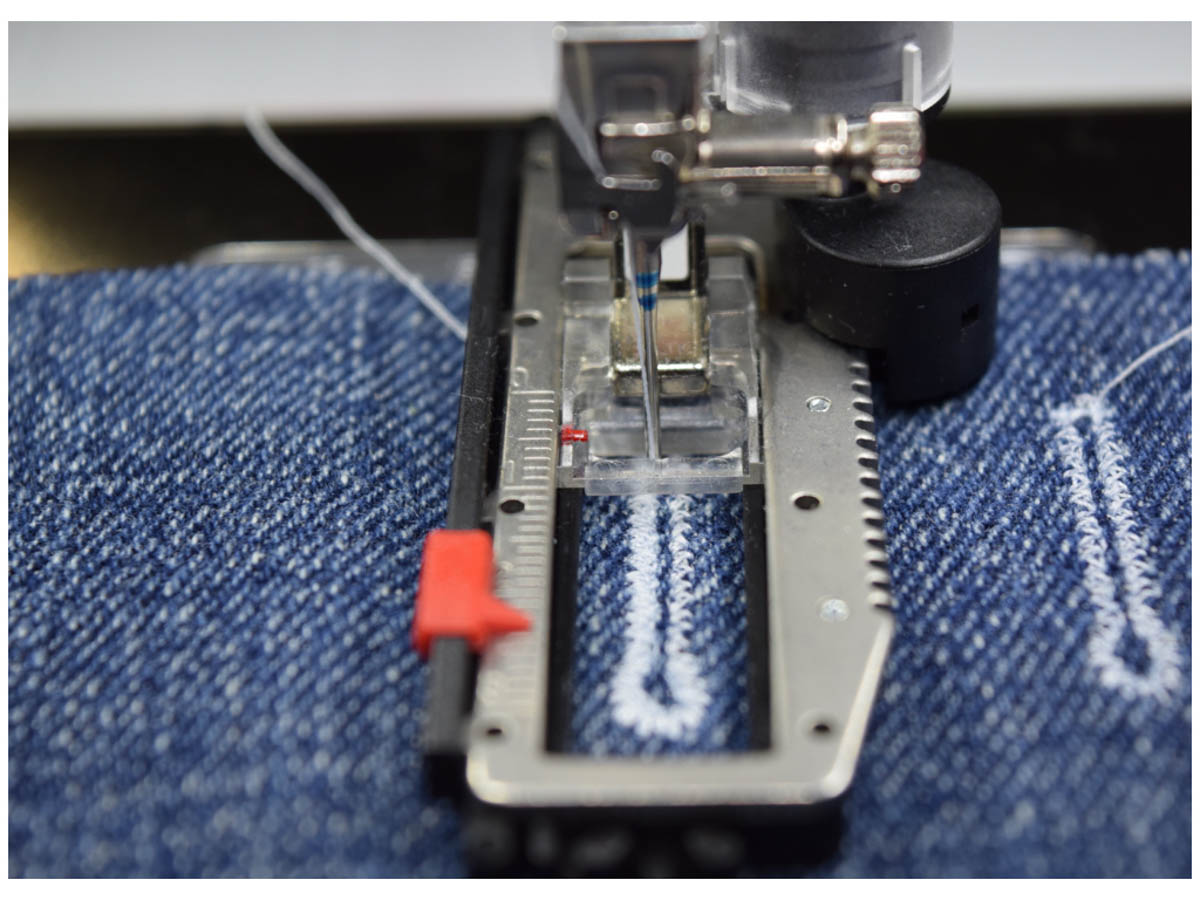
Step 5: Create Buttonhole Row
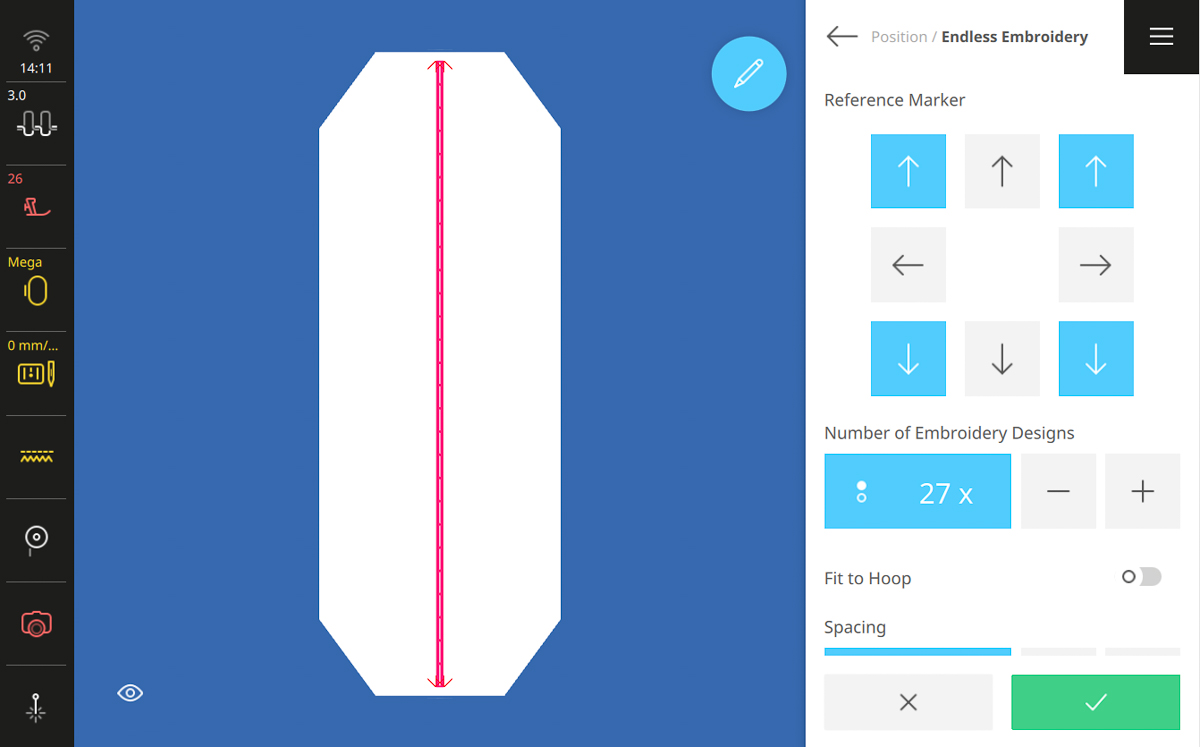
We will use Endless Embroidery to create our button band. Endless Embroidery is a tool that will create and evenly space duplicates of the design in your embroidery hoop. You can also add Reference Markers, which are long basting stitch-like arrows that will sew out and create points of reference for multi-hooped projects.
In the File Manager, select the Personal Folder, then tap on the buttonhole sewing stitch.
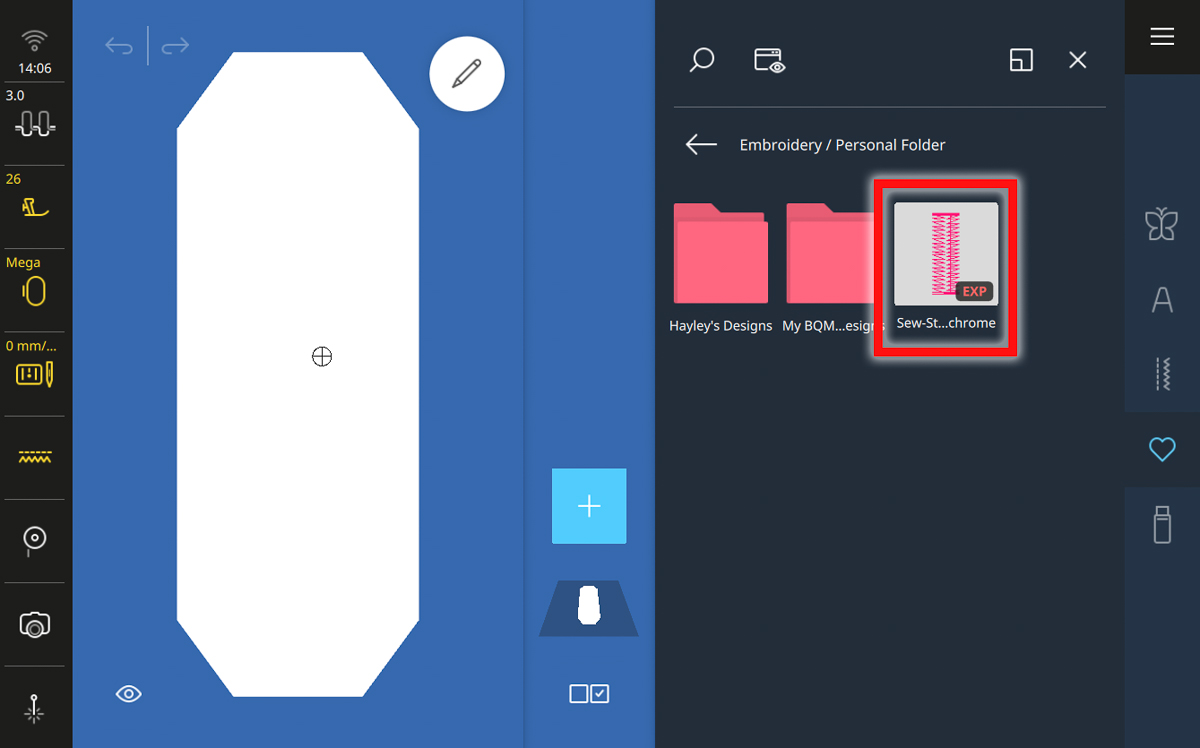
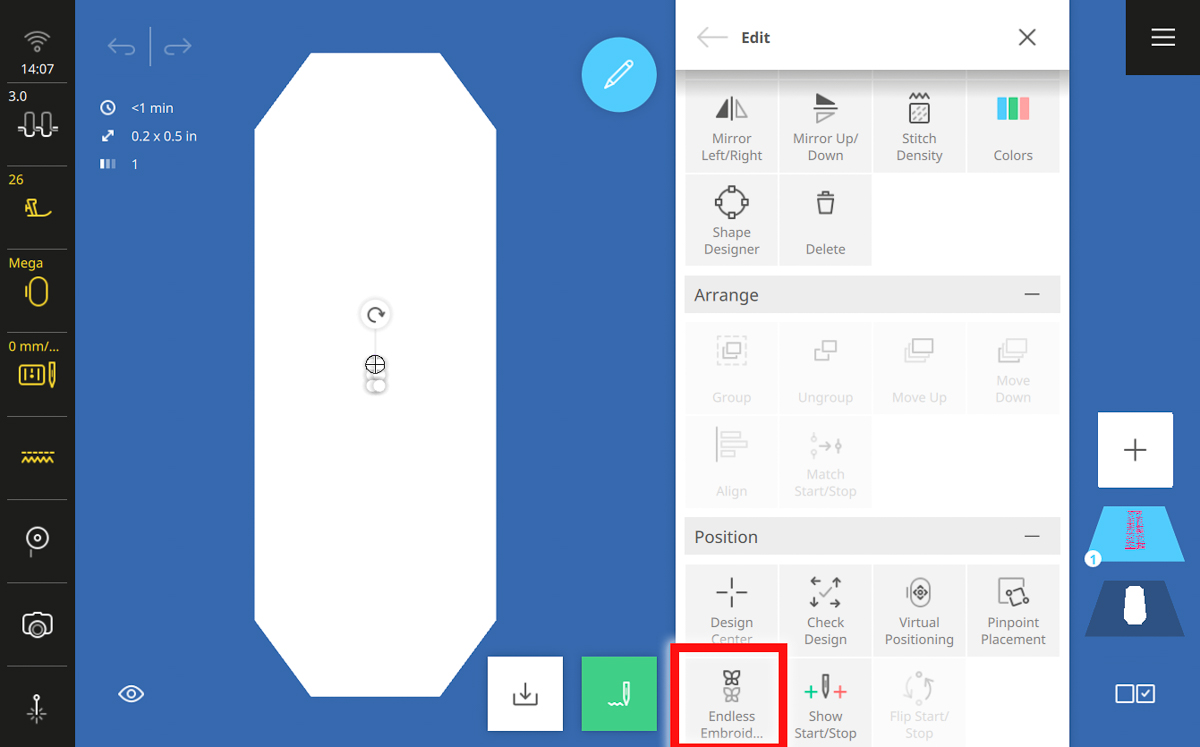
Open the Edit Menu, then scroll down and select Endless Embroidery.
When we open Endless Embroidery, it will automatically calculate the maximum number of repeats of our design that can fit in the length of the hoop. With a small buttonhole stitch like this, it’s quite a lot! Mine will fit 27 times in the length of the Mega Hoop.
Decrease the number of embroidery designs to the desired number of buttonholes for your shirt placket. My Kalle shirt has only a partial button band, so I reduced the number to four for my shirt.
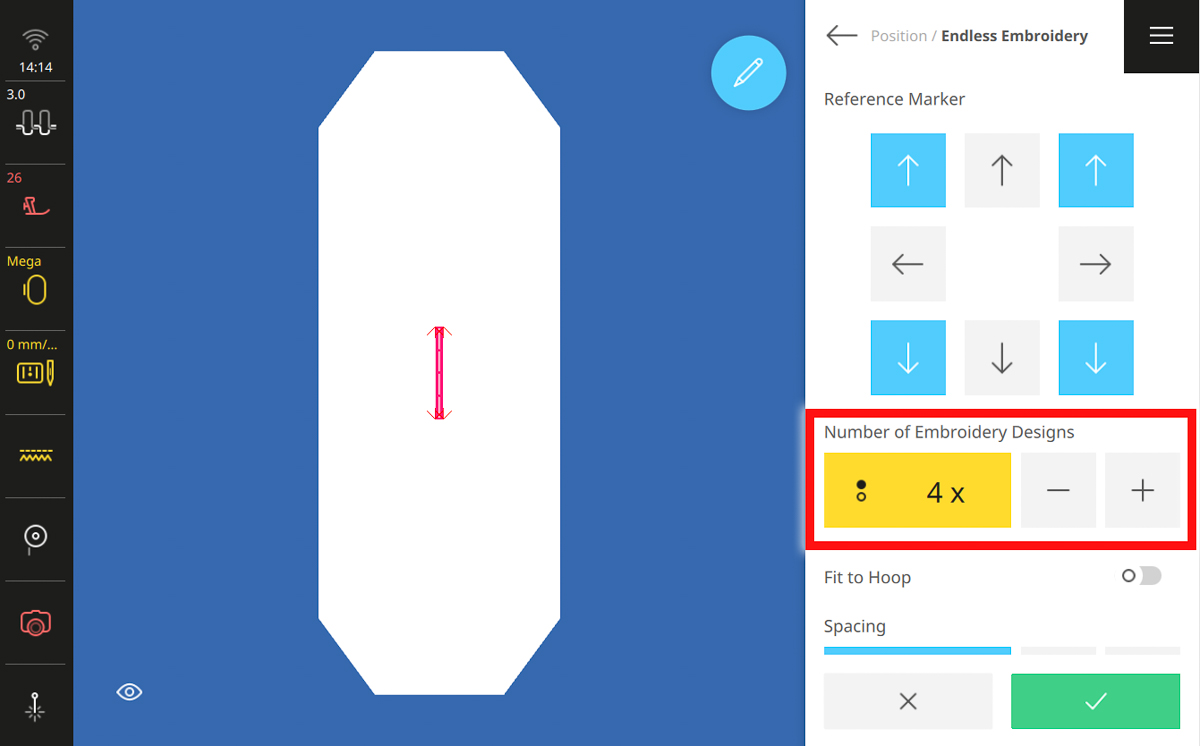
Scroll down in the Endless Embroidery menu to Spacing and increase it so that the buttonholes fit the length of your shirt’s button band. This is the beauty of scanning the hoop — you can see that distance change in real time and visualize it right on your shirt!
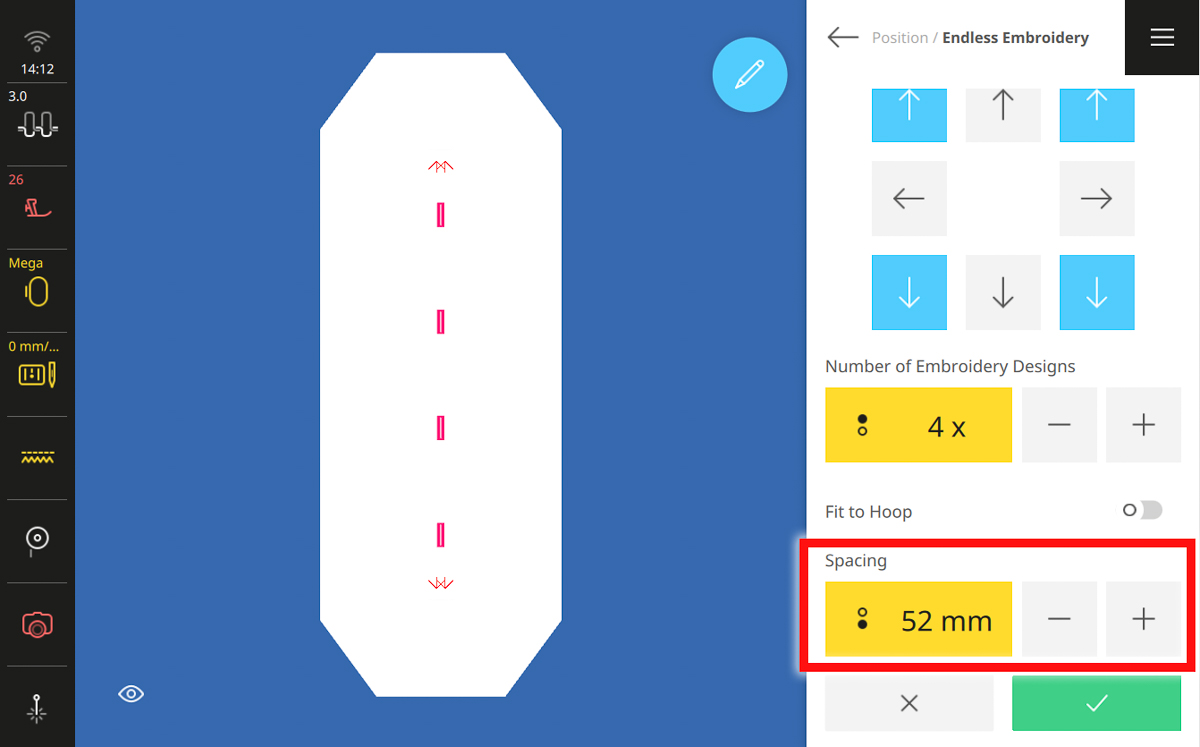
Lastly, deactivate all the Reference Marker arrows. When your button band is set up, tap the green checkmark to confirm.
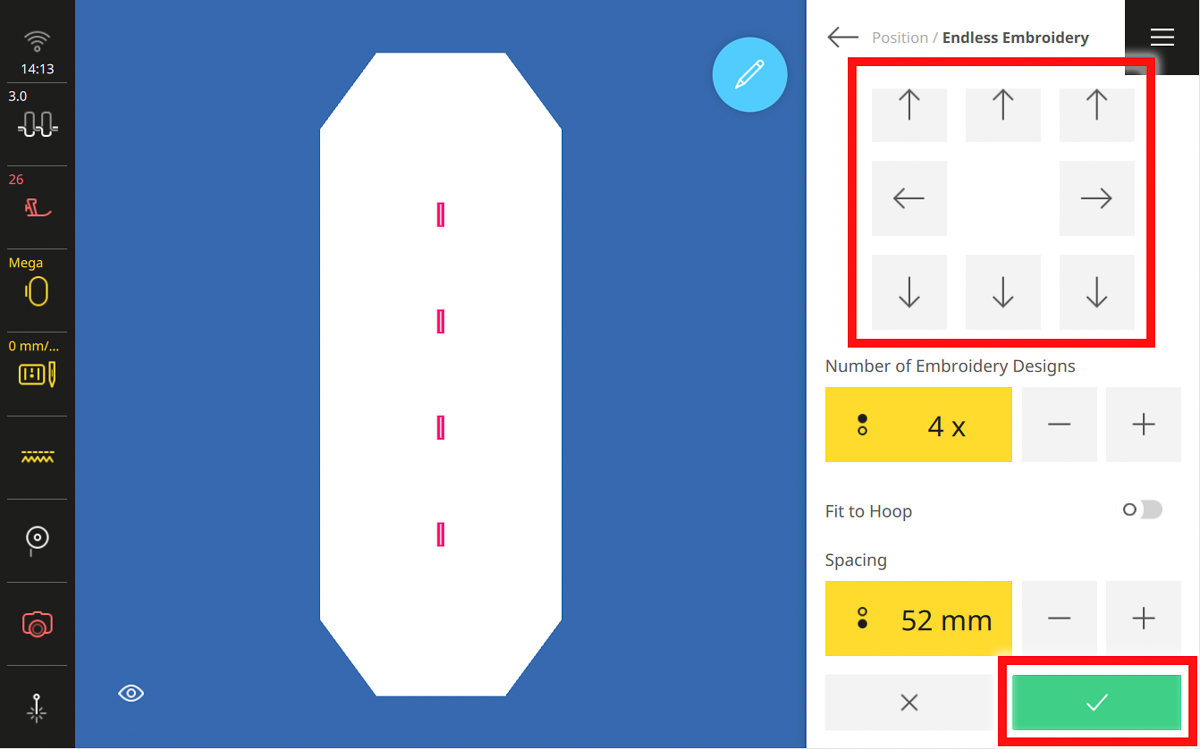
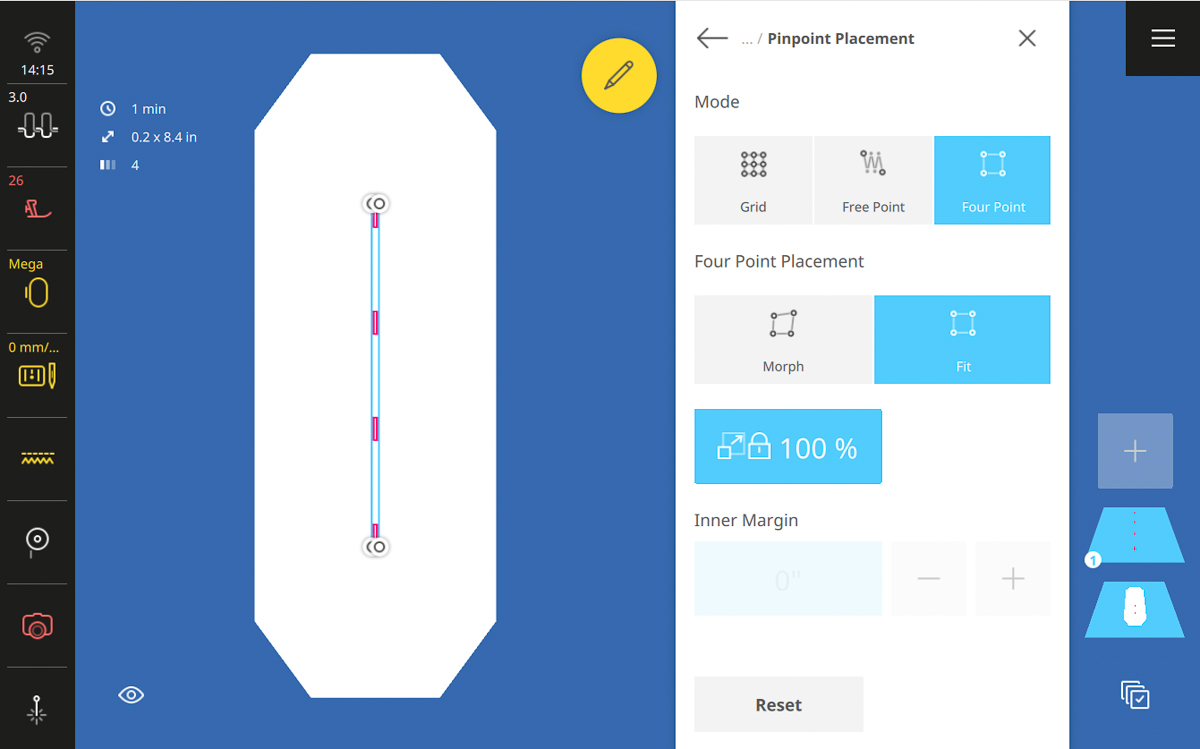
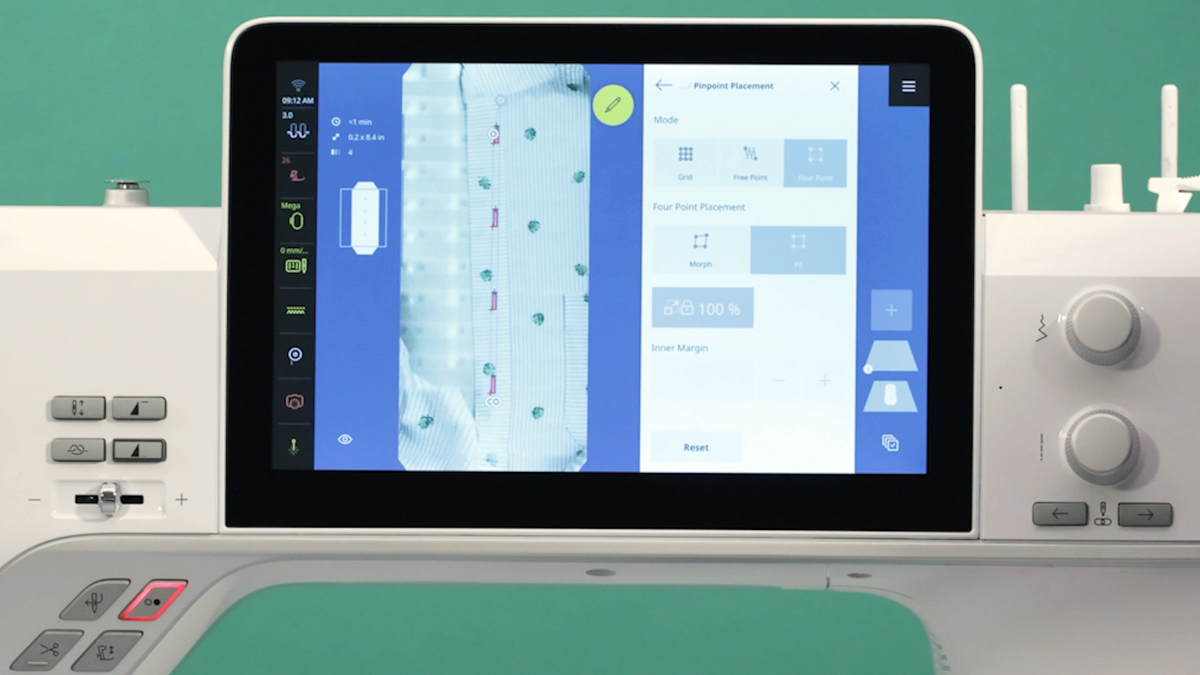
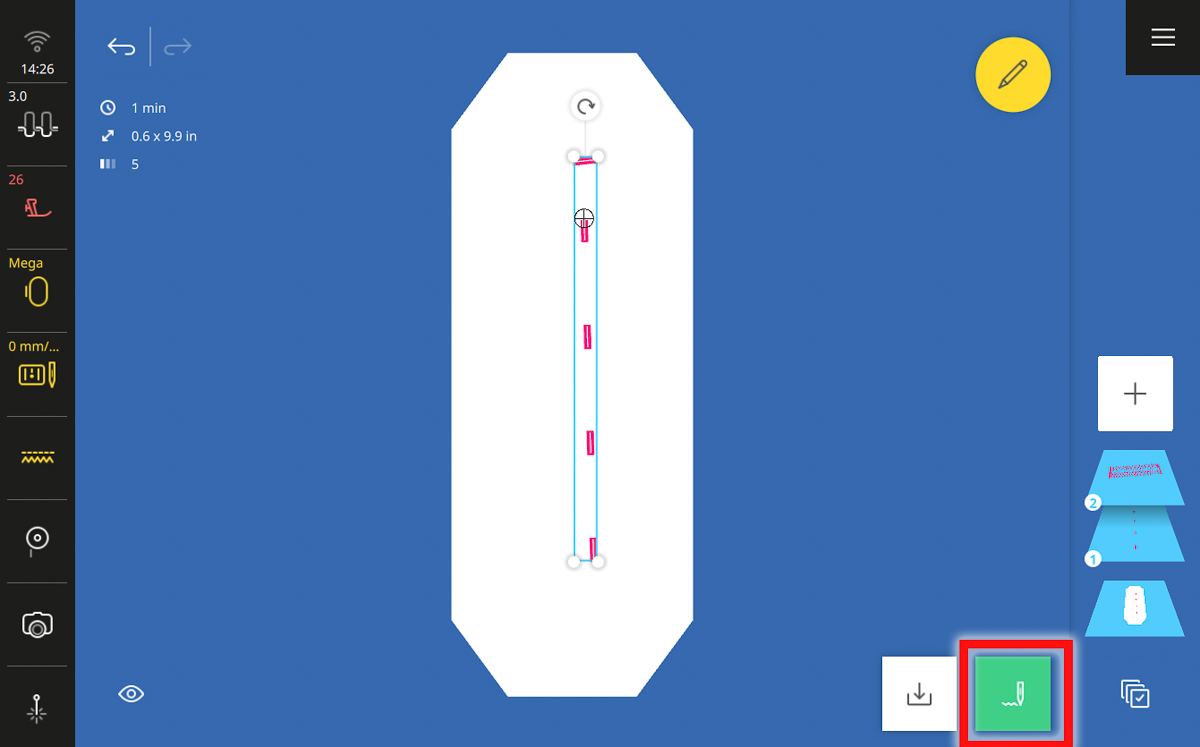
Step 6: Position Buttonholes
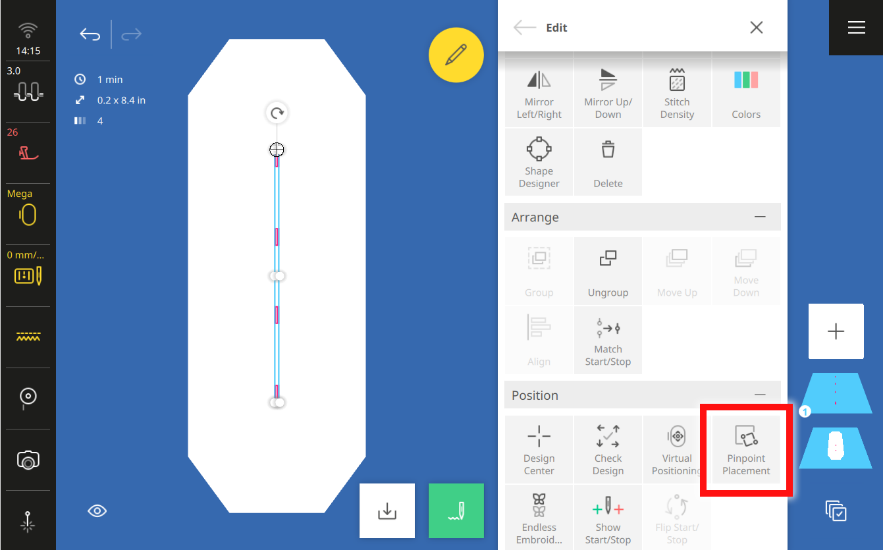
Tap the back arrow to return to the Edit Menu. Scroll down to the Position submenu and select Pinpoint Placement.
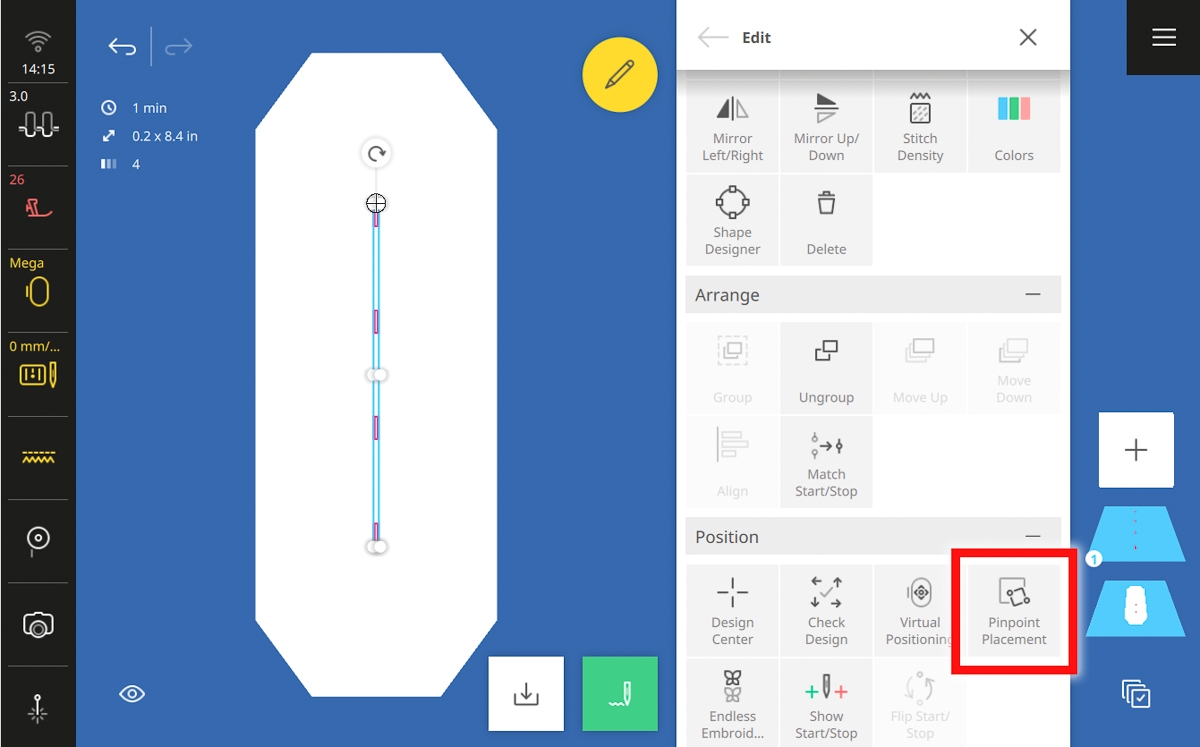
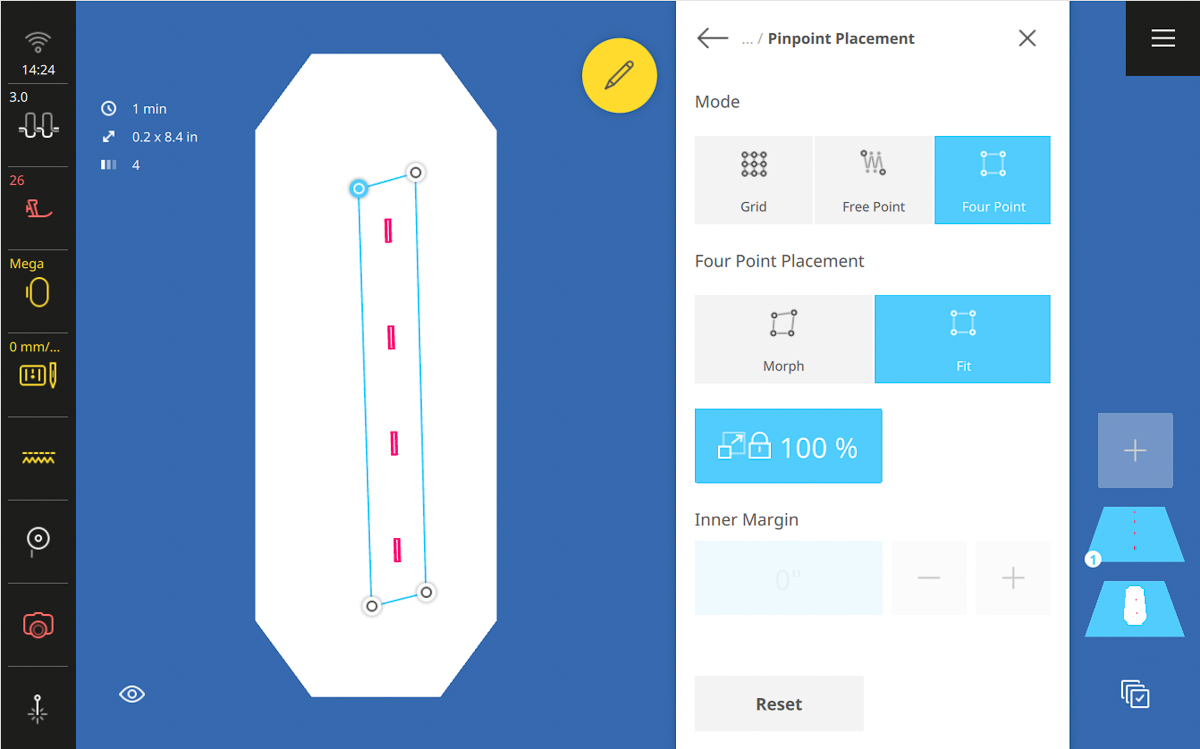
Select Four Point and choose Fit. The Fit tool will perfectly center our row of buttonholes within the four points we set to outline the button band.
Before you move anything, be sure to tap the 100% Lock. This will make sure that our buttonholes do not get resized in the process of positioning.
Tap one of the four dots in the Design Altering Area, zooming in if you need to. Then, use the Multi-function Knobs to move this point with the corresponding corner of the button band. Activate the Pinpoint Laser to better see exactly where that point is moving.
Moving methodically around the design (like going clockwise or counterclockwise), select the next dot in the Design Altering Area.
After all four points have been aligned to the corners of the button placket, the row of buttonholes will be perfectly centered. Close the Edit Menu when finished.
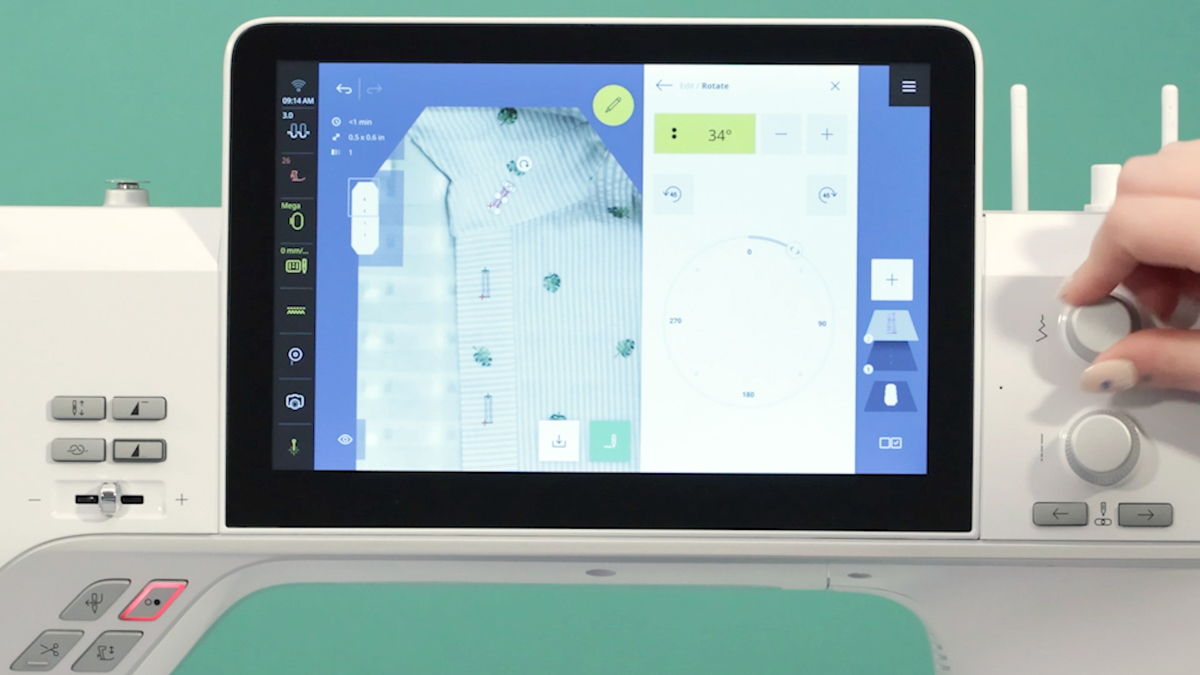
You may also choose to add a final top button to the collar stand of the shirt. In the File Manager, select the Personal Folder, then tap on the buttonhole sewing stitch.
Zoom in as needed and visually place the buttonhole on the collar stand. Use the Rotate handle on the Bounding Box or the Rotate tool in the Edit Menu to angle it horizontally to fit parallel inside the collar stand.
Step 7: Stitch out
After all buttonholes are positioned, tap the green needle icon to go to Stitchout.
In the Stitchout Summary, most settings can be left at the default recommendations. However, you will want to turn Thread Away off and set the Color to Single Color.
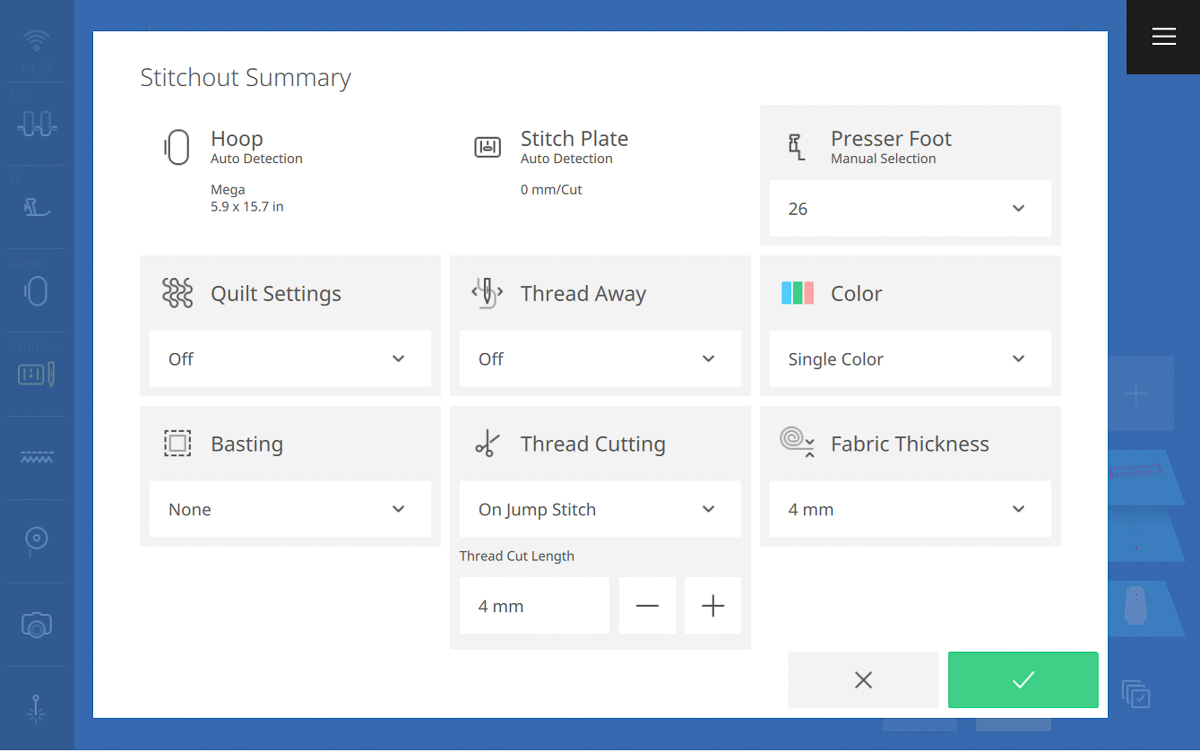
It is recommended to turn off Thread Away when items are floated in the hoop (not secured between the inner and outer rings of the embroidery hoop) to prevent the presser foot catching on any loose fabric.
Stitching as a Single Color design will instruct the machine to sew the entire design without pausing for a thread color change between designs, or in this case buttonholes.
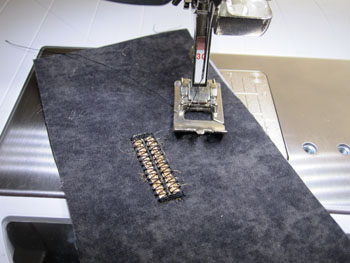
Press and hold the Start/Stop button to begin and allow all buttonholes to stitch out.
When stitching is completed, un-hoop the stabilizer and shirt, and tear away excess stabilizer and set aside. Then, use a buttonhole cutter or seam ripper with a straight pin to open the buttonholes on your shirt placket.
Step 8: Attach buttons
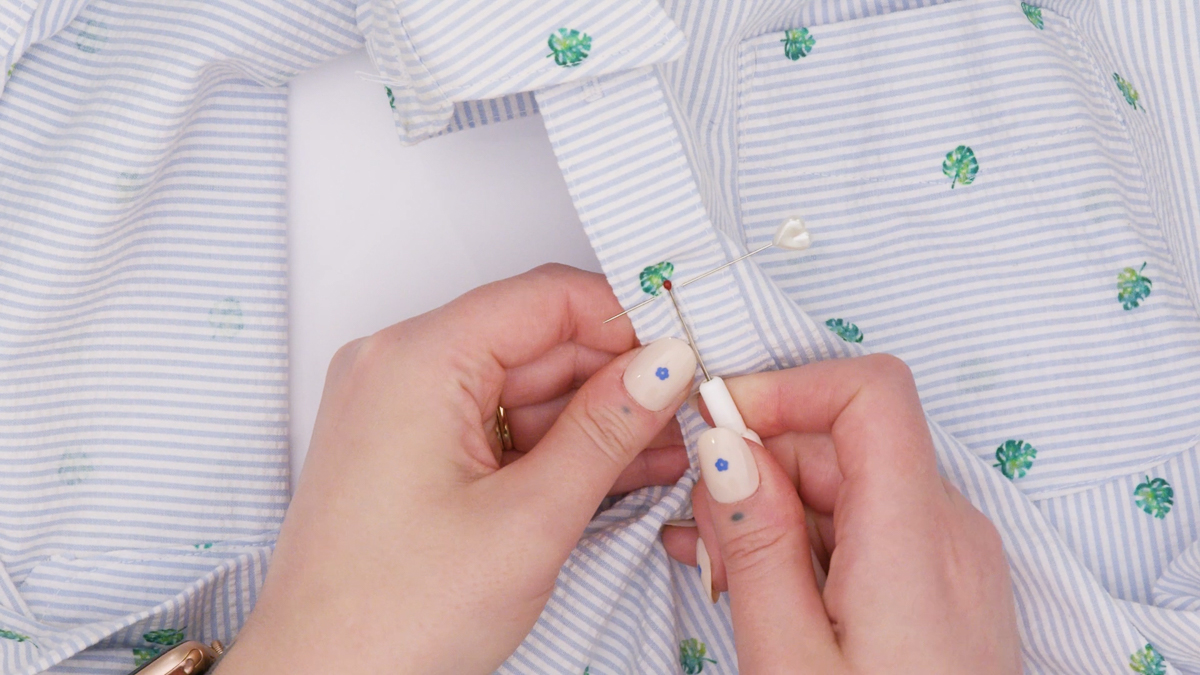
Lay your shirt fronts together, as you wish for it to sit when fully buttoned. Use a fabric marking pen and mark a dot through the center of each buttonhole onto the side of the shirt where the buttons will be attached.
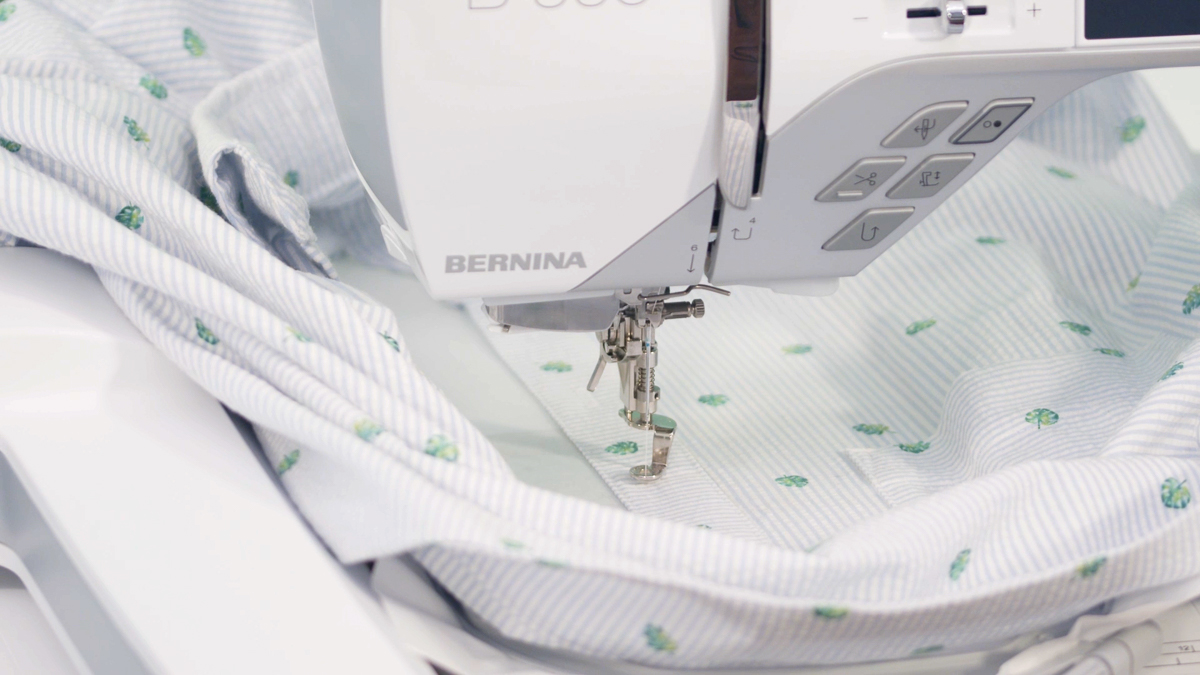
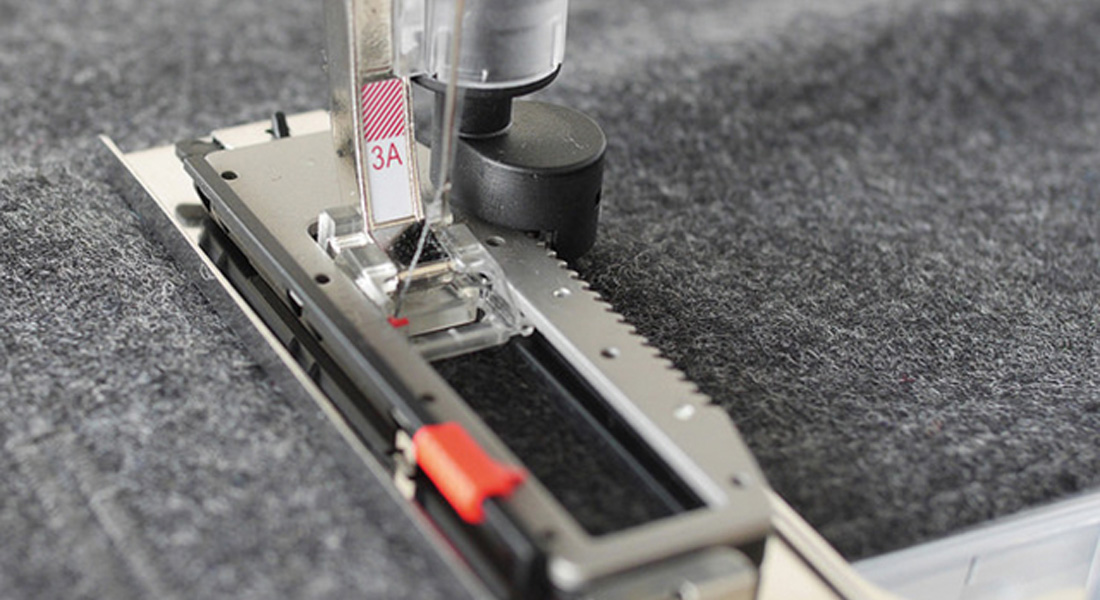
On the machine screen, navigate to Sewing Mode and set the machine up for sewing. Attach Button Sew-on Foot #18 and the 9 mm Stitch Plate. Be sure to select the #18 foot in the Presser Foot Menu.
Select stitch #60, the button sew-on program.
Place medium-weight tearaway stabilizer on the back/wrong side of your button band. I highly recommend using the scraps from your embroidery for this!
Place the button band underneath the presser foot, centering one of the marked points for a button underneath the presser foot. Place a button on top of this dot and use the Free Hand System to slowly lower the presser foot onto the button, aligning the holes of the button with the openings in the presser foot.
When properly lined up, use the Start/Stop button to sew out the button sew-on program. The machine will sew a set number of stitches, with intermittent securing, and stop automatically when completed.
Manually cut threads and secure as desired. I recommend hand-knotting threads on the back side of the shirt and adding a dab of Fray Check for an extra tidy and secure finish.
Repeat this process for all buttons on your button band, then remove the tearaway stabilizer.
Now wear your new me-made shirt with pride!

Used Products

What you might also like


2 comments on “Easy Buttonholes with Embroidery”
-
-
This is great! Thanks! Any thoughts about doing a video tutorial on this?
Leave a Reply
You must be logged in to post a comment.
Thank you! This was an excellent tutorial.