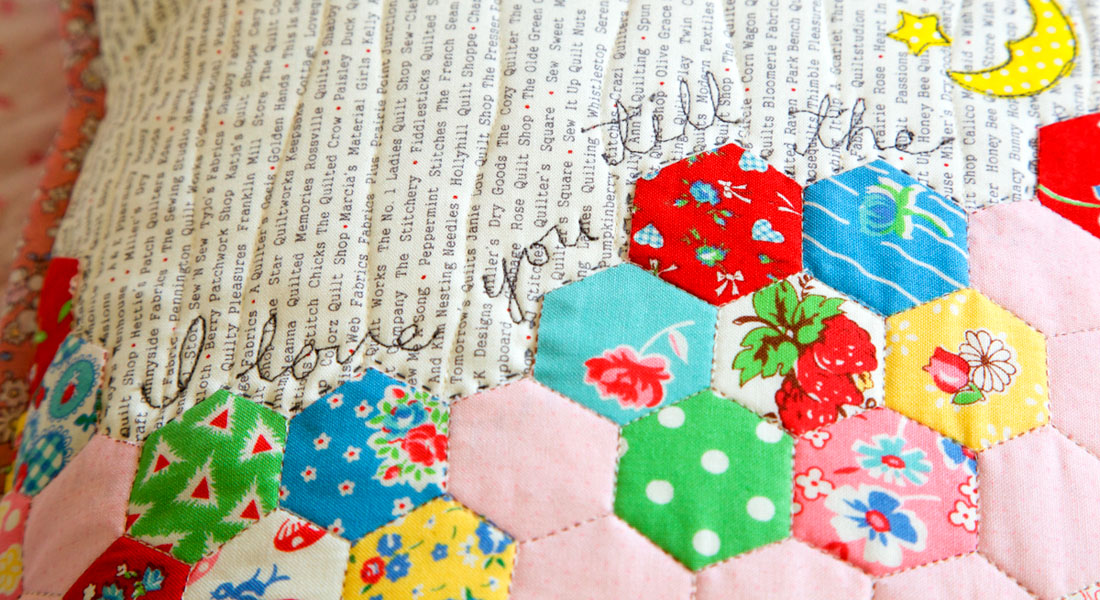
Easy Vintage Embroidery Applique Pillow Case
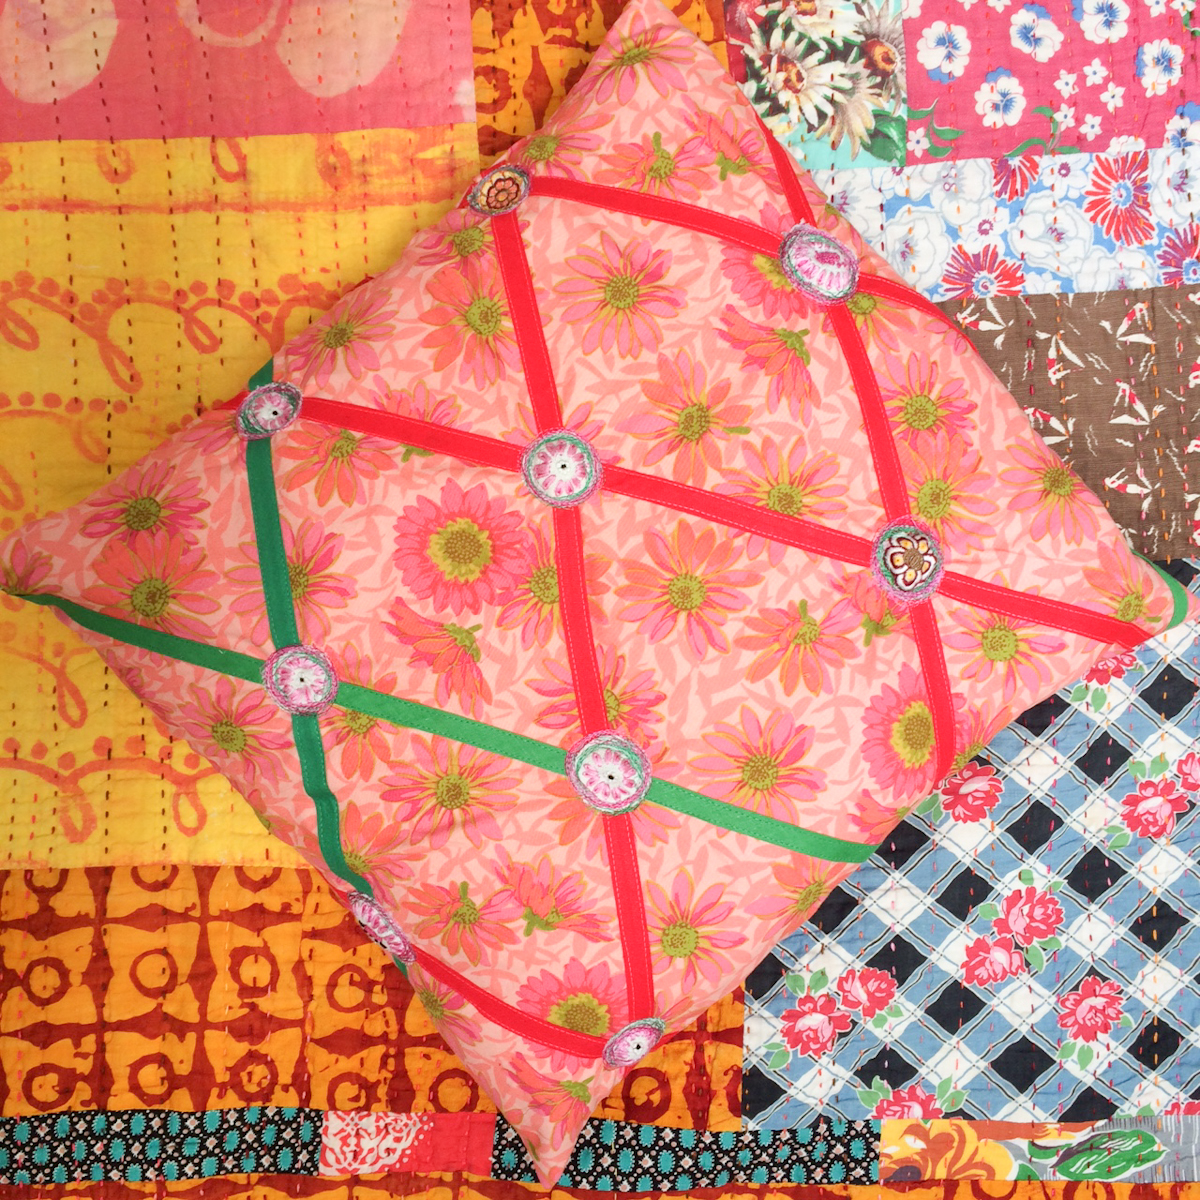
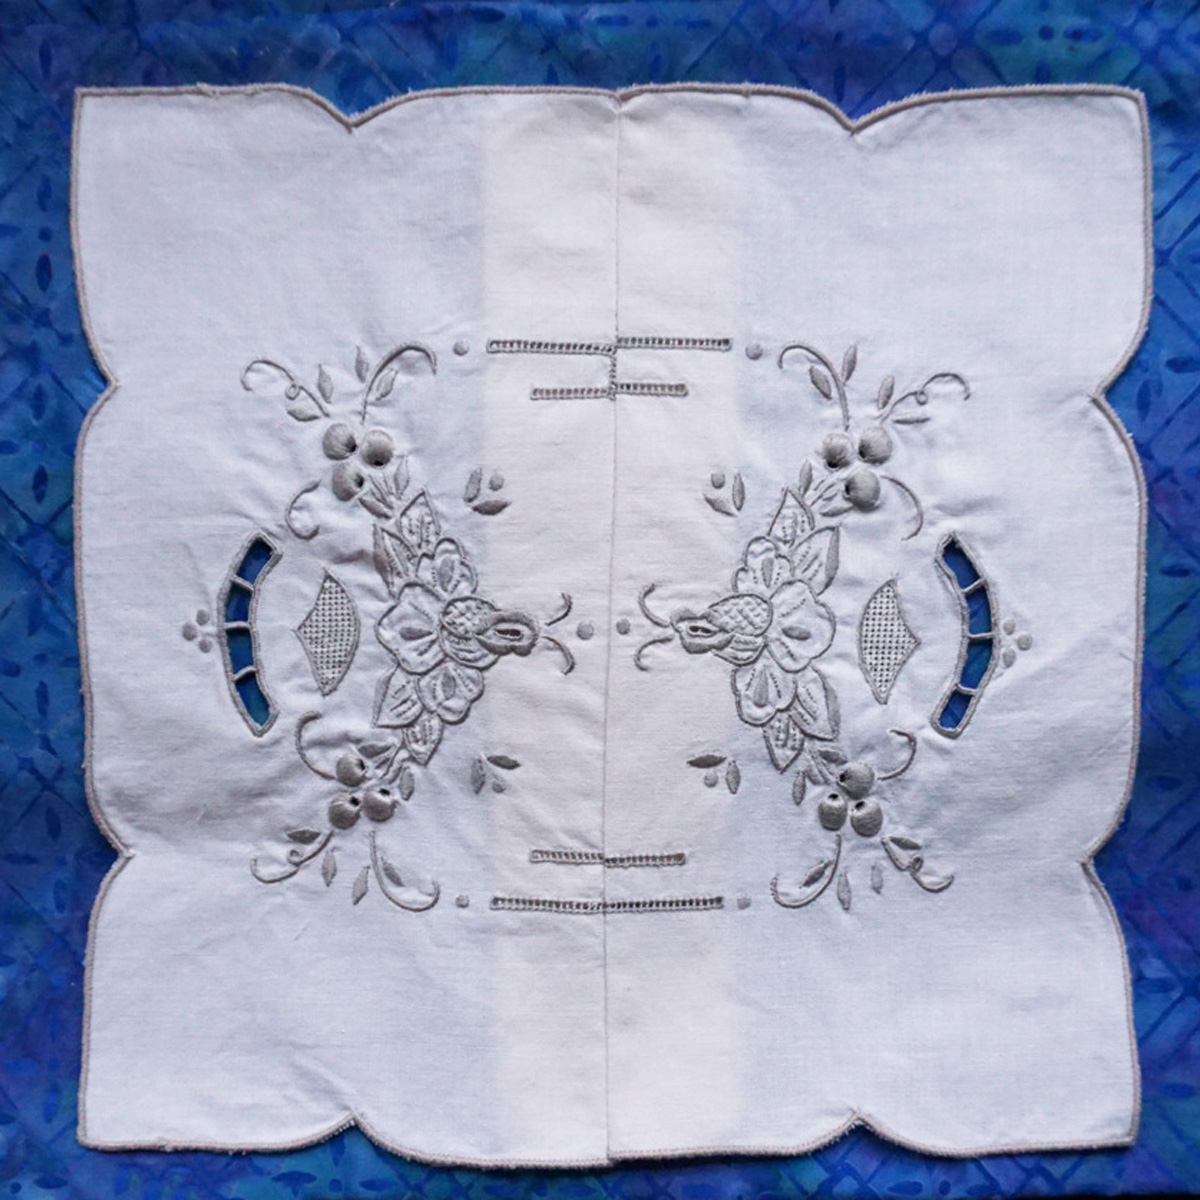
I am an irrepressible collector, and I can’t seem to leave a rummage sale without at least one or two embroidered linens. Often, they’ve got stains, but usually the embroidered part (or at least SOME of the embroidered parts) are spared, making them the perfect material for collage and applique. For this little pillow project, I used the lazy daisies from an old tablecloth to create flower appliqués for a bright pink throw pillow—perfect for making a guest bed or sofa a little sunnier this spring. This project is a fun exercise in collage, and best of all, uses no pins.
Materials to Make a Vintage Embroidery Appliqué Pillow Case
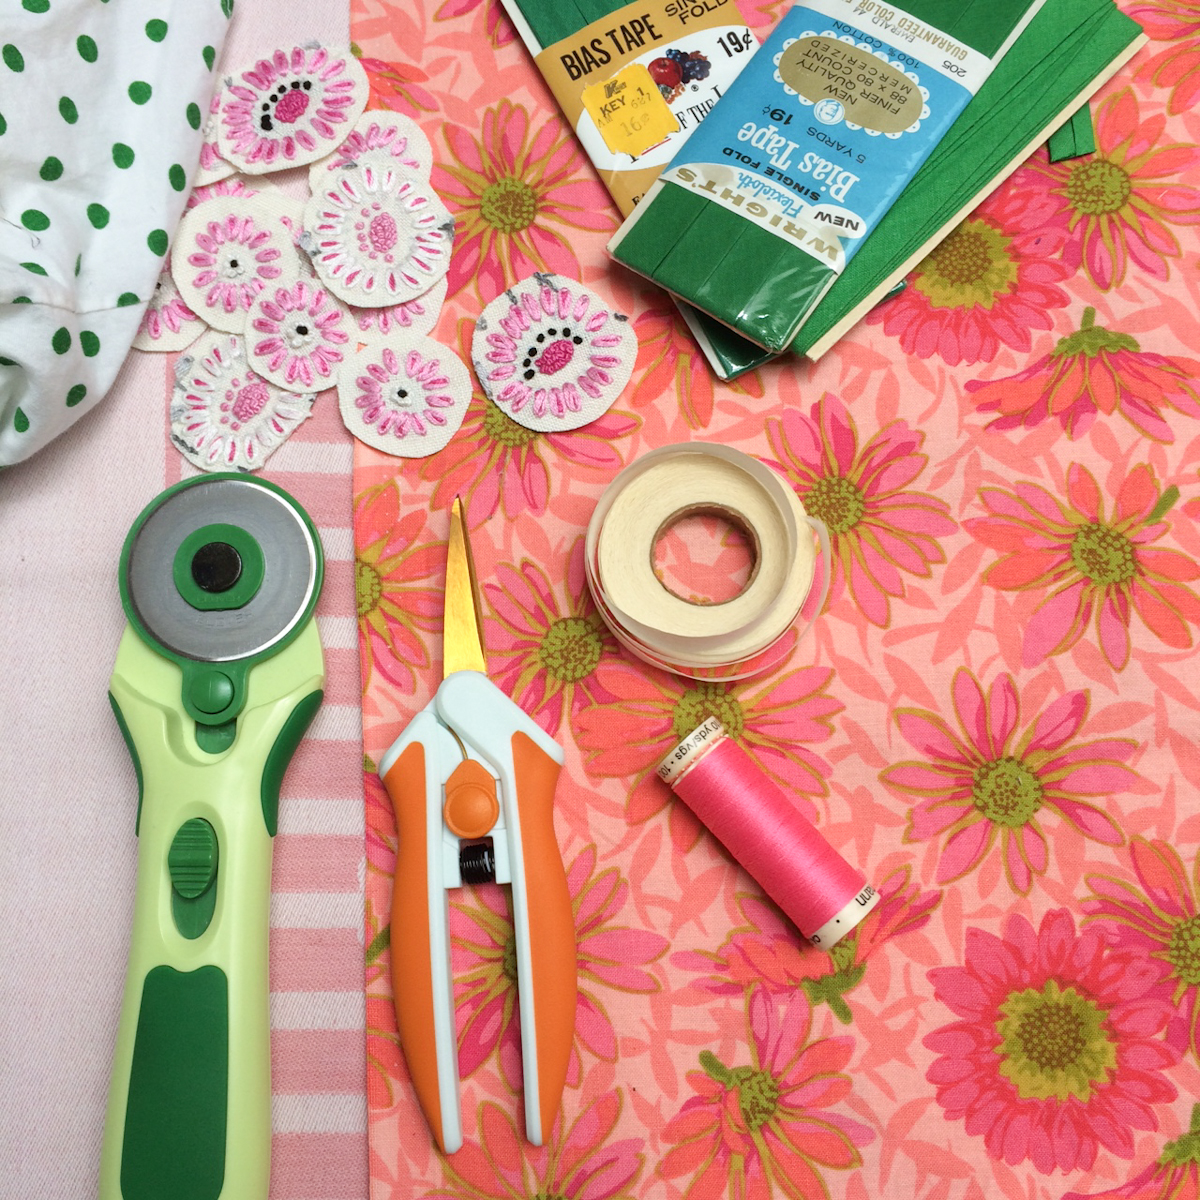
- 16″ Pillow Form
- 36″ x 17″ piece of fabric
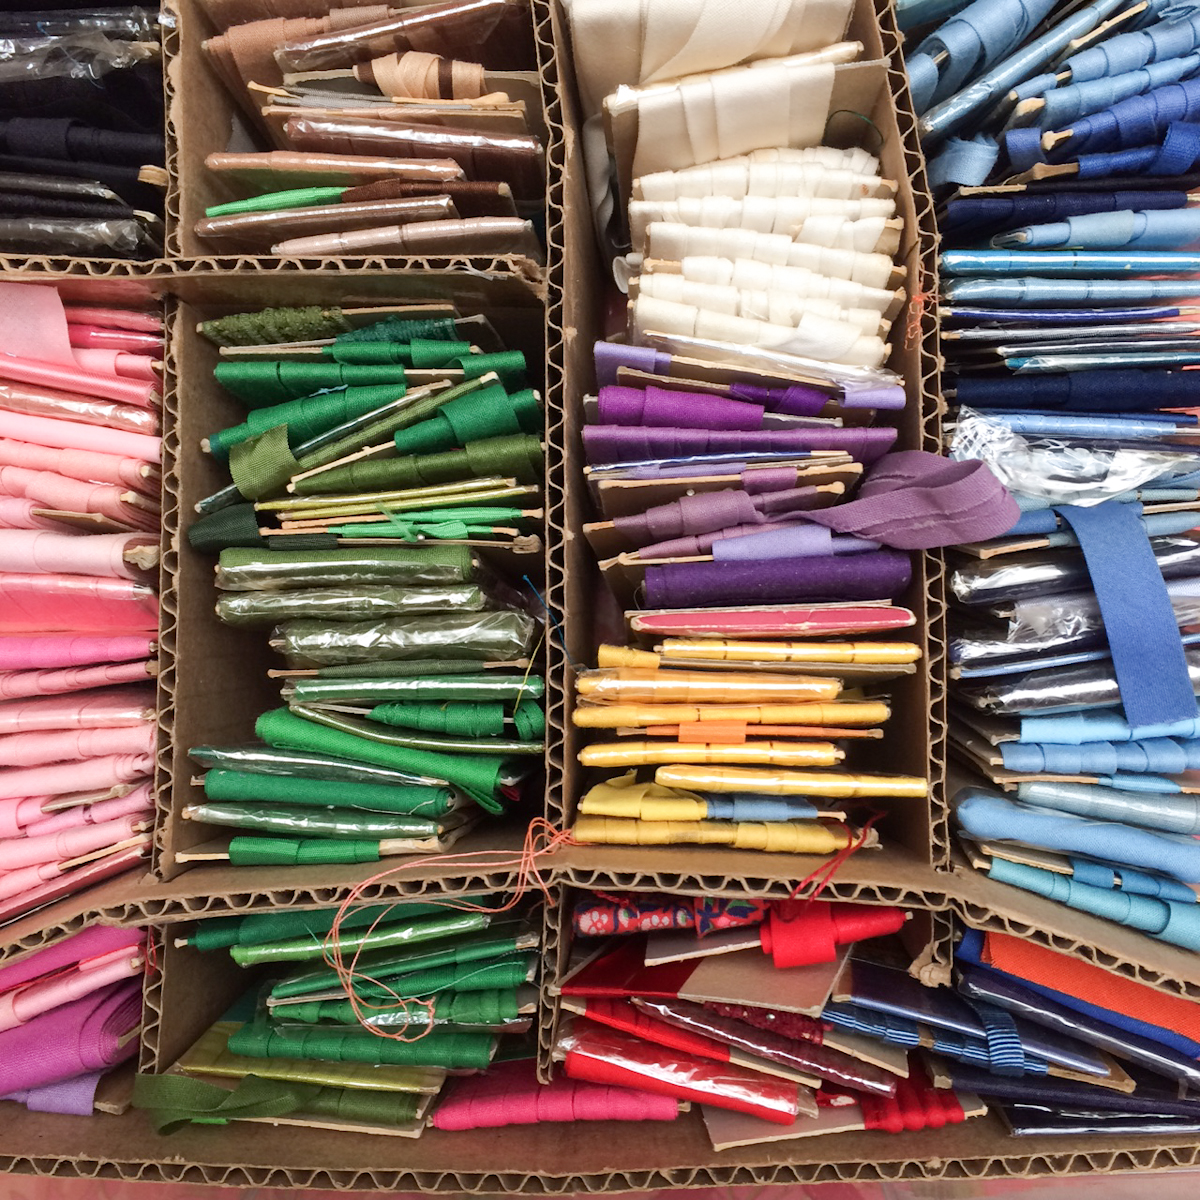
- Bias Tape or Ribbons to form criss cross pattern
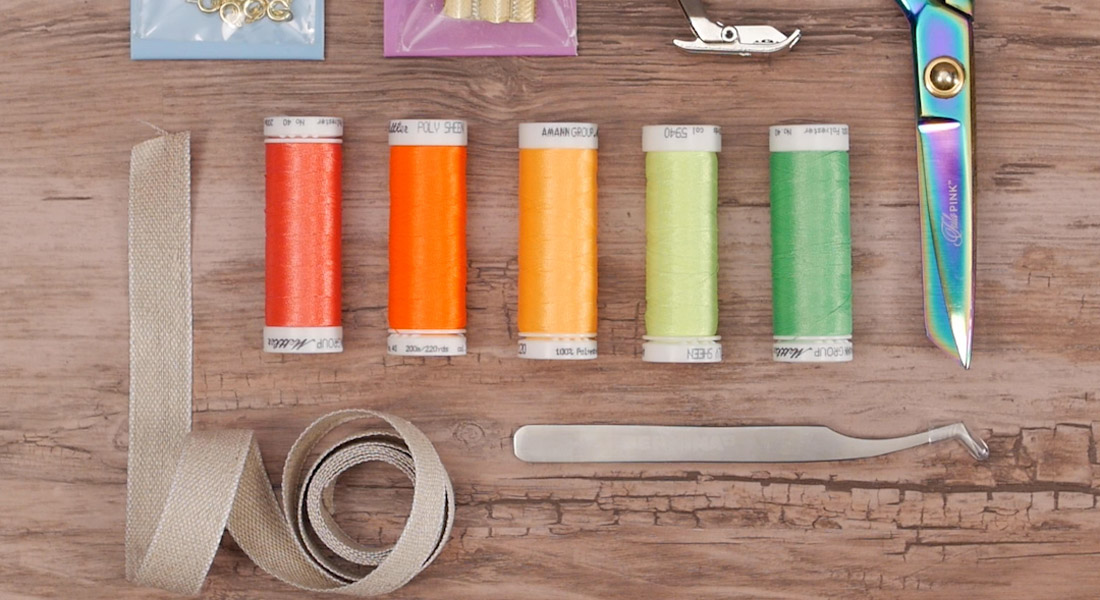
- Embroidery (I used an embroidered table cloth from a rummage sale)
- Fusible Web
- Fusible Web Tape
- Iron and Ironing Surface
- Sharp Snips
- Rotary Cutter and Mat
- Thread
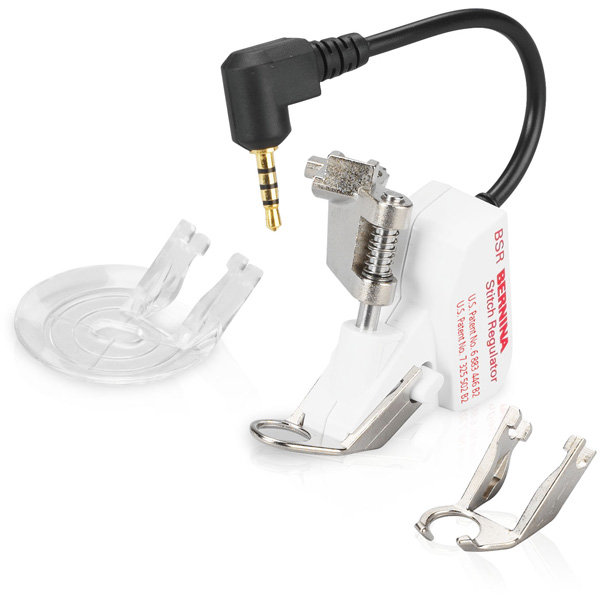
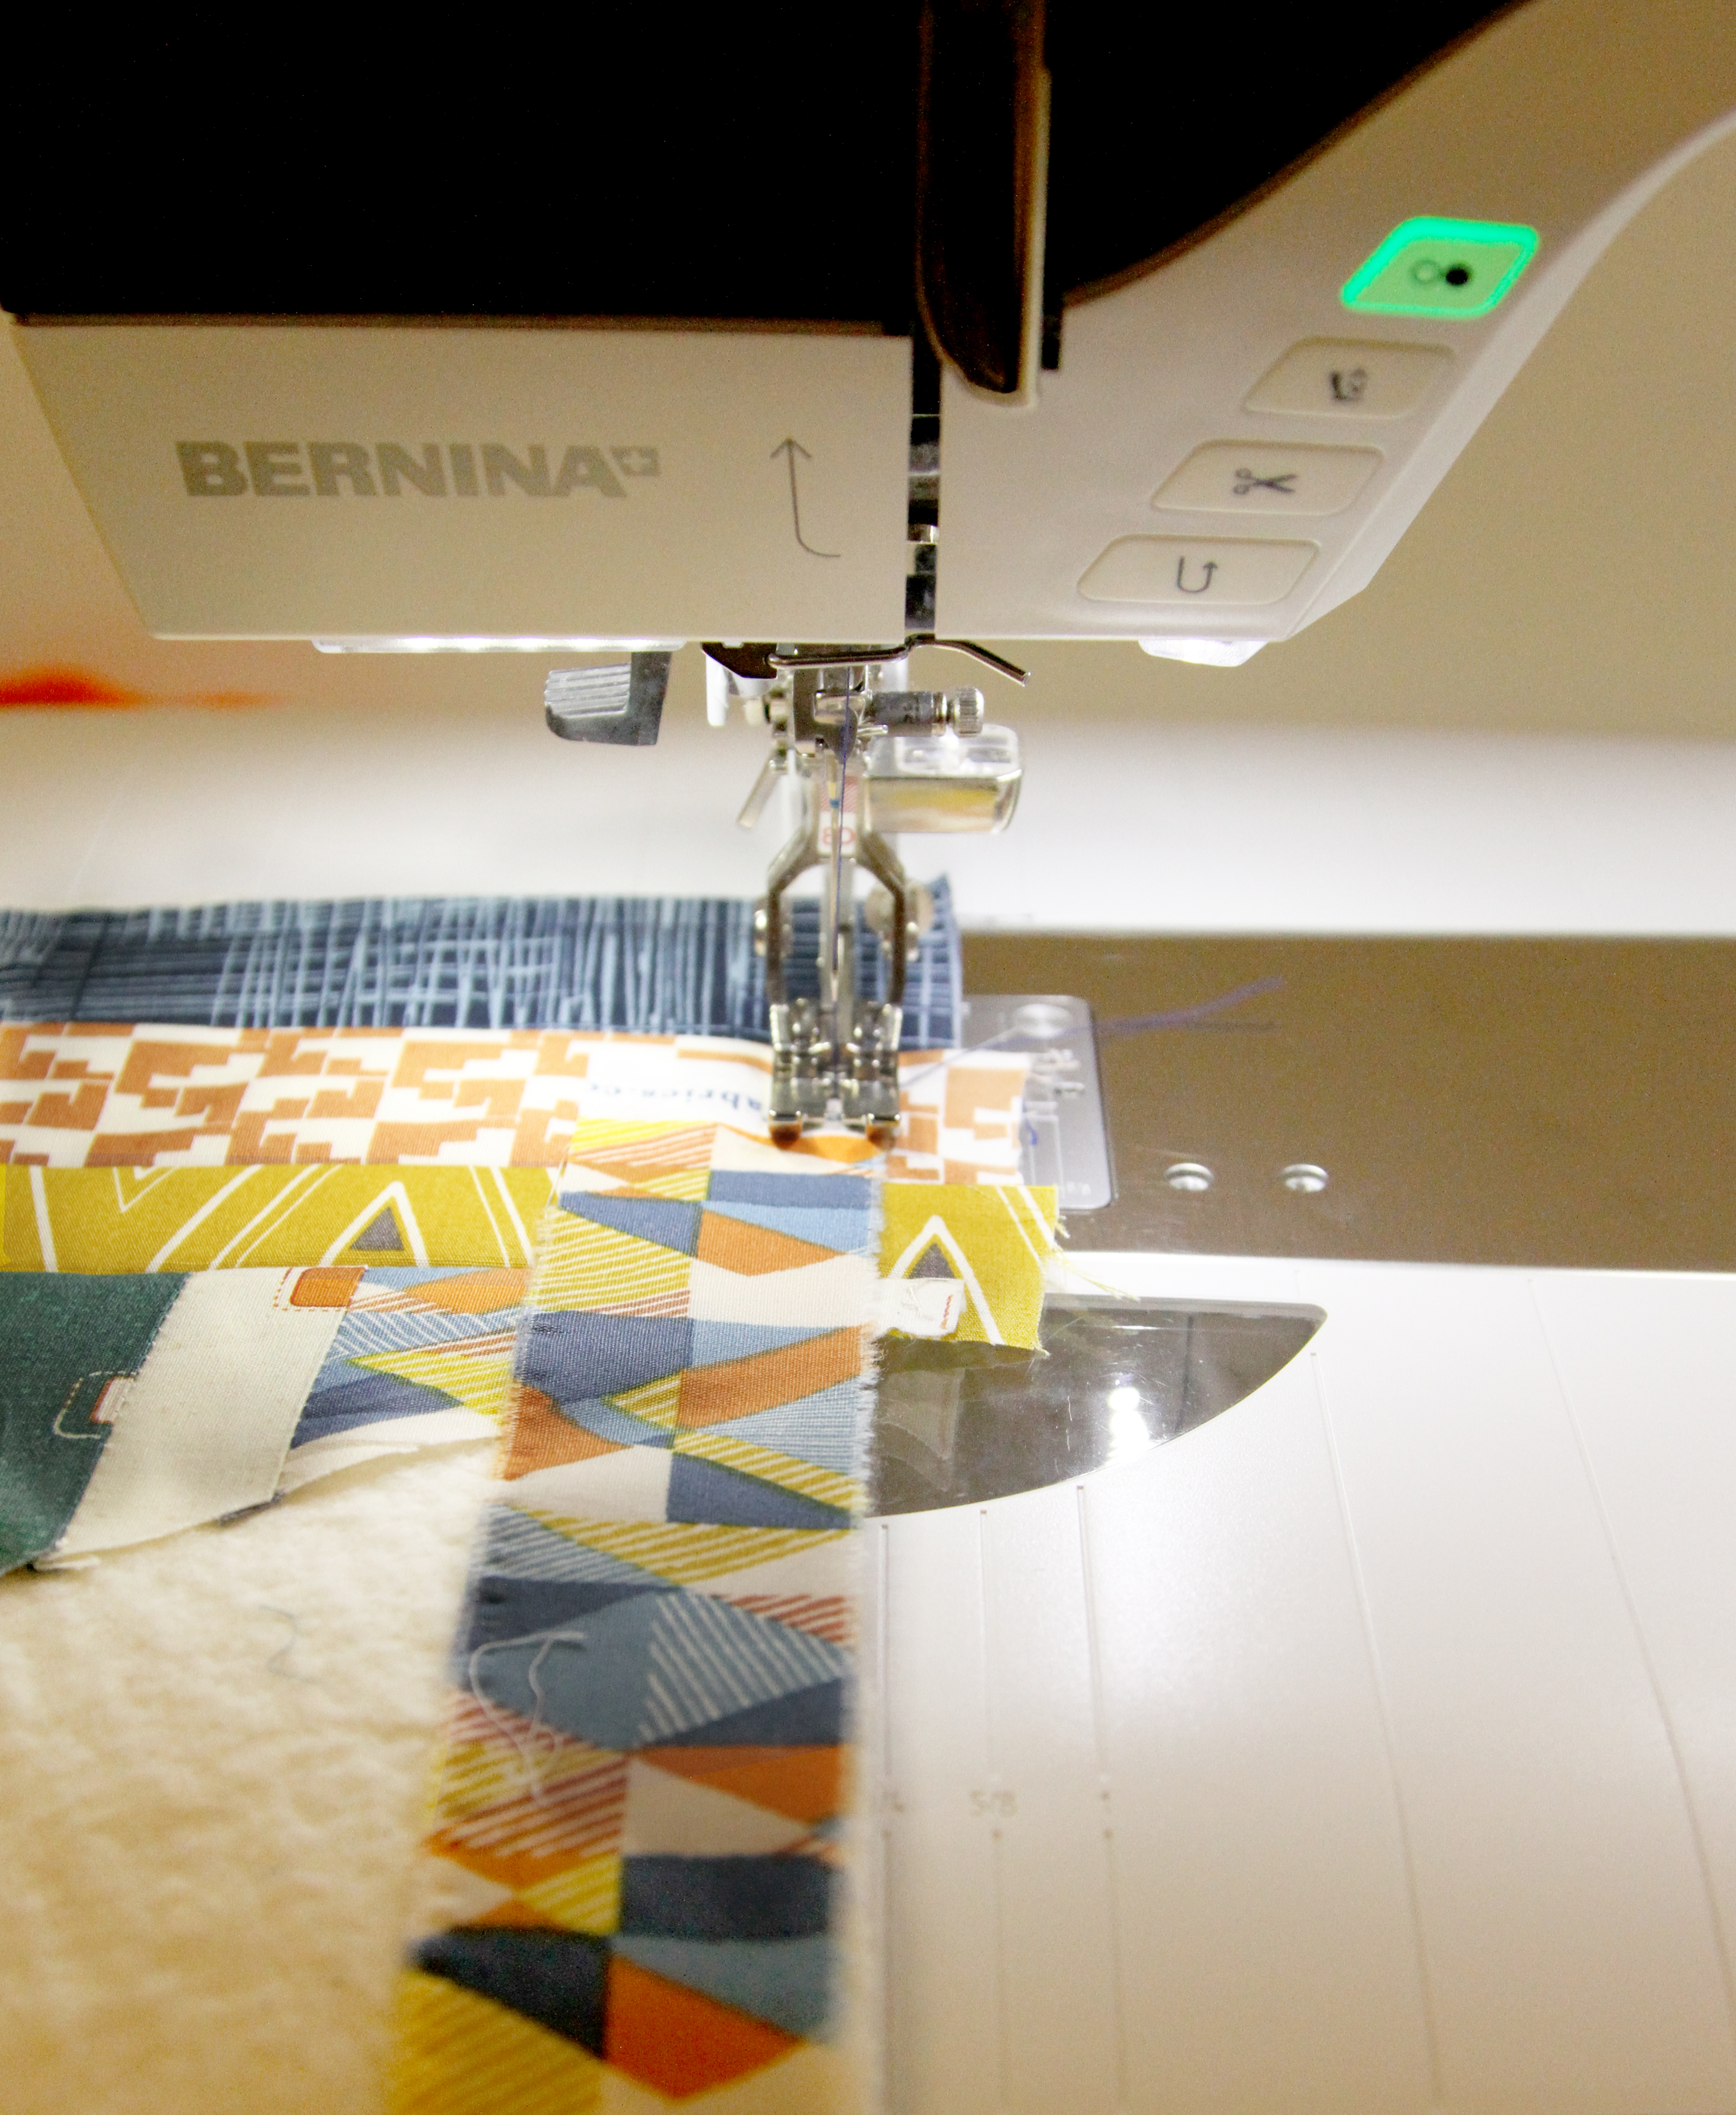
- Sewing Machine (I sew on a BERNINA 770 QE, and for this project, for the sake of experimentation, I also sewed the embroidered appliqué on the BERNINA Q20. This project can easily be stitched on any machine using a free motion foot, but for best results, I used the BERNINA Stitch Regulator (BSR).
- Optional: Free motion quilting halo
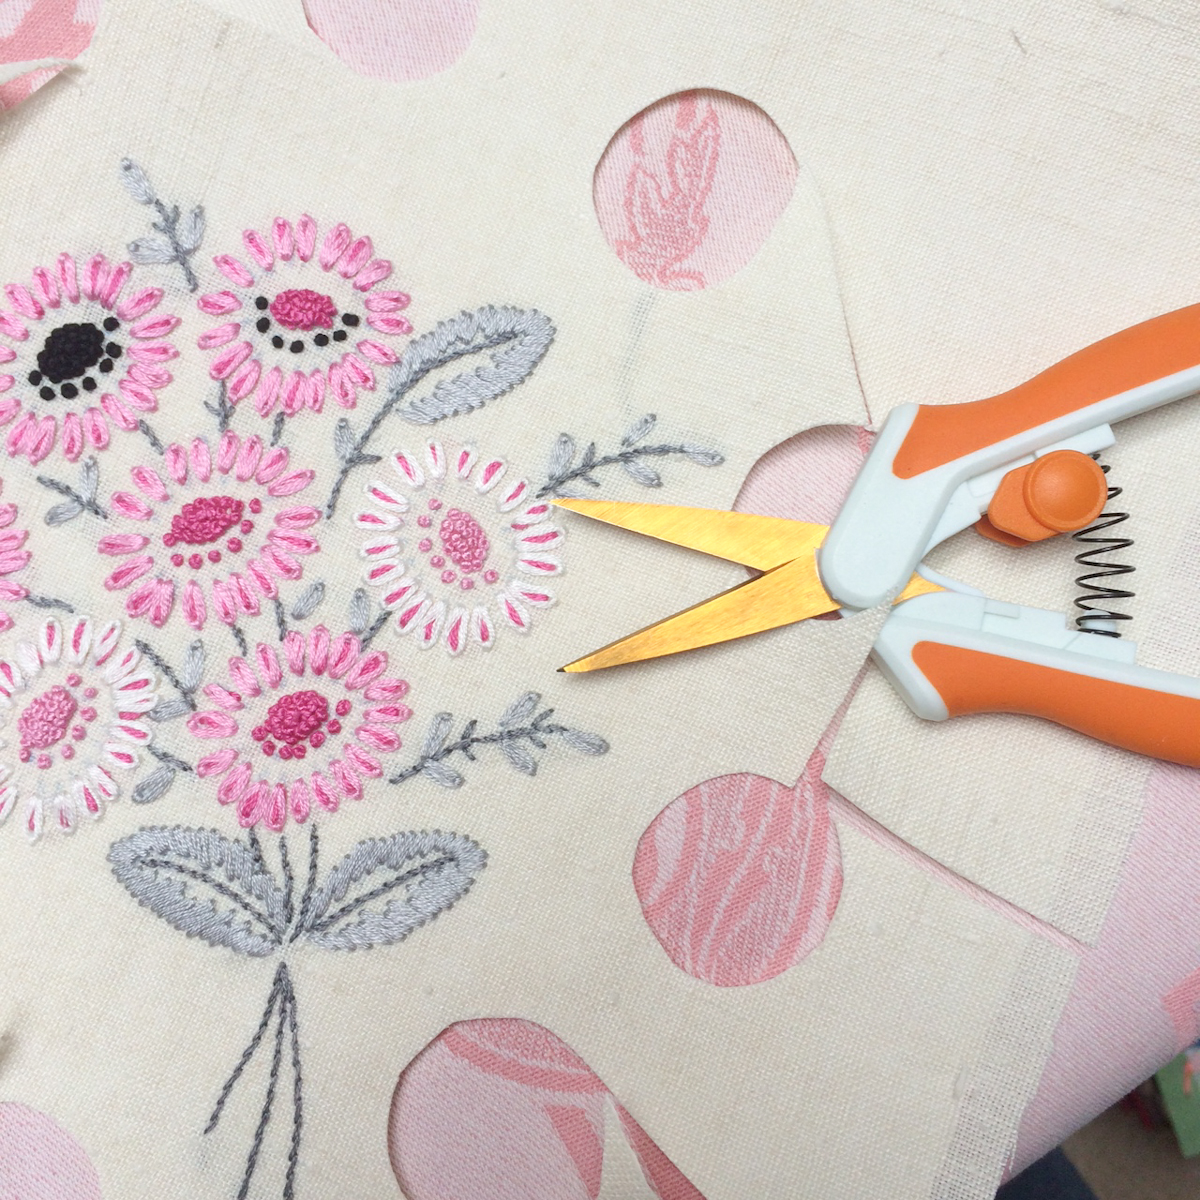
1.) First, prepare your fabrics. Iron your base fabric and cut it into a 36″ x 17″ rectangle. Then iron a piece of fusible web to the back of your embroidered cloth and cut out the individual flowers.
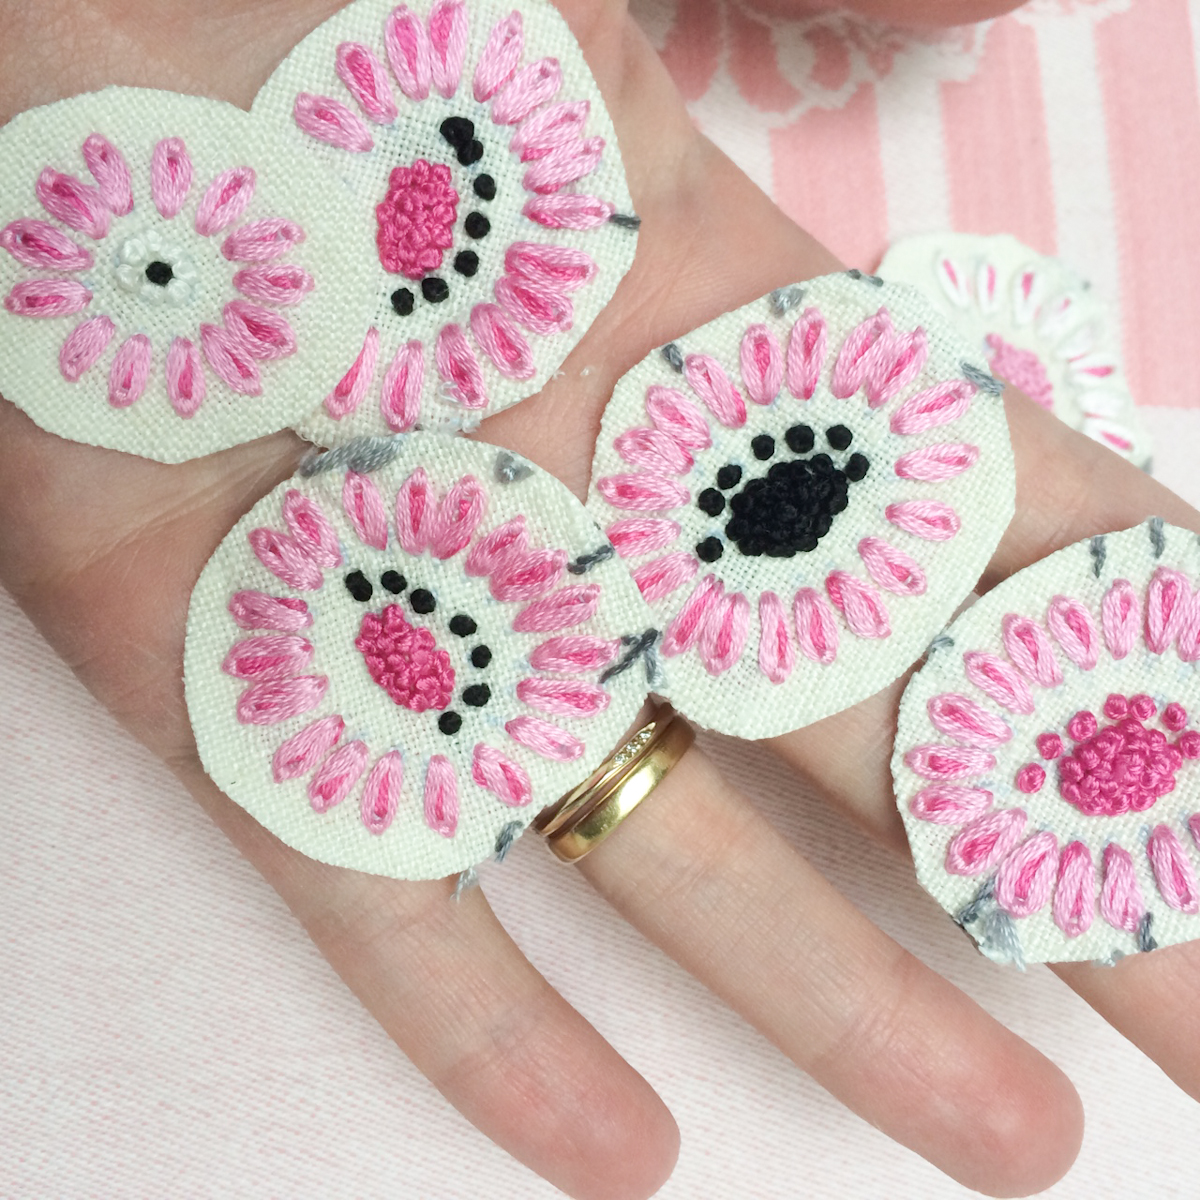
Leave a little room around the embroidery to allow space for sewing them into place on your base fabric. Lastly, iron the fusible web tape to the back of your bias tape. I used two different colors of green tape and a little red for contrast. It will come as no surprise to readers that I also have a big collection of vintage bias tape, and I love all the different shades that it’s been made in, and that it has faded into over the years.
2.) Iron and sew your tape: Iron your bias tape onto your fabric using a hot iron. I ironed mine on the bias. When it is all in place, move over to your sewing machine and stitch them into place. As an alternative, you could use pins instead of fusible web tape, but I find that I end up poking my fingers with something this delicate, and the tape makes this project really quick and easy.
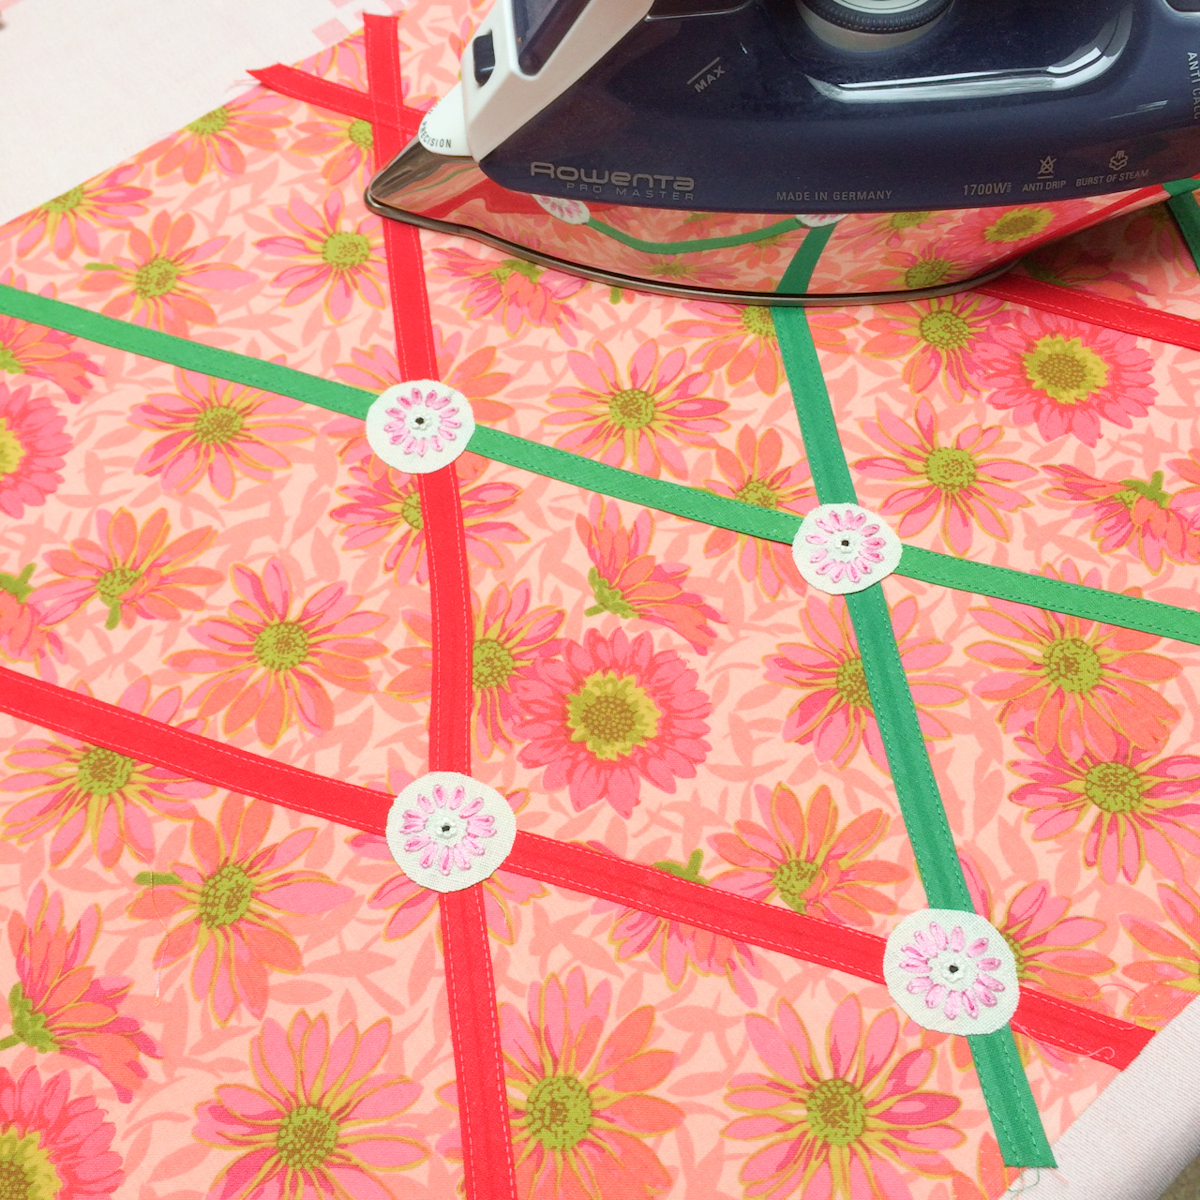
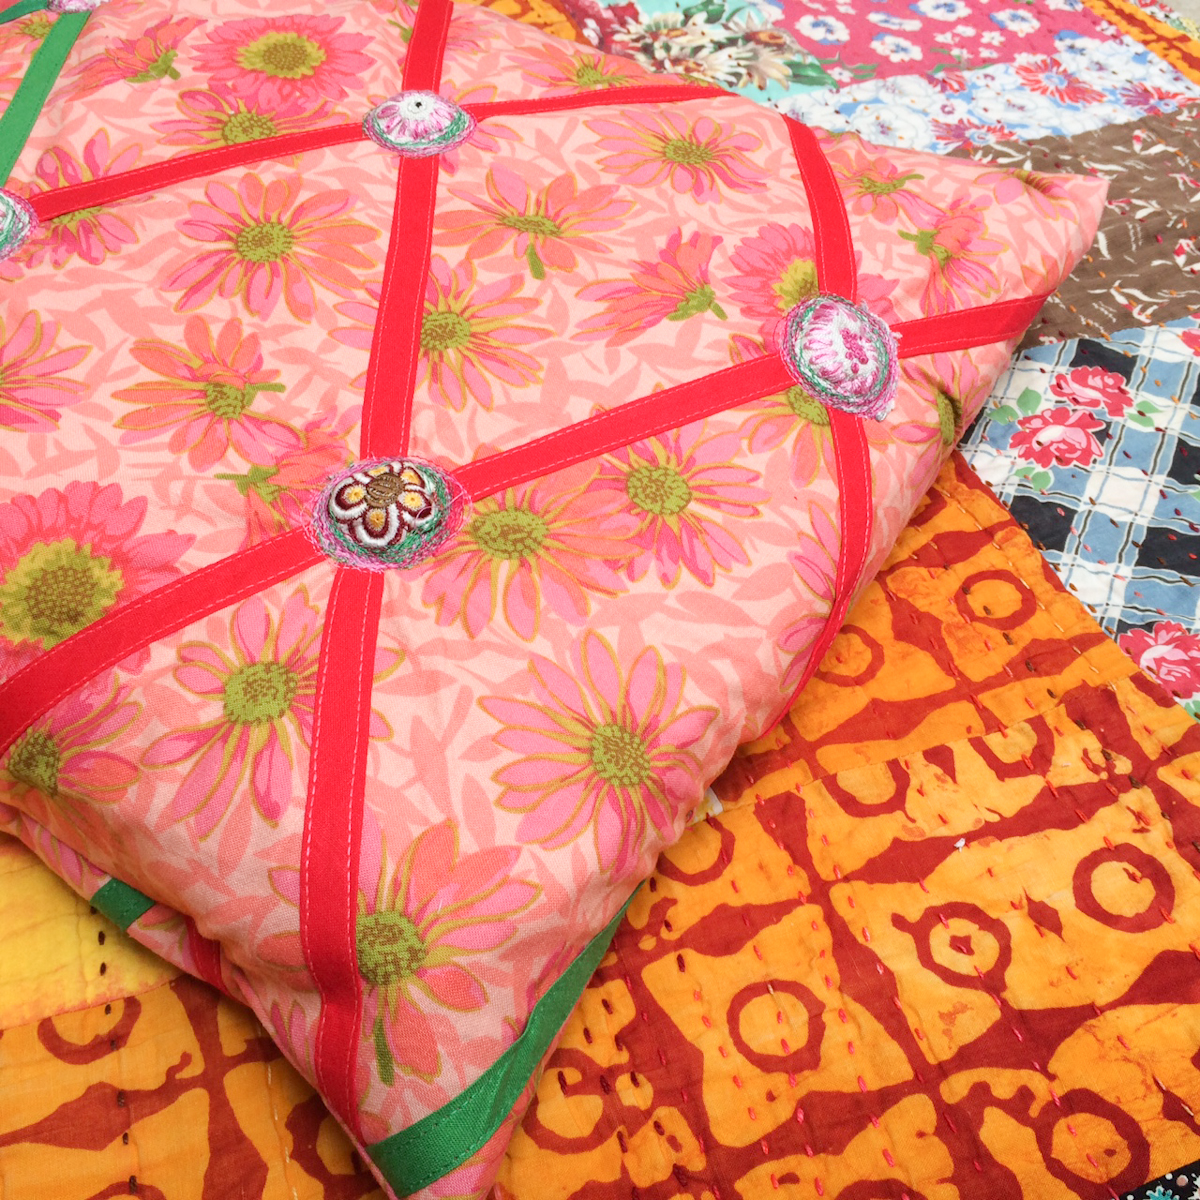
3.) Iron and stitch your flowers: Lay out your rectangular base fabric and begin to place your flowers at each of the bias tape intersections. Instead of ironing as you go, wait until you’ve got the layout that you like the best before ironing them down. Remember that a 16″ square will be the front of your pillow, with the edges getting folded to the back, so be sure to put your favorite flowers in the center section of the rectangle. To stitch the flowers down, I used the BSR foot, and stitched lots and lots of circles around the embroidery. I first stitched in green, and later in hot pink. As you can see in the photograph, I used a quilting halo to keep the base fabric relatively flat as I stitched. The more you stitch around in a circle, the more your fabric will start to puff up in the center, creating three dimensional flowers, which I quite like. If you prefer a flatter version, use less stitches, or consider stitching the flowers down with a satin stitch or tight zig zag. When you’re finished, snip any remaining loose threads and iron flat (or as flat as you can if you’ve got a lot of puckering like I did).

4.) Stitch the ends over: First, stitch the ends under. Fold the short ends of your fabric over by 1/2″, press, and sew in place using two parallel lines of sewing.
5.) Find your center: Determine which part of the pillow will be the front and center. I used my cutting mat to measure 16″ and played around with different areas until I found the most appliquéd flowers that I wanted to show off. At that point, I ironed the pillow with wrong sides together to give me a guideline, and then turned the fabric right sides together and ironed along those same lines to press the pillow in reverse. Then I sewed along both sides with a straight stitch. Finally, I used pinking shears to trim the sewn edges and prevent any future fraying in the washing machine.

5.) Stuff and Fluff: Turn your pillowcase right side out and add the pillow form. Step back and admire your work!
The threads and Fiskars snips for this project were provided by Brewer sewing. Thank you!
Used Products


What you might also like


One comment on “Easy Vintage Embroidery Applique Pillow Case”
Leave a Reply
You must be logged in to post a comment.

Such a cute project! ! ! I have a new found love for vintage linens especially ones with embroidery. I absolutely love this and can’t wait to create this. Thanks