Fabric Ornaments With Circular Attachment #83

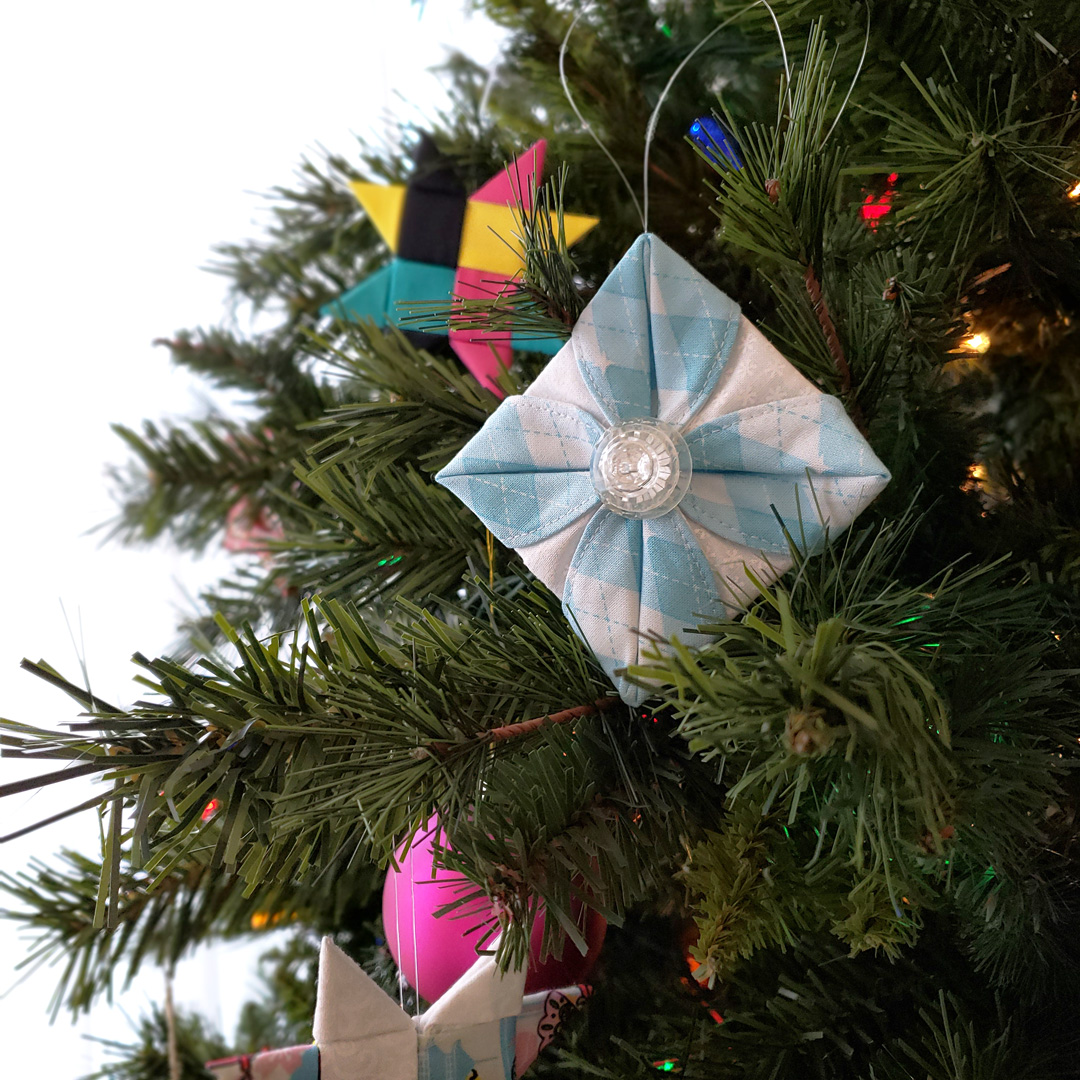
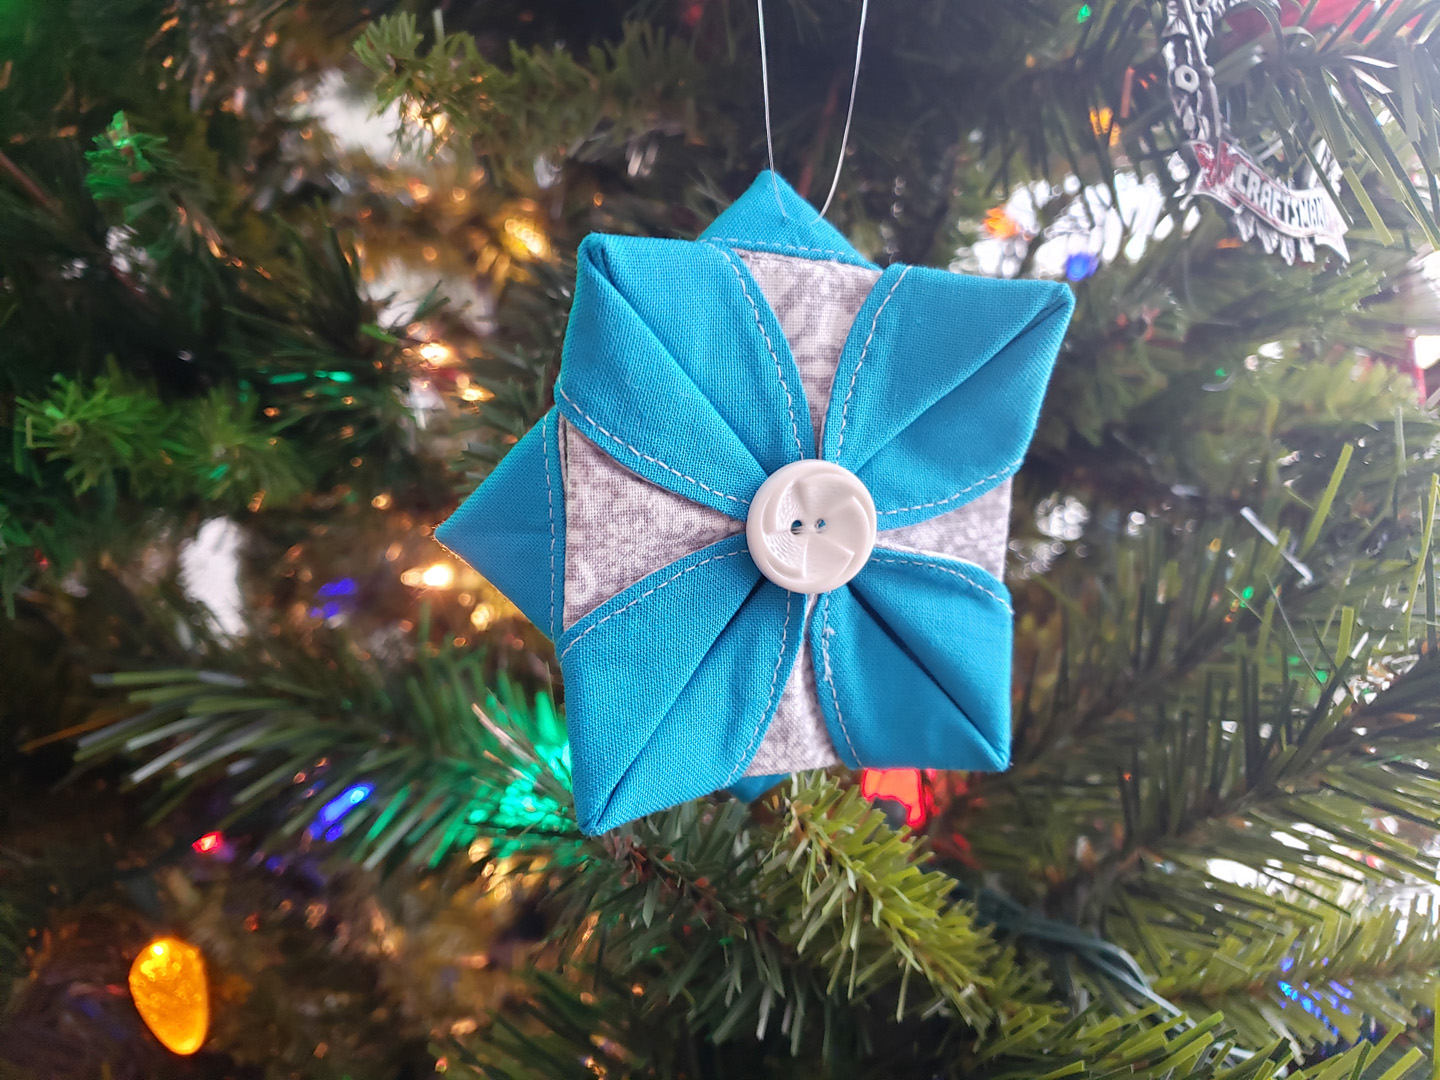
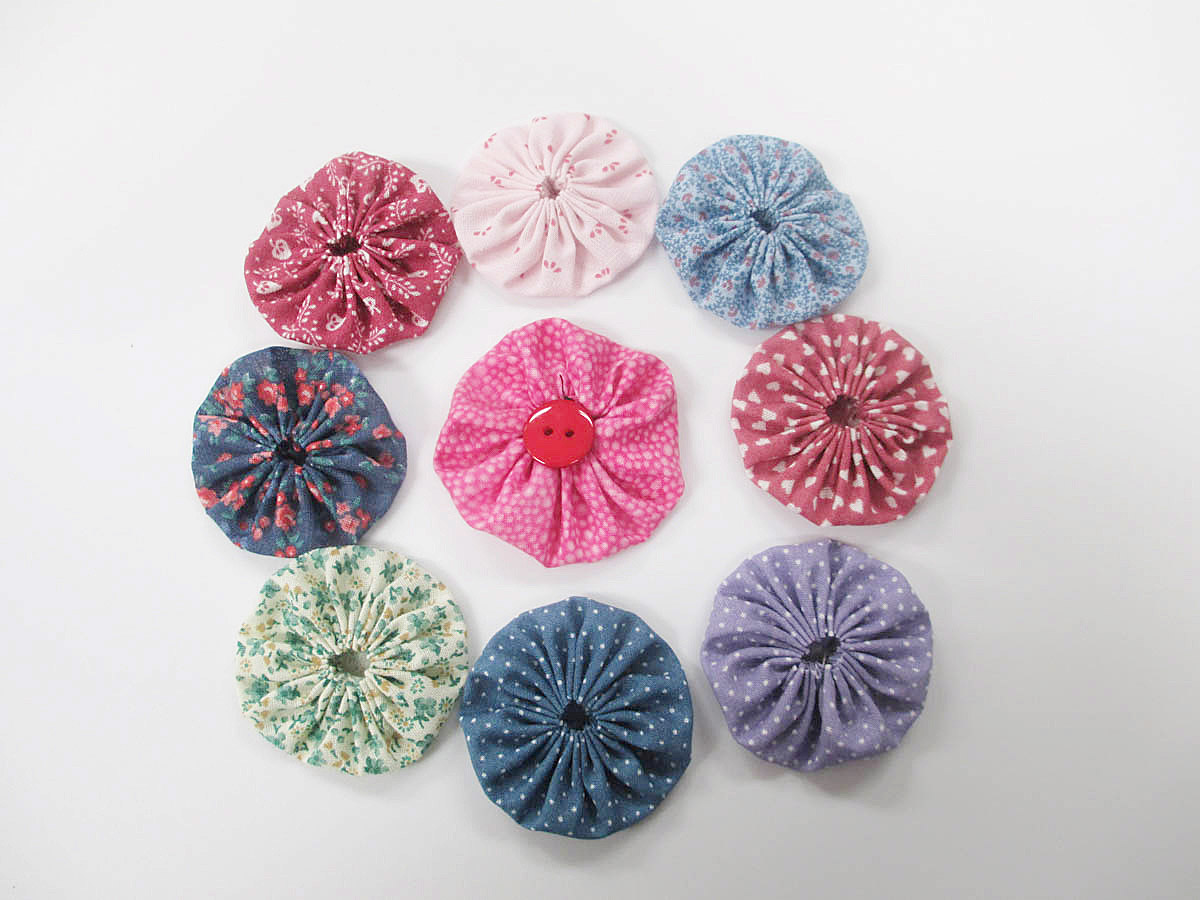
These pretty fabric ornaments are so easy to make! Start with a stitched circle and fold to create the final flower shape. Hang the finished ornament as-is, or add a special button to the center of the ornament for a special touch.
You can even add two ornaments together to create a two-sided 3D ornament.
The size of the final ornament is approximately half the size of the circle you make. In this tutorial I will show you how to start with a 6″ circle to make a finished 3″ ornament. If you want a smaller ornament, just start with a smaller circle!
Materials to Make a Fabric Ornament
- Various cotton medium weight fabrics, fat quarters or scraps at least 7″ x 7″ square
- Medium weight fusible interfacing
- Coordinating thread
- Clear monofilament beading cord or thin ribbon
- Assorted buttons (optional)
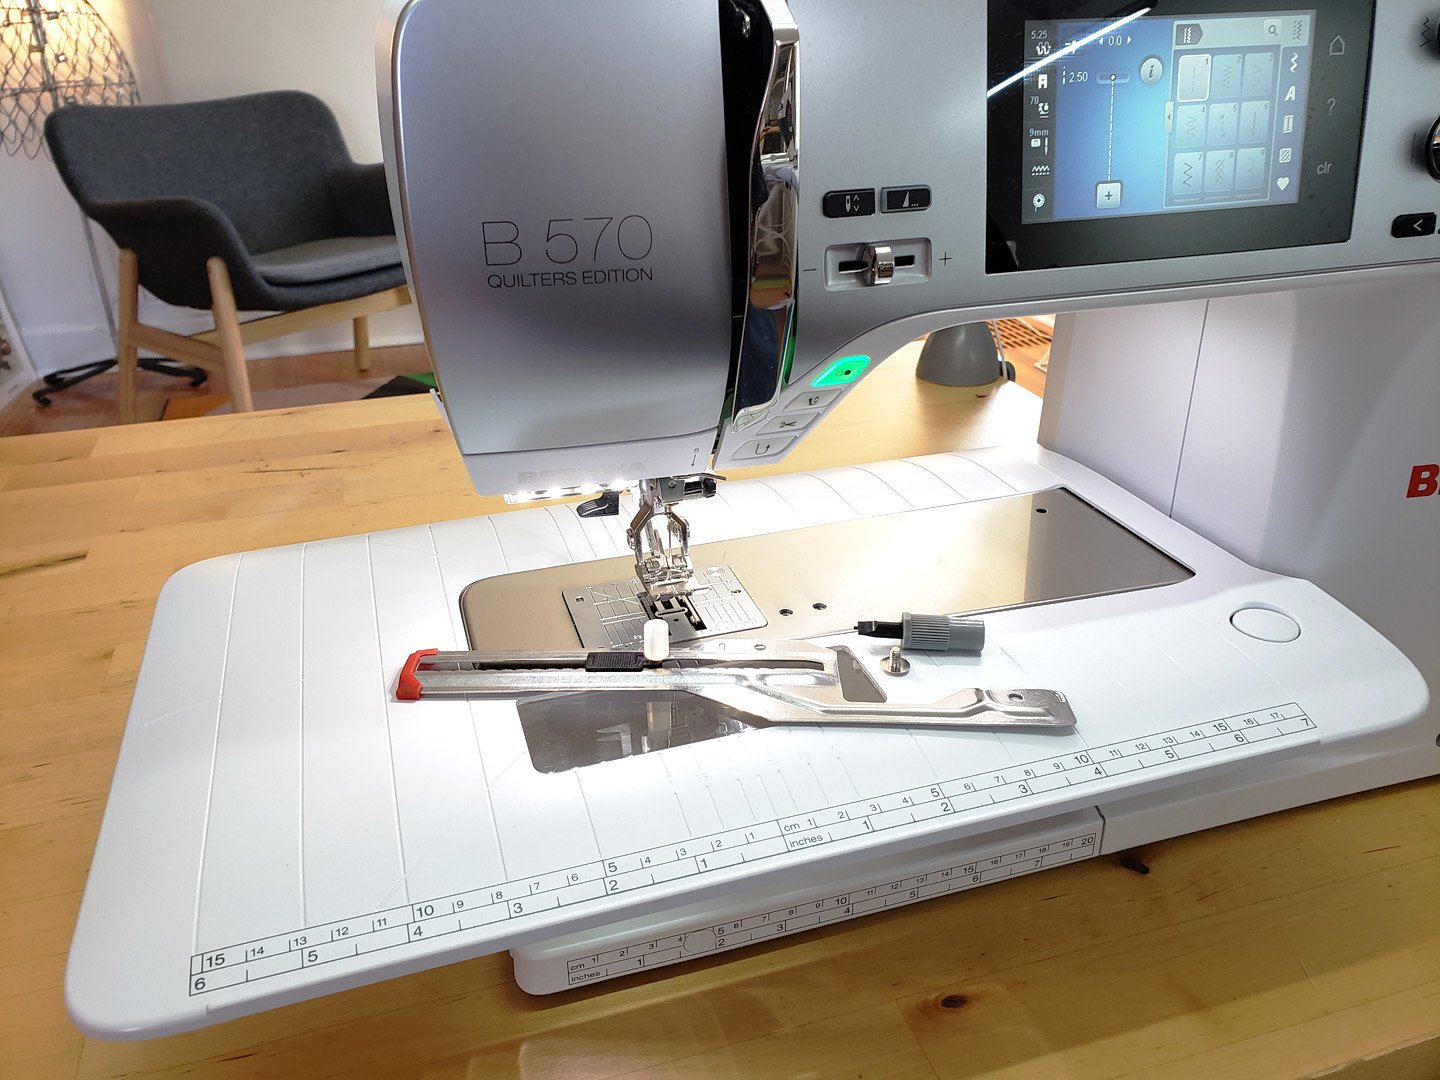
- Sewing machine (I use a BERNINA 570 QE)
- Reverse pattern foot #1D
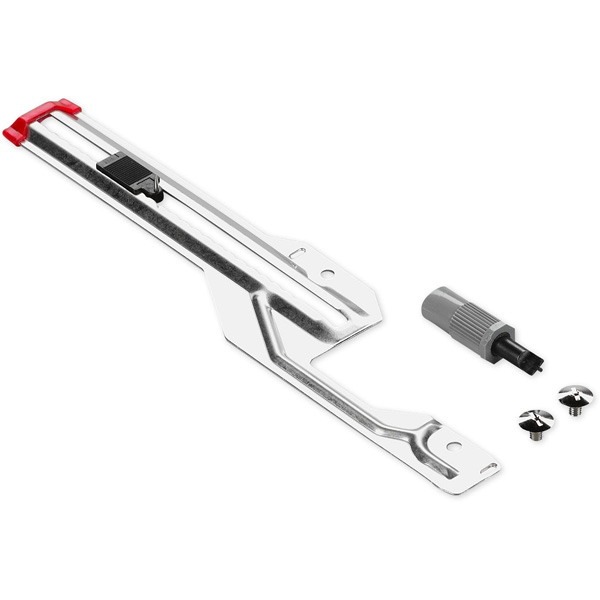
- Circular embroidery attachment #83
- Rotary cutter, cutting mat, and acrylic quilting ruler
- Pinking shears
- Thread snips
- Hand sewing needle and thread
- Iron and pressing surface
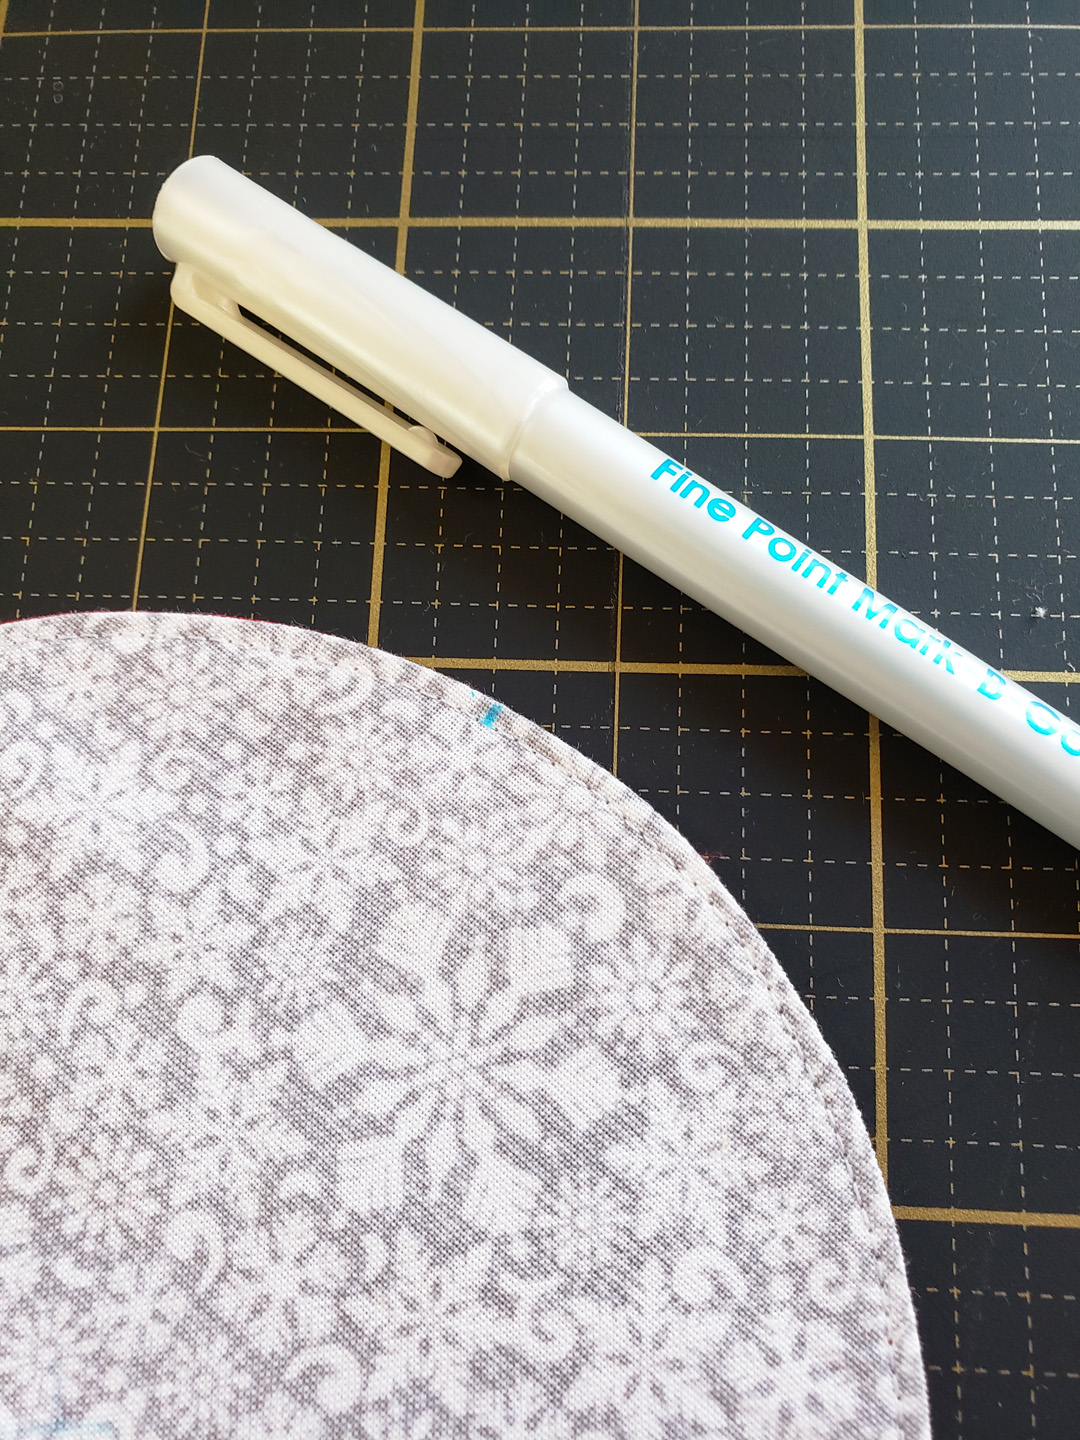
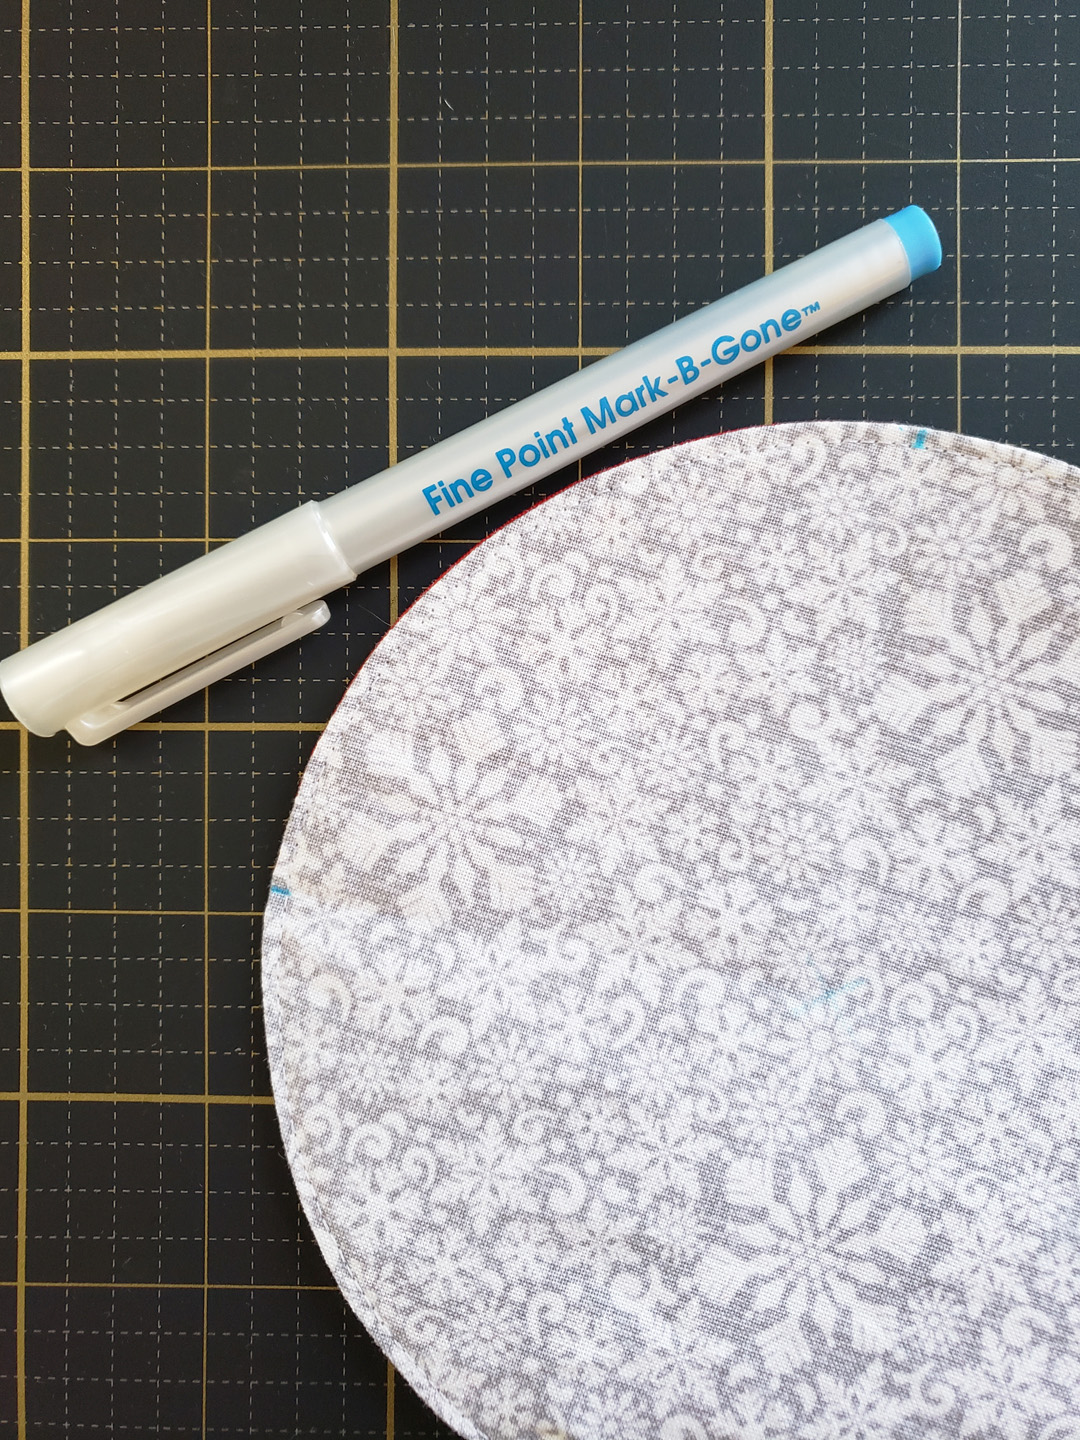
- Fabric marking pen or pencil
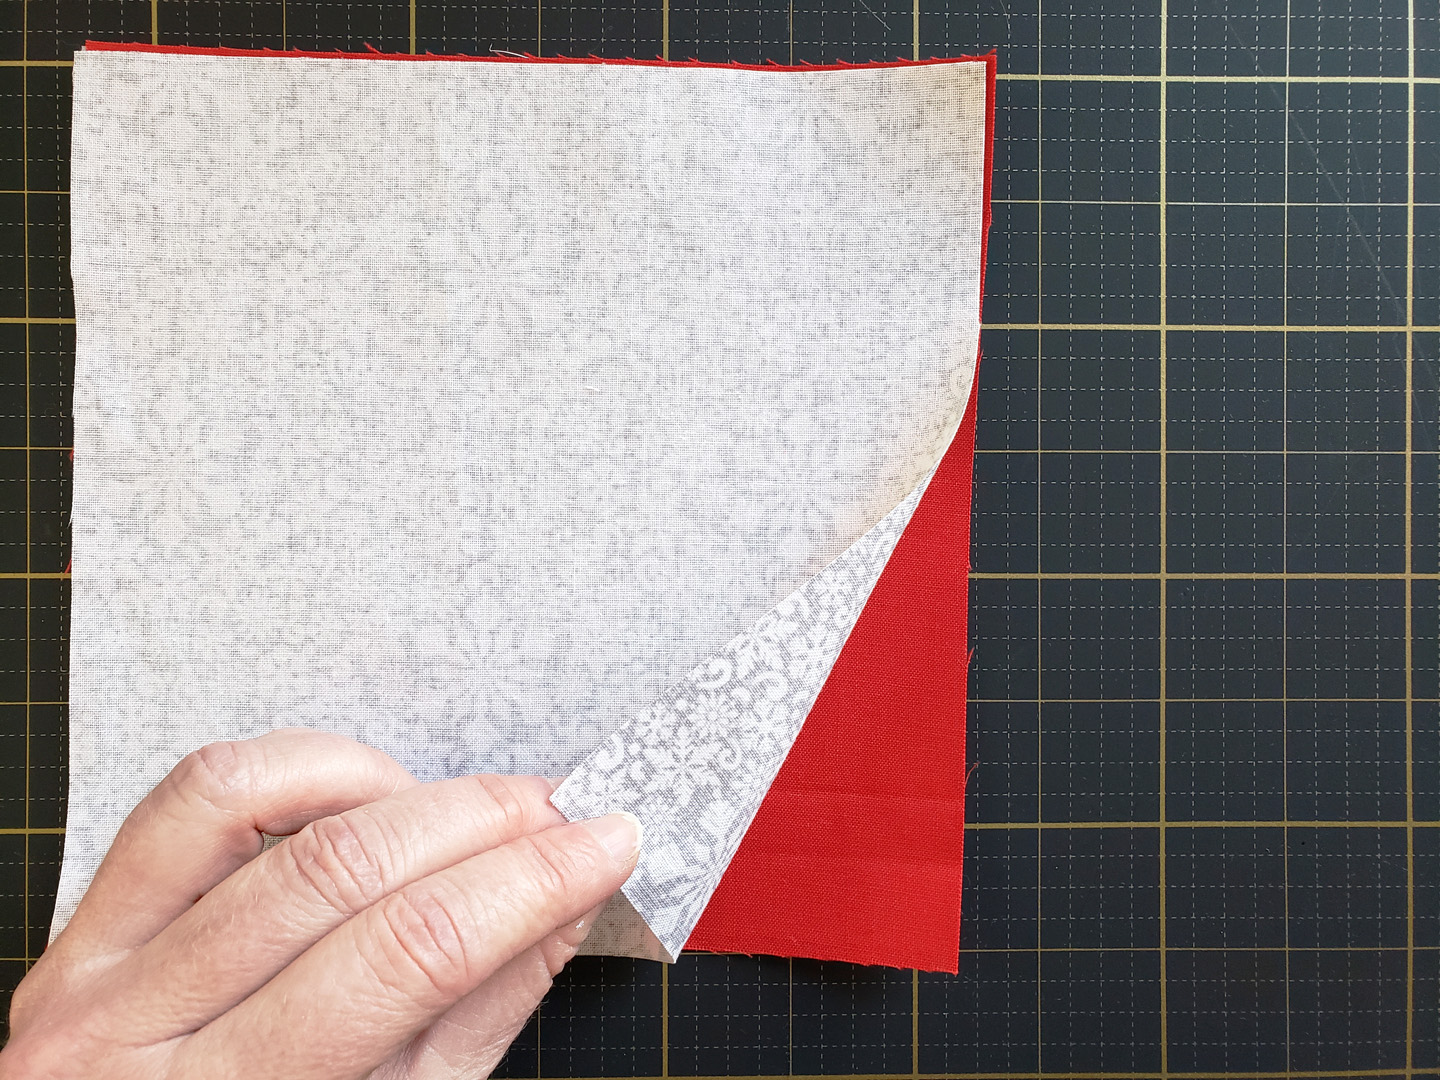
Each ornament is made from two contrasting pieces of fabric. To prepare your fabric, cut two contrasting pieces of fabric and one piece of medium weight iron-on interfacing to 7″ x 7″ square.
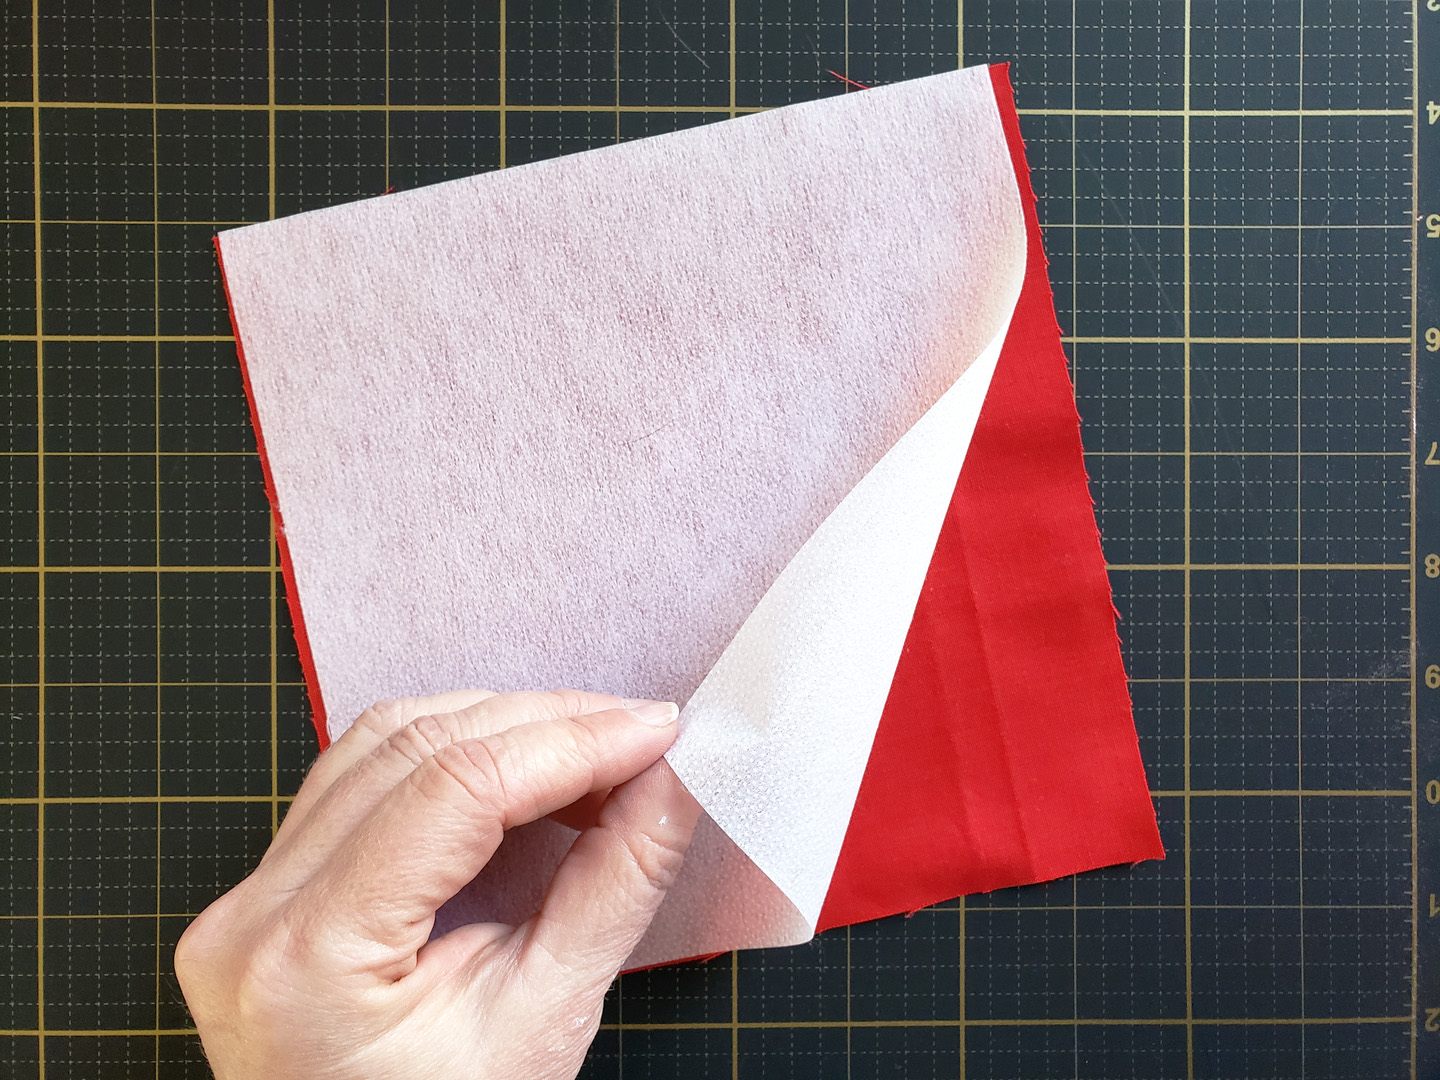
One piece of fabric will be on the back of the ornament and will peek out a bit from the front. The other piece of fabric will create the four petal shapes on the front of the ornament. Press the iron-on interfacing on the wrong side of the fabric that will become the back of the ornament. The interfacing adds some stiffness to keep the finished ornament looking crisp and it helps to stabilize the layers when sewing with the Circular embroidery attachment #83.
After you have fused the interfacing to the wrong side of the ornament back fabric, layer the pieces right sides together with the interfaced piece on the bottom.

Find the center of the square by using a ruler set across the square from corner to corner, marking the middle with a fabric marking pen or pencil.
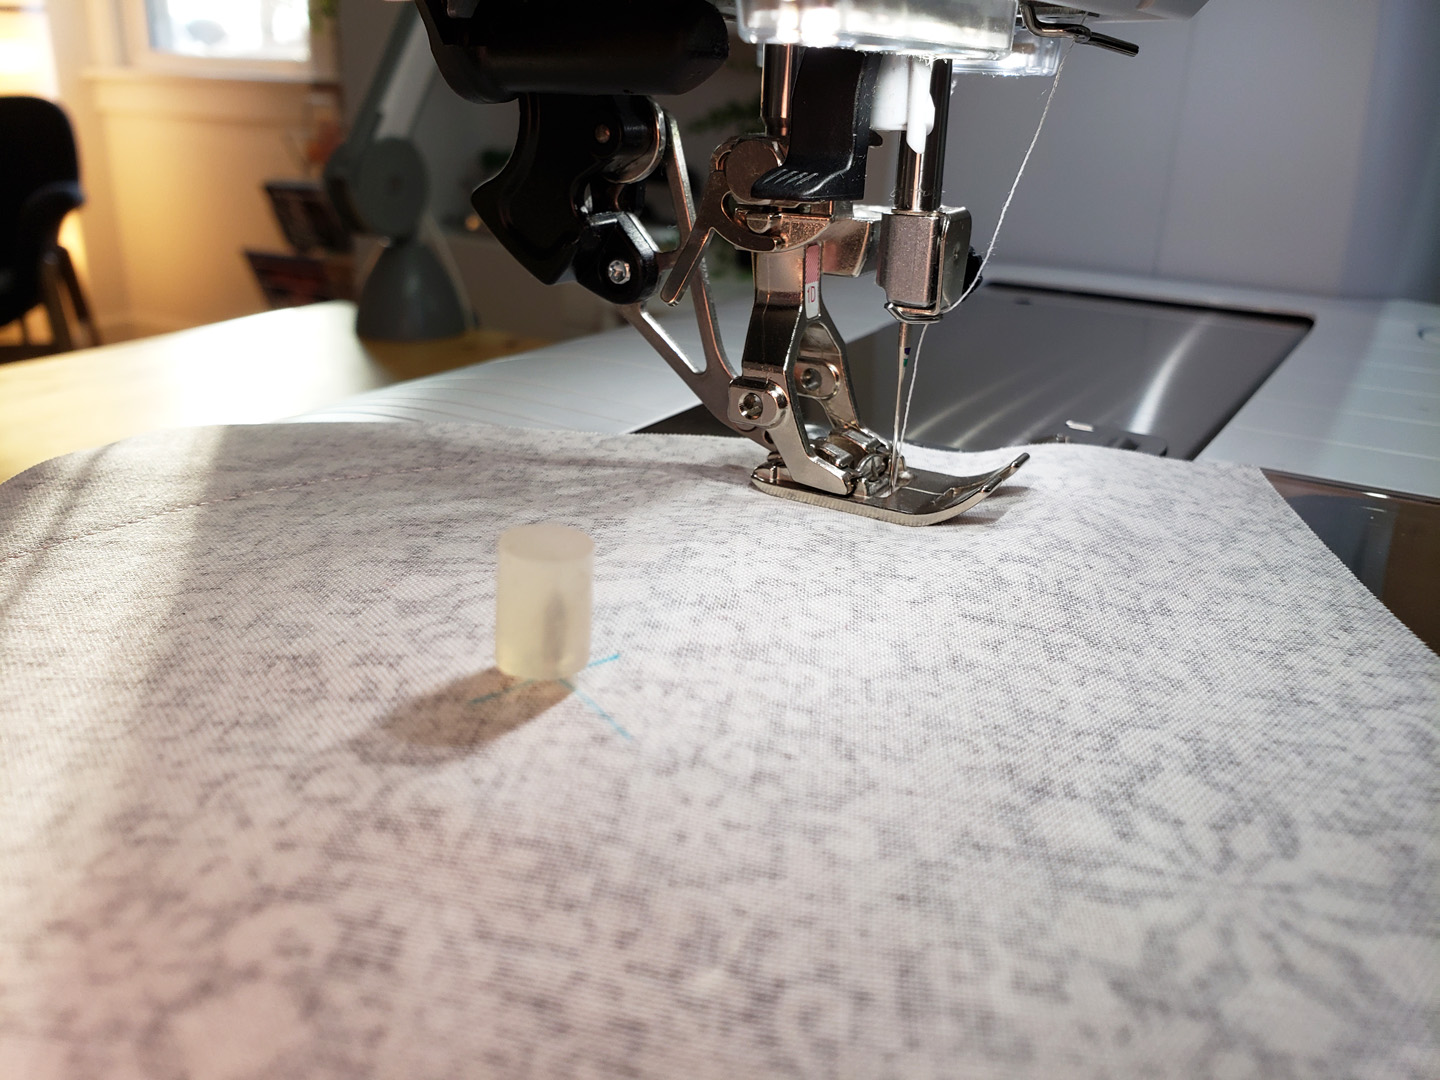
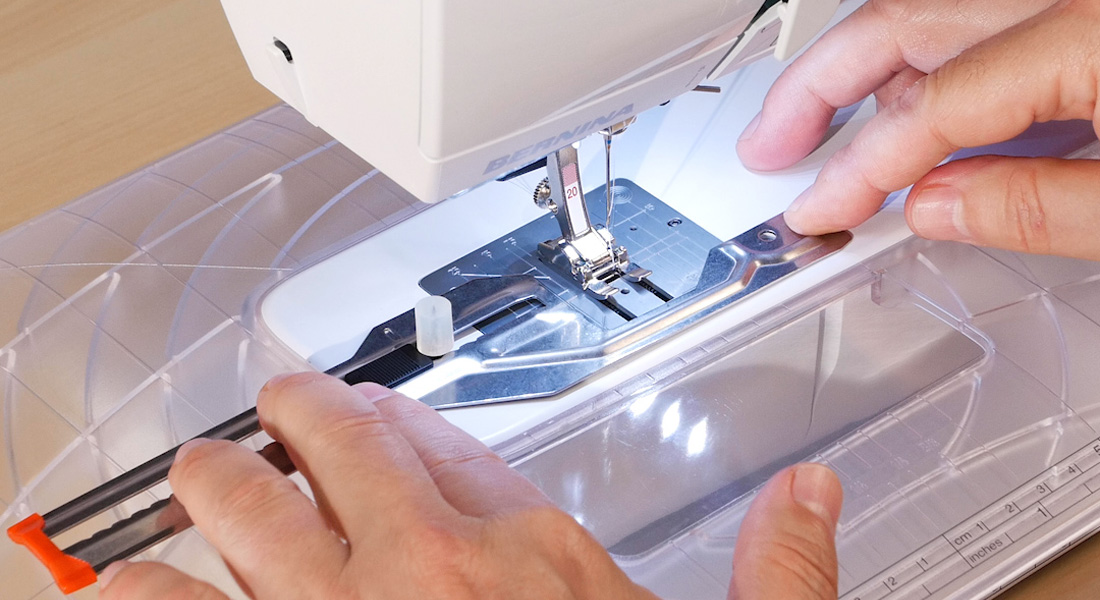
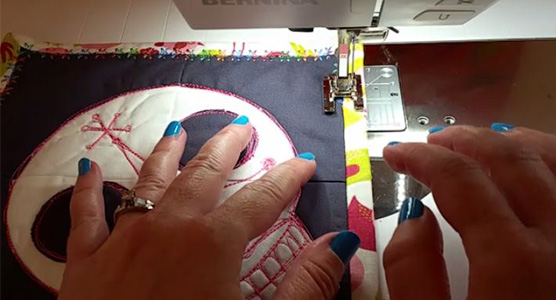
Set up your sewing machine with Circular embroidery attachment #83.
The box includes the attachment, a small screwdriver, and two screws. If you haven’t used this attachment before you can find some great tips and techniques here at WeAllSew!
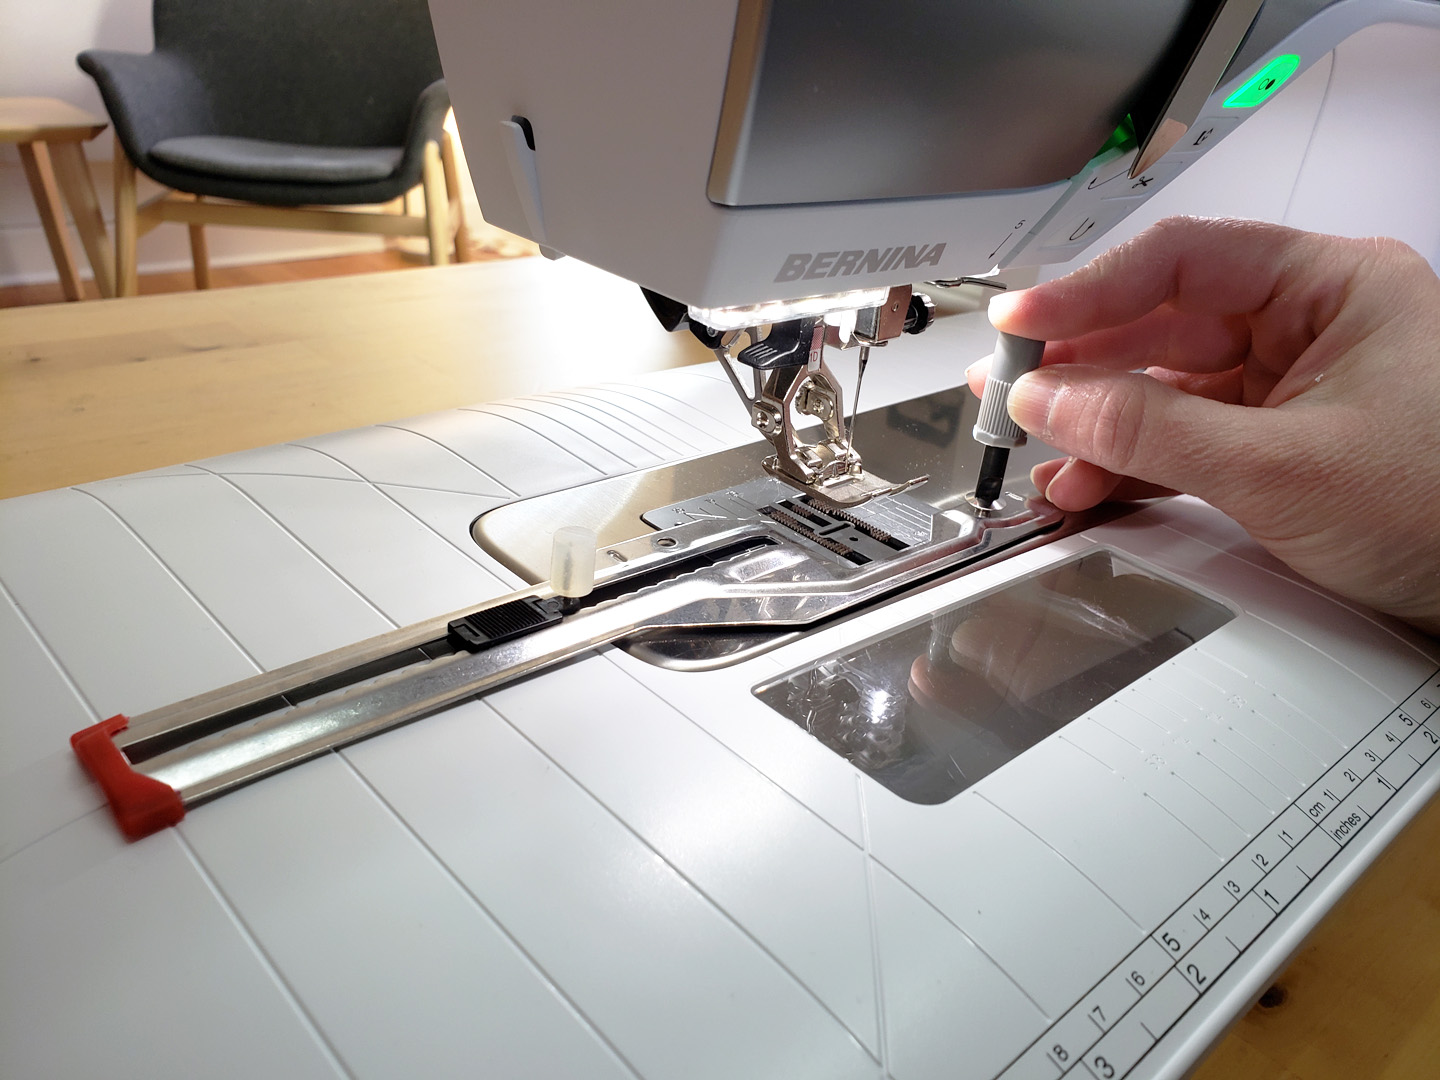
Once the attachment is secured to your machine, set the point of the tool at the 3″ mark to the left of the needle. My B 570 QE includes measurements on the sewing table, but you can use a ruler if you don’t have clear measurements to follow on your machine.
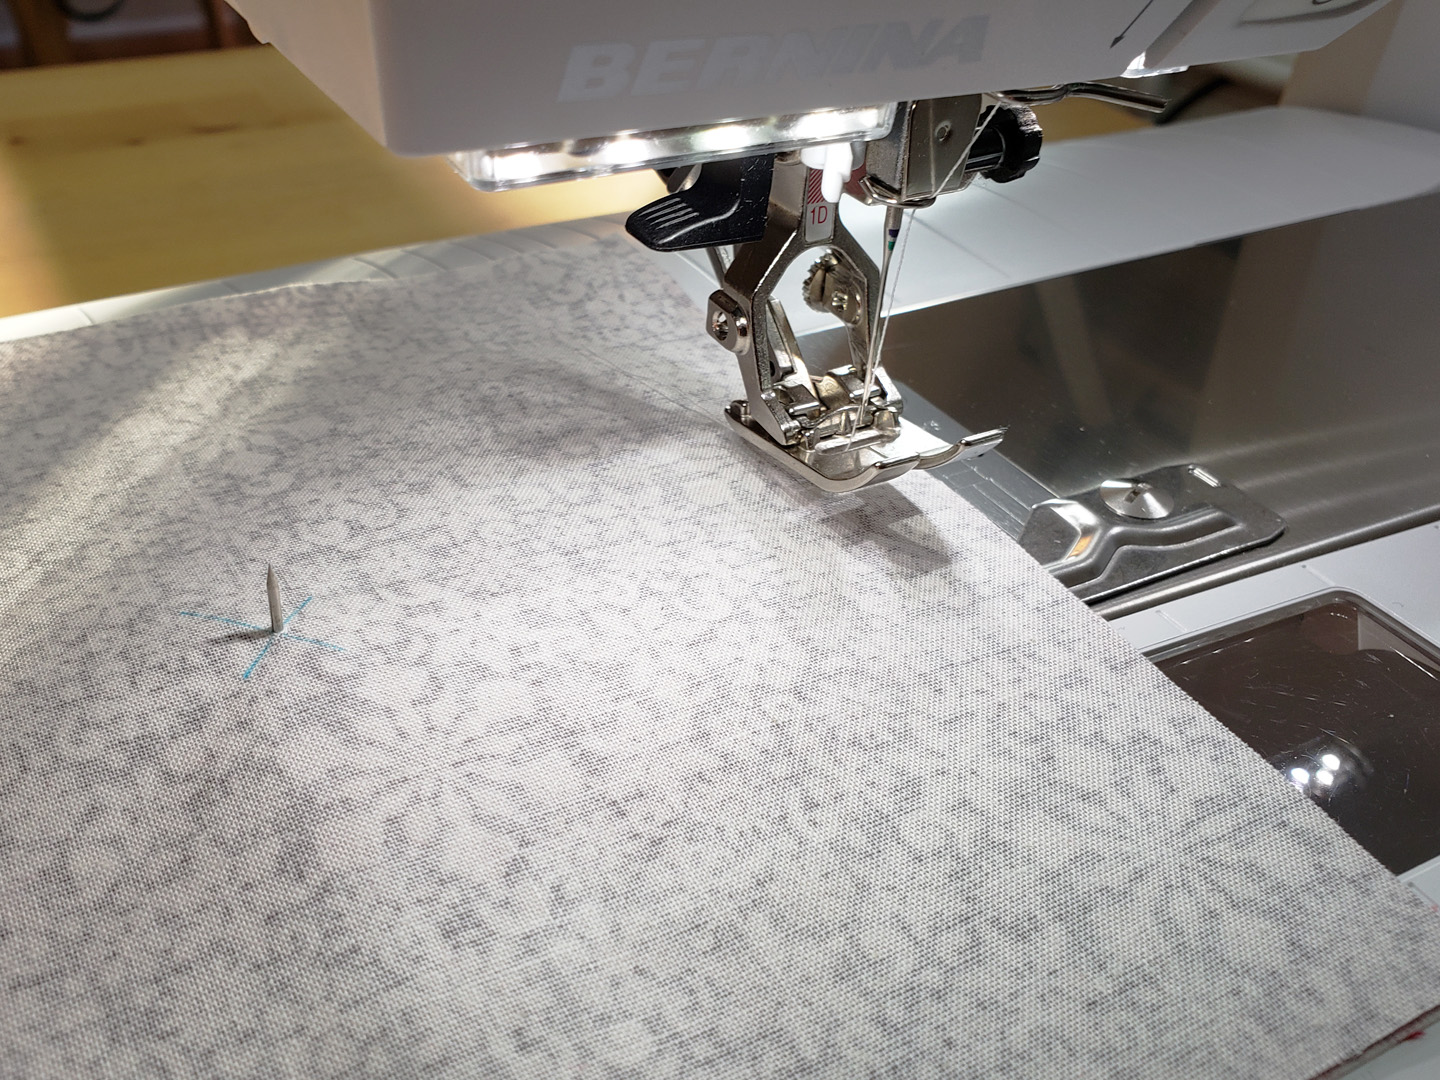
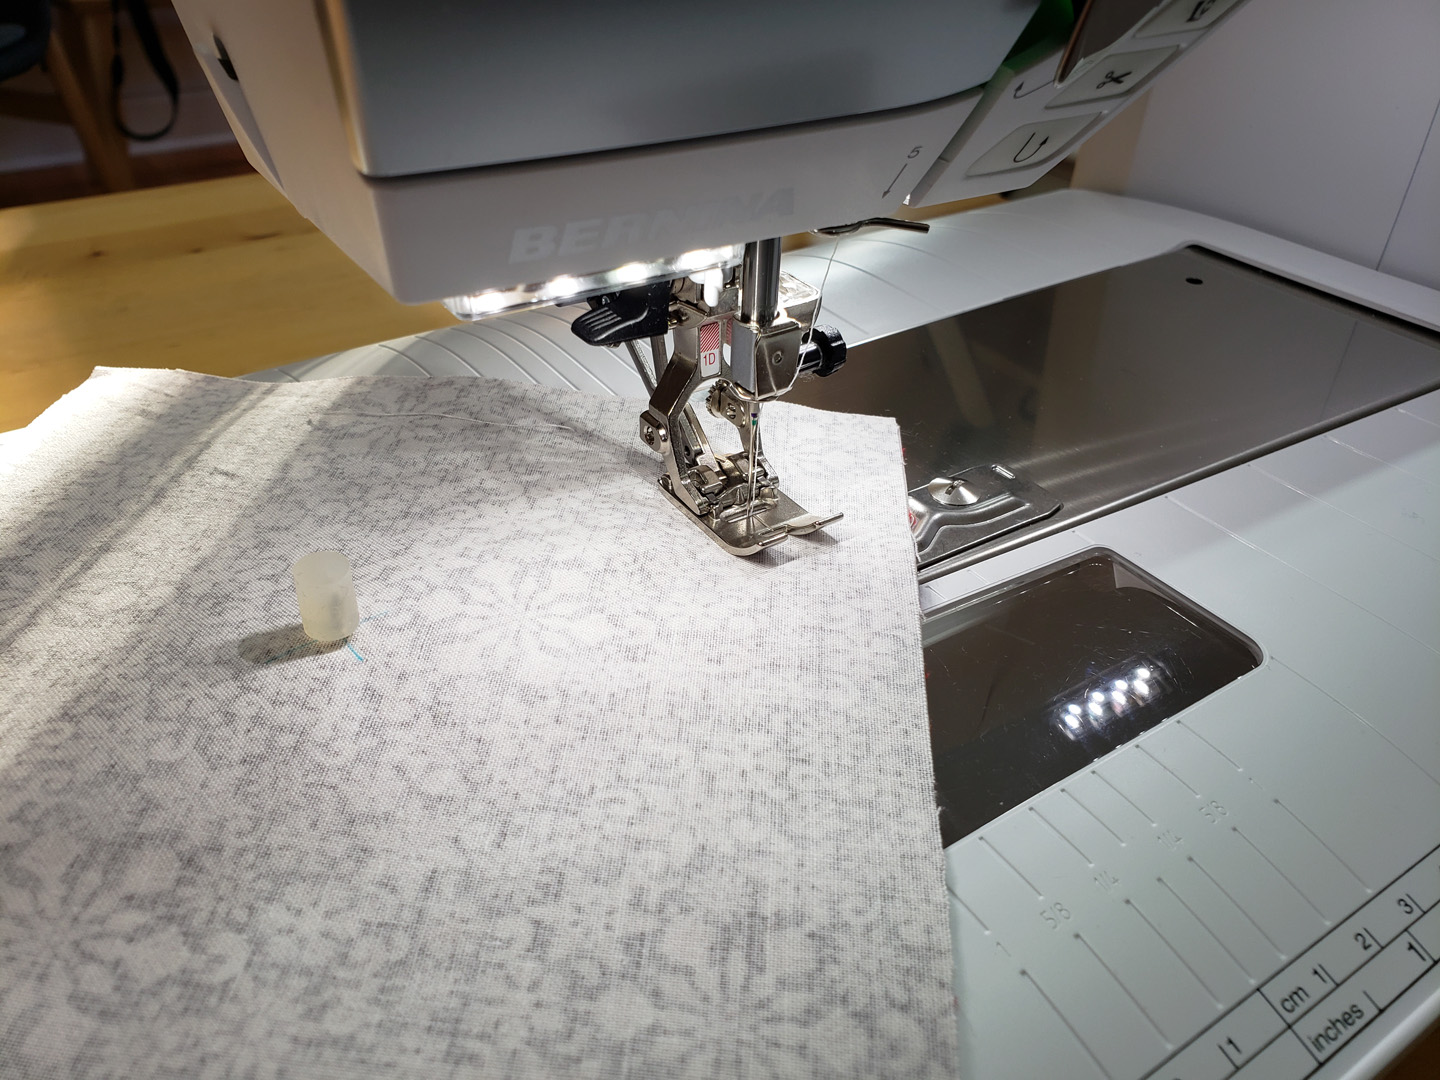
Remove the clear rubber protector from the point and gently press your sandwich of pieces down with the point through the center of the “X”. Wiggle the fabric under the presser foot and smooth out the fabric.
Replace the clear rubber protector over the point. This is so important because that point is SHARP!
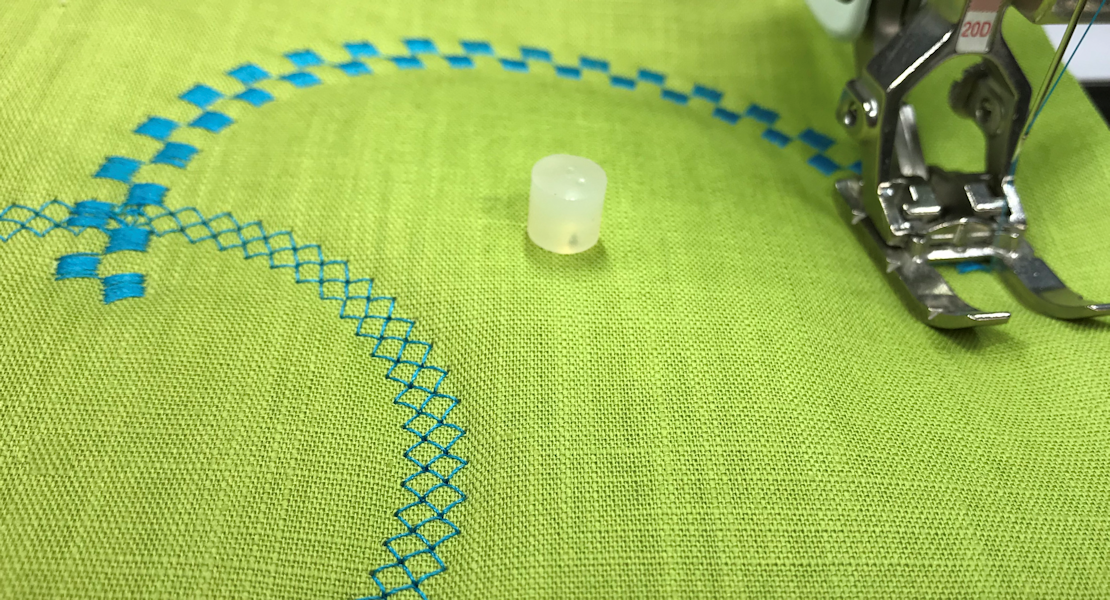
Start sewing with a straight stitch set at about 2.0mm in length. Backstitch a few stitches to secure the seam.
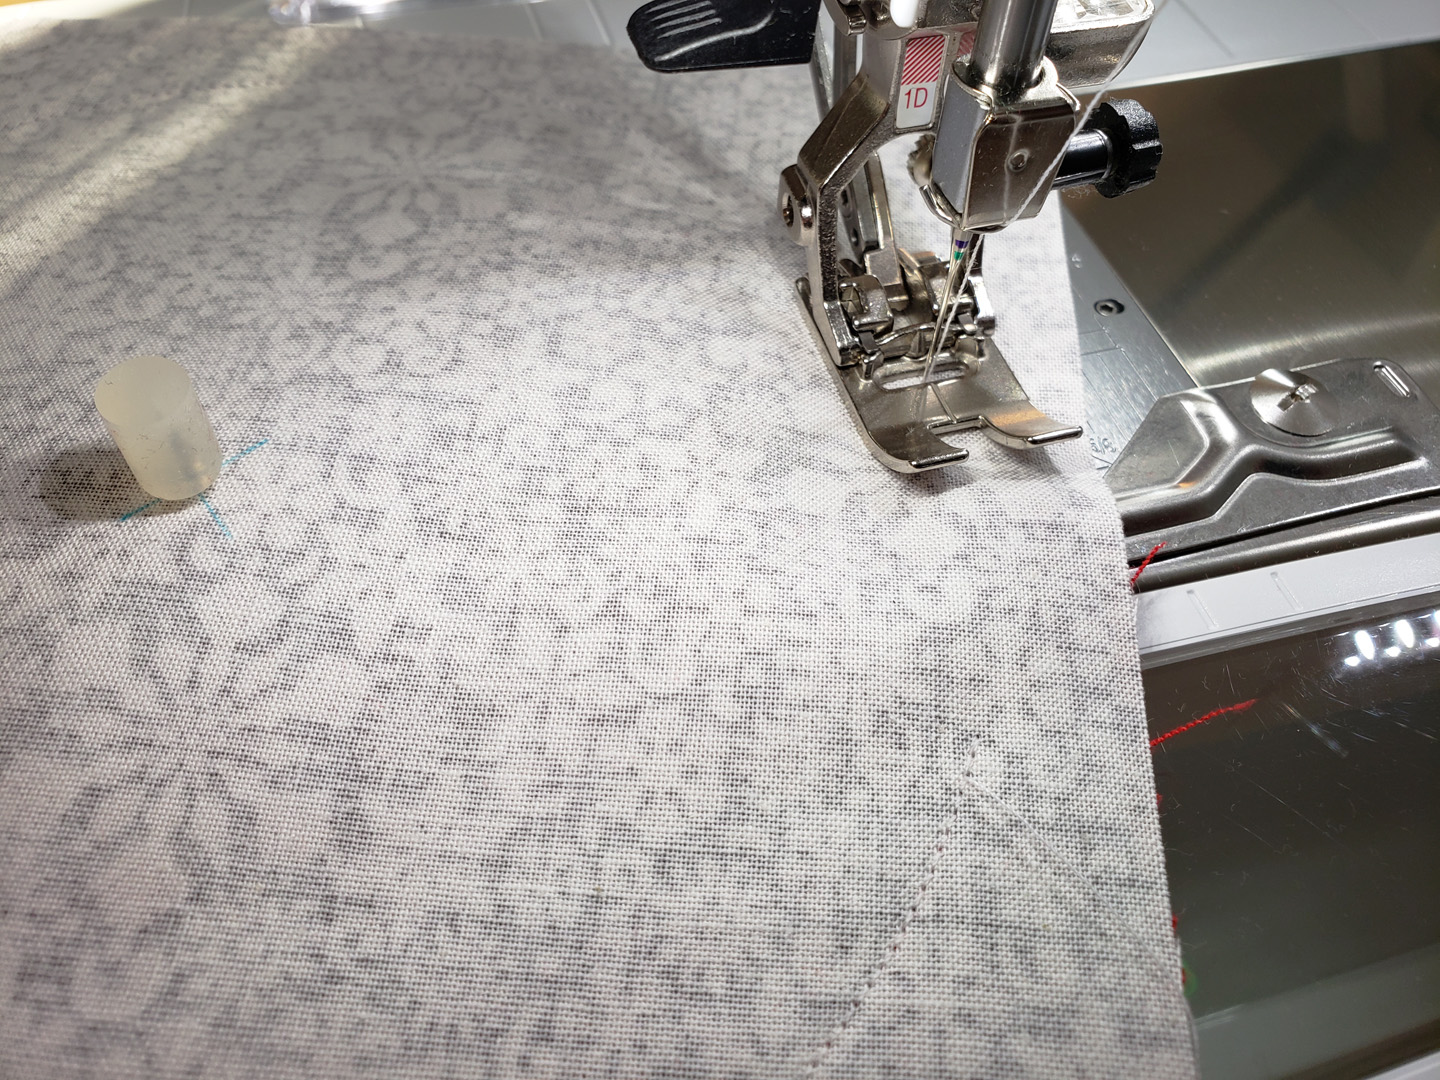
Stitch until you see the start of your stitches and leave about 2″ to 1.5″ opening for turning the circle inside out. Backstitch to secure the stitches.
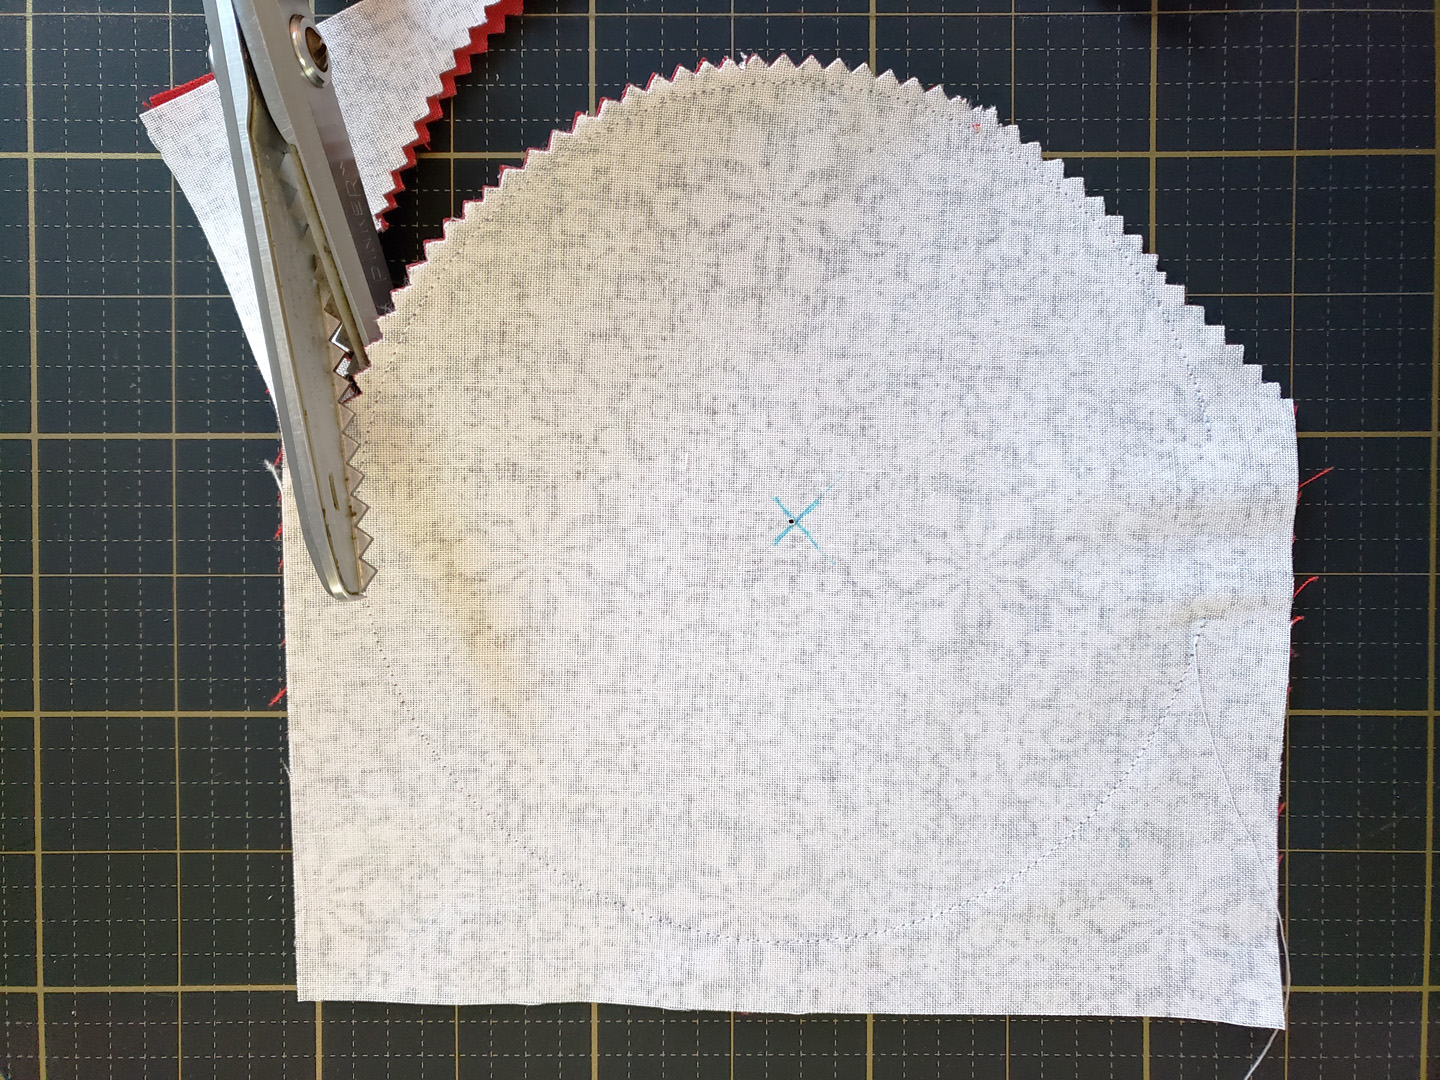
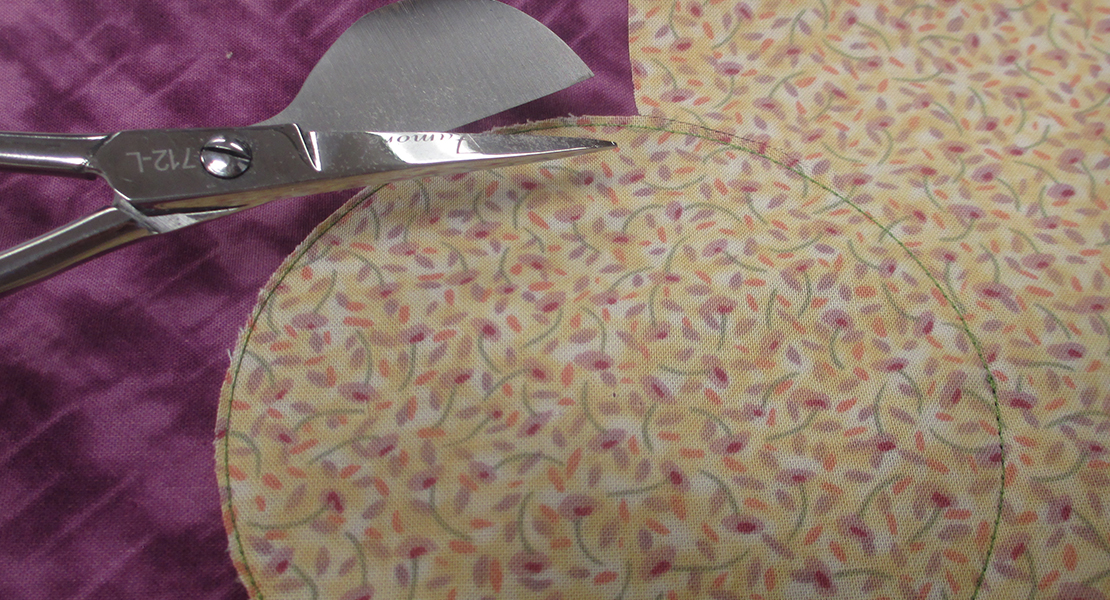
Remove the fabric from the machine and the Circular embroidery attachment. Using pinking shears, clip close to the stitching. Leave a little bit more fabric at the opening to allow for turning under the seam.
Reach in through the opening and pull the circle inside out.
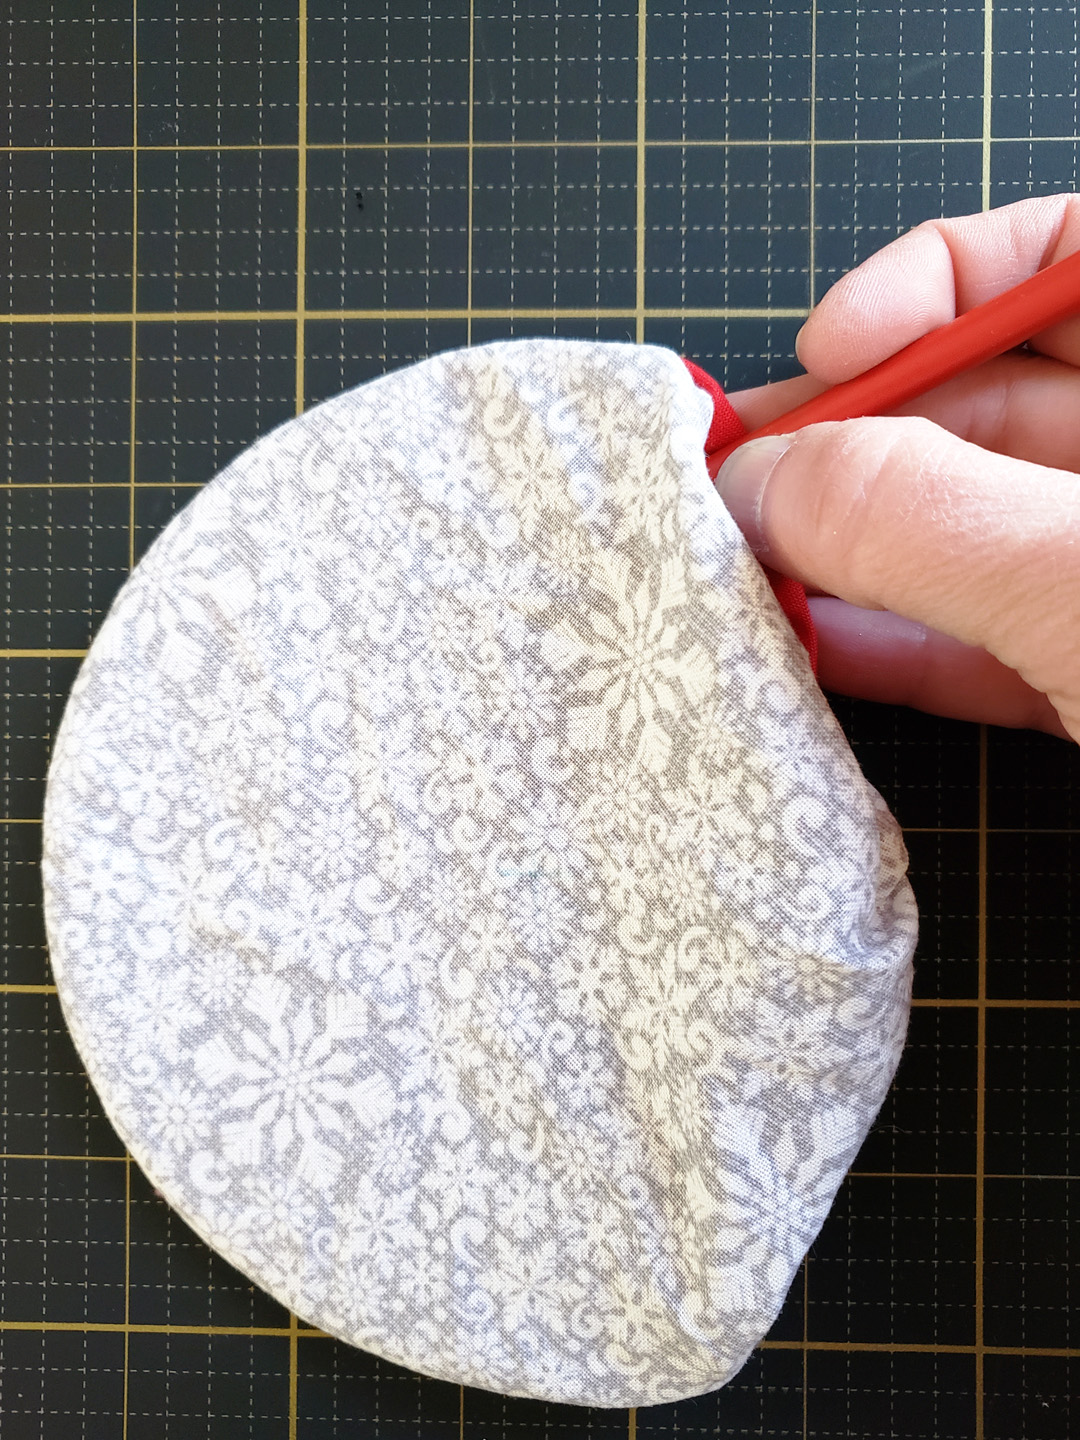
Use a point turner or blunt chopstick to help push out the edges of the circle.
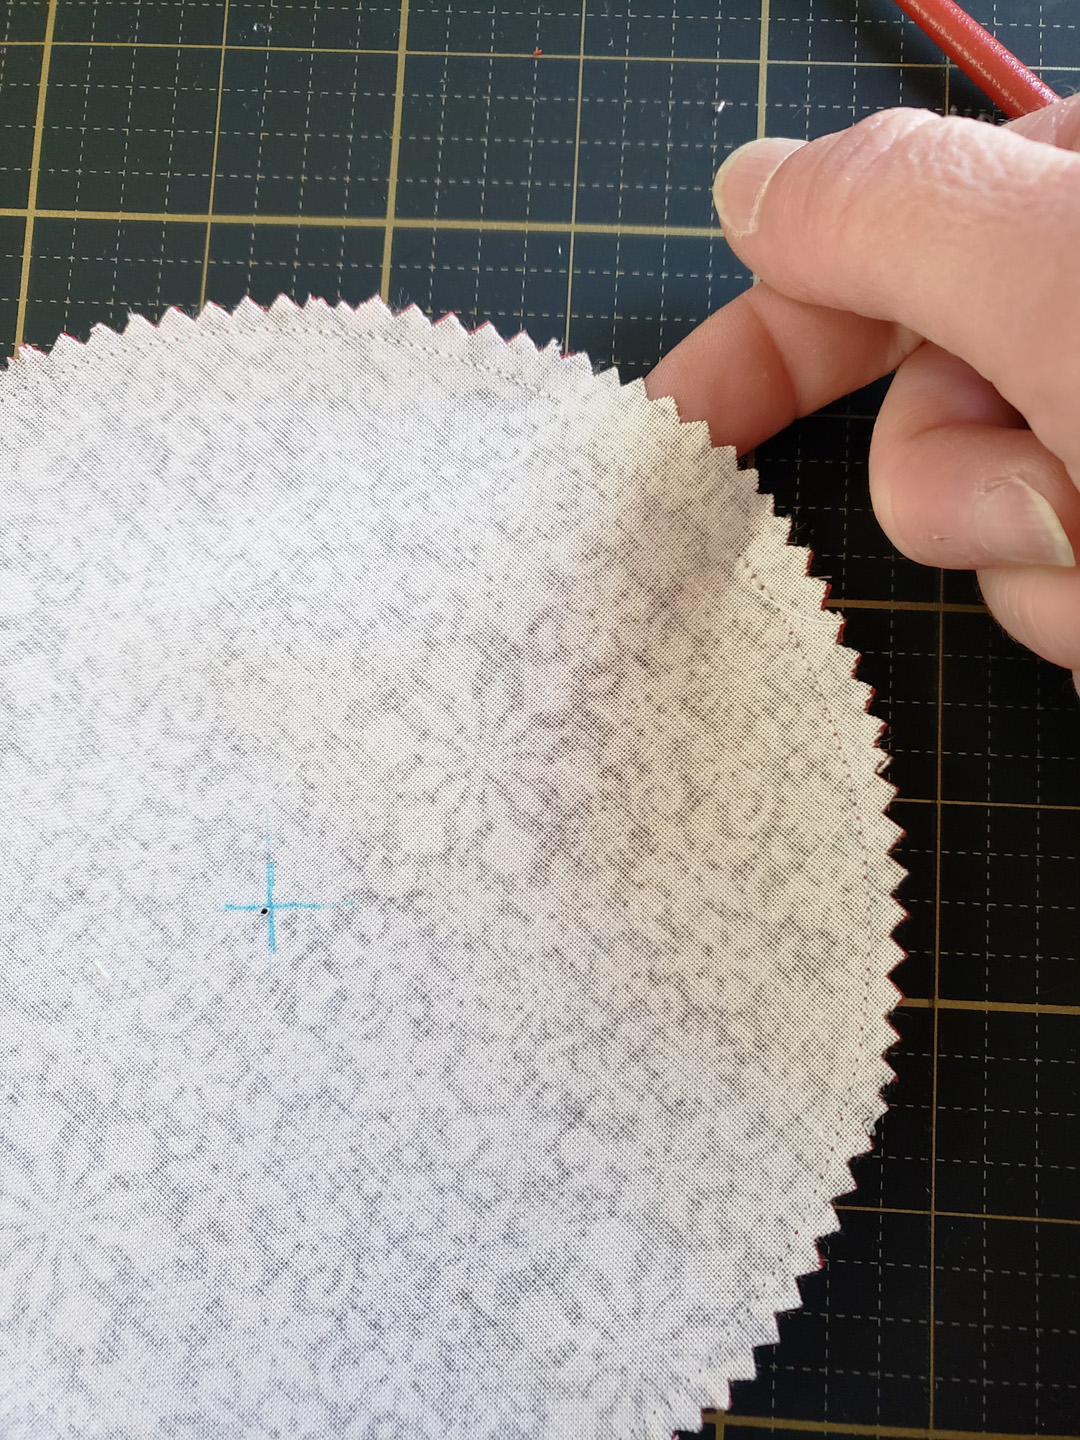
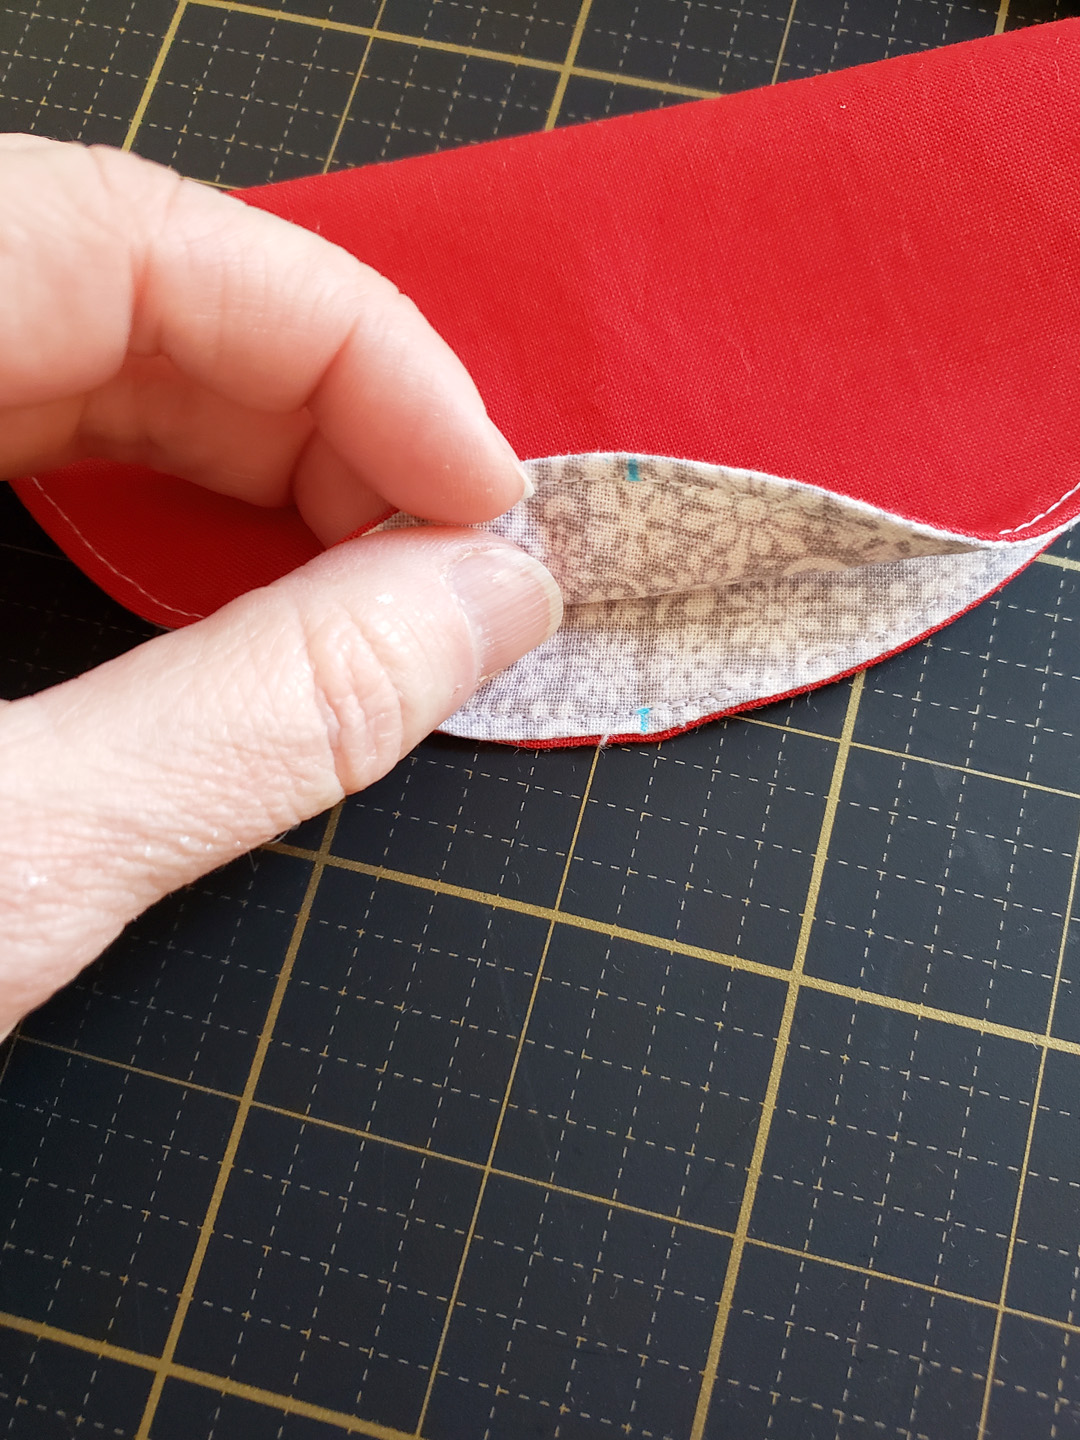
Press the edges well after turning. Turn under the fabric in the opening and press.
This portion of the circle won’t be perfect (and that’s okay, it will be hidden later), just try to get it looking as good as you can when pressing it under.

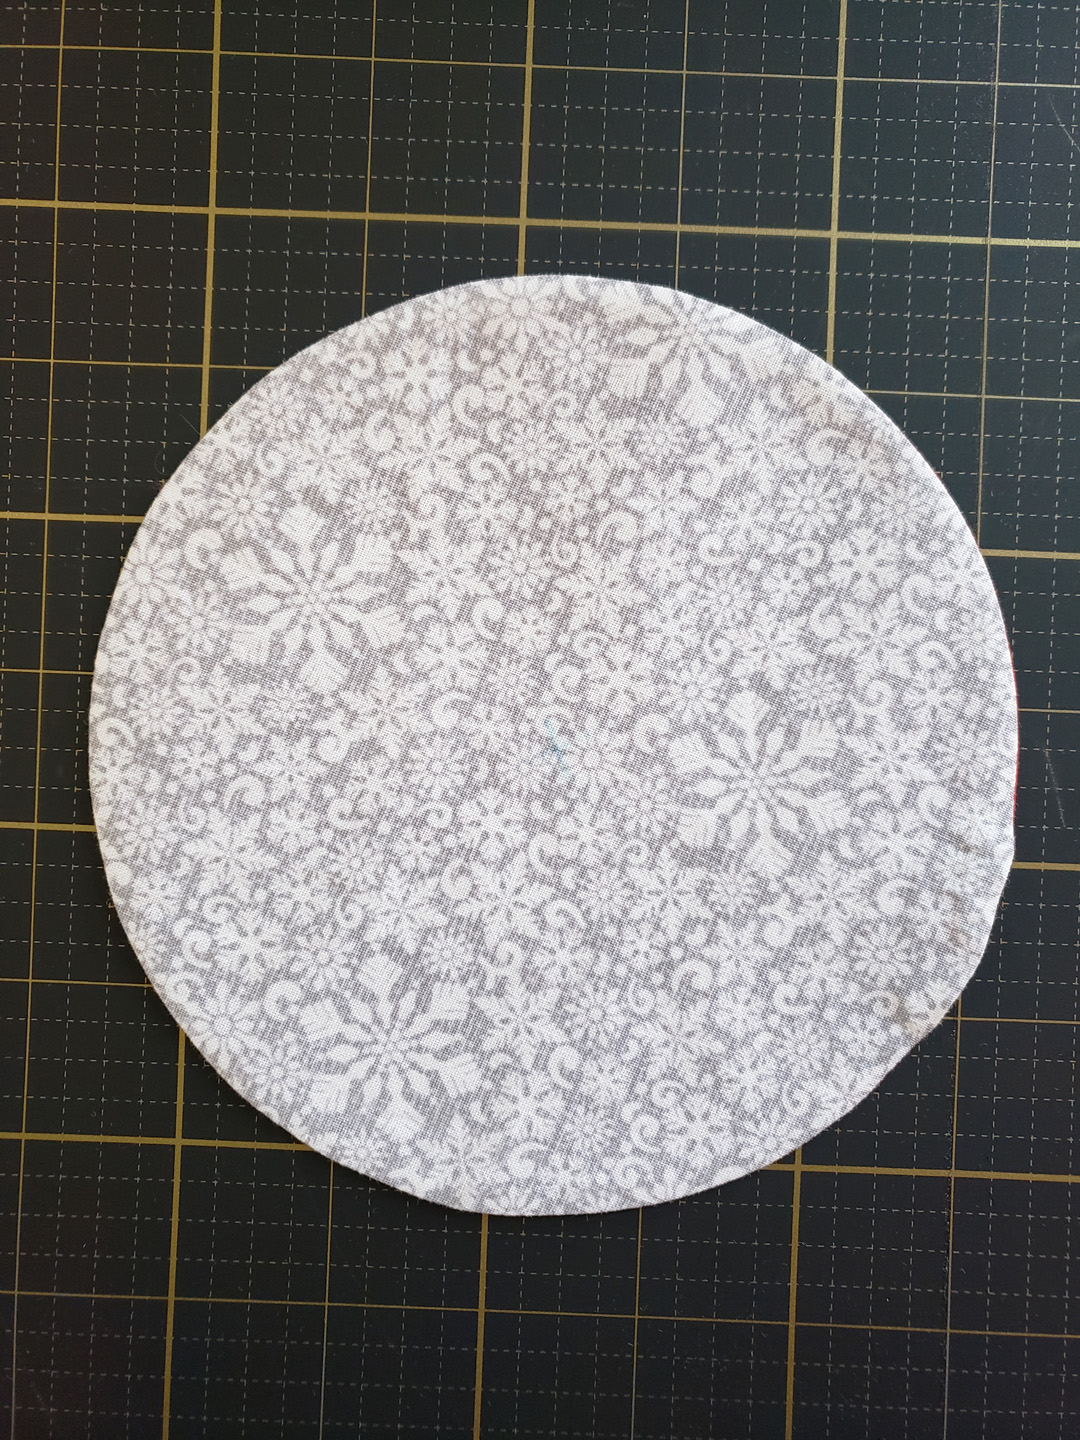
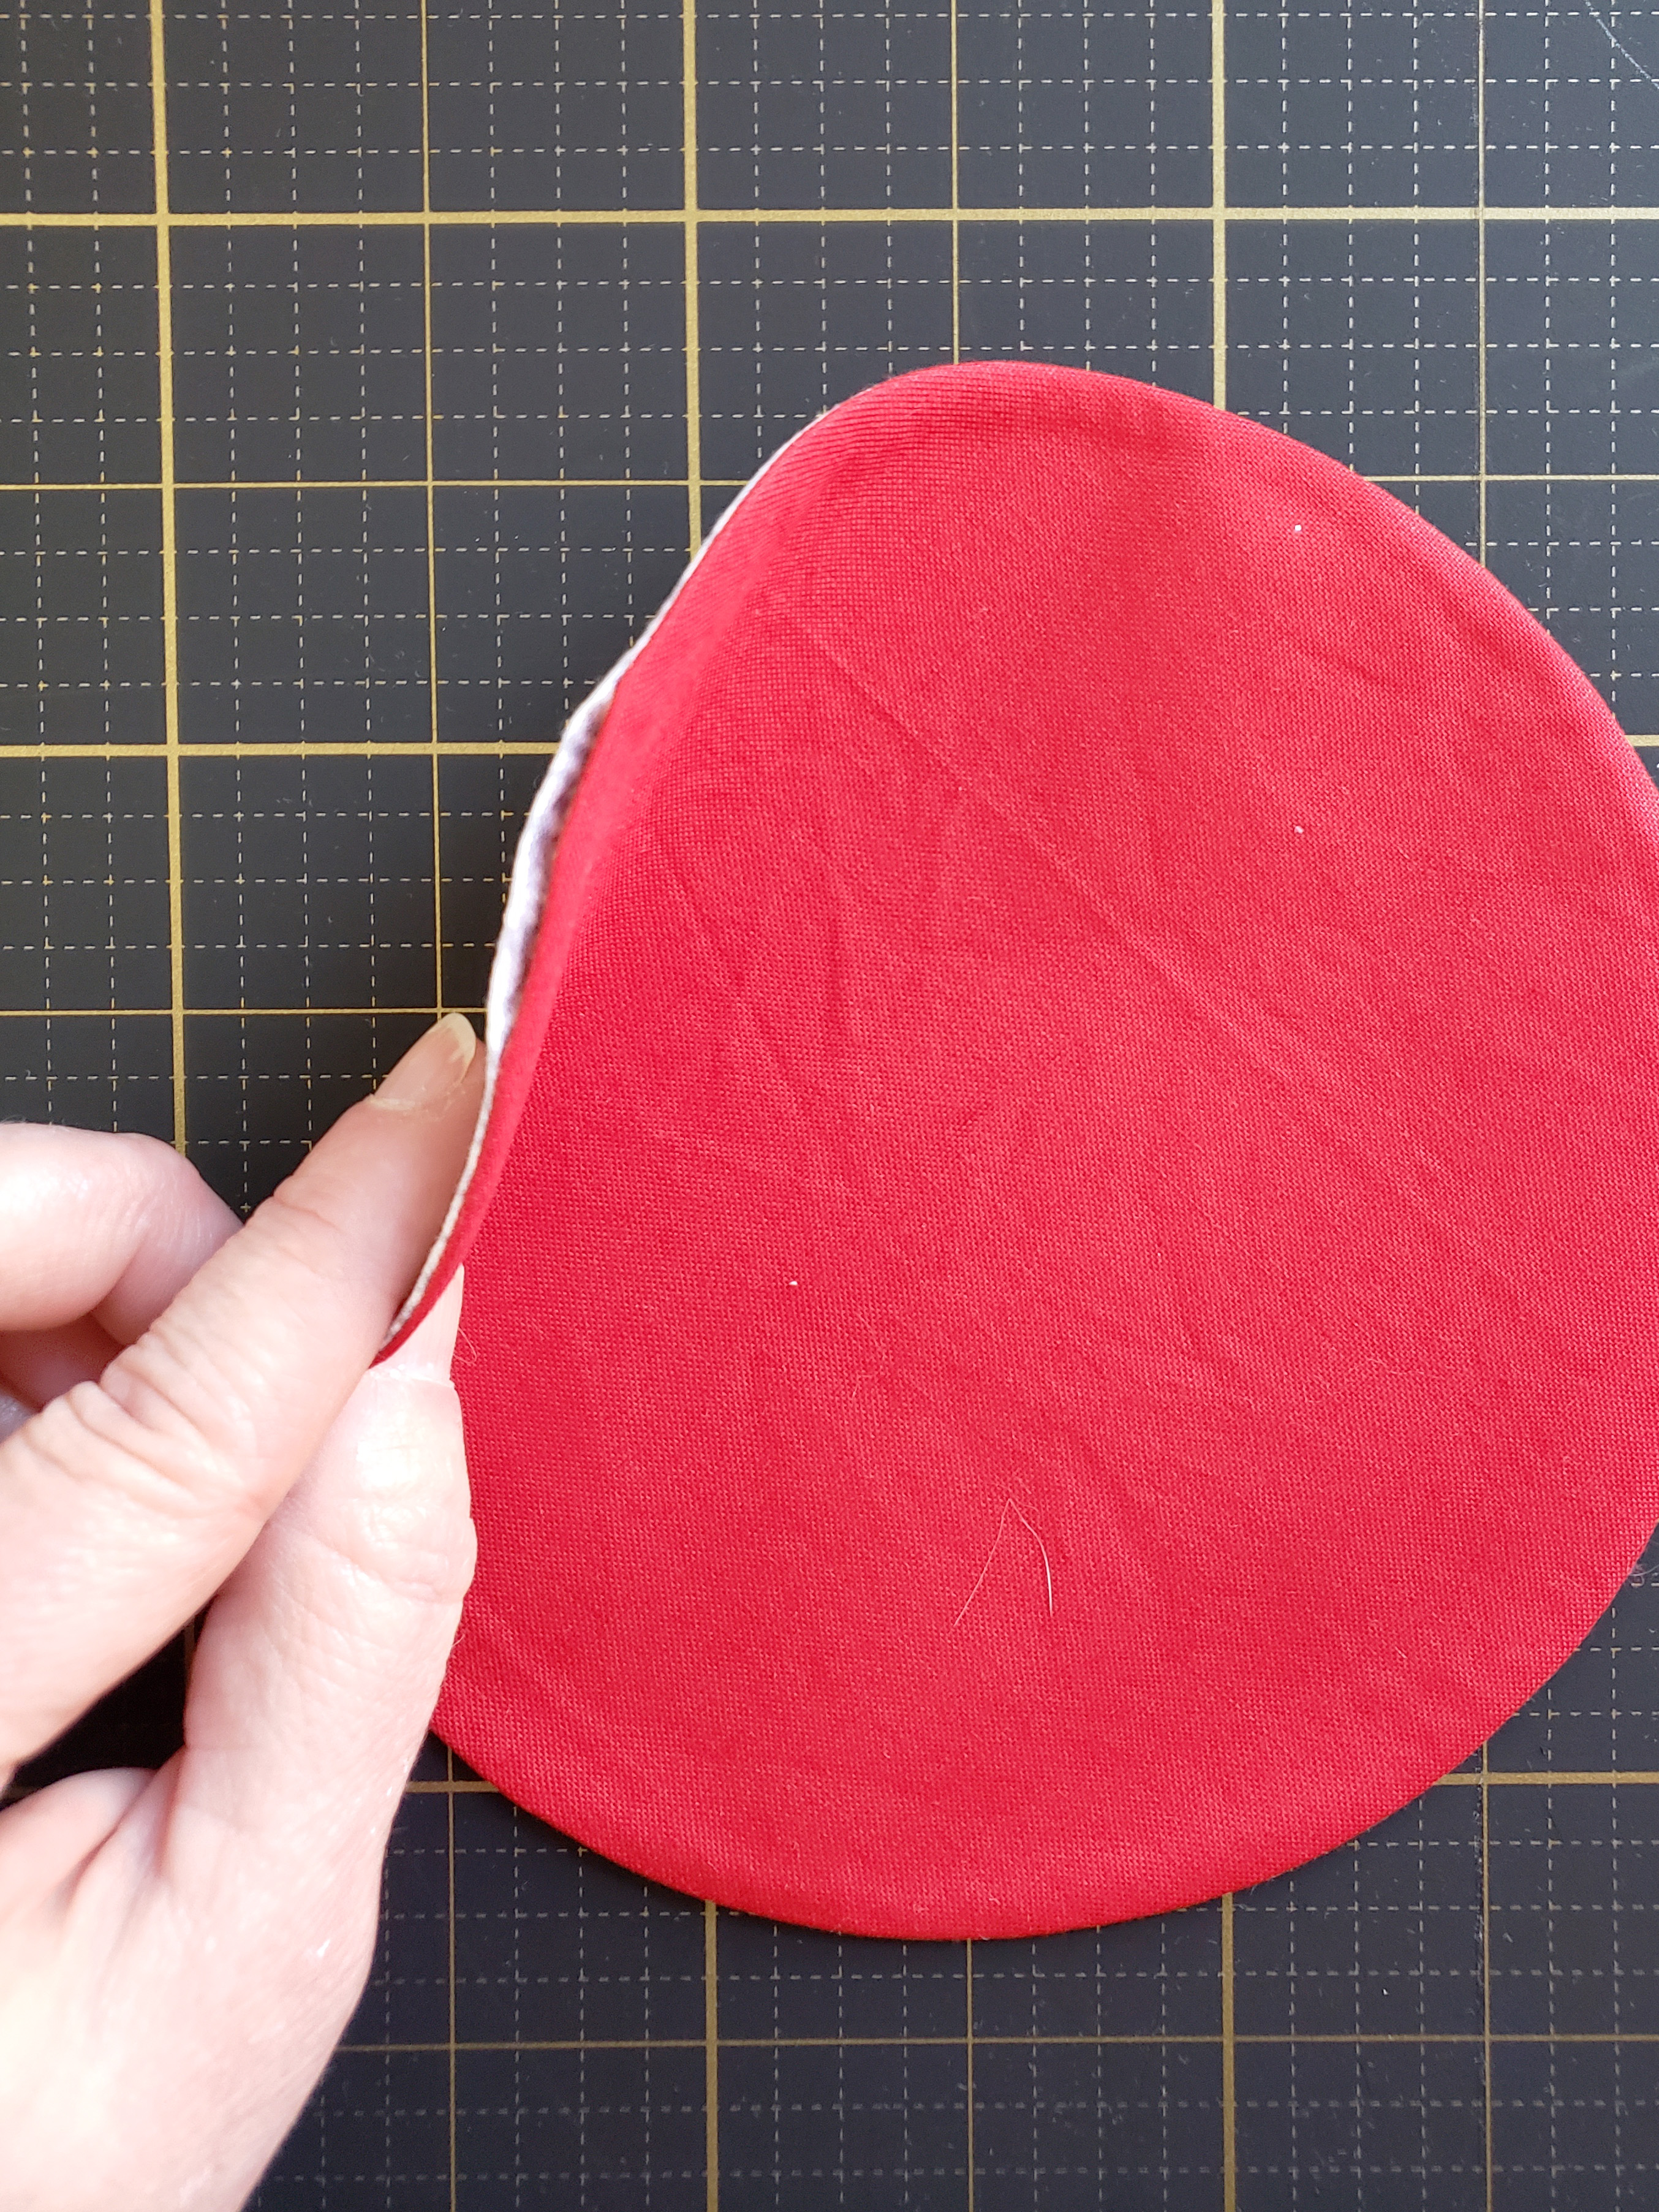
Remove the Circular attachment #83 from your machine for the next step. Reset your straight stitch to a 2.5mm length. Top stitch all around the circle. I usually try to start stitching close to the opening so I can make sure I’ve stitched it closed.
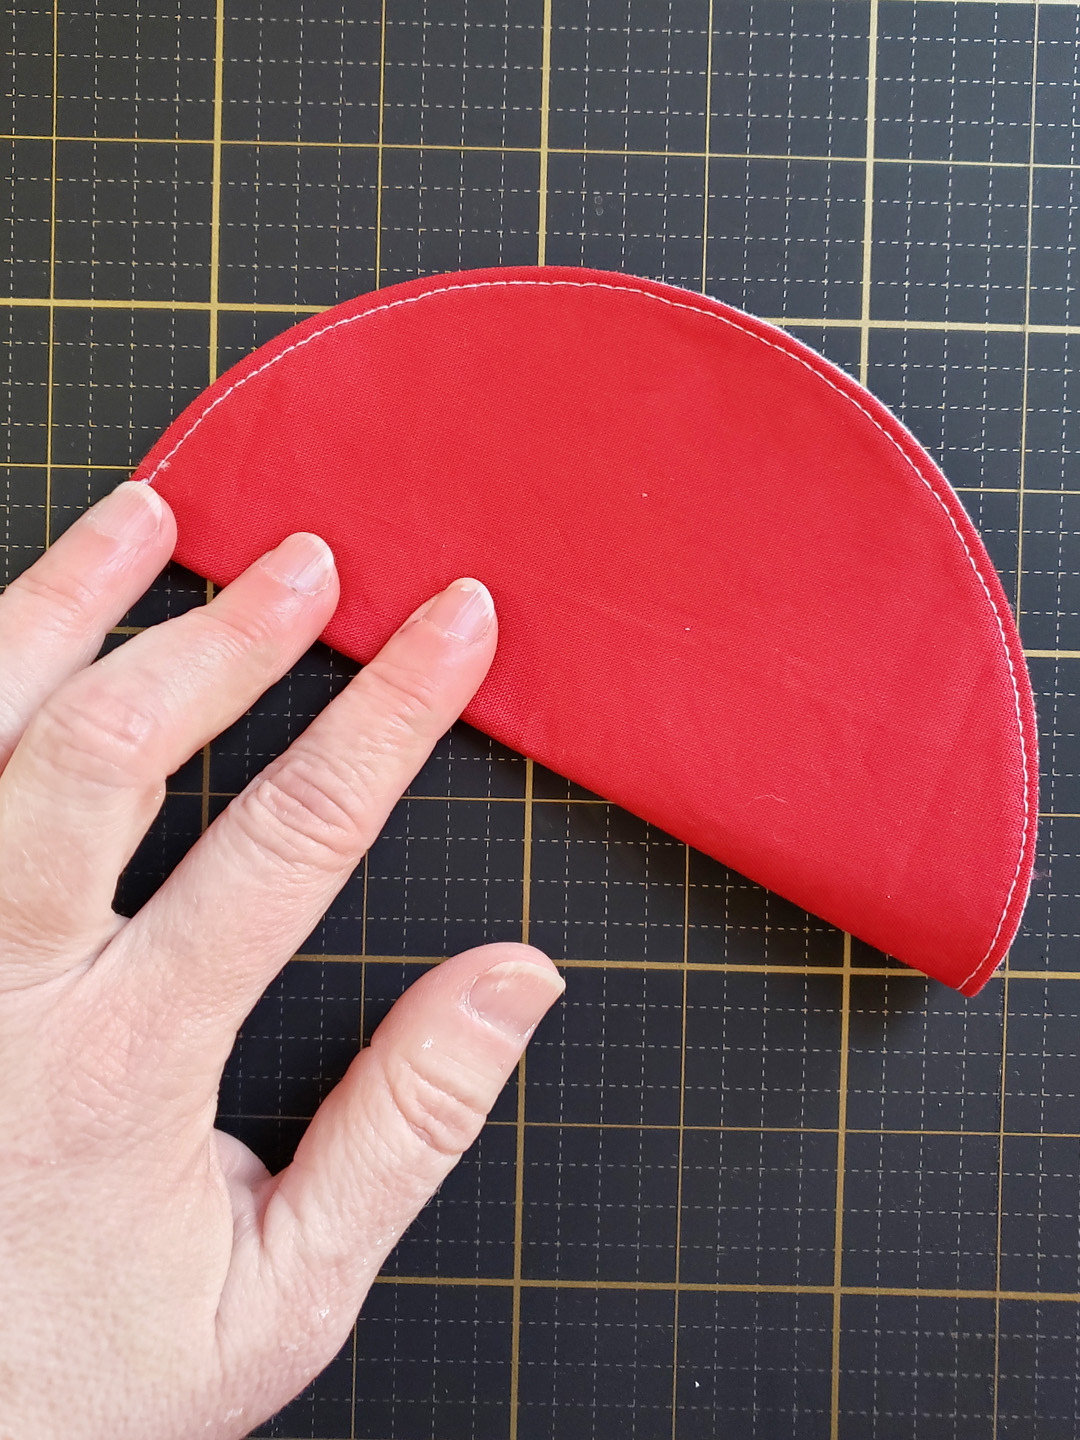
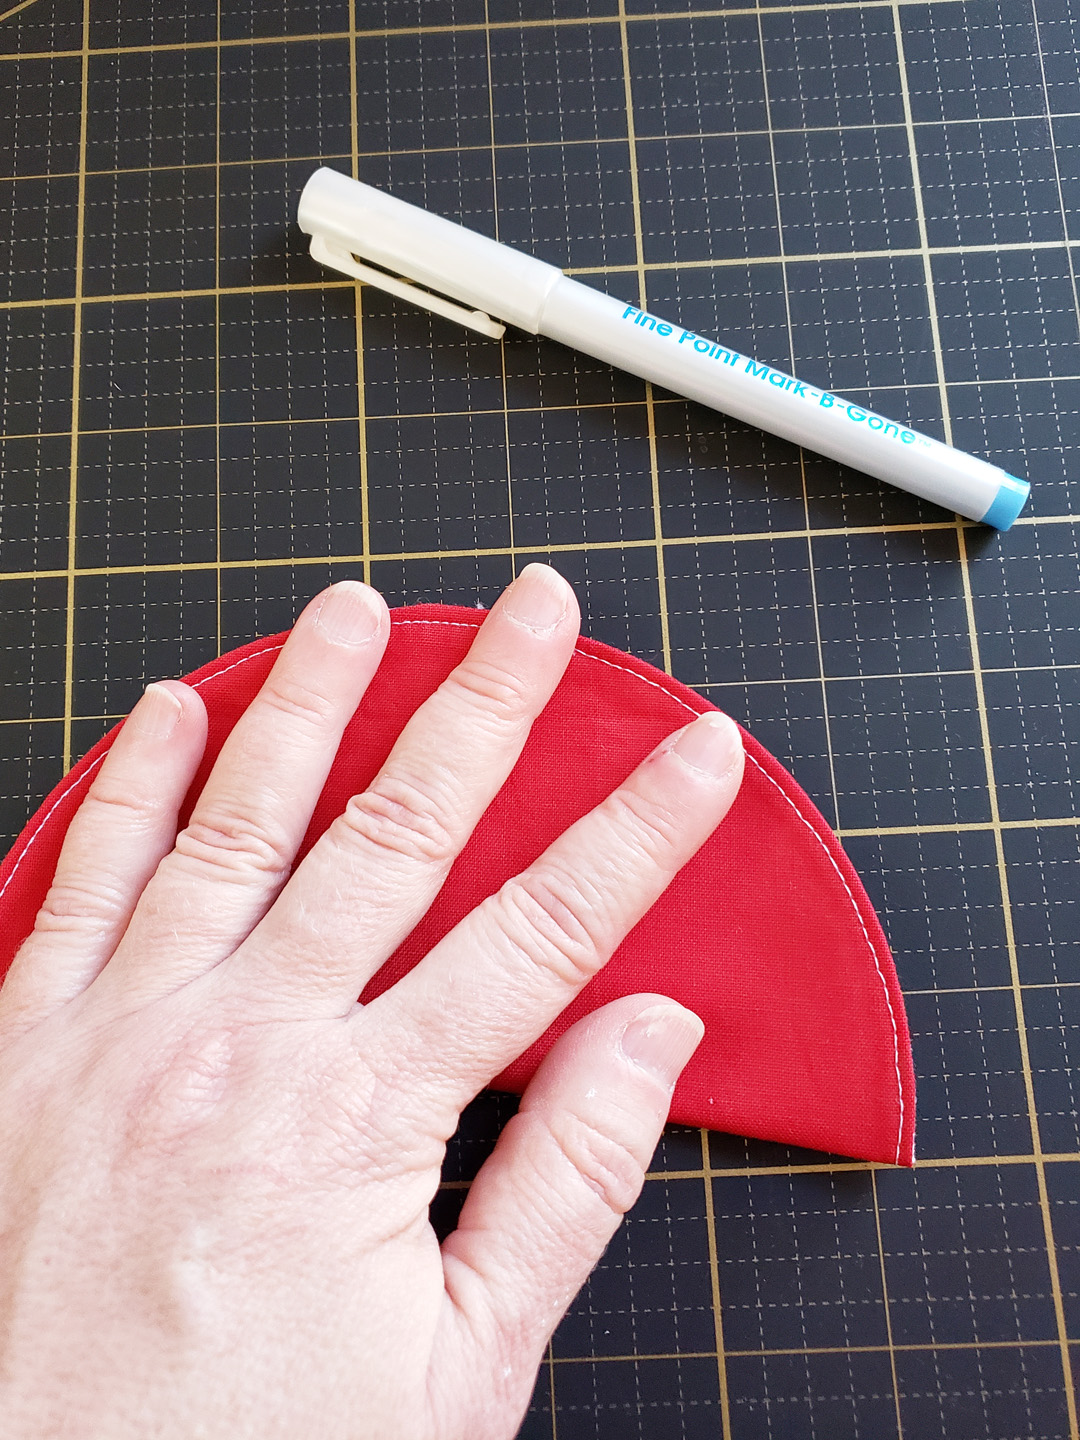
Grab your fabric marking pen or pencil and your finished circle. We are going to mark four equidistant points around the circle. First, fold the circle in half to form a taco shape. Here’s where I make sure that the opening (the part that may look a bit off from pressing closed after turning the circle inside out) is dead center in one of those side folds.
Finger press the side folds. Open up the fabric circle and mark the folds.
Fold the fabric circle in the other direction, matching the two marks you just created in the center.
Finger press the side folds.
Mark these spots with your fabric marking pen or pencil.
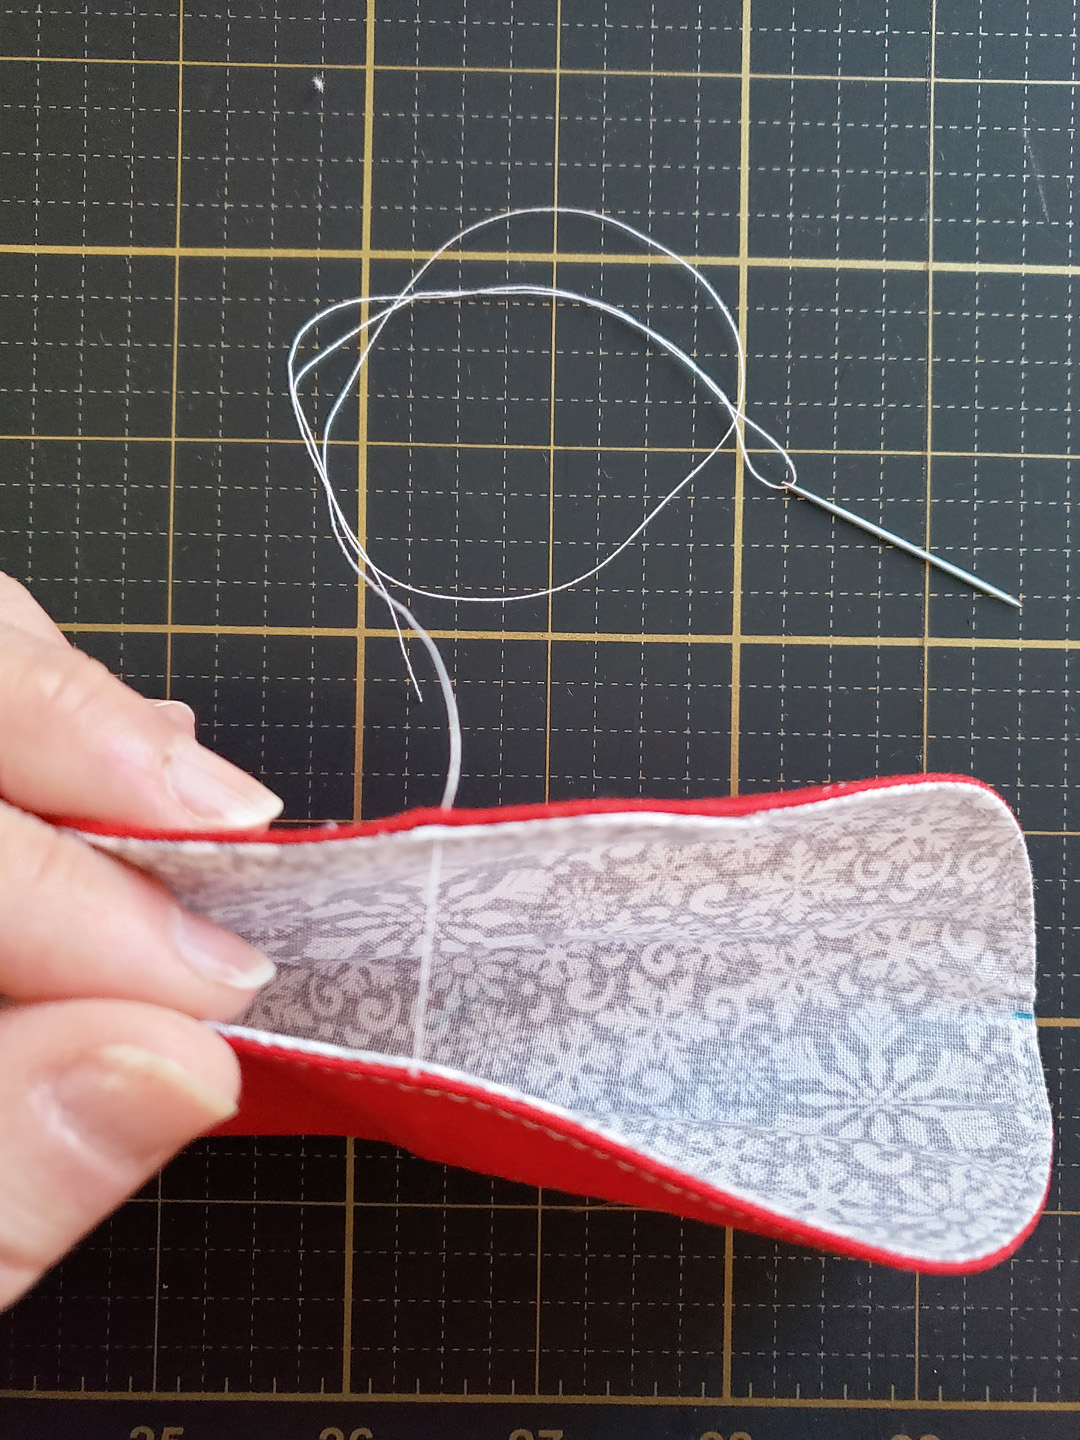
Grab your hand sewing needle and thread for the next steps. First, secure the thread in one marked spot on the circle. Next, tack one side to the opposite side using the marks you made.
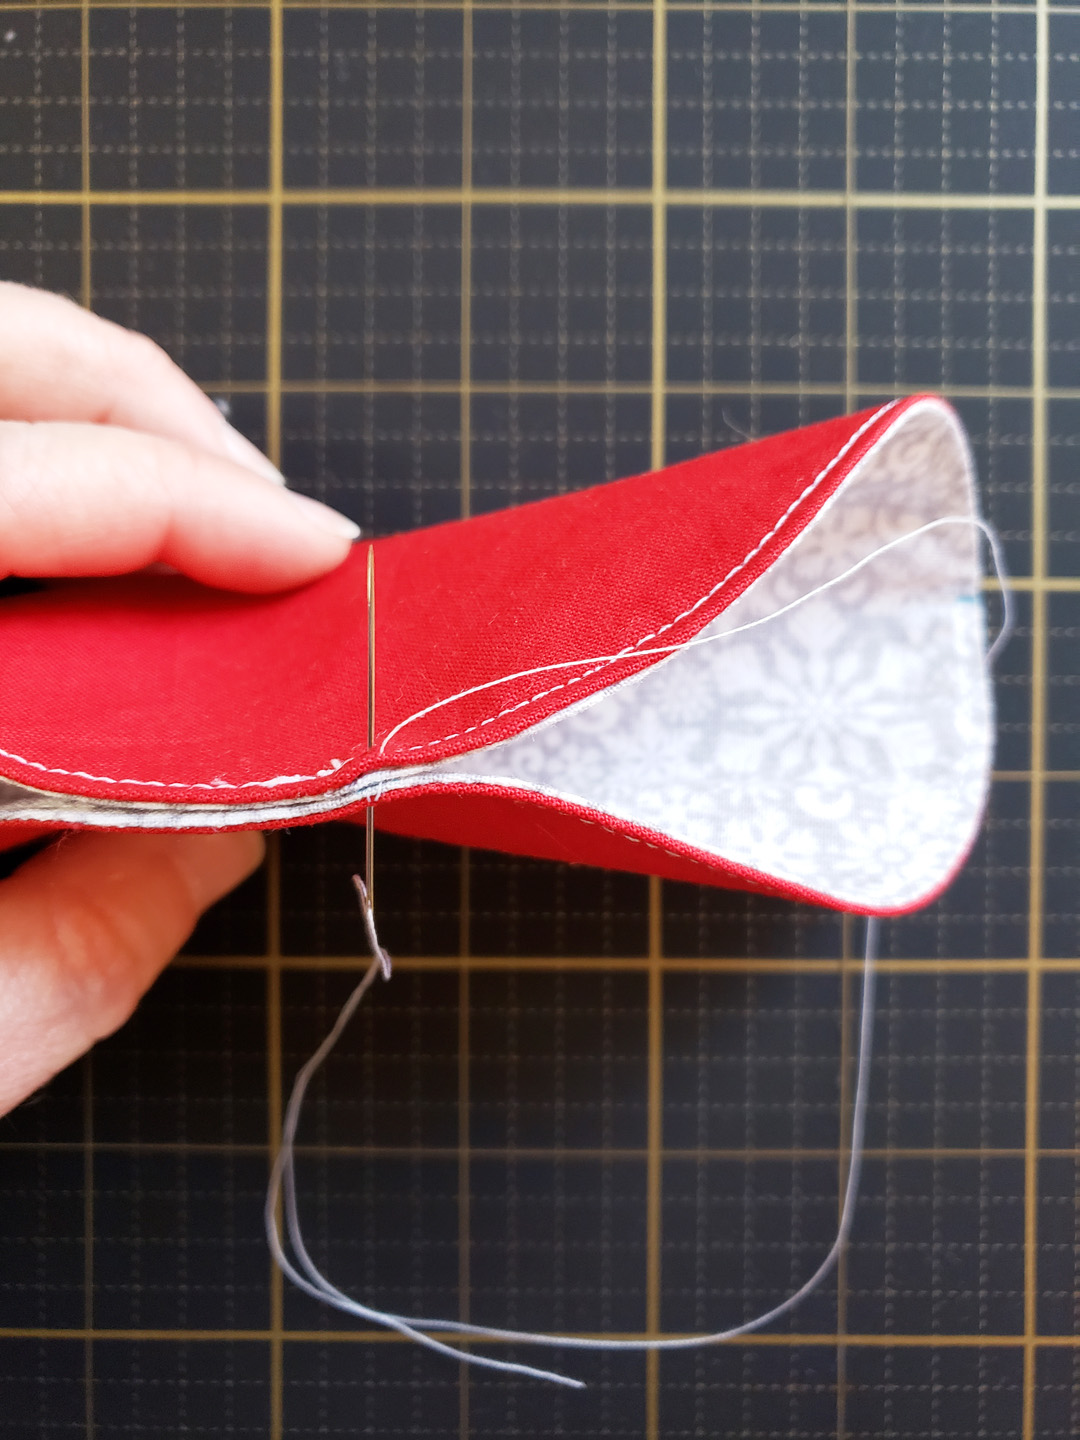
Secure with a few tacking stitches.
Take a stitch through one of the other side center marks.
Take a stitch through the tacking stitches already sewn holding the other two sides together.
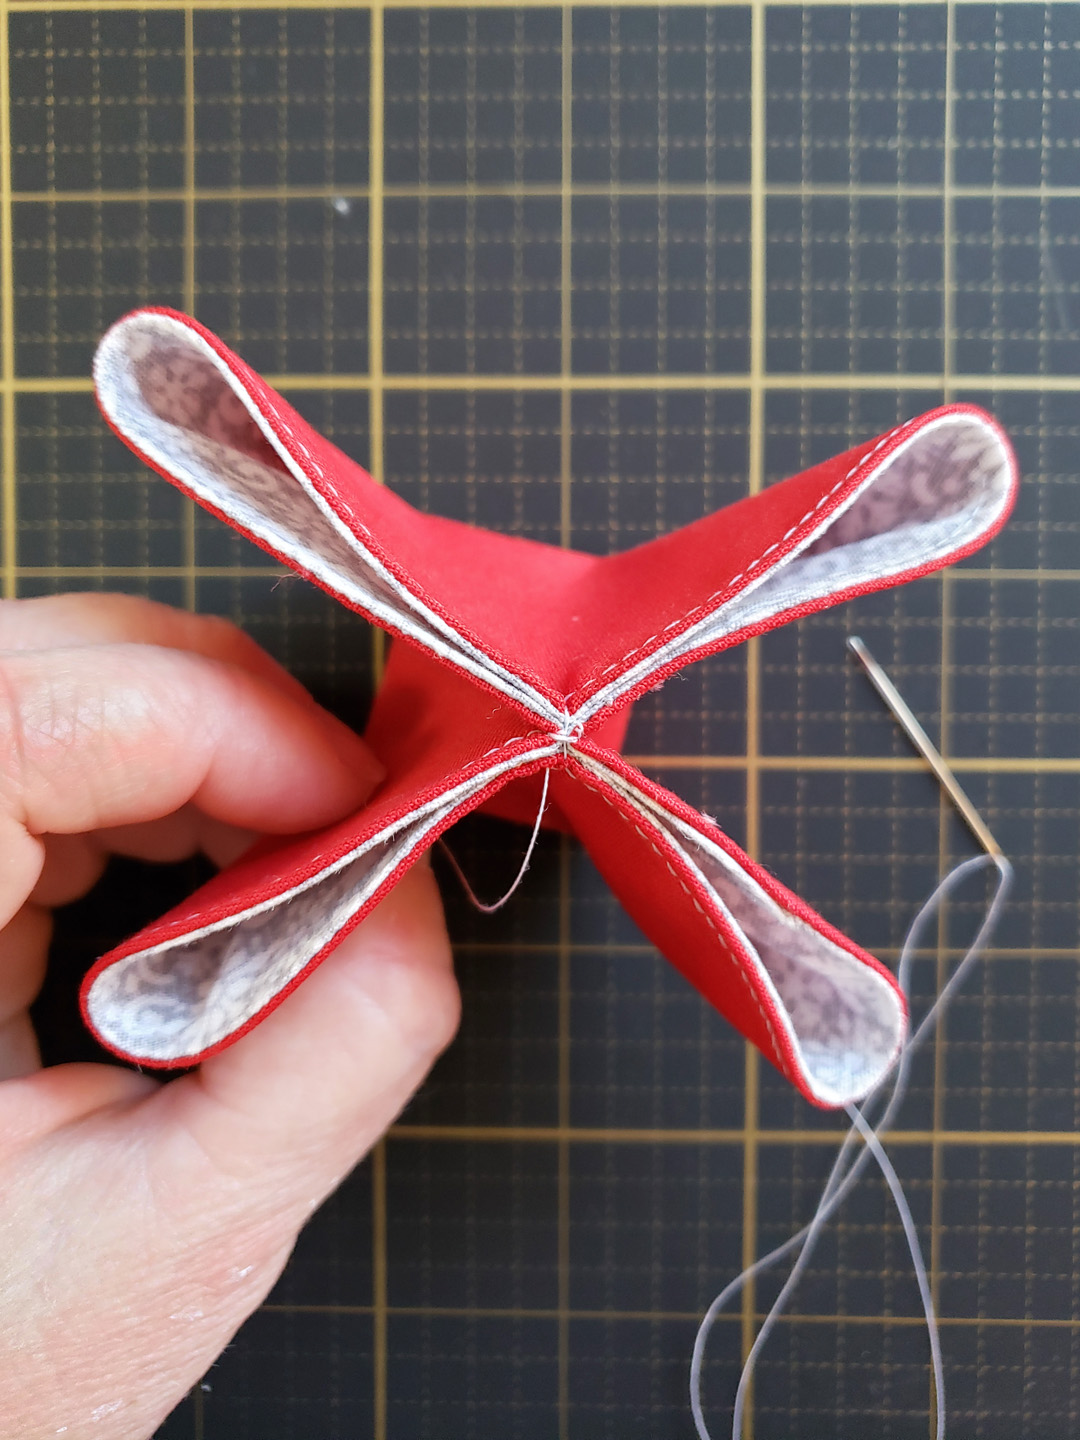
Sew through the last side center mark, and take a few more tacking stitches to hold all the sides together in the center. Secure thread with a knot.
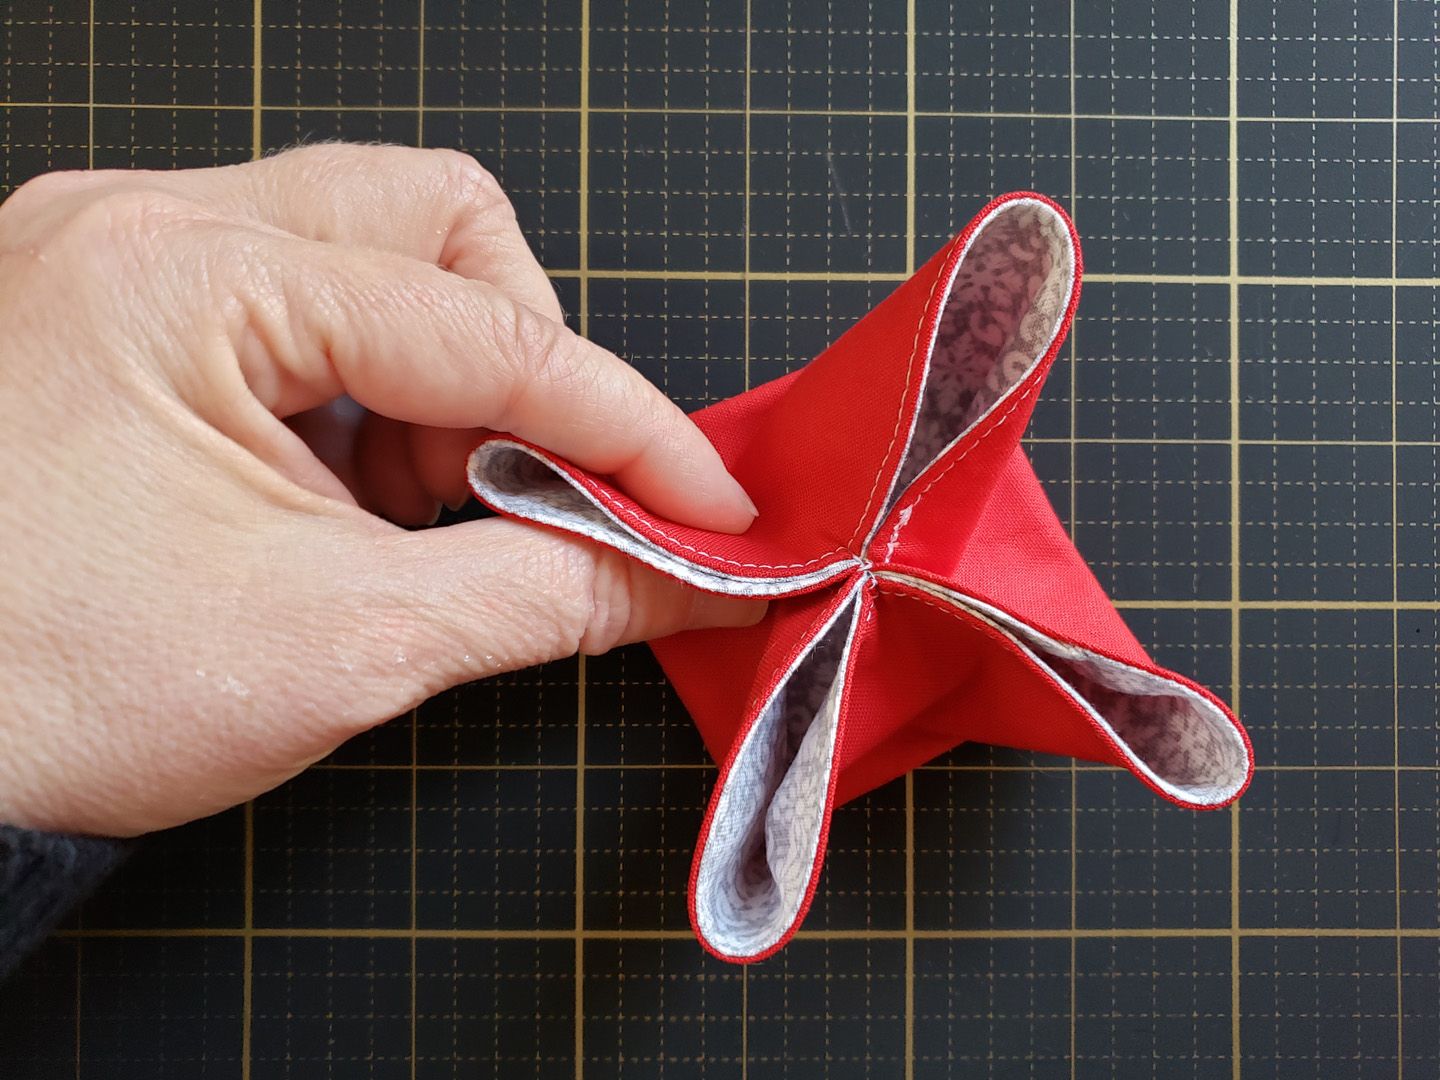
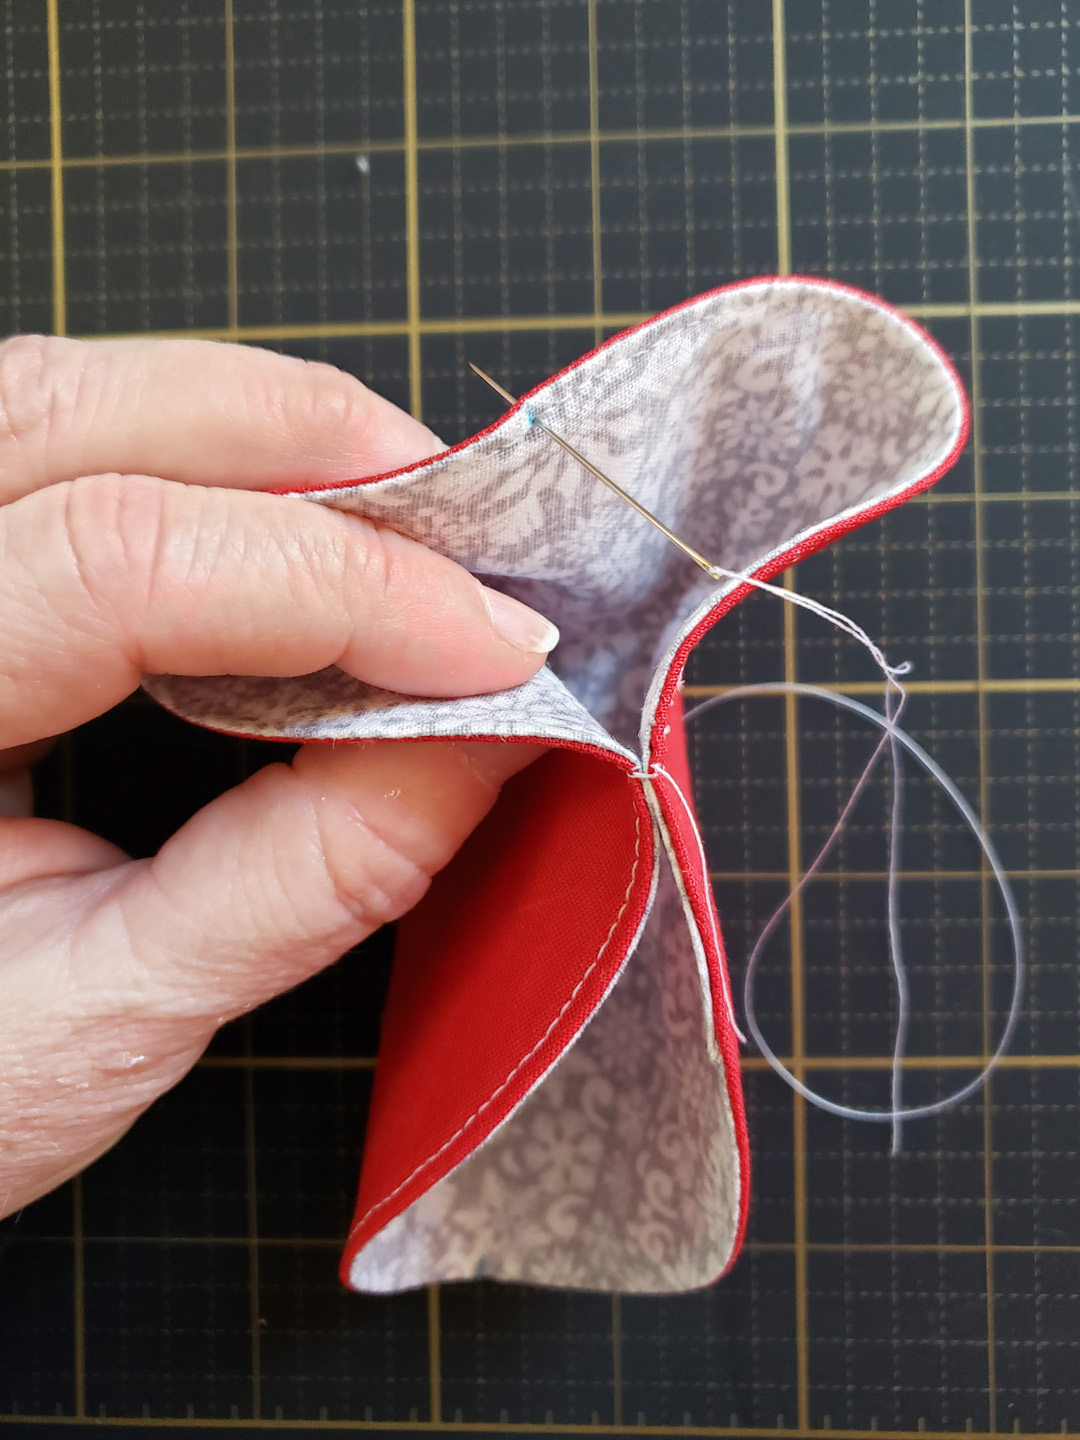
Start to push the center down, and you will start to see a square shape form.

Use the markings on a cutting mat to help you work the shape with your fingers until you form a square shape.

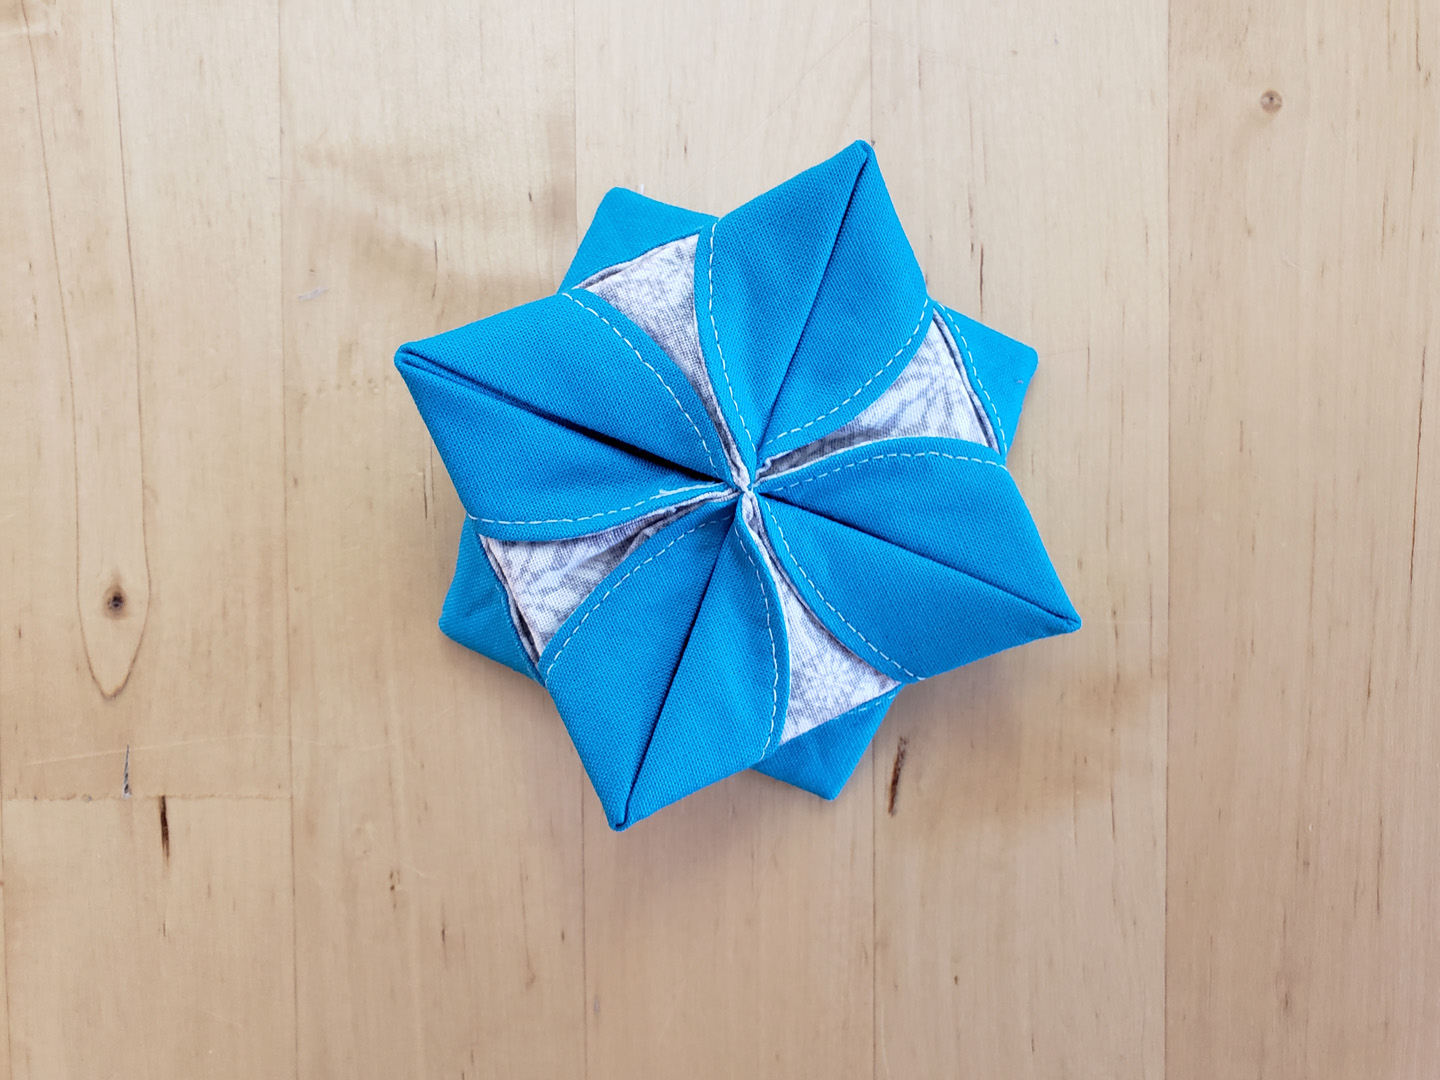
Once you have formed a square shape you can begin to make the petals.
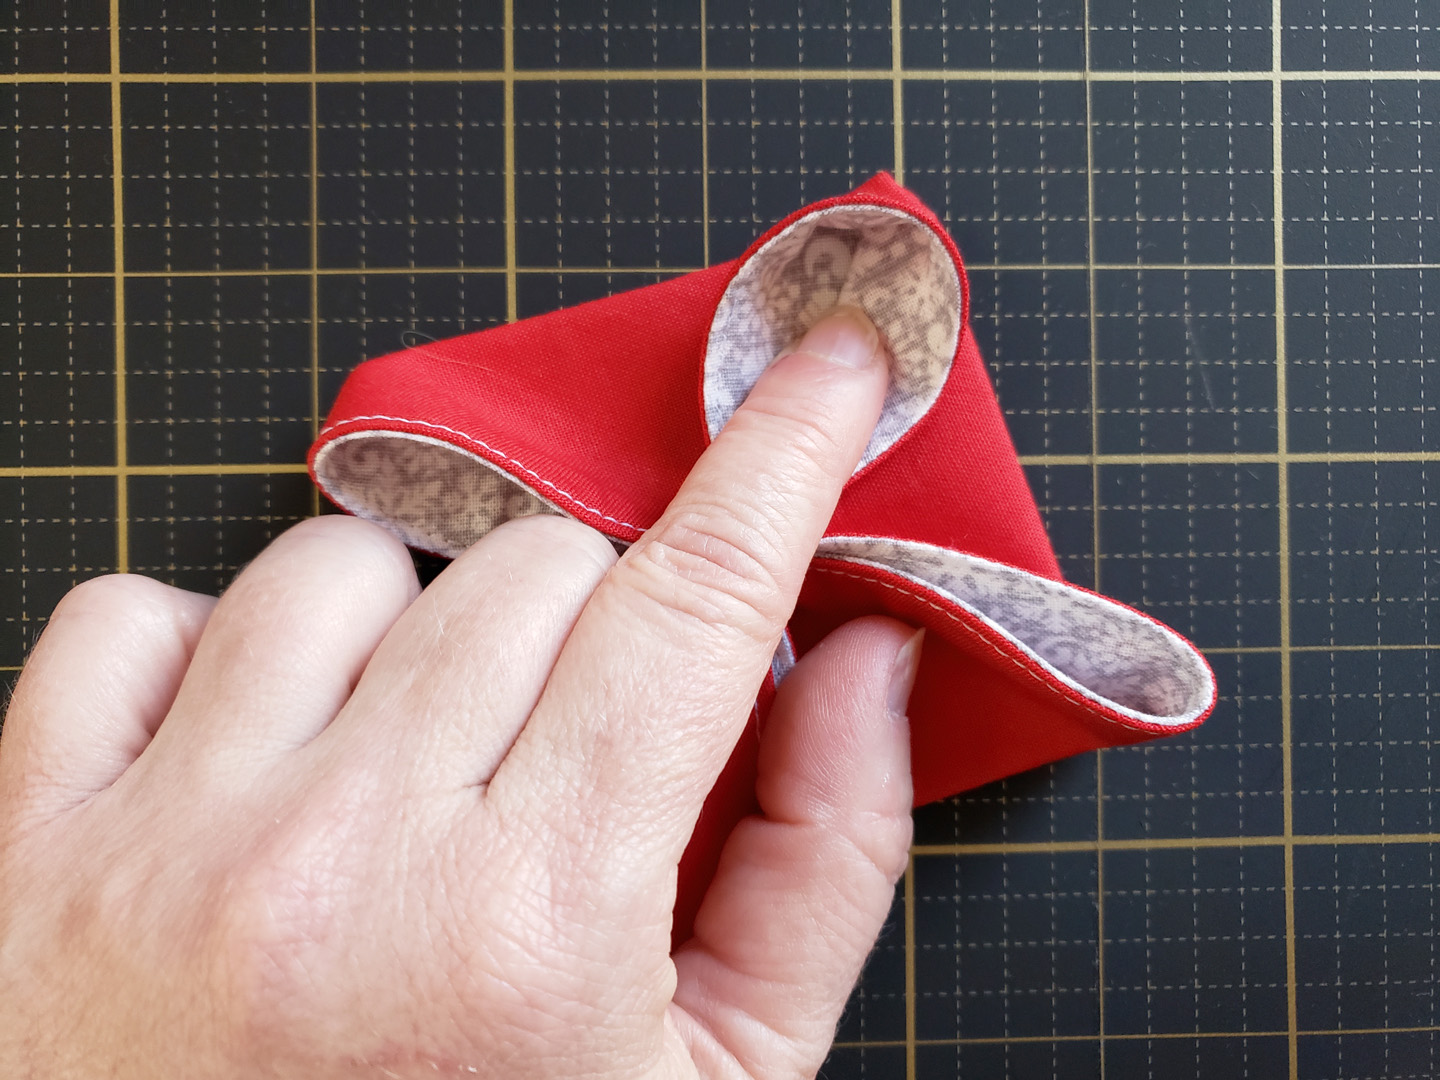
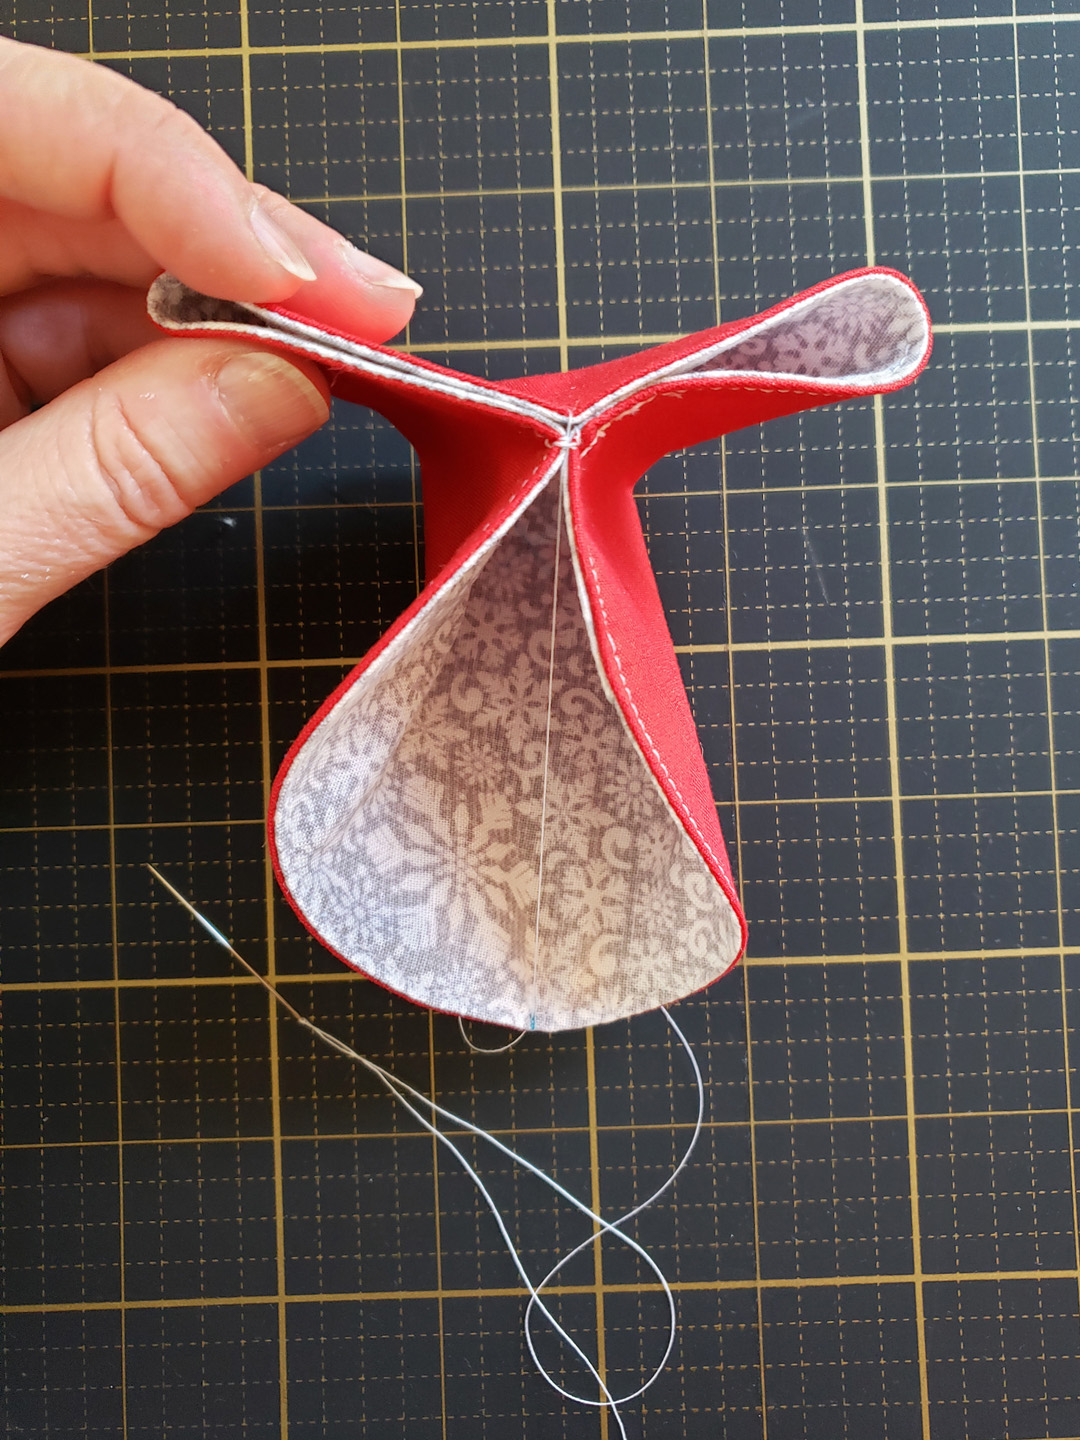
Push down on one petal and notice how it forms a hood shape at the top.

Push this hood shape over to the back side of the ornament. Work the corner with your fingers to form a point.
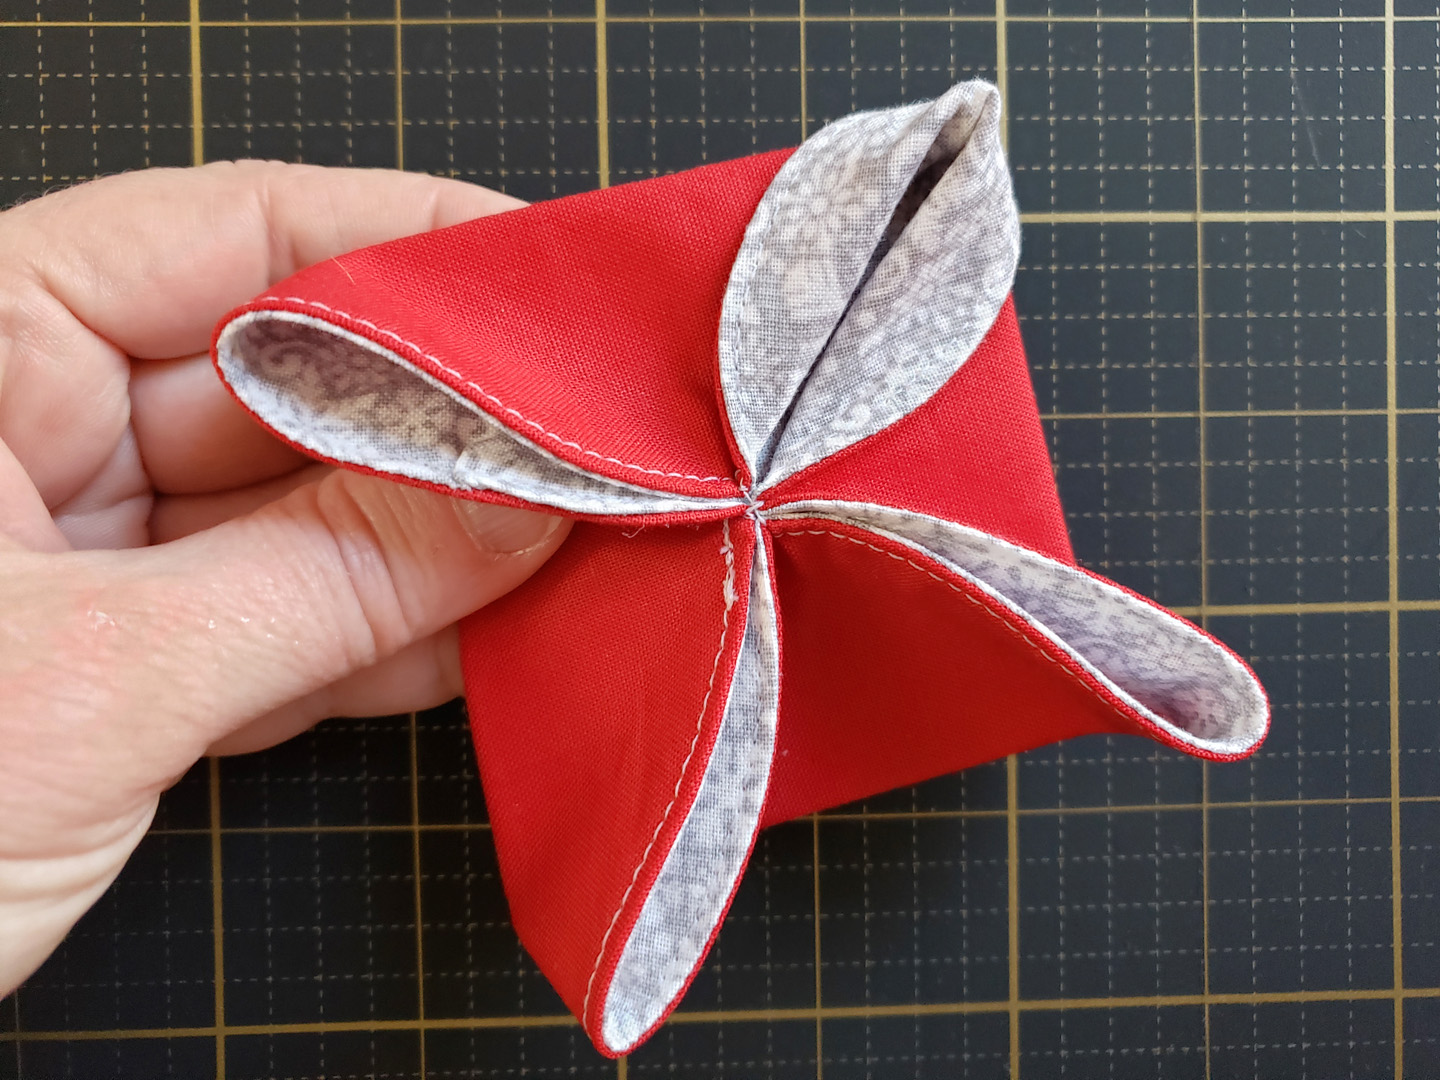
Next, work around the other three petals to create the ornament.
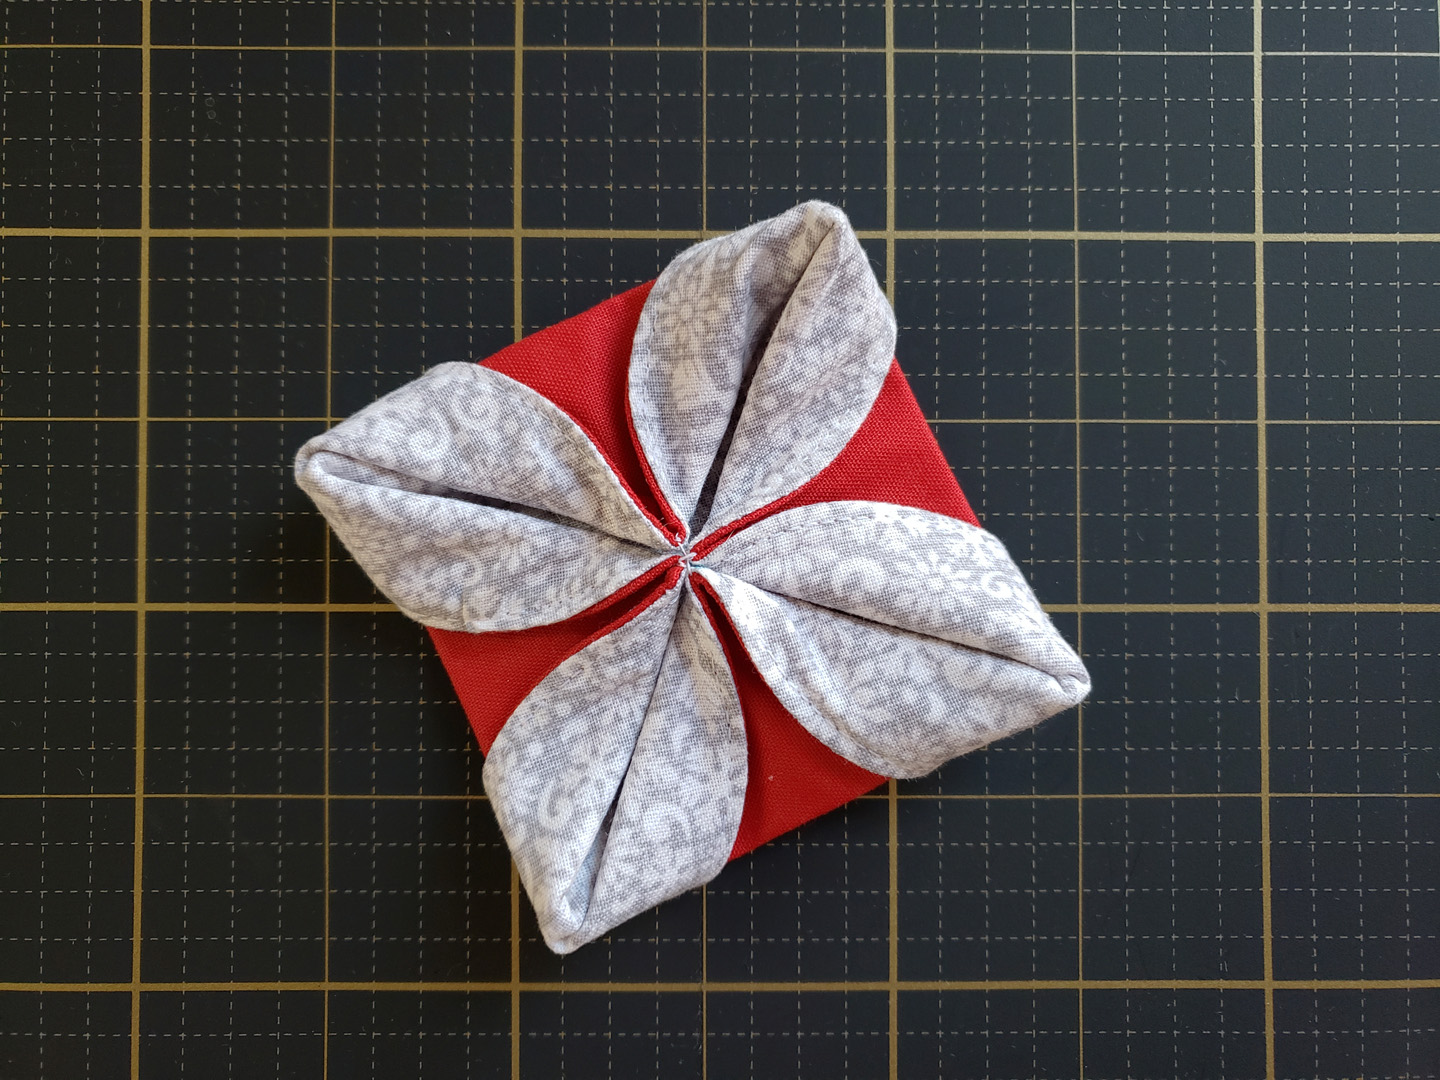
At this point you can fiddle with each of the petal shapes to make sure they are looking even.
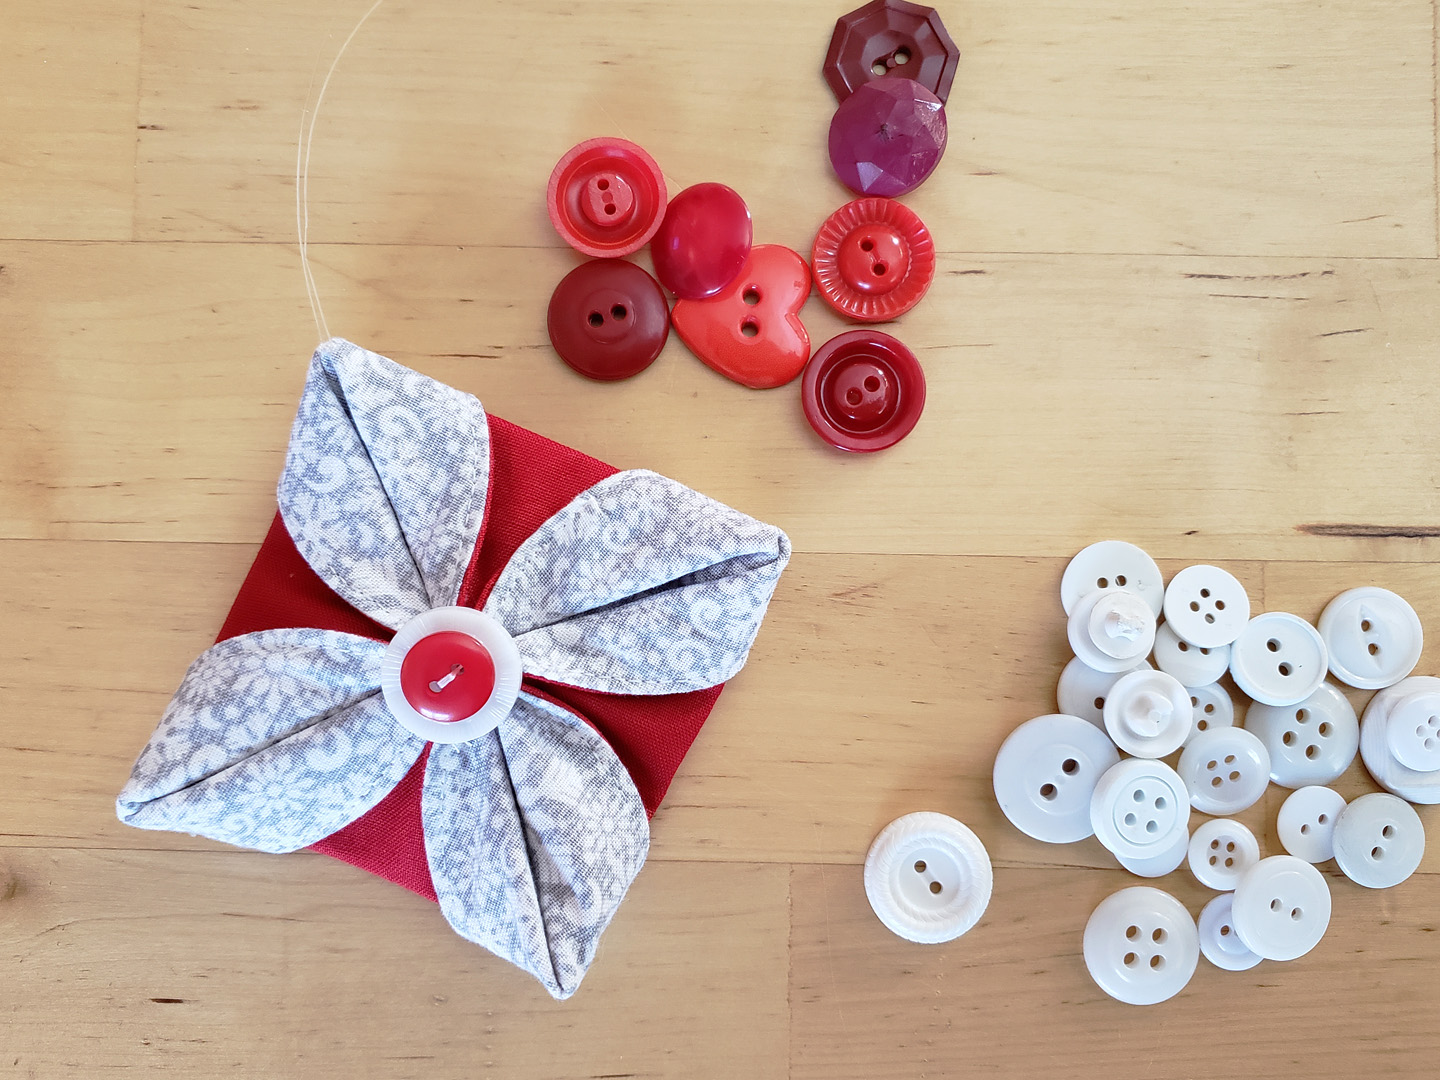
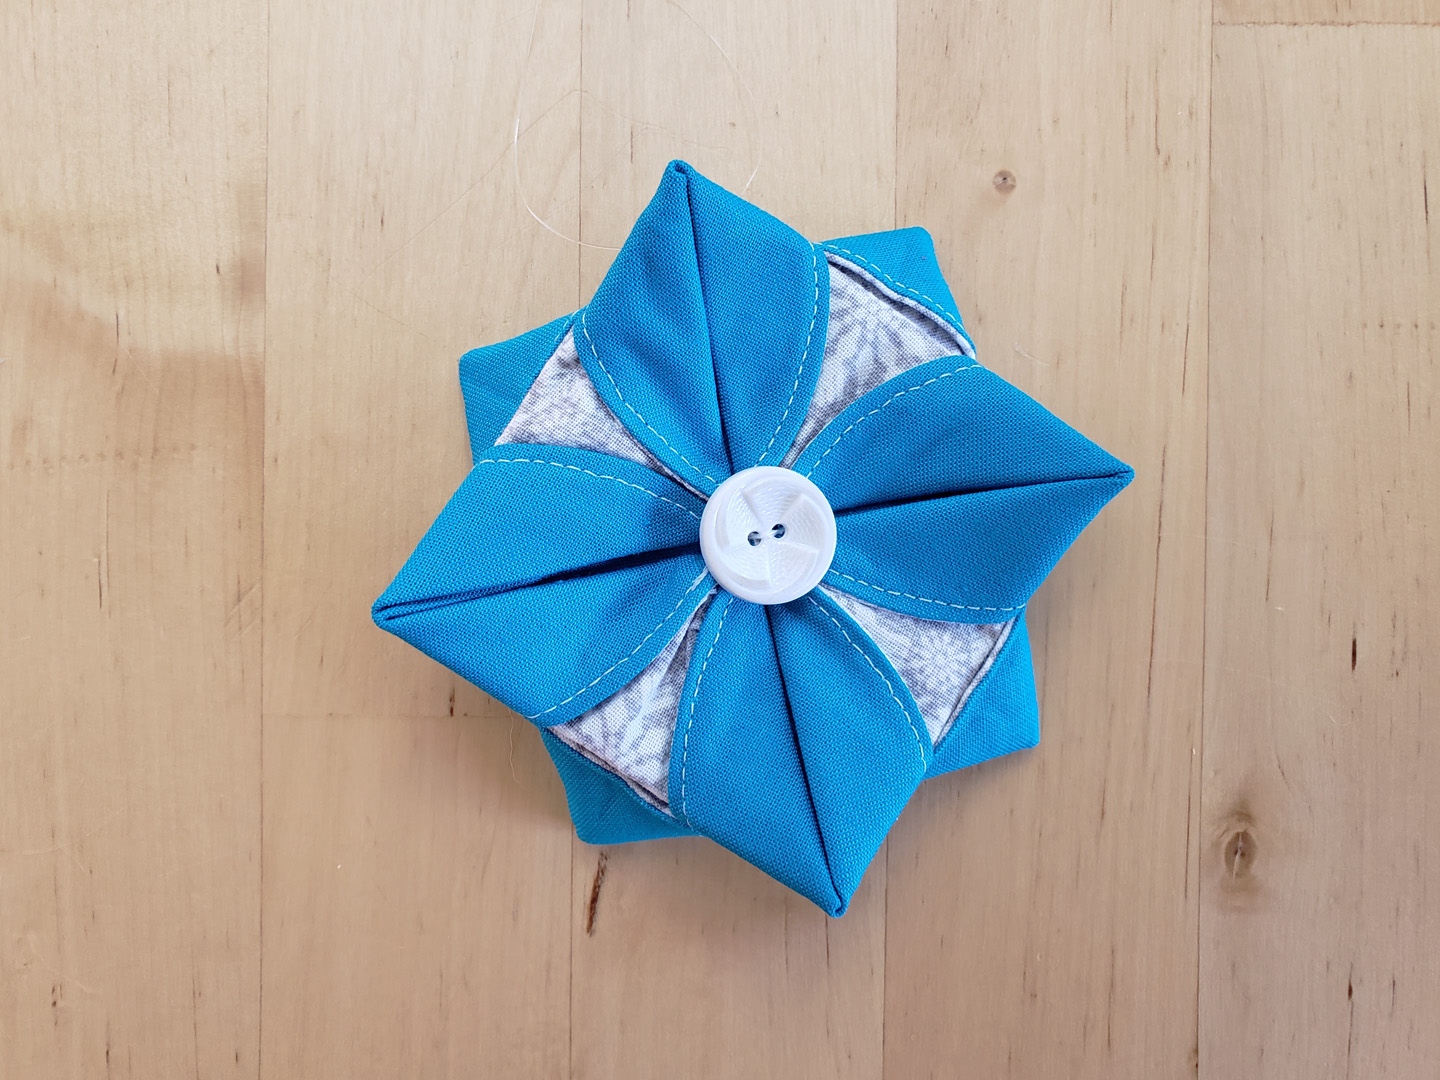
Add a hanger from one point of the ornament with ribbon or monofilament beading cord. You can finish your ornament at this step, or you can add a button or two to the center.
To create a tw0-sided 3D ornament, make two single ornaments of the same fabrics.
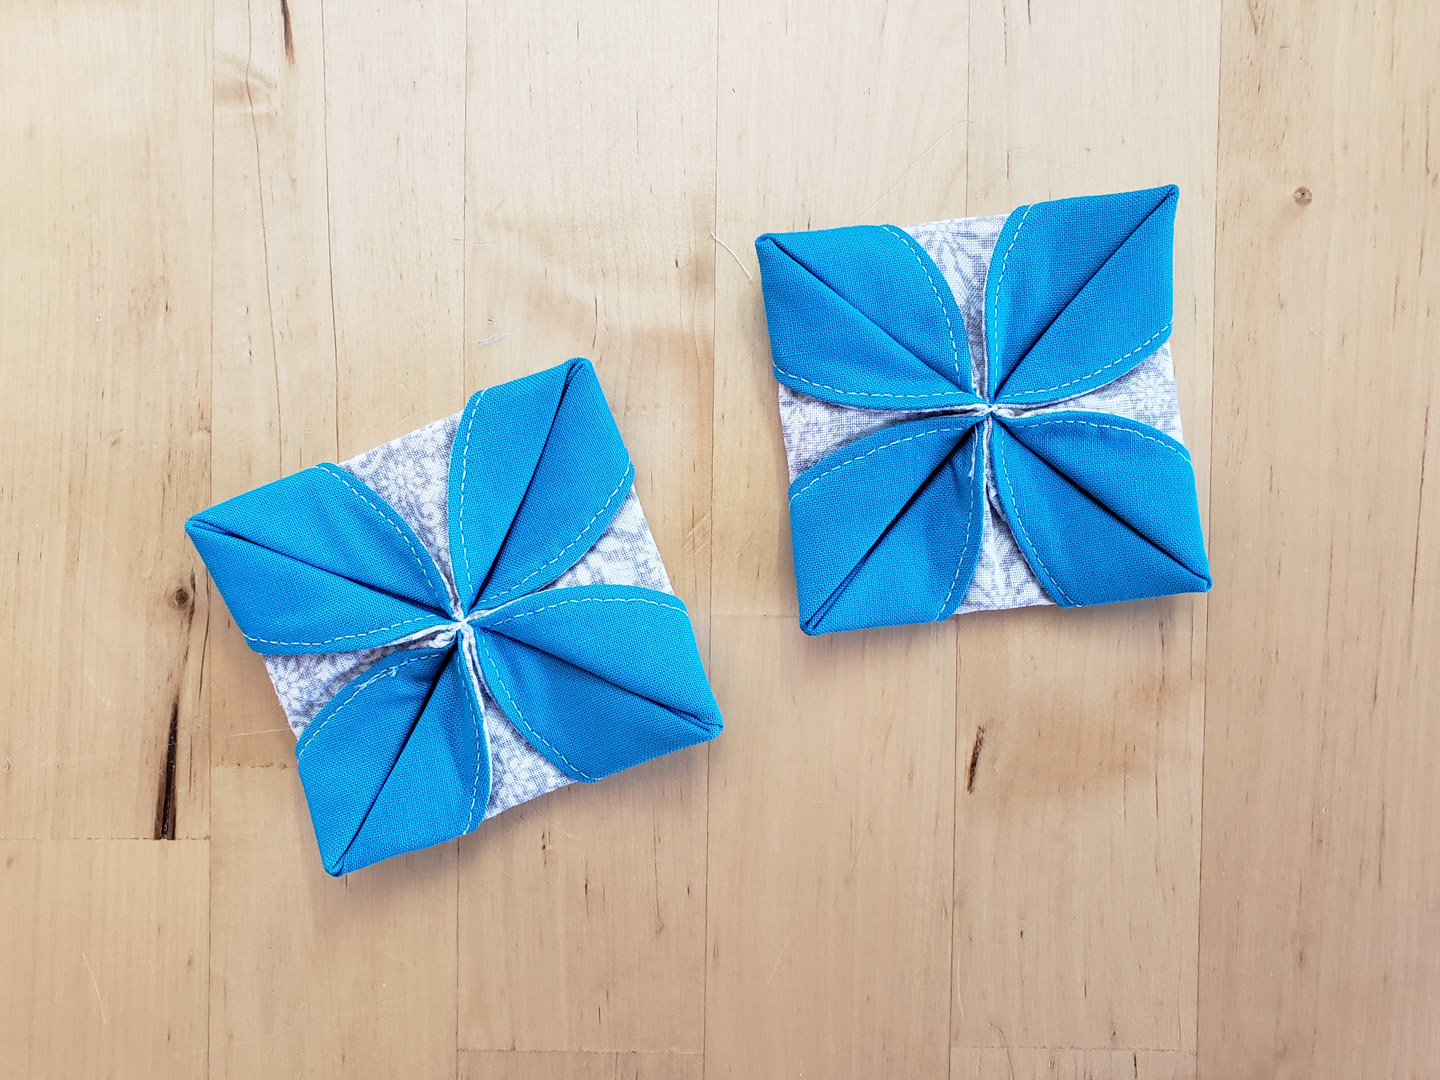
Stack one on top of the other, back-to-back.
Secure together through the center of the two ornaments by hand sewing a few tacking stitches.
I also hand stitched a button to each side of the ornament at the same time.
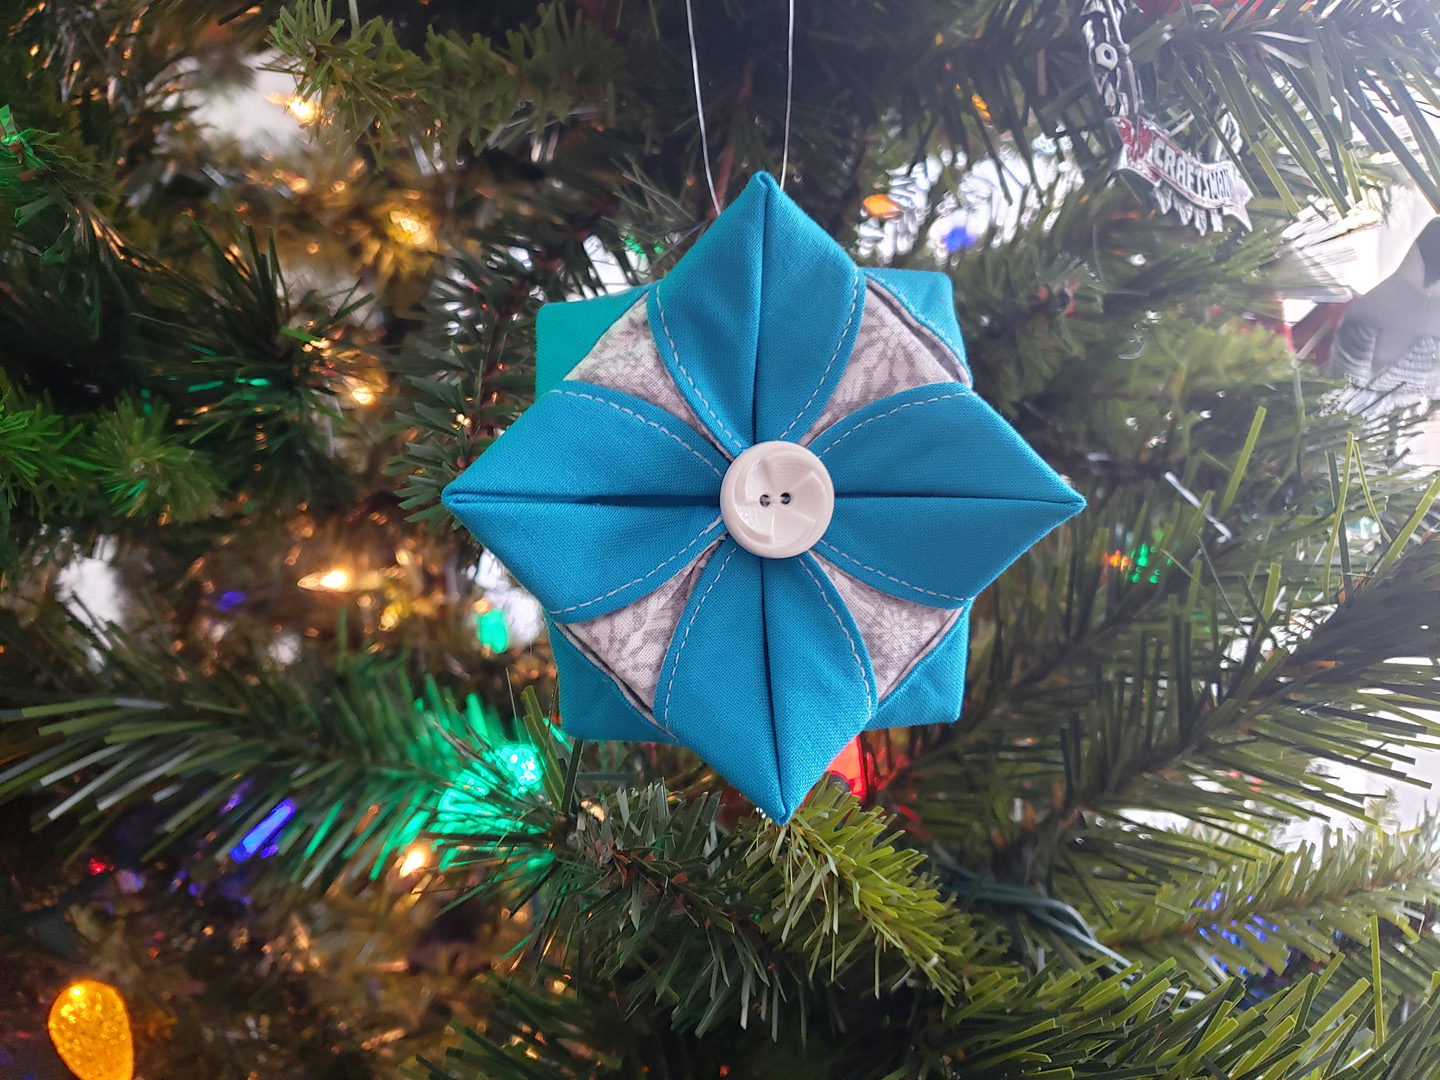
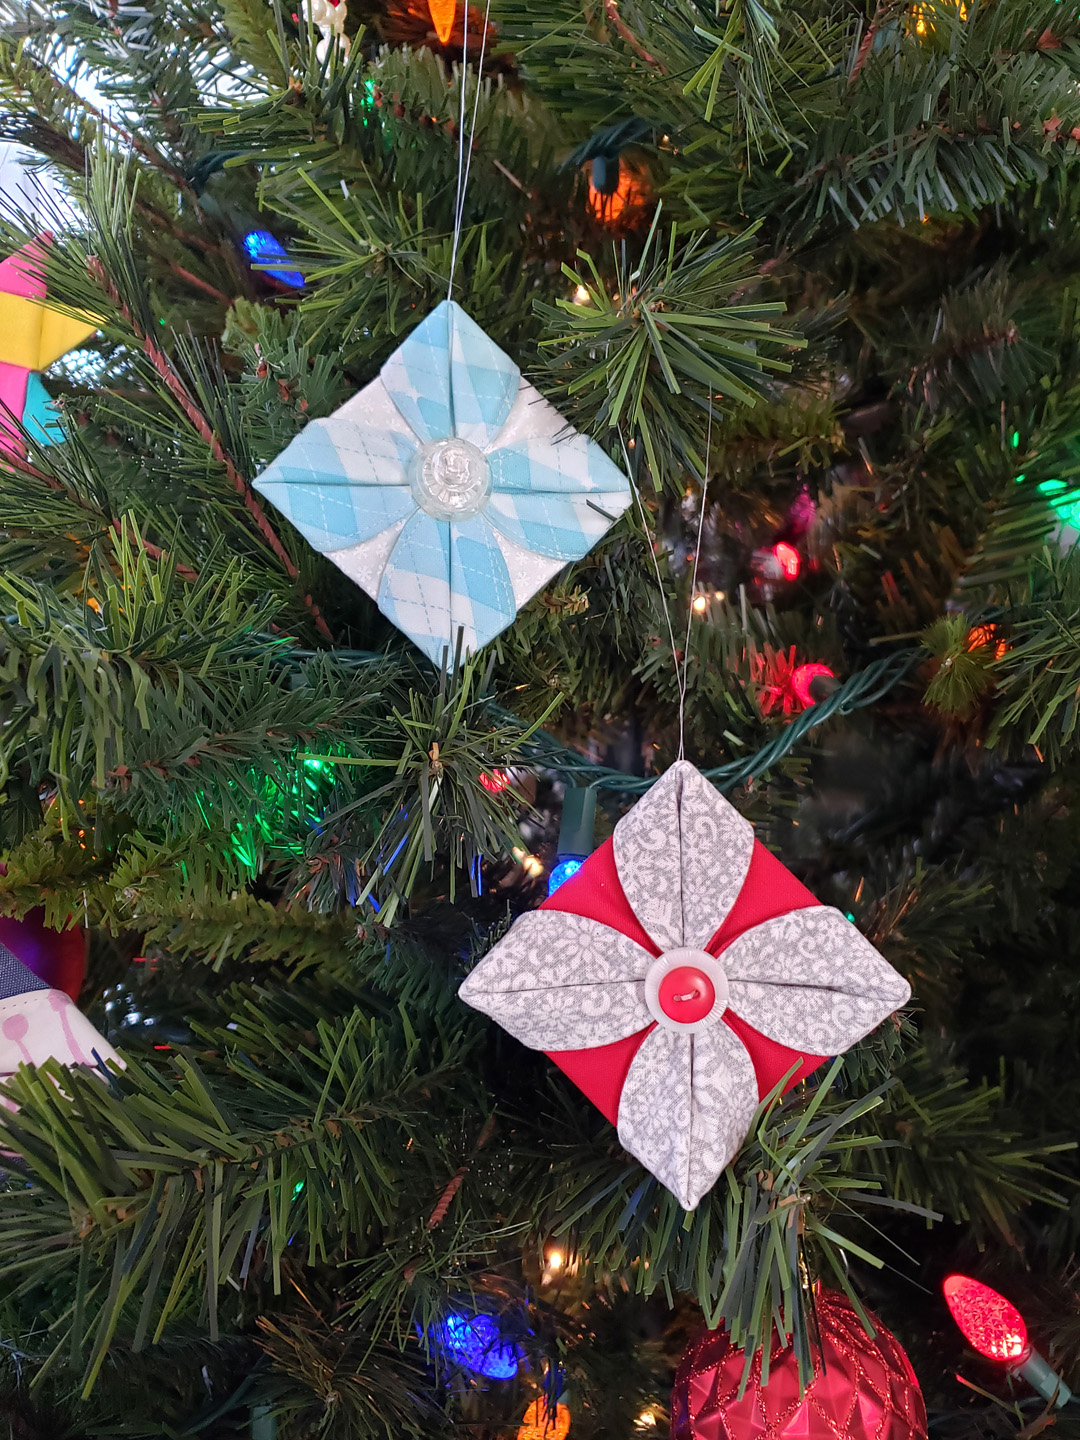
Hang on your tree and enjoy! These are so fast and easy to make I created a bunch of them at once. I prepared about 20 at the same time assembly-line style.
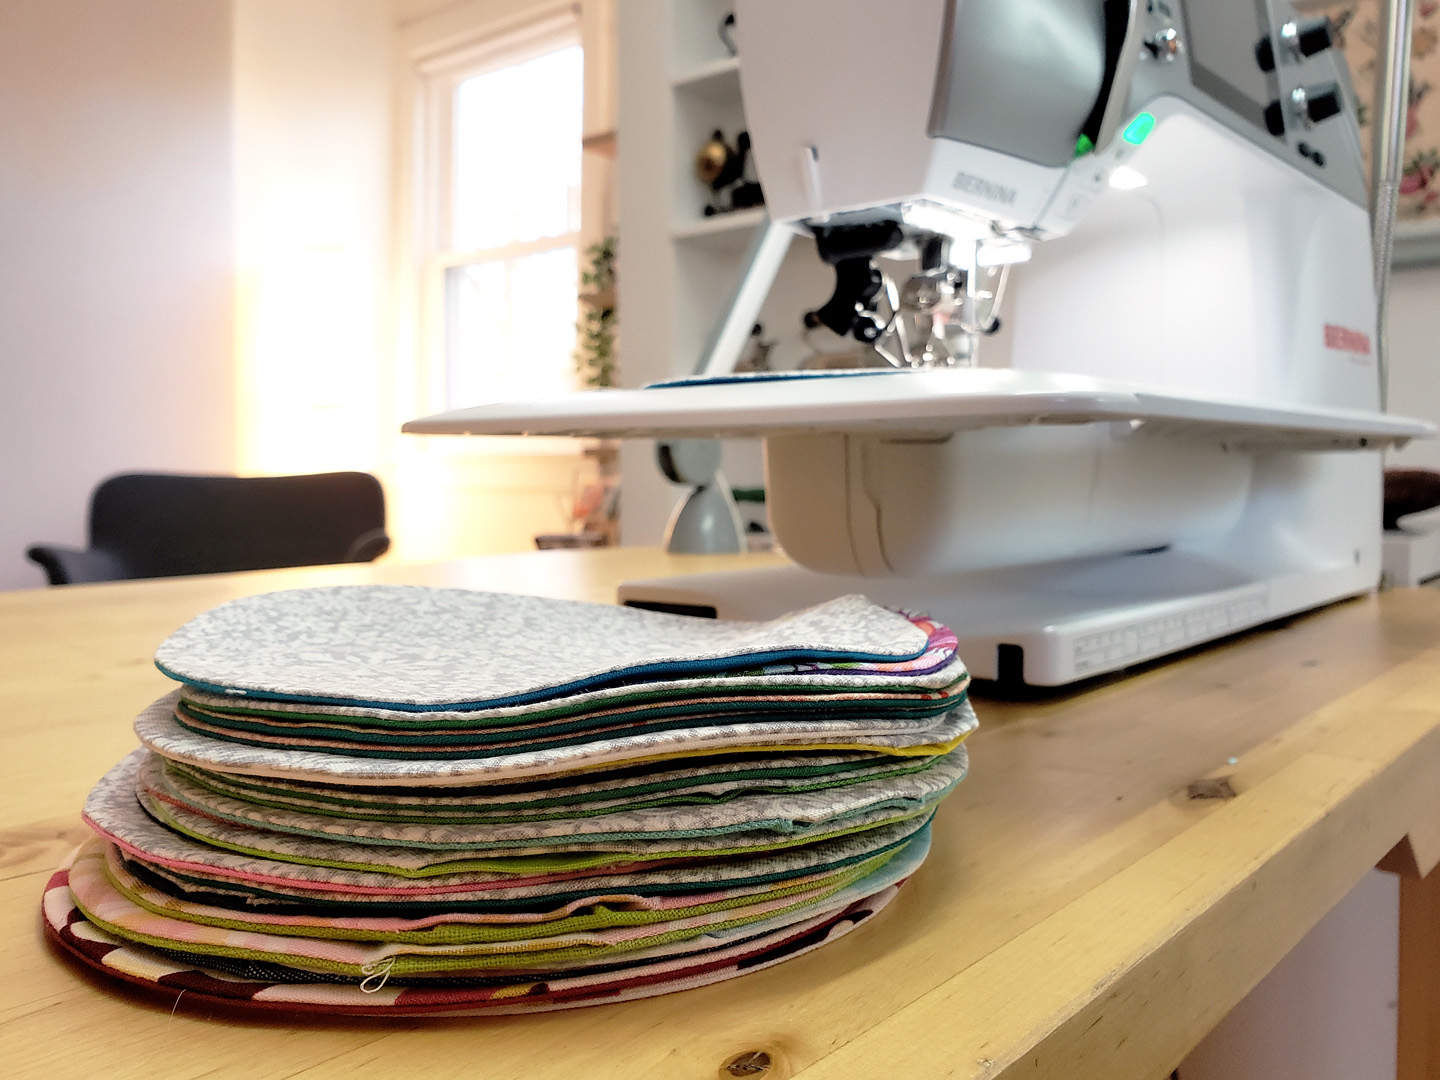
Turning them inside out and finishing with hand stitching are perfect tasks to do while watching a holiday movie!


What you might also like


3 comments on “Fabric Ornaments With Circular Attachment #83”
-
-
What a great project!! I really like the origami look of the fabric ornament. And it’s something that’s made easier to make by using the circular embroidery attachment!
-
Thanks so much @elizabethcook for checking out the project! These are great for using up scraps, I made loads of these last year. Cheers!
-
Leave a Reply
You must be logged in to post a comment.

Such a cute, fun project! Thank you.