Fabric Weight Tutorial
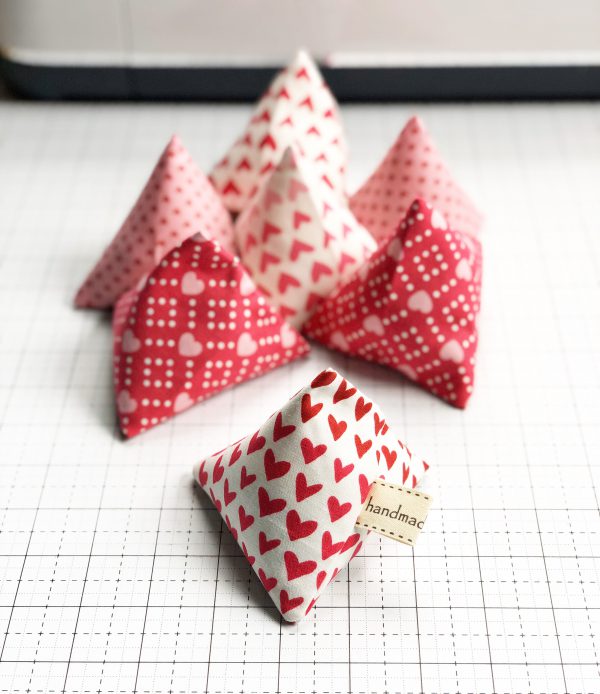
Hello everyone!! Kymona here, and I’m still excited about Valentine’s Day. The entire month of February should be dedicated to love. It’s safe to assume all of us here have a love for sewing, right, so I hope your ready for this new project I have in store for you. Fabric weights!! Yes, they are the cutest thing I’ve seen in a while; I might be a bit bias since I made these.
Plus, it’s a great stash buster!
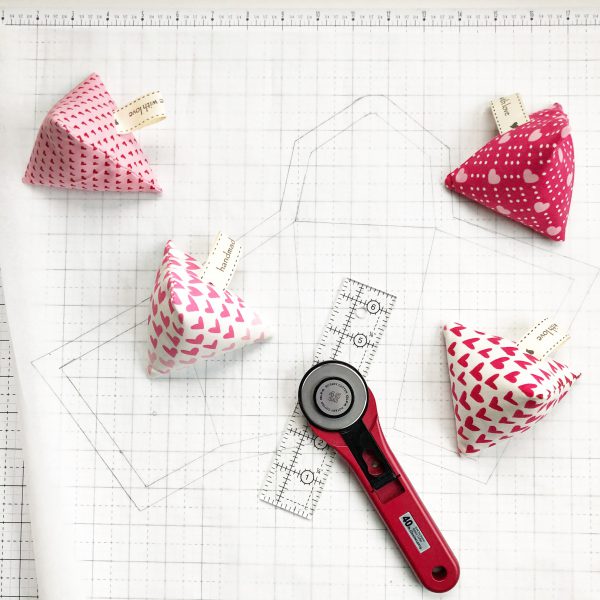
Finished fabric weight size: 3.5 inches x 3.5 inches
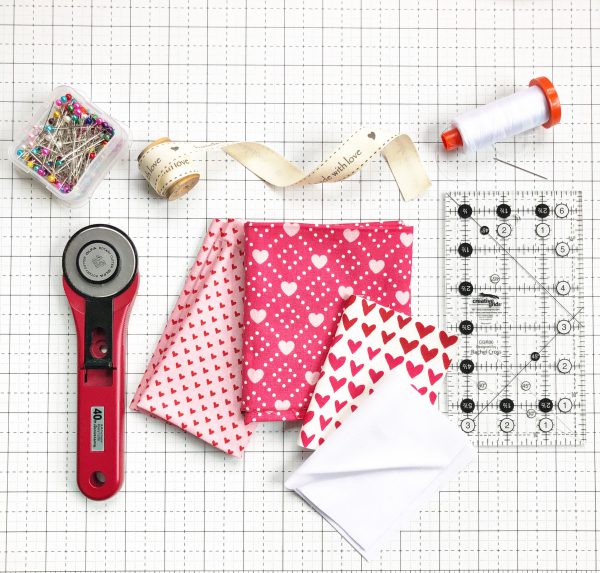
Materials to Create a Fabric Weight
- Fat Quater ( I used Hello Sweetheart by Echo Park)
- Lightweight Fusible Interfacing
- Straight Ruler
- Pins/Clips
- Rotary Cutter and Mat
- White Thread
- Scissor
- Sewing Needle
- Ribbon
- Point Turner
Instructions to Sew a Fabric Weight
Step 1 – Cut the fabric
Cut (1) fabric quarter and (1) piece of fusible interfacing to 8 inches x 4 inches.
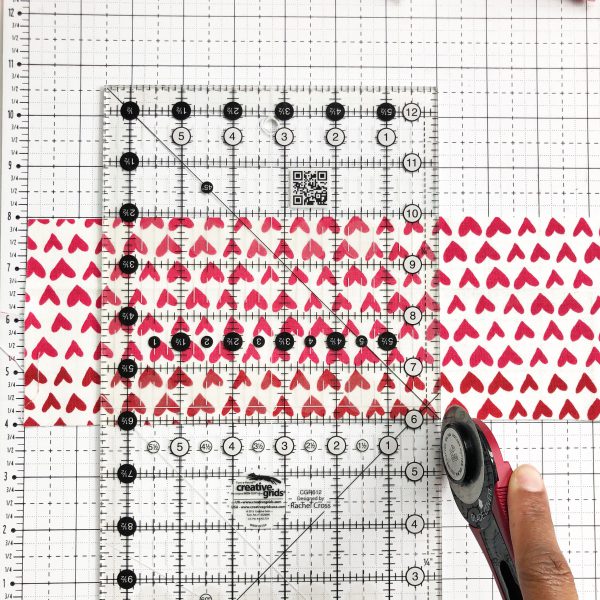
Note: All seams allowances are 1/4 inch unless otherwise noted.
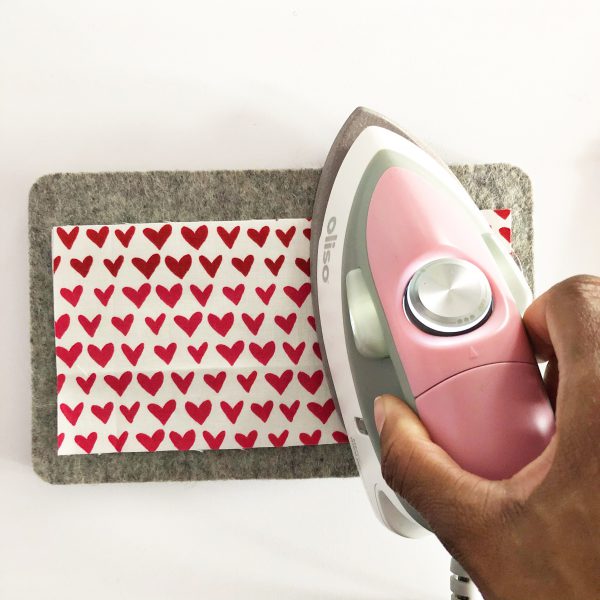
Step 2: Prepare the fabric for sewing
Fuse the lightweight fusible interfacing to the wrong side of the cut material.
Cut a piece of ribbon cut about 2 to 3 inches in length and fold in half, raw edges together. Place the folded ribbon 1 inch from the top of the 4-inch side — raw edge to raw edge.
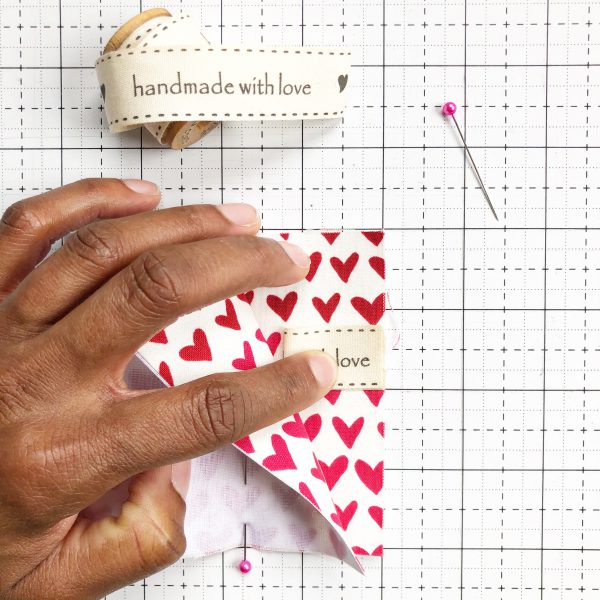
Fold the fused fabric in half on the 8-inch side.
Pin/clip or hold in place.
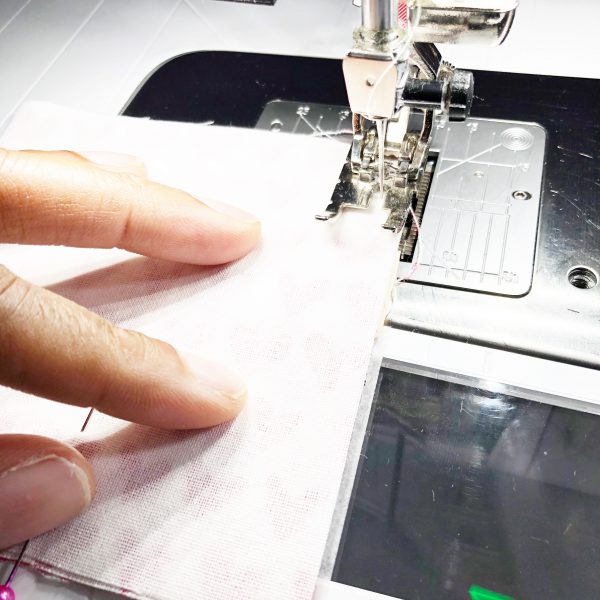
Step 3: Sew the sides together
Attach the Patchwork foot #97D foot to your machine. Sew two sides together to form the fabric weights.
Step 4: Iron the edge
Fold the unsewn edge a 1/4 of an inch and iron in place.

Step 5: Trim and turn the fabric
Trim the two sewn corners.
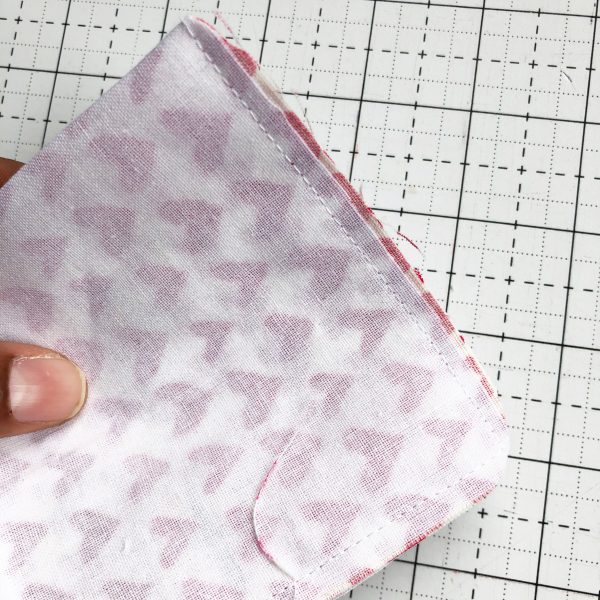
Turn and use a point turner to poke out the corner.
Iron flat.

Step 6: Fill with rice and create the triangle
Take the two corners and bring them together to form the fabric weight.
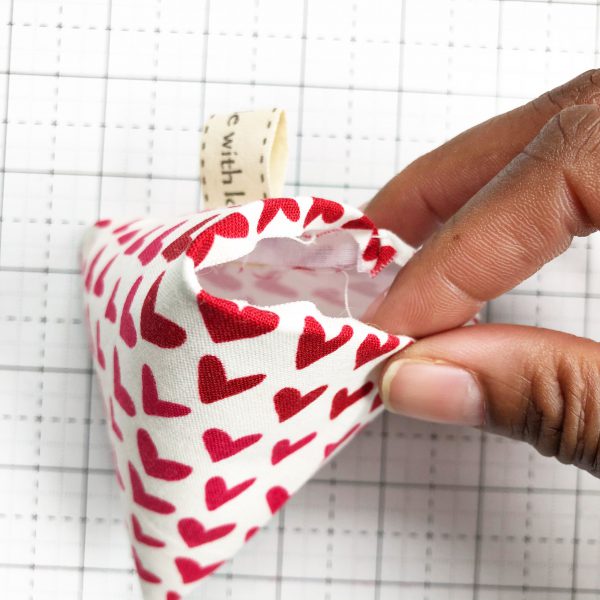
Fill the pouch up with rice. Leave about a 1/4 inch from the top.
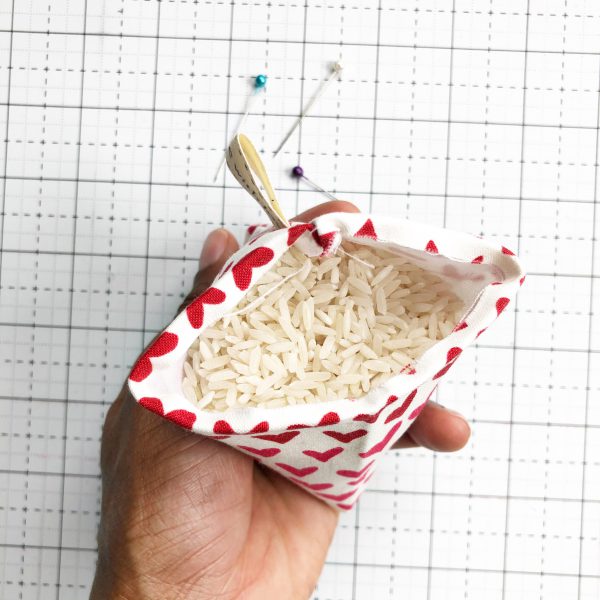
Pin or clip top edges together.

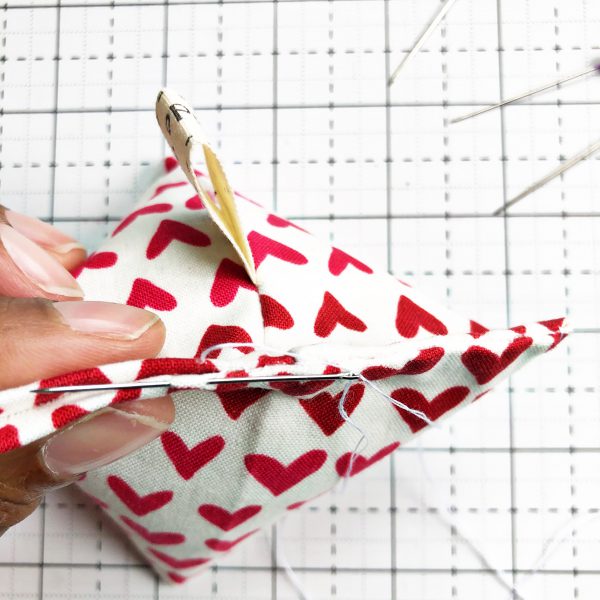
Step 7: Hand stitch to close
Use a needle and thread to stitch the pouch close.

Nice and easy, right!! It’s such a great way to use all of those scrap pieces of fabric you have in your stash. Even if you don’t cut patterns, you can gift them to someone who does!

Fabric weights are easy to make and use. Anyone who cut patterns would love to own a set of these.
Used Products


What you might also like


28 comments on “Fabric Weight Tutorial”
-
-
Thank you so much, Sue! You are more than welcome. They were fun to create.
-
Hi, just love these and will have to make. Could this also be used for a pin cushion with emery sand? I have been looking for some small like this .
-
Yes! It is similar to the chicken pincusion and yoy can fill it eith wahtever you choose.
-
-
-
Love this idea and plan to make them if my 97D will ever come into my distributors who I bought my machine from. He ordered it in Dec 19 and here it is end of February it still hasn’t come in. Not good!
-
Hello Brenda! Thank you so much. I’m sorry your foot hasn’t arrived yet. While you wait, you can use the general sewing foot that comes with your machine. Just line the fabric up on the 1/4 line on your slide-on-table.
-
-
-
too cute for words….. got to make some1
-
Hello Lydreina5174! Thank you so much. You are going to have fun making them. Please share.
-
-
Super cute! What is the template shown in the beauty shot picture?
-
Hey Julie! Thank you so much. That pattern template is another project I’m working on for a future post. Stay tuned.
-
-
Hello Kymona,
Such a sweet little project. It does help with clearing out your stash as you said.
Where did you get that sweet ribbon with “handmade with love” ?????
I have been making my own, but it would be nice to have something just like that.
Thank you!-
Hello Mrskebl! Thank you so much. I love stash busters. The ribbon is from May Arts Ribbon, 3/4 inch Ivory Canvas Printed Ribbon with Woven Edge, Handmade with Love. It comes on a huge roll.
-
-
Where can i find the ribbon “handmade with love” ?????
-
Hello Marhold53! The ribbon is from May Arts Ribbon, 3/4 inch Ivory Canvas Printed Ribbon with Woven Edge, Handmade with Love.
-
-
Super cute and very functional. I am going to make the Archer shirt (with the Sew Along). These will be very helpful. Thank you for the tutorial❤️
-
Hello Marilyn! I’m so glad you like this project. Yes, this will be perfect for your sew-along. I hope you share what you create.
-
-
Decide which side you are going to leave open and press up 1/4 inch before sewing any seam. Much easier to press up on the flat fabric. Are the plastic pellets you can buy in fabric store as heavy as the rice. I had a friend have mice get in and tear up something she had stuffed with rice.
-
Hello IIgaines! I’m not aware of the plastic pellets you mentioned. If you’re worried about the rice, fill it with something substantial enough that they will not move on their own. You could put small metal washers in them, but that could be costly and dangerous if it falls on your foot. So, check out the plastic pellets and make sure they are heavy enough for your weights.
-
Maybe the “sand” that is put on the bottom of bird cages. Should be available at pet stores. I can’t remember what it was called, grit?
-
-
-
Love this, i’d like to make it larger, double the size, any idea on how to increase pattern?
Thank you-
Hello Sewbobbins!! Thank you so much. I’m happy you like them. To increase the size, just make sure you are going up the same amount on both sides. For instance, the pattern reads 8 inches by 4 inches, increase by two on both sides will give you 10 inches by 6 inches. Play with those measurements to see if that size works for you. Let me know if you have any other questions.
-
-
These are really cute, great little gifts! I went to my Houston, TX, quilt guild’s annual retreat earlier this month, where we give “quilt fairy gifts,” and about 55-60 quilters attend. I made 60 of these little fabric weights, created in batches of 10 per fabric selection. They went pretty fast. Is there a place here, where I could post a photo of them? Btw, I think my grocery store was concerned because I ended up purchasing 6 bags of rice!
-
Hello Megclix! Thank you so much. I’m happy you like them and shared them at your retreat. That is wonderful. Everyone there was fortunate. Do you have Instagram and/or Facebook? If so, post them there and tag BERNINA. If not, you can email them to me.
-
-
What is the purpose of the lightweight fusible interfacing for? Could you just use two pieces of fabric?
-
Hello Maureen,
I used lightweight fusible interfacing for structure. If you use two-piece of the same weight fabric, it still might not hold up. If you used a heavyweight fabric, you would not need interfacing.
-
-
I’m thrilled to see this tutorial, and just ordered some of that “Handmade with Love” ribbon. Thank you, Kymona! I can’t wait to make some. A friend made some, using the very small colored pebbles for fish tanks – perhaps those who don’t want to try rice could use that?
-
Hello enjoys,
You are more than welcome. I hope you love your new weights. Please share. Yes, you can use anything small that has consequences. I know someone who used small metal washers picked up from home depot.
Thanks,
Kymona
-
-
Such a cute project. I love them!
Leave a Reply
You must be logged in to post a comment.
This is adorable!! Thanks for sharing