How to Make a Comic Book Bag for Your Next Con
The One Convention Bag To Rule Them All!
Ever been on the hunt for the perfect bag that does everything you want and need it to? Ever been to a conference, convention, art expo, craft show, or event that has you carrying a large variety of of things – while also keeping your hydration handy and having badges dangle from your neck when all you want is everything to be contained and organized in one chic vessel? Wouldn’t it also be great if that vessel had a handy spot for storing artwork, autographs, or books that show off your interests while still being waterproof and secure? For me, decades of attending conventions, like comic-con, and conferences pushed me into creating my own bag that keeps everything handy, organized, and shows off my style too. Follow along as I build the perfect bag that can be customized in endless ways to make it YOUR perfect bag.
Tools & Supplies
- Medium Weight Leather (3-7oz) in the following sizes:
- 2-3 Square feet depending on how much customization you want to do. I recommend a good double finished leather as it gives you a little more bang being two-sided (see customization options below)
- Leather for strap: 1.5” x 24”-42” depending on length wanted for customizing – My strap is 39” long
- Additionally, you can use 1.5” nylon strapping instead of you wish.
- 1/2-3/4 yard of Heavy Gauge Vinyl depending on the width and customizations. I used a 961 GSM vinyl, 54” width. If you aren’t accustomed to working with vinyl, I suggest 3/4-1 yard in case of any mistakes.
- Gridded Cutting Mat
- Metal or thick see-thru acrylic ruler
- Rotary Cutter
- Embroidery Scissors or Snips
- 2 D-Ring Screw Back Rivets (2 Additional optional ones for phone pouch)
- 6 Screw Back Stud Foot
- Clasp Closure
- Leather Hole Punch depending on screw sizes: I used 1/4 and 3/8 hole punches
- Punching Mat
- Mallet
- Sewing Clips
- Clear/Invisible nylon thread
- Heavy Duty color thread if preferred
- Leather Needle – Because I used a thick vinyl and thick leather I used this 18/110 needle.
- Non stick or roller presser foot
- OPTIONAL:
- Snap & Setting Set
- Chicago screws
- Grommets
- Precision flame lighter or pyrography machine for singeing threads
- Cardstock paper
- Lanyards or Chains for all the optional accessories
- Cardboard, Plastic, or Rubber reinforcement for bag bottom
- Double stick Tanner’s bond tape
Step 1: Getting Started – The Pattern
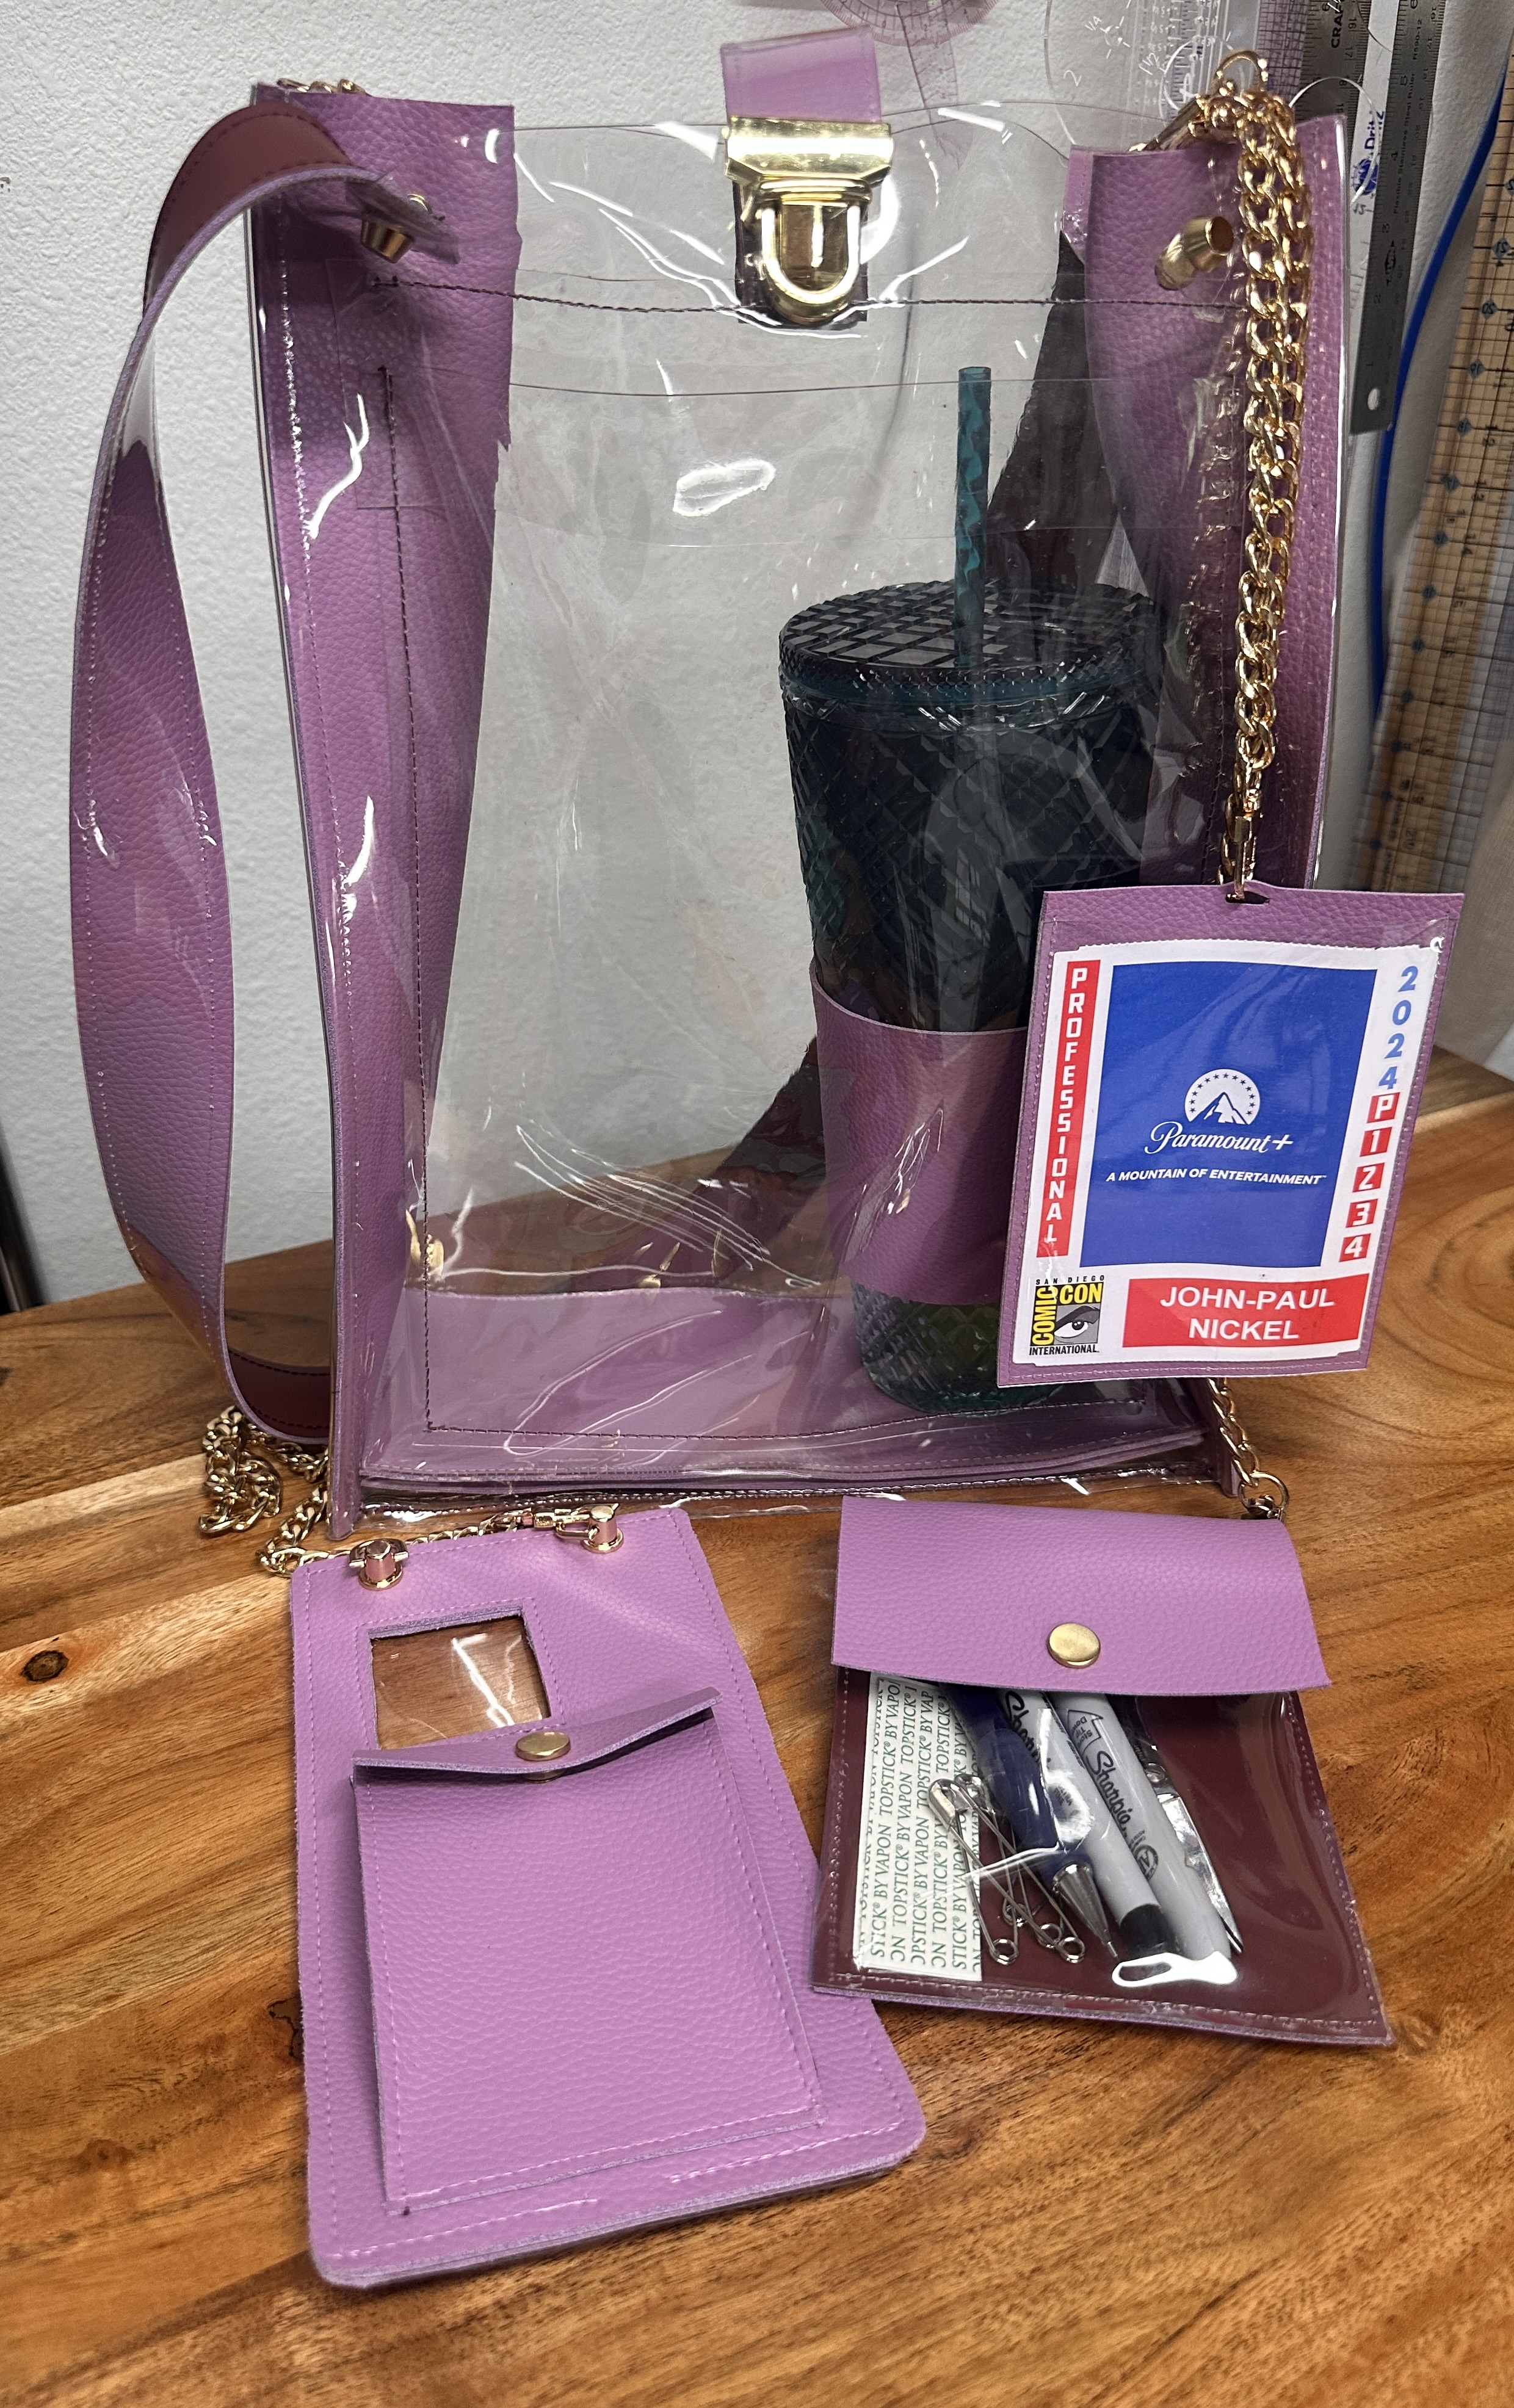
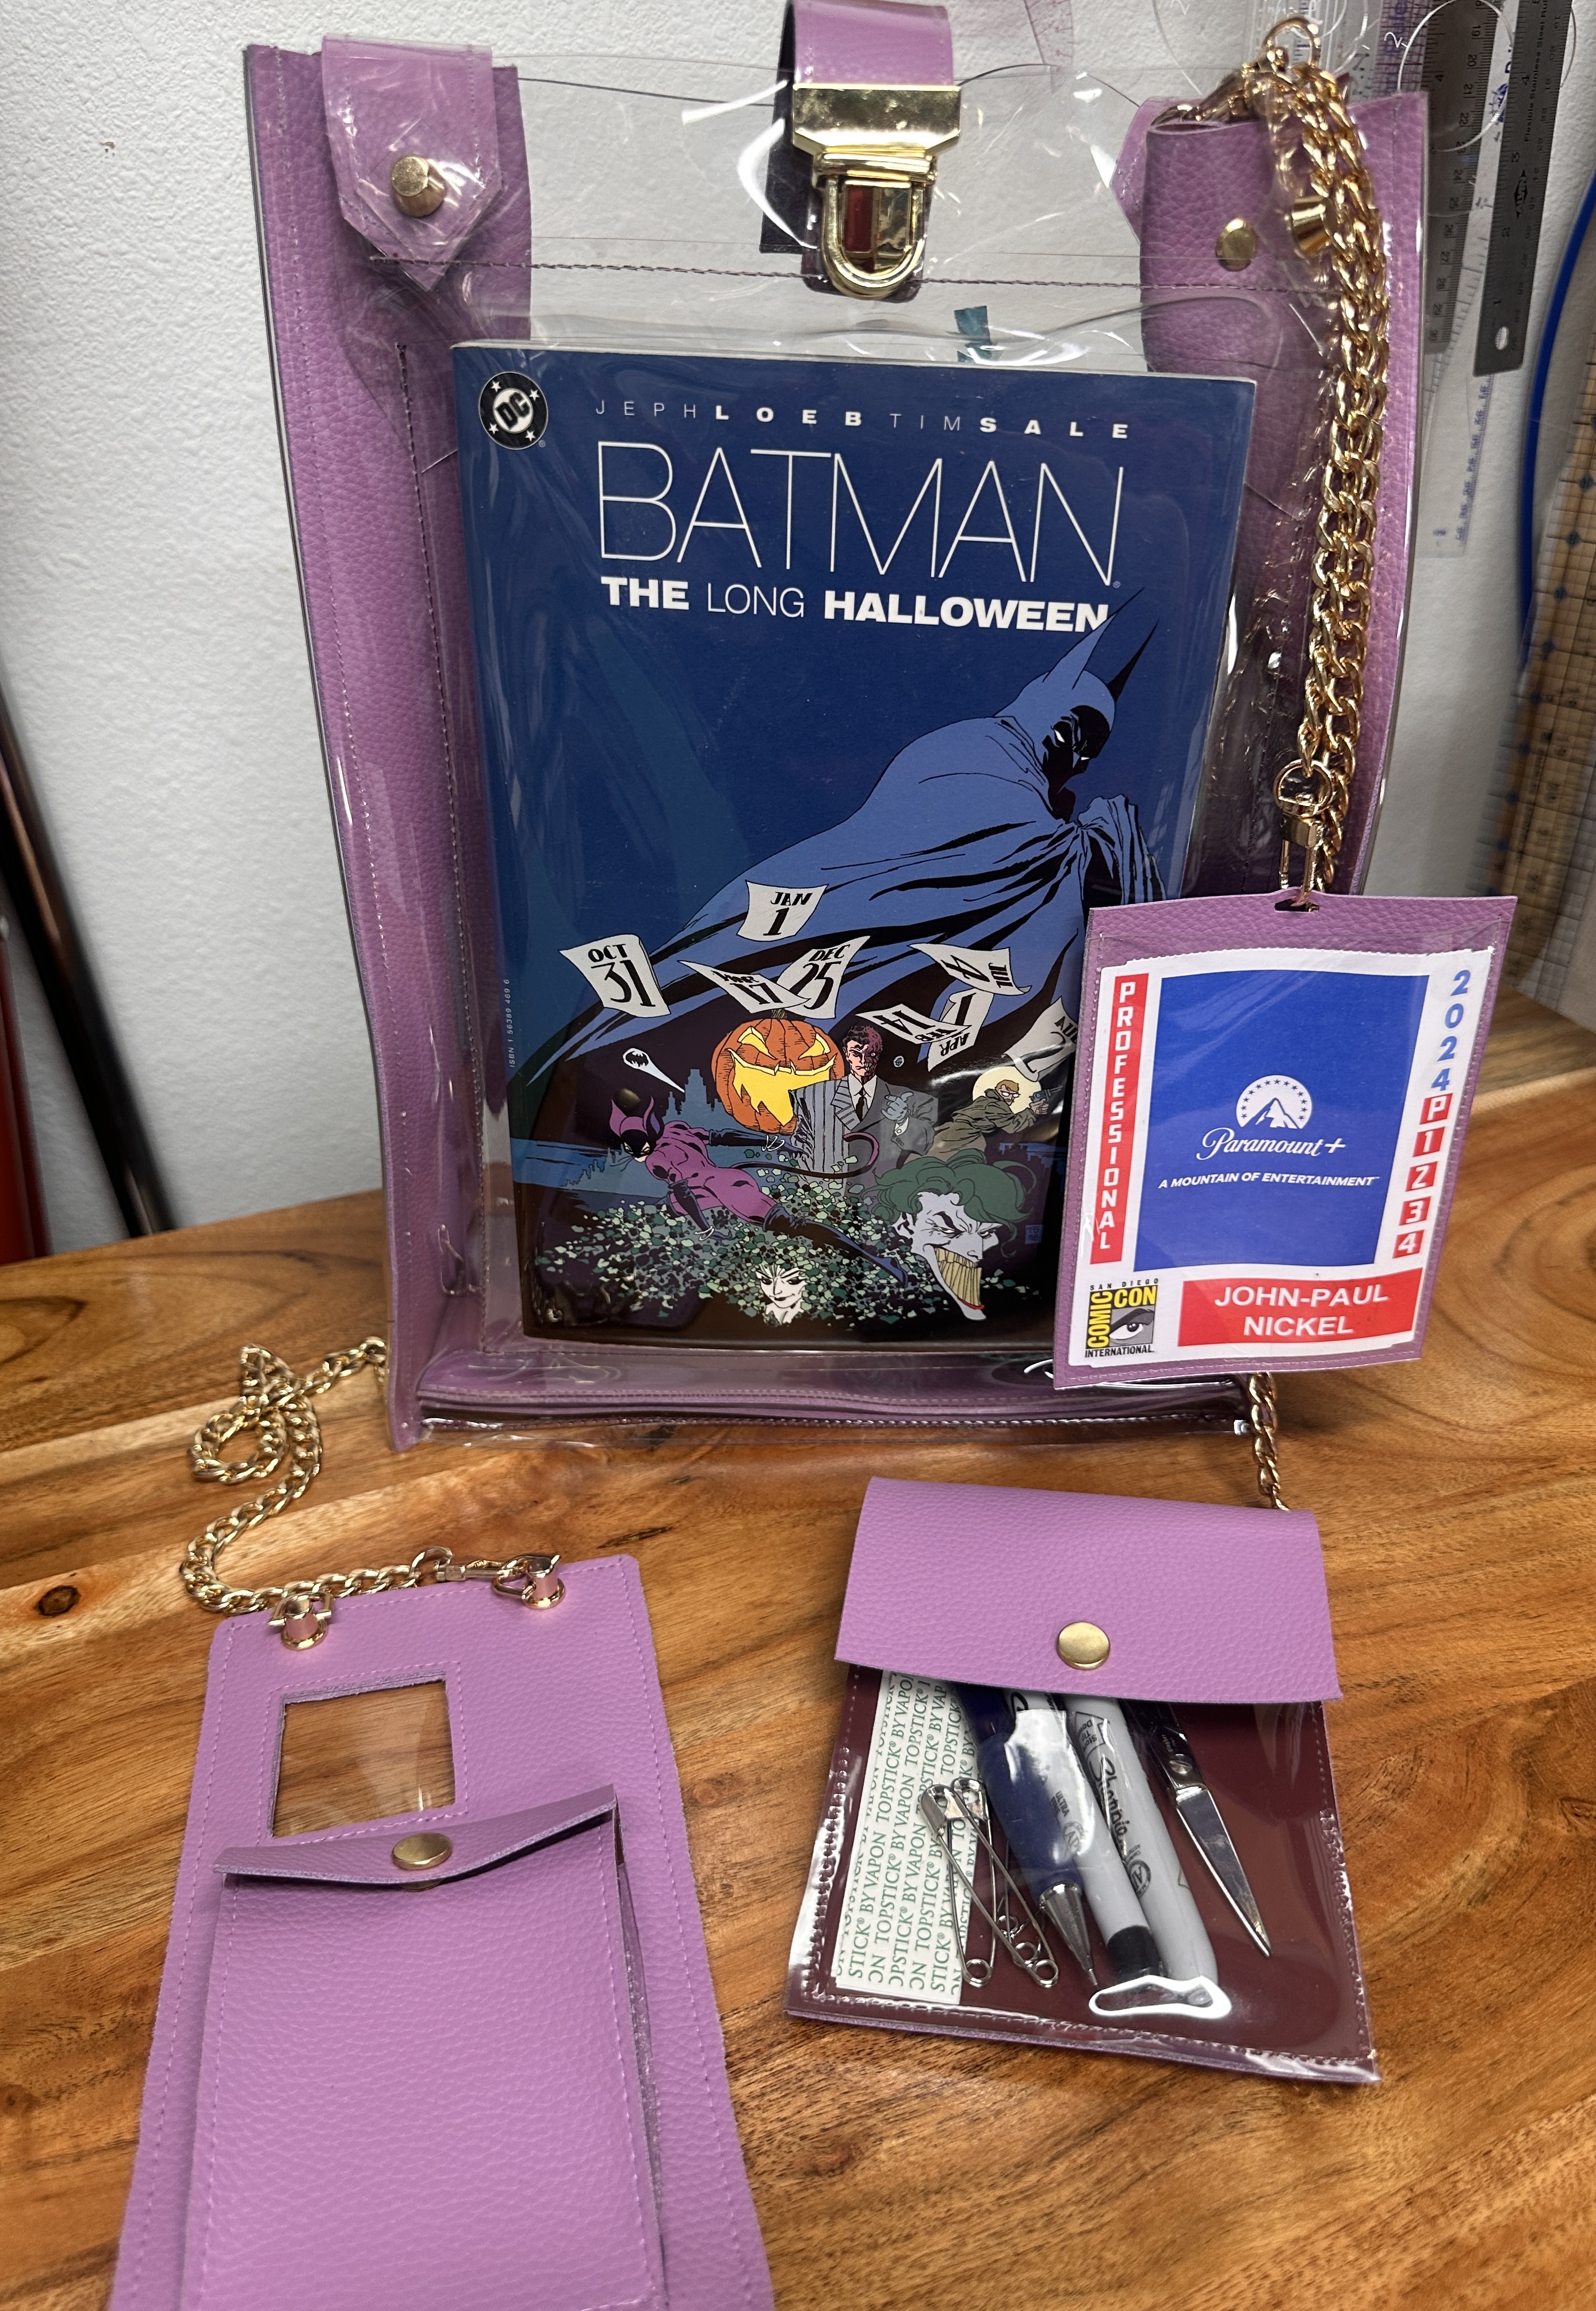
In going to conventions, I always end up getting even just a small piece of art, or patches, or stickers, and wish that I had a special compartment of whatever bag I’m carrying to keep them stiff and also, safe from the elements of the convention and weather. Also, I’d love to show off the beautiful works I find, this was the beginning spark of development for this clear vinyl bag. With both form and function, there’s a clear inner pocket that holds comics, graphic novels, regular books, artwork, etc. The great part about it being clear vinyl is that works for stadium events that often require clear purses- and sometimes I’m that person who likes to take whatever book I’m reading along with me if I need to get to an event extra early. I also know a lot of people going to conventions like to get photographs signed by actors and such, this perfectly suits that purpose as well.
In making this bag for yourself, first, think about the multiple purposes it may have for your life, and this can help you customize what size you want it to be.
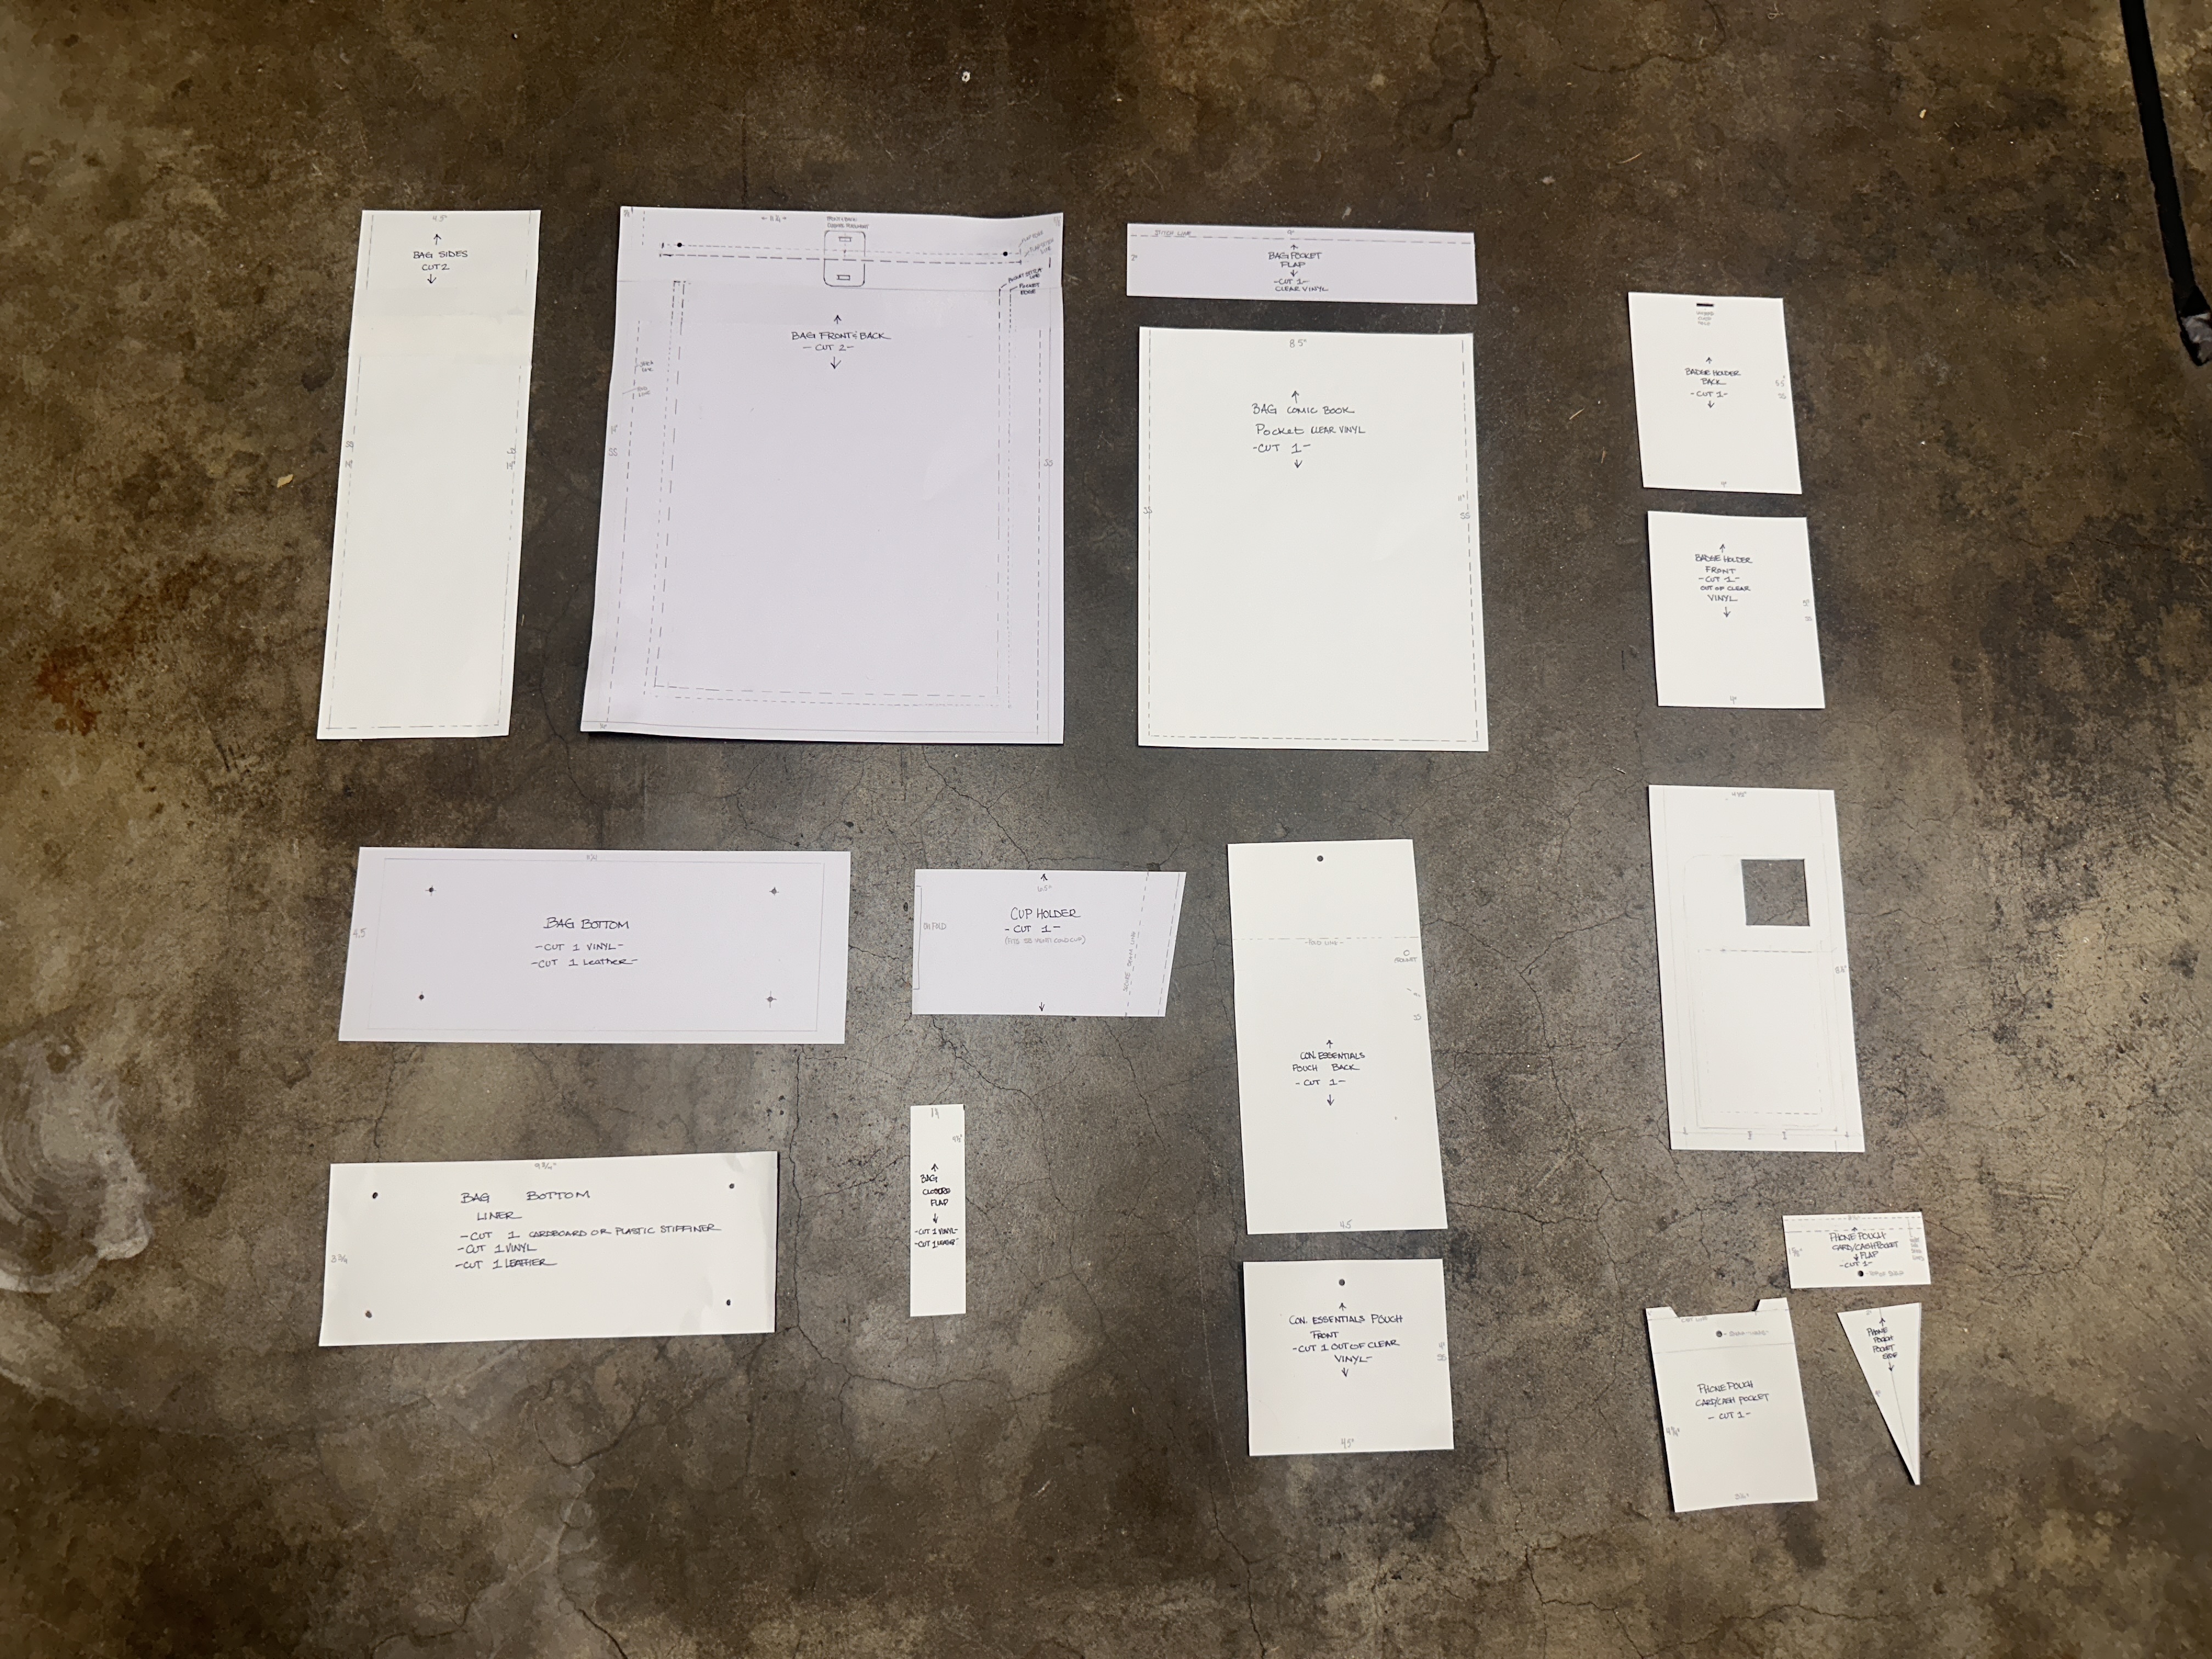
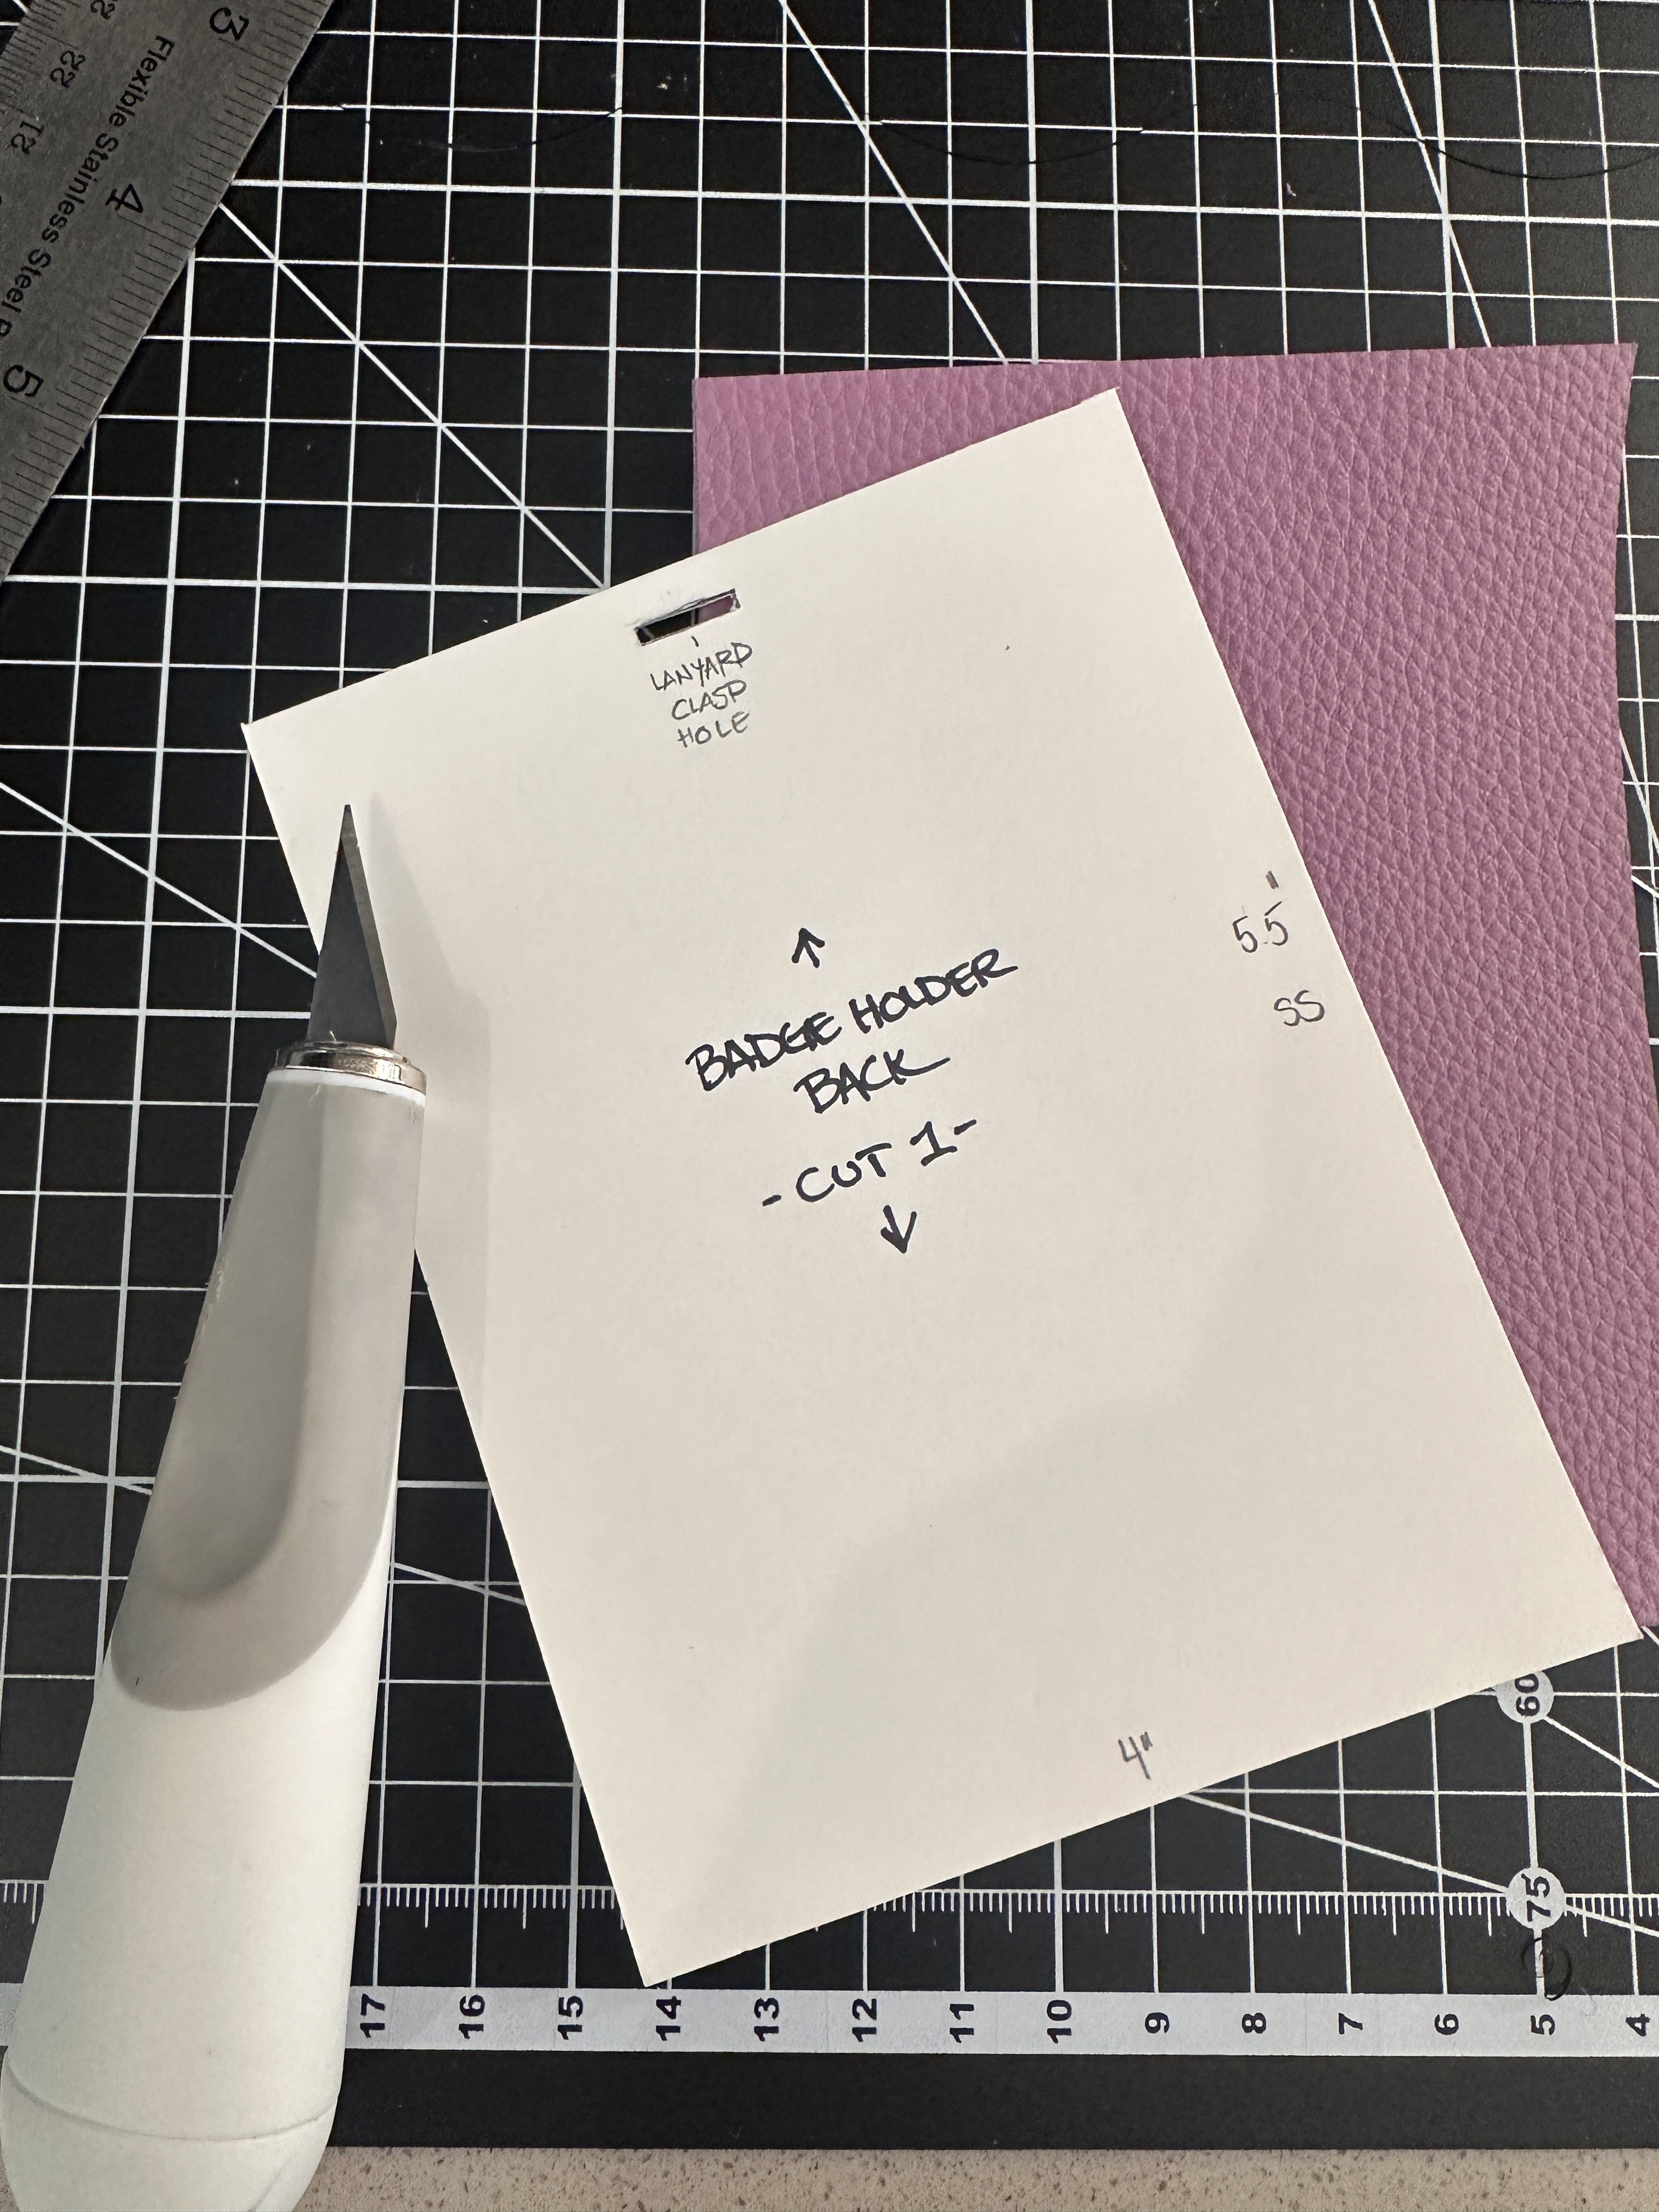
I’ve made this pattern to fit a variety of needs, and it’s dimensions are easy to manipulate if needed- but you may find it’s that perfect size that’s not too big, not too small but just right! I’ve put the dimensions on the pattern pieces for you to see to create your own pattern- until I learn how to digitize them myself!
I started by making the pattern pieces on card stock paper so that it would be sturdy when cutting the leather and vinyl. But because the pieces are standard rectangular shapes- you don’t even need a pattern, you can just measure it out and cut these pieces if you’re feeling confident.
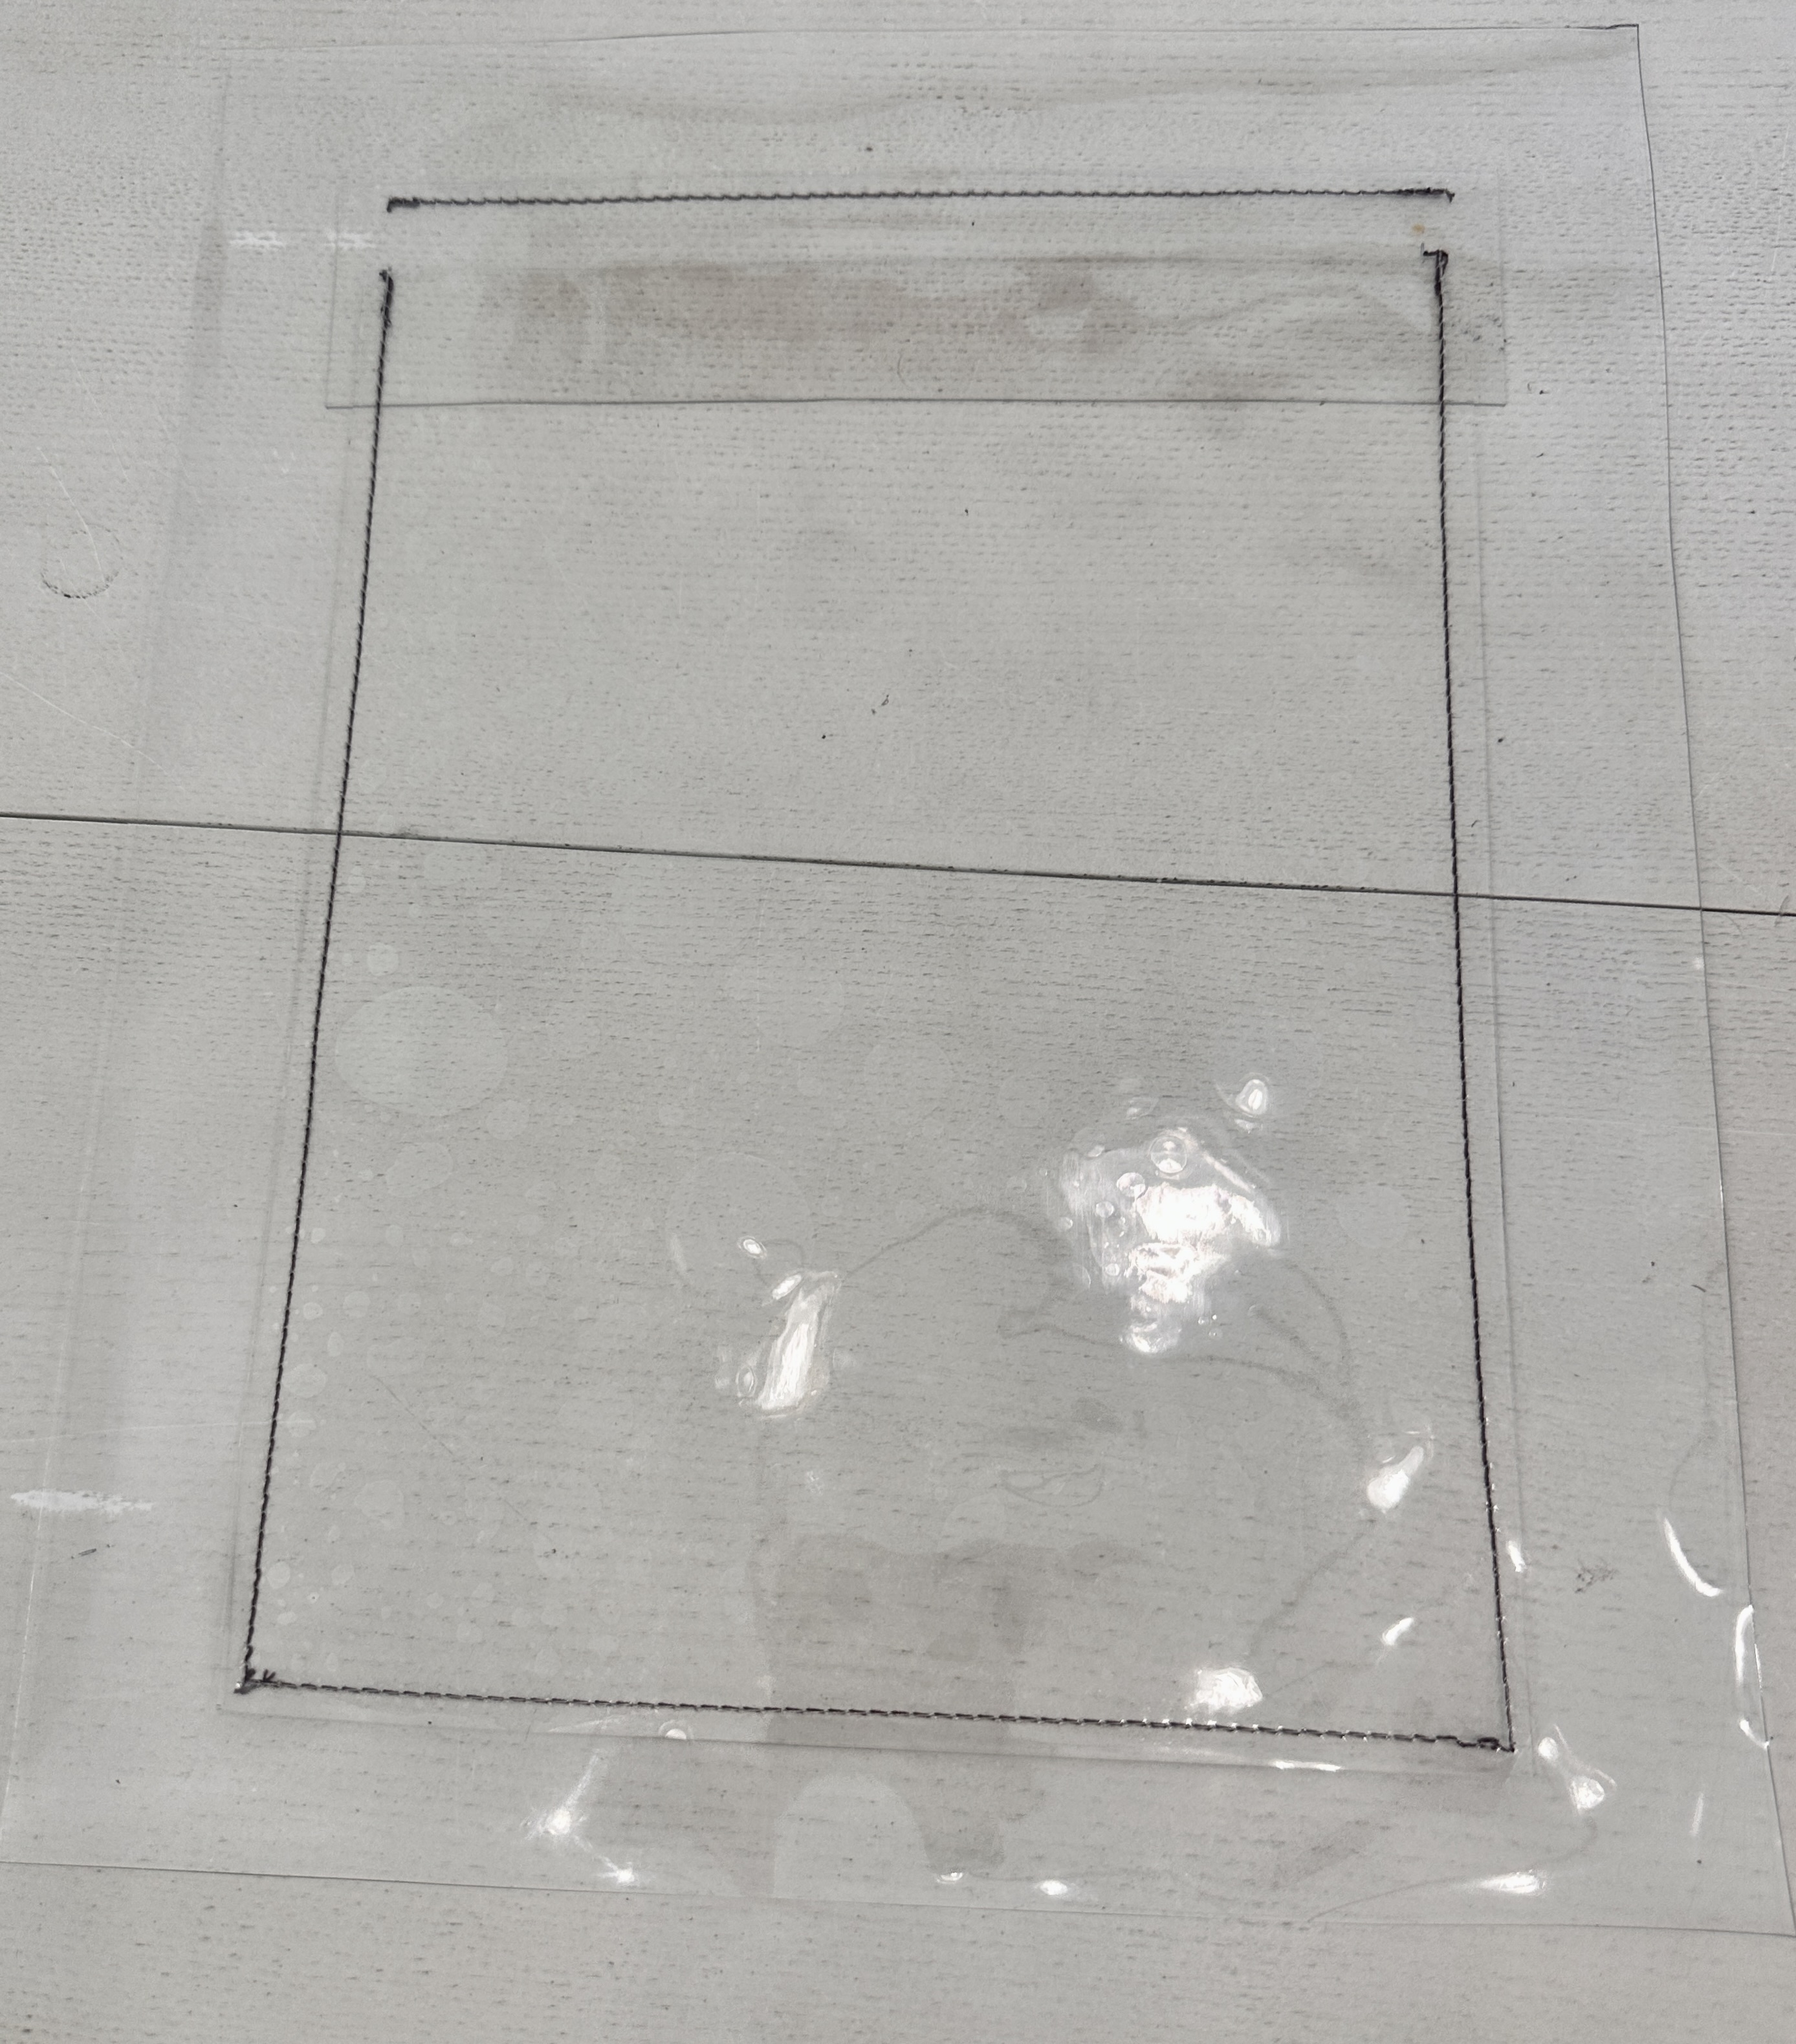
Step 2: Cutting out the Pattern
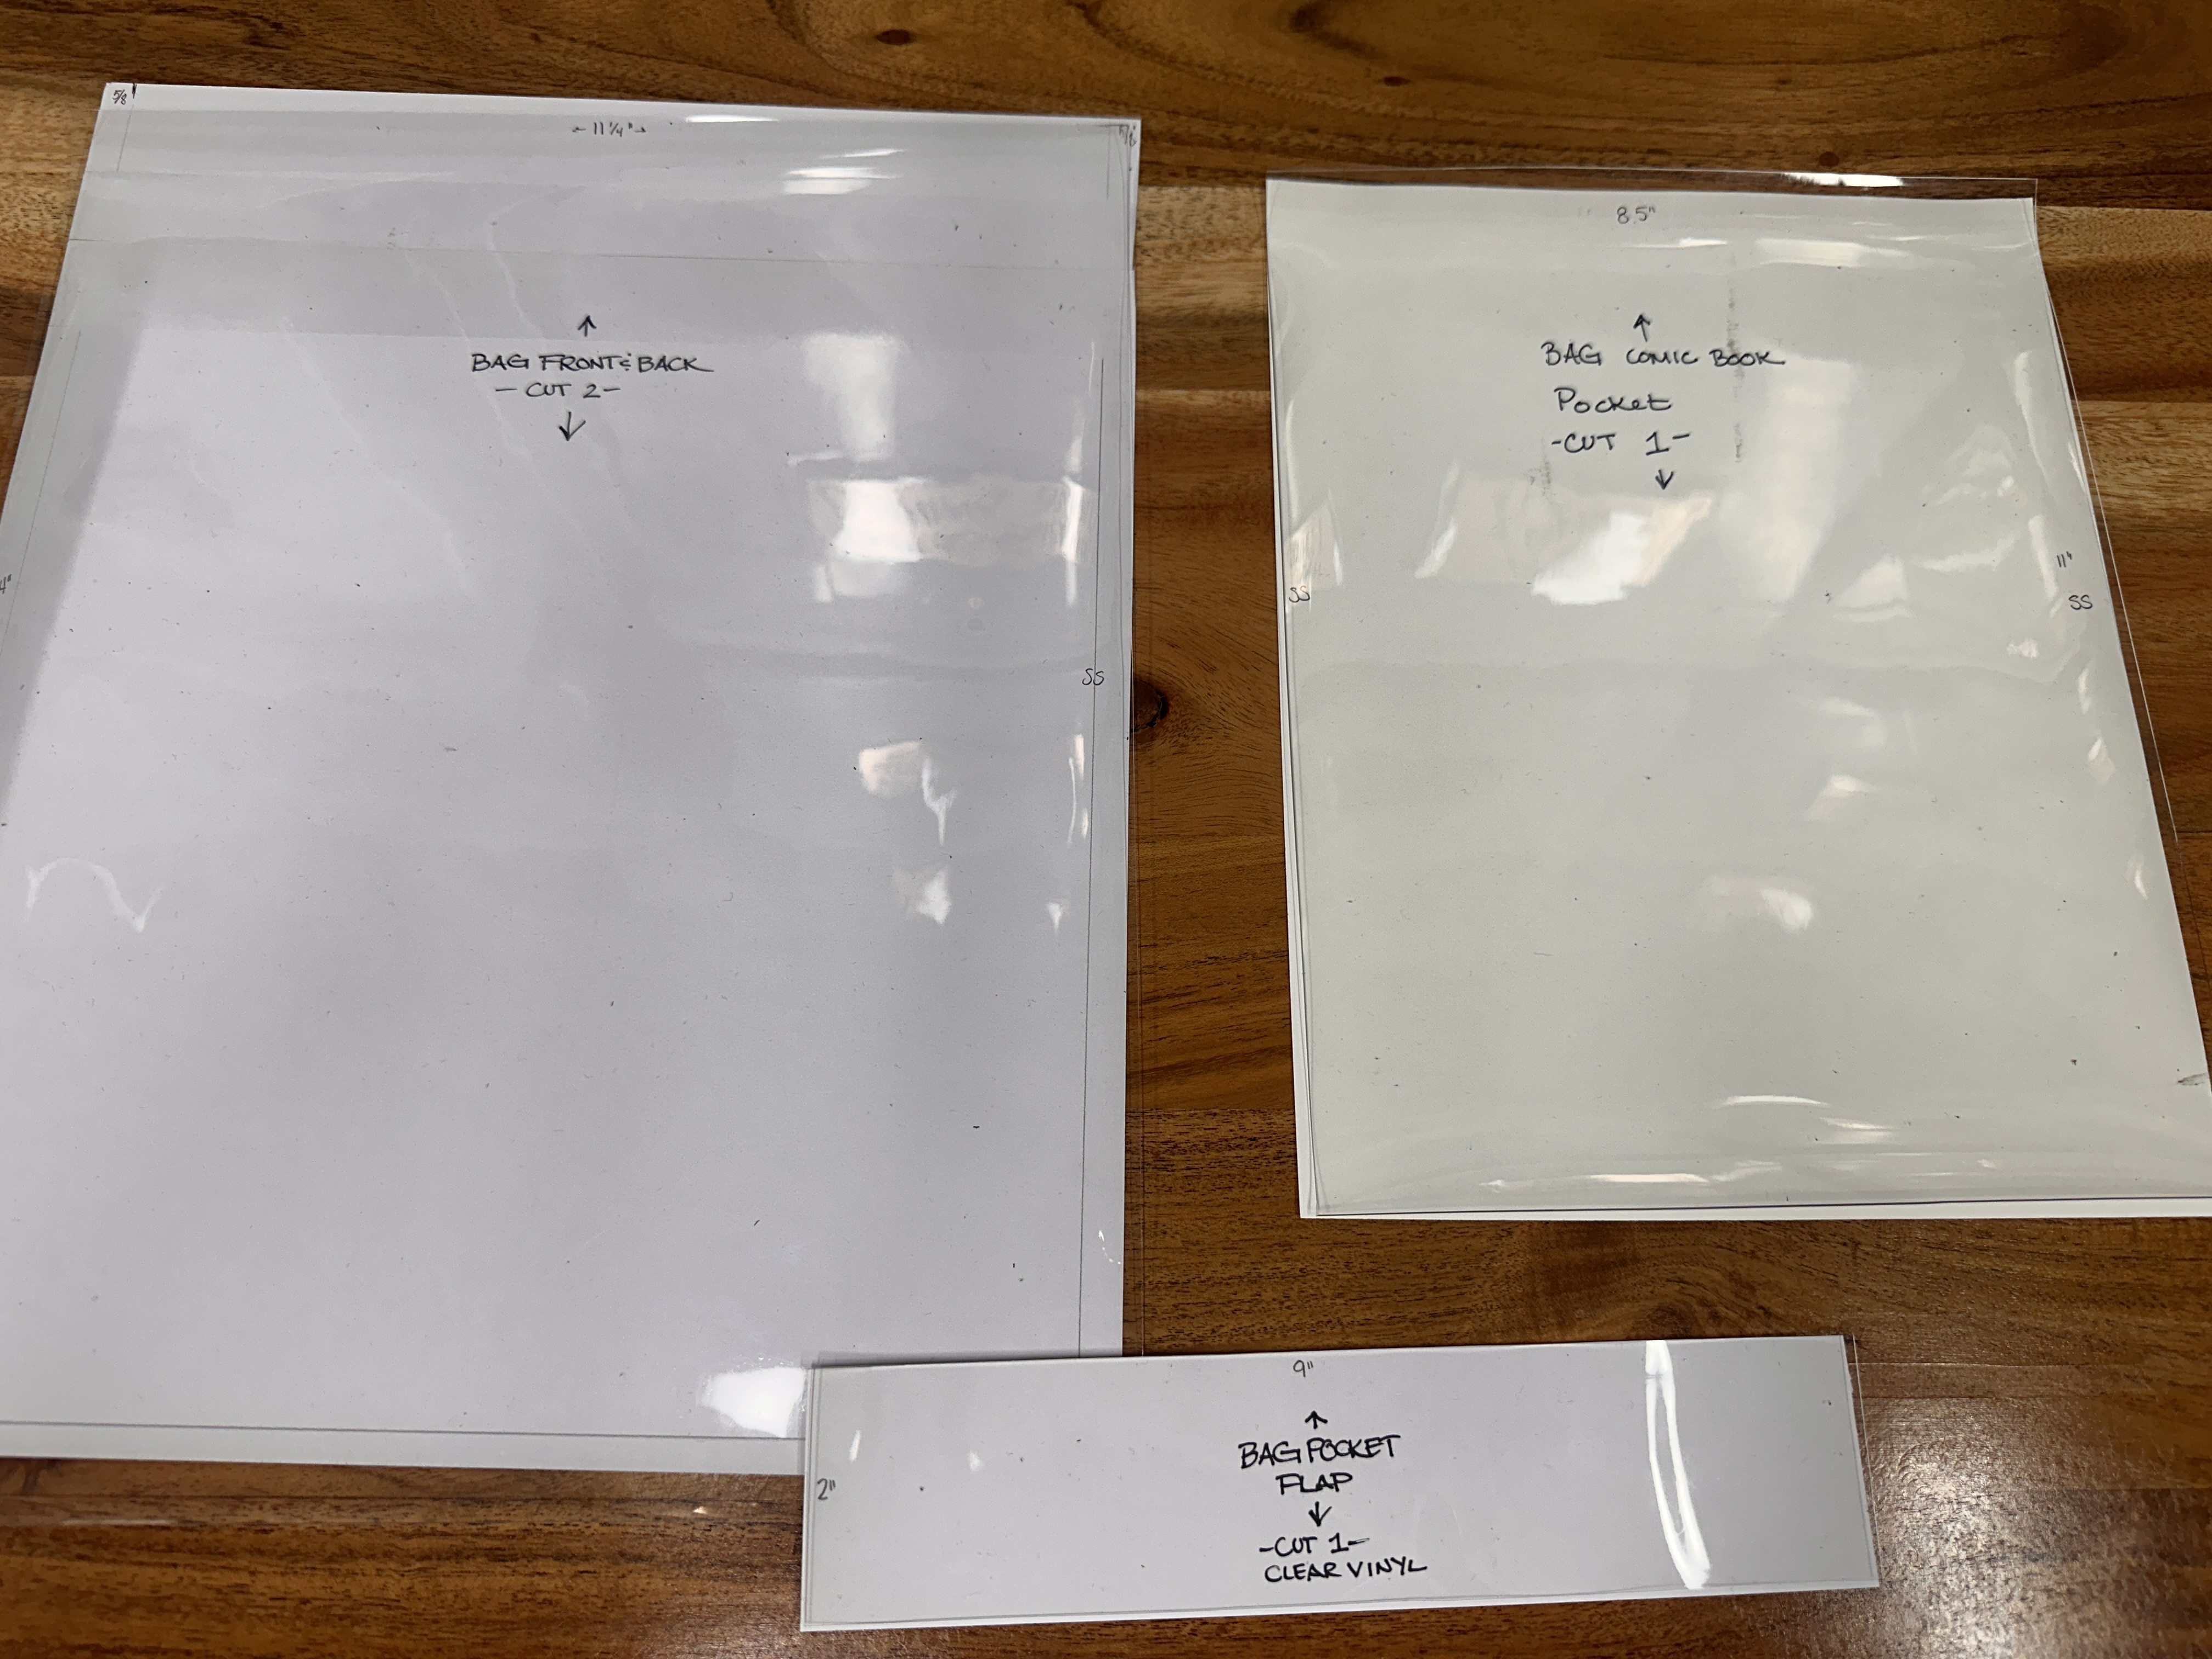
When you’re cutting leather and vinyl- especially with this project being see through- it’s best to be diligent with cutting and preparation because any mistakes are clearly visible. Inevitably, you’re bound to cut or sew one piece wrong and have to redo it. Plan your pattern layout on the materials accordingly.
Cut your vinyl pieces first, then leather. Make sure to “square up” each of the pieces to make sure you are making even cuts. Even a ruler that sticks perfectly to the material magically moves sometimes, and this is where a gridded mat and clear ruler come in handy.
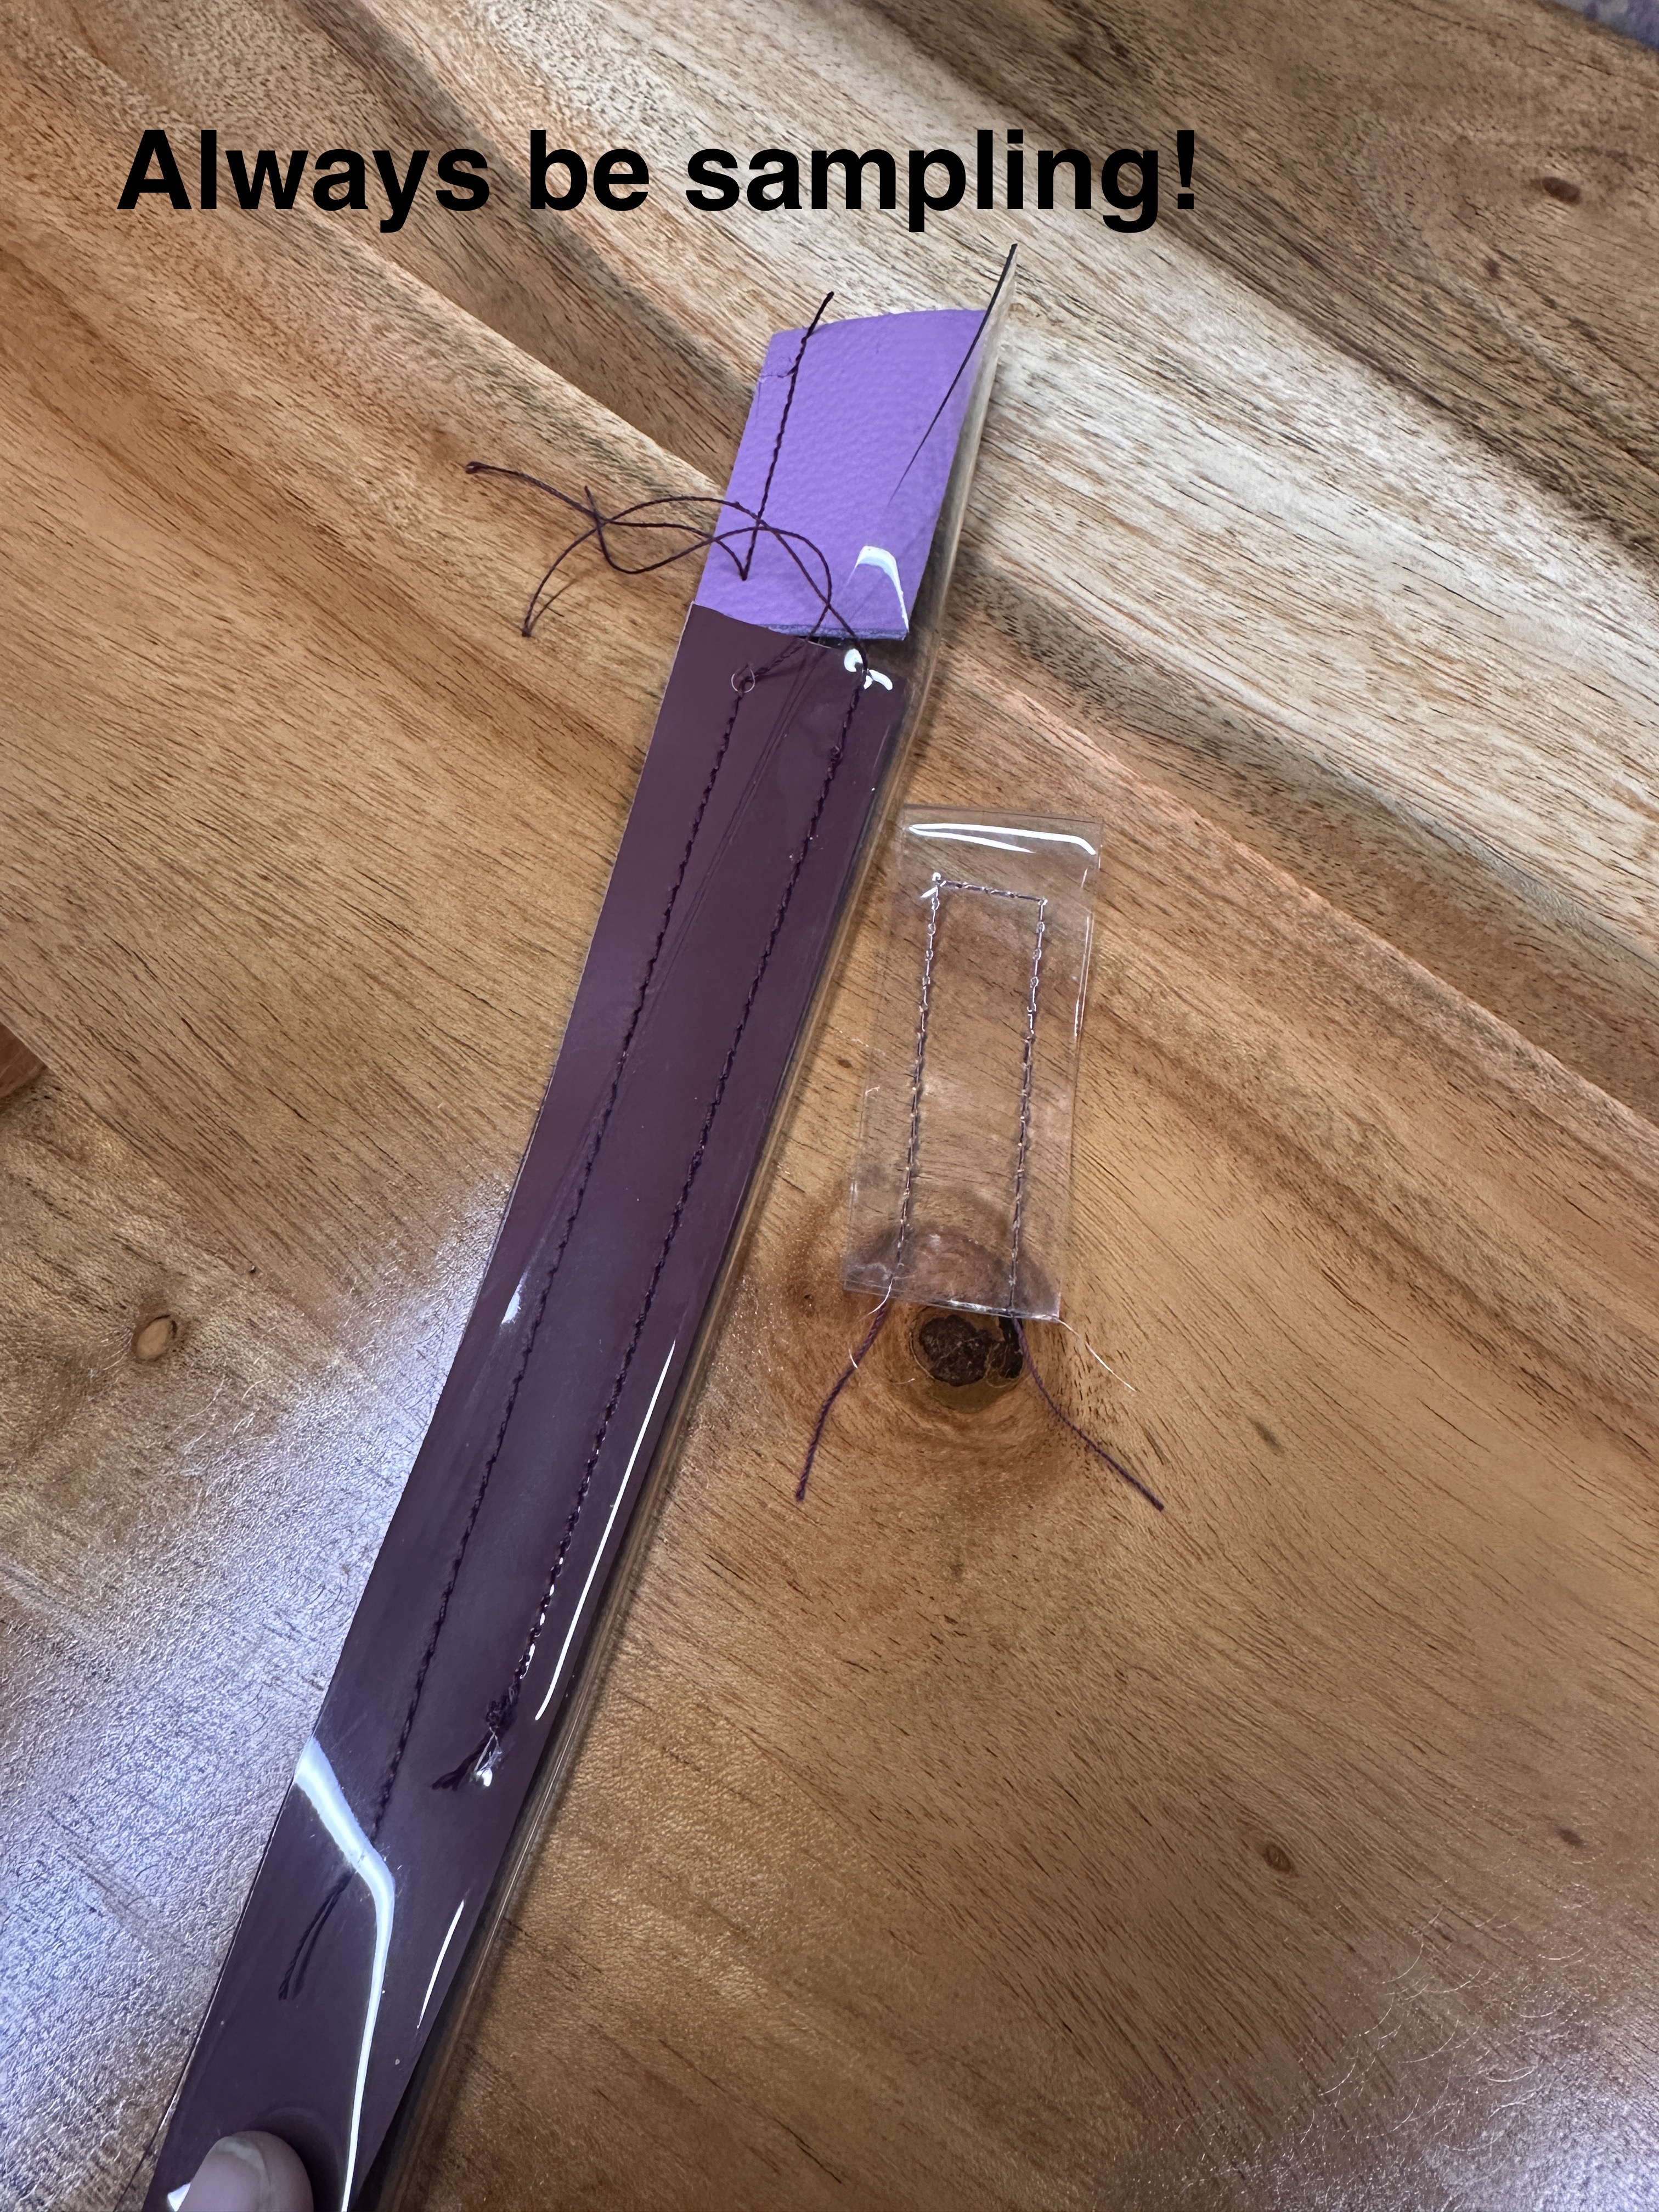
I also recommend cutting a “sample” piece to start – making sure your rotary blade is still sharp enough for the task, and then you have a sample piece ready for checking your stitching on the machine. I always start stitching on a sample piece first to make sure I have the tension and stitch length exactly as I like it to begin.
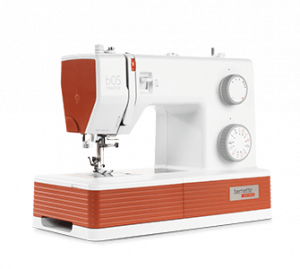
For this project on the b05 Crafter, I found setting the tension on the machine to 6 worked best.
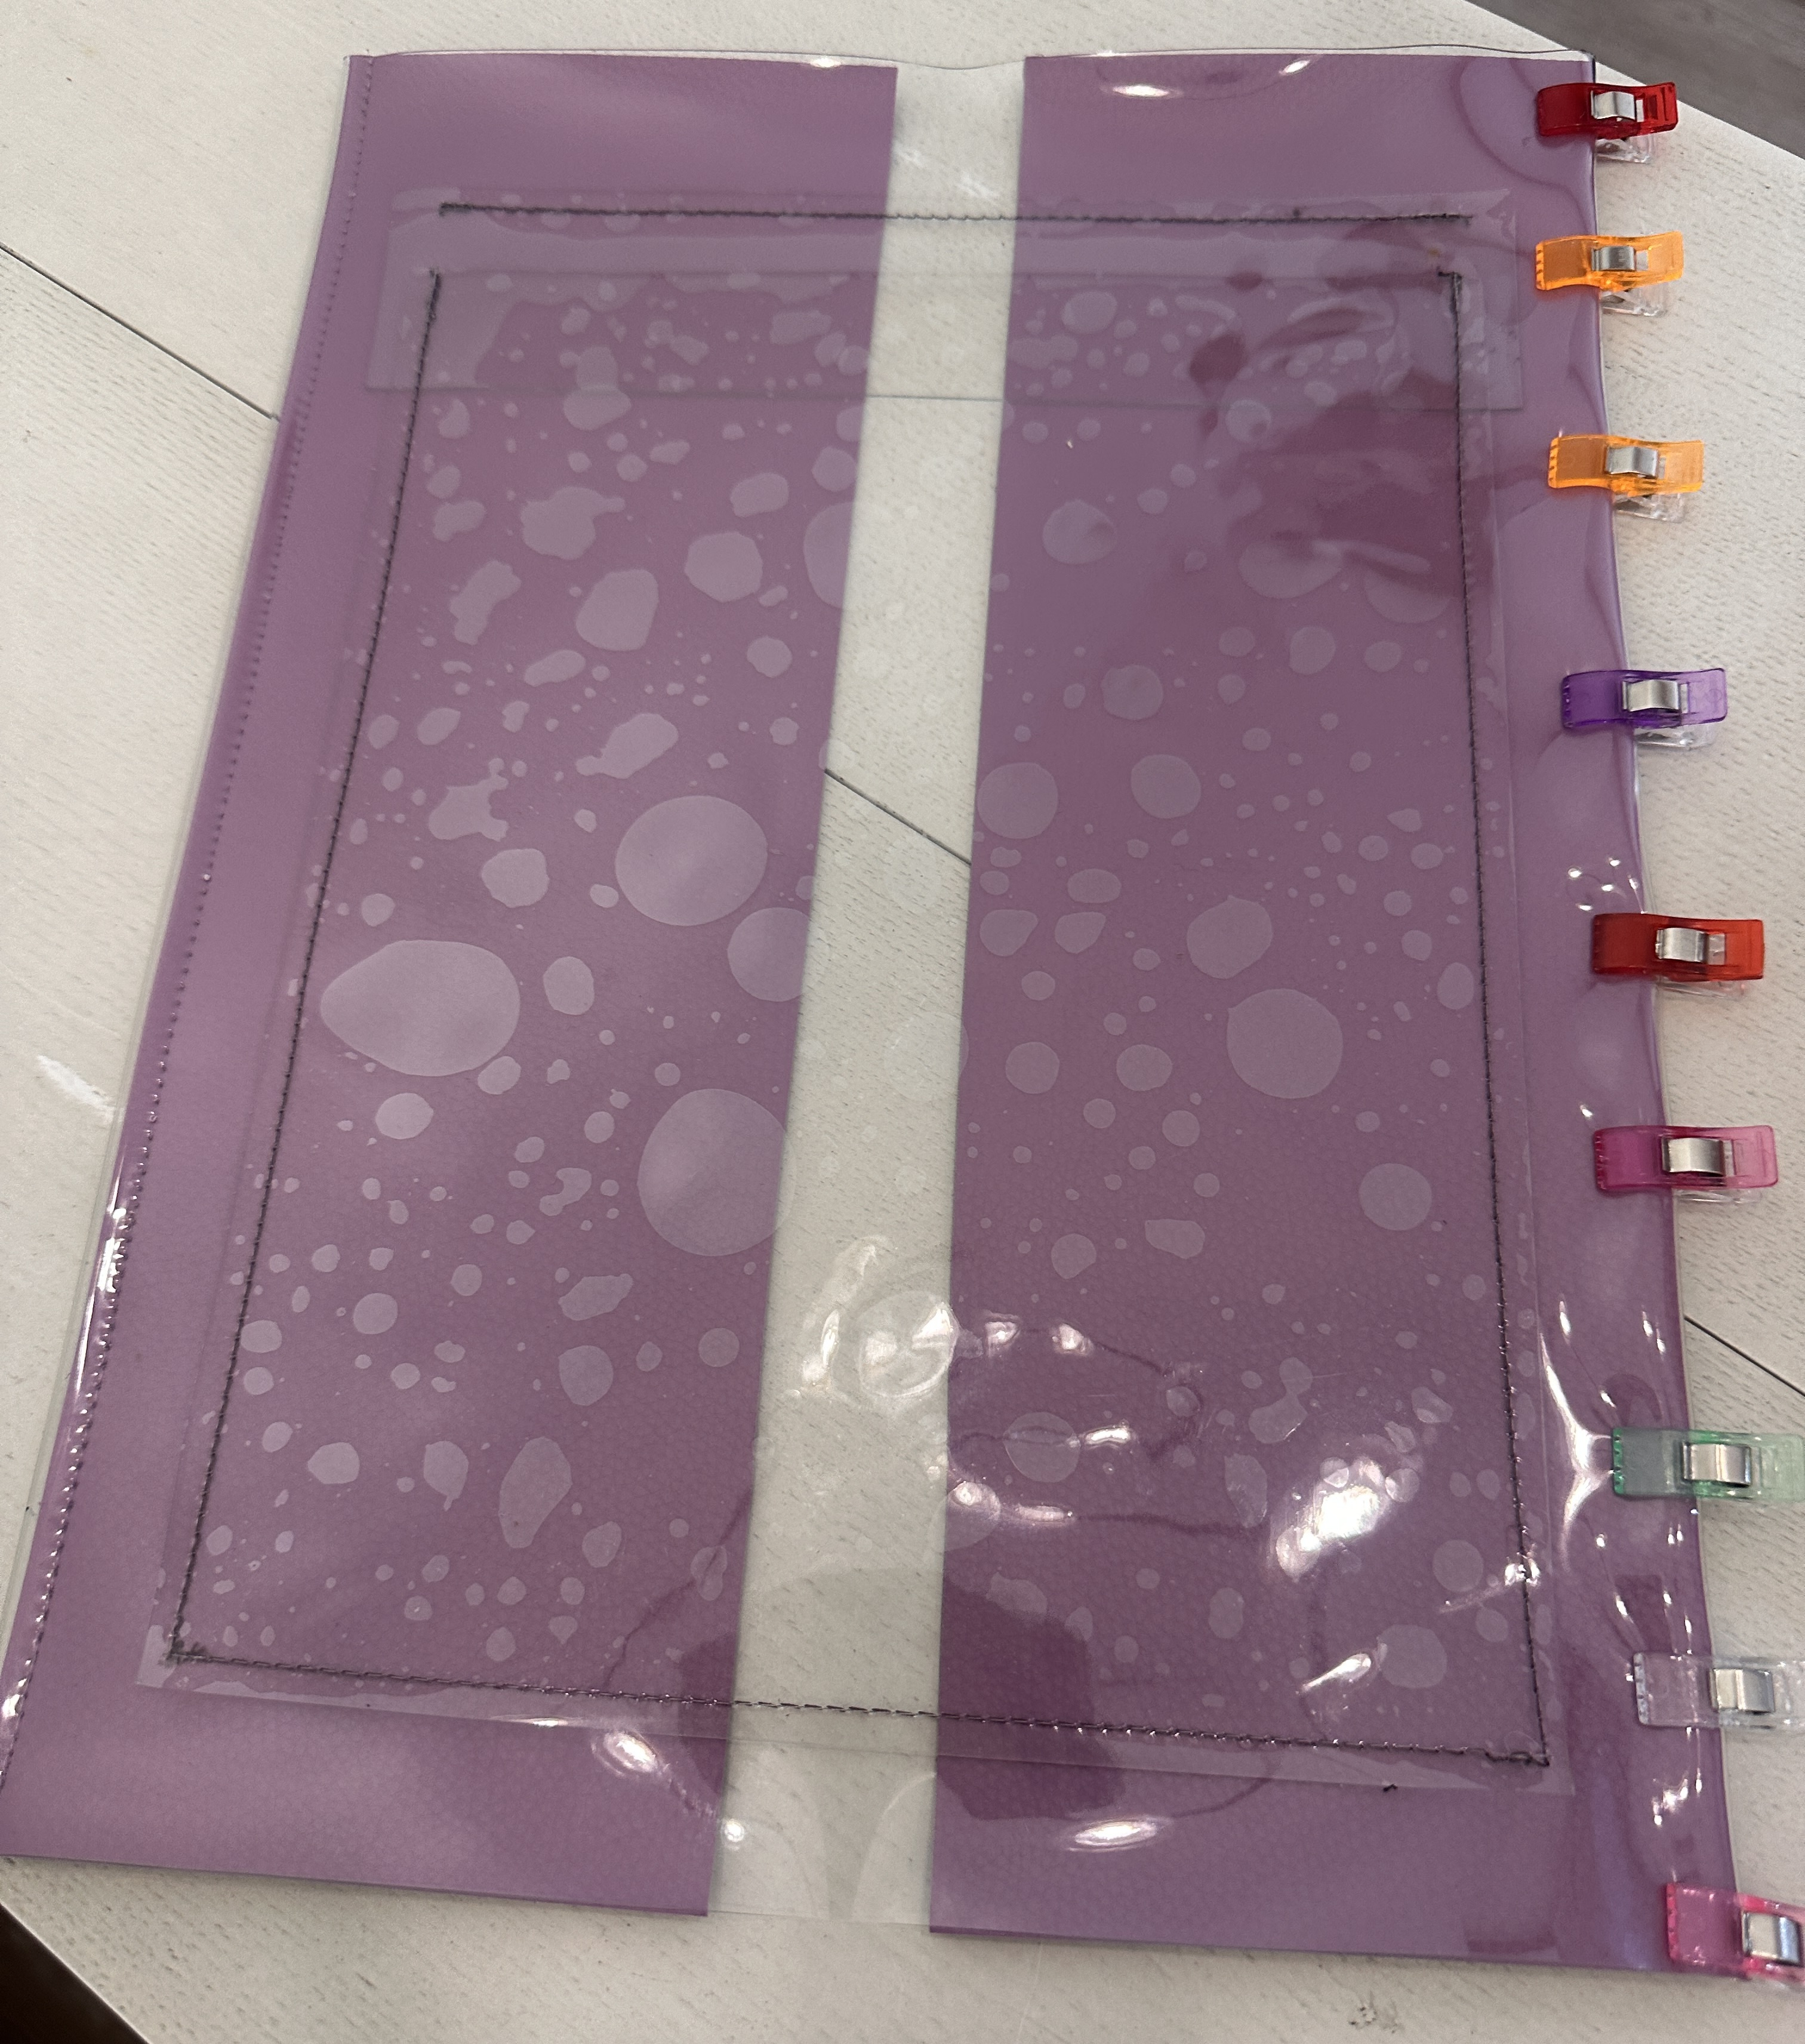
Step 3: Sewing the Front Pocket On
One of the fun things about sewing with clear vinyl is that it just sticks together, without the need of any clips! But you do want to make sure the pieces are perfectly placed to match up with the pattern- using your pattern piece underneath as a template, or double-checking your placement with a ruler makes it all go according to plan.
Make sure you’ve put on your Non-Stick foot and leather needle on your machine, and you’re ready to go.
One of the things I love about the b05 crafter is that I can use both a heavy-duty thread in the bobbin or as the main thread, and both the main and bobbin threads do not need to be the same weight. The b05 adjusts beautifully and regulates stitches with ease. So pop your threads in and get sewing.
Here’s the front pocket sewn on.
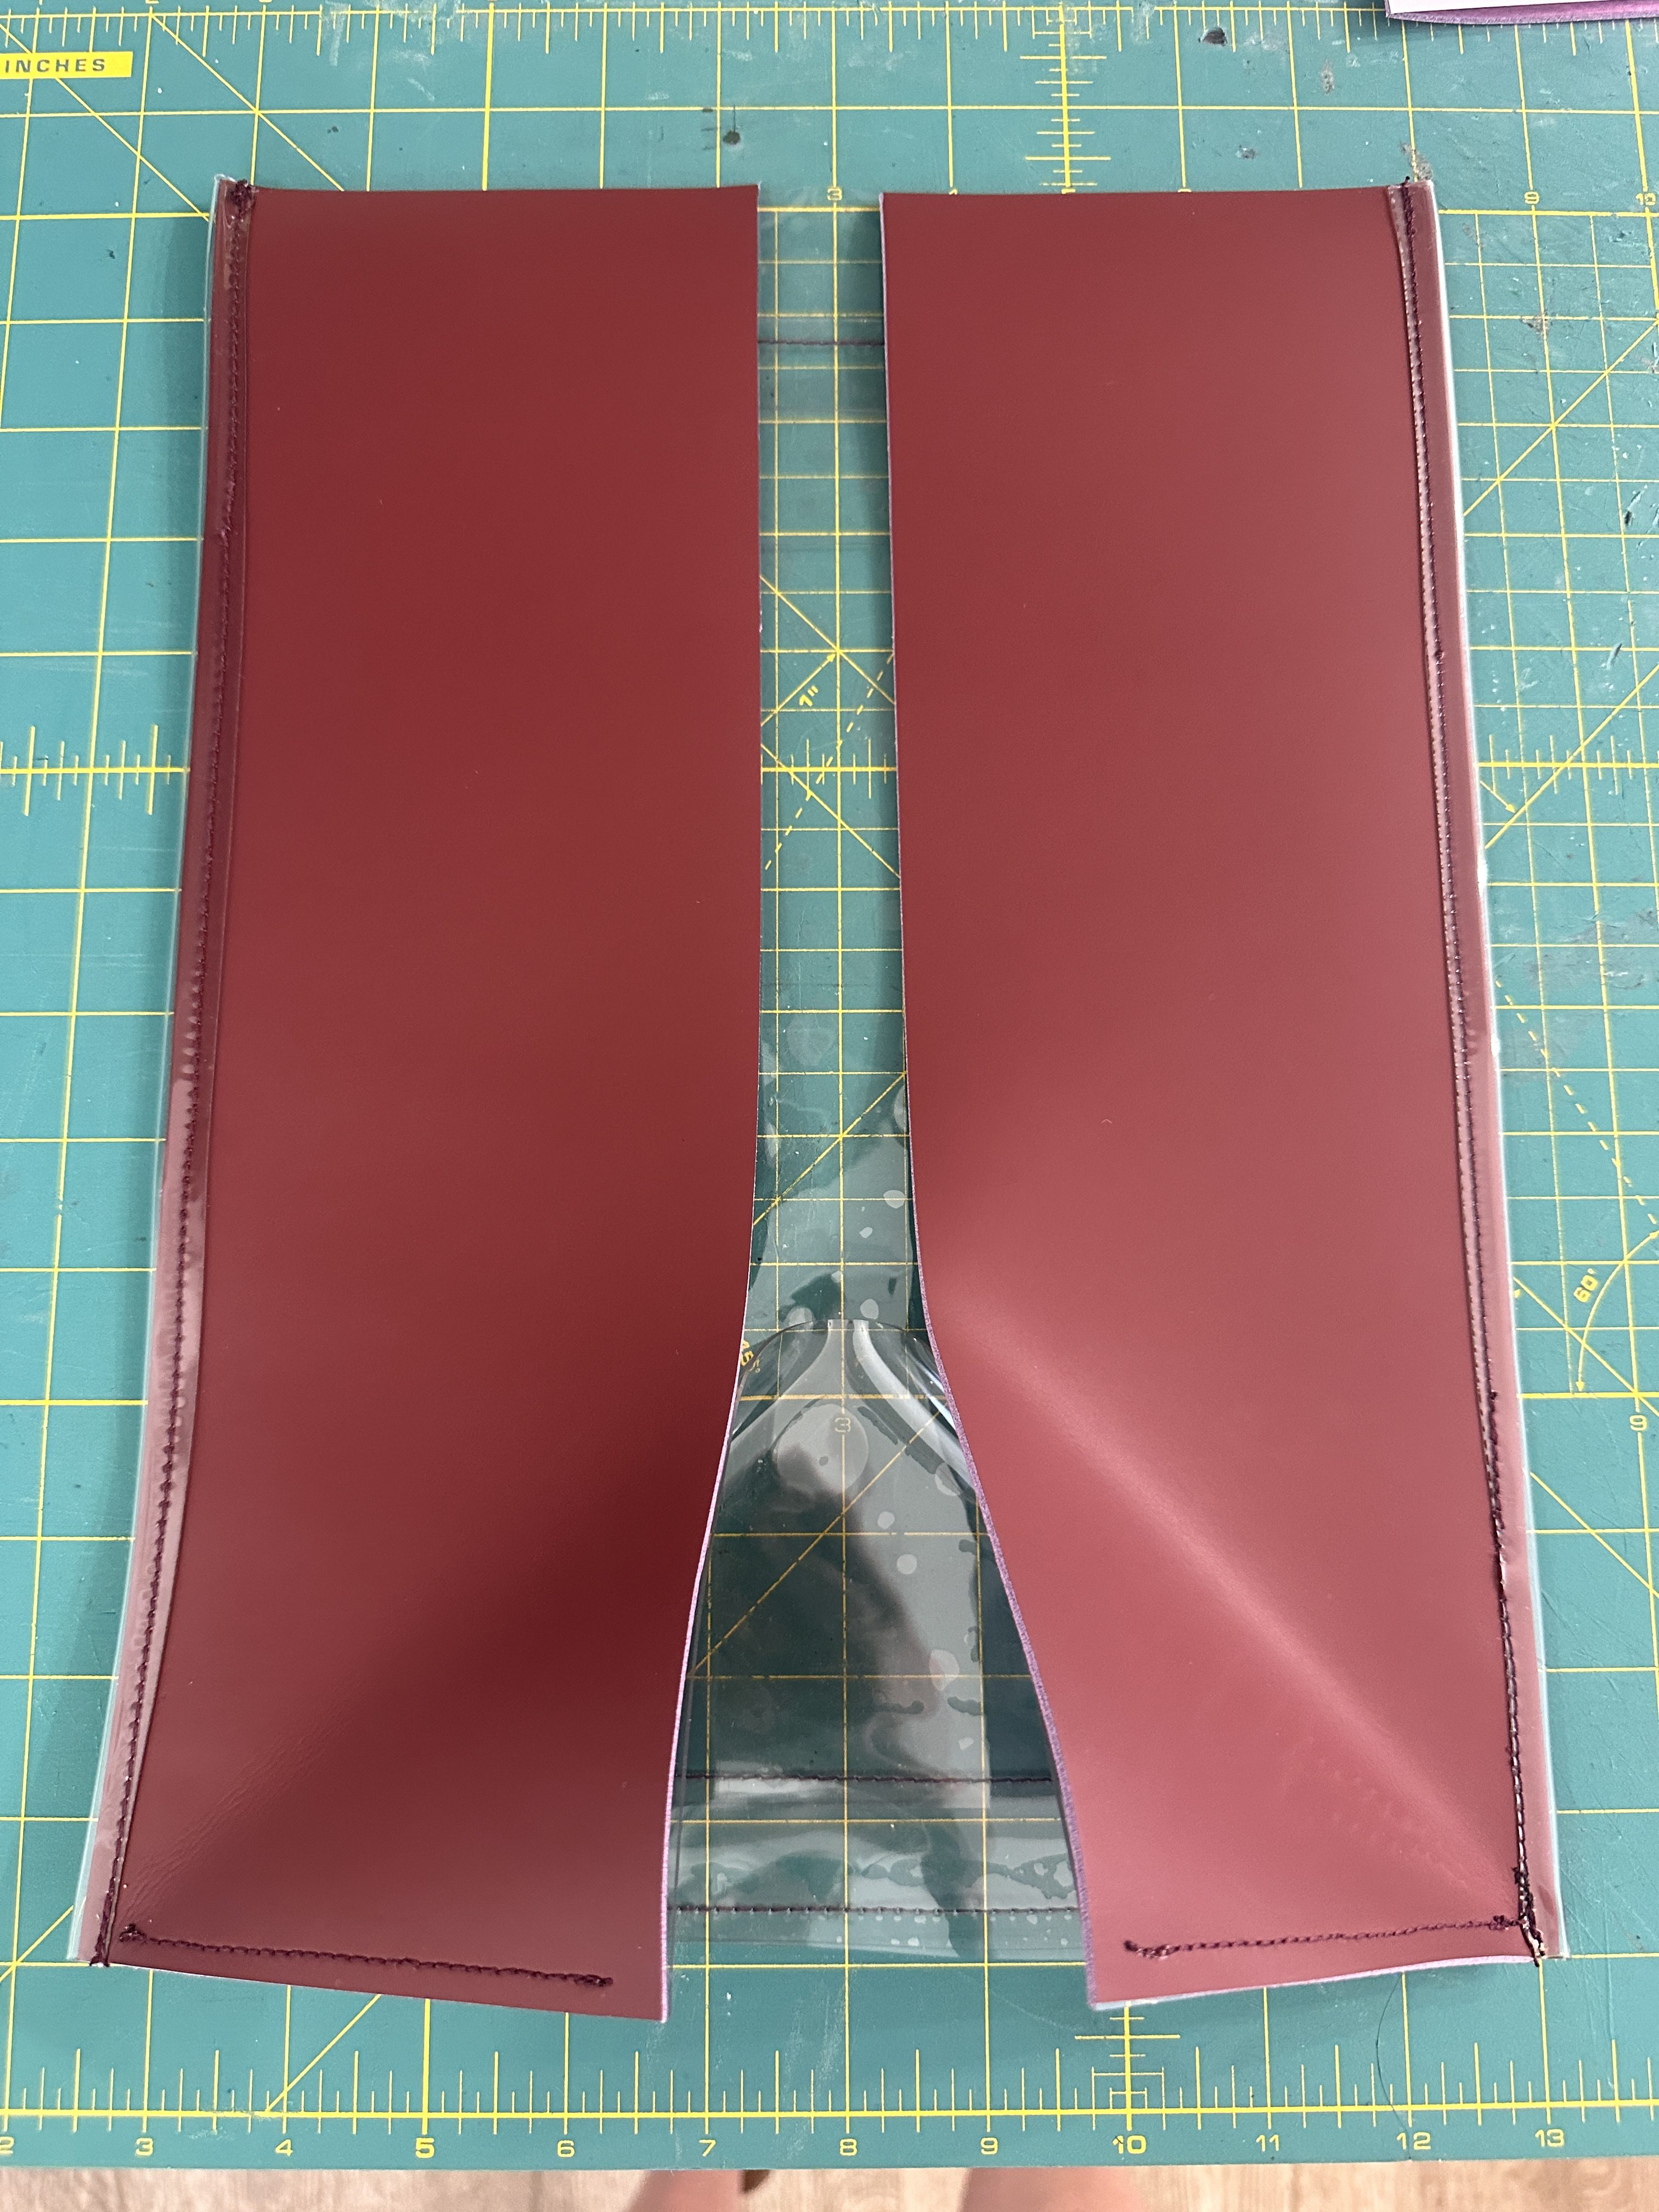
Step 4: Sewing the Leather sides to the Vinyl Front & Back (With Beverage Holder Option)
Here you’ll want to use your sewing clips to hold everything together.
For this bag, I overlapped the vinyl edge to create soft corners – I learned from the prototype that I made that I didn’t enjoy the way the raw edge felt throughout the day. If this texture doesn’t bother you, a raw edge does look cool, but be forewarned, it can feel scratchy.
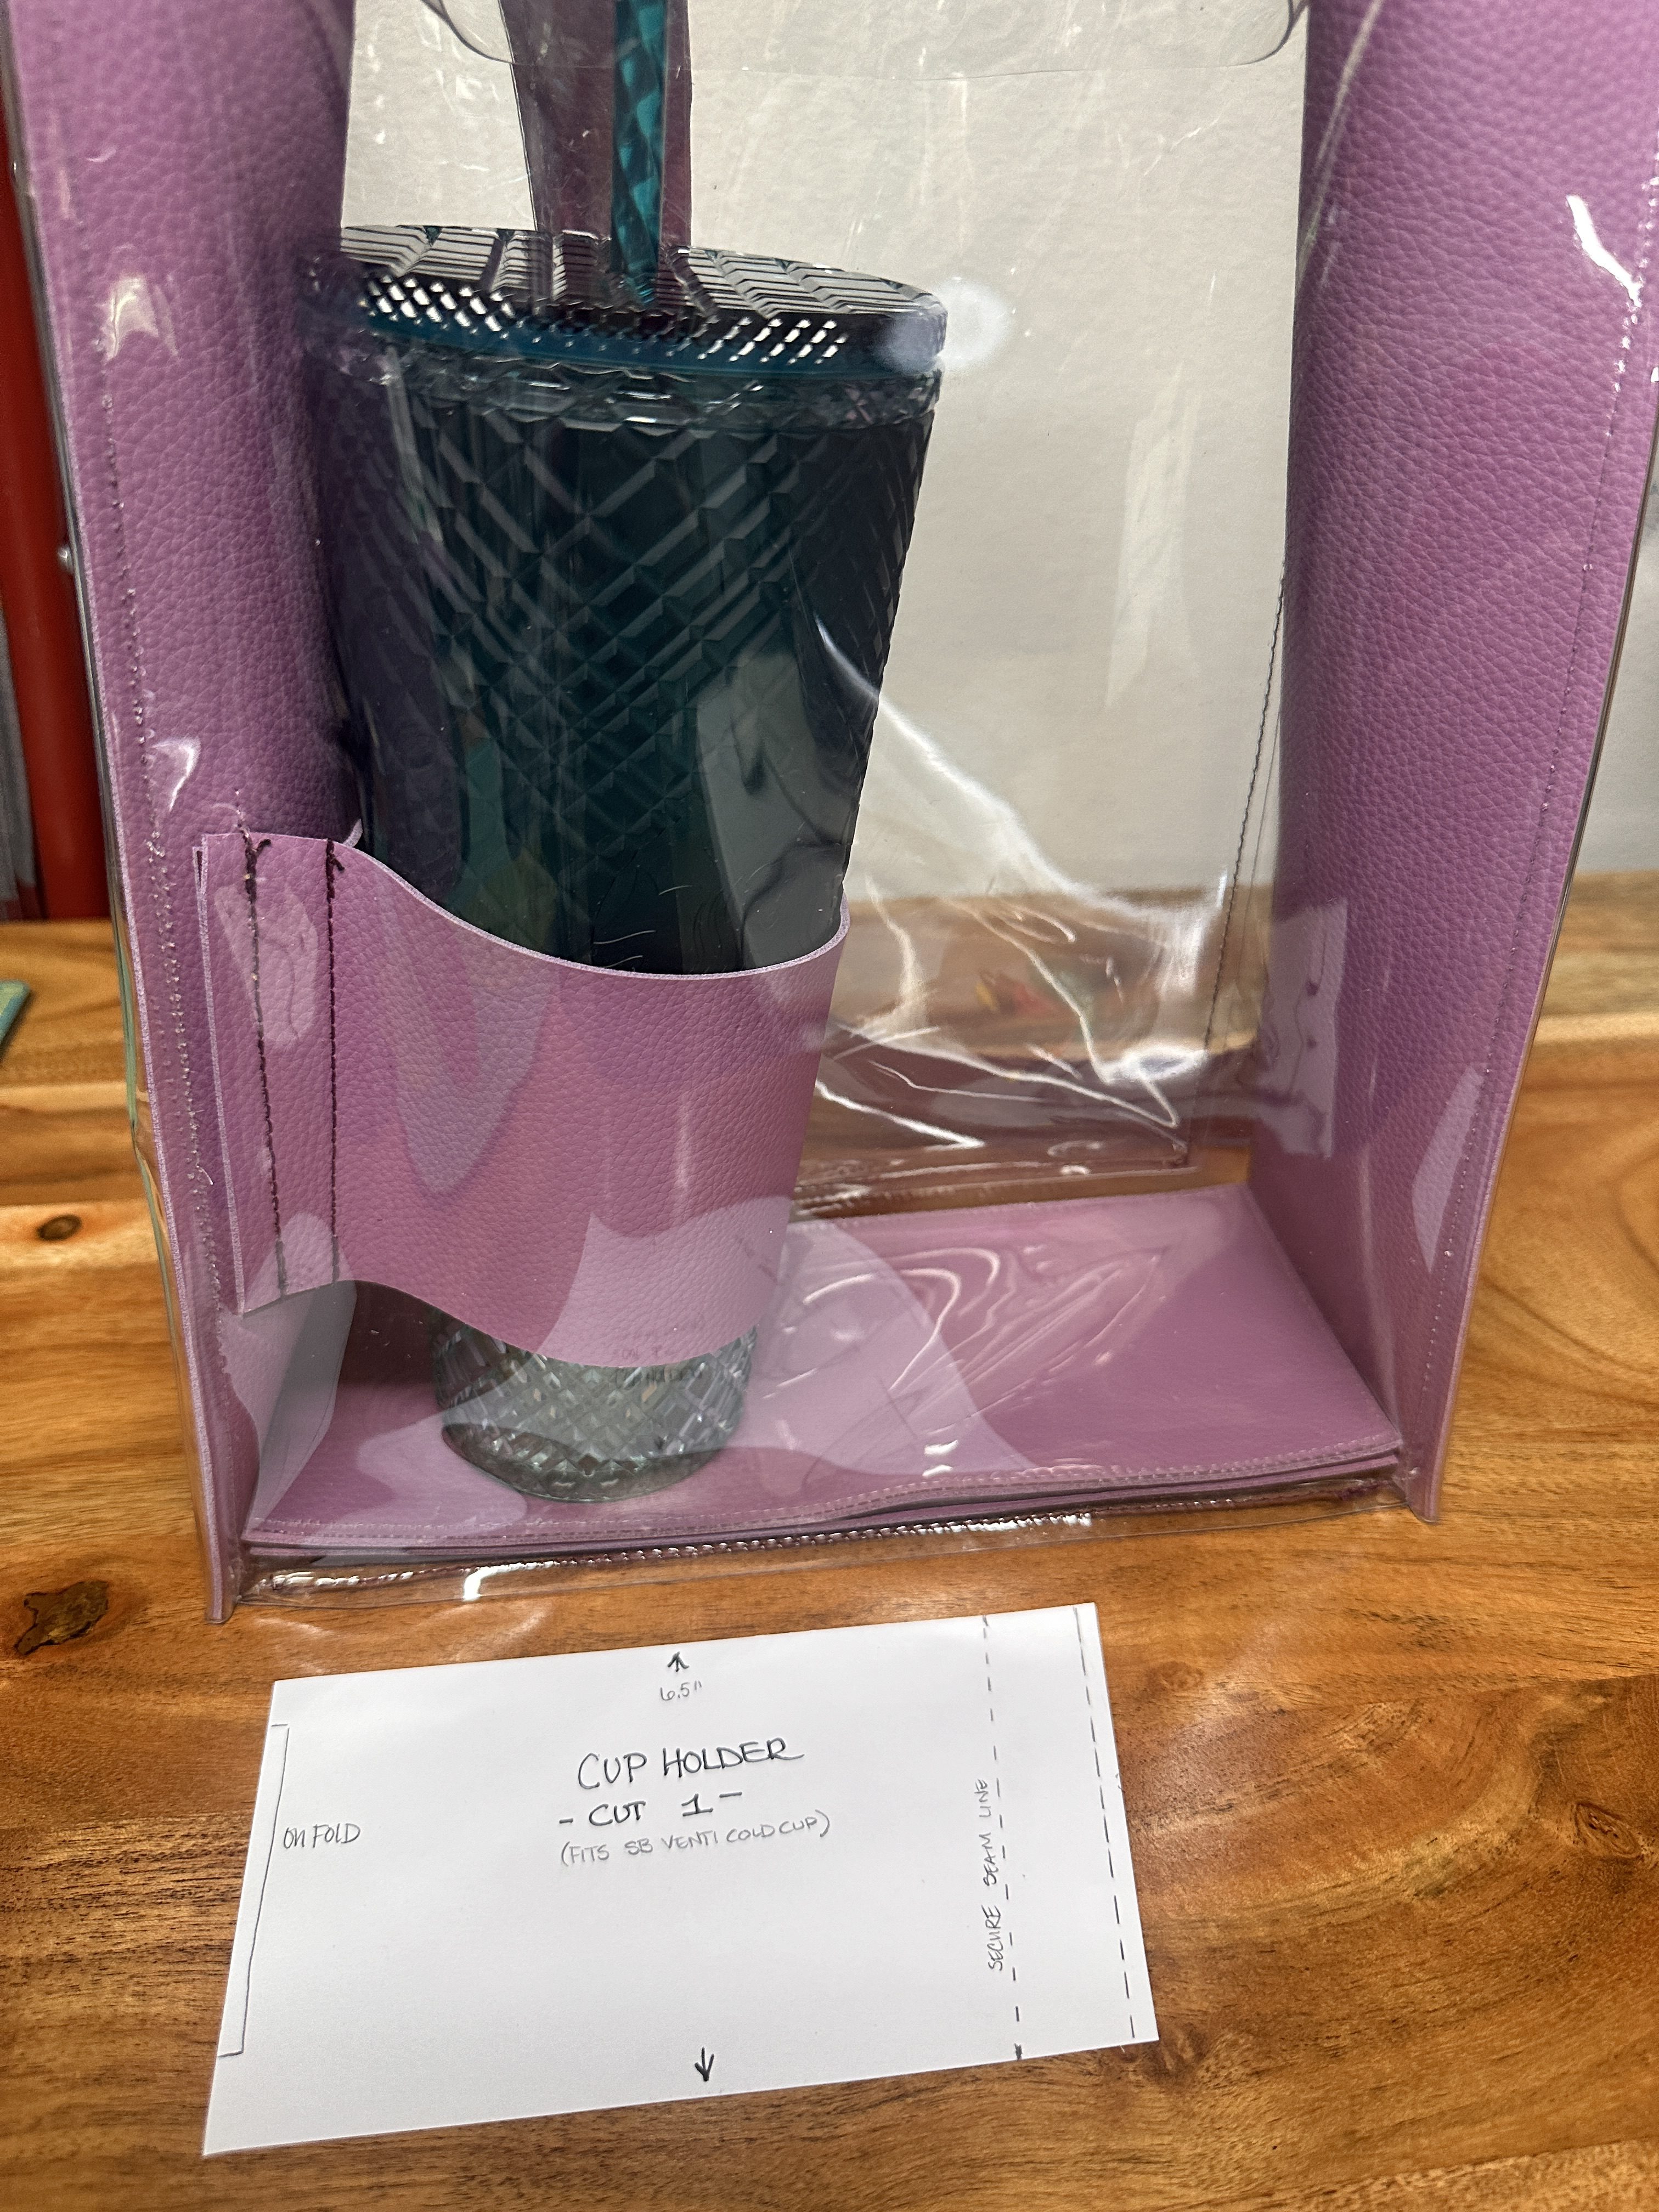
I sewed each of the side pieces to the front piece first. Then sewed the left side piece to the back piece. Before sewing the right side piece to the back, you want to insert your cup/bottle holder if you are adding that option.
I fitted my Cup Holder to the size of my favorite “on the go” container- by that worldwide coffee chain we all know. I added a stay stitch to keep it perfectly angled in the bag too because it is a tapered cup. I then stitched the holder to the right side of the bag close to where the back seam will be, leaving just enough room for the side seam.
Once the cup holder is in place, sew the right side to the back panel. You are now ready to work on the bottom piece!
Step 5: Sewing the Bag Bottom and Optional Bottom Liner

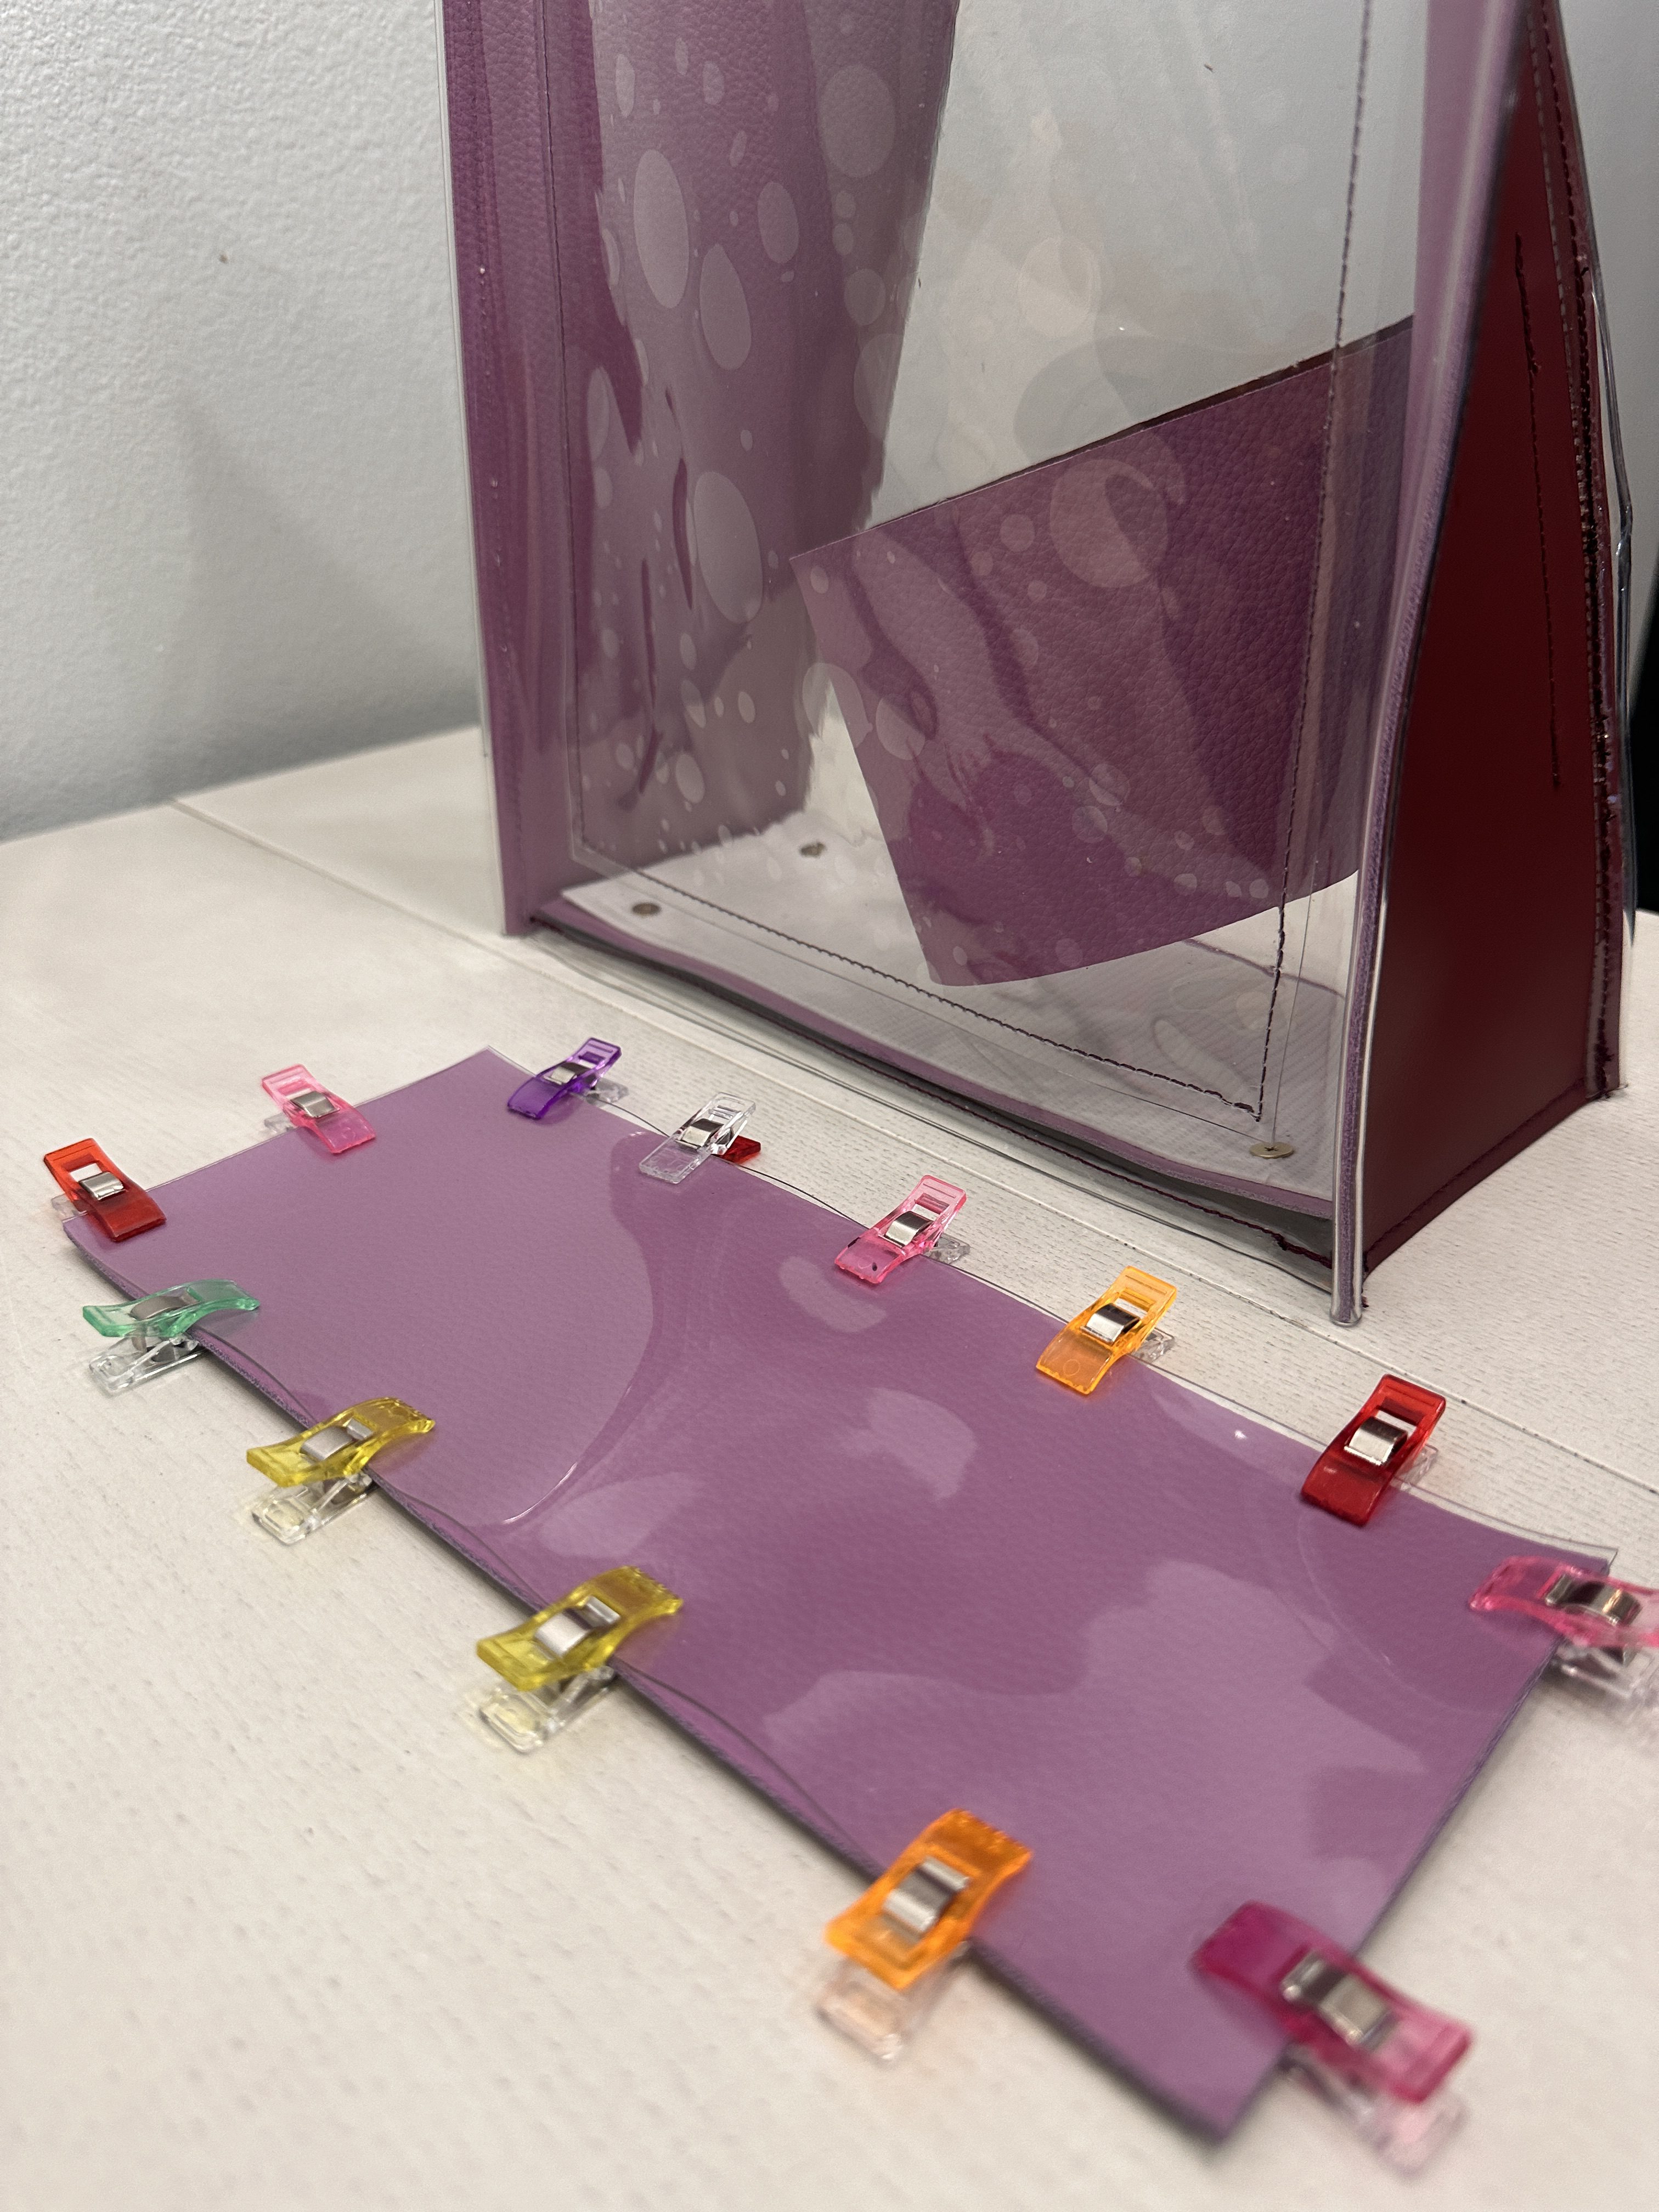
Depending on what you plan on using the bag for, you can start this next step two ways. If it is going to have normal wear and tear without heavy objects inside, you can place the vinyl and leather bottom pieces together, use your sewing clips to place everything and stitch away!
If you’re like me and going to have your computer, iPad, drink and whatnot in the bag, you’ll want to make the optional liner, and you will definitely want to add the rivet studs to the bottom for supportive feet. And make sure to punch the feet holes in your vinyl and leather before assembling it.
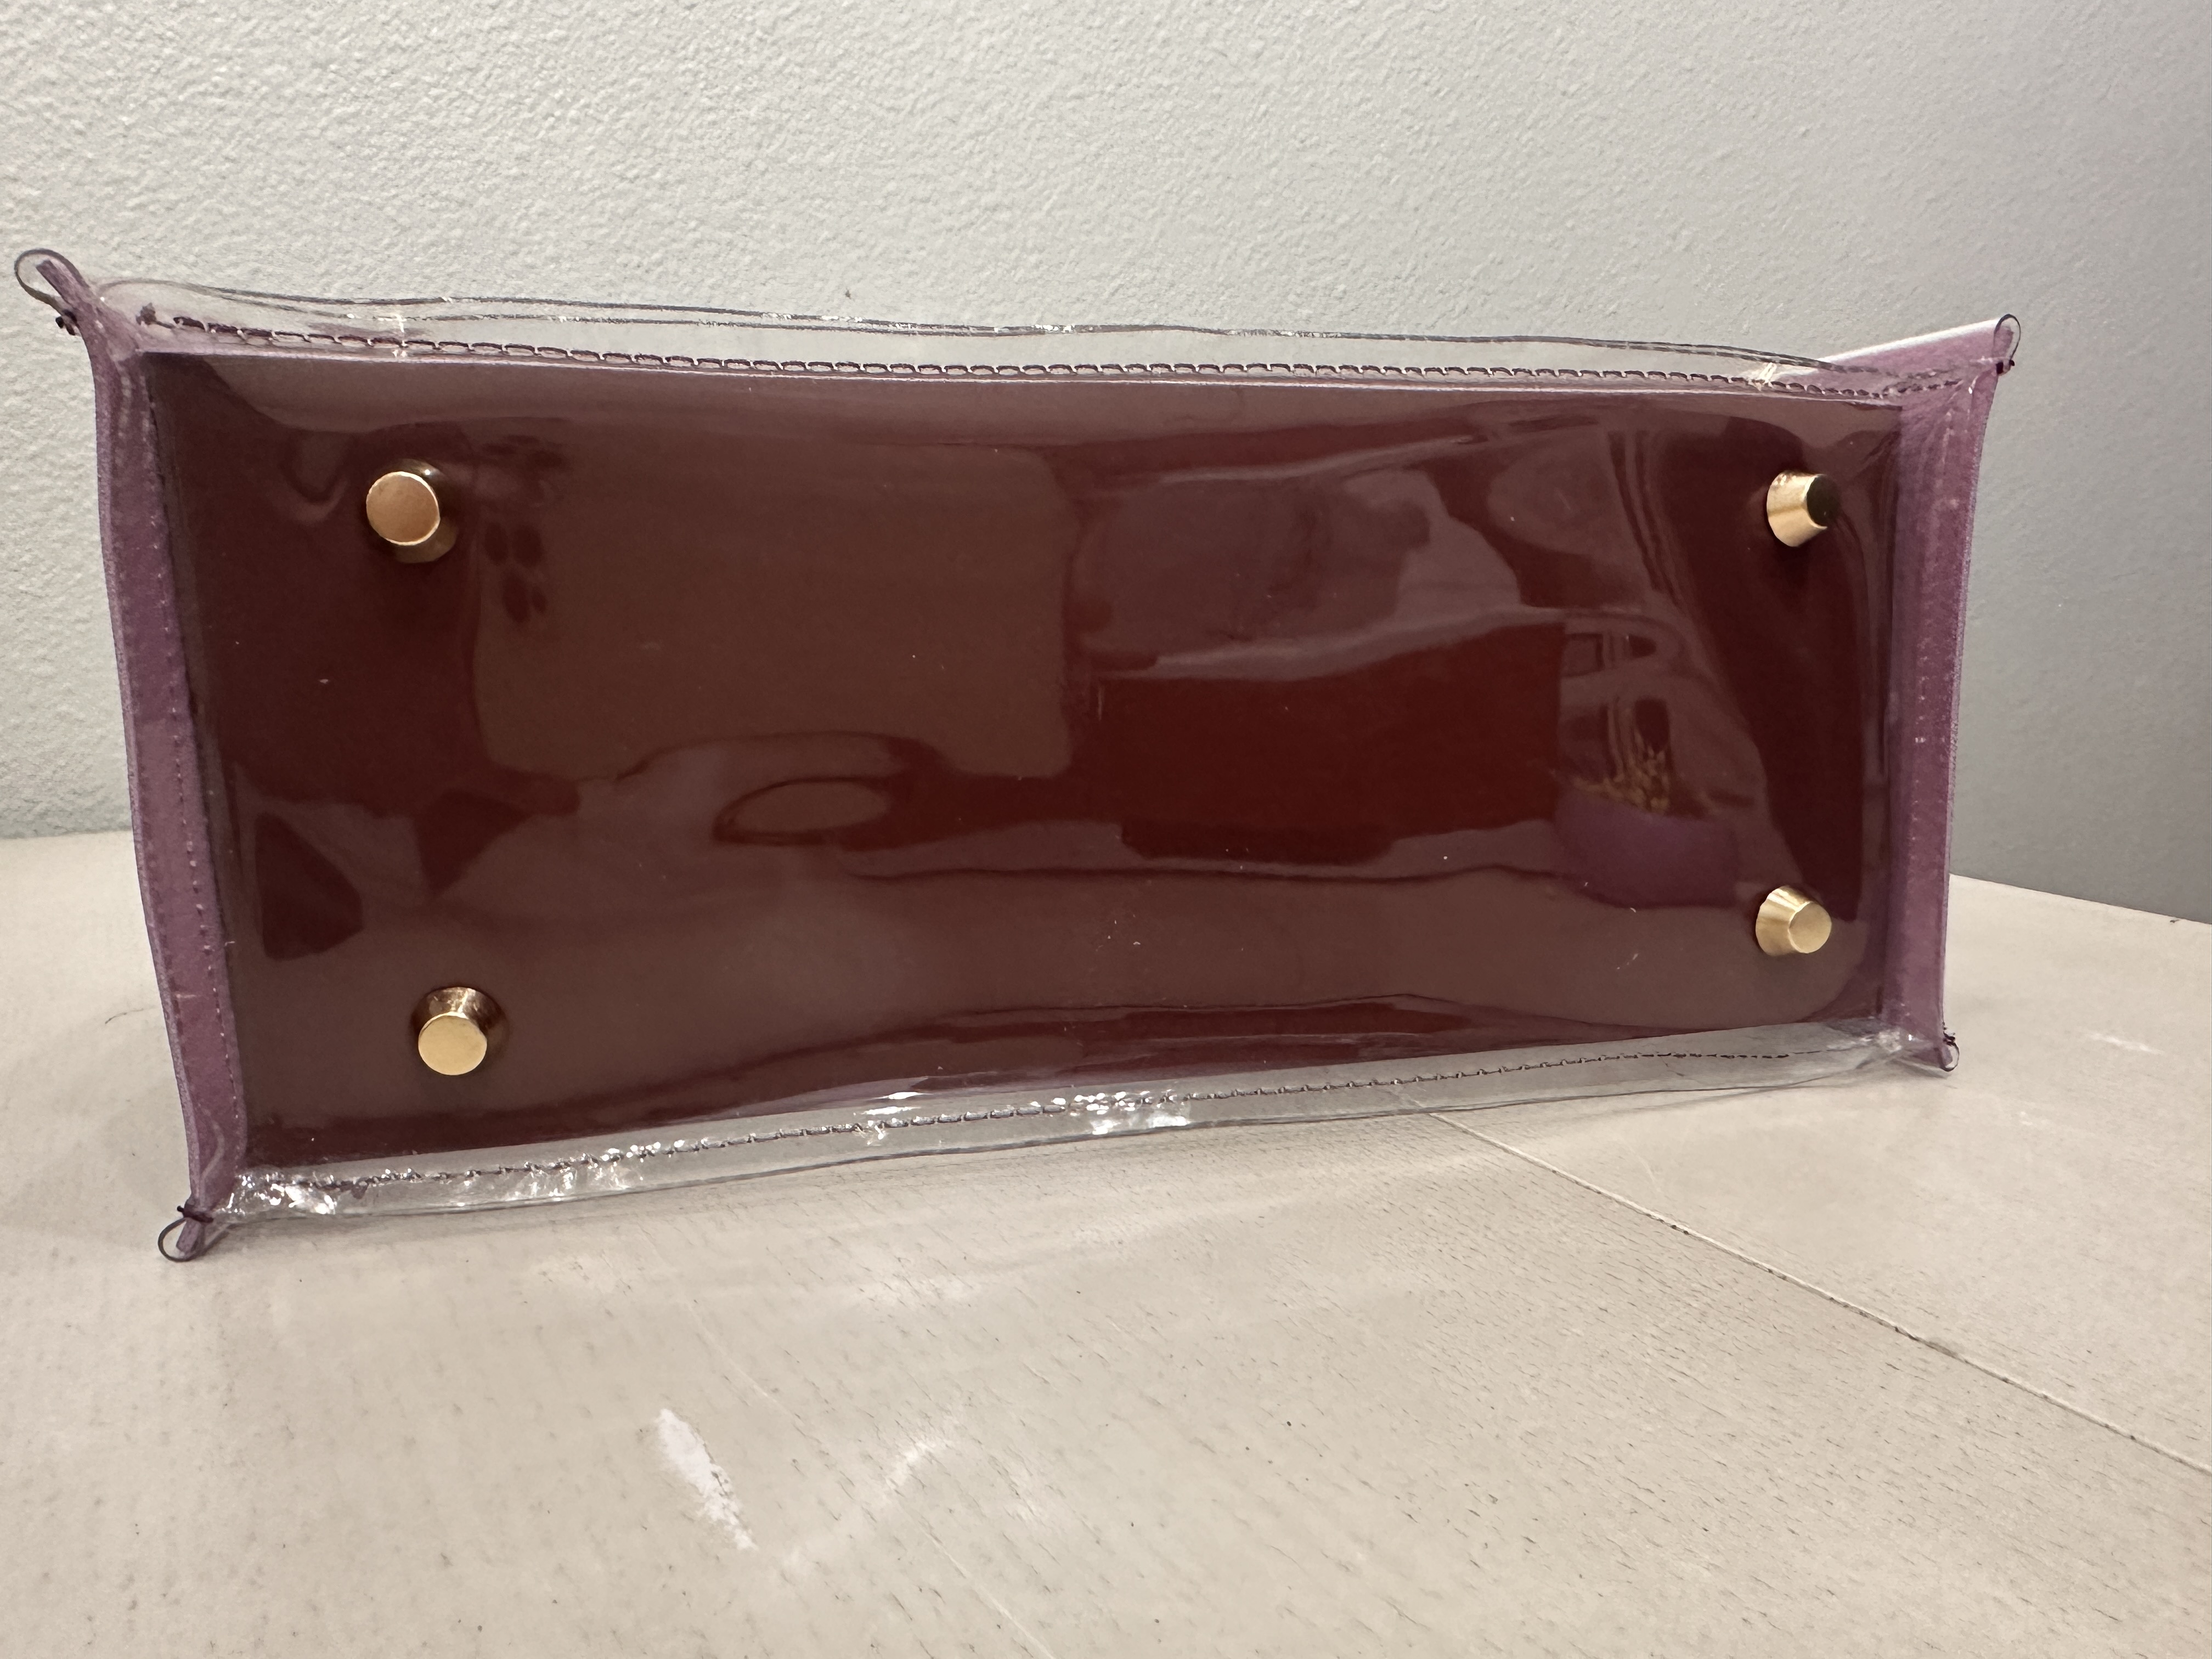
Also, note that the liner pieces are slightly smaller than the bottom pieces to accommodate seam allowances.
For my liner, I happened to have some extra thermoplastic from some shoes I was making, and it was the perfect strength for what I needed. But depending on what you need, you can use foam, a thicker veg-tan leather, extra worbla you have lying around- there are a multitude of possibilities.
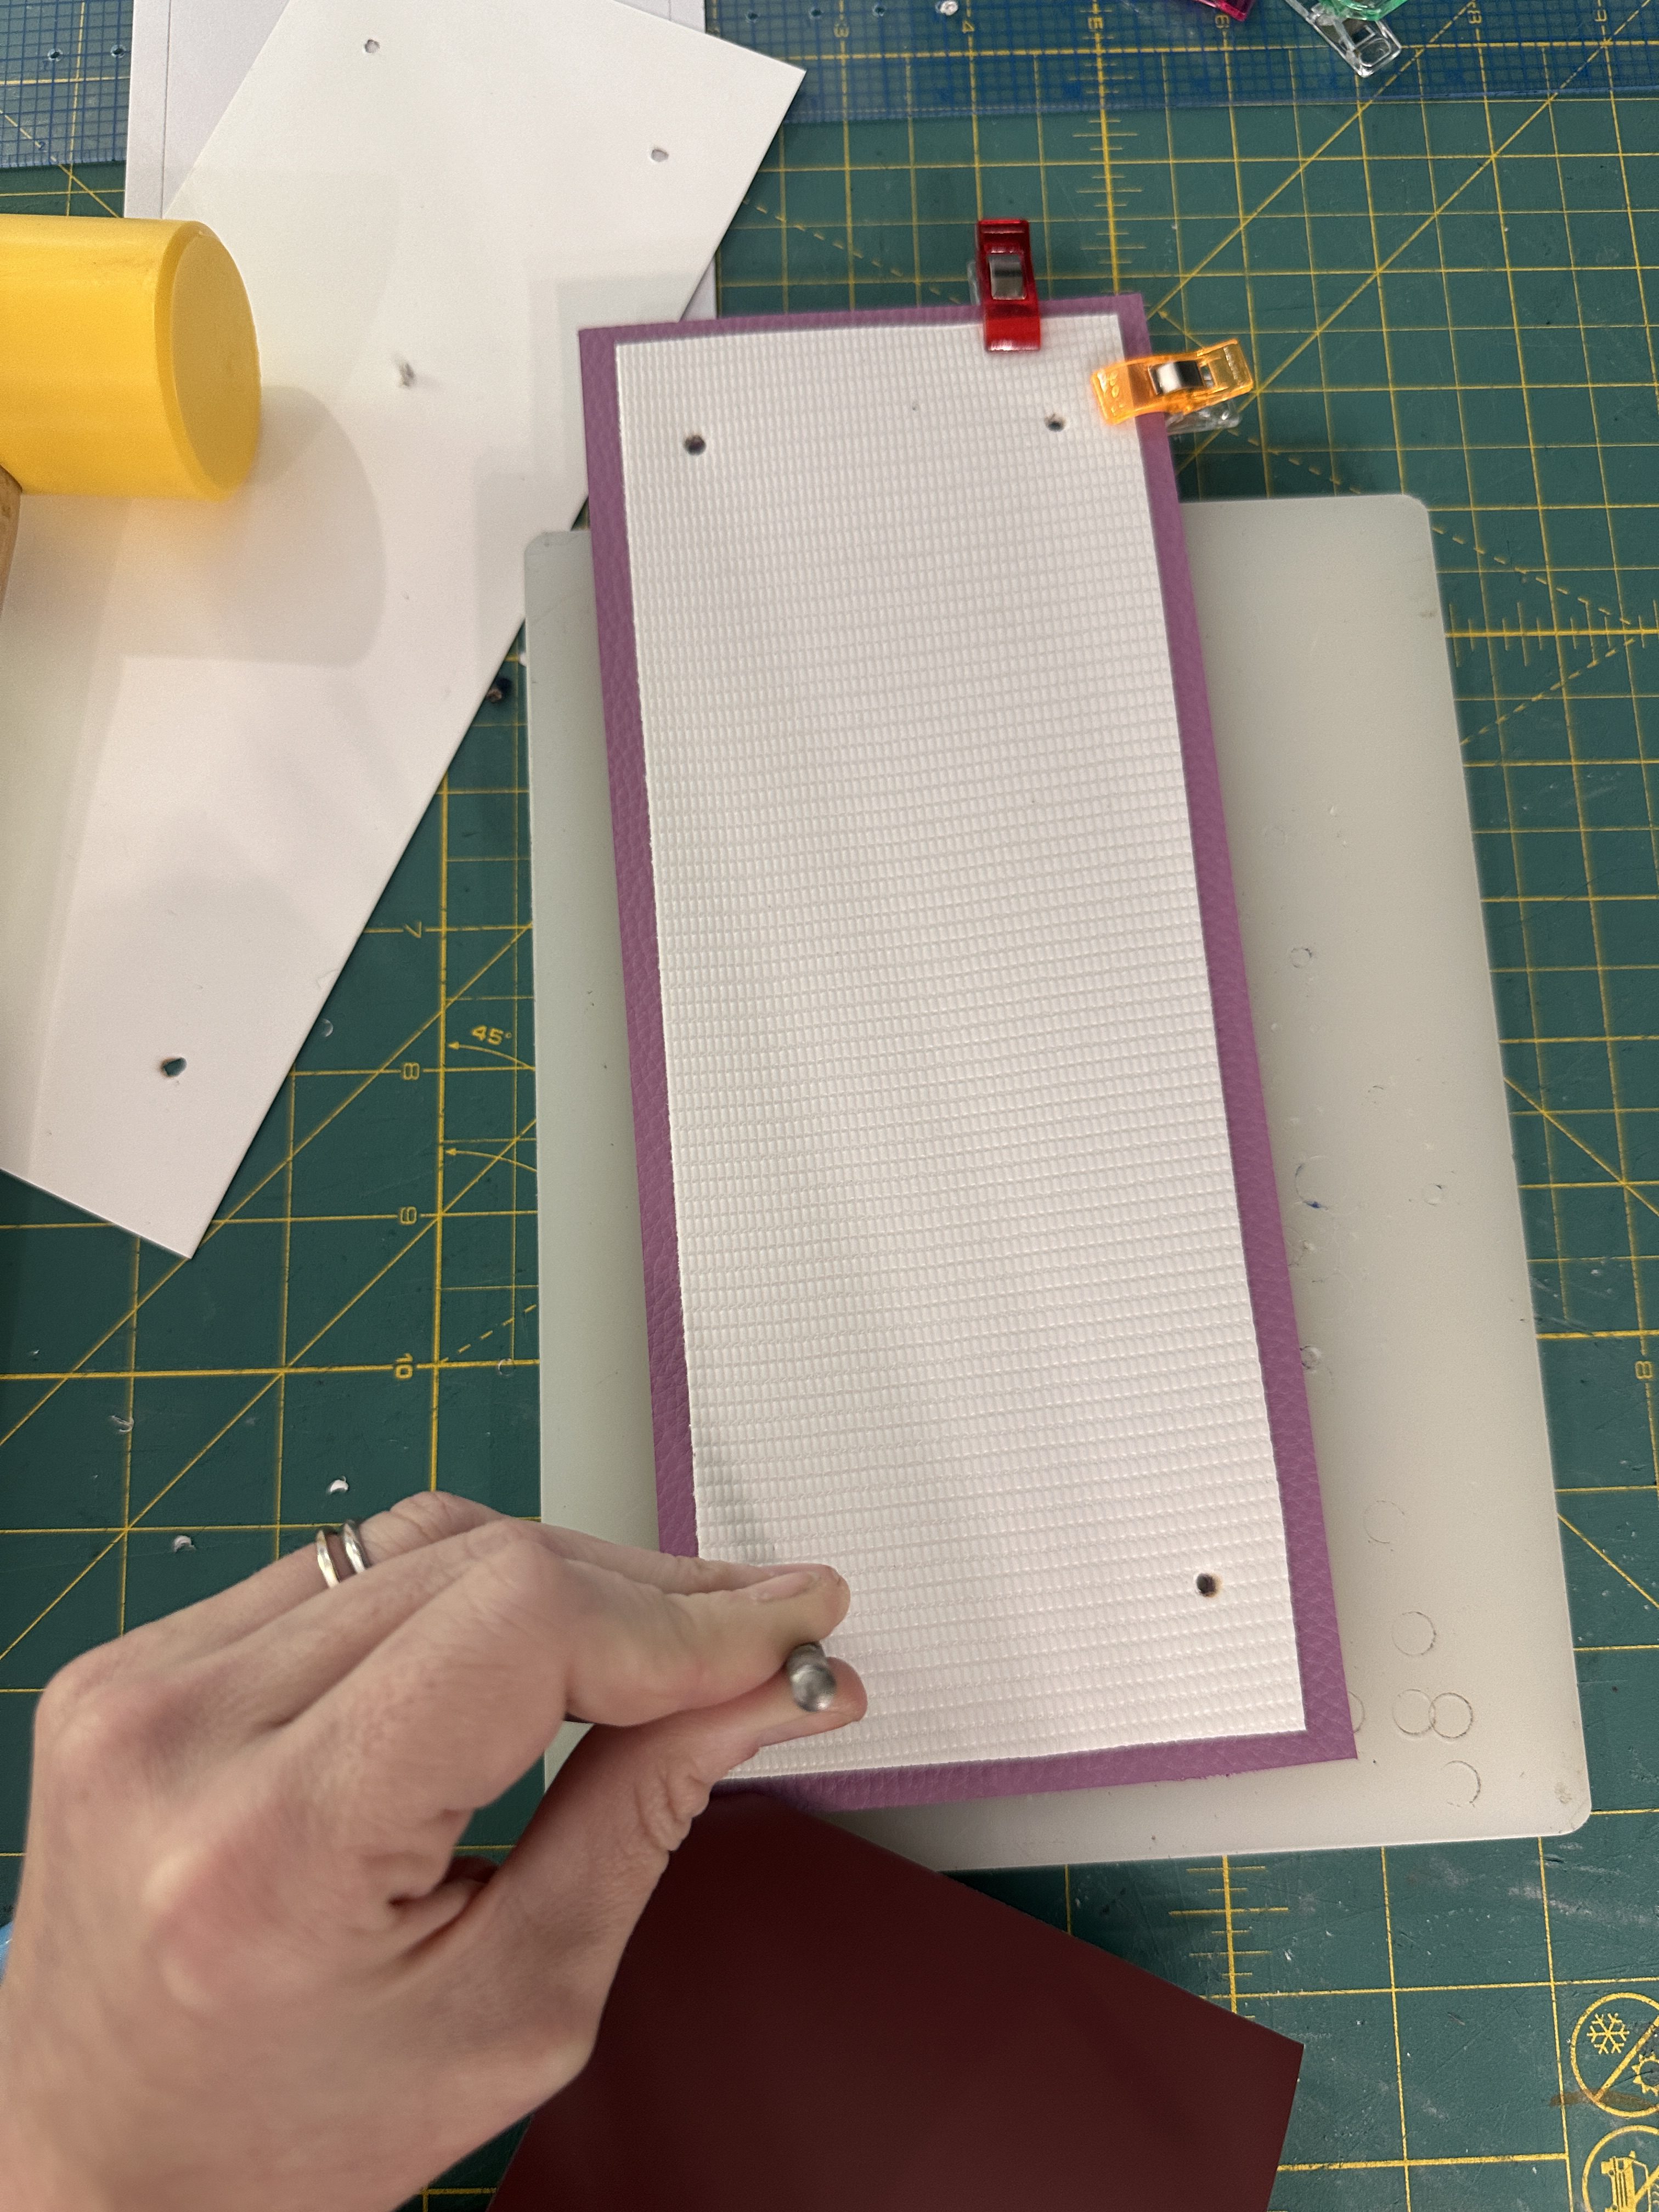
After sewing the liner vinyl and leather together, I used tanner’s bond tape on the thermoplastic to adhere it to the liner, and then repeated the process on the side that would stick to the inner bag bottom after it is assembled.
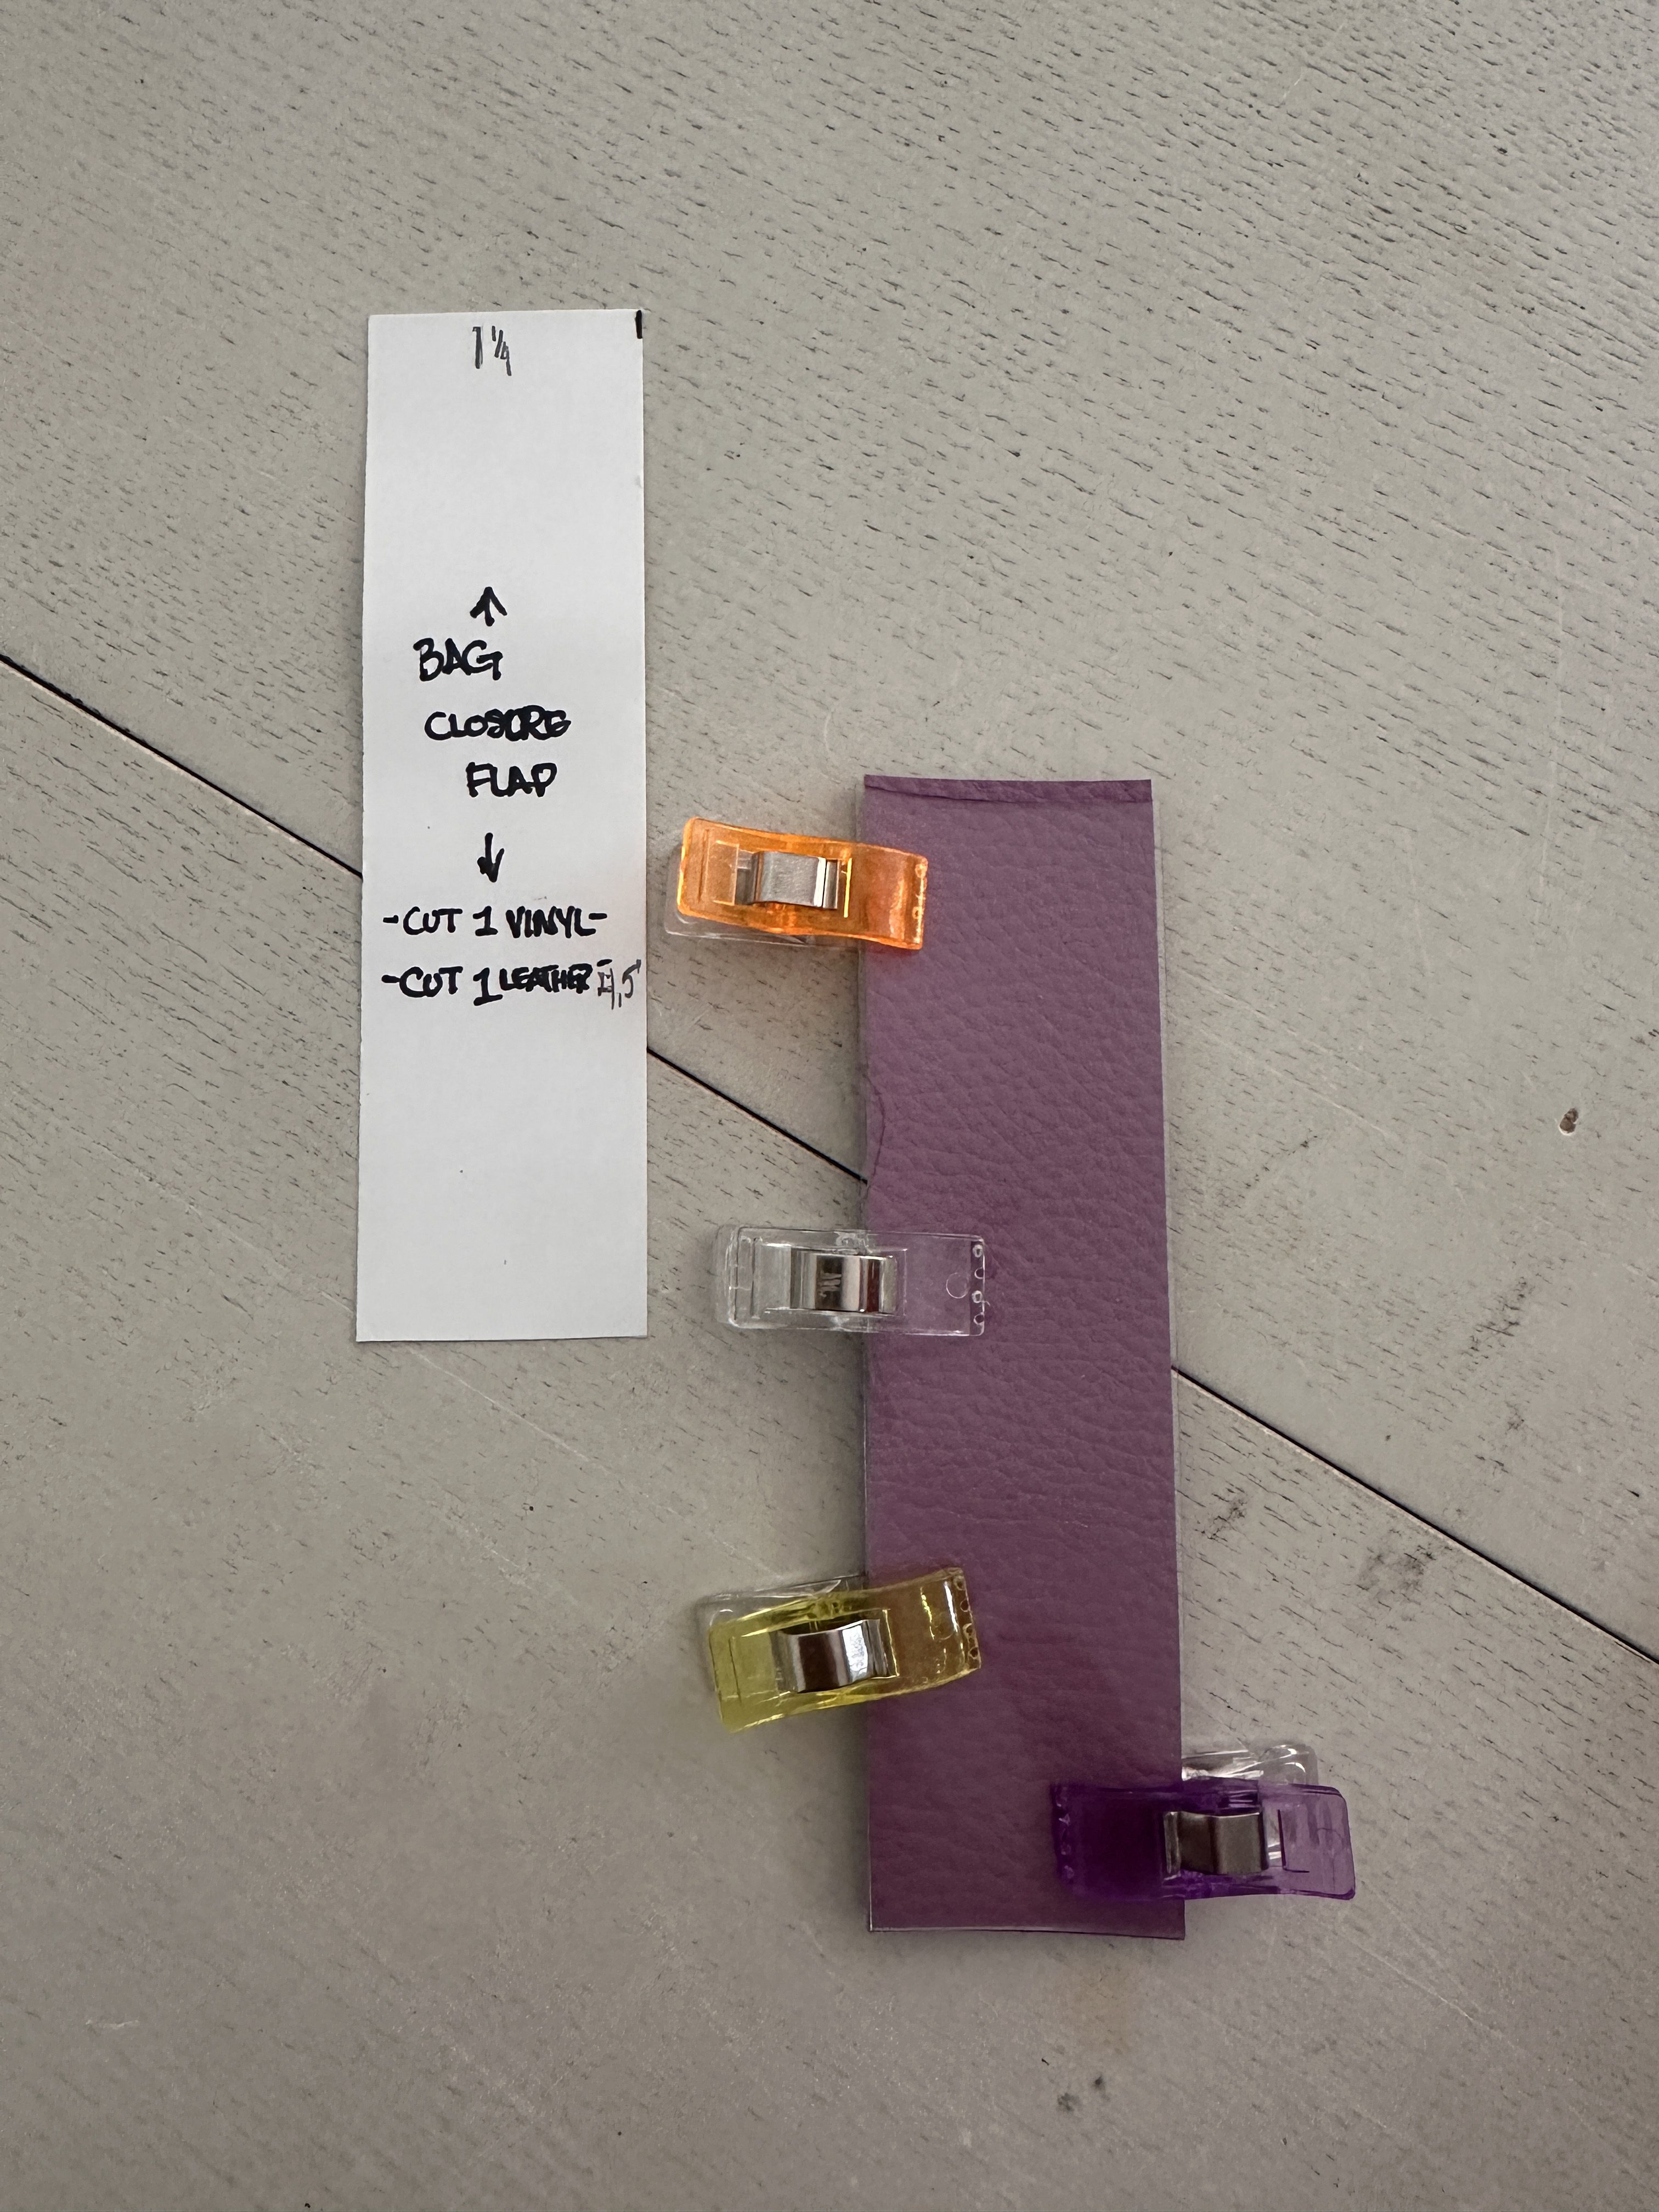
Step 6: Closure Strap & Hardware
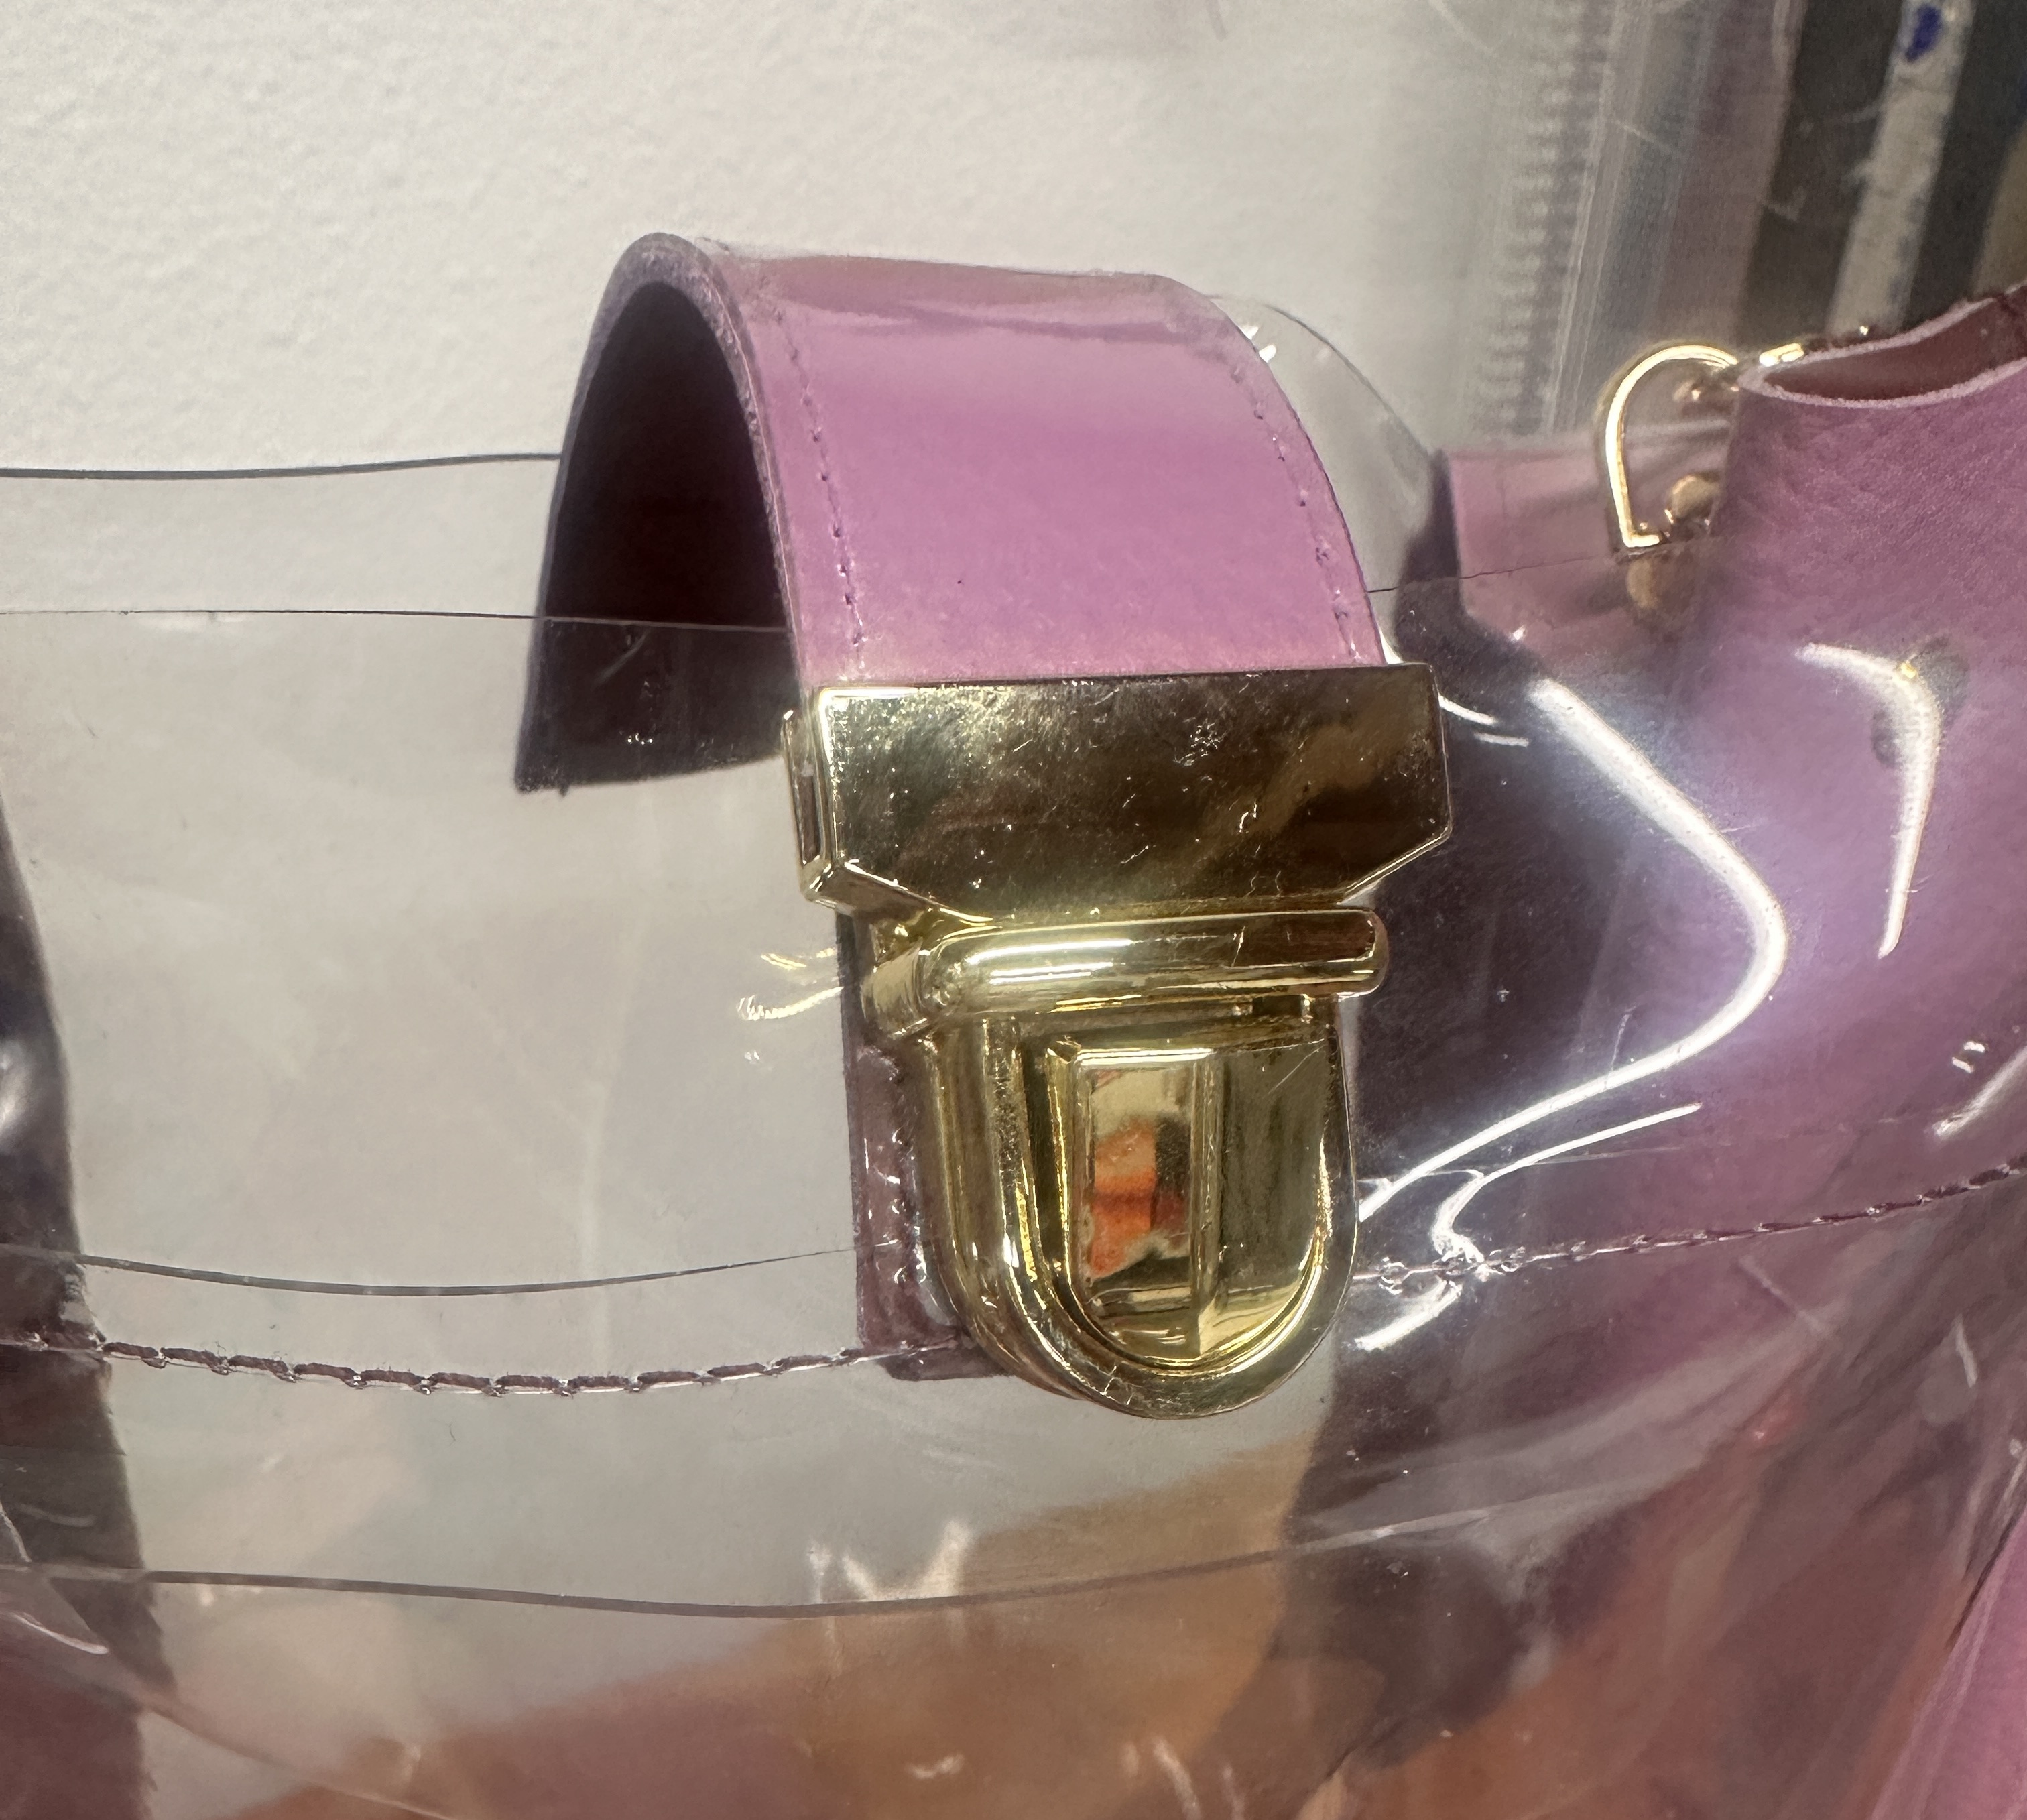
Technically, making the closure strap is optional, but I highly suggest doing this step. It gives the bag that finished look and keeps everything secure while accessible.
I topstitched the vinyl to the leather first, then placed one end of the strap on the back of the bag, centered.
This is where you want to triple-check the measurements and make sure you have it truly centered on the back, as well as centered with the front so that everything is spot on. I first sewed it onto the back in a square seam, and the made it extra sturdy with an “x” seam within the square.
Next comes the front! Again, triple-check centering on the front and alignment with the back.
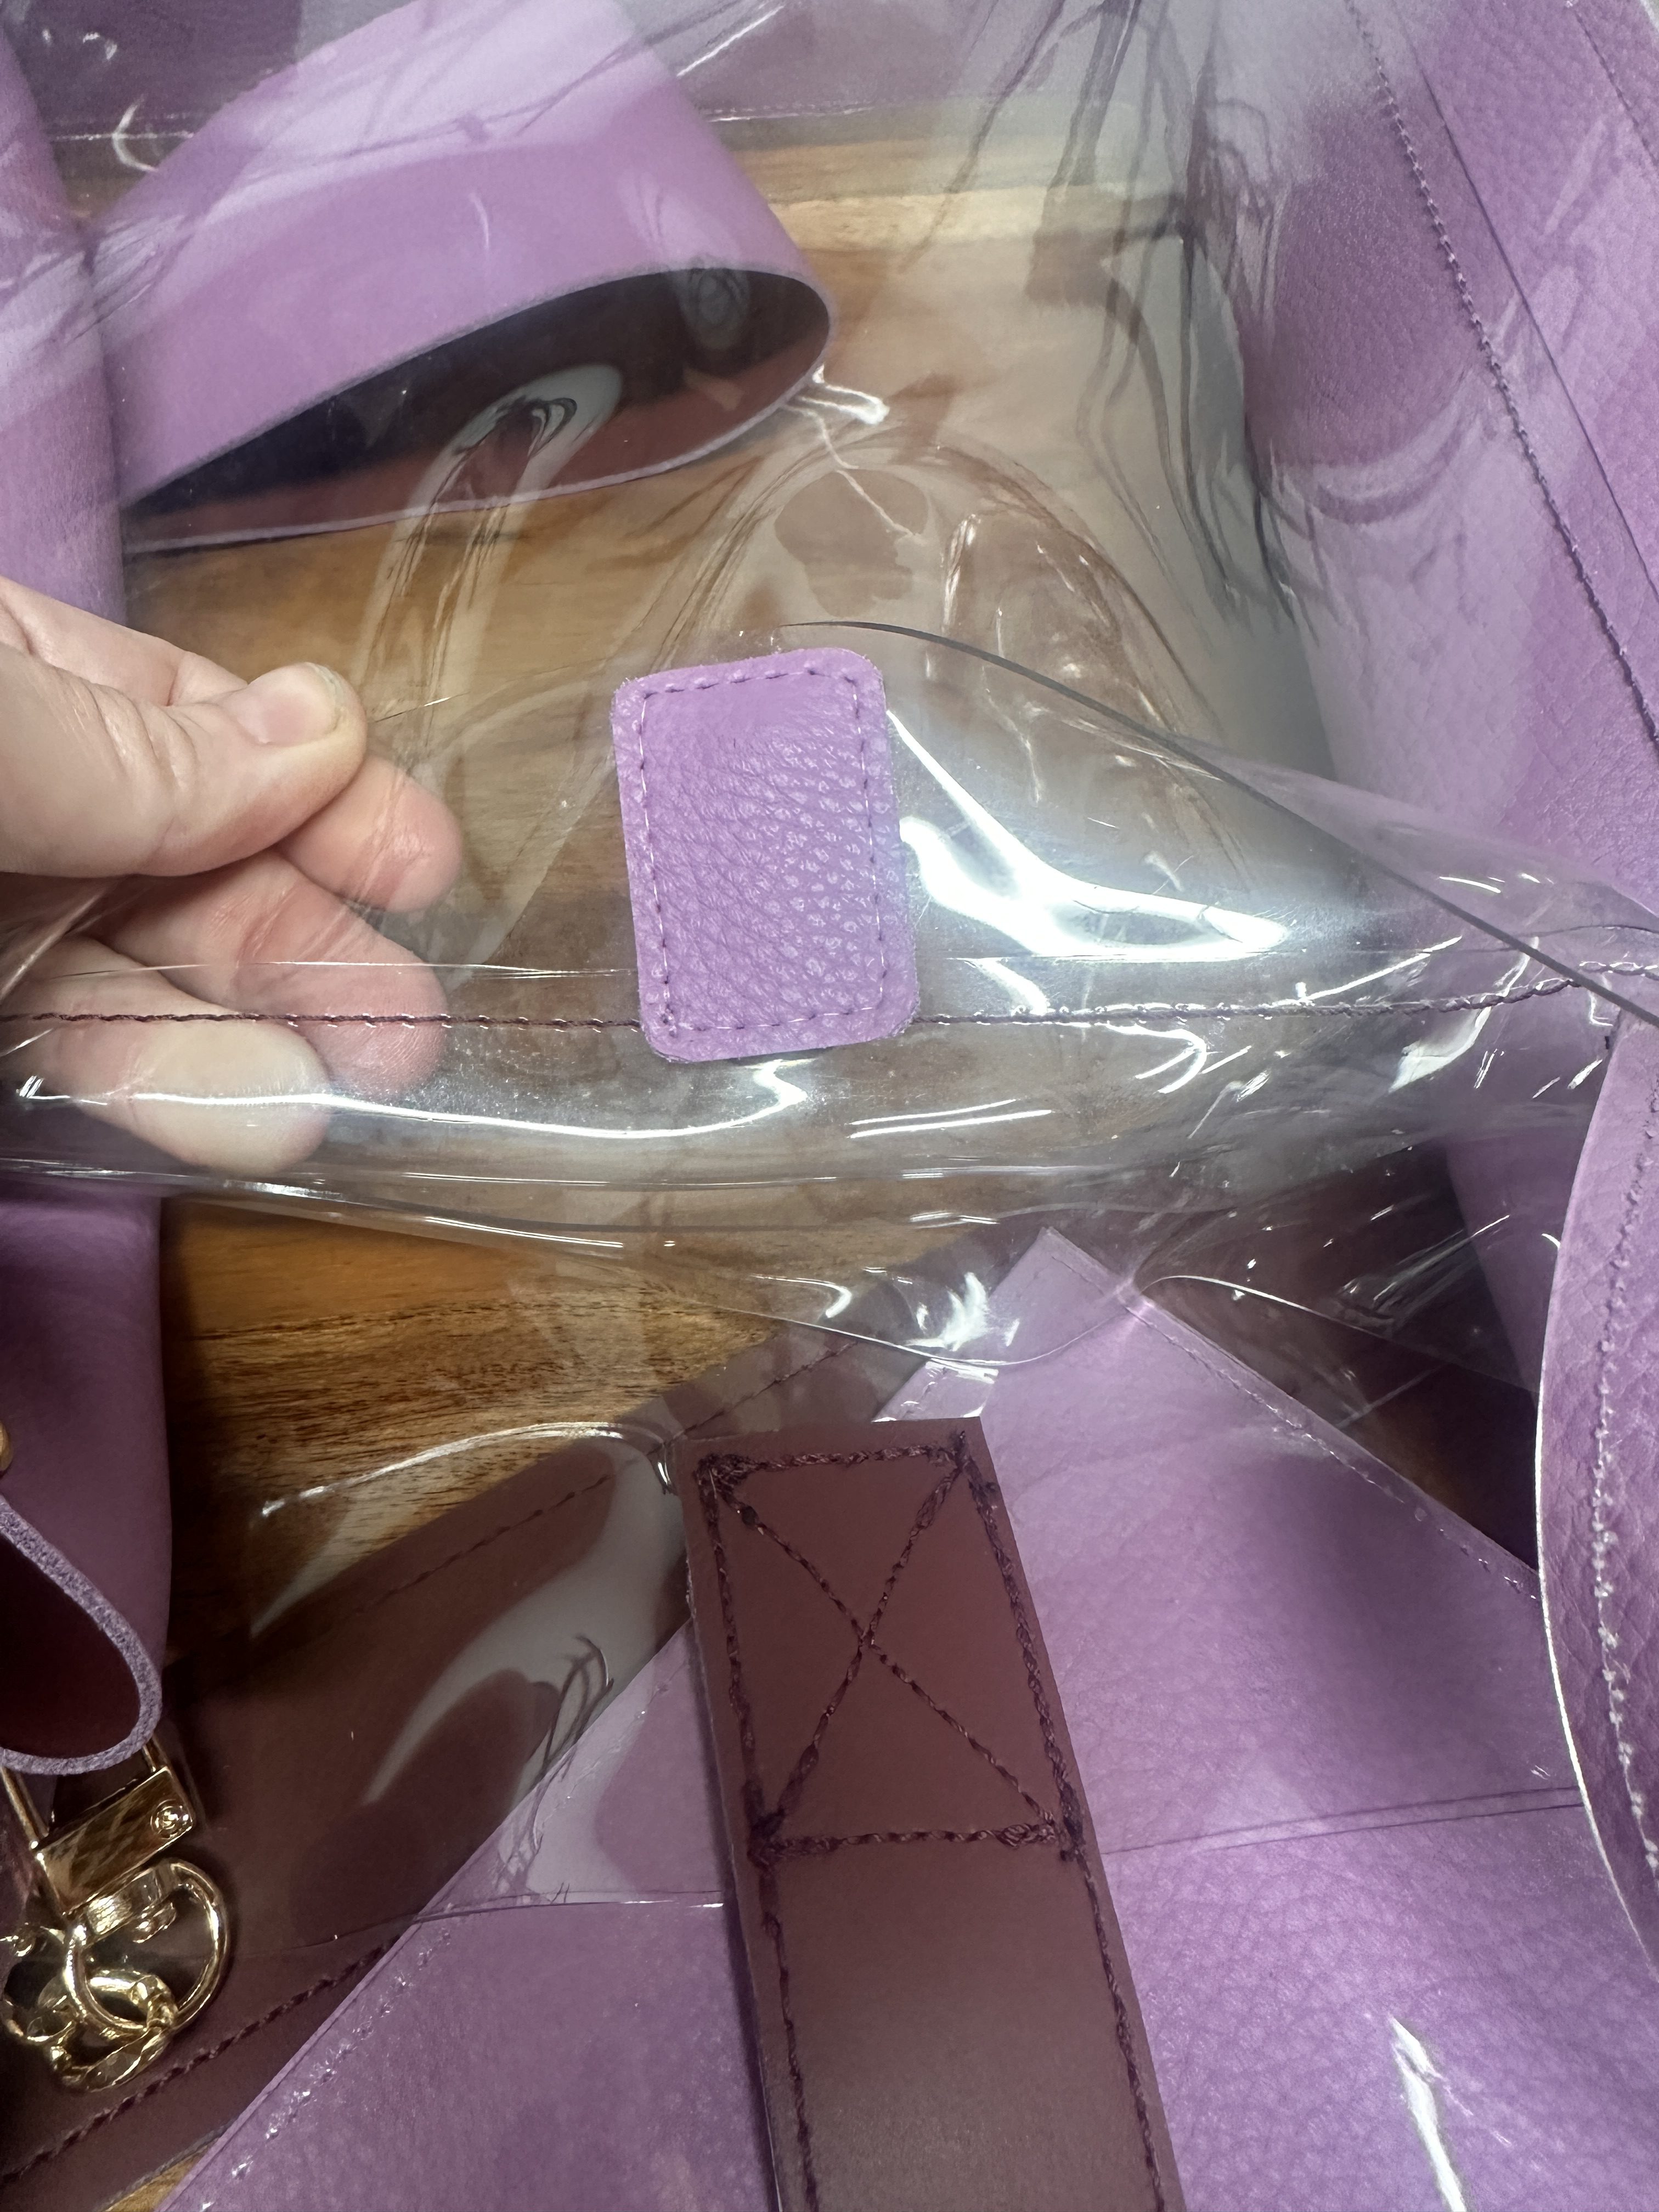
Depending on the closure that you use, you may want to create a nice finishing cover to hide some of the unseemly hardware on the inside. I made this tiny little one with leather and vinyl to hide where the hardware “locks” into the bag front. 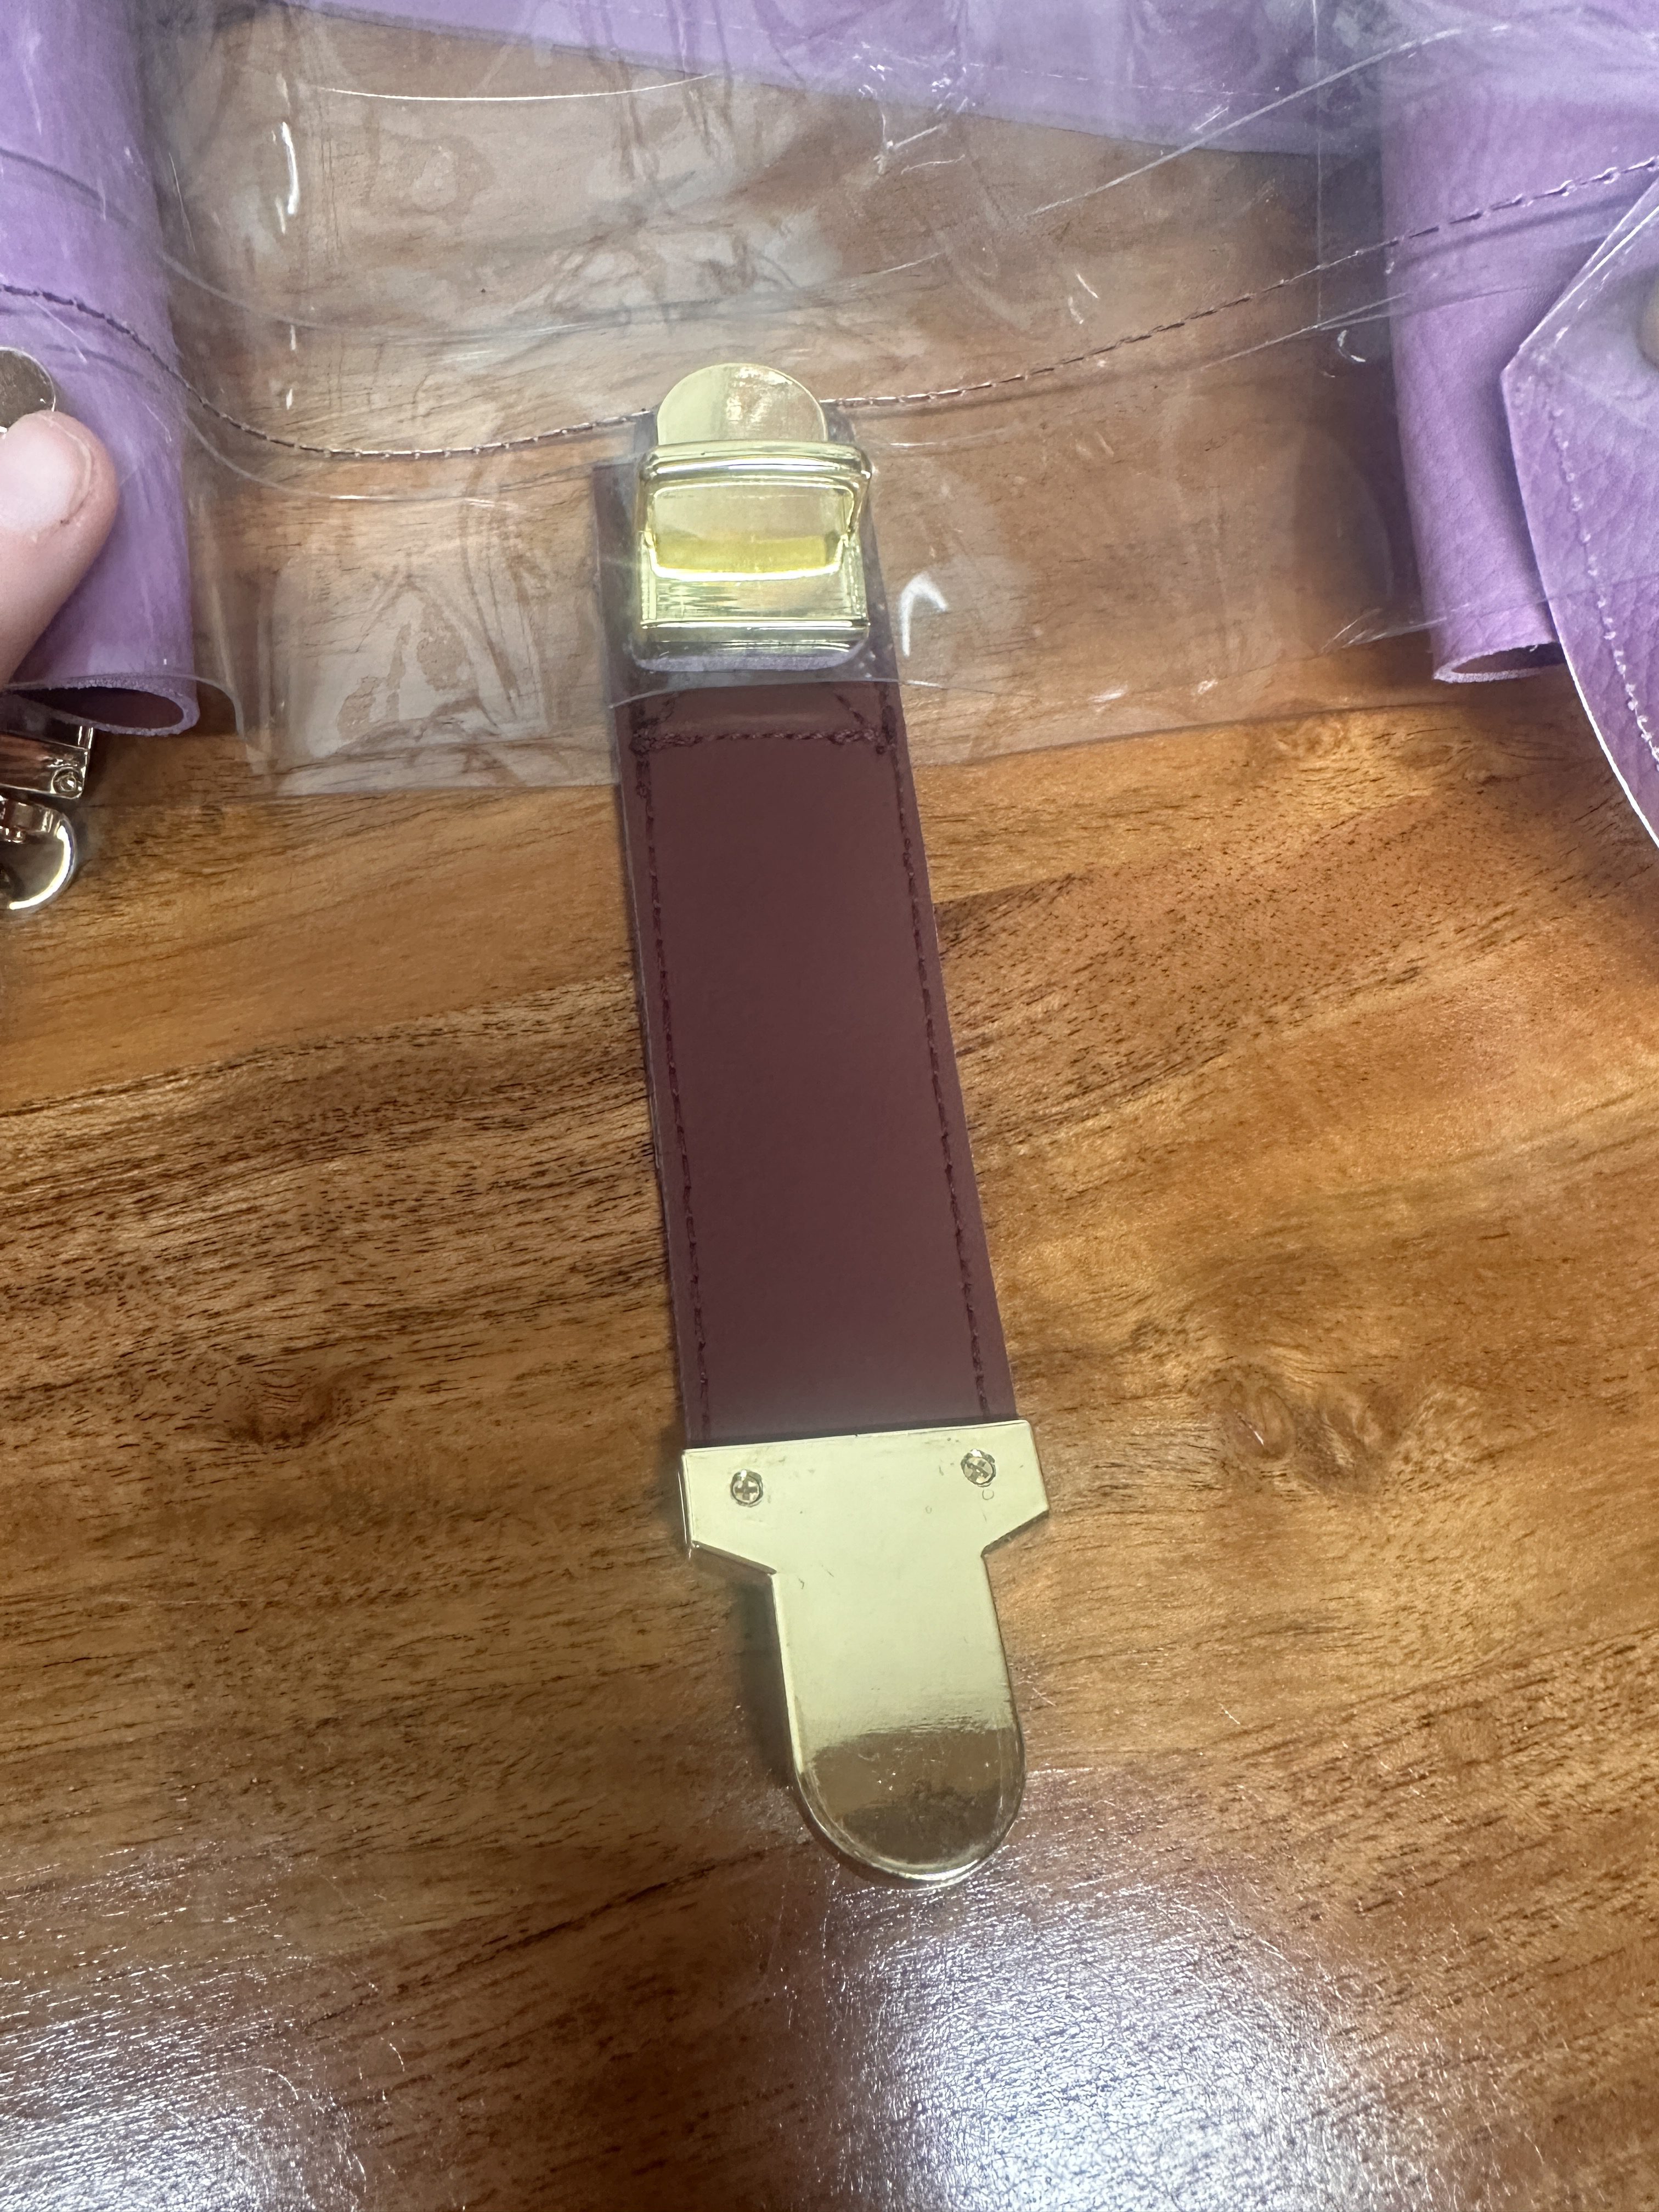
Step 7: Bag Strap

Now onto sewing and installing the carrying strap!
Here you can customize to your hearts desire by doing a shoulder strap, double straps to make it a clutch, or follow my pattern and installation for a crossbody strap.
To figure out the length of your strap, I suggest measuring the length from a tote, satchel or bag you already have.
If you want to figure out a whole new length, I suggest grabbing an extra set of hands so you can hold the bag at the length you want it to hit, and then measure the length from the bag, over your shoulder, to the other side of the bag for strap length.
Since I had made a prototype of this bag first, I was able to experiment and readjust. My preferred strap length came to 39” long, with a 1.5″ width. I had enough vinyl to cover the top layer of the leather strap, and sewed the two pieces together. The leather would’ve been strong enough on it’s own, but since I had enough of the vinyl, I utilized it to keep it all as a cohesive design. Once the strap pieces were sewn together, I sewed a decorative “V” stitch on each end, and cut them down to size – but the regular squared edge looked just as nice. The finishing is up to your personal preference.
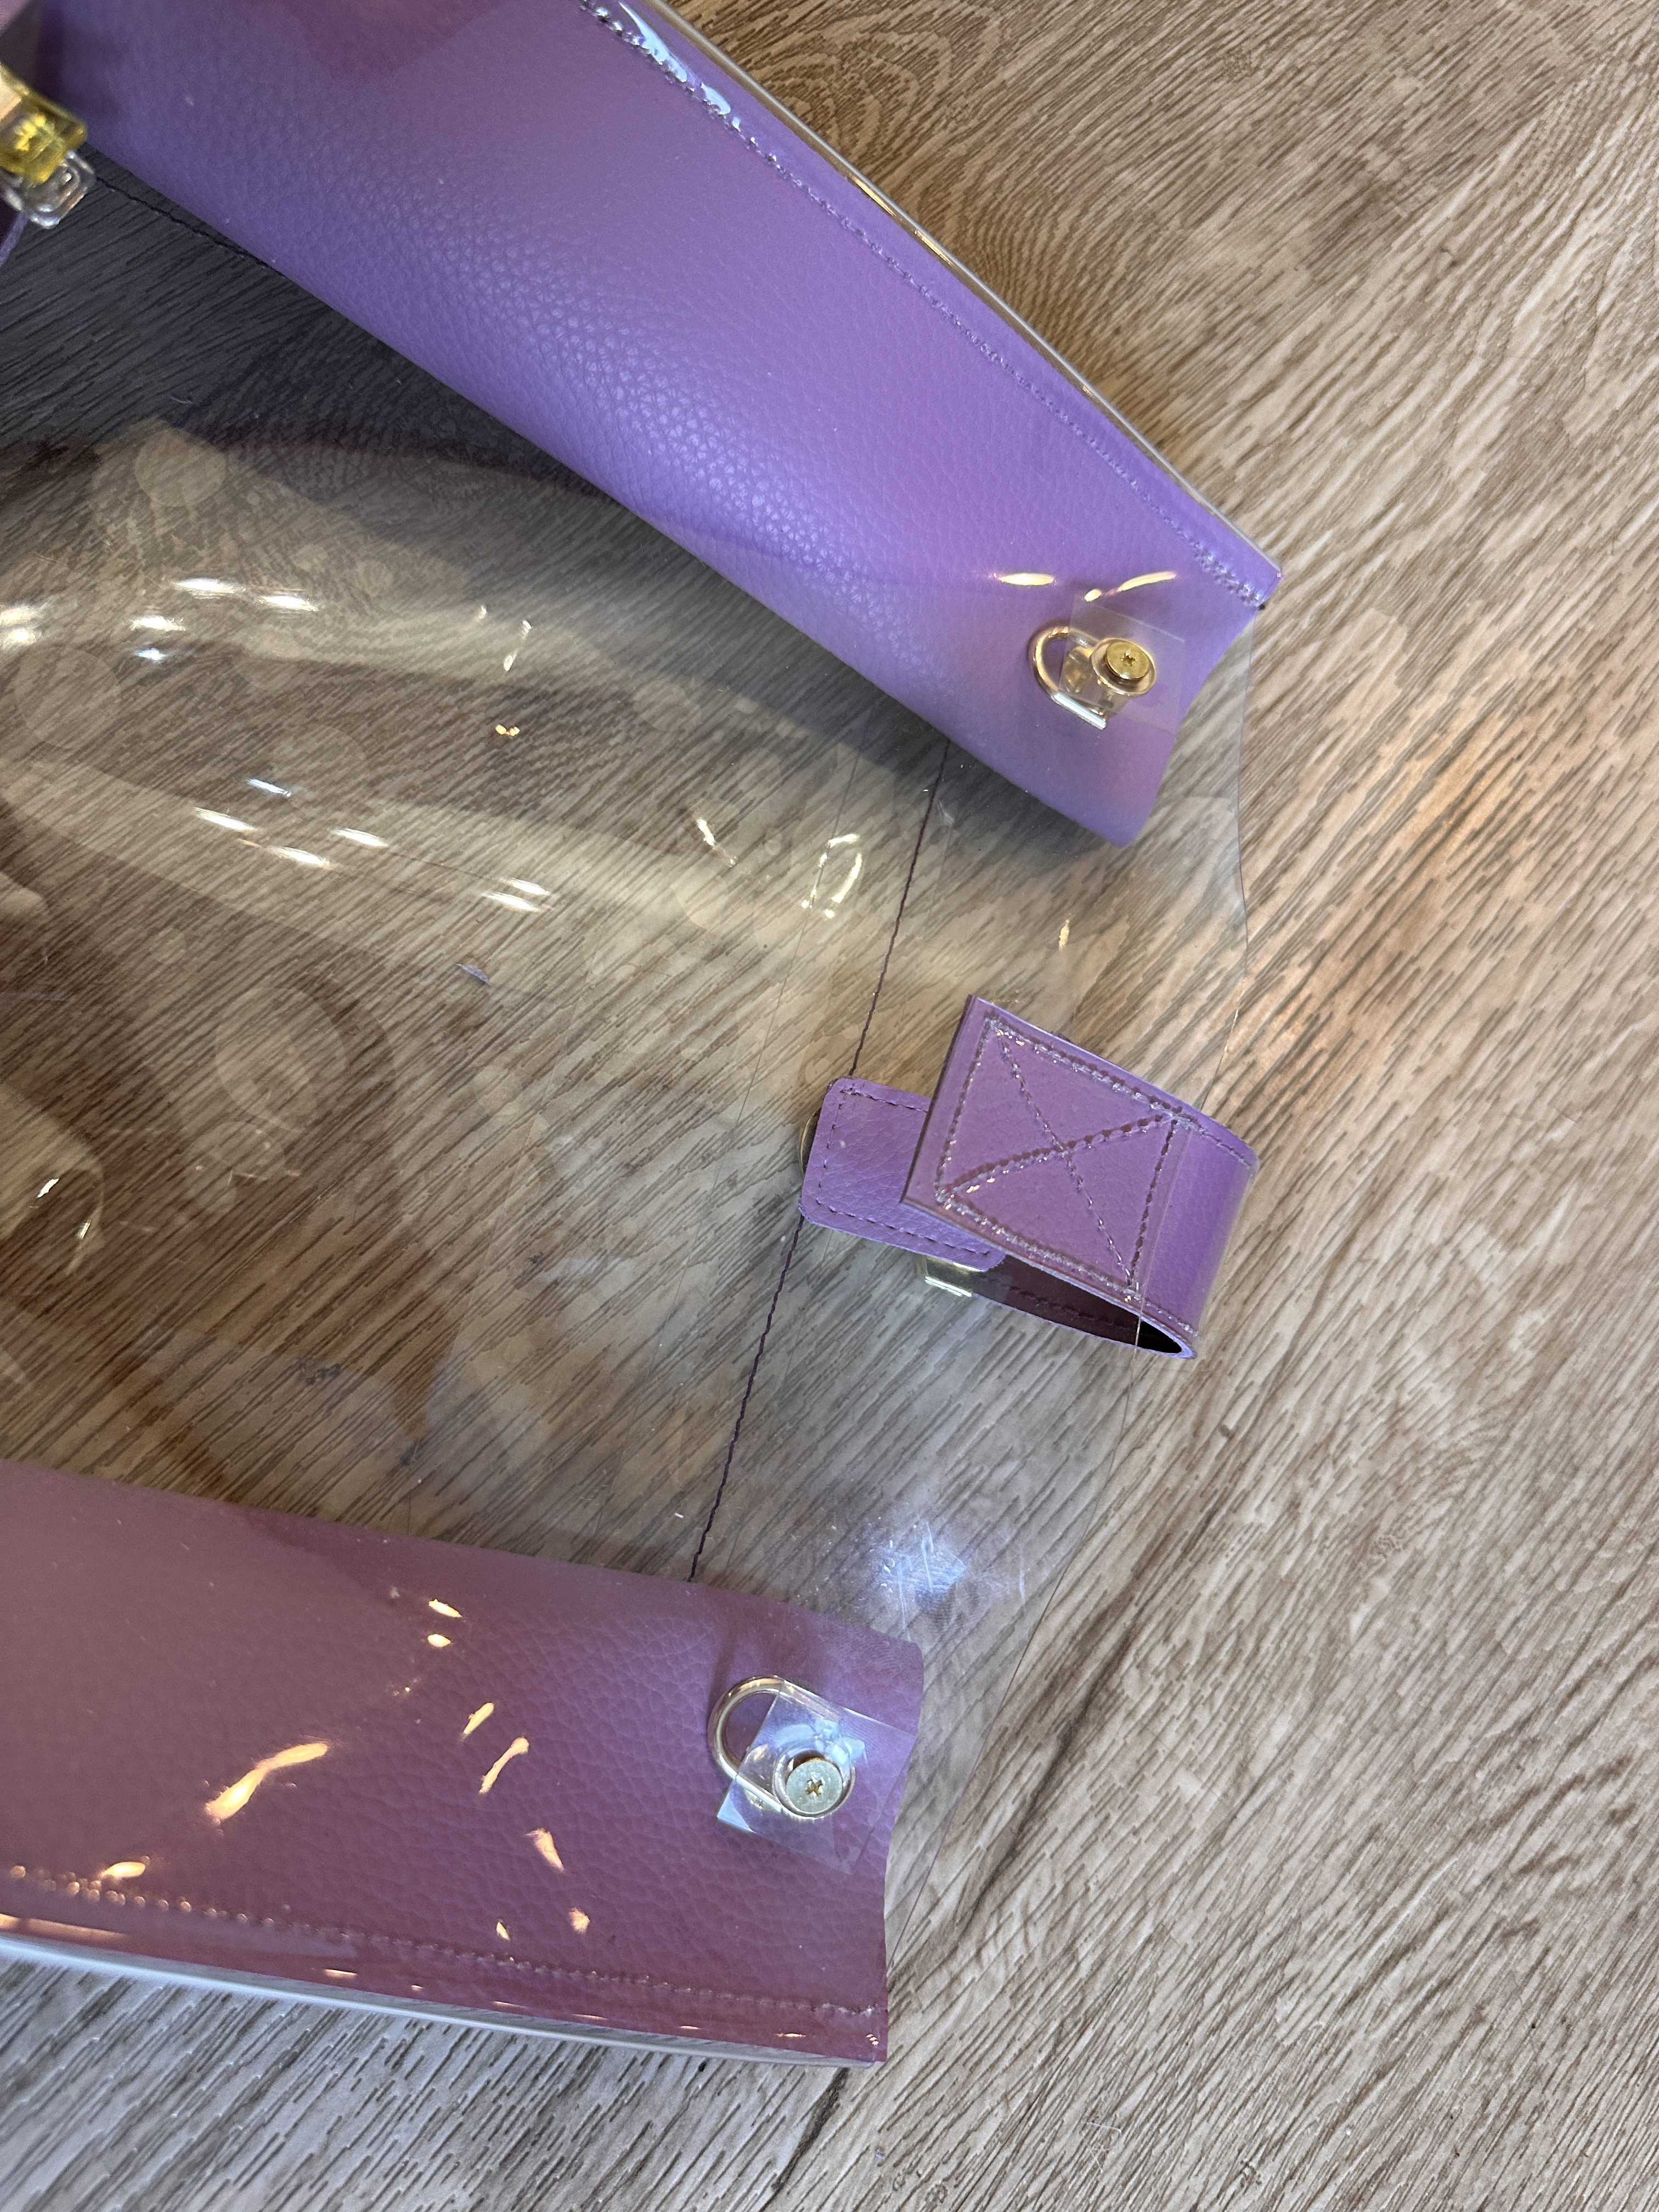
With all the stitching completed, I then used my leather punch to create holes for where the straps will attach to the bag with the screw back studs and D-Rings.
Step 8: Riveting
Time to punch more holes for finishing off the bag. Just like you triple-checked the centering for the middle closure, you will want to triple-check your measurements for the front and back strap hardware. Mine are centered at 1.5” from the finished sides of the bag. To make sure the holes were extra reinforced, I cut little 1/2” vinyl squares, punched centered holes into them, and aligned them with the holes on the bag.
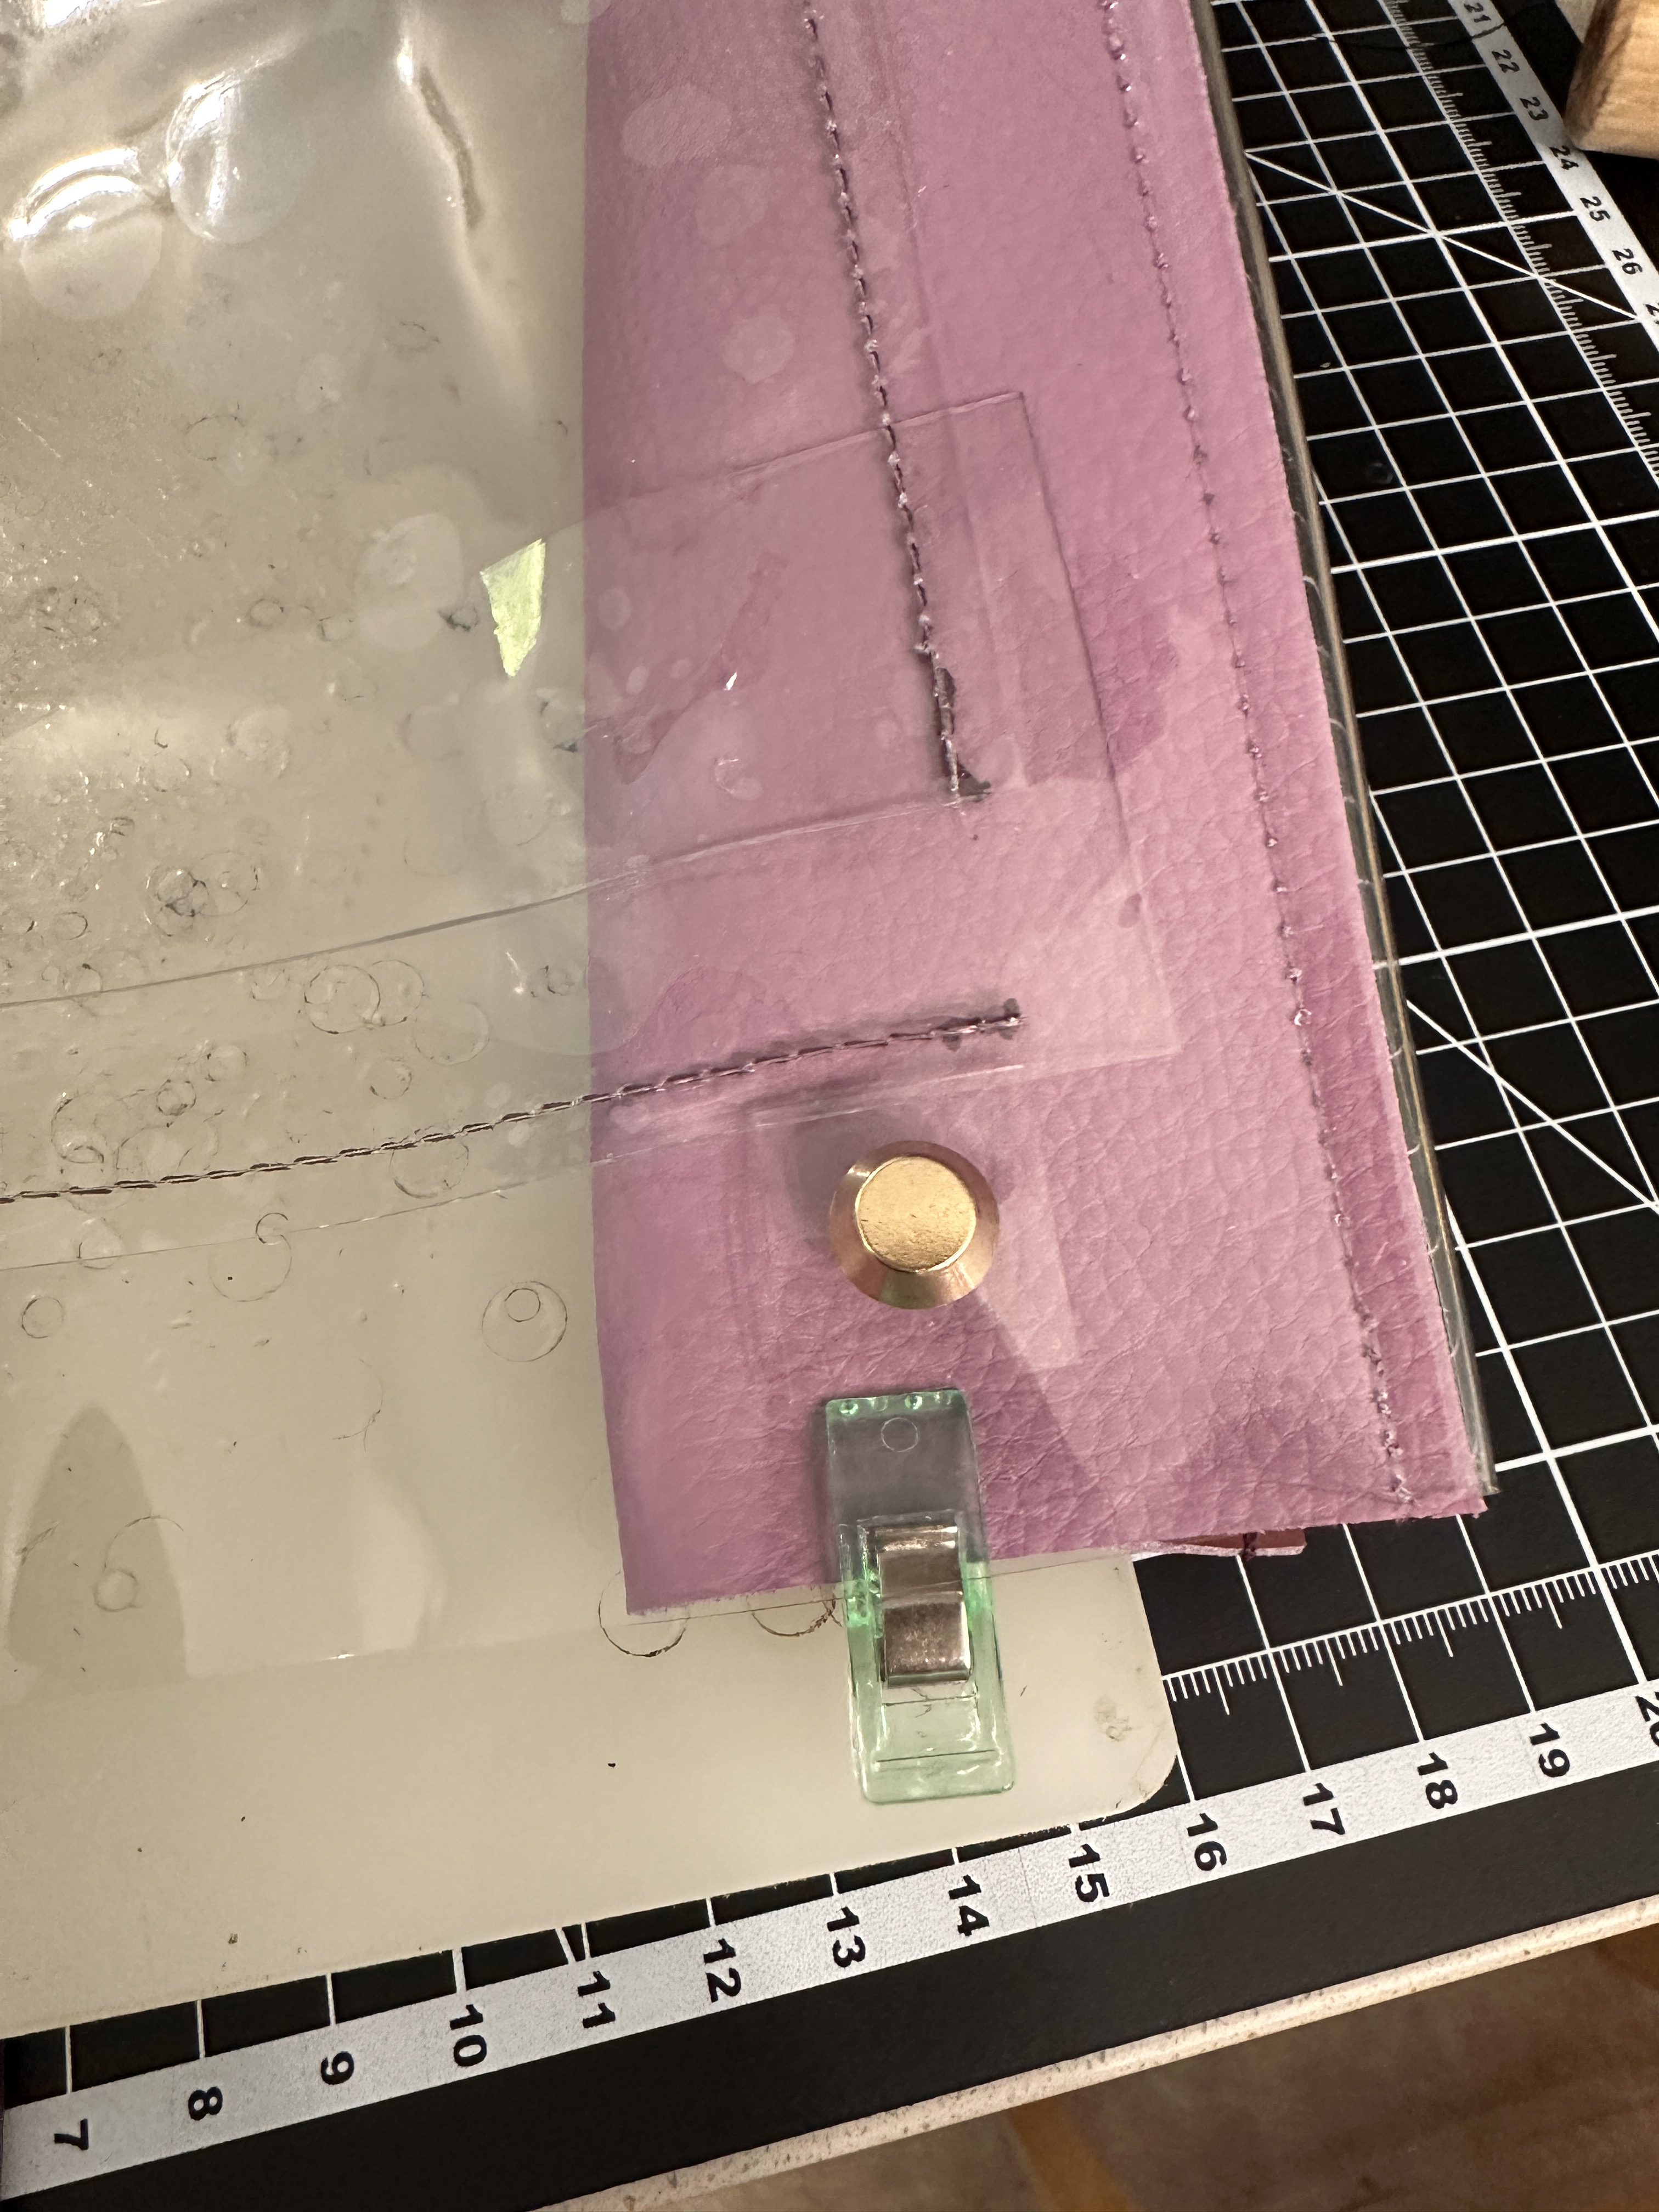
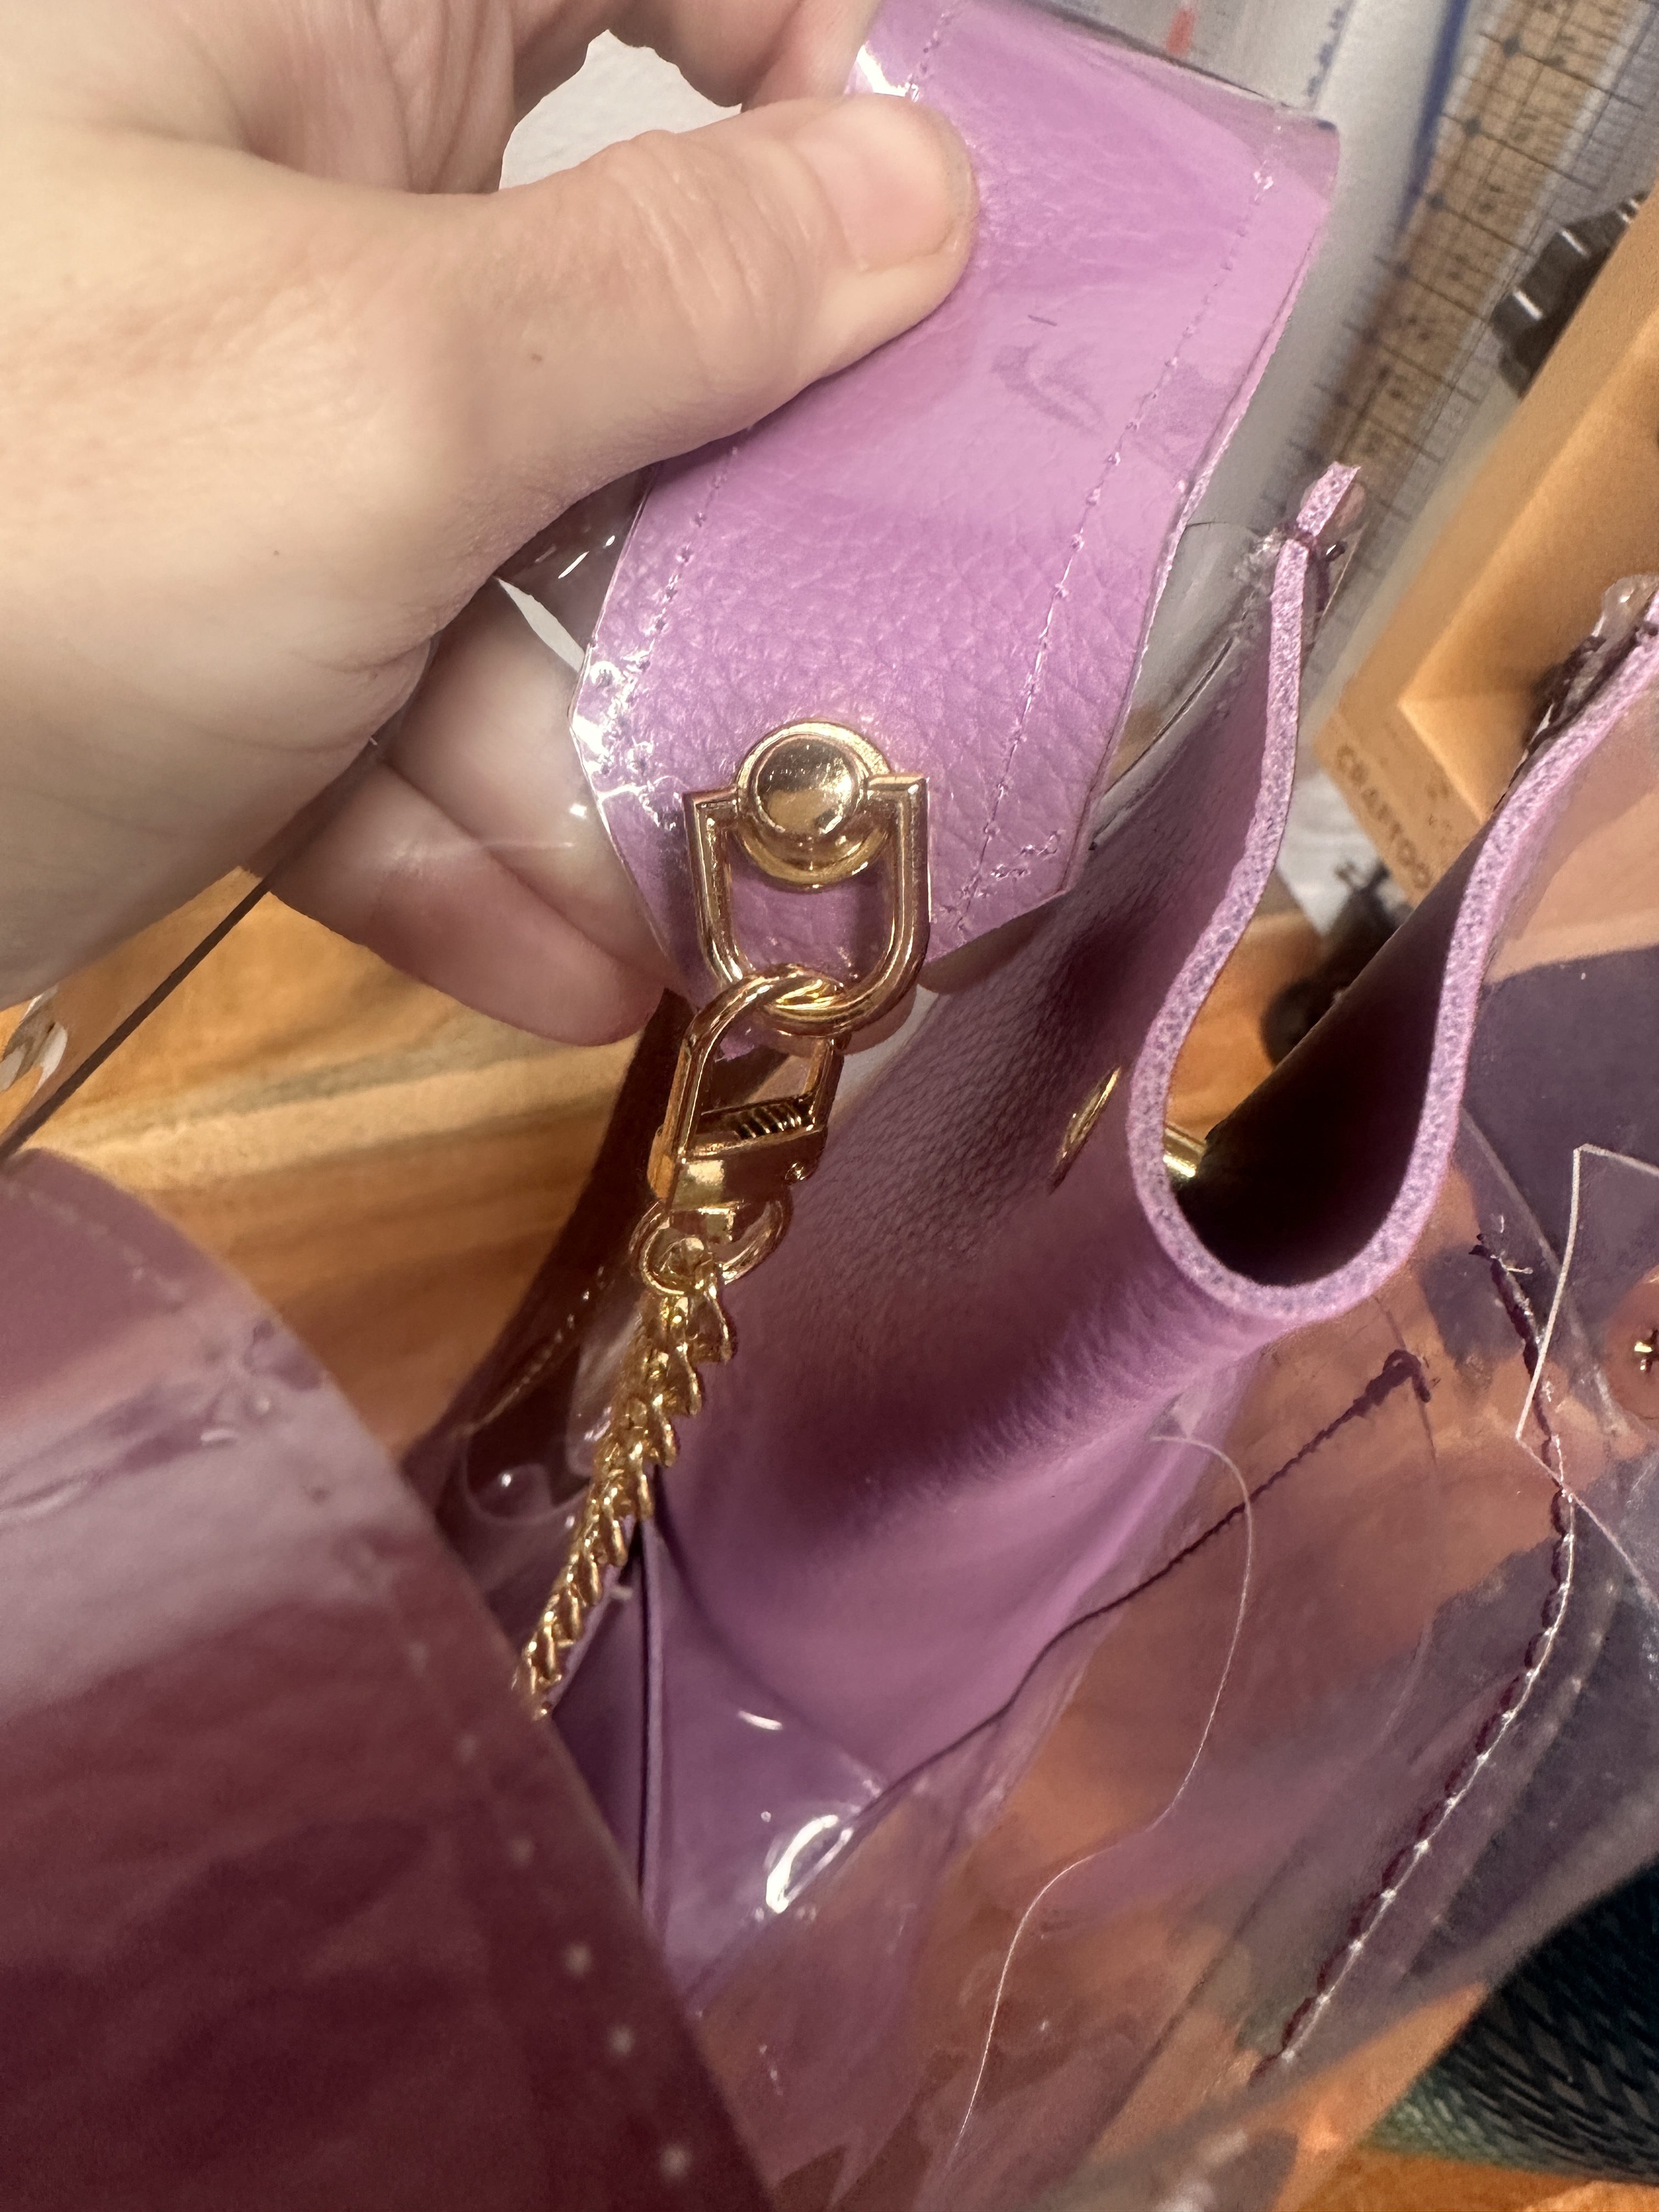
For the front of the bag, I installed two stud rivets, and for the back of the bag I installed two D-Ring Rivets (these are what all my accessories will clip into). 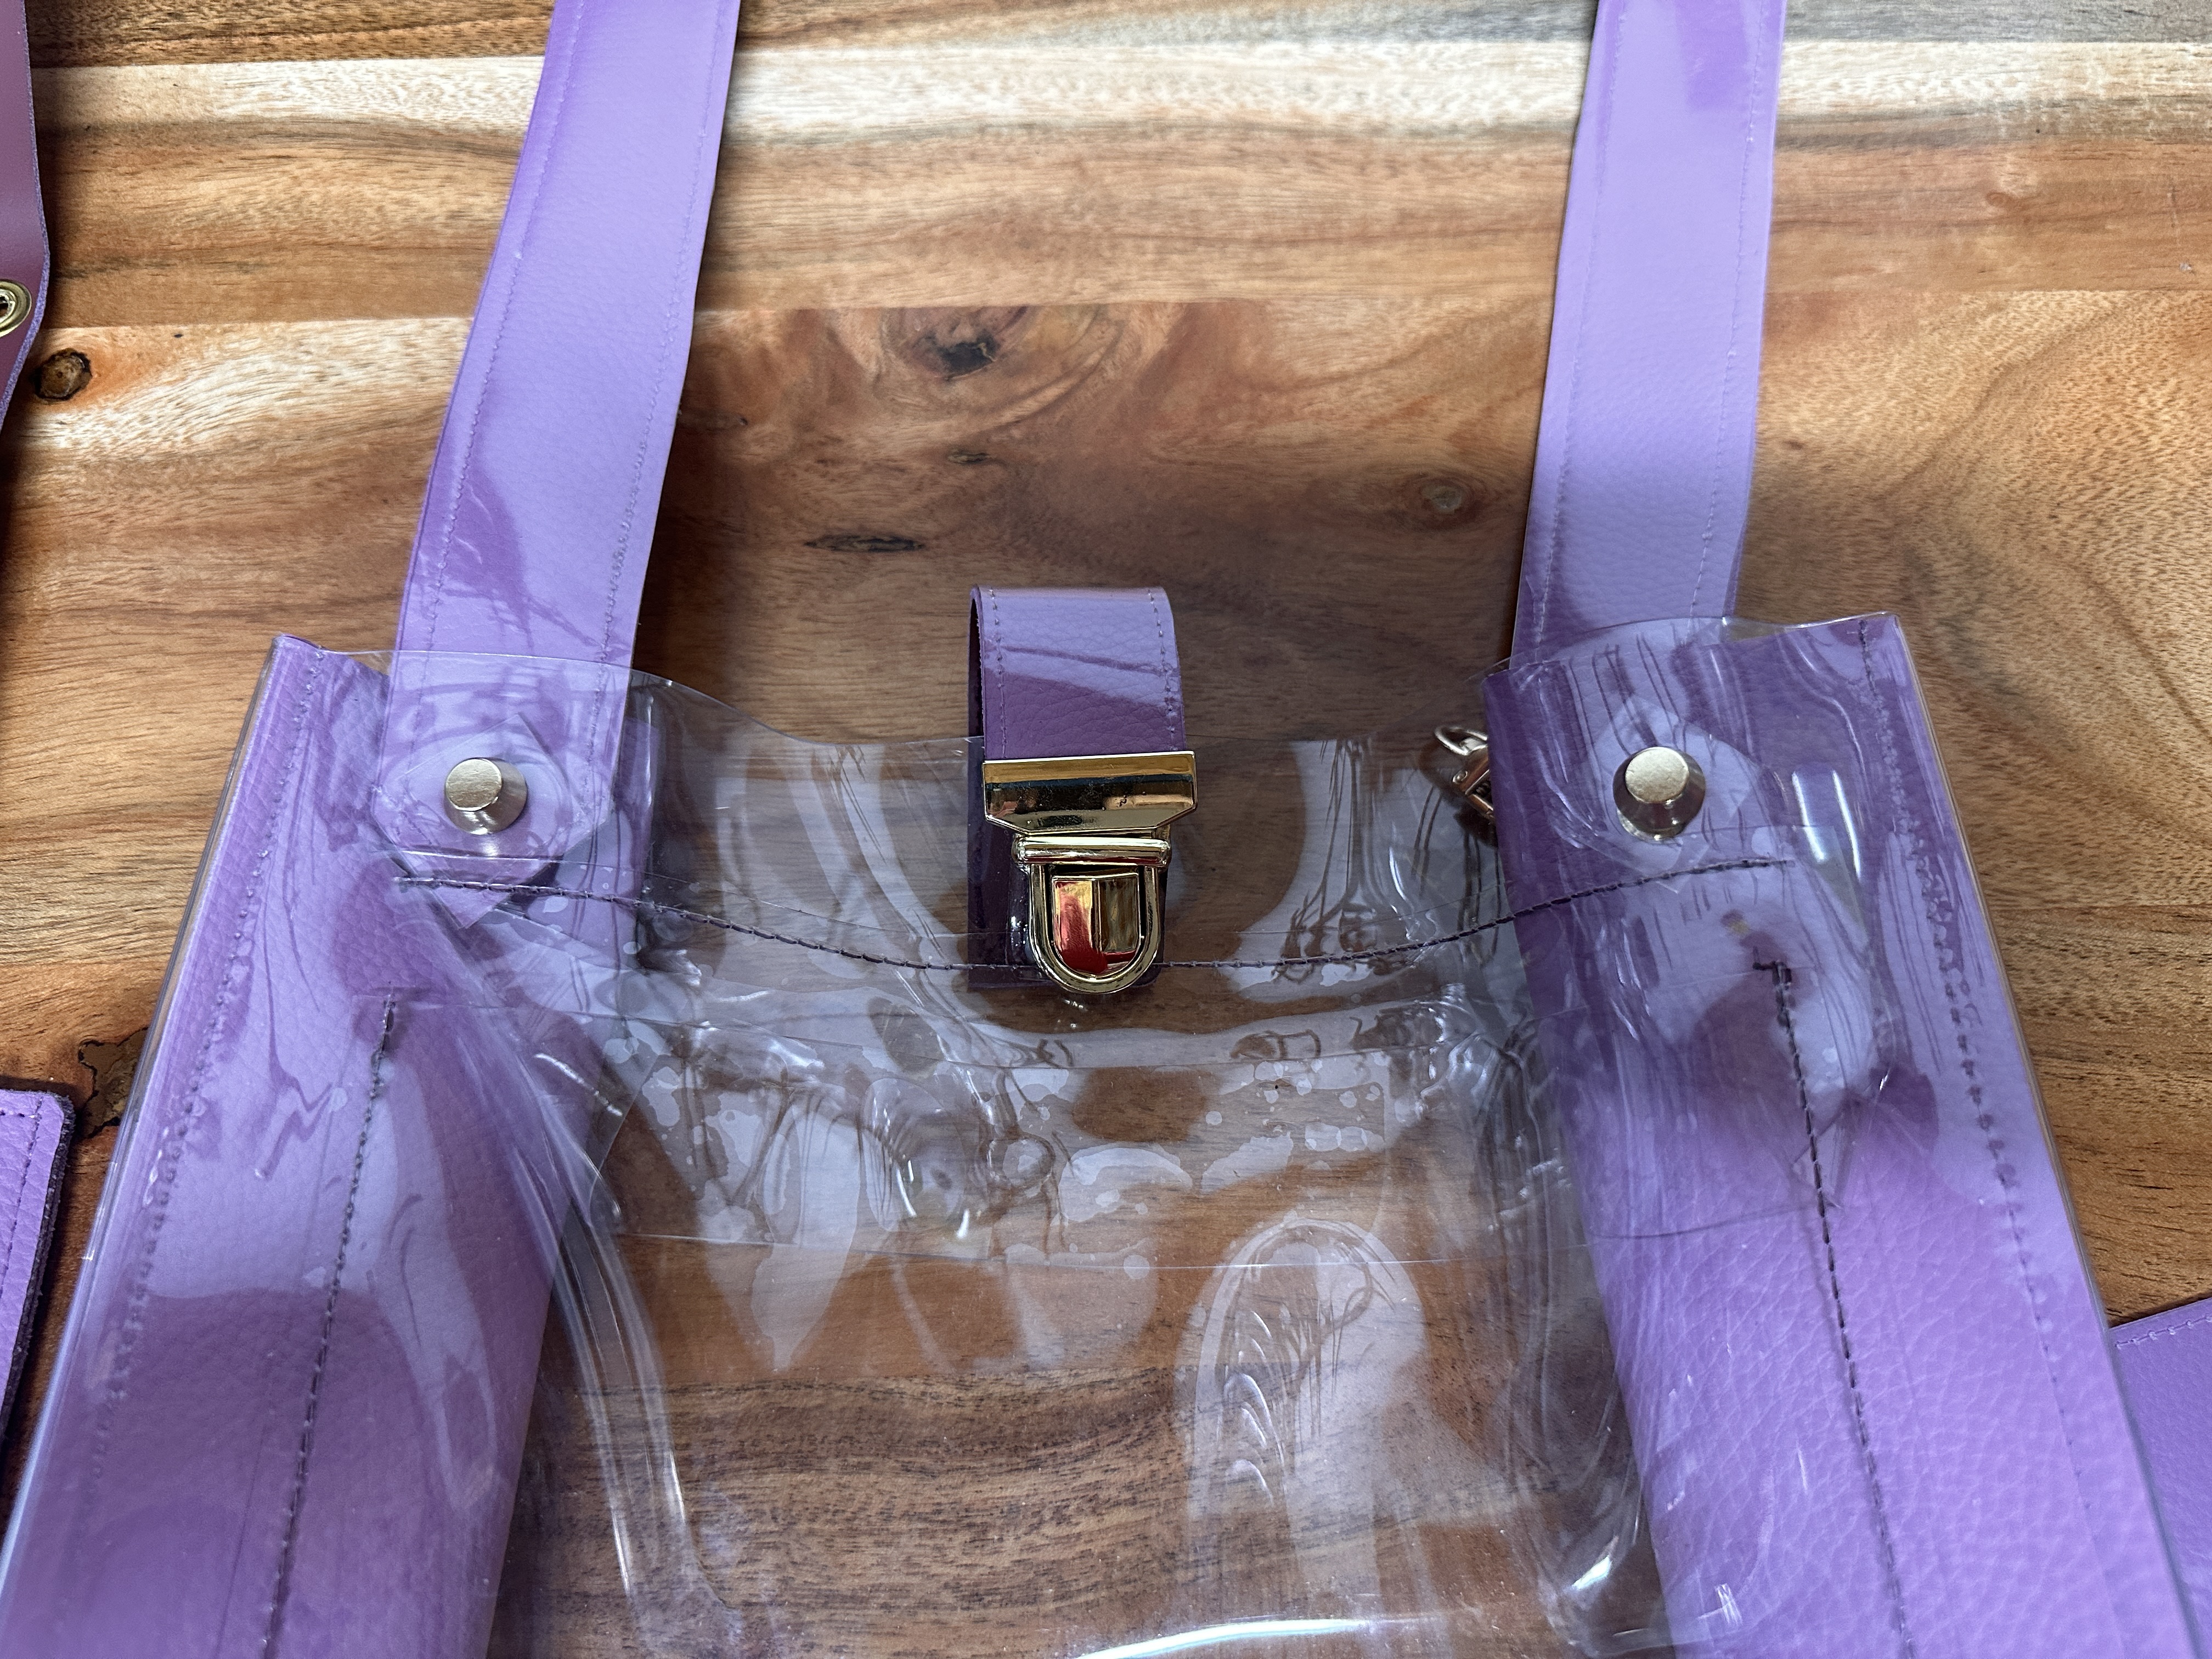
I like to wear my crossbody on the right shoulder, with this in mind, the front portion of the strap is on the left side of the bag, and the back portion is on the right side.
To give the sides a little cinch in (an optional add-on) I added two matching chicago screws to the sides. I placed these holes to line up perfectly with the front and back rivets for a seamless look.
Once the strap and hardware is all attached – your bag is done! Congratulations! You can stop here if you like, or you can have fun with different matching accessories to go with your bag.
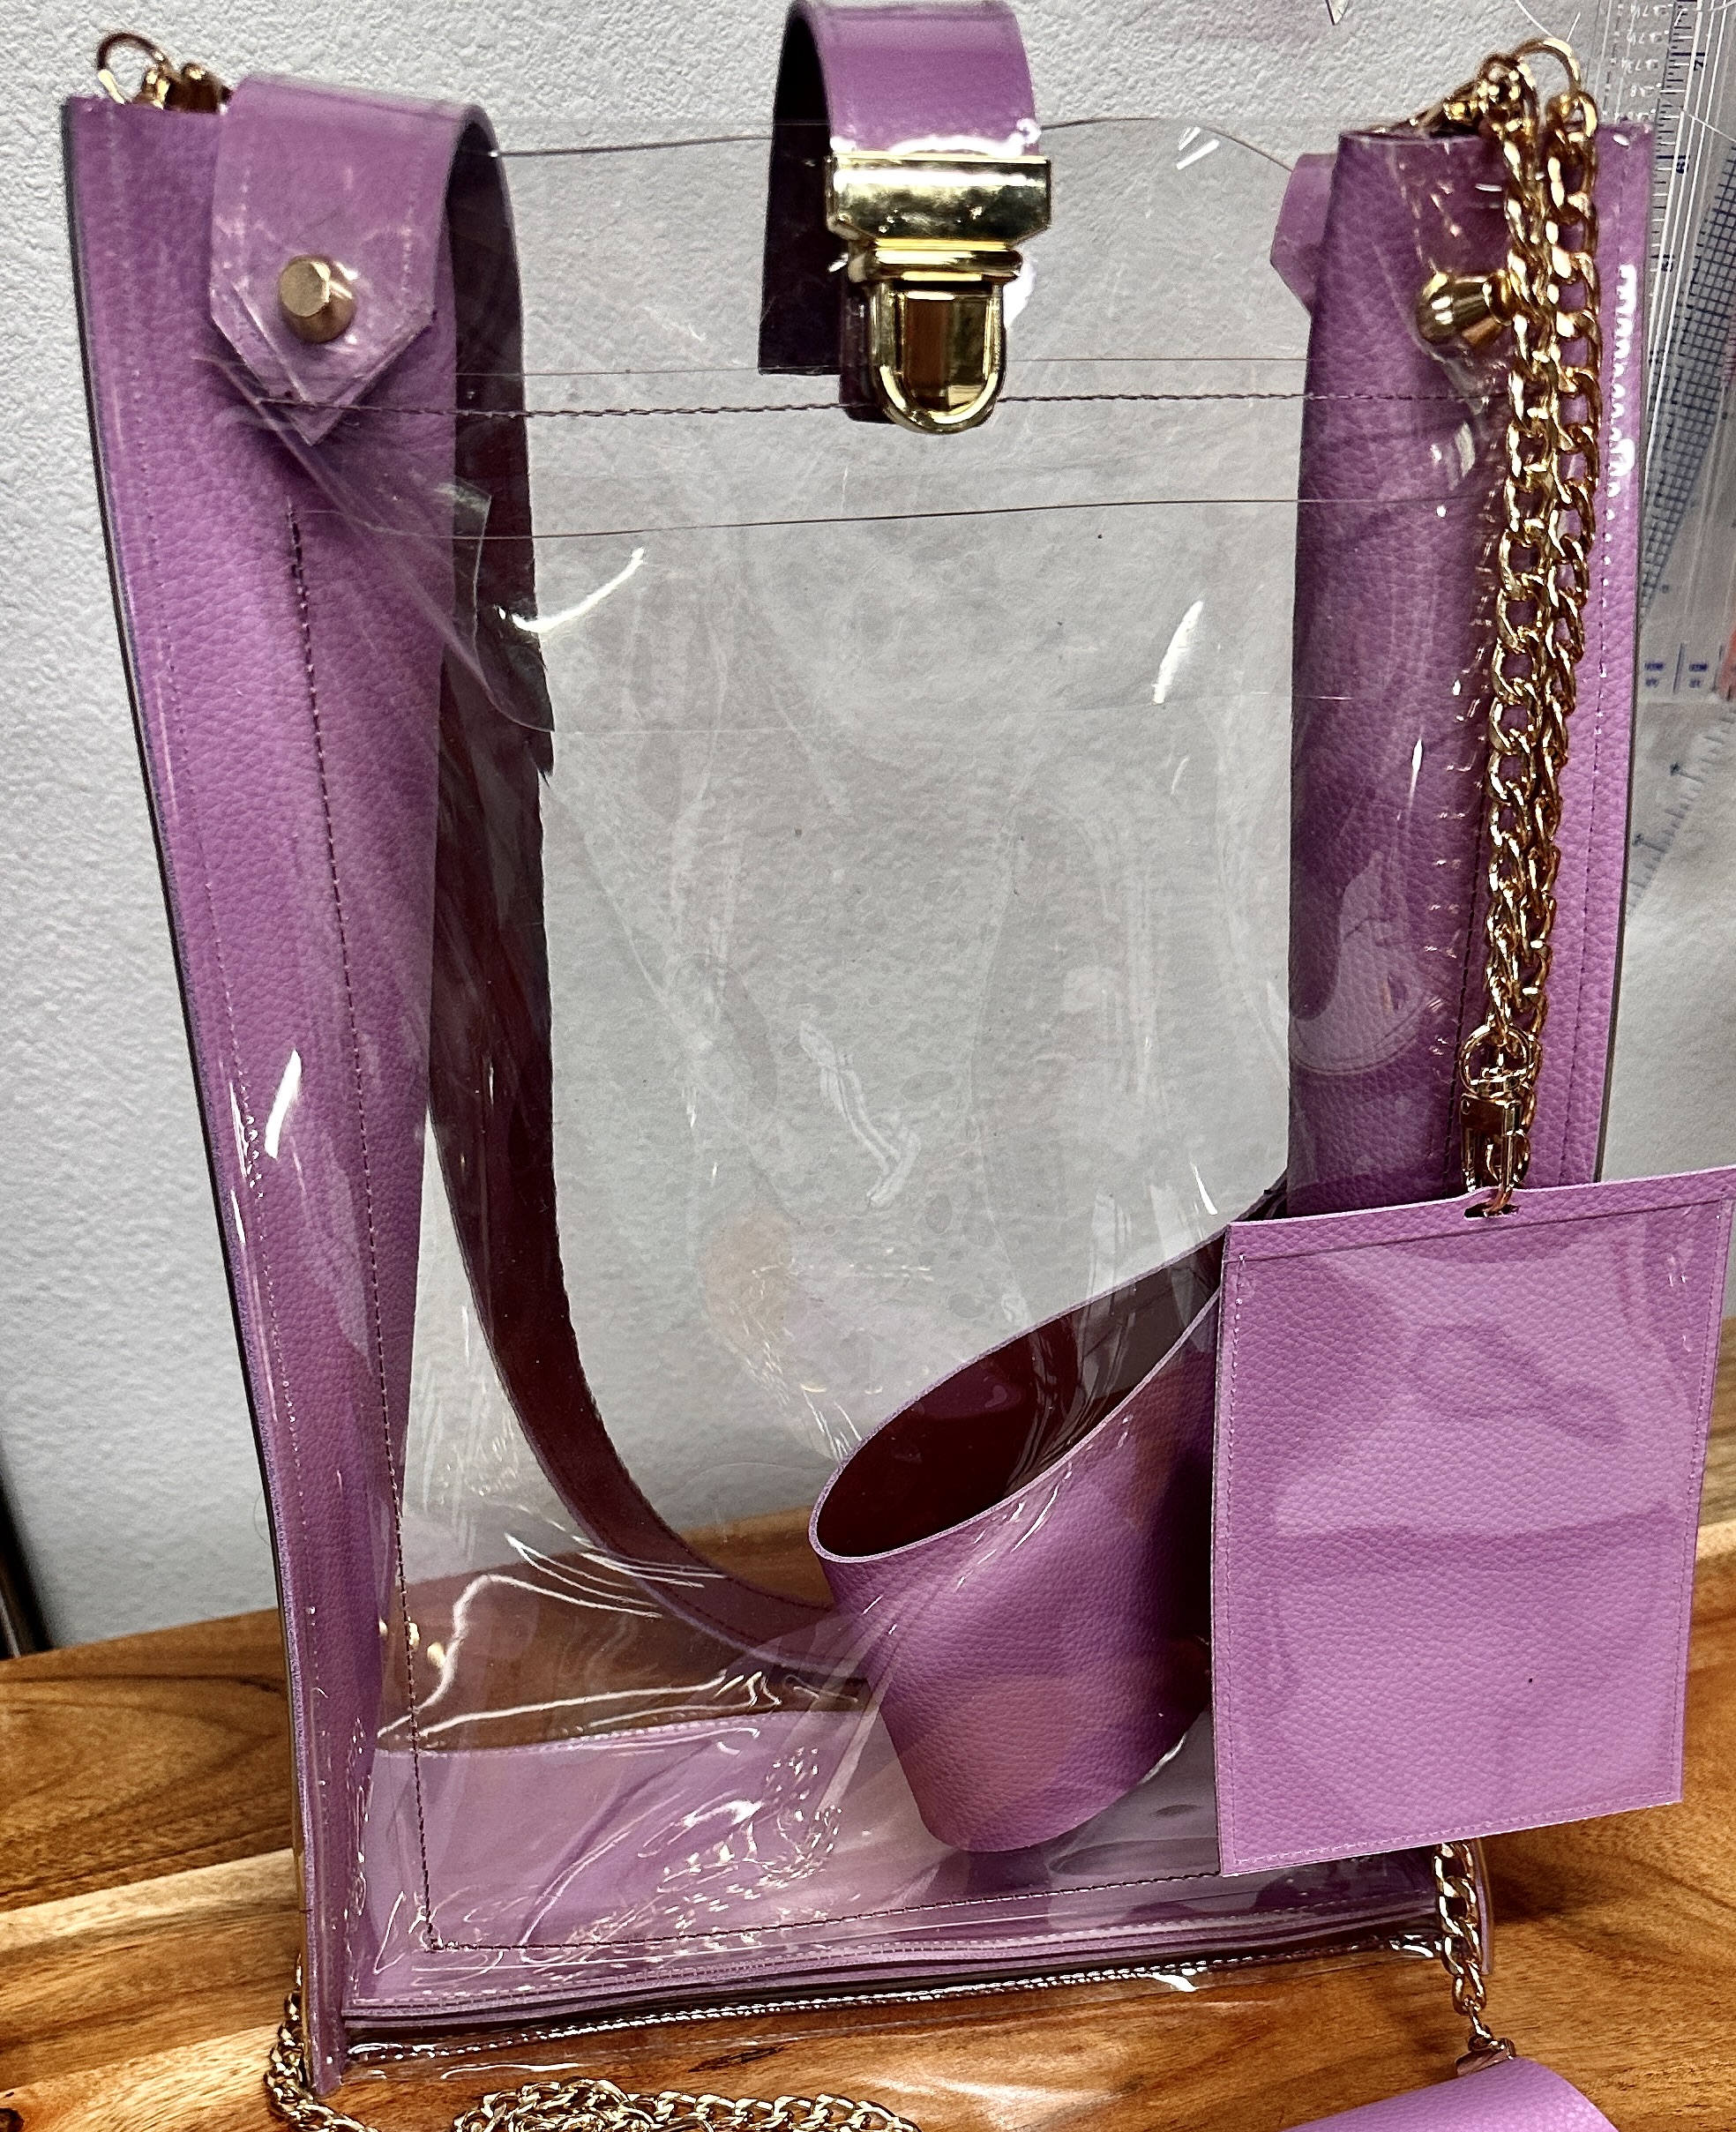
Accessory time – Badge Holder!
Now that the bag is assembled, you could skip these steps entirely – or you can be very extra like me and make all of these organizational accessories to keep everything tidy and matching.
First- the badge holder! Do conventions and conferences give you a lanyard and badge holder? Yes! But do they look as chic and coordinated as this? No! This is also the easiest thing to make accessory-wise. Simple rectangles, with the clear vinyl front being slightly shorter than the leather back to make it easy to slide your badges in and out. Before sewing the pieces together, make sure you cut a small rectangular notch in the leather (see pattern piece) for either your lanyard – or chain to clip in. 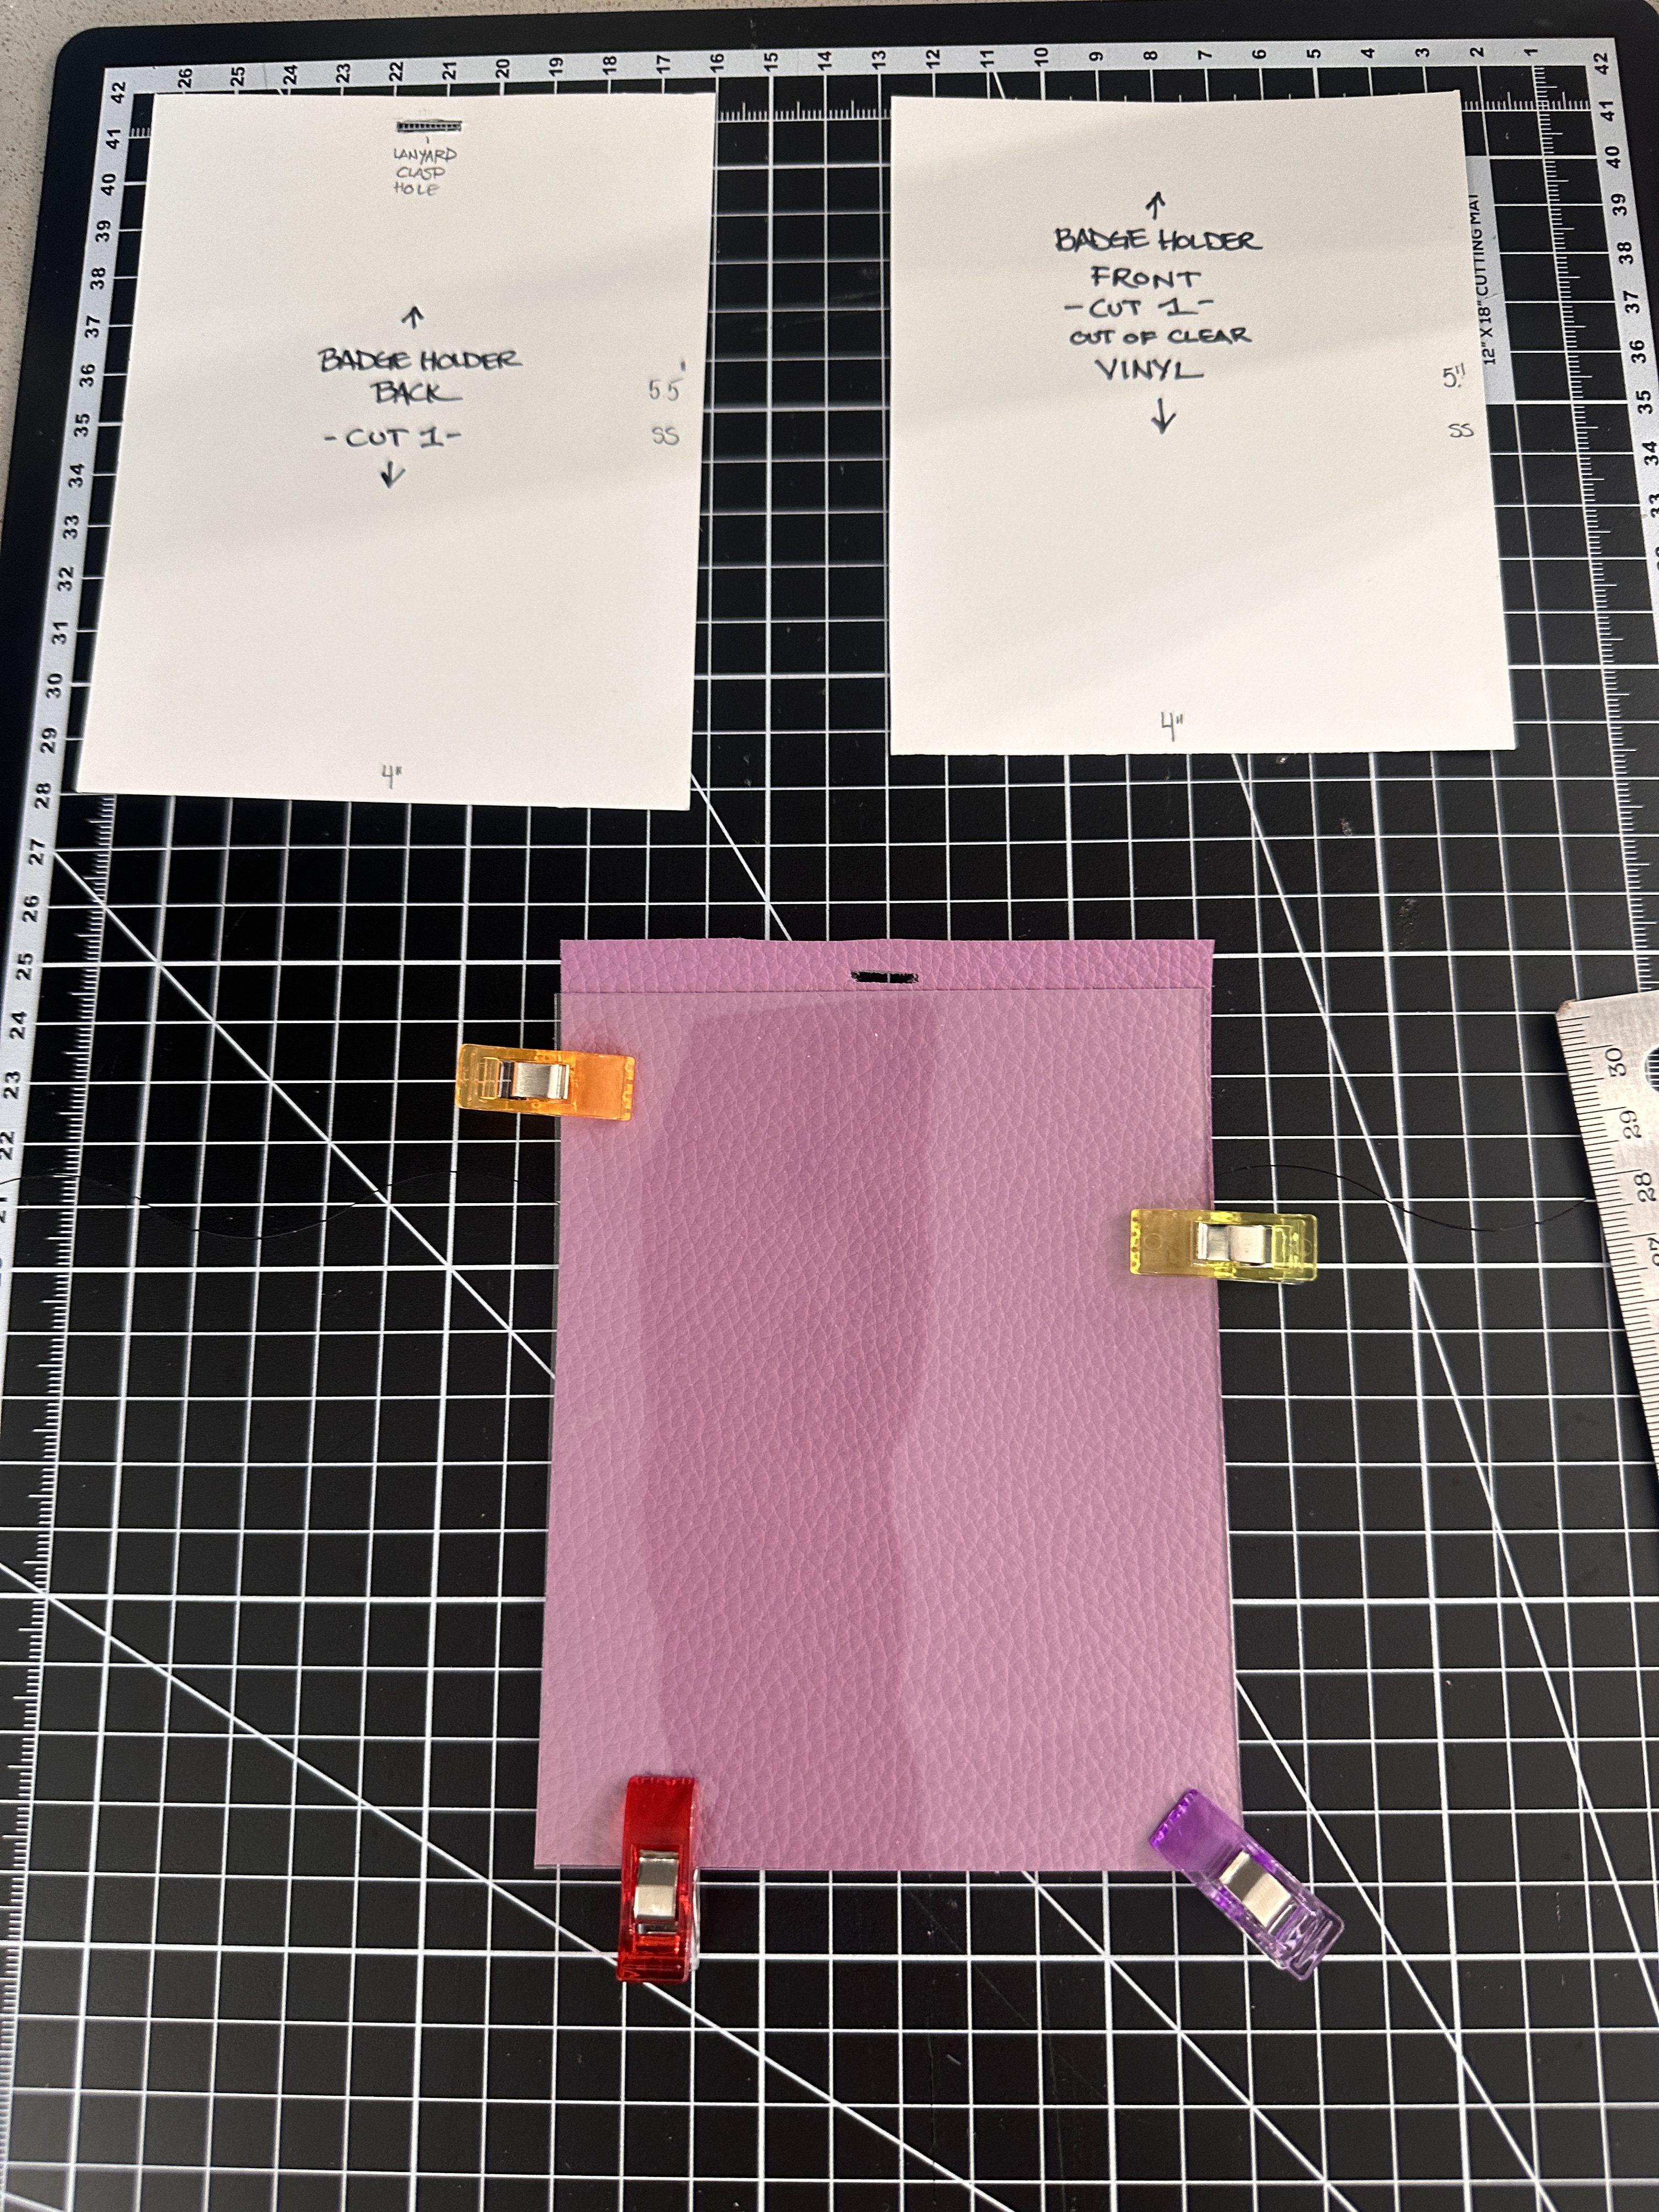 Since I hate having multiple things dangling from my neck, I used a chic gold chain to clip from the purse so I can either leave it displayed outside the bag, or have quick access to it stowed away inside the bag.
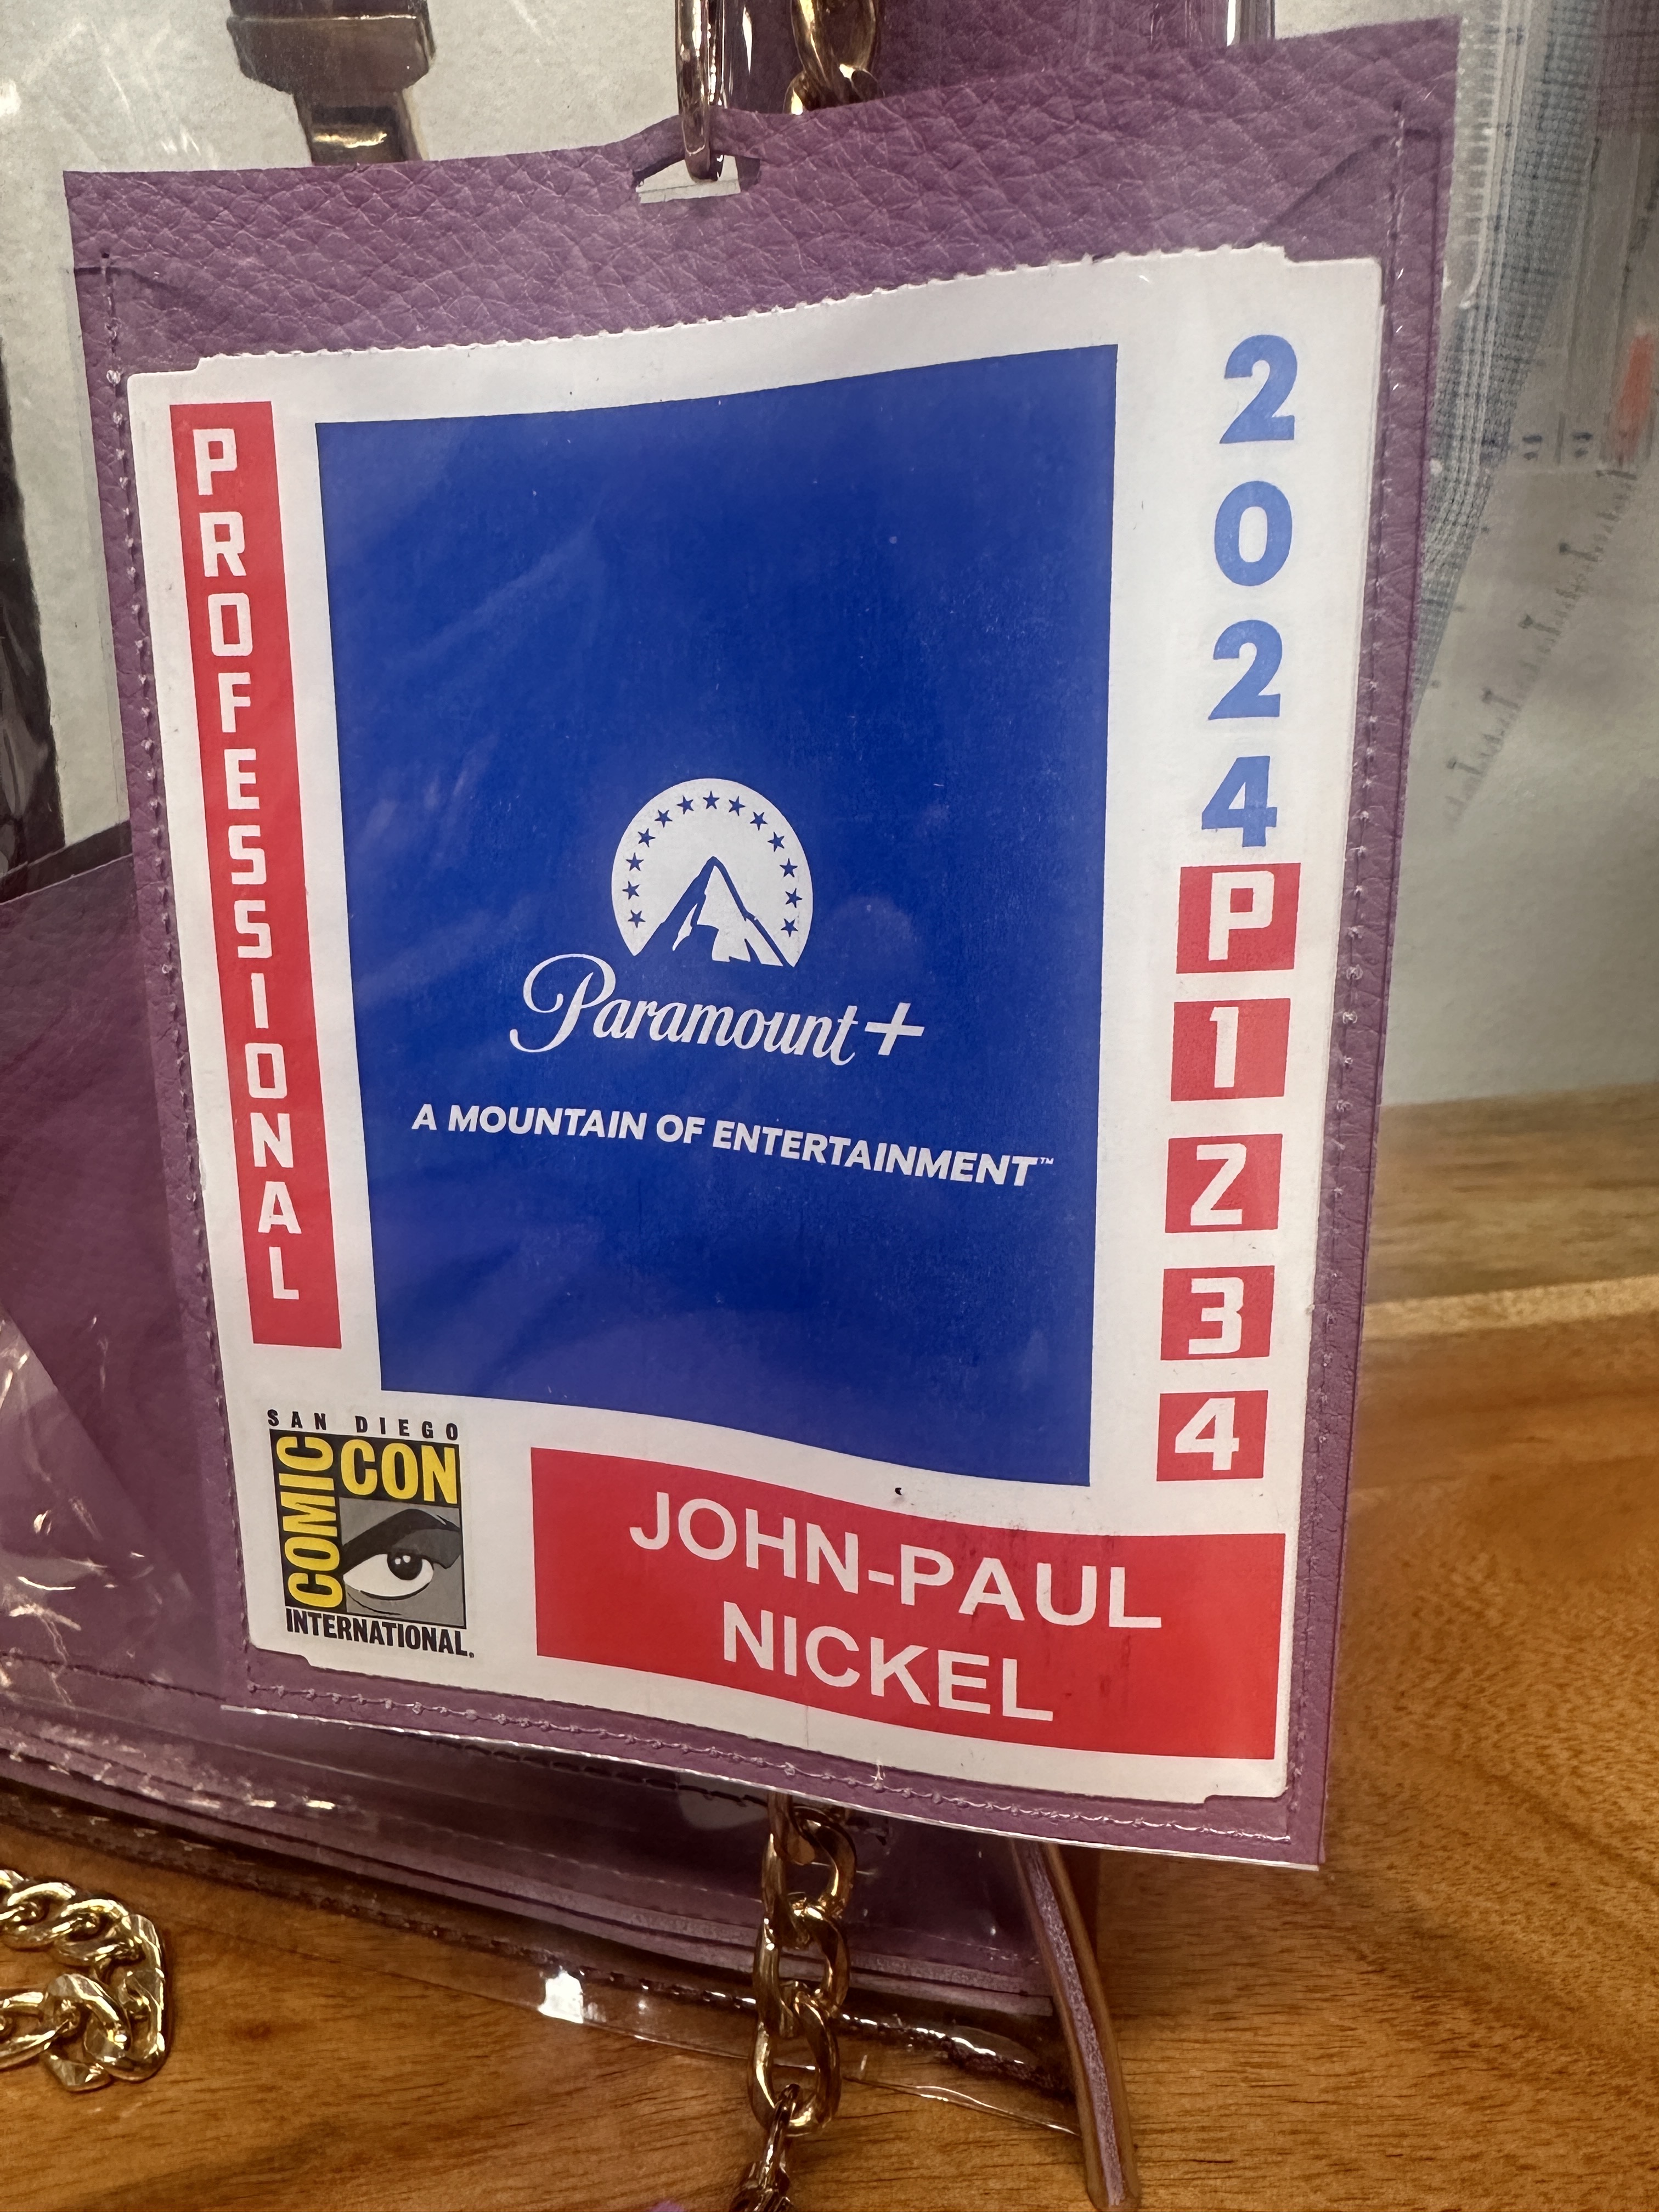
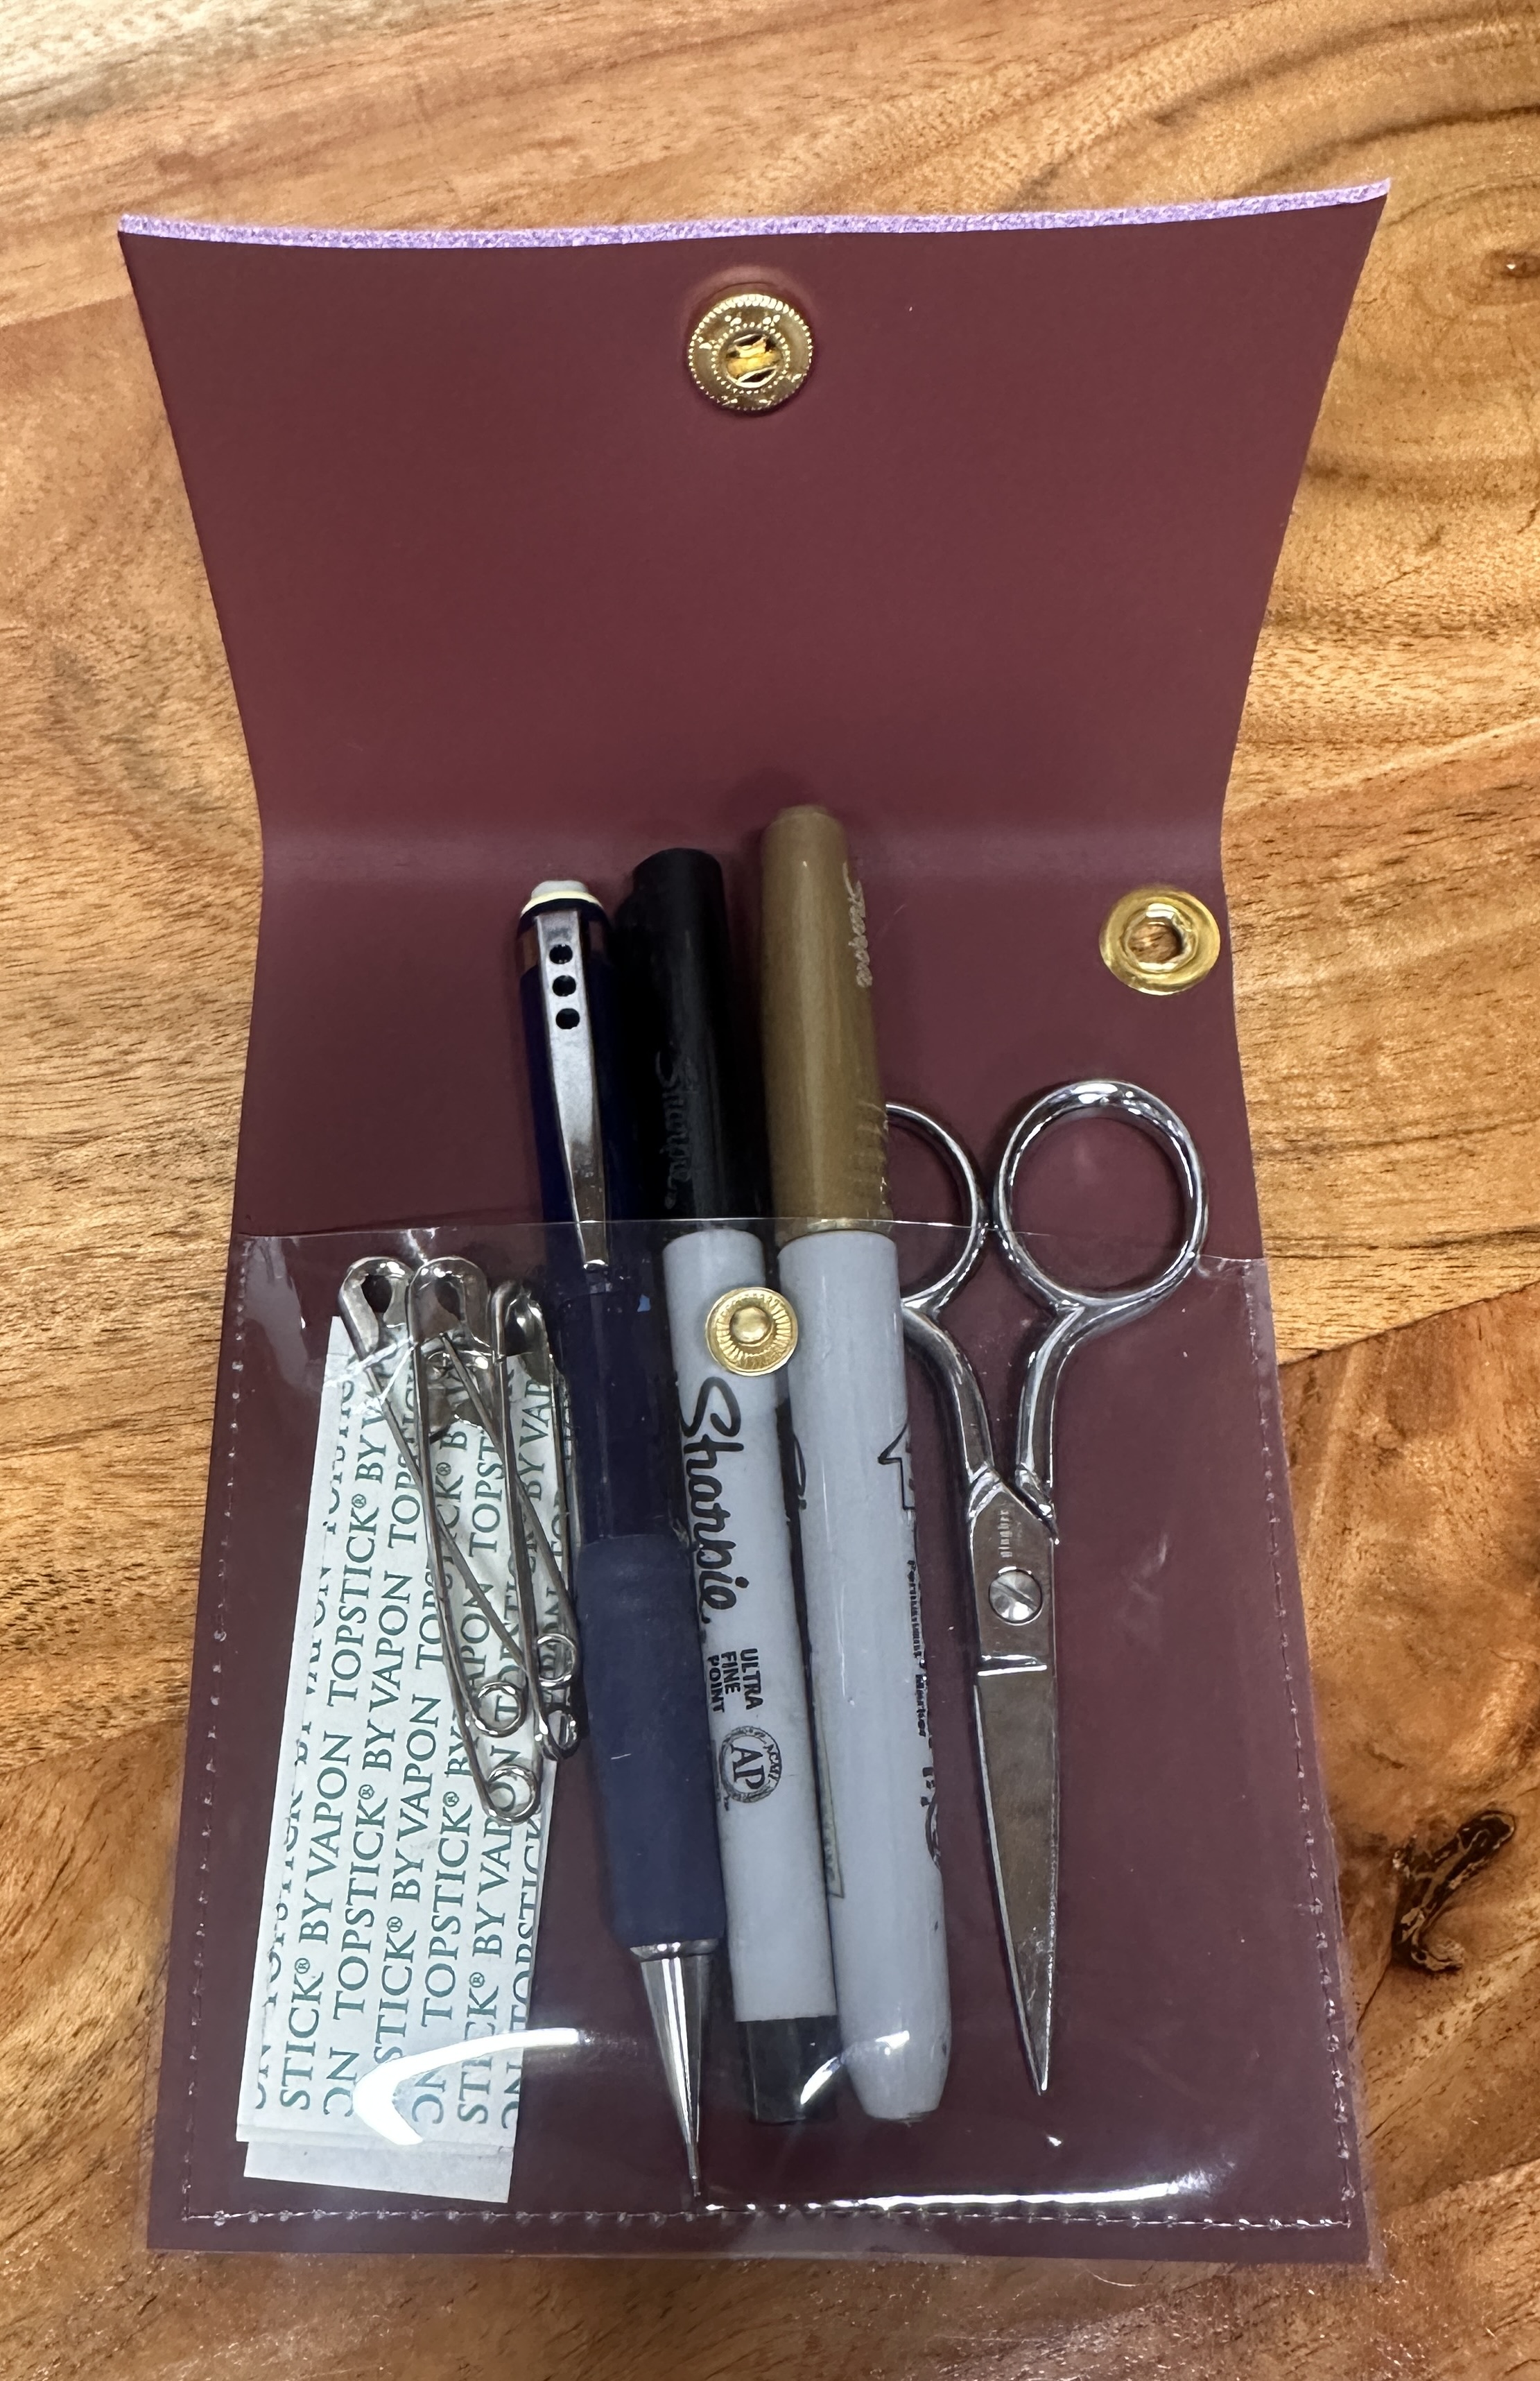
Accessory Time – Essentials Pouch!
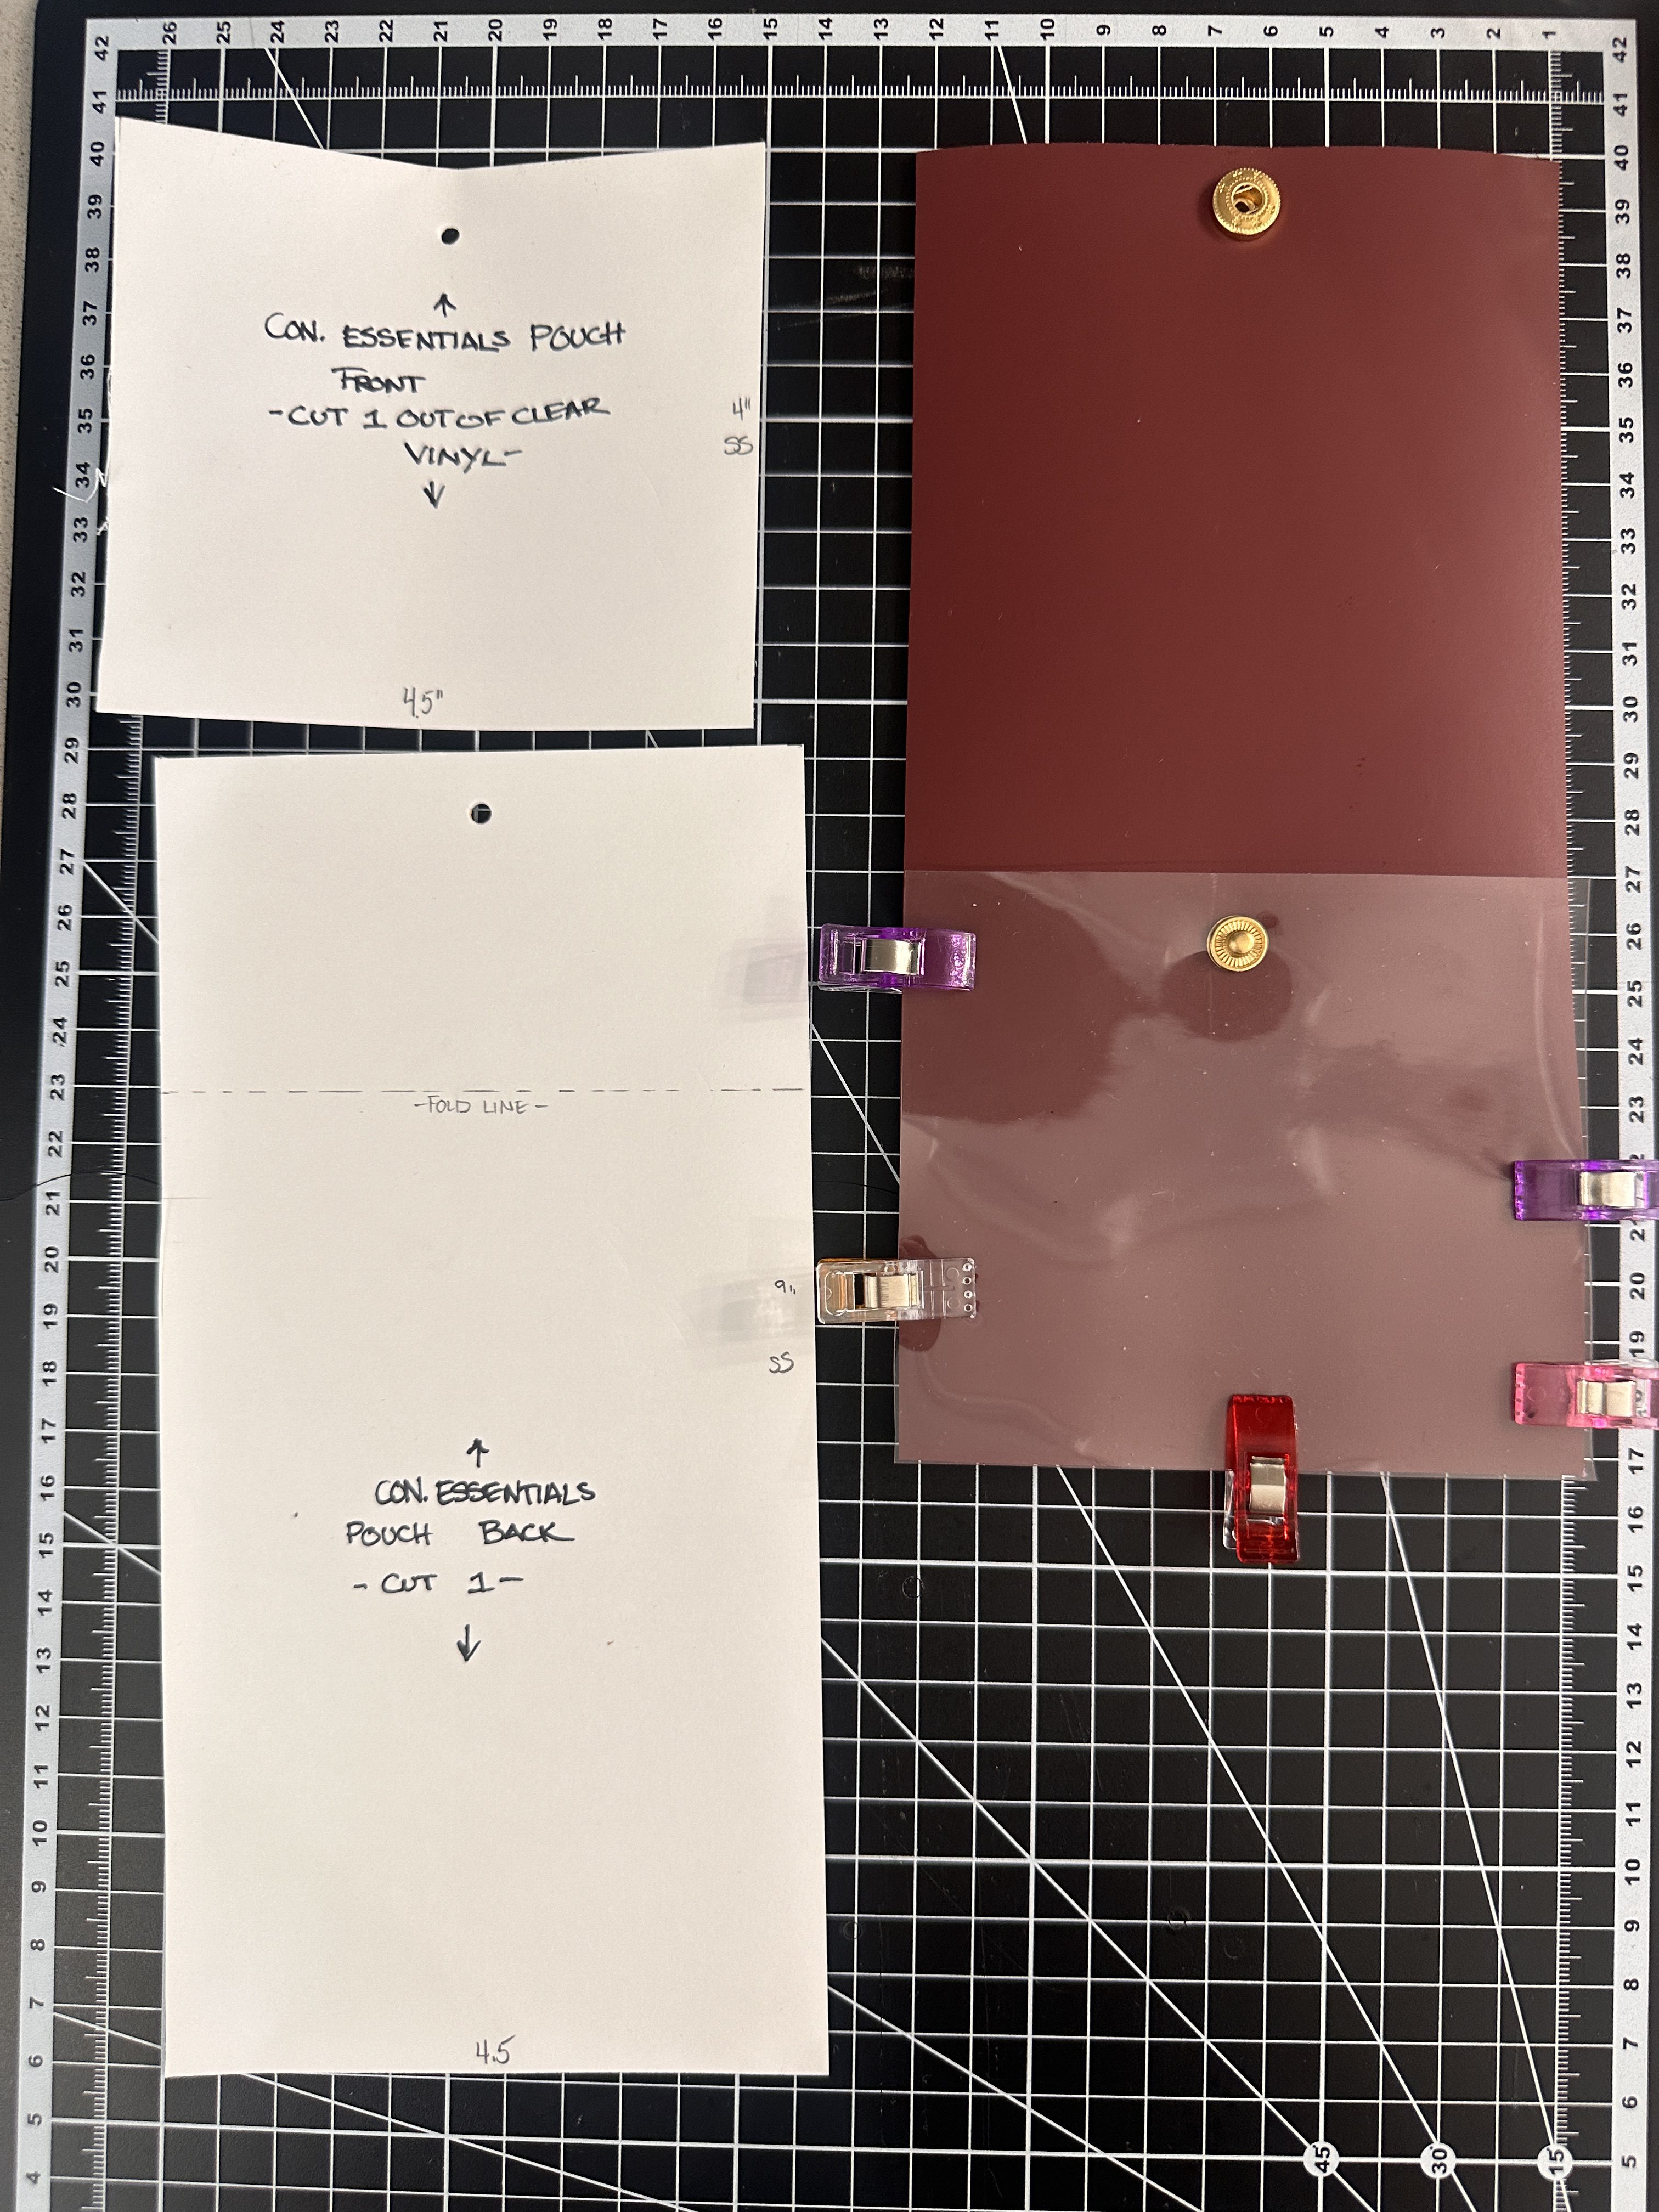
I patterned this little essentials pouch to be the perfect size to hold all the little necessities like pens, sharpies, small scissors, chapstick, topstick, mini-sewing kit, and whatever you may need! I gave it a snap closure top to keep all the items in place, and also a quick grommet in the back so it can clip into a chain- this isn’t necessary though if you’re happy to have it roam freely inside the bag. I placed the snap closures on each piece before sewing the seams of the pouch together just for ease.
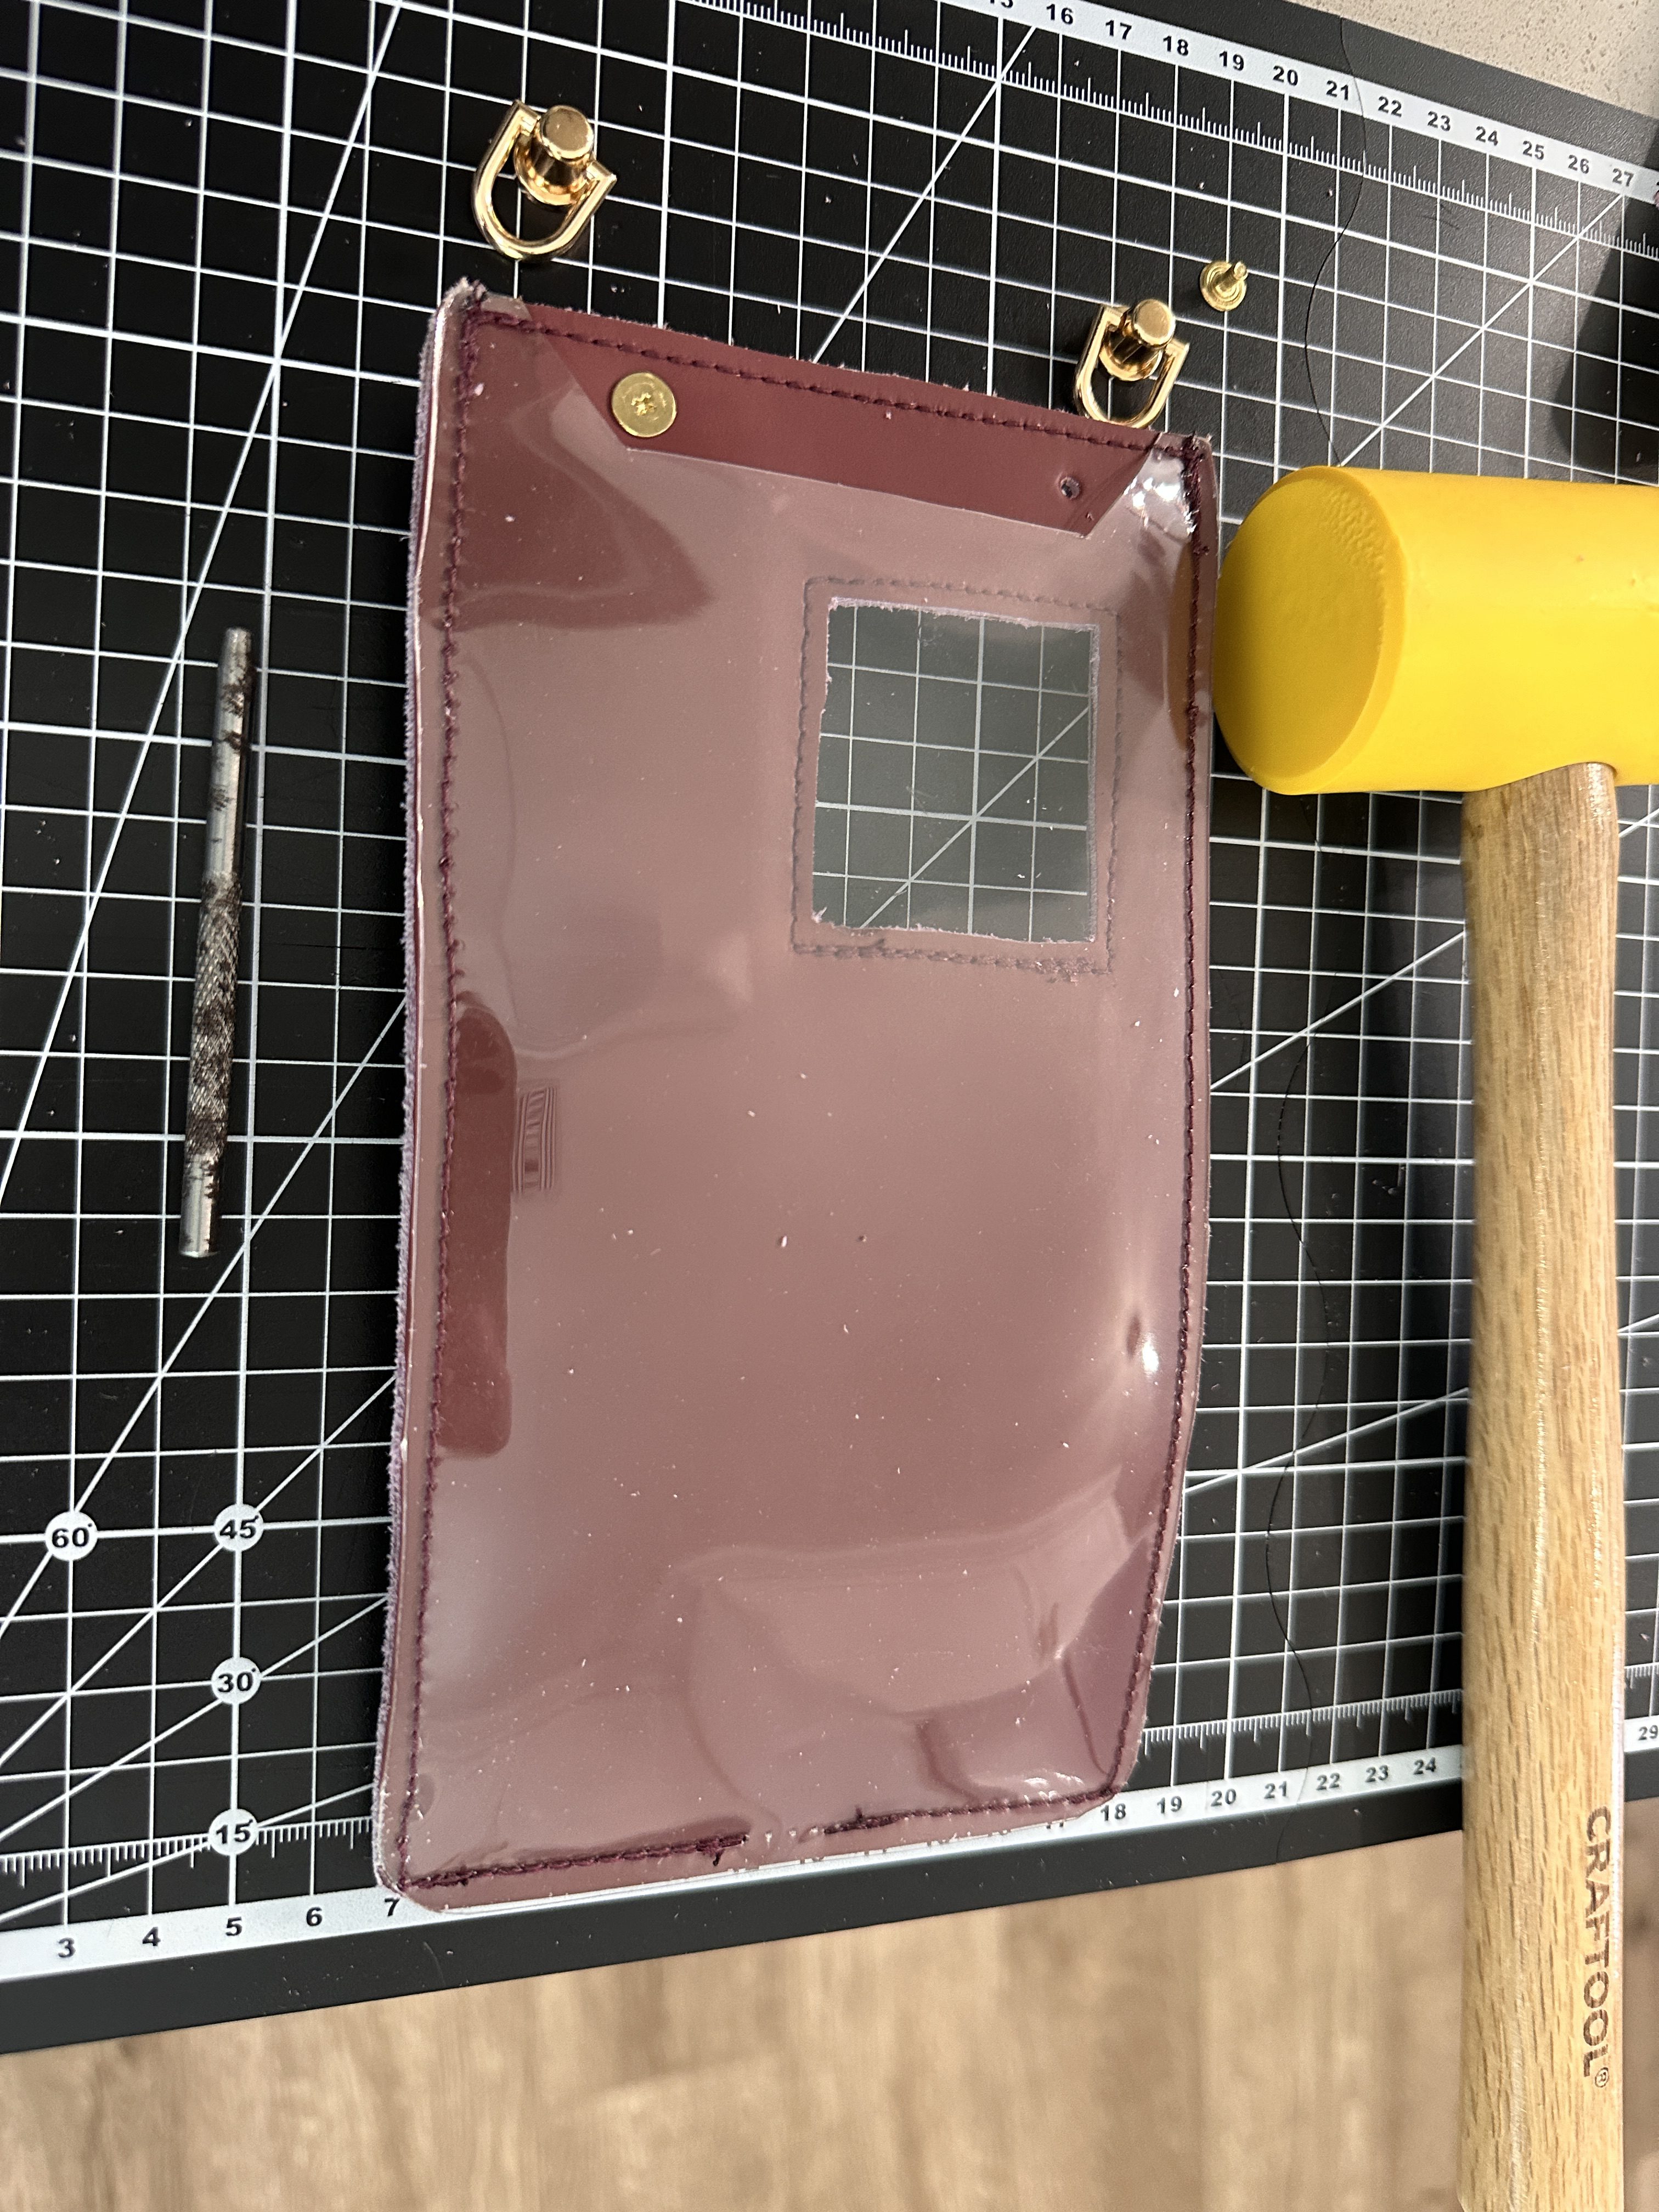
Accessory Time – Phone Pouch!
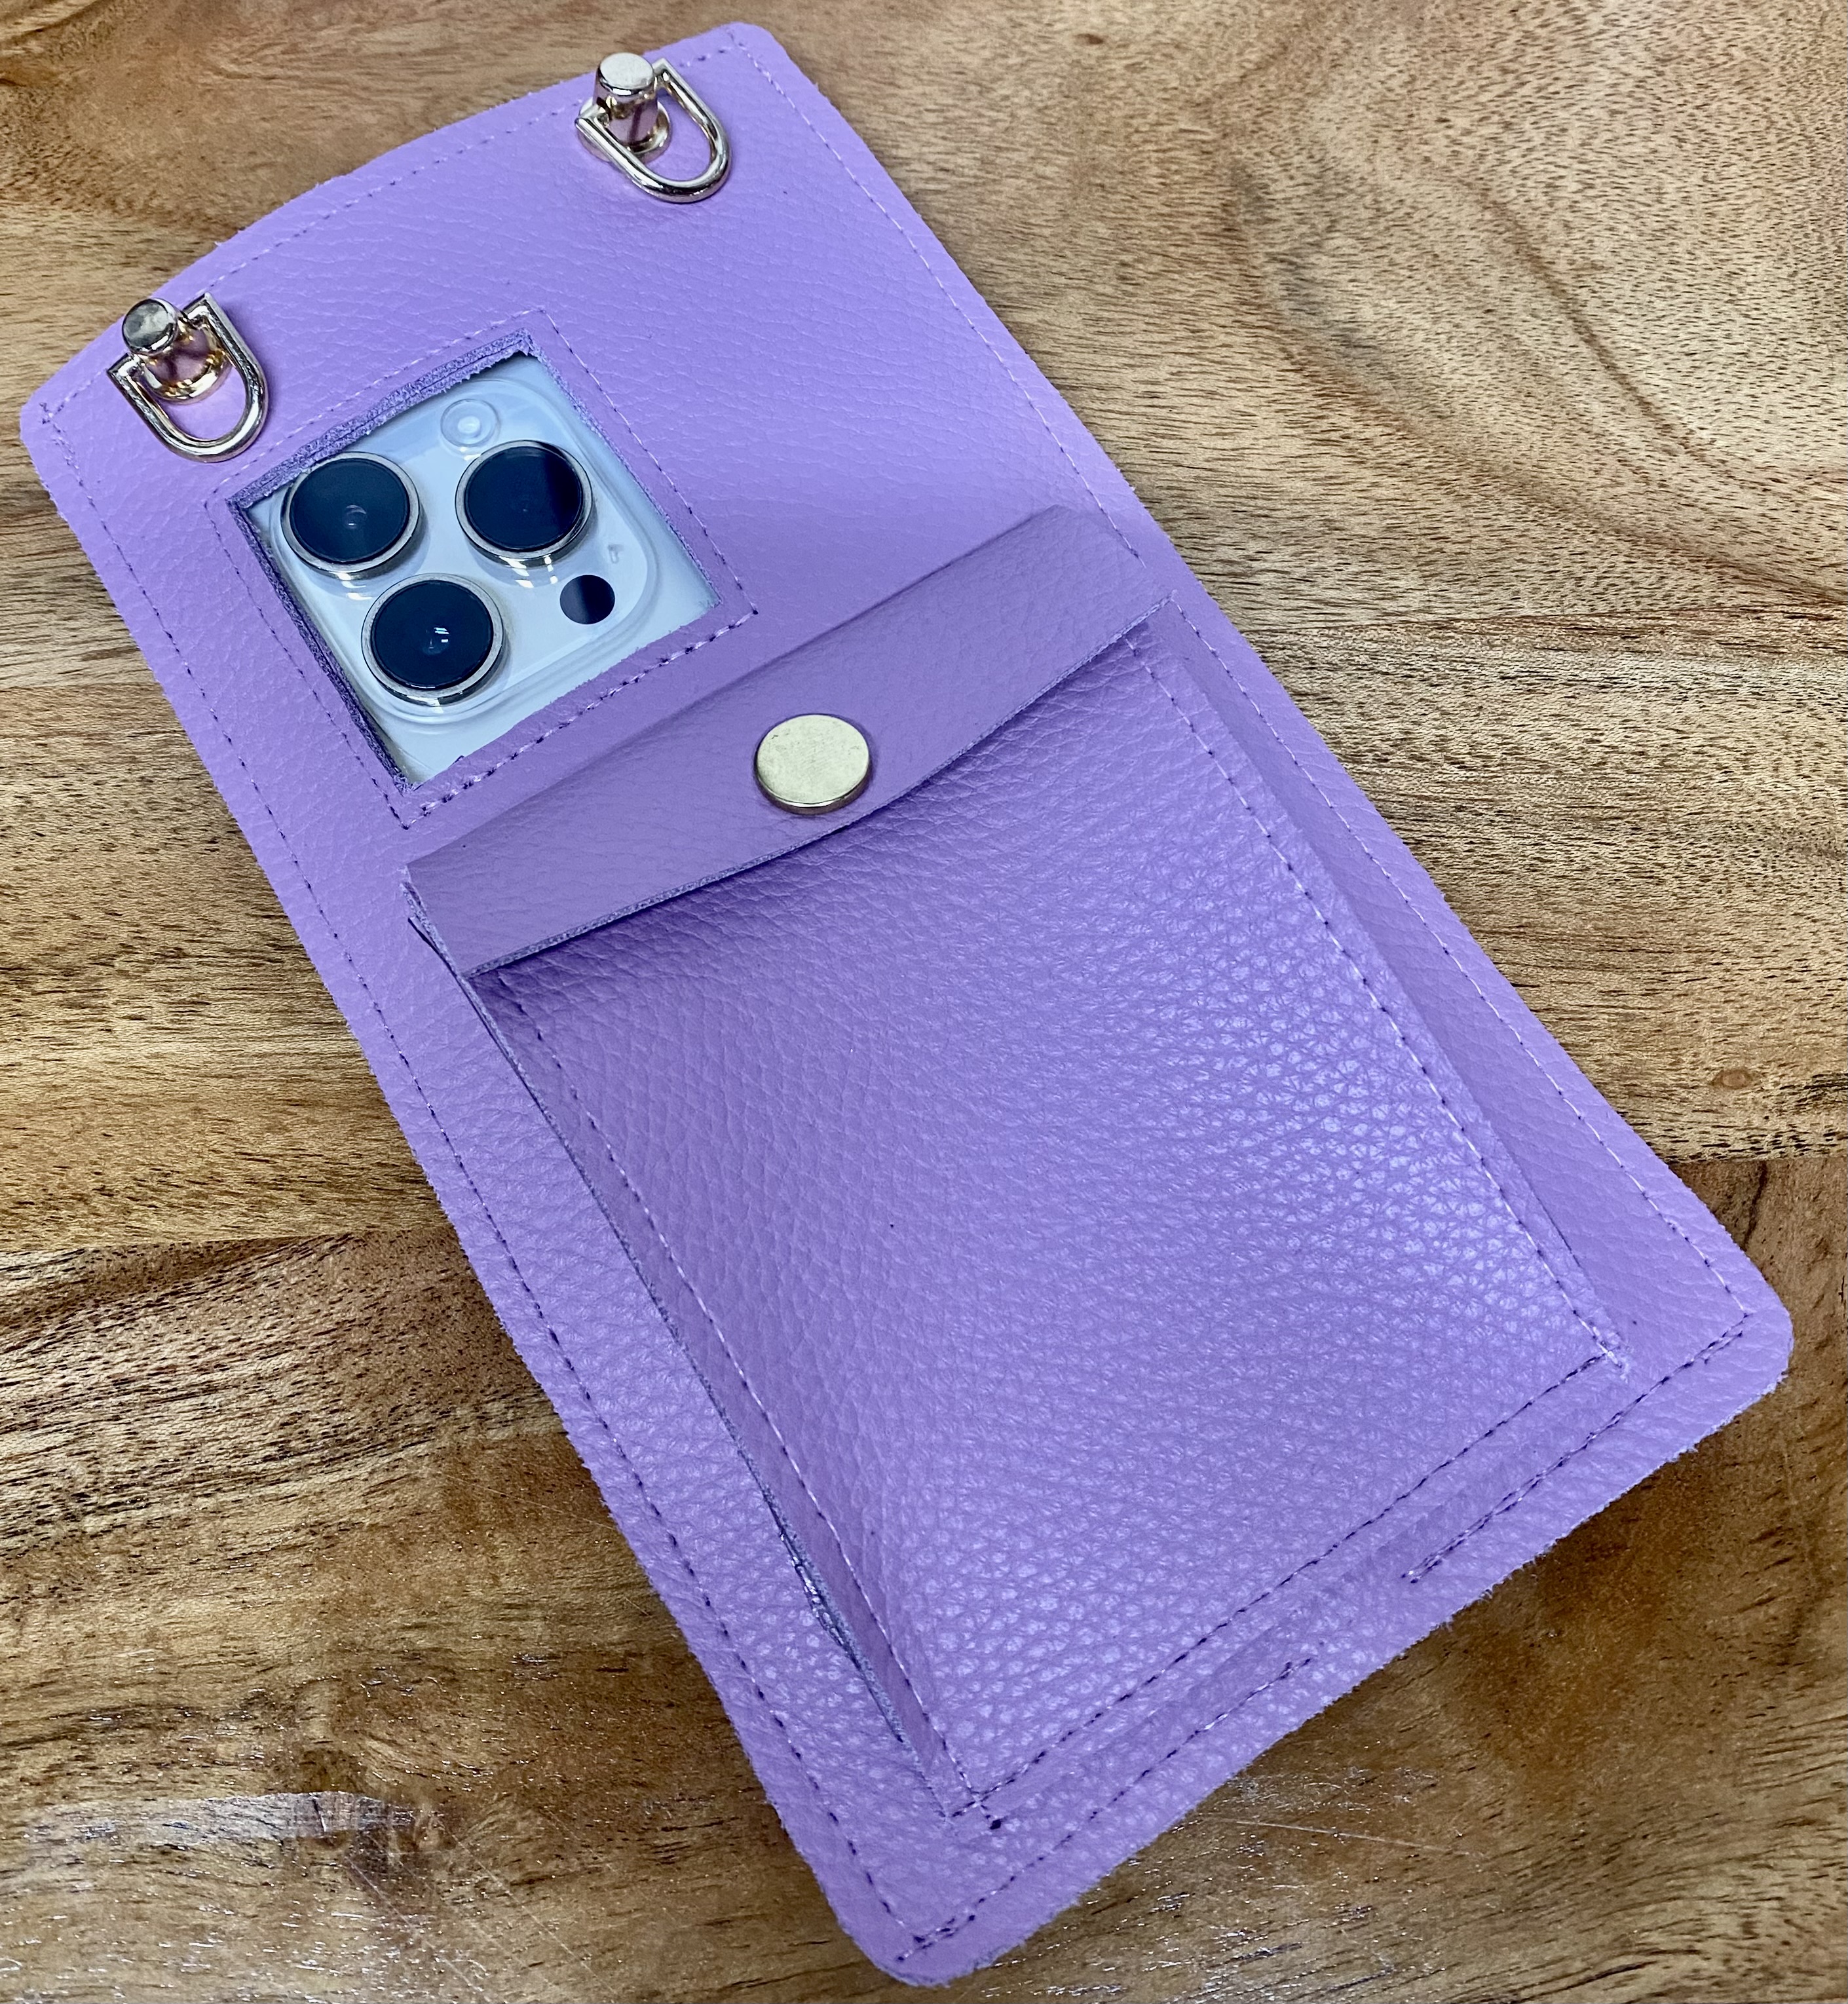
If you’re like me and always want your phone to be handy, and are also constantly paranoid about leaving it somewhere or dropping it- this accessory is for you! I added an extra pocket to the back of this pouch to hold
items you don’t want on clear display- like credit cards, cash, room keys, etc.
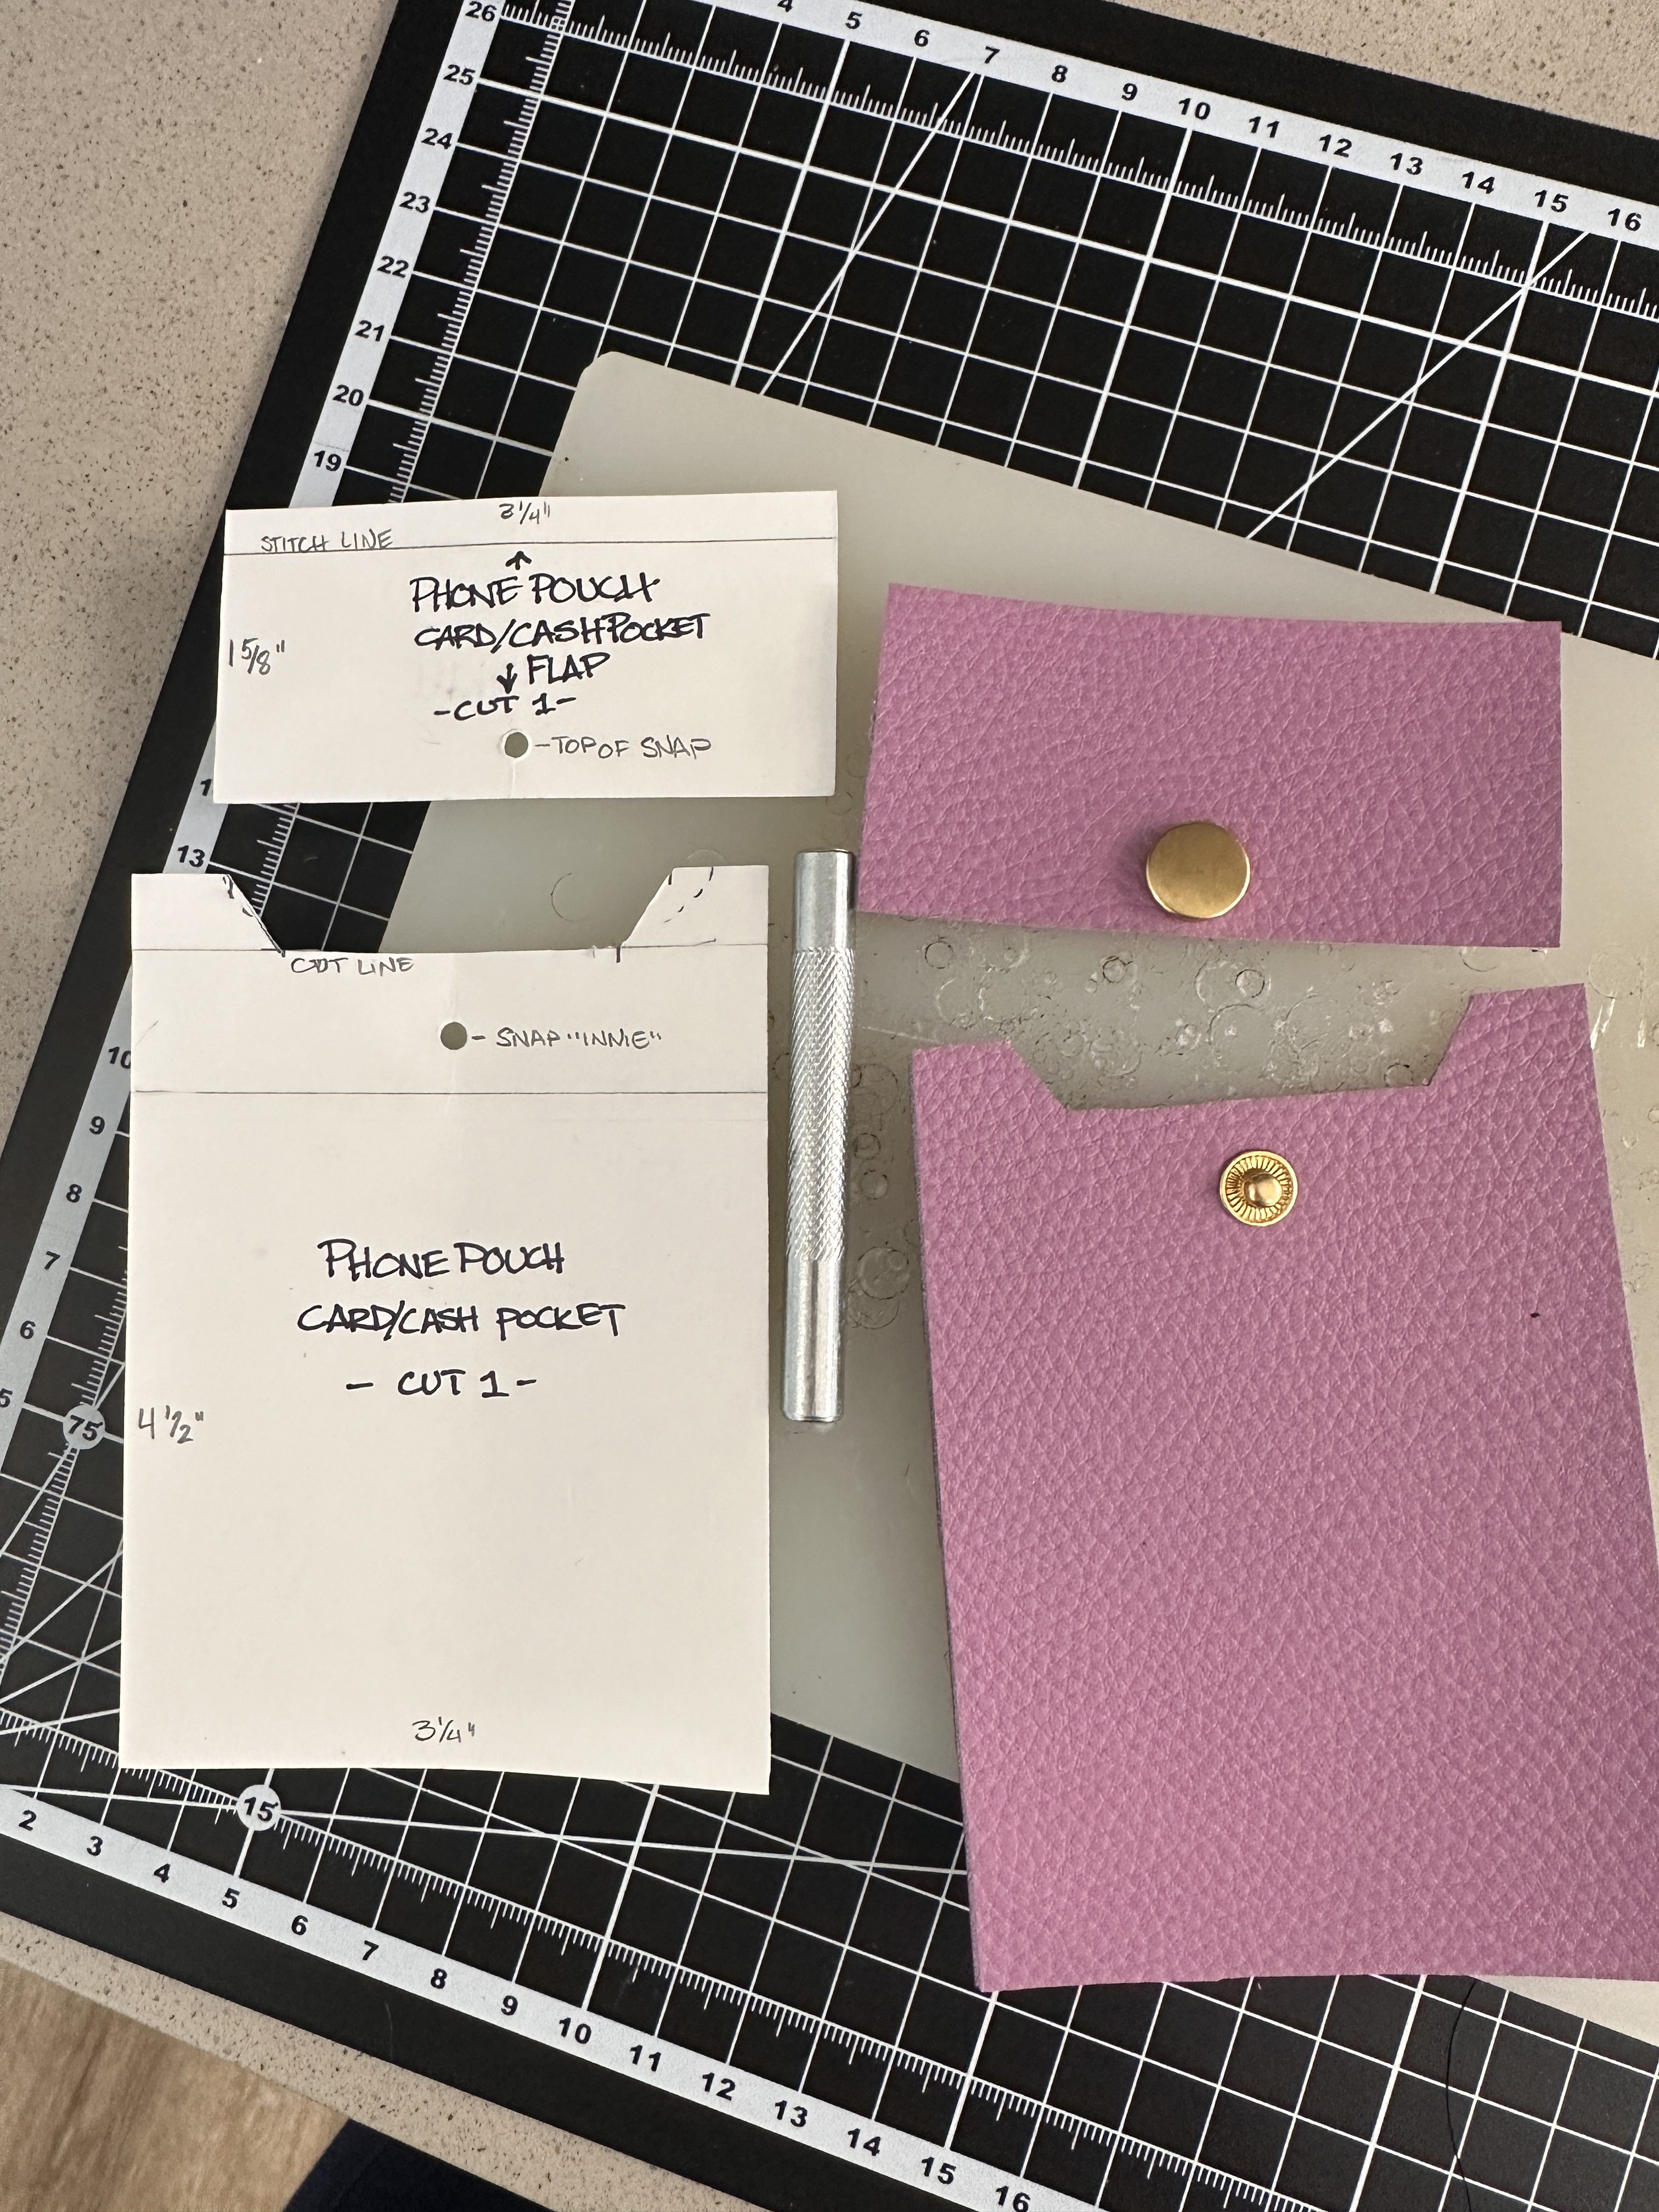
I also cut out a square on the phone pouch for my phone’s cameras to fit through so I can take photos with ease.
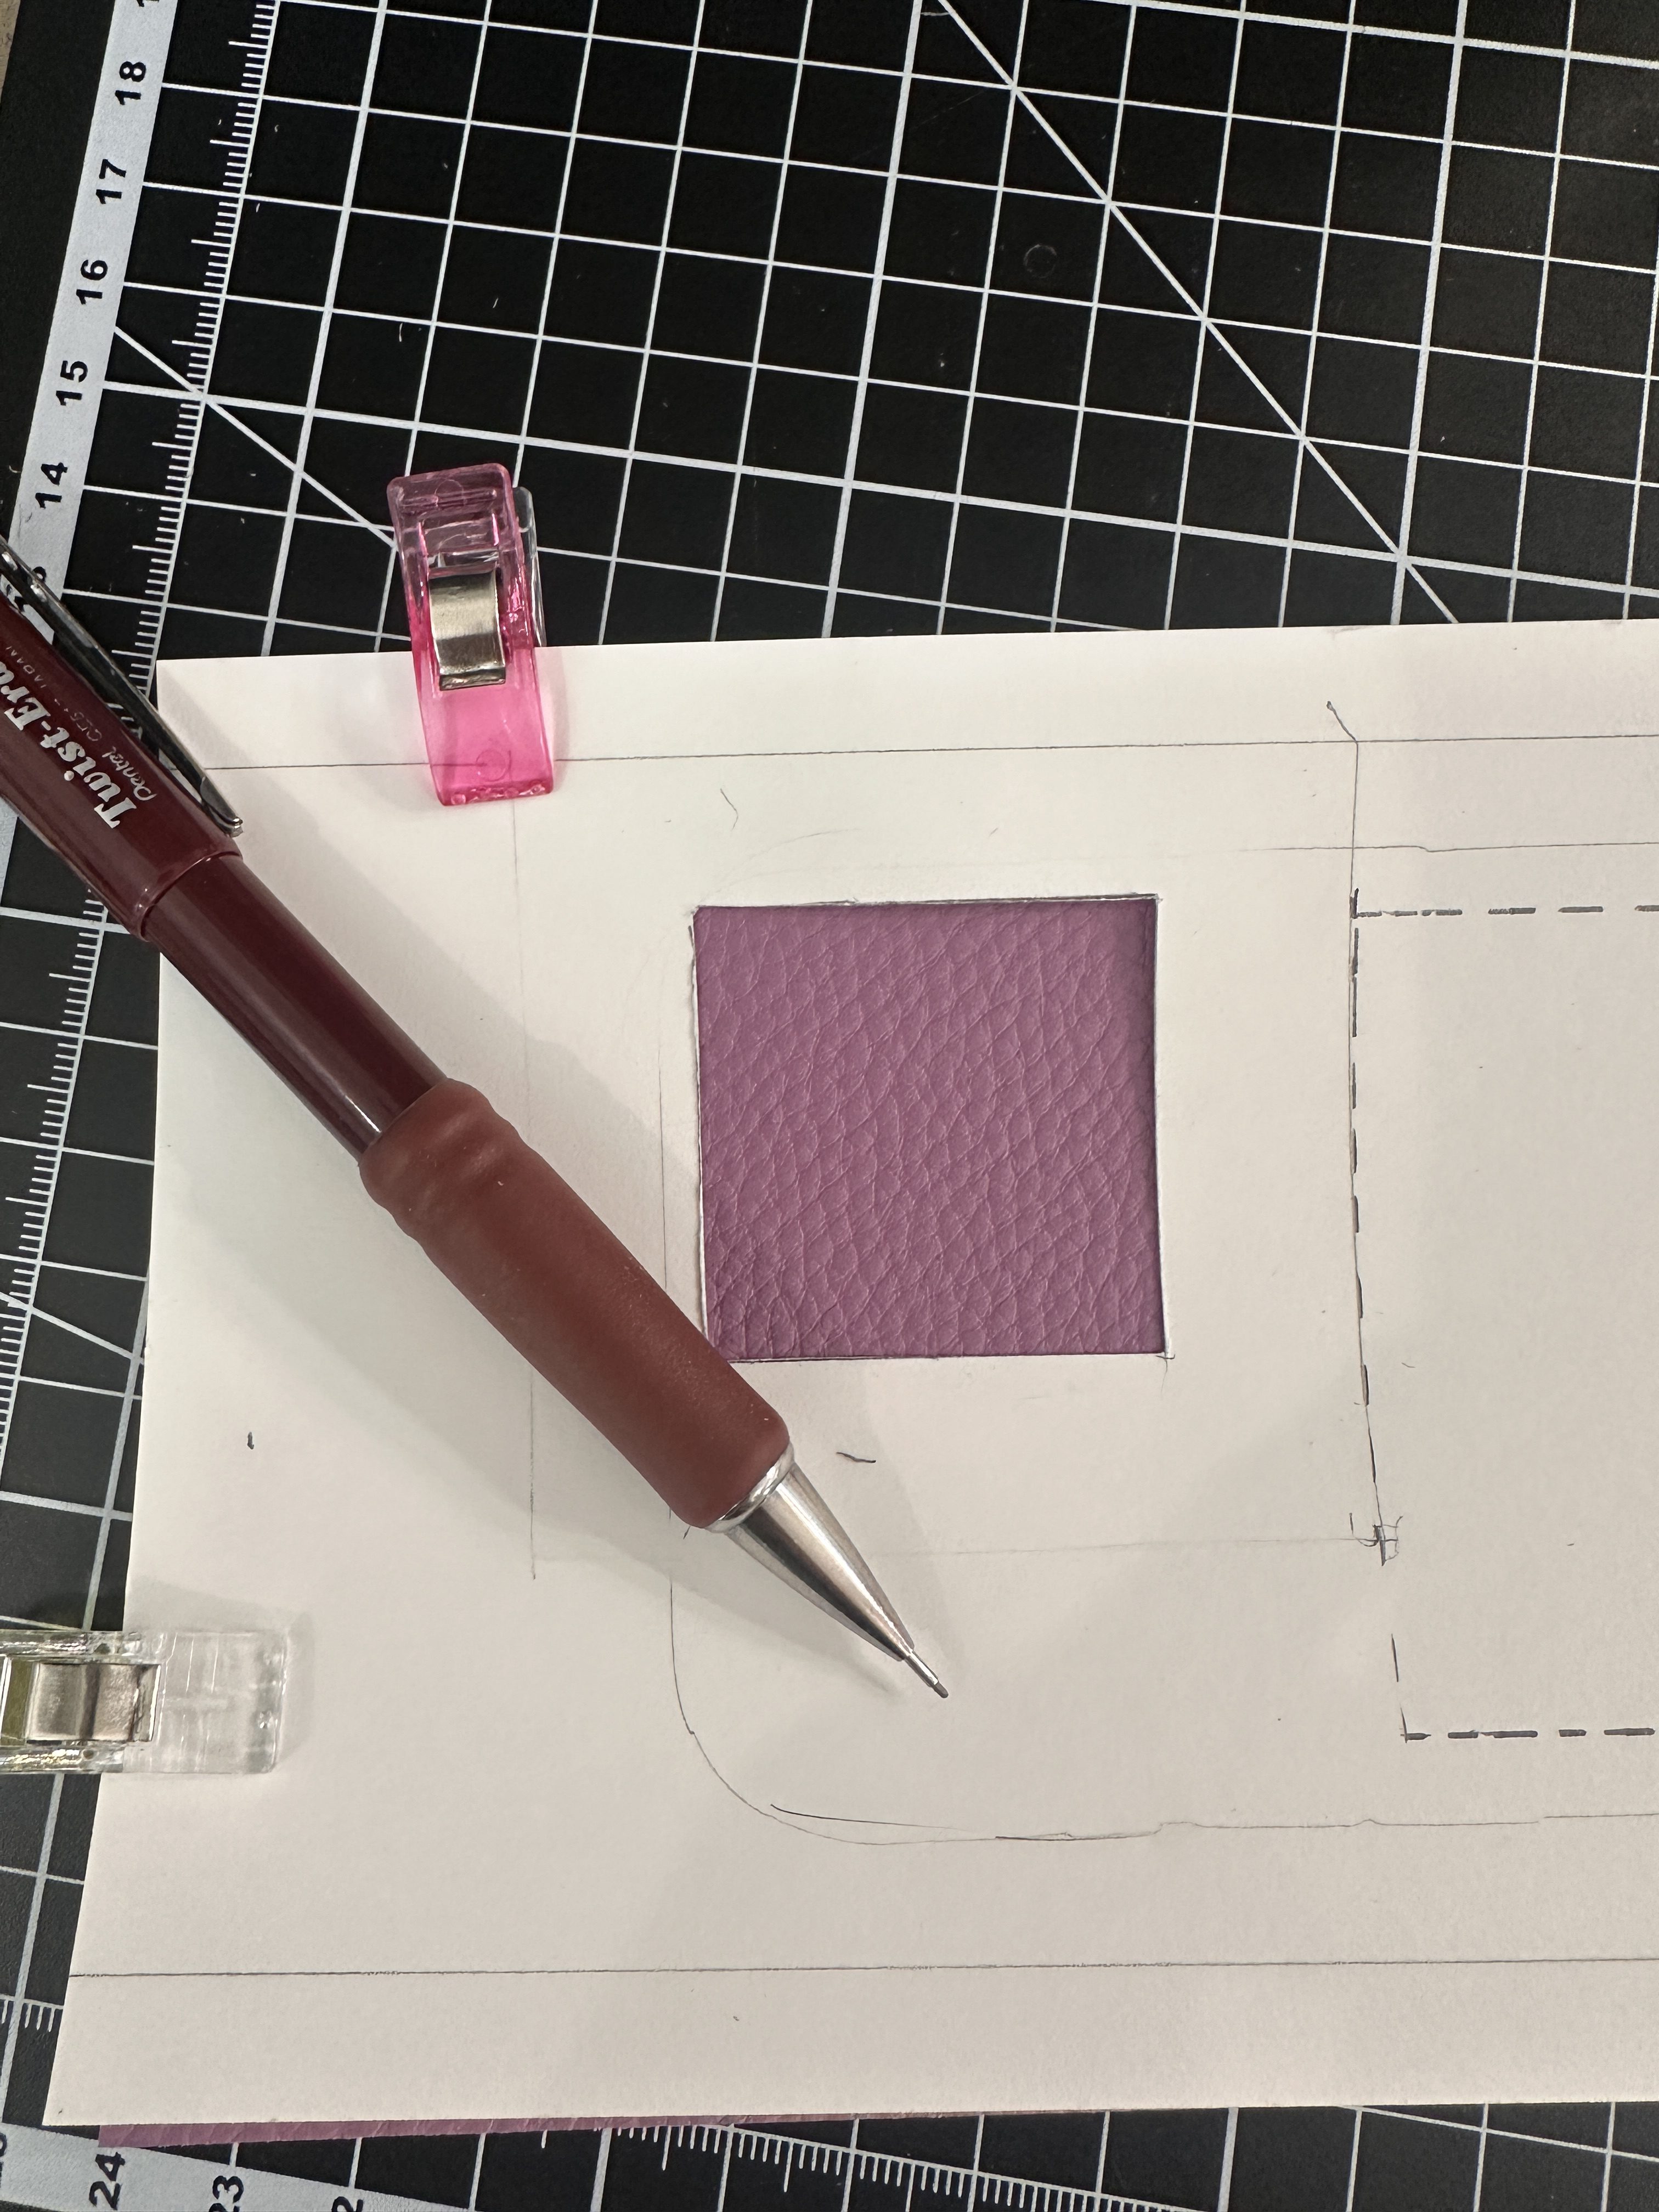
First, cut out the camera square on the two pieces of leather. Then top stitch around the square to keep it all in place.Next, assemble the outer pocket – first with installing the snap to the corresponding pieces. Then by sewing the pocket flap to the pouch.
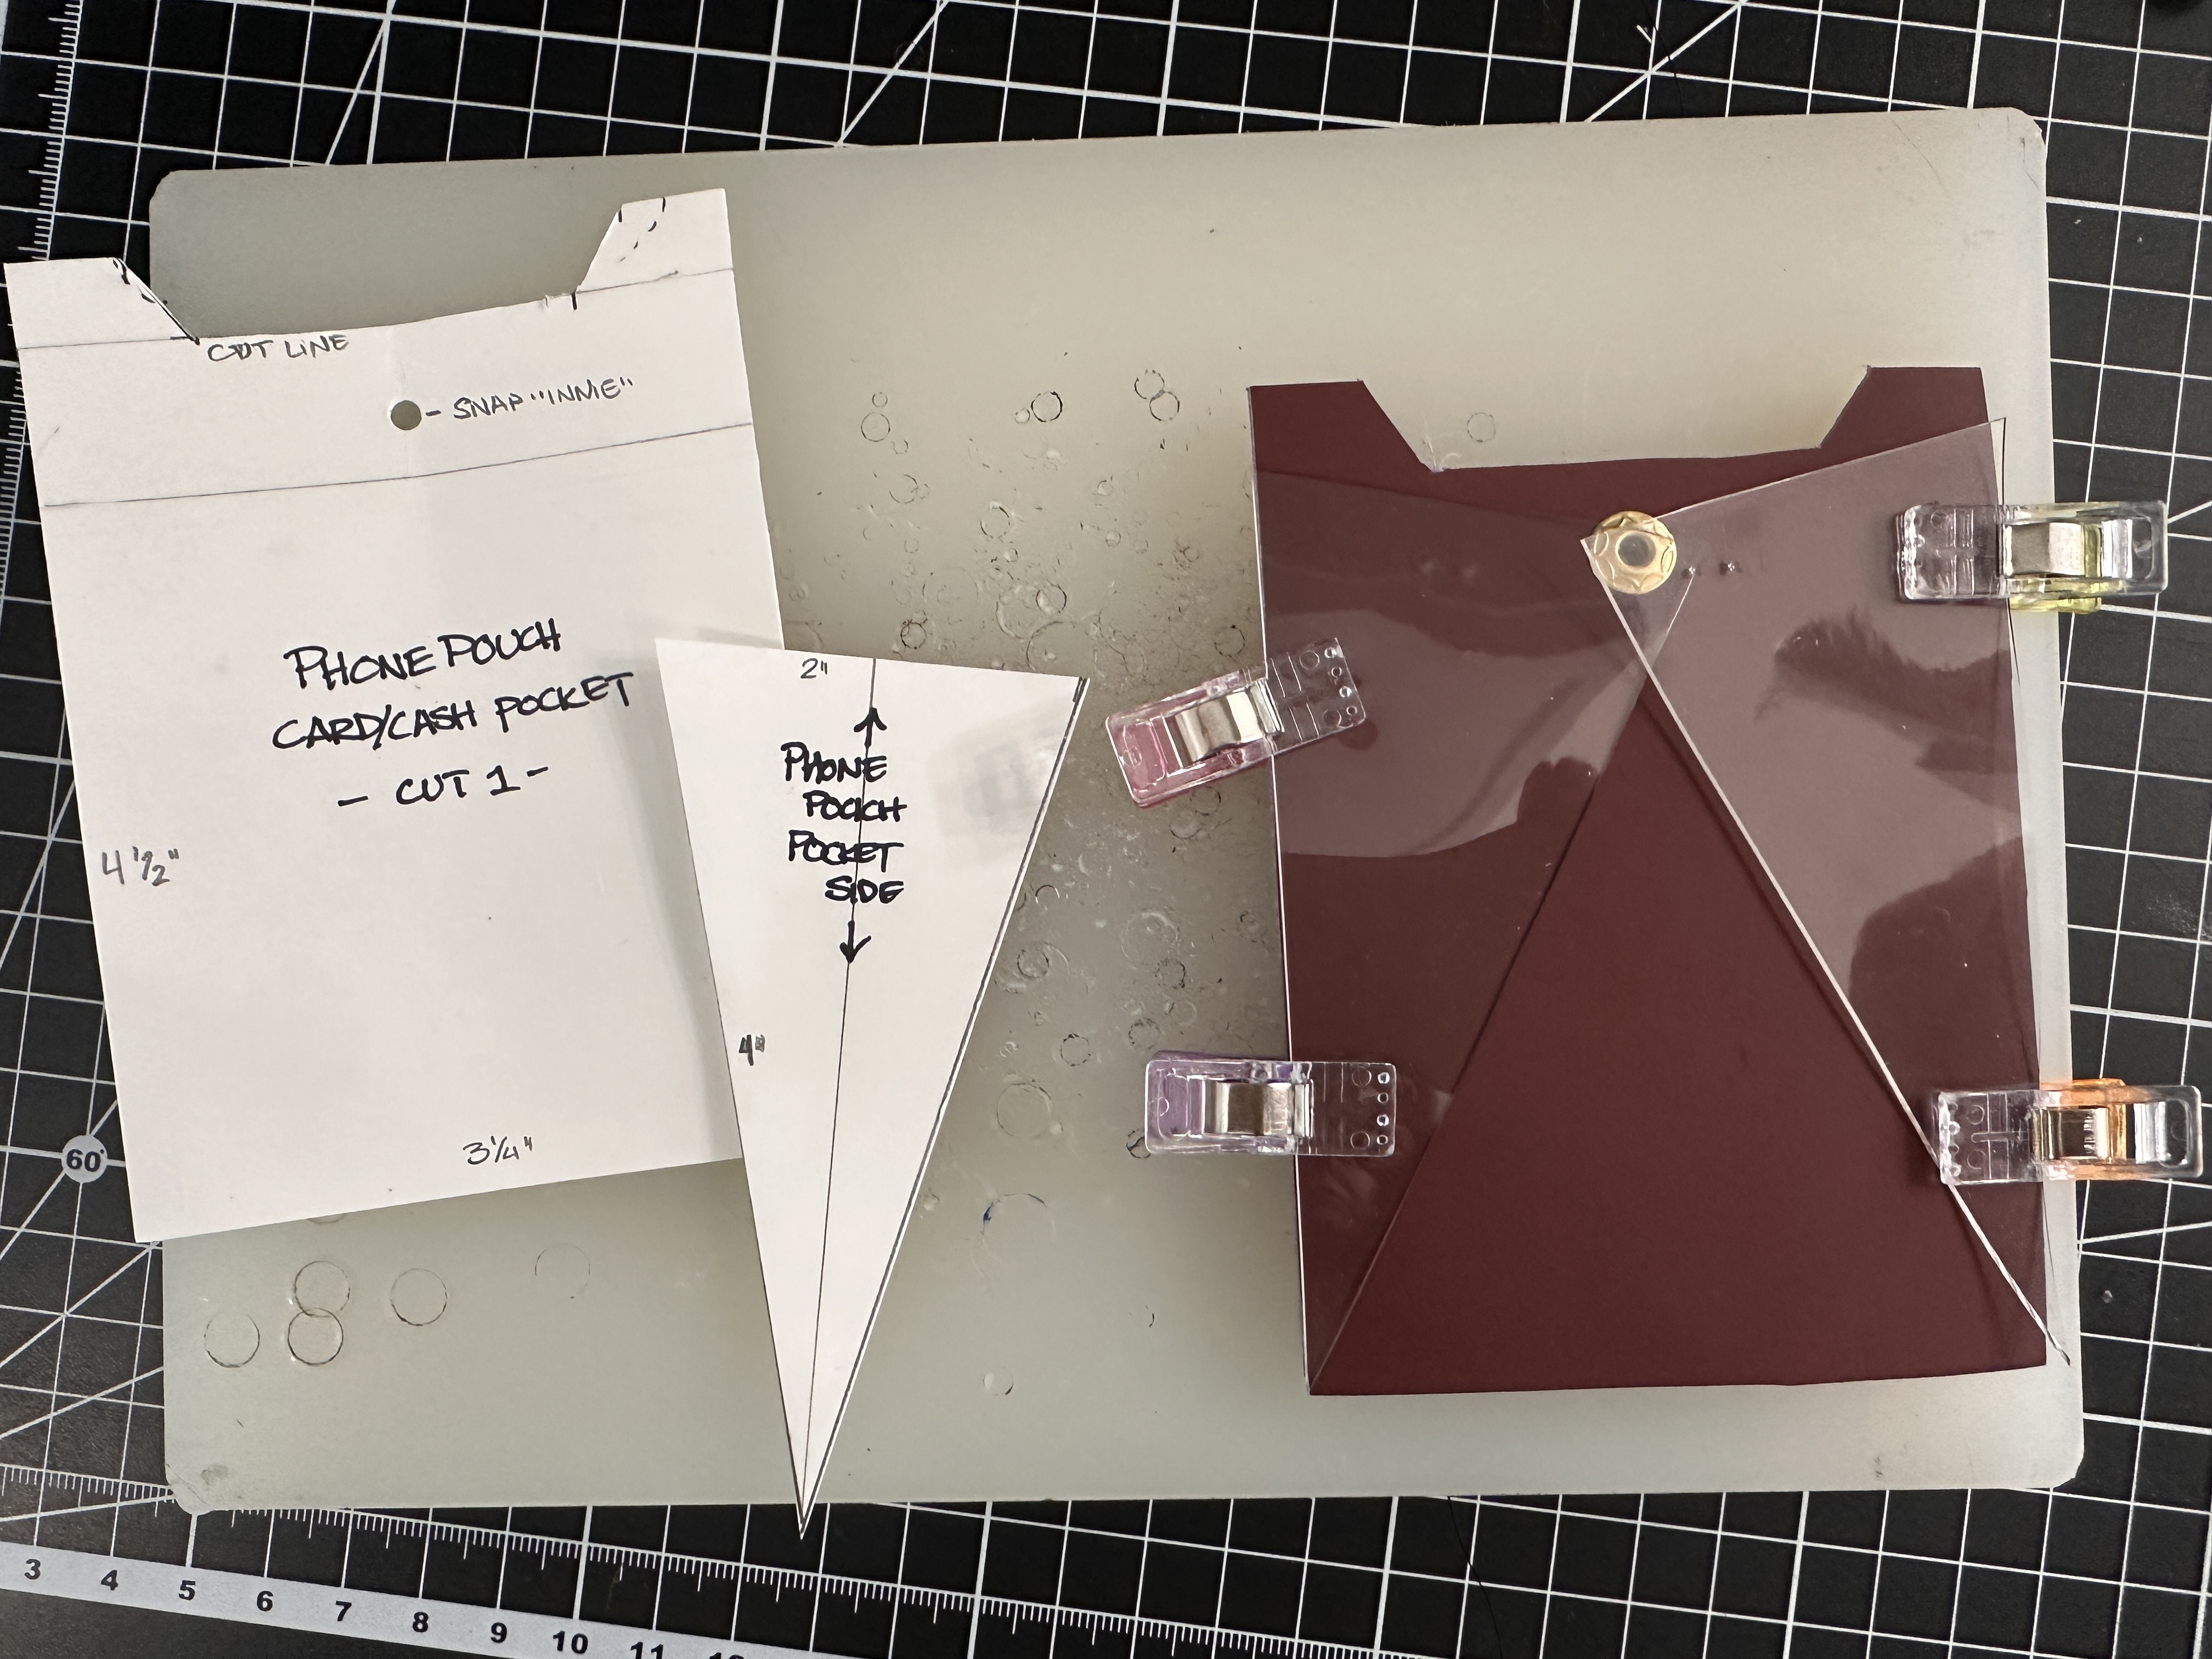
Next, sew the vinyl or leather sides to the pocket front. Once those 3 pieces are together, then sew the pocket to the pouch. Now you’ll sew the top seam of the leathers together on the pouch before sewing the vinyl cover to it. Here I left a small, reinforced opening at the bottom for ease of plugging in a charging cord. Lastly, you’ll install the 2 optional D-Rings with screw backs to the pouch.
I hope you have as much fun making this bag as I did! I can’t wait to see everyone’s customizations and variations on this! Please send me your version on Instagram @jennifermaydesigns!