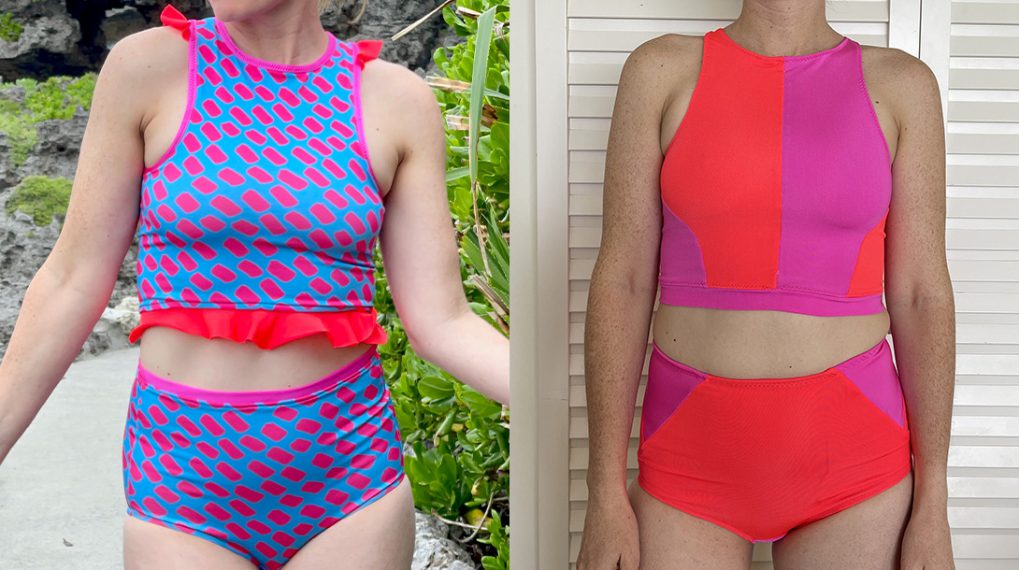
How to Sew a Swimsuit for Summer
With temperatures warming up across the country, bright colored swimsuits are filling up the racks at all of our favorite stores. But, there’s nothing worse than purchasing a store-bought swimsuit, only for it to pull and droop in all the wrong places. This is why making your own custom-fitting swimwear is one of the greatest perks of sewing your own wardrobe!
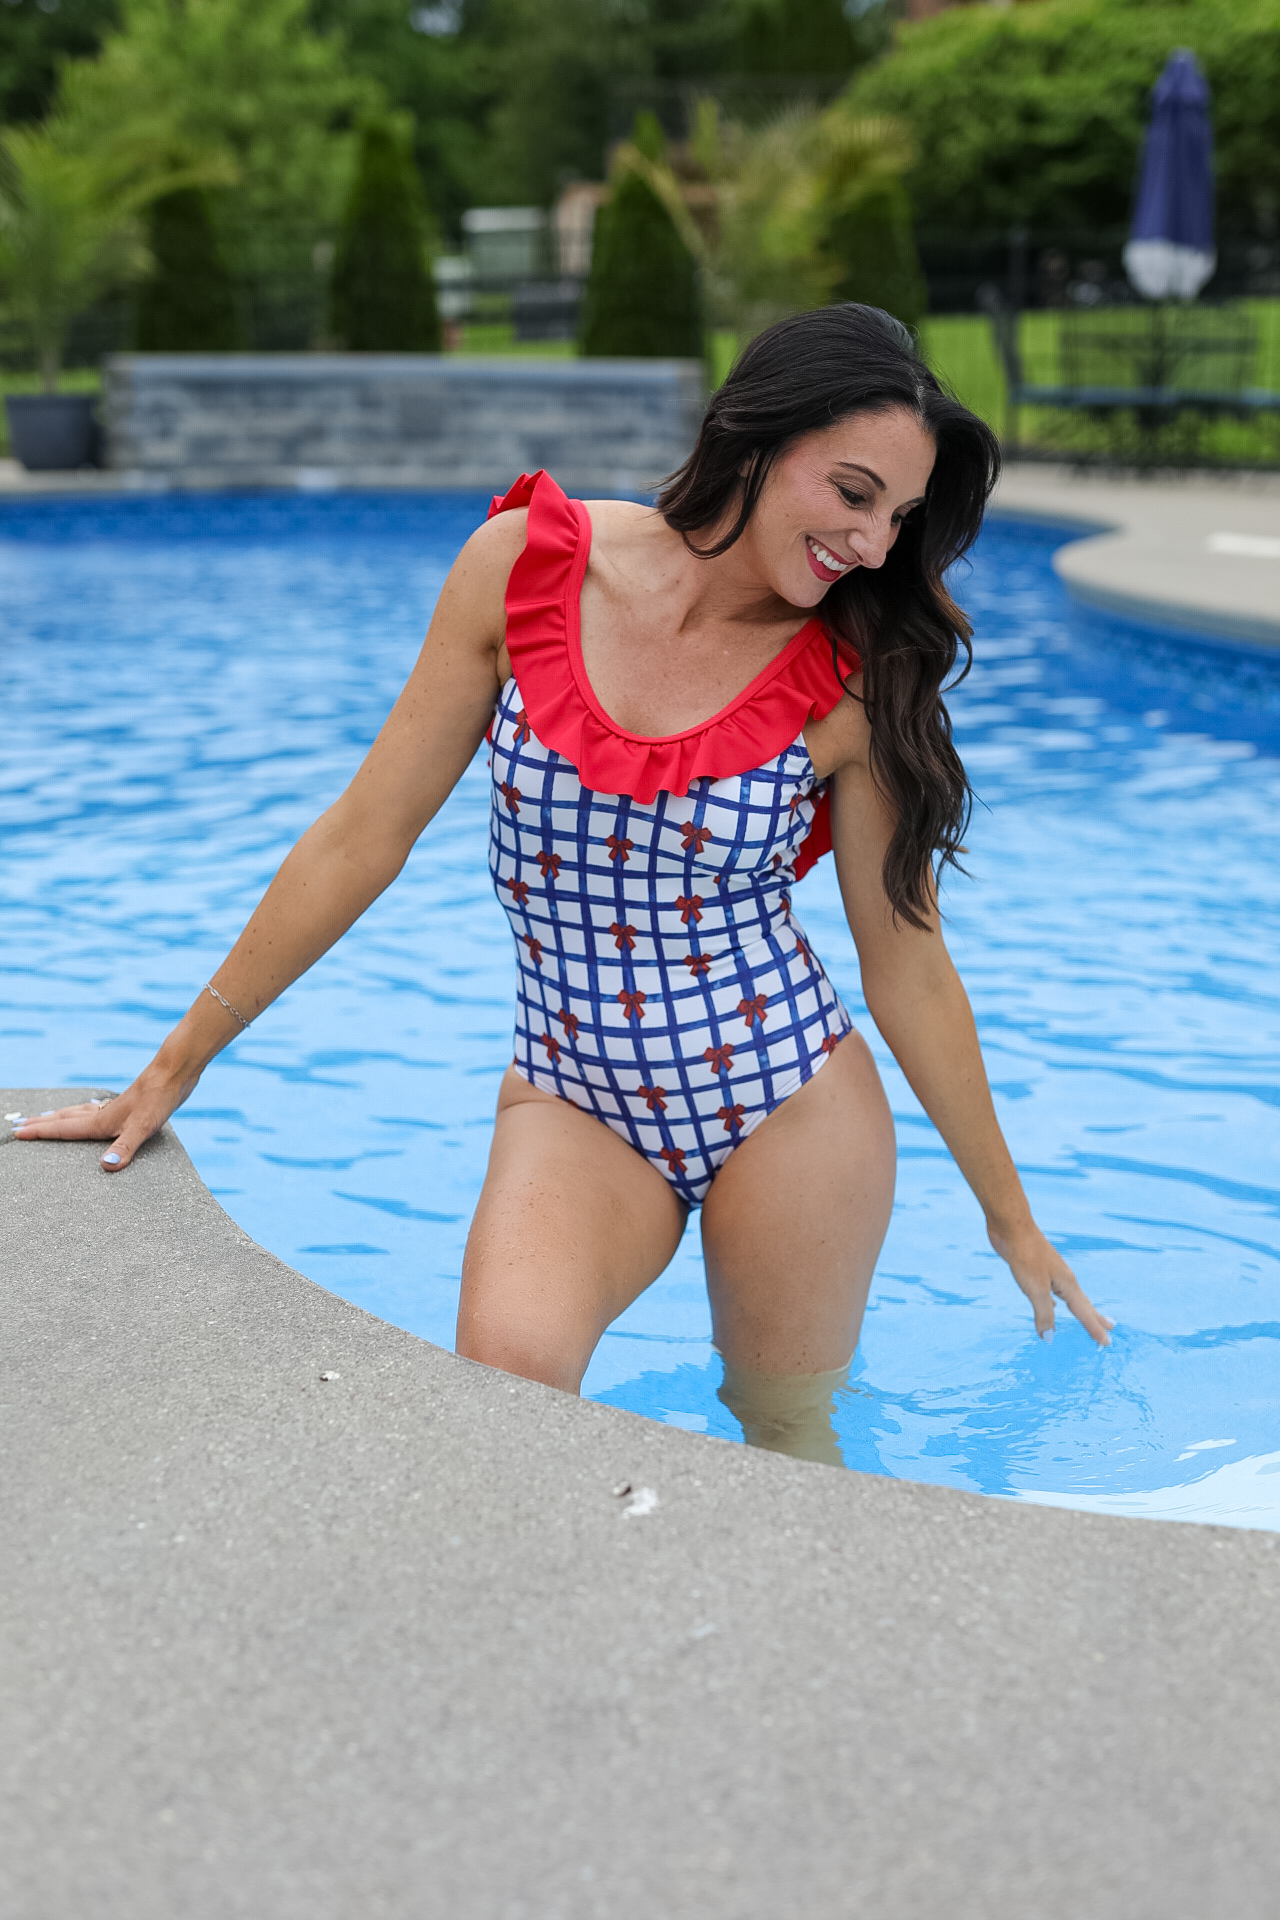
Join me for a sew along to one of my personal favorite swimsuit patterns on the market: The Tilly and the Buttons “Coralie”.
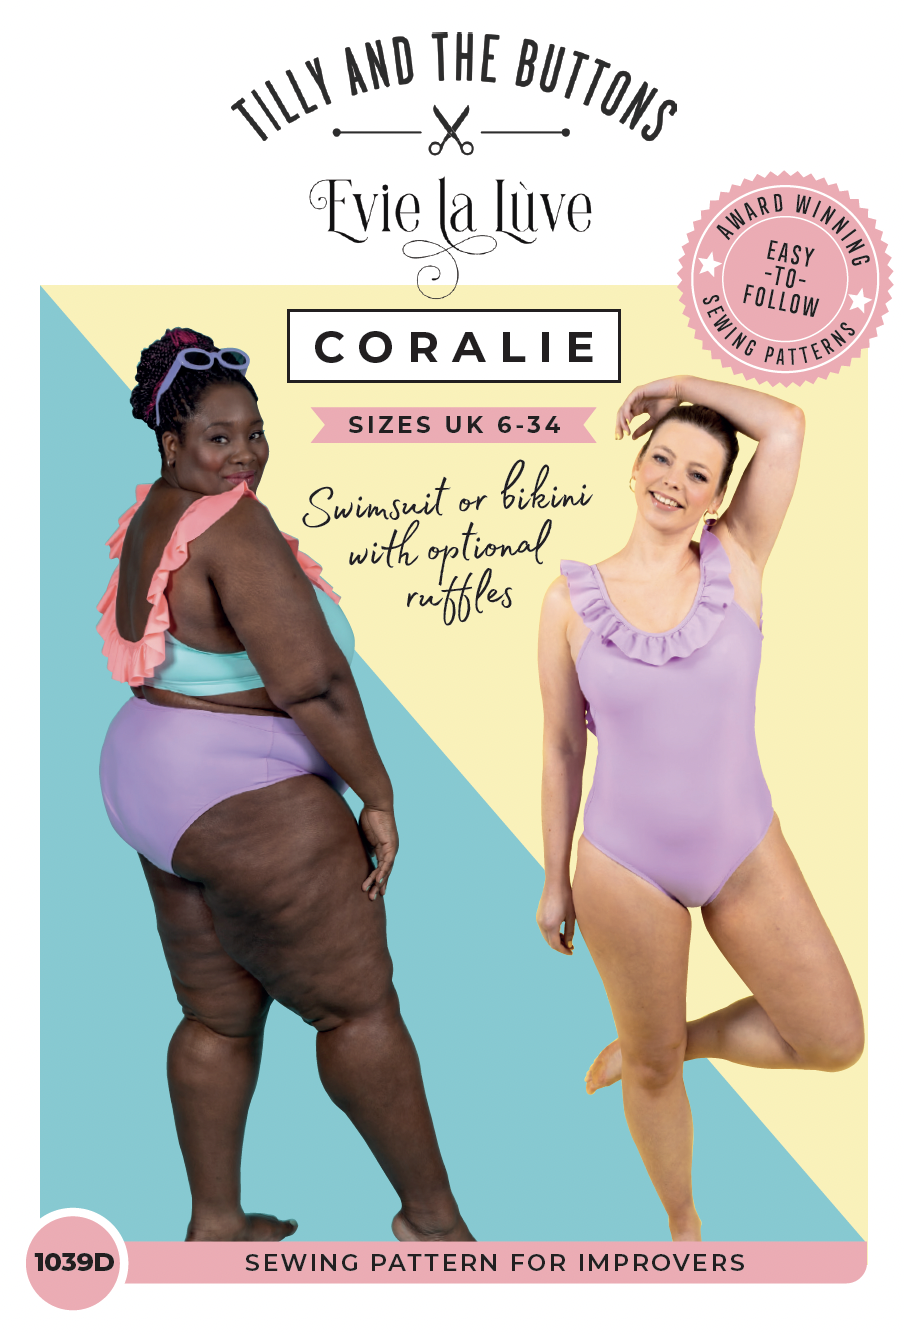
The Coralie has many variations to choose from. You can keep it simple with a standard one-piece bathing suit/bikini. Or, you can spice it up with ruffles and a low back! One of the best parts of this pattern is that there is adequate coverage in the bottoms, so you don’t have to worry about them riding up.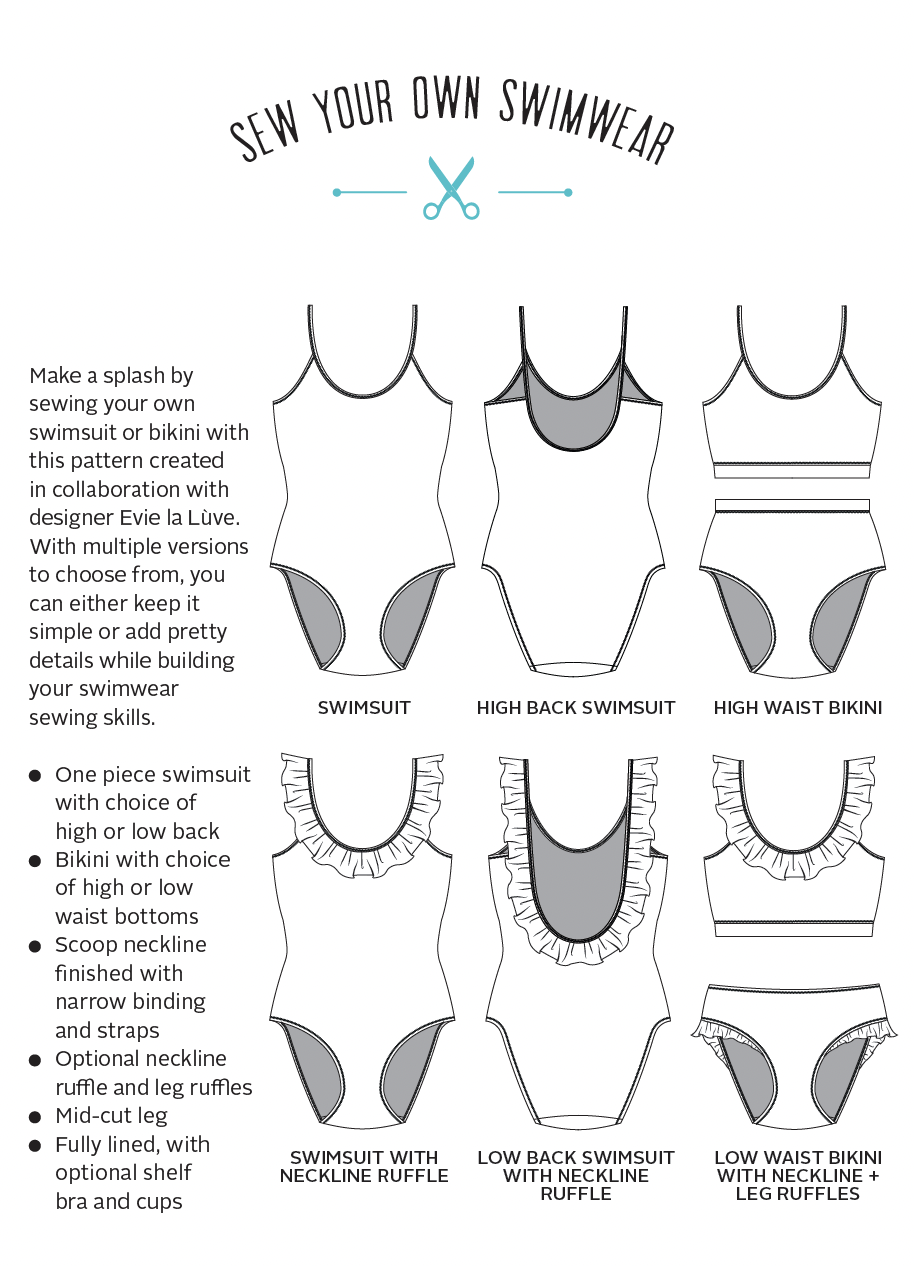
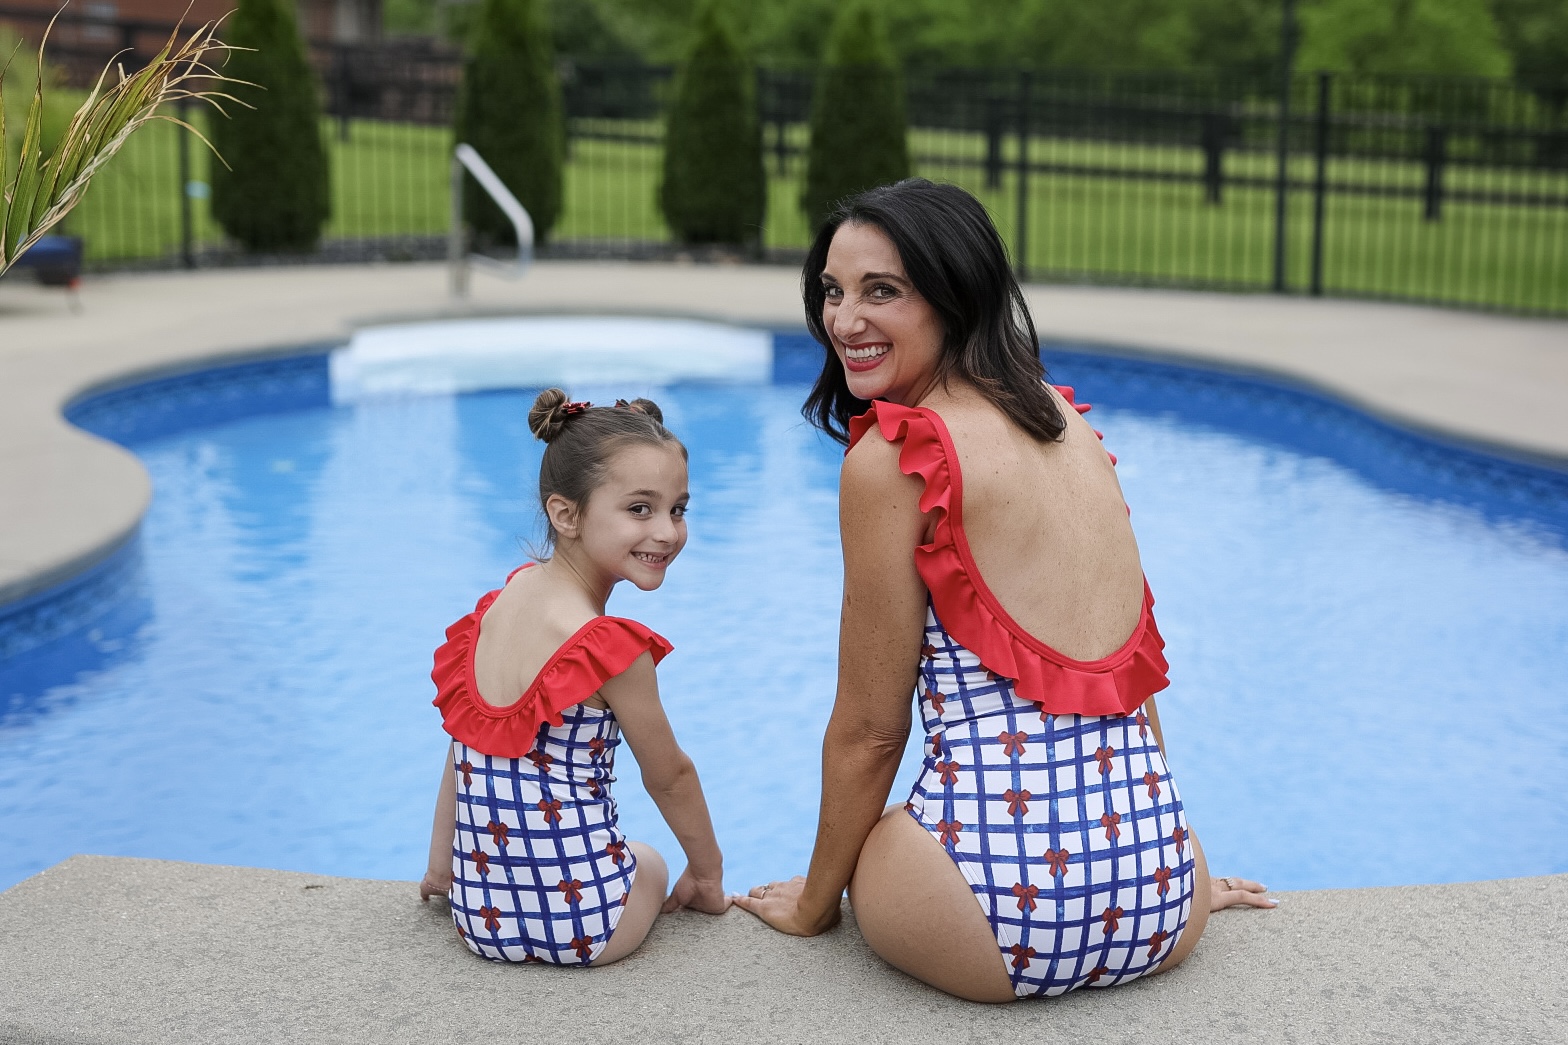
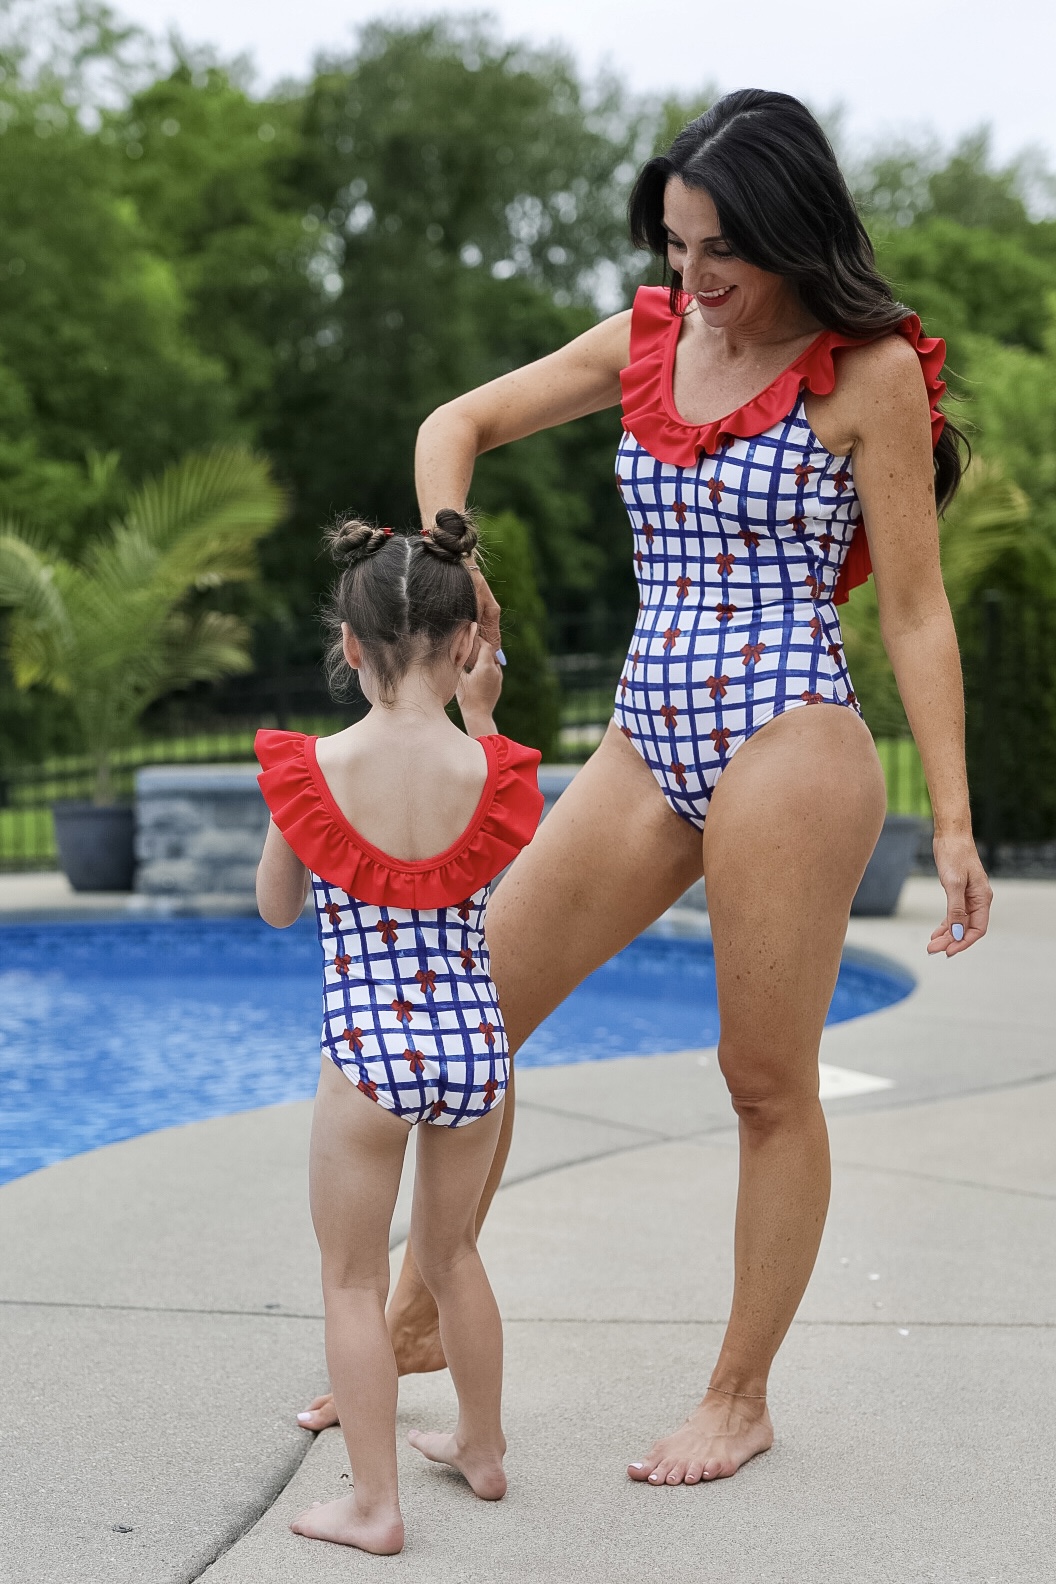
For this sew along, I will be making the low-back one-piece swimsuit with the neckline ruffle for a 4th of July celebration. The Coralie pattern can be purchased online at tillyandthebuttons.com and is available in both a pdf and paper option. If you want to coordinate with your little one, the “Mairin” from Sew A Little Seam is a great option!
Materials to Sew the Coralie Swimsuit Pattern
*Reference page 4 of the pattern instructions for fabric requirements *
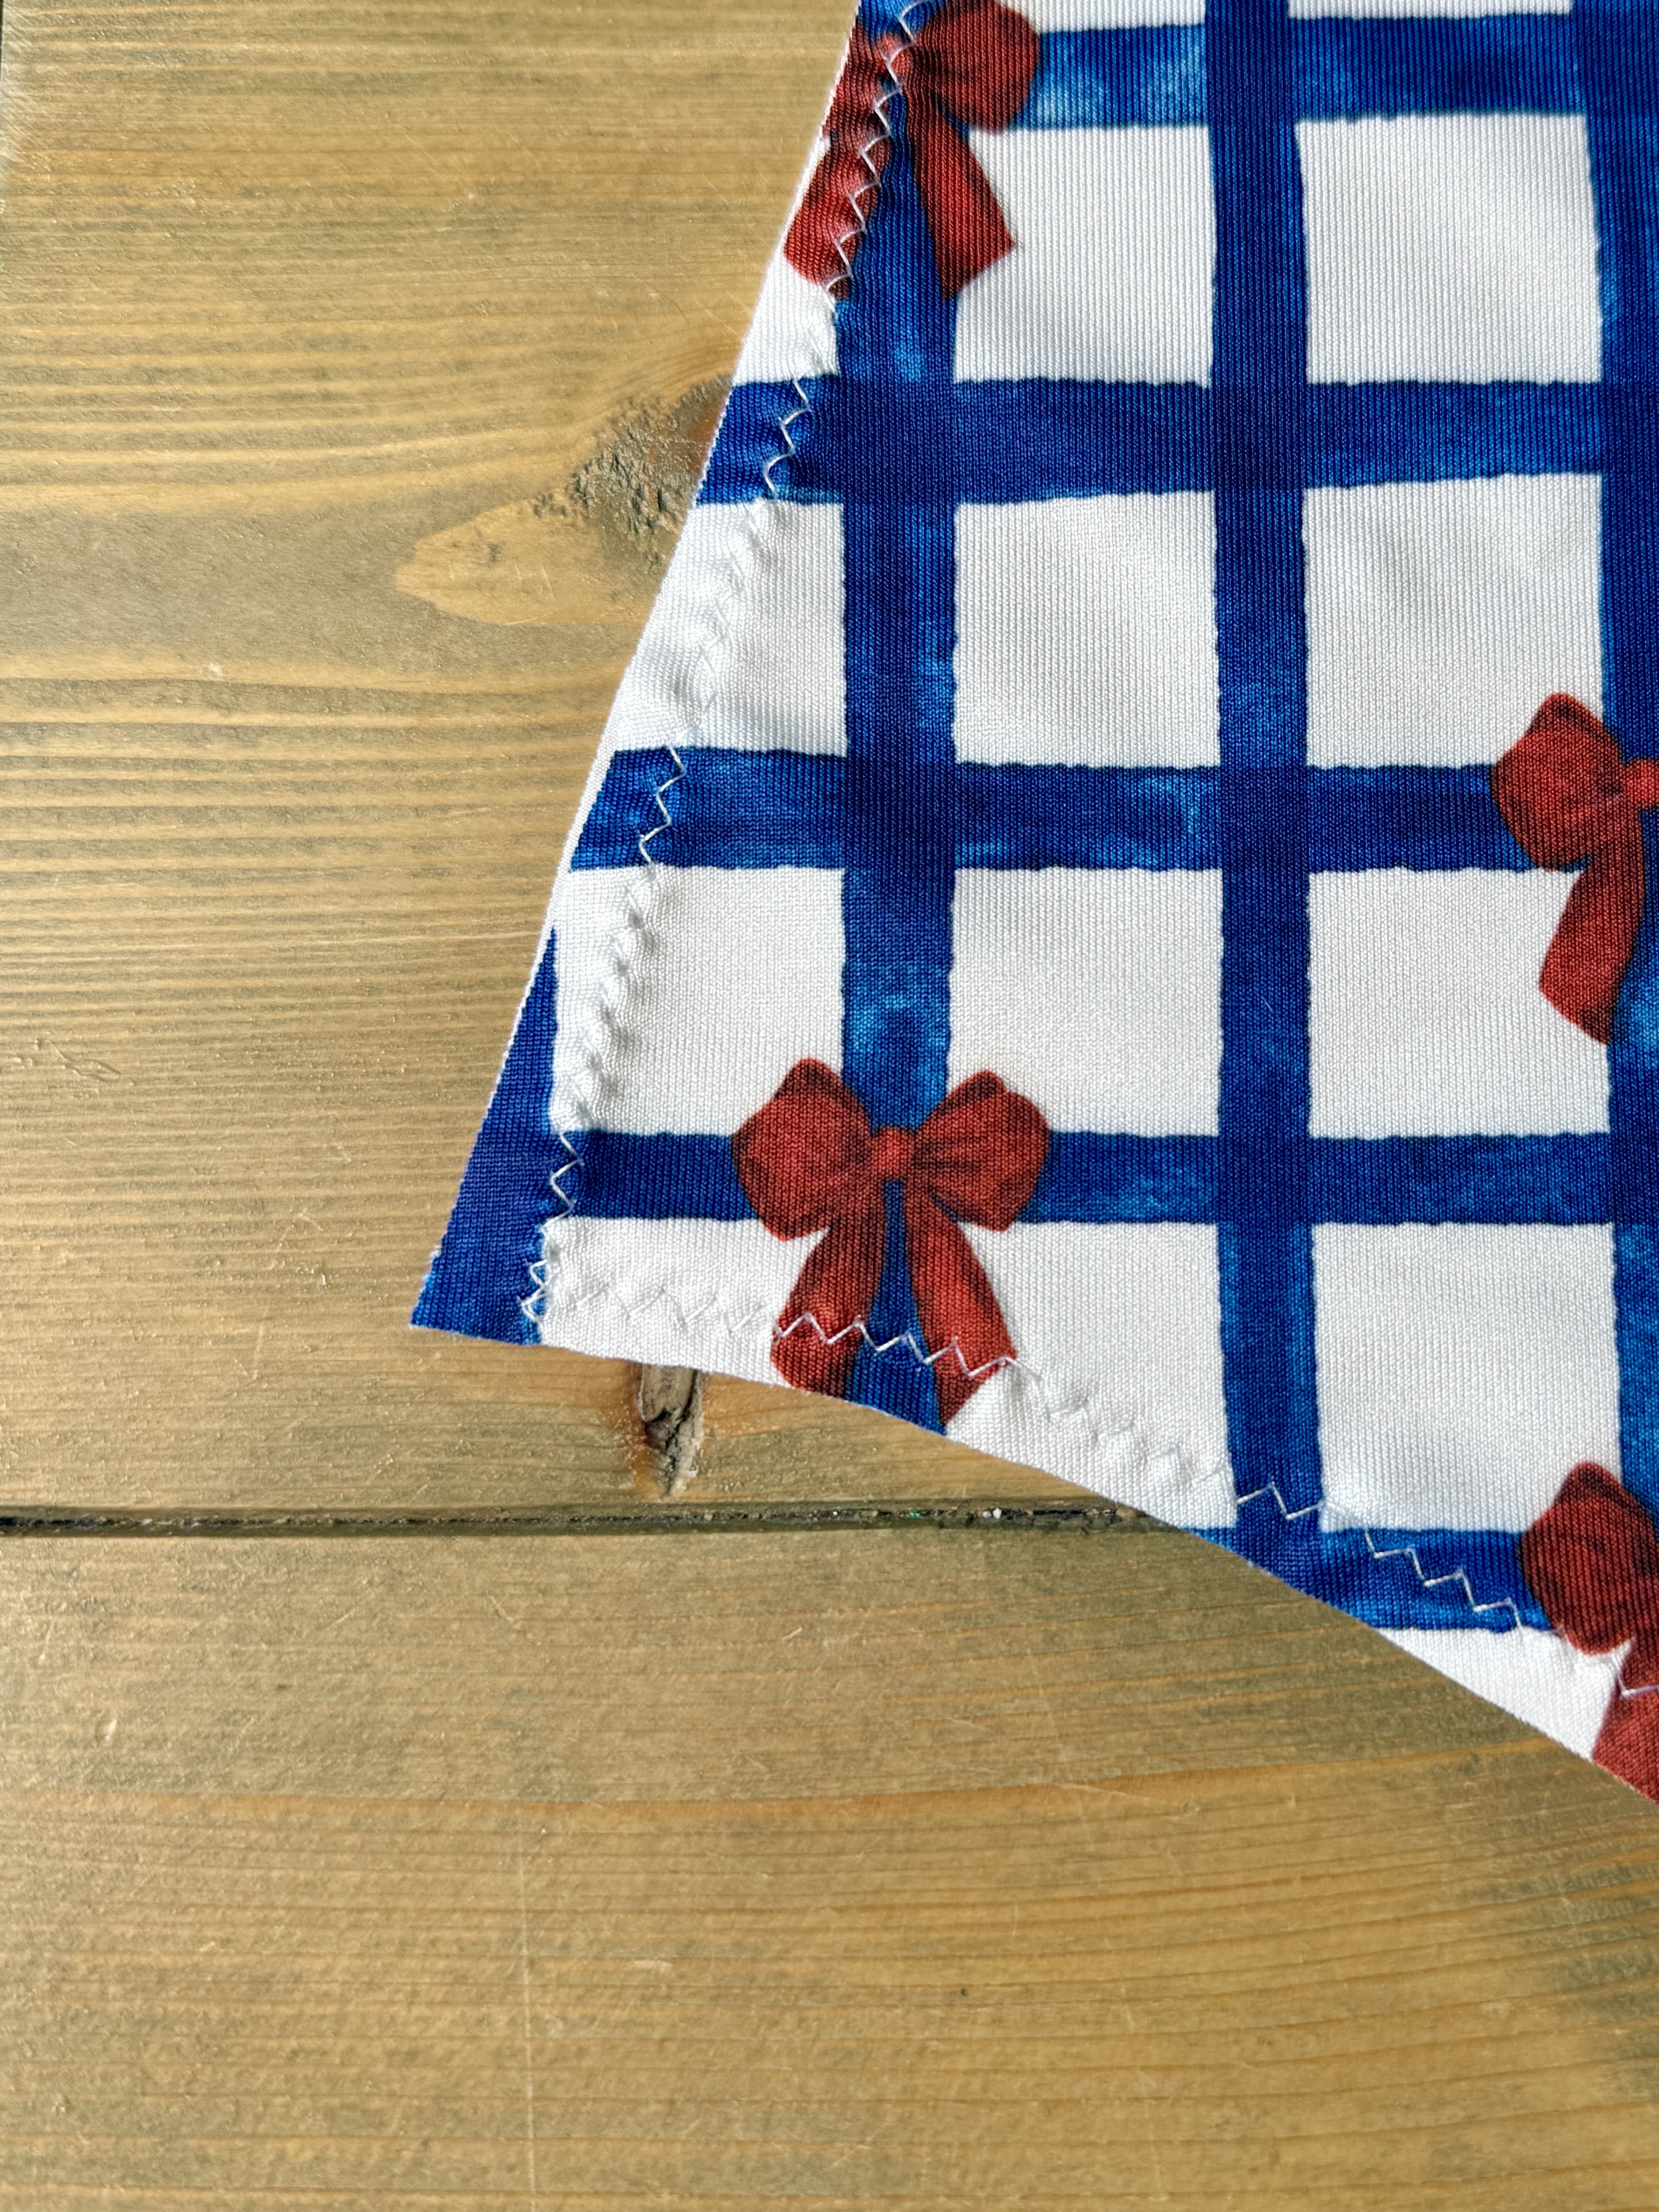
- Fabric: four-way swimwear fabric with at least 50% stretch + swimwear lining with at least 50% stretch.
- Elastic: 3/8″ rubber swimwear elastic + 1/4″ swimwear elastic (if making bikini version)
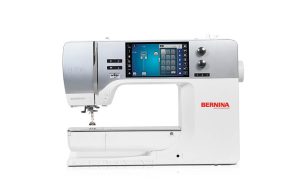
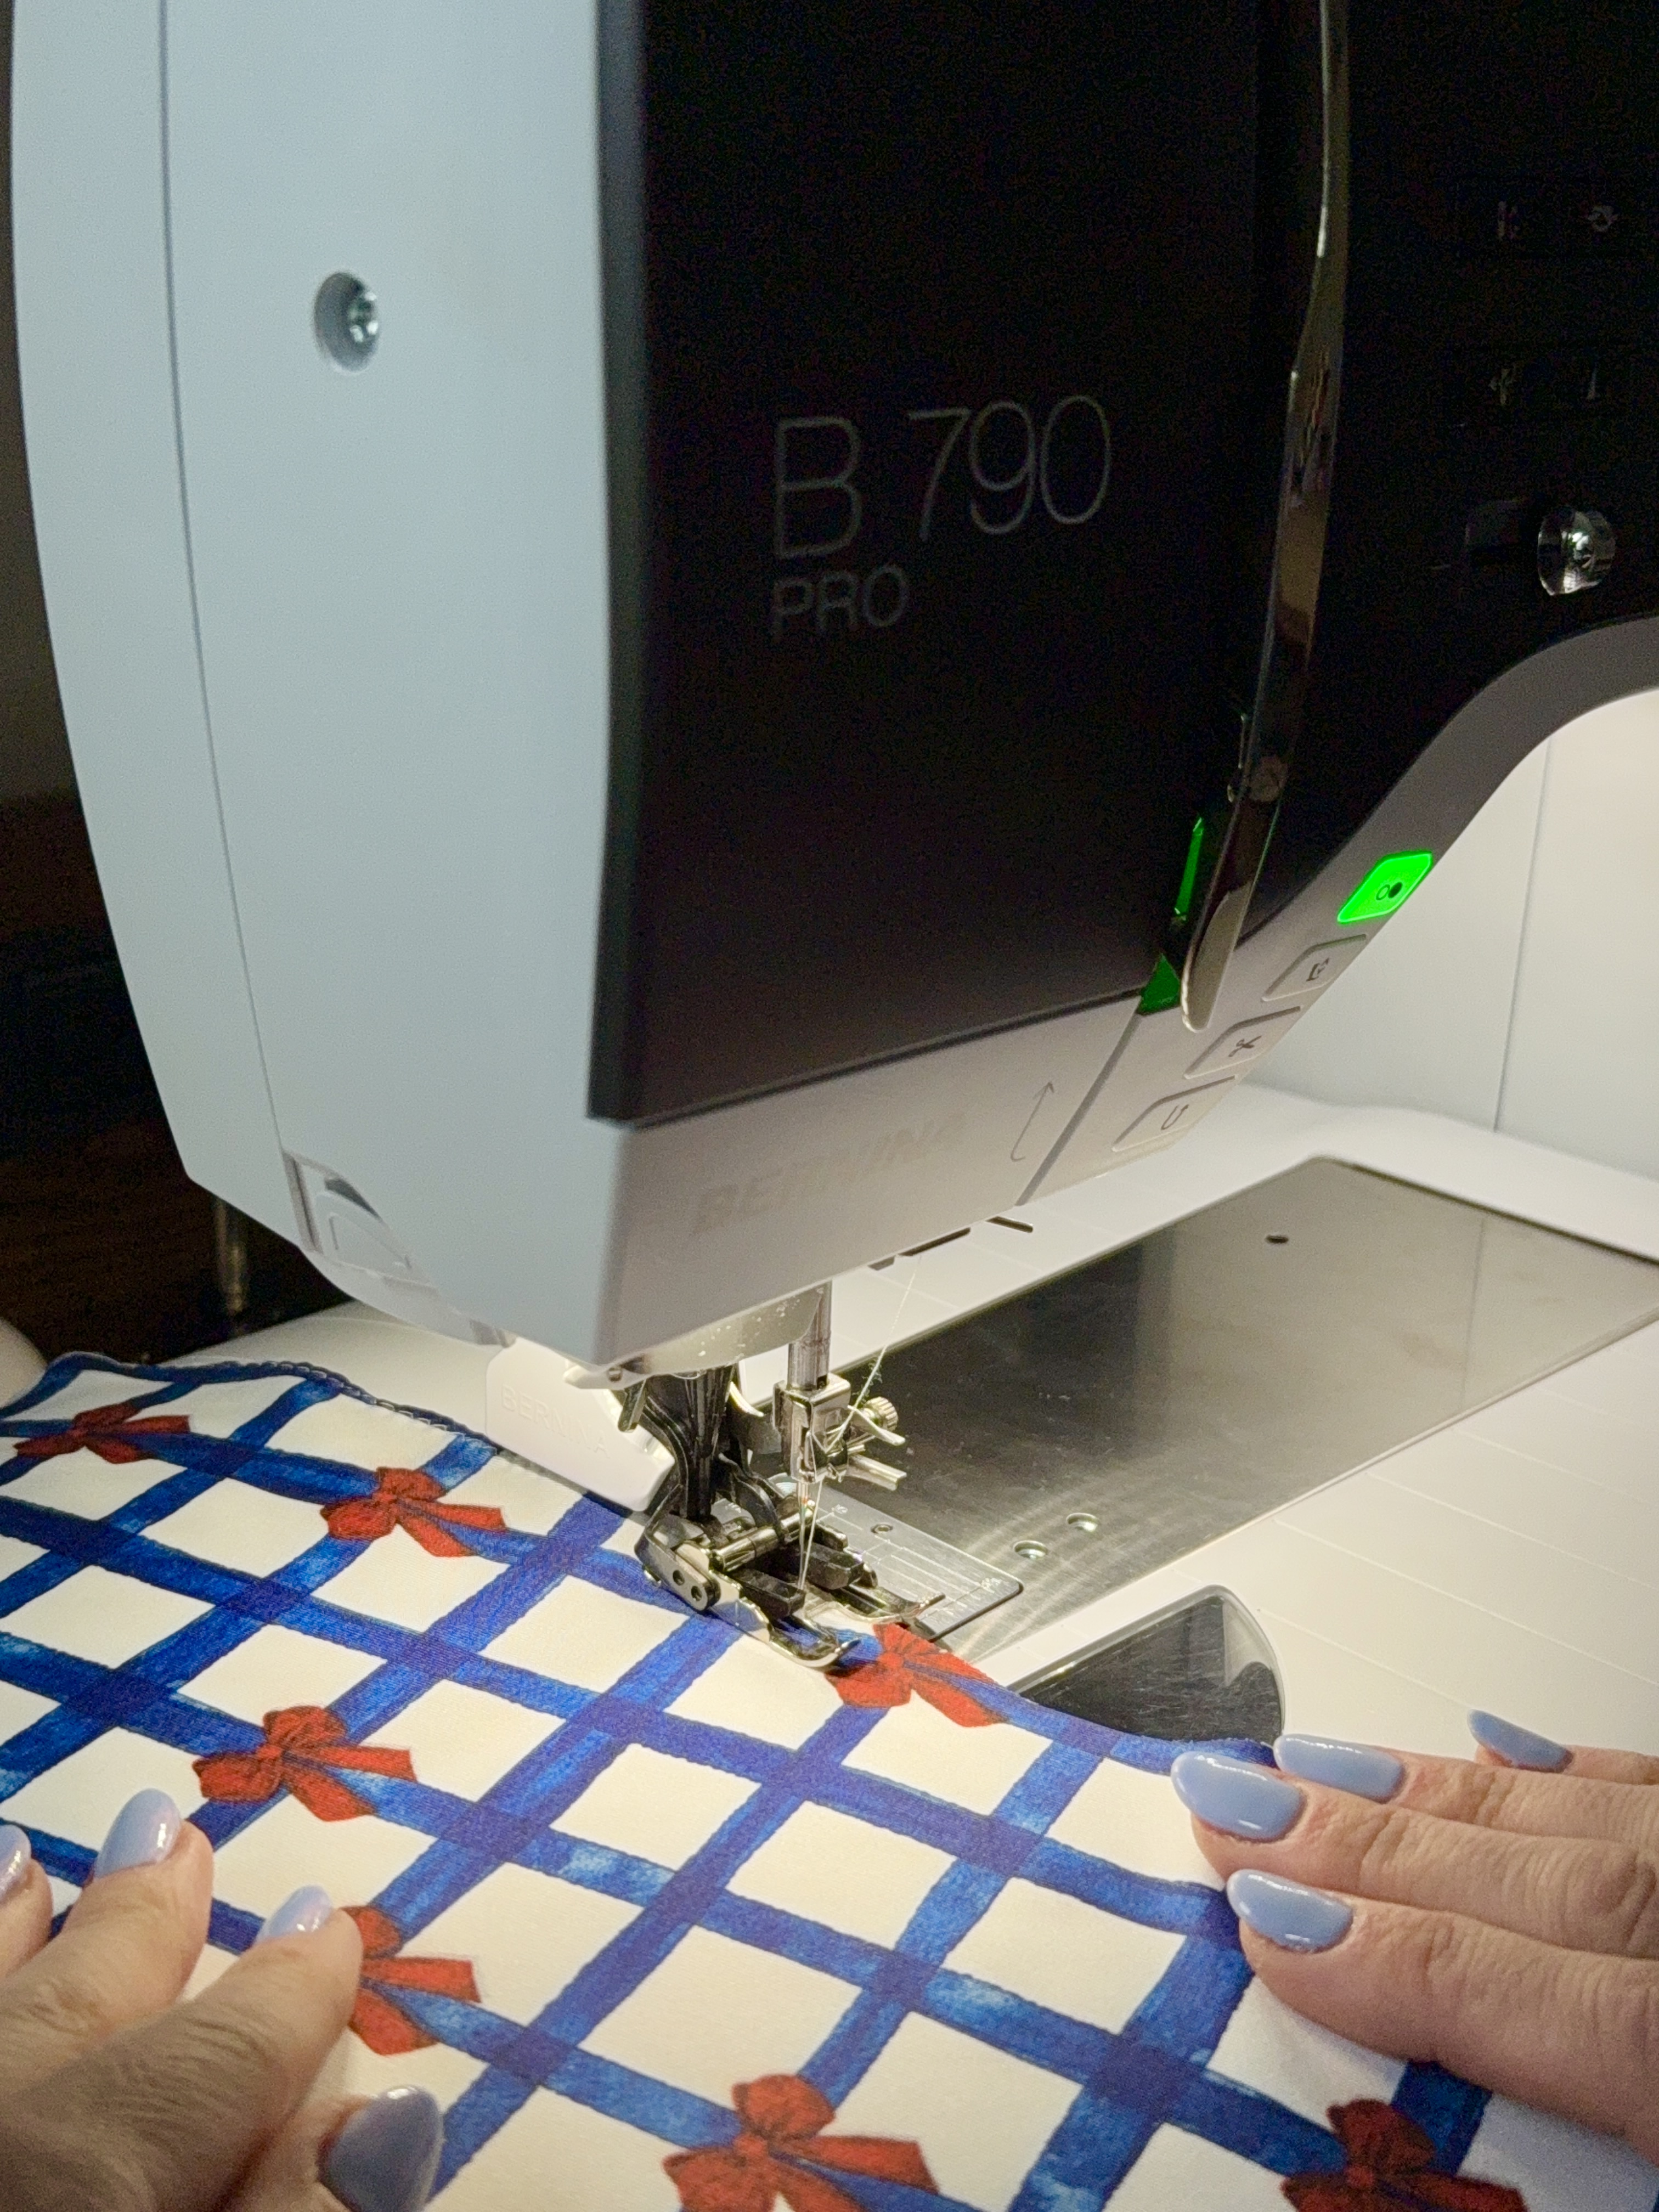
- BERNINA 790 PRO
- BERNINA L 890
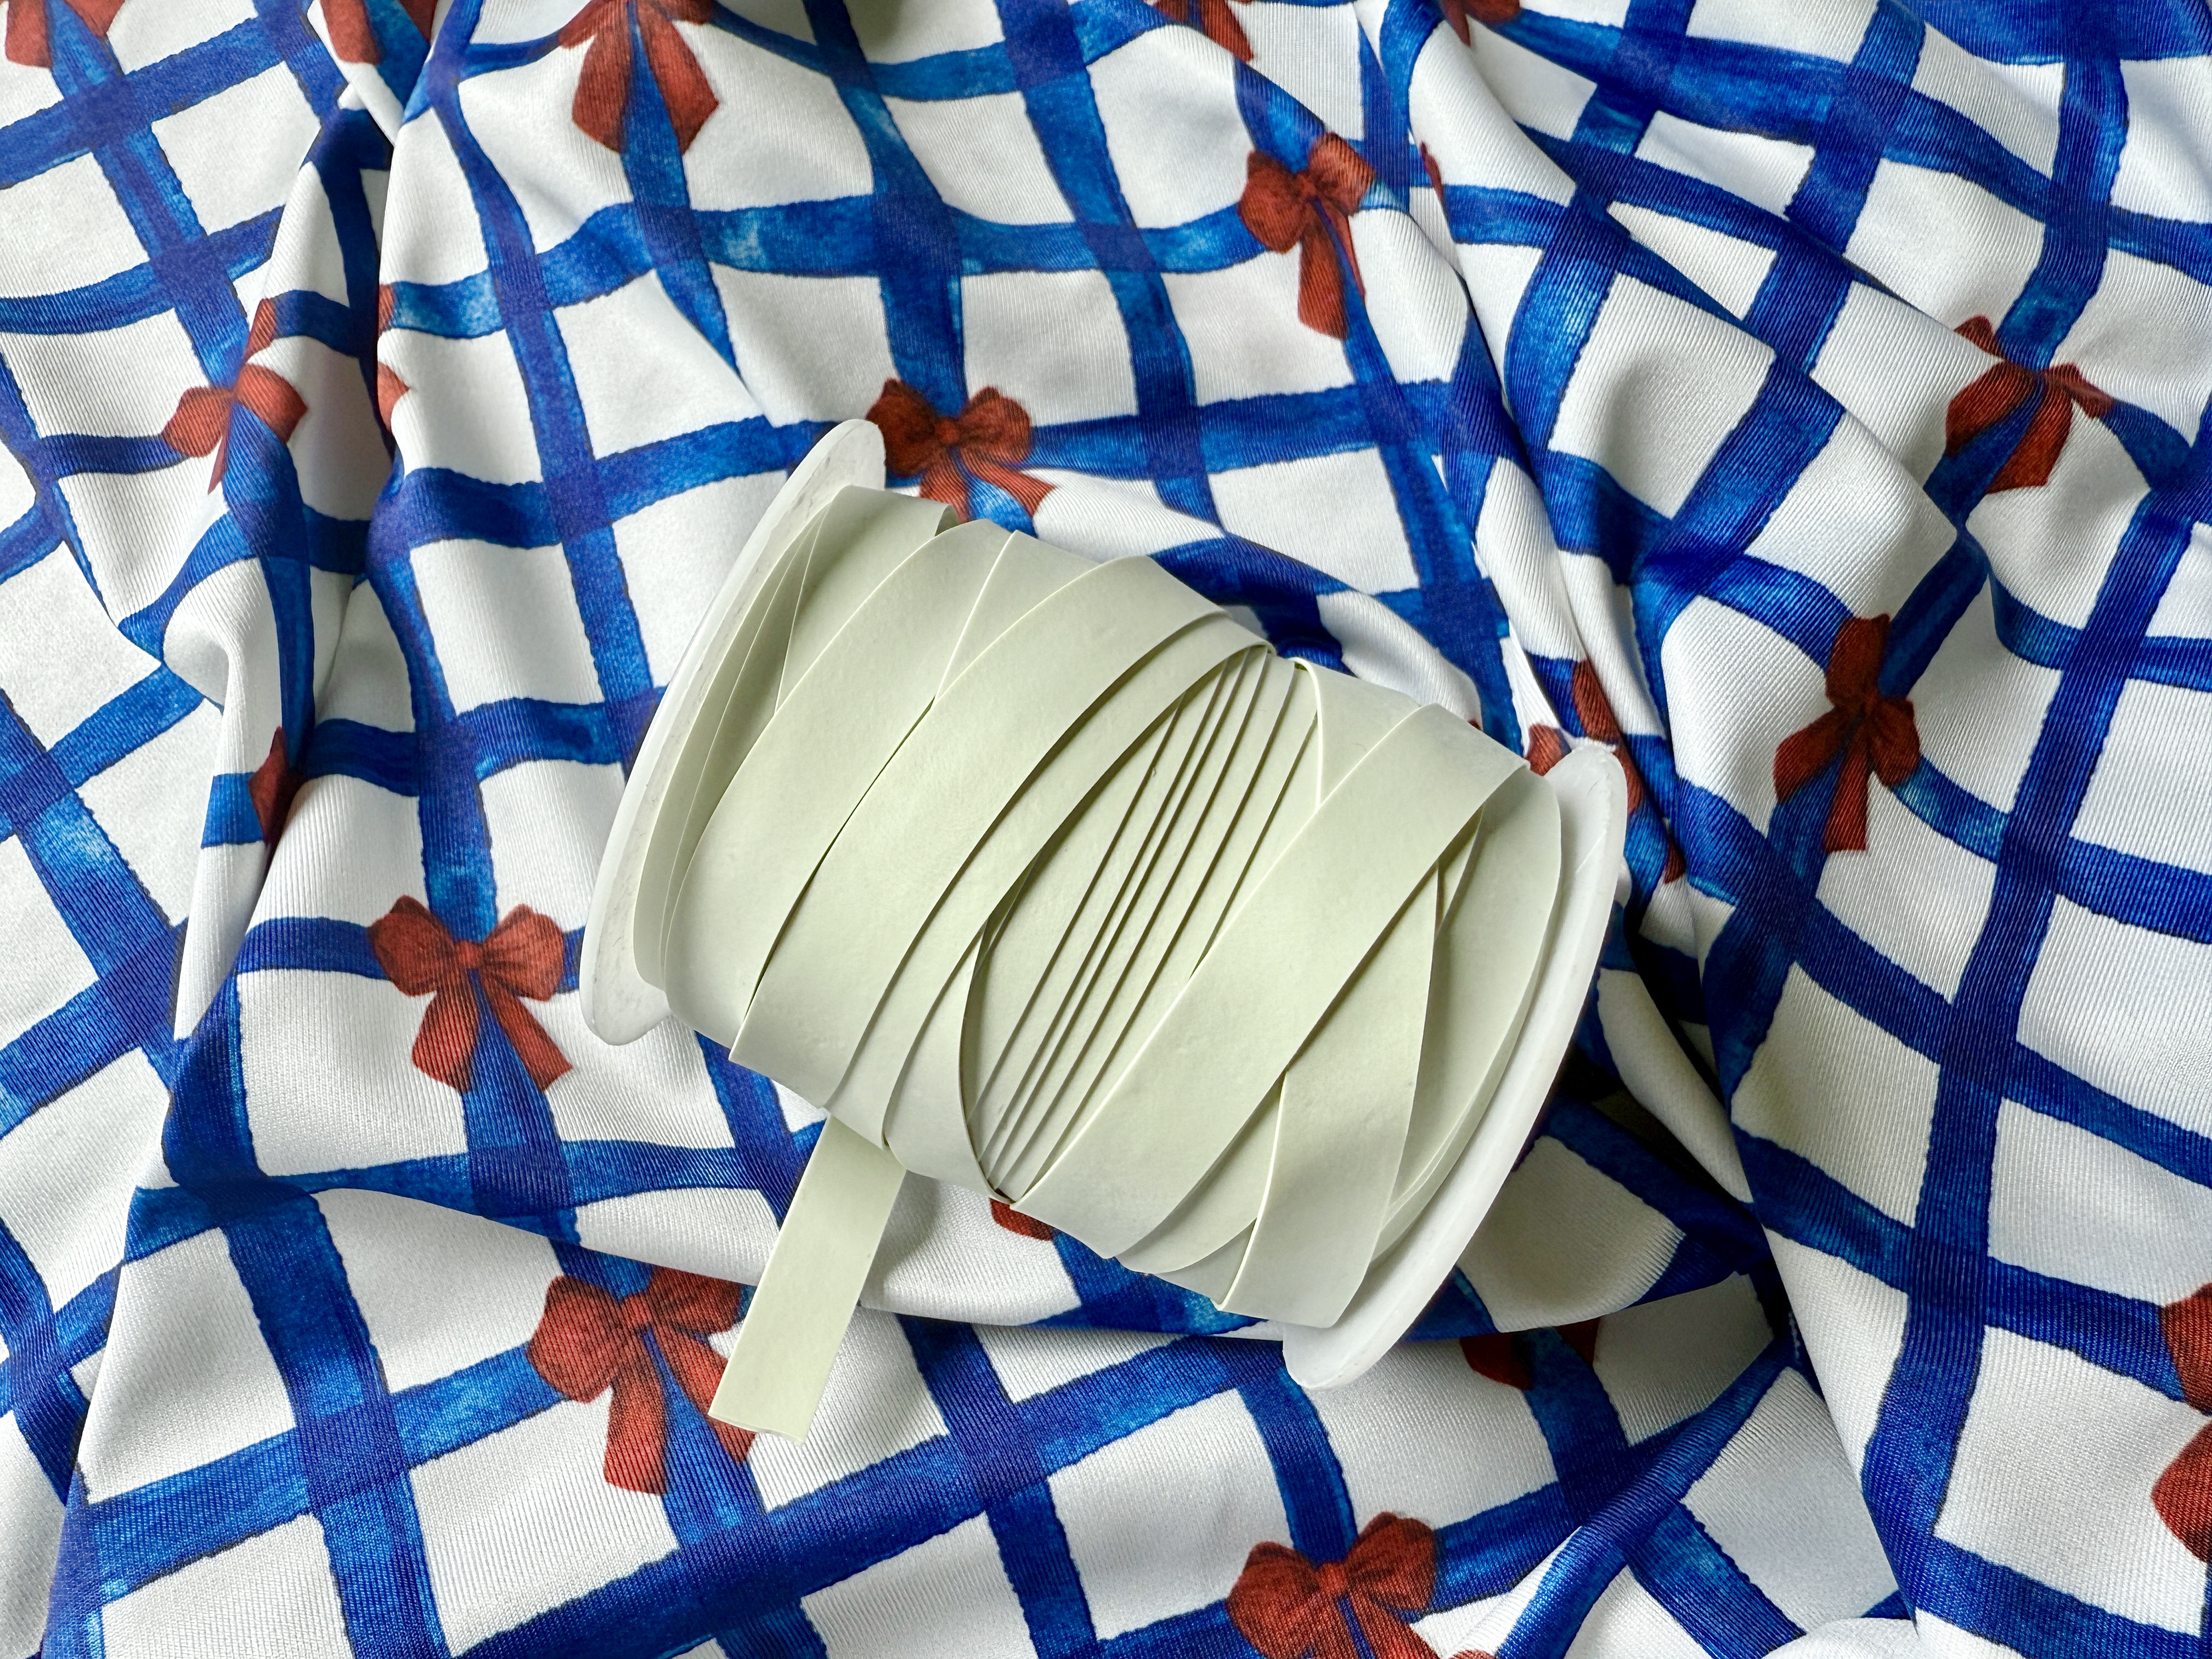
The fabric used for this tutorial was purchased from carriagehouseprintery.com.
Preparing to Sew the Coralie Swimsuit Pattern
- Take your measurements and find your size. Page 7 of the instruction booklet includes a table of both Body Measurements and Finished Garment Measurements. If you prefer a snugger fit, size down one from your body measurements.
- Choose your view. I will be making the low back one-piece swimsuit with the neckline ruffle.
- Print the pattern and cut out your size. The Coralie pattern also includes an A0 and Projector file to reduce paper consumption. If between sizes, it is encouraged to grade your pattern to custom fit your own measurements.
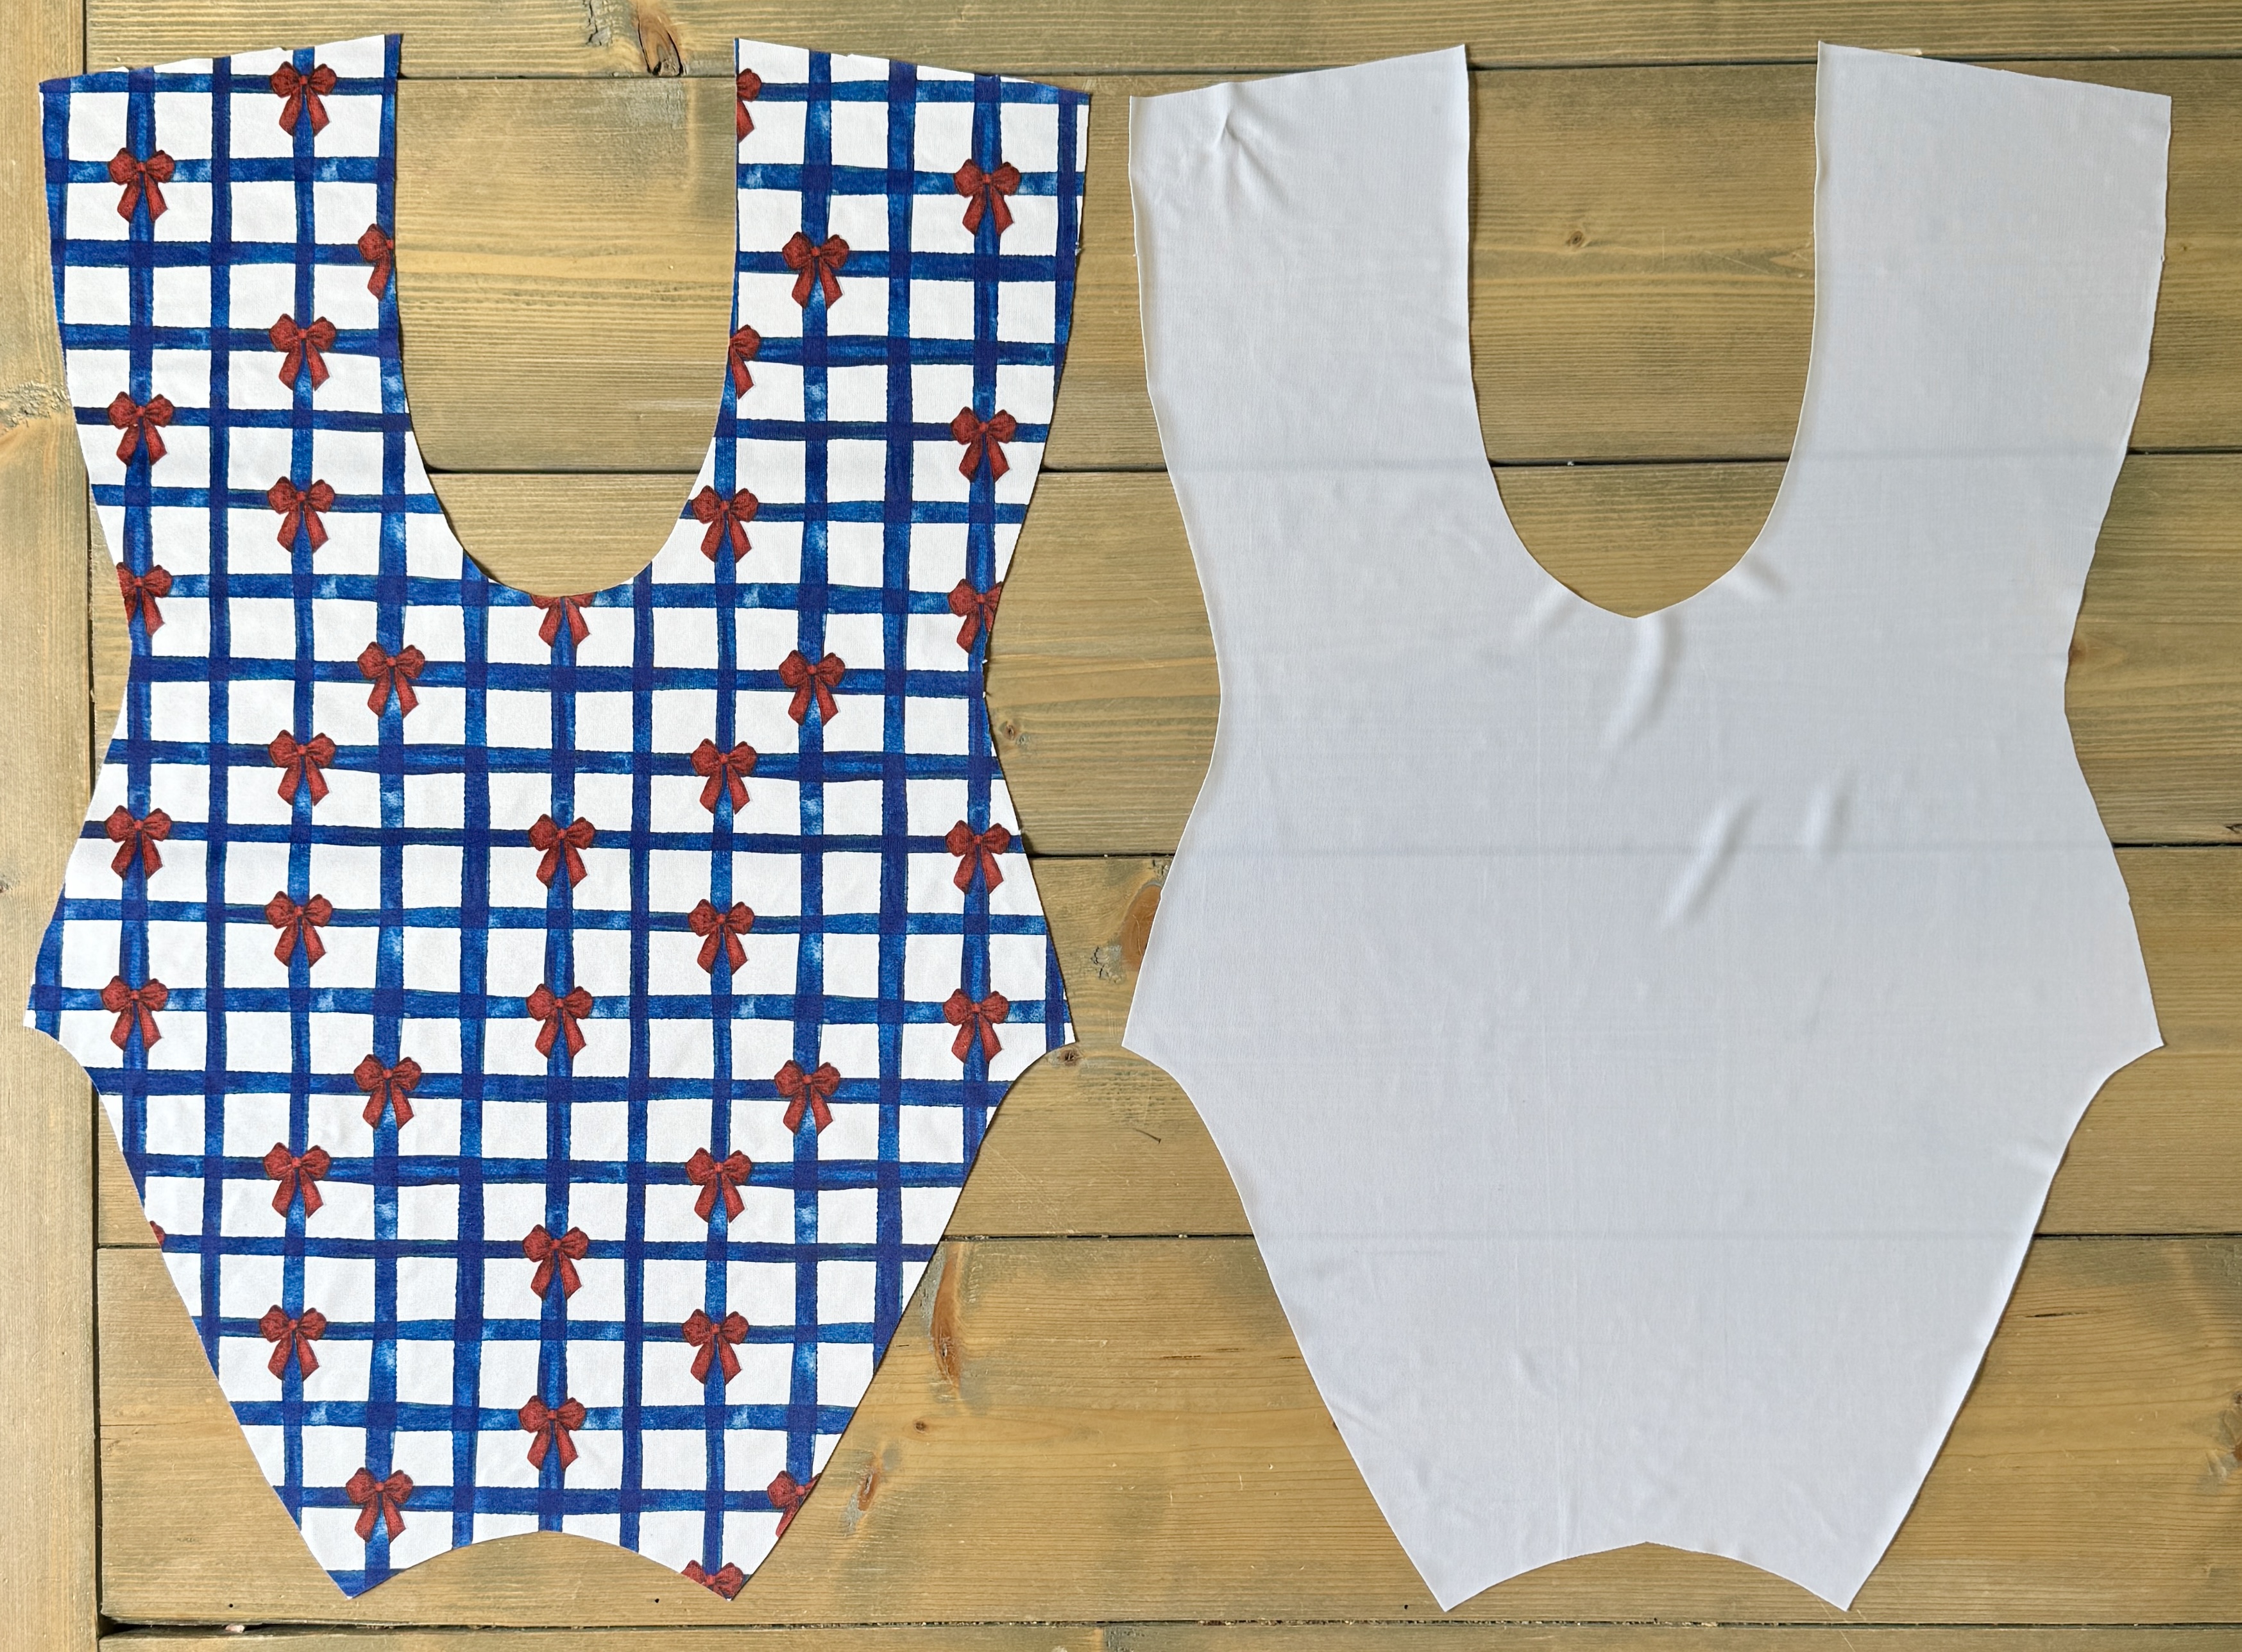
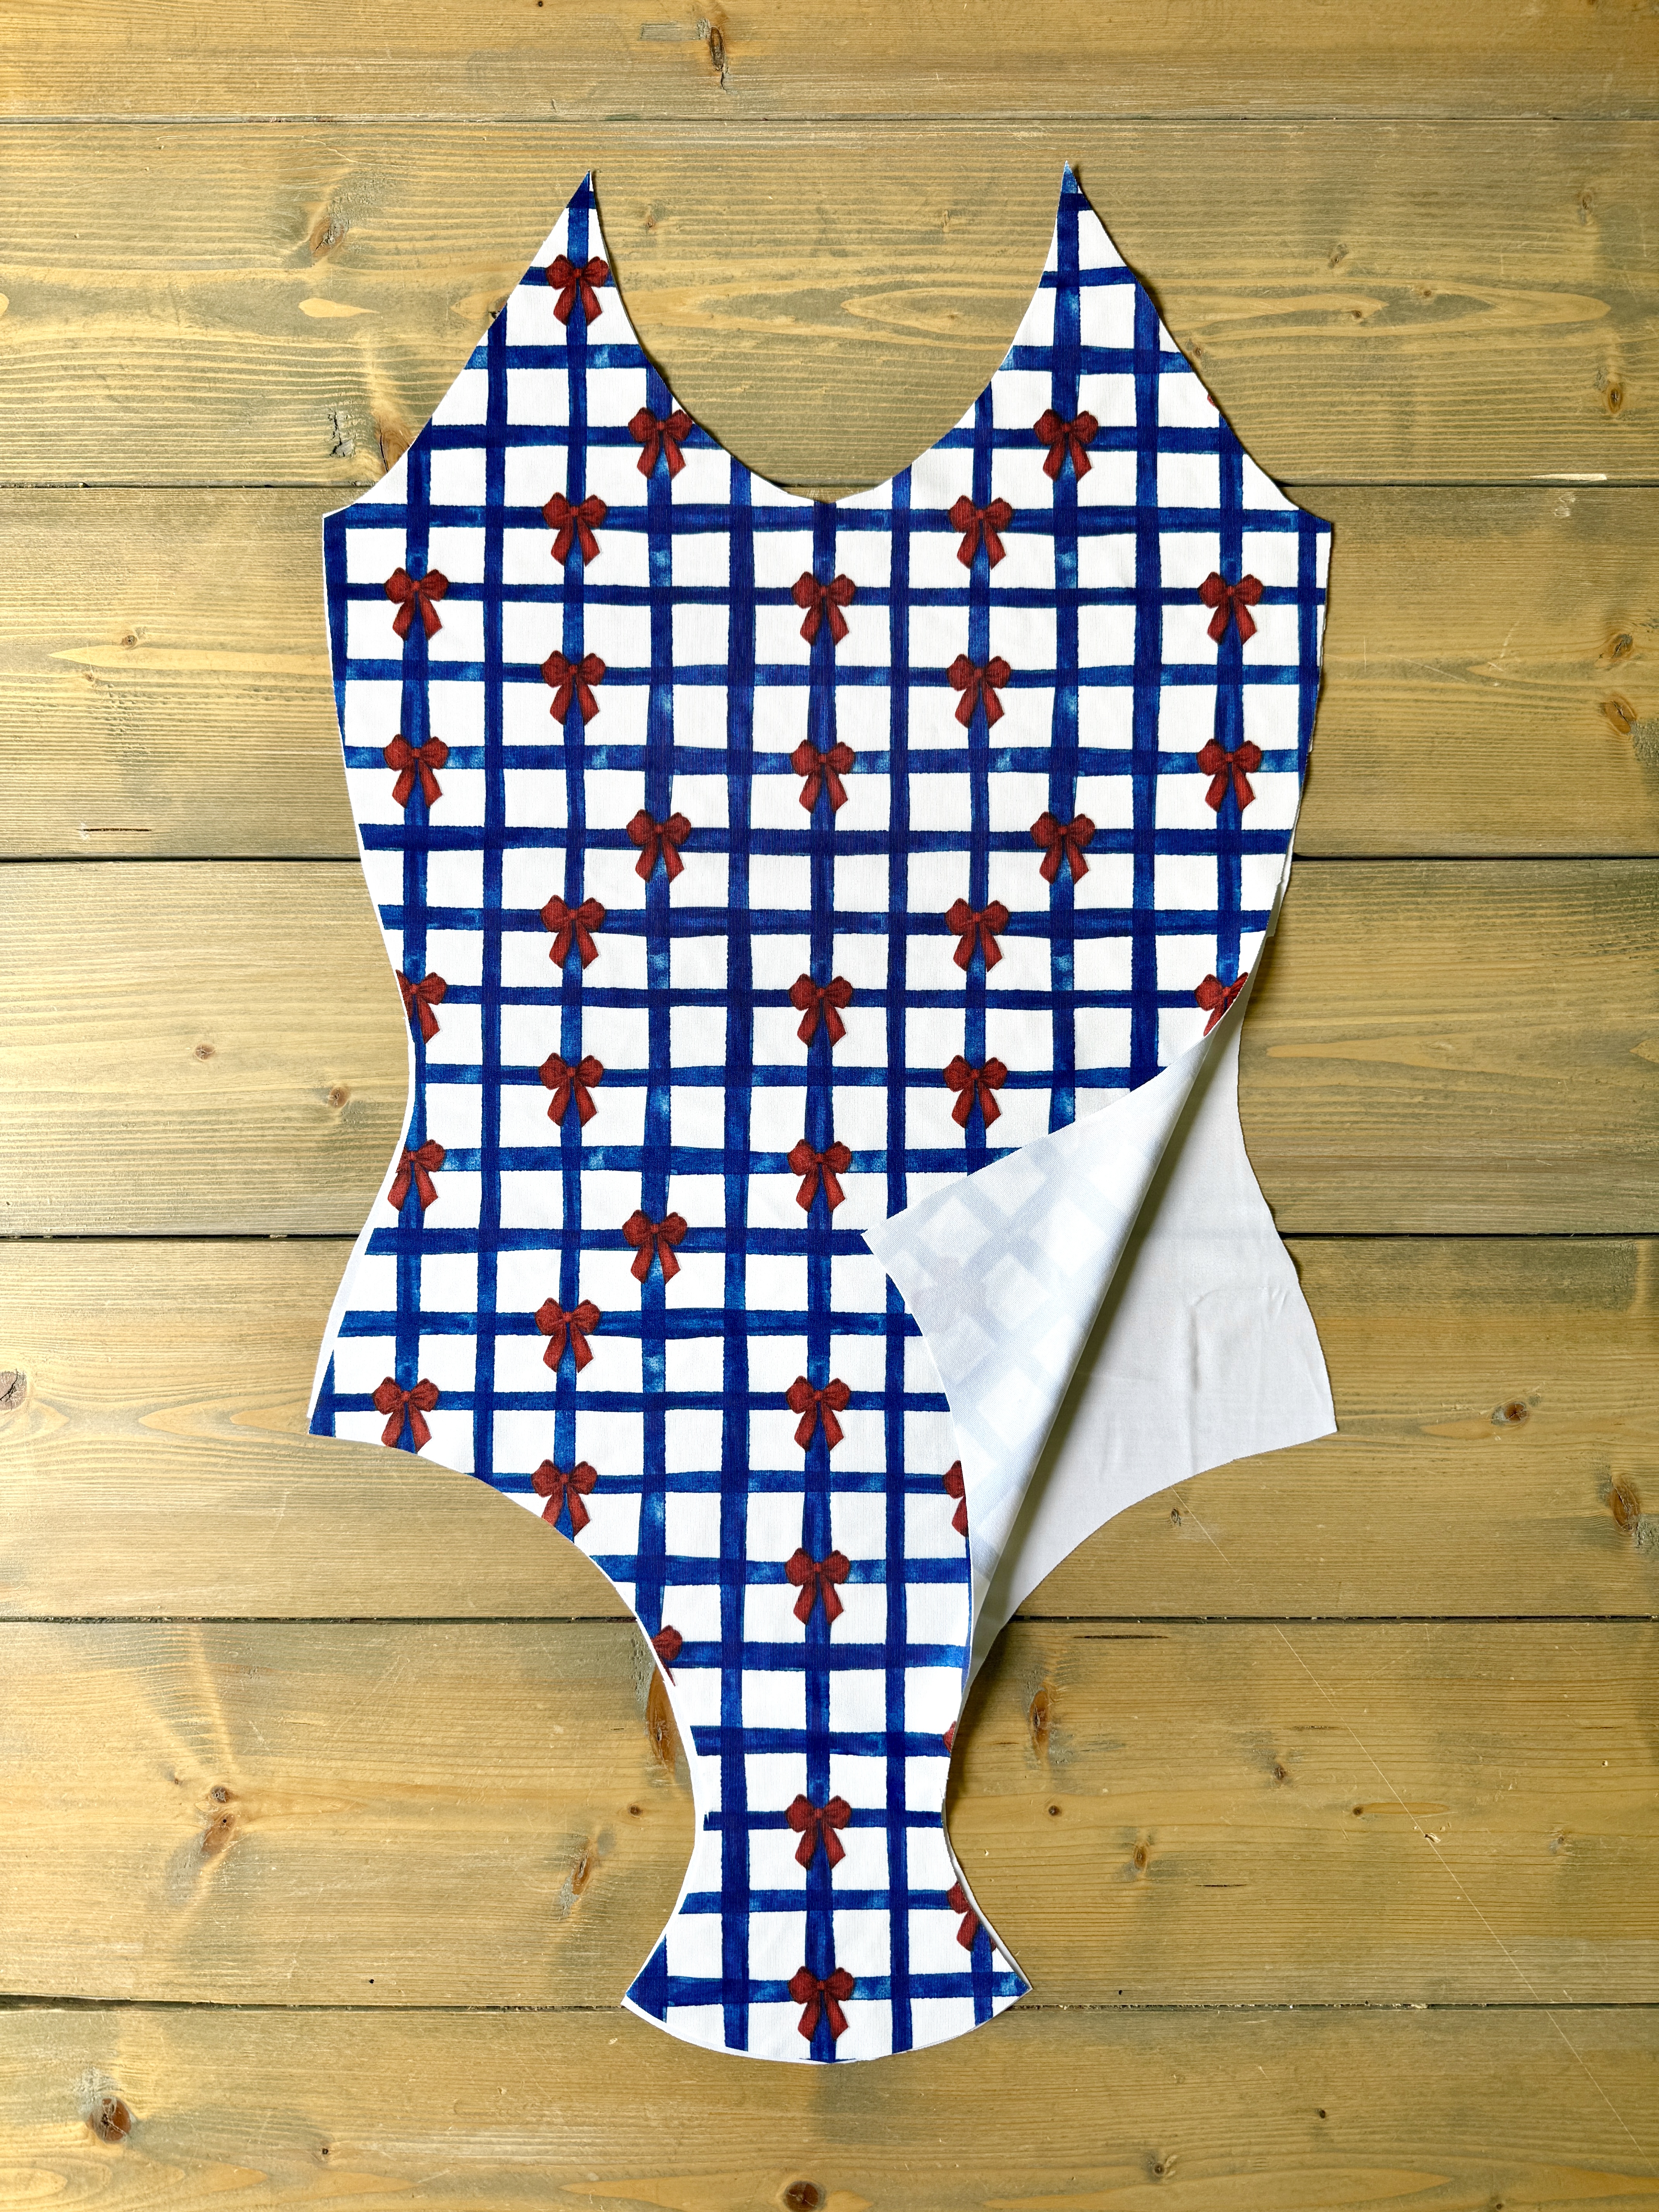
Pieces to Cut for the One-Piece Featuring Neckline Ruffle
- 1 Front Main
- 1 Front Lining
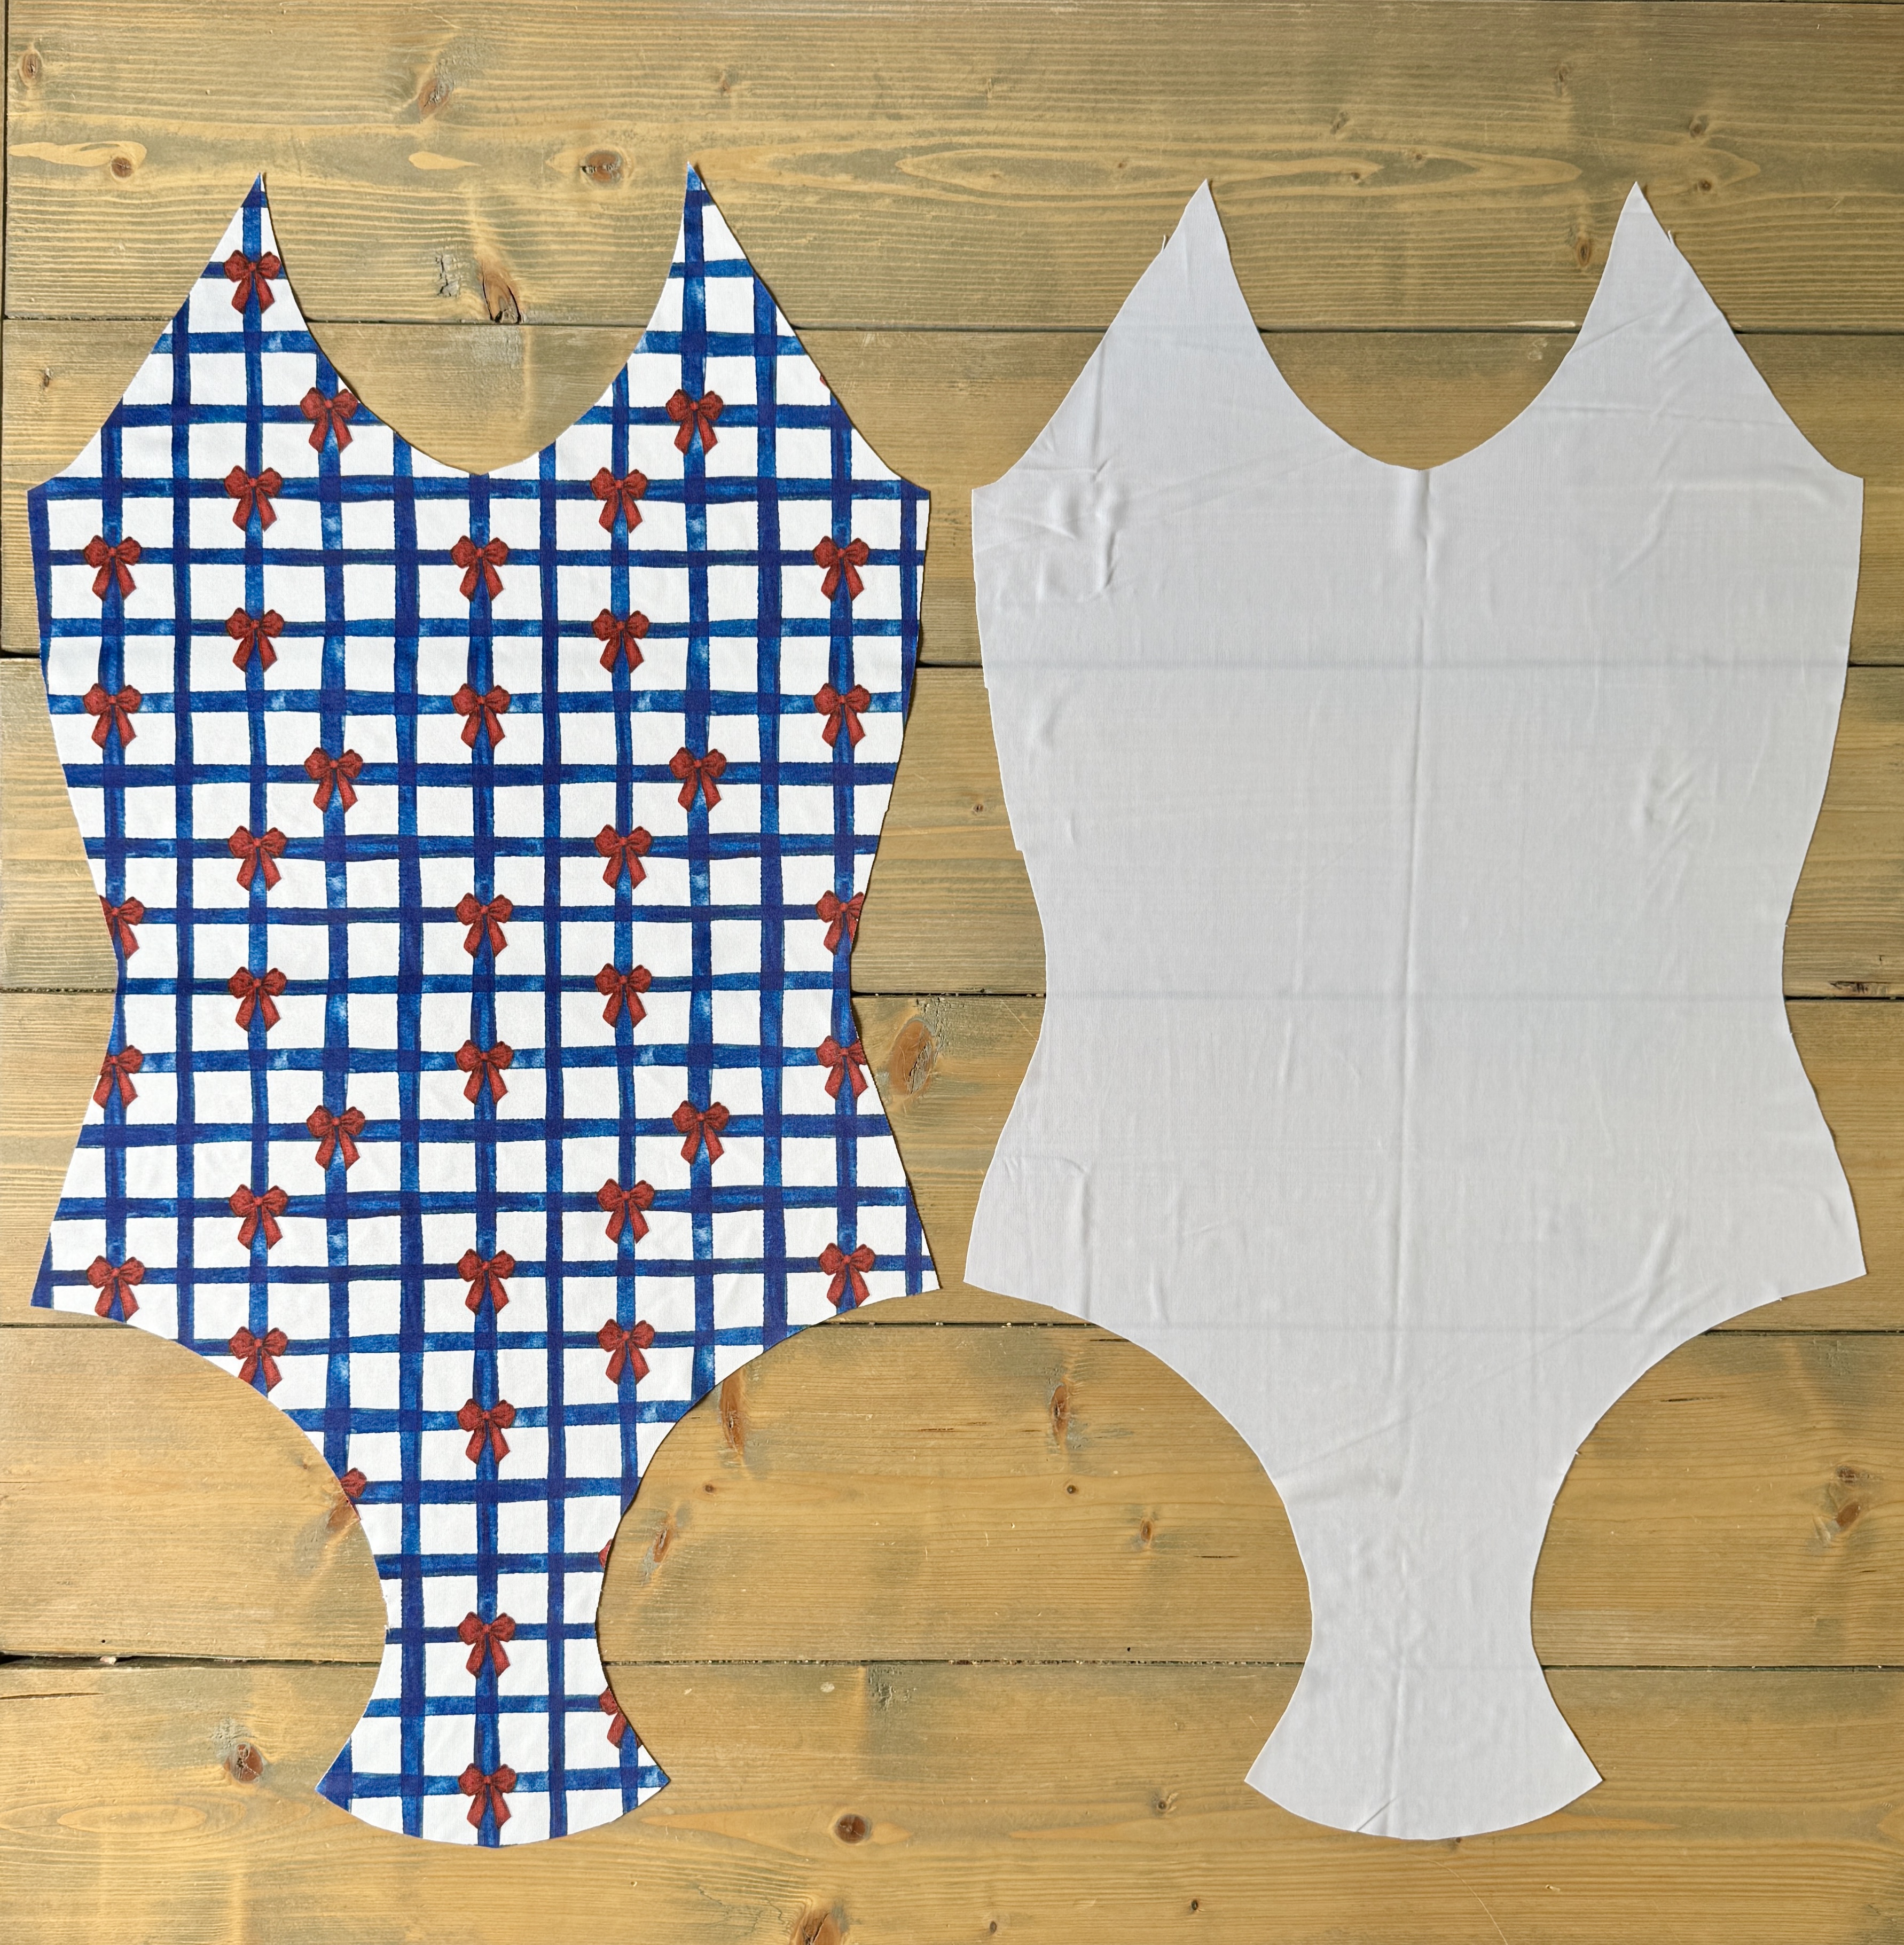
- 1 Back Main
- 1 Back Lining
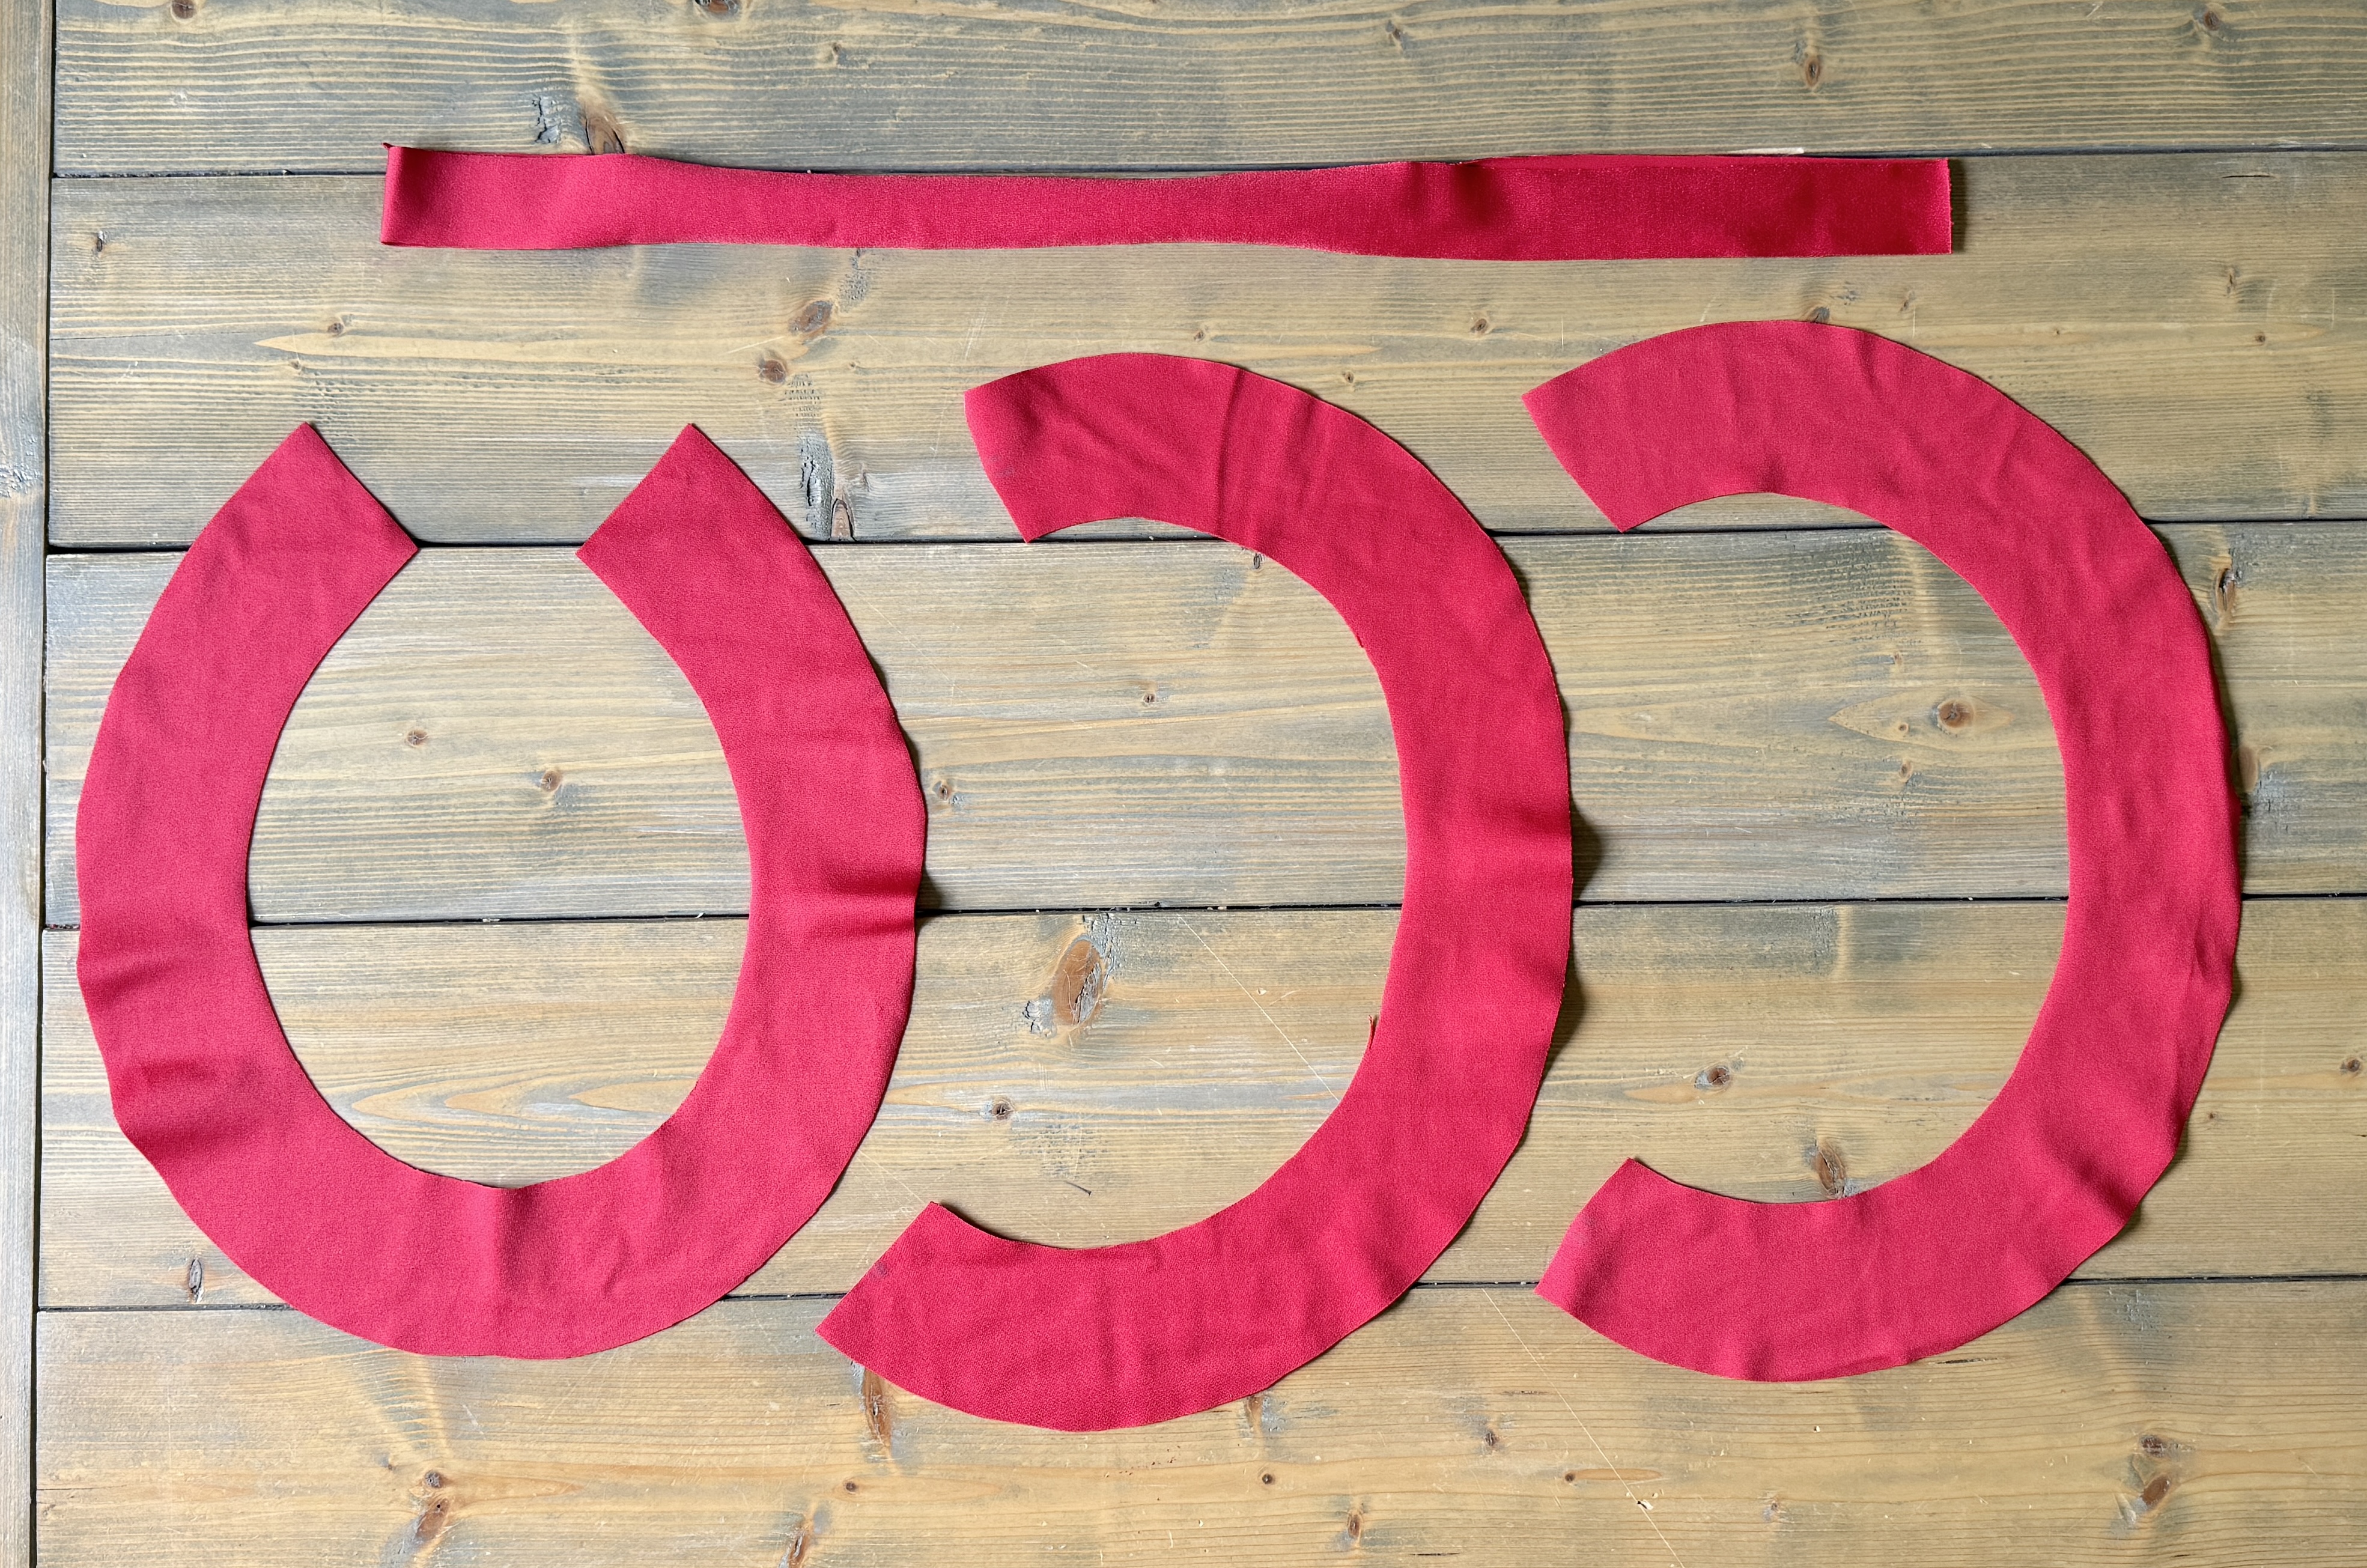
- 1 Neckline binding
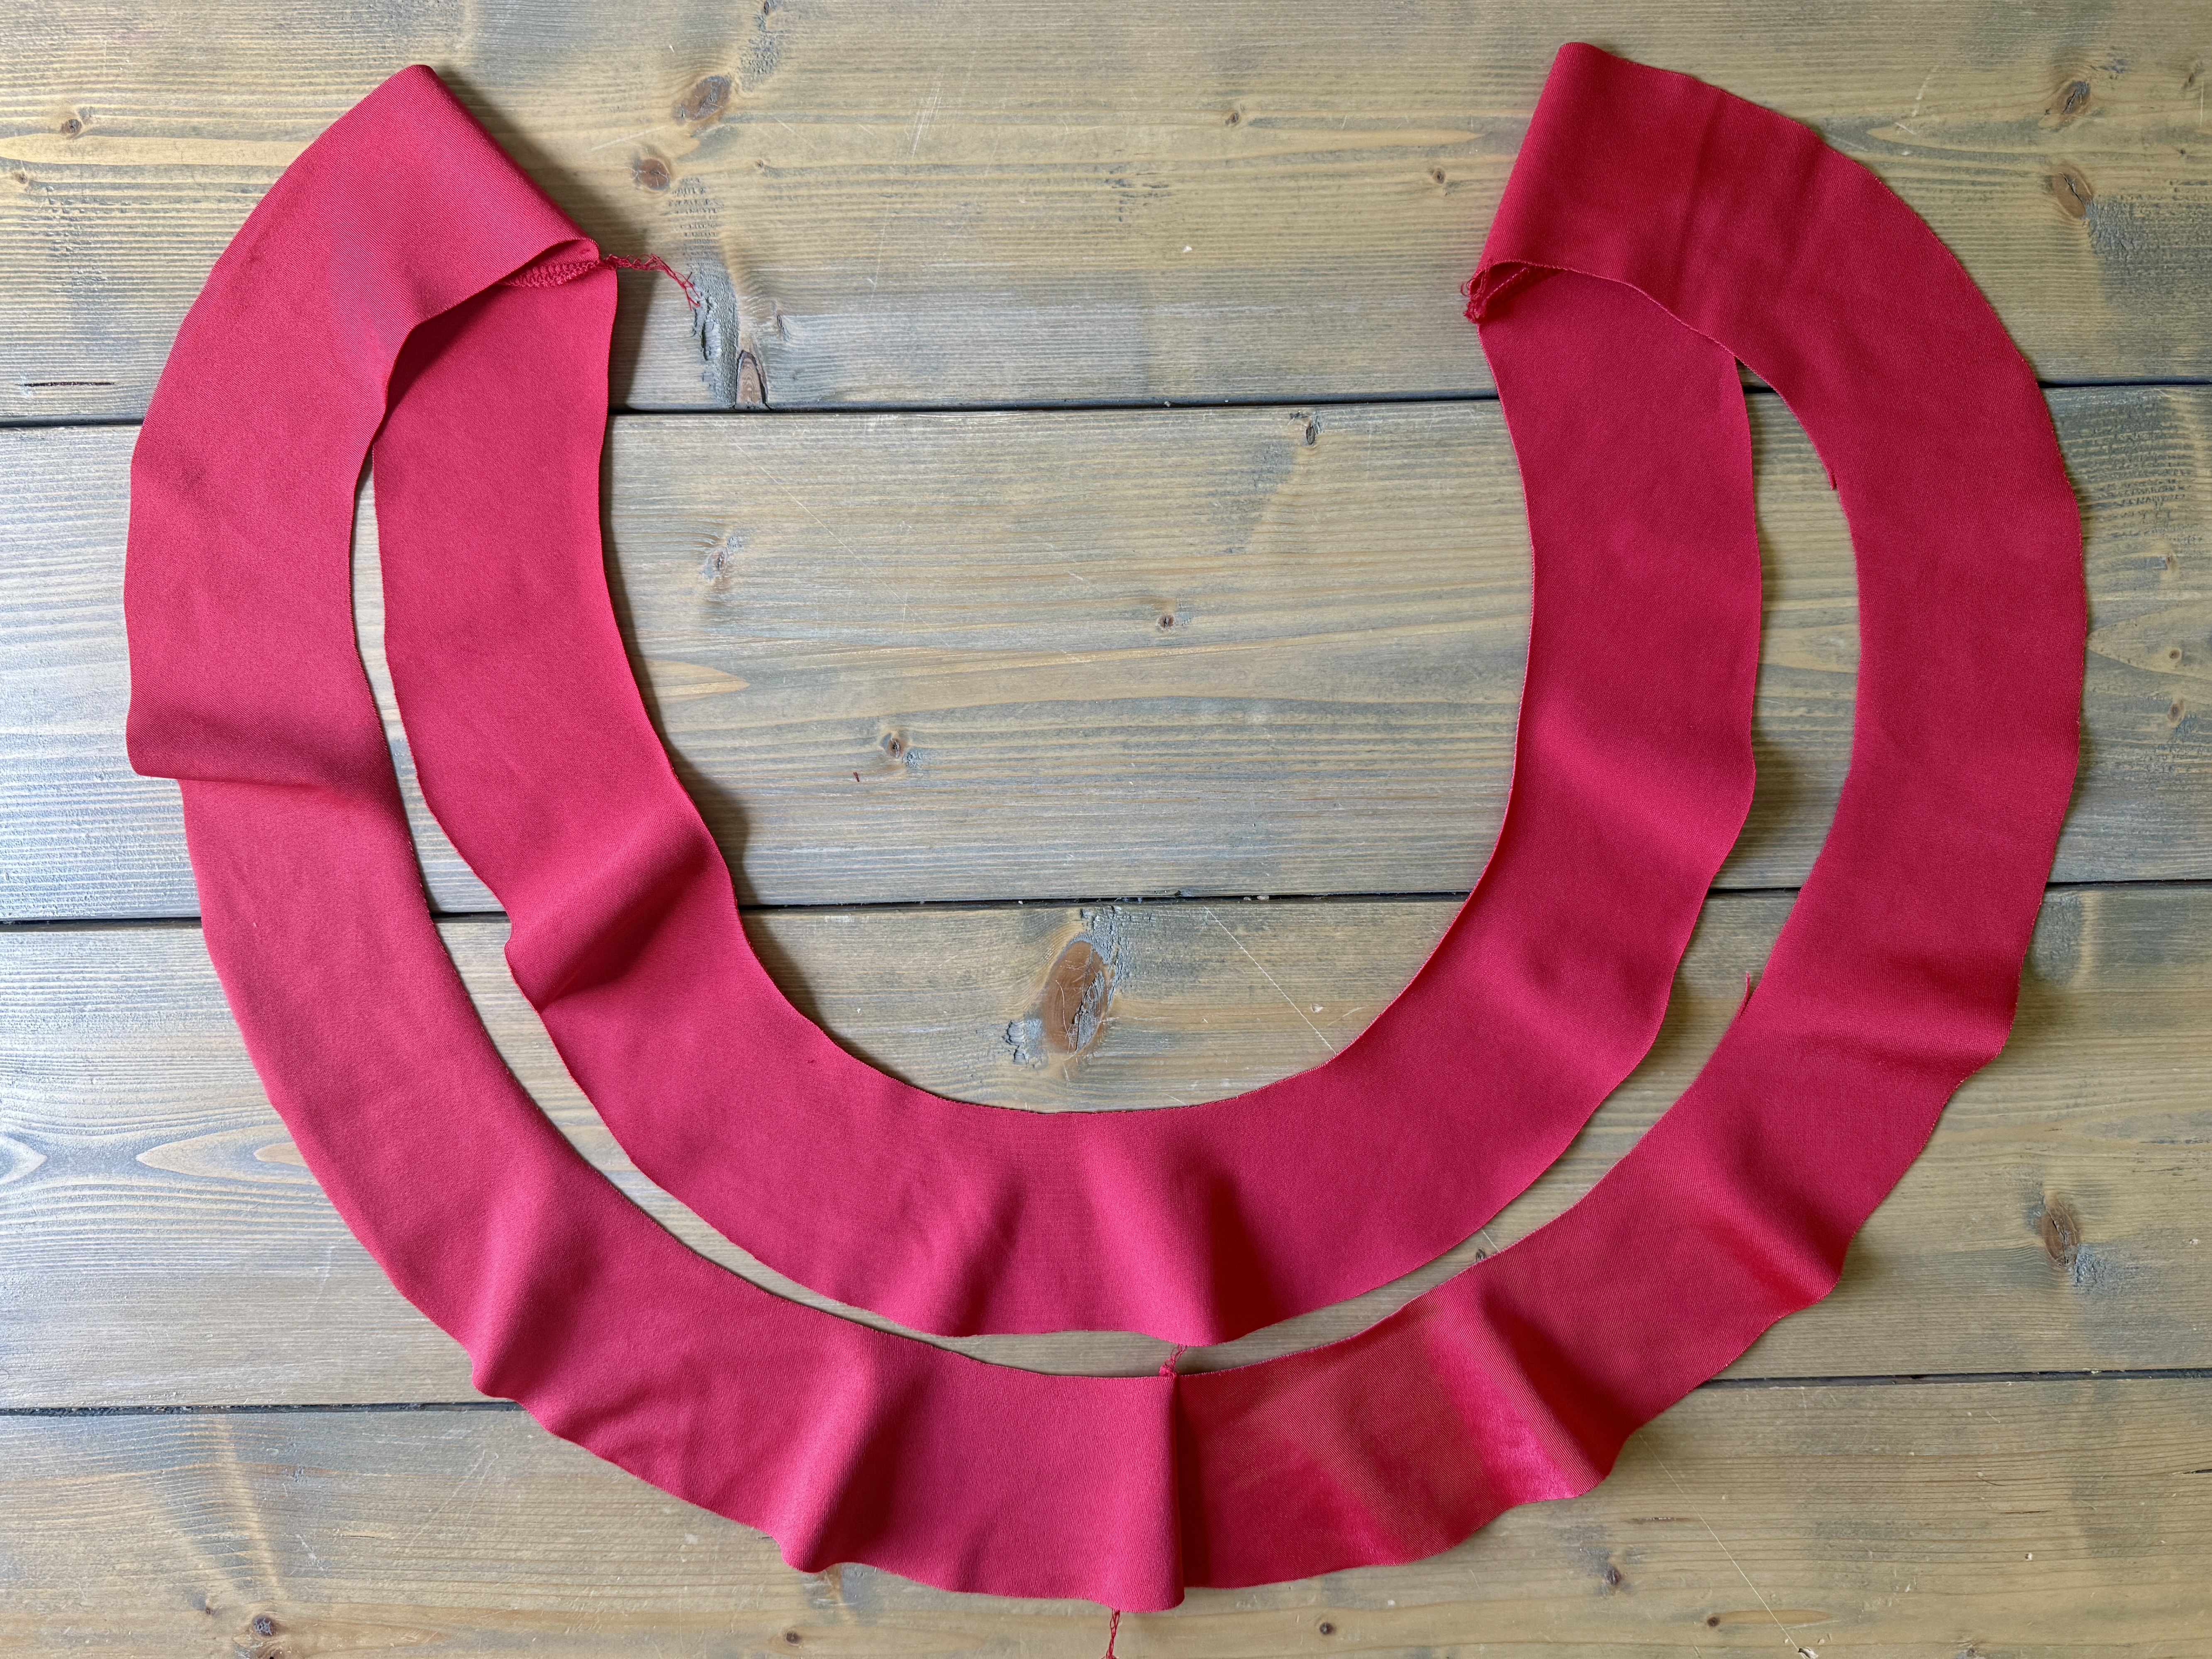
- 1 Front Neckline Ruffle
- 2 Back Neckline Ruffles
Sewing Tutorial for the Coralie Swimsuit Pattern
Note: Seam allowance is 1/4″ unless otherwise specified
Sewing the Bodice Pieces
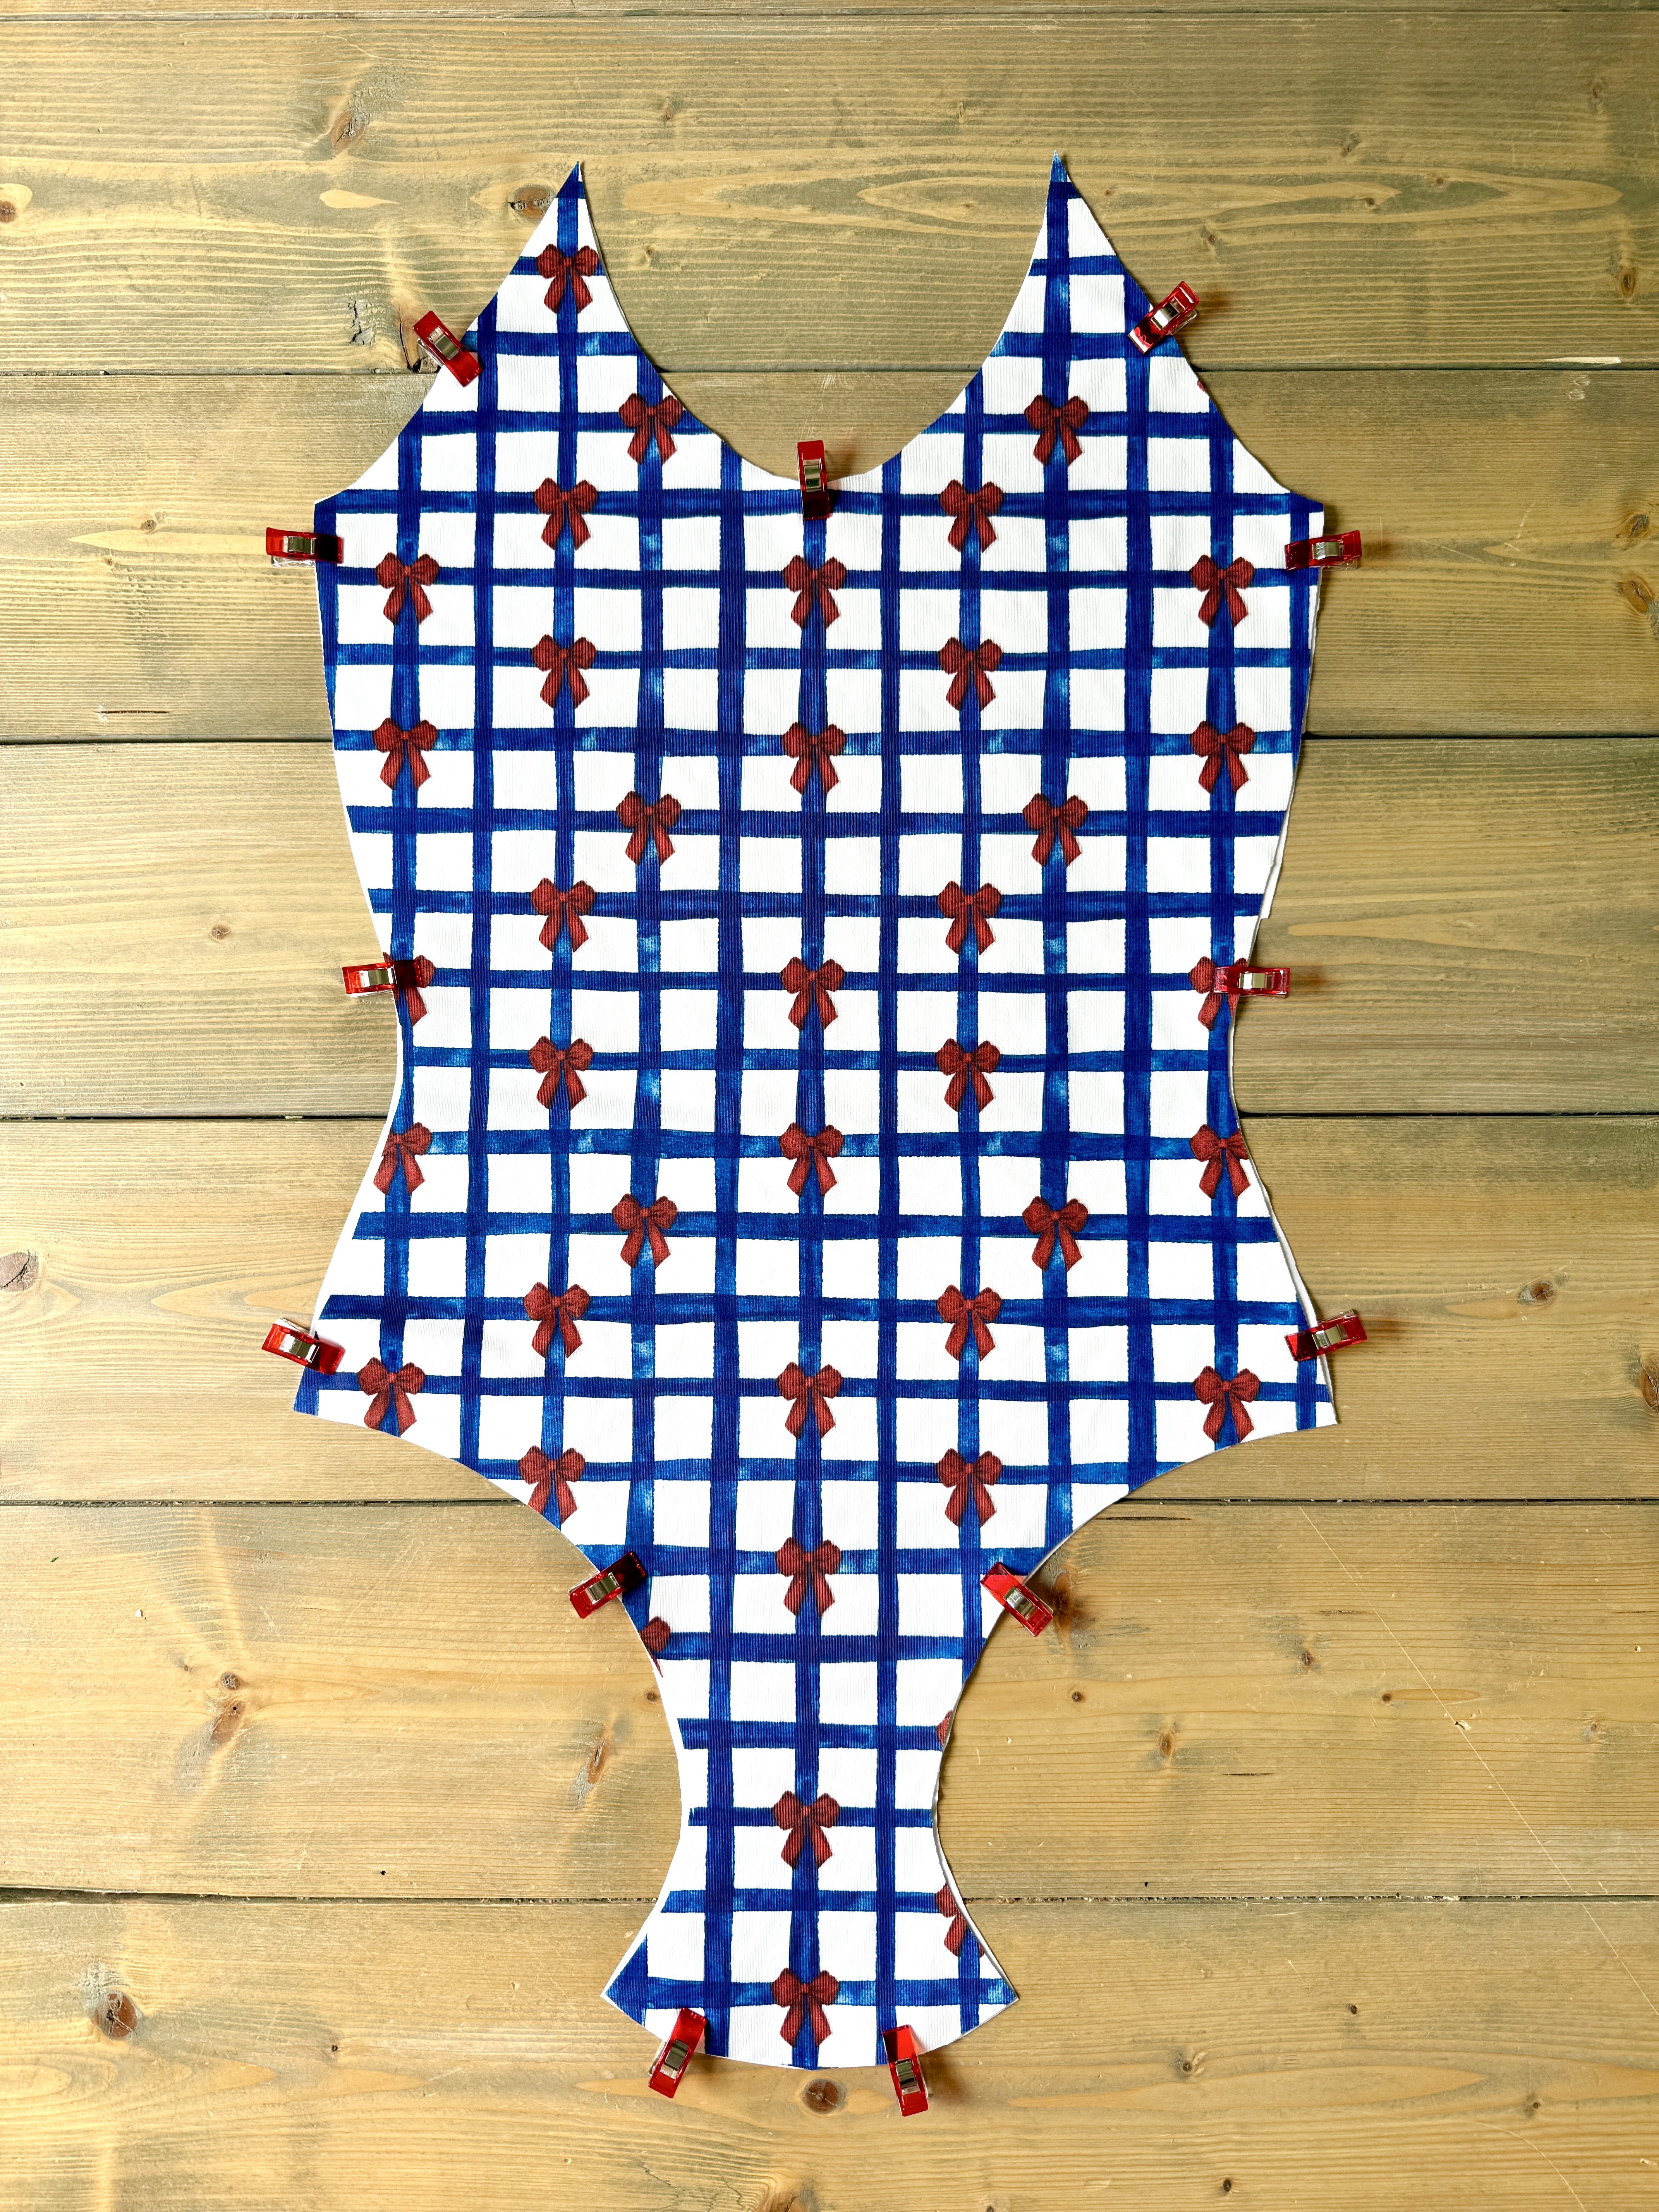
Locate the front main and the front lining pieces. Place the front main and front lining pieces wrong sides together, so that the right sides of each are showing on the outside. Pin in place.
Prepare sewing machine for sewing swimsuit fabric. Replace sewing needle with a stretch/jersey needle. Attach Three-Sole Walking Foot with Seam Guide #50. Select a zigzag stitch and adjust to have a 2mm length and 3mm width.

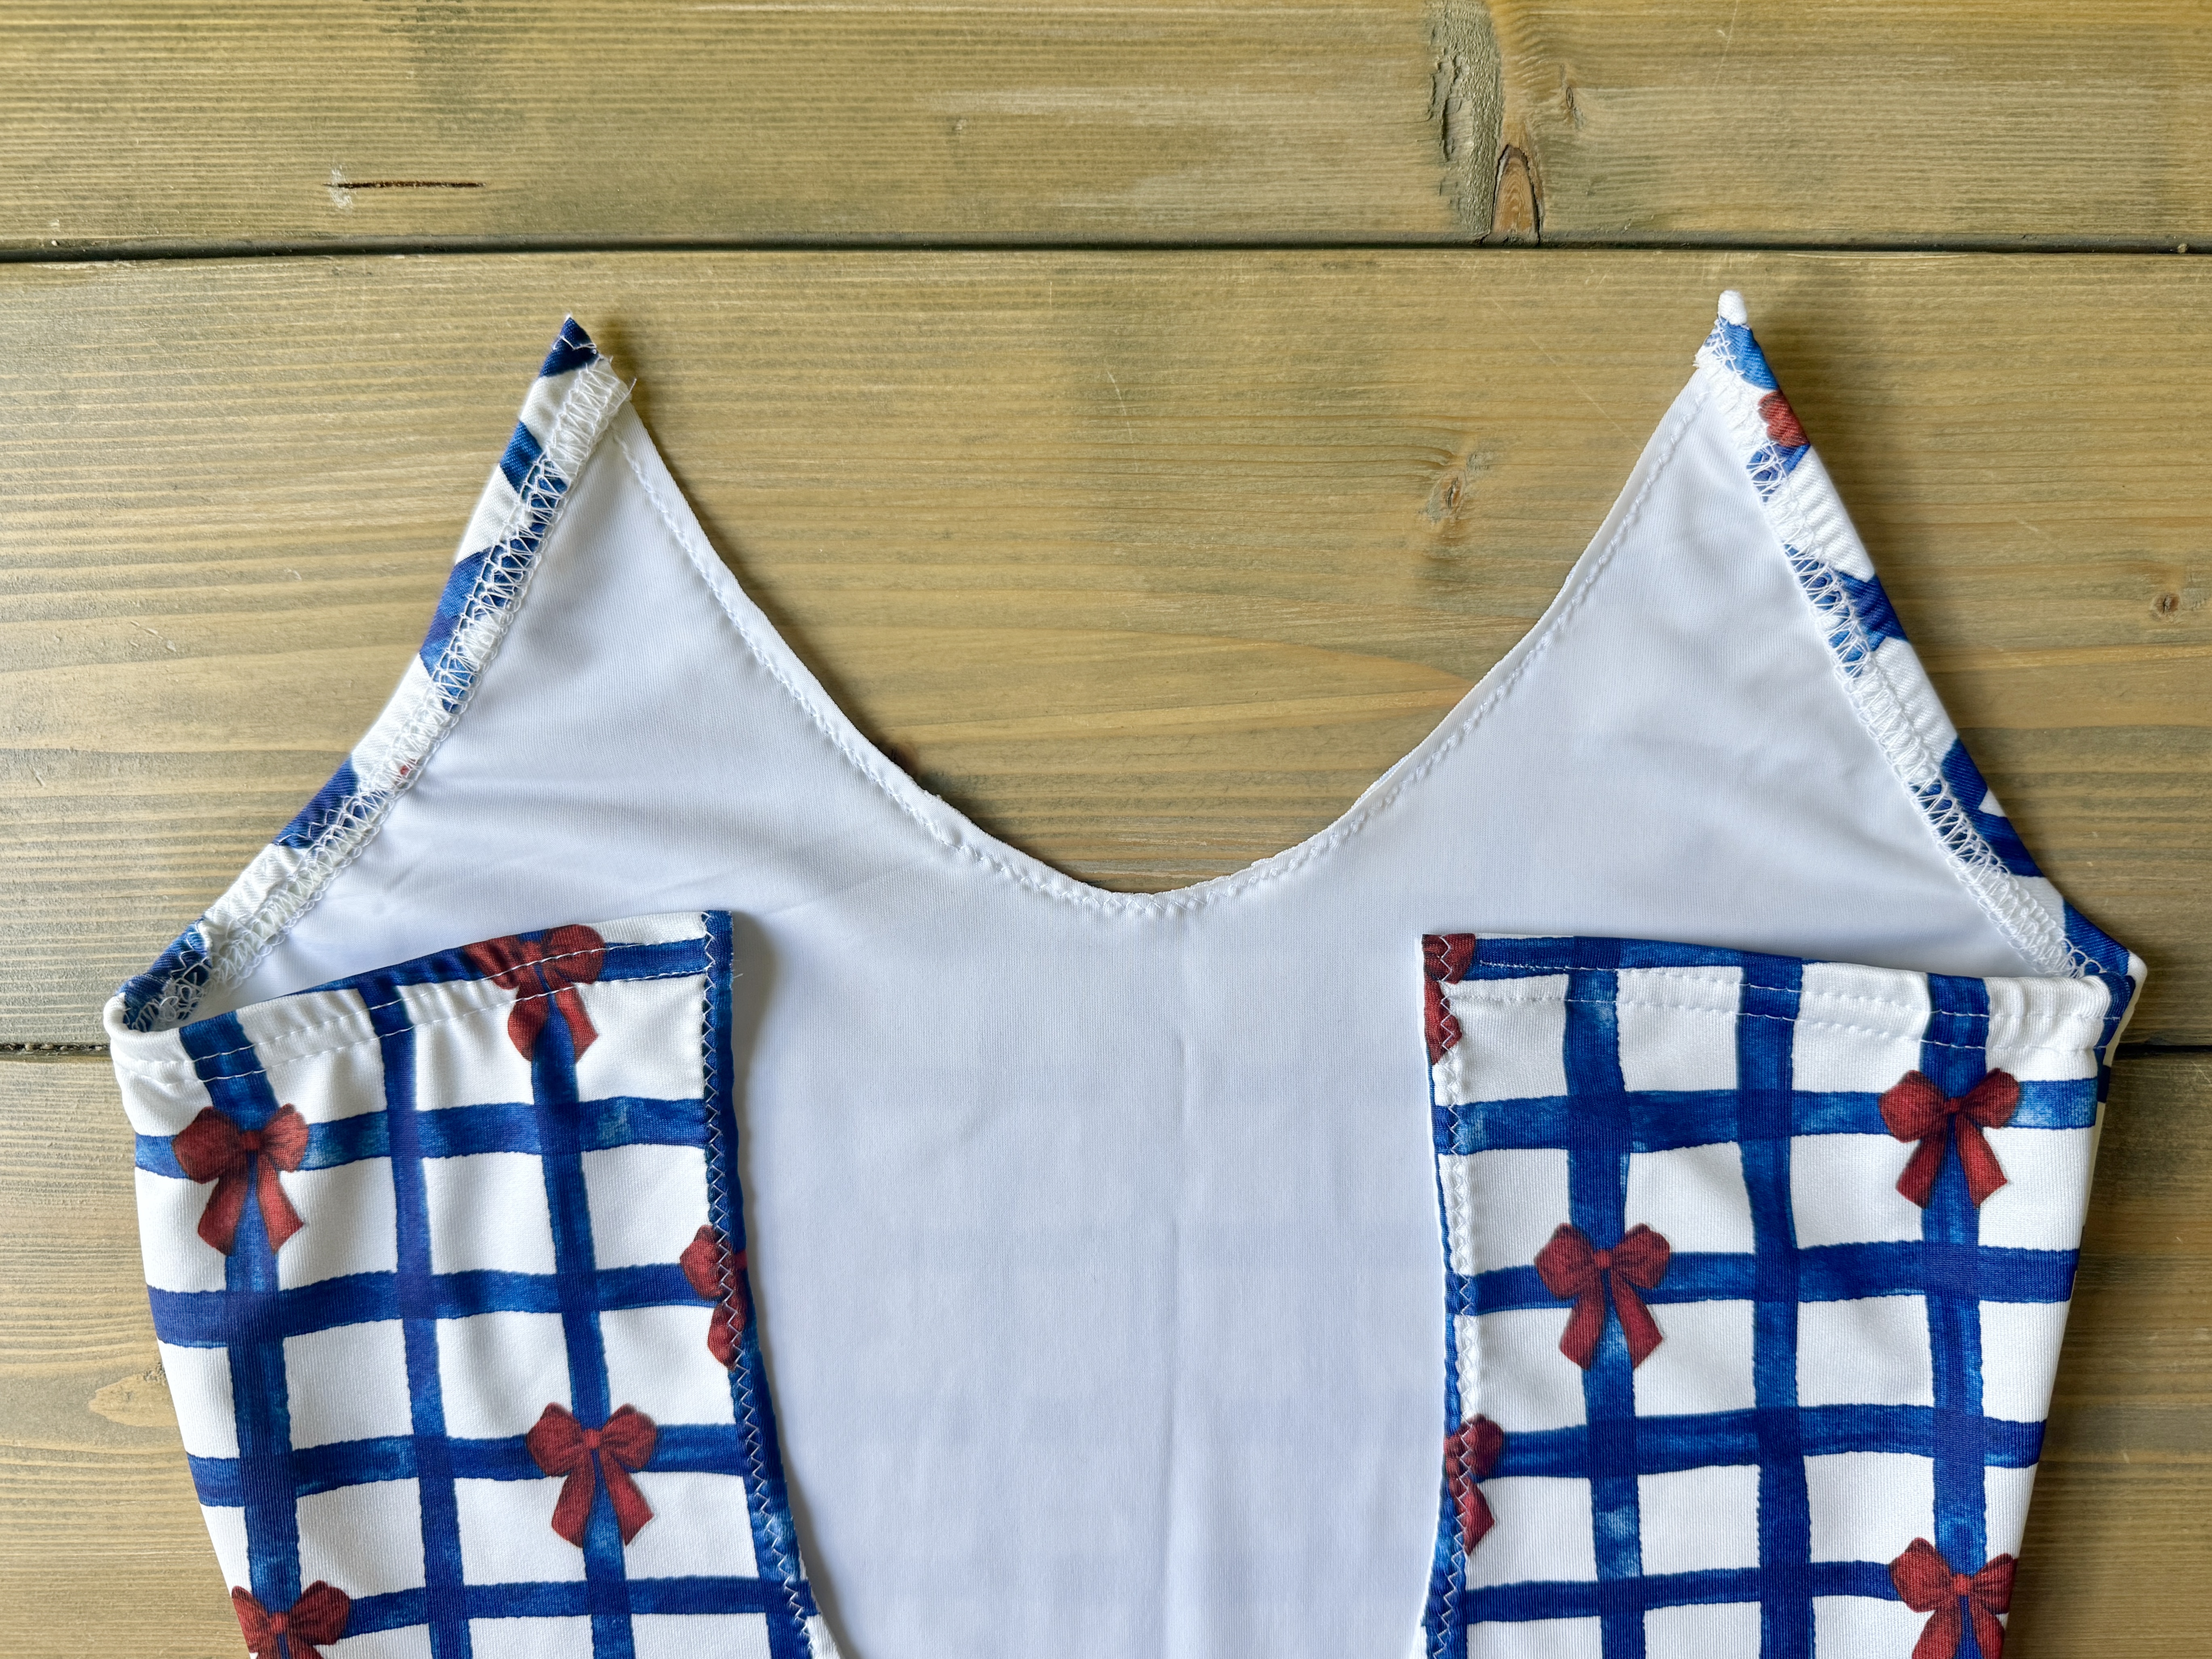
Staystitch all the way around the pieces, securing them together. The front main and lining are now joined together as one piece and will be referred to as the “front”.
Locate the back main, back lining, and the front piece. Fold the pieces in half lengthwise to find the center of each crotch seam. Mark the centerpoint.

Lay the back main piece right sides up. Lay the front piece over it, right sides together. Lastly, lay the back lining on top, wrong sides up.
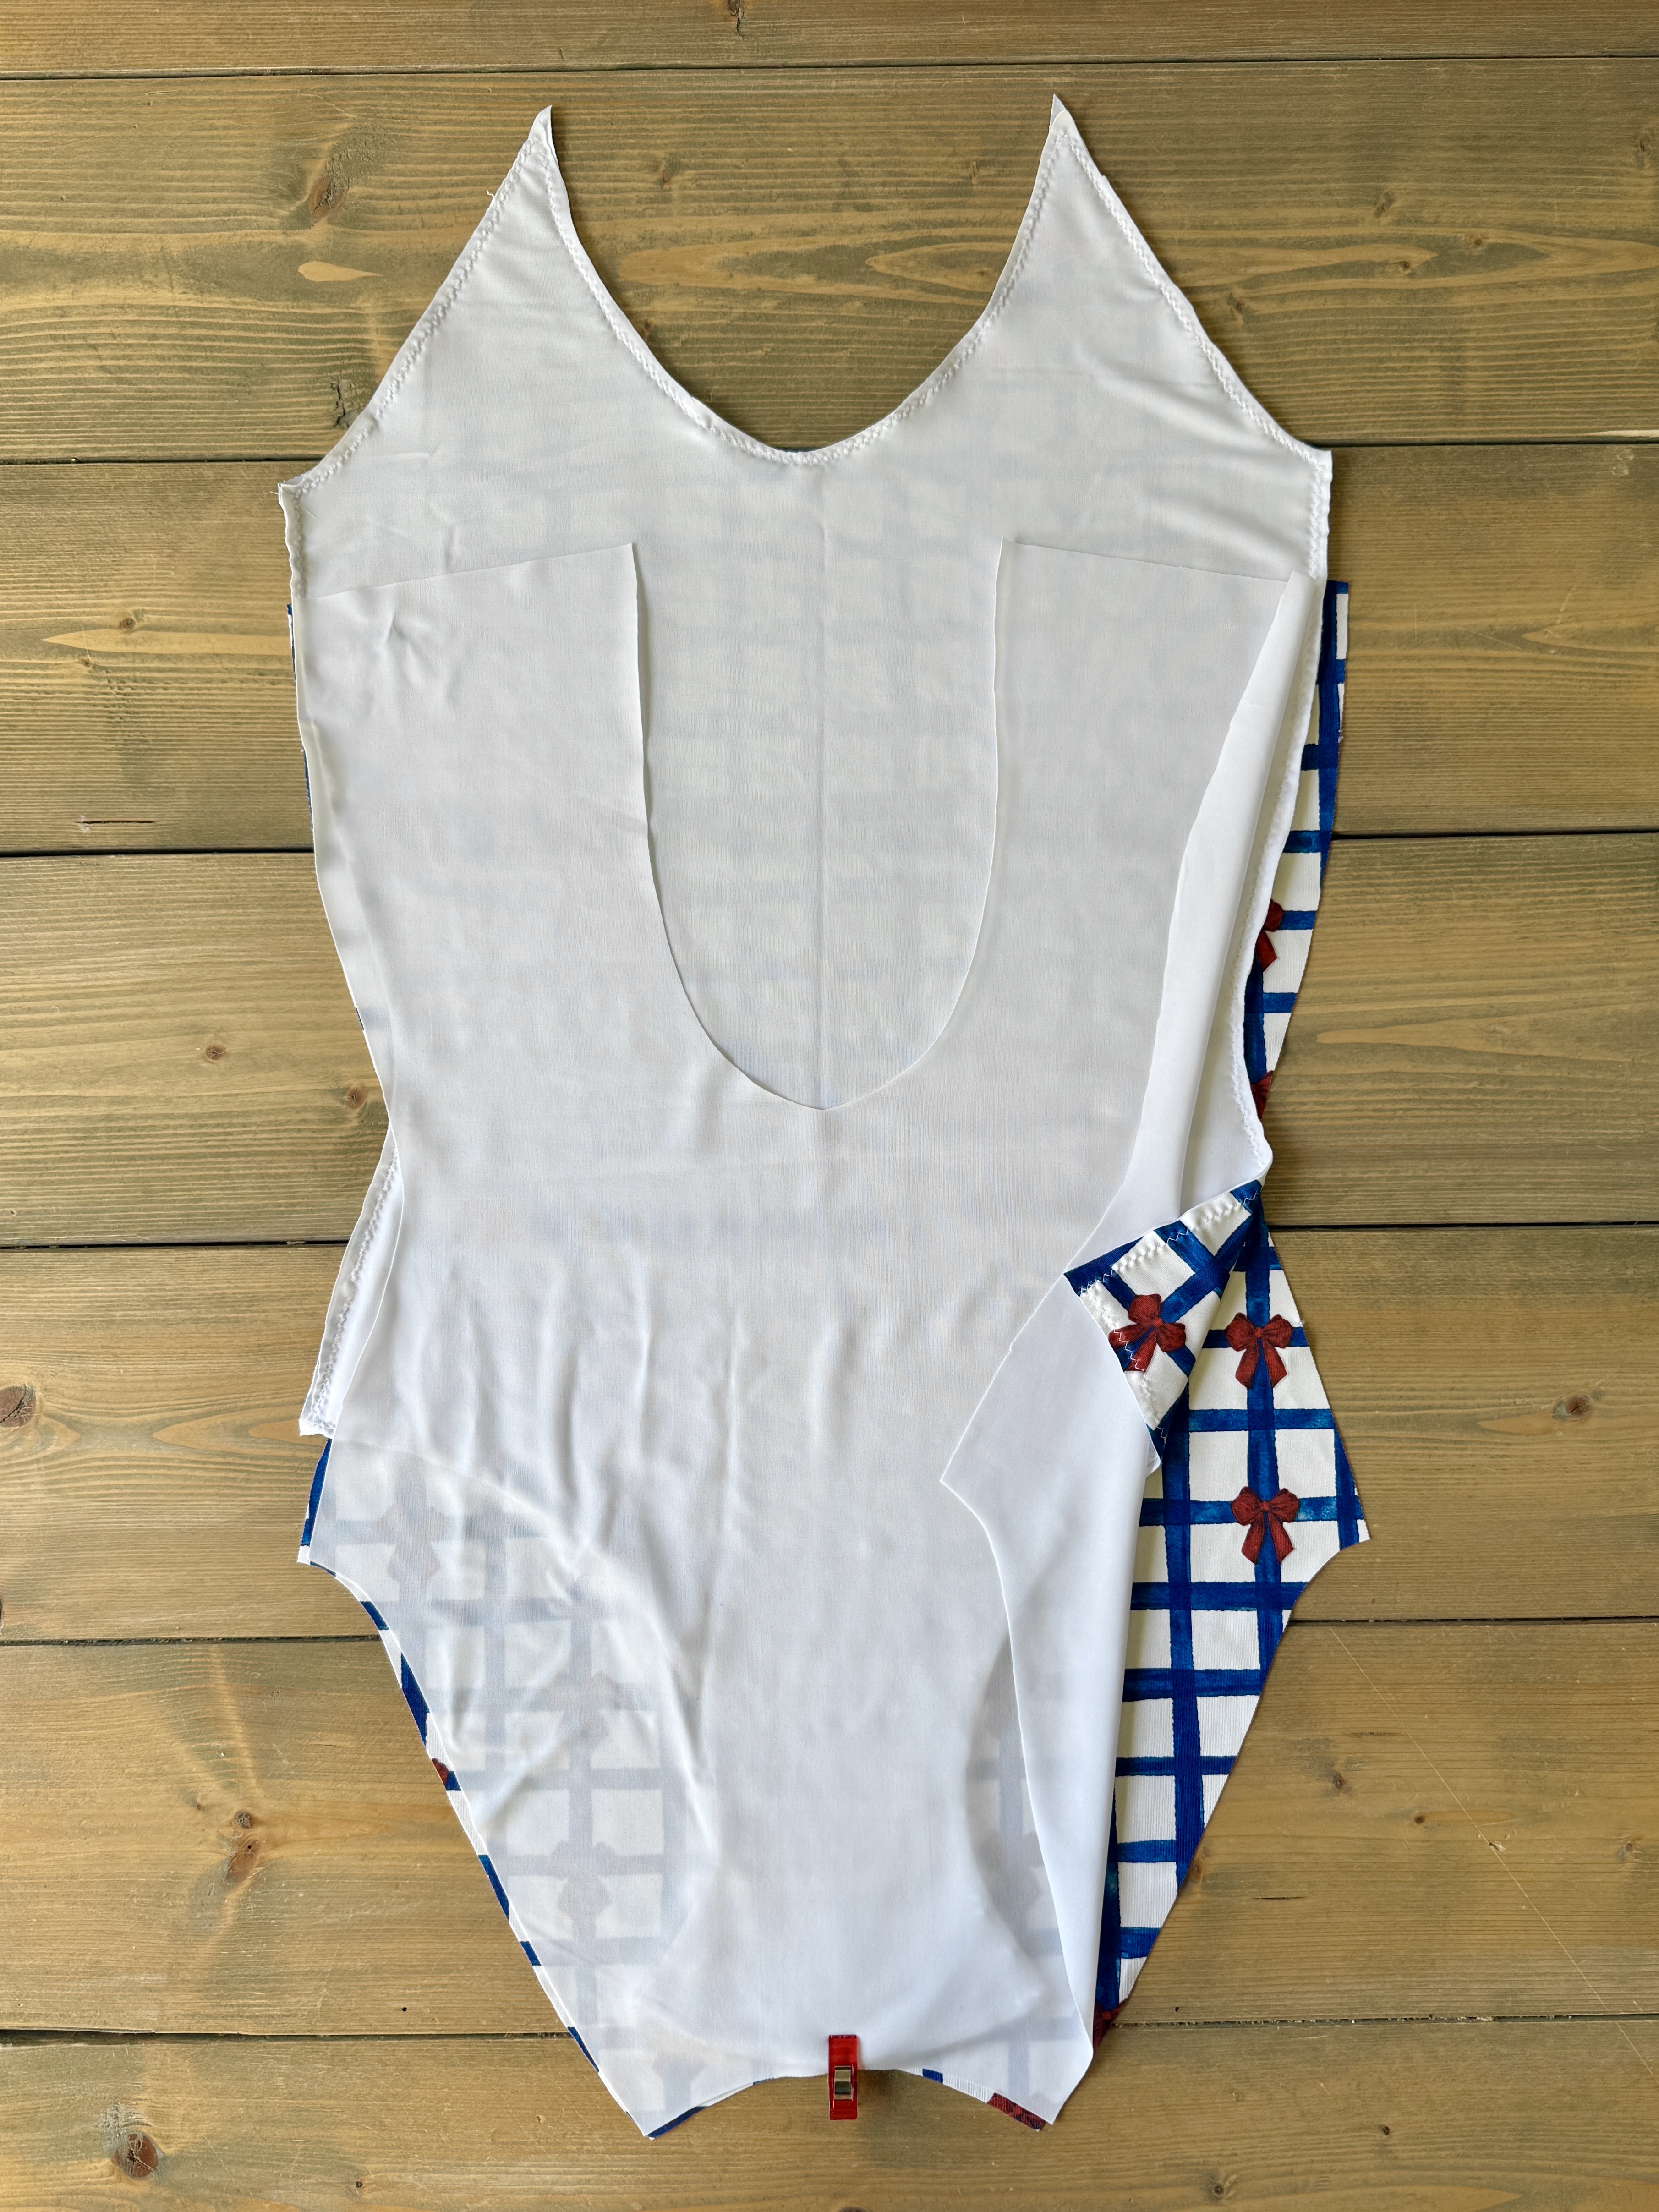
Pin together the three layers at the crotch seam, aligning the center and end points, and easing the rest of the crotch seams together.
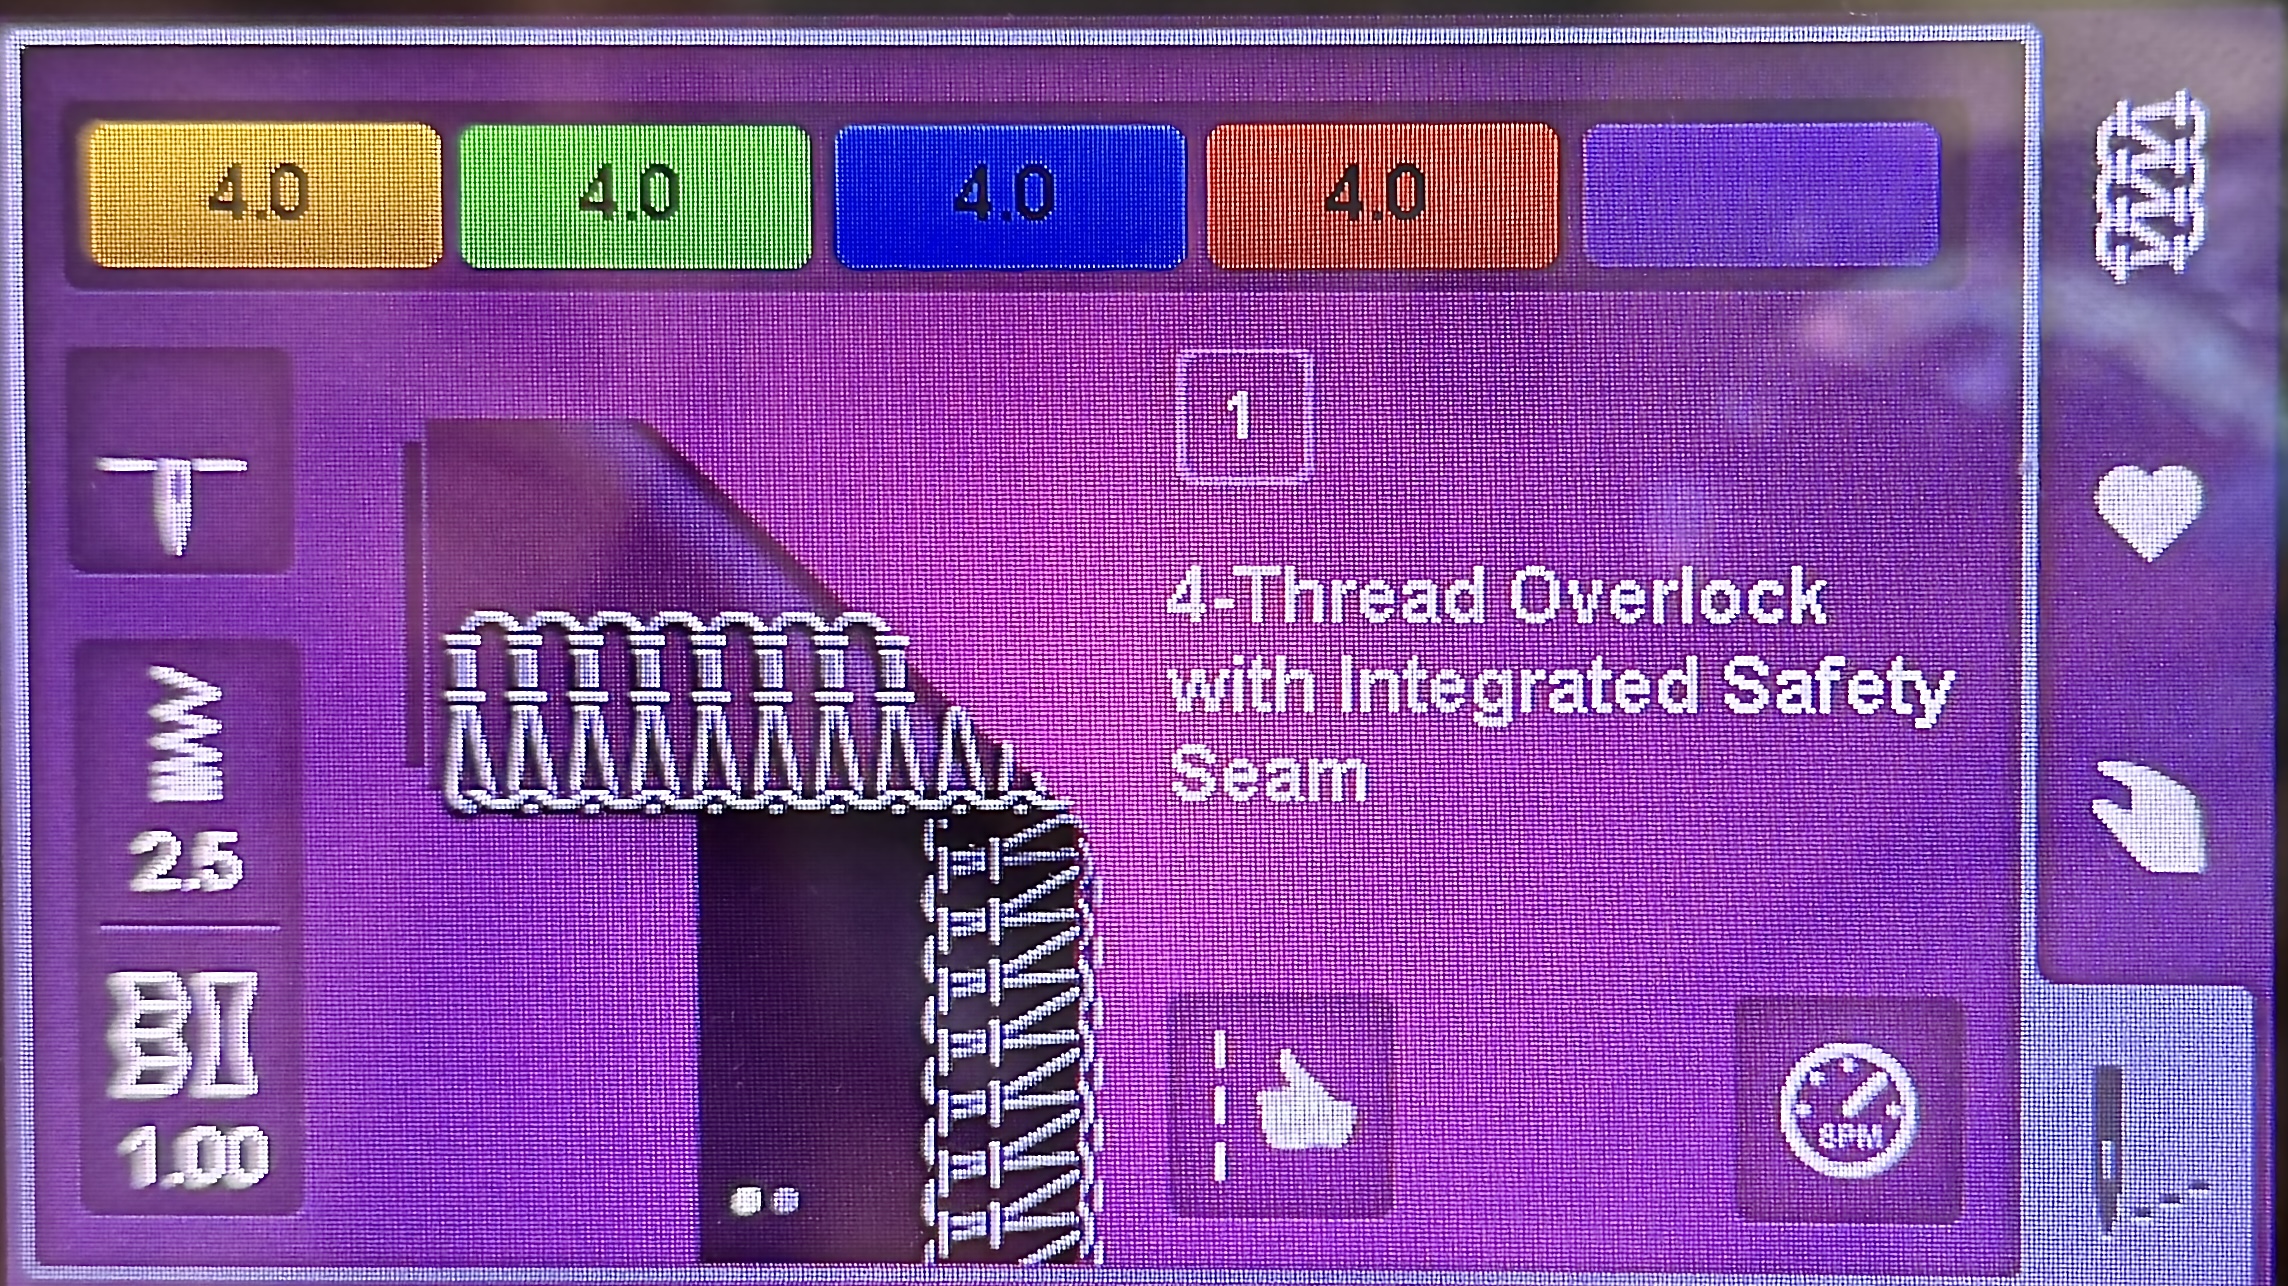
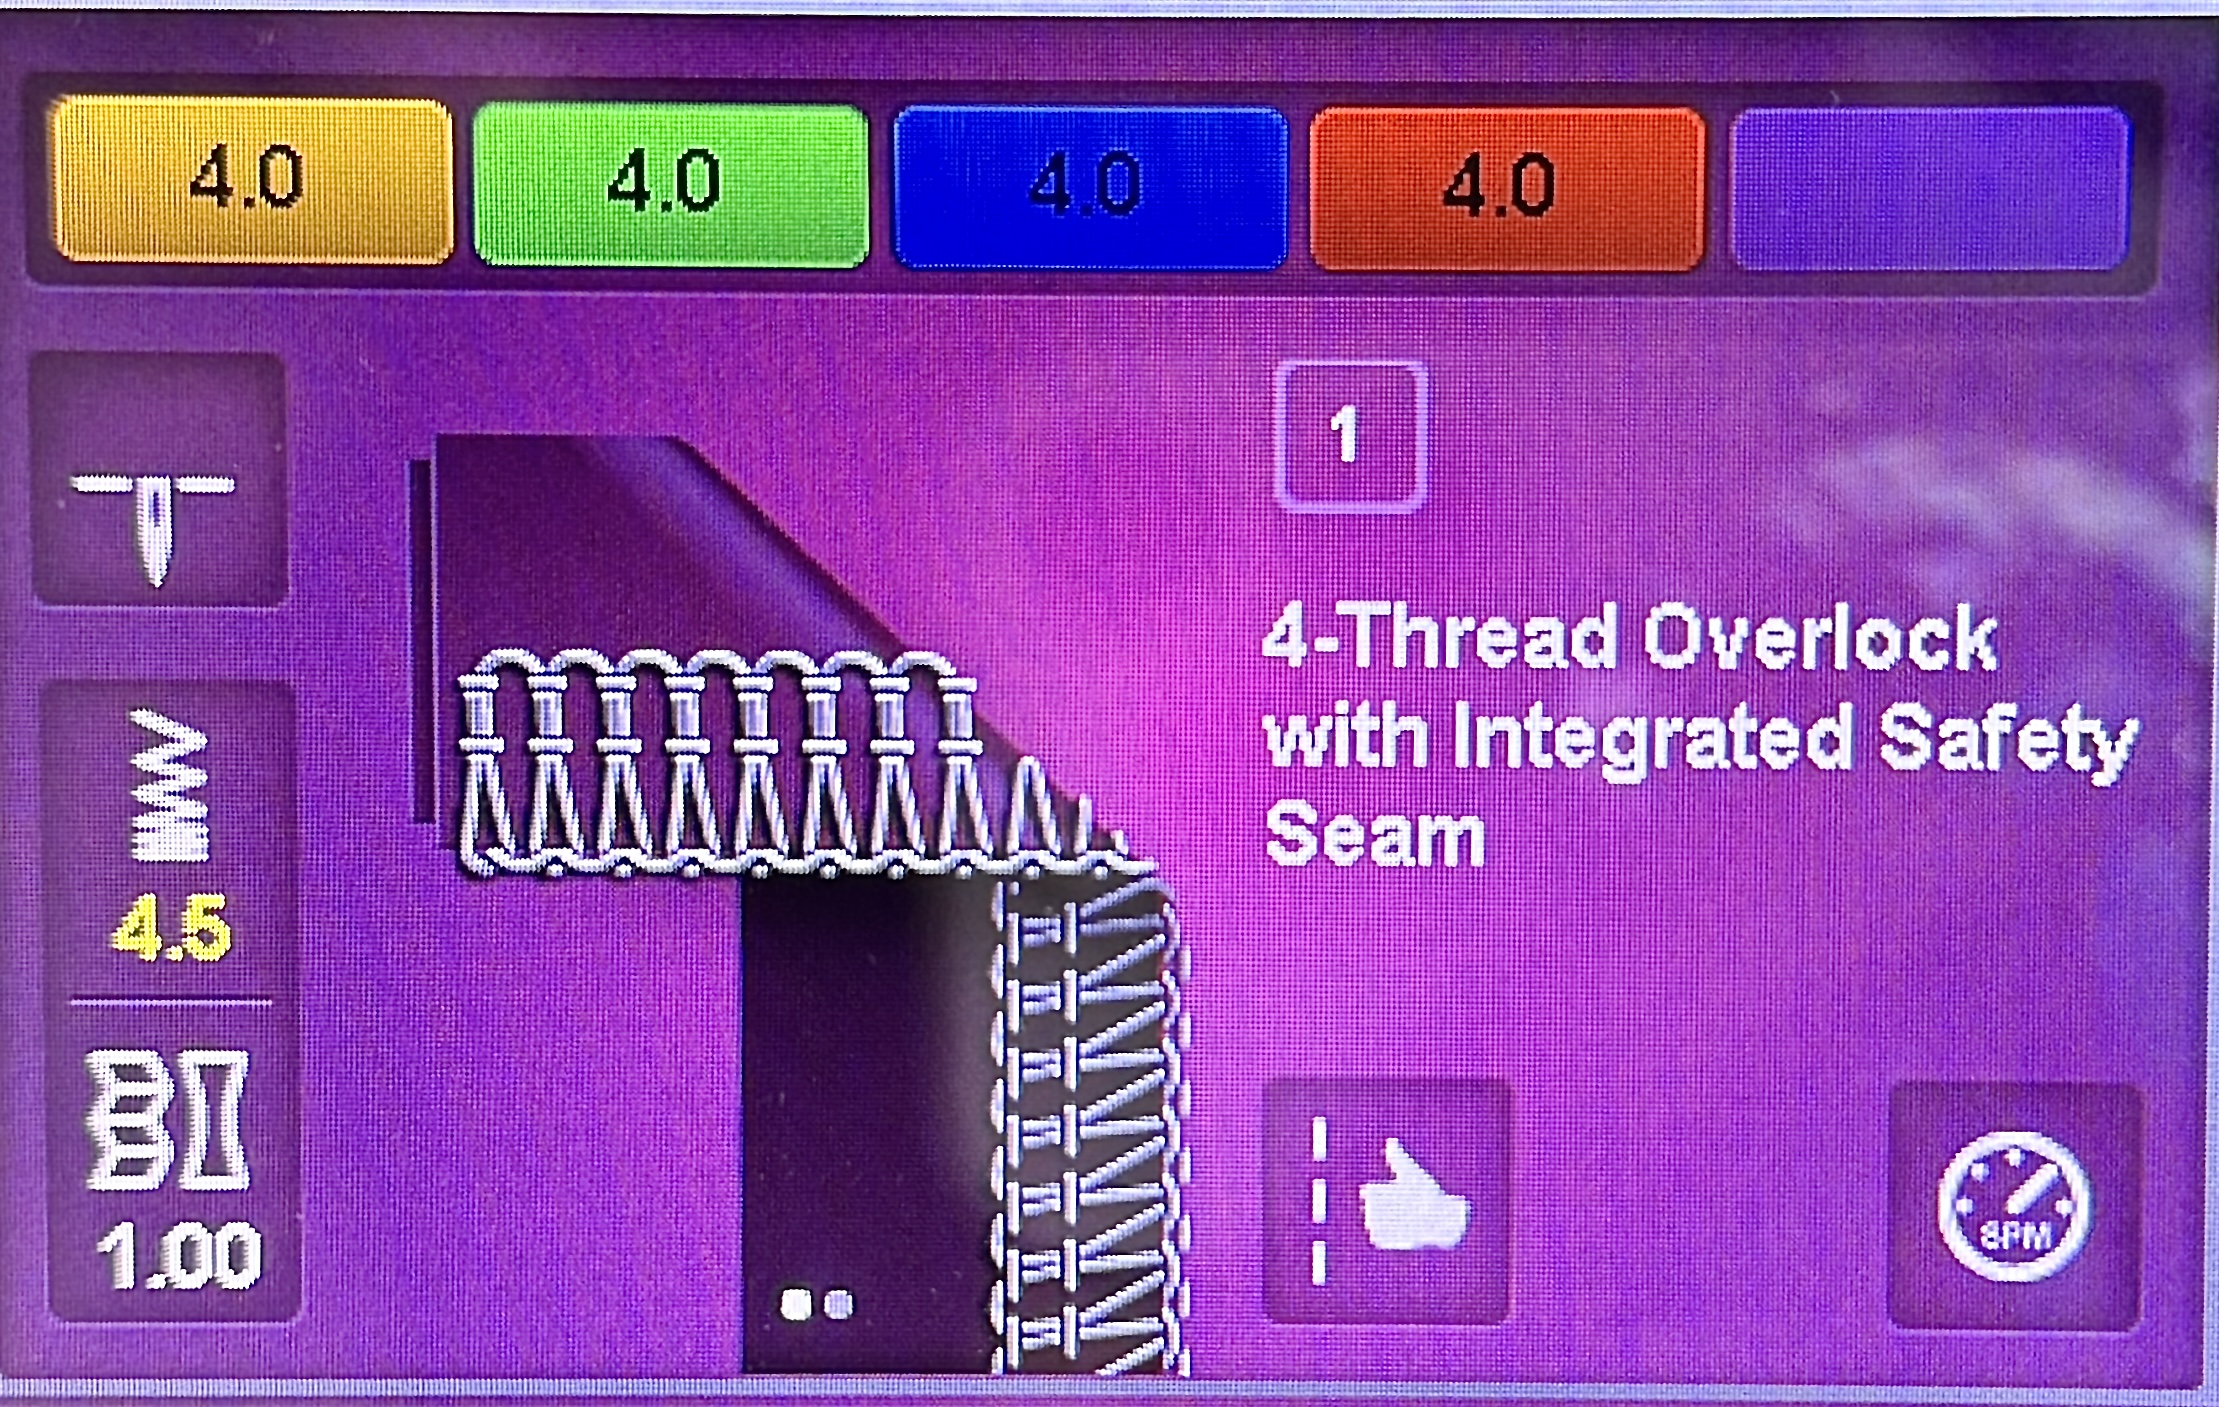
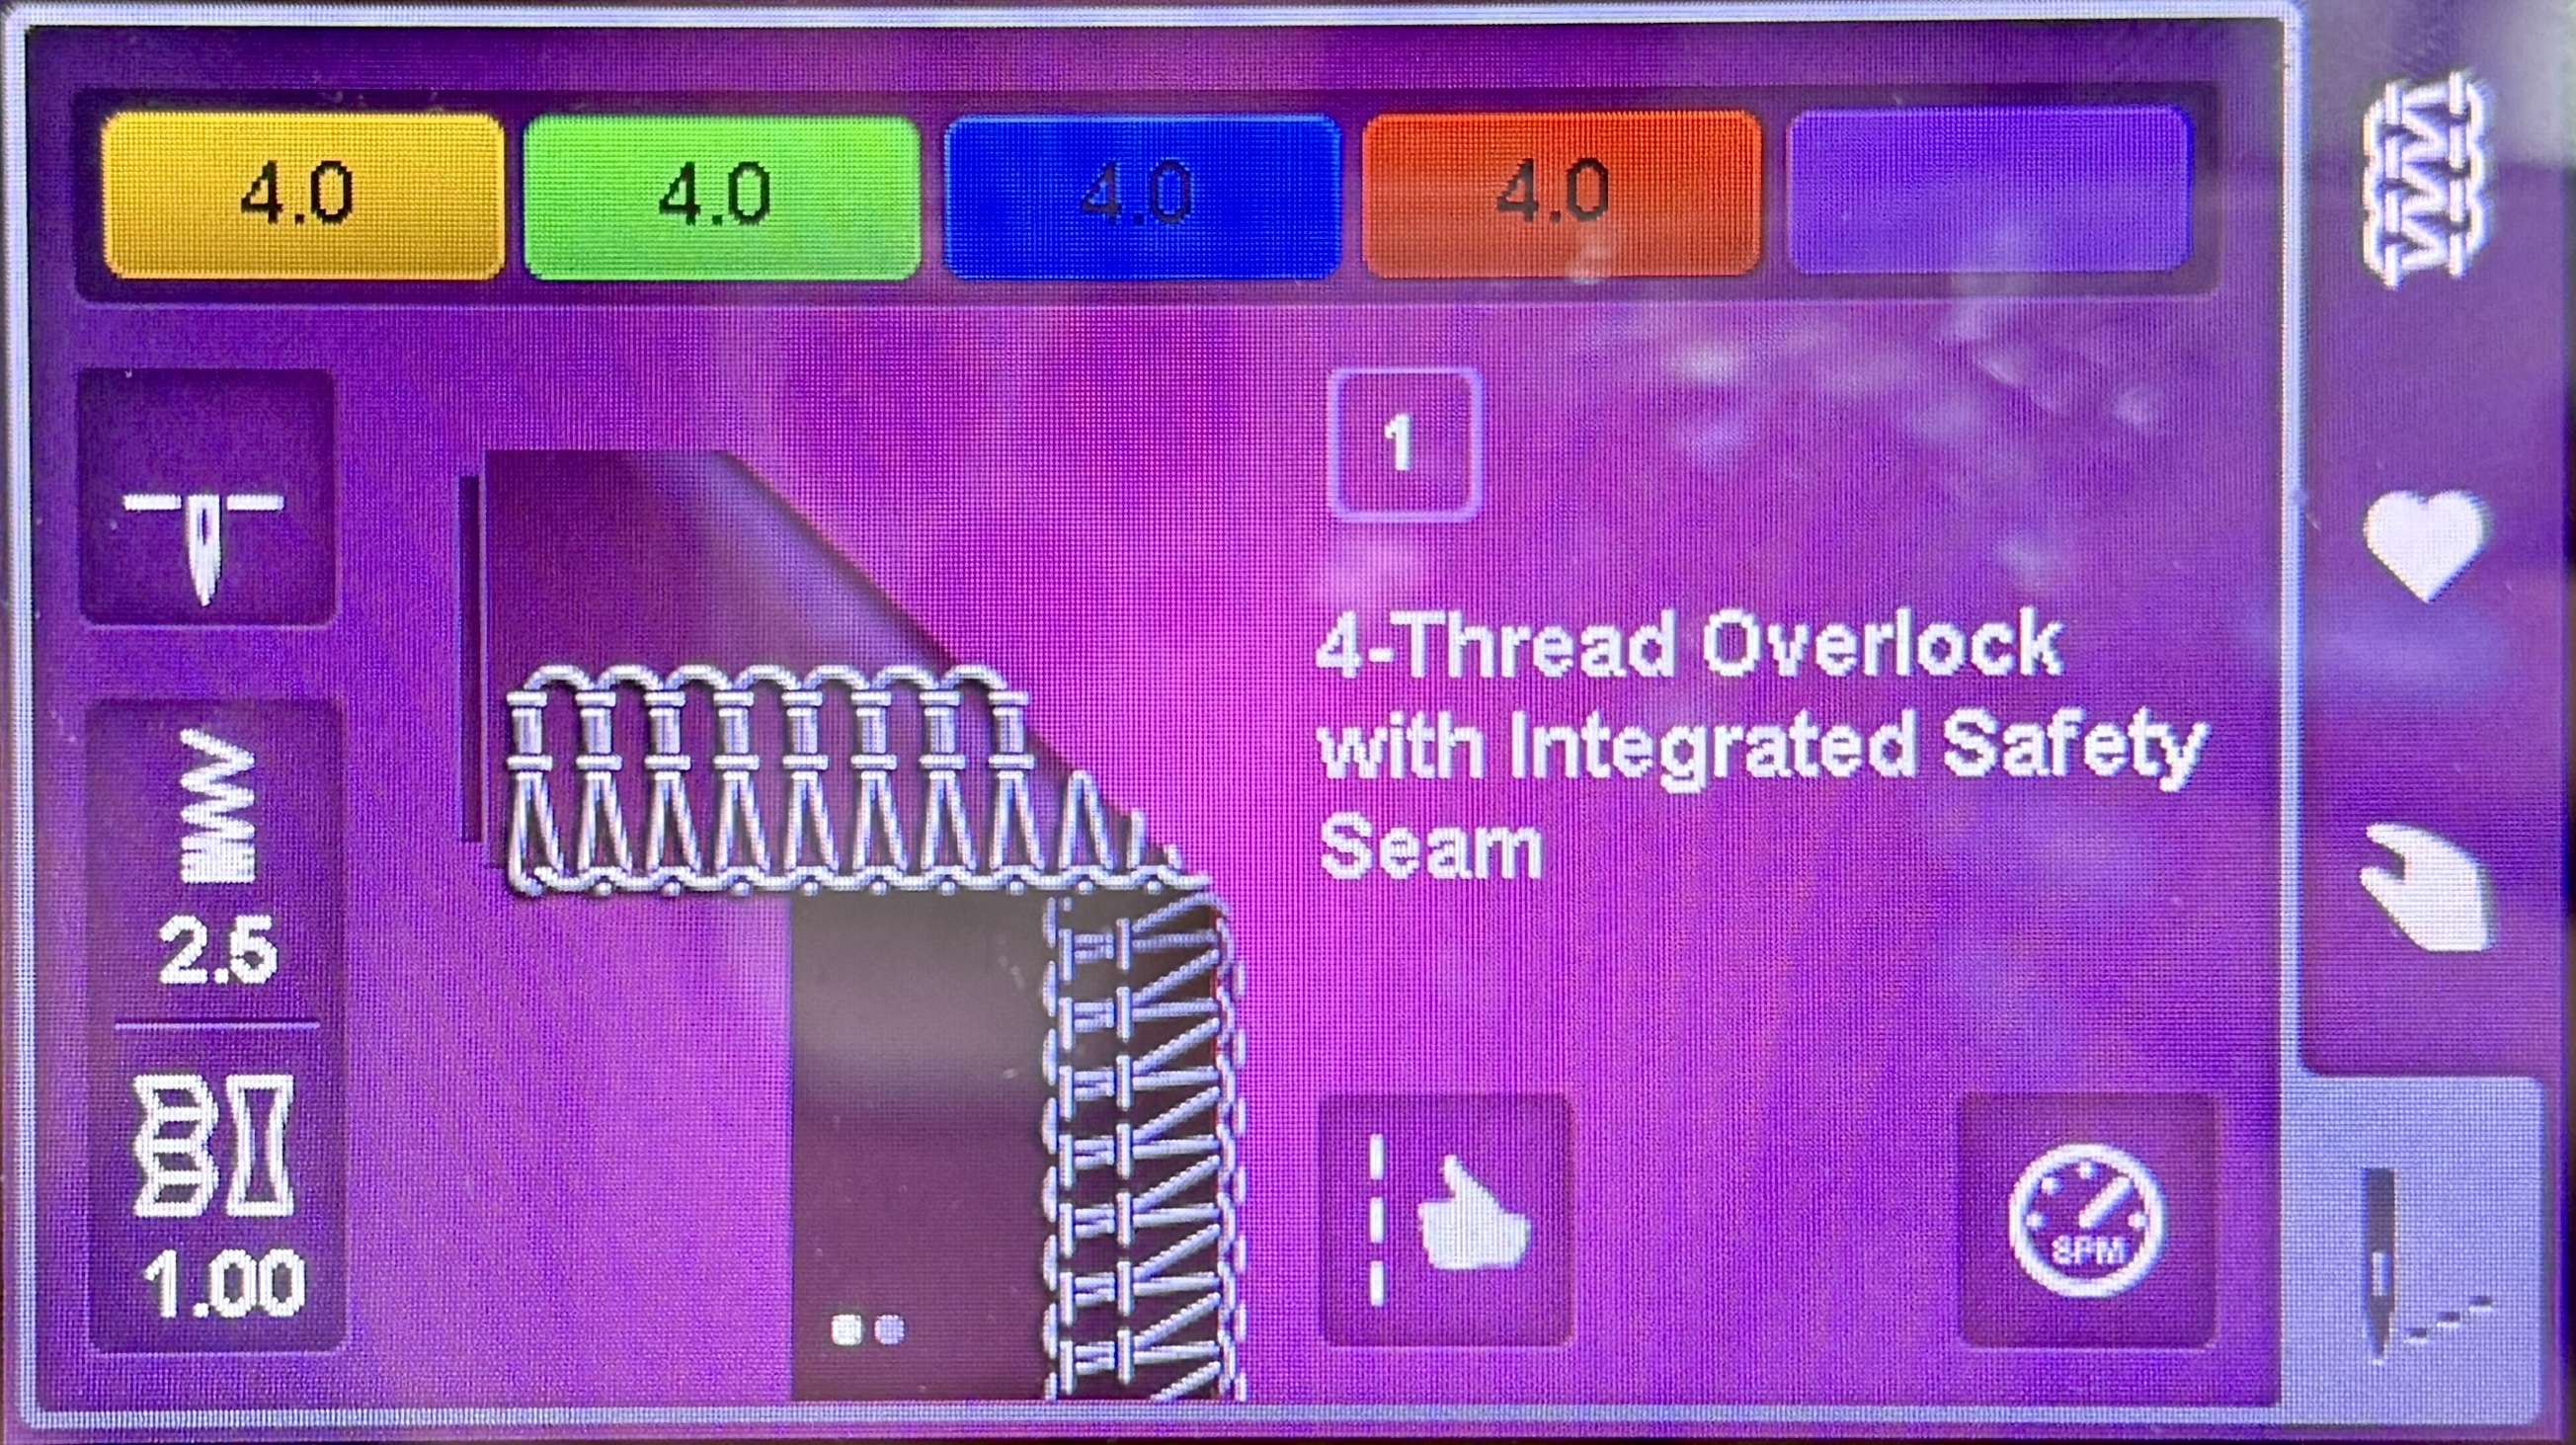
Prepare your serger for use by selecting a 4-Thread Overlock with Integrated Safety Seam (stitch #1 with standard settings) and attaching your Standard Presser Foot Overlock/Coverstitch #C11. Serge together the three layers of fabric across the crotch seam.
Align and pin together the side seams for all three layers of fabric and serge together.
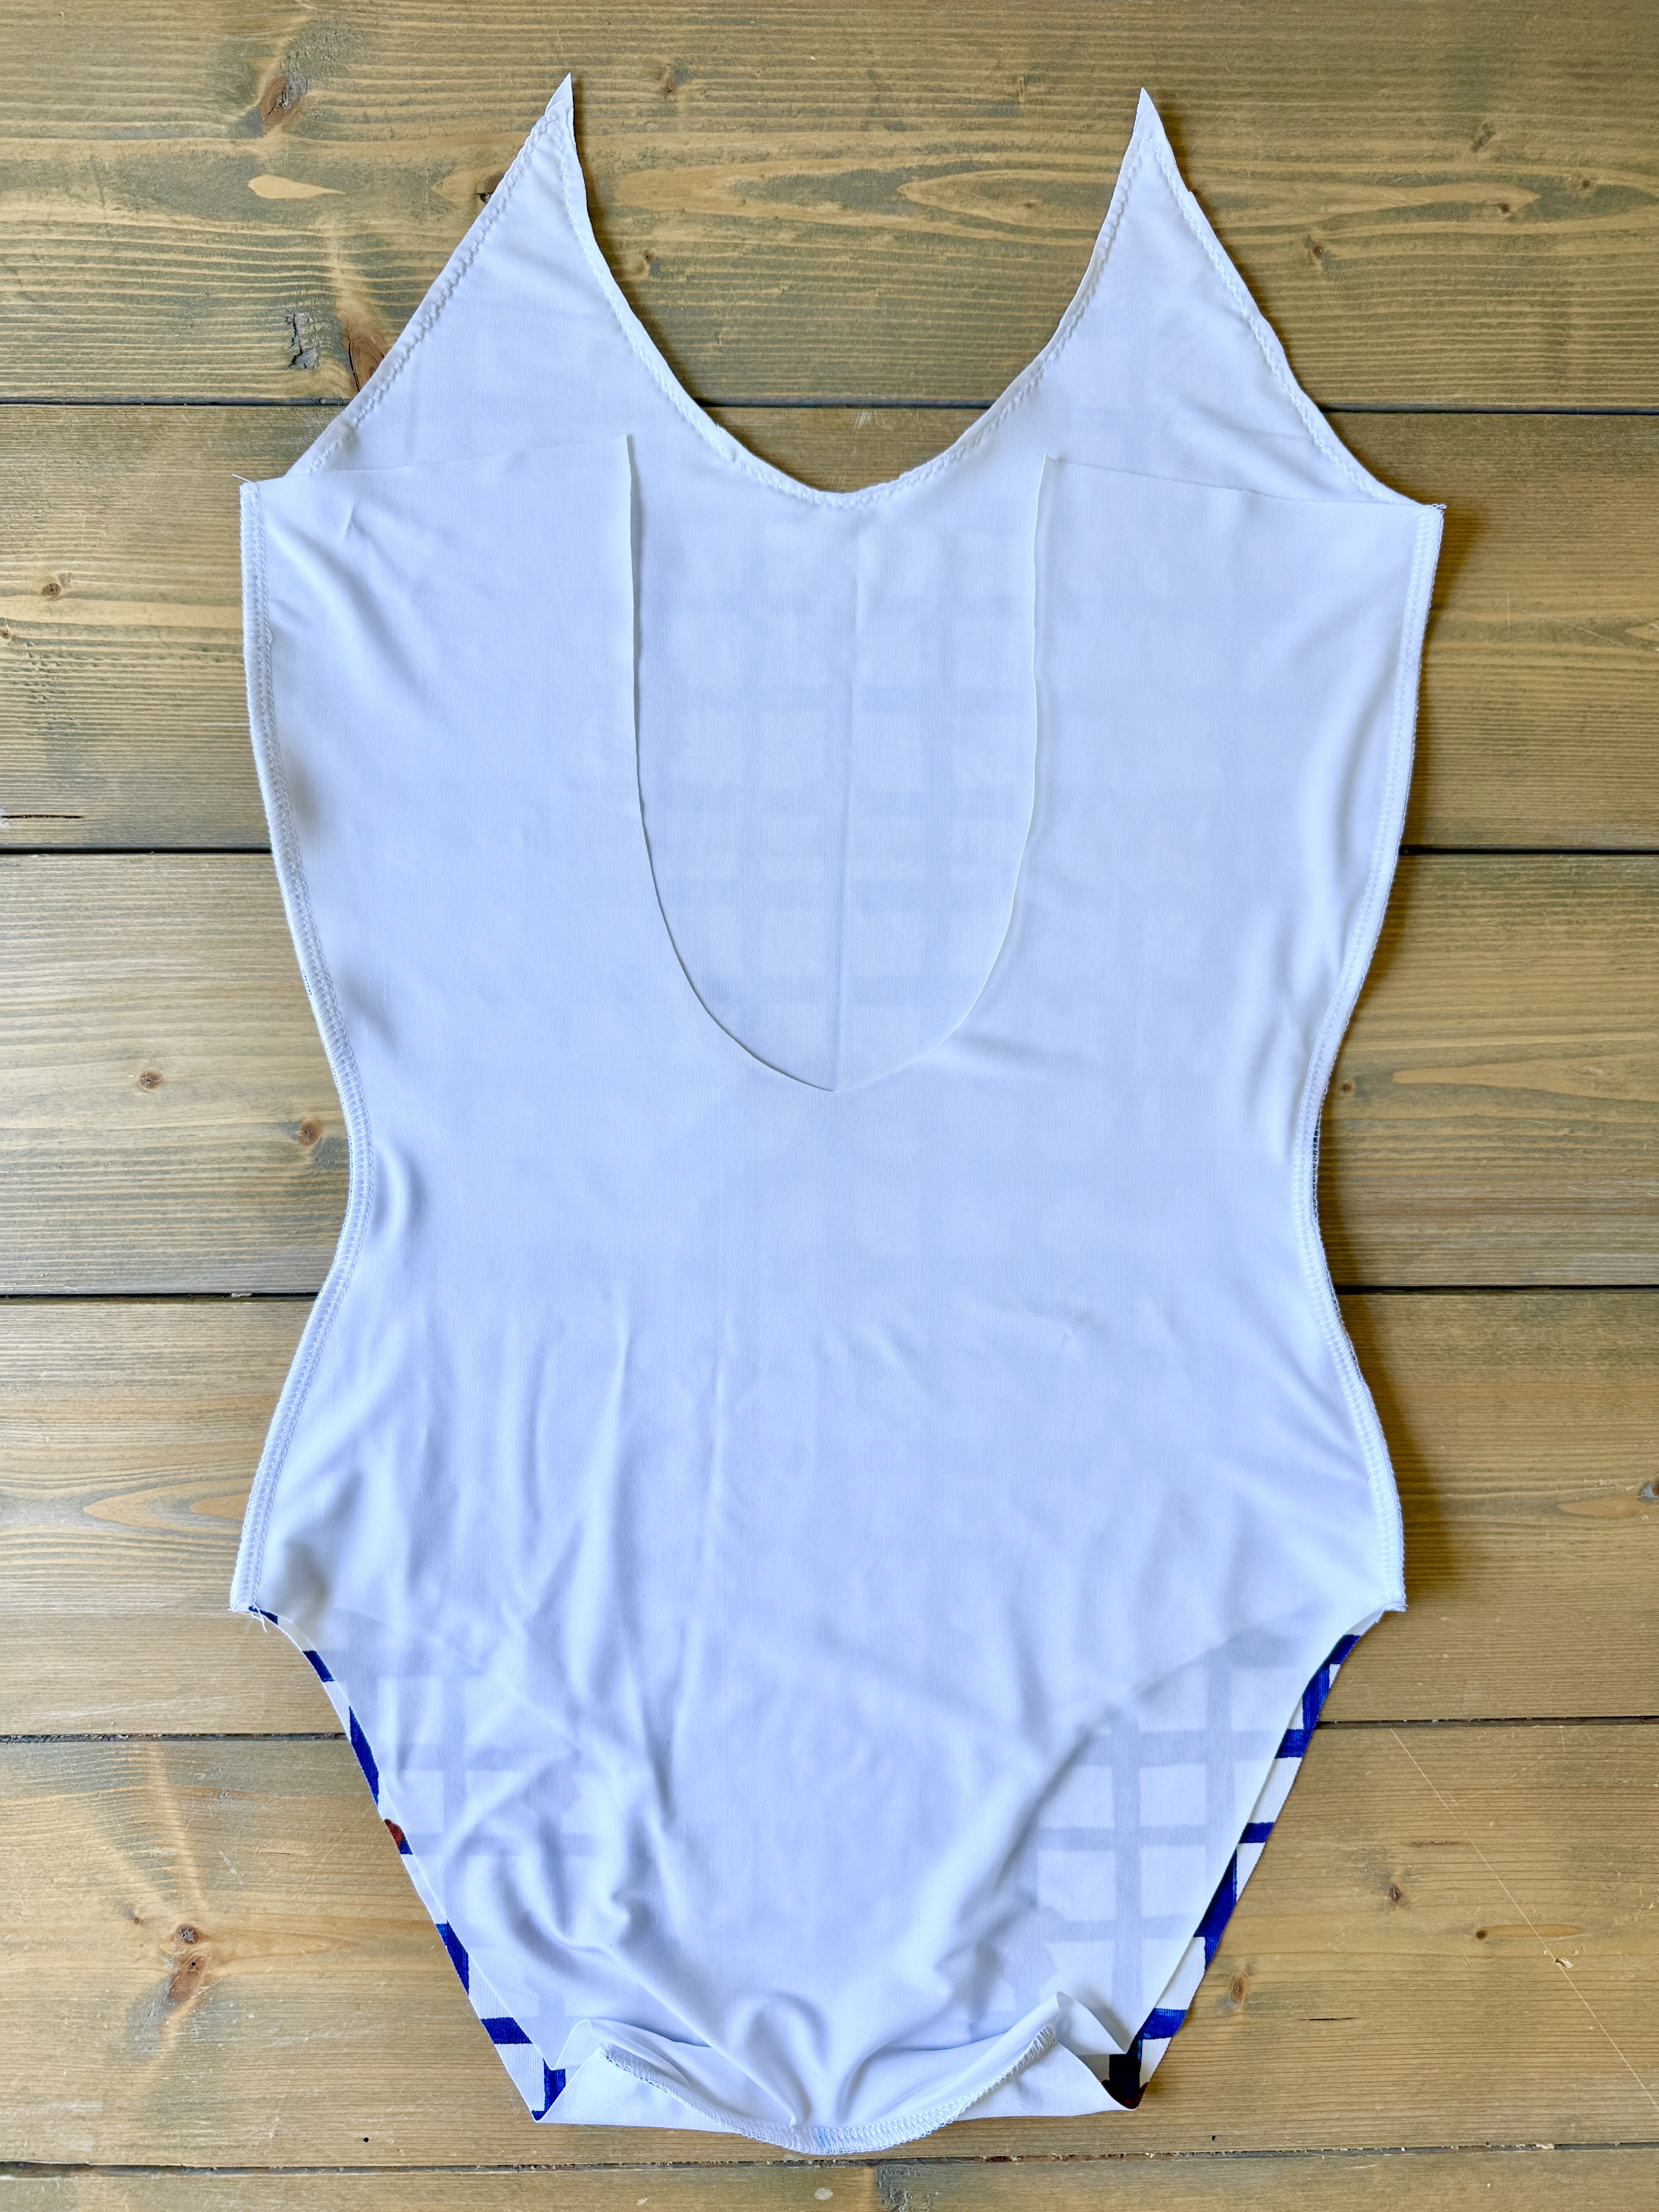
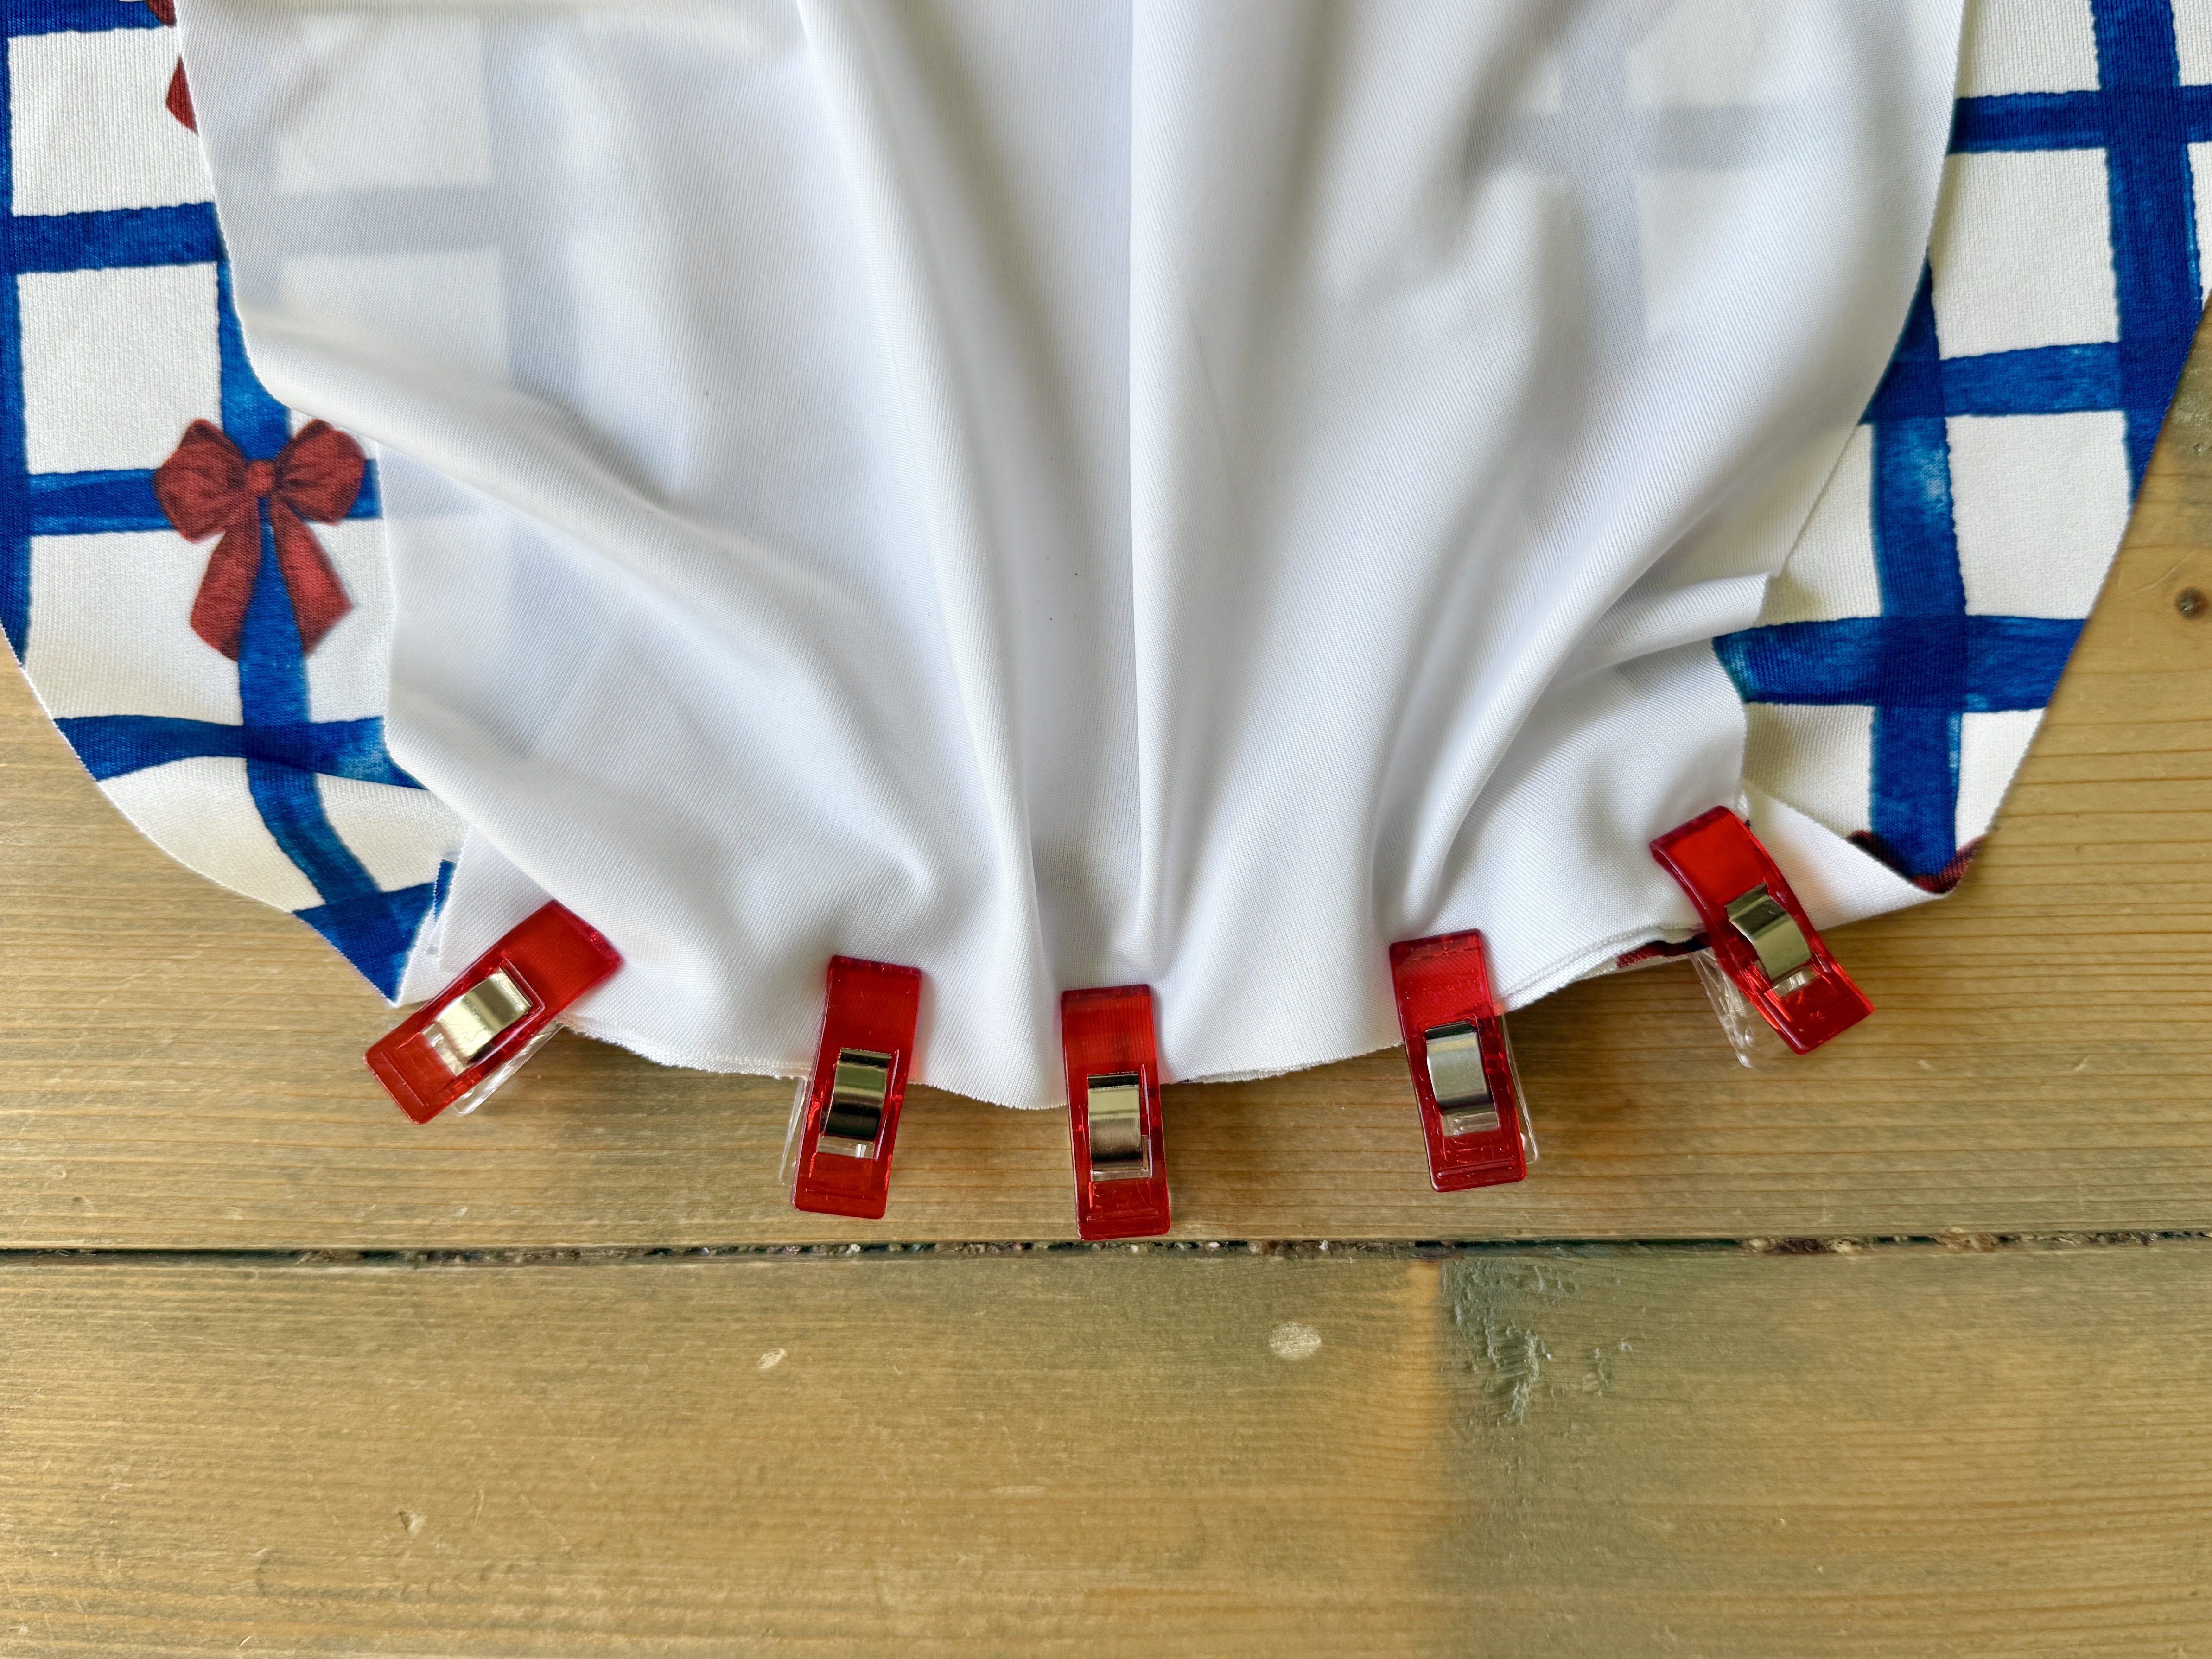
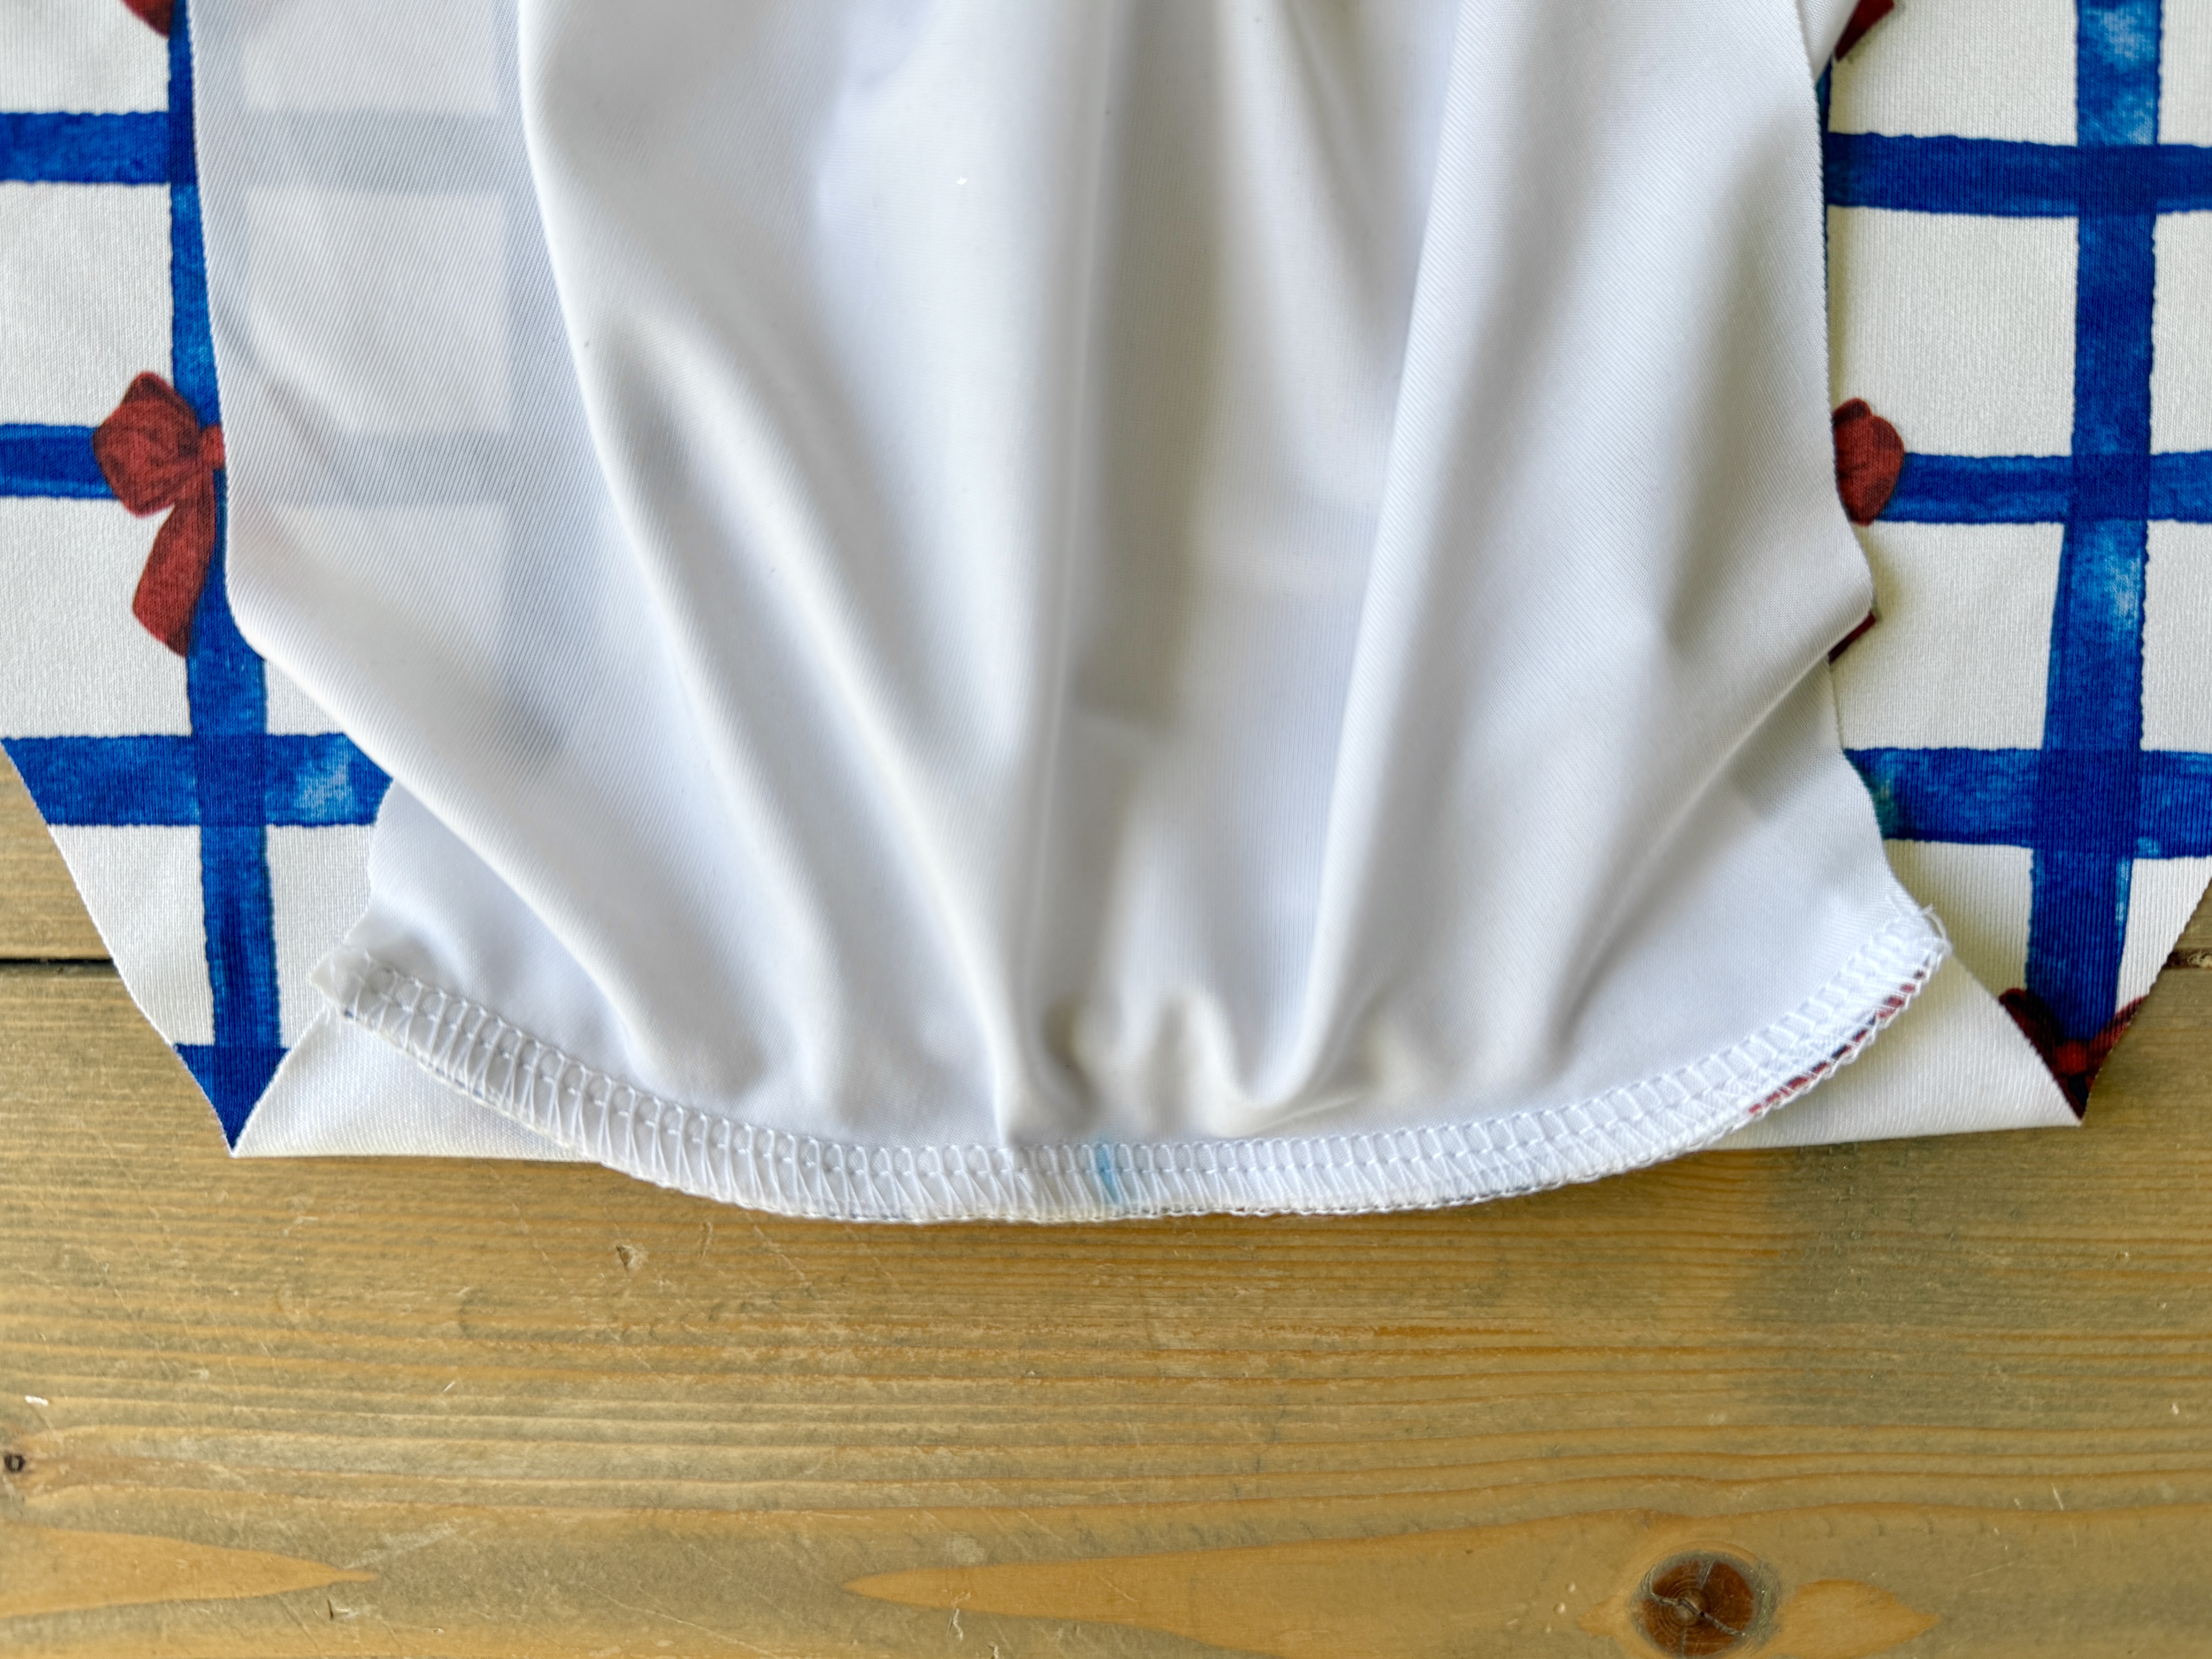
Turn the swimsuit right sides out and try-on to ensure an accurate fit! If happy with the fit, pin the back main and back lining layers together at the leg and top openings. On your sewing machine, staystitch together using a zigzag stitch. Every opening of the swimsuit should now have the main and lining pieces attached together.

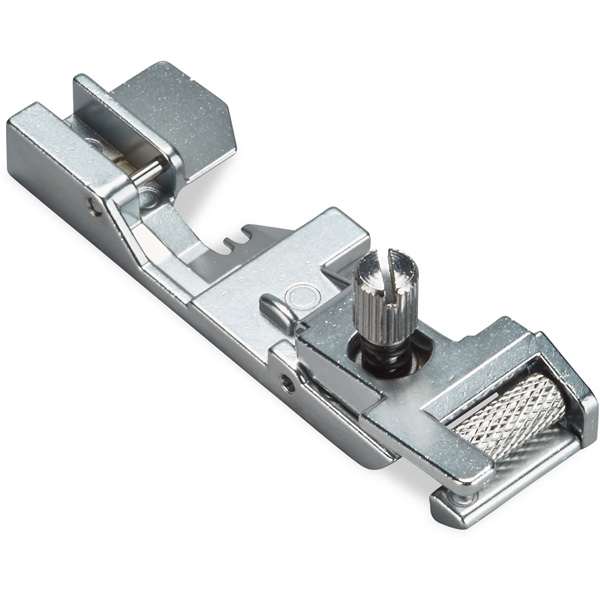
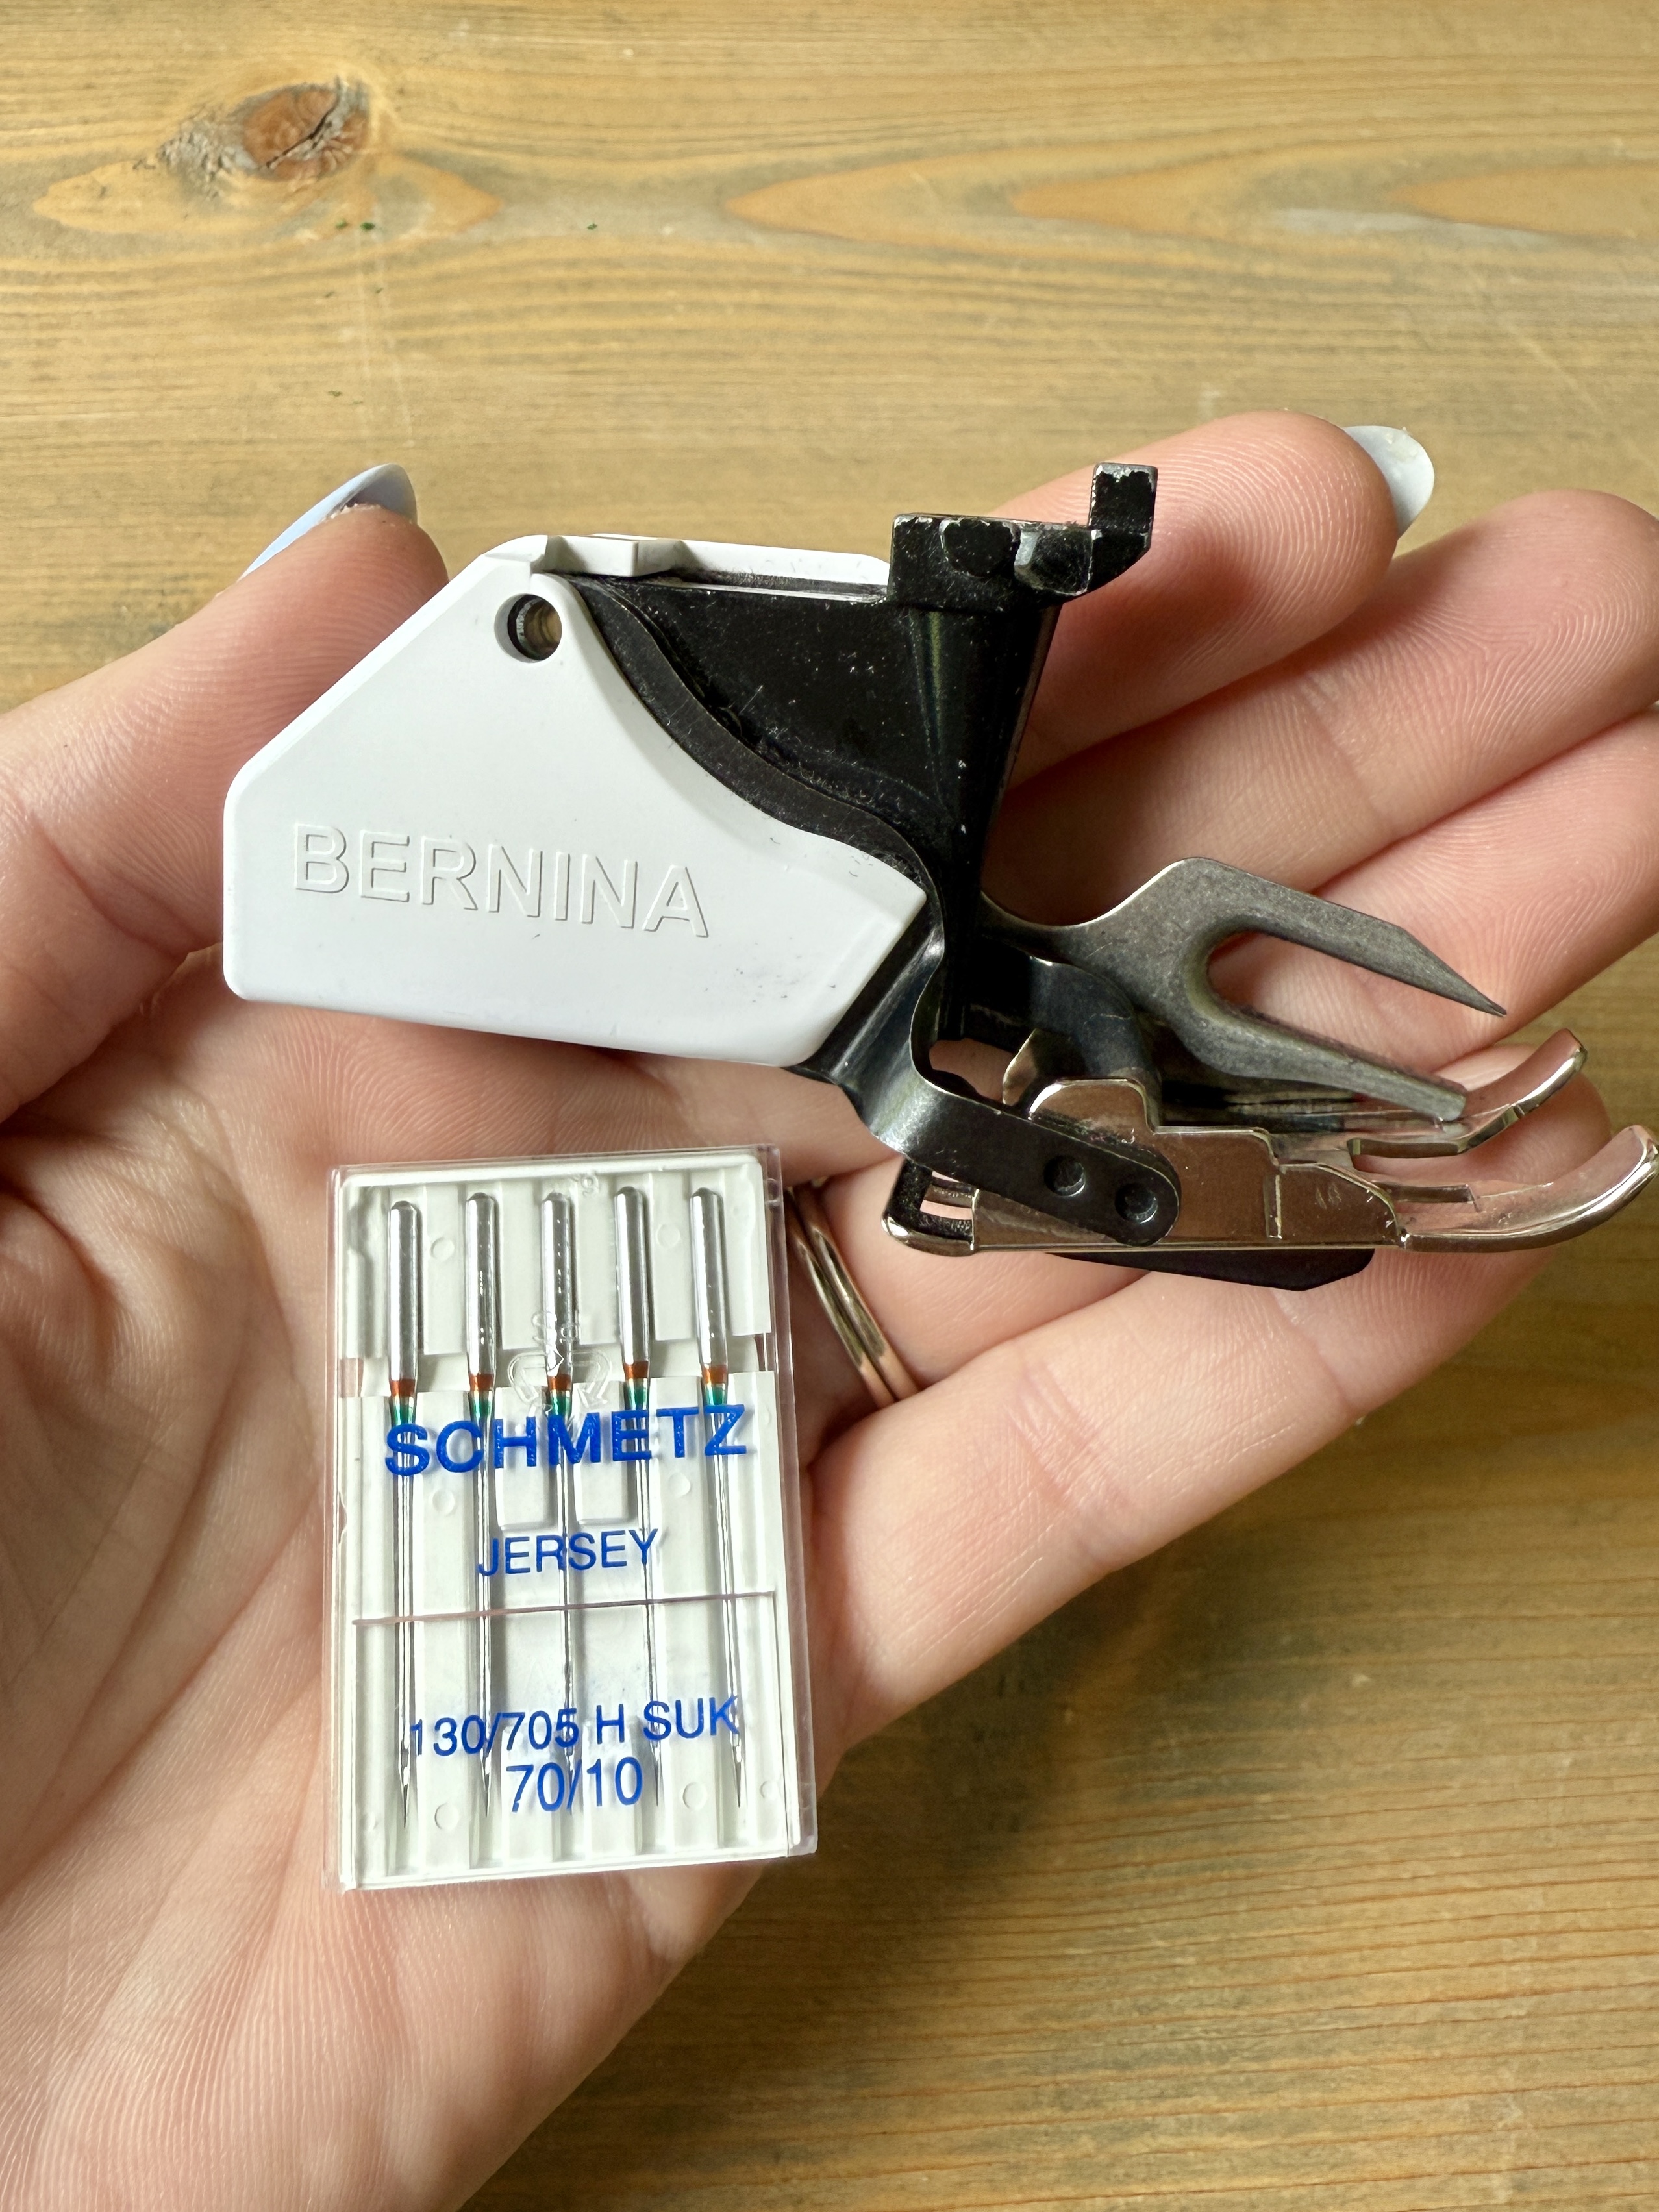
In the next portion, we will be attaching our first set of elastic pieces. The Elasticator Foot makes this process simple and easy! Below is a quick tutorial on how to use the Elasticator Foot with your serger.
Elasticator Foot Tutorial
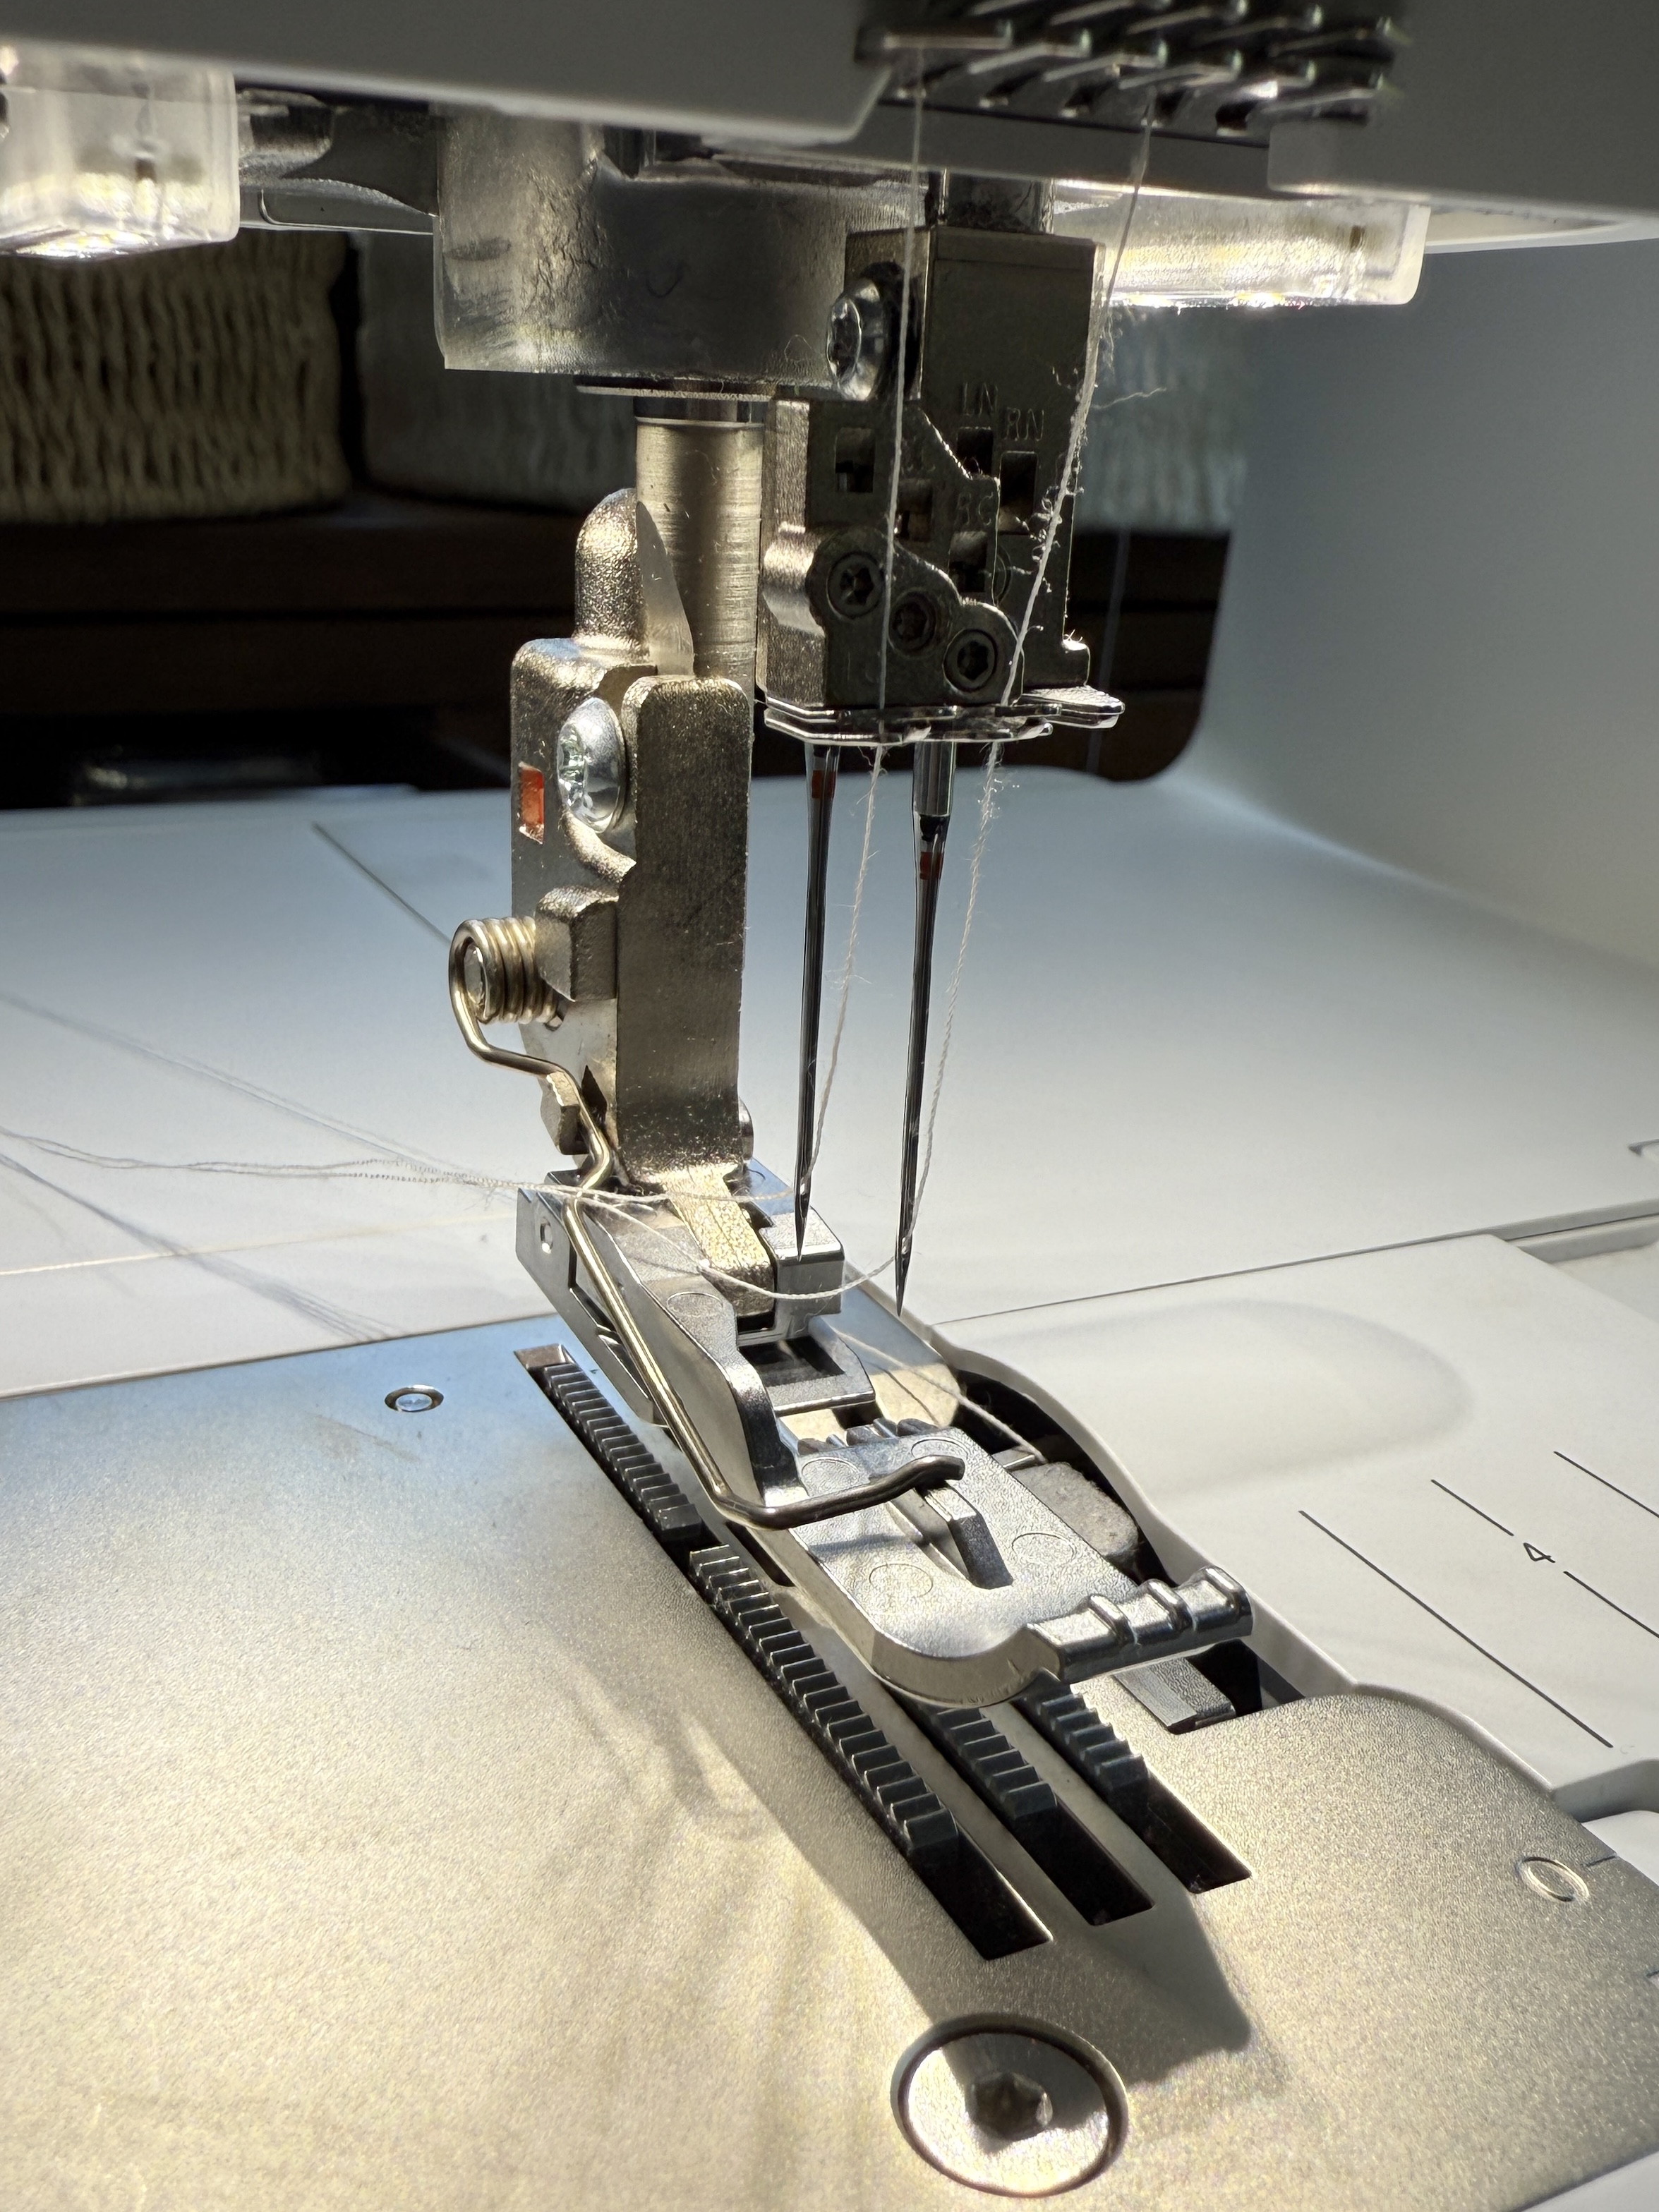
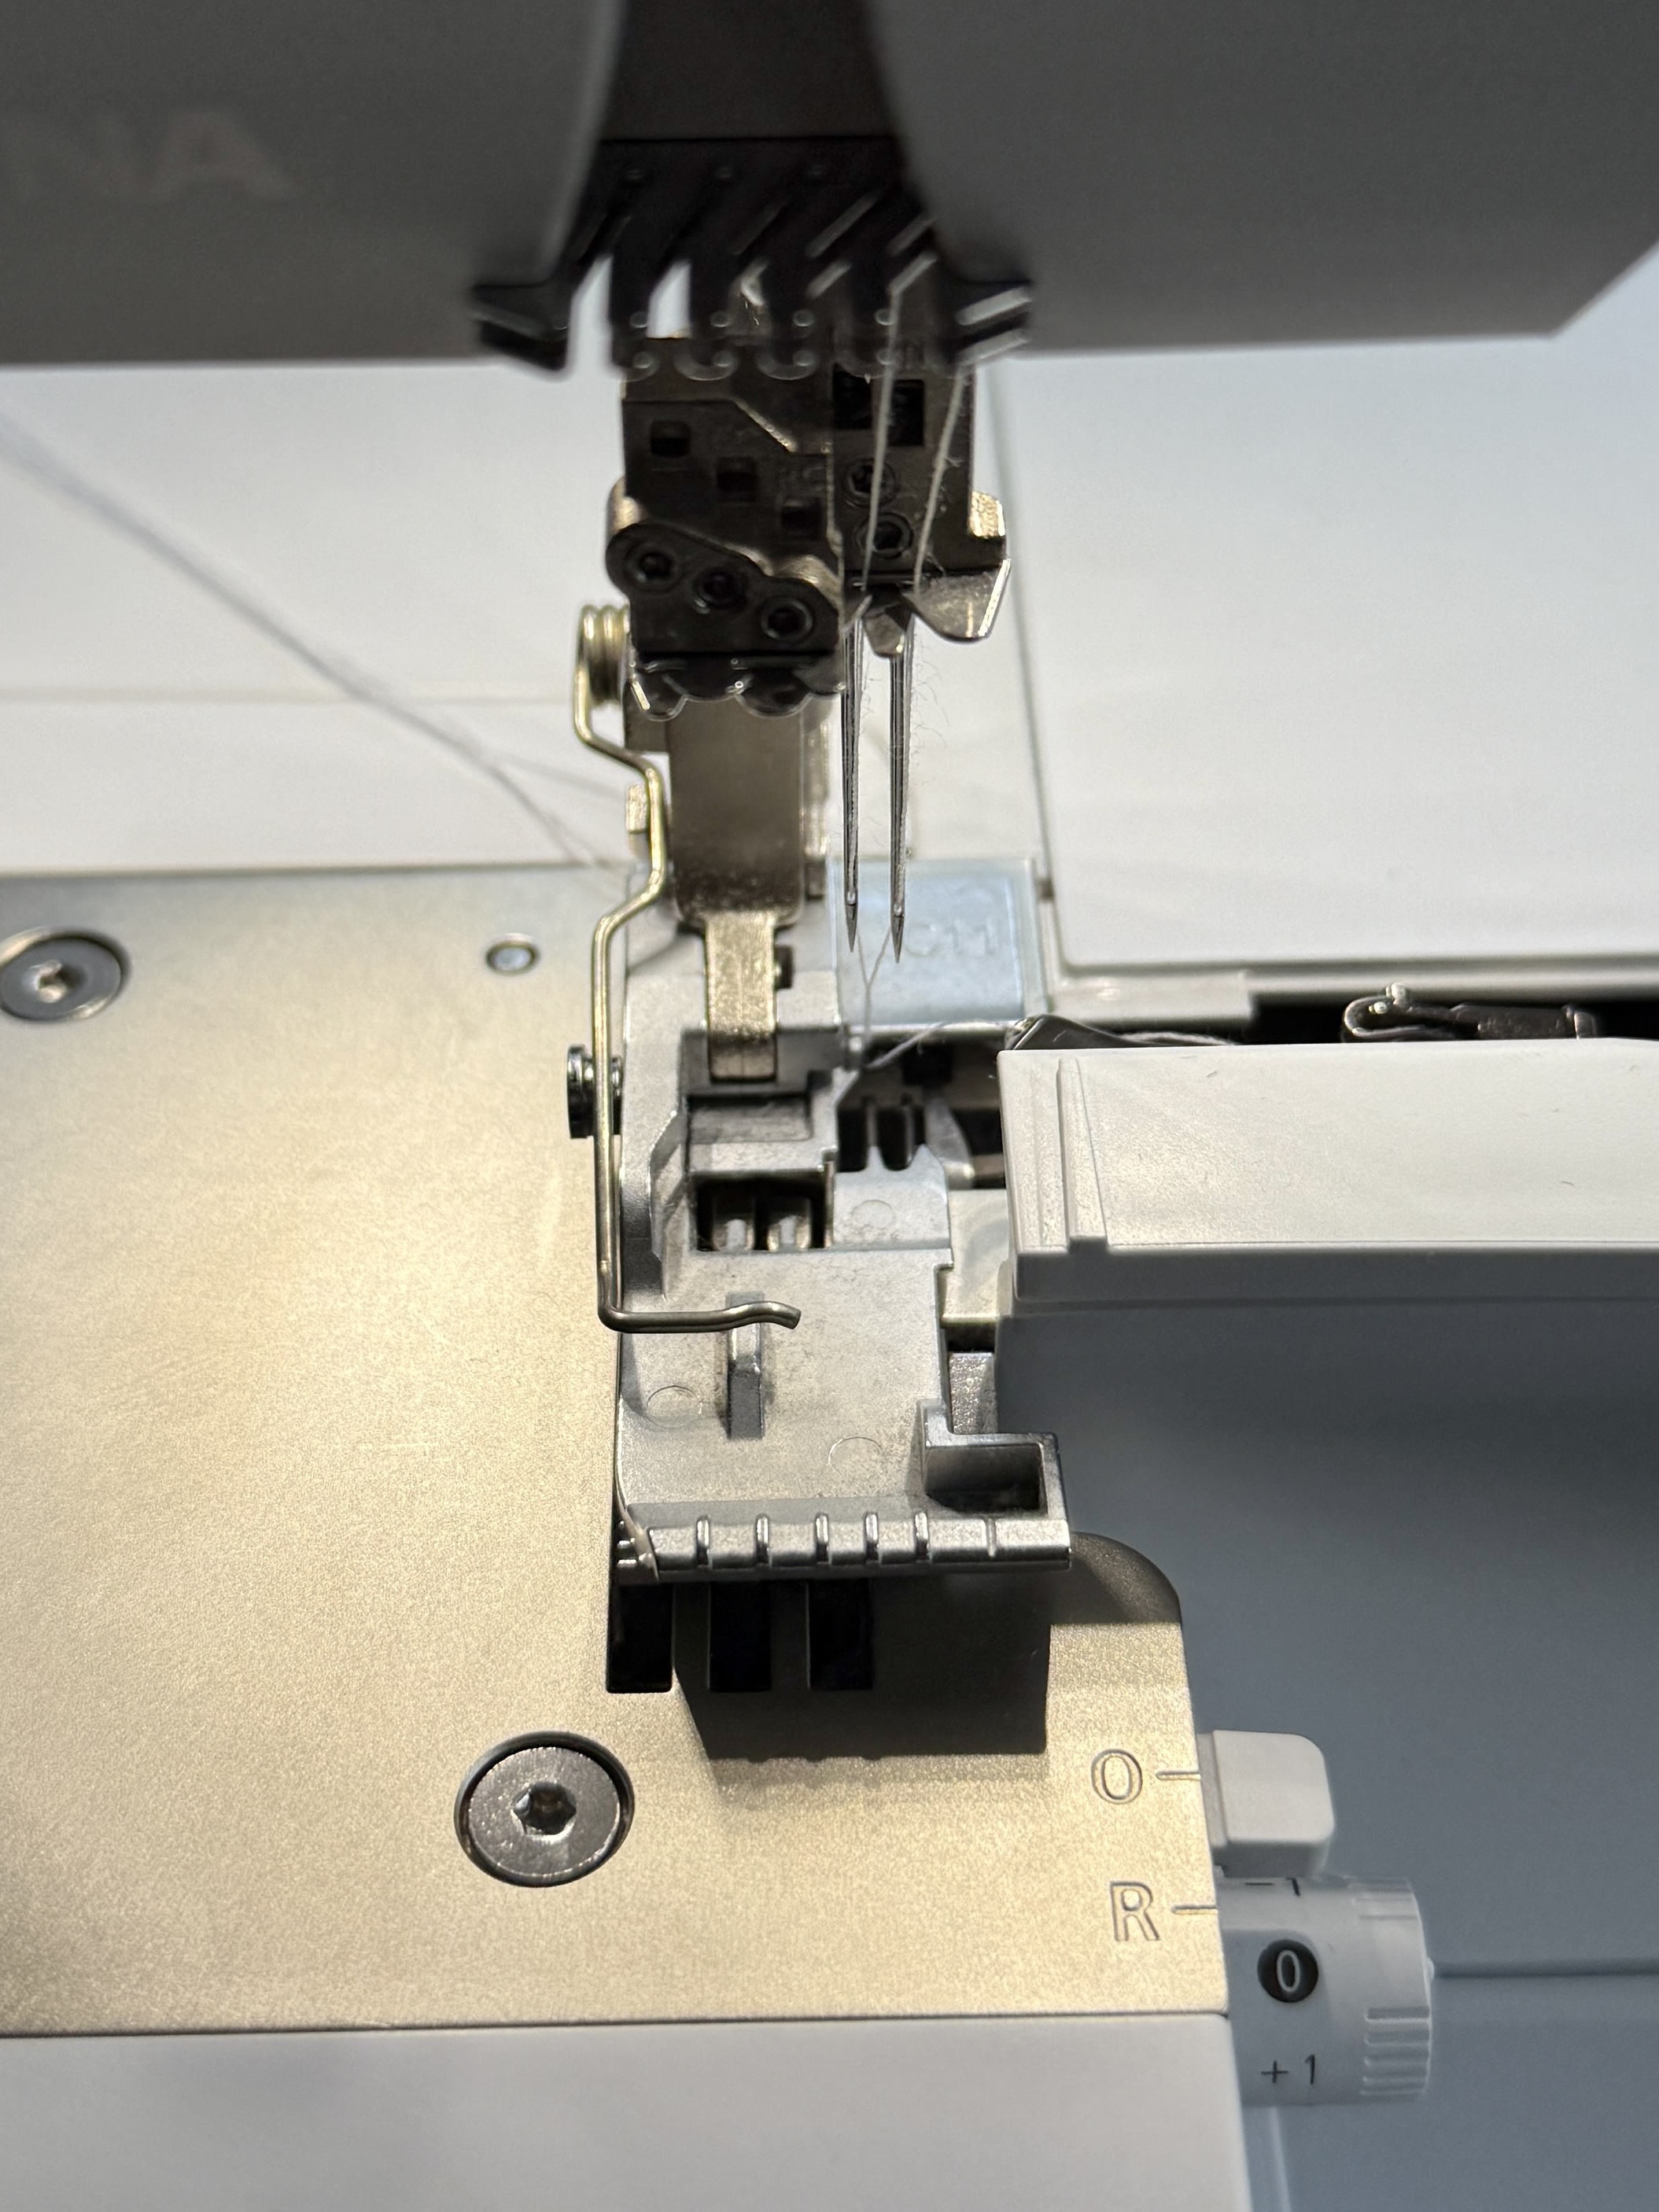
Remove the Standard Presser Foot Overlock/Coverstitch #C11 and attach the Elasticator Foot #C14.

Select the 4-Thread Overlock with Integrated Safety Seam (stitch #1). Keep the tensions on the default settings of 4. Bring the stitch length up to the maximum of 4.5. Do not up your differential feed unless you want the fabric to gather while attaching to the elastic. For this tutorial, we will be keeping the differential feed at the standard setting.
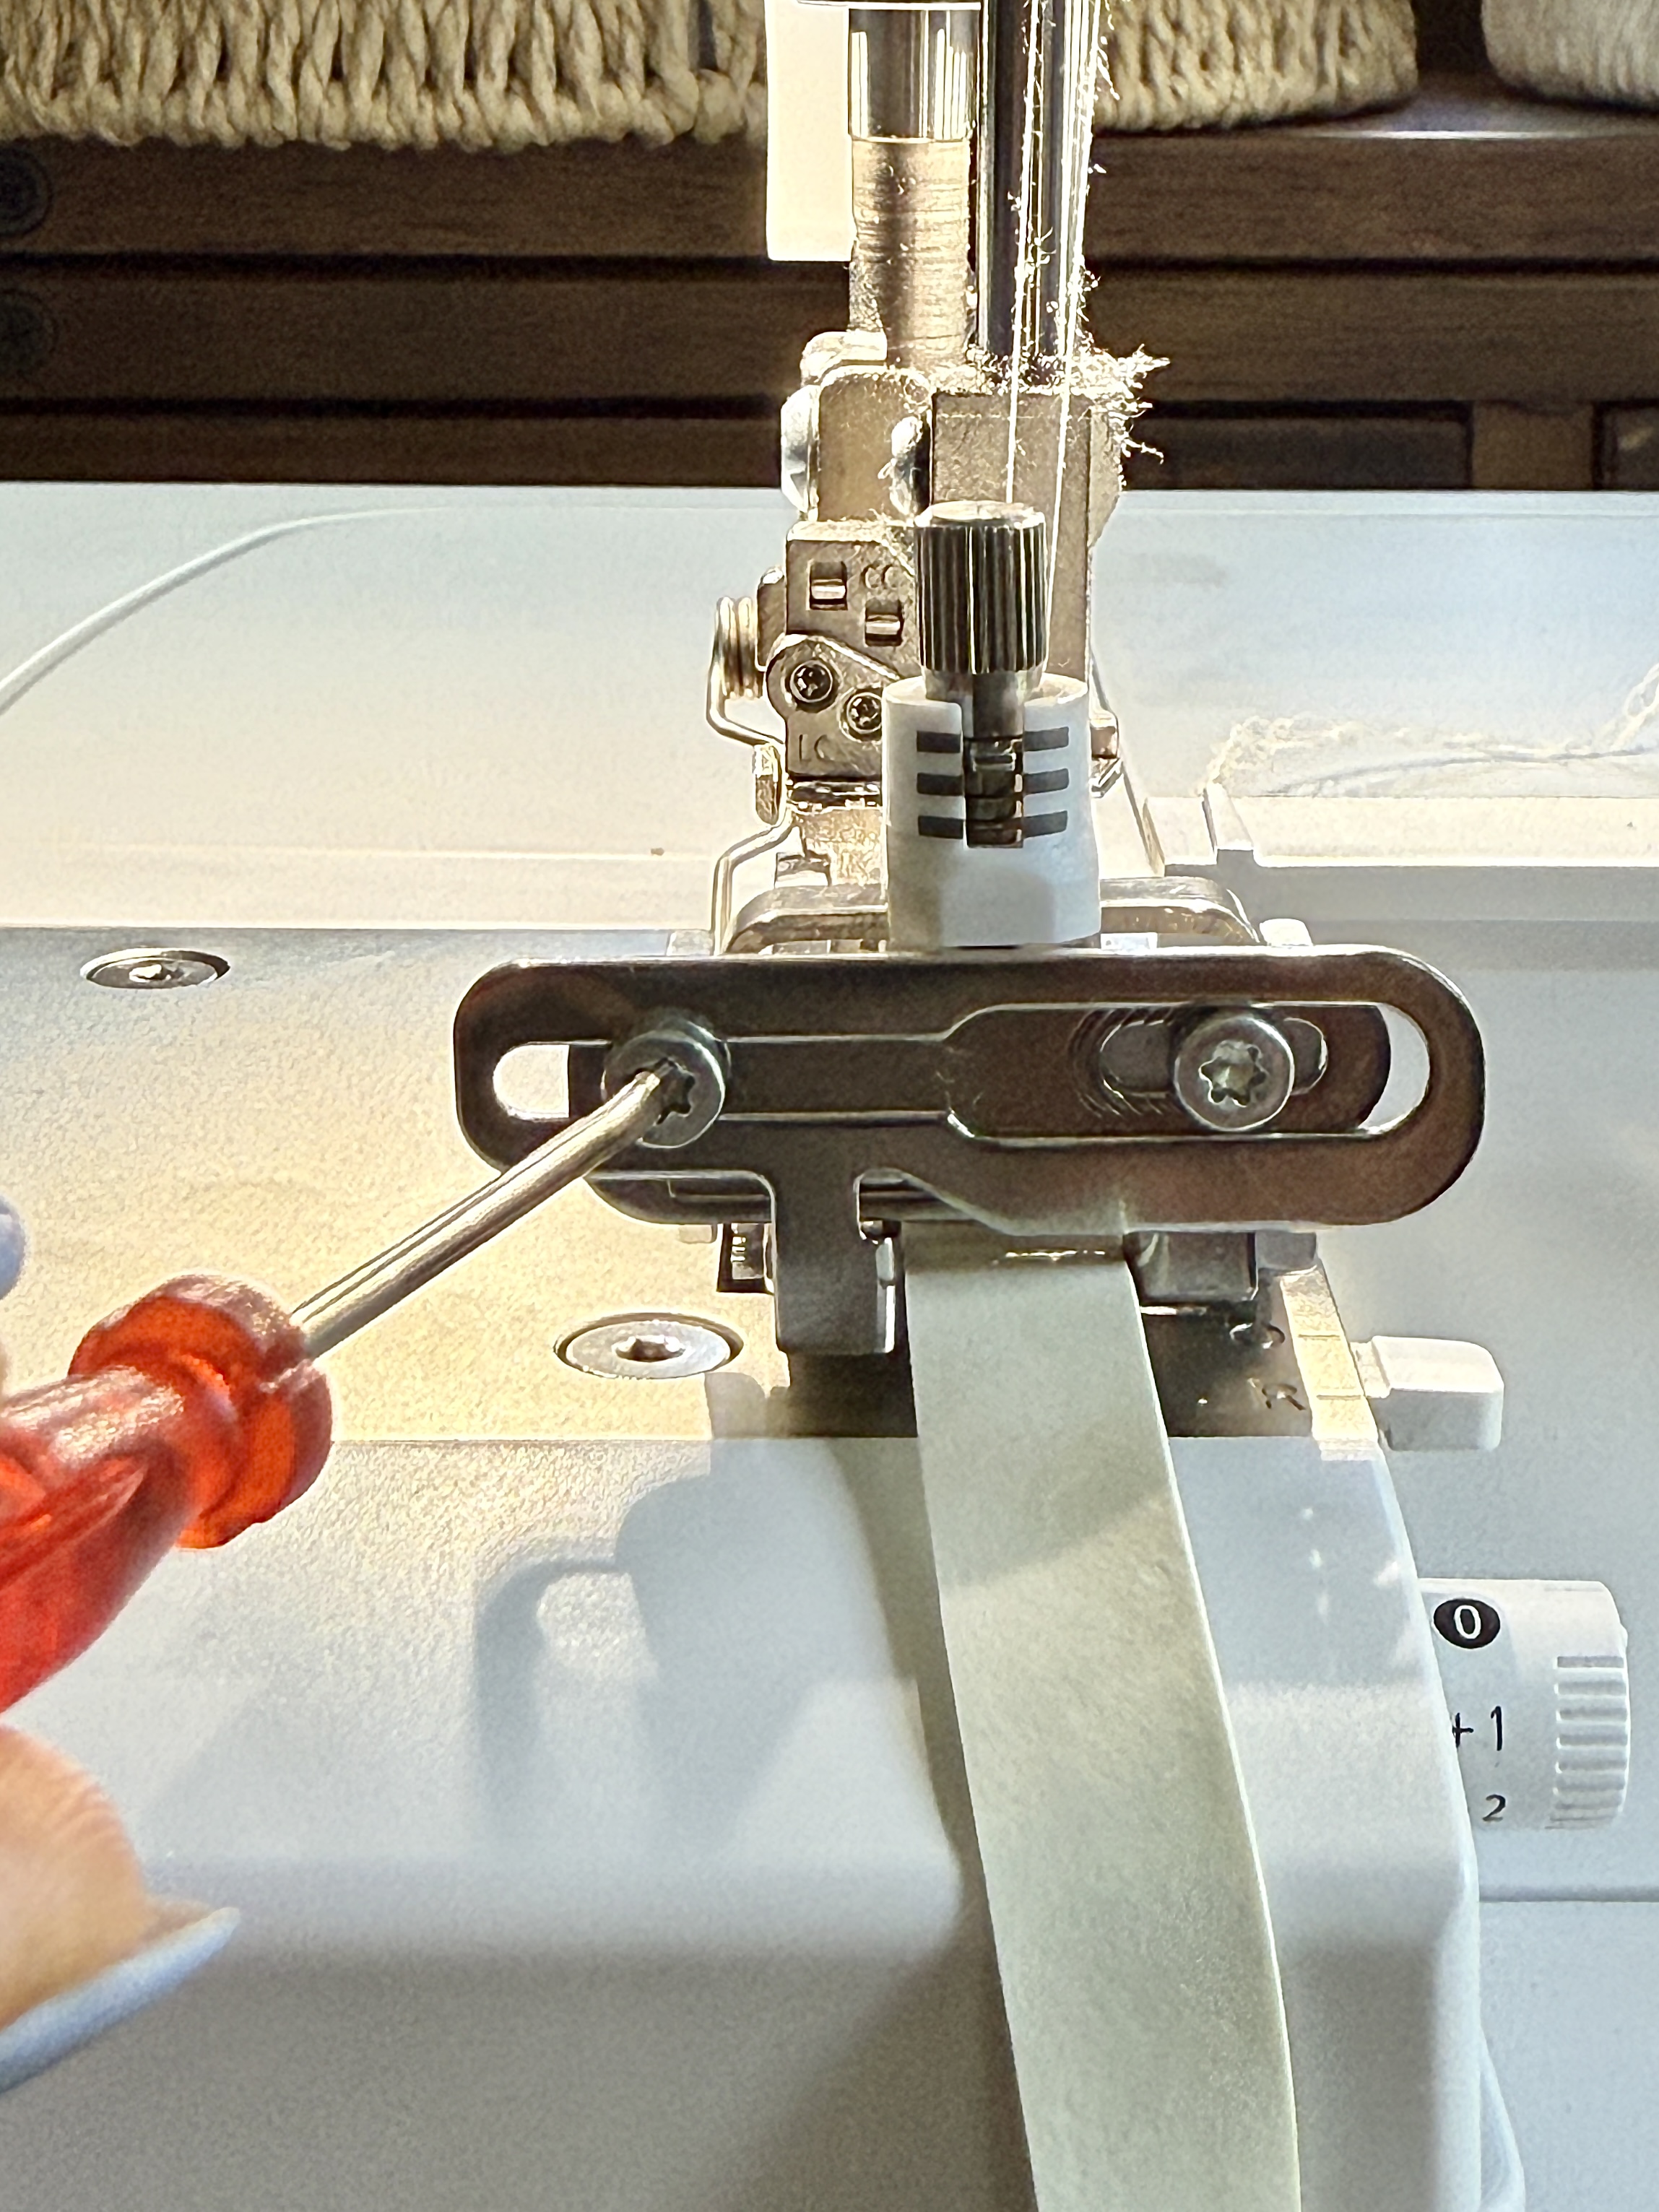
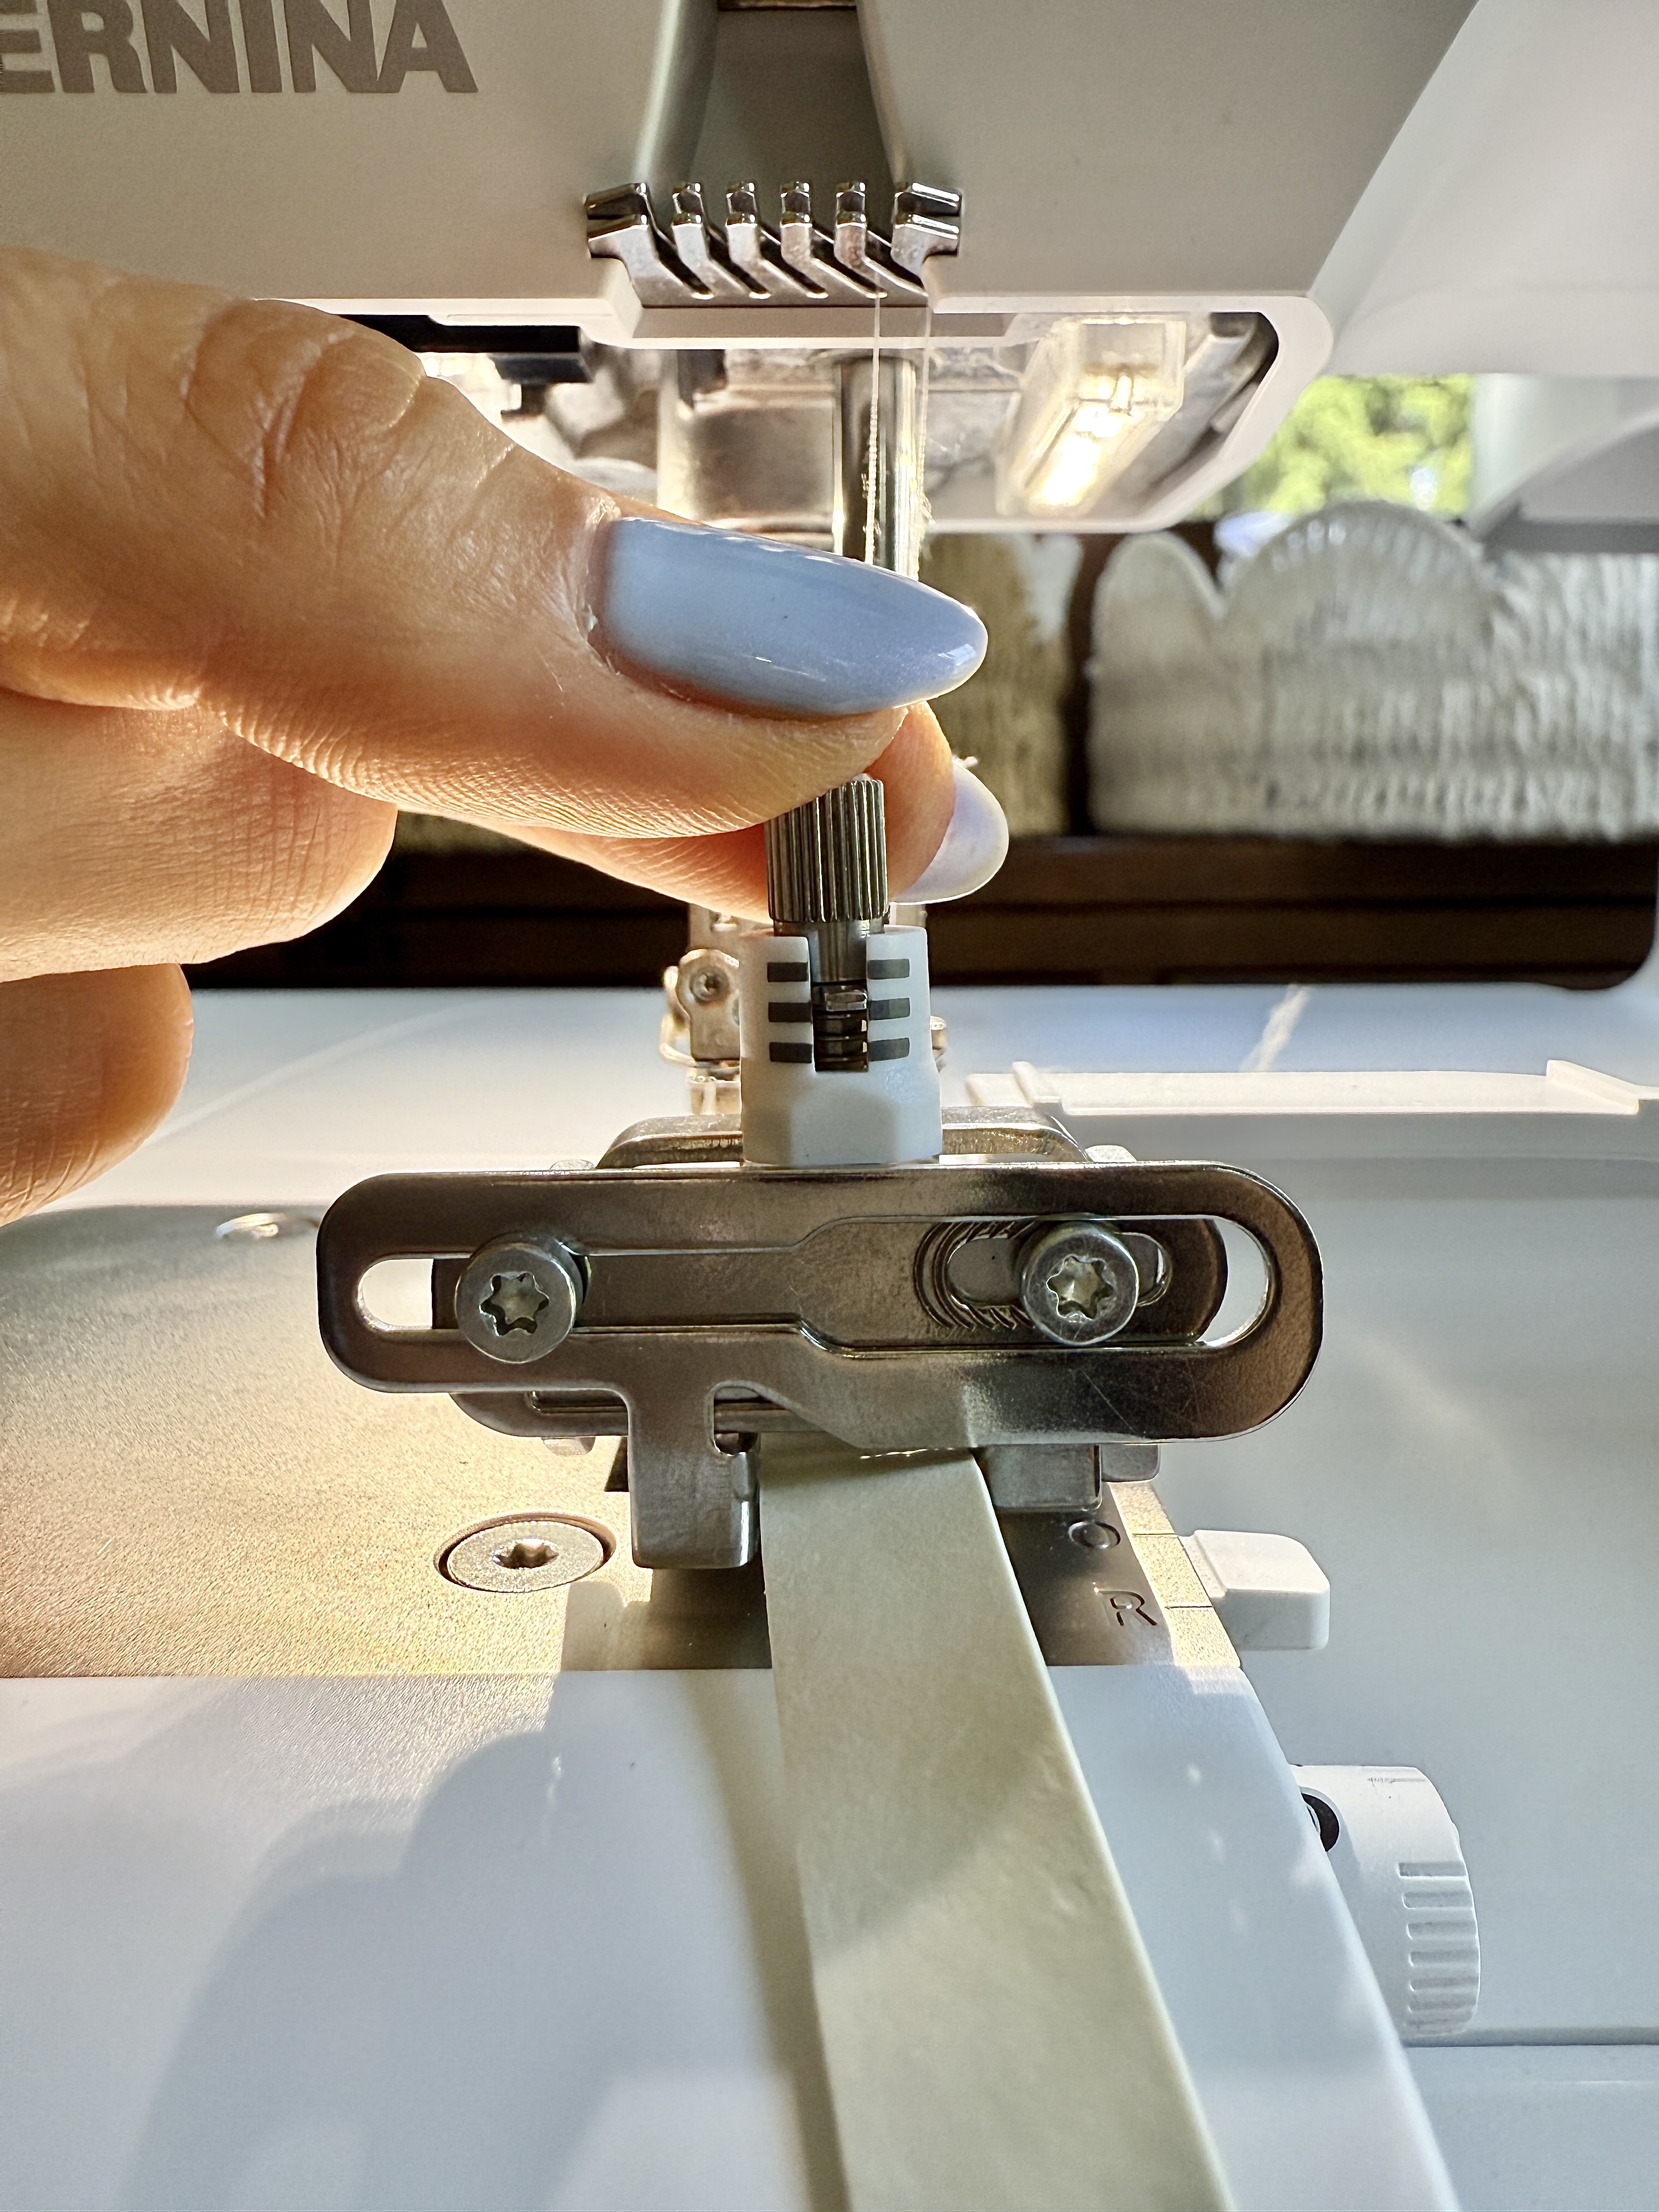
There are two screws on Elasticator Foot. The right hand screw adjusts the guide for the needle and the left hand screw adjusts for the width of the elastic. For this tutorial, we will not adjust the right hand screw.

We will begin tilting back the front section of Elasticator Foot #C14 to open up the placement of the elastic.

Raise the pressure foot. Slide elastic into the slot from the lefthand side so that it sits below the roller. Leave a tail of elastic beyond the needles so that you can guide it with your hands. Bring needles down to stabilize the elastic. Put presser foot down.
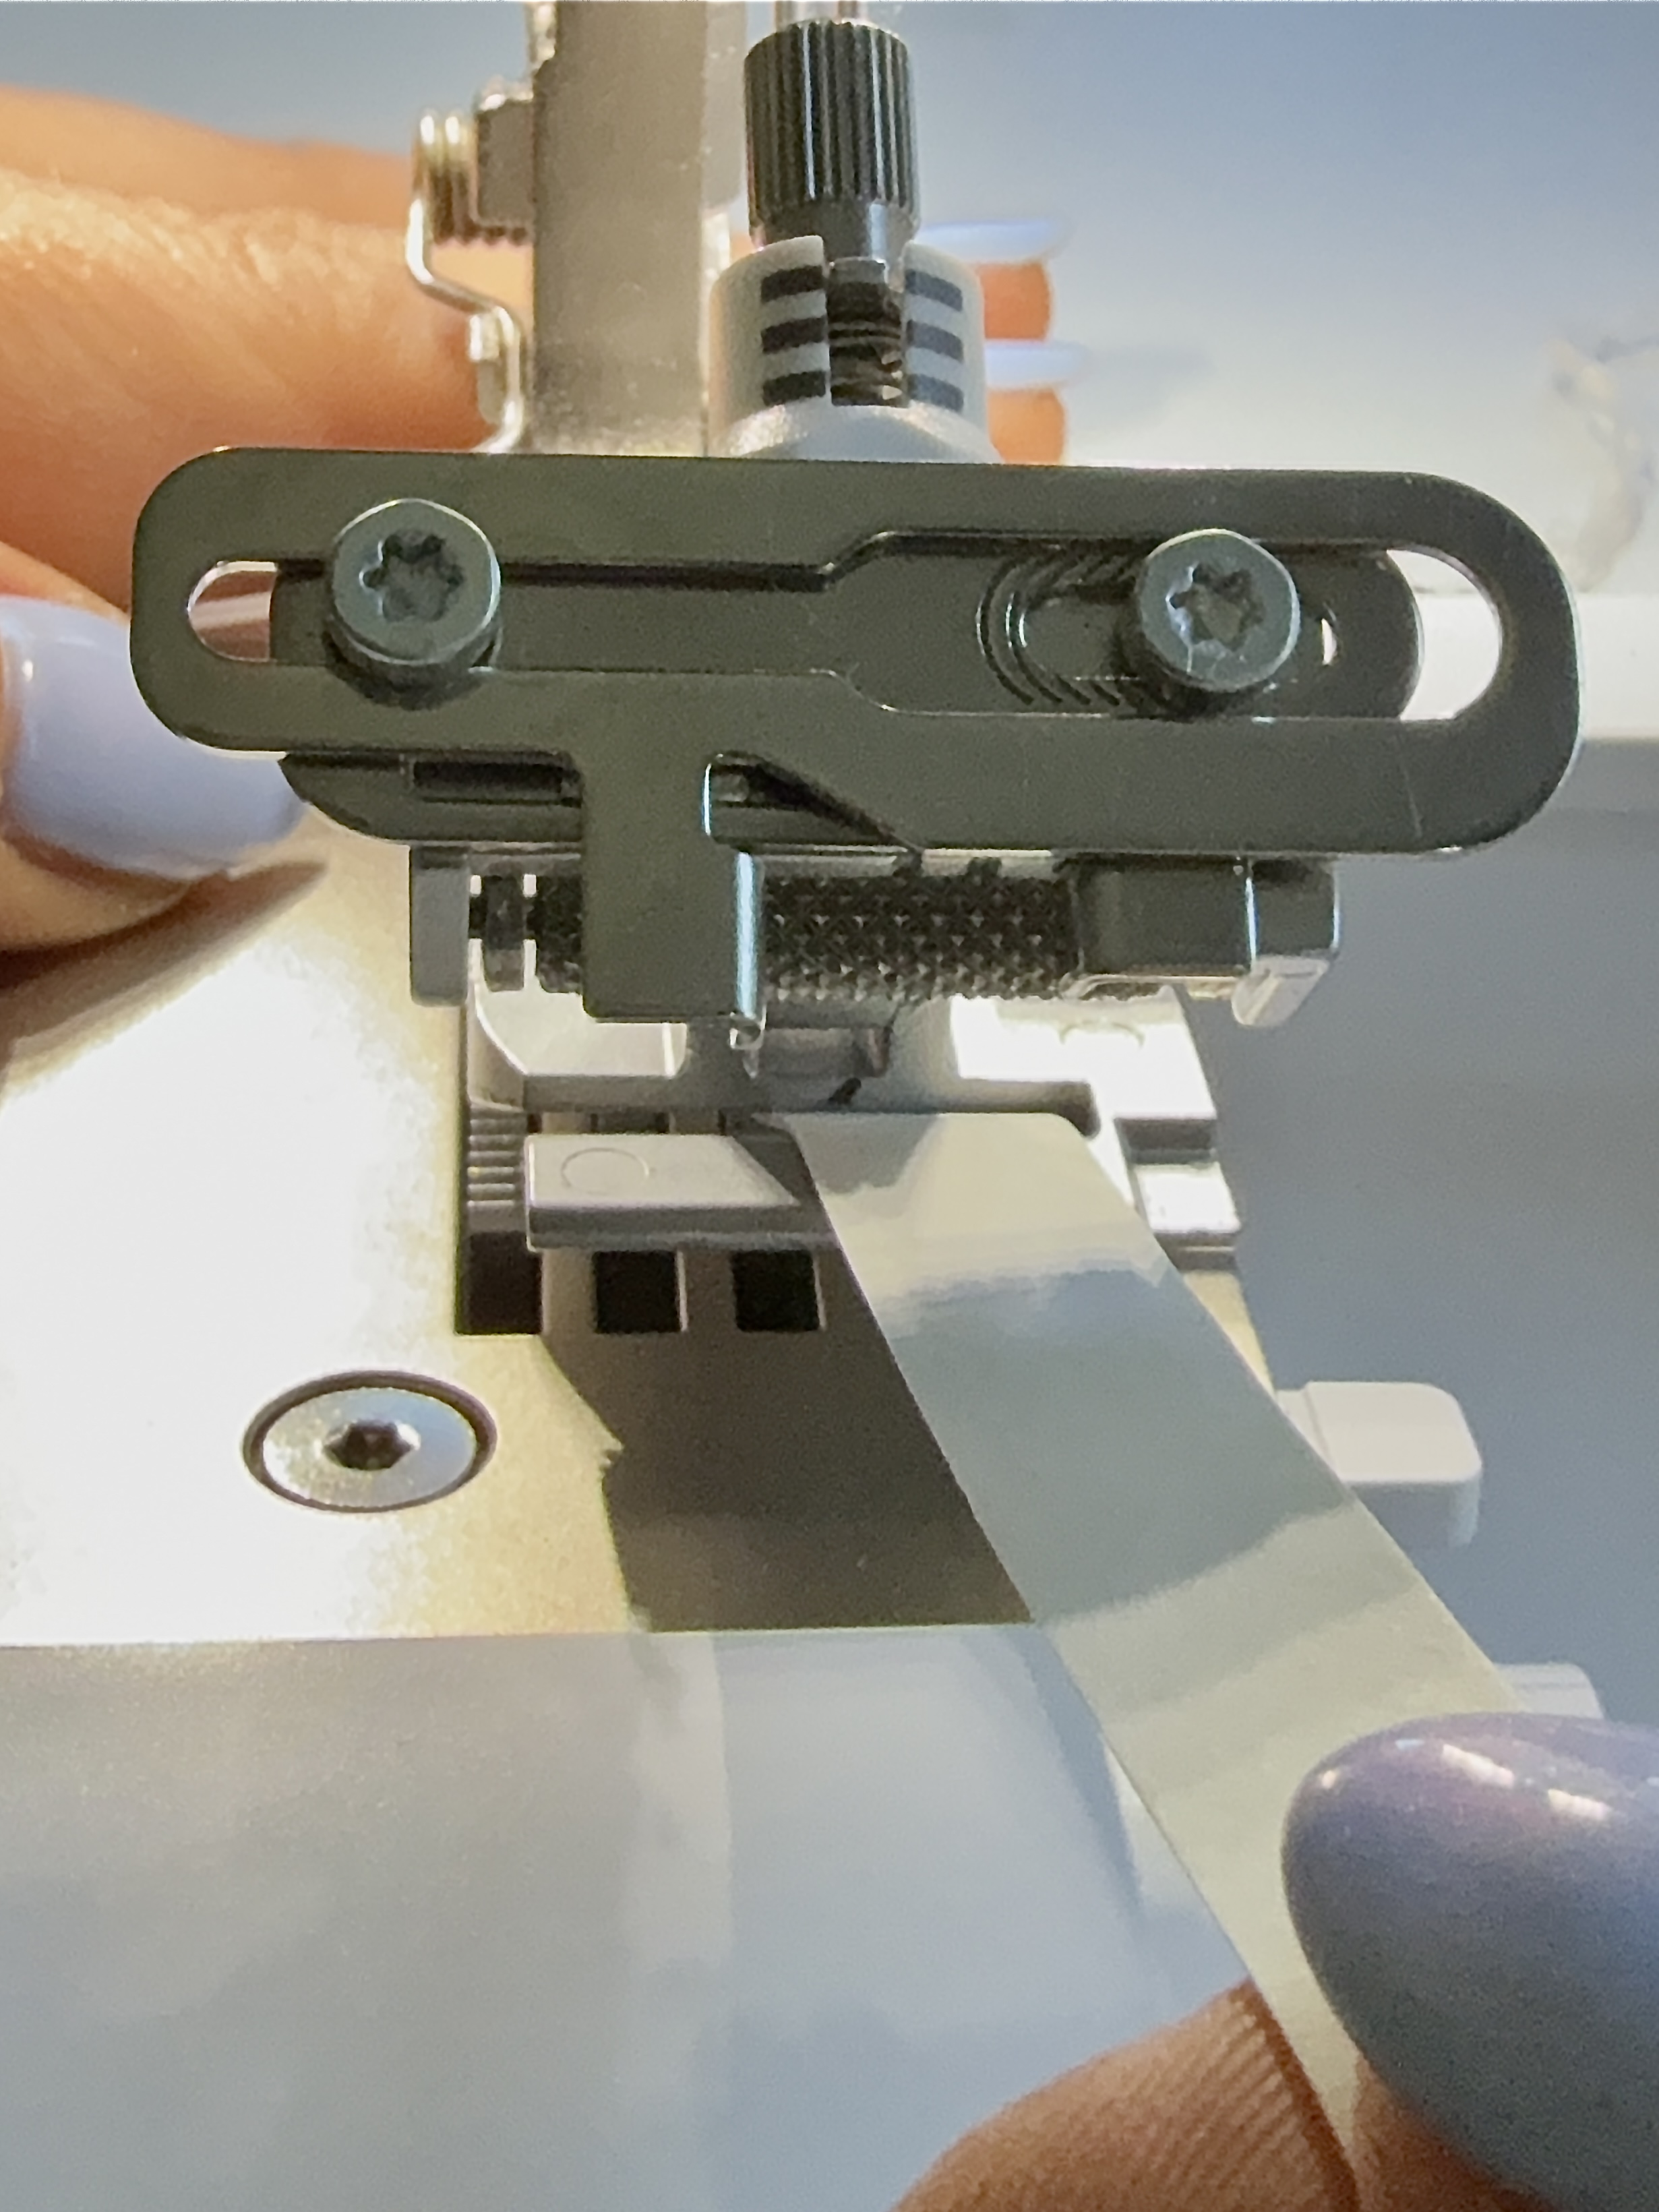
Loosen the left hand screw to allow the left hand bar to move freely. Move the left hand bar so that it is right up against the elastic without putting any pressure on the elastic. Tighten the left hand screw to secure the correct placement of the bar.
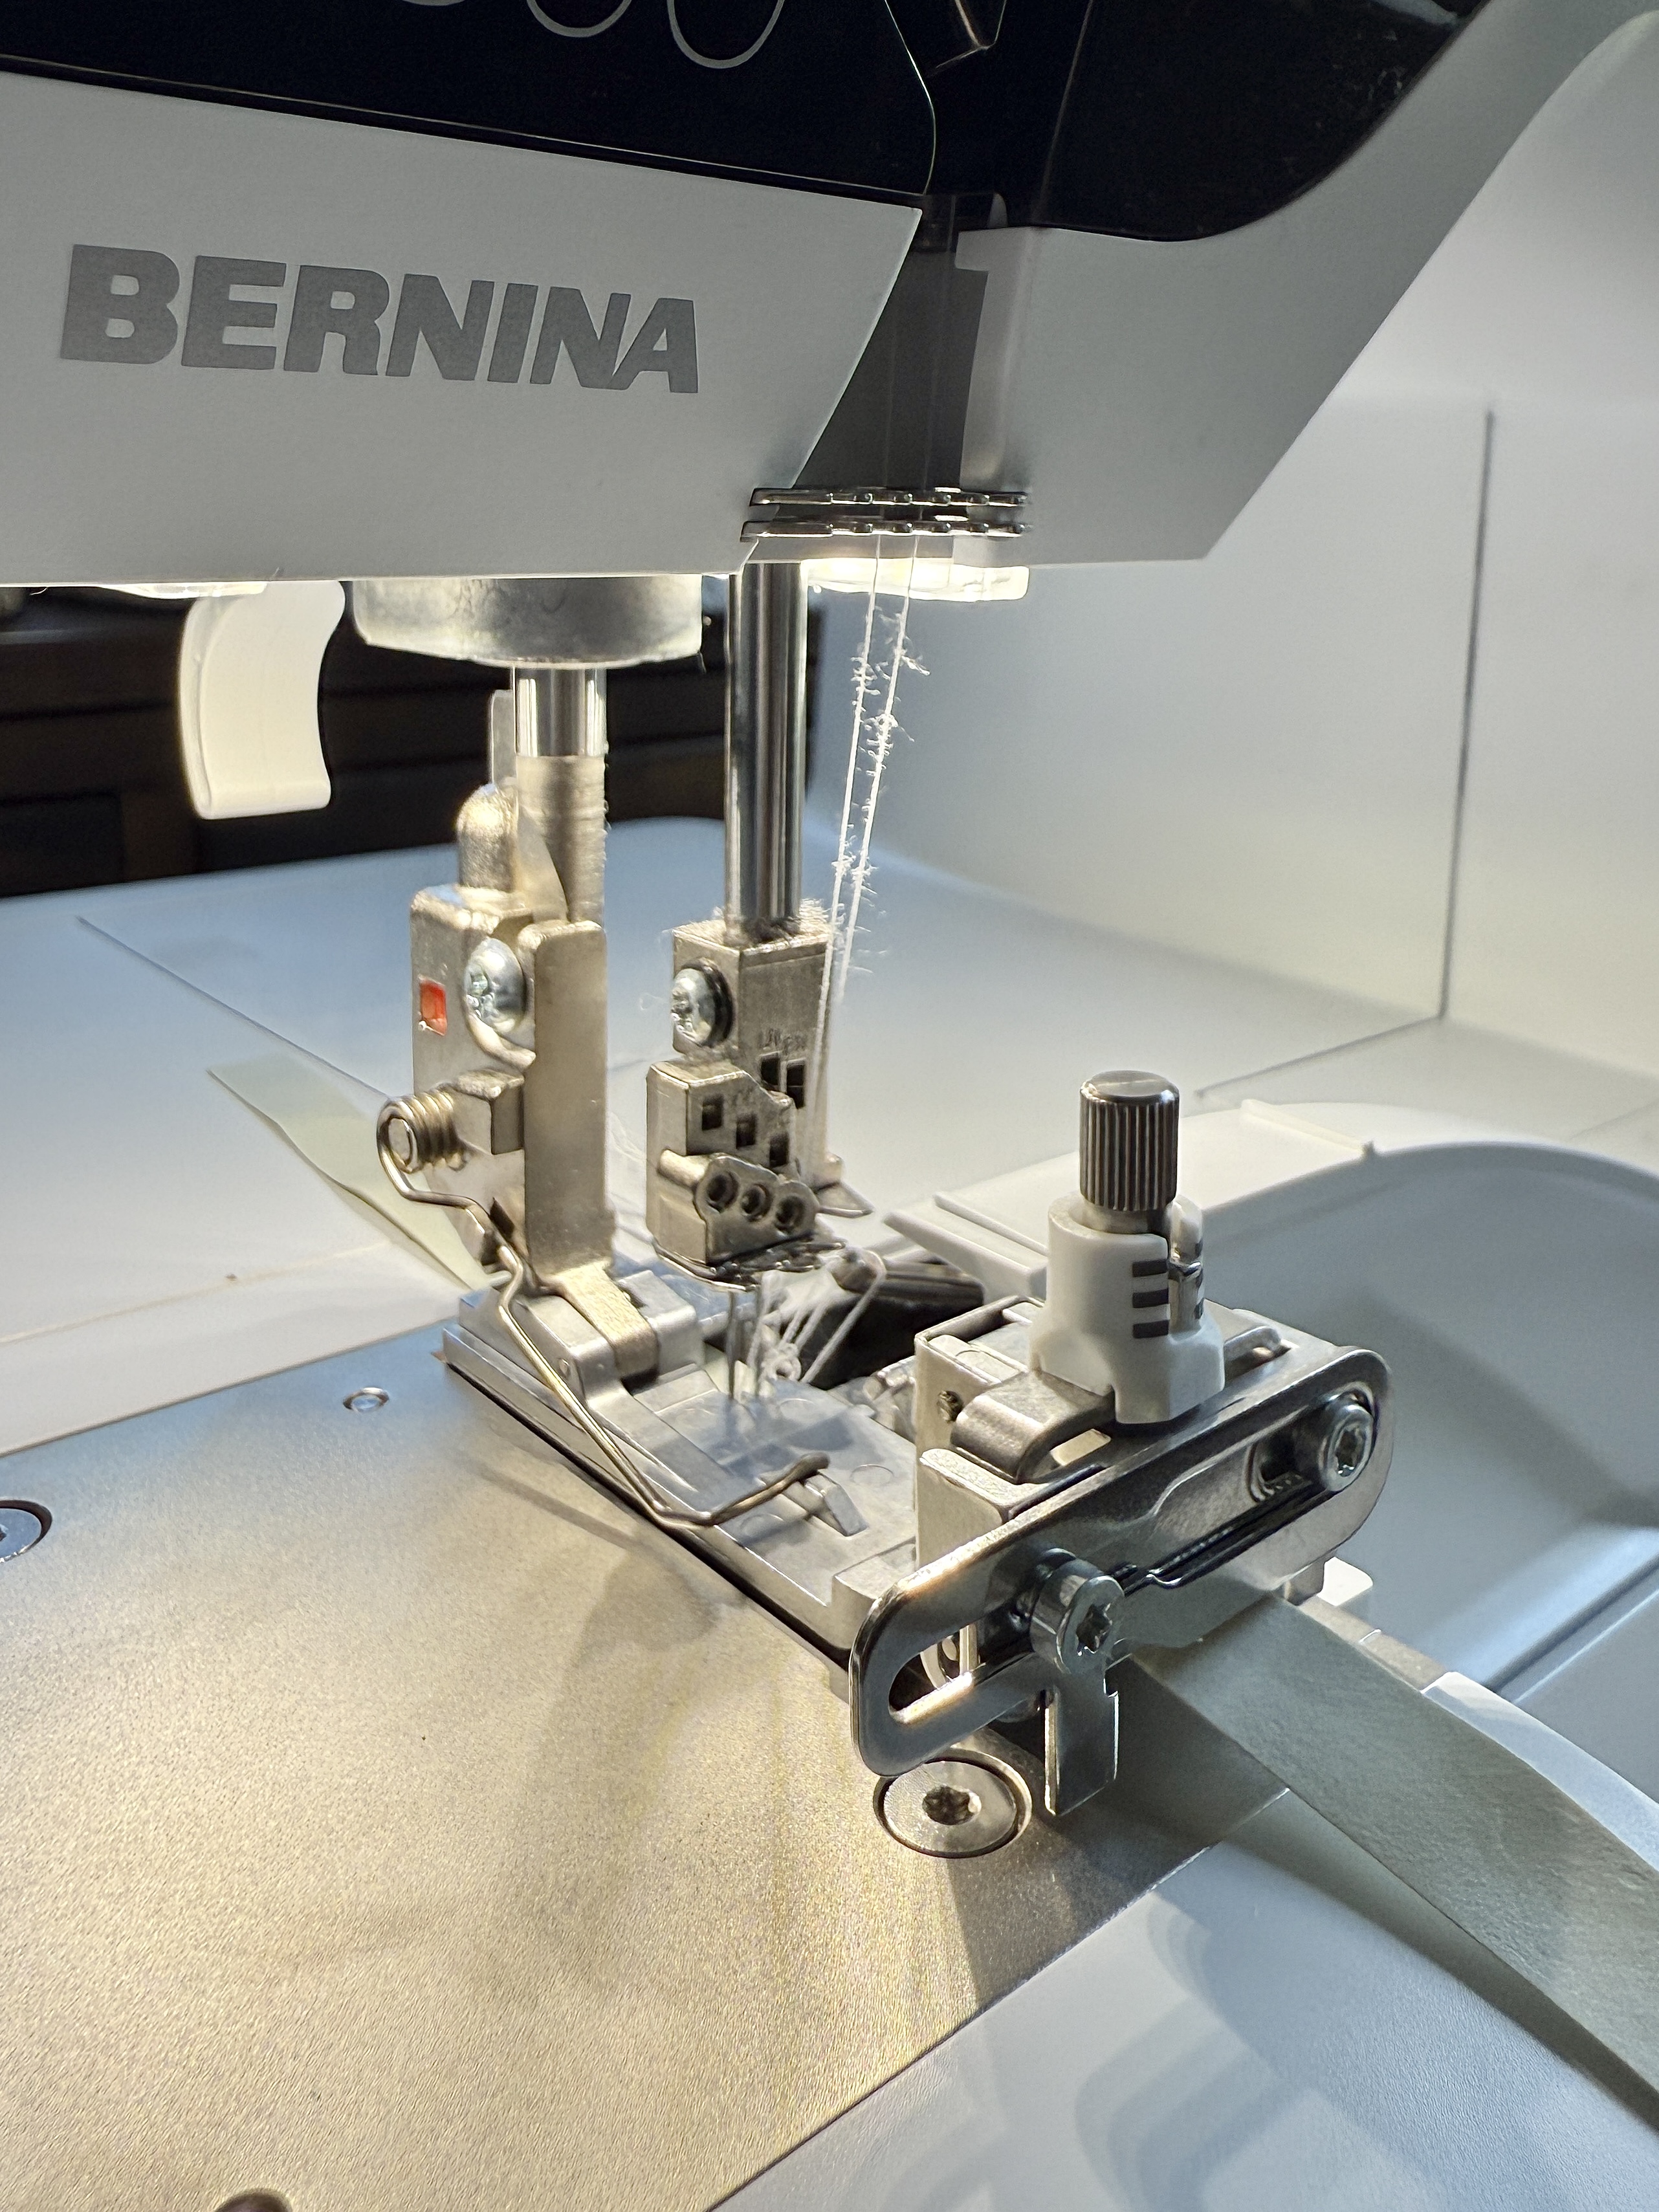
The tension knob at the top can be tightened to the right or loosened to the left. The bars indicated show the different degrees of pressure, resulting in less or more gathering. The highest mark (loosest point) gathers the least amount, the lowest mark (tightest point) gathers the most.
Switch knife to off position. Hold the length of the elastic straight and steady in front of the presser foot. Using a scrap piece of fabric measuring 10″ long, test the percentage of gathering for each turn of the tension knob. This will help you determine how much tension you need for the percentage of gathering you need your elastic to complete.

When end of the elastic is reached, raise presser foot and needles, tilt back the Elasticator Foot #C14, and remove the elastic from the slot. Cut off any excess elastic from the last stitches sewn.
Stabilizing the Underarms with Elastic
Using the tutorial above, prepare your machine for using the Elasticator Foot #C14. Set the tension knob to the left most position (least amount of tension). This should provide a 1:1 elastic to fabric ratio, resulting in stabilizing the fabric without gathering it. Insert the 3/8″ swimwear elastic into the Elasticator Foot. Serge to attach the elastic to the lining side of both underarm seams of the swimsuit. Do not attach across the low back.
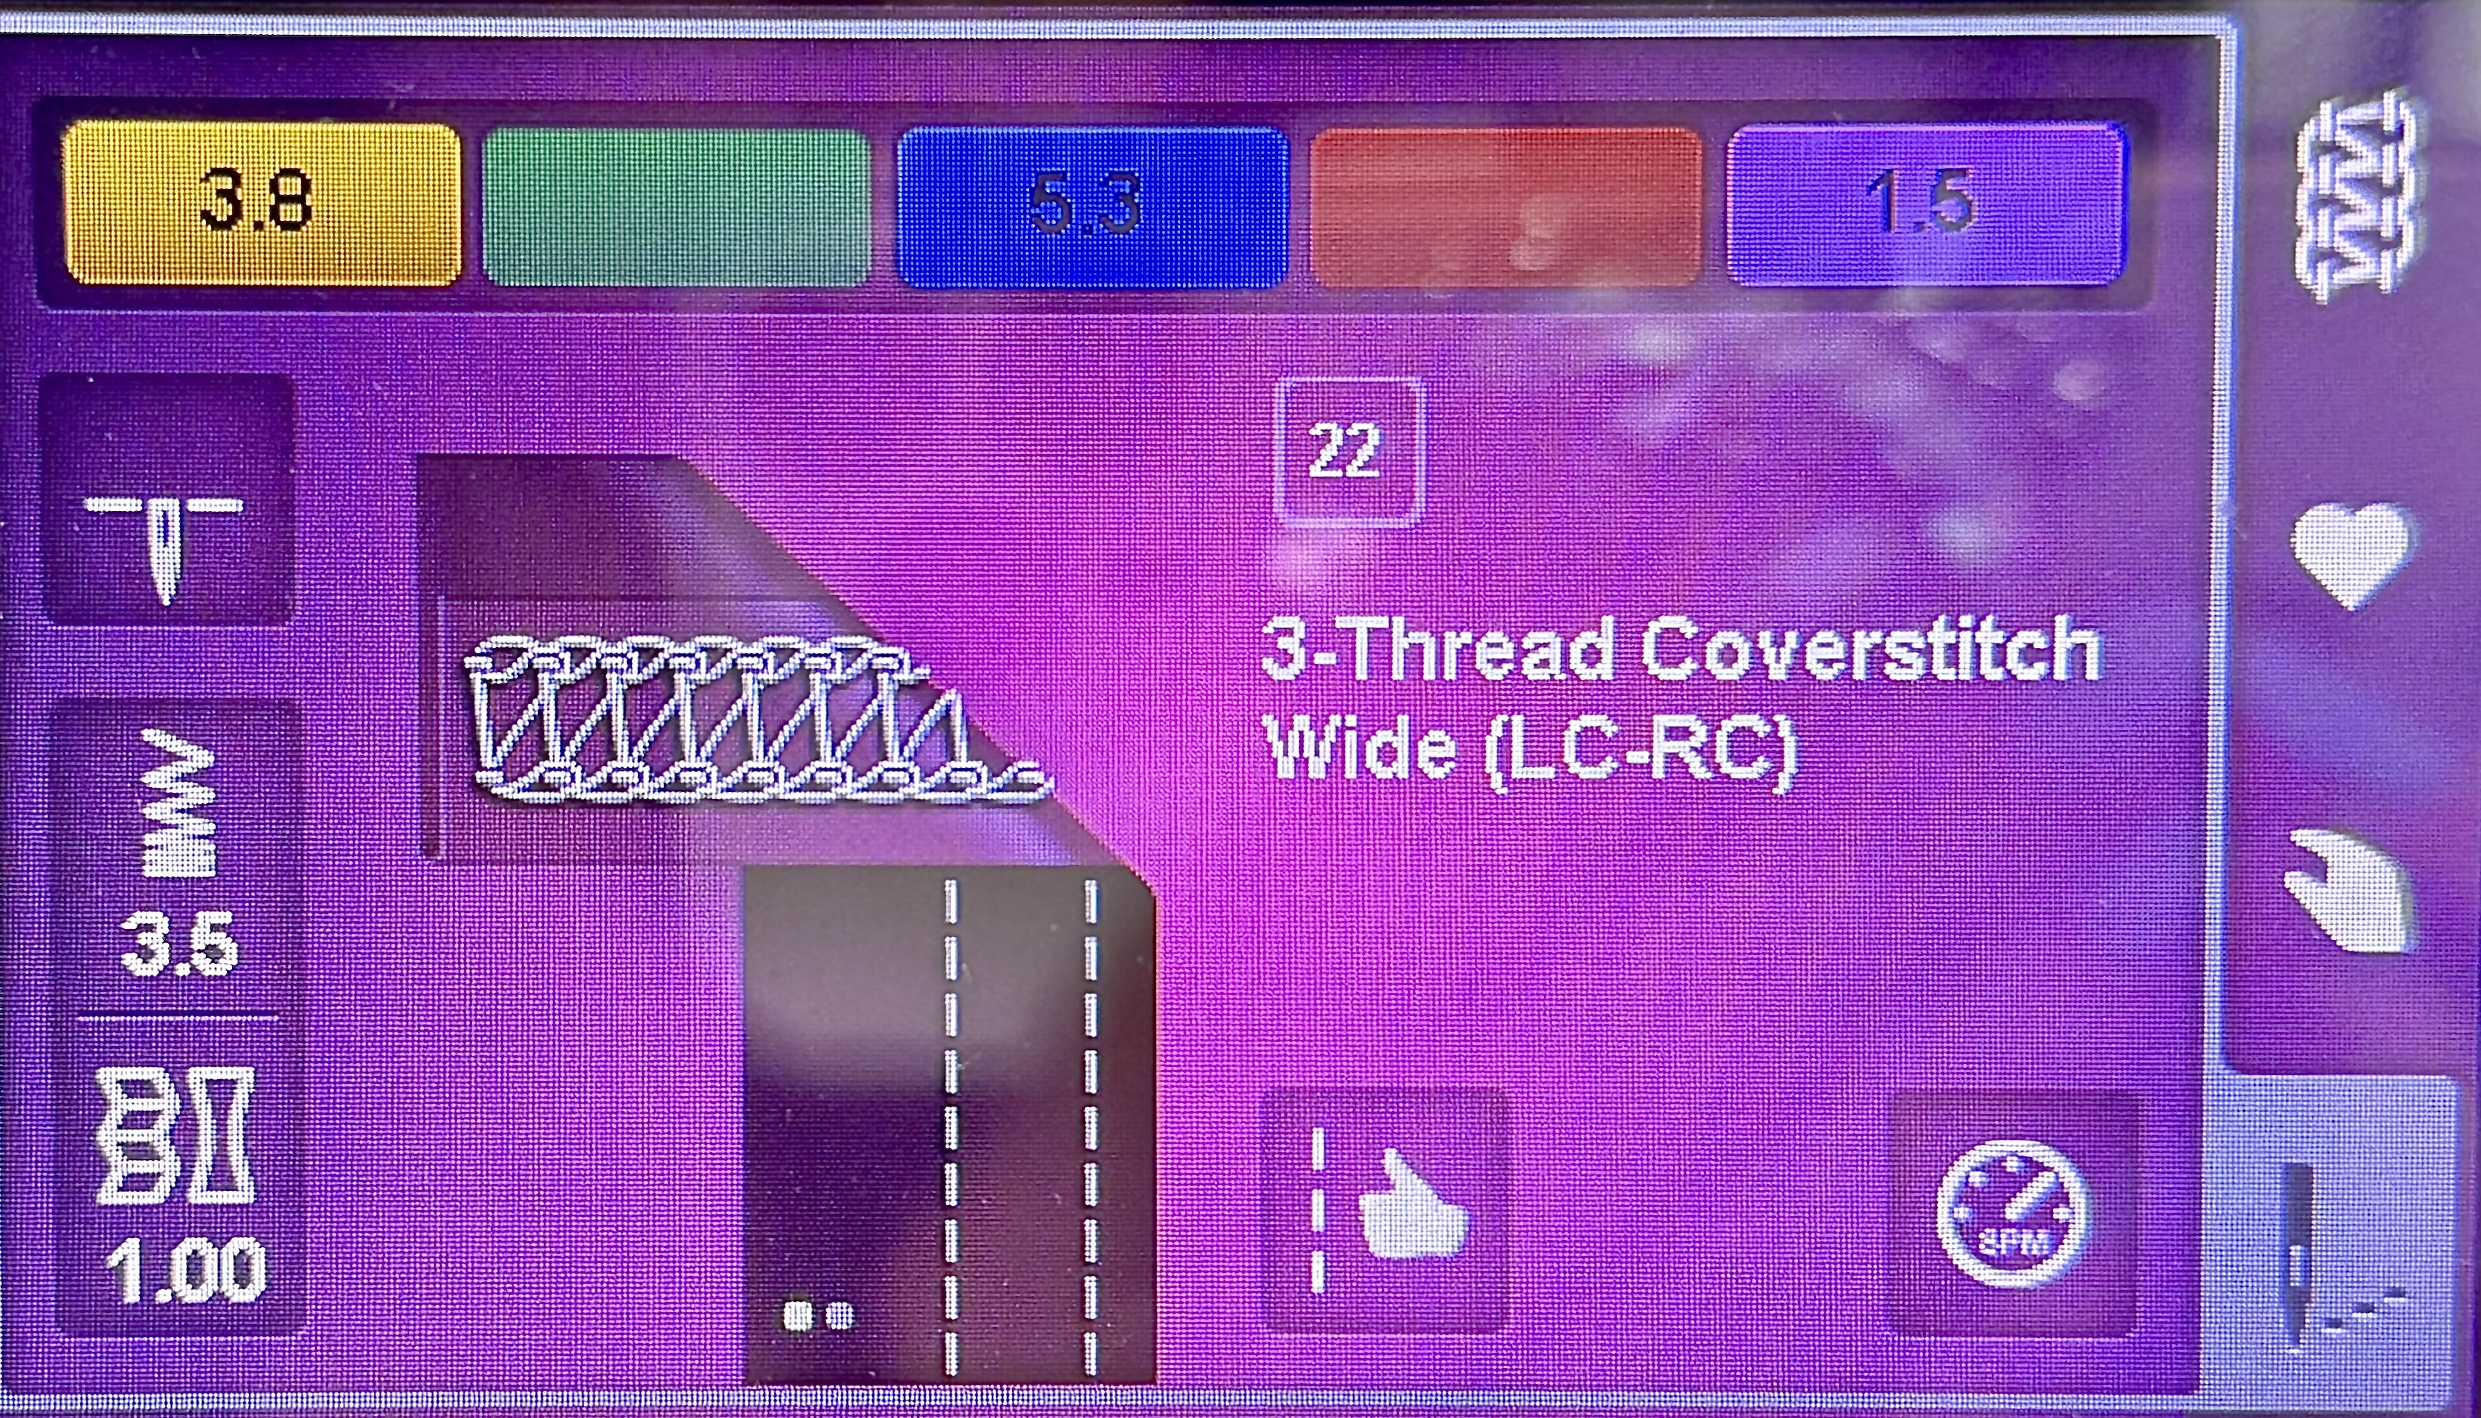
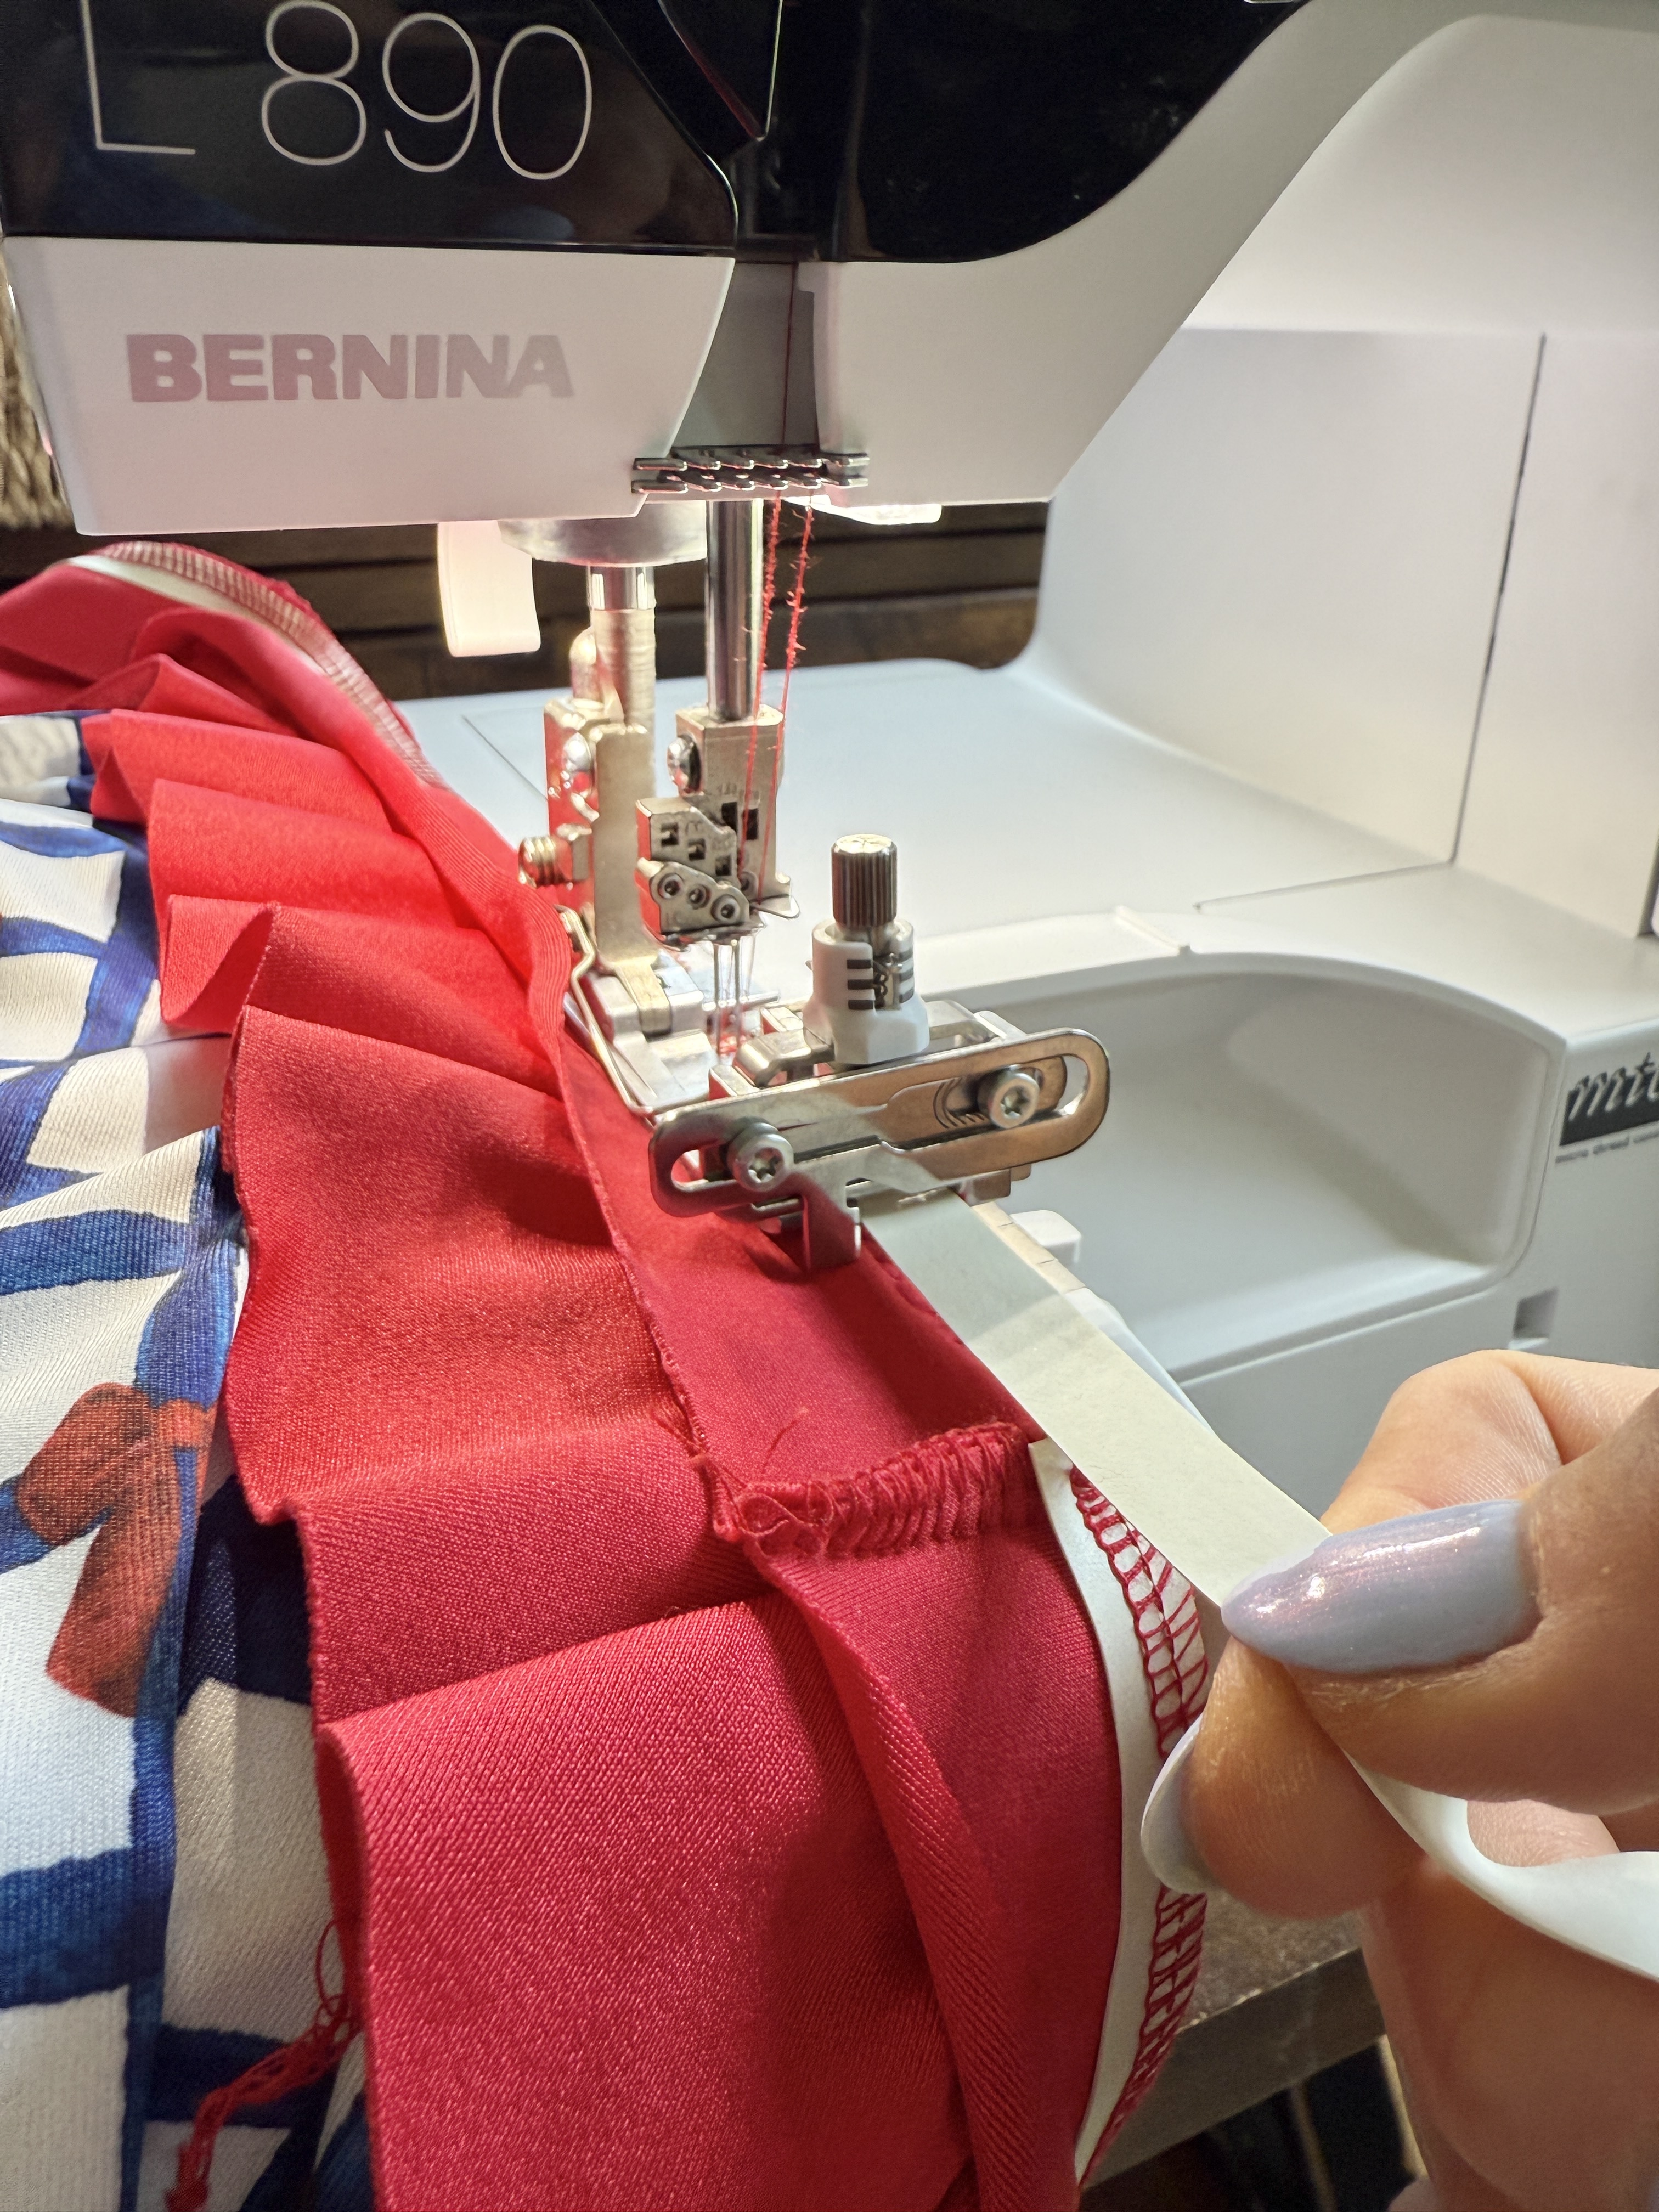
Following the instructions for your machine, convert your L 890 to the Coverstitch function, replacing the Elasticator Foot #C14 with the Coverstitch Foot #C13. Select the 3-Thread Coverstitch Wide (stitch #22), and keep the standard settings in place.
Fold the elastic down to the lining side and topstitch.
Constructing and Attaching the Bindings and Ruffle Pieces
Covert your L 890 back to the standard serger settings, replacing the Coverstitch Foot #C13 with the Standard Foot #C11.
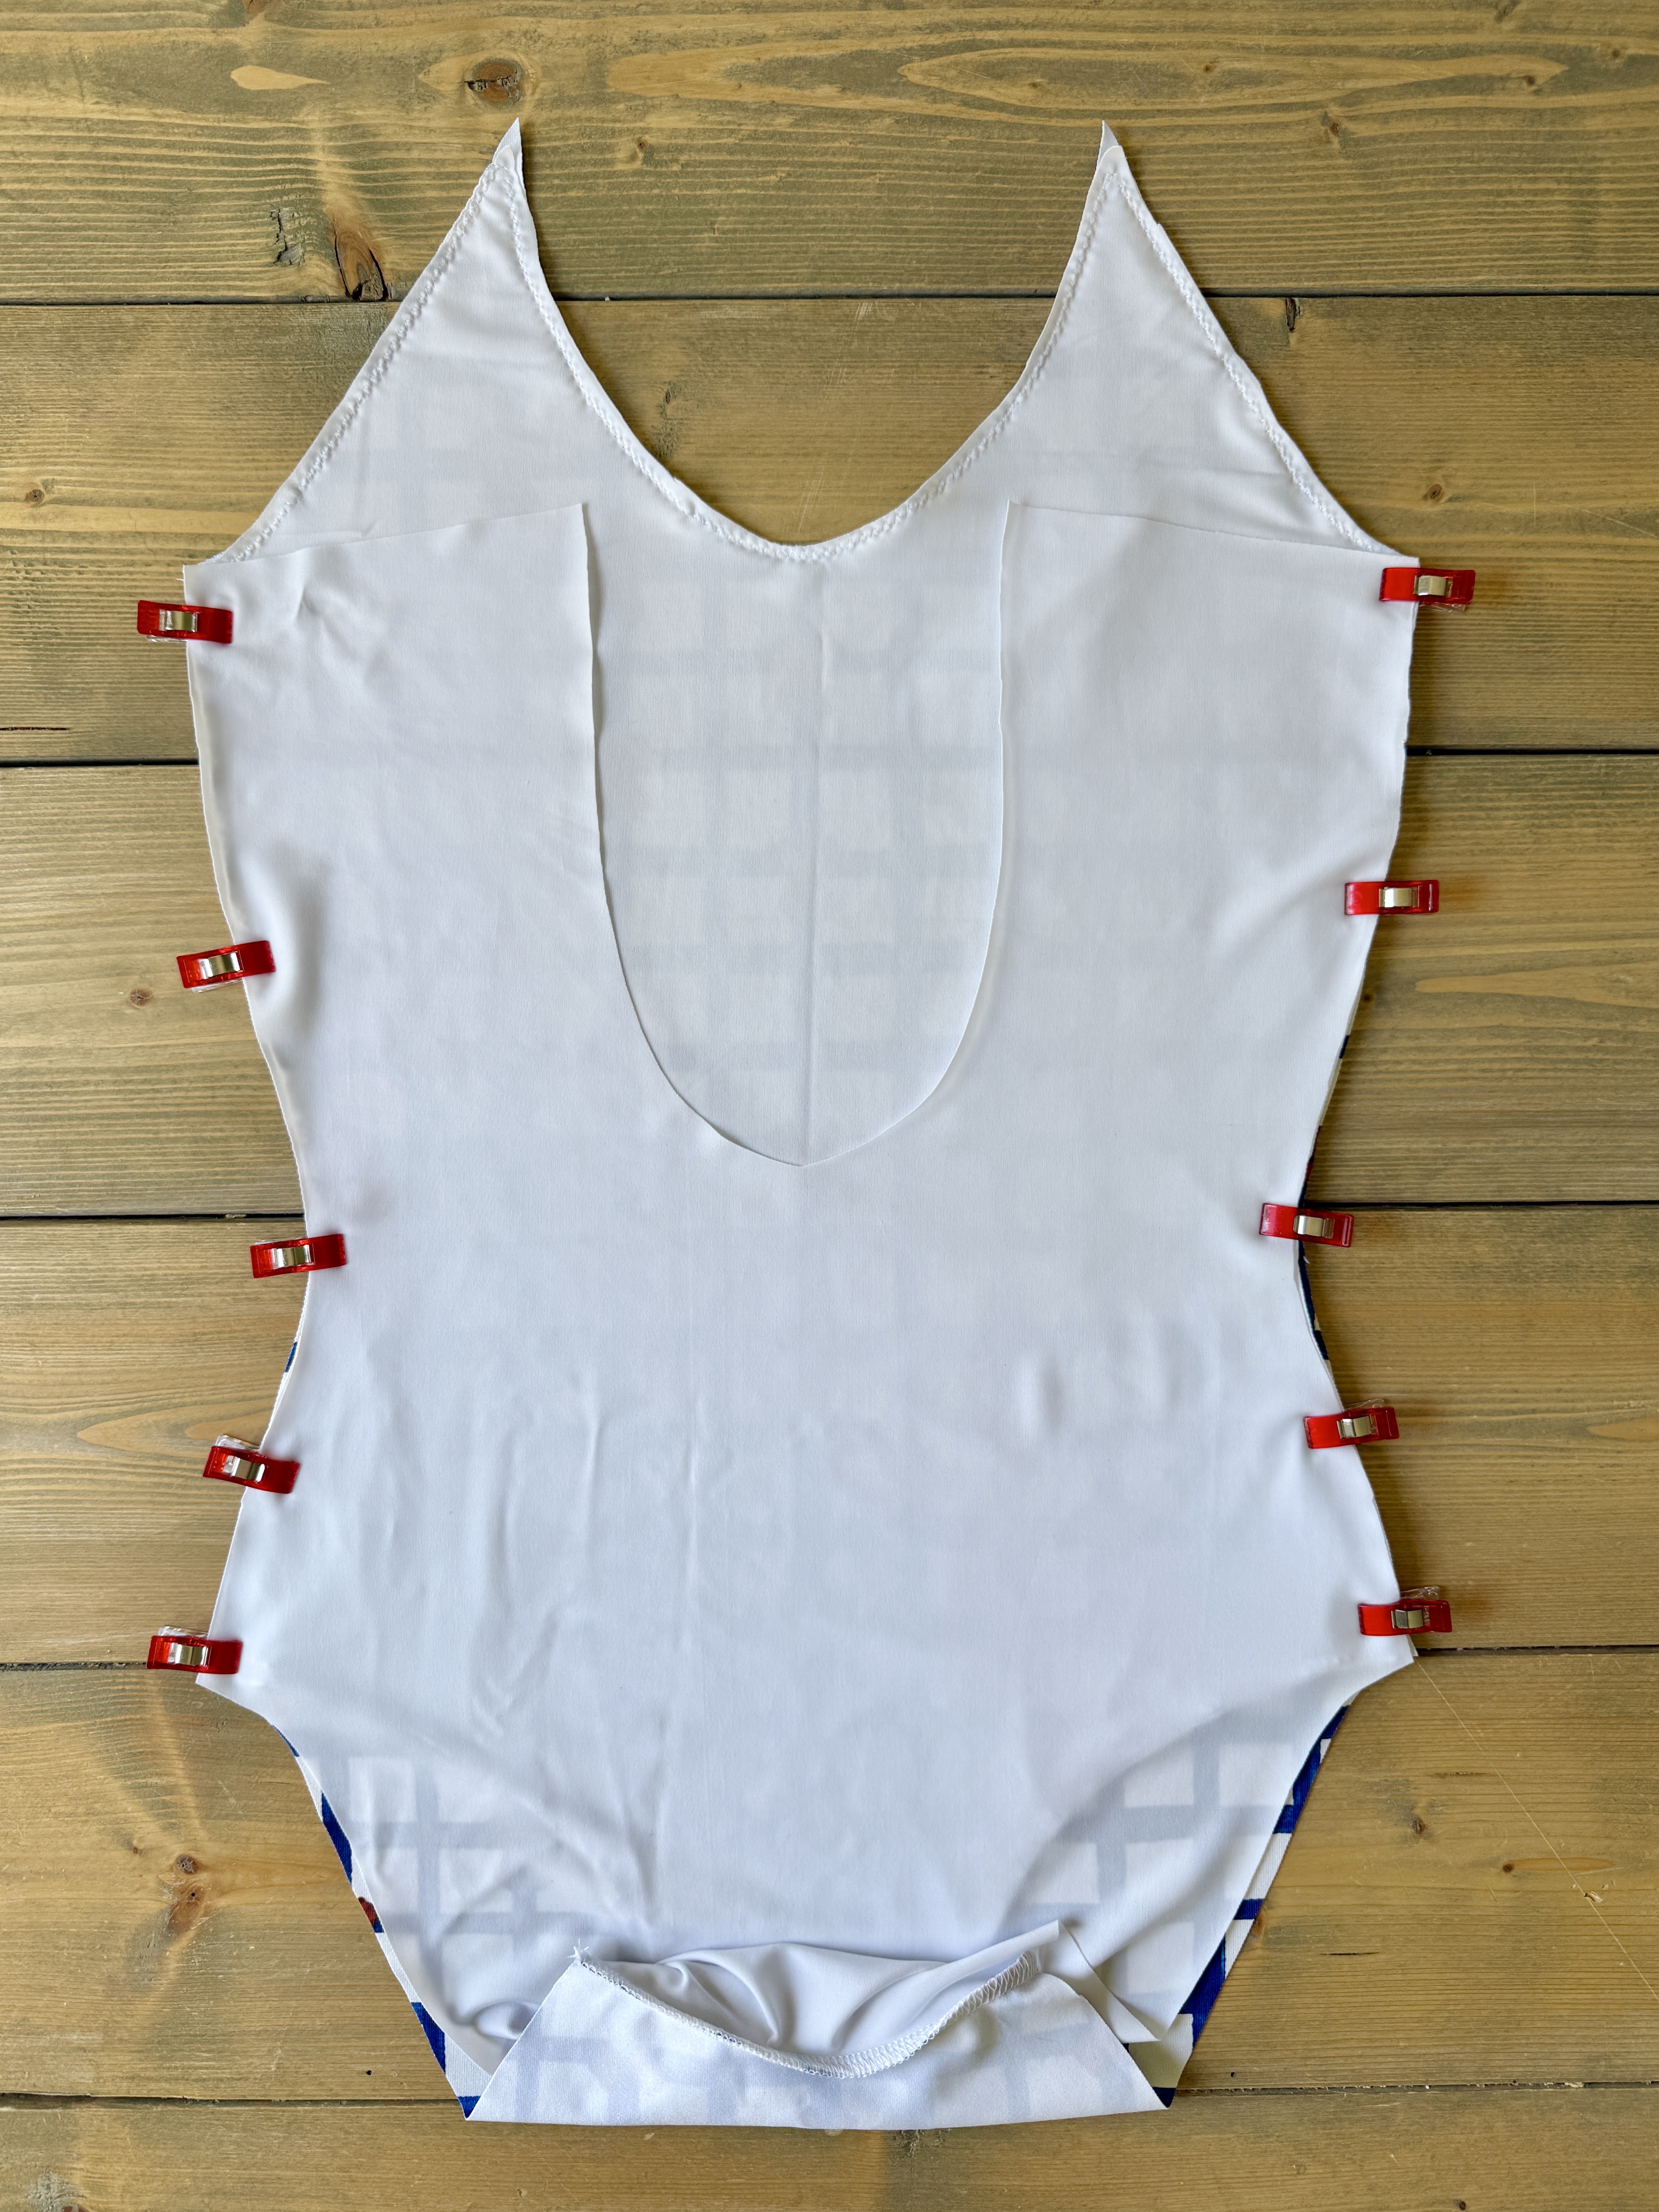
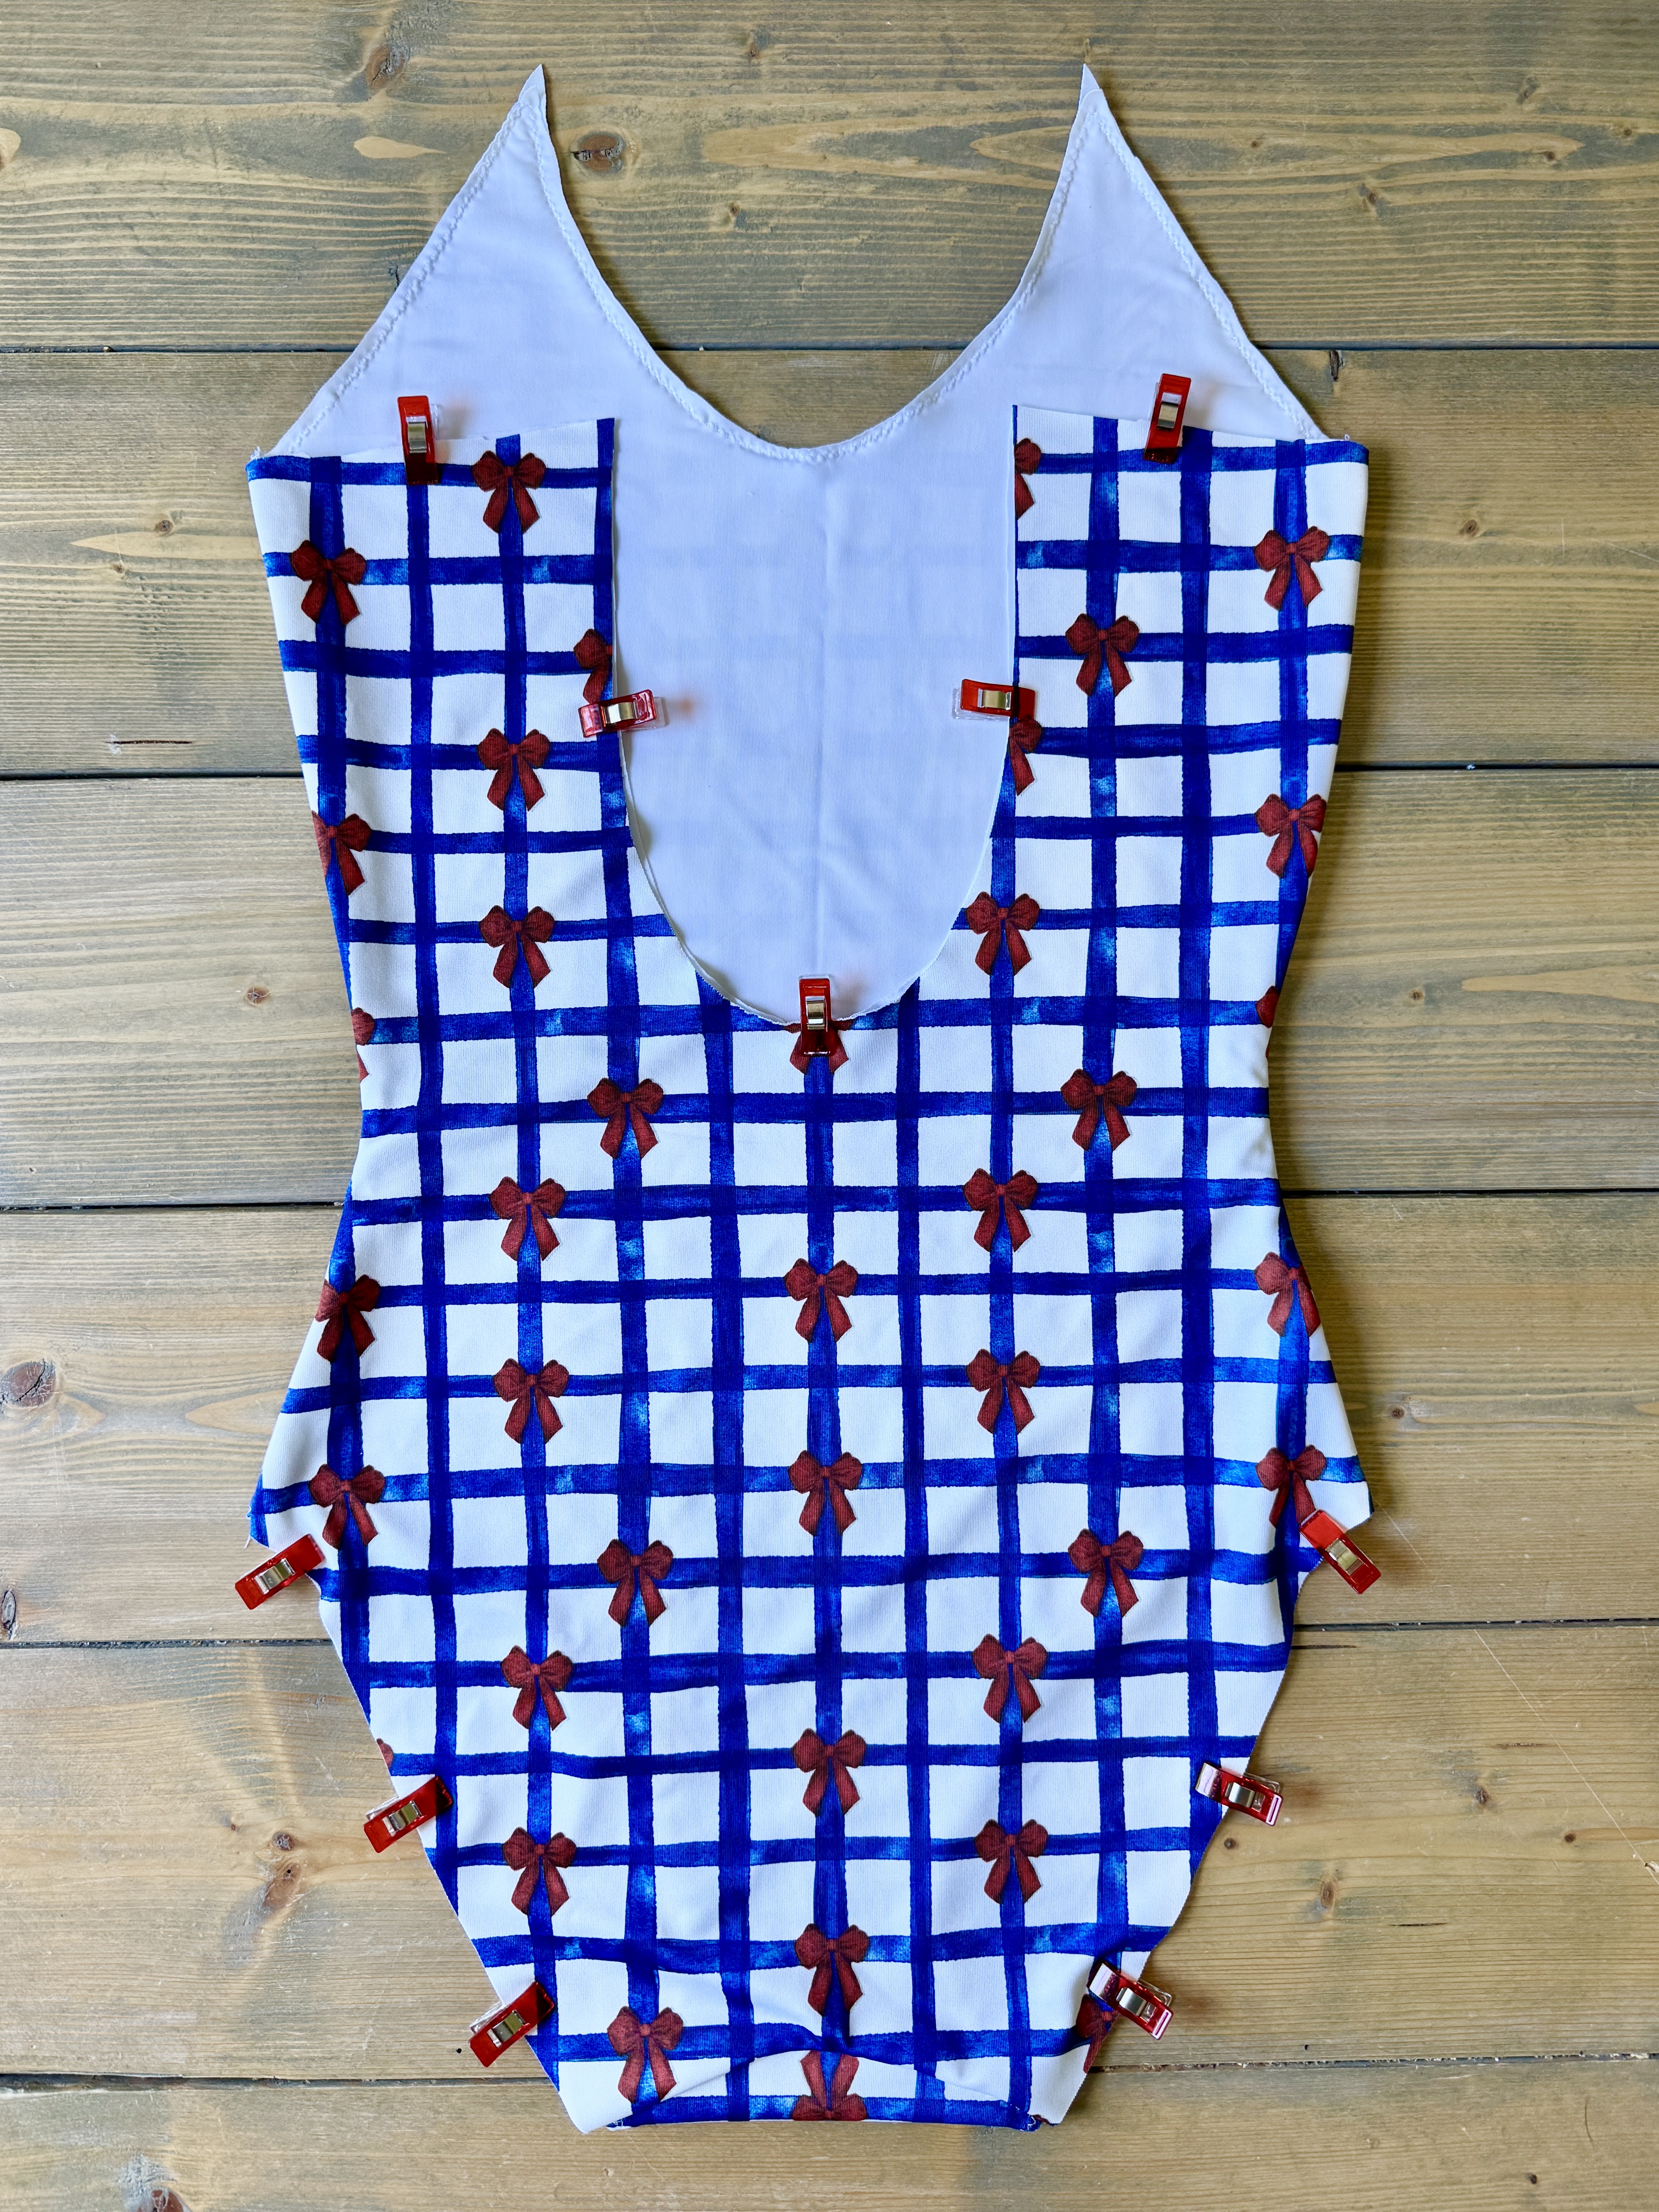
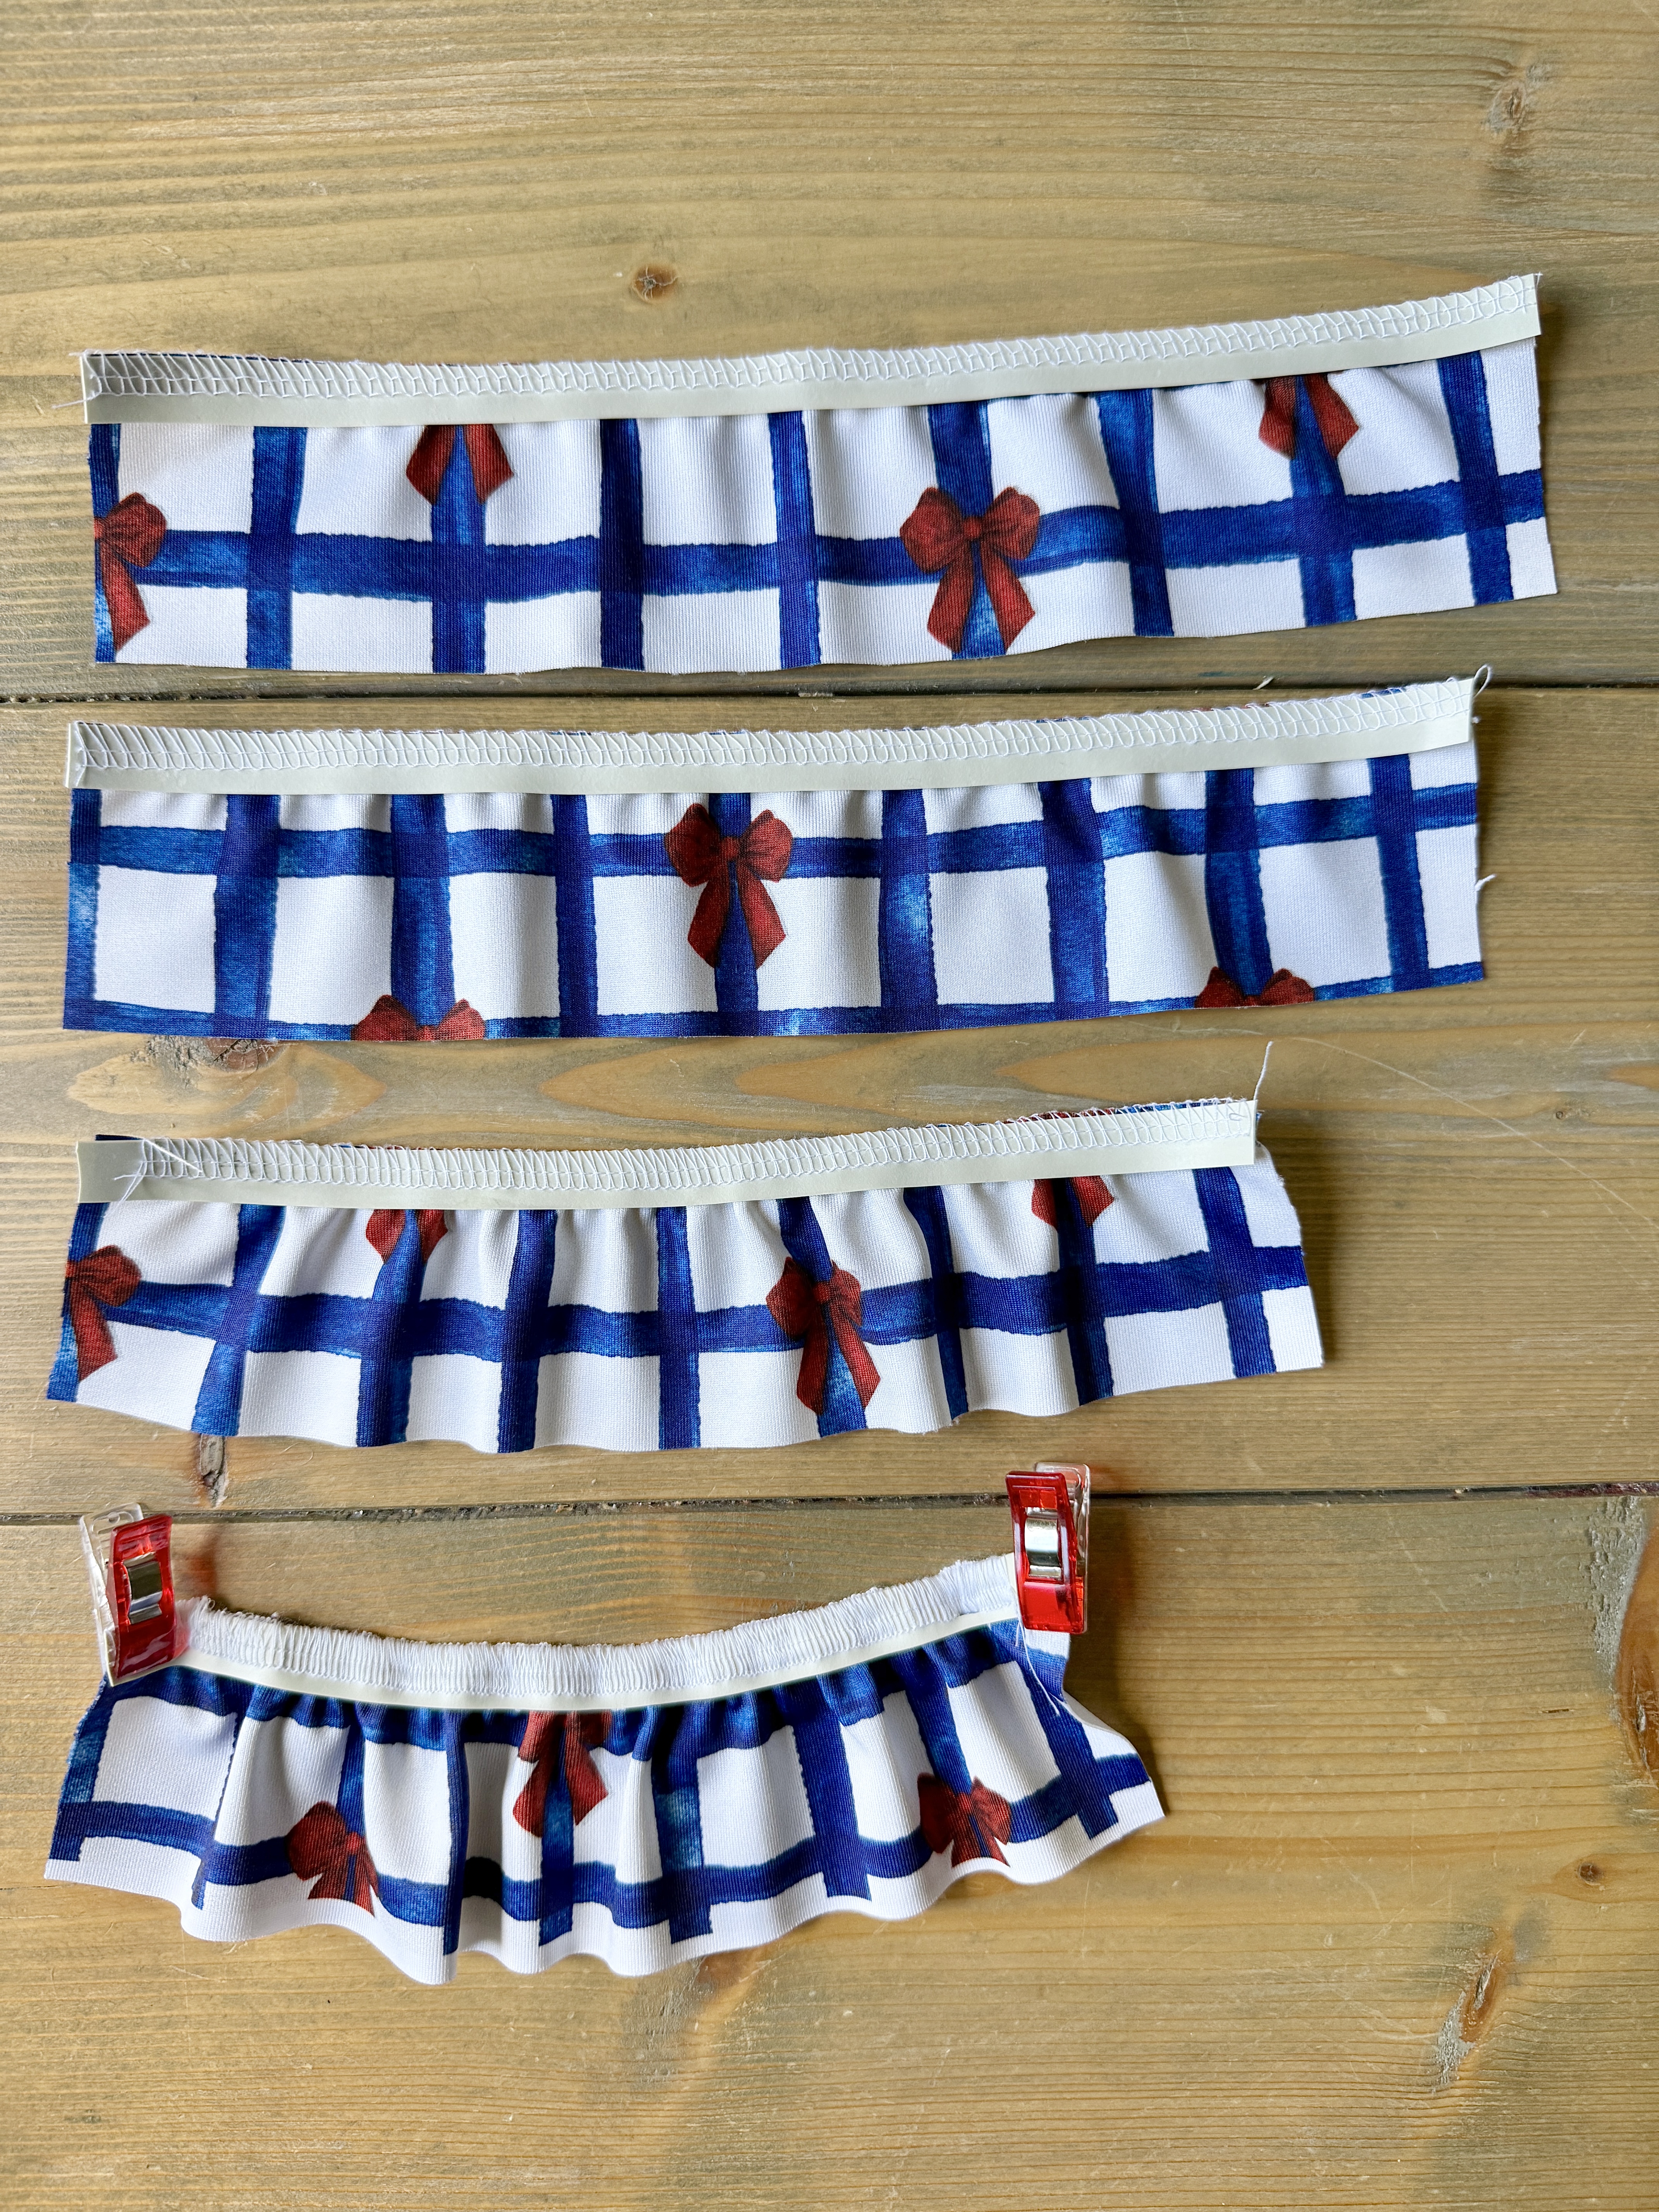
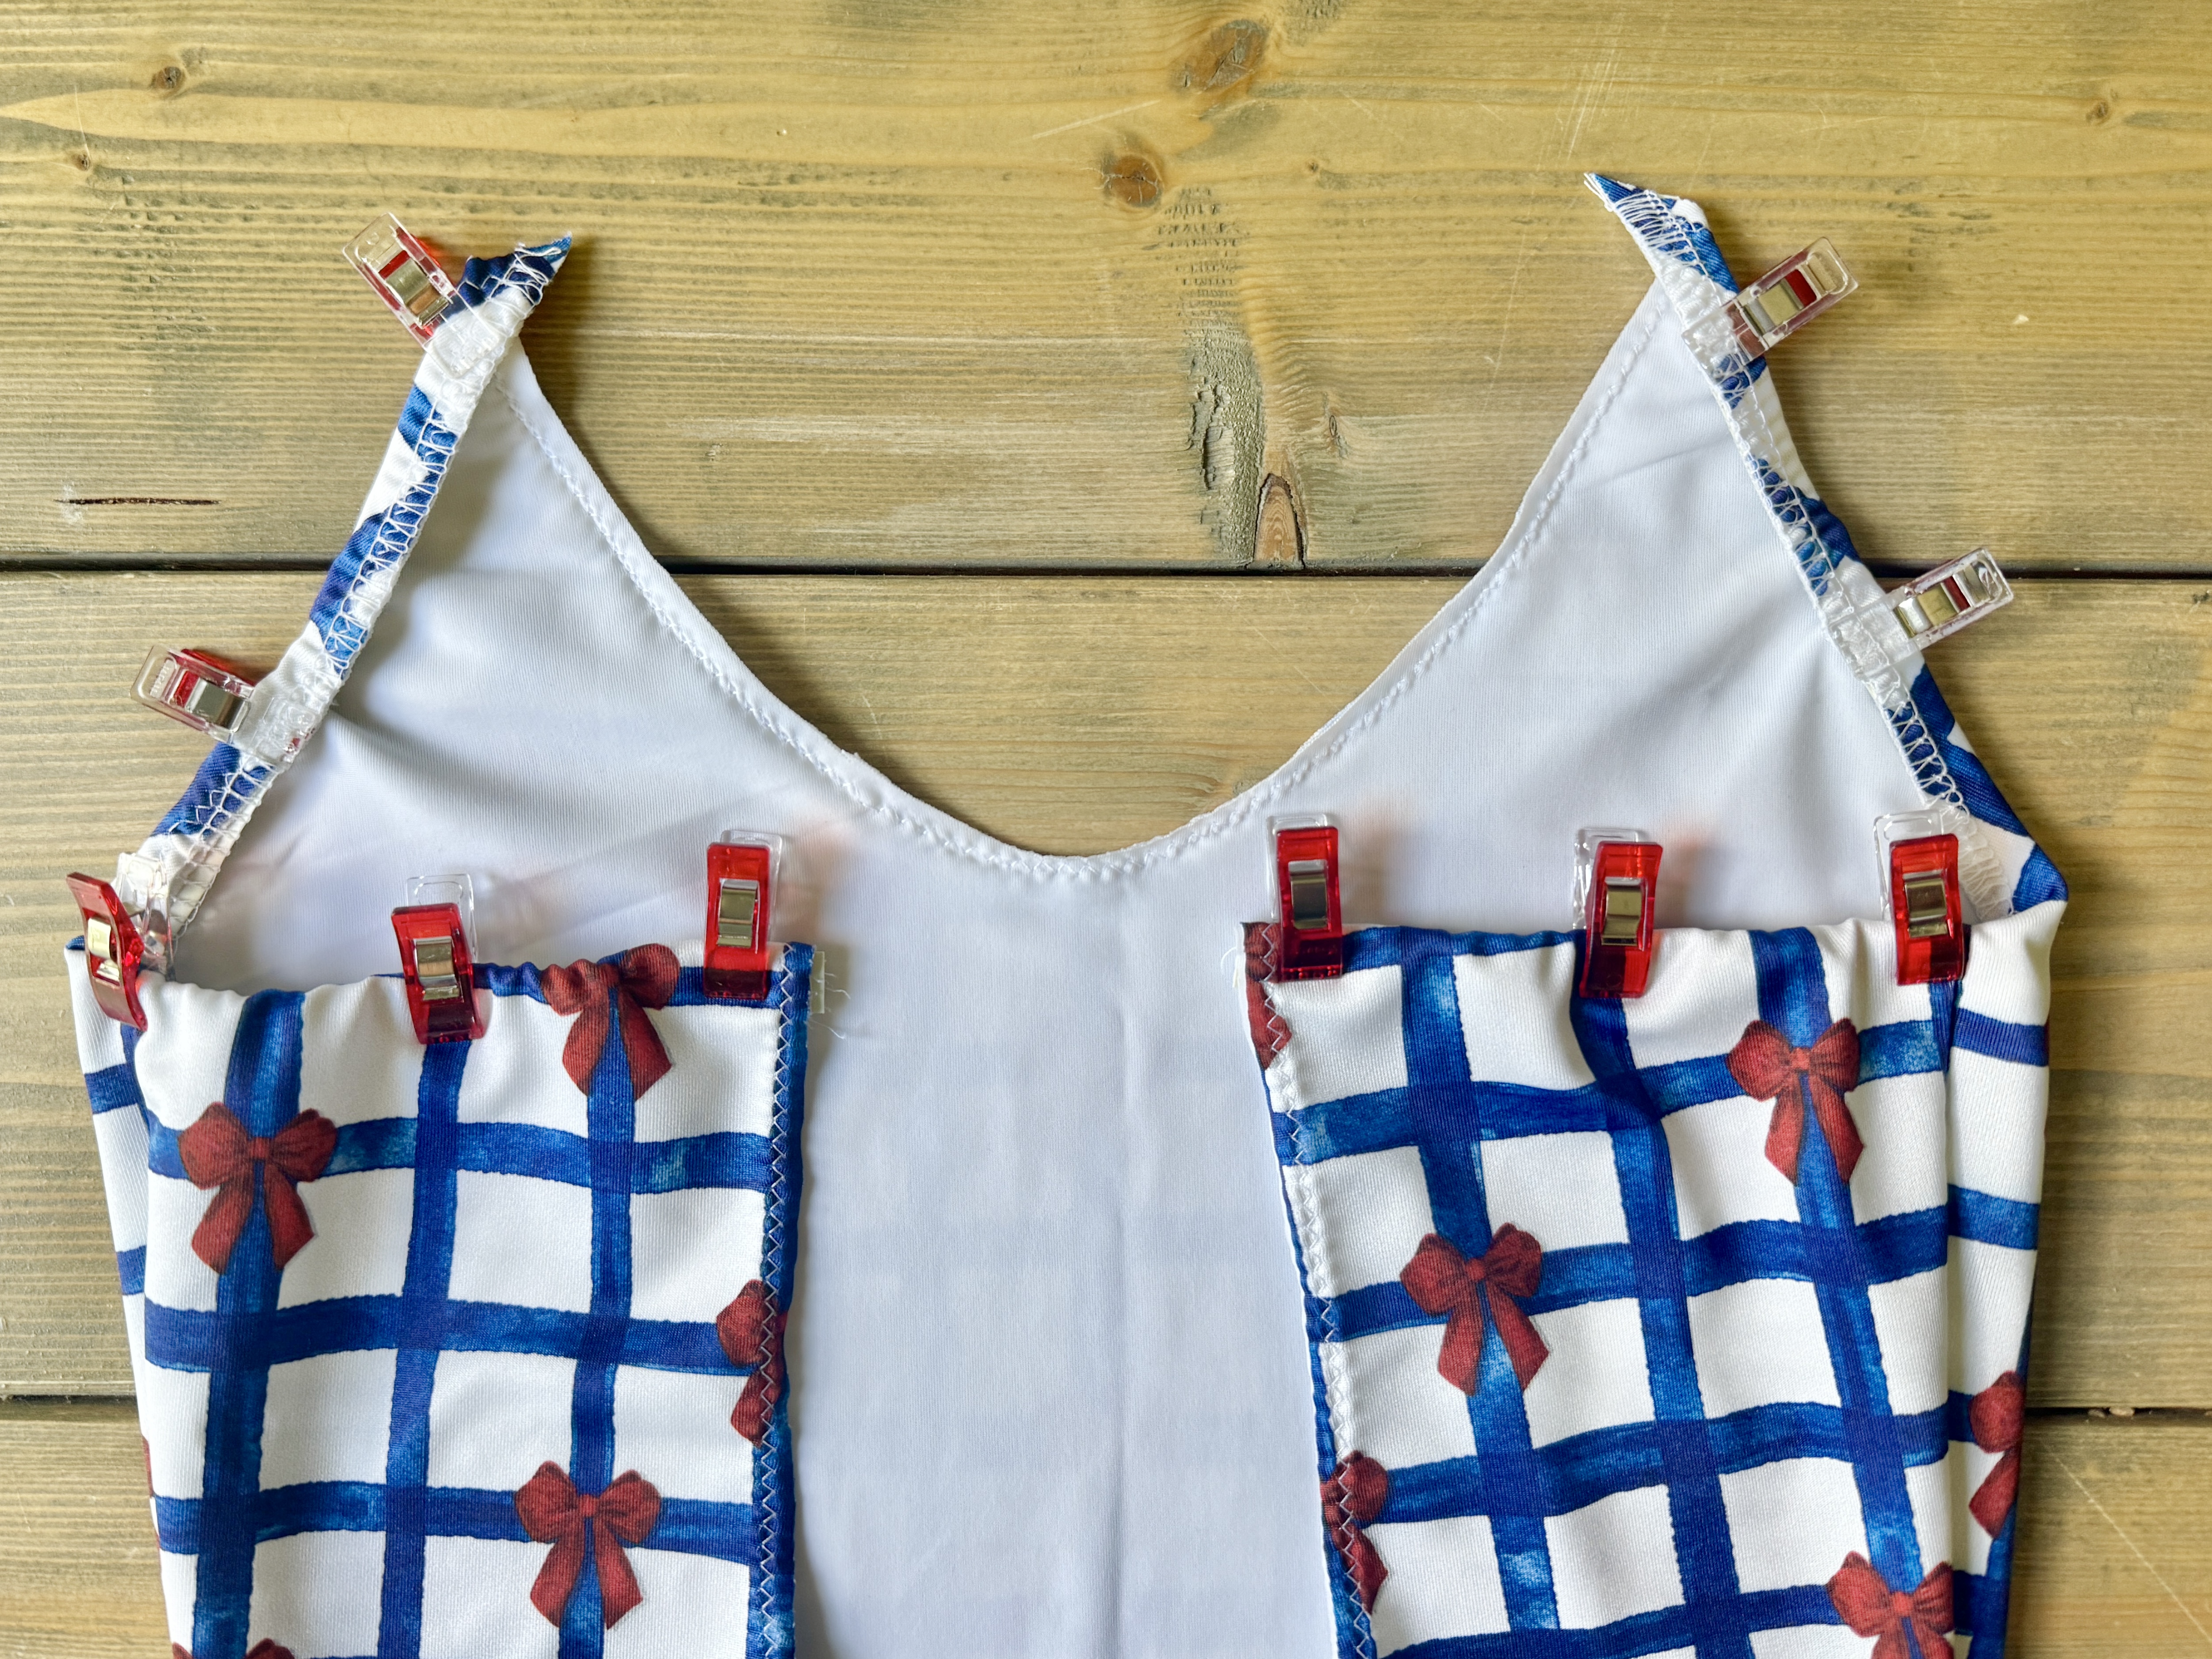
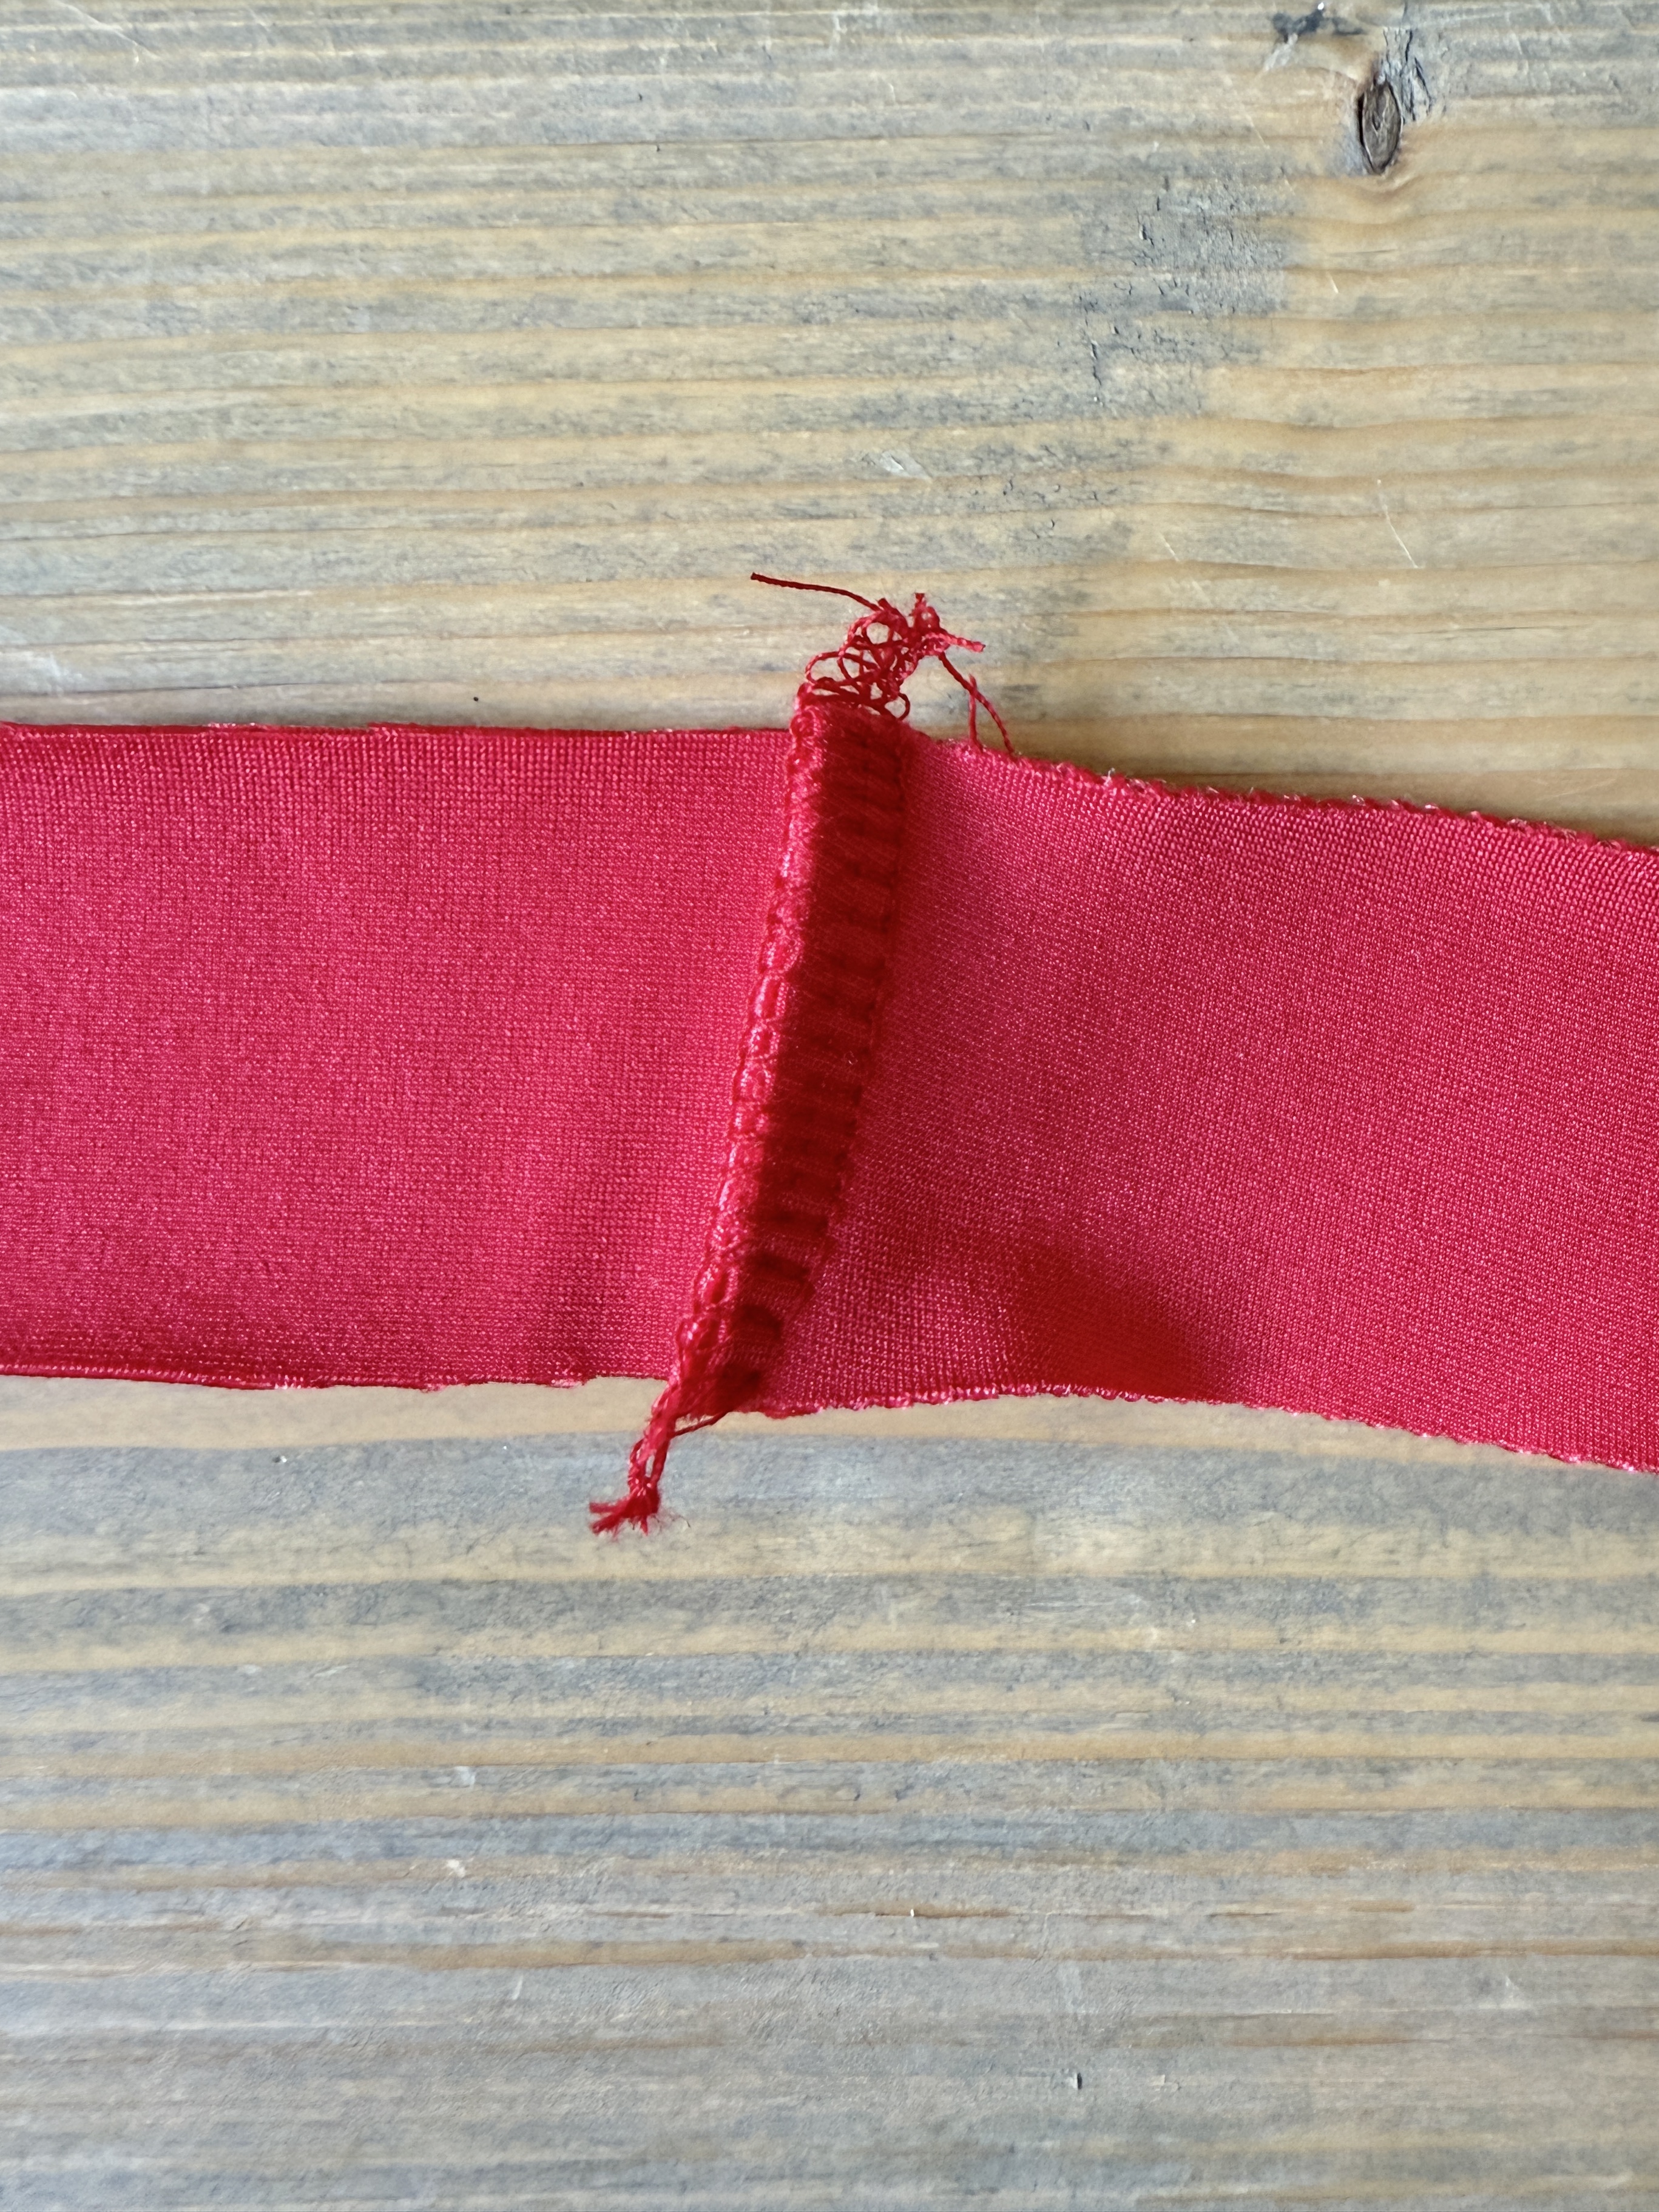
Locate the neckline binding piece. The neckline binding will act as the straps of this swimsuit. With the short ends of the neckline binding piece facing right sides together, serge to attach.
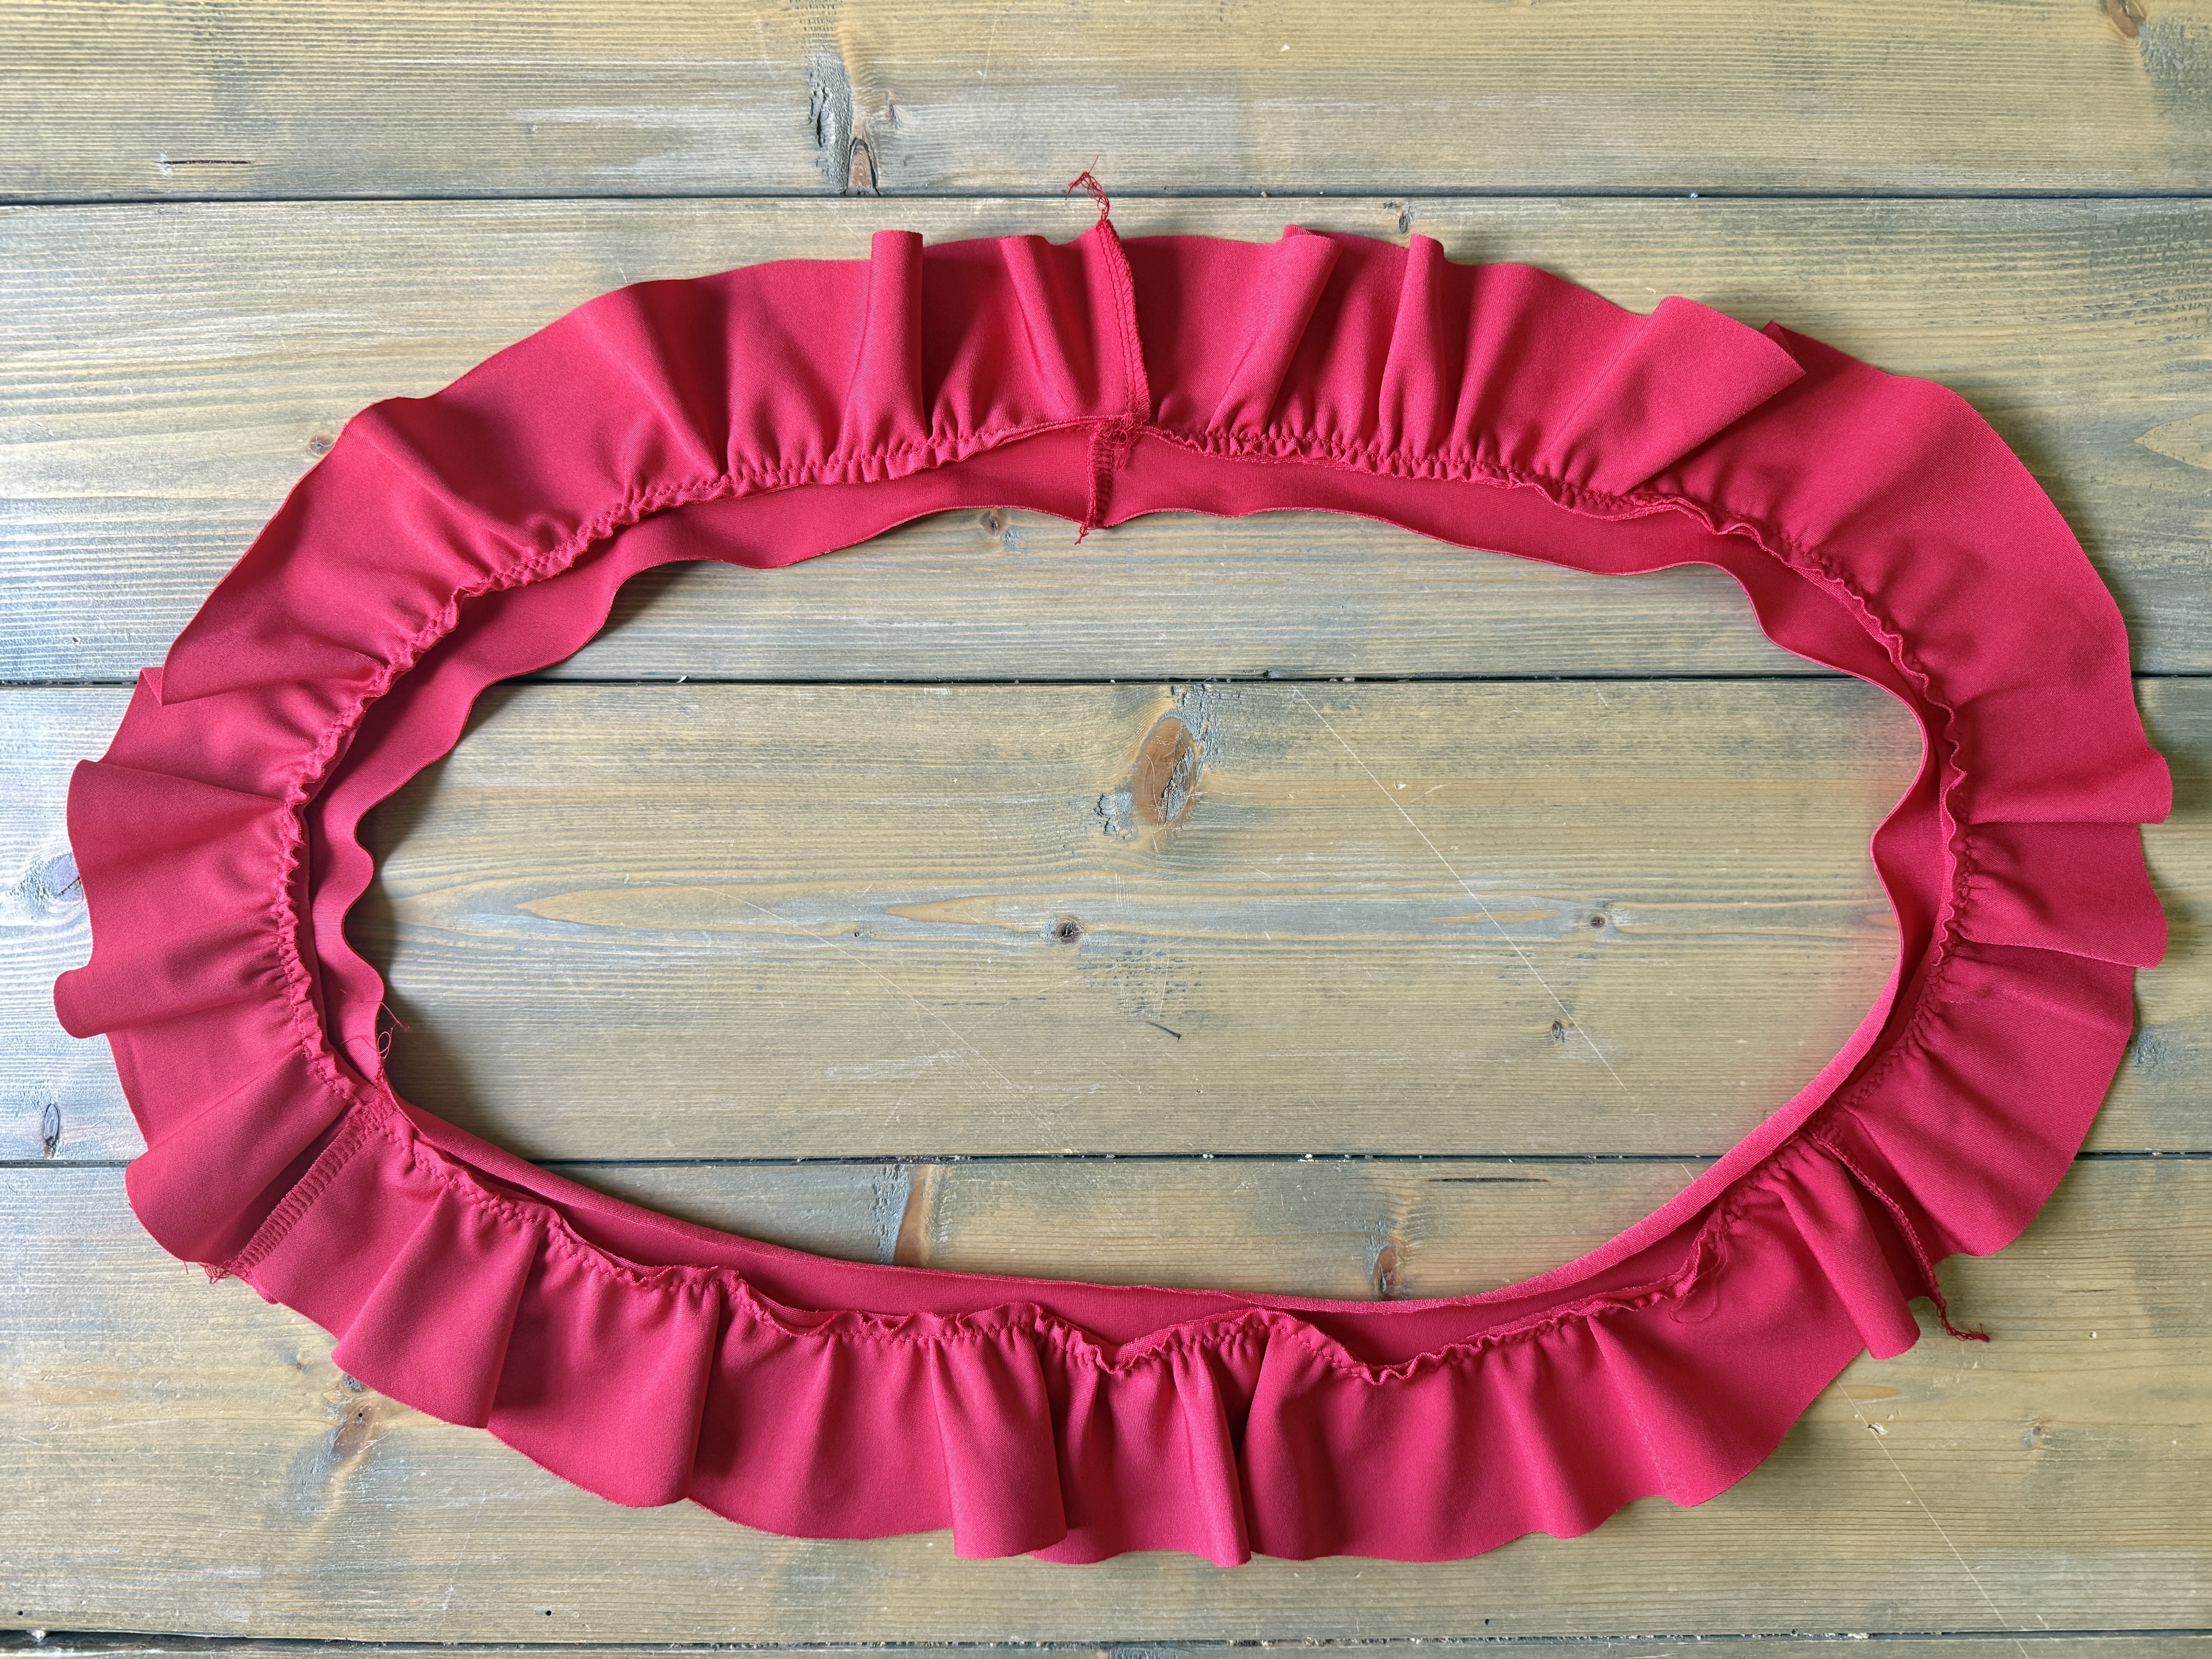
Locate the front and back neckline ruffle pieces. Place right sides together along the center back and shoulder seams. Serge together to create one long loop.
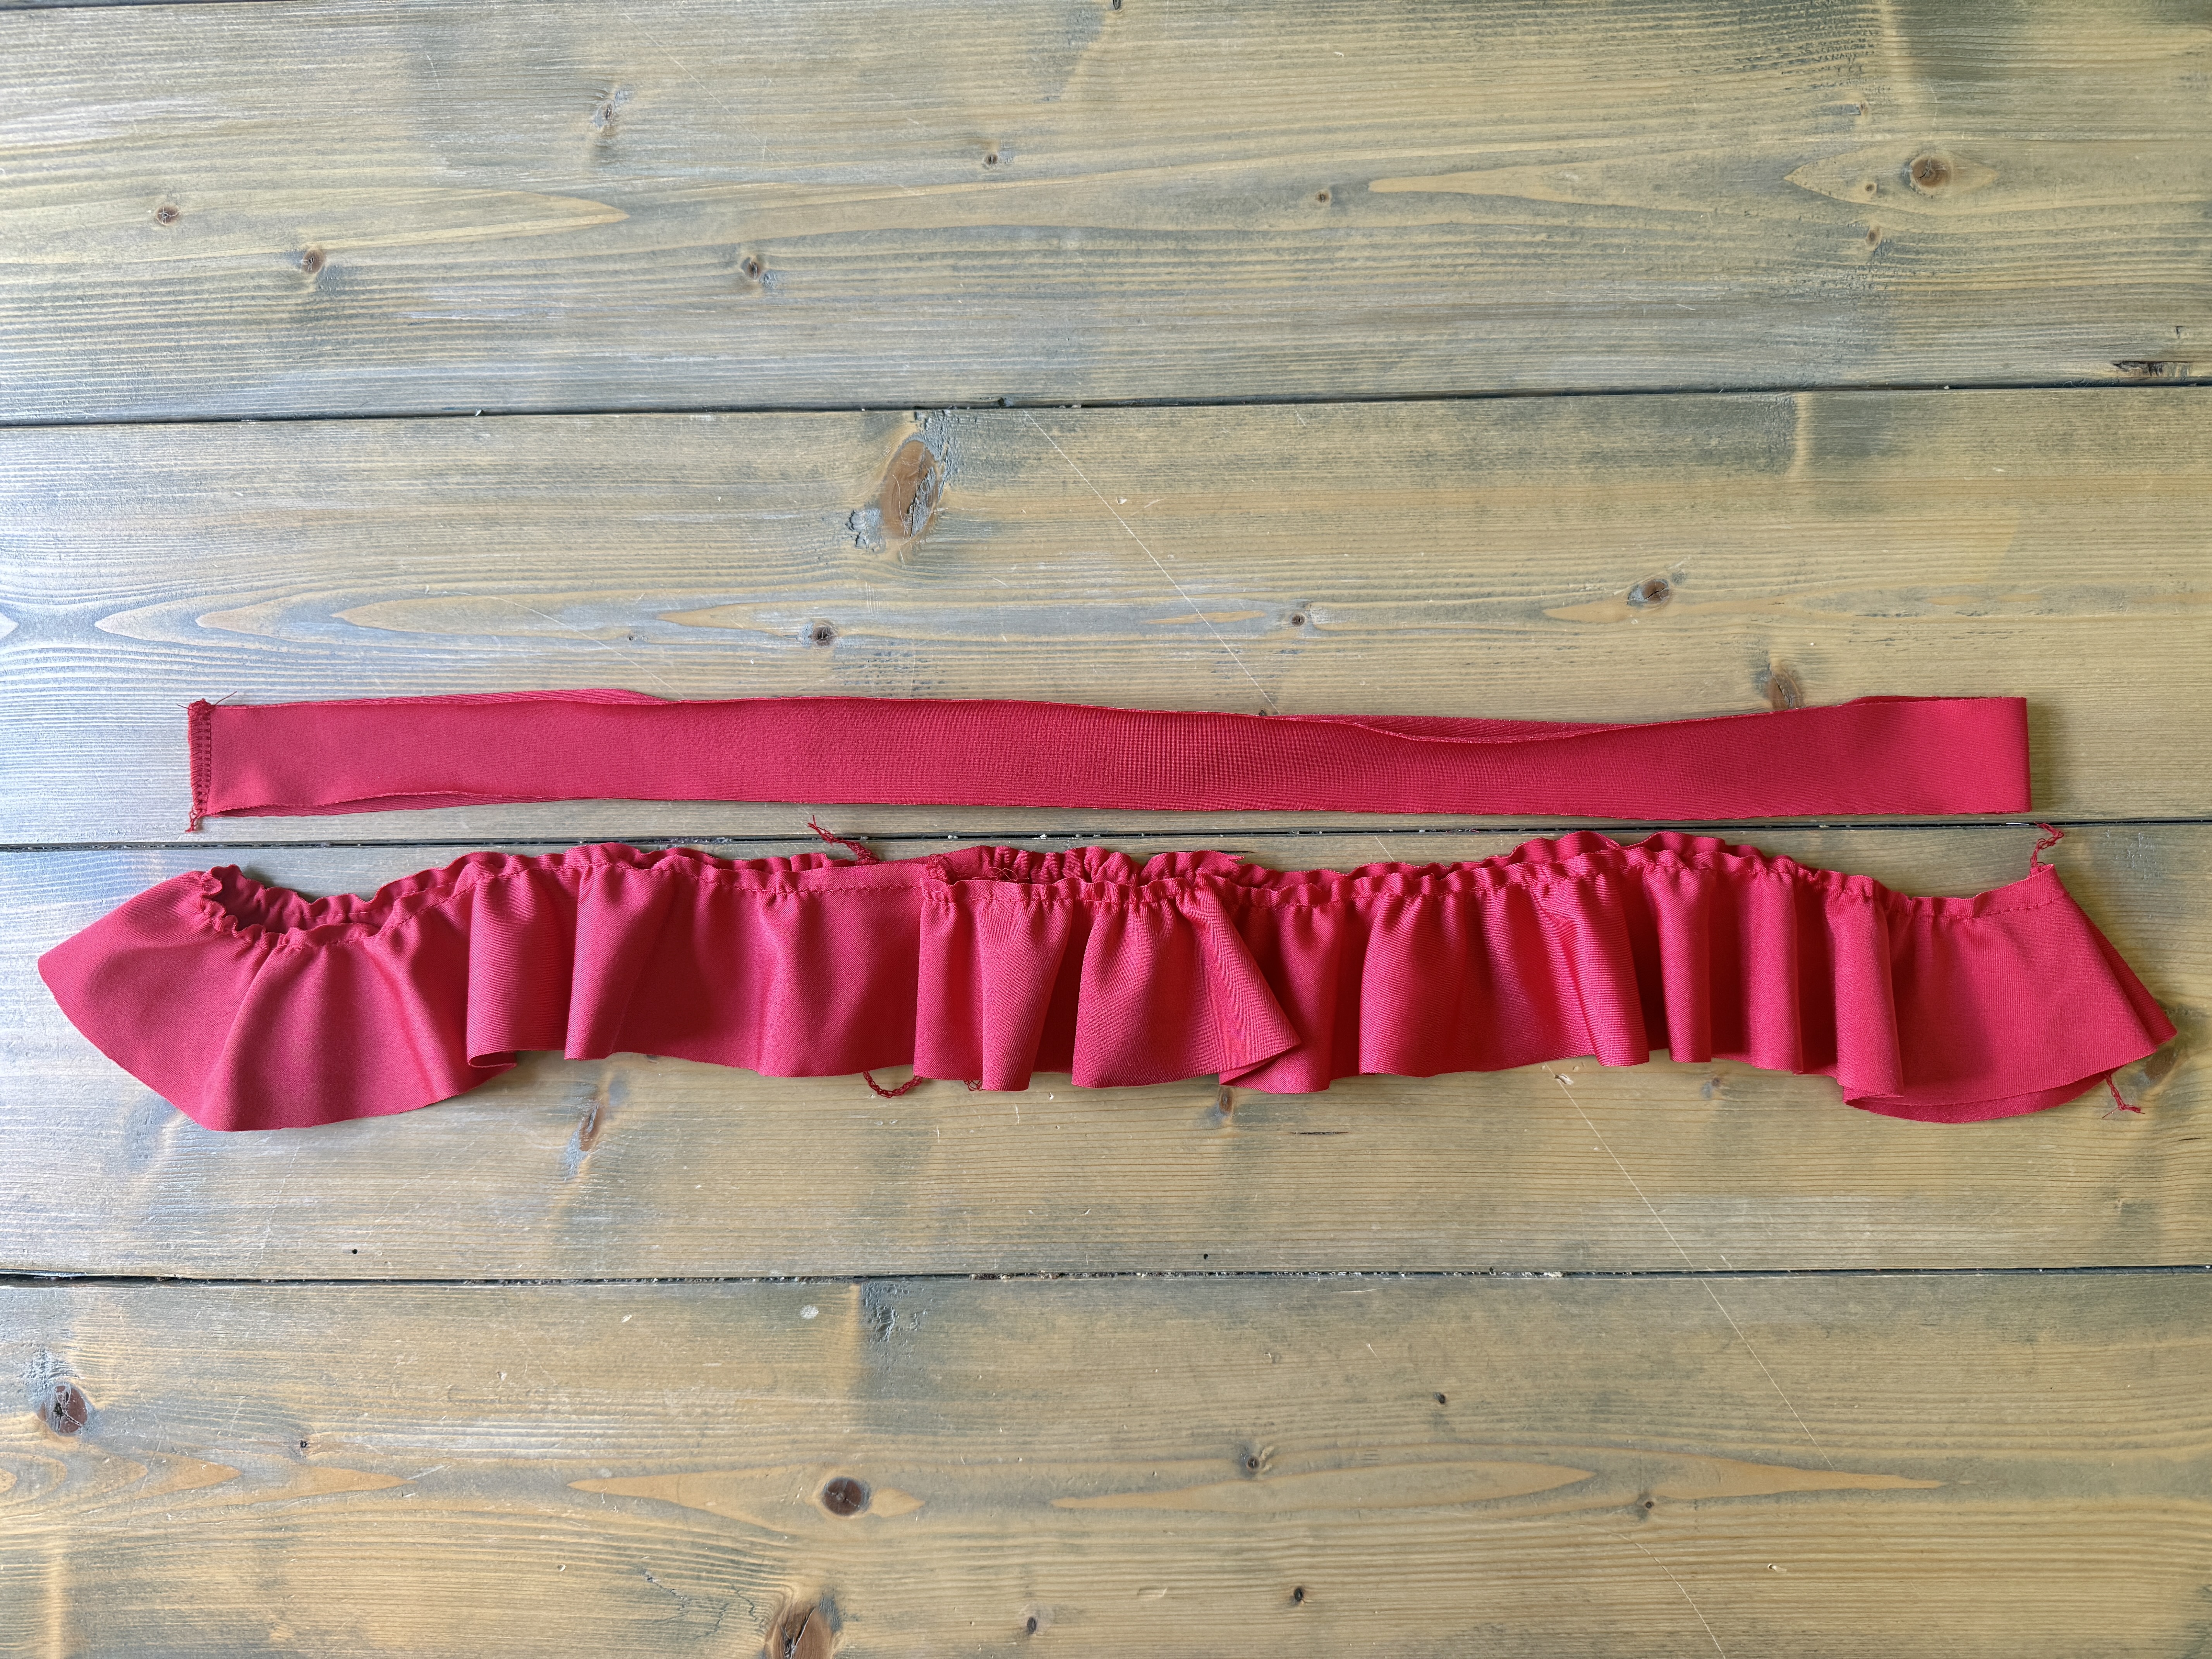
Using your sewing machine, gather the top raw edge of the neckline ruffle to the same width opening as the neckline binding.
With the neckline ruffle and neckline binding right sides together, align the center back seams and pin all the way around. Staystitch together using a zigzag stitch. This will now be referred to as the neckline binding.

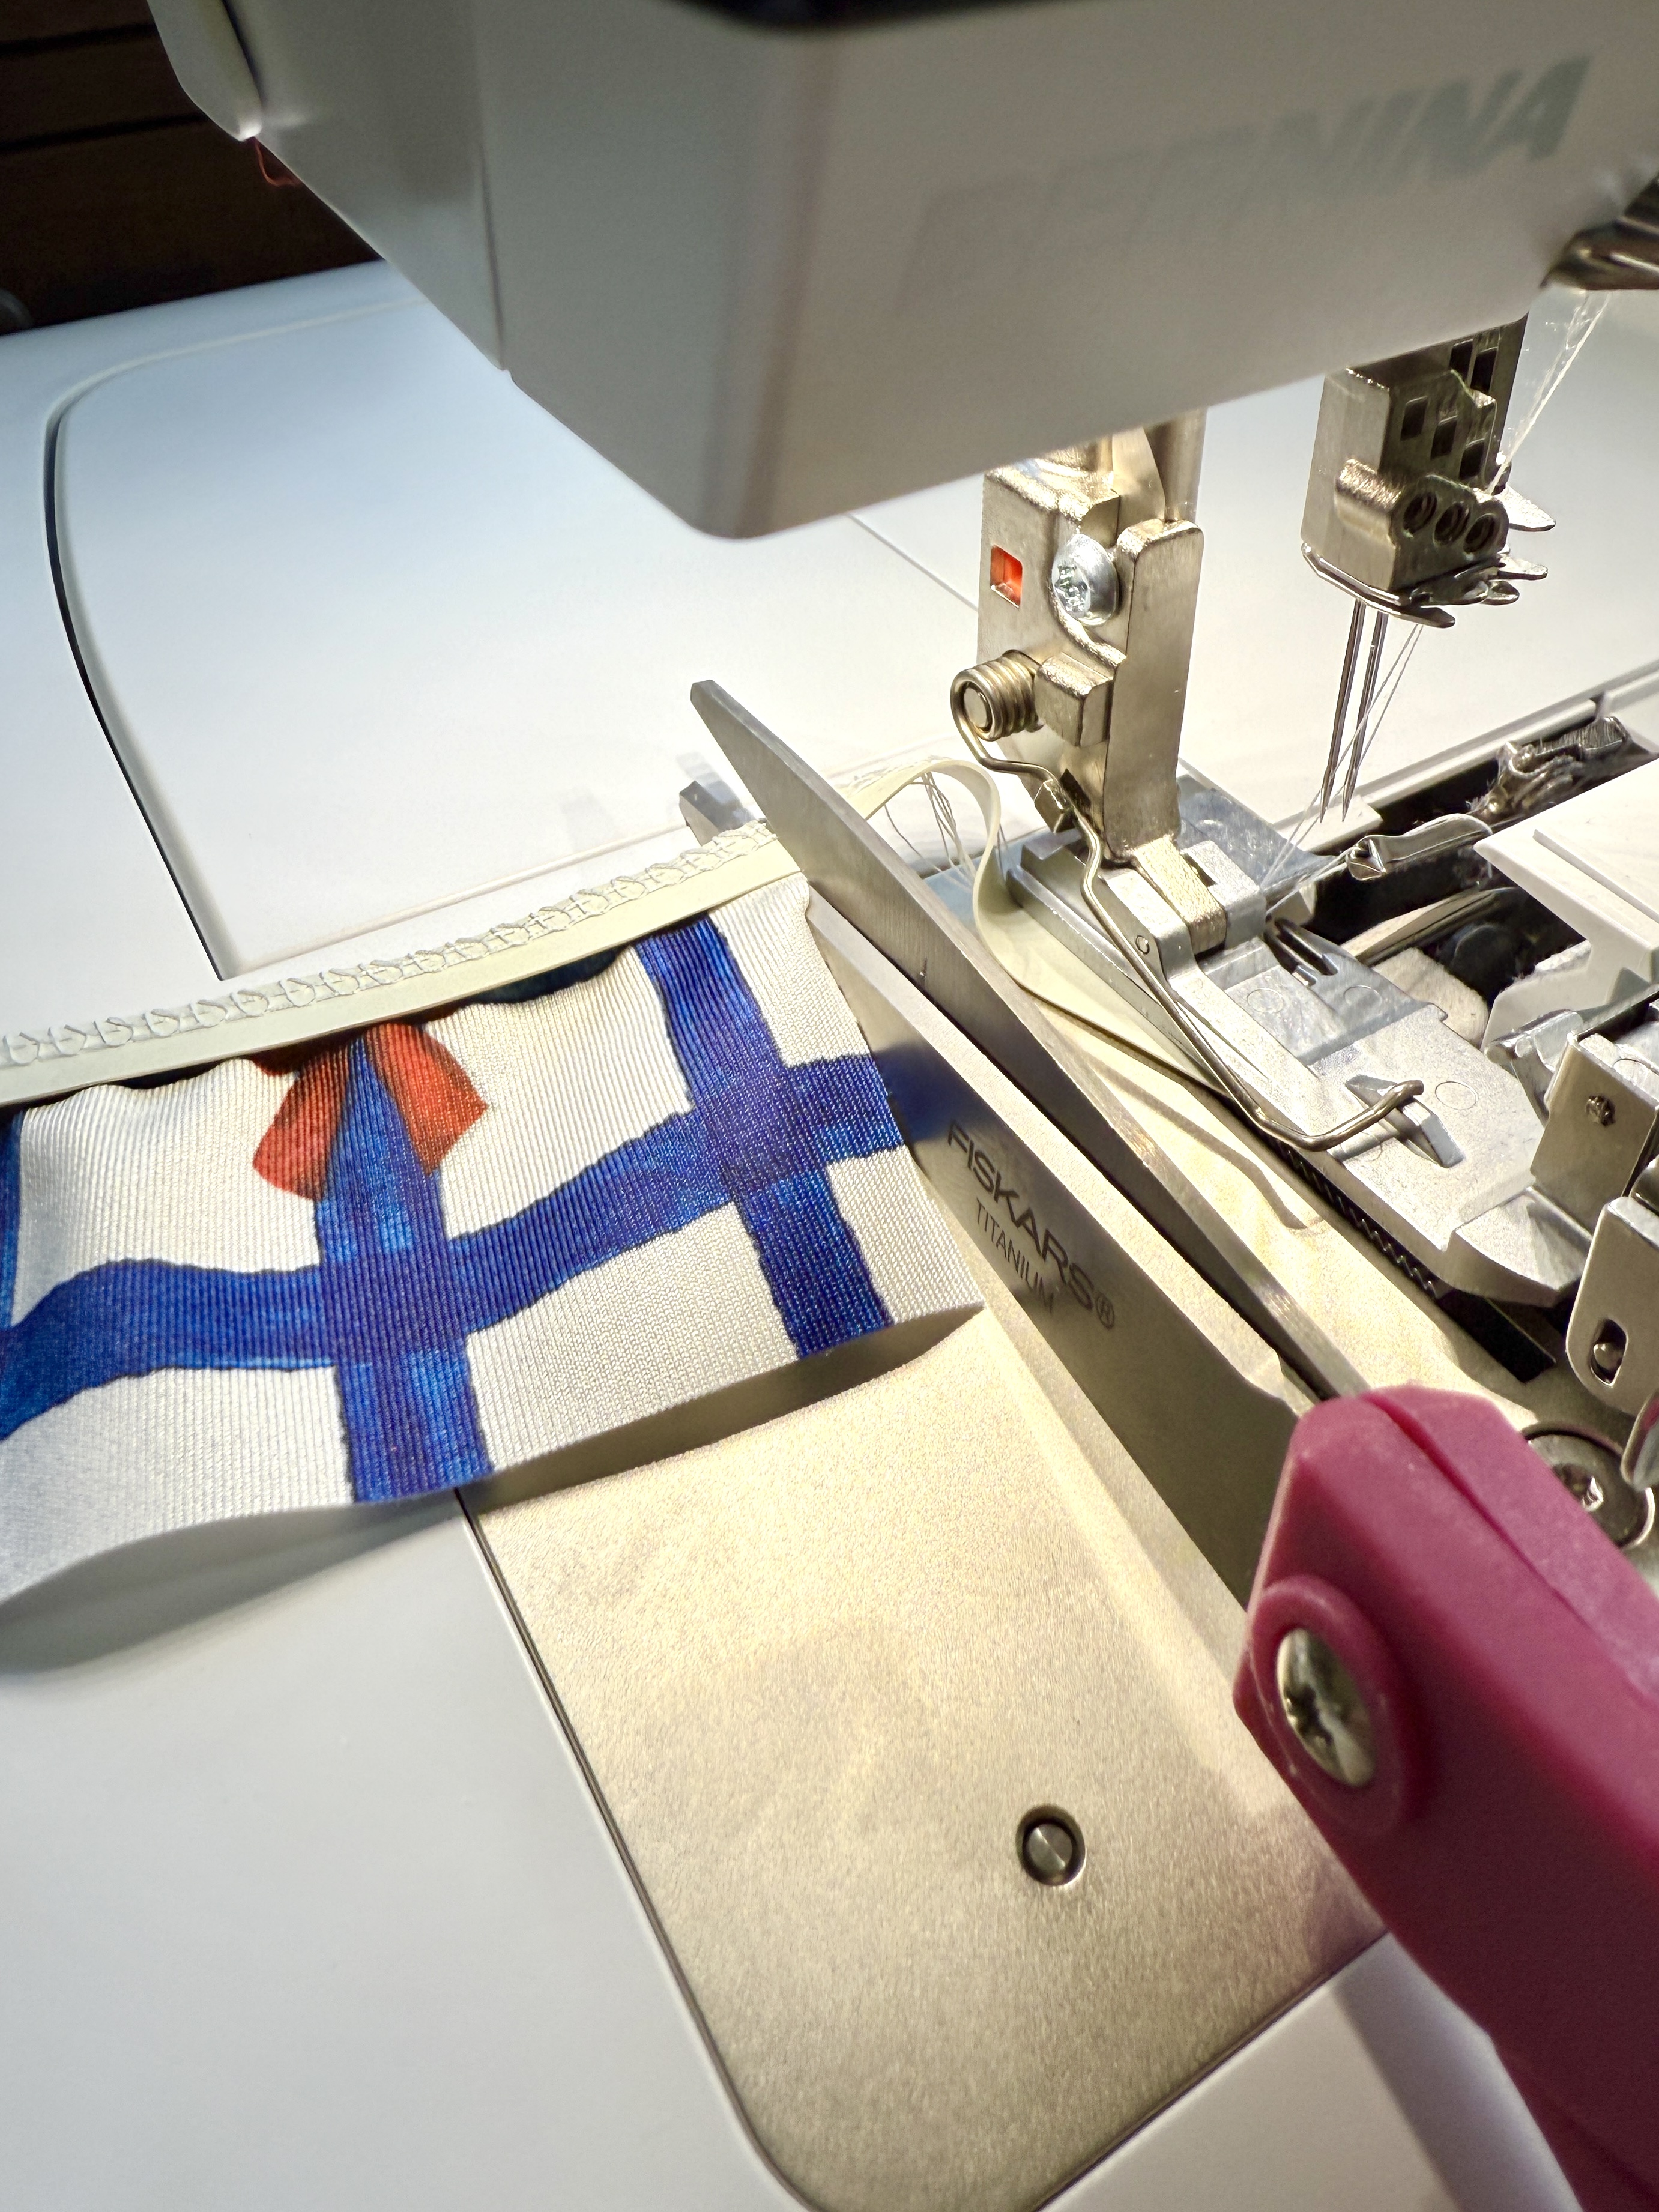
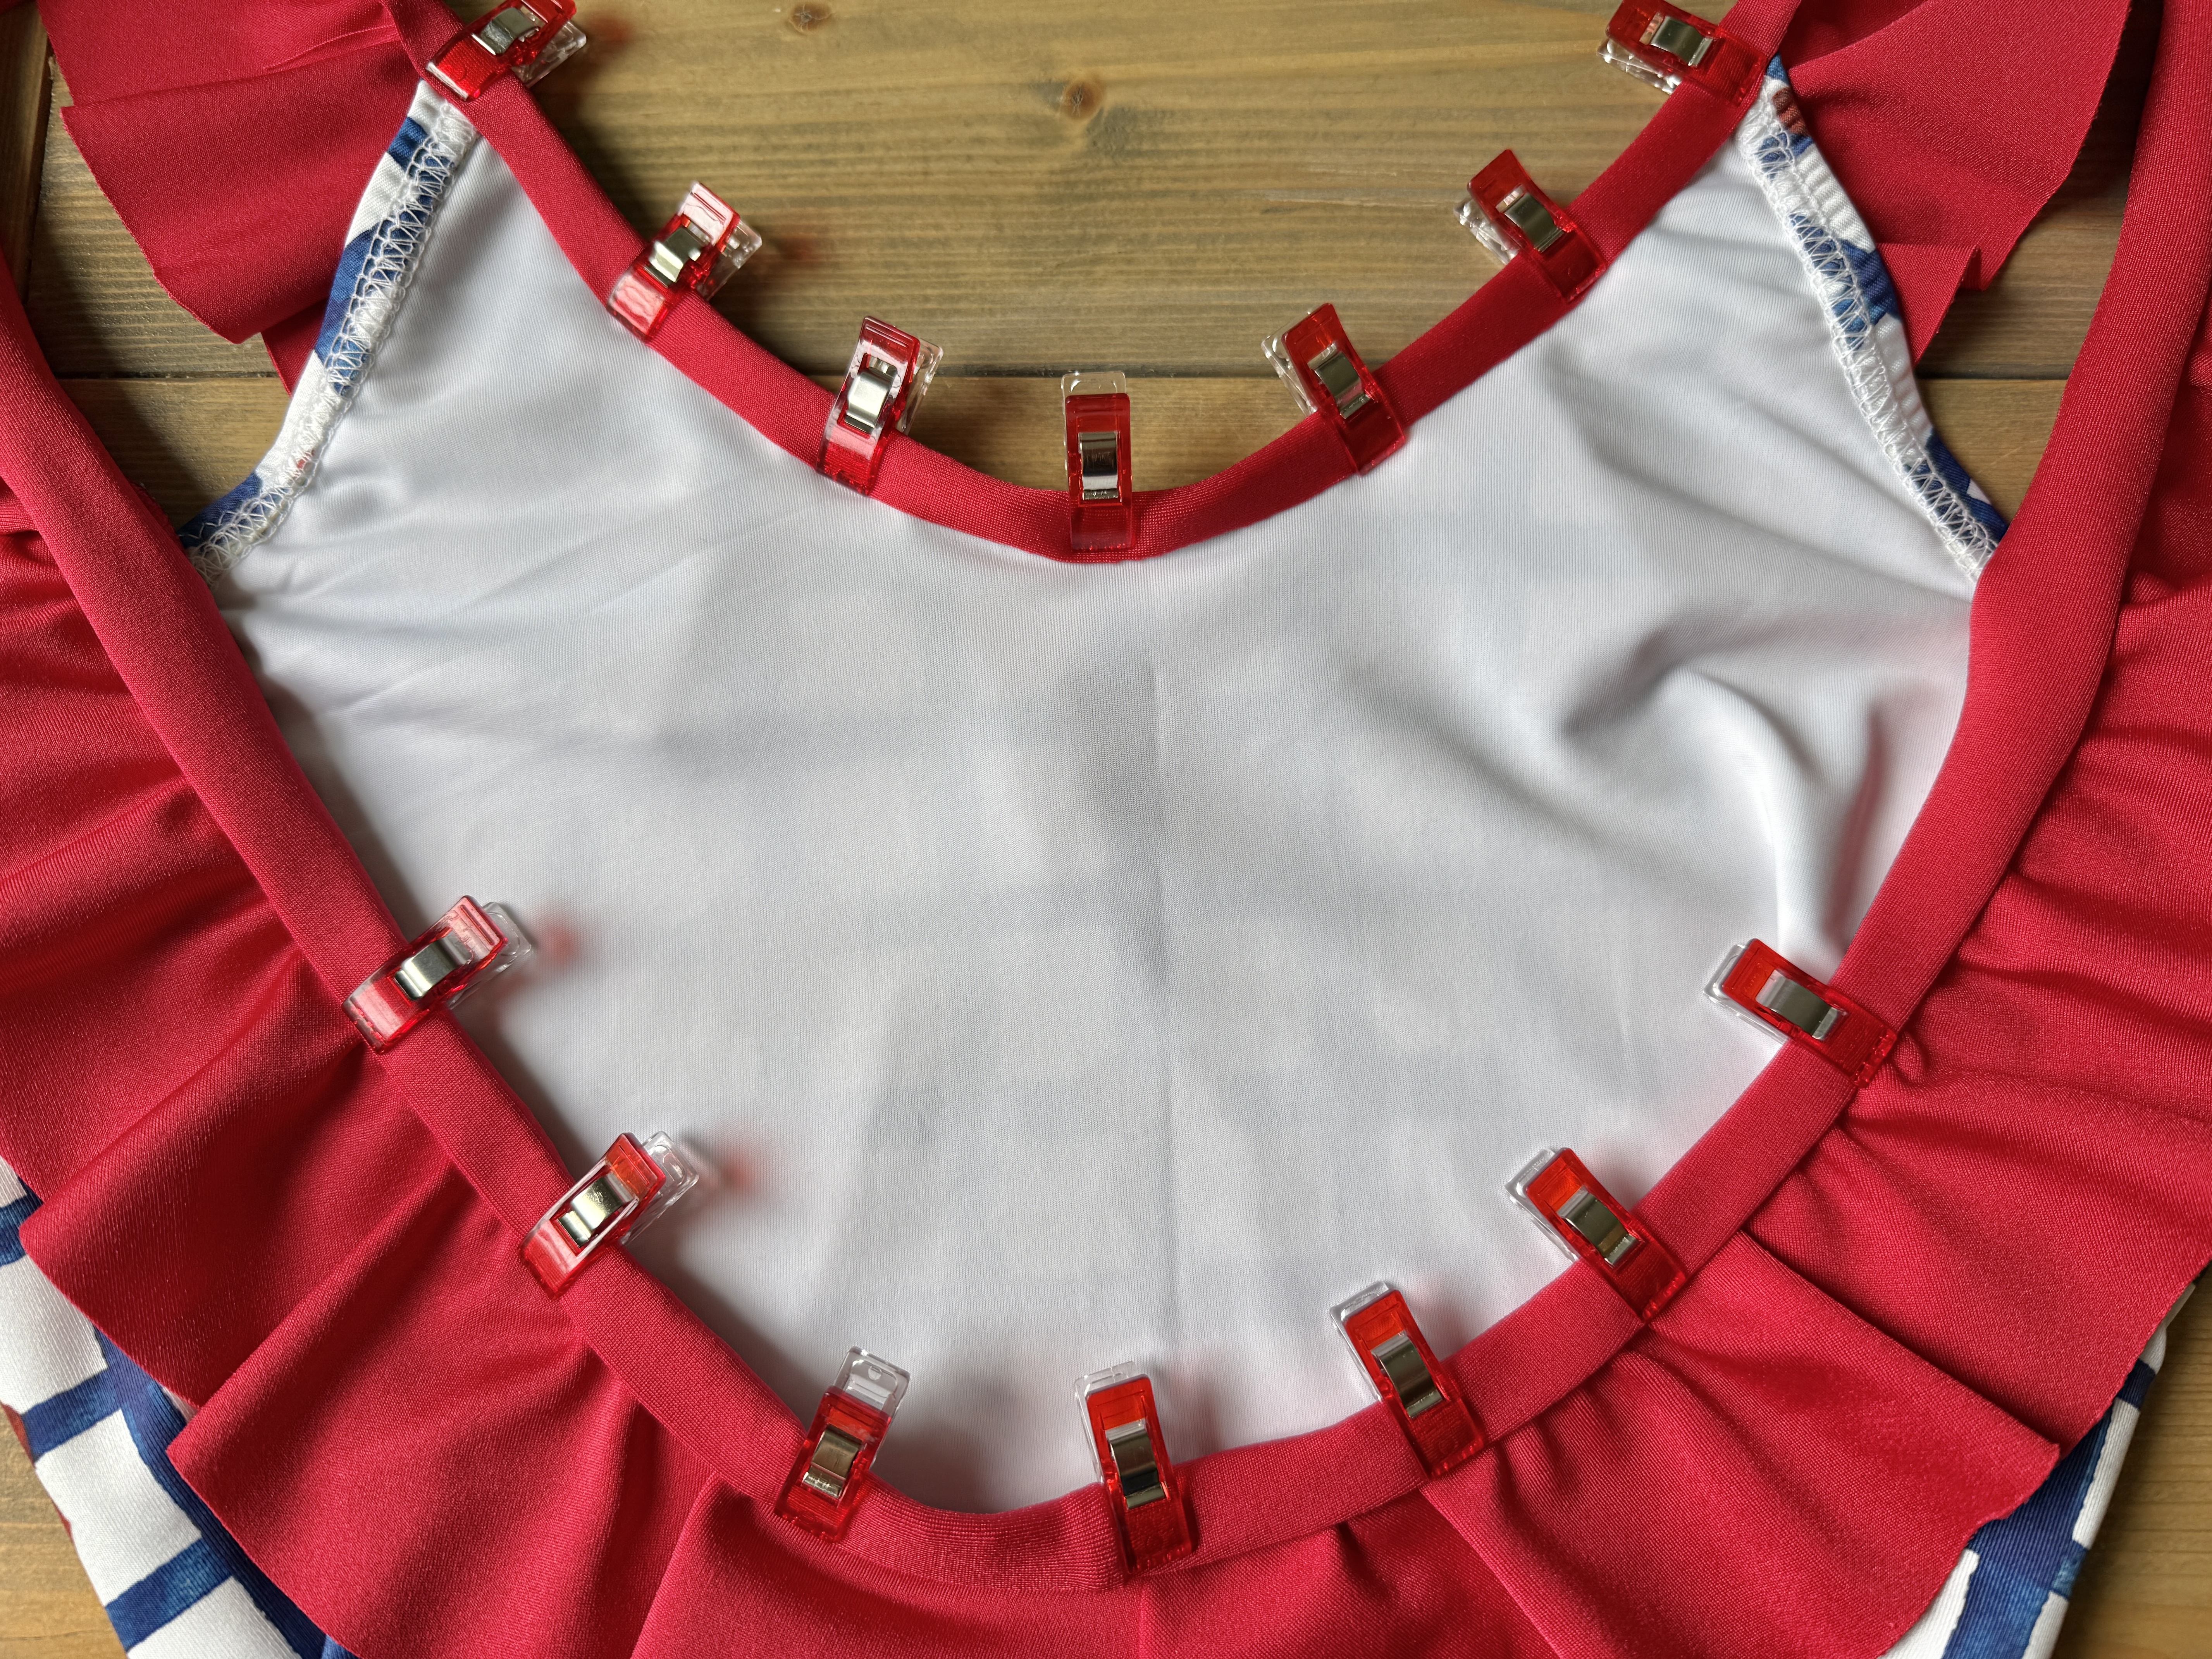
Locate the front swimsuit and mark the center front of the neckline. Align that mark with the center front of the neckline binding, right sides together. The ruffle will be sandwiched between the swimsuit and the binding. Pin across the front neckline. The wrong side of the ruffle will be against the swimsuit.

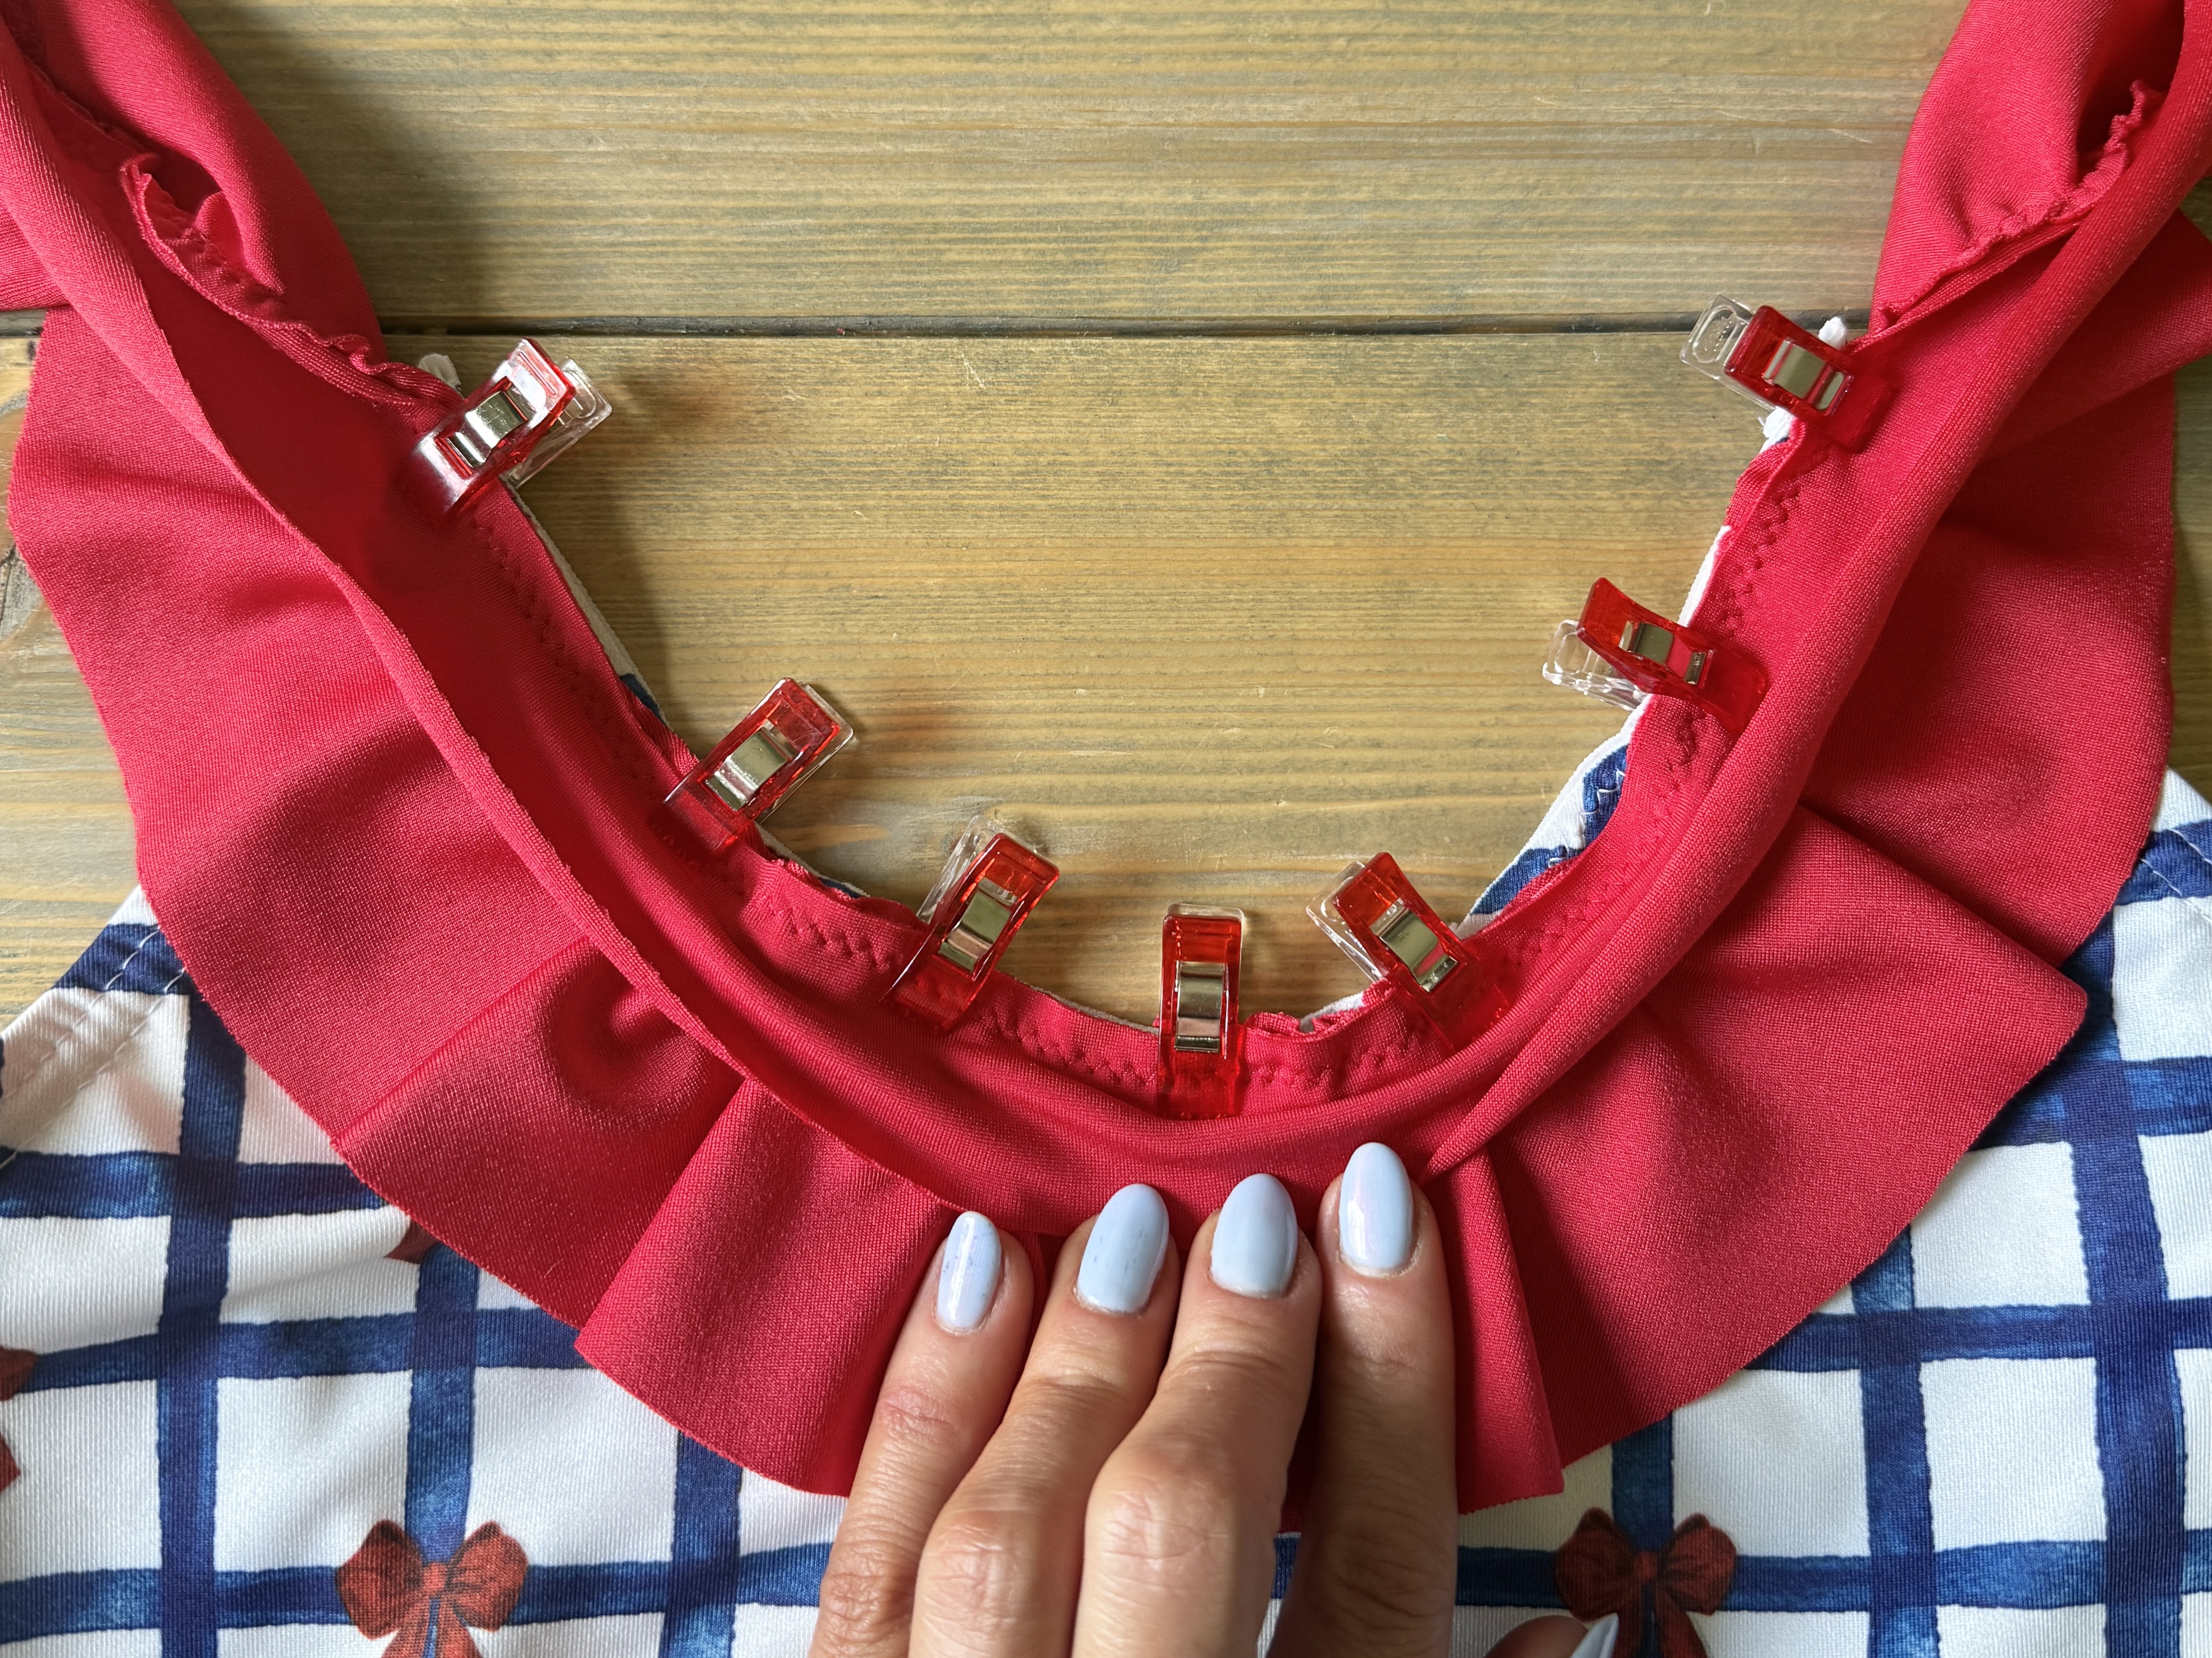
Align the center back of the binding to the center back of the swimsuit in the same way. Pin in place.
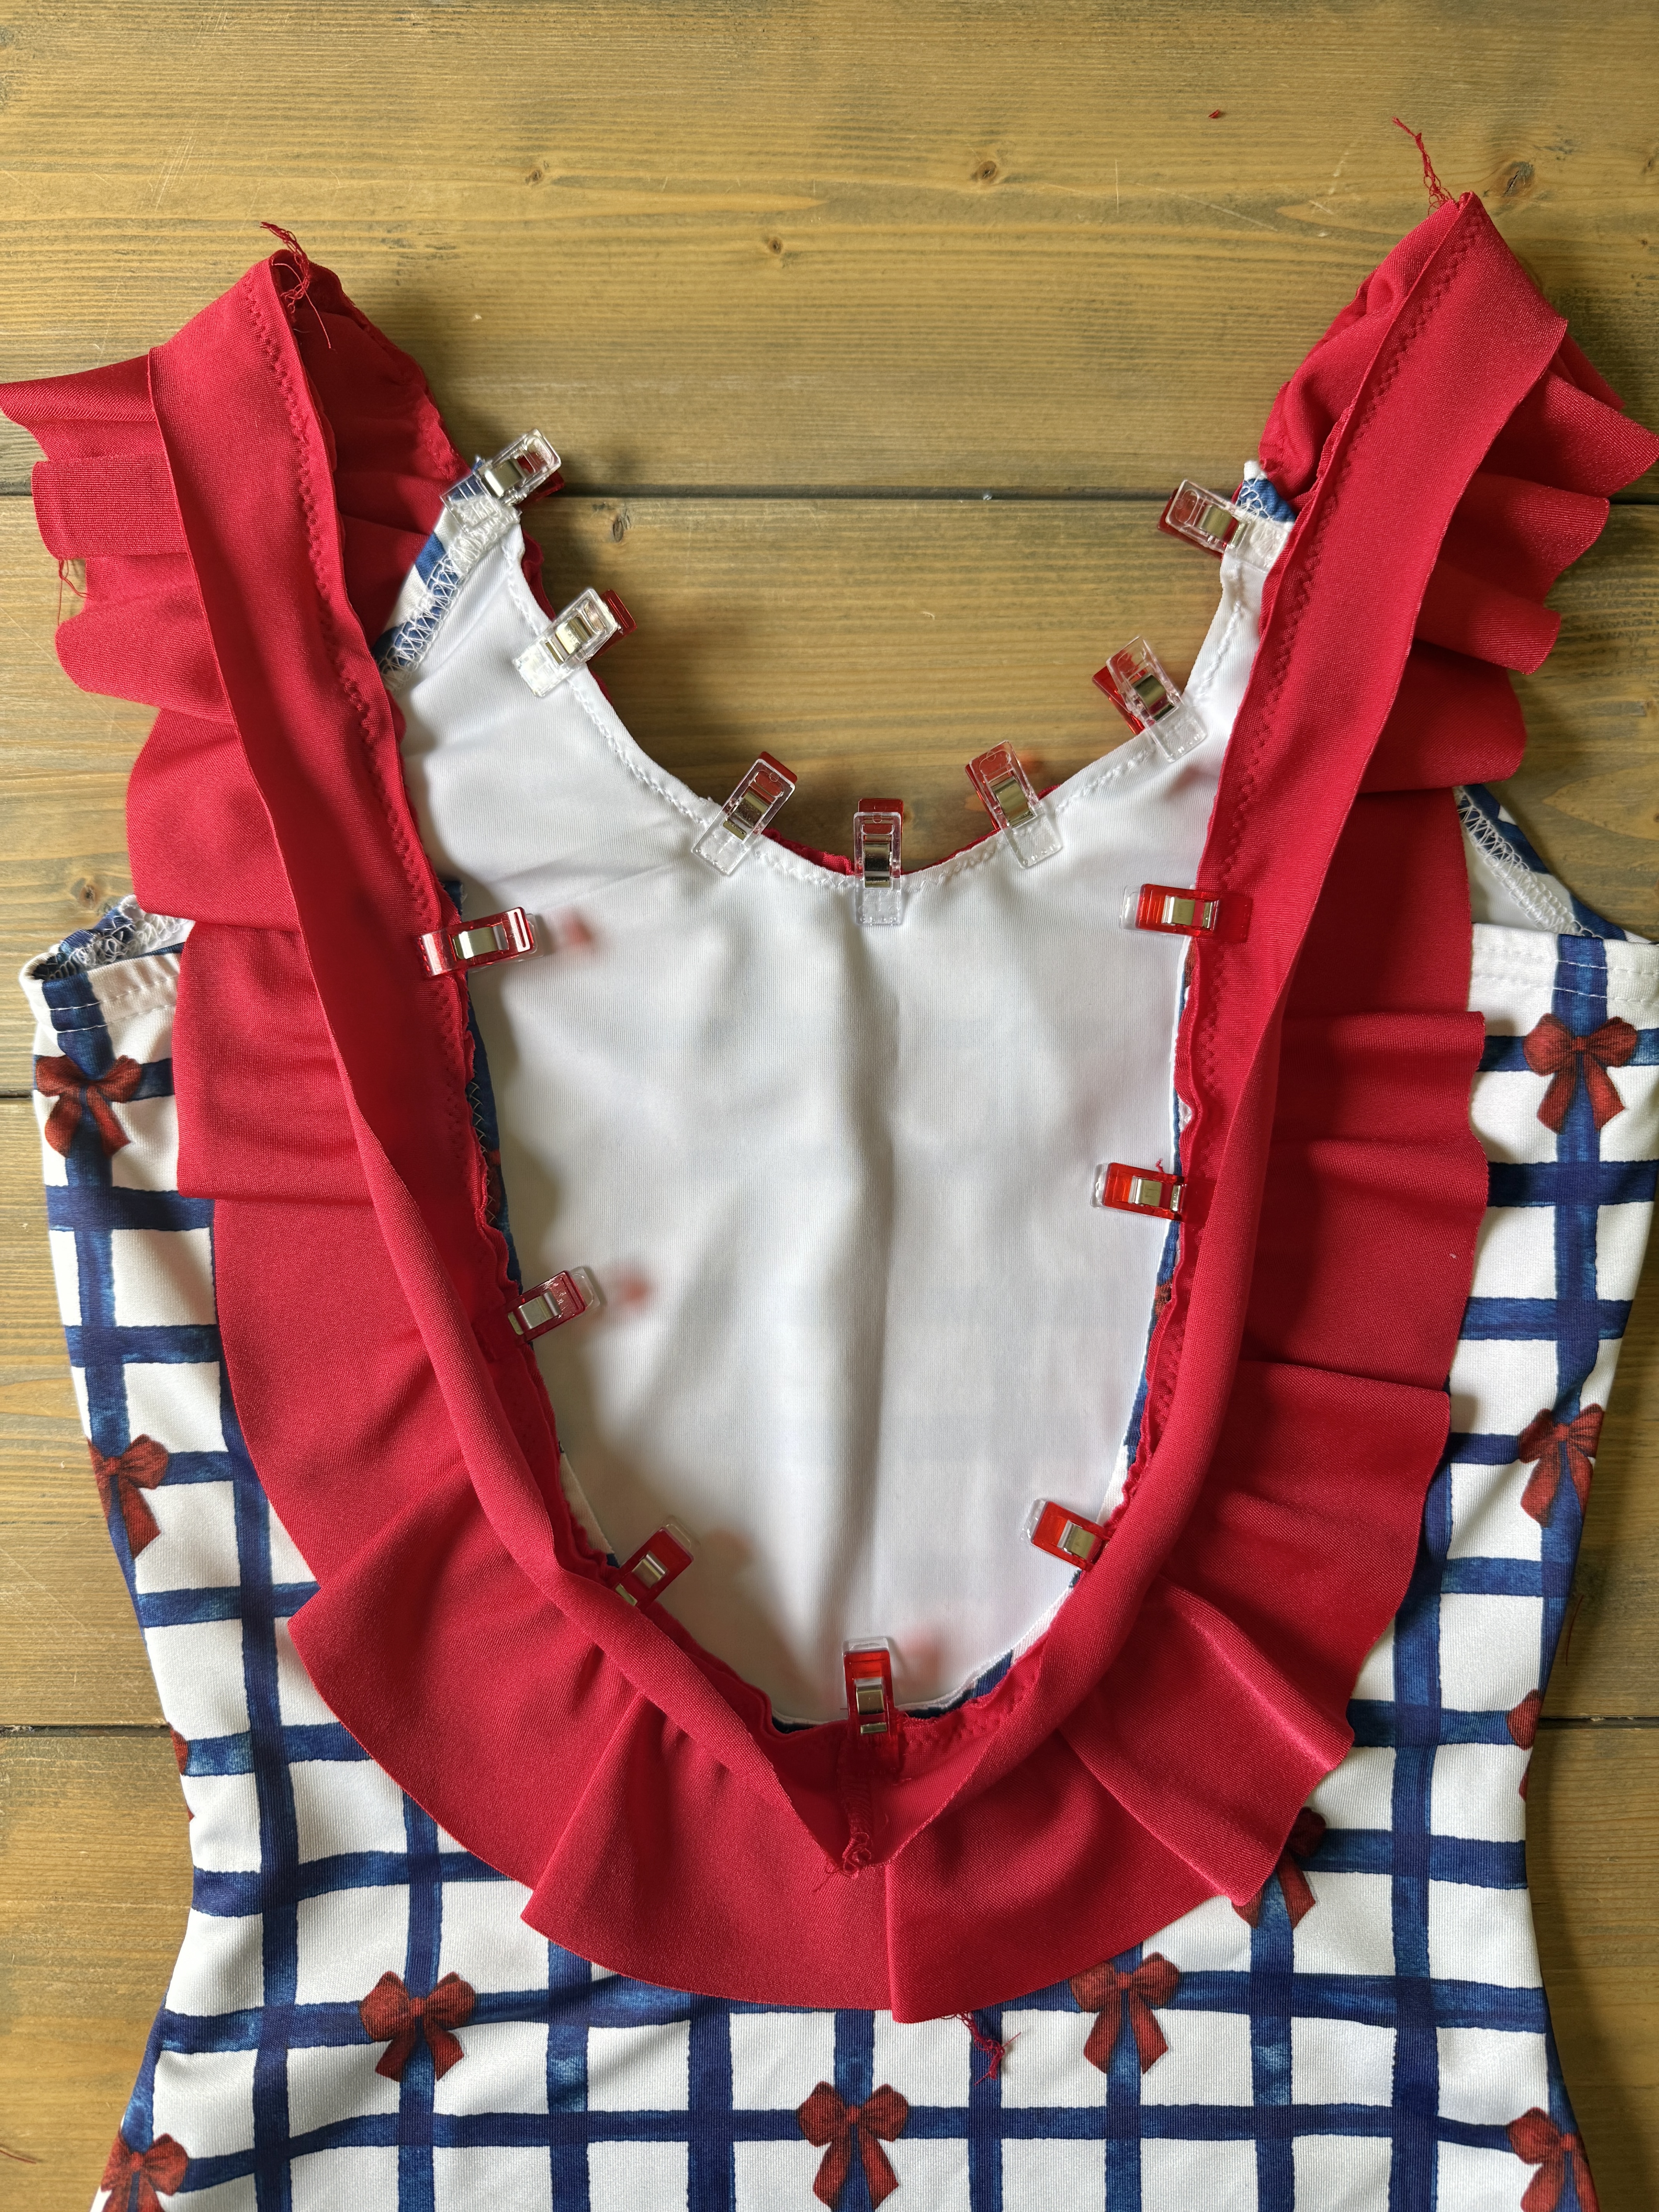
On your sewing machine, staystitch the binding to the front and back neckline openings. The strap portions do not need to be staystitched.
Attaching Elastic to the Neckline and Leg Openings
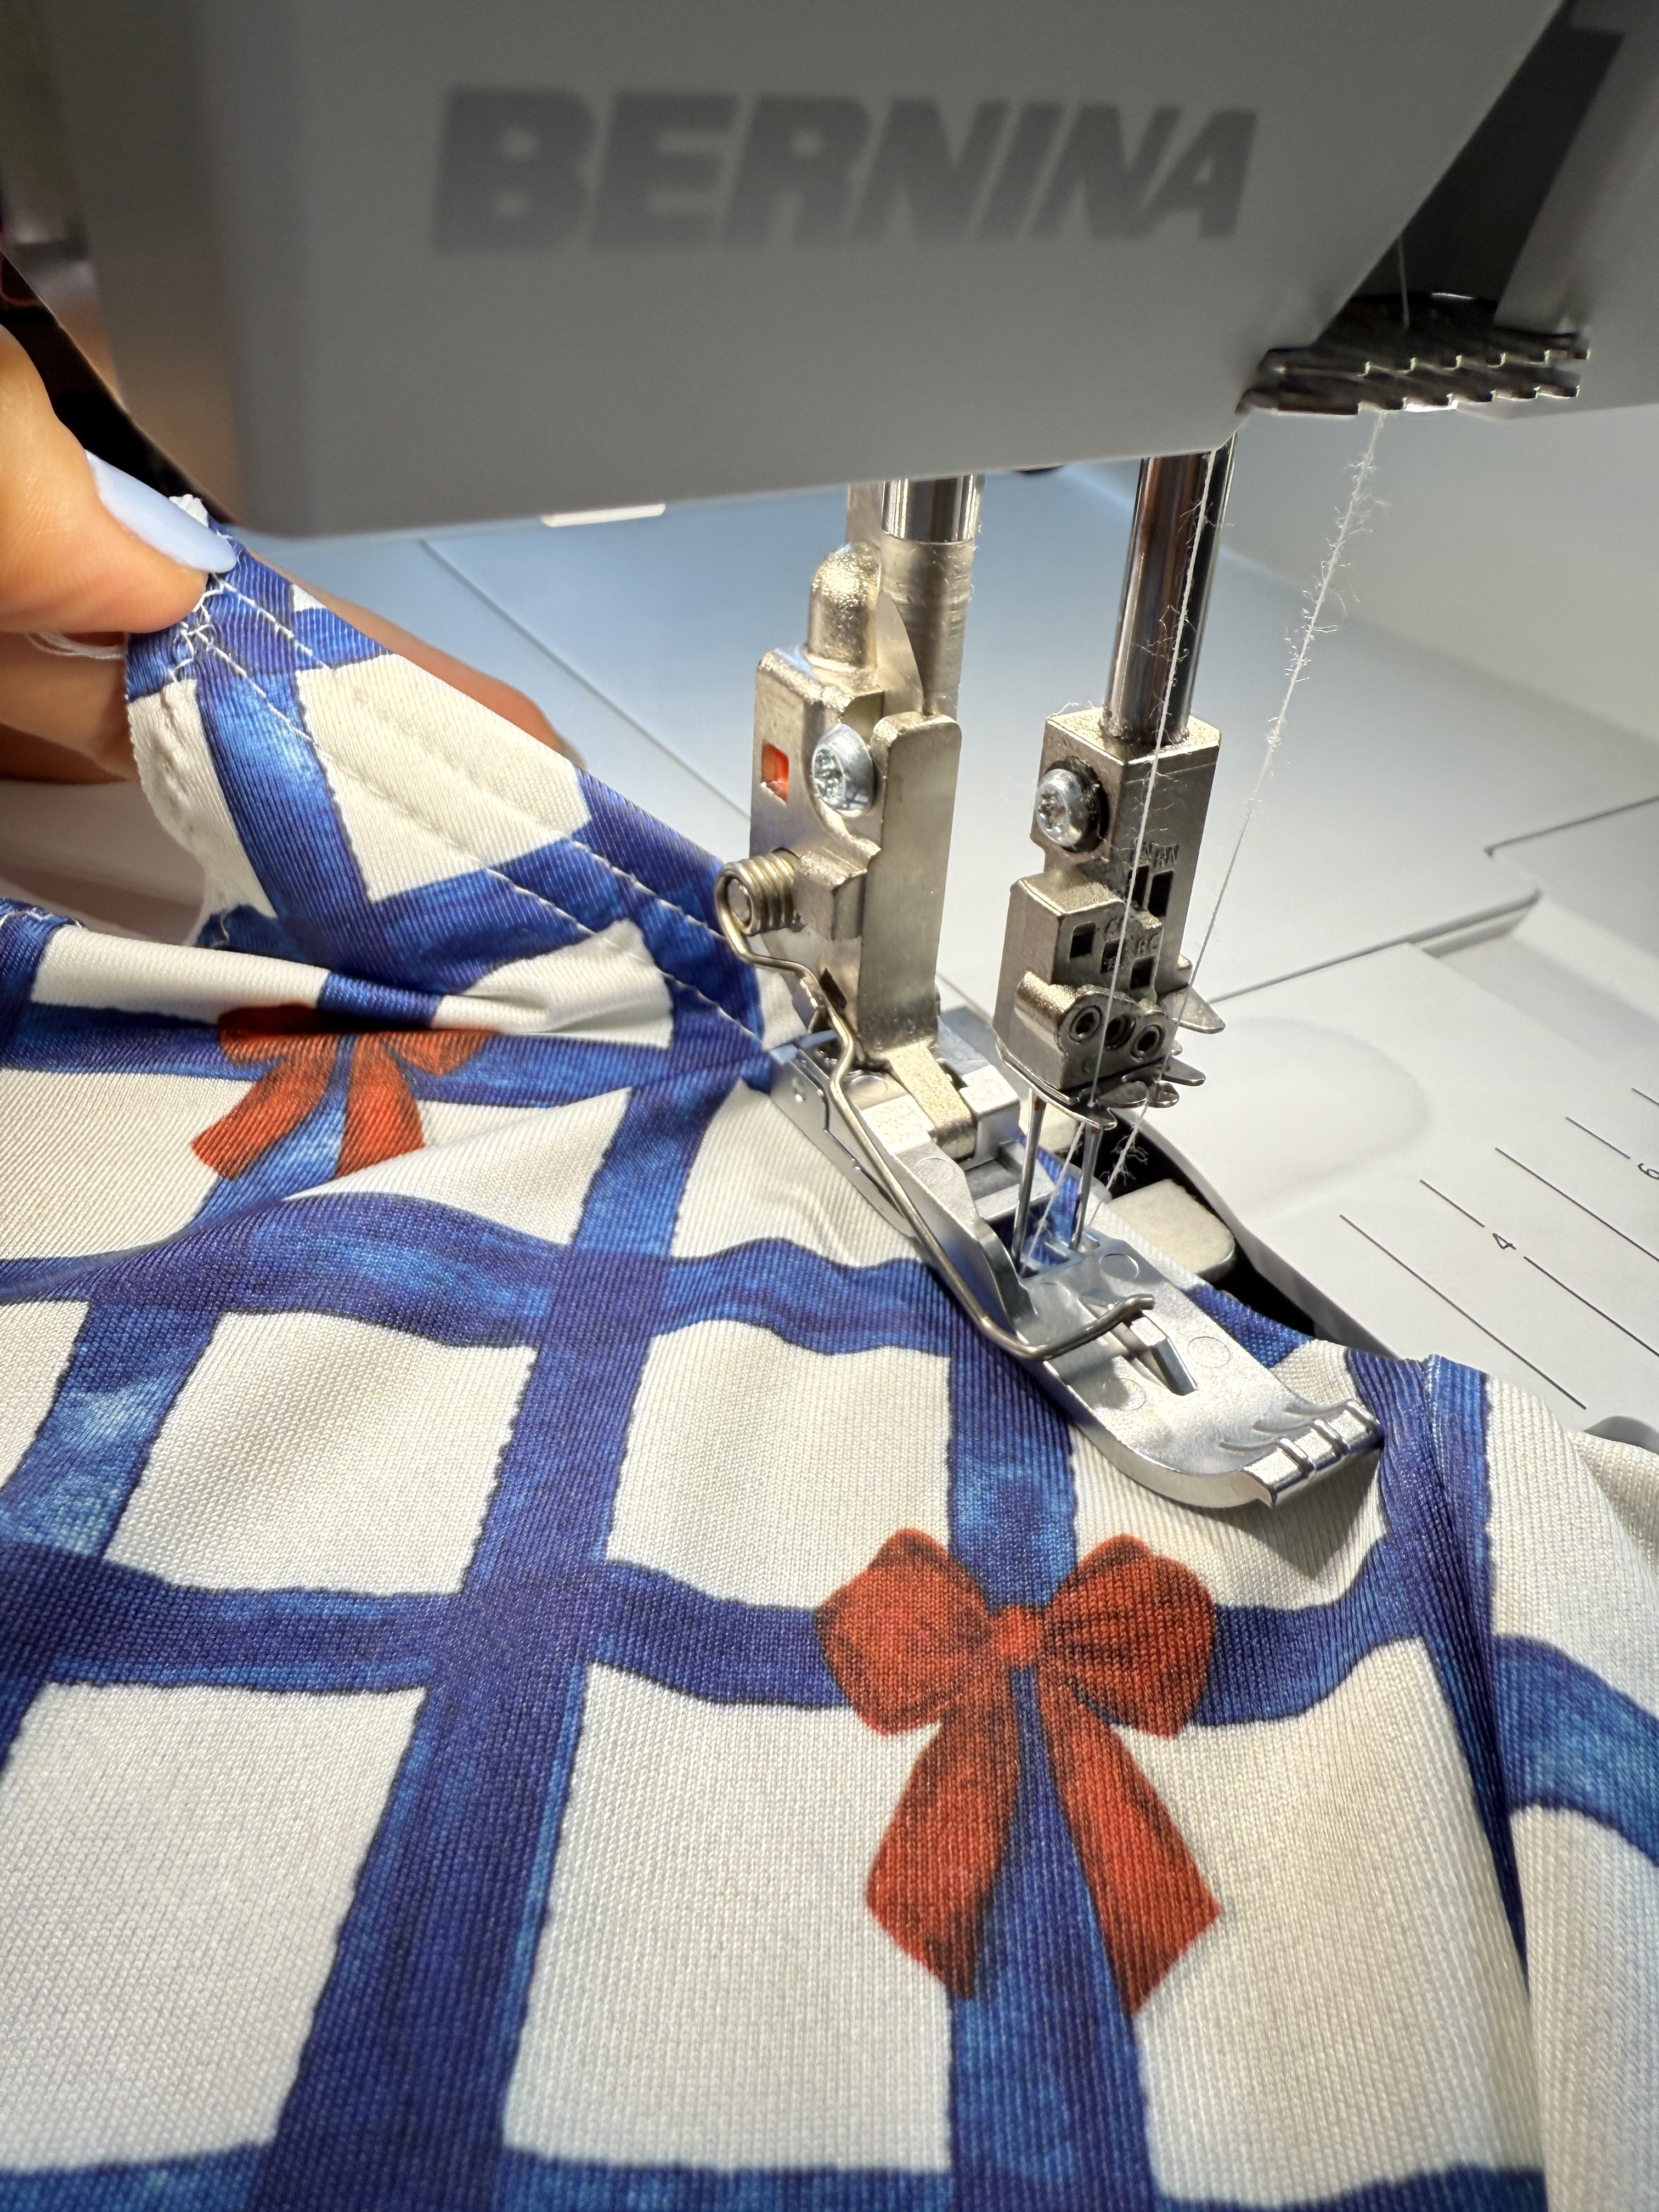
Just as before, prepare your machine for using the Elasticator Foot. Attach the 3/8″ swimwear elastic to the entire neckline opening at a 1:1 ratio (lowest tension possible). Begin at the center back, and when you get back to the beginning overlap the ends of the elastic by 3/4″. The elastic will be attached to the wrong sides of the binding, in the same place you previously staystiched.

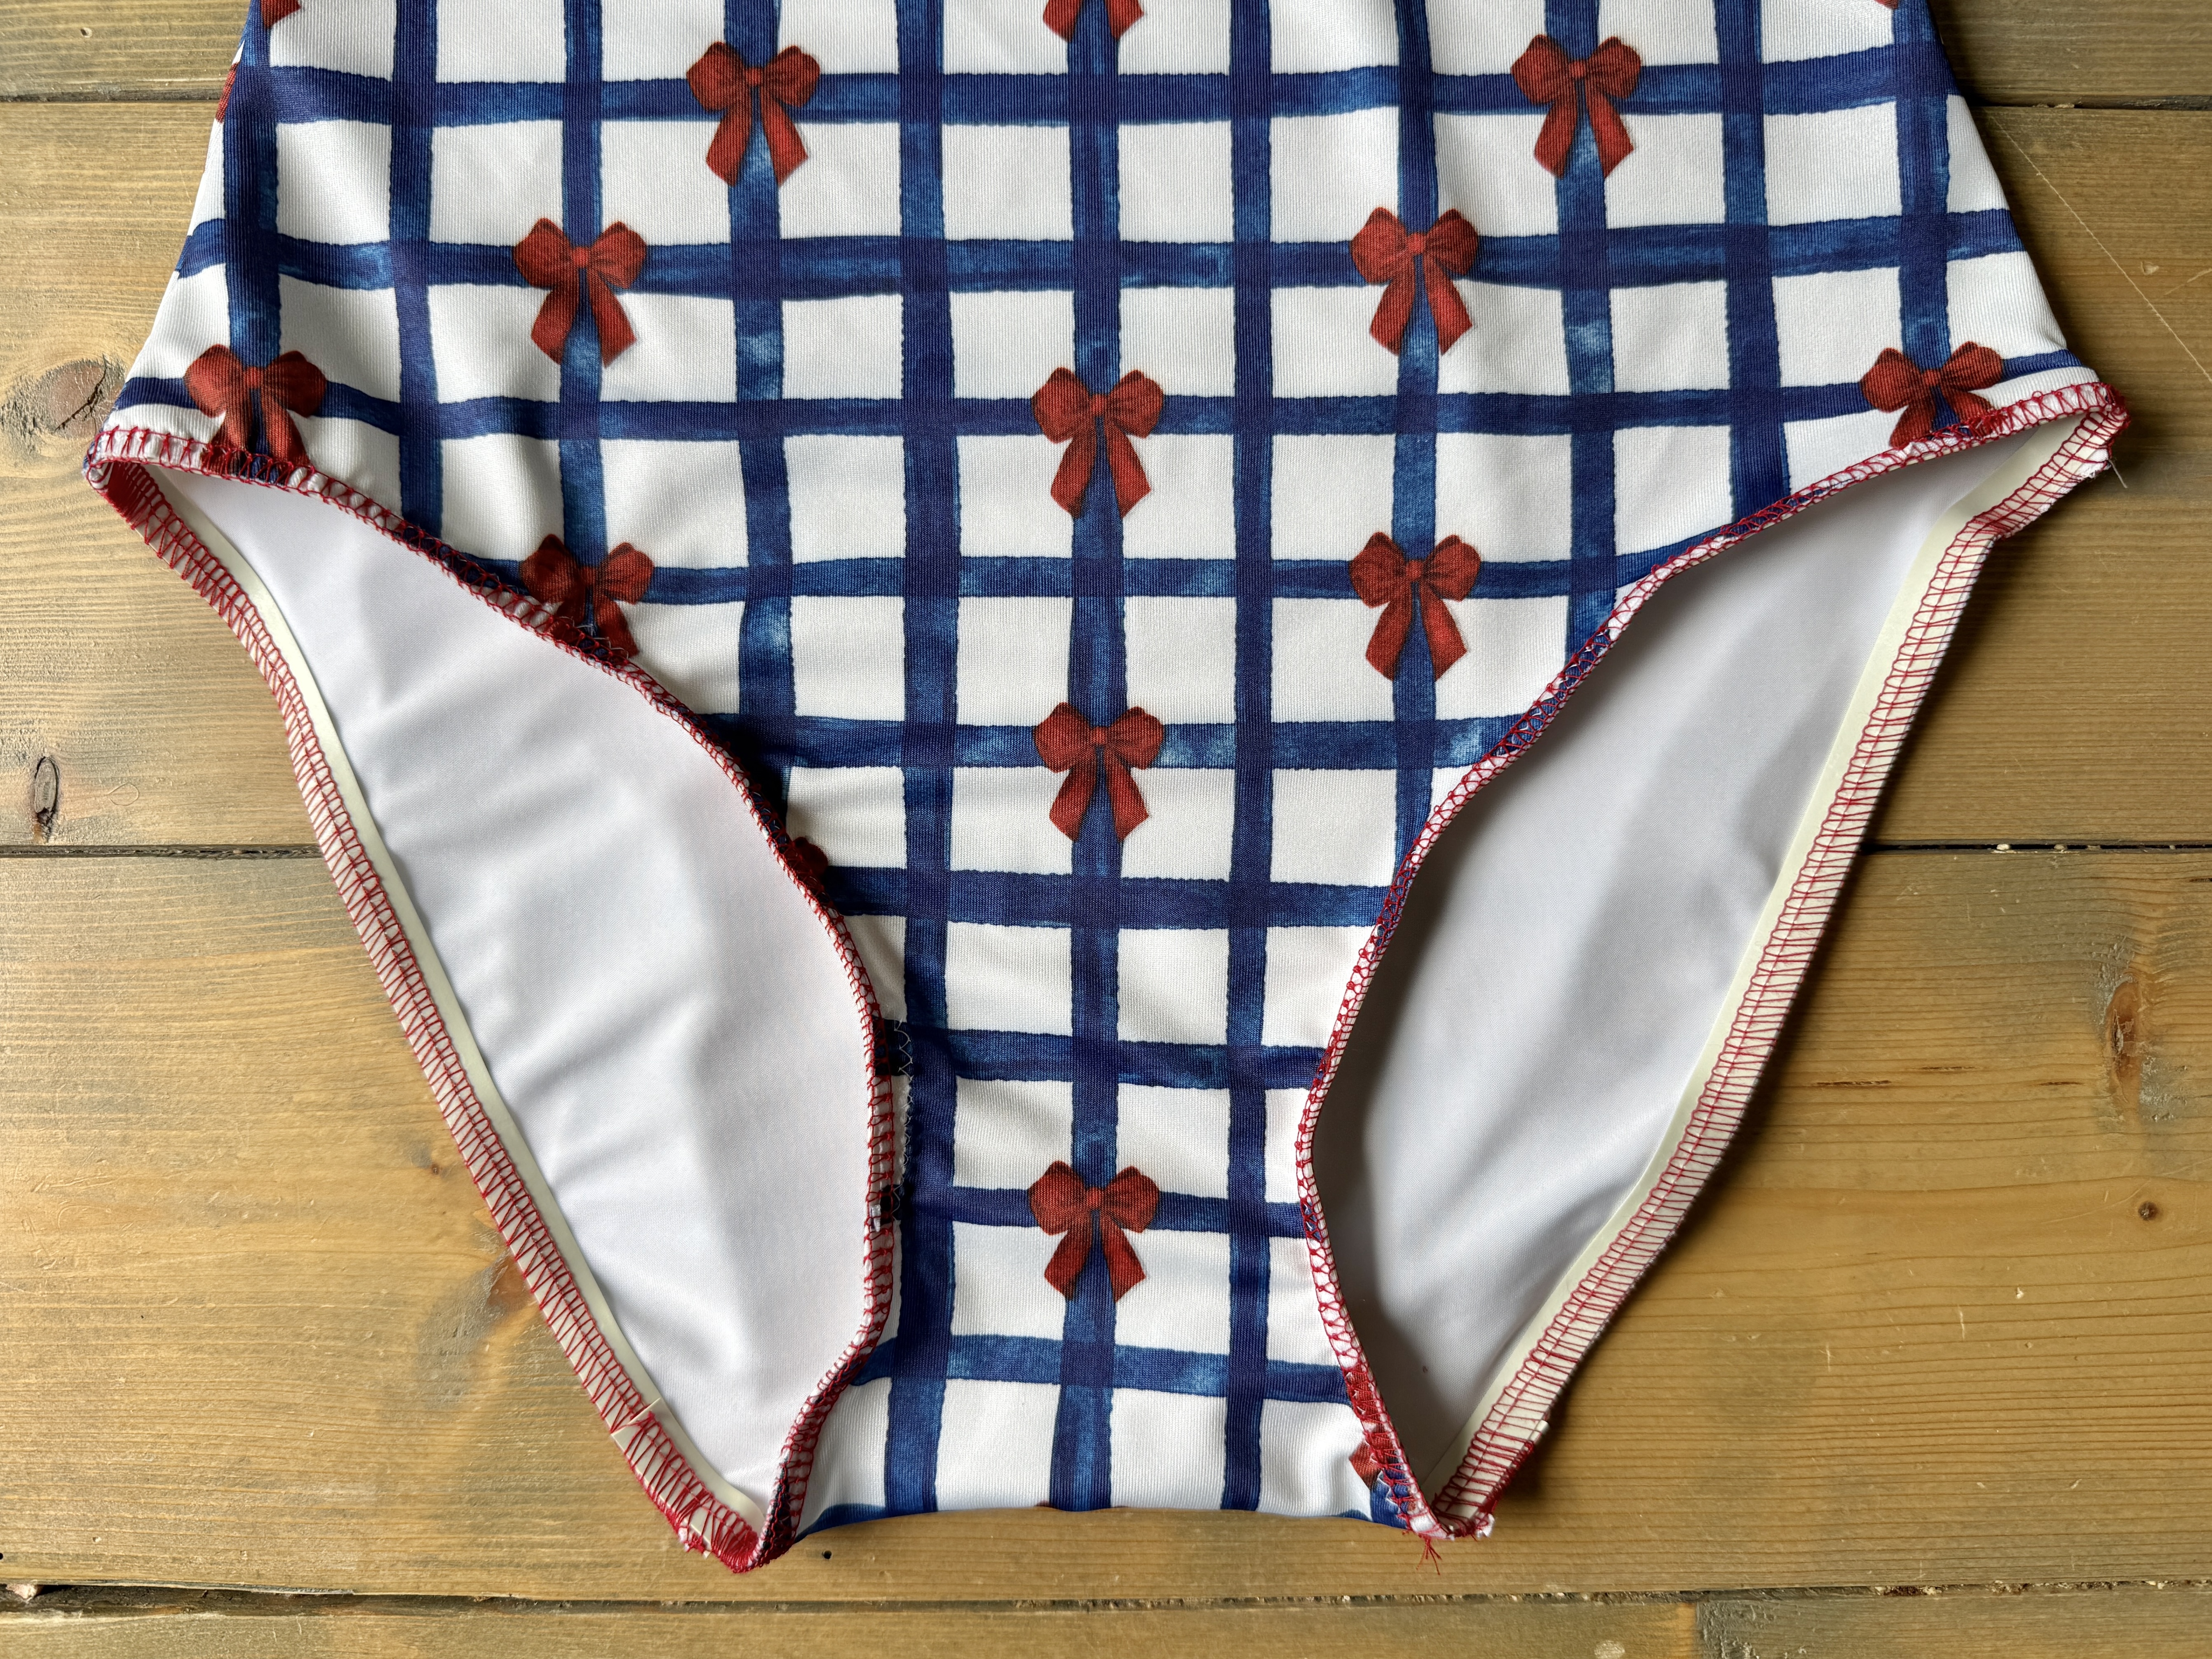
Do the same for each leg opening, attaching the elastic to the lining side of each leg opening. If you prefer the leg openings to be more snug, you can tighten the tension knob by one full turn.
Finishing the Neckline and Leg Openings
Convert your L 890 to the Coverstitch function, replacing the Elasticator Foot #C14 with the Coverstitch Foot #C13.

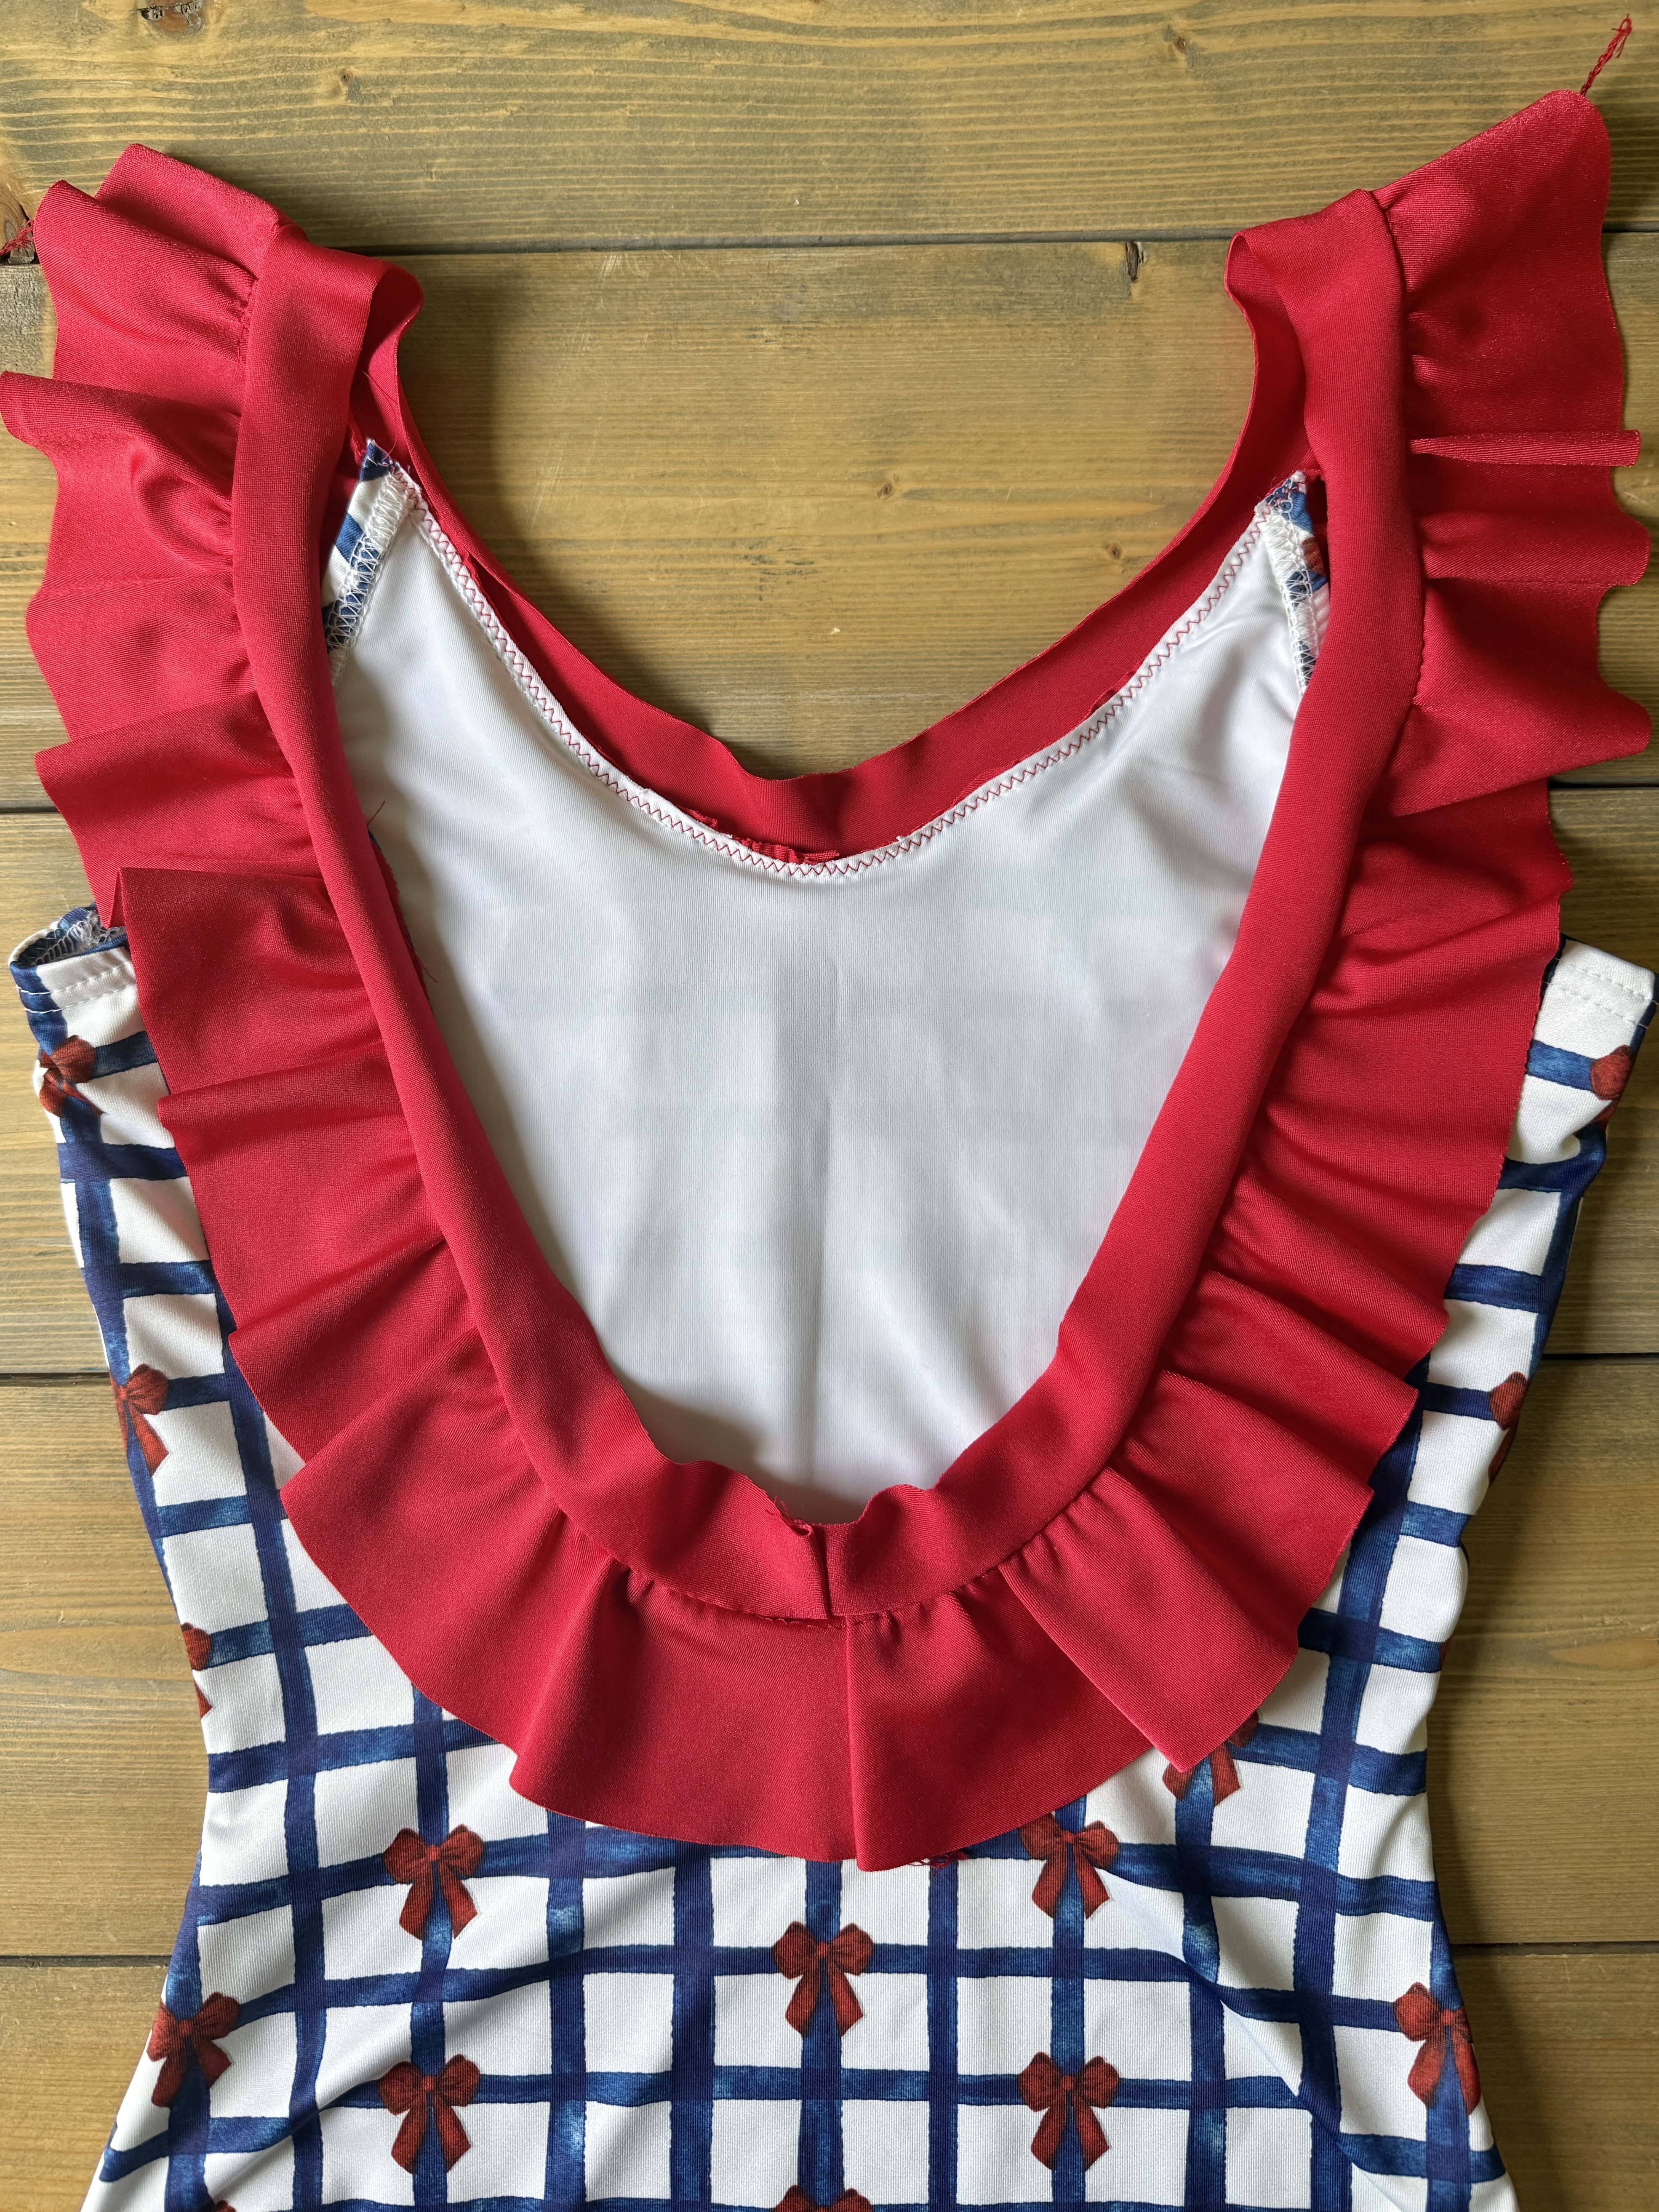
Fold the elastic over to the lining side of each leg opening and topstitch it down using the 3-Thread Coverstitch Wide (#22).

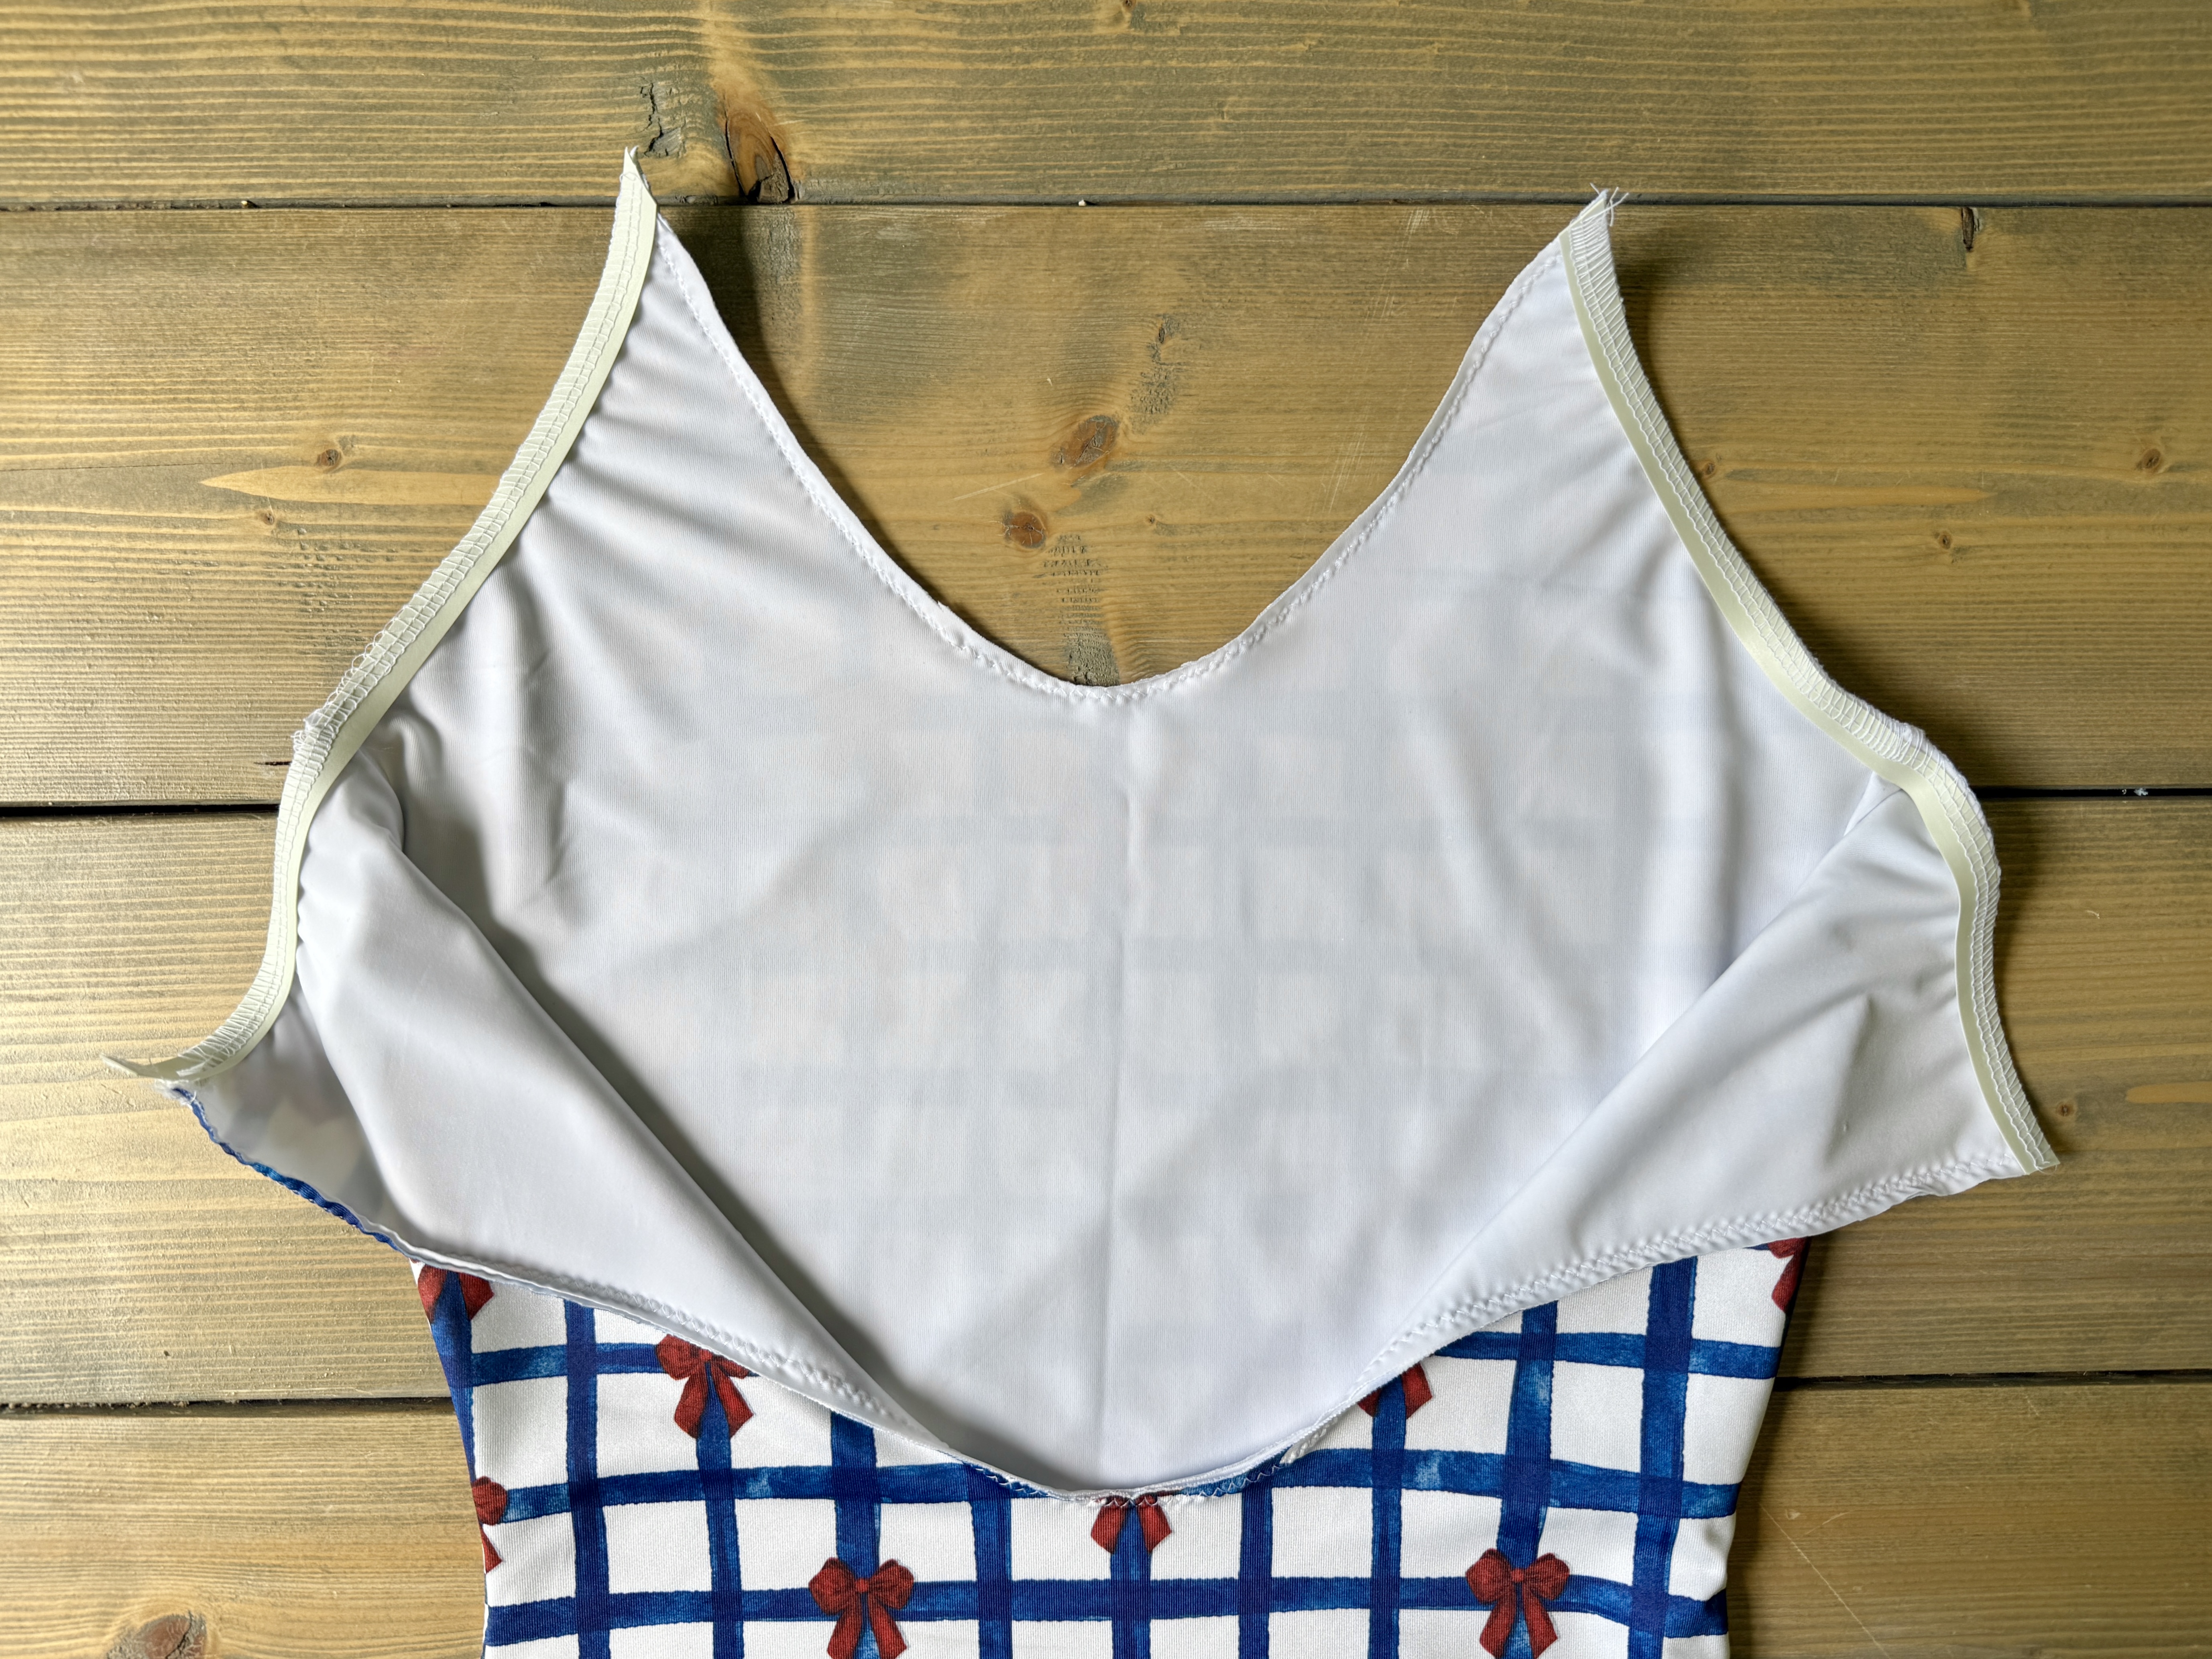
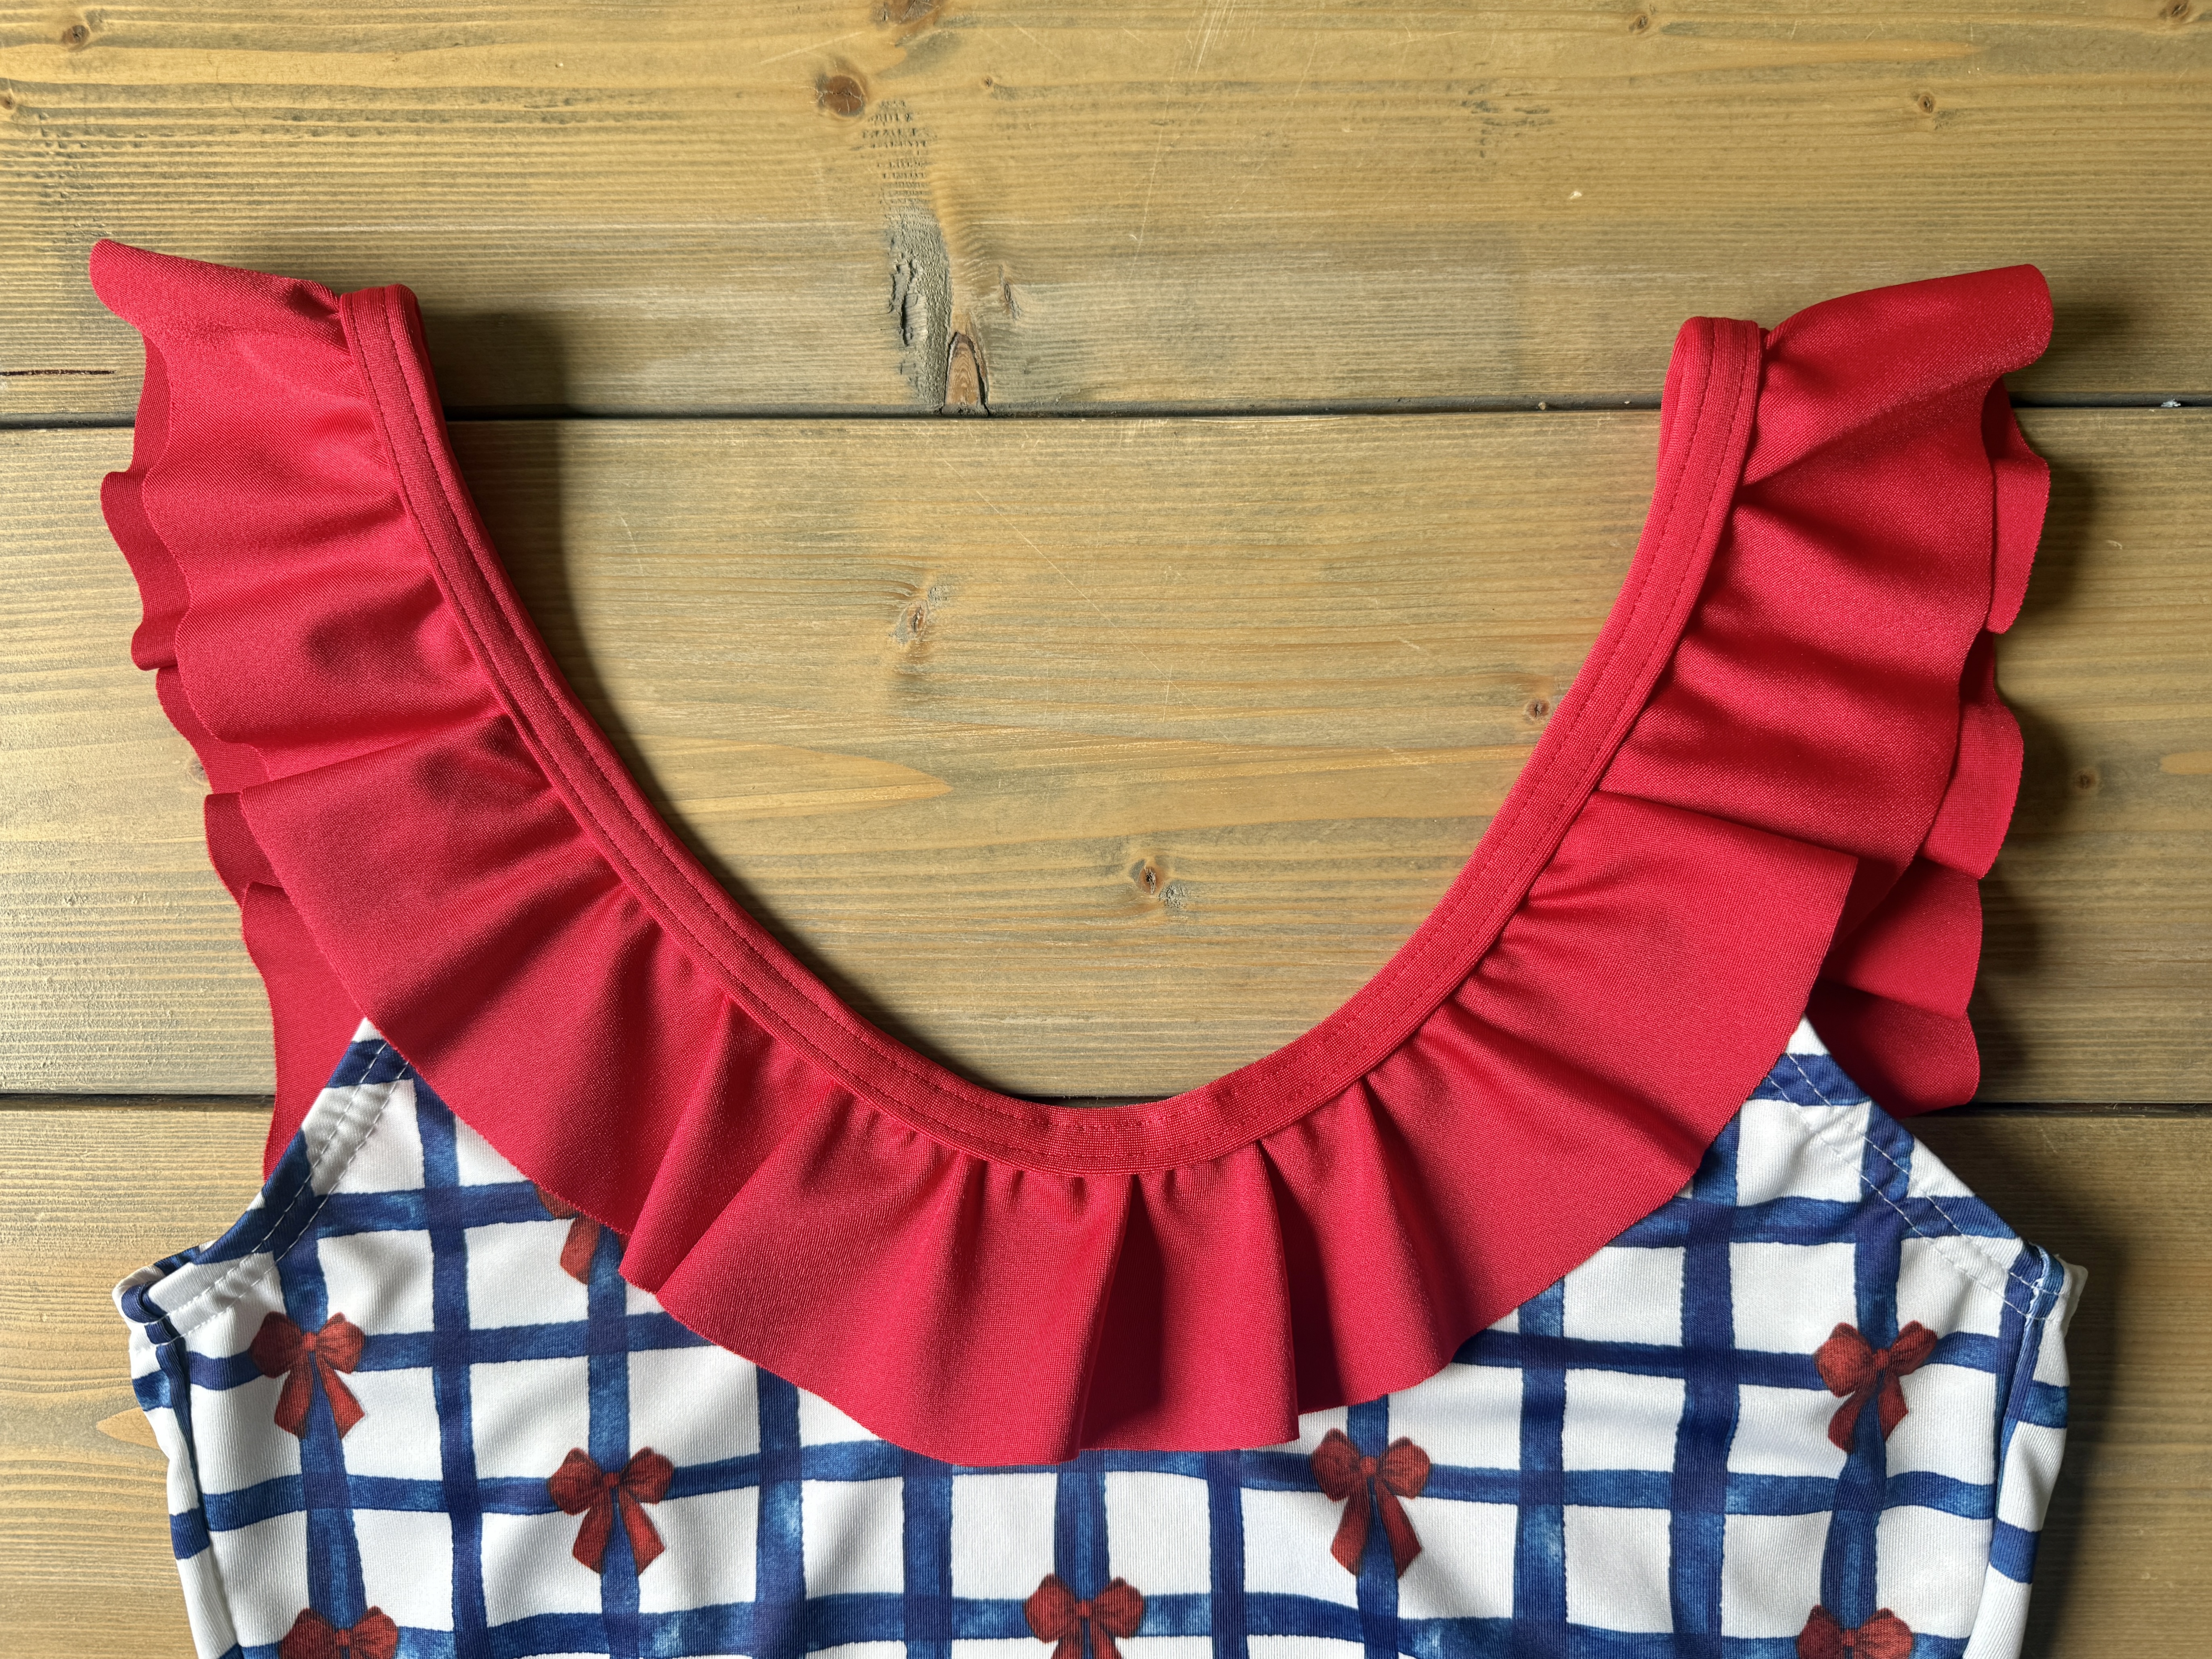
On the neckline, fold the binding up towards the elastic, over and around to the inside of the swimsuit (enclosing the elastic). Topstitch the neckline using the same 3-Thread Coverstitch Wide (#22).
You now have a custom fitting swimsuit you can wear all summer!