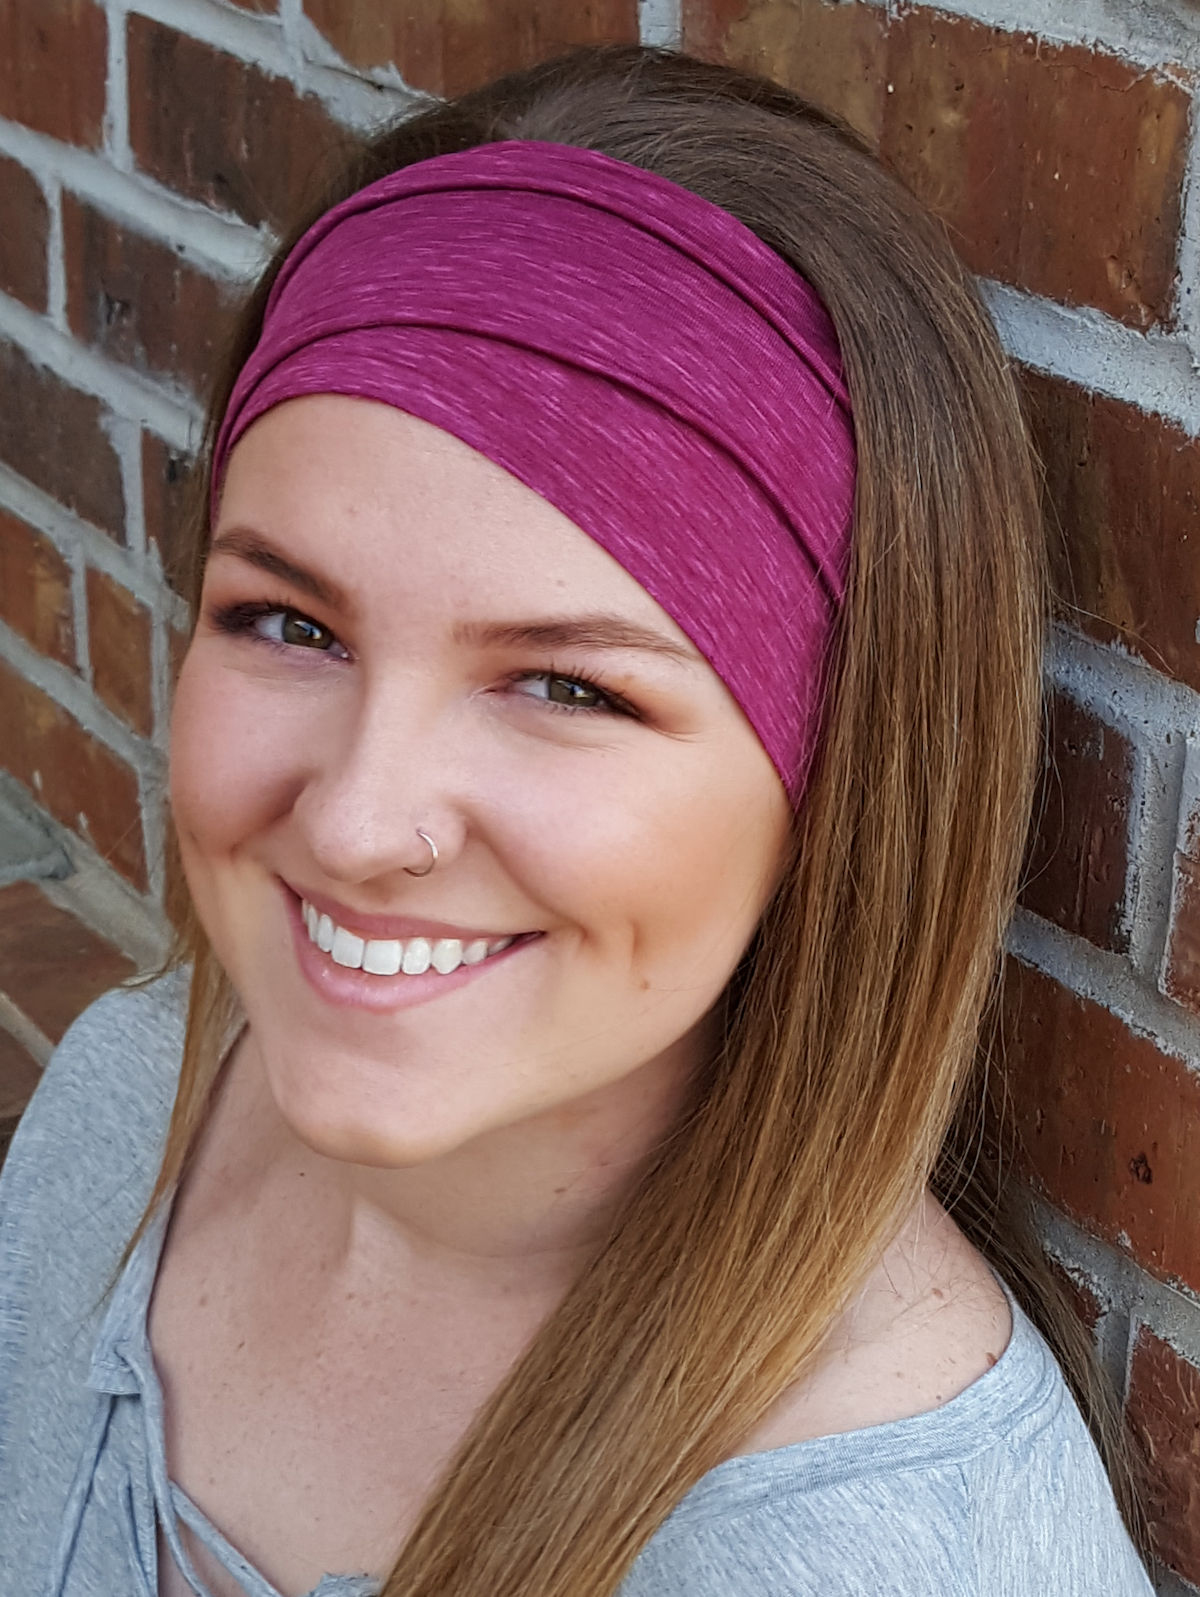
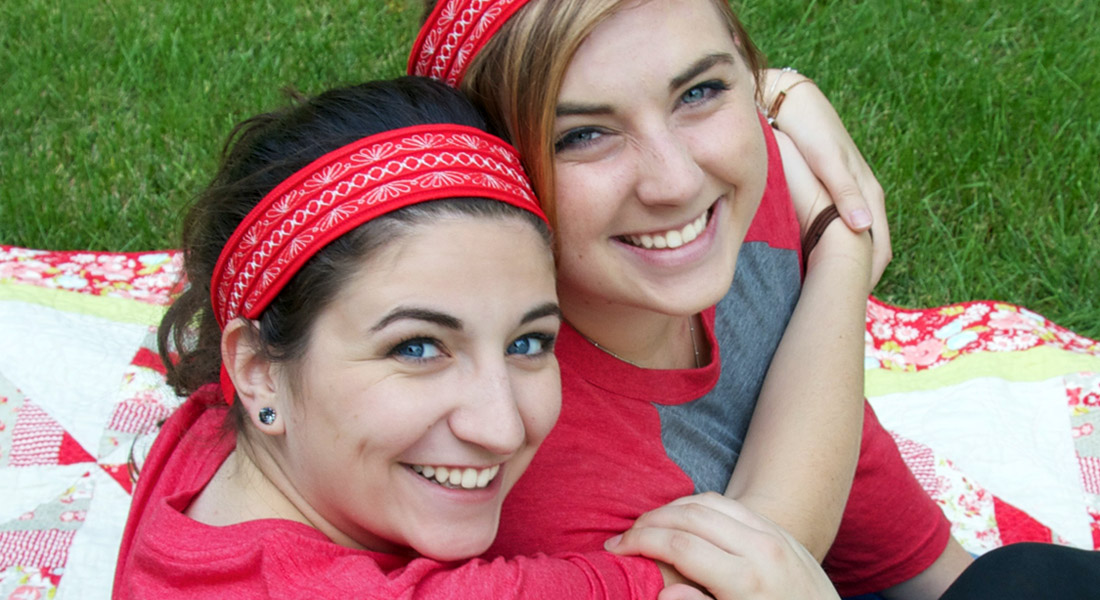
Non-Slip Headband
Whether you’re working out or just looking fashionable, there’s nothing worse than wearing a headband that continually slips out of place. The solution? Make you own. Not only is this tutorial quick and easy (and perfect for beginners), it’s great for using up your favorite fabric scraps. So now you can have headbands that stay in place and coordinate with your wardrobe!
Fabric Selection:
One of the key elements to making sure that your headband stays in place while wearing it is selecting the right fabric. For this project, it is important to use a knit or stretch material that feels ‘firm’ or has some body to it. Stay away from fabrics that are flimsy or have any drape to them. Secondly, it is important that the fabric has good stretch and recovery – when you pull on the material, it should bounce right back into it’s original shape. Great materials could include interlock, cottons with some Lycra\spandex content, or even material that is designated as workout wear.

Materials to sew a Non-slip Headband:
- Knit fabric
- Rotary Cutter & Mat
- Ruler
- Hand Sewing Needle
- Thread to match
Sewing a Non-slip Headband:
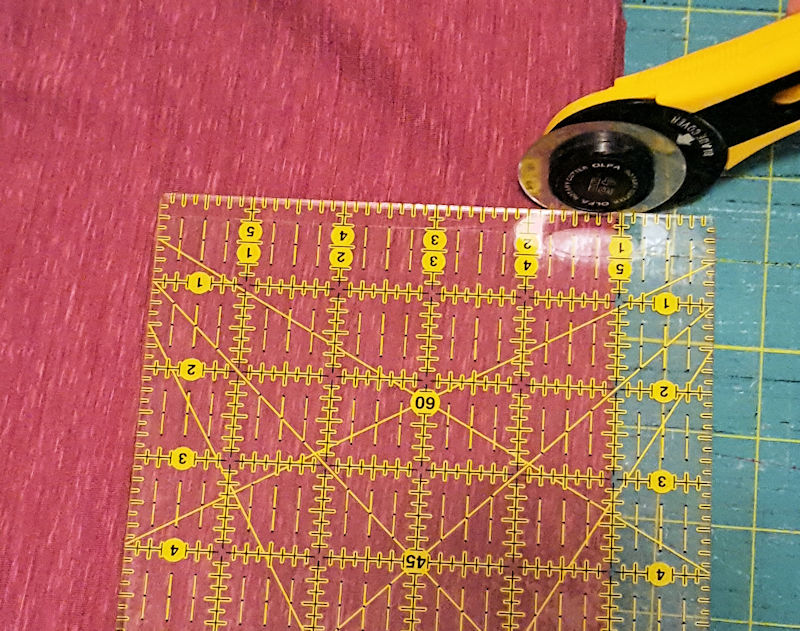
Cut 1, 5″ x 20″ rectangle. Make sure that the greatest degree of stretch is going the length of the fabric.
Find the center of the rectangle by folding it in half, lengthwise, with the wrong sides together. Press.
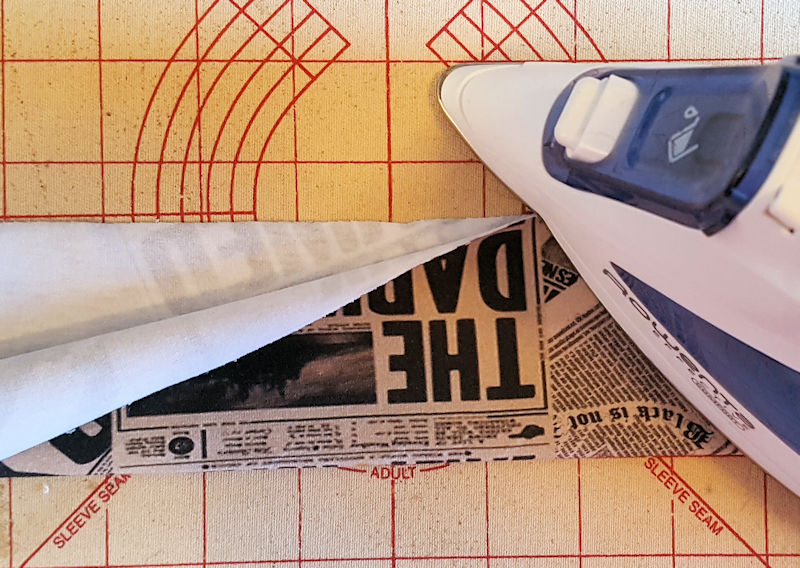
Open the fabric. Next, fold the raw edges of the band in 1/4″ – 3/8″ past the pressed fold line. The raw edges should overlap slightly. Press again.
Fold the raw edges in half, right sides together, so the two ends meet. Make sure that the raw edges are matched.
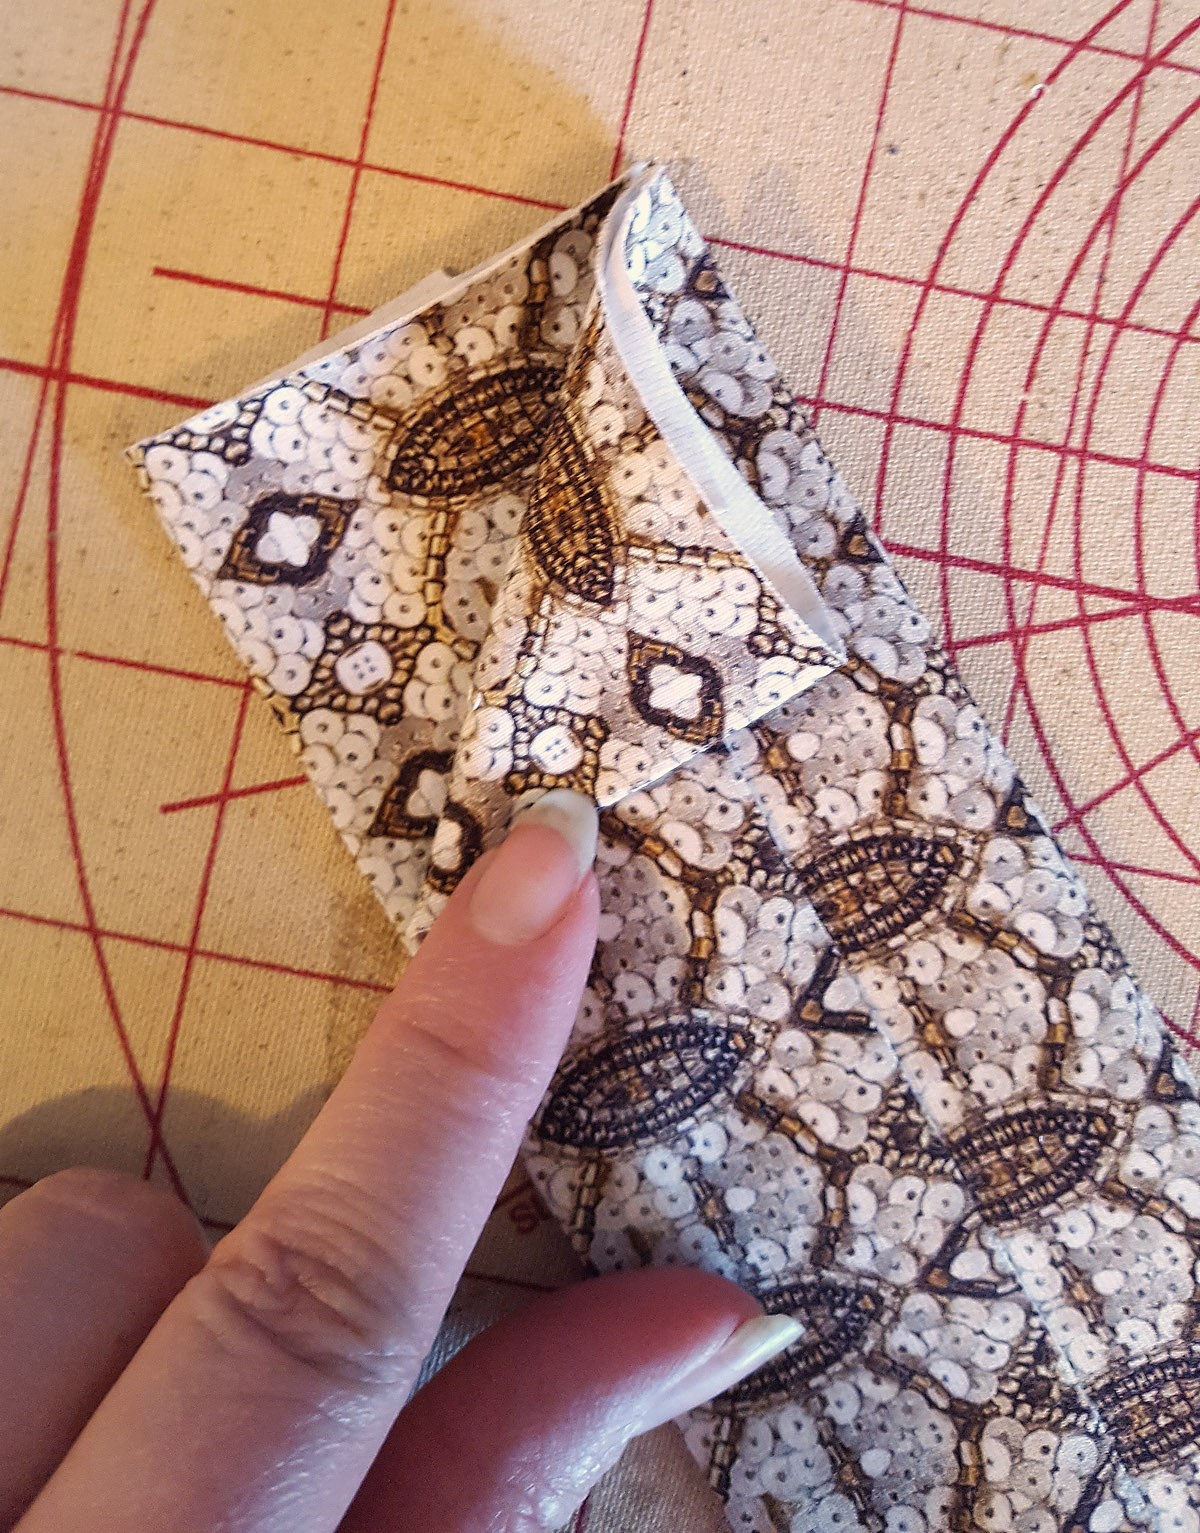
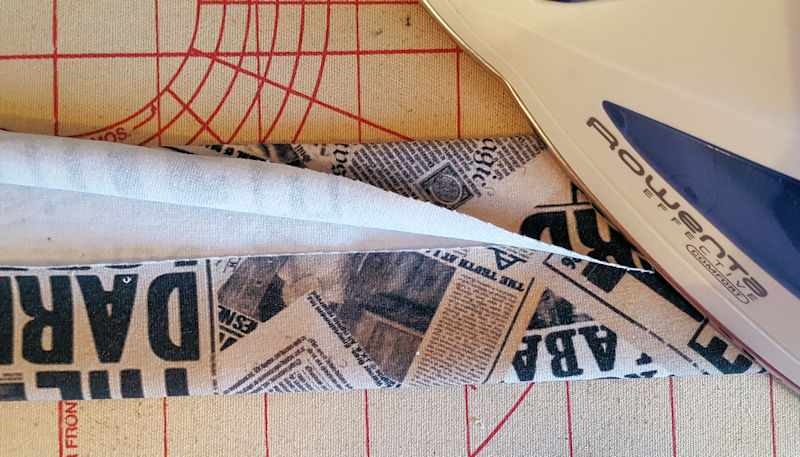
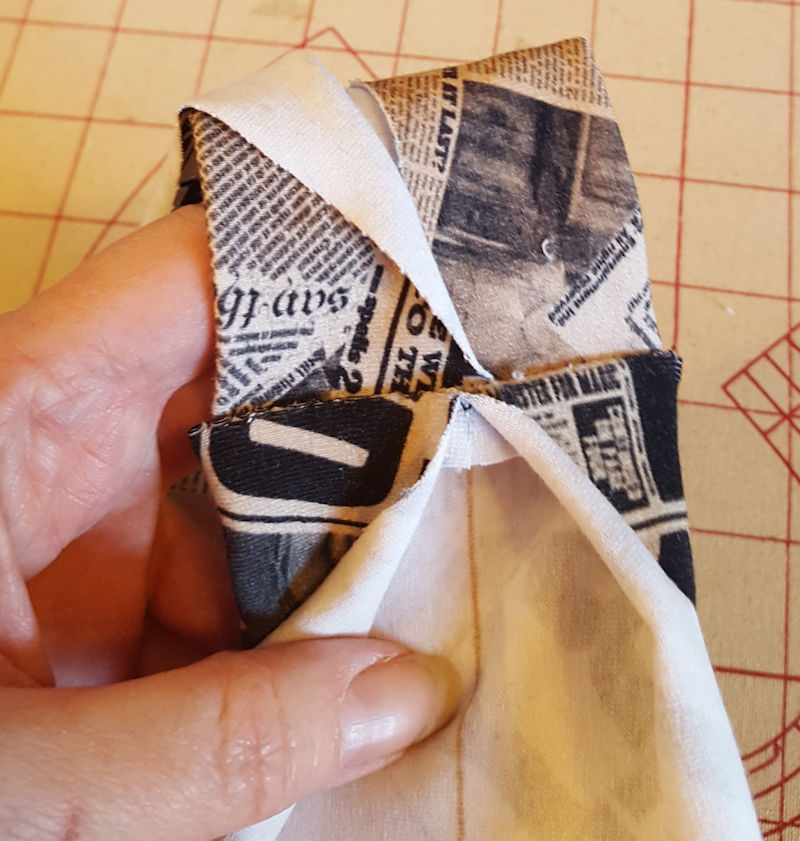
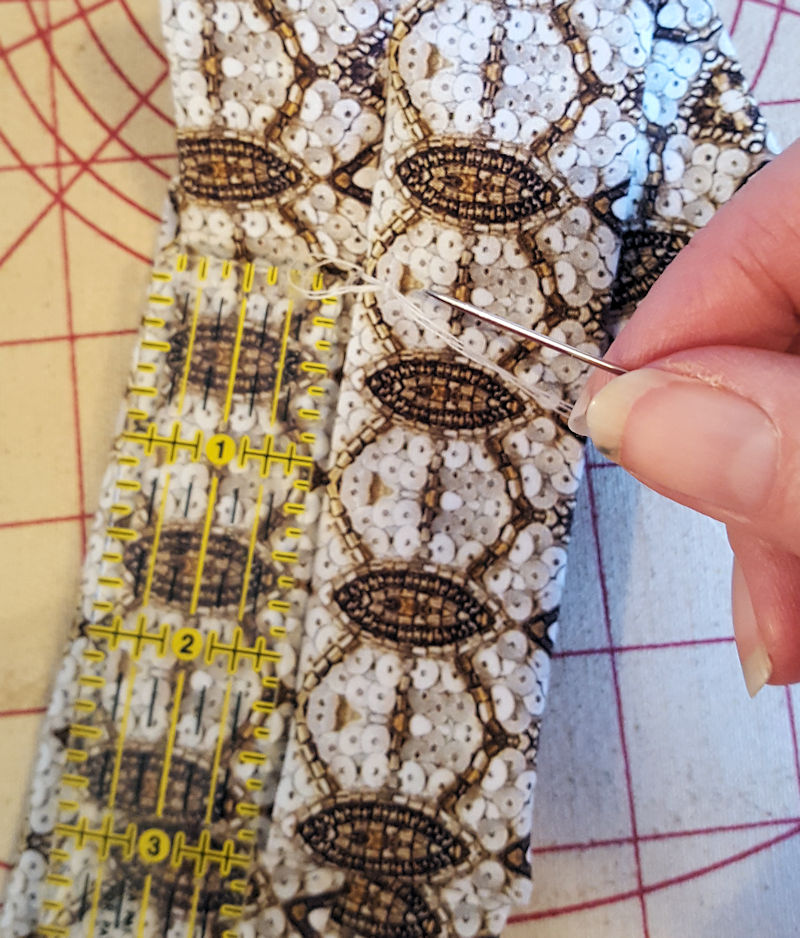
Open out one band end, making sure that the other end is still folded.
Wrap raw edges of the open band around the folded band and pin in place. Doing this will create a finished edge.
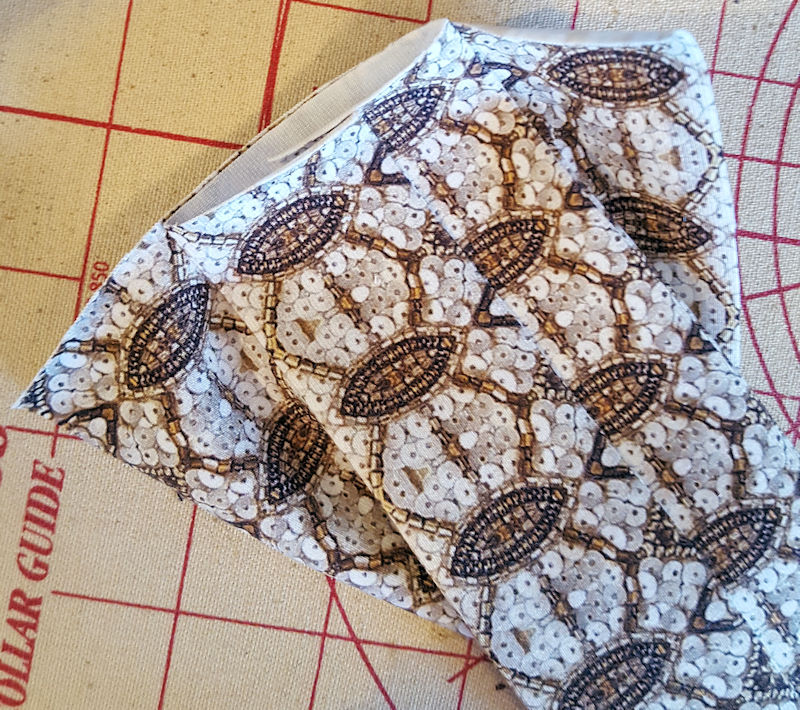
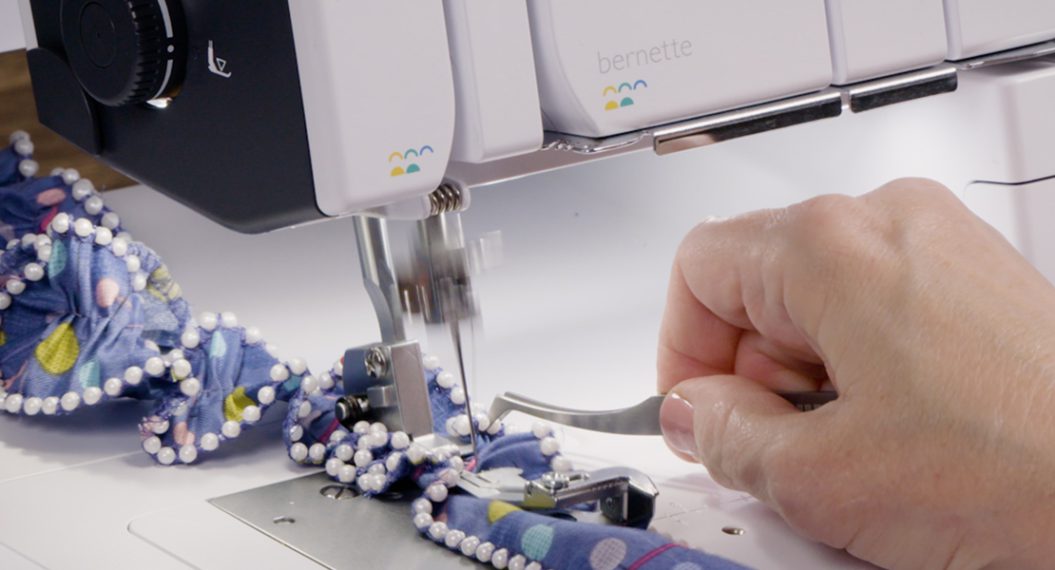
Sew 1/4″ away from raw edges. To keep the seam stretchy and keep them from popping, be sure to use a zigzag stitch while sewing.

Turn the band right side out and press.
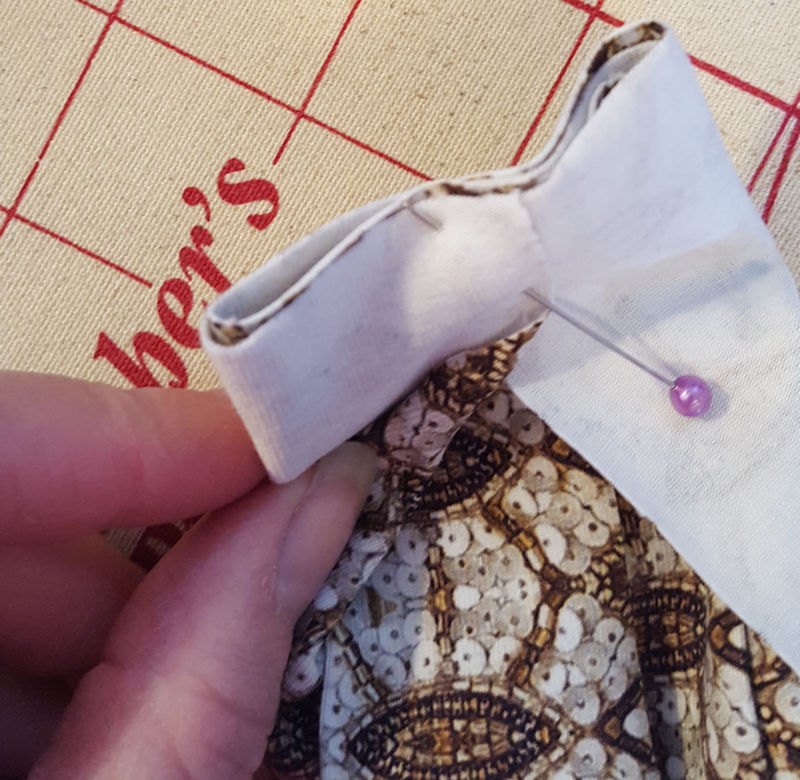
To keep the bottom edges of the band from becoming too thick and flipping out of place while wearing, hand-tack the edges of the band together, approximately 3″ away from the seam. Make sure that you do not stitch through to the right side of the band. Repeat for second side.
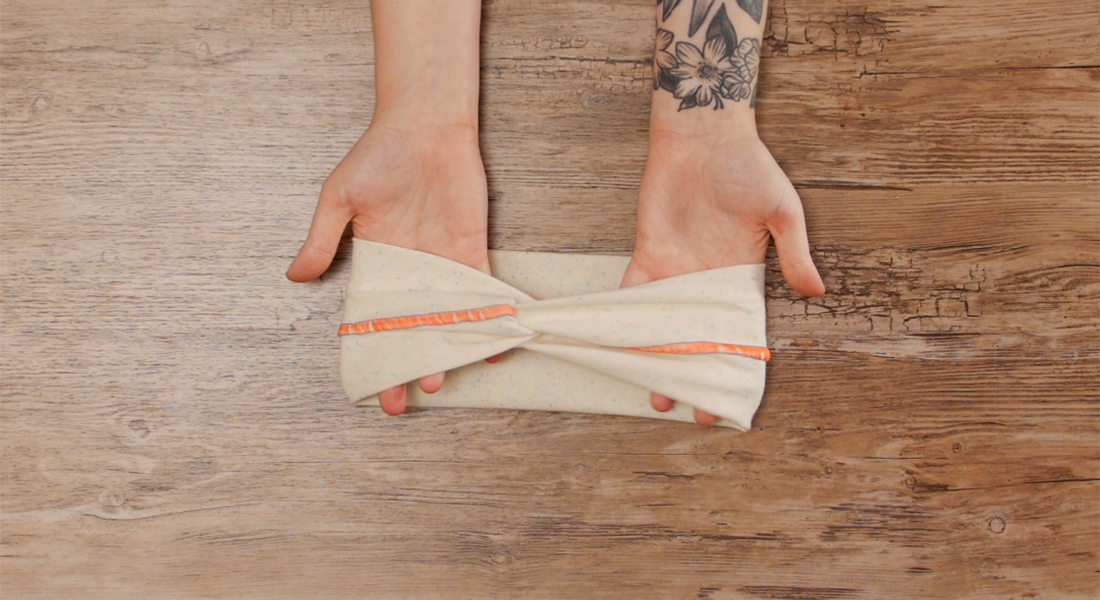
Wear your new headband thick (completely unfolded) or thin (folded as made). Have it cover your ears when it’s chilly or cover your forehead entirely. Try it as ponytail wrap or even as a cowl! Most importantly, use your favorite fabrics and have fun!

Used Products


What you might also like


18 comments on “Non-Slip Headband”
-
-
Yes! That’s exactly what you need to do.
-
I’m still confused on this part.. ugh.. I’m trying to make these for nurse’s at work to attach our face masks too during the covid craziness. Any insight would be helpful. Thanks so much!
-
Basically you’re “wrapping” one end with the other: Open out one end and lay it so that it is right side up. Then lay the folded edge (right side down, the part without a seam is the right side) on top of this piece and center it. Then wrap the loose edges around the folded ends and sew.
-
Alynne, I am trying to do the same thing! I am the project manager – not a seamstress!! But it is my job to find an appropriate pattern that is comfortable, functional, durable, washable and easy to make in a very cost effective fashion. We will be attaching buttons on each side of the headband so the face mask can be attached to the buttons rather than the ears which are getting very raw and sore. I have been asked to coordinate the making of 200+ of these headbands. Can any of you experts help me by suggesting pattern and supply requirements as well as sourcing ideas for larger quantities and best pricing? I’ve found many patterns for masks, but not for headbands. Help ASAP Please!!! If I get more than one design idea, I’ll have 2-3 samples made for a test run and then choose the one that is liked the best by the nurses. Thank you in advance!!
-
I created a very quick video on how to make these (video by my 11 year old, so be patient!), but have temporarily posted it to my Instagram. Hopefully when this is all over, we’ll be able to make a better quality video and load it to the site.
https://www.instagram.com/p/B-sVedjgUGE/
-
-
I created a very quick video on how to make these (video by my 11 year old, so be patient!), but have temporarily posted it to my Instagram. Hopefully when this is all over, we’ll be able to make a better quality video and load it to the site.
https://www.instagram.com/p/B-sVedjgUGE/
-
-
-
So . . . . I’m a little confused. Do the long, raw edges get finished -or- are they left unfinished?
-
Since knit fabrics do not fray or ravel, there is no need to finish the long edges of the headband – they are left raw.
-
-
I am trying to sew these also so they can be used to attach buttons for facemasks! I understand the step on the raw edges but do not understand the next step. How are the ends being sewn together. I feel like this is going to be the next thing all of us sewers are going to be sewing to help the medical field. A video or my pictures would be great. Thanks
-
yes a video would be awesome of the whole process!
-
spbbritt – after you’ve wrapped it, just sew straight across the bottom. The turn, so it’s “right side out”. If you are making them for health care workers and are in a hurry, you can omit tacking them together (the last step).
-
I created a very quick video on how to make these (video by my 11 year old, so be patient!), but have temporarily posted it to my Instagram. Hopefully when this is all over, we’ll be able to make a better quality video and load it to the site.
https://www.instagram.com/p/B-sVedjgUGE/
-
-
Looking to use for nurses also. Wondering if ties could be added instead of elastic. Thank you for this great information.
-
Can you do a video for this headband? I’m also making headbands for nurses who are experiencing pressure ulcers from face masks. I sew and I don’t understand how to do anything past pressing past the fold line. I really like this style headband and it looks like it would be no hassle while health care workers are on the job.
-
I created a very quick video on how to make these (video by my 11 year old, so be patient!), but have temporarily posted it to my Instagram. Hopefully when this is all over, we’ll be able to make a better quality video and load it to the site.
https://www.instagram.com/p/B-sVedjgUGE/ -
I am not going to lie, I was sceptical about making this headband for my granddaughter to use with buttons added to save her ears wearing a mask as a CNA working in emergency during this Covid 19 pandemic. I made the one and tried it on thinking “I LOVE THIS”. I thought it was the most comfortable headband I ever put on my head. I made up just one and then followed a couple other patterns for specific headbands for nurses. Well, I am to tell you this is the favorite headband of all the ones she tried on. It is the winner and it is also the easiest one to make. Thank you so much for sharing this pattern. FYI, I added the buttons up 4 inches from the seam and I kept the button centered so she could scrunch it or open it up to wear. Most of the headbands they put the buttons to the back of the headband but by putting it center I could stitch the button through all the layers to get the best foundation structure for the button.
-
I came across this today on Pinterest, then went to your video. Thank you. I think I was getting hung up on the directions thinking that the long edges were somehow were finished edges. Your video cleared it up.
Leave a Reply
You must be logged in to post a comment.

Love the headband, but I’m sort of lost at the point where you say to open out one end of the band and wrap it around the folded band. Are you opening both sides of the bottom portion in the picture and wrapping one part around the left of the folded band on top, and then wrapping the rest around the right side?