Personalized Mitered Napkin Tutorial
Hello Everyone,
November is one our favorite months here at AGF because it’s the month of giving thanks and being grateful for friends and family. Of course we should celebrate this everyday out of the year, but November is the month most of us no matter where you live will travel home to be with family and friends. Dinner tables will be set and amazing amounts of food will be prepared!
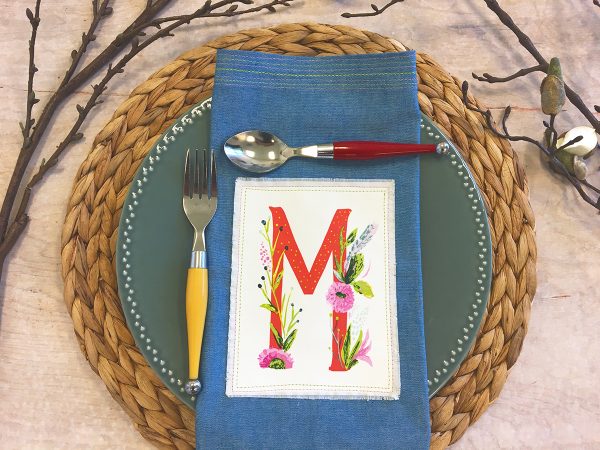
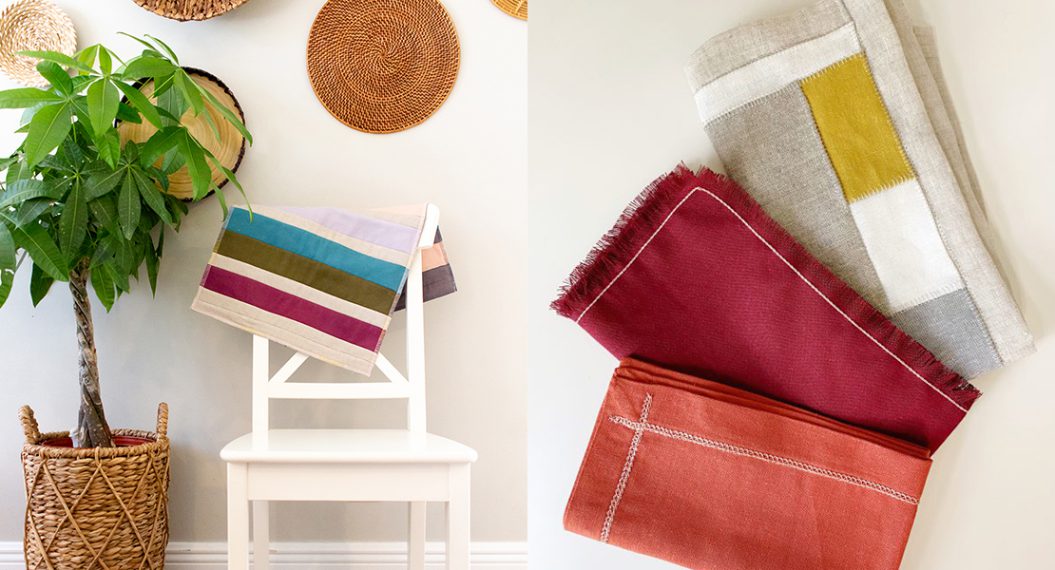
To make your dinner table extra special this year we want to share with you a quick and easy personalized napkin tutorial. To create this project we used the Joyeux Alphabet print from the Joie de Vivre by Bari J. Choose whatever letter you want and fussy cut! For the napkin we used our luxurious outland yarn dyed fabric called Endless Paradise. We have five different yarn dyed fabrics to choose from and it is perfect for napkin making. So grab a color and let’s get started! You can pick up these fabrics online or in your local store.
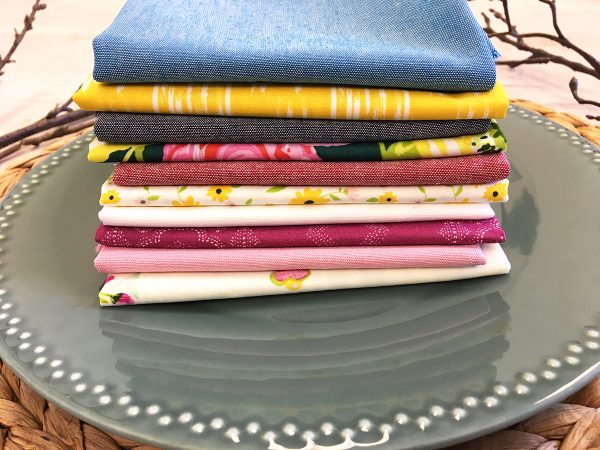
AGF loves the gift of giving and one thing we love giving away is fabrics! If you love our new yarn dyed fabrics and prints from Joie de Vivre (which I think goes together so perfectly), then get ready to enter this amazing FABRIC GIVEAWAY! With this bundle (pictured below) have fun creating this napkin tutorial or other gifts to give away this holiday season! See details at the bottom of this post, and good luck!
Finished Napkin – 15″ x 15″
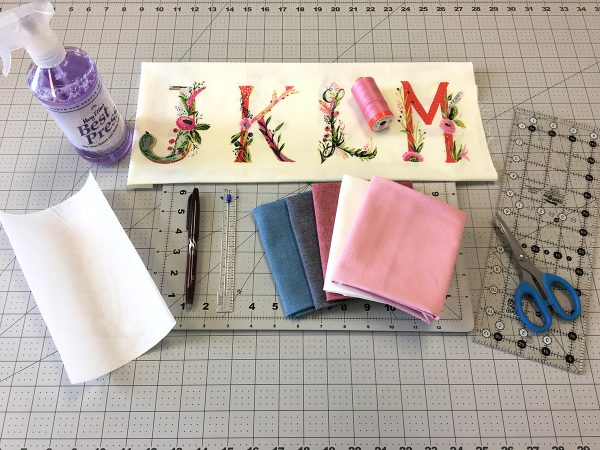
Materials to make a Personalized Napkin:
- Fabric A – JOI-79129-Joyeux Alphabet
- Fabric B – DEN-OYD-6000- Endless Paradise
- Fabric C – PE-433-Snow
Cutting Directions
One (1) Fussy Cut 5″ x 6 1/2″ rectangle from Fabric A
One (1) 17 1/2″ x 17 1/2″ square from Fabric B
One (1) 4 1/2″ x 6″ rectangle from Fabric C (lining)
Cut Steam-A-Seam for pieces from Fabric A and C 1/4″ smaller than the pieces.
Other Materials Used:
- Sewing machine (we use a BERNINA 570 QE)
- Reverse pattern foot #1/#1C/#1D
- Blindstitch foot #5
- Seam Gauge
- Spray Starch
- Fabric Marking Pen
- Clear Ruler
- Scissors
- Aurifil Threads Used:
- #2021- Natural White
- #2430- Antique Rose
- #1231-Spring Green
Step 1: Creating Mitered Corners
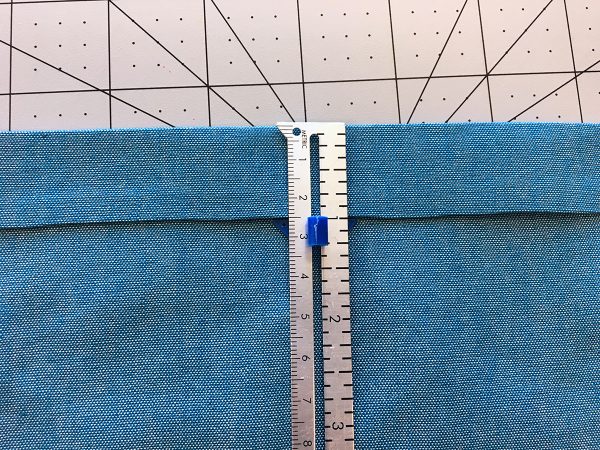
Press over 1/4″ all four sides of your 17 1/2″ square from Fabric B. Our yarn dyed fabrics are perfect for napkin making with its wonderful texture and open weave. Spray starch works great to keep fabric from distorting when pressing your raw edges in. Use generously! I also like to use a press cloth when ironing. Once you fold all edges in 1/4″, fold over and press at 1″ all four sides.
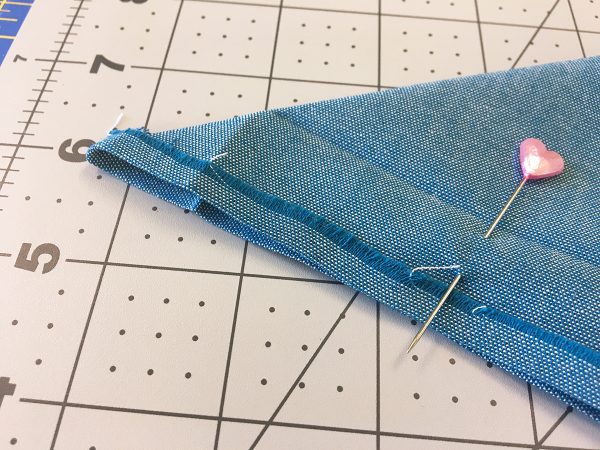
Now to create the mitred corners. Open up your piece but do not unfold your 1/4″ fold. Fold your piece in half diagonally.
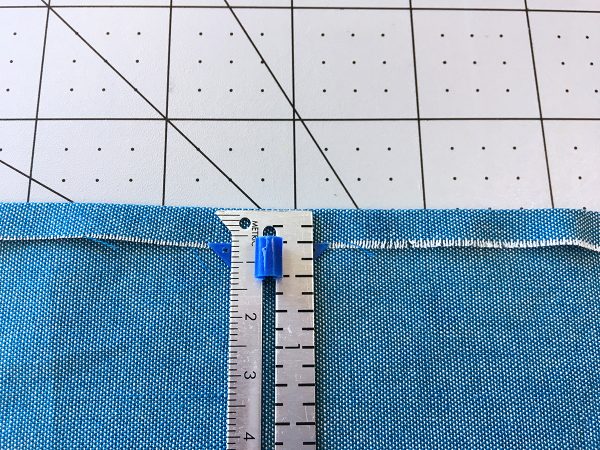
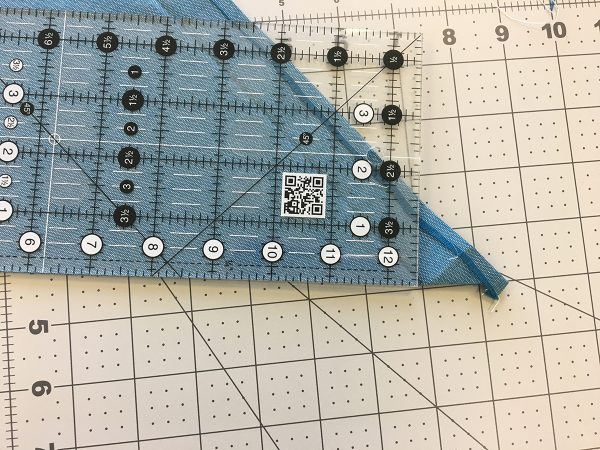
Match up the crease lines created from the second time you pressed the edges of your napkin. Pin in place, and place the edge of your ruler against the edge of the diagonal fold. Place the the corner of the ruler at the intersection of the crease lines.
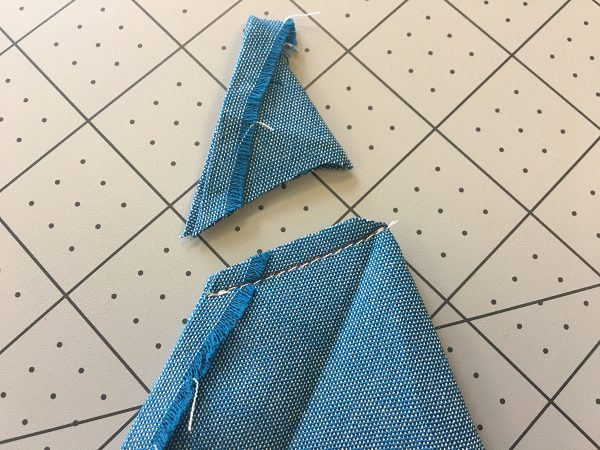
Draw a 45 degree diagonal line across the folded corner. This will be your sew line. Sew along the line, making sure to leave 1/4″ turned under as you sew. Trim your corner leaving a 1/4″ seam allowance.
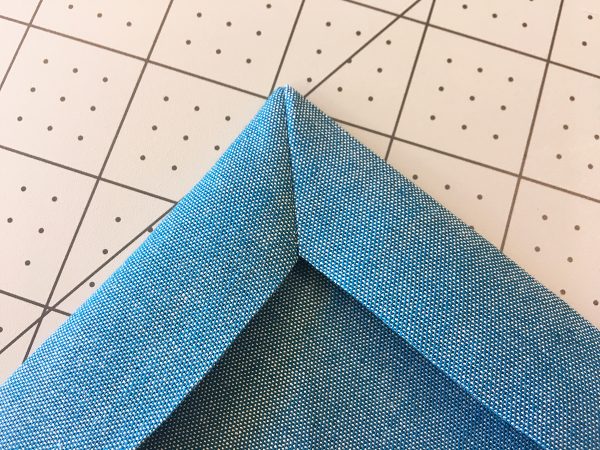
Turn your piece right side out and use a sharp object like a pencil or a point turner to make a nice sharp corner.
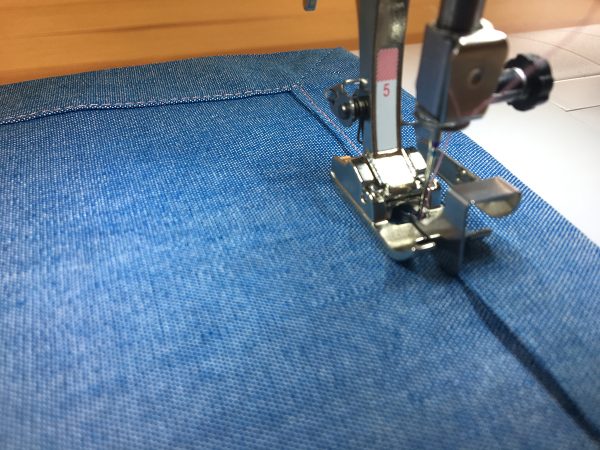
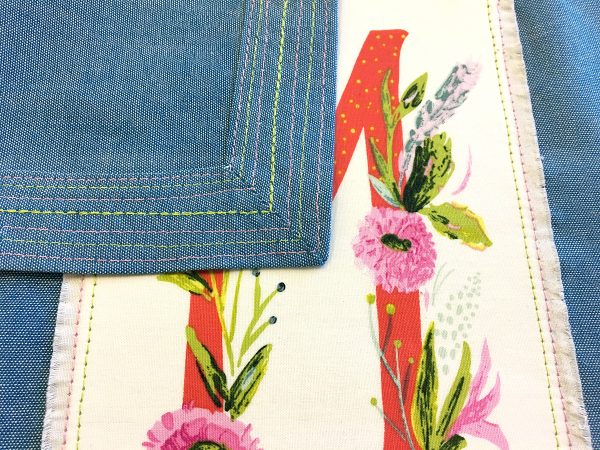
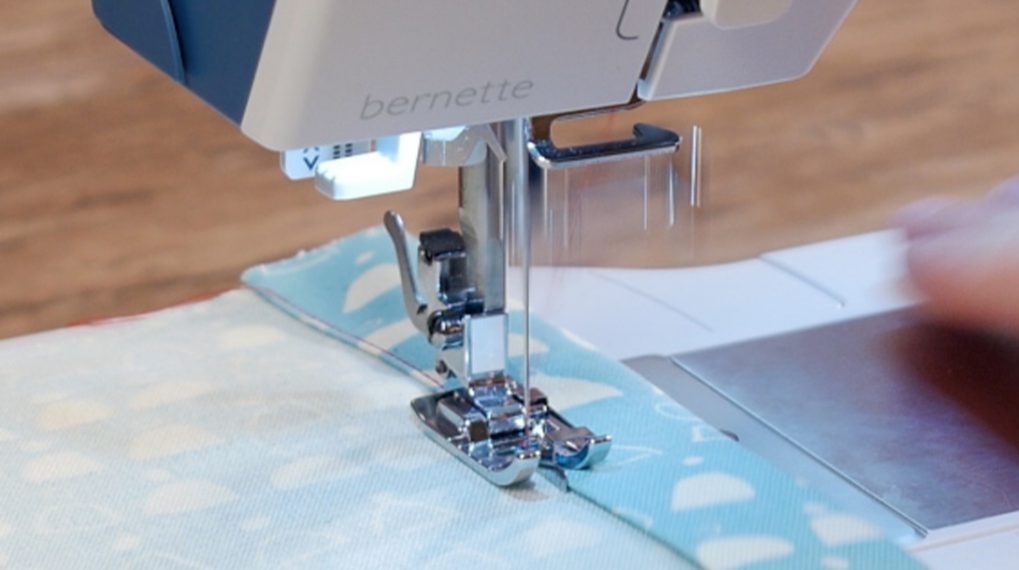
Open up the seam allowance. This will help your your corner to lay nice and flat. Repeat this step for your remaining corners. Then topstitch close to the edge. I like to use my Blindstitch foot #5 to get close to the edge and using the metal guide to keep my stitch nice and straight.
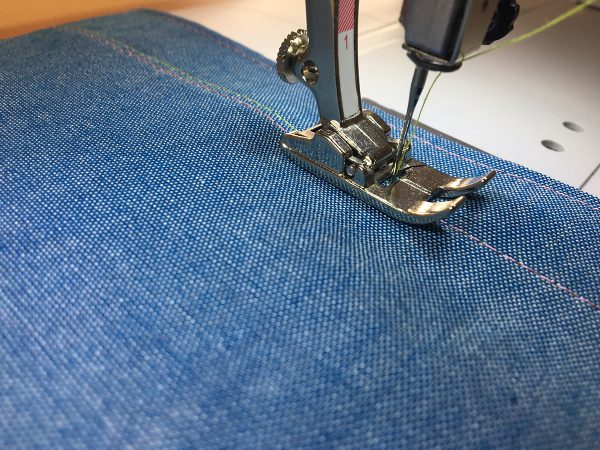
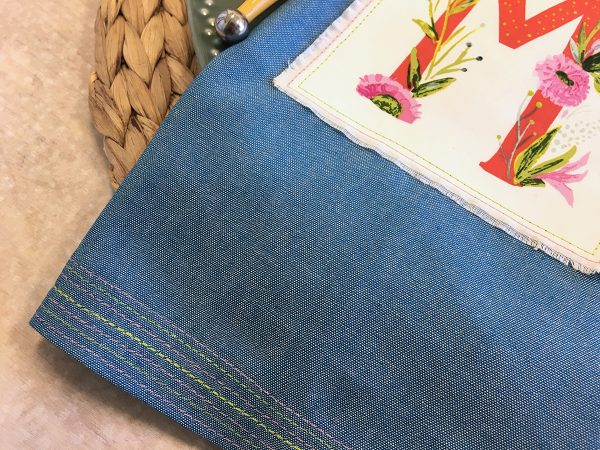
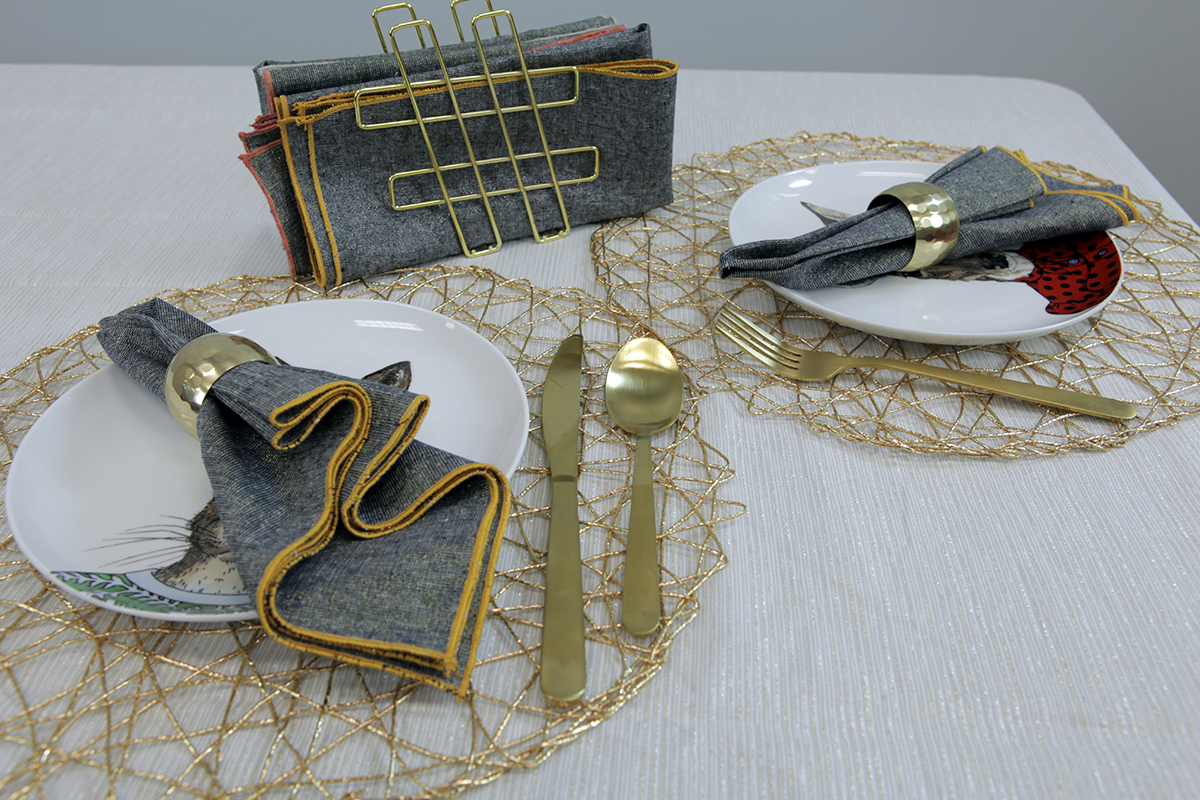
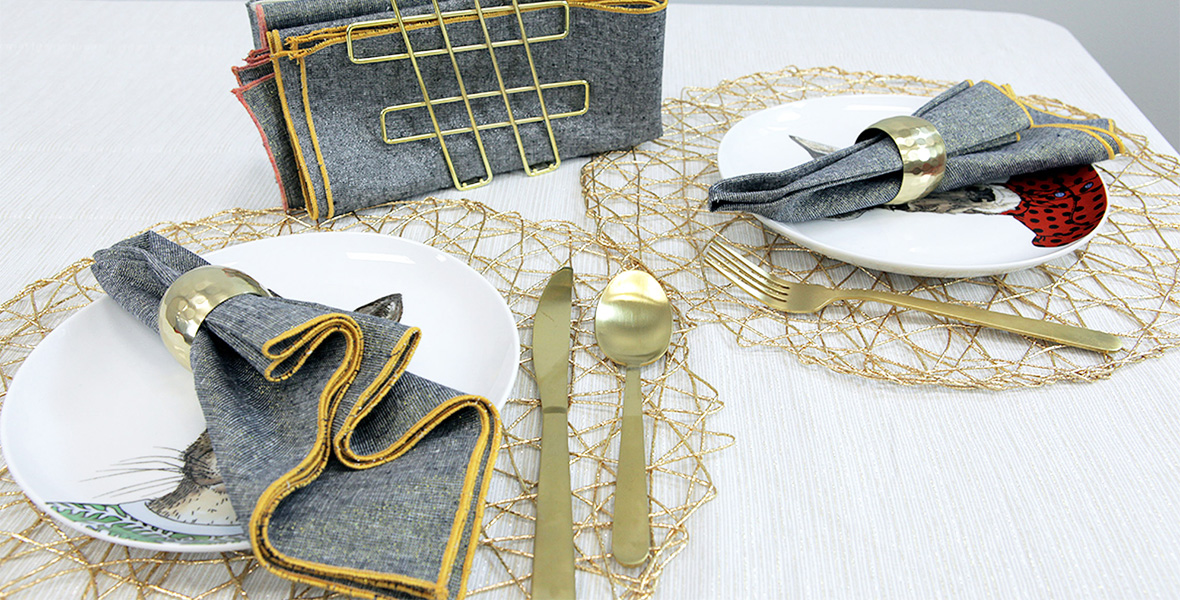
I topstitched my napkin on the outside edge as well and then alternated topstitching about 1/8″ with different color threads. The middle stitch I used a triple stitch to have it pop out more then then the rest of the stitches! Feel free to also use some of the wonderful decorative stitches Bernina has to offer. The possibilities are endless!
Step 2: Letter Applique
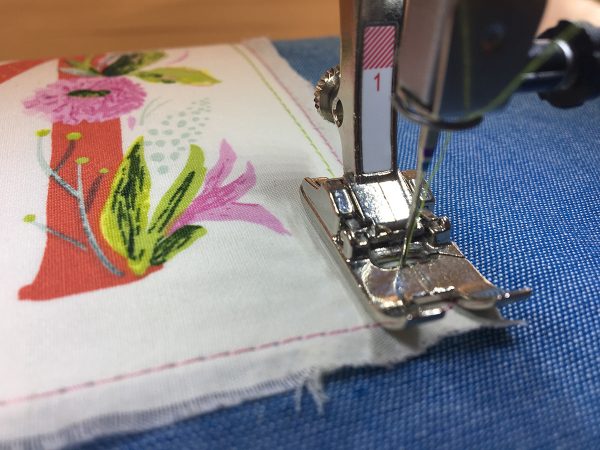
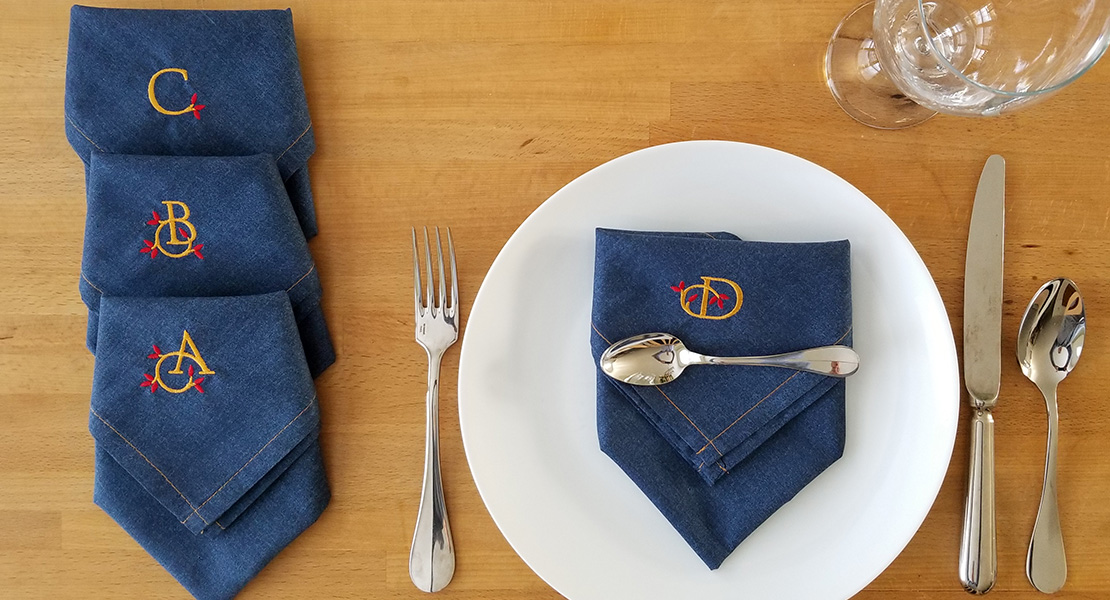
To create the letter applique in the center of your napkin, fuse Steam-A-Seam to your 4 1/2″ x 6″ rectangle from Fabric C, then fuse to the back of your 5″ x 6 1/2″ fussy cut letter. Next, fuse Steam-A-Seam to the back of your piece and place it on the center of your napkin, and press into place. Topstitch twice with two different color threads to make your letter pop off the napkin!
To fray the edges, use your finger nails and scratch the fabric back and forth until you can pull a few threads to unravel the fabric. The fraying detail adds a lovely detail that I think works beautifully with the organic look of the yarn dyed fabric.
And voila your napkin is complete! Set your table as desired. These personalized napkins will be sure to be a hit at your family and friend get togethers this holiday season.
Happy Sewing,
AGF
Enter now for a chance to WIN a bundle of AGF’s yarn dyed fabrics and prints from Joie de Vivre for your very own! One lucky WeAllSew fan will receive this fantastic fabric gift. All you have to do is post a comment below and answer the following question:
What will you sew to help decorate your table or home this Thanksgiving season?
Open for comment entries to the giveaway until Monday, November 21st at midnight CST. Giveaway is open to legal residents of the 50 United States and the District of Columbia who are 18 years of age or older. A winner will be chosen at random later next week, and announced right here!
Congratulations to our WeAllSew reader “beckyb1342”, the winner of the bundle of AGF’s yarn dyed fabrics. Enjoy!
What you might also like
129 comments on “Personalized Mitered Napkin Tutorial”
-
-
I like the method for mitering corners.
-
Mitered corners tutorial very clear. What I am making is a small table runner 12″x30″ that I am using thermolam as batting so it can be used as a big hot mat since Thanksgiving and Christmas dinners are buffet style. Might not get to these as gifts, but hope I get one made for me
-
-
Would make beautiful Thanksgiving napkins!
-
It will be the Sugarplum table runner in fall couloirs.
-
I want to try this method of mitering the corners.
-
I won’t be doing anything special for Thanksgiving. I do love the napkins. Maybe next year!
-
-
Making “Happy Thanksgiving” napkins using machine embroidery on my Bernina 780 <3.
-
Would love to make napkins for Thanksgiving and Christmas.
-
Table cloths
-
I’m making some placemats just so that I can have something special to add to my table. I have that alphabet fabric and was wondering how I could use it.
-
I just made my first quilted table runner! It was pretty exciting as I am just learning how to sew! I love these napkins though, and will have to add them to my projects list!
-
I am hoping to get placemats made. And these personalized napkins featured here are a great inspiration. Thanks for sharing .
-
Making a table runner as a gift to the hostess of our family Thanksgiving. I also have a new table topper for our immediate family Thanksgiving.
-
I will be making napkins. I enjoy all the tips
-
Placemats
-
I’ve made a table topper and runner. I will also be making napkins, so your post is very timely. Thank you for the tips and giveaway.
-
Love the monogram graphic and the mitered corner tutorial……well written and illustrated!
-
PS: Table runner…….
-
-
Love,love,love to quilt hoping to make placemats & coordinating napkins.
-
I have a table topper almost ready.
-
Beautiful fabric colors.
-
I’m on a bag kick, so is probably make some pouches.
-
-
A table runner!
-
I just made some placemats. These monogrammed and easy mitered napkins will complete my Thanksgiving project. Thank you for the tutorial.
-
Lovely alphabet. Thank you for the tutorial
-
I’m making placemats and a table running for our thanksgiving table. I’ll make some coordinating napkins after seeing this tutorial.
-
Love the monogram and miter technique. Thanksgiving out for the first time ever this year, so no sewing for me!
-
Making placemats with pockets for silverware with embroidered “Give Thanks”
-
Love this tutorial ~~ thank you! Have some placemats in process but I highly doubt they’ll be ready for Thanksgiving, lol. These fabrics are so gorgeous!!
-
Would love to make a table runner and possibly some napkins.
-
Not making much for me, but I’m working on a small quilt for a friend who has gone through breast cancer and now was diagnosed with lupus. As if she needed more to deal with! Hoping a small quilt to wrap up in makes her feel loved, because she dearly is.
-
Working on a quilted table runner for Thanksgiving….but wow these napkins are making me reconsider. Love the personalized monogram idea.
-
This year I’m working on a table runner for my mother in laws table. Always like to bring a nice host gift, and think it’s even better when you take the time to make it yourself. I love the idea of the napkins, THOSE LETTERS SWOON…. <3
-
I love those fabric choices for the napkins. The lettered fabric is gorgeous! If I have enough time I will make a table runner to match my placemats and centerpiece.
-
I’ve been leaning to sew on my grandmother’s Bernina 1630 that she handed down to me so I’m going to make some fall placemats with some leftover fabric!
-
A nice quilted table runner! With my Bernini 765 ?
-
I think the project is fantastic! I need to make a table runner and napkins.
-
This year it will be napkins. Thanks
-
Napkins – we always seem to need more cloth napkins in our house!
-
Great tutorial. Pictures make the miter look simple. Can’t wait to try it on napkins and pass it on to my Bernina club members!
-
I like the mitered corned and topstitched hem so much that I must make some napkins to co-ordinate with the Holiday placemats that I am making.
-
Great idea, love the personalized napkins
-
I love the monogram graphic fabric. The design is wonderful. I’m finishing up a table topper in fall colors for my Thanksgiving table.
-
I’ll try this
-
I want to make a Thanksgiving runner this year! Thanks!
[email protected] -
I am in need of napkins this year. Mine are pretty worn. what a great fabric selection!
-
Love the alphabet fabric to add interest to napkins. Great tutorial.
-
Love the mitered corners!
-
I am embroidering the stand alone lace pumpkins for my center piece
-
I confess. With Thanksgiving only a week away, I probably won’t get anything new sewn to decorate my table. But it will have a table runner that I made last year! Thanks for the beautiful napkin tutorial though. I could get those done in time for Christmas.
-
The napkins are beautiful. I would love to make something similar for the holidays.
-
I’d like to make placemats.
-
Not likely I will be able to finish ANYthing any time soon, but would LOVE to be able to make the napkins and other goodies with the methods taught in the tutorial! Those fabrics are lovely!!
-
Working on xmas table runner. Hopefully done by end of month. Fabric are great.
-
I’d like to make a turkey wall hanging.
-
I have just made a set of napkins to use with my Thanksgiving decor. I can hardly wait to use them, they turned out great!
-
I will be making some place mats and a Thanksgiving table runner. Would like to make some of these lovely napkins also.
-
I am planning on a holiday table runner and some napkins.
-
Nice napkins! Those would be great housewarming gift. I’m thinking a table runner would be the thing that I would make.
-
I love making place mats for seasonal decor for the table.
-
Can’t wait to try these. Tips really useful. Teaching a friend patchwork and sewing so will be a great help for that
-
Festive table runner, made with fall colors. Love sewing and love inspiring ideas from We All Sew. Thank you!
-
I am looking to do the pumpkin embroidery table runner. I have some wonderful ideas to incorporate with the napkins.
-
I’m planning to make some napkins this weekend to use for Thanksgiving and everyday. I have this alphabet fabric, and I love the idea of fussy cutting and making personalized gifts!
-
I’m making a Thanksgiving tablecloth, piecing the center with fabric strips. Nothing fancy, but festive!
-
Have made a beautiful pumpkin table runner-would love to make these napkins to match.
-
I am Making a table runner for Thanksgiving with my family and Christmas themed one for christmas. Thanks
For the Ideas -
Fabric B – DEN-OYD-6000- Endless Paradise, the fabric used for the body of the napkin, looks as if it is substantially the same on both sides. I think it would give texture and interest to have the hem on the front of th napkin
-
Great tutorial, I’m not making anything for Thanksgiving but I’m working on a Christmas table runner.
-
Just finishing a nice table runner. But I need new Thanksgiving napkins!
-
Love napkins – always make the table settings look “finished”
-
Planning to make a table runner for the holidays. Thanks for the giveaway!
-
I’ve made 2 table runners for my sister and now plan to make one for myself. I also have a tree skirt to finish … how many days until Christmas?!
-
These napkins…thanks for the tutorial !
-
This is such an easy way to do the corner! I am making a table runner this year.
-
I love cloth napkins and love this idea, it looks simple and elegant.
-
Love the tutorial, but what i really appreciate are the fabric styles you highlighted, as well as the creative application on a timeless and classic napkin! Sweet!
-
The napkins are a wonderful idea. I will most likely only have time for a table runner, but there are always napkins for Christmas.
-
Wow! Terrific tutorial and perfect for my holiday dinner next week! Guess I’ll be busy…
-
These are great! I really like all the extra stitching around the edge. I’m not planning any thanksgiving sewing, skipping right to christmas over here.
-
What a great project. Thanks for all your work.
-
Love this! I’ll probably make these along with some place mats with my new 765 I just received yesterday!
-
I have wanted to make napkins and this is a great pattern.
-
What a supremely helpful tutorial on mitered corners: thanks!
-
Now I feel bad I haven’t made anything. Maybe I still have time. Great tutorial, Thank-you.
-
Table runner with matching placemats
-
I will be making burnt orange placemats and also a colorful fall print tablecloth with different shades of gold, green, orange & brown.
-
Well, I wasn’t planning on doing any sewing for Thanksgiving, but now that I’ve seen those napkins…I’m thinking of maybe making a placemat version of them. So cute!
allisonpogany at gmail.com -
Pretty collection of fabrics. I’m working on quilting a queen size quilt. [email protected]
-
I love the method for mitering napkins. My own method is much more cumbersome and bulky. I have plans for holiday napkins, but will be using this method for constructing them rather than my old method. I think I will have to update the plans for the fabric as well!
-
This weekend, I will be sewing up a few small stuffed pumpkins to add to a Log Cabin table runner I made last month! With some sprigs of artificial berries and leaves, it will be so pretty on my dining room table!
-
I haven’t made anything for the Thanksgiving table, since it will be at my brother’s. But NOW I totally wish there was time to make these, they are beautiful!
-
I love the simplicity of this project!
-
IF I were to sew anything for my table this year, it would have been a lovely runner. But, I do NOT need one more decor thing, really. What the kids do need is doll clothes. So G-ma has been busy with those right now. I don’t even have to host Thanksgiving anymore! My house is far too small for the big group now. We go to one of the kid’s who have HUGE homes now. So we fit!
-
I had made a small set of napkins … but no mitered corners! Back to the sewing machine for me now that I have the info that will make those corners possible.
-
I am going to make some Thanksgiving napkins to decorate my table, thanks for the awesome tutorial.
-
I won’t be sewing anything for Thanksgiving. A couple of years ago I passed the baton to my son and daughter-in-law. The fabric is beautiful and I would love to win it. Thank you.
-
The napkins look like such fun! I would love to make them and a table runner as well.
-
I have a tablerunner with pumpkins for my table
-
I absolutely LOVE these letters! I need to find them!!!
-
The colors and design on the letters is fantastic. The topstitching on the mitered napkins just sets them off. Thanks for the opportunity
-
We will not be eating Thanksgiving at home this year, so I am not doing much decorating. However, I love making cloth napkins, and this fabric would go along way to make napkins for holiday gifts.
-
Love this tutorial!! Great pictures and well written instructions make all of the difference. Thank you for the chance to win the beautiful fun fabric.
-
I just made a reversible apron and want to put together some placemats, mug rugs and napkins. Your napkins are beautiful; thank you for the instructions.
-
I would make a table runner in browns and oranges.
-
Thanks for the tutorial! So much easier & neater than what I’ve done. And your fabrics….are WONDERFUL !! Just about to finish a Christmas/winter table runner of snowmen.
-
The napkins would be fun to make with the fabric.
-
As usual I’m behind in my sewing. I want to make bunting, but I need more fabric. Lol. Fingers crossed I win
-
Love the mitered corner instructions!
-
I still have time to make a 10 minute runner, so that will be it.
Susan in CT -
Love the idea and mitered corners! I’m working on a large Christmas wall hanging with lots of applique I started last year. Hope to get it finished this week!
-
I’m hoping to do a table runner where we can write what we are thankful for each year, and then I can stitch on top of the letters.
-
I have some leftover dresdens in fall solids. Seems like a natural for a turkey decoration.
-
I would love to make a Thanksgiving table runner. Love the mitered corners, hadn’t thought of that before.Thank you.
-
Would love to make these and that gorgeous table runner!
-
I am making linen guest towels and I am using my B500 to embroidery a turkey on one and a pheasant on the other. I am also thinking about making personalized napkins with a monogram or other design instead of using place cards for the Thanksgiving table.
-
I have napkins cut out and heavily starch to do a hem stitch. I haven’t completed them because I wanted to do a mitered corner and was unsure how to proceed until now!!! thanks for this tutorial.
-
Love all your designs and the napkins are a great idea this time of year for sure! Hope you pick me for a winner. Thanks
-
Love the mitered corners! I embroider initials & give as wedding gifts!
-
I love the mitered corners, very professional looking
-
I will make napkins , this tutorial has motivated me.
I really like the way the corners are mitered in the instructions. -
Just learning to use my machine. Will make them this winter for summer birthday gifts so they are ready for next year’s Thanksgiving.
-
A wreath to celebrate Fall, Thanksgiving and my Birthday 😀
-
I will be making name tags and napkins for our Holiday Dinner. I love setting a beautiful table with china, silver and crystal. Then holiday appropriate table linens.
-
I like having napkins for every holiday. Some pretty seasonal fabric plus your great mitering instructions. I’m ready to sew.
-
The fabric is lovely and I would make beautiful placemats. Thanks for the awesome tutorial on mitered corners and for the chance to win some beautiful fabric.
-
Good tutorial for mitered corners. I especially liked the idea of sewing multiple lines of different colored thread around the hem. Nice addition to a plain fabric. Thanks.
-
Your tutorial on mitering corners on napkins was great. Hope to make napkins for the holiday.
Leave a Reply
You must be logged in to post a comment.




love the initials