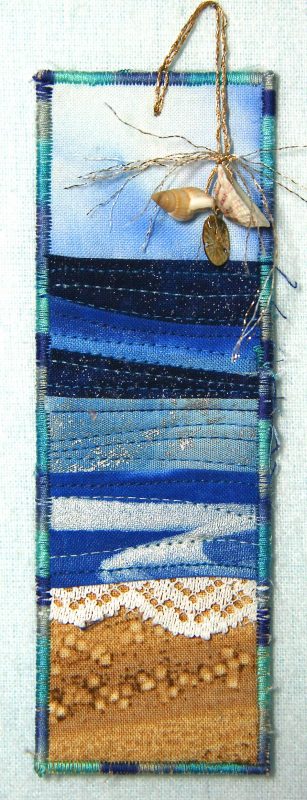
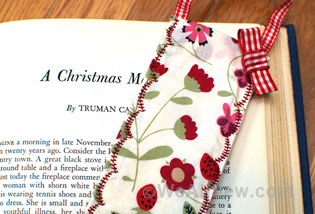
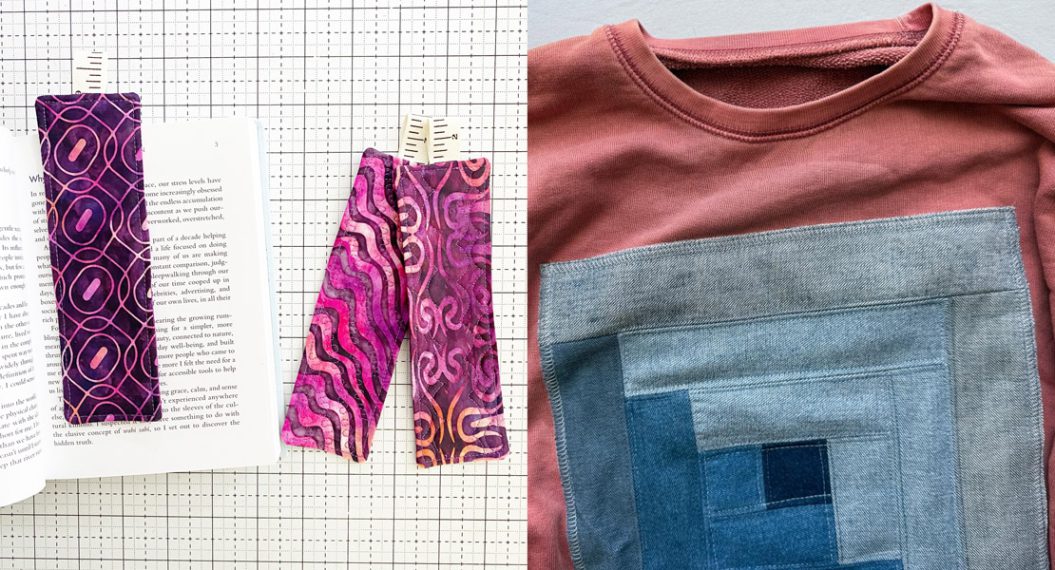
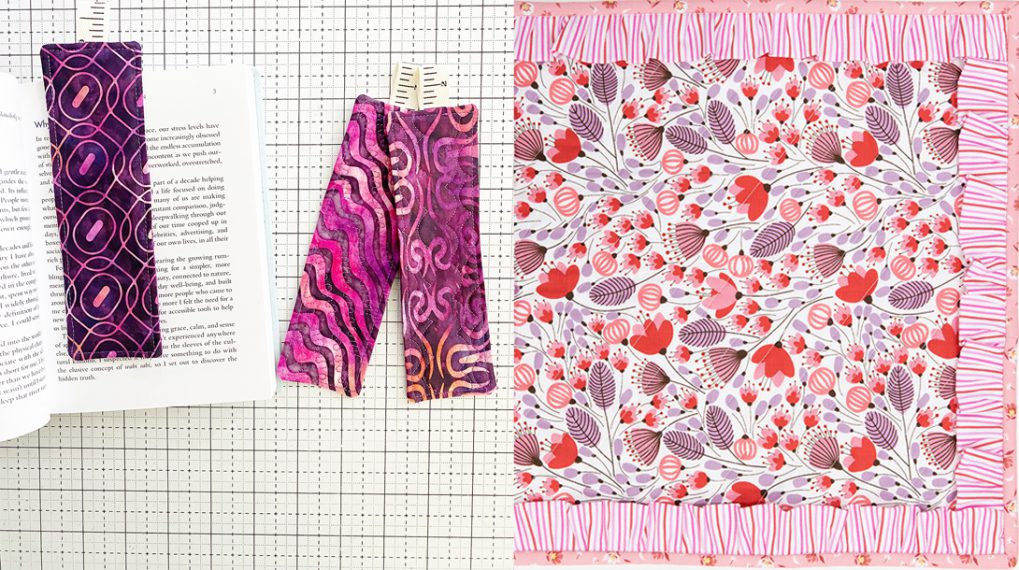
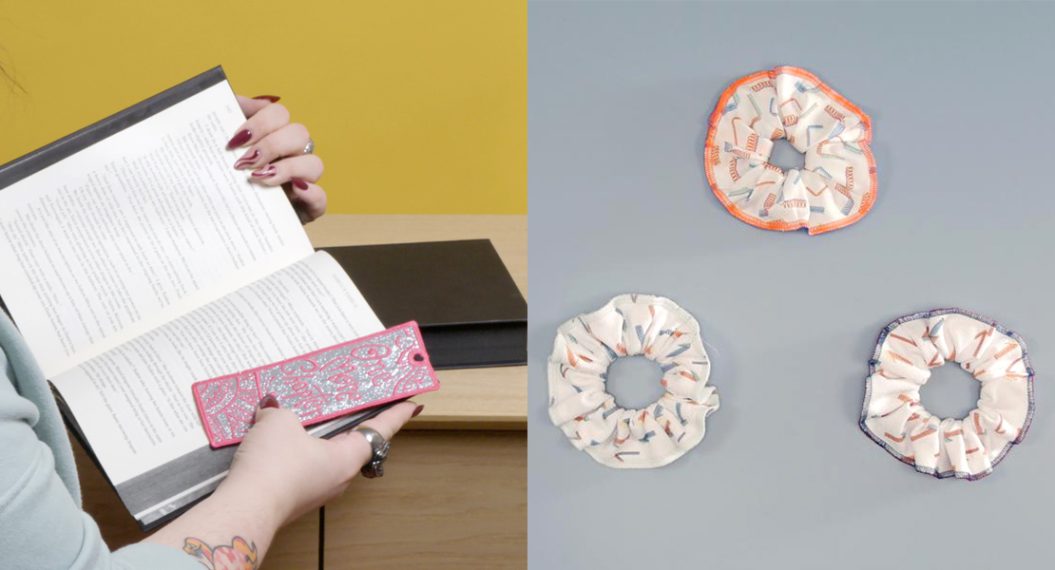
Seascape and Shells Bookmark Tutorial
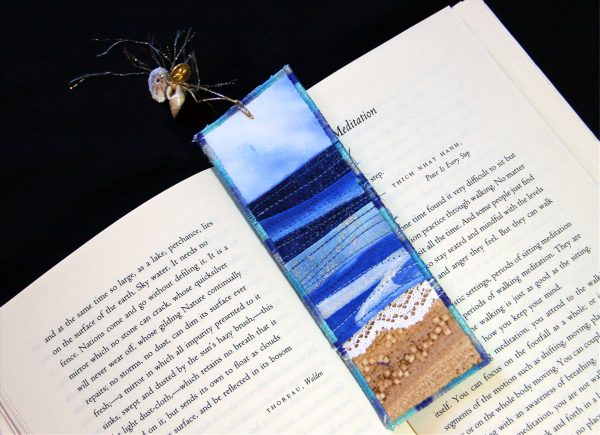
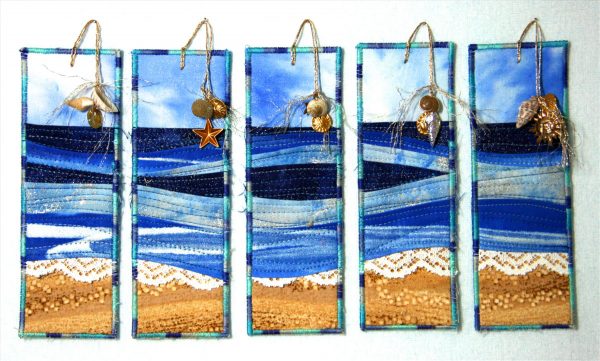
Do you still enjoy reading a “real” book with paper pages you can touch? I do! Create this cute set of 5 one-of-a-kind bookmarks. Keep one for yourself and give the rest away inside a favorite book. The perfect thoughtful gift. Project by BERNINA Ambassador Karen Eckmeier.
Once upon a time… I was teaching an Accidental Landscape workshop and was demonstrating trimming of the little scenes. Sometimes I need to trim as much as 1½”- 2” from the left and right sides to square up a scene. I usually discard these small pieces, however, one of my students suggested that I use them as a bookmark. What a genius idea! With her permission, I touched upon the concept in my Accidental Landscapes book. Now it’s time to show you how it’s done using my “accidental layered topstitching” technique.
Materials to make Seascape and Shells Bookmarks
- Double-sided Fusible (heavyweight) – ¼ yard or piece cut to 6″ x 10″ (brand names include Timtex, Pellon and HTCW, Inc.)
- Sky: 1/8 yard blue and white
- Water: 1/8 yard each of 3 blues; dark, medium and light (One or both of the medium and light blues should be a combination of blue and white)
- Sand: 1/8 yard tan
- Backing: ¼ yard beach or water theme
- White Lace: 1″ wide unruffled with scalloped edge—10″ length
- Seashells/Charms/Beads: an assortment of shells with pre-drilled holes
- Metallic Thread or thin yarn
- Embroidery Needle (The needle must have a sharp point to pierce the completed bookmark. The eye needs to be large enough to thread the thick thread or yarn, yet small enough to slide through the tiny holes of the shells, charms or beads.)
- Non-Stick Pressing Sheet
- Sewing Machine (I am using the BERNINA 770 QE) with BERNINA Reverse pattern foot #1C and Patchwork foot #97D
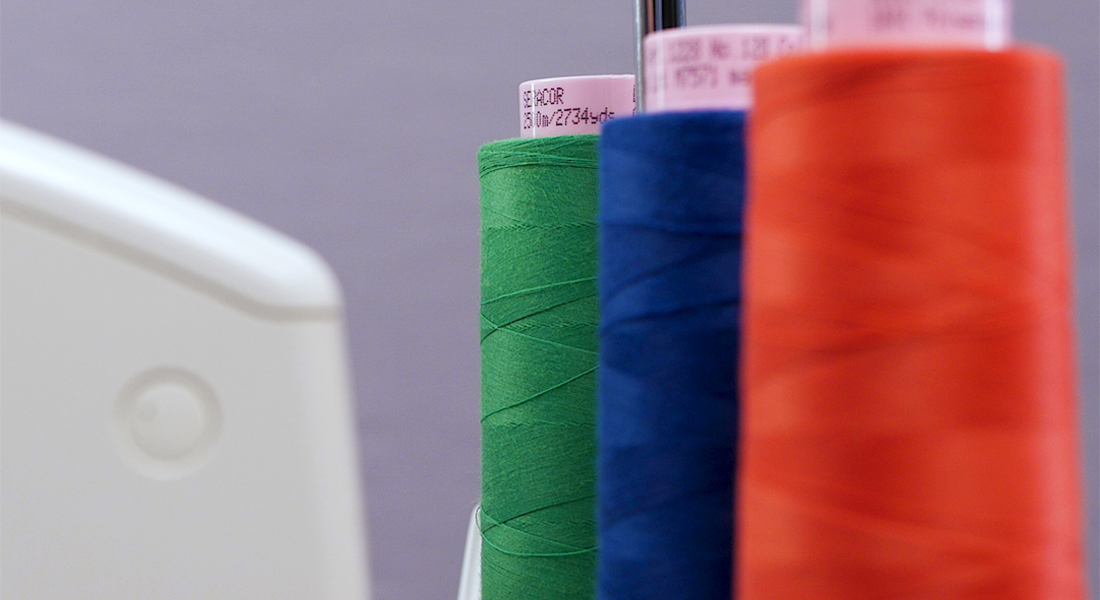
- Variegated blue thread for topstitching, quilting and satin stitch on edge
- Iron
- Rotary Cutter, cutting mat and ruler
Instructions for making the Seascape and Shells Bookmarks
Cutting Fabrics
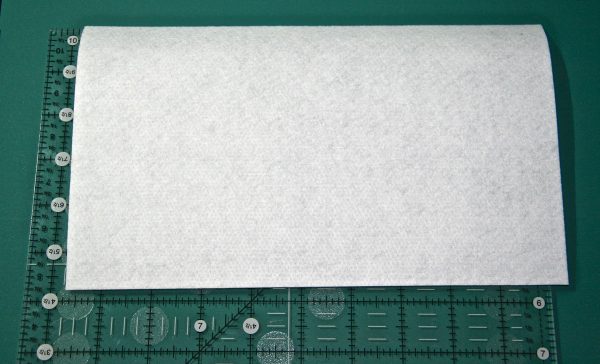
1. Cut the double-sided fusible to 6″ x 10″ and set aside. Then cut the fabrics and lace to the following sizes.
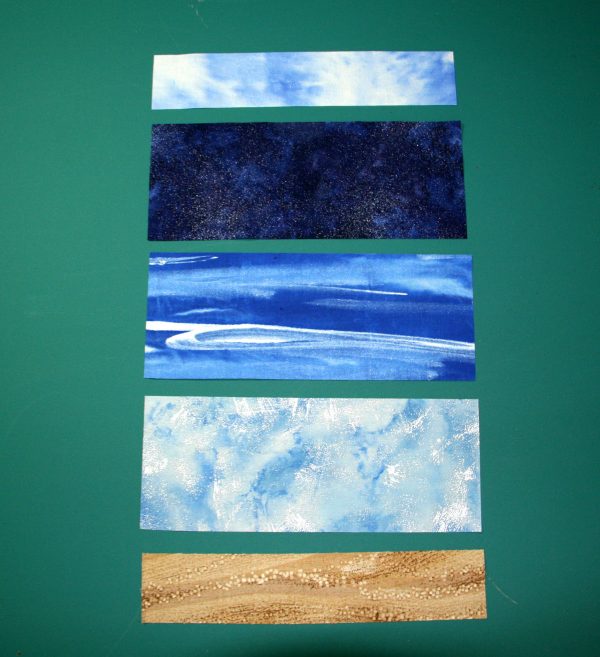
Sky: One 2″ x 10″ blue & white cloud fabric
Water: One 4″ x 10″ dark blue
Water: One 4″ x 10″ medium blue and white
Water: One 4″ x 10″ light blue and white
Sand: One 2″ x 10″ tan
Wave: 10” of white lace
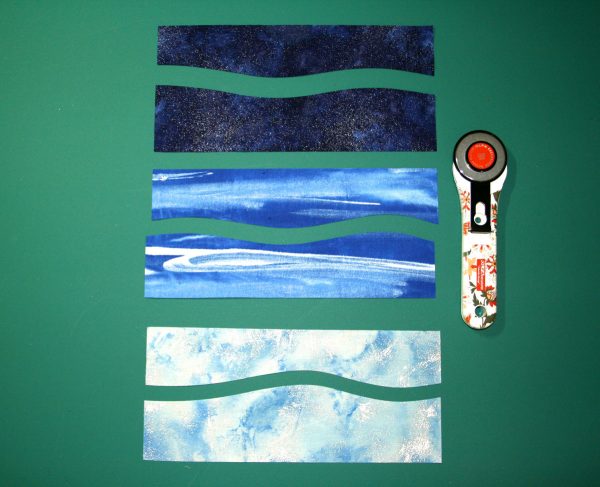
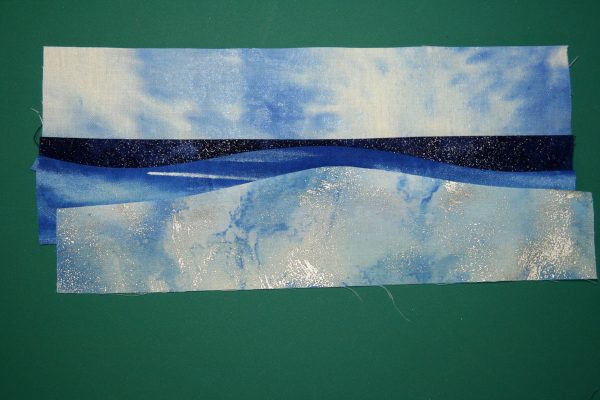
2. Use a rotary cutter to cut a gentle curve across the center (running along the 10″ width) of each of the blue water pieces. Thus creating two 2″ x 10″ strips from each of the water fabrics. The type of curve is up to you, just be sure that the curve is not too wavy, very gentle is the key. This is the “accidental” part of the instructions. Everyone will cut a different curve, and they will all be perfect for the seascape.
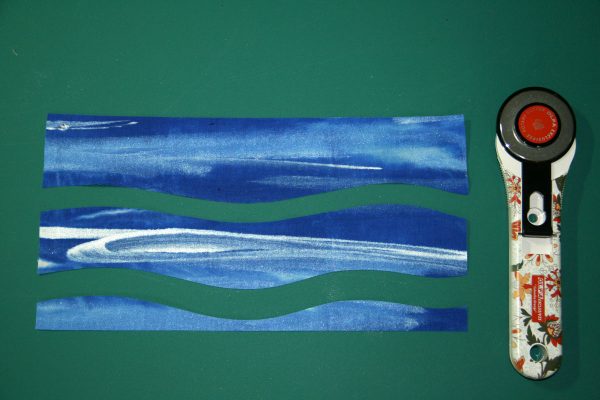
3. Select either the medium blue/white or the light blue/white to cut a second curve on the bottom edge of ONE of the strips. This will be the only strip in the set to have curves on both sides. It will be the “transition piece” to connect the lace, sand and water layers. All of the other strips will have one straight side and one curved side.
Discard the skinny piece (the bottom strip in the photo).
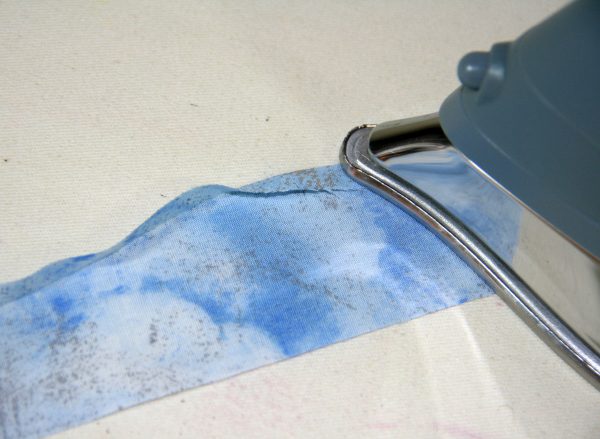
4. Press the curved edges only approximately ¼” toward the back side of the fabric on all of the strips. The “transition” strip, the one with two curved edges will be pressed on both edges. ONE of the dark blue strips will be the only exception; press the straight edge instead of the curved edge. This straight pressed edge will become the horizon line.
Layering Instructions

1. Place the sky strip on a flat surface, such as a cutting mat. Next place the dark blue water strip with the straight pressed edge on top of the sky, so that it overlaps the bottom raw edge of the sky by ¼”.
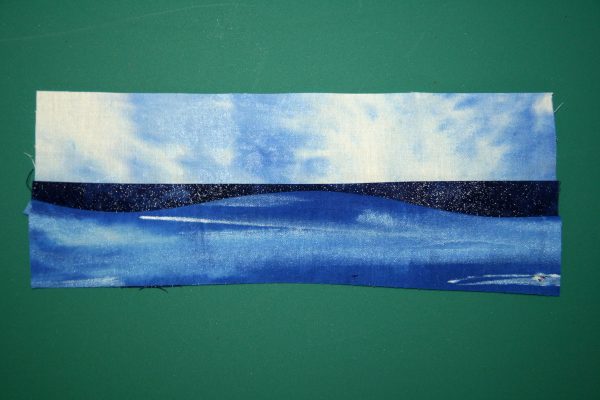
2. Next place a medium blue strip on top of the dark blue.
3. A light blue strip comes next. Notice that this strip is not aligned with the left and right edges. This can only be done as long as the next strip covers the raw edge on the left.

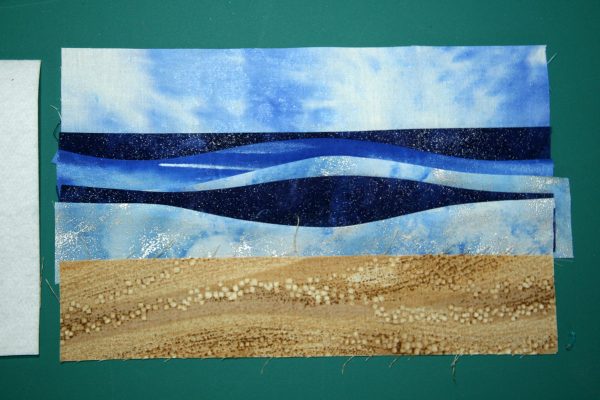
4. Continue layering the rest of the strips, EXCEPT for the “transition strip” (the one that has two sides with pressed curves) and end with the sand strip. At this point place the 6″ x 10″ double-sided fusible next to the seascape to make sure the length measures 6″. Adjust the layers as needed.
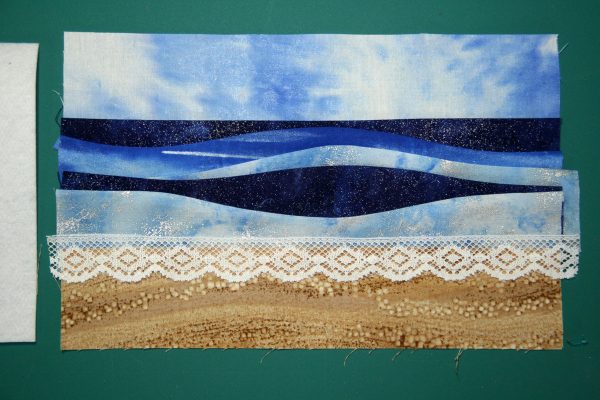
5. Place the white lace on the bottom edge of the last water strip and the top edge of the sand strip.
6. Now it’s time for the “transition strip”. Place it in the middle of the lace and last water strip. Adjust the placement of these 3 strips so that all raw edges are hidden.
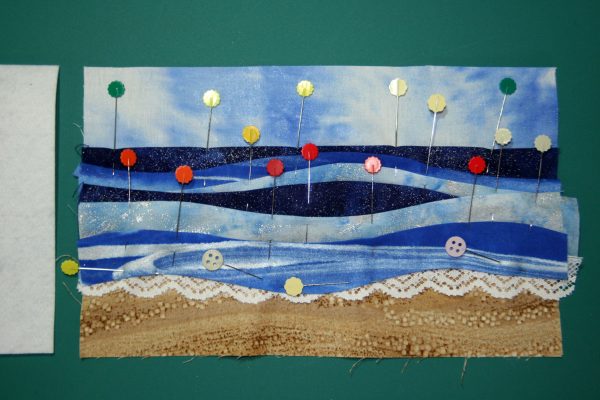
7. Make sure the piece measures 6″ x 10″. Pin in place as shown in the photo.
Topstitch Instructions
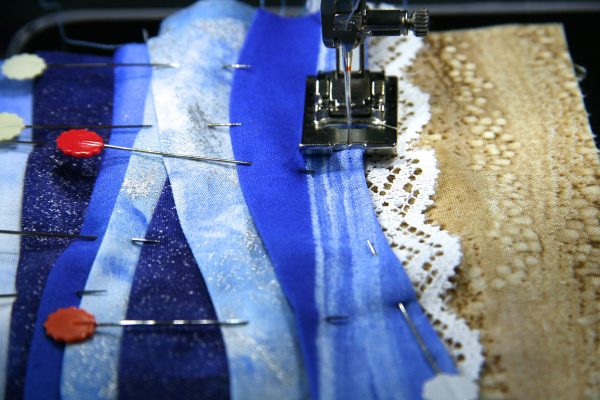
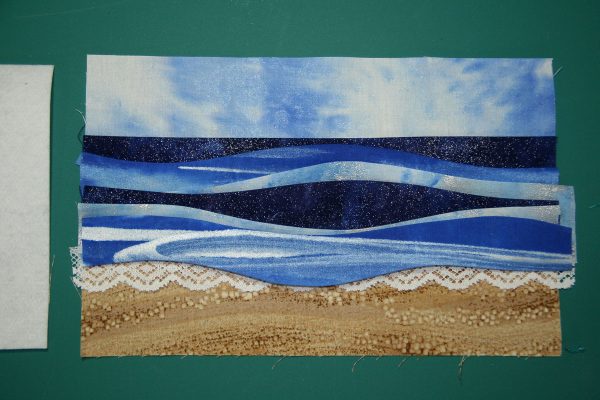
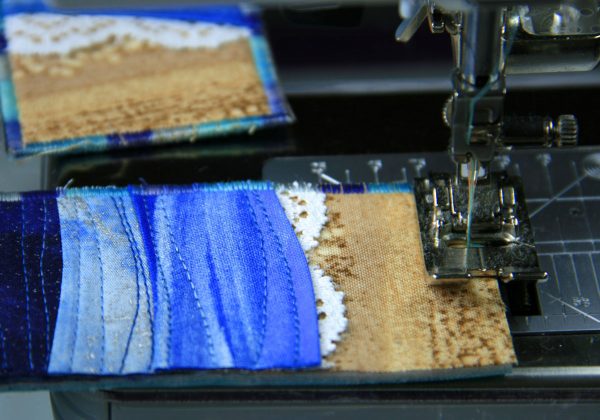
This is where we get to add a little dimension to our seascape. Topstitch 1/8″ from the pressed edge. Using the Reverse pattern foot #1/#1C on my BERNINA 770 QE, I align the inside “toe” of the presser foot with the outside pressed edge of the fabric. Begin topstitching with a variegated blue thread at the bottom wave.
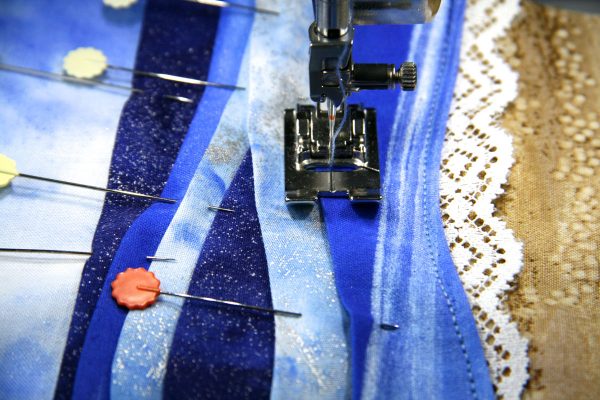
Continue topstitching 1/8″ from all of the pressed edges, removing pins as you come to them.
Fusing Instructions
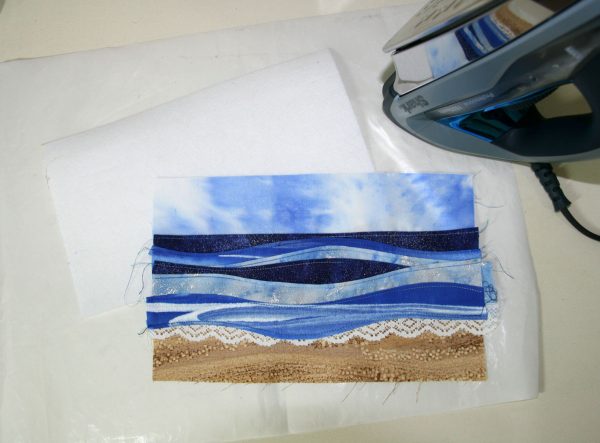
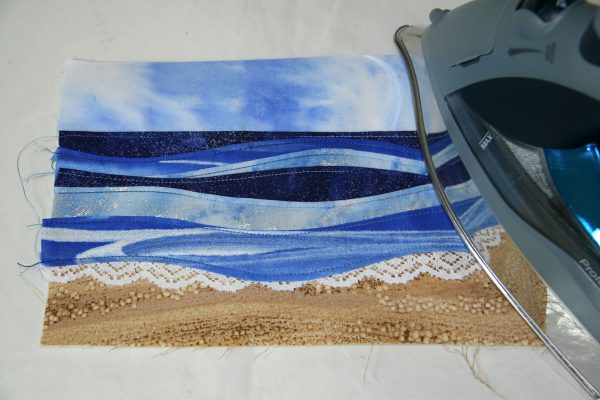
Align the topstitched seascape on top of the double-sided fusible. Be sure to have a non-stick pressing sheet underneath before you use the iron to fuse the seascape to the fusible.
Quilting Instructions
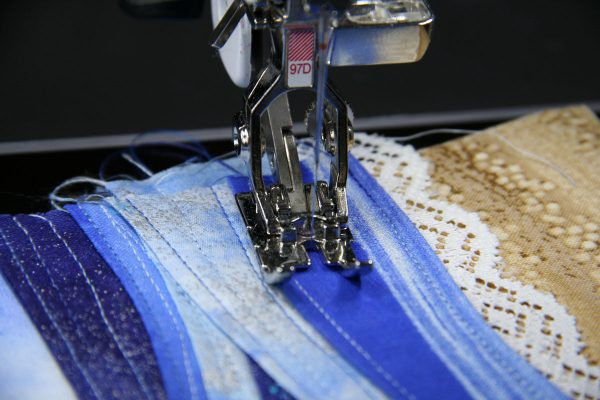
Use the Patchwork foot #97D with the Dual Feed feature to quilt a few lines in each of the sections. The variegated blue thread that we used to topstitch is perfect for the quilting lines too. The photo shows the Patchwork foot #97D with the Dual Feed engaged on the 770 QE. The quilting step is optional, but it really adds yet another layer of textural interest.
Finishing the Bookmarks
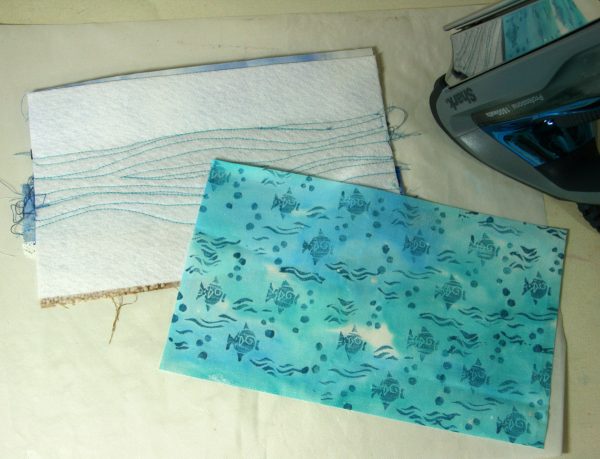
1. Turn the quilted seascape/fusible over and fuse the 6″ x 10″ backing fabric to the reverse side of the quilted seascape.
Align the backing fabric with the reverse side of the seascape. Use an iron to fuse the two together. (Note: the backing fabric is one of my hand-painted fabrics. I used one of my hand carved stamps to create the fish, bubbles and wave pattern).
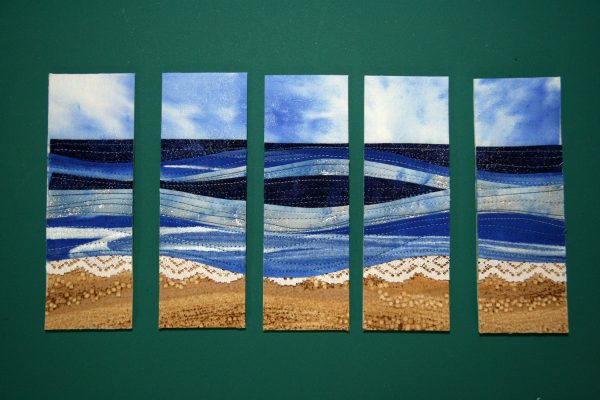
2. Square and trim the edges even. Cut into five 2″ strips. If you are short for some reason, just make your bookmark strips a little narrower and cut them to 1¾”.
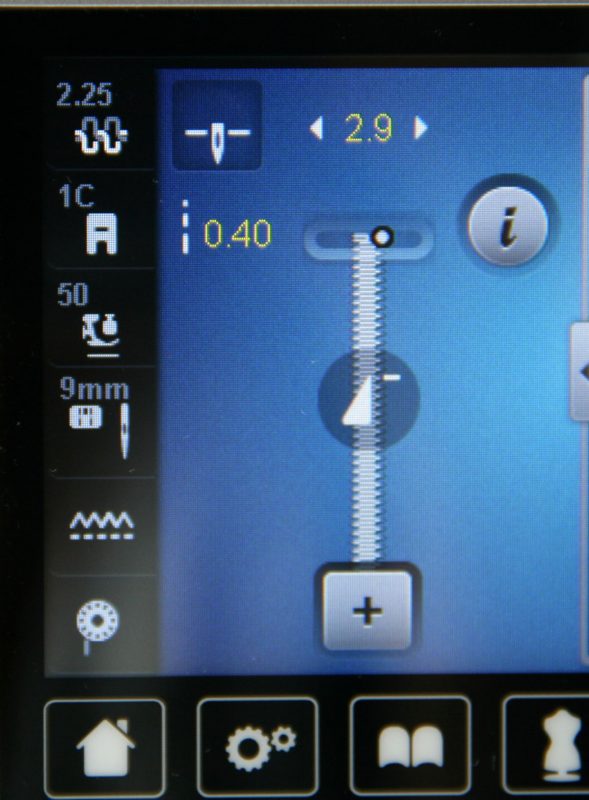
3. Use the variegated blue thread to do a satin stitch or zigzag stitch around the edges of each of the bookmarks. This is the setting I used on my B770 QE.
But please feel free to select the width and density you prefer.
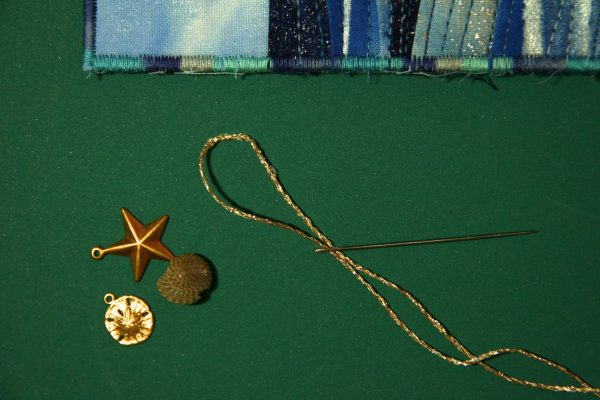
4. Thread a needle with a 12″ length of thread. Double it and thread it through the needle.
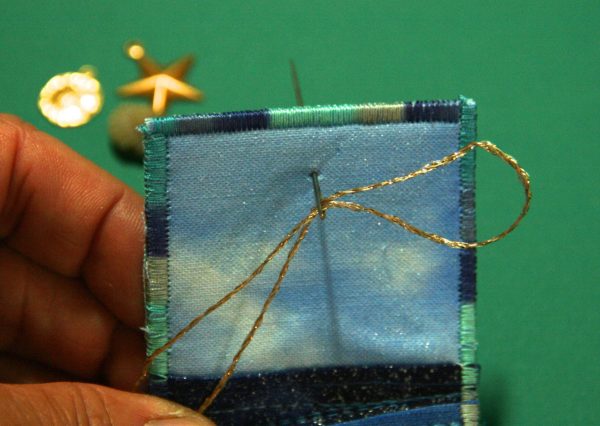
5. Insert the needle about 3/8″ down from the front top edge of the bookmark. Pull the needle through, but hold on to the loop and keep it on the front side. Pull the strands to the back side.
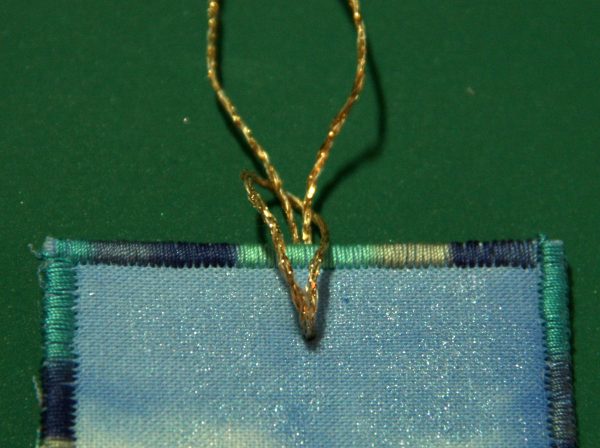
6. Pull threads from back forward and into the front loop and pull into position.
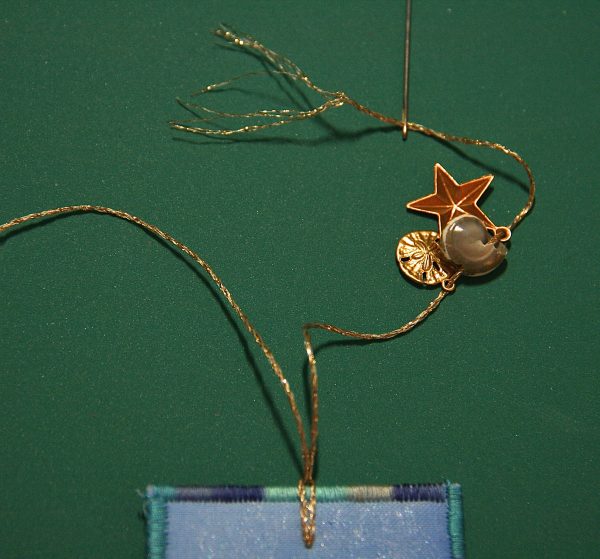
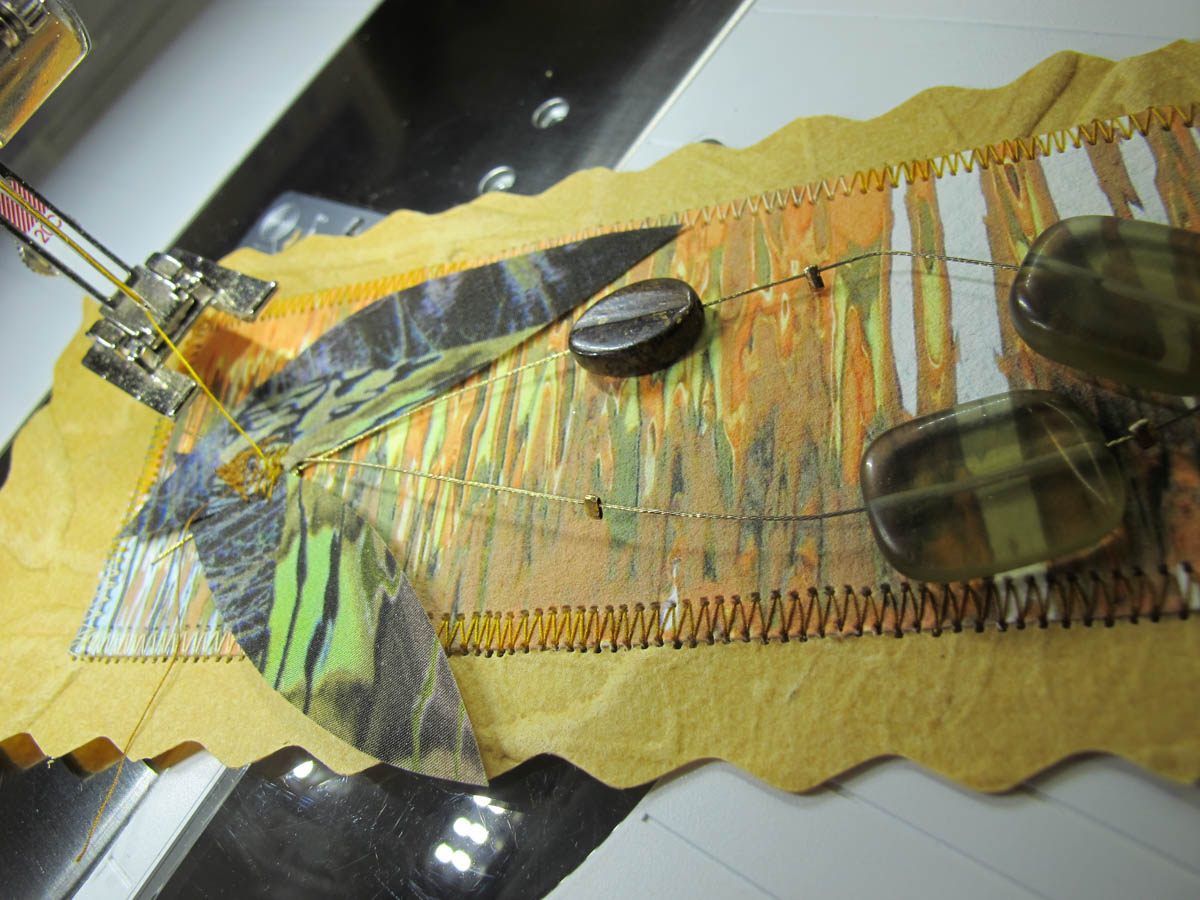
7. Use the needle to thread a grouping of seashells/charms about 2½” from the top of the bookmark. Tie a knot with a single strand of thread around the shell/charm grouping to hold them in place. Leave enough thread at the end to tie the two strands together in the next step.
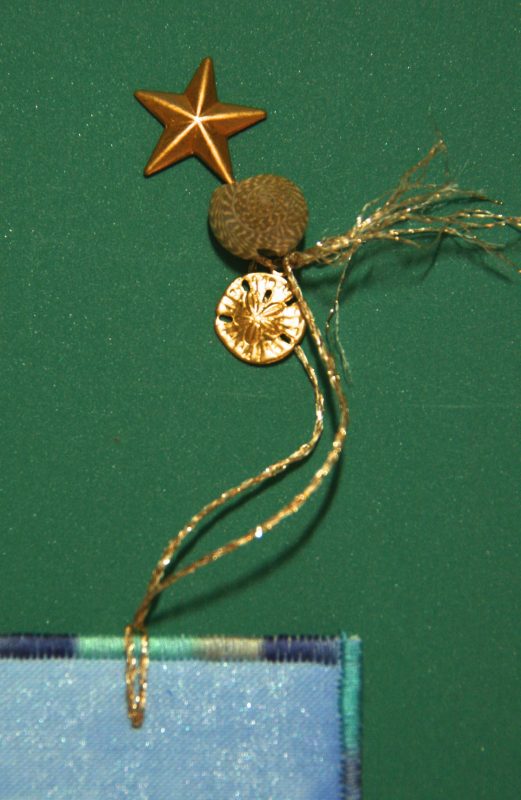
8. Tie the two strands together with a few knots, trim and fray the ends.
Repeat this procedure with each of the five bookmarks. Remember to write a special message on the back and include your name and date so your friends and family can cherish this special keepsake.


What you might also like

One comment on “Seascape and Shells Bookmark Tutorial”
Leave a Reply
You must be logged in to post a comment.

These book marks are lovely. I want to make them now!!