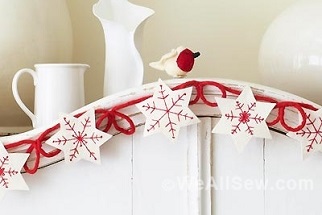
Serger Holiday Trees
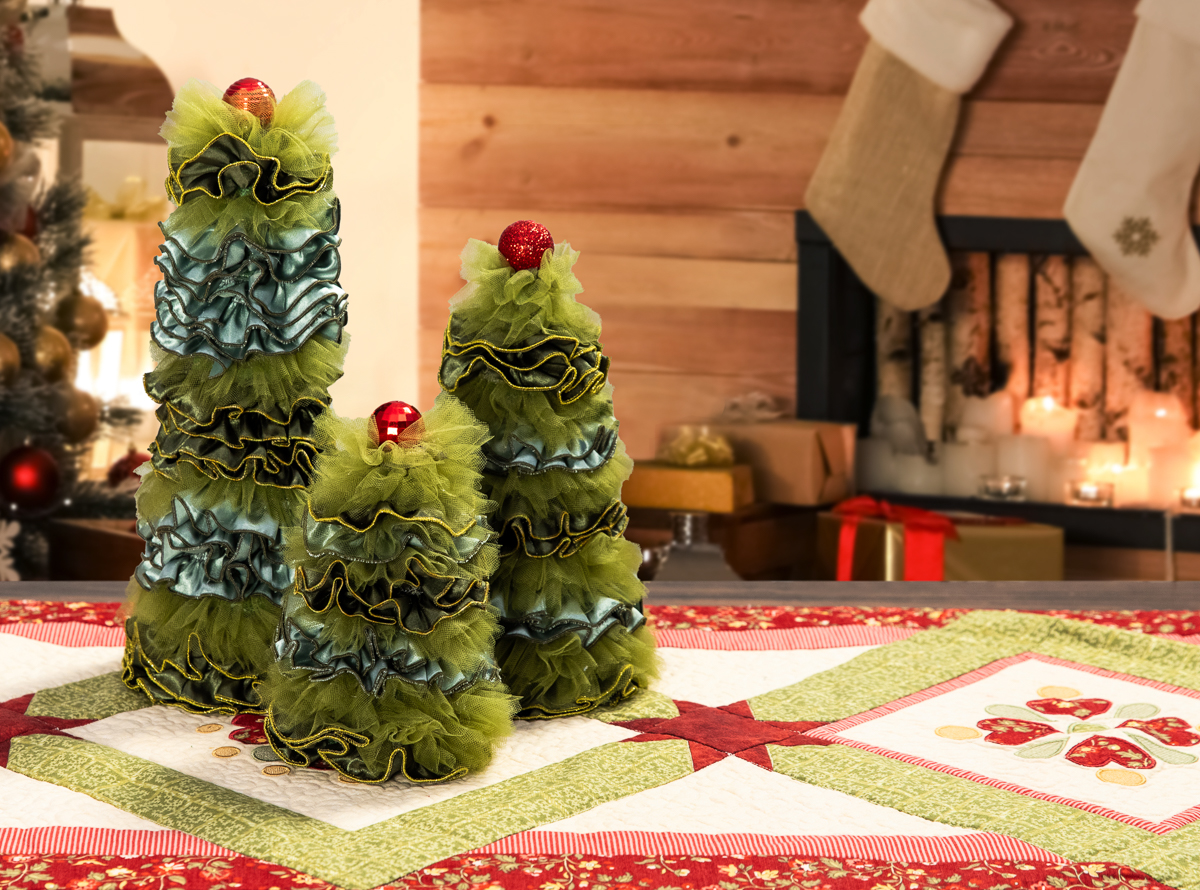
Freshen up your holiday decorating with these fabric trees. The serger makes quick work of adding decorative edging along fabric strips that are then gathered into soft ruffles. A Styrofoam cone and some hot glue make this a fun project to complete in an afternoon or evening … just in time for entertaining. Let’s get started!
Materials for Making the Serger Holiday Trees
- 4-thread serger (I used the BERNINA L 460 Overlocker)
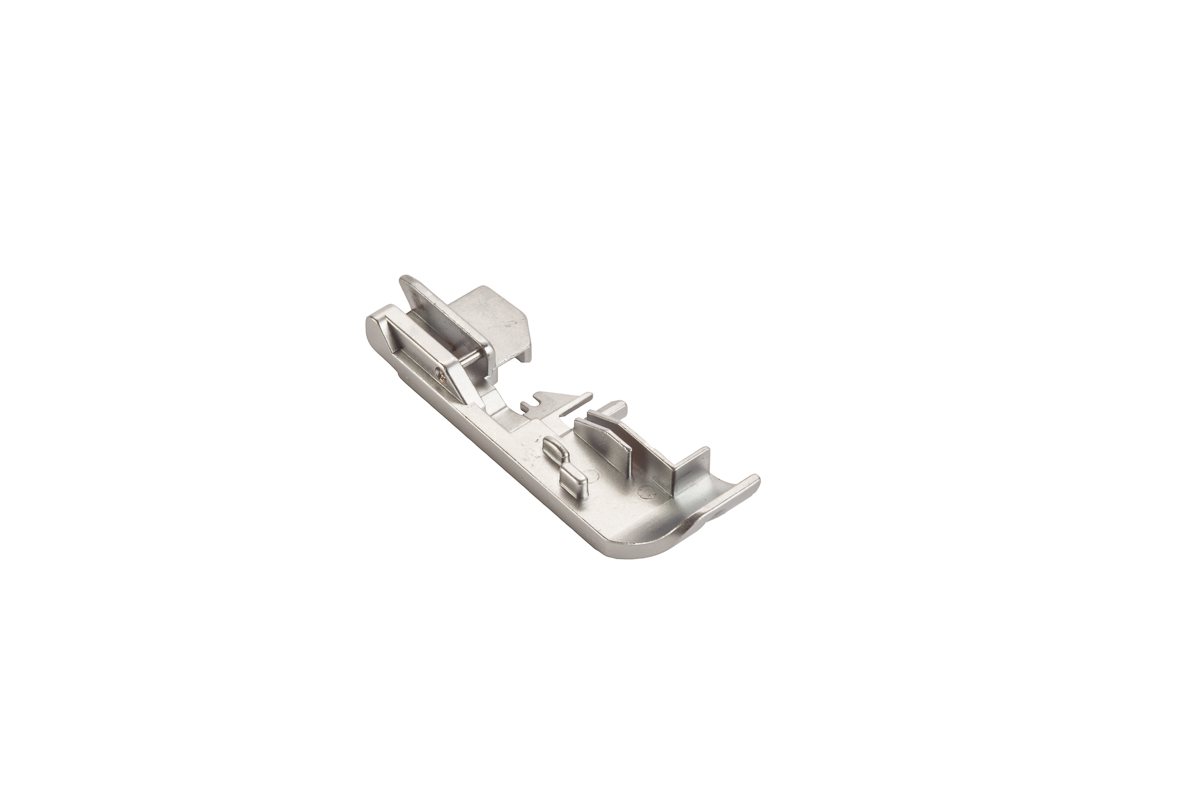
- Standard Overlock Foot
- Cording Foot
- Multi-purpose Foot (optional, for adding beads)
- Fabric:
- 1/4-yard cuts of green fabric in two shades, such as satin and organza. Cut both fabrics into 1 1/2″ x width of fabric strips
- 1 roll of 6” wide tulle
- Cut two strips equal to width of the green fabric strips above
- Cut the strips in half lengthwise to make four 3” wide strips
- Optional: Trim long edges with pinking shears or pinking rotary cutter blade
- Decorative threads of choice for rolled hems
- Serger thread to coordinate with decorative threads
- ELX 80/12 needles
- 6” green Styrofoam cone
- 1” red ornament for top of tree
- 4 mm beads on a string (optional)
- Hot glue gun and glue sticks
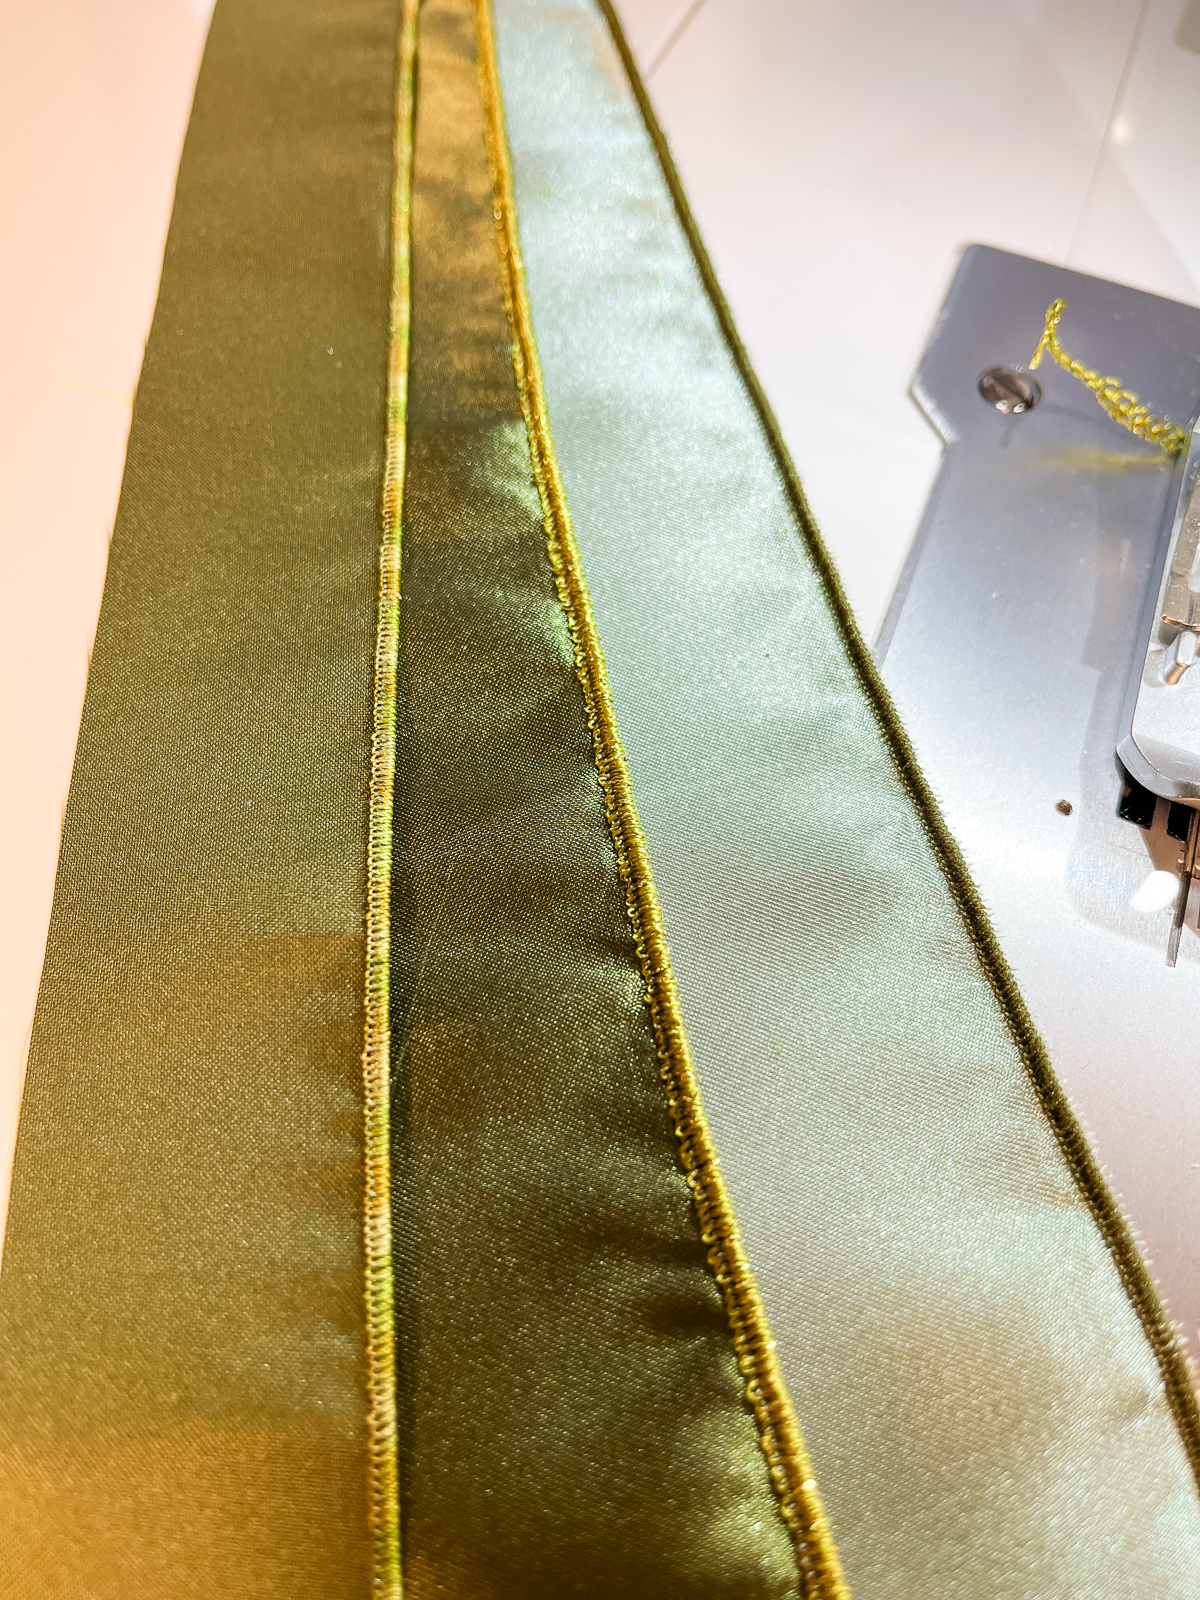
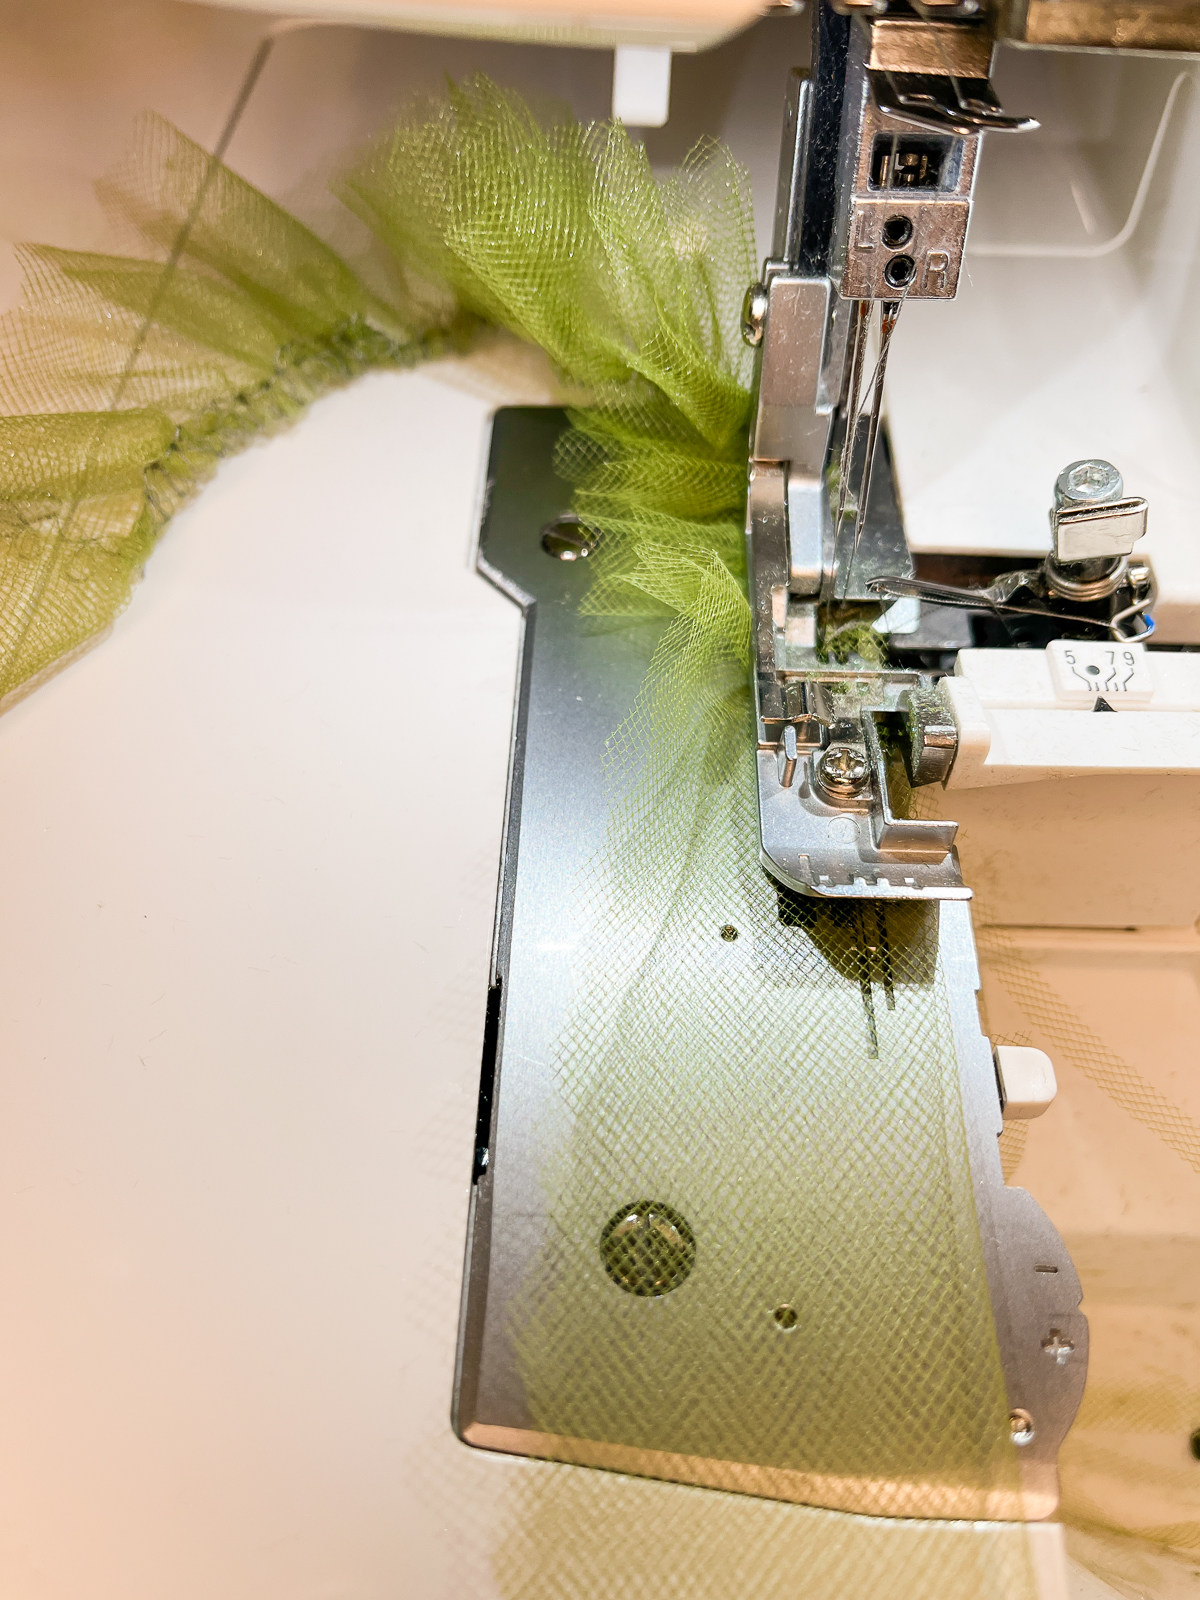
Step 1: Hem
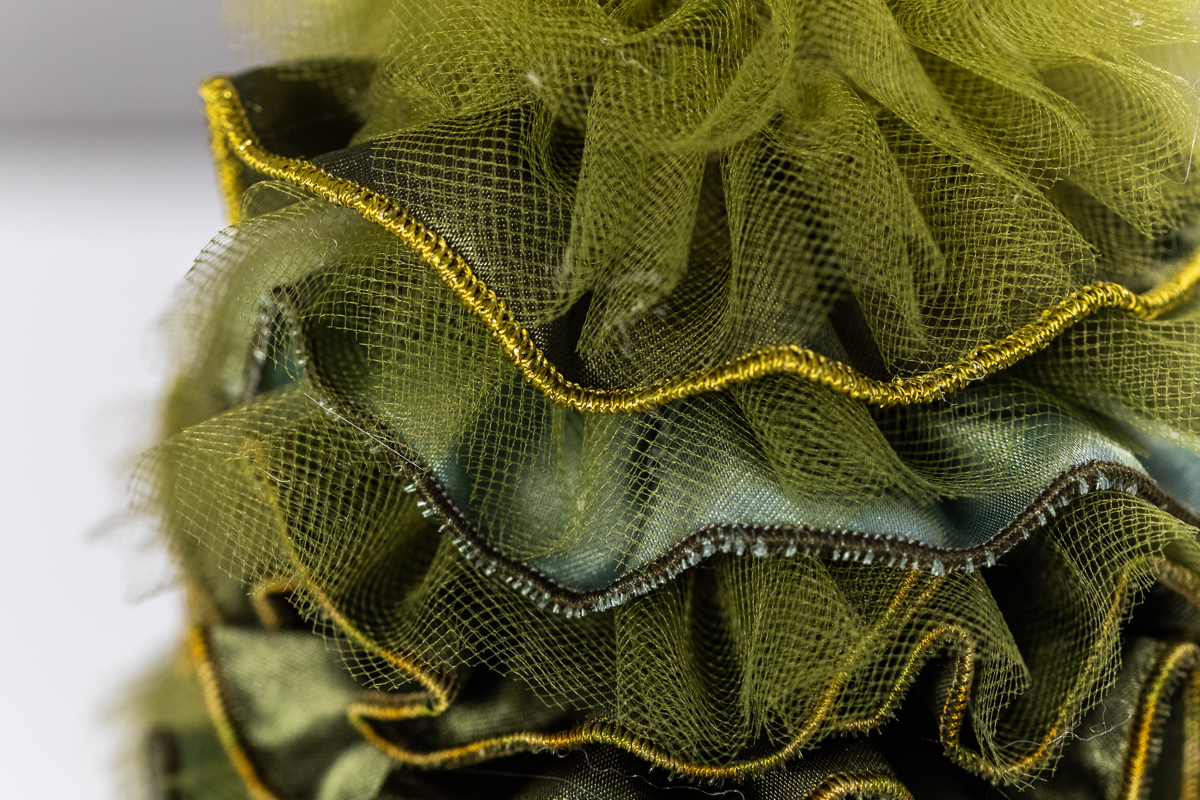
Set up for a 3-thread Rolled Hem #8. Thread needle and Lower Looper with serger thread. Thread the Upper Looper with decorative thread. (You can also use the 2-thread Rolled Hem Stitch #13, placing the decorative thread in the Lower Looper.) This is the perfect time to play with your collection of decorative threads. Mix it up on your fabrics!
Attach the Cording Foot. This is particularly helpful when using decorative threads for a rolled hem. The groove on the underside allows for smooth movement of the rolled hem under the foot.
Test your stitch on one fabric strip and adjust as needed. Then roll hem one long edge of each strip, trimming no more than 1/8″ as you go. Do not sew a rolled hem on the tulle.
Adding beads gives a fun look. Use a 3-thread Overlock Narrow (RN) #4 and the Multi-purpose Foot.


Step 2: Gather
Set up for a 4-thread Overlock #1. Increase both needle tensions to between 7 and 8. Increase the stitch length to 4 and the Differential Feed to 2.0.
Test sew on your previous practice fabric and adjust tensions as desired.
Gather the 1 1/2″ strips, skimming the knife.
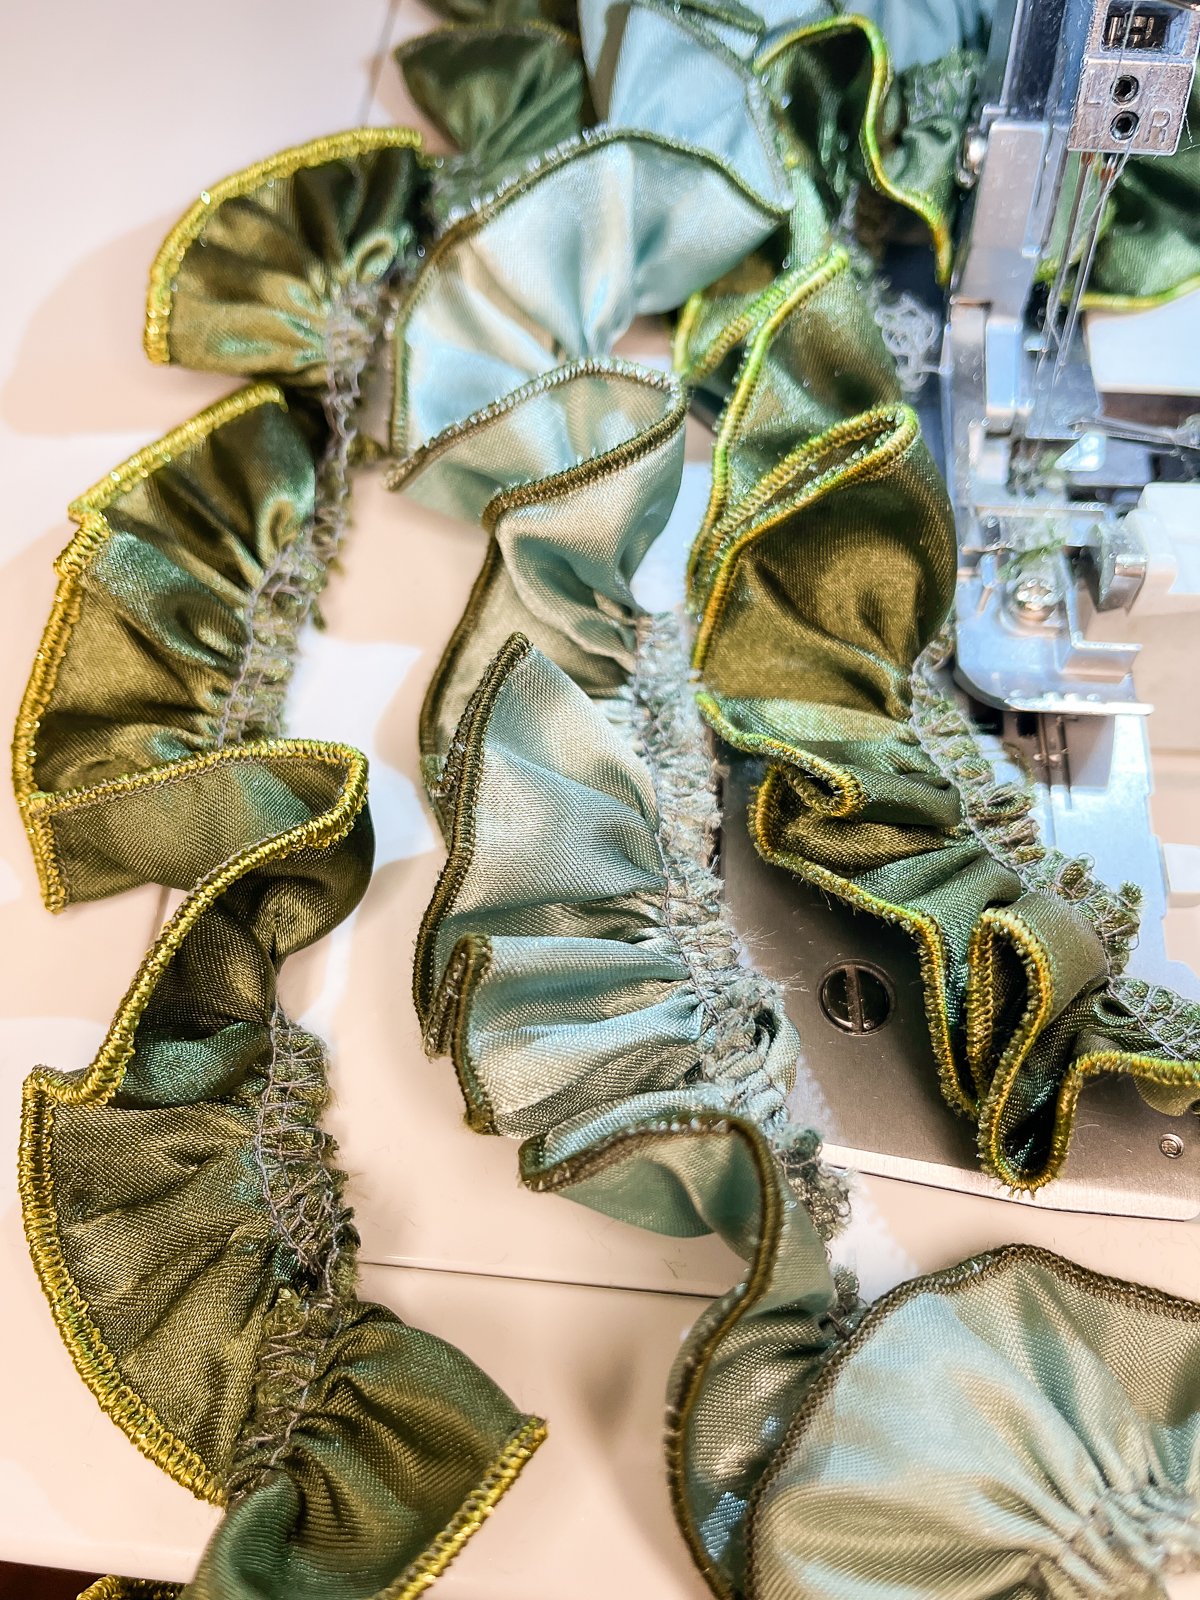
Fold the 3” tulle strips in half lengthwise and gather along the fold, skimming the knife.
Step 3: Glue
Apply a couple of inches of hot glue 1/4″ to 1/2″ above the bottom edge of the cone. Fold under the selvedge edge of the first strip and place on the glue. Work a few inches at a time. As you spiral up, add the next row 1/4″ to 1/2″ above the previous row. Fold under the selvedges at the beginning and end of each strip.
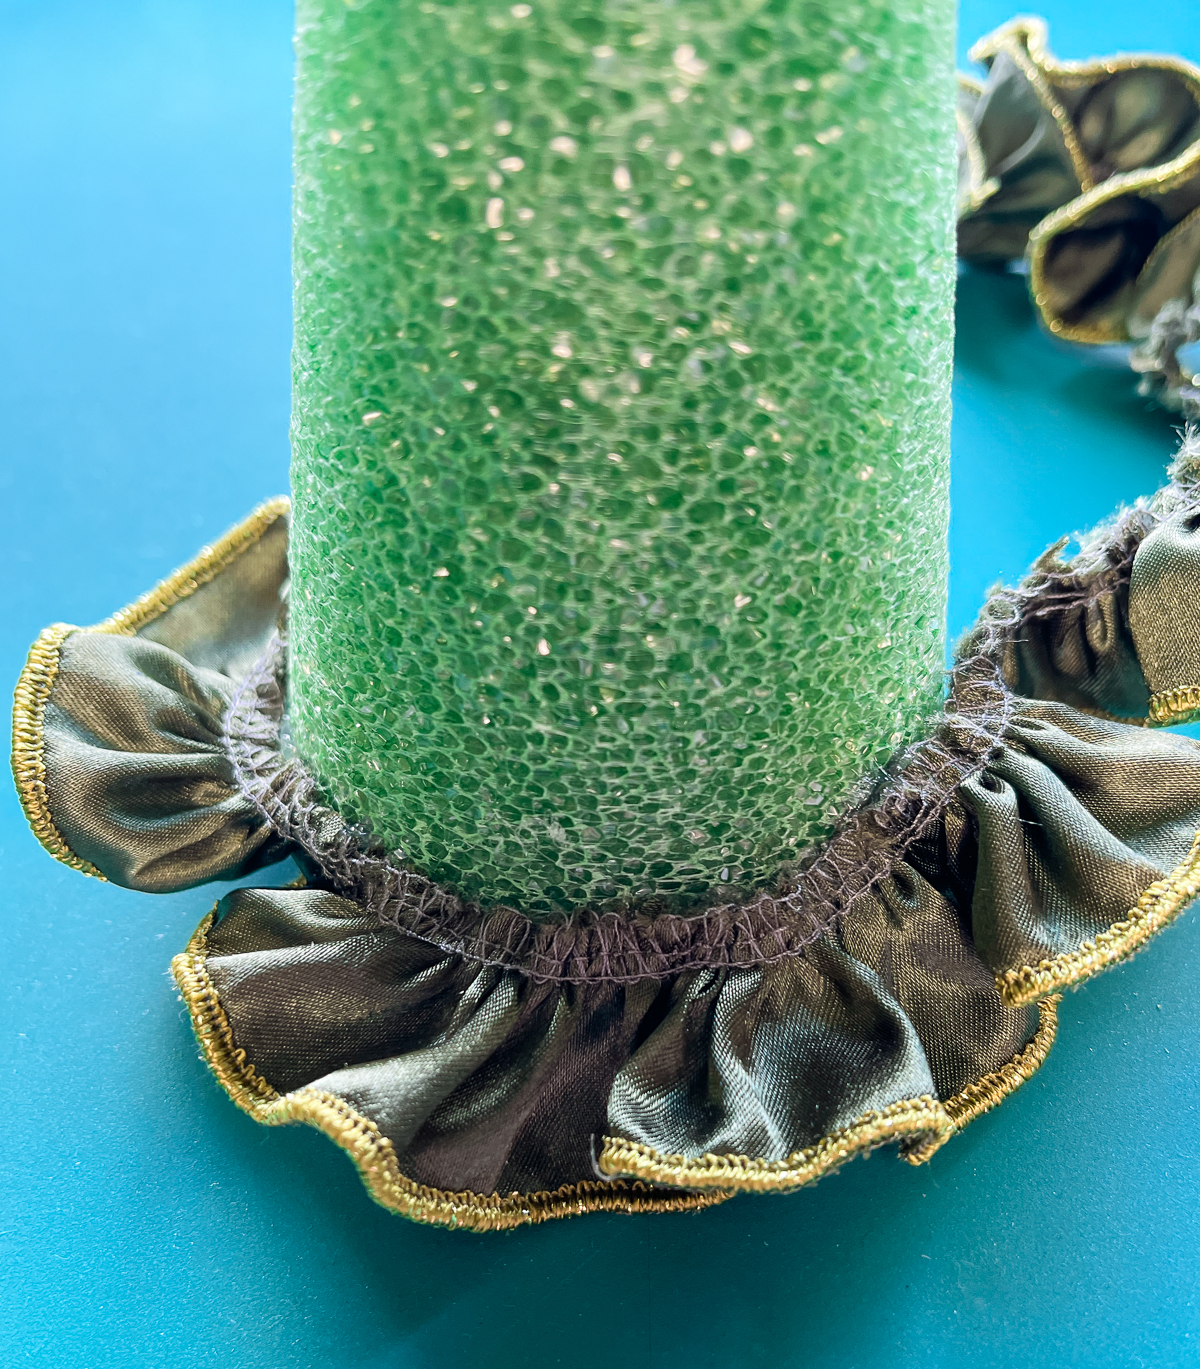
After the first woven strip, add a tulle strip.
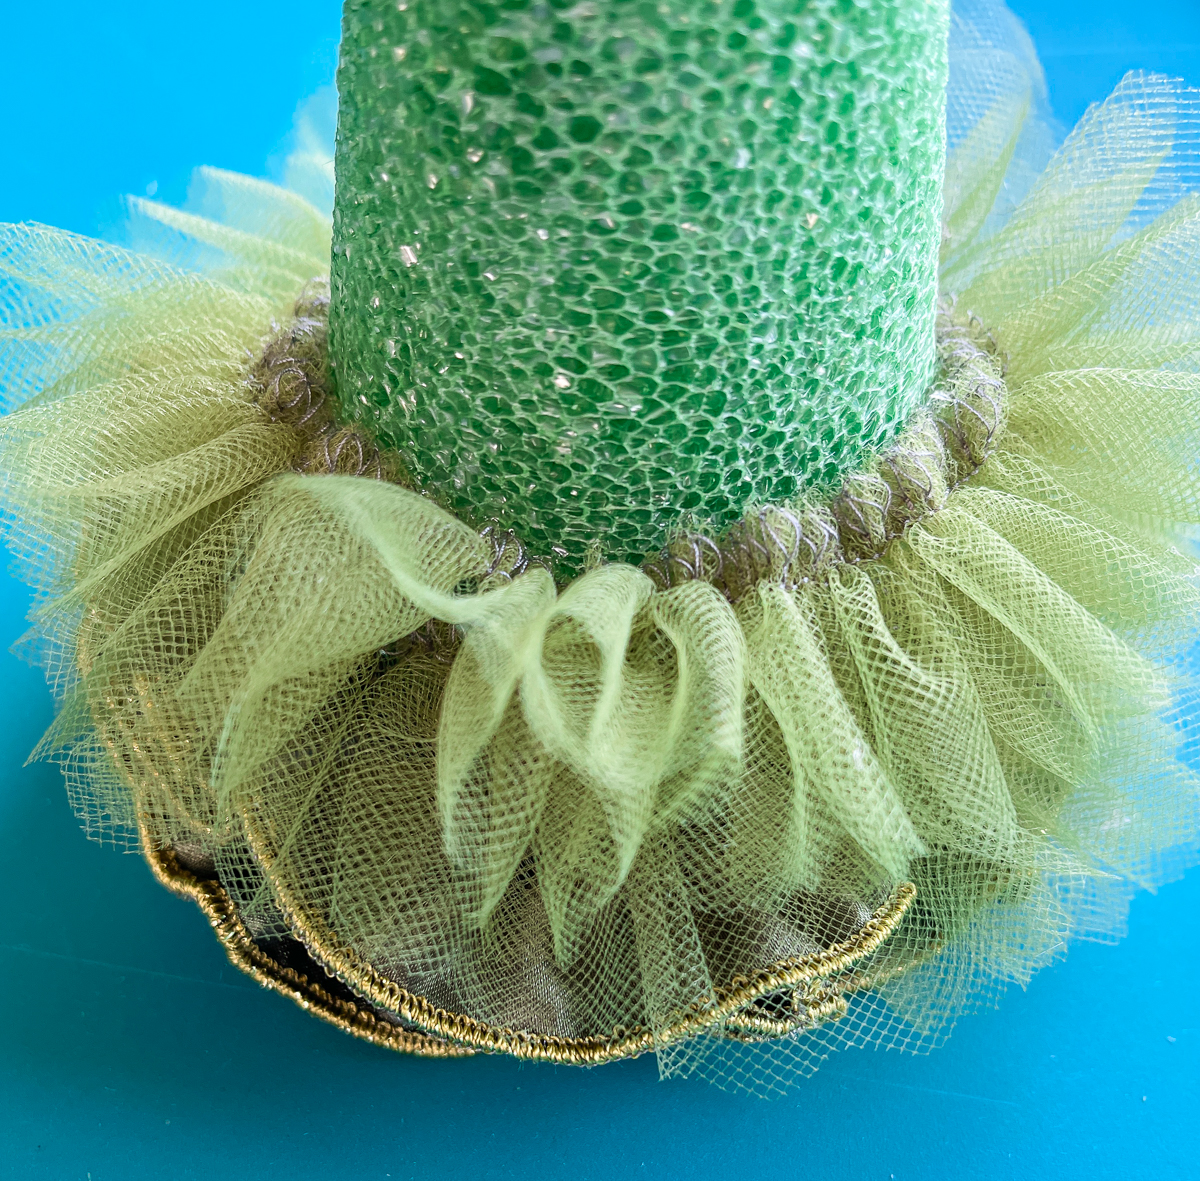
Add another round of a different woven fabric.
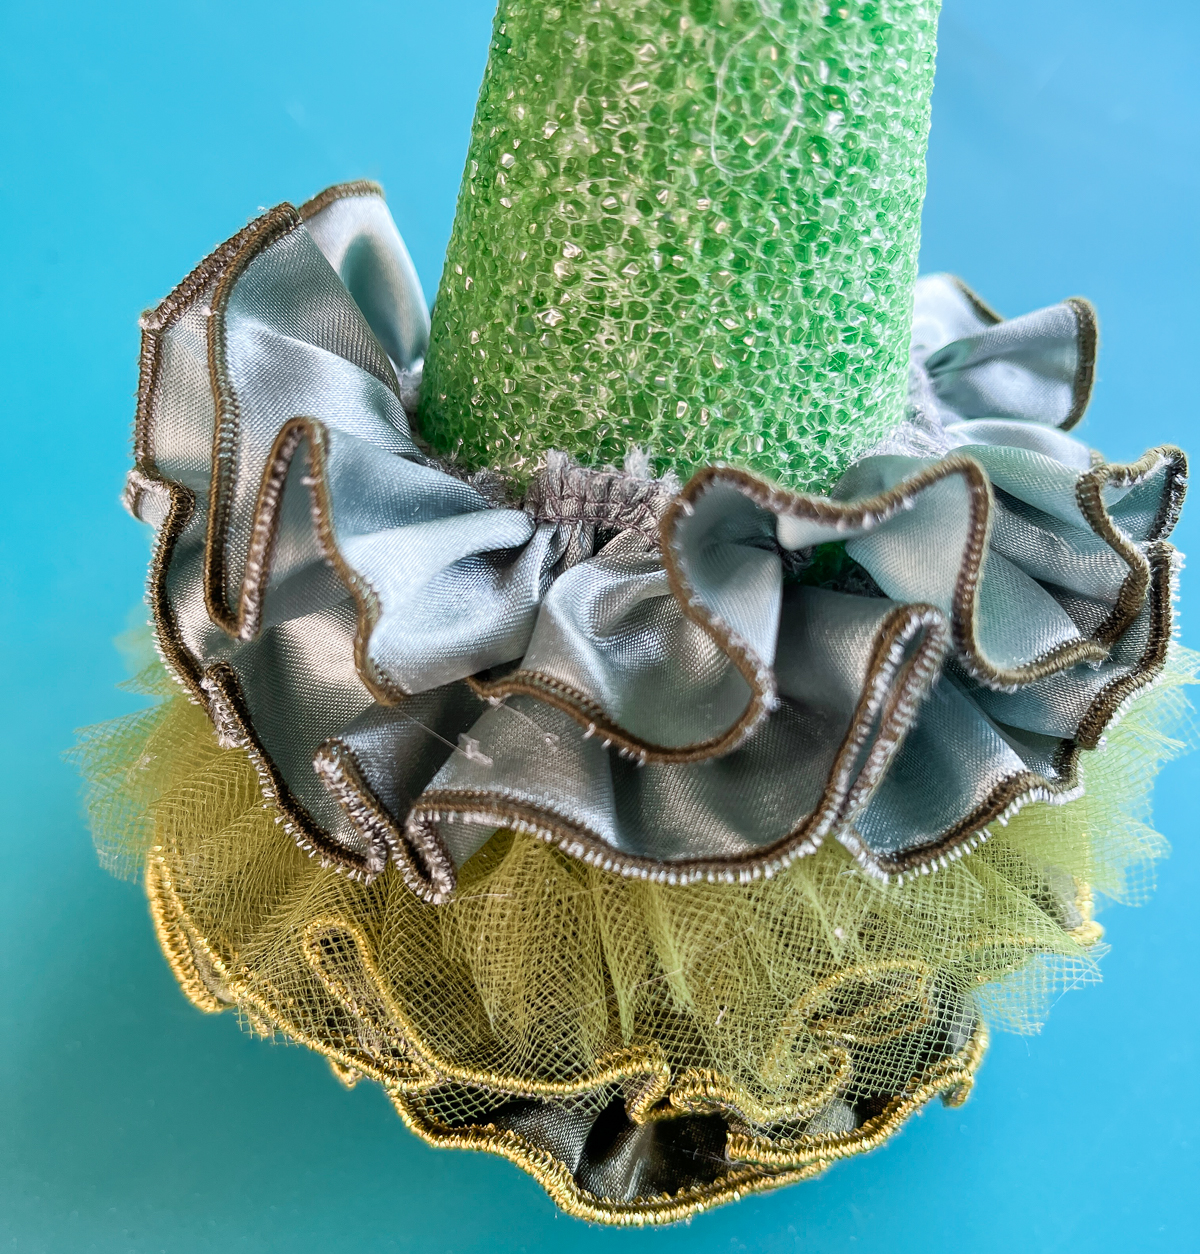
Repeat, adding tulle between each fabric layer until you reach the top. End with a tulle layer.
Tip: You do not have to use the entire length of each strip. I went around a couple of times with each strip. As you move up the cone, you use less. Vary the amount used as desired.
Remove the hanger part of the ornament and glue the ball to the top of the tree, pressing the ornament top into the Styrofoam. Fluff the fabrics and remove any hot glue strings.

And that’s it … you have a festive fabric tree that you made with only a serger and a bit of hot glue. Make assorted sizes for a holiday mantel or tablescape.
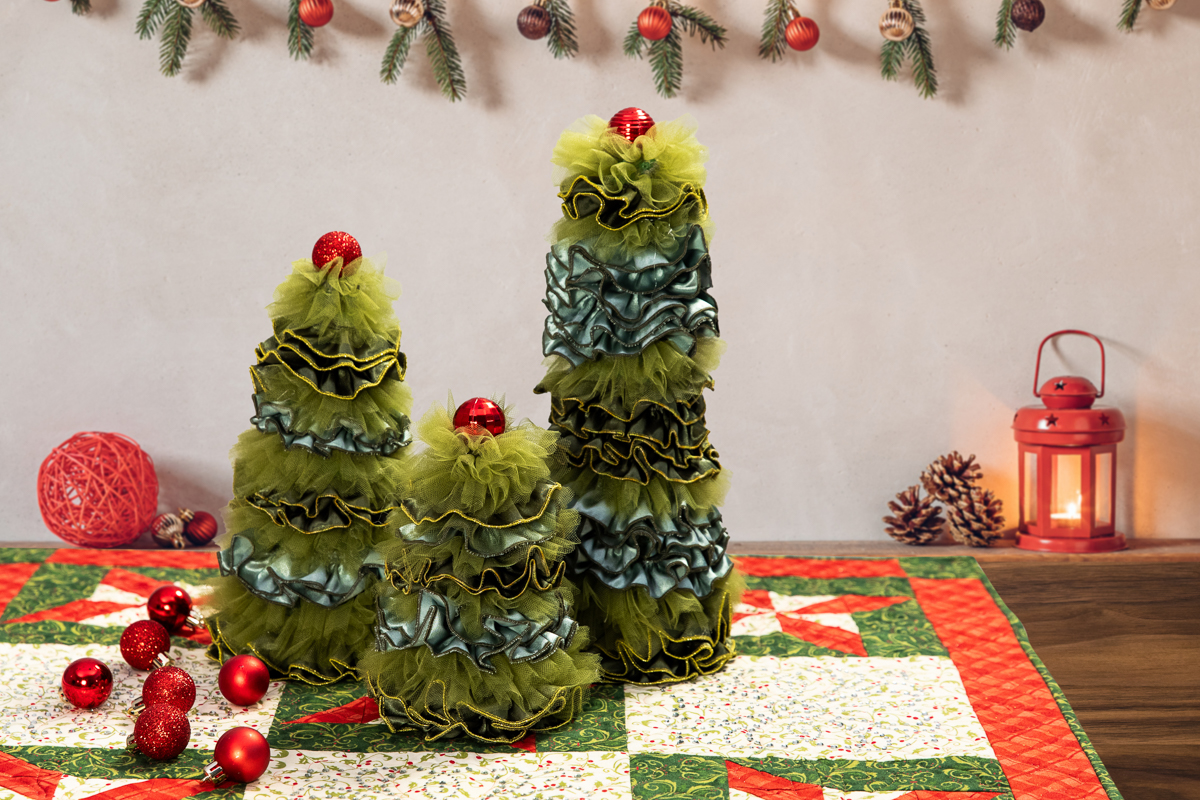
Insert some pixie lights for sparkle.

Switch up the greens for a more playful look.

If green isn’t your color, change it up a bit. Pink and blue are also fun!


Be sure to share your serger decorating on social media and tag @BERNINAUSA so we can admire your creations too! Until next time, happy serging!
Used Products

What you might also like


3 comments on “Serger Holiday Trees”
-
-
Mary
Super idea.
Love it! -
what a great idea love them
Leave a Reply
You must be logged in to post a comment.
So cute! Need to make these soon!