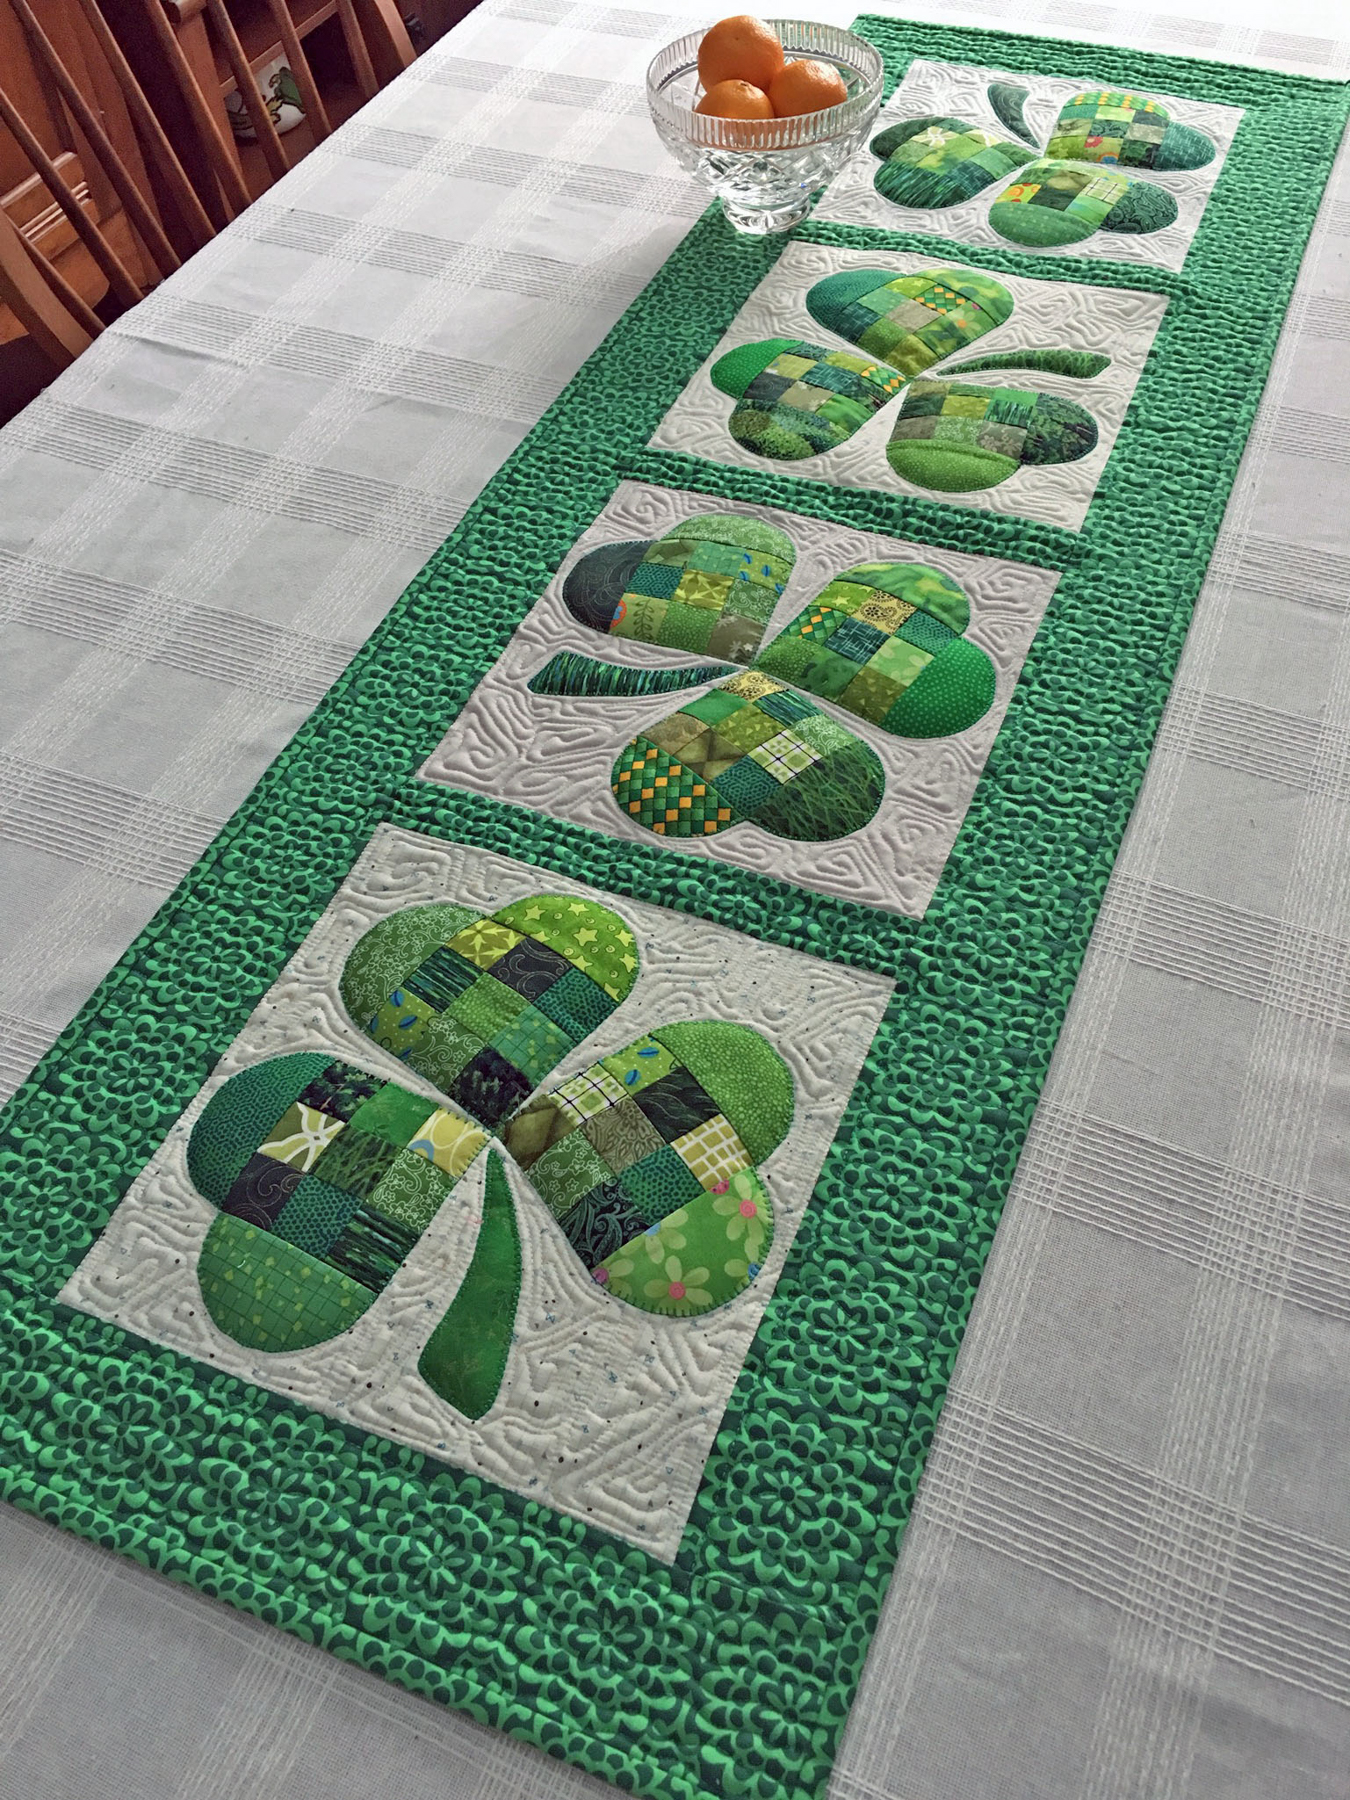
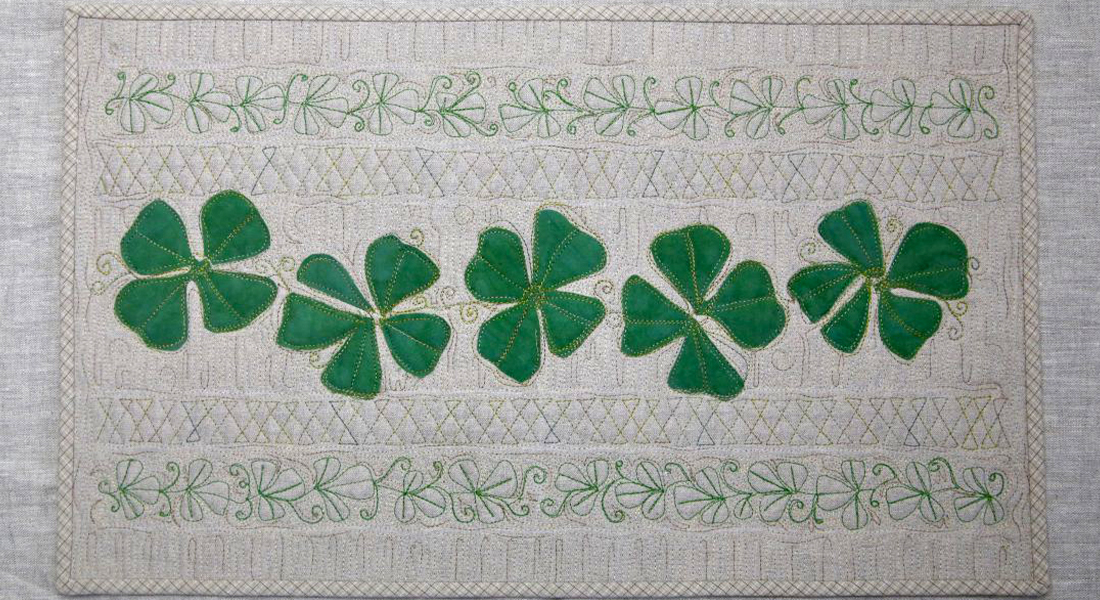
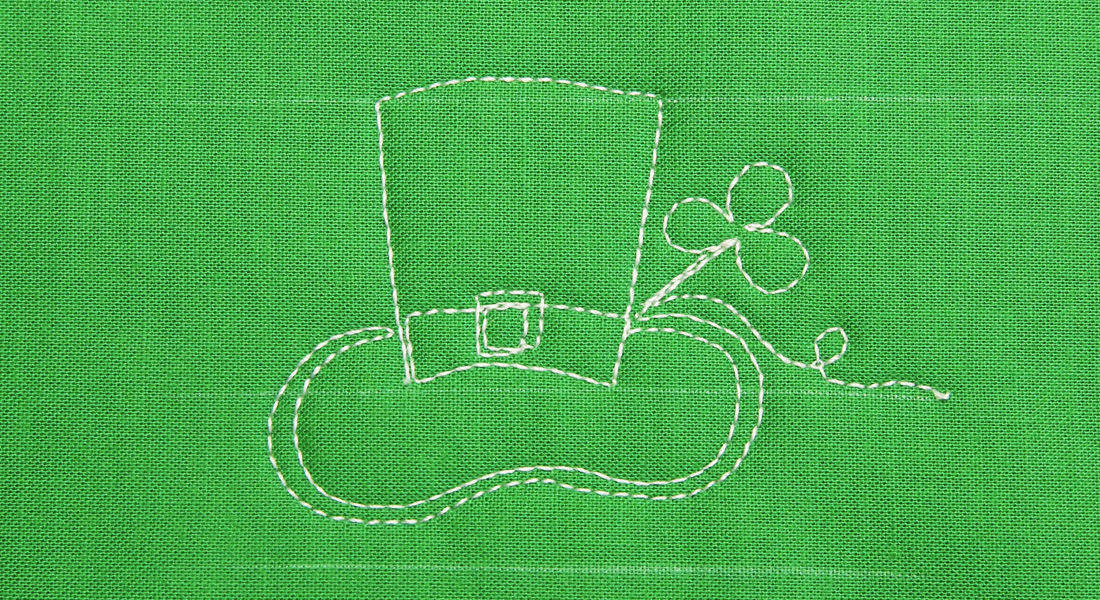
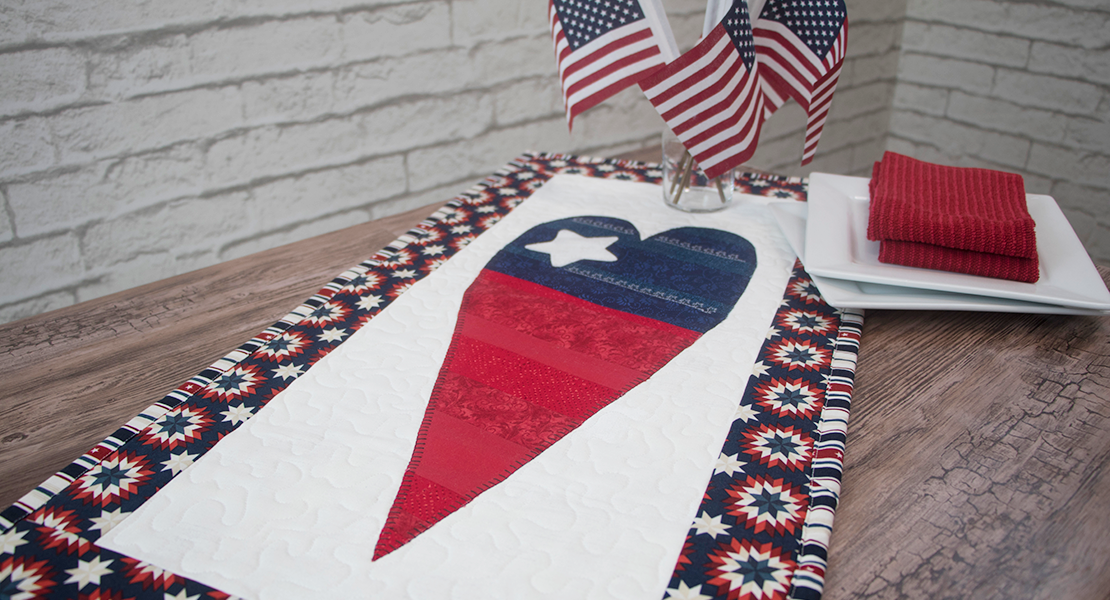
Shamrock Table Runner for St. Patrick’s Day
The Shamrock. No other symbol combines thoughts of melting snow and imminent springtime with the legendary luck of the Irish. Warm up your St. Patty’s Day celebrations with a festive, scrappy runner for your table.
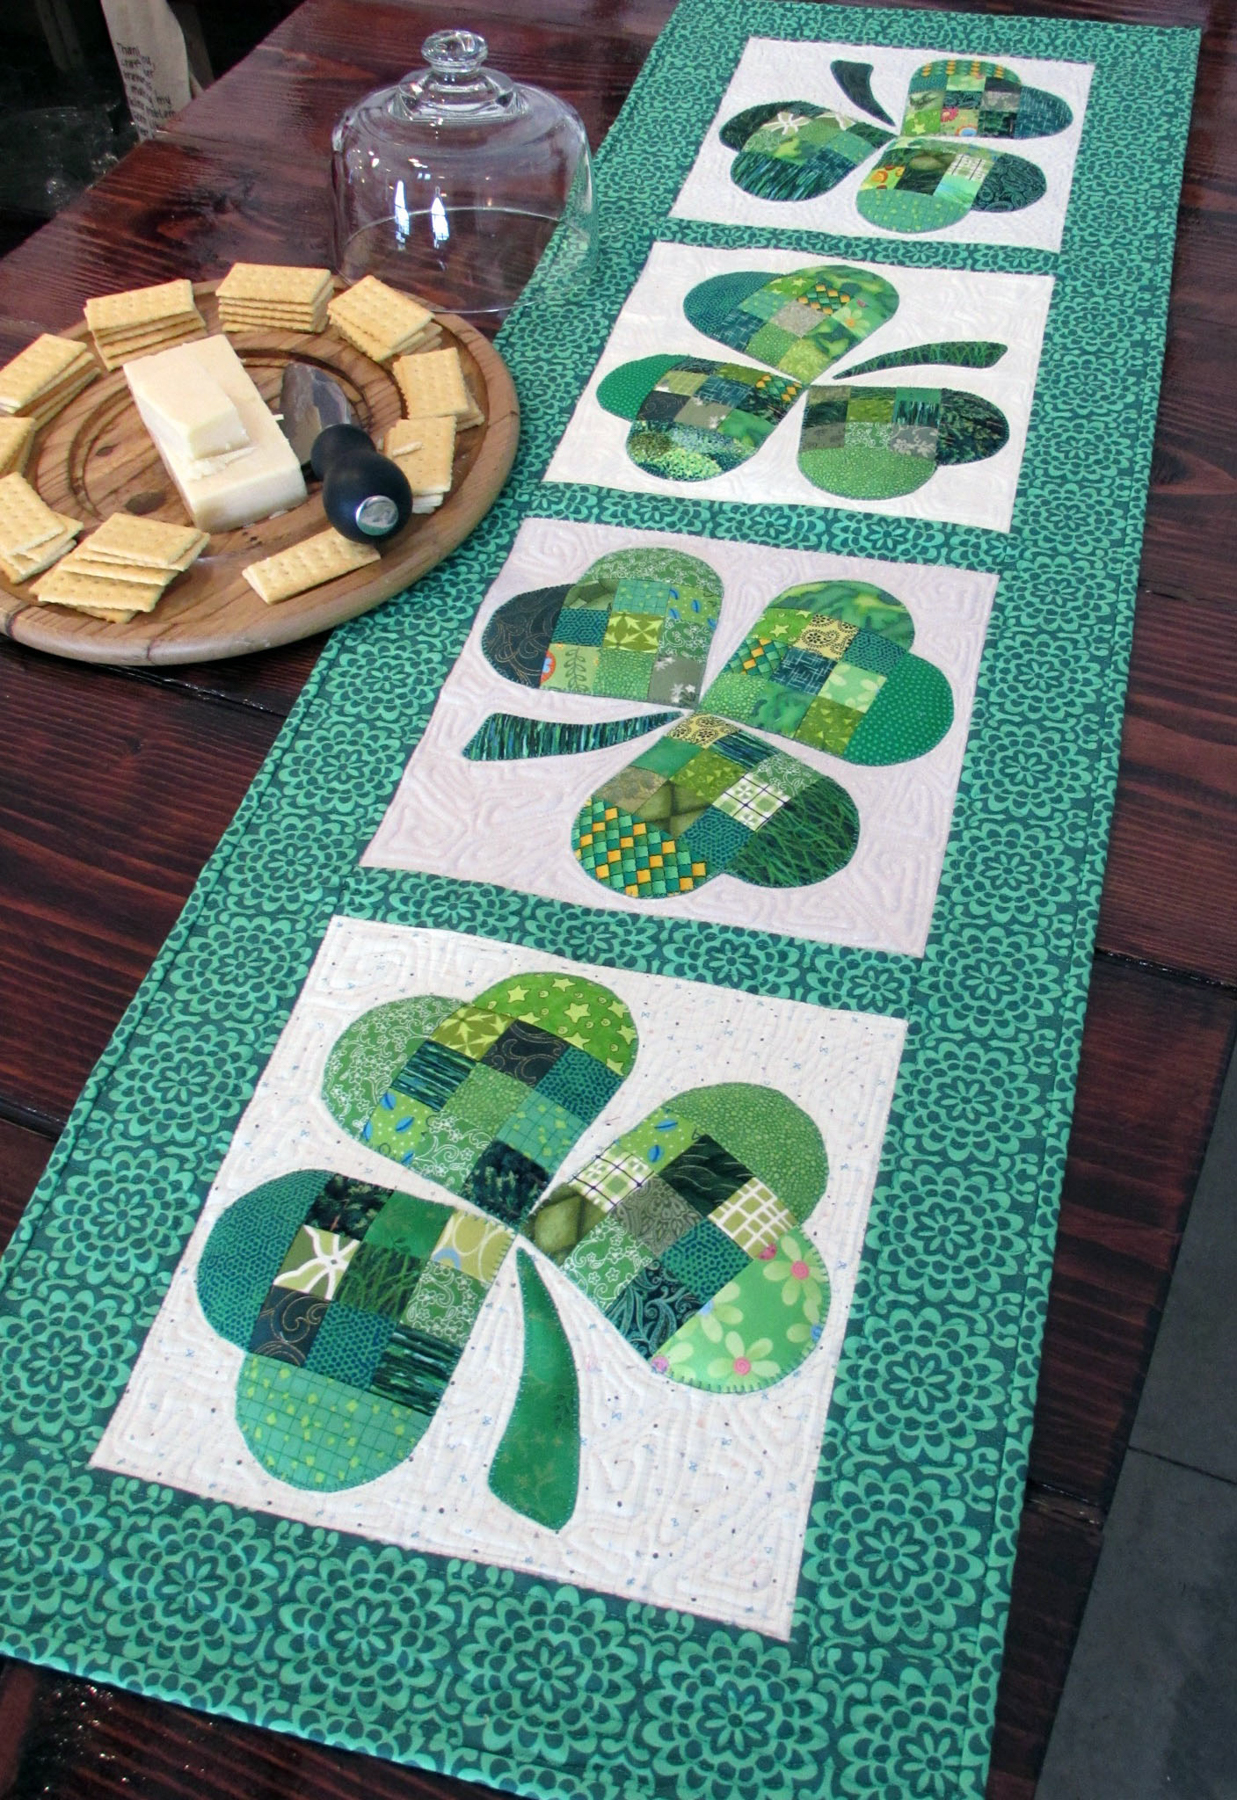
Hi, I’m Joan Ford of Hummingbird Highway. Nope, I don’t have even one smidge of Irish heritage. Even so, when you live in Syracuse, New York like I do, the home of the famed upside-down traffic light, a little ‘bit of Irish’ naturally smiles upon you as St. Patrick’s Day approaches. Irish heritage or not, one thing is certain: I love working with scrap fabrics, so I hope you enjoy making this very fun and very lucky, scrappy table runner project. Can you see the 9-patch blocks, hidden in plain sight?
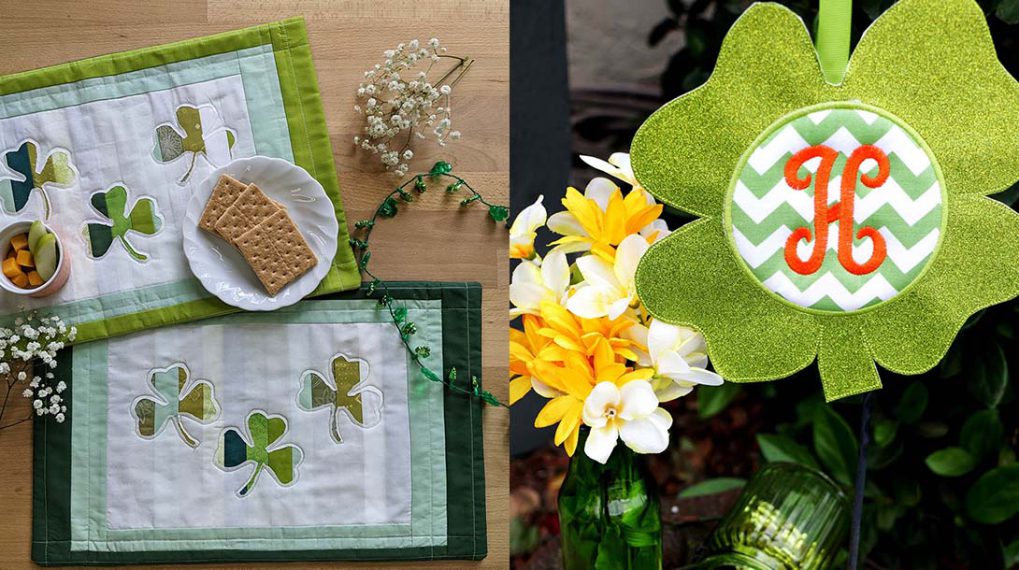
Speaking of 9-patch blocks . . . if you love scrappy 9-patches, click here gather up an extra special bonus “Breakfast Place Mats” pattern—it’s free!
Back to that oh-so-lucky table runner . . .
Finished size 15” x 49”
Materials to Create a Shamrock Table Runner
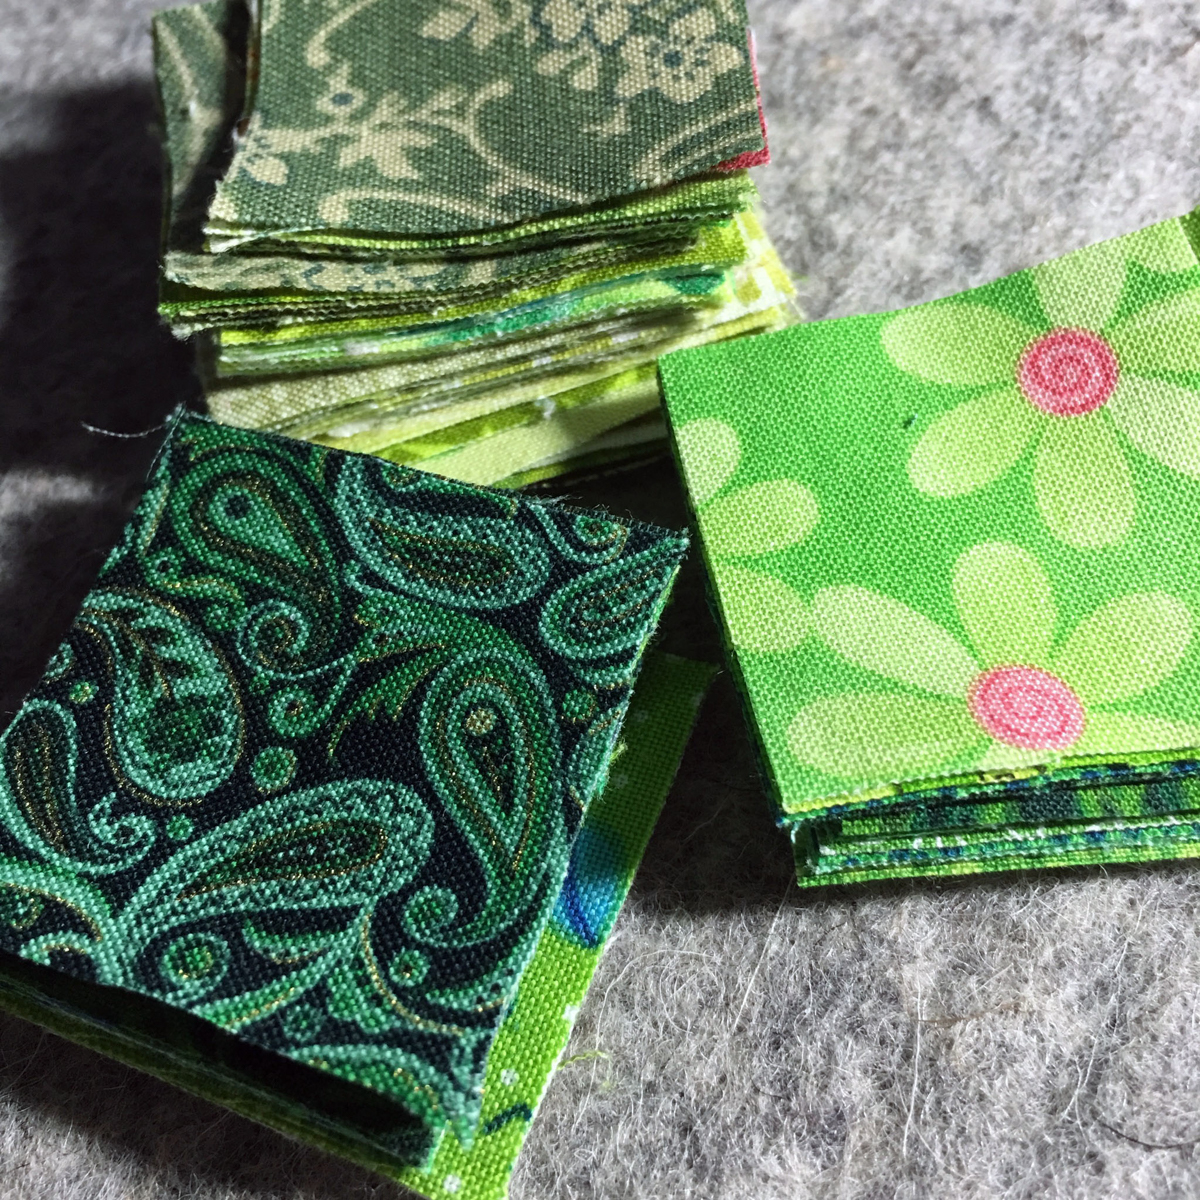
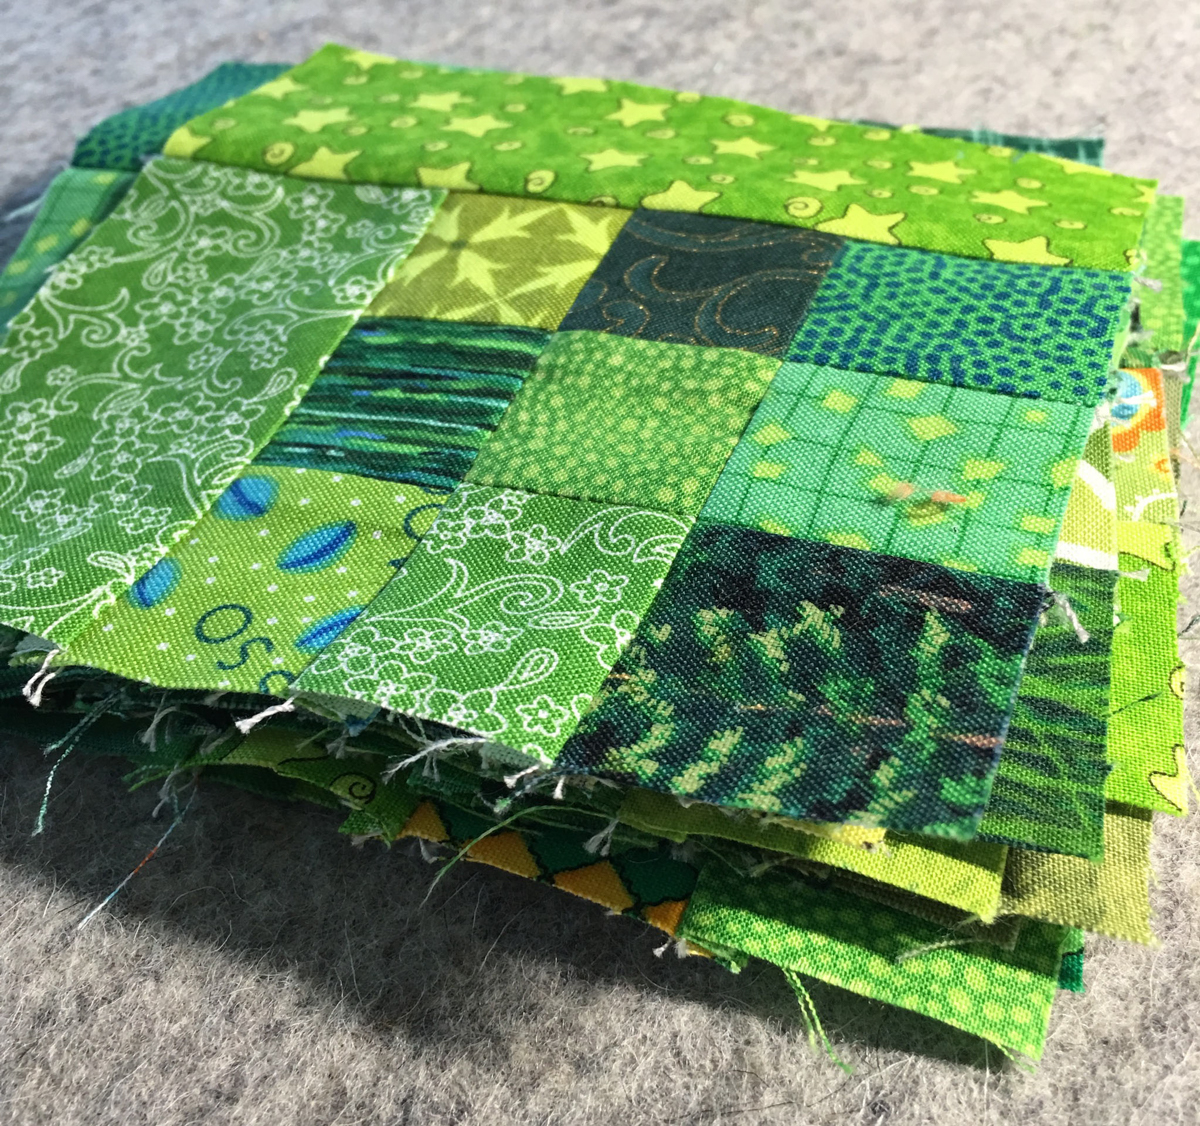
Scrap Fabrics
- 108 – 1½″ green print squares:
- 12 – 2″ x 3½″ green print strips
- 16 – 2″ x 5″ green print strips
- 4 – 10½″ low volume/white print squares for the block backgrounds (I cut a square from four different white-on-white print fat quarters)
Yardage
- 1 5/8 yards Kelly green print for the sashing, borders, binding, and backing (I used True Colors, Wallflowers in Green by Amy Butler for Free Spirit Fabrics
- 18″ x 52″ batting (If I have some wool batting leftover from another project, that’s my preference. I used Hobbs Heirloom Premium Wool for my runner.
Other Materials
- 1 yard, 12″-wide paper-backed fusible web
- Heart-shaped leaf and stem template
- Thread, 50 wt cotton—light gray or green for piecing; Kelly green for appliqué stitching and quilting; cream for quilting.
- Needle and thread to secure the binding by hand.
- Sewing Machine, I sew on a BERNINA 750 QE
- BERNINA Patchwork foot #37
- BERNINA Walking foot #50 with Seam Guide
- BERNINA Stitch Regulator (BSR)
Instructions on how to Create a Shamrock Table Runner
Cutting
Kelly green print
- Cut all strips along the lengthwise grain.
- Cut three 3″ x 58″ strips. Trim two of the strips to 3″ x 44¼″ for the side borders strips, and subcut two 3″ x 15½″ end border strip from the third strip.
- Cut one 1¾ x 58″ strip, and subcut three 1¾″ x 10½″ sashing strips.
- Cut three 2¼″ x 58″ strips for the binding.
- Reserve the remaining fabric measuring approximately 24″ x 58″ for the backing.
Fusible Web
- Cut twelve 5″ squares and four 2″ x 5″ strips for the leaf appliqué, reserve the remainder of the web for the stem appliqué.
Assembly
(Use a scant ¼″ seam for all the pieced elements)
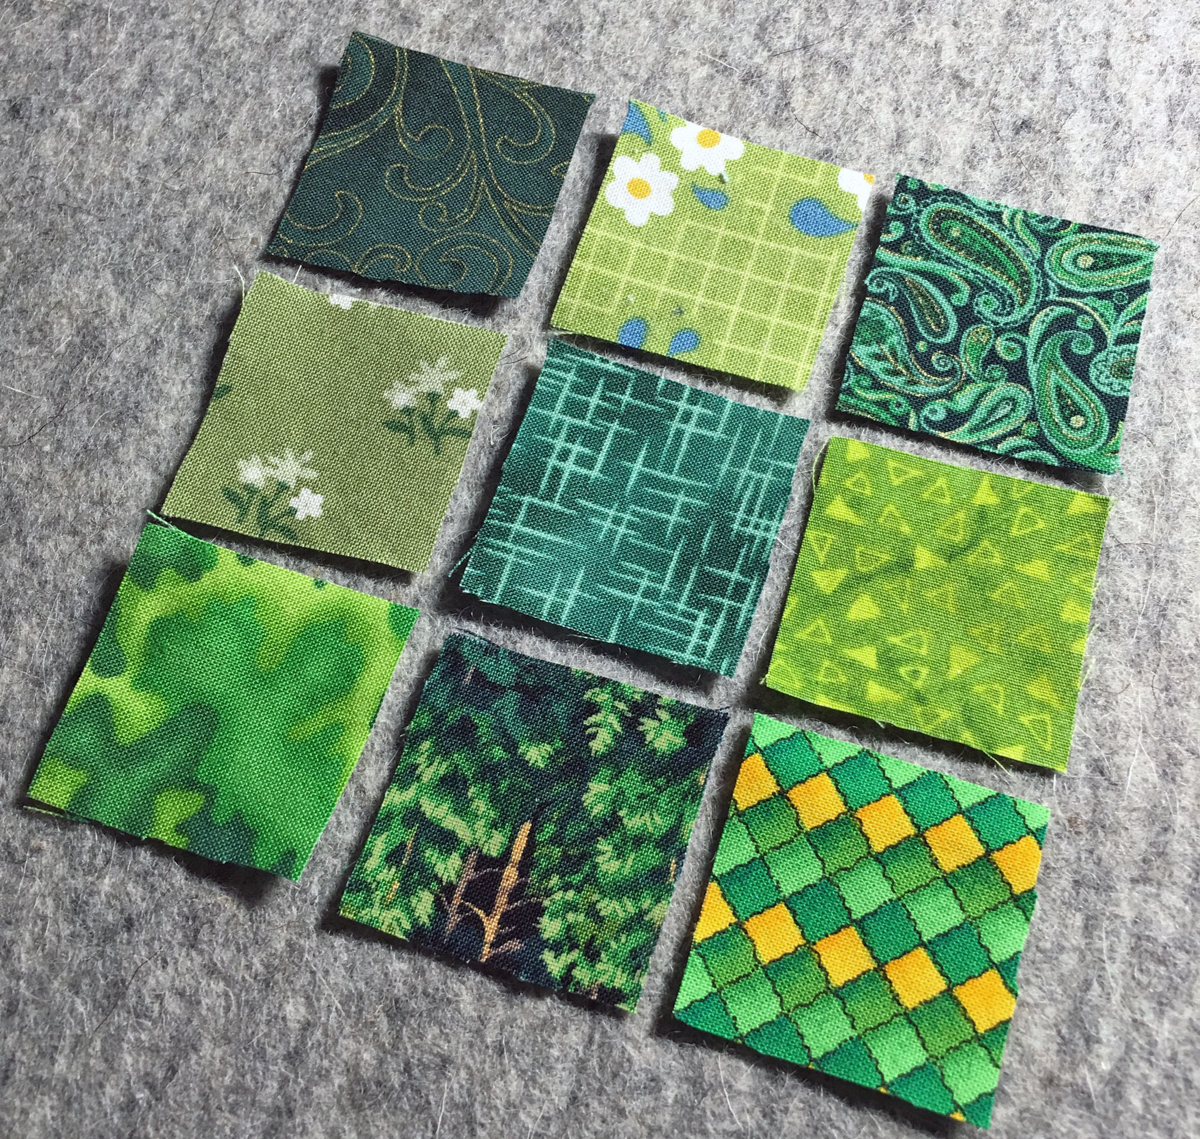
Make 9-patches
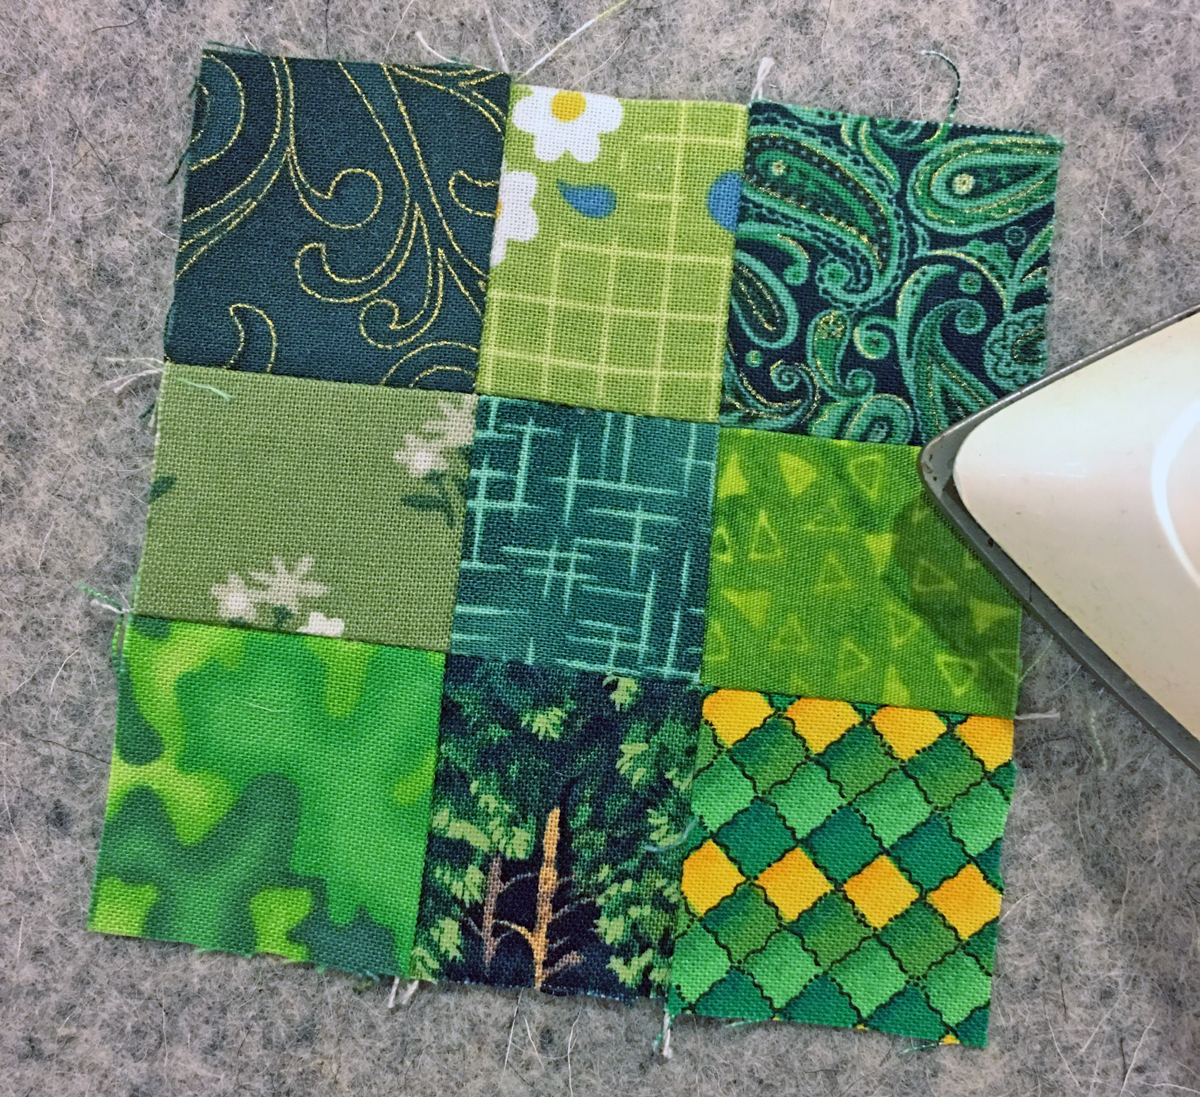
Select 9 – 1½″ green scrap squares and arrange them into a 9-patch block, three rows of three squares.
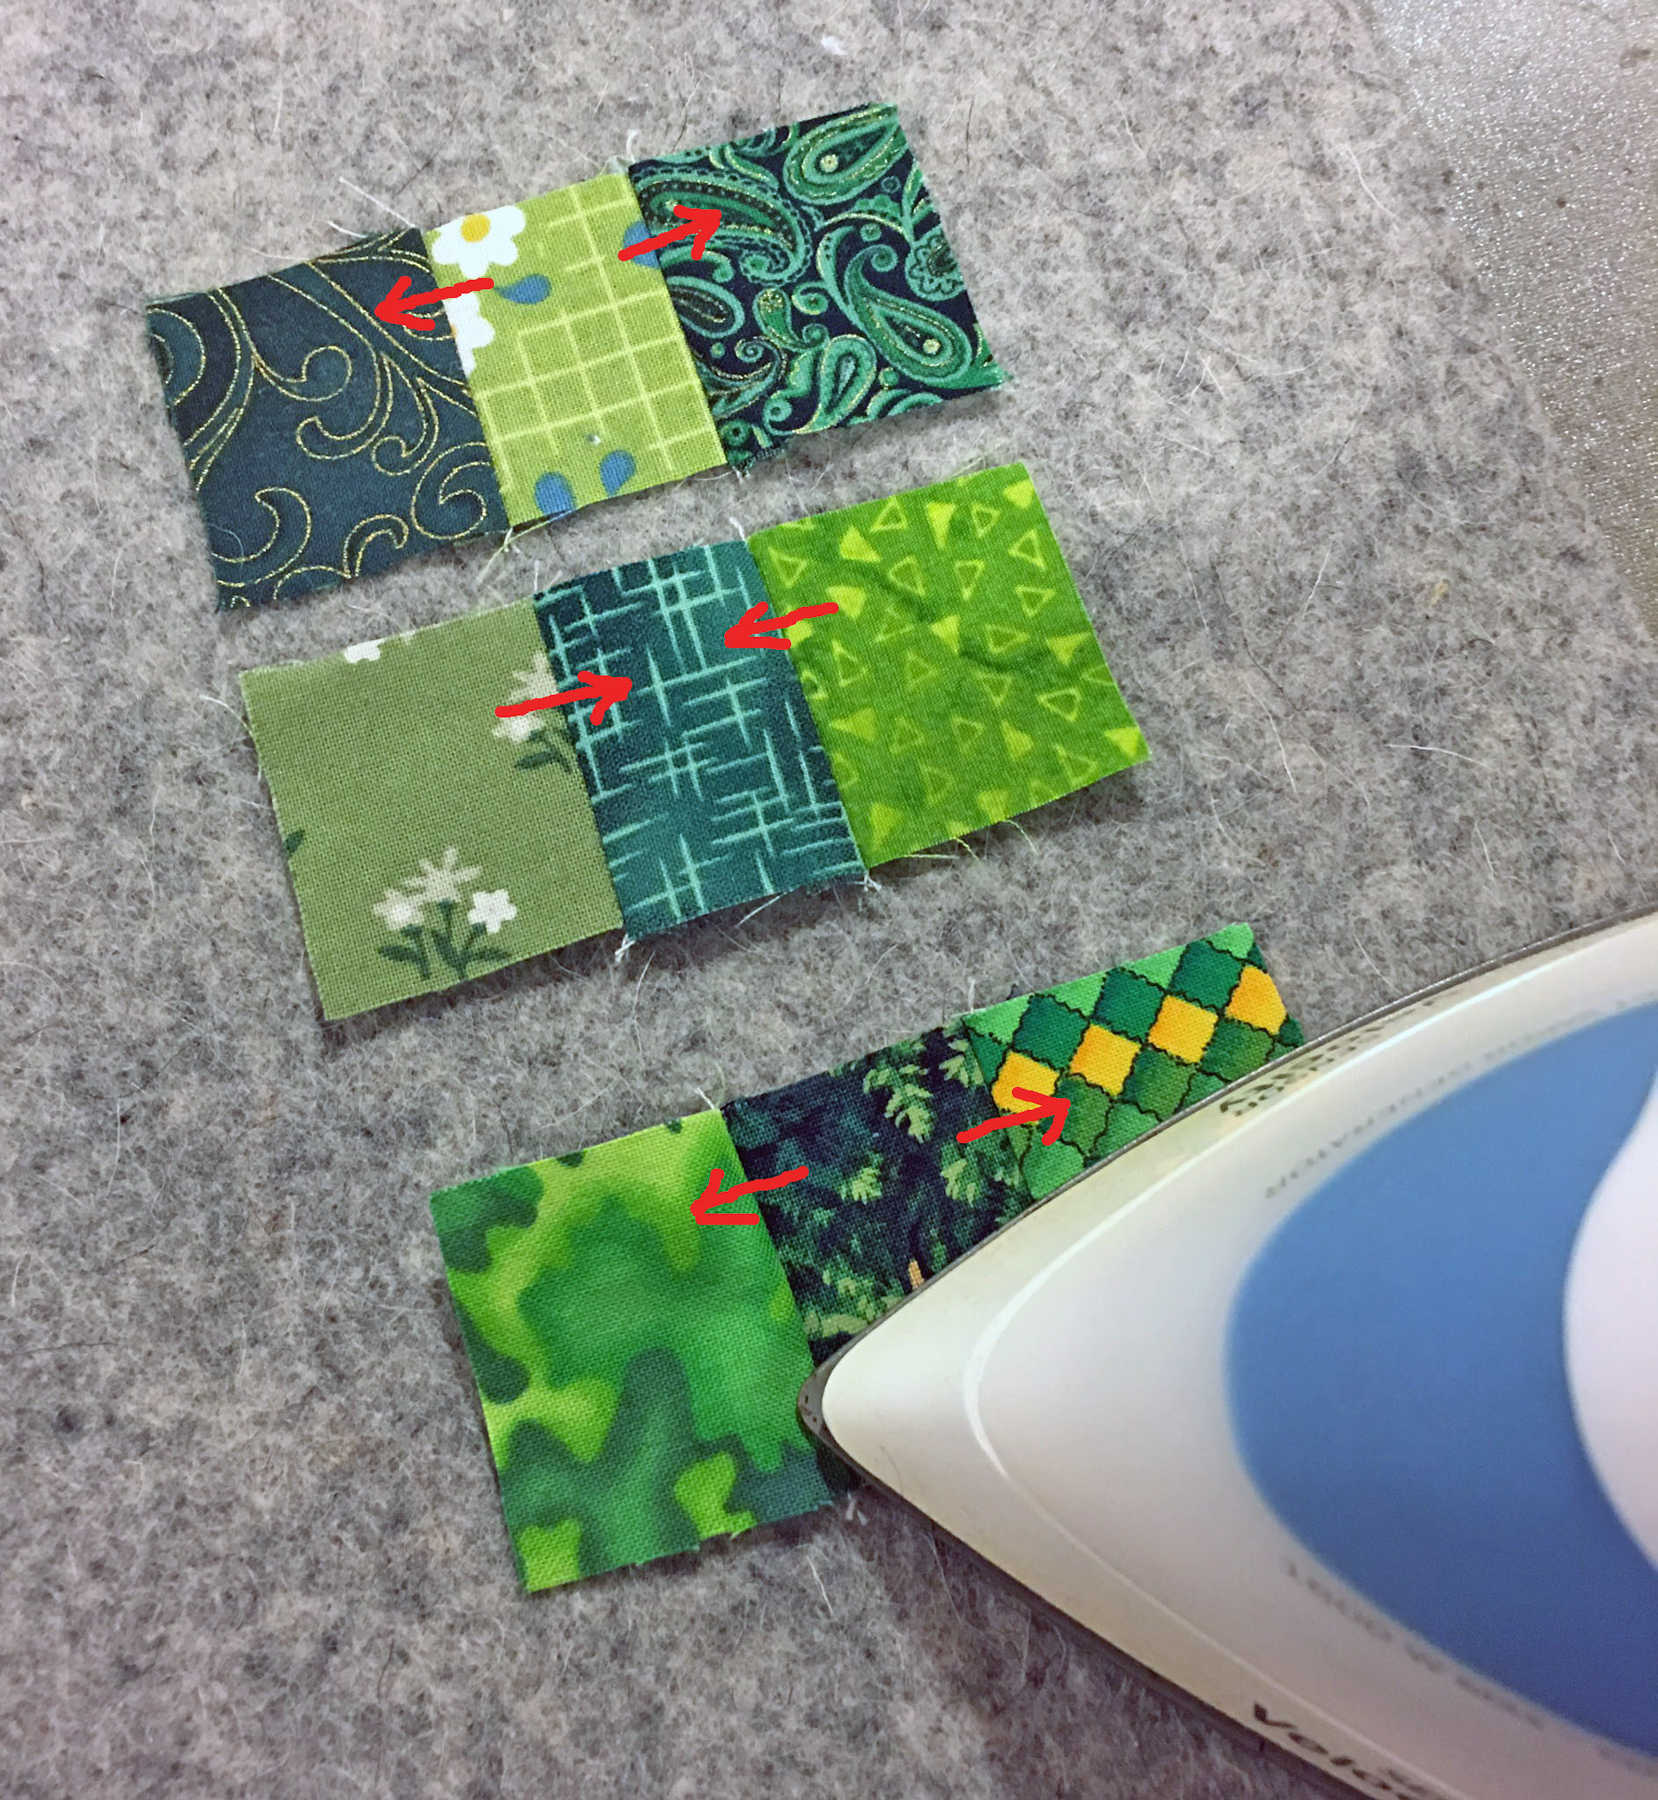
Sew the scraps into three rows, then press the seams alternately as shown by the red arrows.
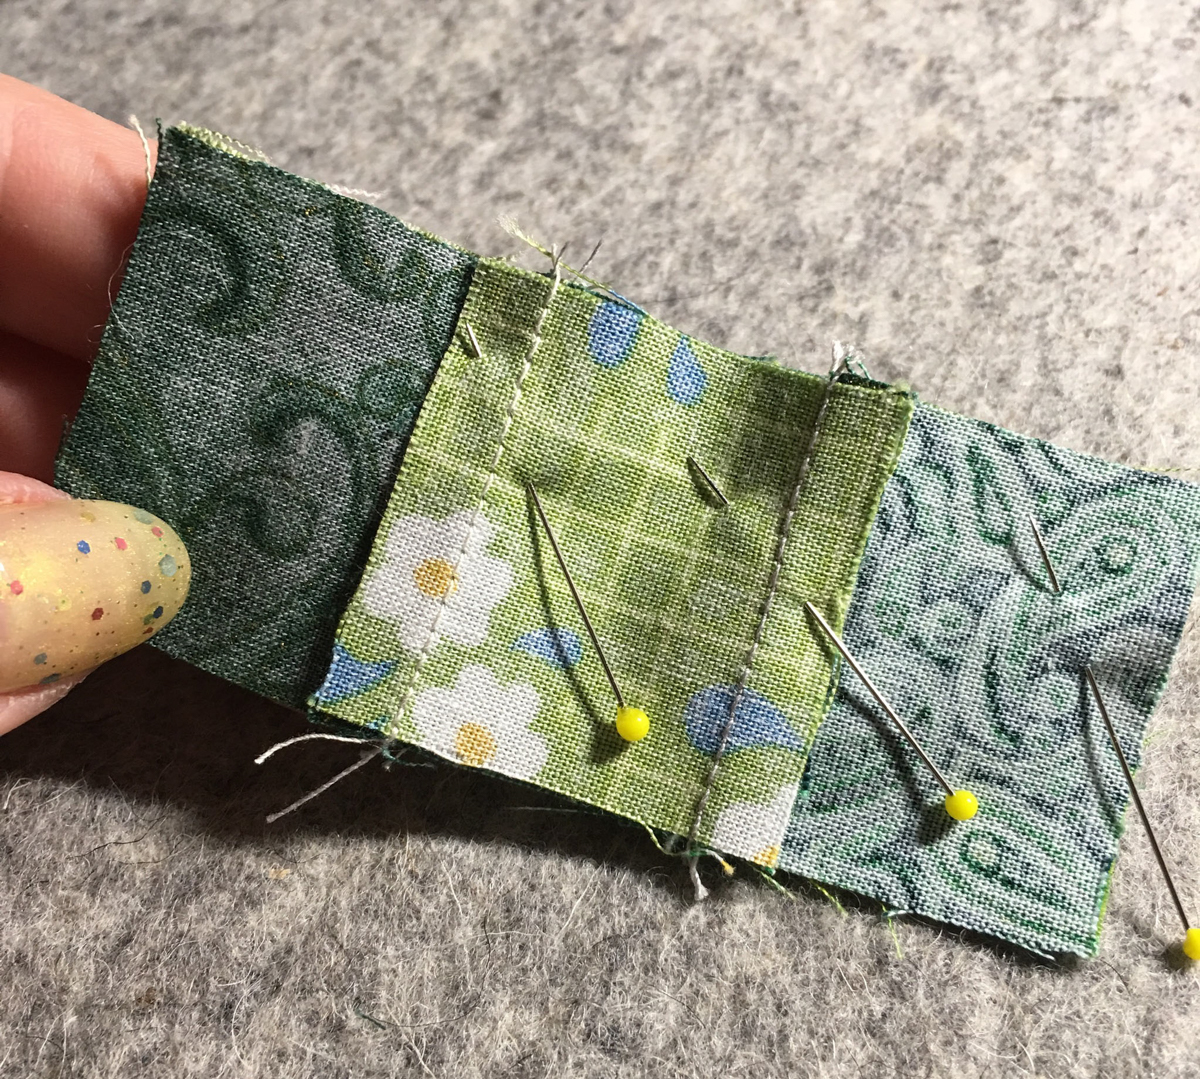
Place the first and second rows right sides together and secure with pins, then sew. I like to place the pins so the nested seams are secured and the pin point is just outside the ¼″ seam sewing area, with the shank of the pin on the pieces. That way, the pins can remain in place as the seam is sewn. Pin and sew the two-row assembly to the third row to complete the 9-patch.
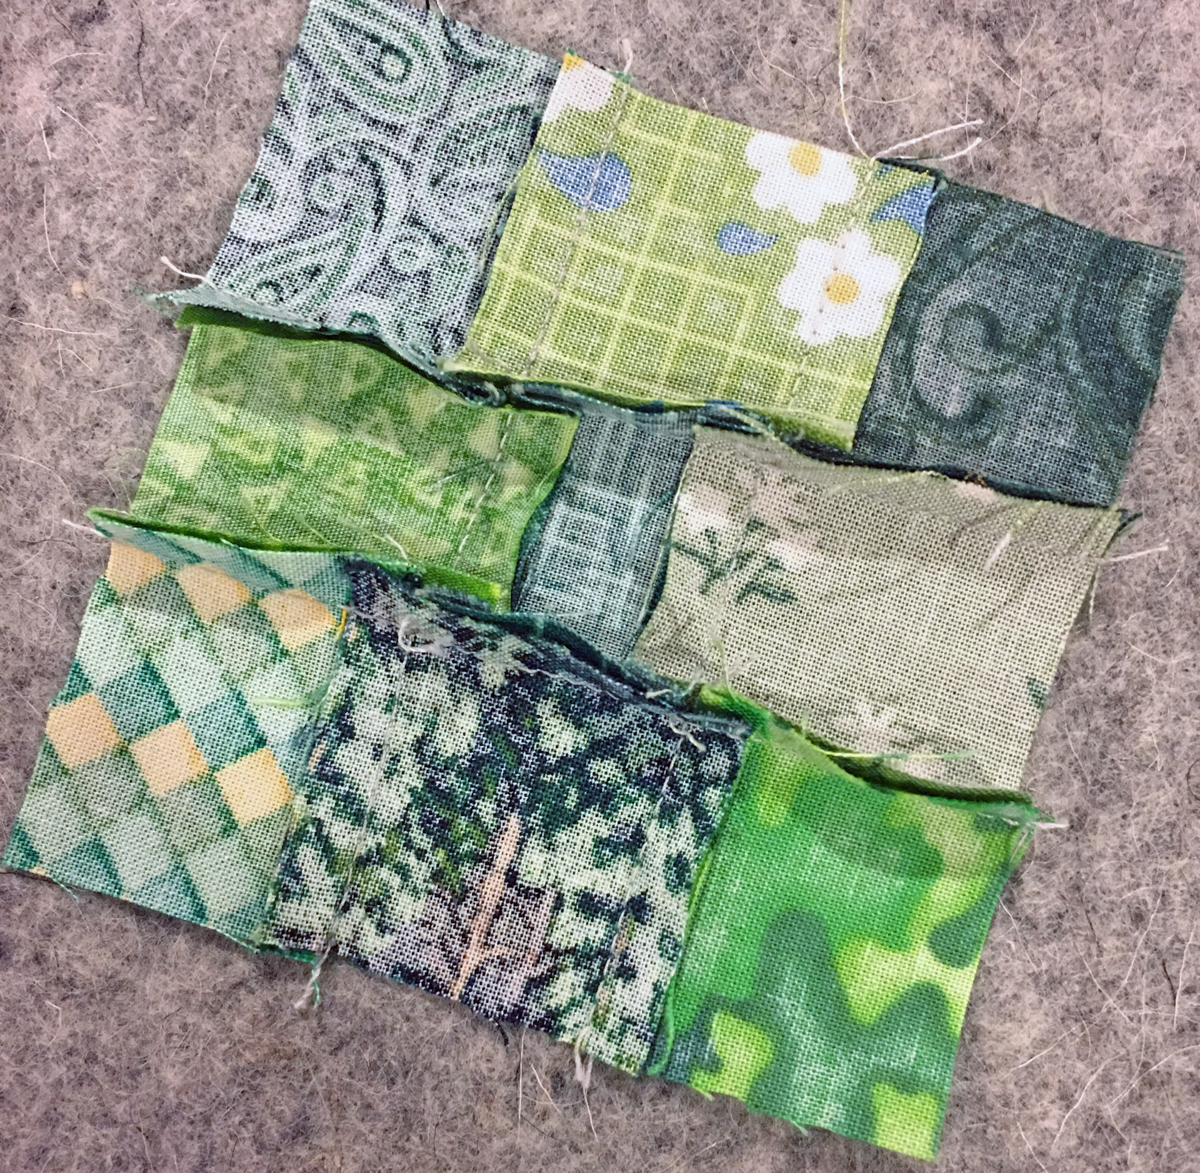
With a seam ripper, remove the two or three stitches between the seam connecting the rows and the fabric edge as shown. Repeat this for all four seam intersections on both sides of the unit.

Place the block on your ironing surface, right side down.
Working one seam intersection at a time (I’m starting with the seam intersection on the top right of the block), identify the direction of the two opposing pieced seams within the first two rows (solid red arrows). Then ‘furl’ (this technique is also called ‘pop,’ ‘twist,’ or ‘twirl,’ and reduces bulk at the seam intersection) the seams so all four seams are pressed in a rotation around the center seam intersection, with only the very center of the seam pressed open.
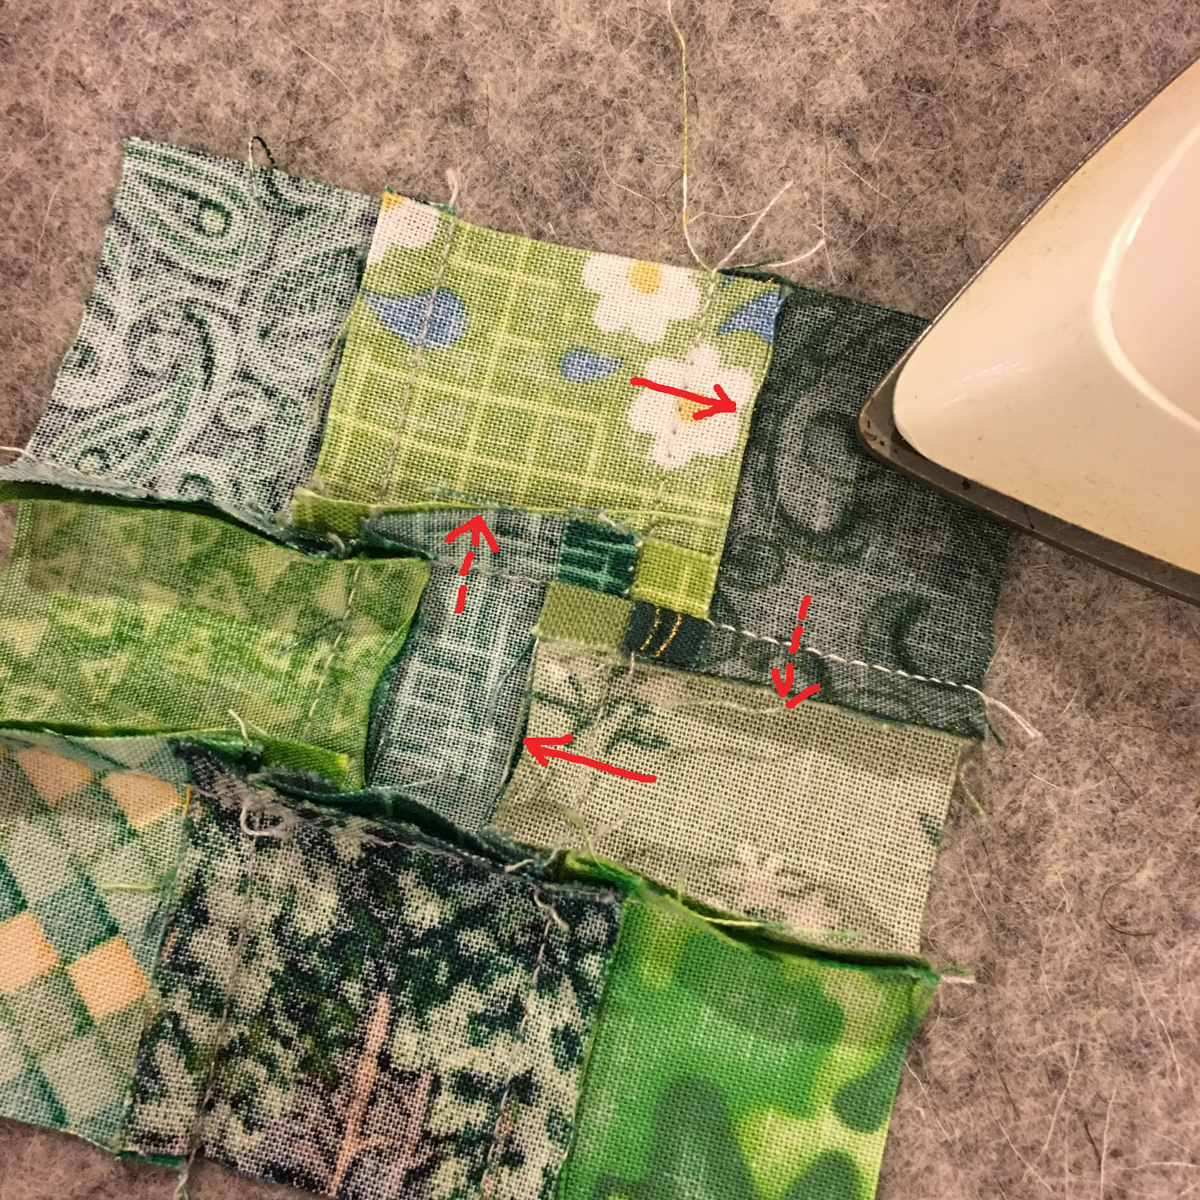
Repeat to ‘furl’ each seam intersection. The seam allowances at all four intersections will be evenly distributed, reducing bulk.
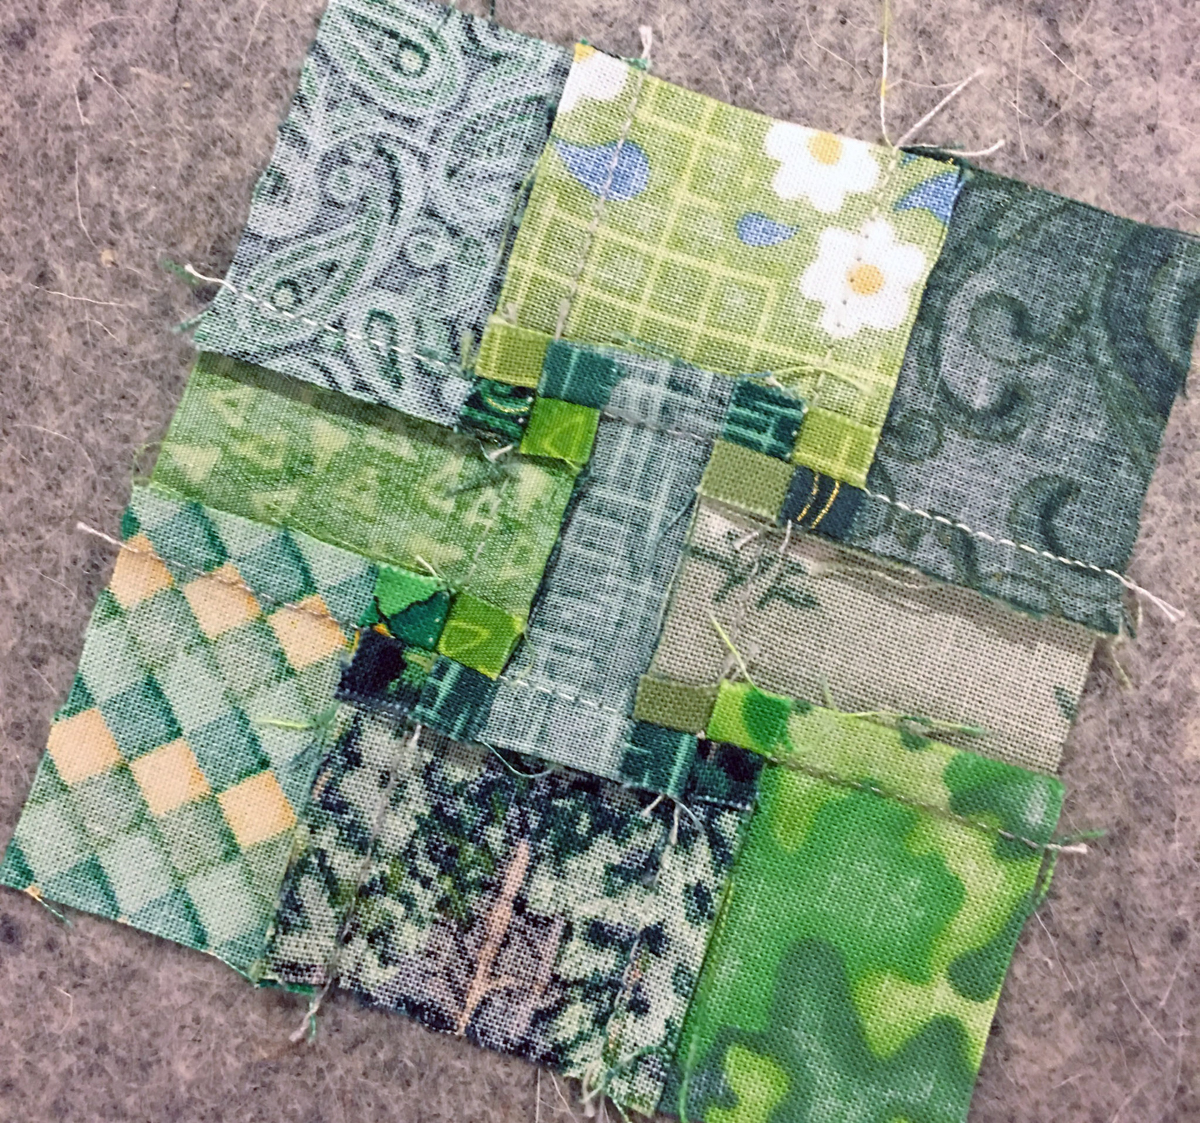
Turn the block right side up and press from the front.
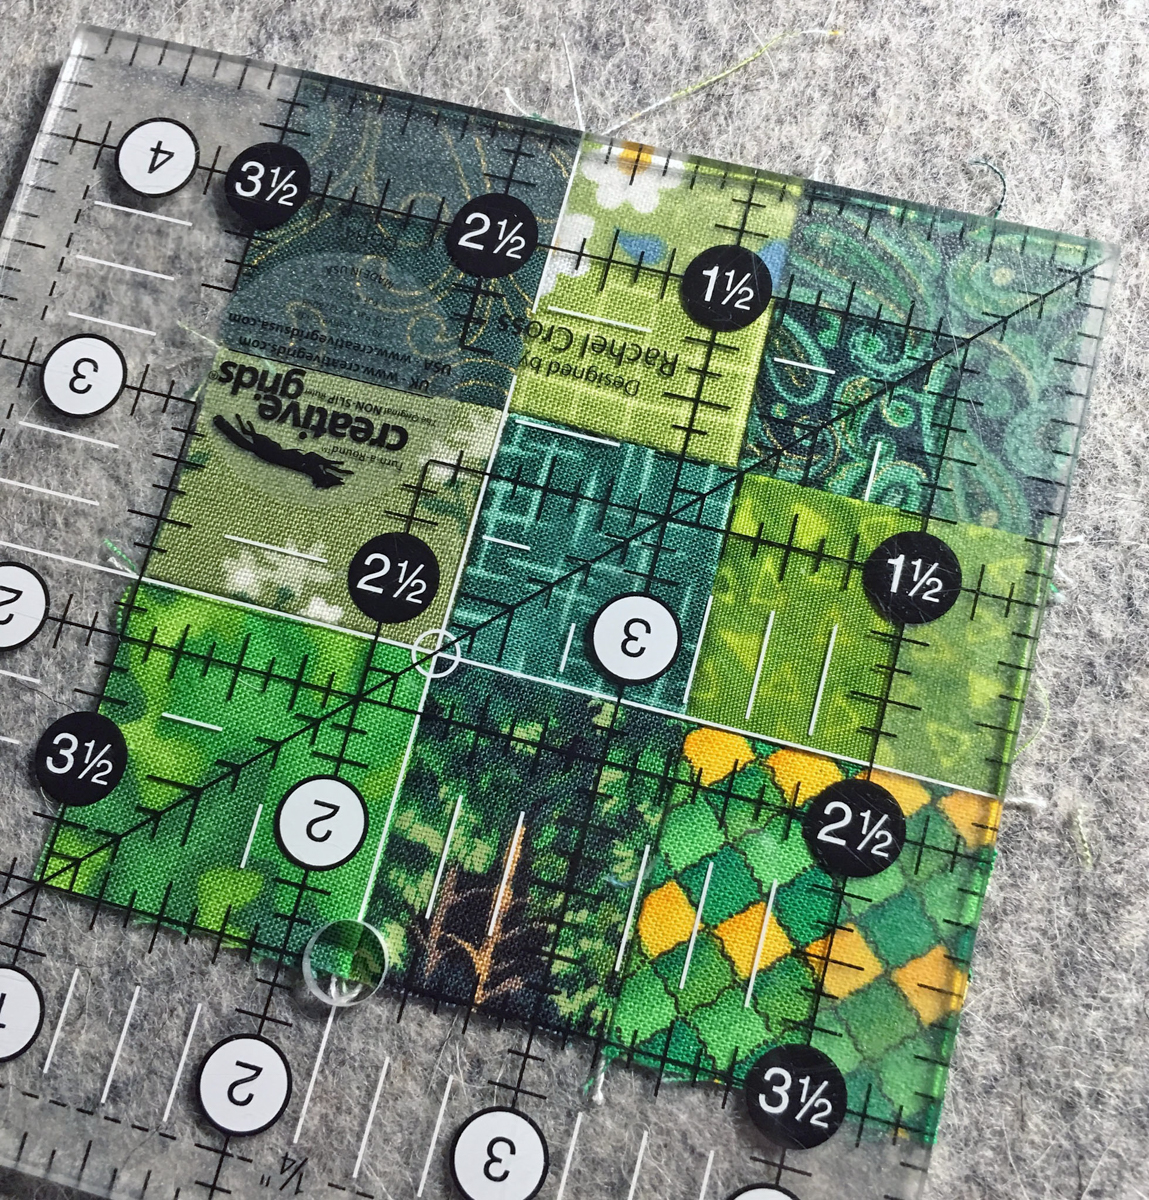
The 9-patch measures 3½″ square. Repeat to make 12 scrappy 9-patch blocks.
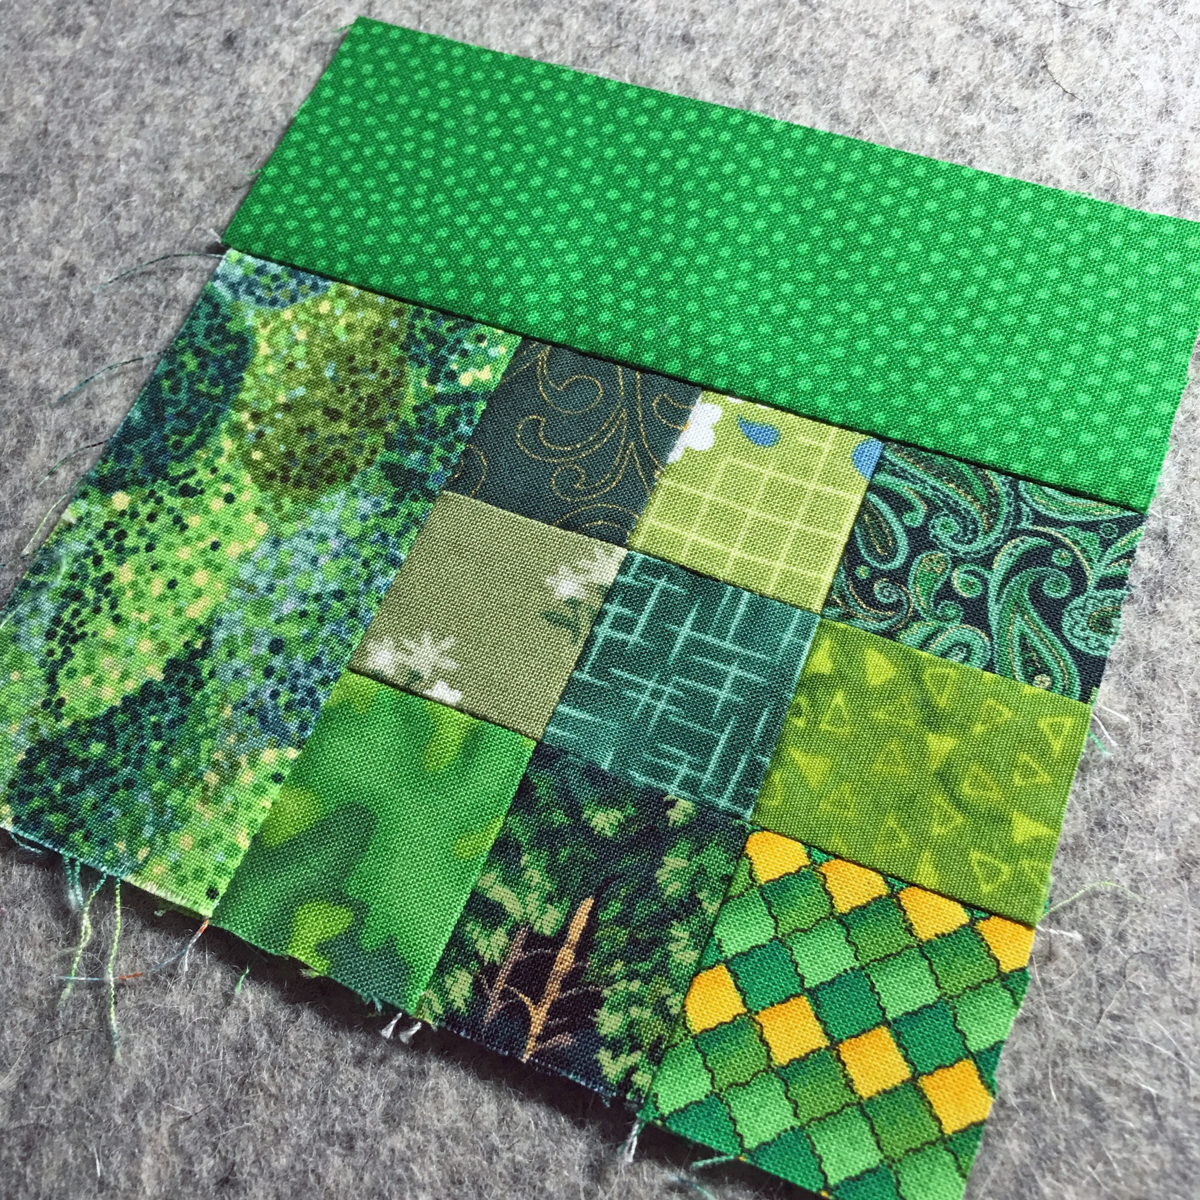
Sew a green 2″ x 3½″ strip to the left side of the block, then sew a green 2″ x 5″ scrap strip to the top of the block. Press the seam toward the strip after each addition.
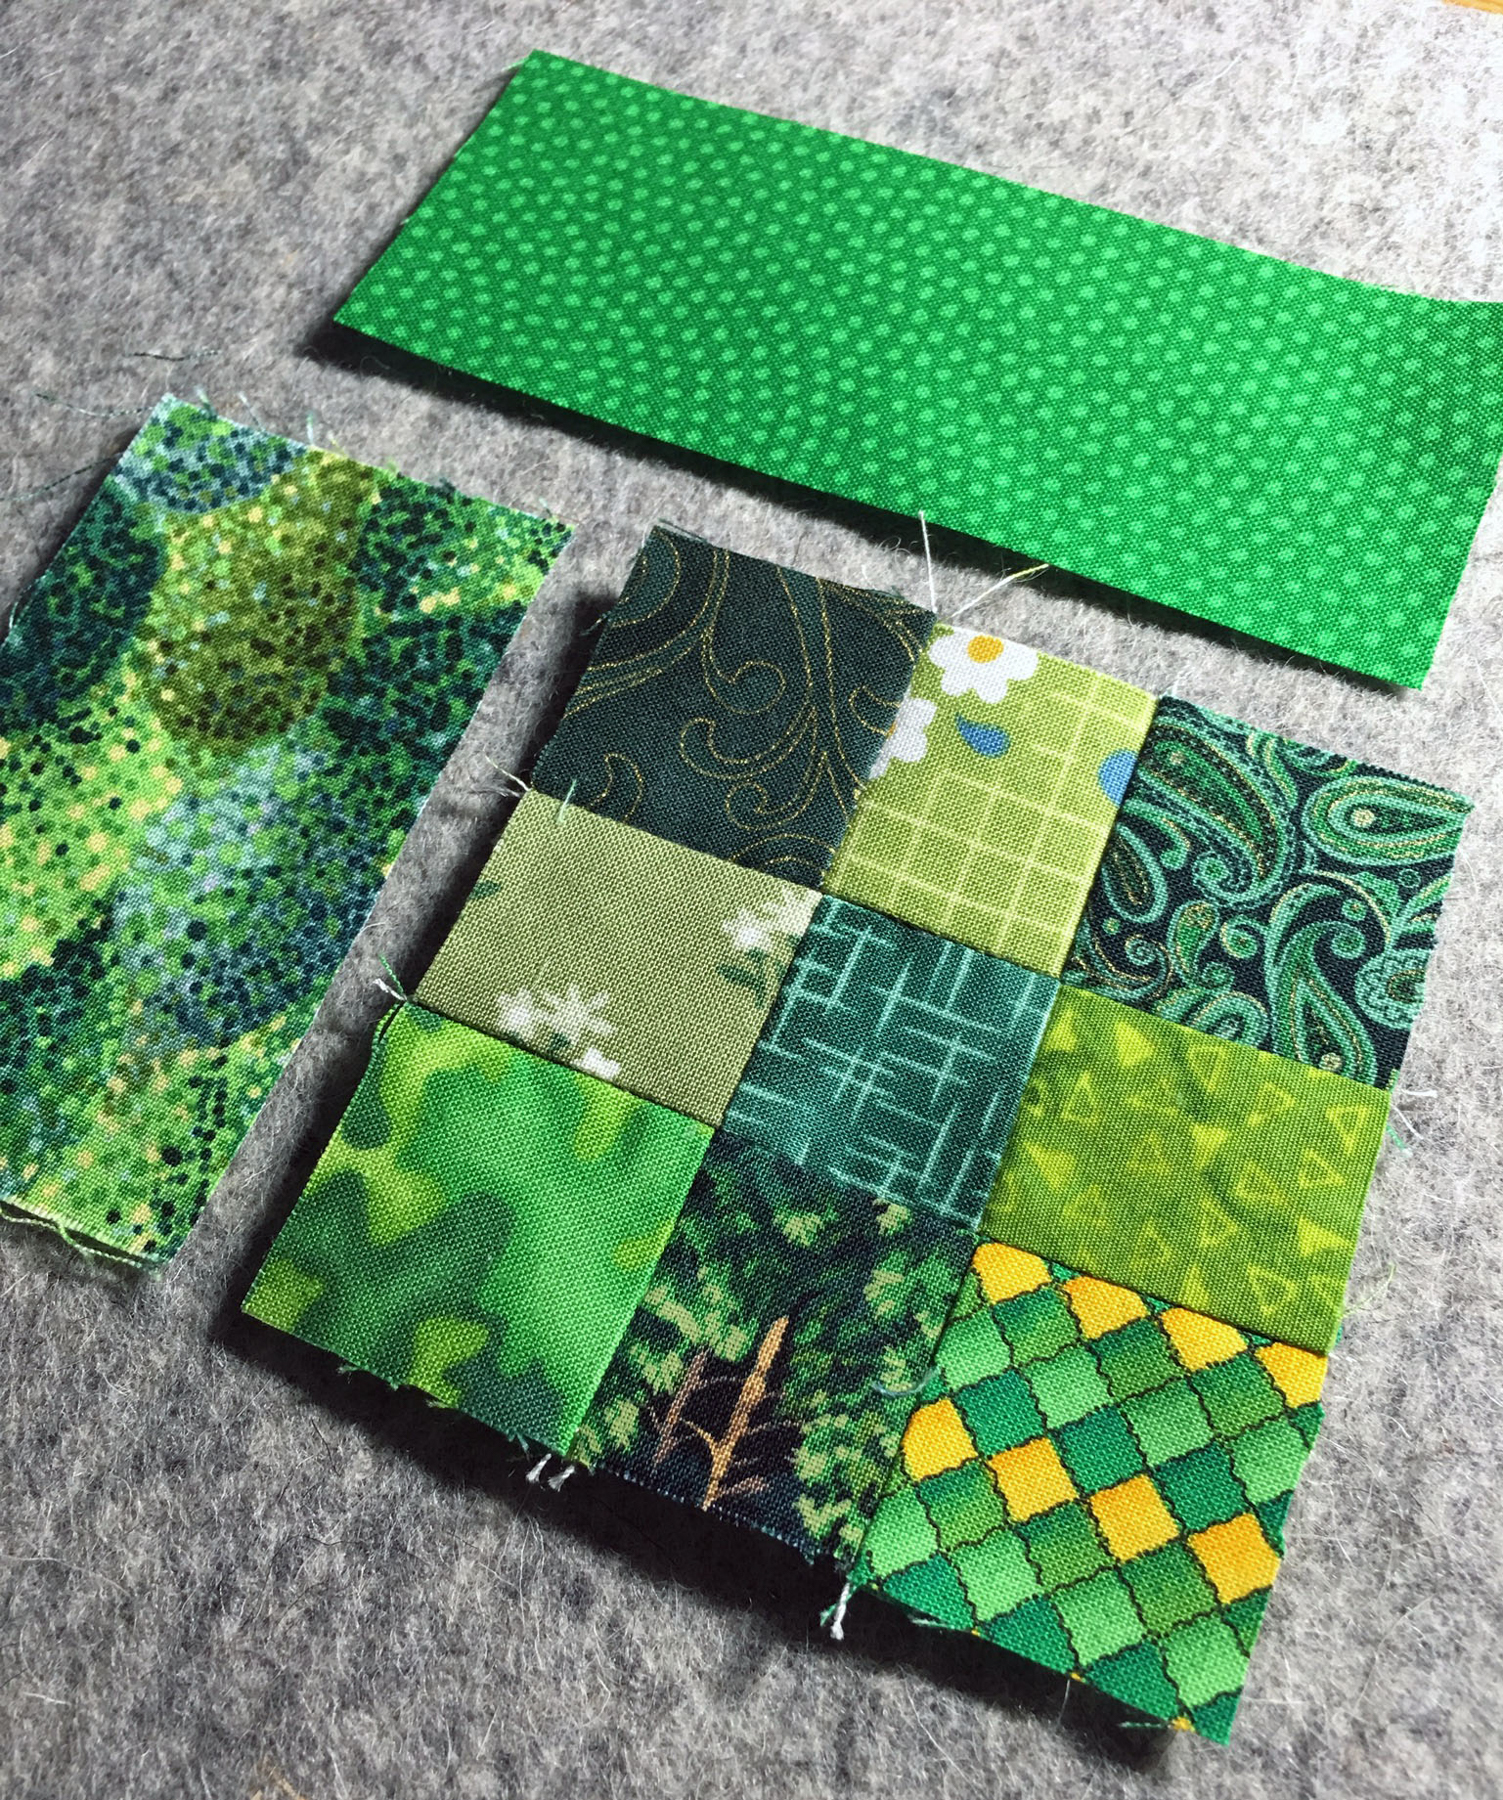
The block now measures 5″ square.
Repeat to make 12 blocks, and set aside.
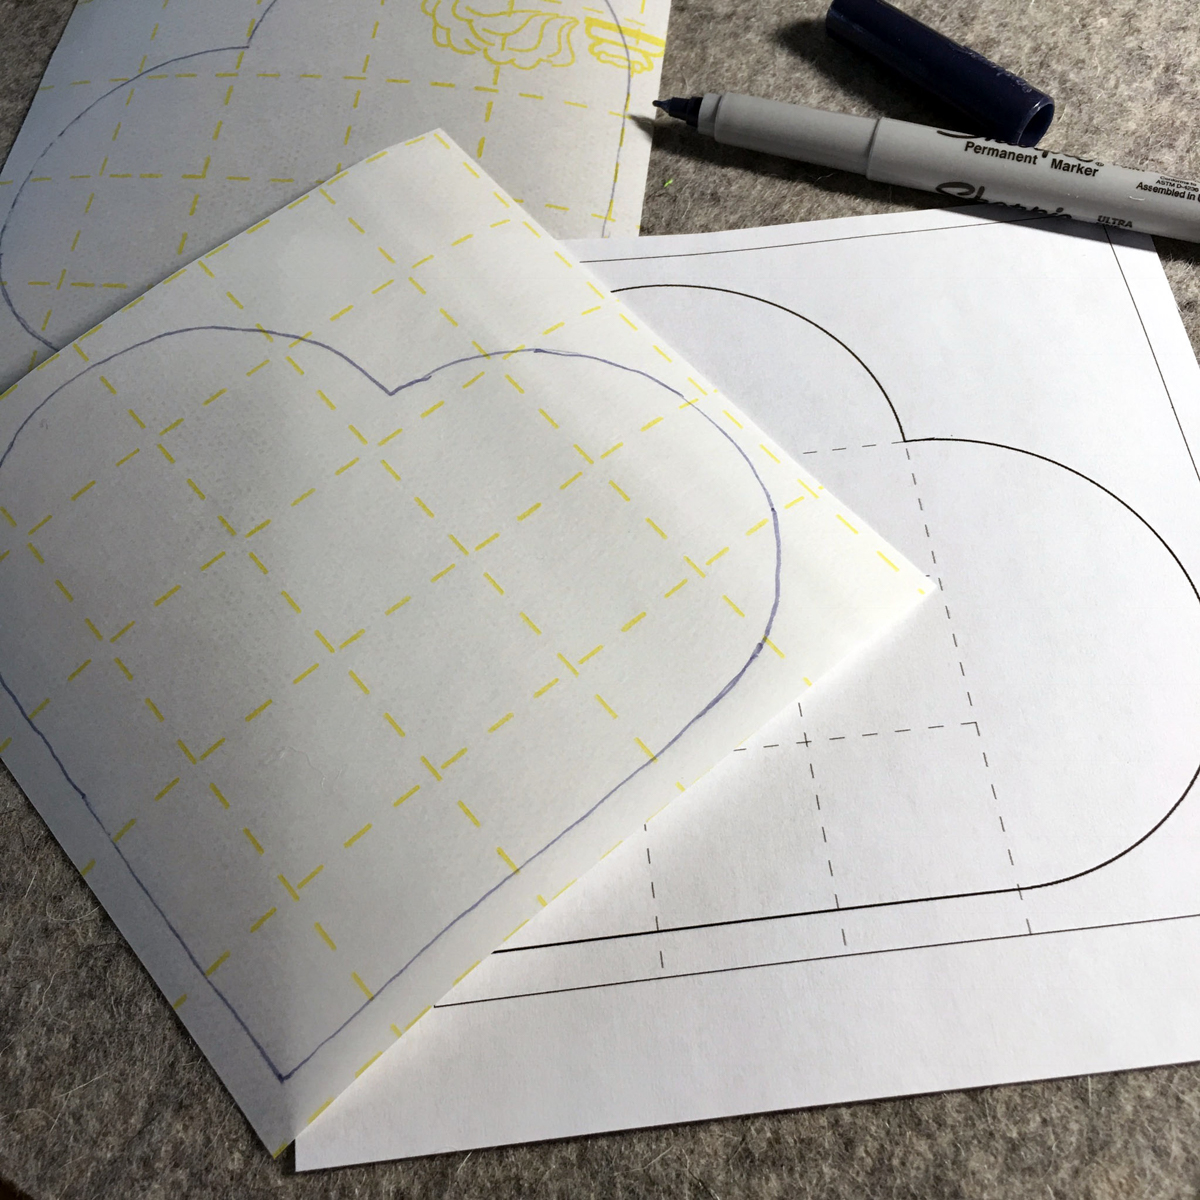
Align the edges of a 5″ fusible web square with the square on the heart-shaped leaf template. Trace the heart shape onto the paper side of a fusible web square. Use a fine-line permanent marker to draw the lines. Repeat to make 12 marked fusible web squares.
Retrieve the blocks set aside earlier. Fuse a marked fusible web square to the wrong side of each block, so the point of the heart shape is aligned with the 9-patch corner of the block.
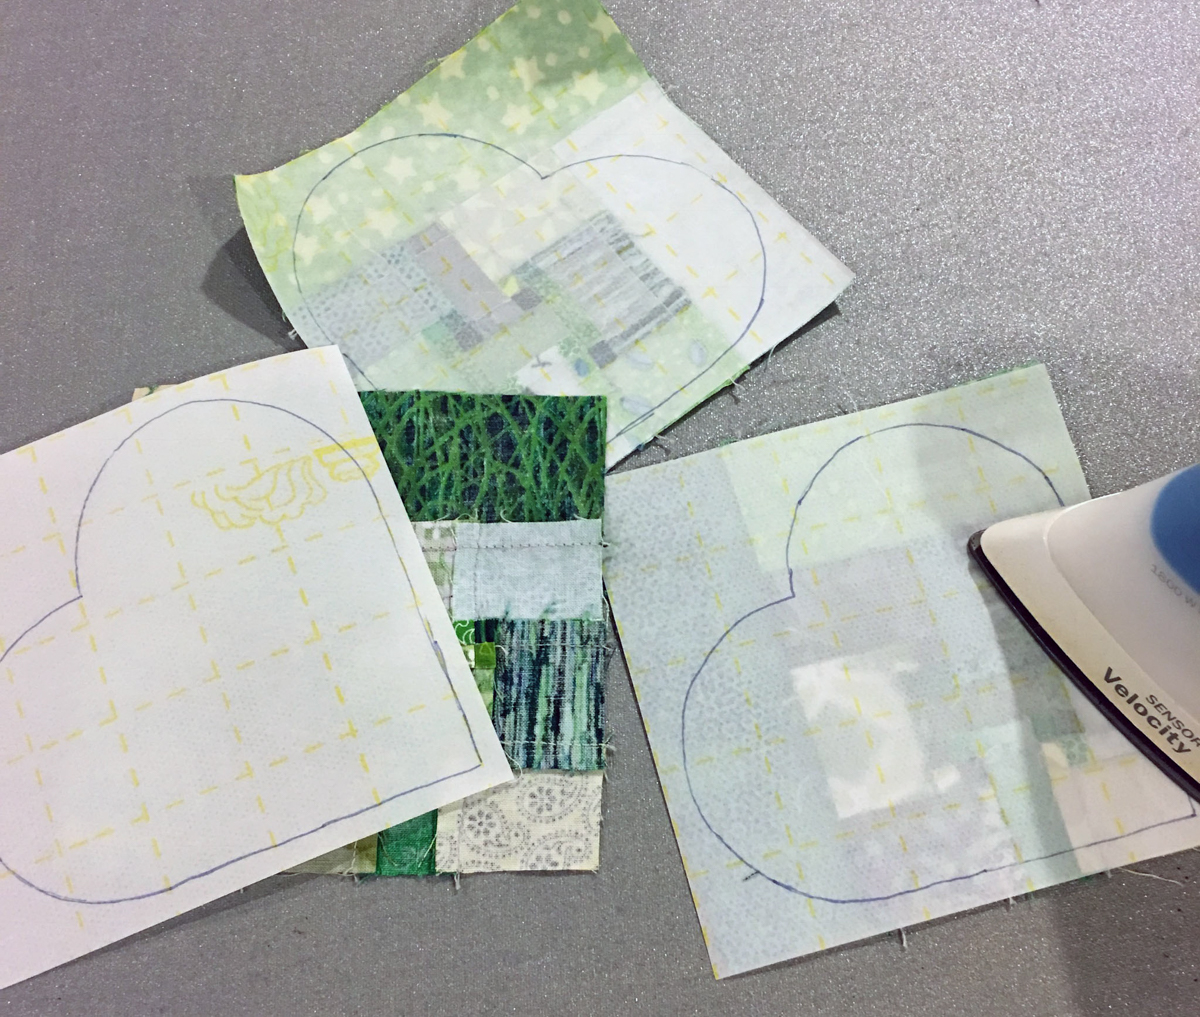
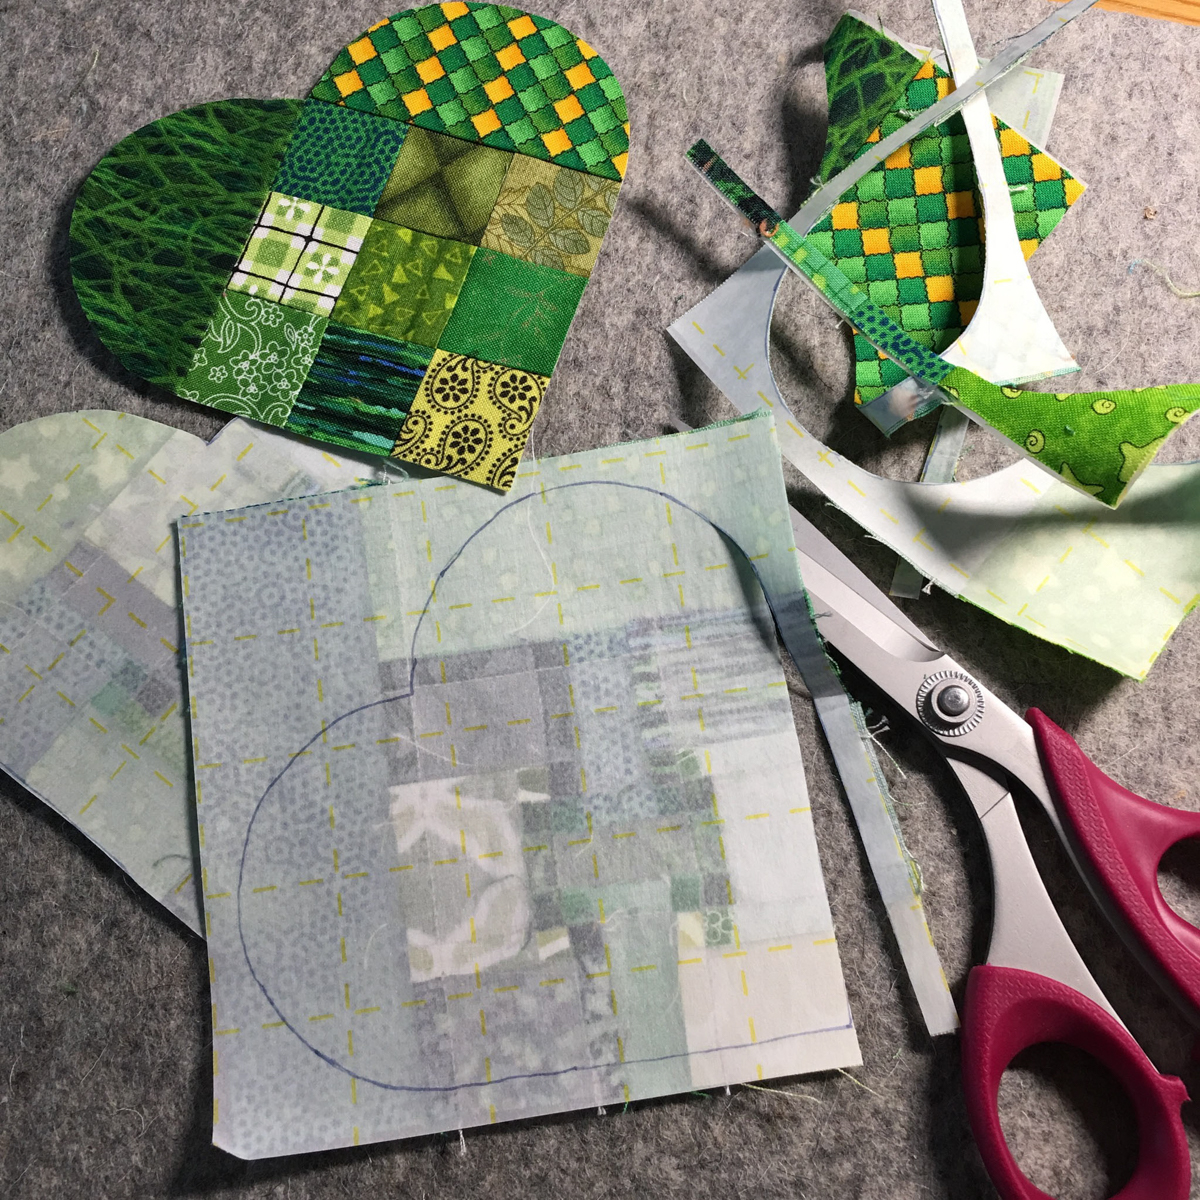
Cut on the lines.
Similarly, trace a stem shape on the paper side of each 2″ x 5″ fusible web rectangle. (The stem shape is already reversed.) Fuse to the wrong side of each of the remaining four green 2″ x 5″ scrap strips, and cut on the line.
You will have 12 scrappy heart-shaped leaves, and four stems.

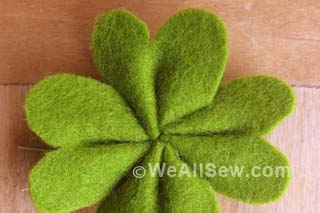
Select three heart-shaped leaves and one stem, remove the paper backing, and arrange the shapes into a shamrock on the right side of a 10½″ background square. The heart points should barely touch, and the stem should float apart from the heart-shaped leaves slightly. Make sure that all the shapes are at least 3/8″ away from the background fabric edges. Fuse. Repeat to make four shamrock blocks.
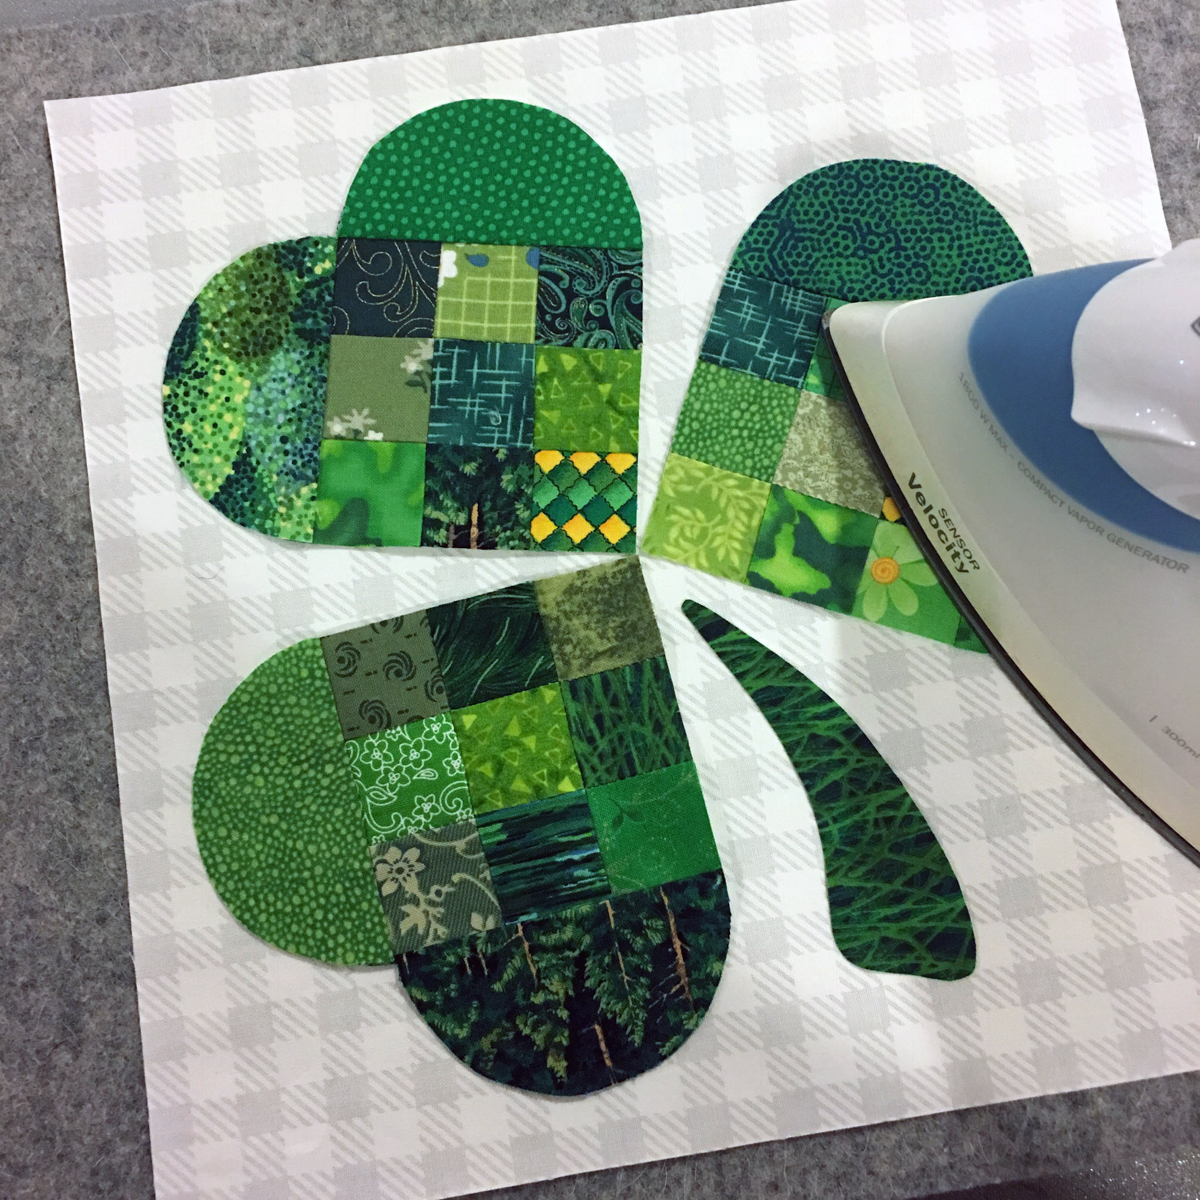
At this point, you could blanket, satin, or zig zag stitch (My favorite is the blanket stitch!) around the shapes to secure the applique edges, but I prefer to save that step, so my stitches can do double duty to secure the applique and the layers of the quilt sandwich at the same time.
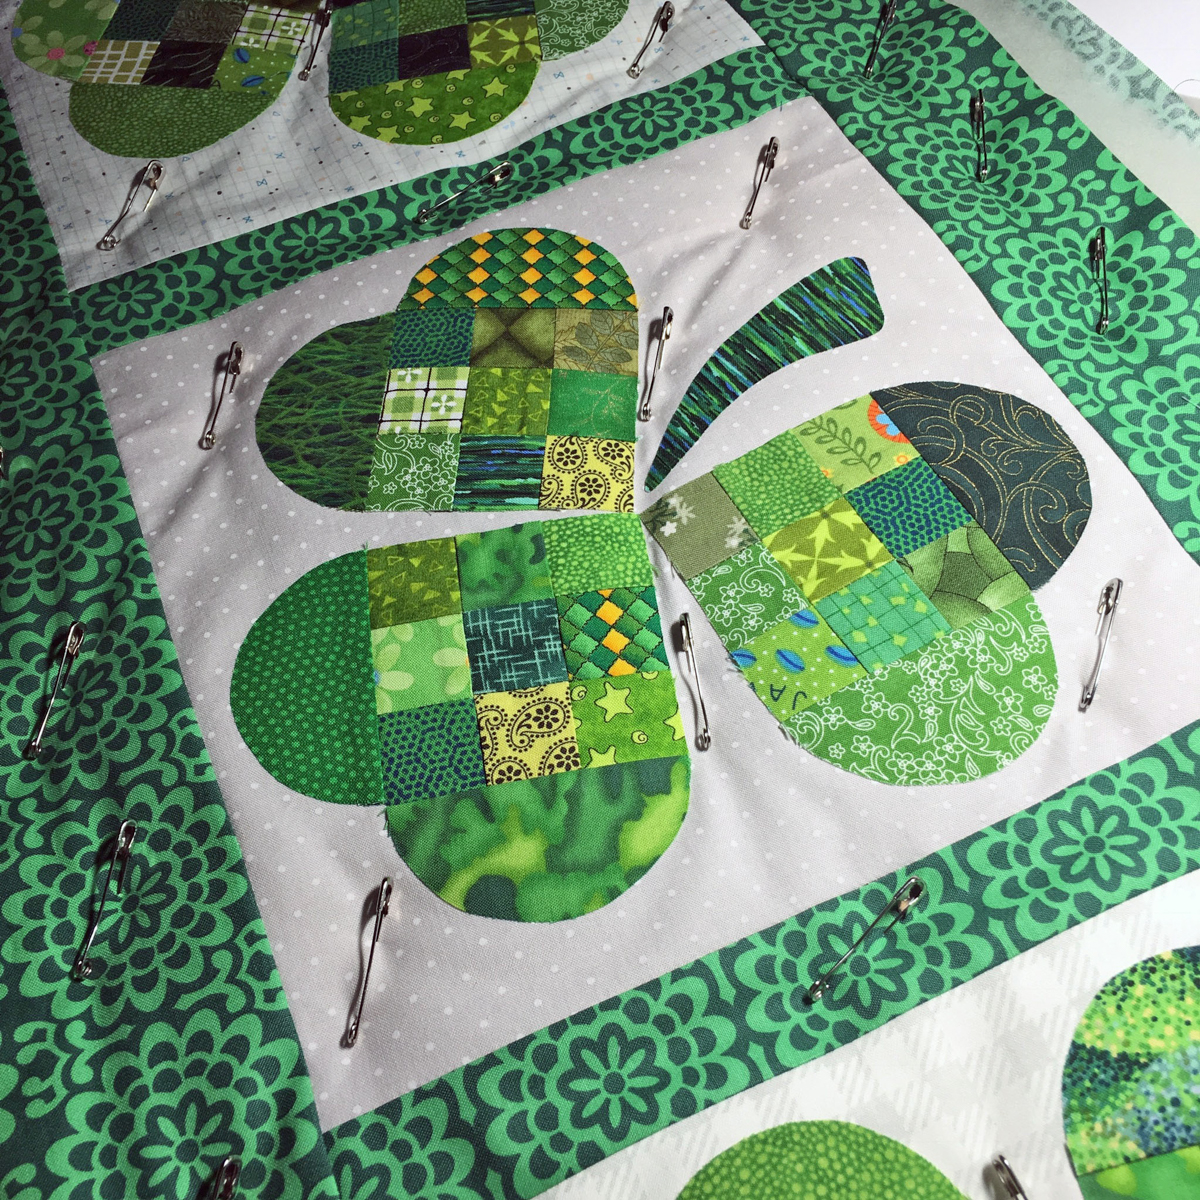
Arrange the four blocks in a row, then sew a 1¾ ″ x 10½″ green print sashing strip between the blocks. Press the seams toward the sashing strips.
Sew a 3″ x 44¼″ green print side border to each long side, and a 3″ x 15½″ green print end border to each short end of the runner. Press the seam toward the border after each addition.
Layer backing, batting, and quilt top. Pin baste.
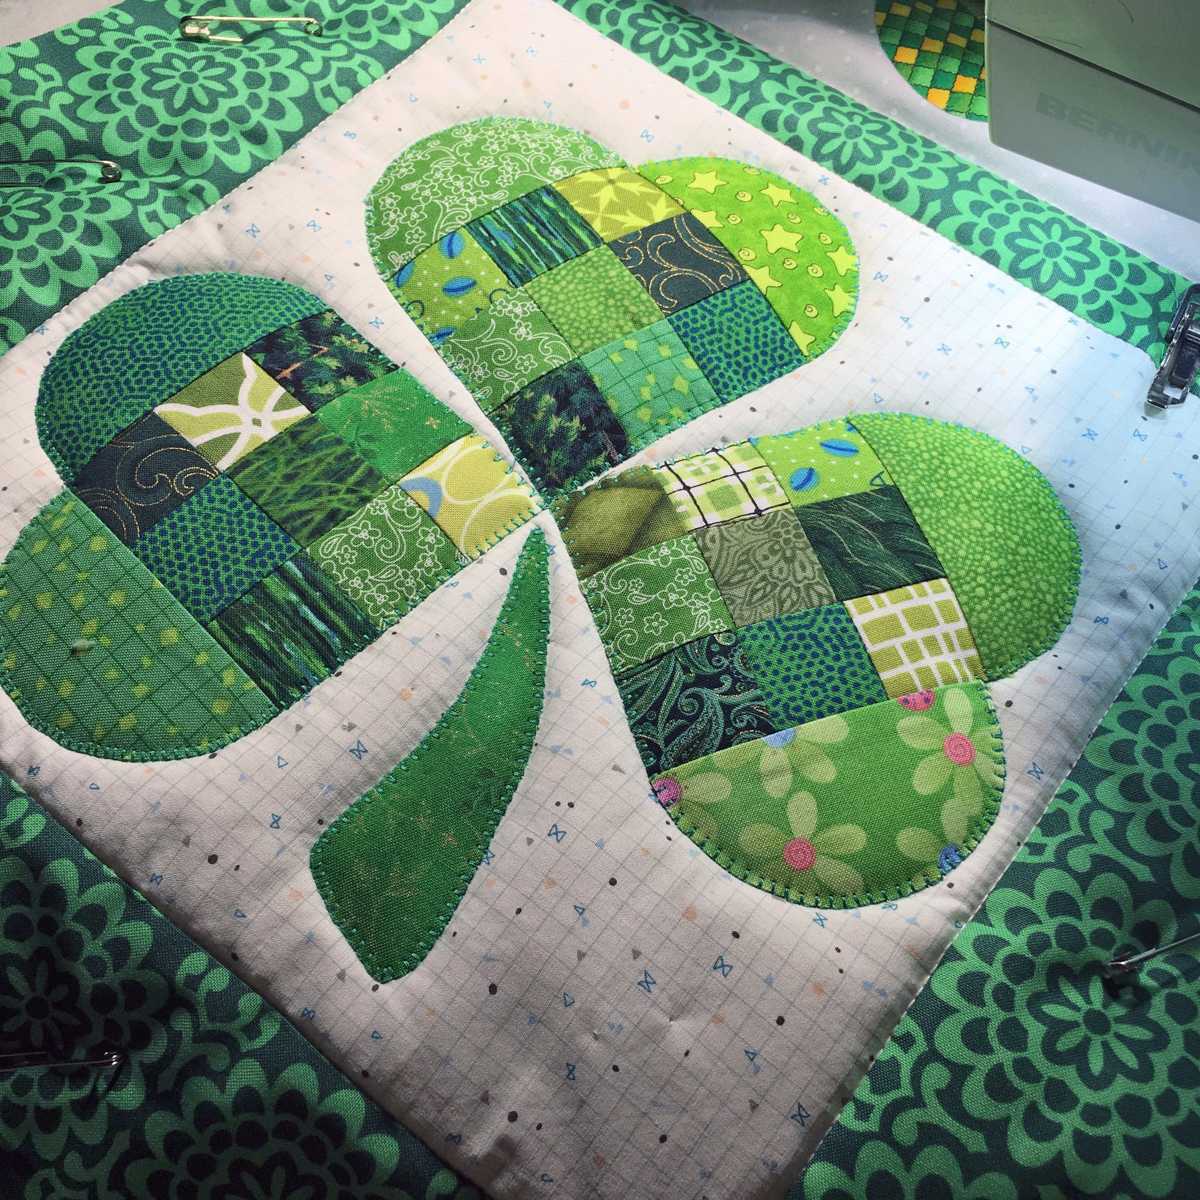
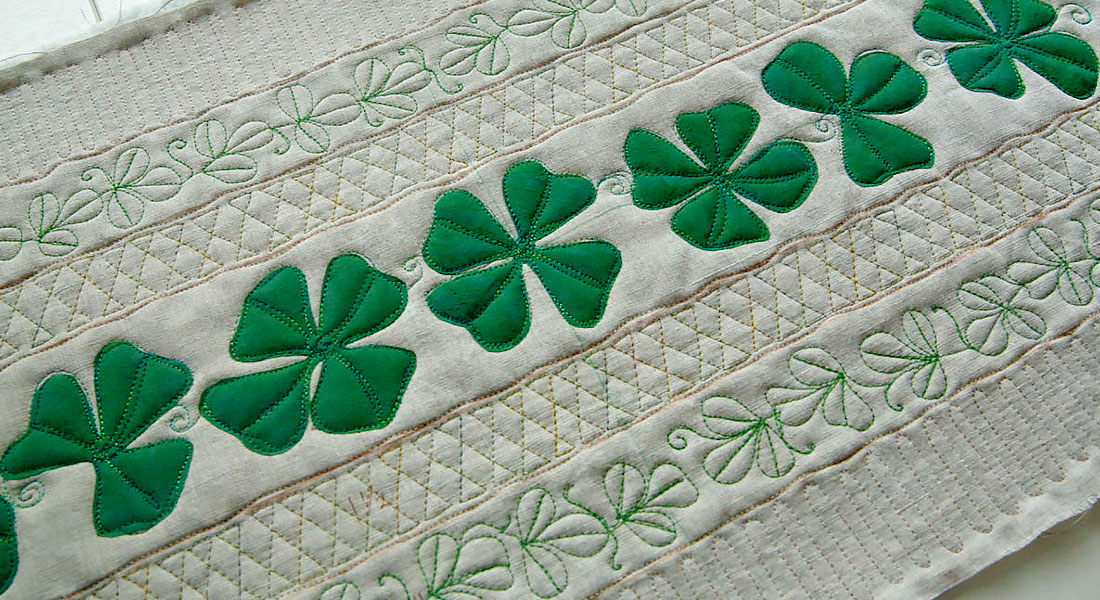
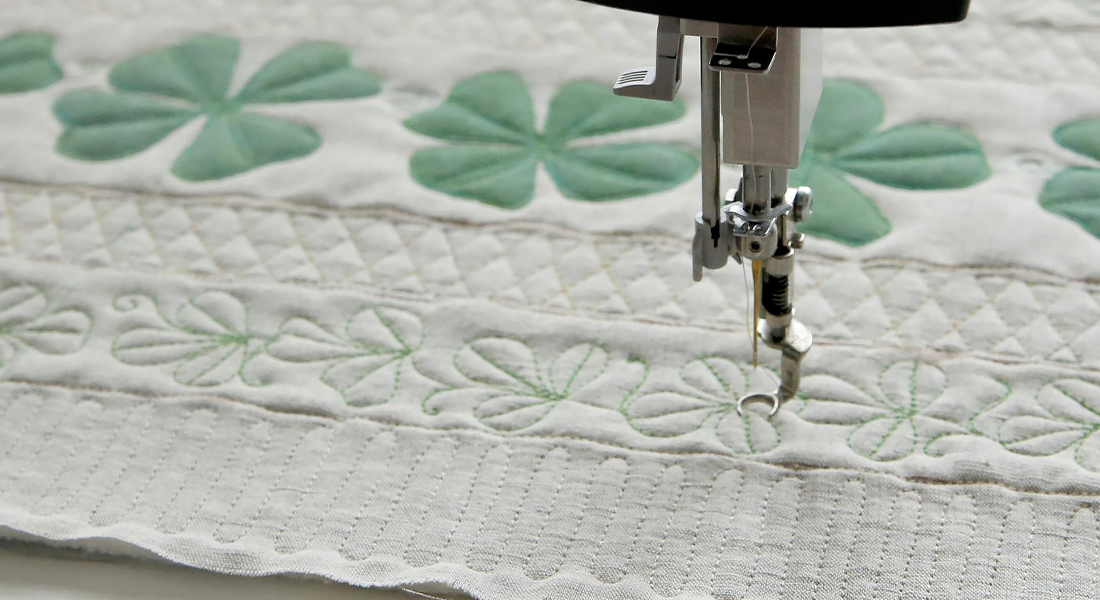
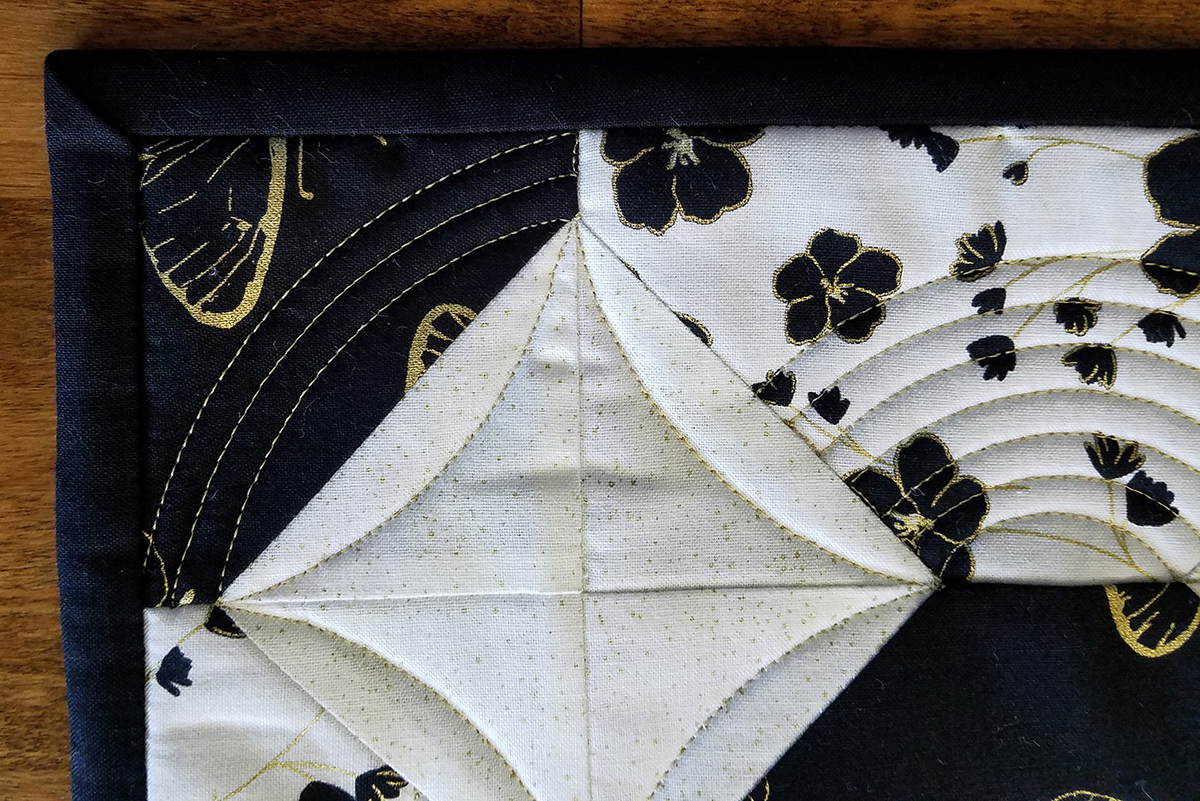
Using the BERNINA Walking foot, blanket stitch around the appliqué shapes through all layers. When you reach the point where the heart-shaped leaves intersect, submerge the needle into the quilt sandwich (needle down), lift the presser foot and pivot the runner under the foot to change quilting direction. Then proceed around the next leaf shape. Stitch around the stem separately.

Lovely! The wool batting sets the stage for great quilting texture and wonderful lofty puffy-ness!
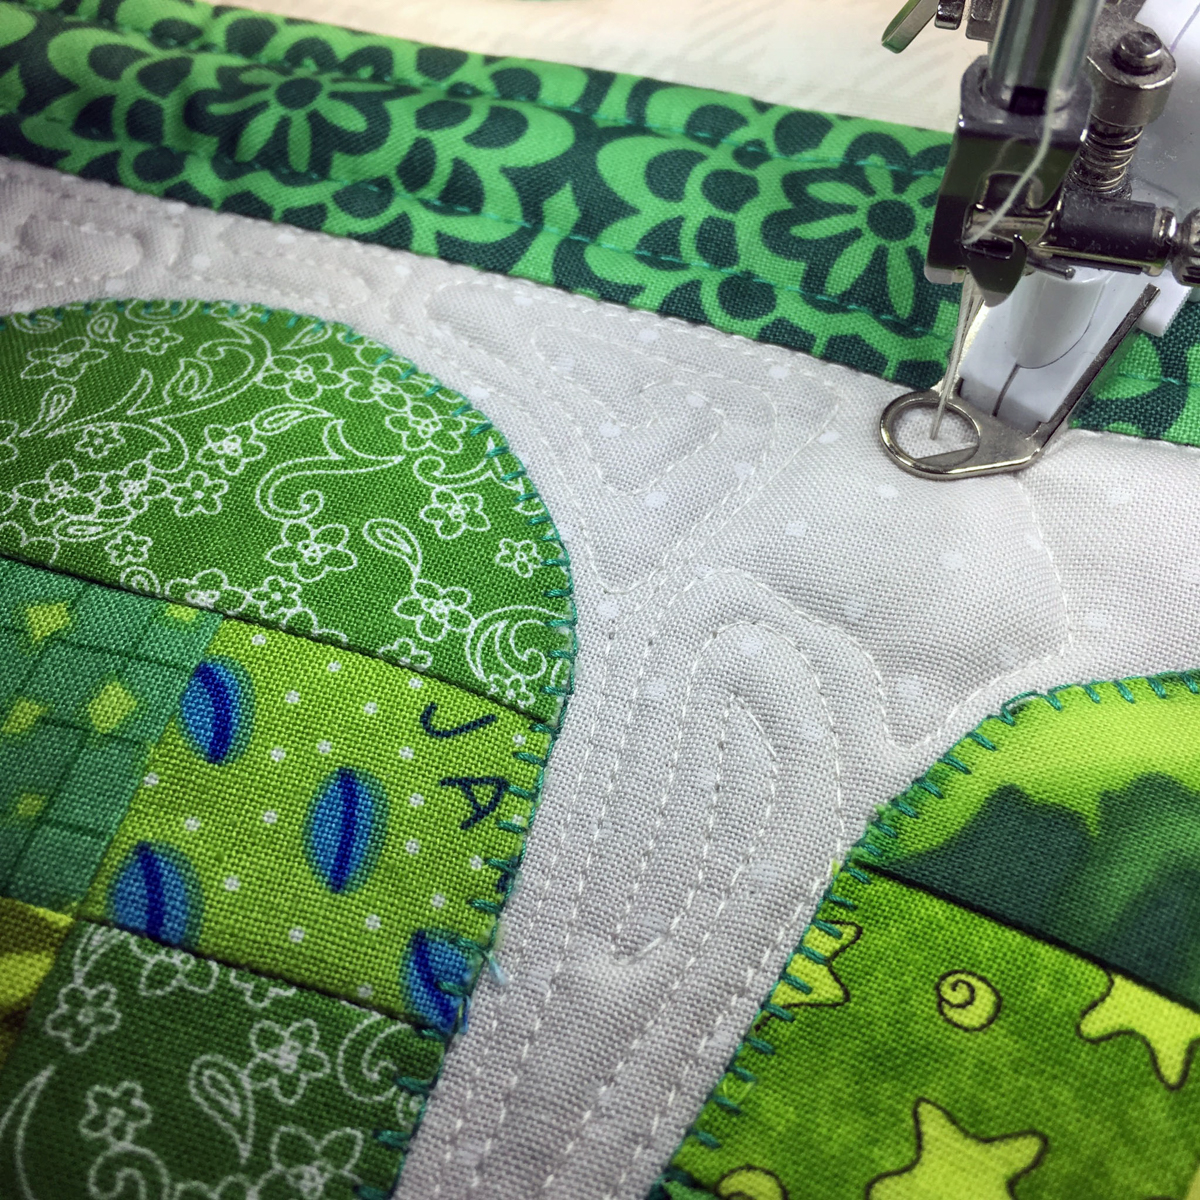
Now, switch over to the BERNINA Stitch Regulator (BSR) and fill in with some free-motion stitches.
With the quilting complete, trim the batting and backing even with the table runner top. Use the double-fold binding method to attach the binding strips. Sew the binding strips together end to end using a diagonal seam. Press the seams open, then press the binding in half lengthwise, wrong sides together.
With raw edges aligned, sew the binding to the front of the runner using a ¼″ seam. Miter the binding at the corners.
Turn the folded edge to the back of the table runner and hand stitch in place.
Then . . . put the corned beef and cabbage into the slow cooker and serve up a festive St. Patty’s Day feast!


What you might also like


25 comments on “Shamrock Table Runner for St. Patrick’s Day”
-
-
I just completed 2 of the Shamrock table runners and they came out so nice. I did not do the quilting around each shamrock as I had a cute shamrock printed white as the background so I stitched in the ditch. Great effect! Hopeful for an Easter inspired table runner coming up.
-
-
This is very cleaver! I like the way you used the hearts and 9 patch. Good photos of quilting also.
-
This is adorable!!! Thank you so much!
-
I’m going to make this runner. The instructions look easy to follow and I love the design. Wish me some Irish luck.
-
You have motivated me to give this a try. Thank you for the beautiful directions.
-
I love this but will make three. One for me and two as gifts. Thanks for such clear directions. Happy Quilting!
-
Thank you this pattern is adorable. One of the best shamrock table runners I have seen.
-
This looks fun. I’m new to appliqué so can you provide a few name brands … like the grid on the paper in your sample but don’t see that when I search in amazon. Appreciate you sharing this project!
-
I use Steam-a-seam2 Lite which has the grid as shown in photos. Hope that helps.
-
-
Hi, I really like this table runner, however, I do have one issue with your post. 17th of March is St. Patrick’s Day NOT St. Patty’s Day. Patrick is the patron saint of Ireland & he was a man….. Patty is short for Patricia, a girls name.
-
Wow! I love this table runner, it is beautiful! In my email it said it was free? I cannot find where to download this pattern? Can you help me with this? I would love to make this really bad!!!
Thank you,
terri2-
Joan Ford provides the heart-shaped leaf and stem template for download in the post. You can find it under the section “Other Materials.” Enjoy!
-
Terri, there isn’t an actual pattern to download, everything you need – materials requirements, cutting, and step by step instructions and photos are all in the blog post. The shamrock and stem shapes as well as a link to a bonus place mat pattern are linked in the post. Hope this helps!
-
-
Part of what would be helpful, is being able to print or save to a file. Not so much for instruction, but for the picture reference. I like to have a picture to refer to for skill building or making sure I’m doing technique correctly.
-
Hello oakson2014, our WeAllSew blog content is posted in an open format. If you wish to print the post, you can easily print your tutorials from the WeAllSew blog. If you attempt to print directly from the screen a PDF will be generated for your convenience. Please give it a try.
-
-
Is there a template available for the leaf and stem?
-
Yes! Look under the list of “Other Materials” near the top of the post. .. you’ll see a link there for the pdf file. Happy Stitching!
-
-
I also have a Bernina, love it!
-
I tried to print this table runner from a variety of options. First time, no pictures, Second time, copied it to my word processor and no pictures copied, Third time from my we browser where I got two pages with pictures and then no pictures just text. Is there something I am missing about printing the projects from We All Sew? Thx
-
Hello! It may depend on the browser you are using. With Google Chrome, make sure all the images are loaded on your page before printing. In the upper right hand corner, click the three dot menu and then choose print (or click Ctrl+P on your keyboard). It should load all of the text an images on the page. To save paper, be sure to change your Page settings to Custom (click the little drop-down next to Pages to do so) and enter 1-15 (this should be the entire post, but not the comments). We hope this helps!
-
-
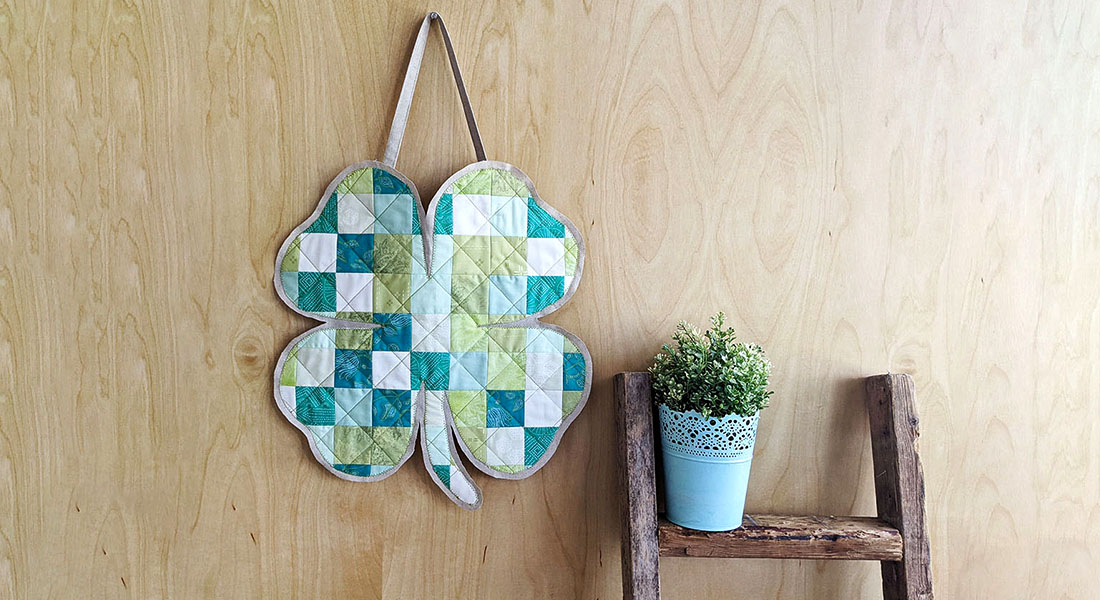
This is SO cute!! You inspired me to get out my machine and start quilting again! I’m going to put the 4 blocks together in a square and make a table topper. These little green 9-patch hearts make me smile!! Thank you!!
-
How can I print these instructions out? Phone to small to read from, home computer in another room, will not fit in sewing room. Help please, I need to make this soon.
-
Hello! You can print directly from your browser by clicking Ctrl+P (on Windows) or Command+P (on Mac). You can also go to your browser menu and select “Print.” Any of these options should open the print dialogue box where you can print the blog post out. You can also copy and paste the blog into a Word Document and print from there. We hope this helps!
Thank you for reading WeAllSew!
-
-
Using just one block, I made a wall hanging for my sewing room. I am very happy with the results. Thanks to your detailed instructions, it was a fun, easy project.
Leave a Reply
You must be logged in to post a comment.
I’m absolutely crazy about this pattern (I have no such blood in me either) but the fabric colors are amazing & the shapes as well as quilting approach, well it’s all A-#1 in my view.
For my purposes though, because of my kitchen table, I’d make 4 blocks but sew them together as a square so I’d have approximately 15 inches. I’ll plan to make it!
Thank you very much, WeAllsew.com