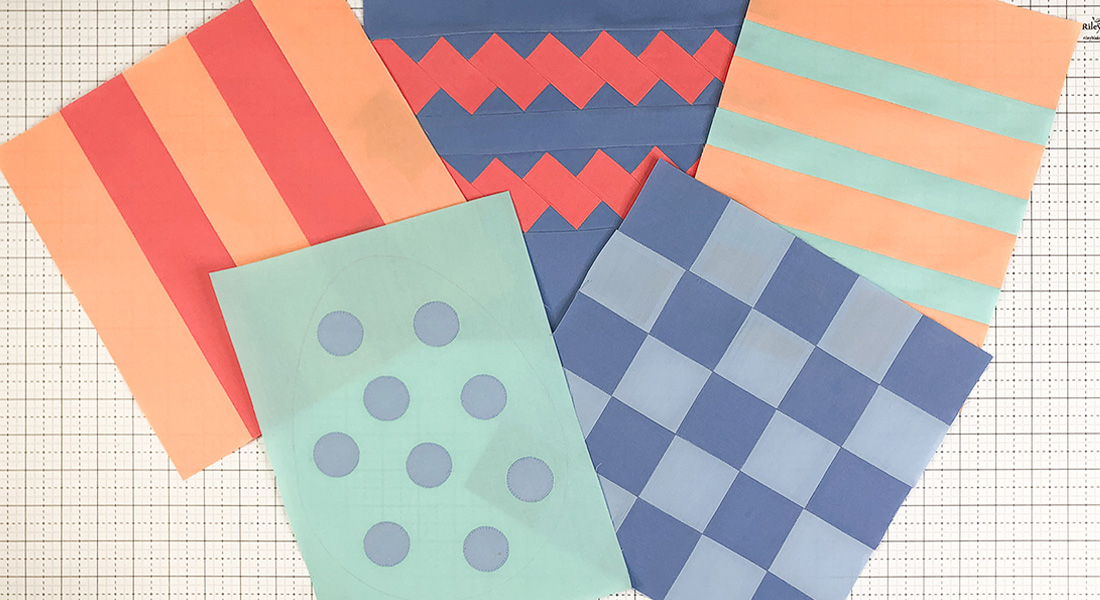
Shamrock Table Runner Quilt Along, Part Two
Welcome to part two of the Shamrock Table Runner Quilt Along!
This series is designed to help you learn a variety of free-motion quilting techniques while creating a small art quilt or table runner. Many of the skills learned in this project can be applied to your larger quilting projects.
In part one, we created the basic framework for our quilt. First, we layered a quilt sandwich. Next, we marked the center lines and the quilting lines. Finally, we stitched the lines to divide our table runner into sections for further design.
In this lesson, we will create appliqué shamrocks to fill the center row and then free-motion quilt around the appliqué.

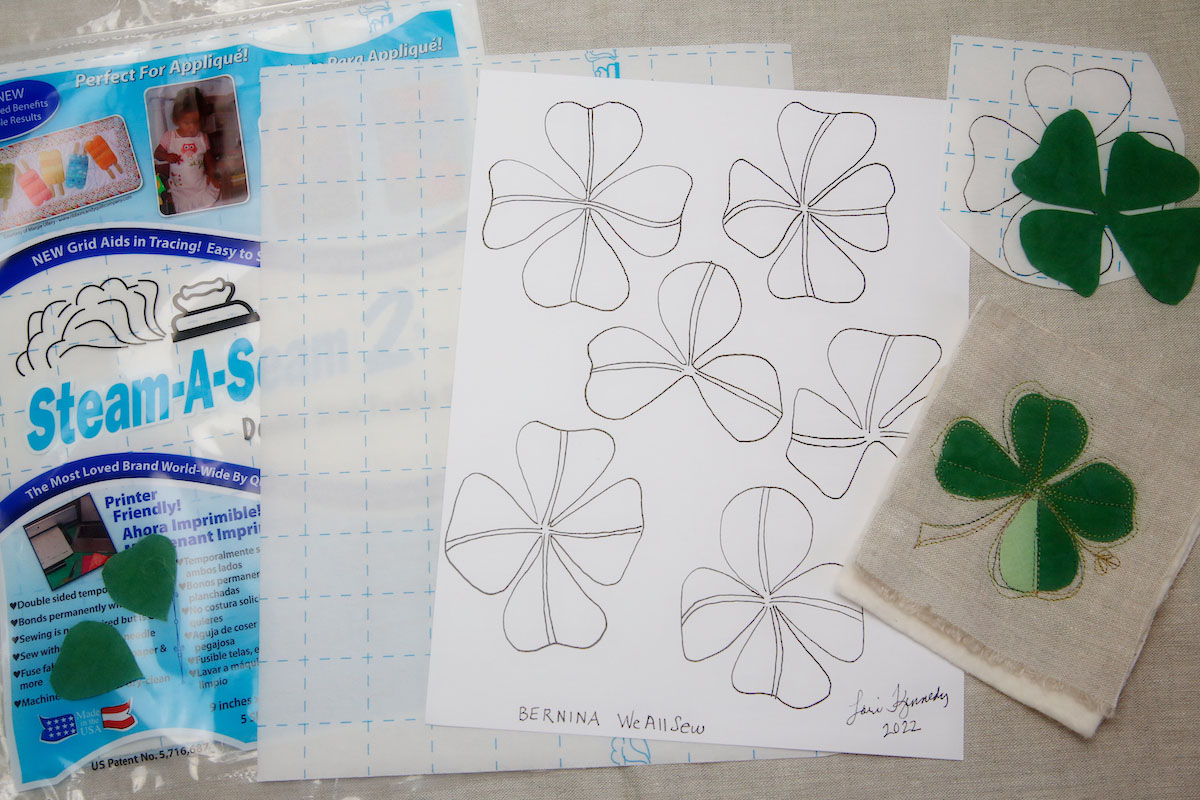
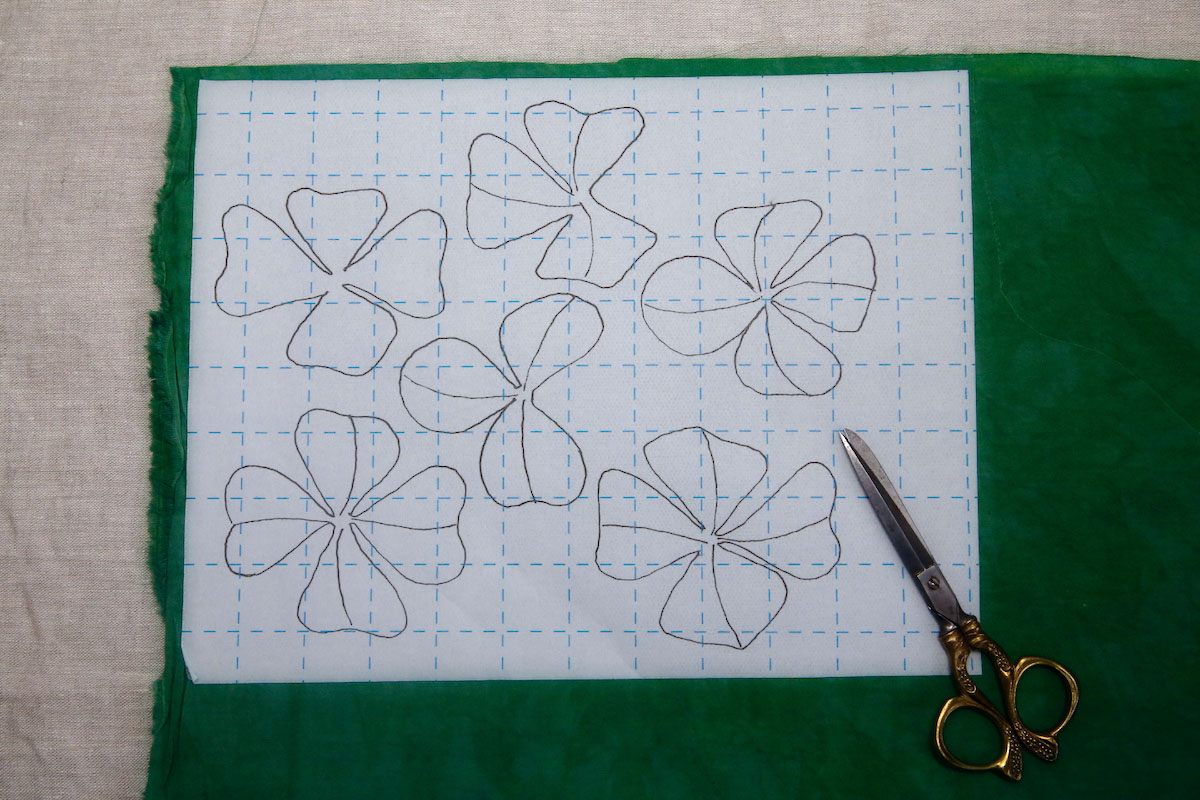
If you haven’t done so already, print the shamrock pattern. Note: You may choose to print the shamrock pattern directly on to fusible web designed for printers.
What is Fusible Web?
Fusible web is a double-sided adhesive that allows you to bond fabric to fabric. The web comes in sheets or on a roll and has paper on one or both sides of the fusible web. There are many brands including Steam-a-Seam (Warm Company), HeatnBond (ThermoWeb), and WonderUnder (Pellon). While the brands have slight differences, they are used in basically the same way:
- Trace or print a design onto the paper protecting the web
- Peel off the backing paper (if it has one)
- Use an iron to fuse the web to the applique fabric
- Cut out applique shapes
- Fuse shapes to base fabric.
Each manufacturer has specific instructions for fusing time and heat settings—be sure to read the directions carefully.
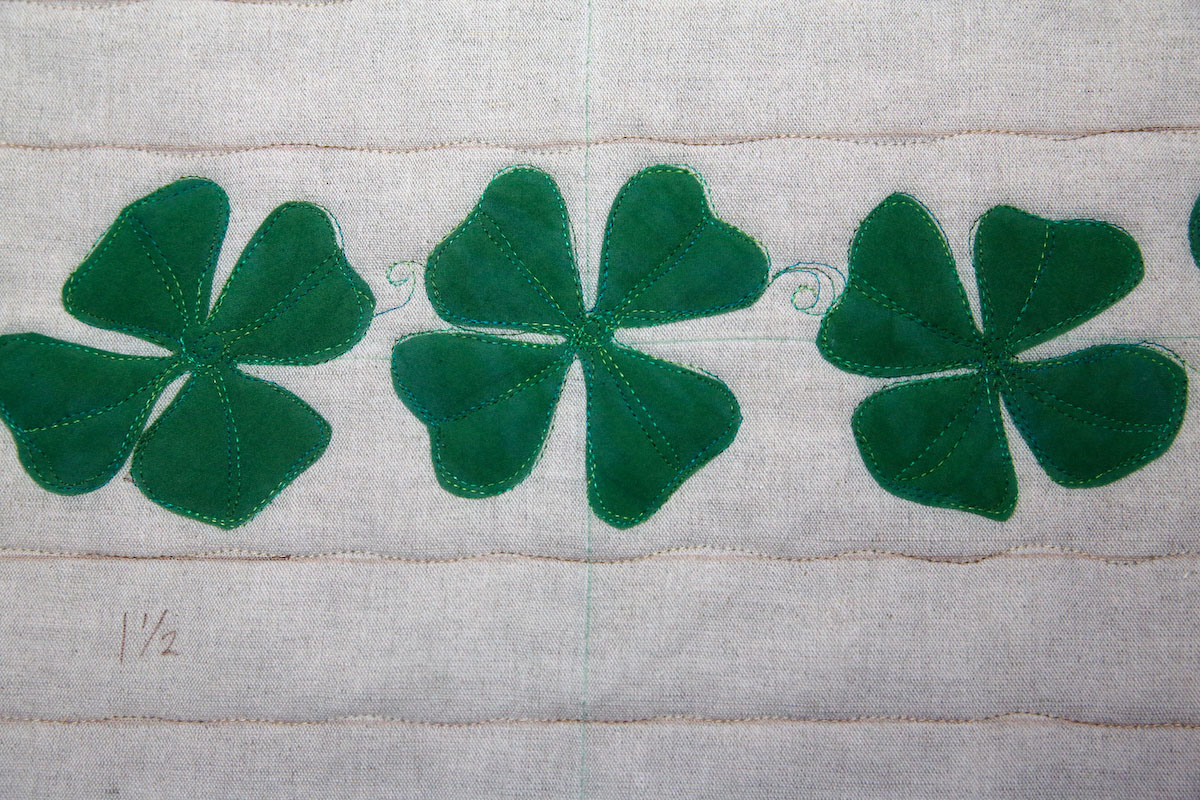
Shamrock Appliqué Center Row
In today’s lesson, we will complete the four-inch center row of the table runner with shamrock applique.
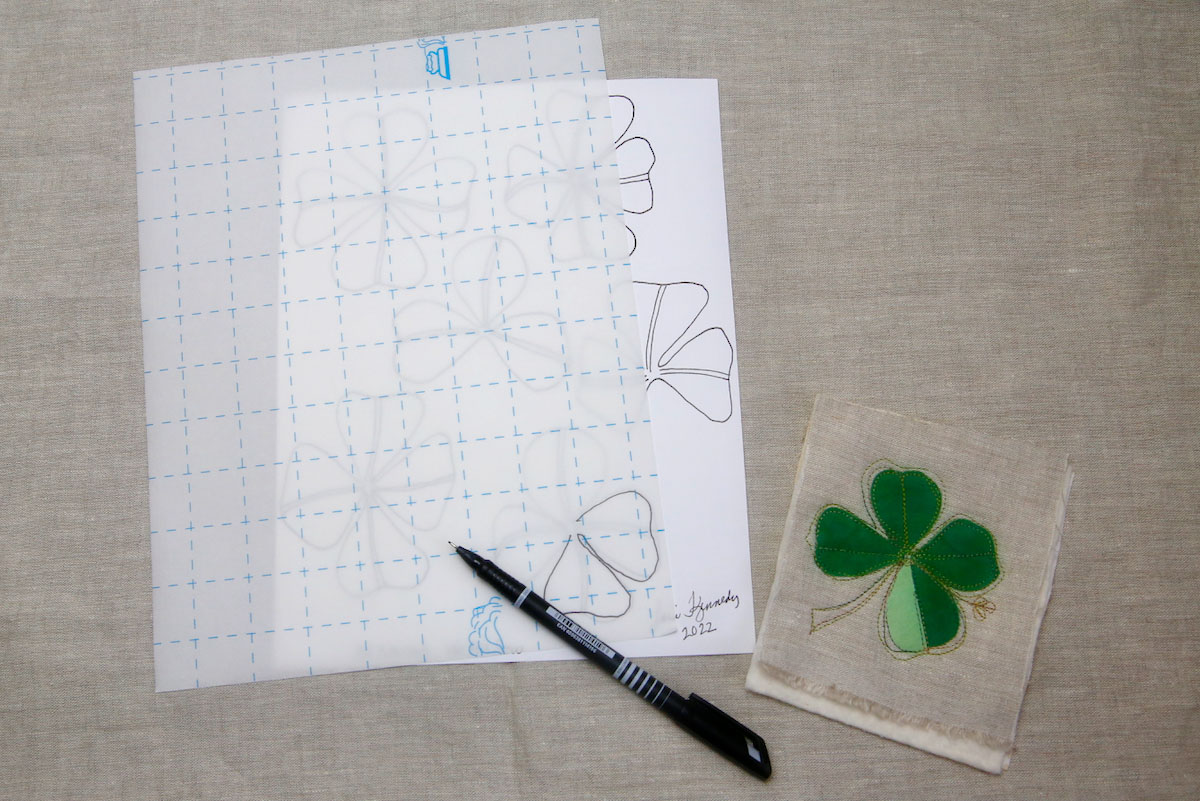
Trace Shamrocks on Fusible Web
Layer a piece of fusible web on top of the printed pattern and trace the shamrocks.
Peel Off Backing Paper
If your fusible web has paper on both sides, peel off the backing paper. Be careful to remove the backing paper and not the paper with the traced pattern. Note: Some brands only have paper on one side. If the web is designed to go through a printer, there will be paper on both sides of the web.
Fuse to Green Fabric
Next, follow the manufacturer’s instructions to fuse the sheet to the green shamrock fabric.
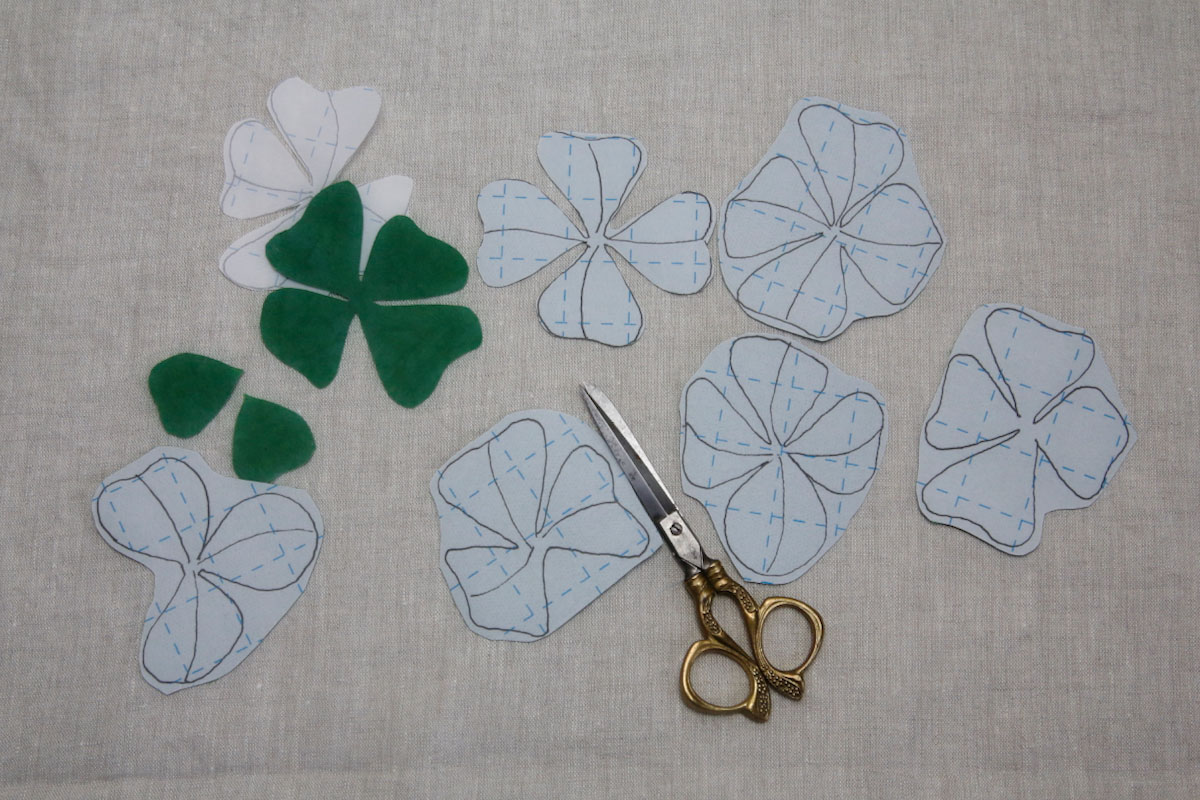
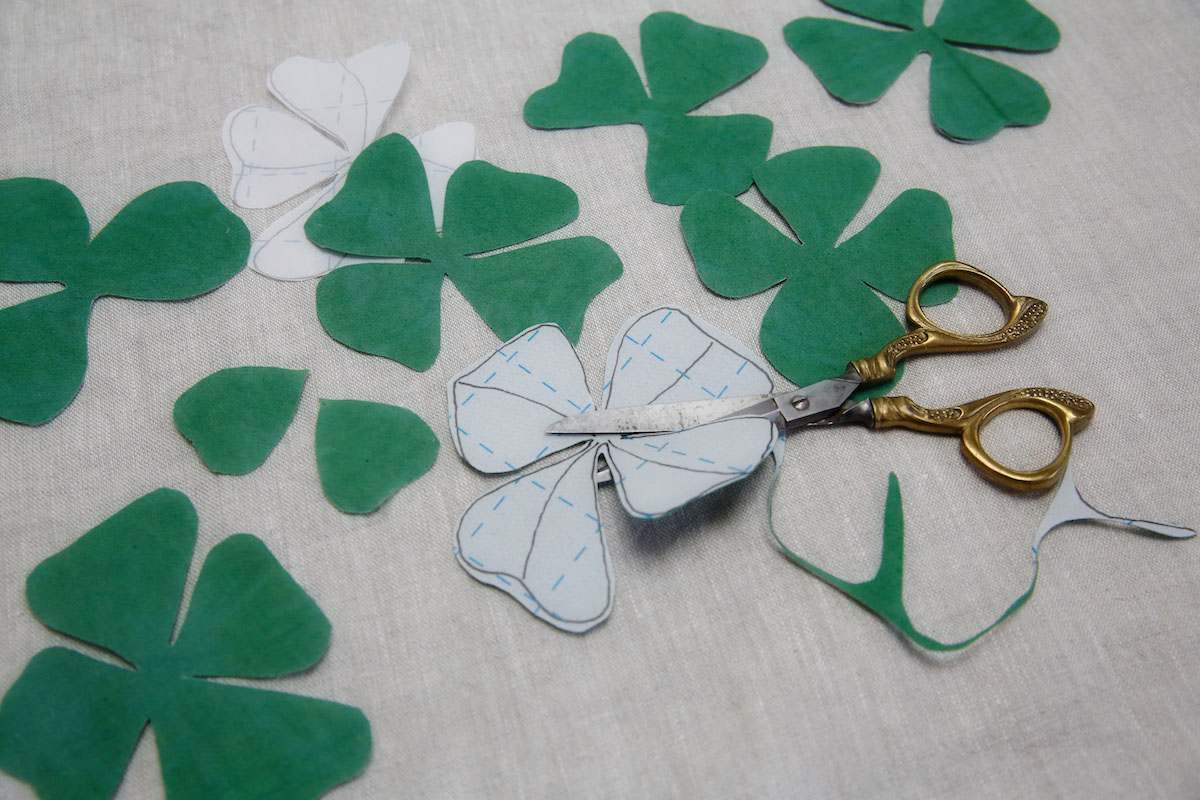
Cut Shamrocks
Cut out the shamrocks. Save the scraps to cut smaller shamrocks or partial leaves if desired.
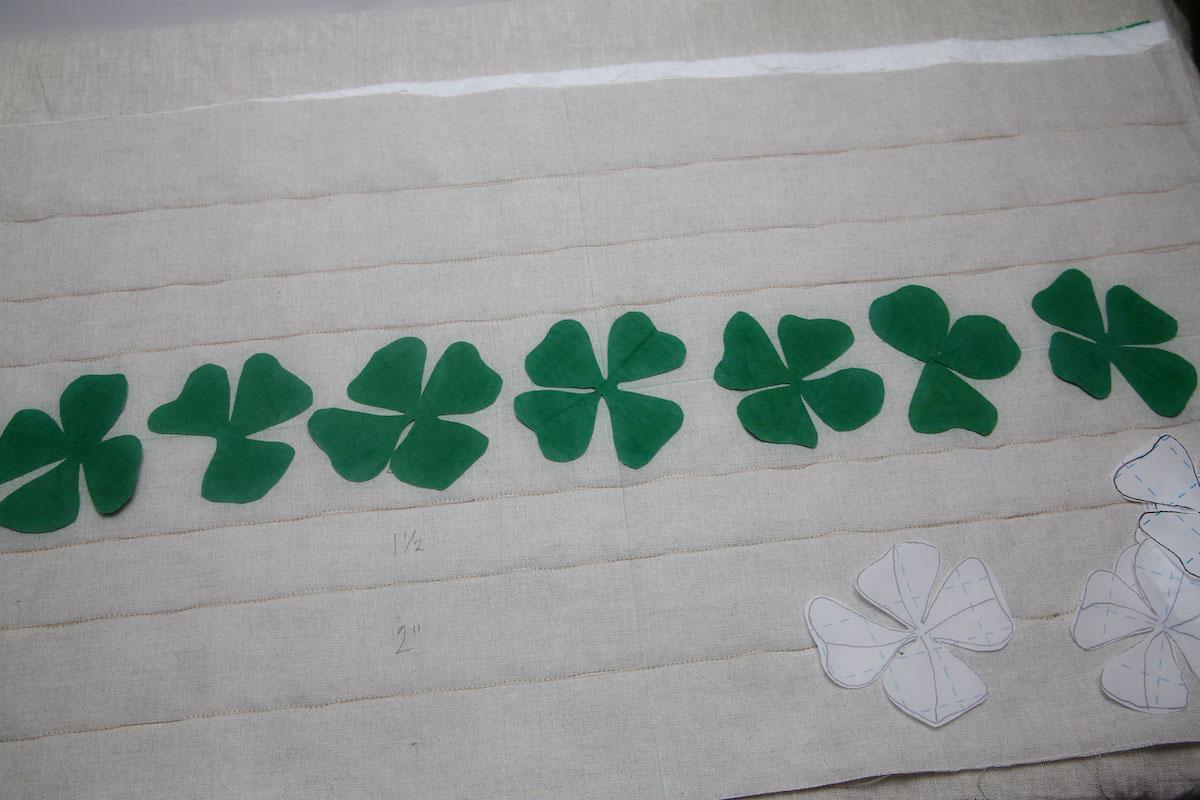
Design the Center Row
Remove the backing and arrange the shamrocks in the center of the quilt.
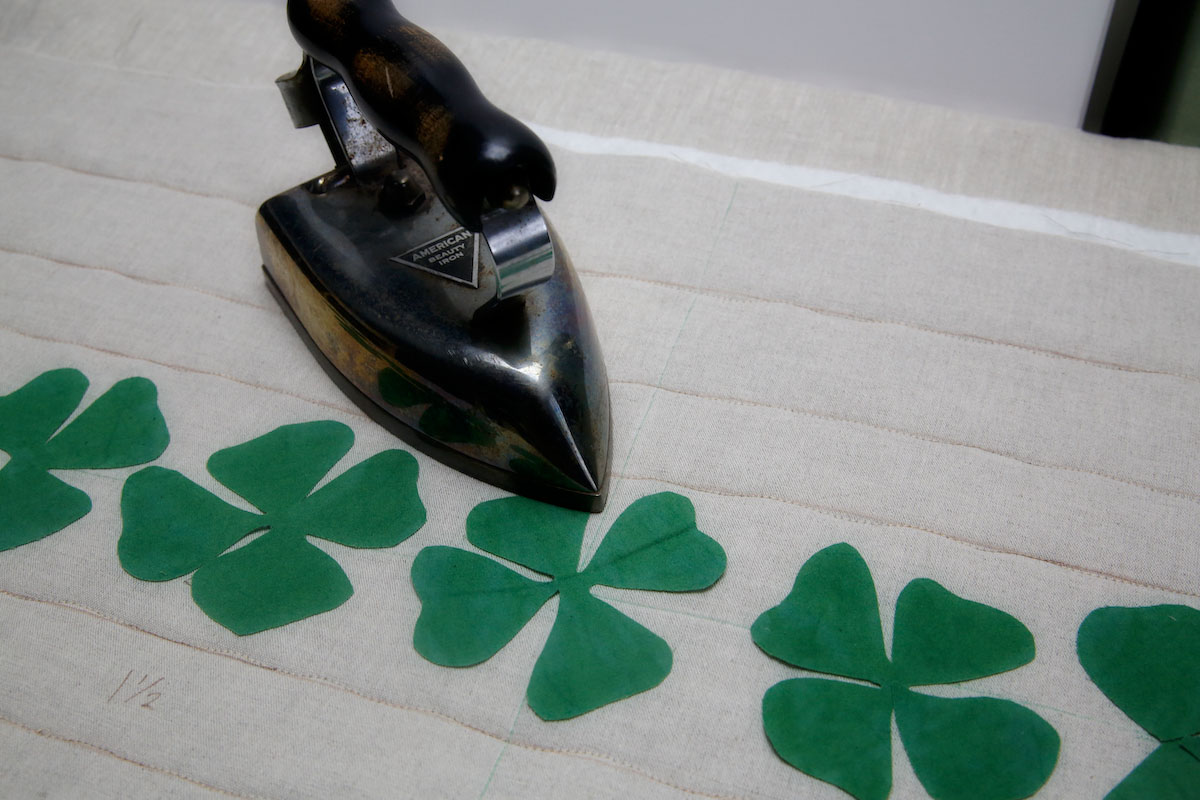
Press
When you are happy with your composition, follow the manufacturer’s directions to fuse the shapes in place.
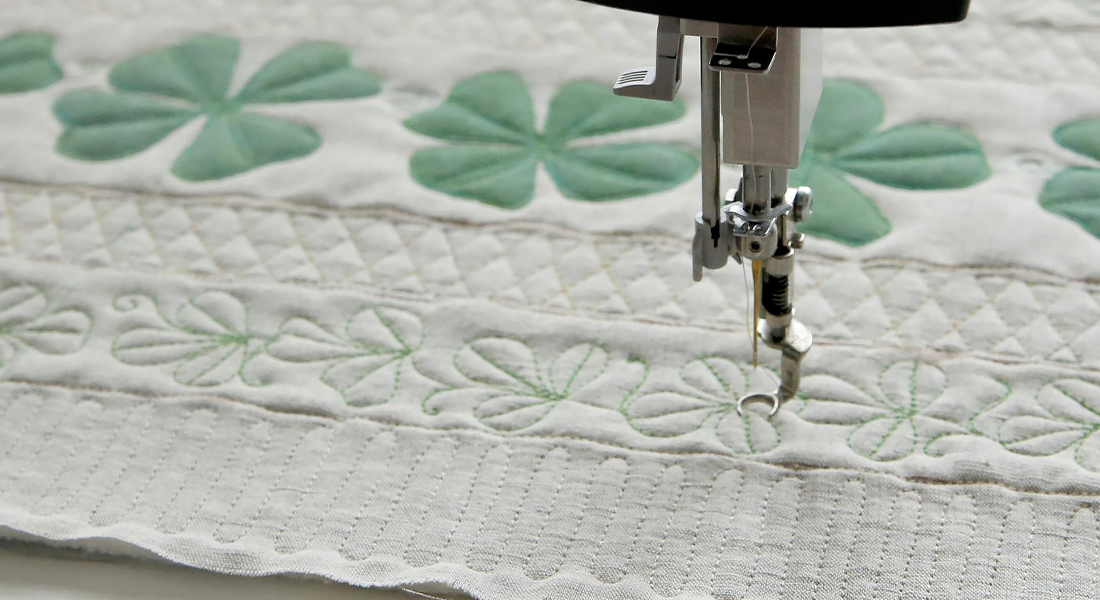
Now we are ready to free-motion quilt!
Free-motion Quilt the Appliqué
What is Raw Edge Appliqué?
Because we have not turned under the appliqué edges, this technique is known as raw-edge appliqué. The combination of fusible bonding and the quilting will prevent most fraying. Some fraying is considered acceptable and even desirable in this quilting method. Some fabrics fray more than others so experiment to find those that suit your design style.
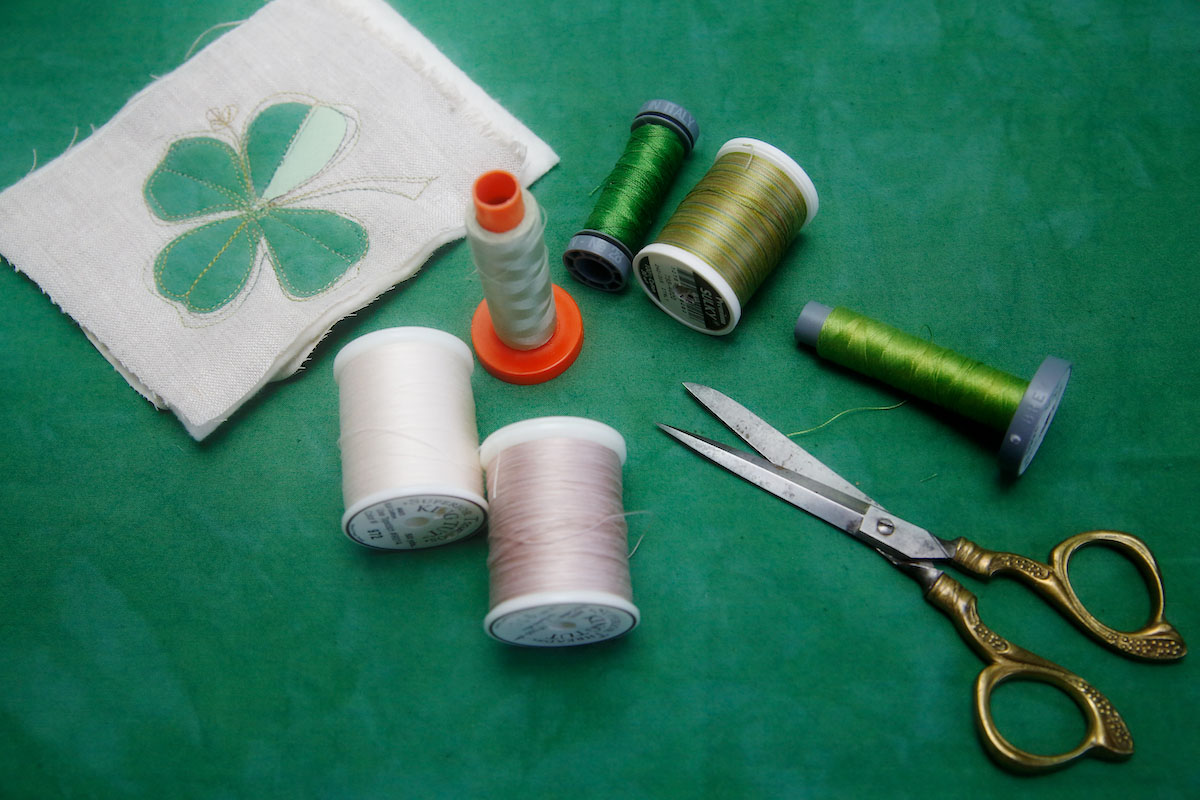
Choose Thread
Your choice of thread for free-motion quilting is always an important consideration! If you want to see the quilted line, choose heavy-weight thread in a color with high contrast to your appliqué. If you prefer a more subtle line, choose a matching color. Spool out several inches of thread to see how it will look on your fabric. I chose heavy-weight variegated green thread. The color transitions smoothly from green to green-blue—perfect for a subtle texture on leaves!
Read more about choosing thread on WeAllSew.
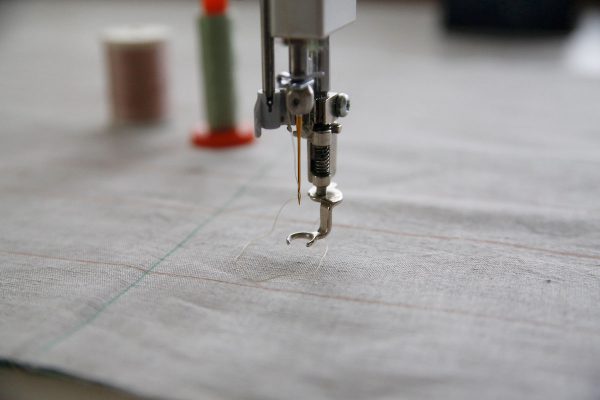 Machine Set-up

Set up your machine for free-motion quilting. In the bobbin, choose 50 wt cotton or polyester thread. Use either green (to match the top thread) or a color to blend with your background fabric—in this case, a light linen color.
As always, make sure your machine is clean and well-oiled. Insert a size 90/14 needle and lower your feed dogs.
Test the tension in the border of the quilt and look at your stitches. Spend a few minutes experimenting to make sure your stitch is well balanced. Adjust the top tension and notice how the changes affect the look of your stitches. This step is very important—the only way to create beautiful, quilted projects is to begin with nice-looking stitches. Your stitching line may be wobbly or imprecise, but that is far less important than creating a well-balanced stitch.
For more information on machine set-up, read Twelve Steps to Free Motion Quilting.

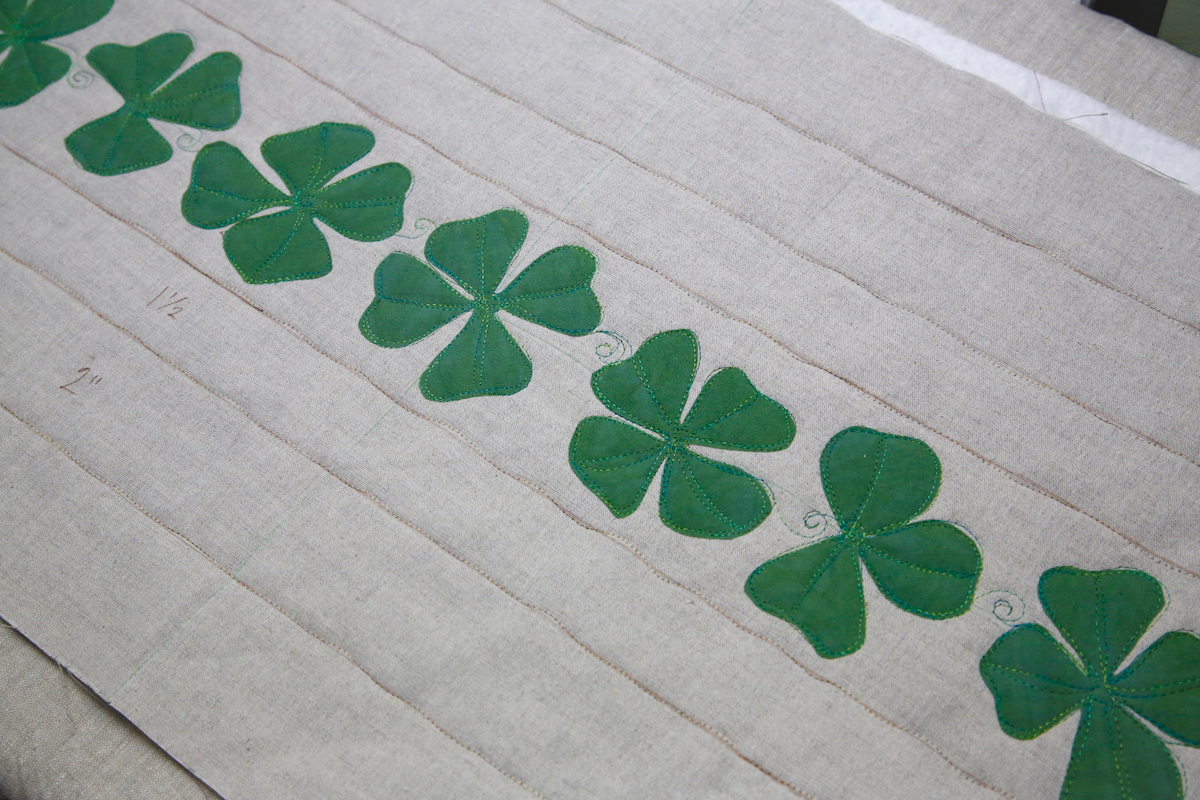
Free-motion Quilt Around the Shamrocks
Free-motion quilt around the edge of the shamrocks. Begin with a curlicue knot. Quilt around each applique three or four times. Stitch on and off the applique to cover the raw edges and don’t worry about precision. Imperfect stitching that goes on and off the edge of the applique looks great in the final project! If you stray far off the applique, go around the shape a few more times so all the lines appear to outline the shamrocks.
Add a straight line from the center to the edge of each shamrock petal to create contour. Add a spiral or a swirl between each leaf to travel from applique to applique.
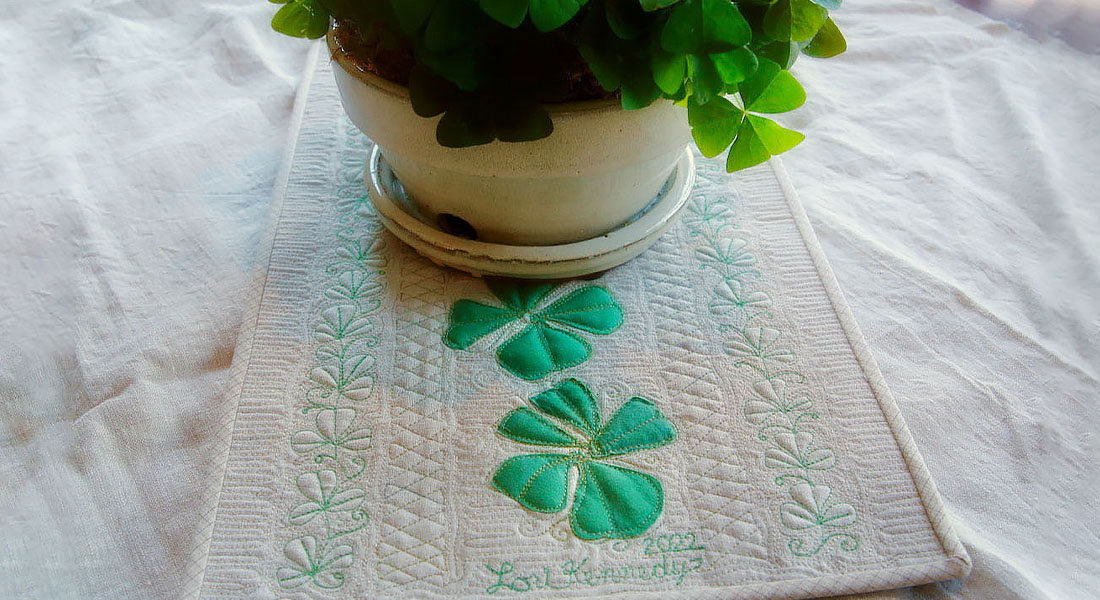
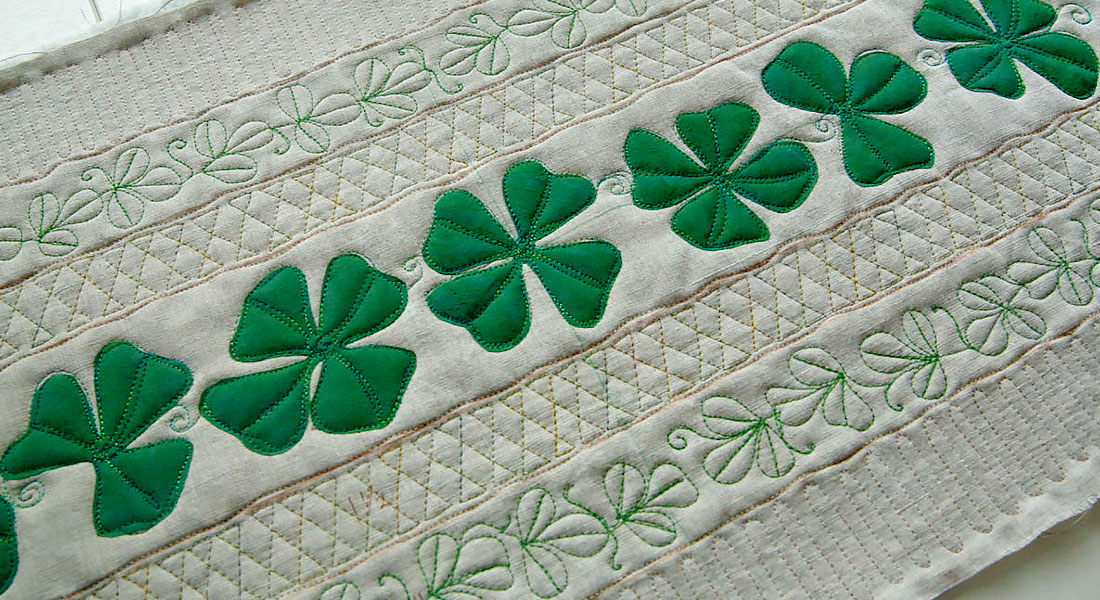
You’ve now completed the center row of the table runner!
Along the way, you’ve learned about raw edge applique, fusible web, choosing thread and you’ve practiced free-motion quilting!
Coming Soon
- Part 3: Free-motion Quilt Motifs: Shamrocks, the Twist and the outer border
- Part 4: Background Fills and Finishing Techniques
For more free motion quilting lessons and projects, check out my books on Etsy including 25 Days to Better Machine Quilting!


why won’t the template and instructions download? only the quilting guide.