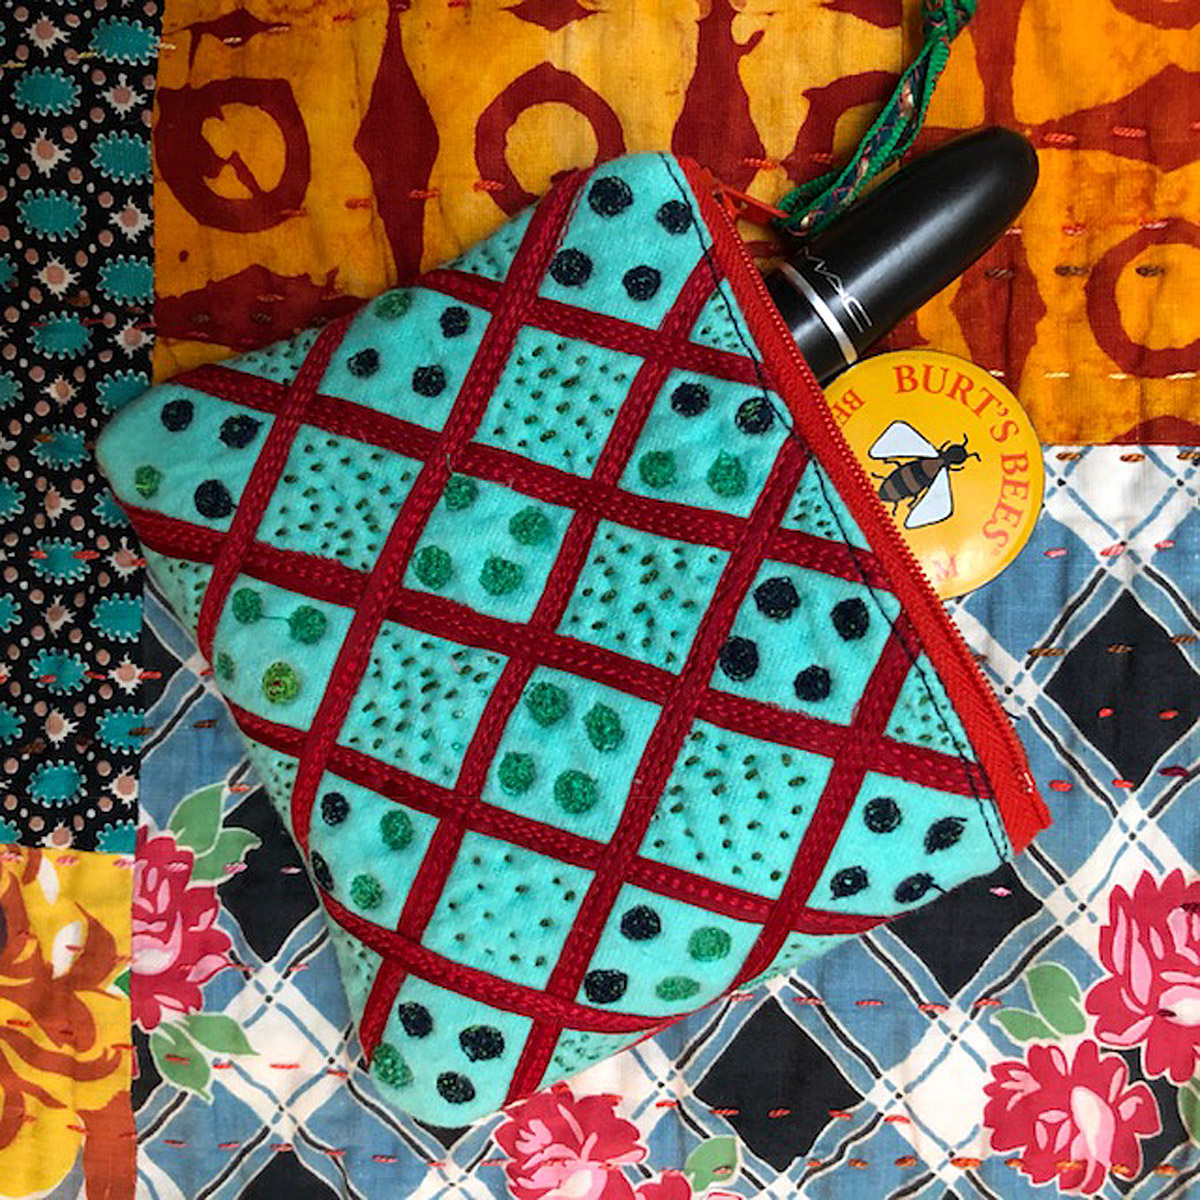
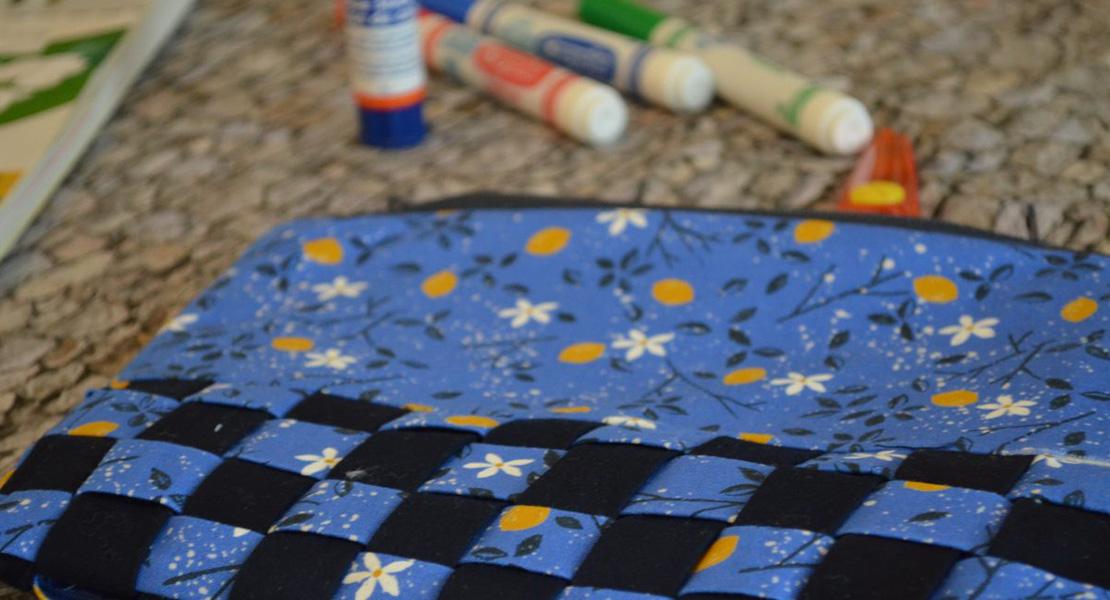
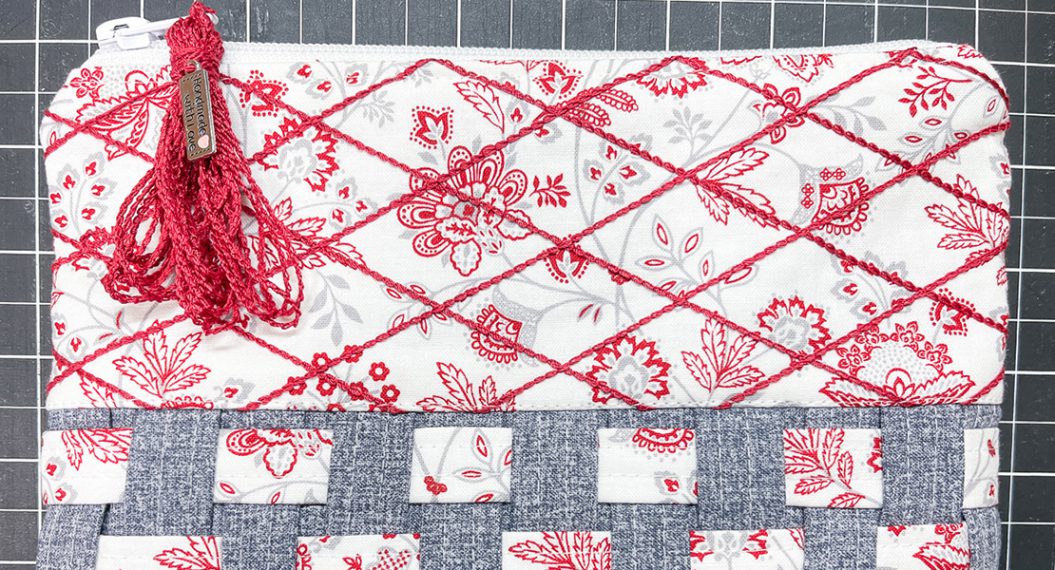
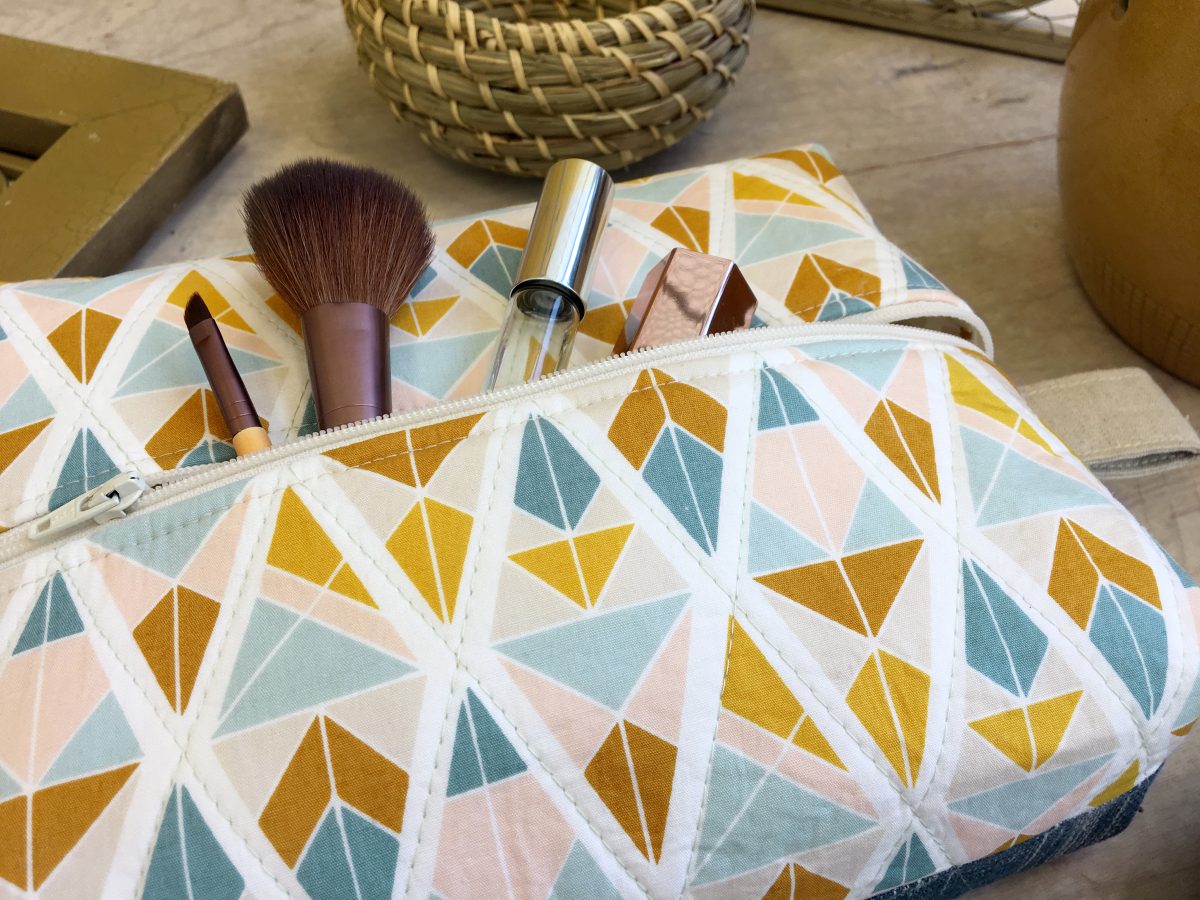
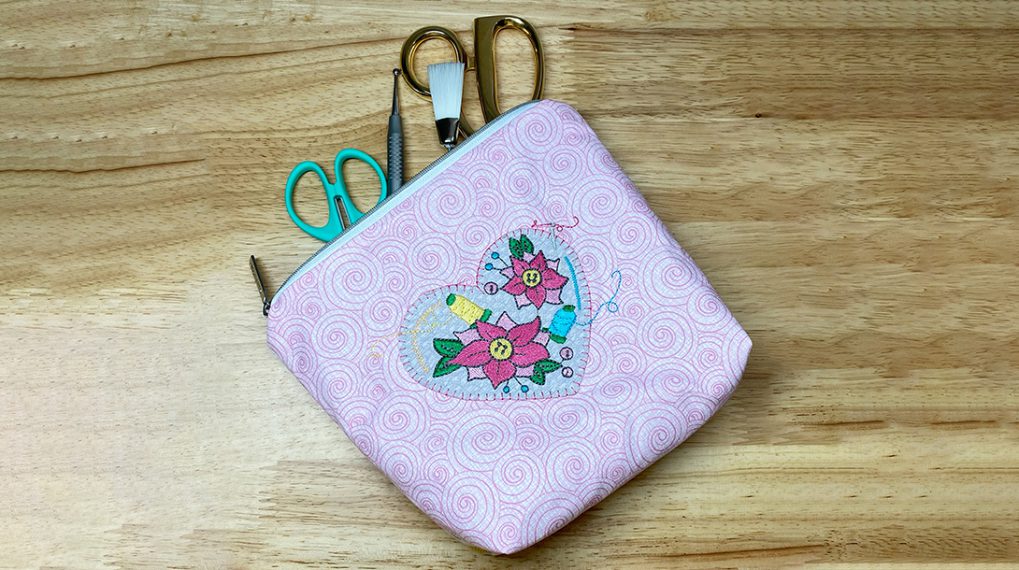
Vintage Print Inspired Zipper Pouch
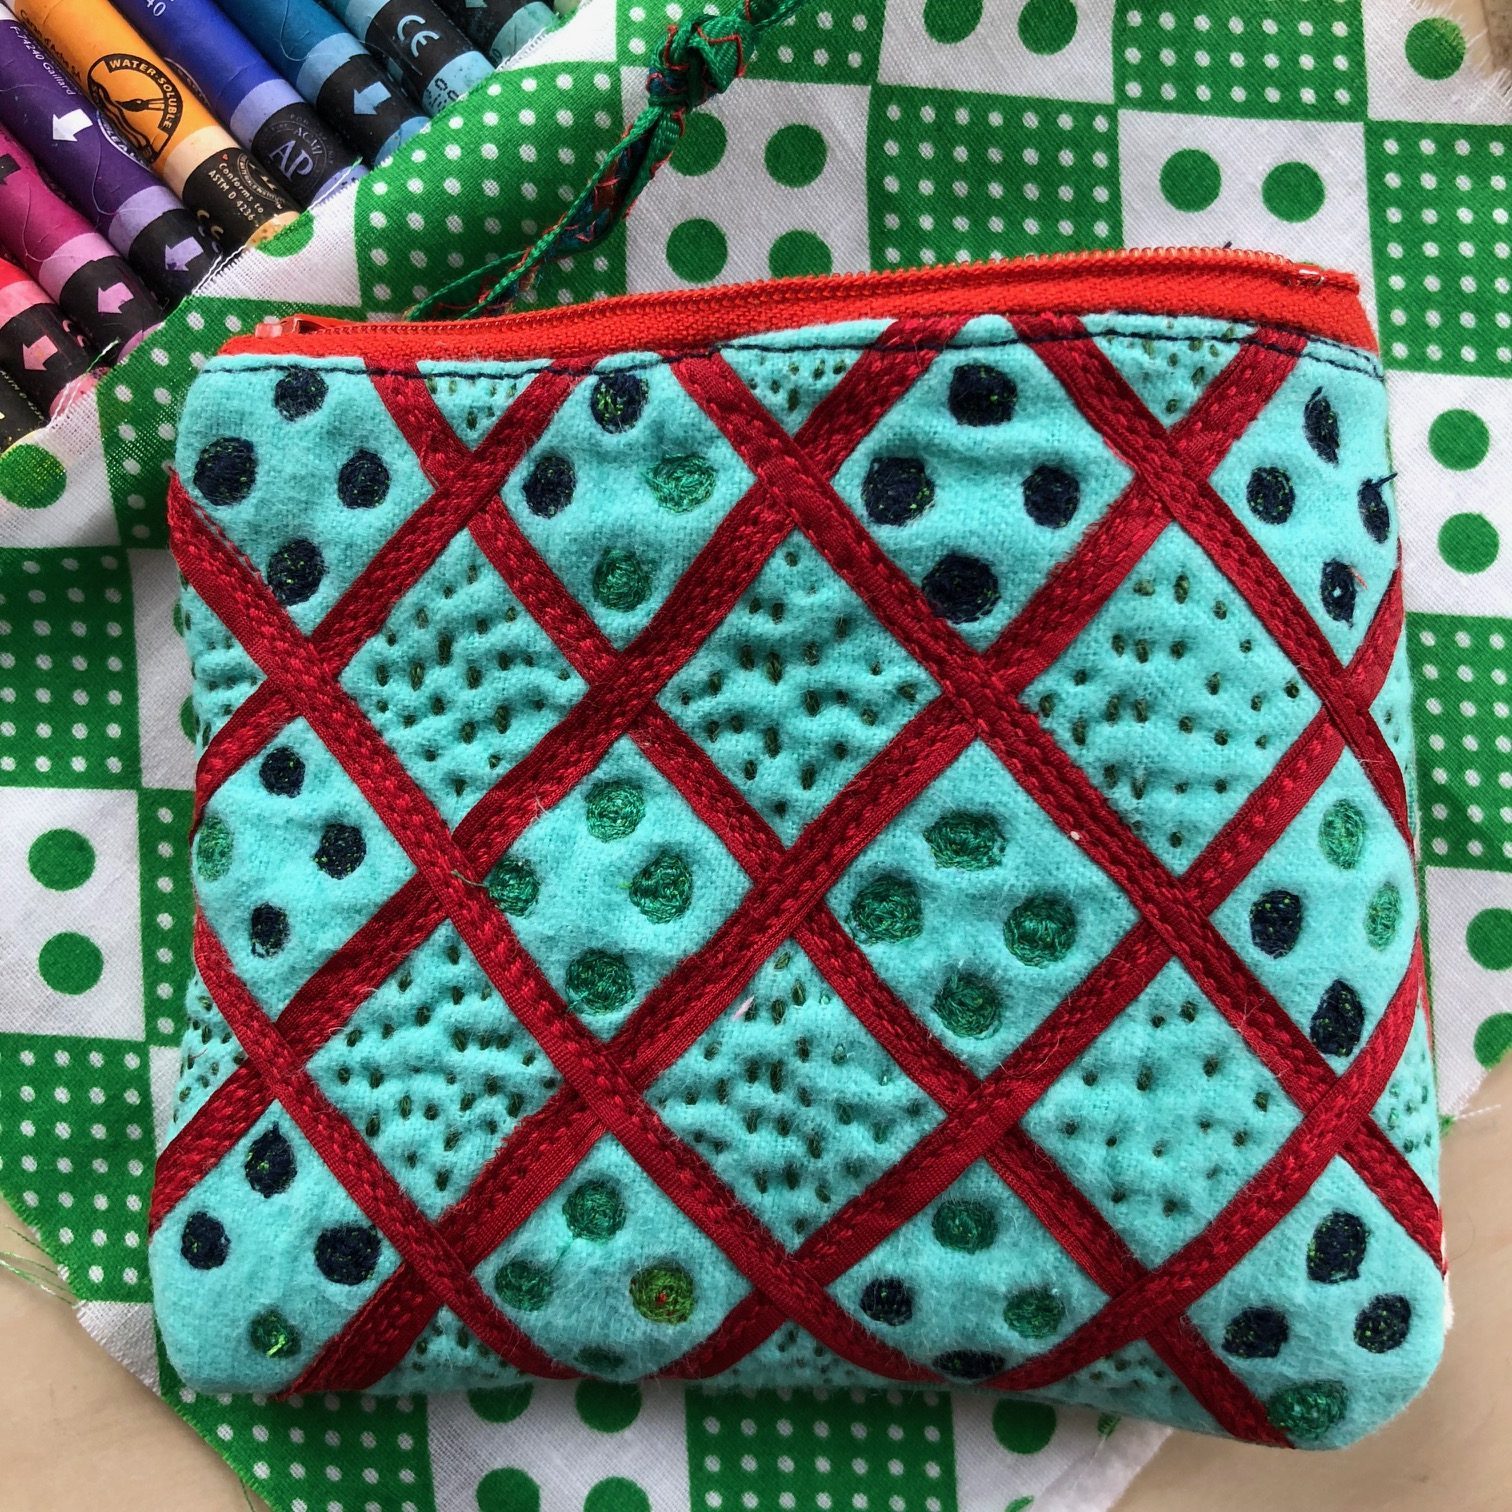
I’m an artist, and a maker, and a designer, but really, I’m a collector. I can’t pass a thrift store without going in for a quick spin. I’ve got boxes and boxes of vintage fabric scraps, and I also love looking at textile design books for inspiration. Feeling stuck? Leafing through a design book filled with patterns, or digging through your own scrap pile can be a great way to get yourself back up again. Here, I used the design from a scrap of vintage cotton to create a simple pattern using my BERNINA Stitch Regulator (BSR) and a bit of bias trim. I lined the bag quickly with fusible web and sewed it into a quick change purse. No pins, no measuring, not much fuss at all. Never sewed a zipper? Great! This is an excellent first project. I’ll show you how I made mine.
Materials to Make a Vintage Print Inspired Zipper Pouch
- Scrap of Vintage fabric to trace (or an image from a textile design book)
- Permanent Marker
- Sticky Sulky Solvy
- Small scrap of quilt batting
- Thread (I used two or three shades of green, blue, and red)
- Bias trim (you could also use ribbon or yarn for this step)
- Fusible Web
- Lining Fabric and Fabric for the outside of the bag (cut four of the same size)
- Plastic zipper the same length as your bag or bigger. You can cut to fit.
- Sink or large bowl for rinsing the Sulky Solvy out of your fabric
- A squirt of fabric detergent (just a smidge)
- Embroidery Floss or Perle Cotton
- Embroidery Needle

Sewing a Vintage Print Inspired Change Purse
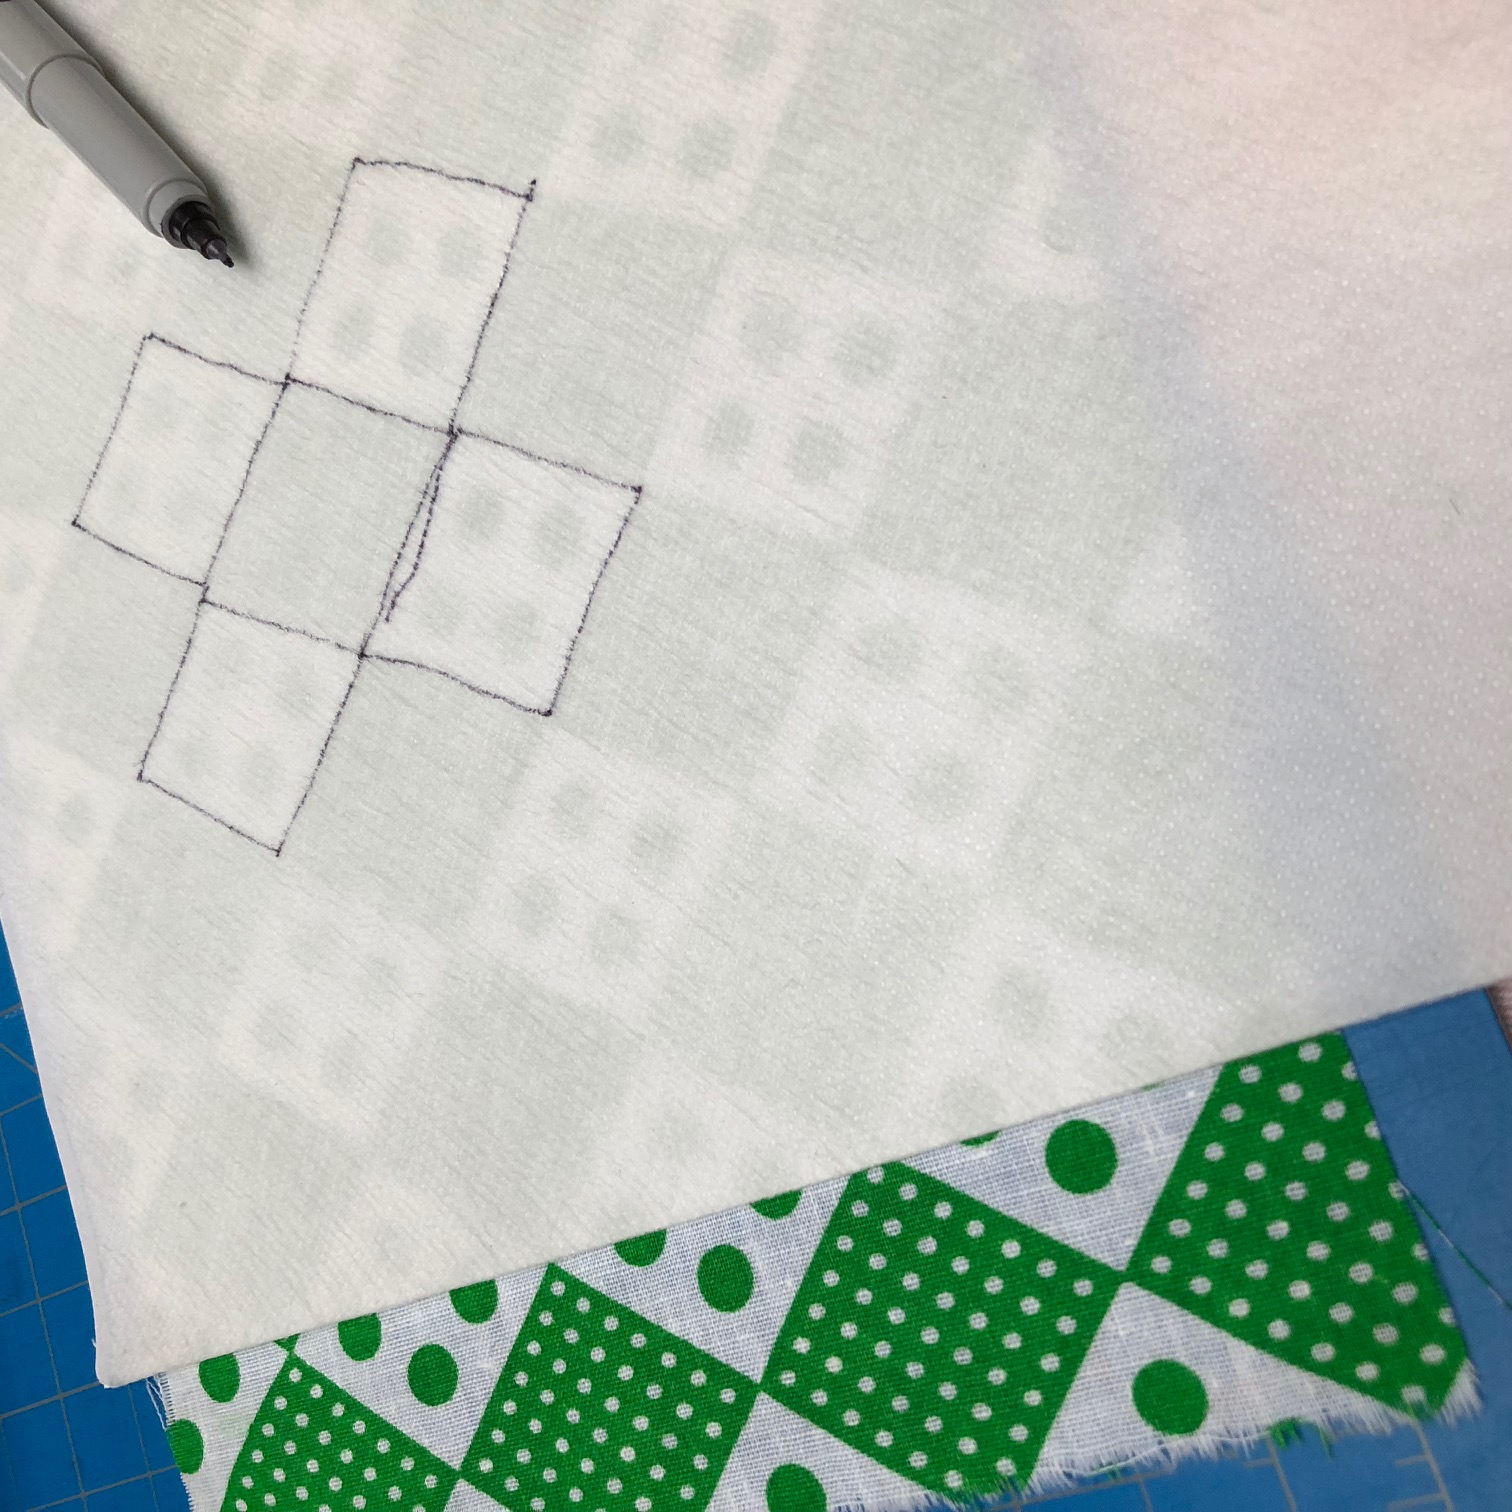
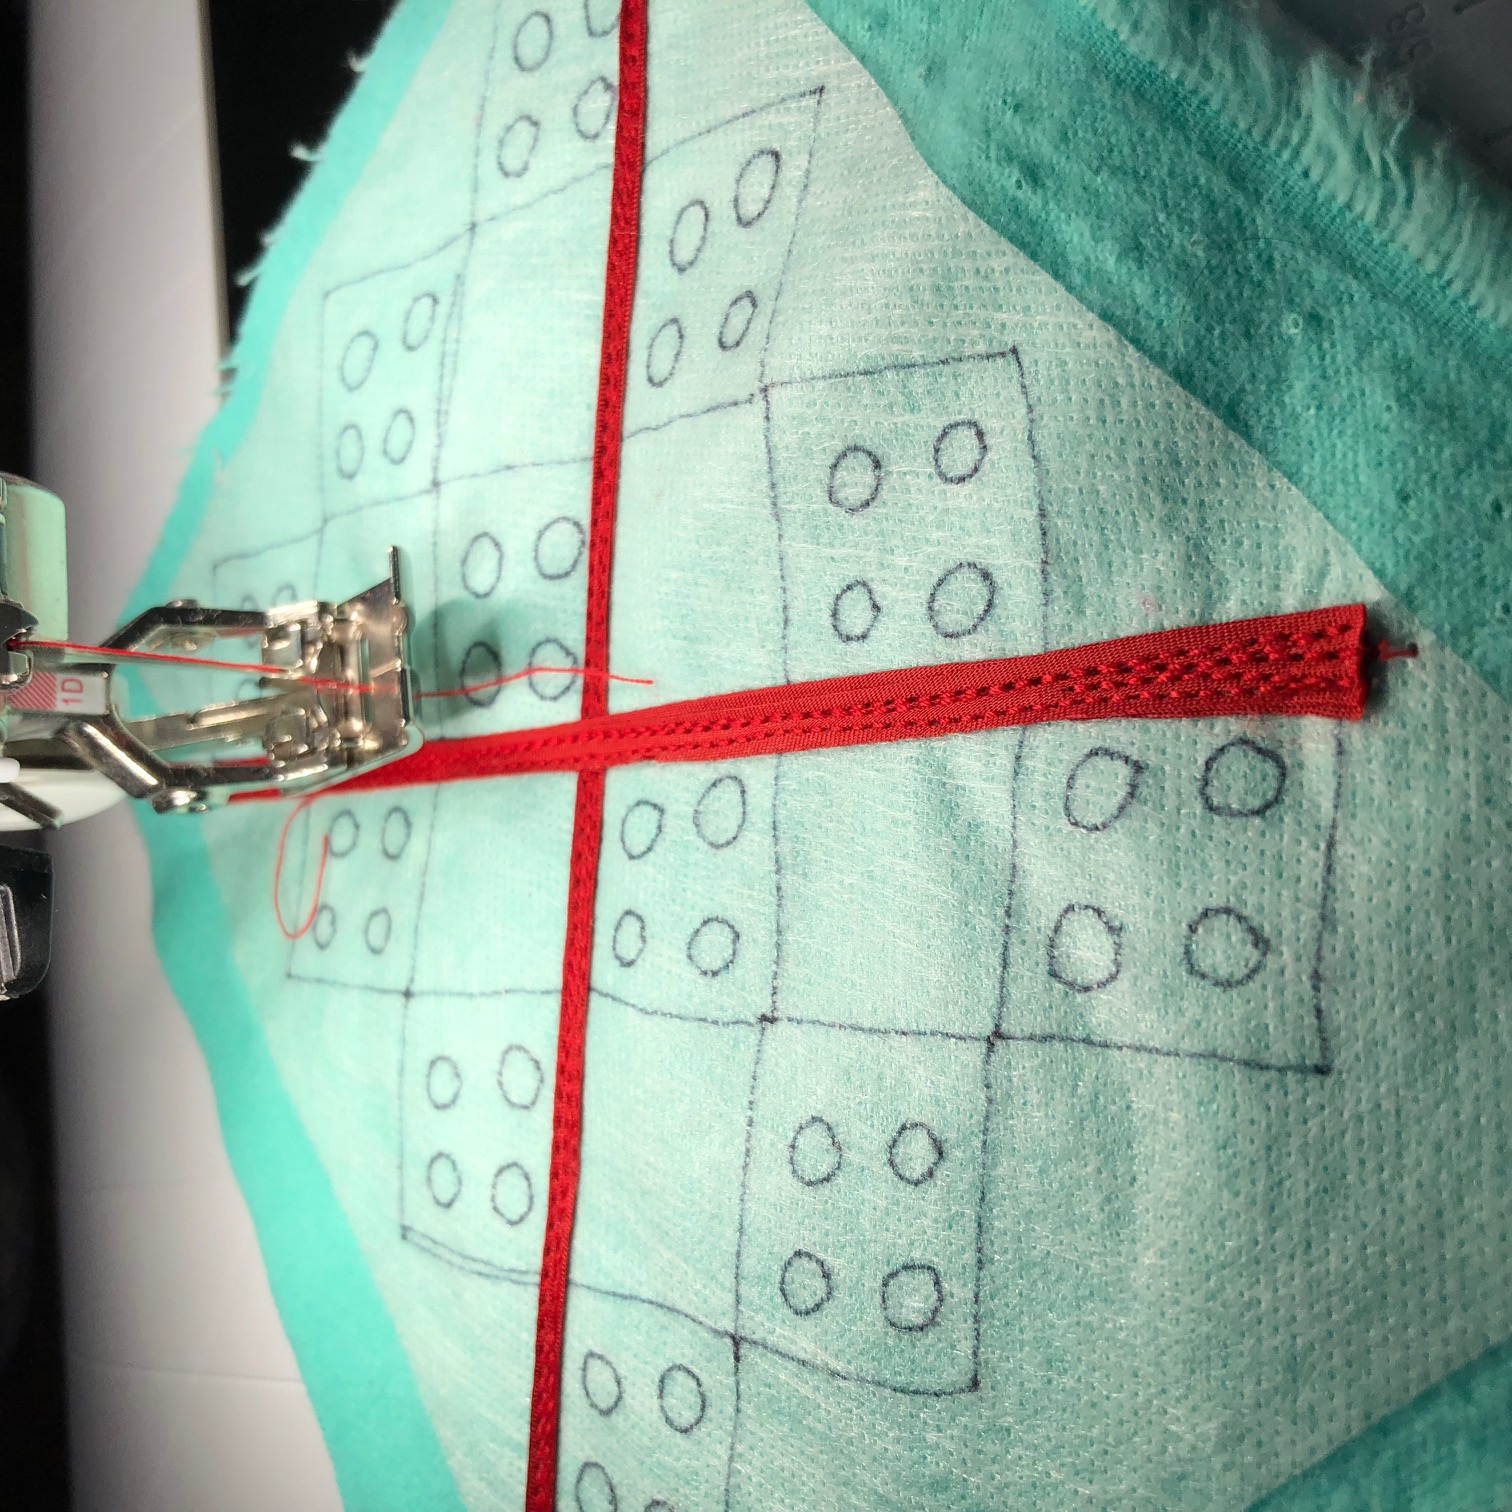
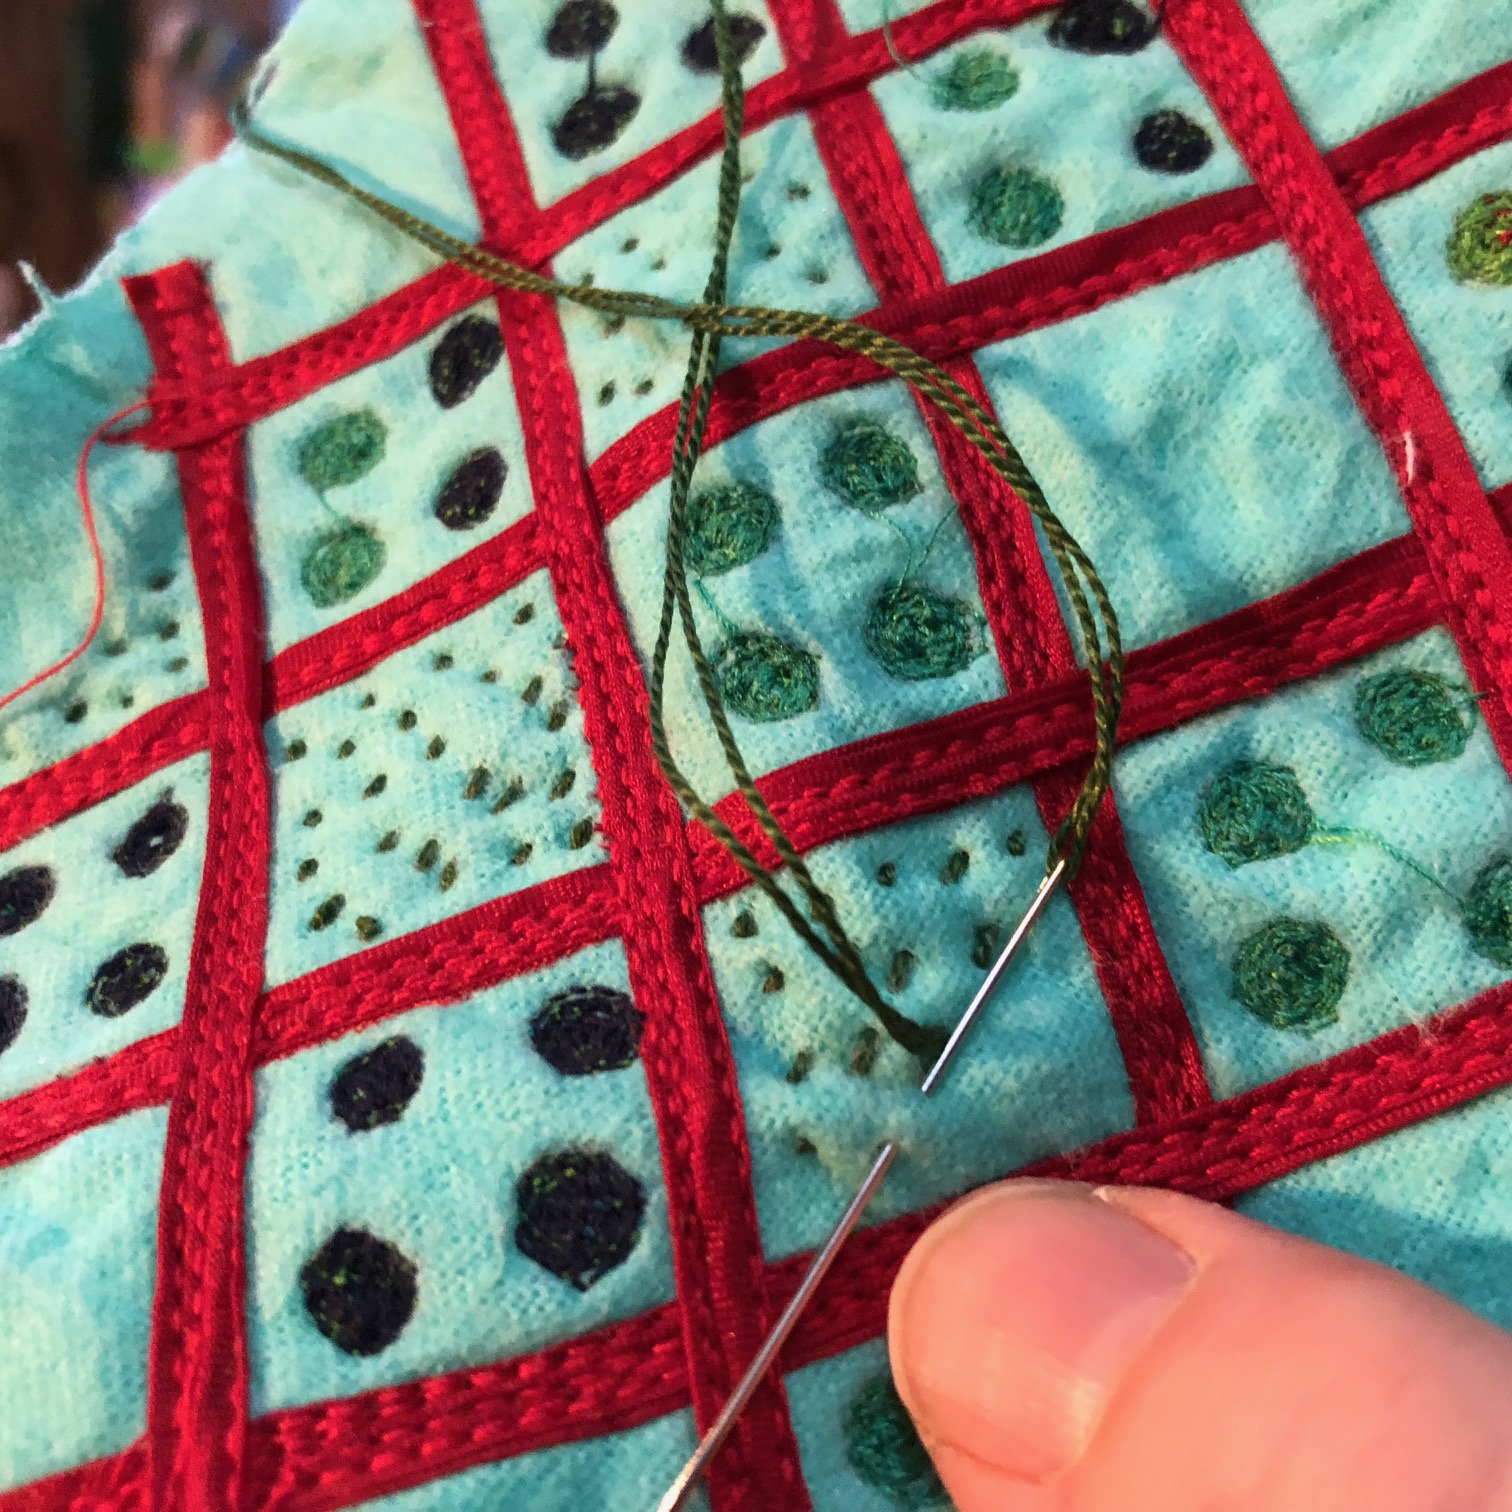
1. Using Sticky Sulky Solvy, I traced the pattern of the fabric onto the fabric side of the sheet. When I was finished tracing, I peeled the paper backing off and stuck my Solvy onto one of the outside pieces of fabric. It’s a good idea to cut this down to size after you embroider it. I placed my fabric over a piece of quilt batting to make the stitching stand out in the next step. I didn’t baste it into place since this is such a small project.
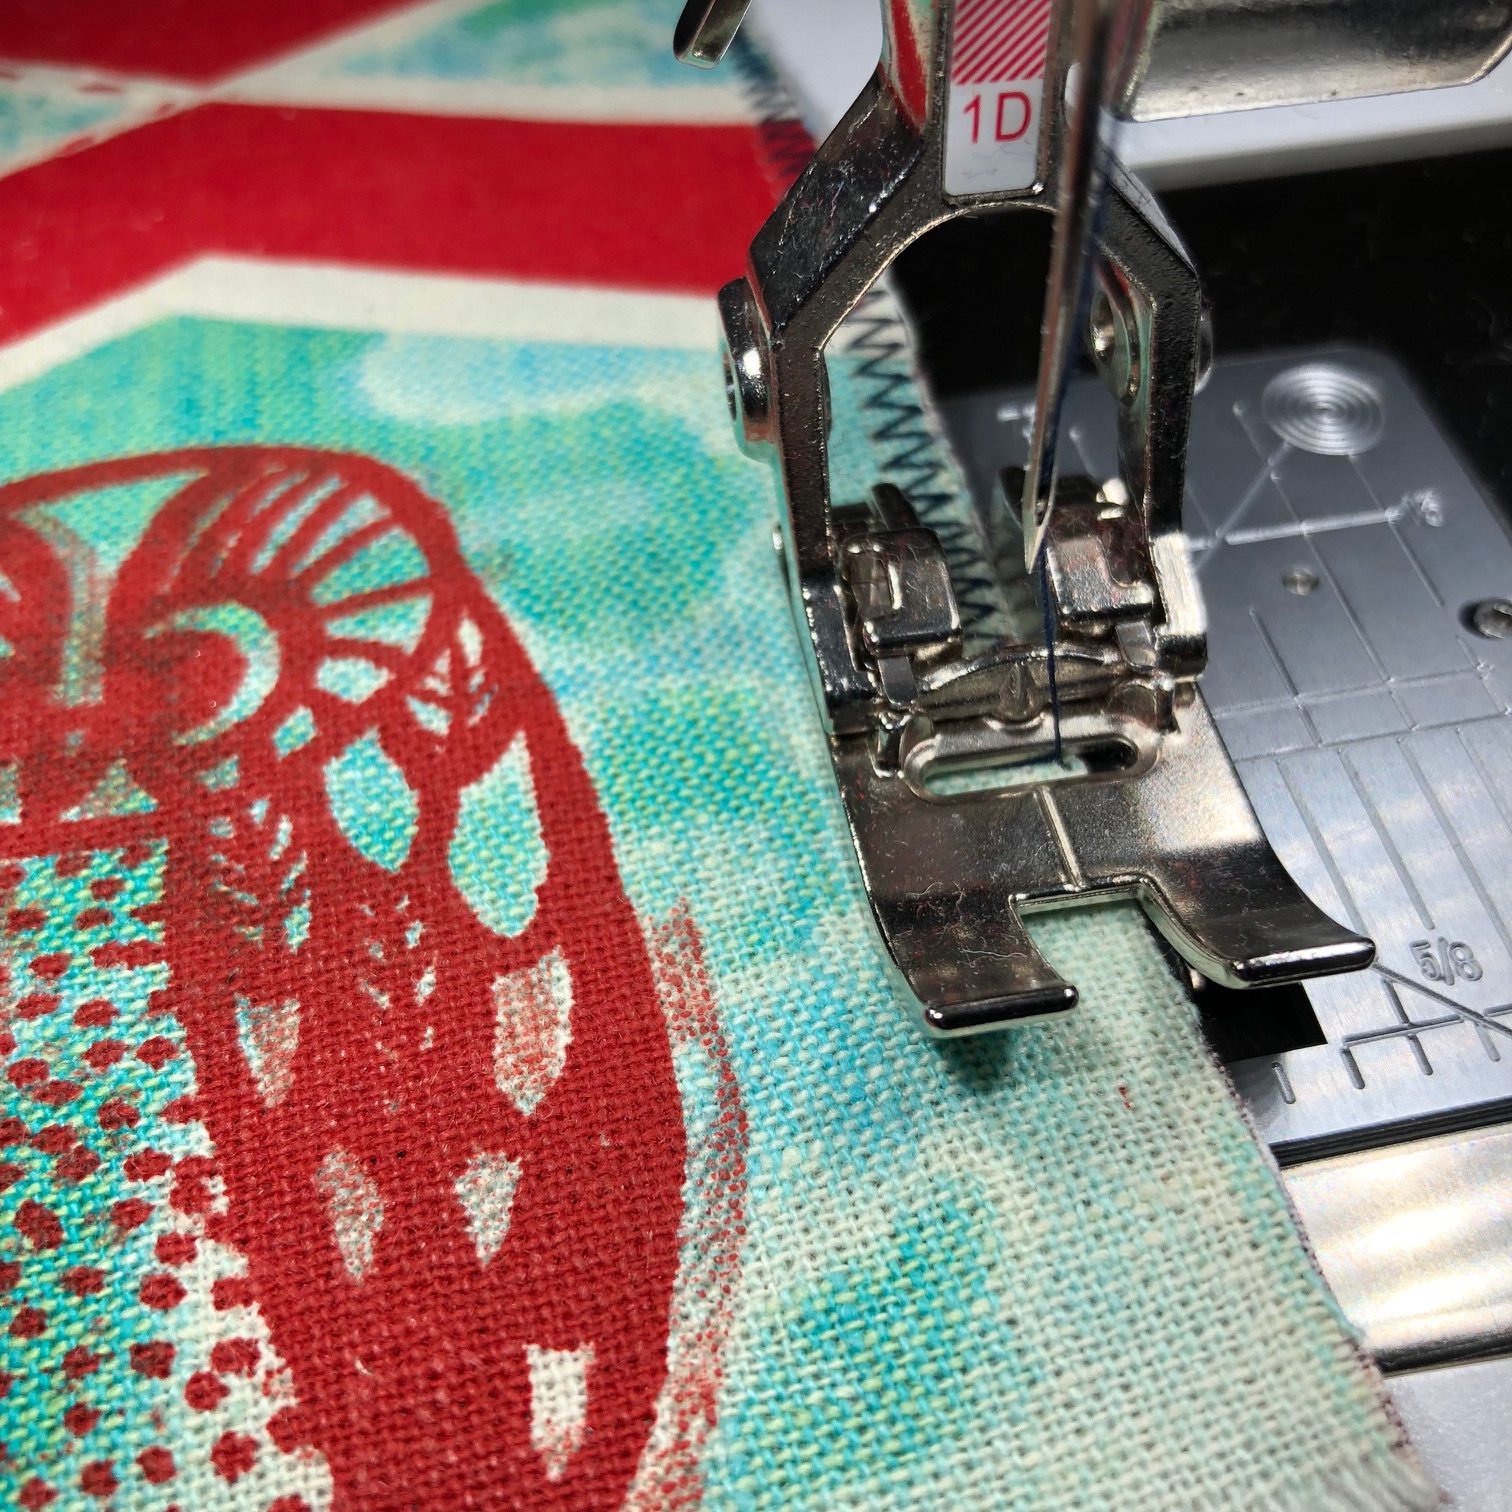
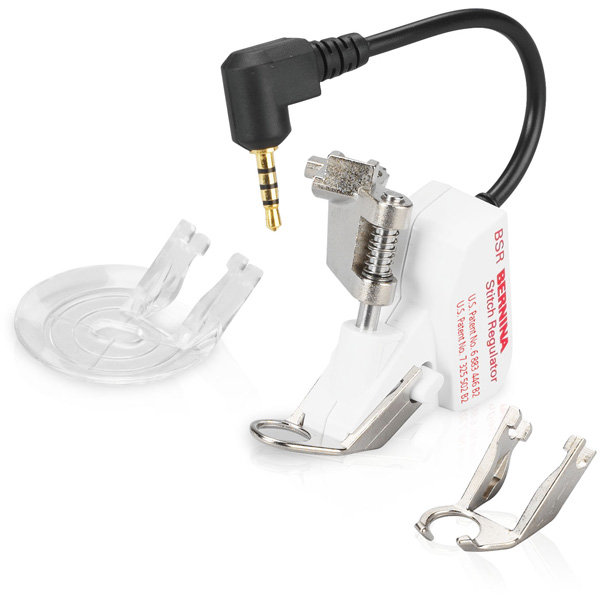
2. First, I covered the striped lines in the design using the Reverse pattern foot #1D with Dual Feed and matching red thread over top of bias tape. Next, using my BSR foot and lowering my feed dogs (have I mentioned that I love that the machine will remind you to do this step if you forget?) I embroidered the large circles of my design in a few different shades of green and blue for variation. Next, I switched to the Reverse pattern foot #1D foot and stitched the bias tape into place using a matching thread. I didn’t use any pins, but of course, if it makes your more comfortable, do it.
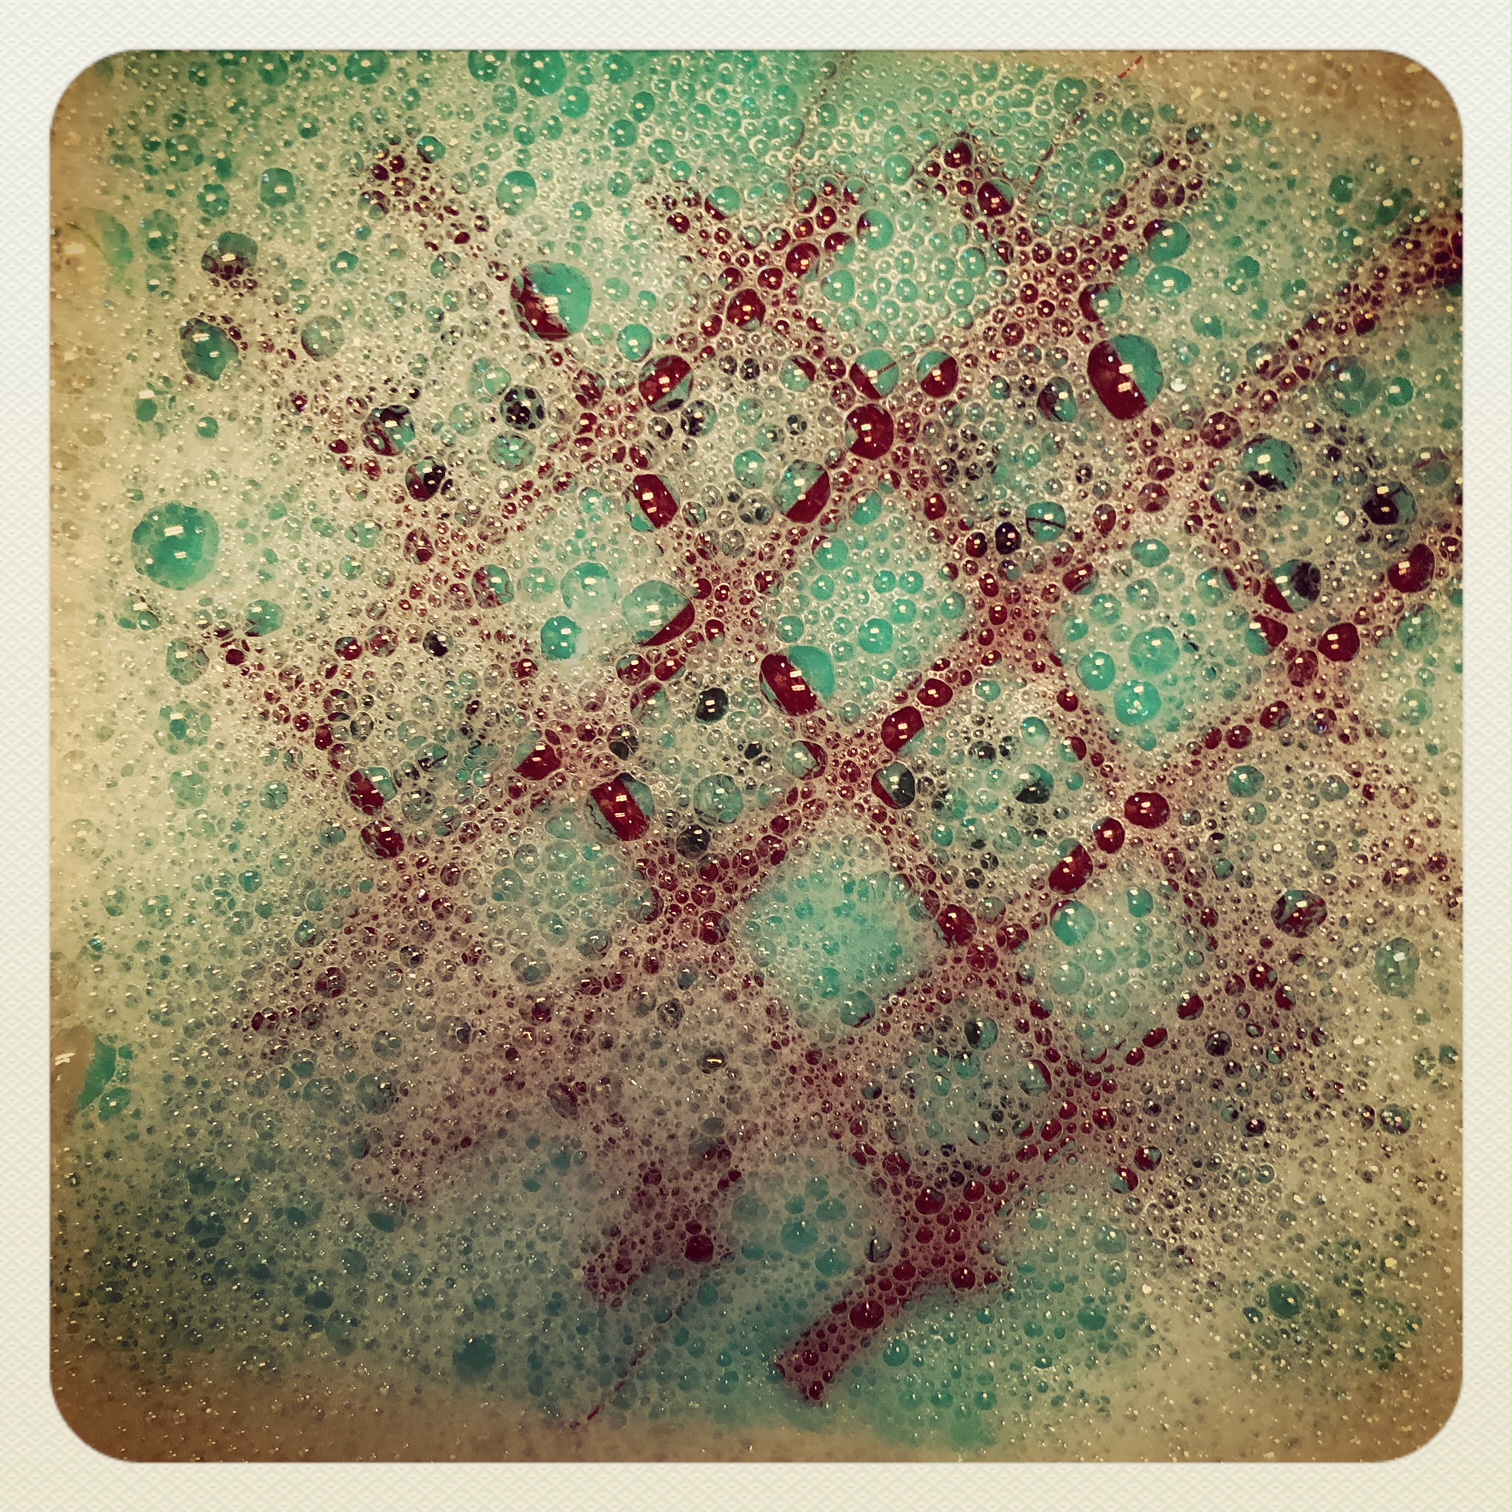
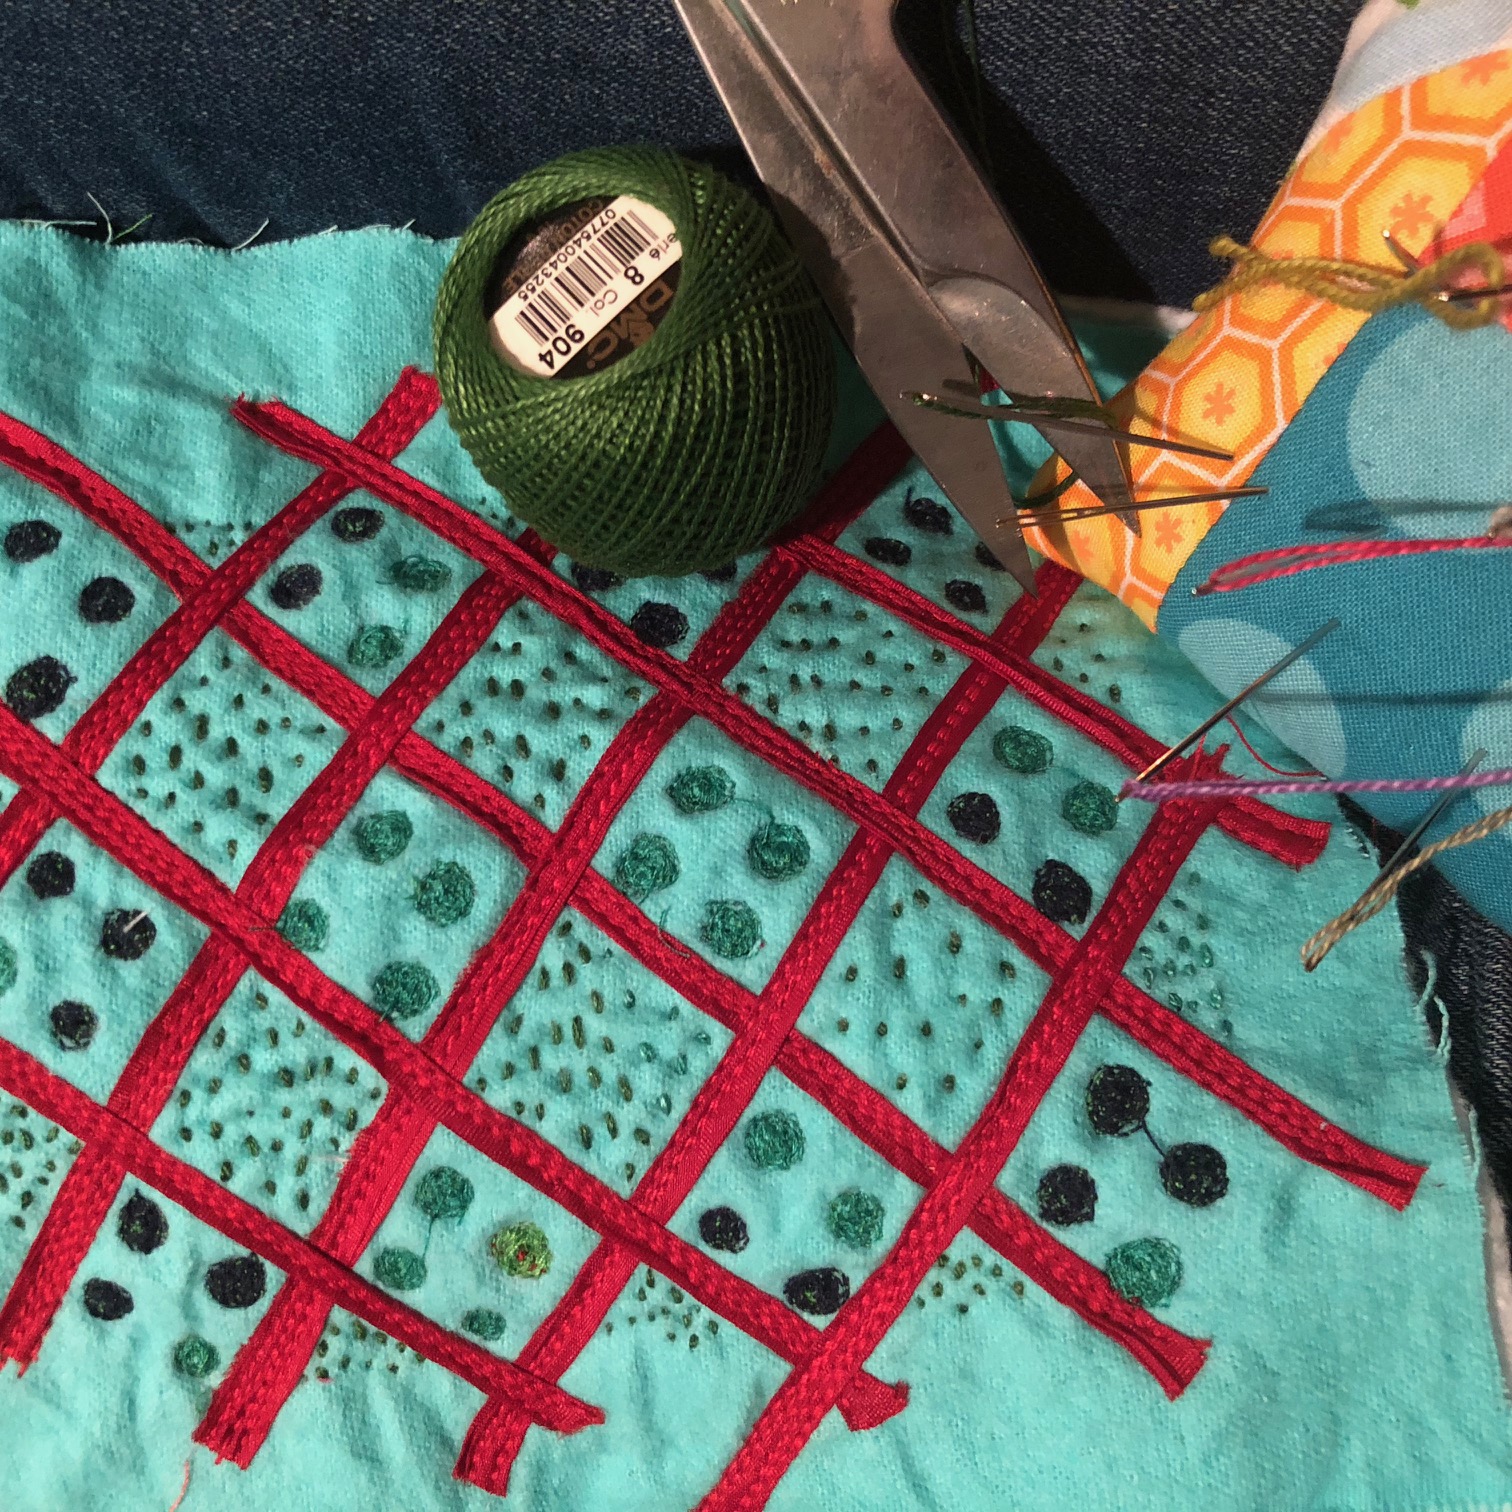
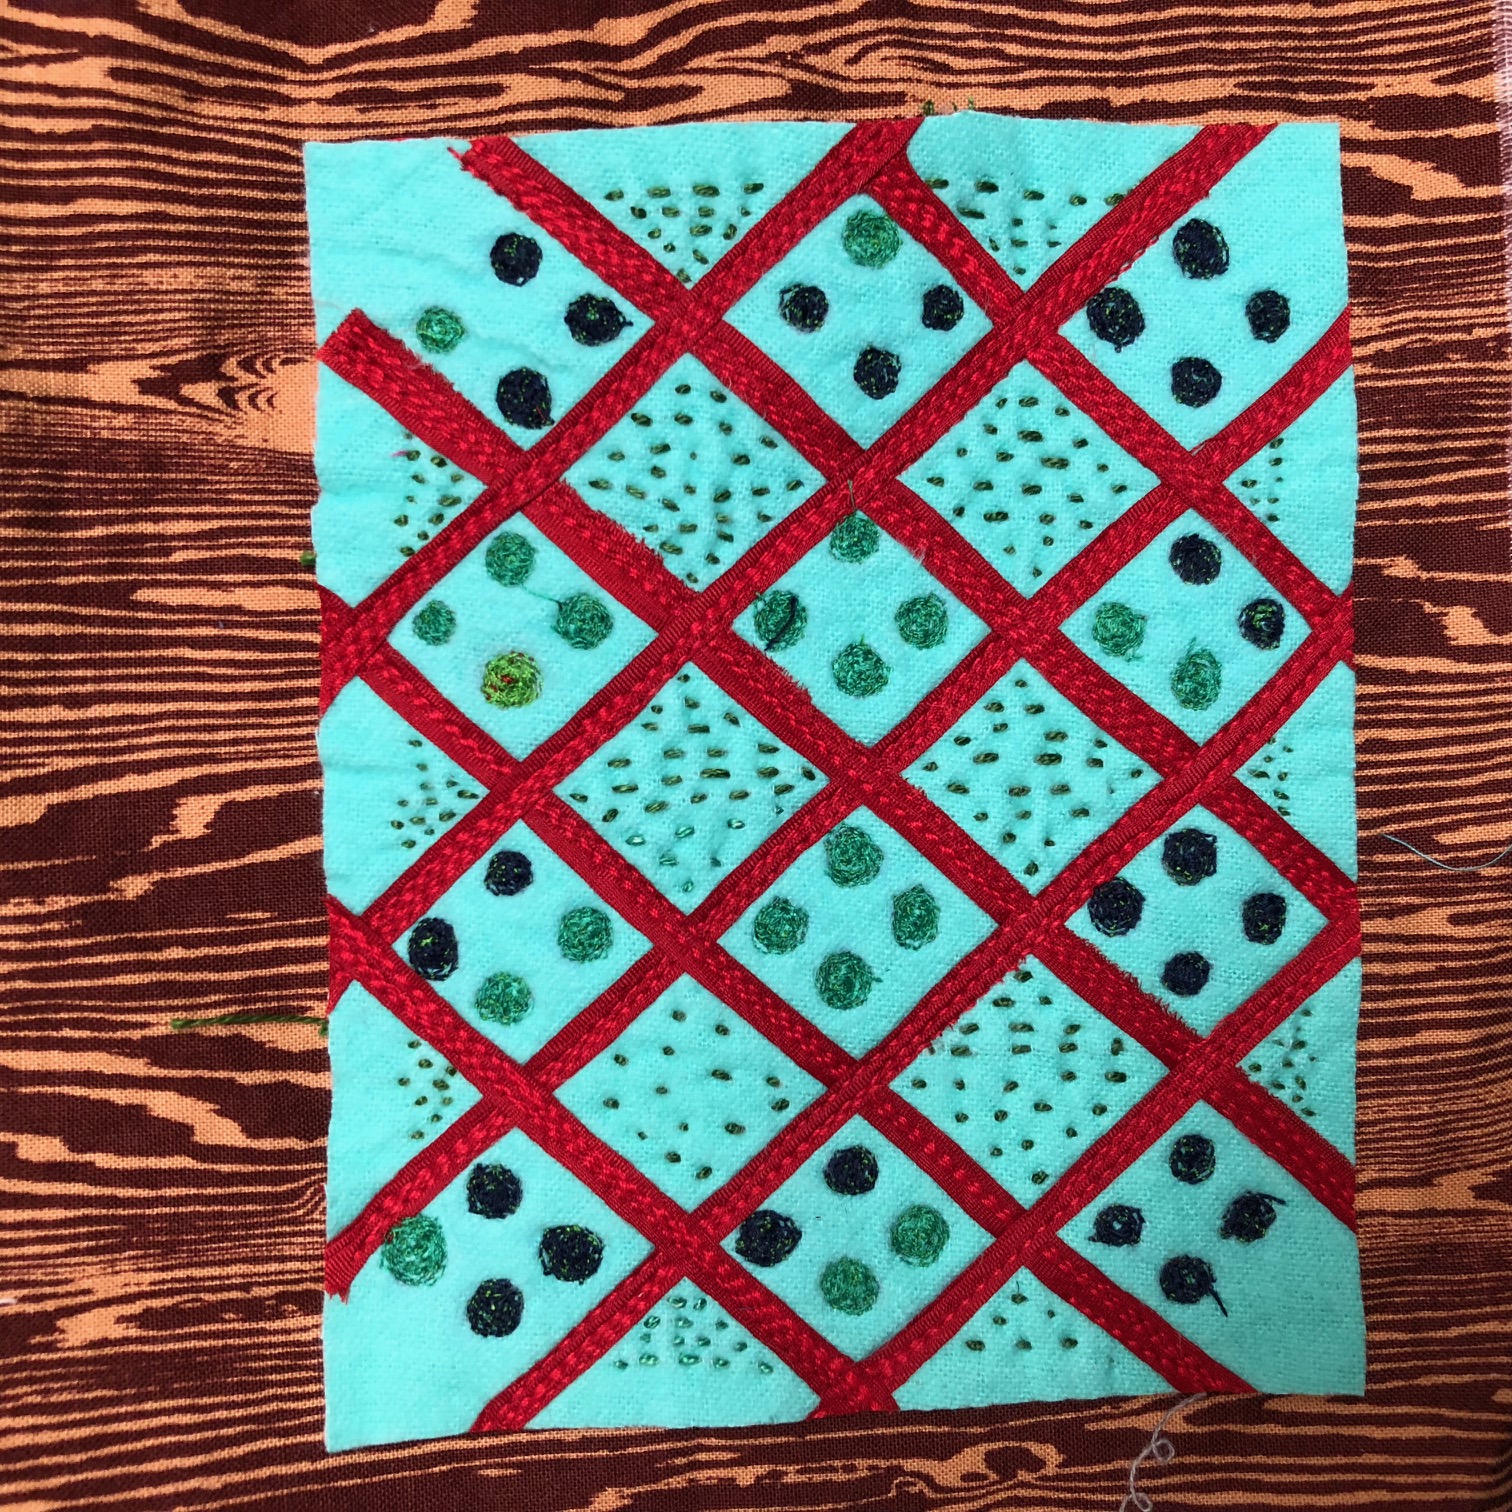
3. Having completed the sewing machine part of my fabric design, I headed to the sink to rinse out the Sticky Sulky Solvy. I used my bathroom sink for this step, but you could also use a bucket or a tub. Make sure that there’s a little cool water and a squirt of detergent in the sink before you add your fabric. Keep the water running over top of your fabric to get the adhesive on its way. It takes a while for the starch to dissolve. Walk away! It might look like it’s all gone, but it is not. Soak for at least an hour, preferably overnight. When you are finished, give it one last rinse before you hang it to dry. If you take it out too soon it will dry and be stiff as a board. You don’t want that, especially for the next step.
5. I switched gears and got out my hand embroidery supplies. I stitched simple running stitches in the diamond shapes to mimic the tiny polka dots in the print. This is a great time to cozy into the couch with a movie. It takes a little while.
4. Before I start to sew the zipper bag together, I took a few minutes to snip any loose threads or connected threads from the machine embroidery part of this project. Keep it neat. Is the backside neat? No! No one will see the backside. Don’t stress about that part. It will literally be invisible, because I’m going to fuse another piece of fabric to it.
5. Time to fuse! Next, I ironed the fabric, and cut it down to the size I wanted the zipper pouch to be. Mine is roughly 4″ x 6″, but you can literally make yours any size you like, as long as your zipper is long enough. I then fused the fabric onto fusible web and then fused a backing fabric right onto it. I did the same for the remaining two pieces of fabric, fusing them together with wrong sides facing.
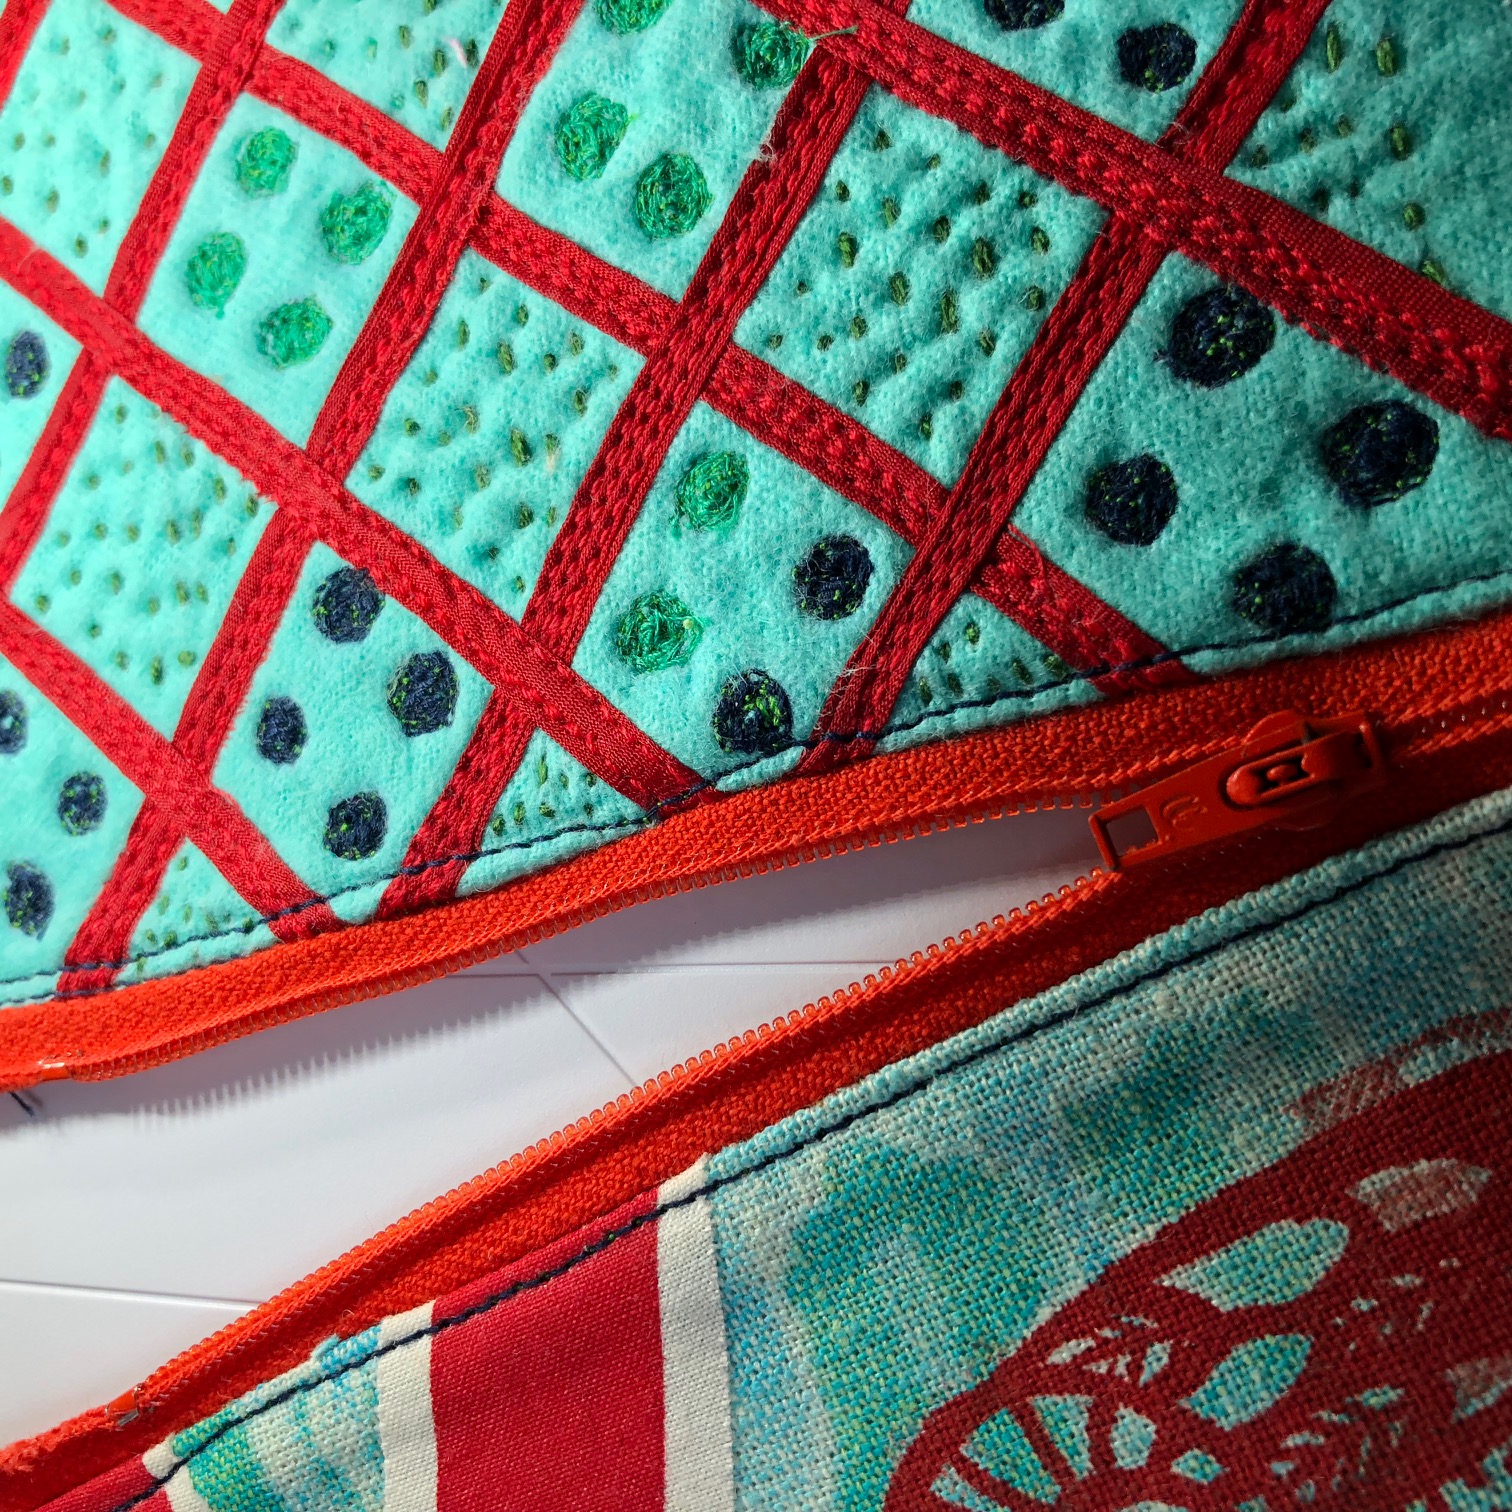
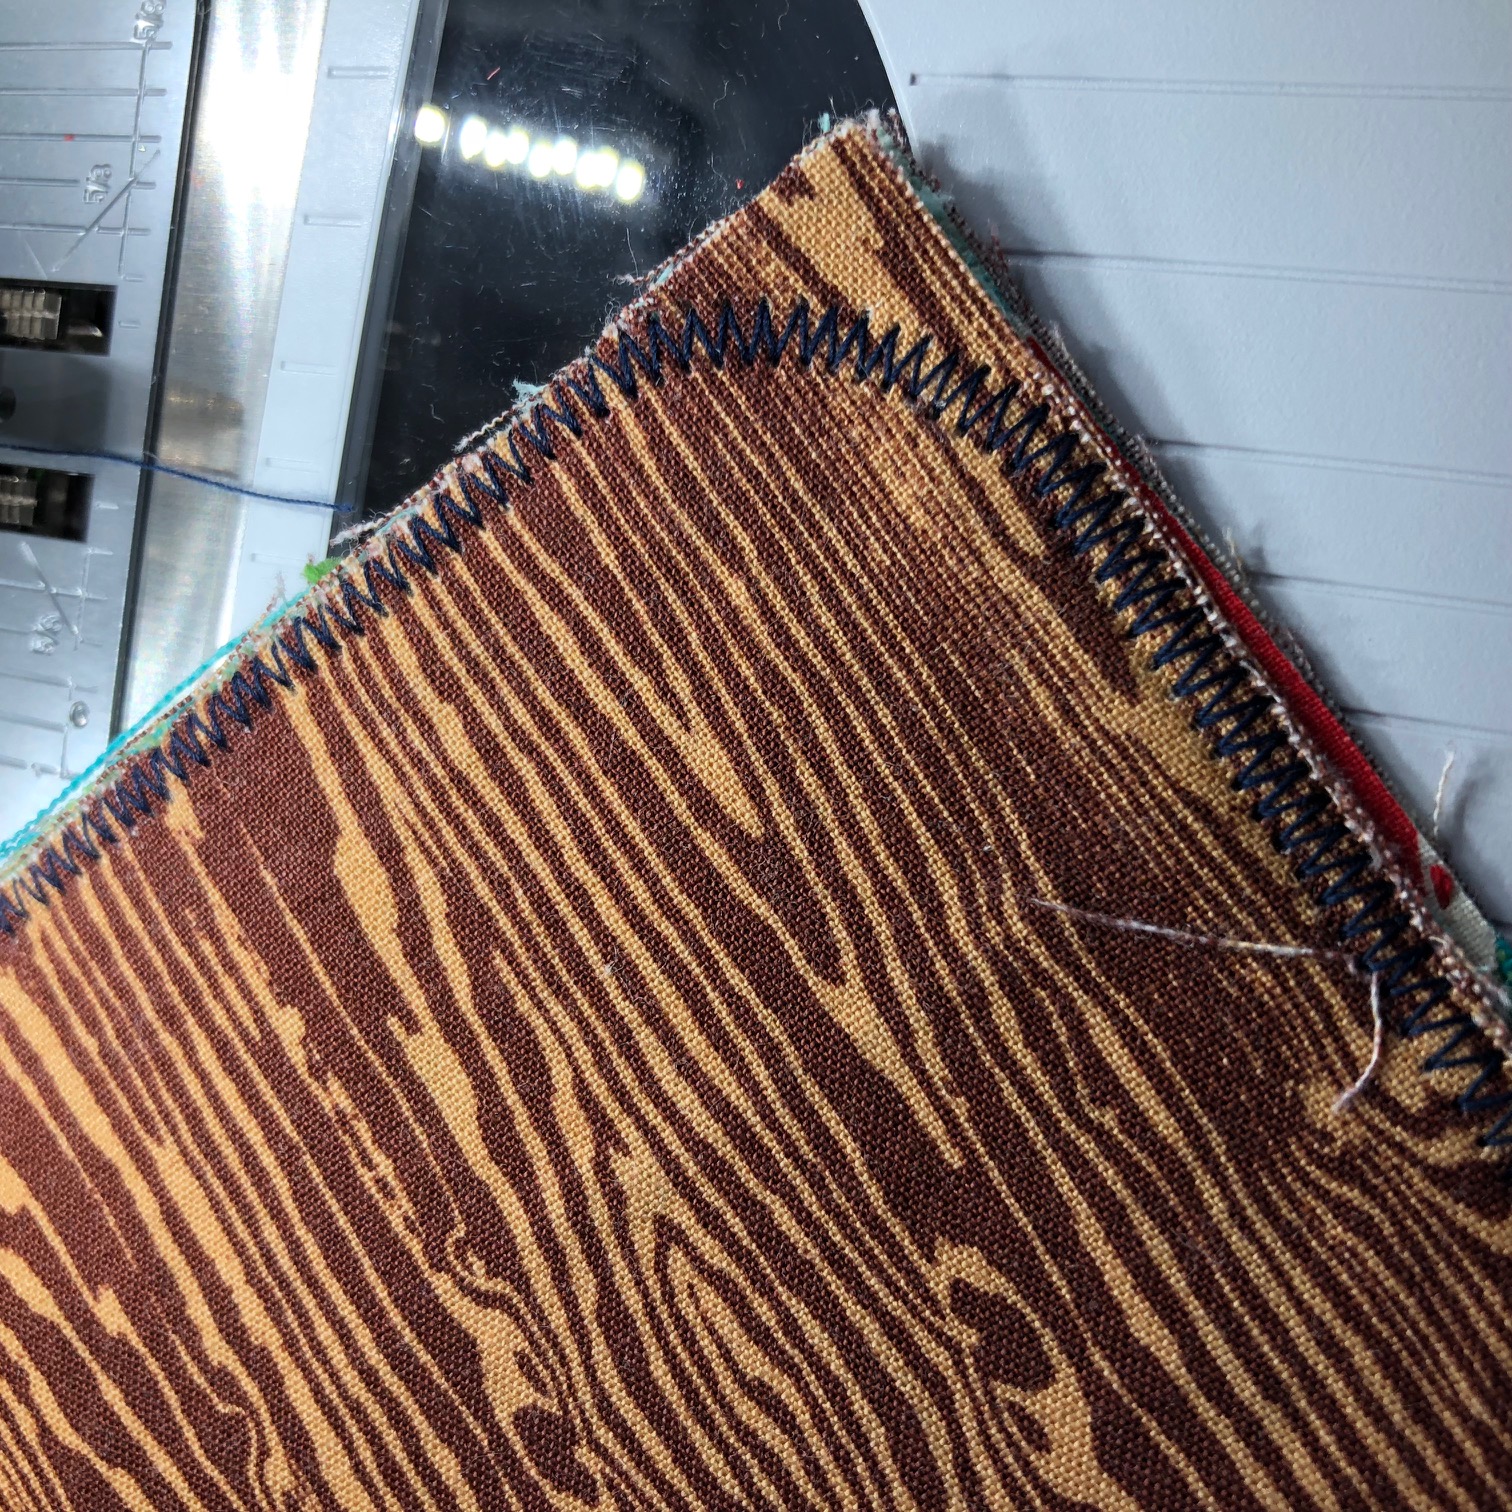
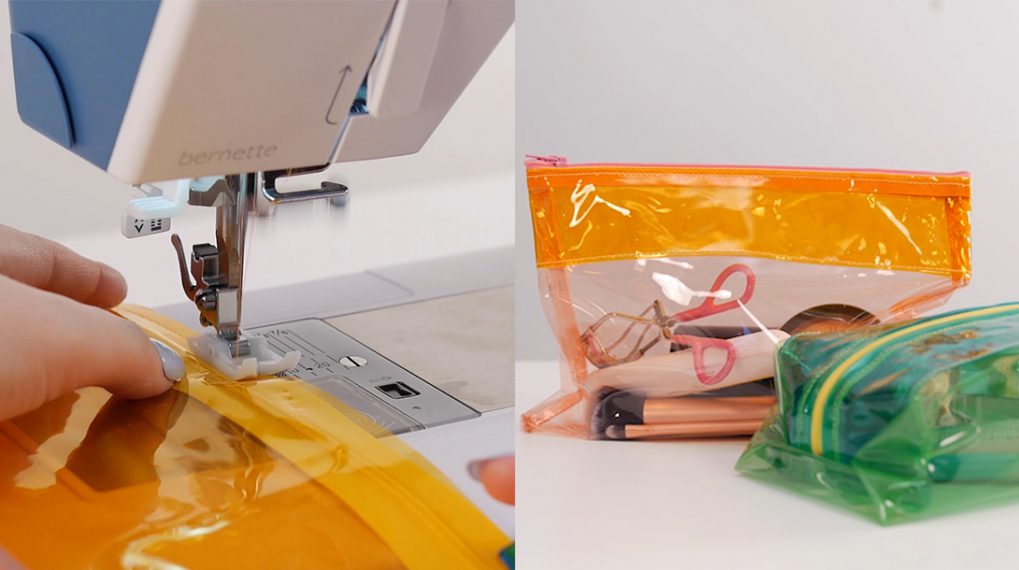
6. I used a zig zag stitch and the Reverse pattern foot #1D to stitch a zig zag line across the top of both pieces of fabric. This prevents the zipper from getting chewed up in your cloth later on.
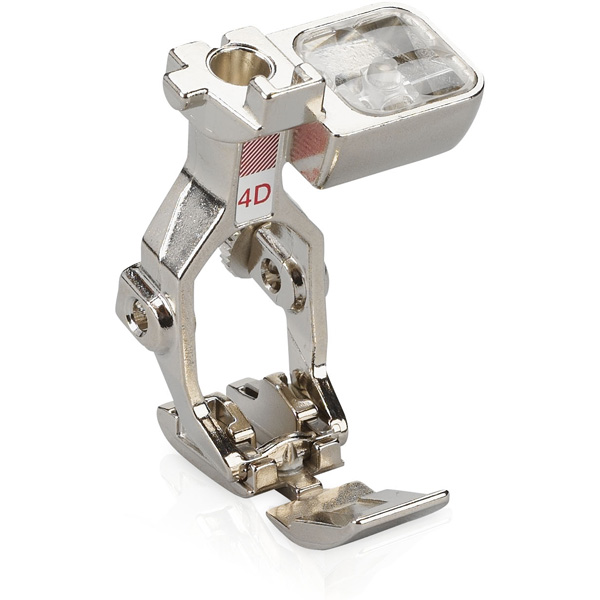
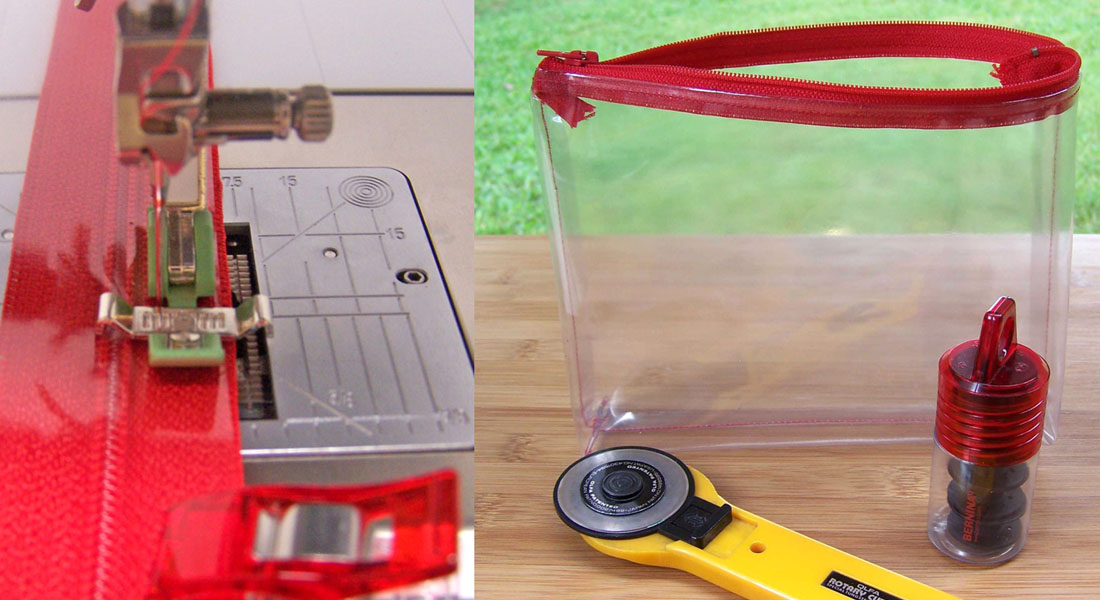
7. Zip it up. Ok, here’s where the magic happens. I attached my Zipper foot #4D, and switched my machine to straight stitch. Don’t forget this step, or your machine will be very angry. Holding the zipper upside down, I stitched it to the right side along the top edge of my fabric. Move the zipper out of the way to make way for the sewing machine foot. I ironed the zipper down, and did the same thing for the other piece of fabric, sewing the zipper upside down on the right side of that piece of fabric.
8. Keeping the zipper foot on, I top stitched the fabric into place, which helps the zipper from getting chewed up by the zipper in the future.
9. Holding right sides together and MAKING SURE THE ZIPPER IS HALFWAY ZIPPED ONLY, I used a zig zag stitch and then a straight stitch on the inside edge of the zig zag to stitch around the outside edges of the bag. I made a slightly rounded corner to make the bag easier to turn right side out later. For a more detailed tutorial on zippers, check out Vanessa’s post, here.
10. I flipped the bag inside out, pressed the corners out with my fingers, and zipped it shut. Finally, I added a little ribbon to the zipper pull to make it easier to open and shut.


What you might also like


One comment on “Vintage Print Inspired Zipper Pouch”
Leave a Reply
You must be logged in to post a comment.

I love this zippered pouch. Such a great project to include your own personal touch. Thank you!!!