How to Make a Snuggly Owl Pillow
This snuggly owl pillow is the perfect addition to any child’s arms. It’s made with love and totally customizable. Try it once then create it again and again using different colors and fabrics as gifts or treats for the little ones in your life.

Download the Snuggly Owl pattern pieces: snuggly_owl_pattern_pieces_121814.pdf
Supplies
Sewing machine
Fabrics in desired colors (see Cutting Instructions)
Thread to match fabrics
Polyester stuffing
Scissors/shears
Straight pins
Hand sewing needle
Step 1) Cut out all pattern pieces in the colors and fabrics of your choice.
- Owl base – cut 2 on fold
- Wing – cut 2
- Bodice – cut 1
- Outer eye – cut 2
- Inner eye – cut 2
- Feet – cut 4
- Beak – cut 1
- Center strip – cut one 46″ x 3 1/2″ strip

Step 2) Stitch the “body parts” to the owl base.
Bodice
Lay the bodice on top of the front owl base, using the pattern as a guide. Fold under the top edge 1/4″ and pin in place.

Sew close to the edge along the top, then the two sides, attaching the bodice to the owl base. There’s no need to fold the side edges under, as they will be covered up later.

Wings
Lay the wings on top of the owl base. Fold under the inner edges 1/4″ and pin in place.

Sew close to the pinned edges of the wings, attaching them to the owl base.

Beak and eyes
Pin the beak in place and zigzag close to the edge of all three sides.

Do the same with the outer eyes.

Repeat for the inner eyes.

Step 3) Add the feet.
Pin two of the feet pieces right sides together. Sew around the outer edges with a 1/4″-wide seam allowance. Do the same with the remaining two feet pieces.

Turn both feet right side out and stuff with a bit of batting.

With the batting stuffed down in the each foot, pin the feet to the bodice/owl base, matching the raw edges and aligning the outer edge of each foot with the inner edge of a wing. Stitch the feet to the owl base using a 1/2″-wide seam allowance.

Step 4) Pin the center strip to the owl base.
Begin lining up the center strip along the outer edge of the owl, starting at the very bottom of the owl. Use pins to attach the center strip to the owl, but leave a few inches of the center strip free at the very beginning.

Continue pinning until you approach the first point at the top of the owl. Manipulate the edge of the center strip as needed as you align it with the curves of the owl.

A corner will need to be made at the point, so flip the center strip up, making a diagonal fold. Keep the left edge of the center strip even with the left side of the point. See how the red and pink fabrics make one continuous line for a few inches?

Keeping that angle in place, flip the center strip down, keeping that top fold of the center strip even with the top of the point.

Keep those edges on the left even with each other.

Pin it all in place as you go.

Continue pinning, folding, and pinning the center strip around the second point the same way as the first. When you reach the end of the strip, leave a few inches free at the end.

Place the two center strip ends right sides together and pin them together. The center strip may have stretched as you pinned it around the owl, so adjust where the ends are pinned together so that the center strip forms a continuous piece of fabric around the owl.

Trim away the excess fabric.

Pin this section of the center strip to the owl base, matching up the outer edges.

Step 5) Stitch the center strip to the owl base.
Begin sewing the center strip to the owl base, using a 1/2″-wide seam allowance, stopping as you near the first point/corner.

As you near the point, keep the fold of fabric folded away from the needle. Continue to sew, stopping 1/2″ before the end of the point. Backstitch a few times, but don’t cross into that 1/2″ space at the end.

Turn your owl to begin sewing around the other side of the point.

Flip the fabric away from the needle, and then place the needle down in the fabric 1/2″ from the end. Backstitch a few times, but don’t cross into the 1/2″ space at the beginning.

Continue stitching the center strip to the owl base, turning the corner at the second point the same way as the first.
Continue stitching all the way around the owl base.

Step 6) Stitch the front and back together.
Place the owl back base right sides together with the front owl base. Pin the edges of the back owl base to the center strip, matching up the tops of the owl’s head so that the points are directly across from each other. Be sure that you are pinning right sides together.

Place the owl under the sewing machine presser foot with the center strip facing up; this will allow you to maneuver the fabric around the points the same way that you did when attaching the first side.

Stitch using a 1/2″-wide seam allowance, leaving about a 4″ opening along the bottom edge of the owl.

Step 7) Make the owl ears.
At the top of the owl, pinch the points on one side together, creating a fold along the center strip from the back point to the front point. Repeat for the other set of points.

Sew a straight line 1/2″ below the folds in the center strip. Start at the end of one of the vertical lines, sewing to the other one as shown in the photo.

Do the same with the other point. This will help create nice creases and folds for the points of the owl after you turn it right side out.

Trim off both corners of each end, being careful not to clip through any seams.

Step 8) Stuff your owl.
Stuff your owl full of polyester stuffing.

Fold the opening edges toward the inside 1/2″, and then hand-stitch the opening closed.


What you might also like

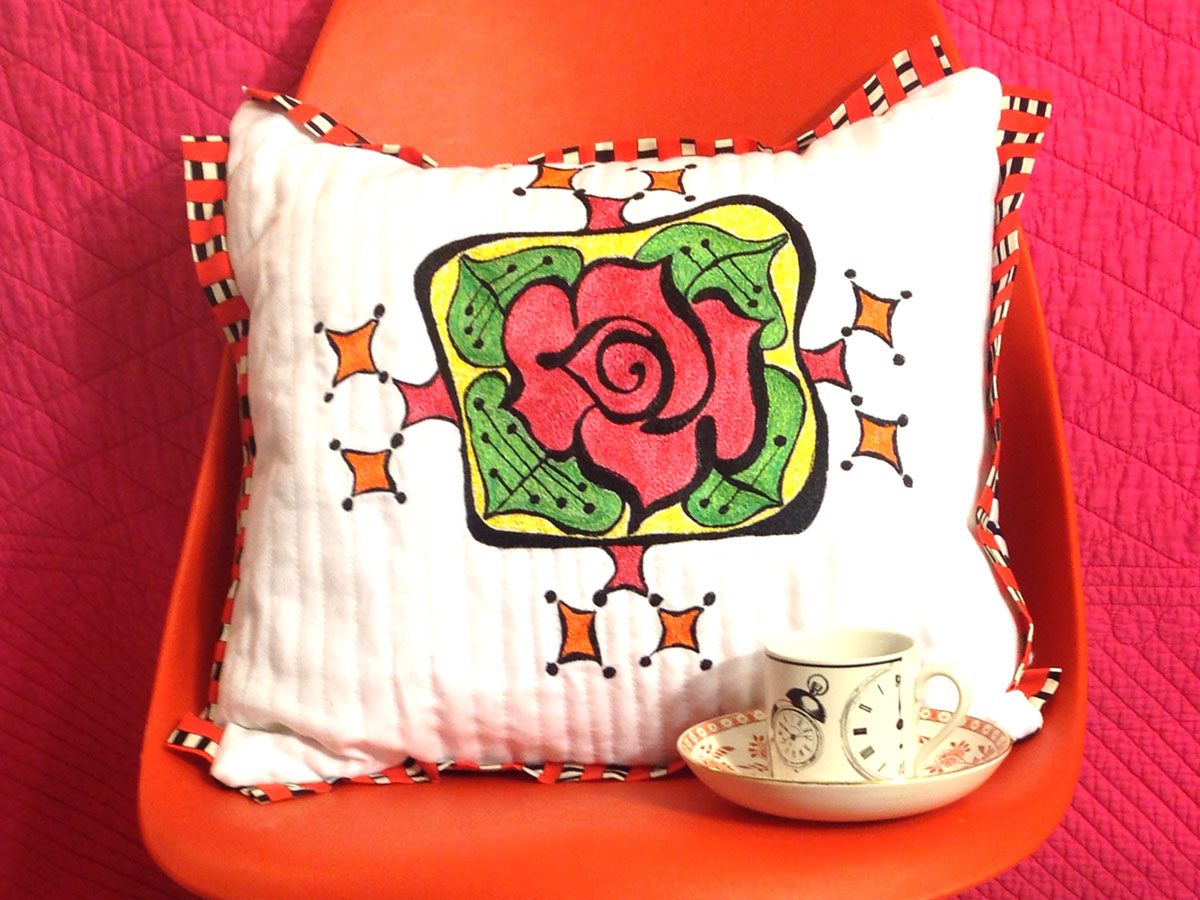
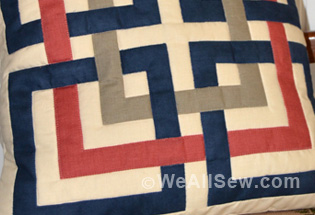

![Is that big, bold scrap of fabric staring at you? This quilt square is designed to let a large print fabric shine. This simple block is quick to make and easily stitched into a pillow. With a bit more fabric you can turn it into a placemat or table runner. The perfect project for turning fabric scraps into something bold and beautiful. Geometric Quilt Block Pillow Supplies Large scraps or fat quarters of 100% cotton quilter's fabrics: One large print One light solid or small print One medium solid or small print One dark solid or small print 1/2 yard of white cotton fabric for the pillow lining 1/2 yard of fabric for the pillow back Coordinating thread 14" square pillow form Universal or Sharp needle, size 75/11 1/4" foot (BERNINA Patchwork Foot with Guide #57) Straight stitch foot (BERNINA Straight Stitch Foot #13) Zigzag foot (BERNINA Reverse Pattern Foot #1) or overlock foot (BERNINA Overlock Foot #2) Rotary cutter and self-healing cutting mat Clear acrylic gridded ruler Download and print the Geometric Quilt Block Pillow Cutting and Piecing Diagrams: [download id="90"] Step 1) Cut the fabric pieces. Accurate cutting helps avoid crooked, puffy, or uneven seams in your quilt block. Use a self-healing mat, a clear acrylic gridded ruler, and a rotary cutter to cut the pieces for your quilt block. Rotary cutters Rotary Cutting Tips Self-healing mats come in different sizes. 24" x 36" is a good size to have, but if you don't have a dedicated sewing space or don't plan to use it often, try an 18" x 24" mat instead. Acrylic rulers also come in many shapes and sizes. A standard 6" x 24" ruler is a good start, and I've also found a 12-1/2" x 12-1/2" square ruler to come in very handy. Rotary cutters are measured by the size of the circular blade in millimeters. A 45 mm rotary cutter is perfect for making the kind of straight cuts needed for this project. Use the grid on your cutting mat to help square up fabric pieces when needed, but when measuring to cut the pieces be sure to use the gridlines on the acrylic ruler. Hold the ruler firmly on top of the fabric, and use a steady, firm, pressing motion when cutting with the rotary cutter. Cut one of each pattern piece from the corresponding fabrics (also see downloaded Cutting Diagram): Piece #1 - Light solid or small print, 4" x 3" Piece #2 - Dark solid or small print, 4" x 5" Piece #3 - Light solid or small print, 4" x 2-1/2" Piece #4 - Large print, 9-1/2" x 9-1/2" Piece #5 - Light solid or small print, 2-1/2" x 9-1/2" Piece #6 - Dark solid or small print, 14-1/2" x 2-1/2" Piece #7 - Medium solid or small print, 14-1/2" x 3-1/2" Step 2) Piece the block. Set your sewing machine for a straight stitch about 2.5 mm long. Attach a quarter-inch foot, such as BERNINA Patchwork Foot with Guide #57, to your sewing machine. The blocks will be sewn together using a 1/4"-wide seam allowance. Stitching an accurate 1/4"-wide seam will help your block come together with nice, straight seams and avoid pieces not fitting together as you sew on. Geometric Quilt Block Pillow Patchwork Piecing Tips Us a quarter-inch foot to help you keep the correct seam allowance width. The BERNINA Patchwork Foot #37 is designed specifically so that following the edge of the foot will create a 1/4"-wide seam allowance. BERNINA Patchwork Foot with Guide #57 is similar to foot #37, but adds a metal guide at the side of the foot to help you like up your fabric piece exactly at the edge of the foot. Attach a seam guide to the bed of your sewing machine along the 1/4" seam allowance mark on your stitch plate, then place the edges of your fabric pieces against the guide as you sew. Alternatively, place a piece of blue low-tack painter's tape along the 1/4" seam allowance mark on your stitch plate as a guide for your fabric. Piecing Diagram Geometric Quilt Block Pillow Start by stitching Piece #1 to Piece #2 along one 4" edge. Press the seam allowances to one side. Next, sew Piece #3 to Piece #2 along one 4" edge as shown in the diagram; press after stitching. Geometric Quilt Block Pillow Continue adding pieces to the block as shown in the diagram, pressing each seam as you go. Tip: When pressing seams, be sure to press DOWN with the iron as opposed to "ironing," or pushing the iron back and forth over the seam. Ironing (back and forth motion) can cause straight seams to go crooked. Pressing straight up and down with the iron will help your seams stay nice and straight. Press all seams again from the back of the block when finished. Geometric Quilt Block Pillow The finished block should measure 14-1/2" x 14-1/2". Geometric Quilt Block Pillow Step 3) Construct the pillow cover. Cut one 14-1/2" x 14-1/2" square of fabric for the pillow lining. Cut two 11" x 14-1/2" rectangles of fabric for the pillow back. Create a 2" hem along one edge of each 11" x 14-1/2" pillow pocket piece: Turn under 1" along one long edge; press. Turn under an additional 1"; press. Geometric Quilt Block Pillow Topstitch close to the inner edge of the folded hem with a straight stitch, using either a multi-purpose foot or a straight stitch foot. Geometric Quilt Block Pillow Layer and pin the pieces of the pillow together: Begin with the 14-1/2" square of white cotton for the lining. Add the finished patchwork block, right side up, matching all edges. Add one pocket pillow back, right side down, matching the raw edges. The finished hem will be about 5" from the other end of the pillow. Add the other pocket pillow back, right side down, on the opposite edge. The hemmed edges will overlap. Geometric Quilt Block Pillow Pin around all four edges of the pillow. Set your sewing machine for a straight stitch of 2.5 mm long. Stitch around all four sides of the pillow using a 1/2"-wide seam allowance. Trim all seam allowances to 1/4". Attach an overlock or zigzag stitch foot to your sewing machine. Set your machine for a zigzag or overlock stitch and sew over the raw edges to keep them from unraveling. Geometric Quilt Block Pillow Turn the pillow cover right side out, gently pushing each corner from the inside to turn it. Insert the 14"-square pillow form through the opening in the back of the pillow cover. If needed, use a little fiberfill to help fill out the pillow corners. Geometric Quilt Block Pillow Geometric Quilt Block Pillow](https://weallsew.com/wp-content/uploads/sites/4/2014/01/Geometric-Quilt-Block-Pillow-WeAllSew.jpg)

40 comments on “How to Make a Snuggly Owl Pillow”
-
-
Hi Joy, the pattern is downloadable in a PDF file, just click on the text that says, “Snuggly Owl by Ashley Johnston” under the picture of the owl.
-
-
Easy and concise pattern with adorable results. My friend and I just tried this pattern together and we both LOVED our owls! They turned out extremely cute, if you would like to see pictures just check out http://modsprouts.com/?p=440.
Rebecca -
sew cute
-
Sorry – I am having trouble reading some of the letters as they are a bit blurred
-
What am I doing wrongt?
-
HI Beverly — Are you having trouble with the Capcha word (the one that lets us know you’re human and not a computer)? If so, there should be an button/option to get a different word. All Capcha words are a bit blurry on purpose, but you may be able to read a different word better than the first one offered. Jo
-
-
These things are freaking ADORABLE. I just made one for myself…yes, I am 22 years old and just made myself a snuggly owl pillow…and PROUD OF IT! It can be seen here: http://www.facebook.com/photo.php?fbid=10150433541012244&set=a.10150307225487244.389951.501842243&type=1&theater
-
It’s prettier if on the back you just add two pieces of fabric(like an envelope)Then you’ll have a pajama bag. Kids will love it.
-
-
I LOVE THIS OWL AND PLS SEND ME THE PATTERN OF OWL SMILE. THANK U
-
Hi Maria — Isn’t this owl the cutest thing ever? And easy to make, too. You can download the pattern and instructions by clicking on the red Snuggly Owl by Ashley Johnston link at the end of the project description. Jo
-
-
Pingback: 13. owl « make great
-
Pingback: 17. owl. « make great
-
Pingback: WeAllSew « https://weallsew.com
-
Pingback: WeAllSew « https://weallsew.com
-
Pingback: Bienvenue chez Mininours « Made By Ally
-
Can’t seem to open the PDF pattern, it says that the link is broken. Could you please send me the pattern.
Thanks!-
Hi, khaleesi – We’re experiencing some technical problems with our PDFs. I’ll e-mail the file to you. Sorry for the inconvenience! Jo
-
-
Pingback: Owl Pillow Sewing Tutorial | Huppie Mama
-
Love this pattern!. I liked it so much that I made one for each of my daughters friends. This is a keeper.
-
Pingback: Cojín en forma de búho | DIY
-
I can’t seem to download the pdf. Can I get it sent to me?
-
Watch for it in your mailbox – Jo
-
-
Please may you email me the pdf too as I can’t open it from this page- sorry to trouble you!
Becky-
Hi, Becky – You should be able to right-click on the link and open it. I’ll send you a copy. Jo
-
-
I cant seem to download the template can you email it to me
-
Please may you email me the pdf too as I can’t open it from this page- sorry to trouble you!
Rosalinda-
Done – watch for it in your mailbox! Jo
-
-
Will you please email me the pattern? So excited to make these for Christmas!
-
Right click on the Snuggly Owl pattern pieces link, then select Save and save it to your computer. From there you can open it and print the pattern pieces. Jo
-
-
Pingback: Fabric Owl Pillow with Free Pattern
-
When my grandson was born, I made him and owl family of seven different sizes by increasing and decreasing the pattern. They ranged from 6 inches to 30 inches tall. Each one is different with different textures, colors, trims, etc. He loves them
-
Thank you for the Owl remote pattern, making that asap 🙂
-
Hi there, the down load I can not see the long strip that goes between the front and back please guide me.
Kind regards
Kerry
Leave a Reply
You must be logged in to post a comment.

Hi ,,,, the owls are so cute!!! Could you pls send me the pattern,,, Thanks