How to Sew an Appliqué Portrait Pillow Keepsake For Mom
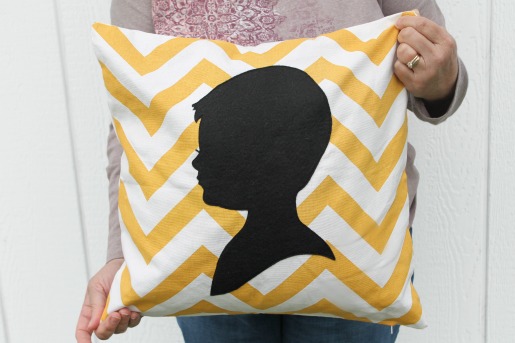
Portrait silhouette pillows are a unique and meaningful gift to make and give for every celebration: weddings, graduation, birthdays and especially for Mother’s Day! It can be challenging to to find the perfect gift for those you love—whether it’s your mom, sister, your best friend, or even for yourself. Today we are going to create hand cut appliqué portrait pillows from a side profile photograph (remember when we actually printed them on paper?!) or digital image that will be cherished for years to come. From start to finish you can make a gorgeous gift in an hour and for under $20.
You’ll Need:
- Double Sided Fusible (I choose Pellon EZ Steam II)
- Sharp Short Bladed Scissors
- Sharpie Marker
- Ruler
- Photograph (any size)
- Black Felt
- Home Printer/Scanner
- Premade or Self Made Pillow Cover
- Black thread
- BERNINA Reverse pattern foot with clear sole #34 (optional)
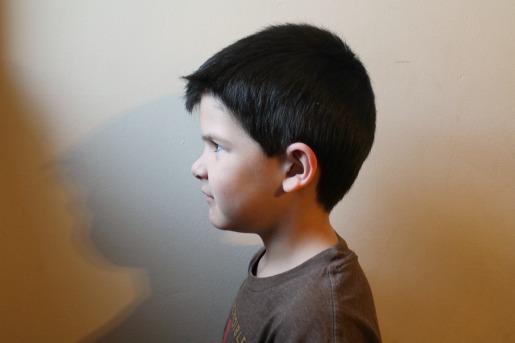
1. Start by finding a good side profile photograph. You can still work with it if there is background scenery. I chose to snap a quick photo of my son using my phone against the wall.

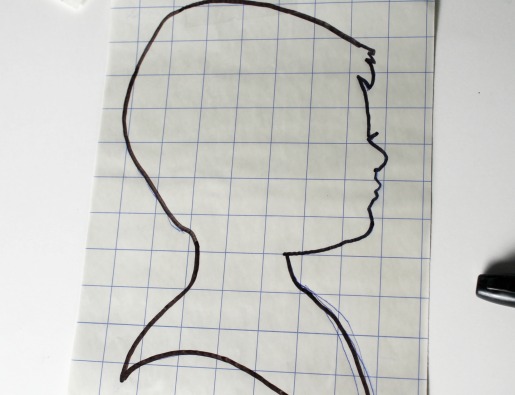
2. Next, using my home printer—I printed out the profile image. If you are using an original photograph, you can make a black and white copy image at home, local library, or at a print shop (Kinkos, Staples, etc.). Using a sharpie marker, a ‘fine-tip’ one would be ideal, trace an outline of the portrait. You can change the hair style or add a shirt collar if you choose to.

3. Flipping over the paper you’ll notice the Sharpie marker bled through. Trace over this to make it nice and dark. This will be the image that we resize to fit onto your pillow case. Use a ruler to measure your silhouette image outline—mine measures 4 1/4” tall. How are we going to resize the outline to fit a large throw pillow?

4. I am using a 16×16″ premade pillow case. I wanted my applique to be 12” tall. I will scan my sharpie drawn outline using a home printer but first I need to know to what percentage the image needs to be resized to. Using a little math equation above I am able to figure out that the 4 1/4” trace photo needs to be resized 282%. Here’s how it worked out: 12 inches/ 4.25 inches X 100= 282
*This tip can be used to resize block patterns, appliqués, and more. It will work for any measurement units, as long as they are the before and after measurements are the same units (inches, centimeters, yards, etc.)
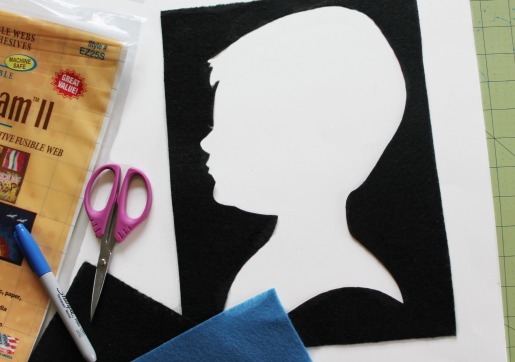
5. After printing out the resized black and white image I traced the outline onto my double sided fusible interfacing sheet by laying the print out beneath the gridded paper. If you have trouble clearly seeing the image, use a light table or tape both the pieces of paper to a window.
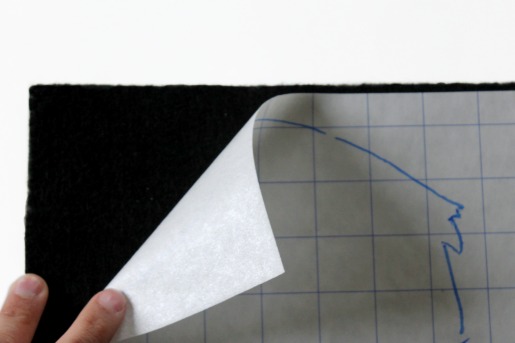
6. Remove opposite side backing of the fusible sheet, finger press the tacky side to the wrong side of your appliqué fabric, or in this case the black felt. I chose this particular fusible because it offers a very sturdy foundation for making precision cuts in felt on the next step.
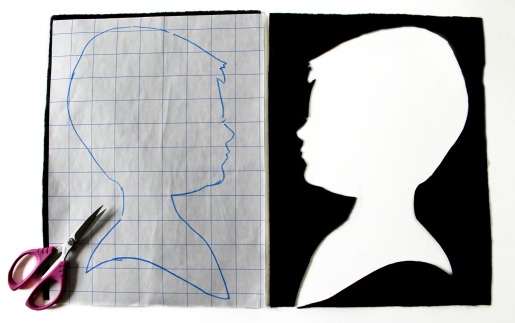
7. Using short sharp scissors, carefully cut out your appliqué portrait.
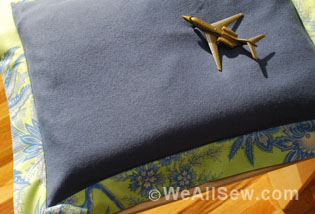
8. Remove the gridded paper backing. Finger press the appliqué this time onto your pillow cover. The appliqué placement can still be adjusted at this point. When you are satisfied with the placement, carefully turn your pillow cover inside out. Set iron to cotton setting with steam and press the wrong side of the pillow cover firmly in place for 10 seconds. Do no try to iron the topside of the felt.

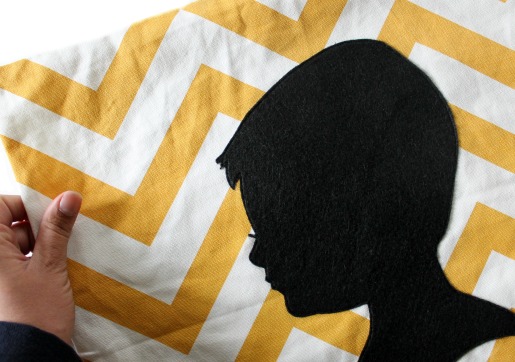
9. Finish off your appliqué by sewing it into place. The BERNINA Reverse pattern foot with clear sole#34 it’s my preferred foot for all of my freestyle appliqué work—keeping the stitch length to between 2.0 and 2.4 will help you to easily navigate the detailed facial features along the way.
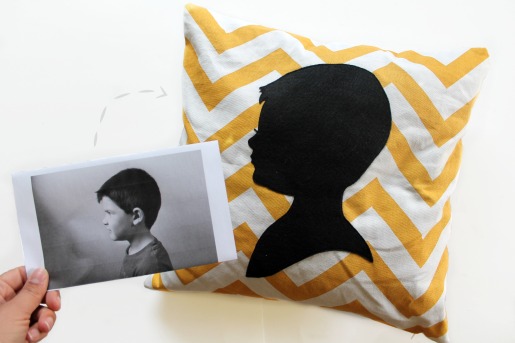
Thanks for joining me here on WeAllSew. I hope you’ll be inspired to create a one of kind gift for someone you love!


2 comments on “How to Sew an Appliqué Portrait Pillow Keepsake For Mom”