Snowflake Quilt-Along Week 1
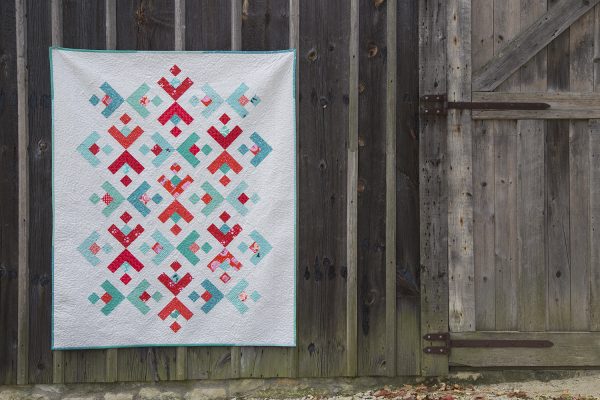
Fall is in full swing here in Chicago, making this the perfect time to stitch up a cozy holiday quilt. I set out to design a pattern that was simple enough to make before December begins, but beautiful enough to catch anyone’s eye during the celebratory season. The Snowflake Quilt uses a creative layout and blocks on point. Use of negative space makes this quilt look harder than it is. This pattern is suitable for any quilter, whether you’ve made two quilts or two hundred. The layout reminds me of a delicate snowflake, which we will likely see sooner than later here in my neighborhood!
Over the next three weeks, we will create the Snowflake Quilt. During this first week, we will cut our fabrics and stitch up our blocks. During week two, we will assemble the quilt top. And finally, during week three, we will baste, quilt, bind and enjoy!
Snowflake Quilt-Along – Week 1
Pattern by Faith Jones, Fresh Lemons Quilts
Finished Size: 55″ x 67″
Block Size: 8″ x 8″ Finished
Number of Blocks: 34
Materials to Make the Snowflake Quilt
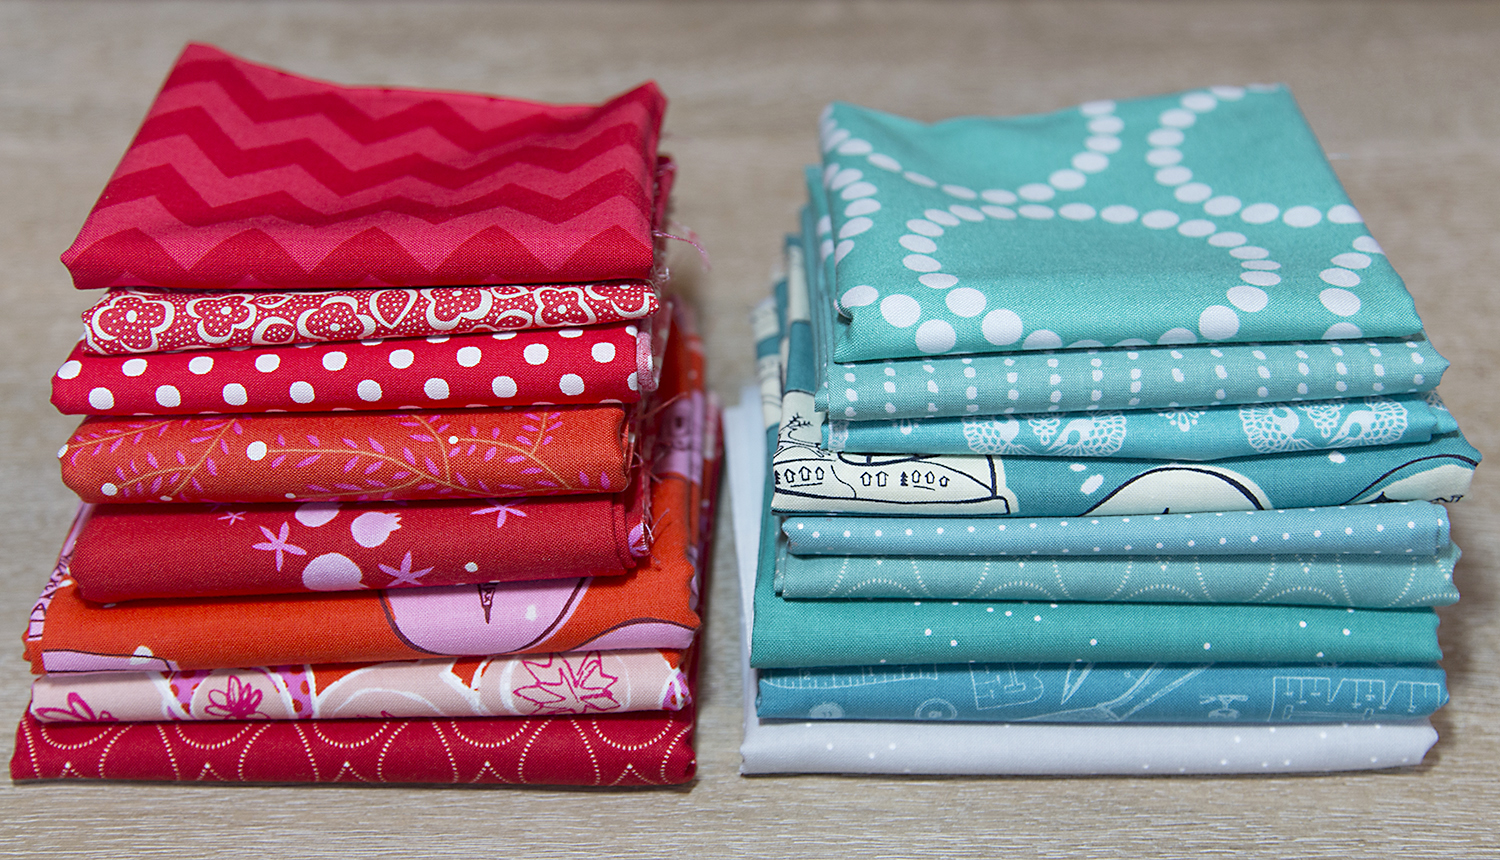
For my Snowflake Quilt, I used a variety of red and aqua prints. I wanted a scrappy quilt, but not an overly busy quilt. In order to achieve that look, I did not mix prints within each block. That helps define the individual blocks as well.
The background fabric of my Snowflake Quilt is a light gray. I used Cotton and Steel Fabrics‘s Sprinkle print in the Stardust color way. It reminds me of light snow falling against the winter sky.
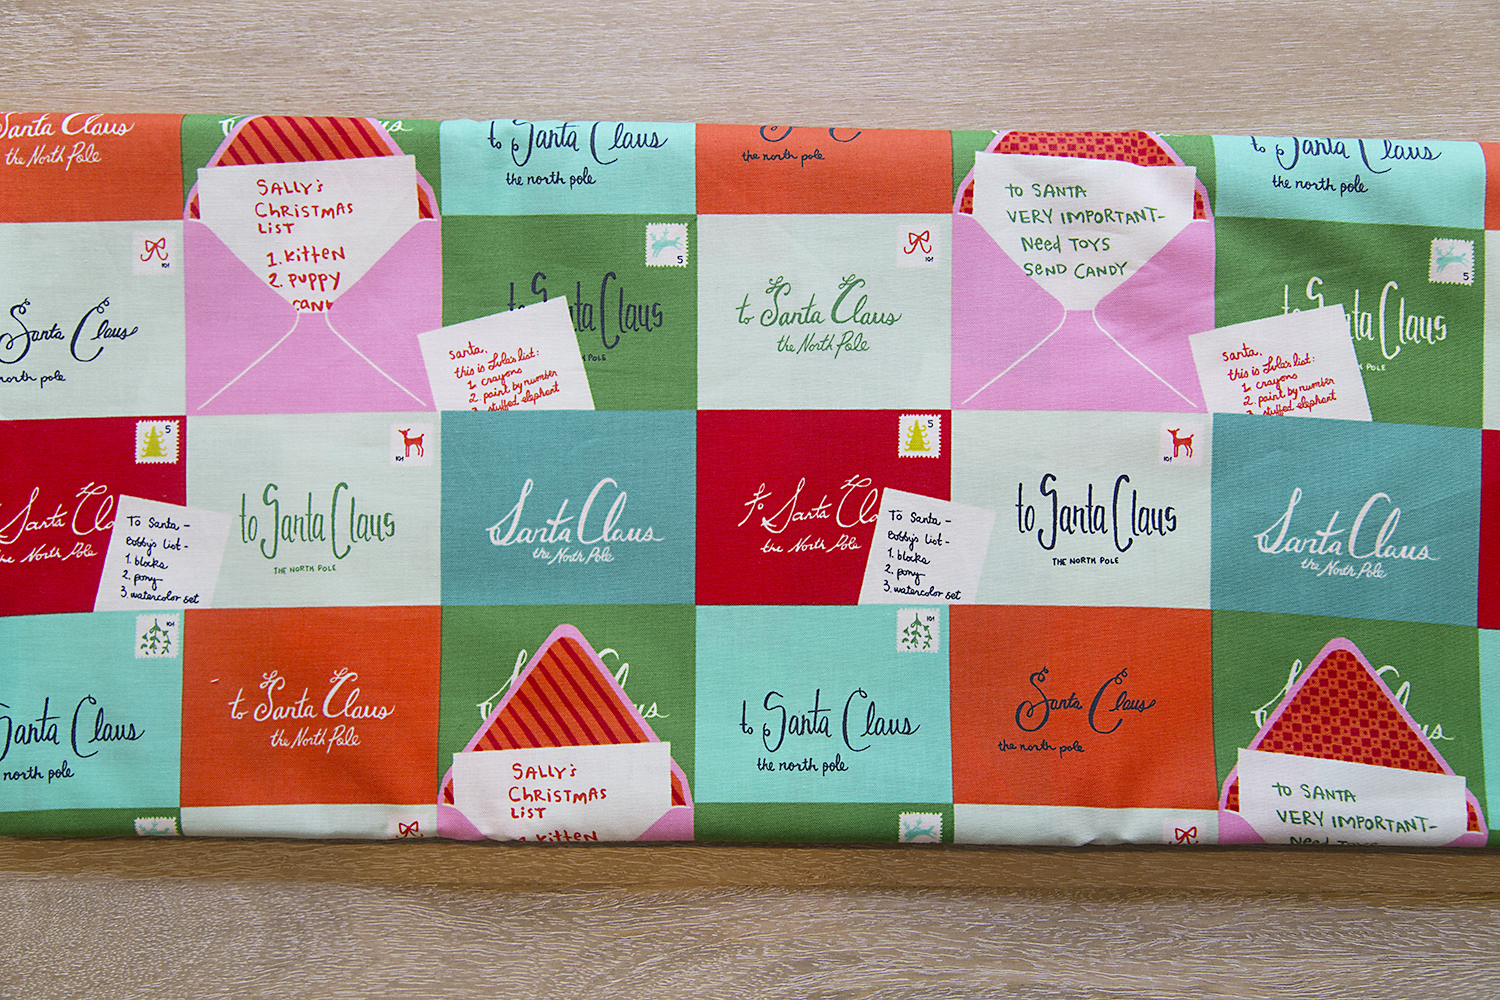
For my backing, I used a fun print called Notes to Santa from Cotton and Steel’s Tinsel collection.
Quilt Top:
3/4 yard scrappy assortment of Red Fabric
3/4 yard scrappy assortment of Aqua Fabric
3-1/2 yards Background Fabric
Quilt Backing, Binding and Batting:
1/2 yard Binding Fabric
3-1/3 yards Backing Fabric
63″ x 75″ Piece of Batting
Cutting Instructions to Make the Snowflake Quilt
Aqua Fabric:
Cut (14) 2-1/2″ x 2-1/2″ squares from a scrappy assortment of fabric
Cut (20) sets of the following*:
- Cut (1) 2-1/2″ x 2-1/2″ square
- Cut (1) 2-1/2″ x 4-1/2″ rectangle
- Cut (1) 2-1/2″ x 6-1/2″ rectangle
*Each set should contain pieces from all of the same fabric
Red Fabric:
Cut (20) 2-1/2″ x 2-1/2″ squares from a scrappy assortment of fabric
Cut (14) sets of the following*:
- Cut (1) 2-1/2″ x 2-1/2″ square
- Cut (1) 2-1/2″ x 4-1/2″ rectangle
- Cut (1) 2-1/2″ x 6-1/2″ rectangle
*Each set should contain pieces from all of the same fabric
Background Fabric:
Cut (68) 2-1/2″ x 2-1/2″ squares
Cut (34) 2-1/2″ x 6-1/2″ rectangles
Cut (34) 2-1/2″ x 8-1/2″ rectangles
Cut (4) 8-1/2″ x 8-1/2″ squares
Cut (10) 8-7/8″ x 8-7/8″ squares, cutting diagonally from corner to corner resulting in (20) HST (half square triangles)
Cut (2) 5-1/2″ x 70″ strips (you can piece together smaller pieces to form this 70″ strip)
Instructions to Sew the Snowflake Quilt Blocks
All seam allowances are 1/4″. I pieced my blocks on my BERNINA 750QE using Patchwork Foot 37D with the dual feed engaged and a straight stitch needle plate.
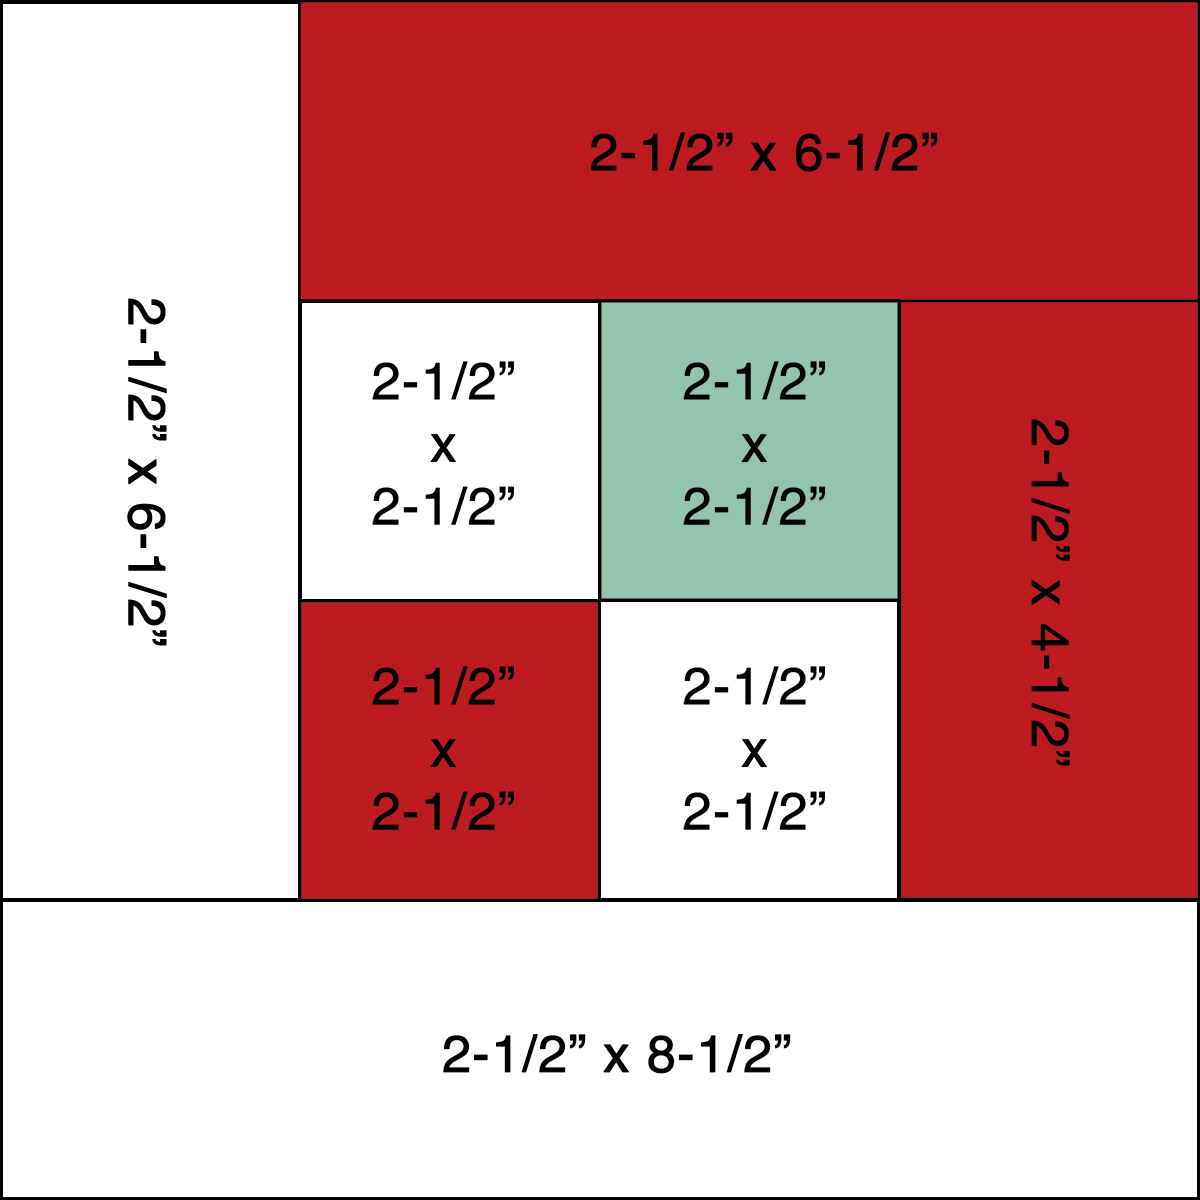
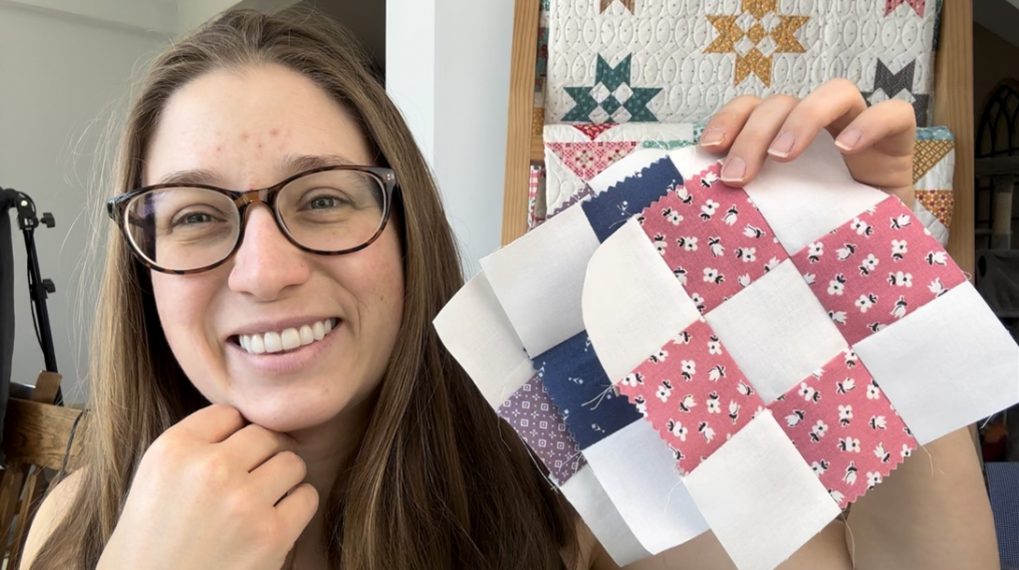
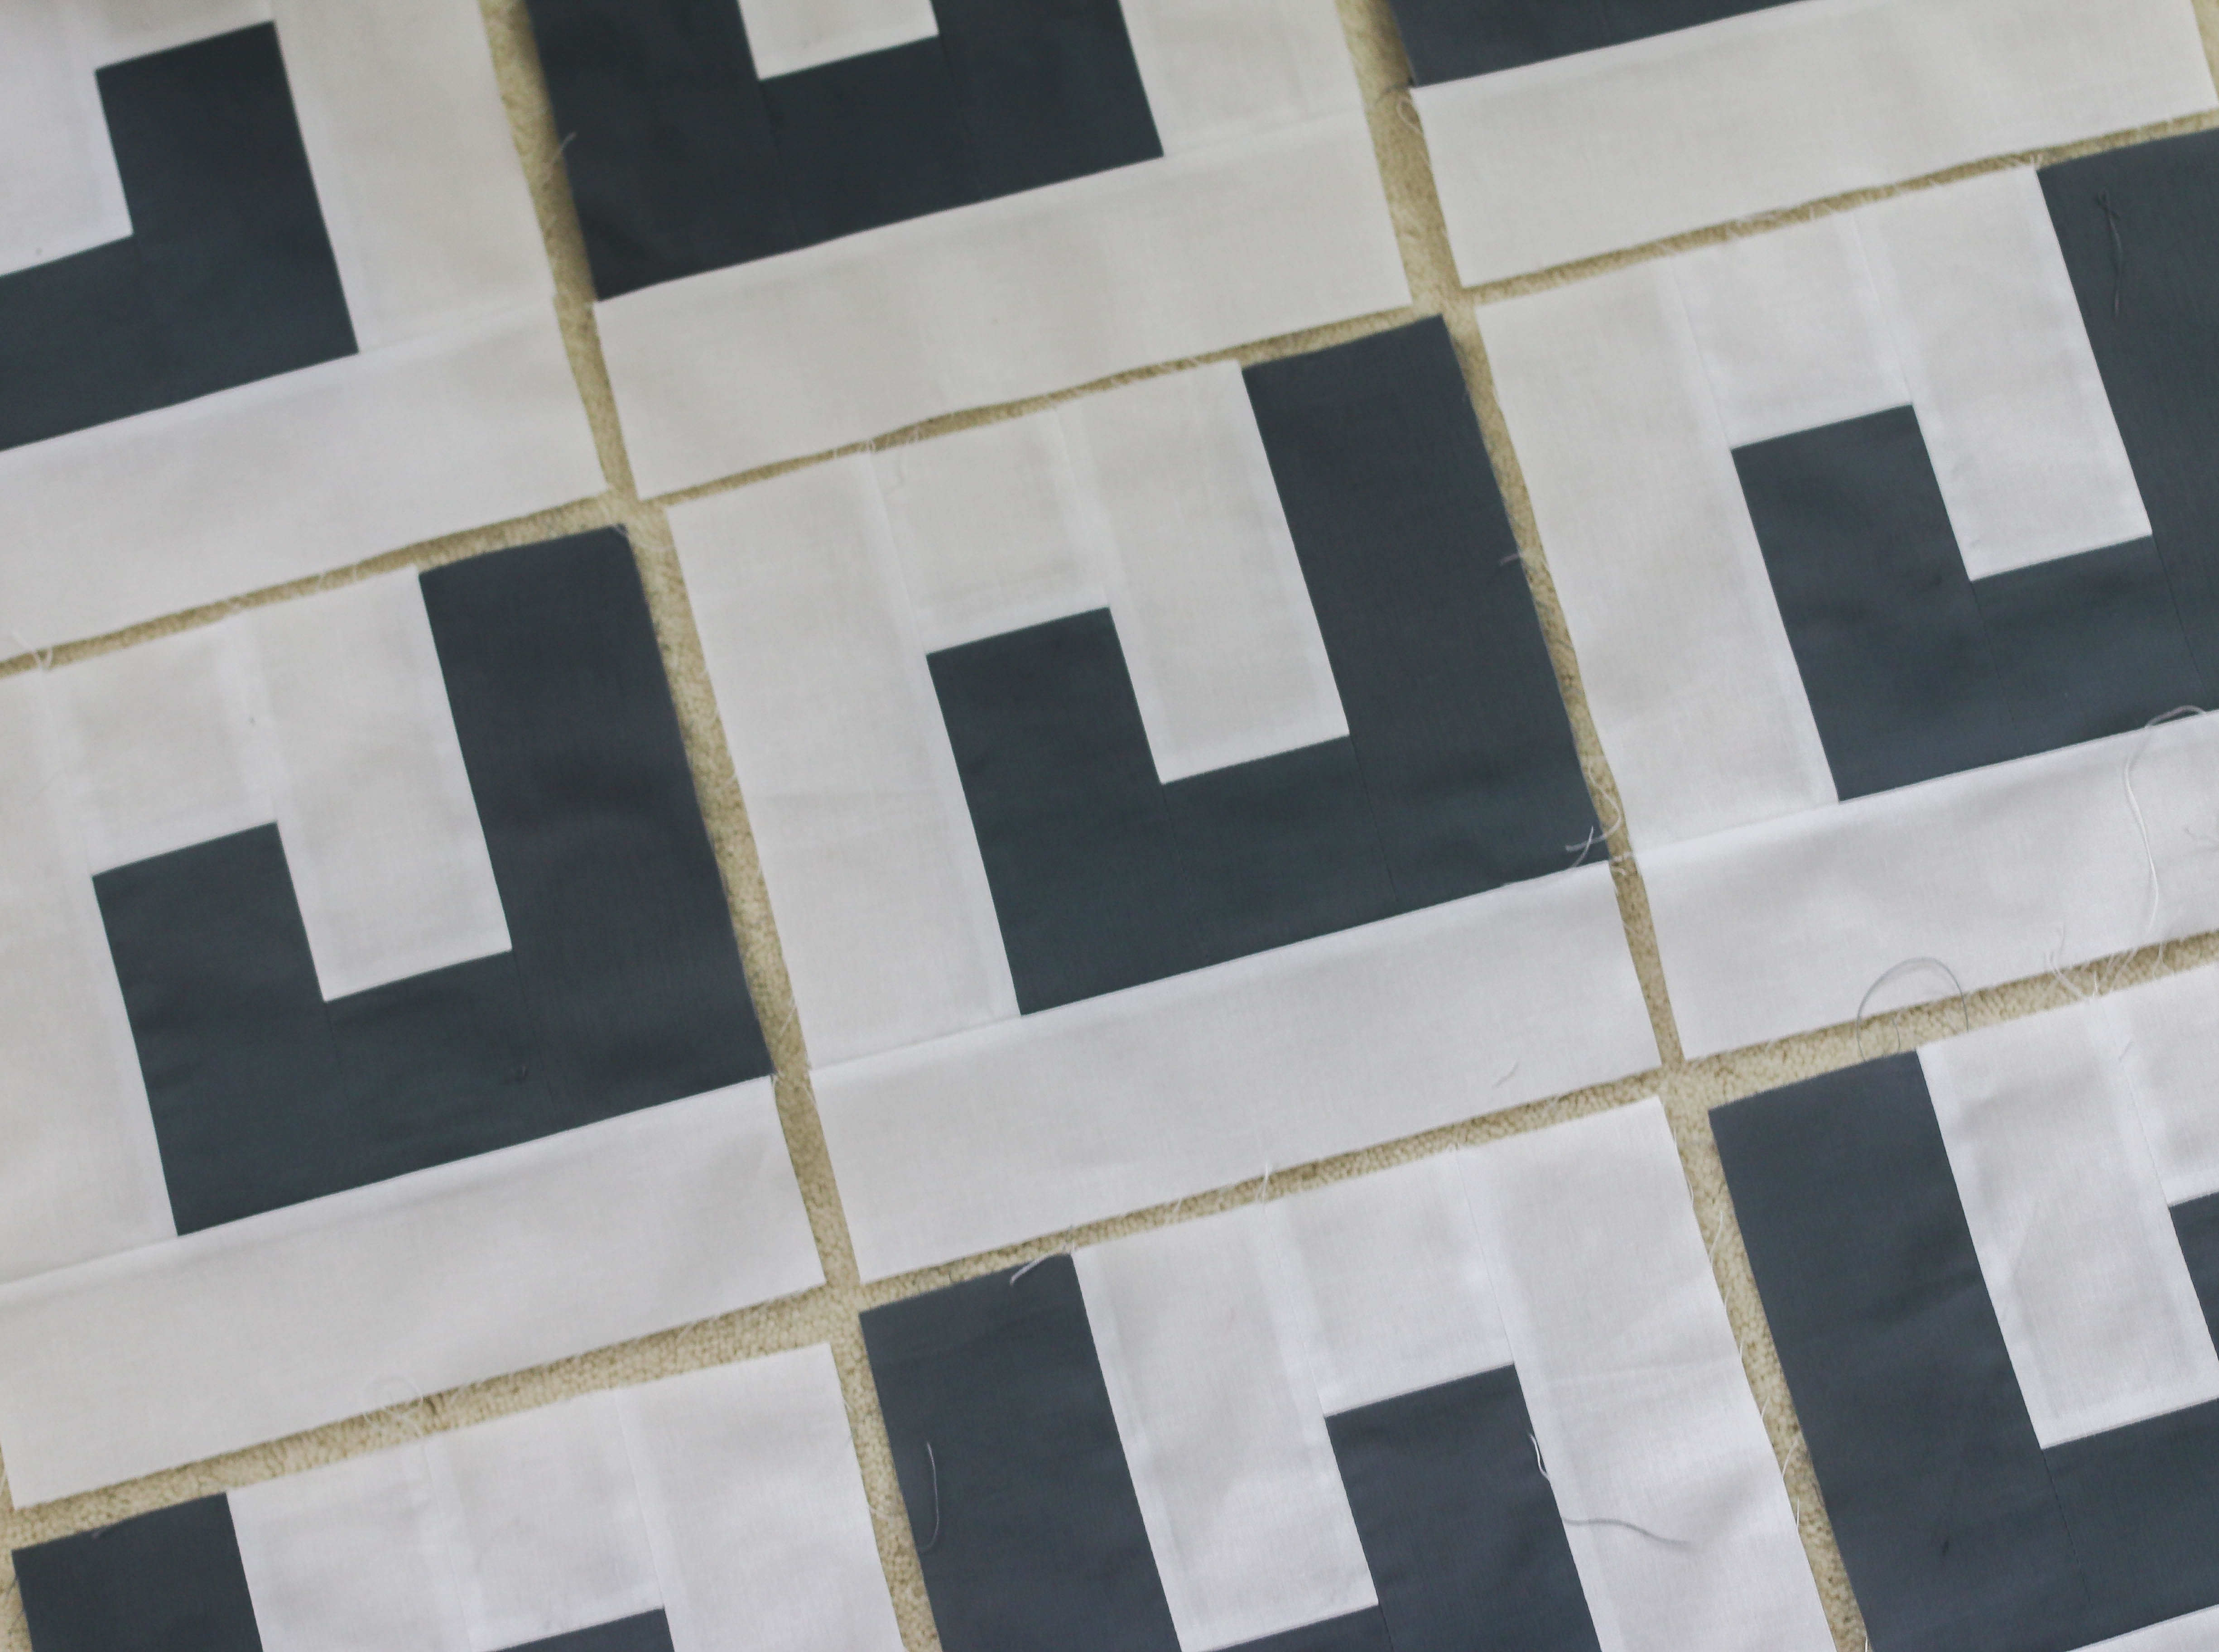
Piecing Block A (8-1/2″ x 8-1/2″ unfinished):
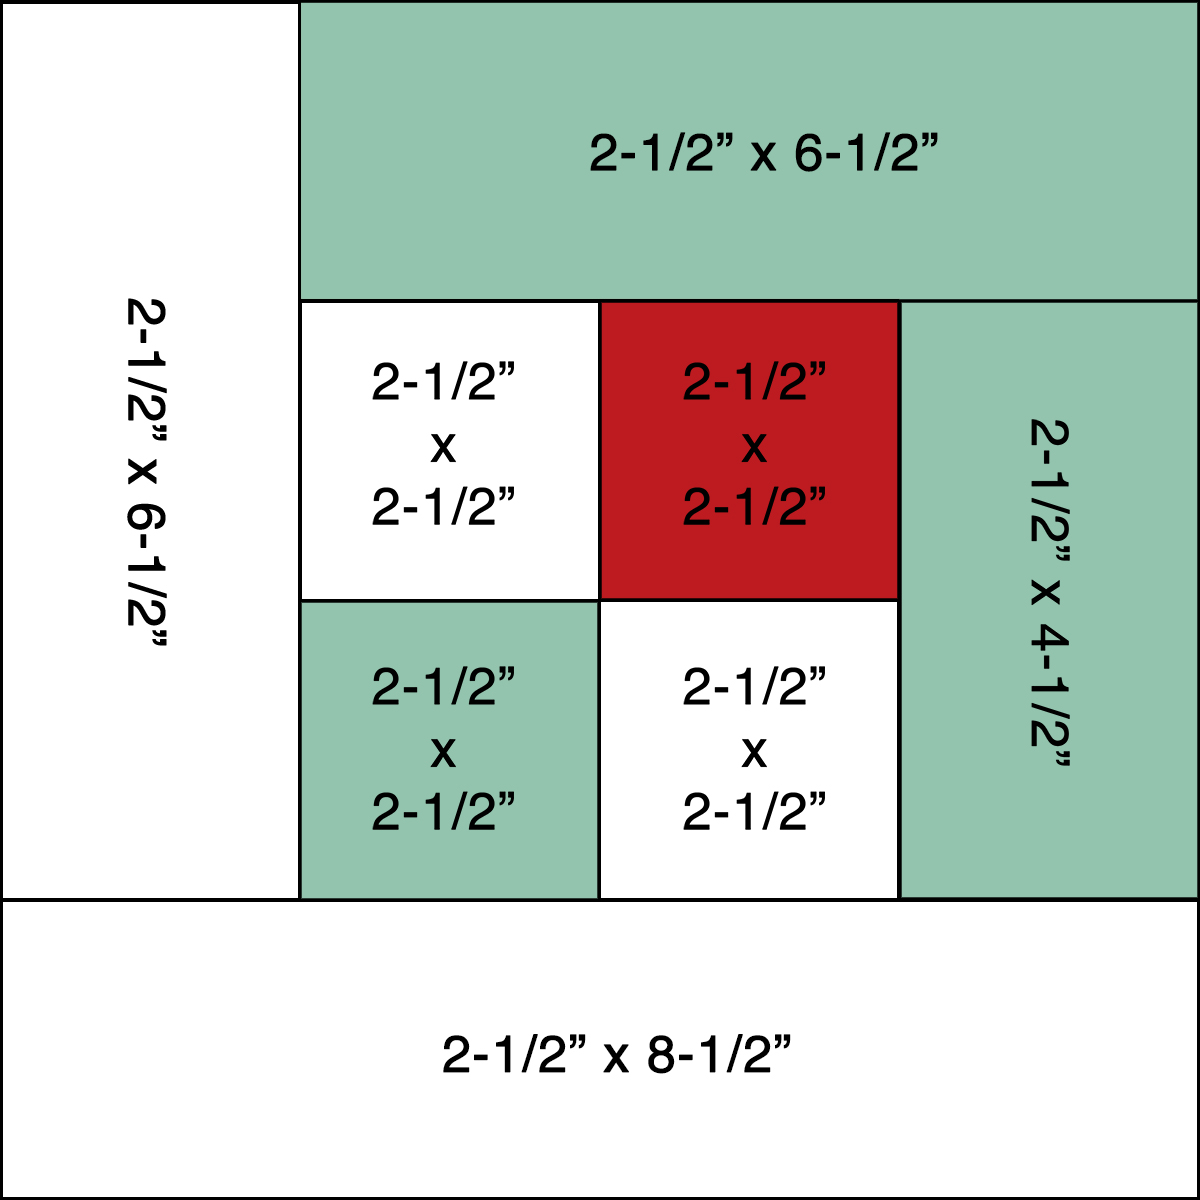
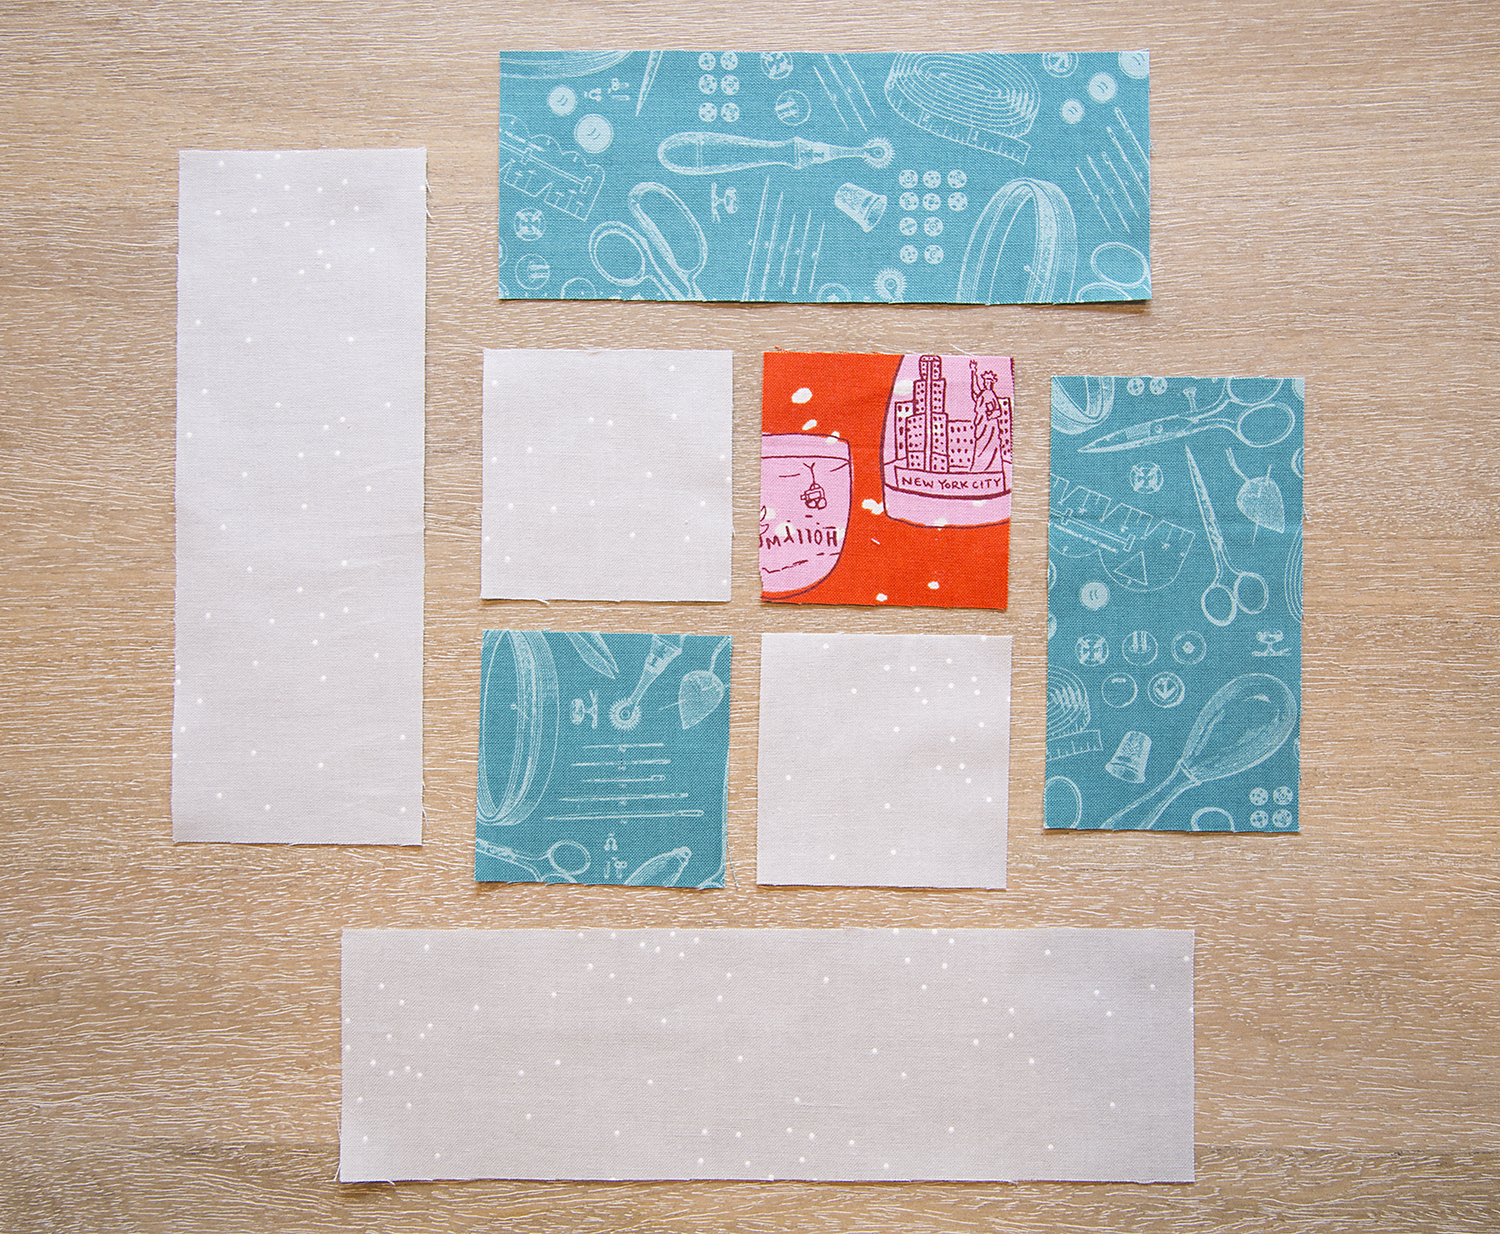
Step 1. Collect your cut fabrics for making your first Block A.
From your Aqua fabric, gather one fabric set of:
- (1) 2-1/2″ x 2-1/2″ square
- (1) 2-1/2″ x 4-1/2″ rectangle
- (1) 2-1/2″ x 6-1/2″ rectangle
From your Red fabric scrappy assortment, gather:
- (1) 2-1/2″ x 2-1/2″ square
From your Background fabric, gather:
- (2) 2-1/2″ x 2-1/2″ squares
- (1) 2-1/2″ x 6-1/2″ rectangle
- (1) 2-1/2″ x 8-1/2″ rectangle
Step 2. Lay out your fabric as shown below.
Step 3. Starting in the center of the block, stitch the 2-1/2″ x 2-1/2″ background square to the 2-1/2″ x 2-1/2″ red square. Press your seam to the side towards the red fabric.
Stitch the other 2-1/2″ x 2-1/2″ background square to the 2-1/2″ x 2-1/2″ aqua square. Press your seam to the side towards the aqua fabric.
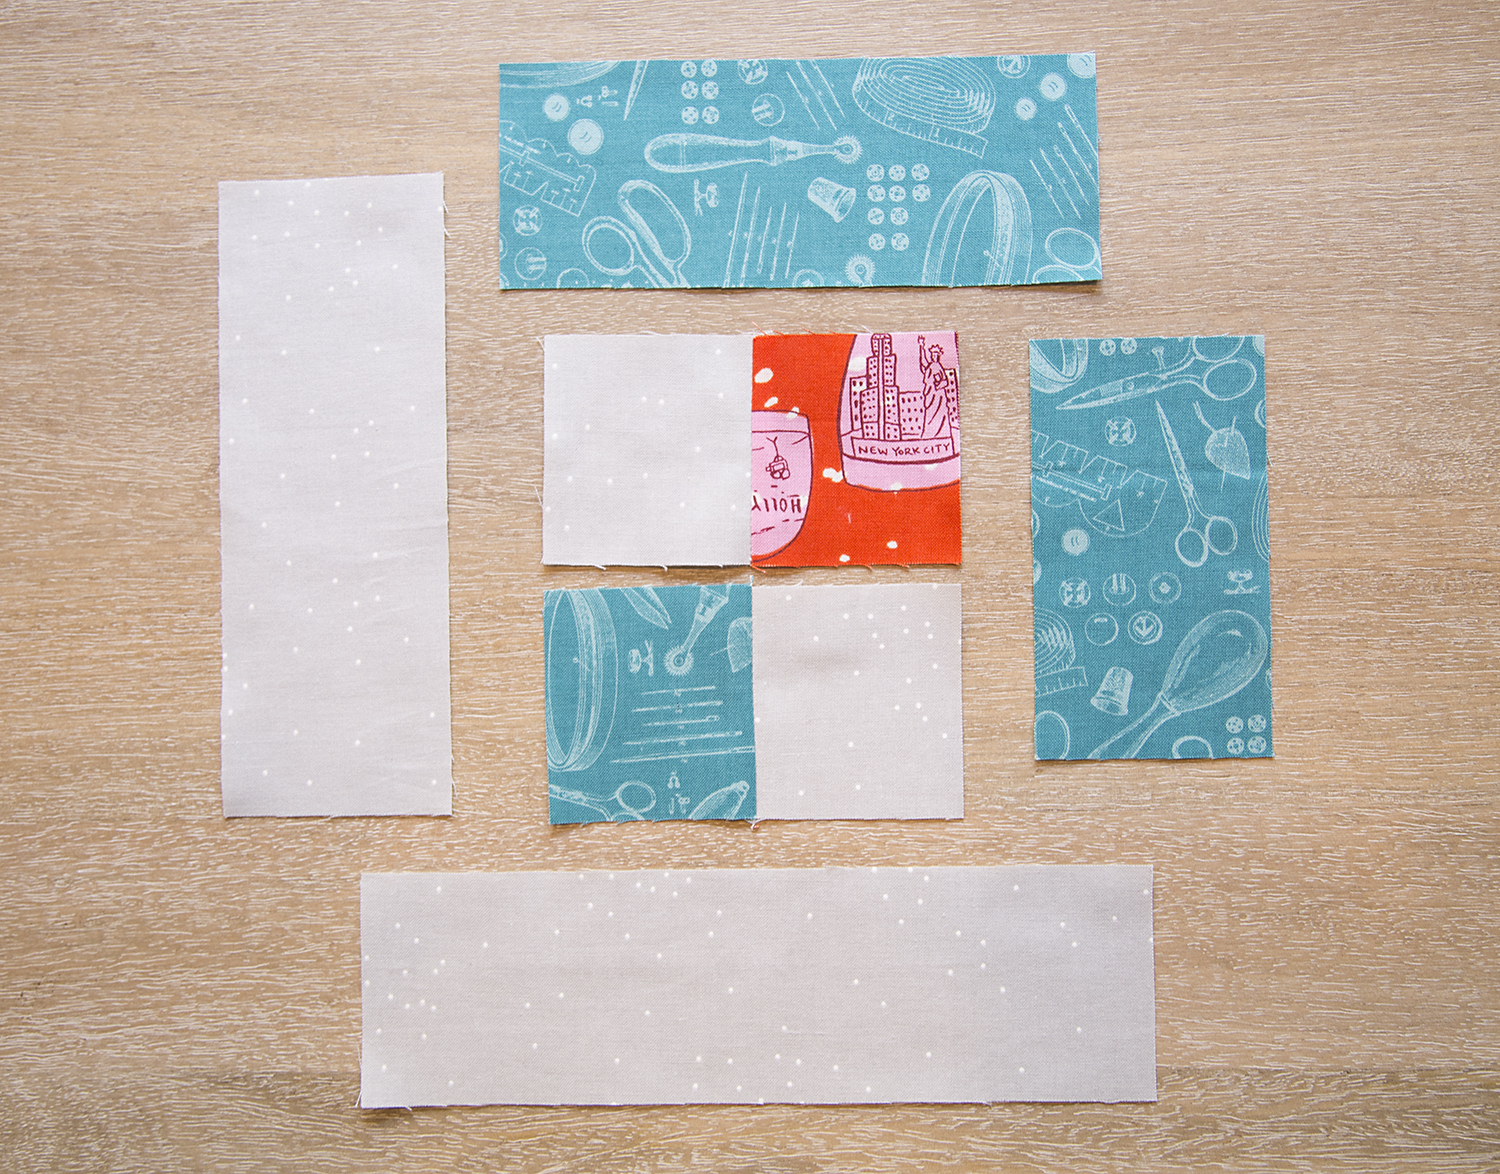
Step 4. Stitch your 2 pieced strips together to form the center 4-patch square of the block. Press your seams open.
Step 5. Stitch the 2-1/2″ x 4-1/2″ aqua rectangle to right side of the pieced 4-patch square, as shown below. Press your seams open.
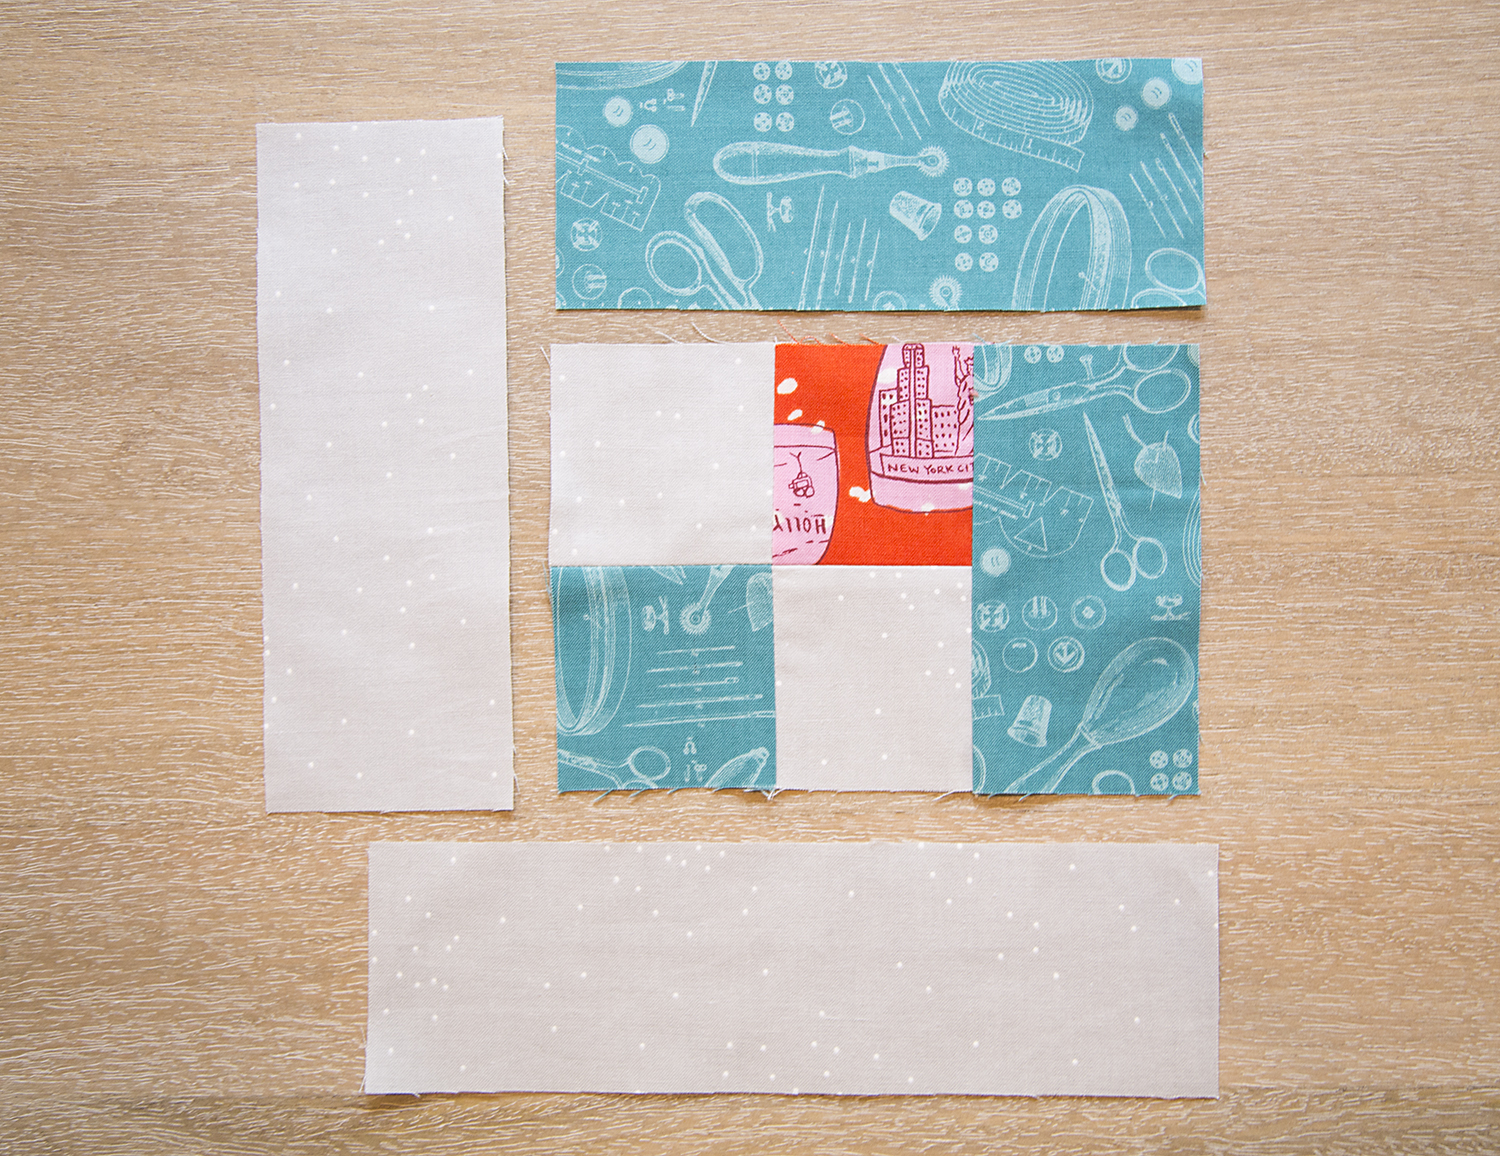
Step 6. Stitch the 2-1/2″ x 6-1/2″ aqua rectangle to the top of the block, as shown below. Press your seams open.
Step 7. Stitch the 2-1/2″ x 6-1/2″ background rectangle to the left of the block, as shown below. Press your seams open.
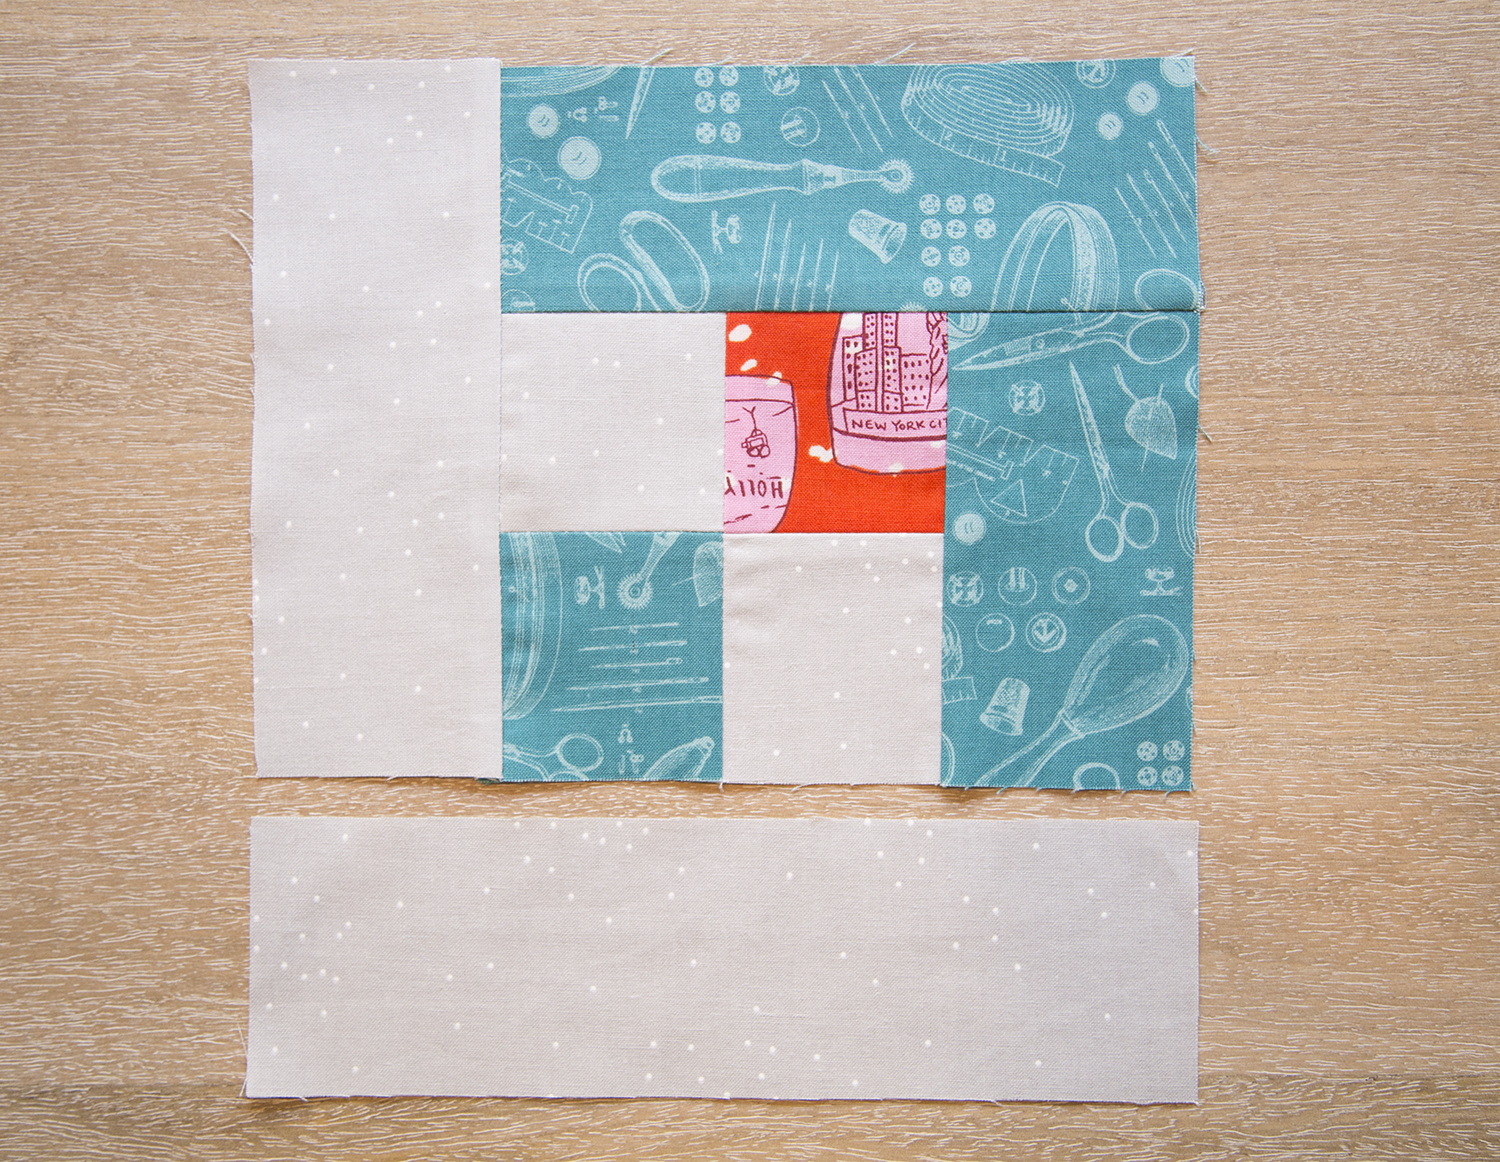
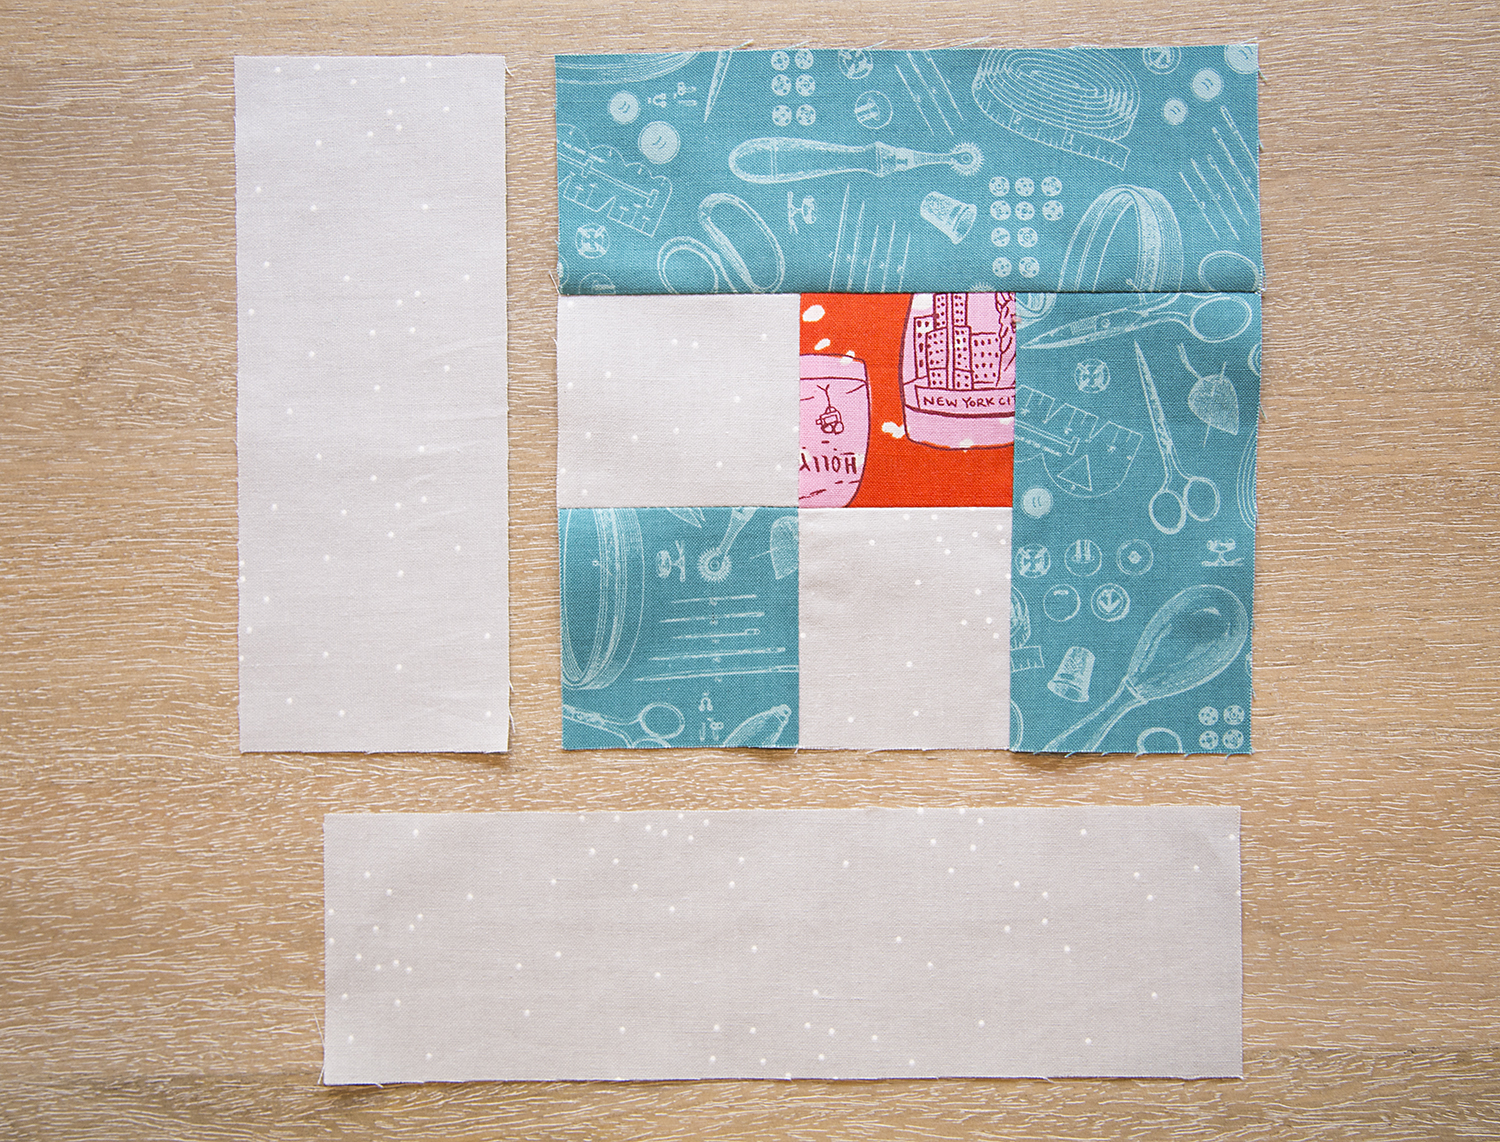
Step 8. Stitch the 2-1/2″ x 8-1/2″ background rectangle to the bottom of the block, as shown below. Press your seams open.
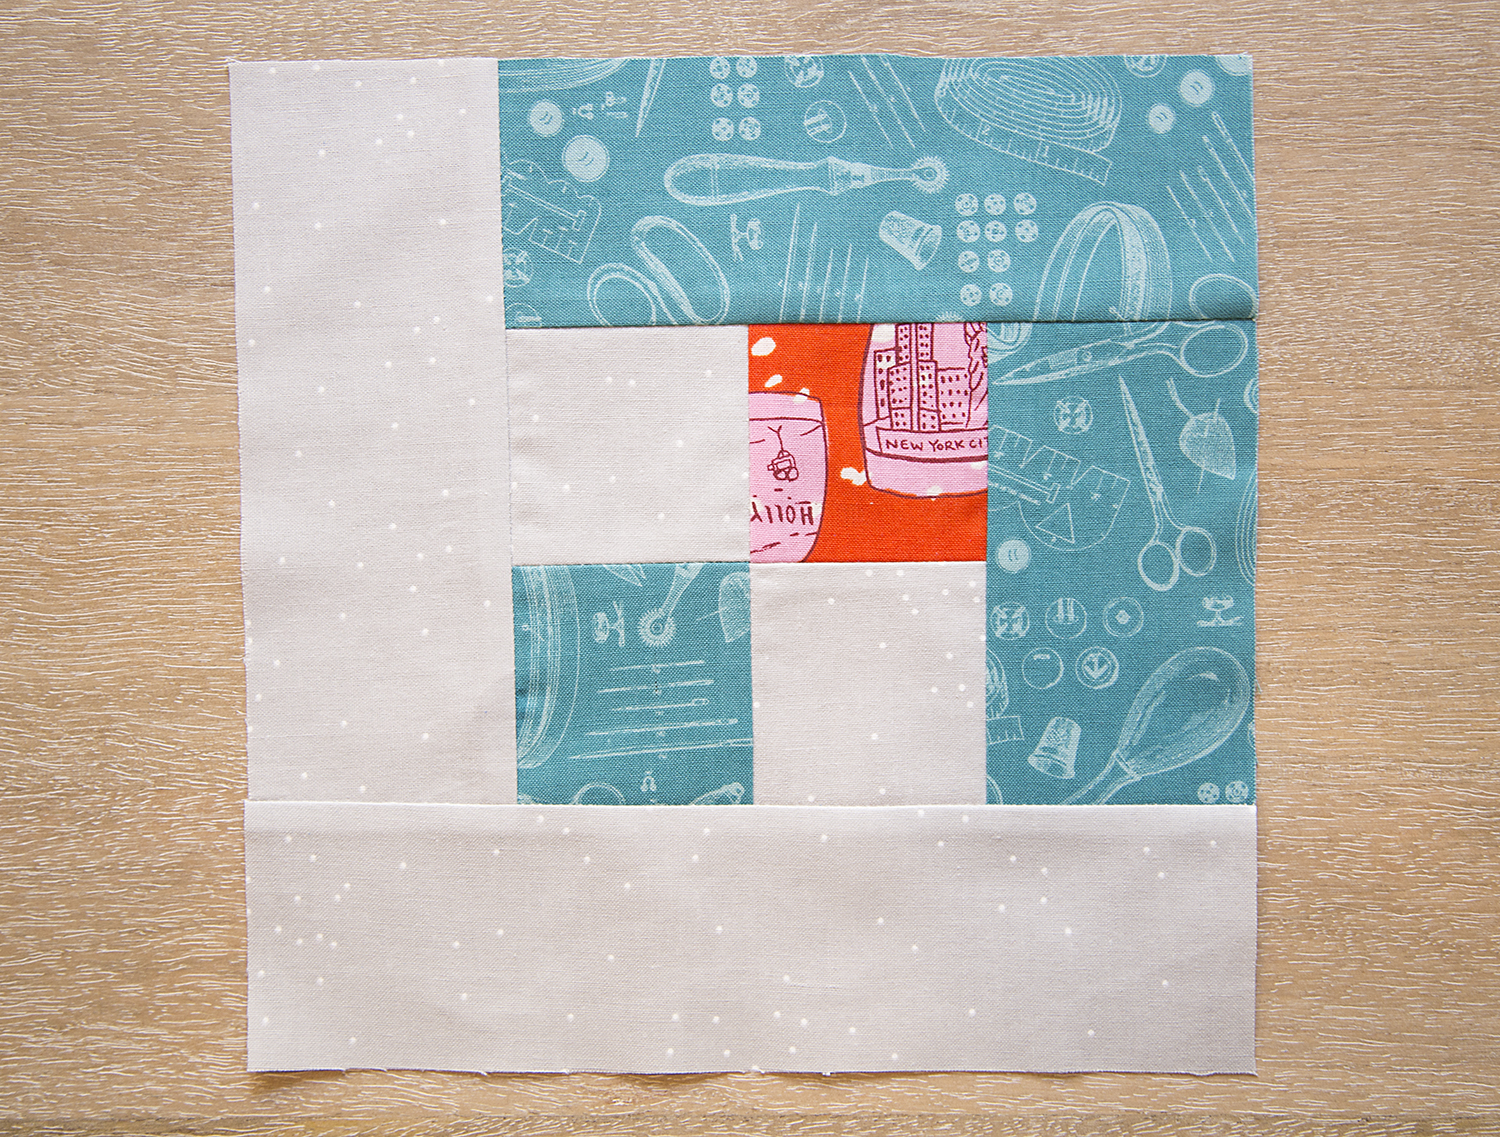
Congratulations! You have made your first Block A!
Step 9. Repeat steps 1 – 8 and piece 19 additional Block As, for a total of 20 blocks.
Piecing Block B (8-1/2″ x 8-1/2″ unfinished):
Step 10. Collect your cut fabrics for making your first Block B.
From your Red fabric, gather one fabric set of:
- (1) 2-1/2″ x 2-1/2″ square
- (1) 2-1/2″ x 4-1/2″ rectangle
- (1) 2-1/2″ x 6-1/2″ rectangle
From your Aqua fabric scrappy assortment, gather:
- (1) 2-1/2″ x 2-1/2″ square
From your Background fabric, gather:
- (2) 2-1/2″ x 2-1/2″ squares
- (1) 2-1/2″ x 6-1/2″ rectangle
- (1) 2-1/2″ x 8-1/2″ rectangle
Step 11. Block B is assembled exactly the same as Block A. The only difference is the red and aqua colors are reversed on this block. Follow directions 2 – 8 from the Block A piecing instructions to assemble your first Block B.
Step 12. Repeat and piece an additional 13 blocks, for a total of 14 Block B’s.
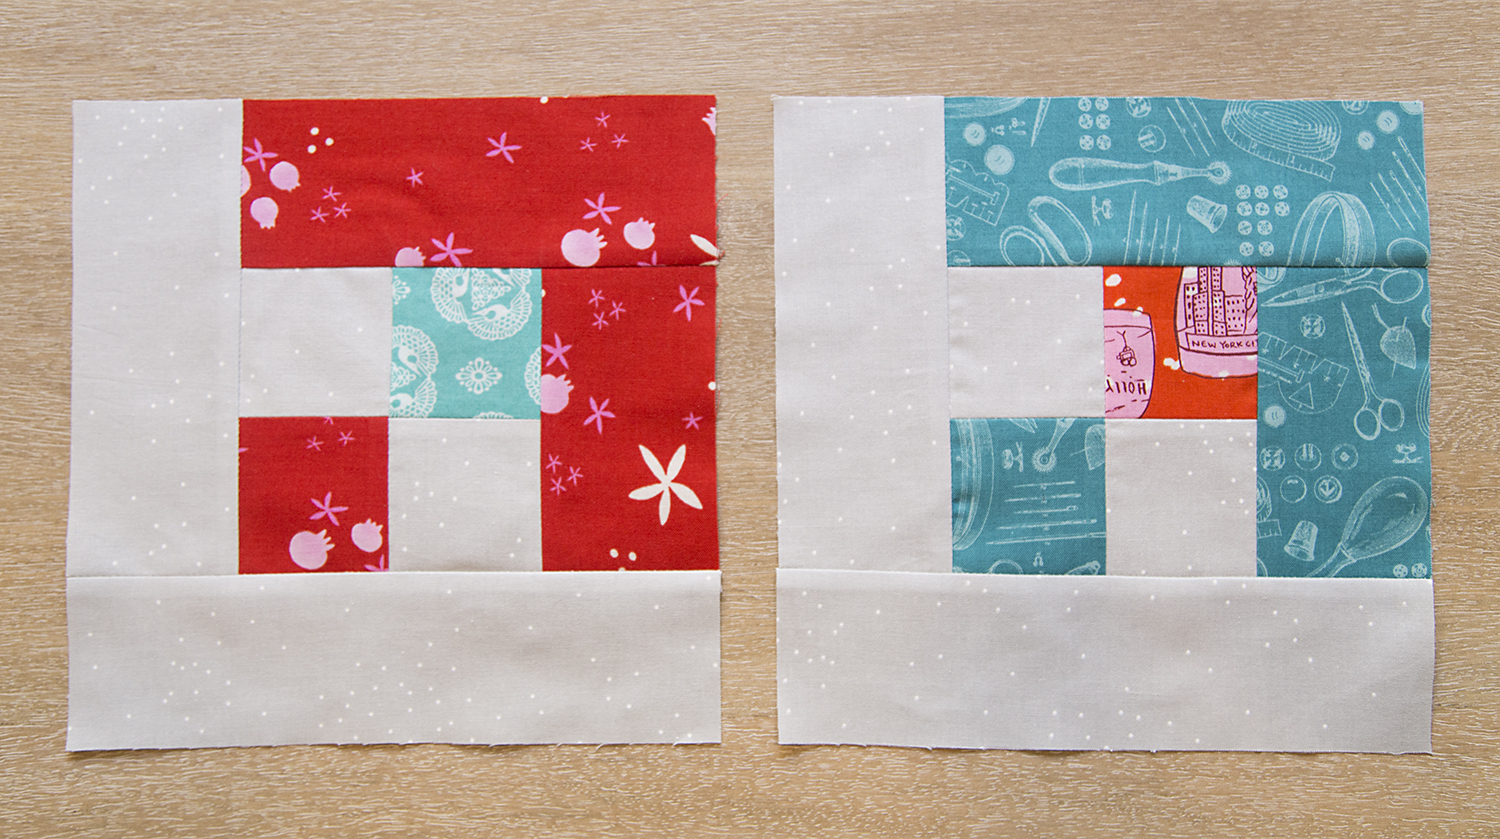
Congratulations! You have made your Snowflake Quilt Blocks!
Come back next week for directions to assemble your quilt top.


14 comments on “Snowflake Quilt-Along Week 1”
Could you use fat eighth bundles for this?
I am totally not a scrappy quilter so with that in mind how many colors do I actually need. I really like the quilt
can we download the pattern?
Looks like a relatively simple fun quilt to make this time of year. But it’s a Loy of 2 1/2” sqs to cut out!
This is a very lovely quilt block/ quilt
I would love to start it right away. Roxann
Is there a way to make the quilt larger? If so how can I do that