Curvy Quilting Table Topper
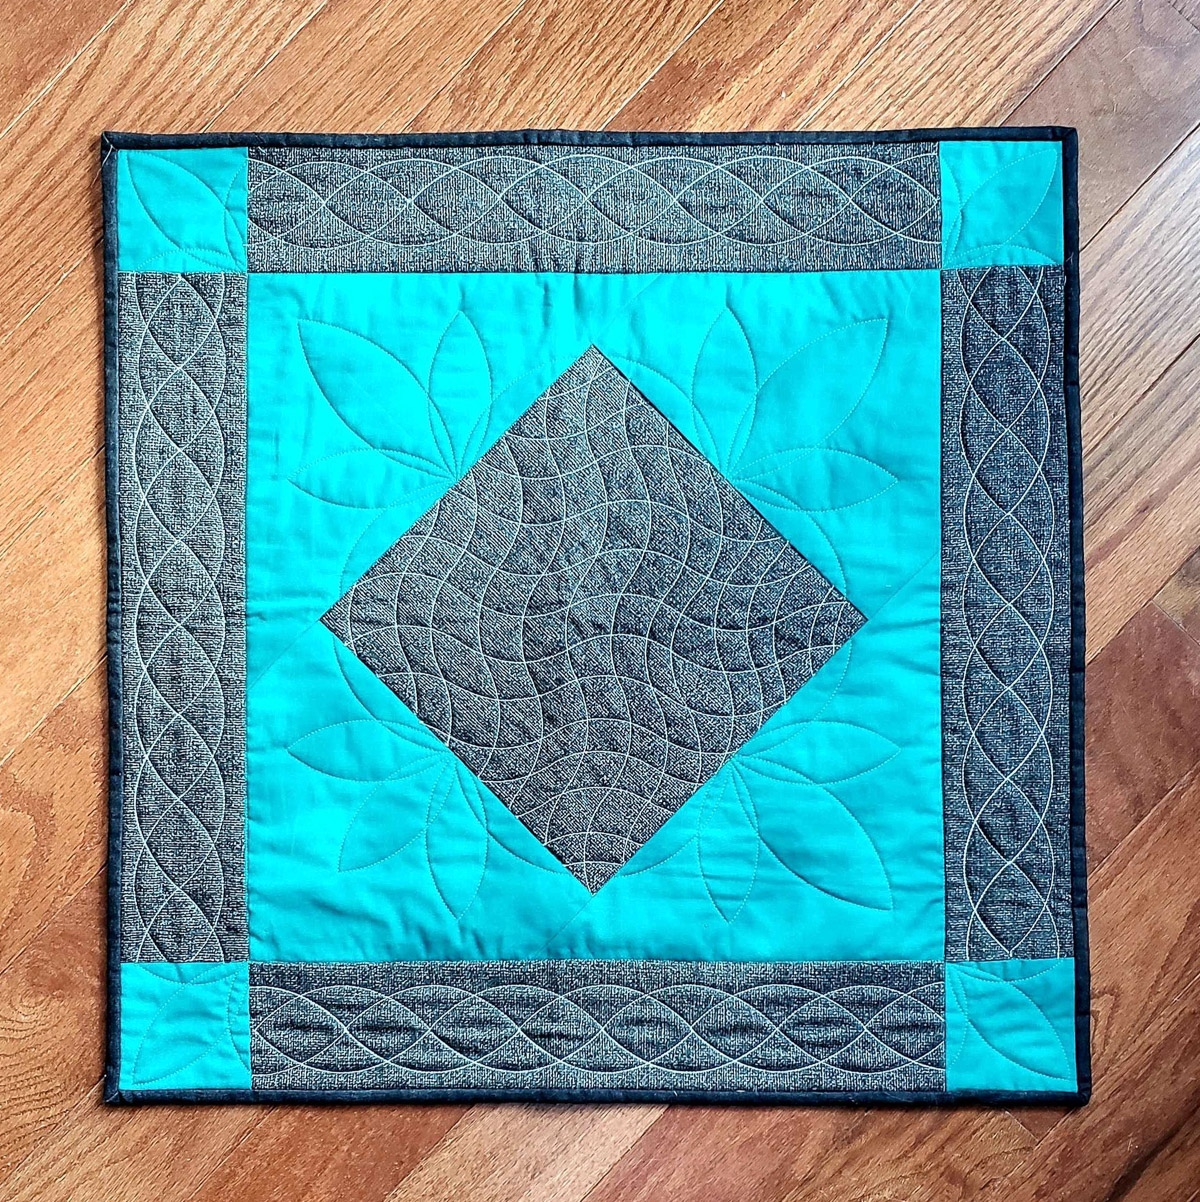
A simple two-color table topper is a great way to increase both piecing and rulerwork skills. This fun little topper features quilting using three different rulers to create a mix of eye-appealing curvy designs. It also allows you to try out some new quilting rulers without committing to a large project. The finished size is 22” square, perfect for any size table. Dig in your stash bin, select some fabrics, and let’s piece, quilt, and bind this Curvy Quilting Table Topper!
Materials for Sewing the Curvy Quilting Table Topper
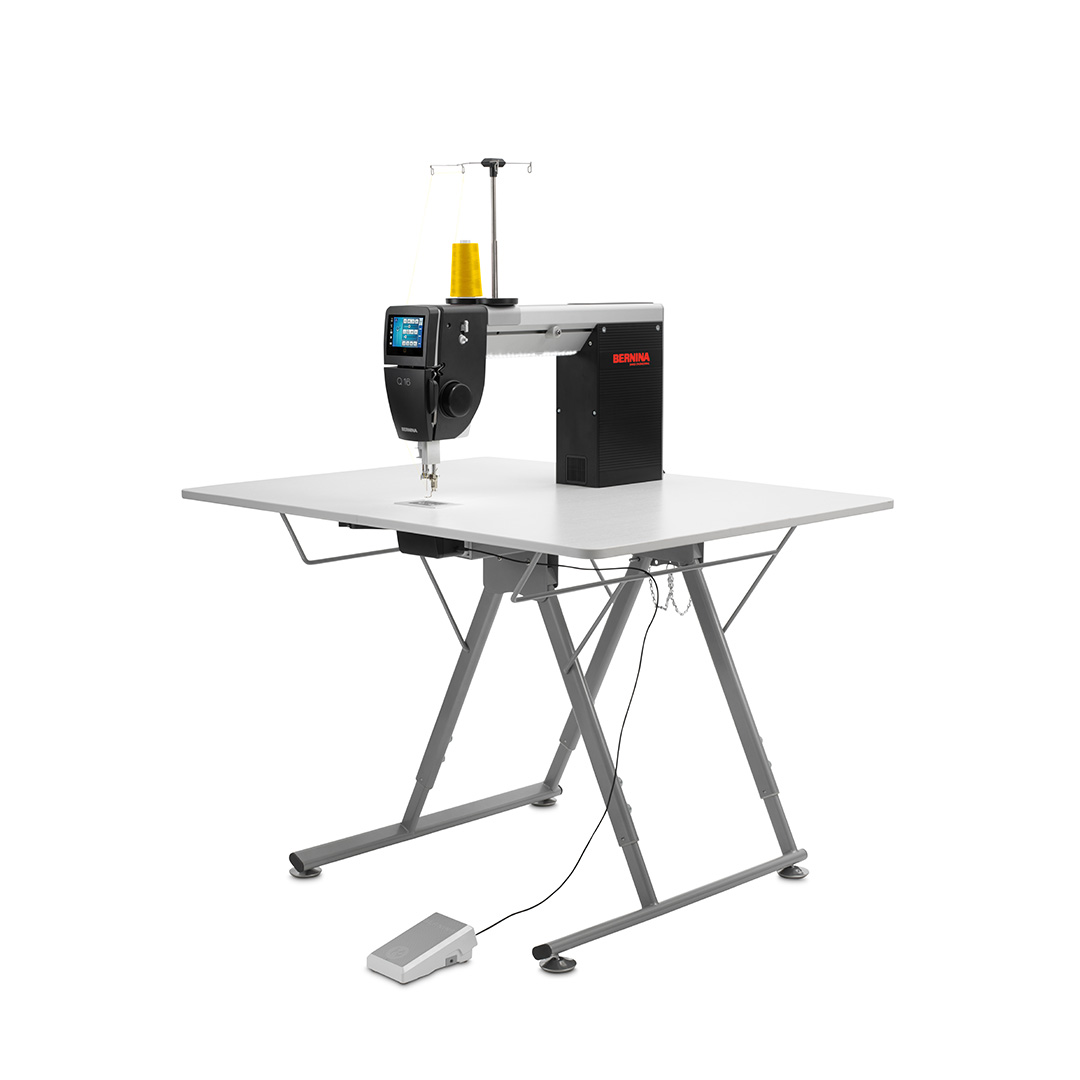
- BERNINA Q 16, Q 16 Plus, or Q 20 on a table
- Ruler Foot #96
- Good Measure 4” Leaf Ruler
- Pointed Leaf / Oval Ruler from the Borders Set Ruler Kit
- Squiggle Ruler from the Essentials Ruler Kit
- New 90/14 quilting needle
- Fabric:
- Pieced top (see Step 1 for materials and instructions)
- 23” square backing fabric
- 23” square thin batting
- 40 or 50 weight quilting thread of choice
- Quilting gloves (optional)
- Basting Spray, Marking Pen, and Straight Edge
Step 1: Piece the Top
Assembling the table topper is super simple. Tonal or solid fabrics and a contrasting thread will really allow the quilting to show.
Cut Fabric Pieces
Fabric A (Teal):
- (4) 3 1/2” border cornerstones
- (2) 10” squares cut on one diagonal to yield four setting triangles
Fabric B (Gray):
- (1) 9 1/2” center square
- (4) 3 1/2” x 16” border strips
Fabric C (Black)
- (3) 2 1/4” x WOF binding strips
Assemble Top
- Sew two Fabric A setting triangles on opposite sides of the Fabric B center square; press seam allowances open. Sew the remaining two Fabric A triangles to opposite sides of Fabric B center square; press seam allowances open. Trim this Center Unit to 16” square.
- Sew two Fabric B border strips to opposite sides of Center Unit; press seam allowances toward Center Unit.
- Stitch Fabric A border cornerstones on each end of the remaining two Fabric B border strips; press seam allowances toward cornerstones.
- Join border strips from Step 3 to opposite sides of the Center Unit, nesting seam allowances, to complete; press.
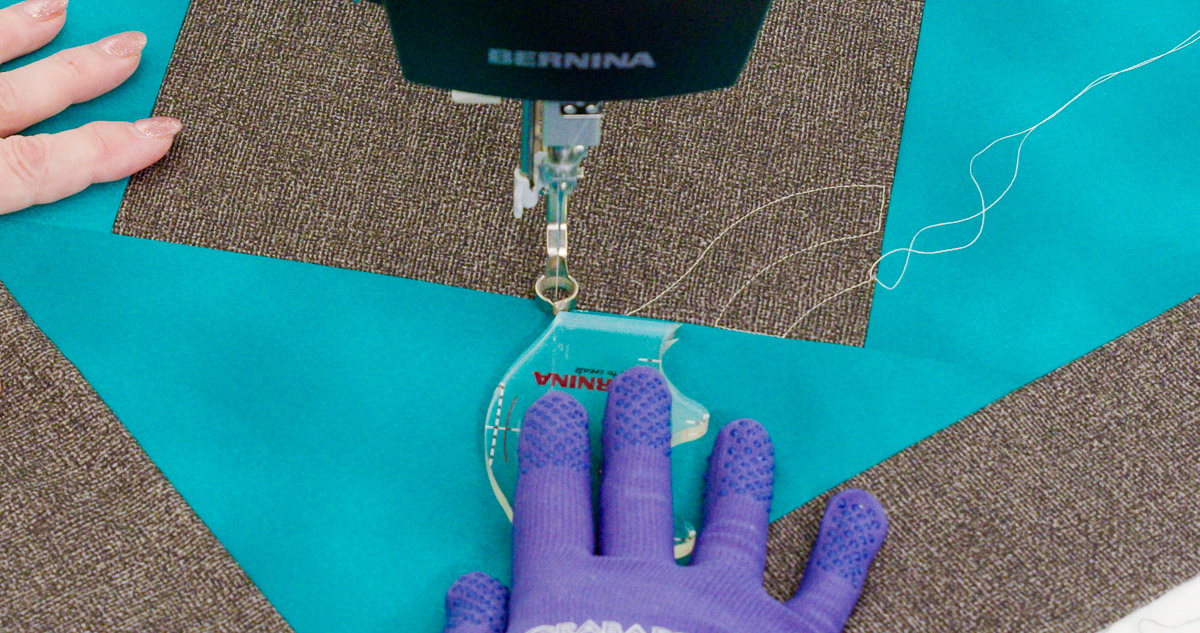
For smaller projects such as this, spray basting the backing, batting, and top together works great to prevent shifting and puckering while quilting.
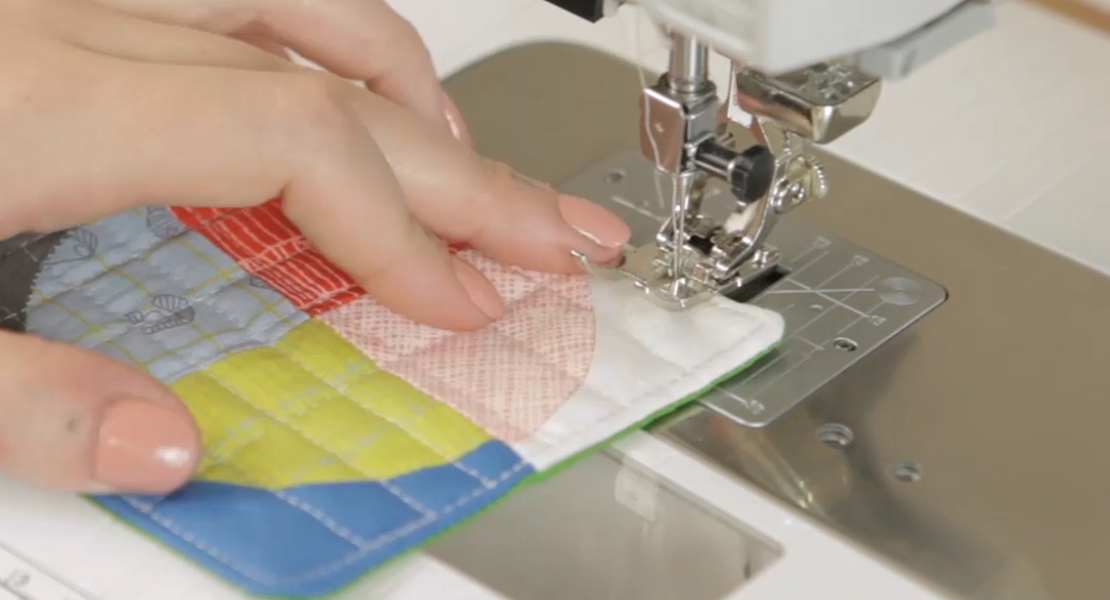
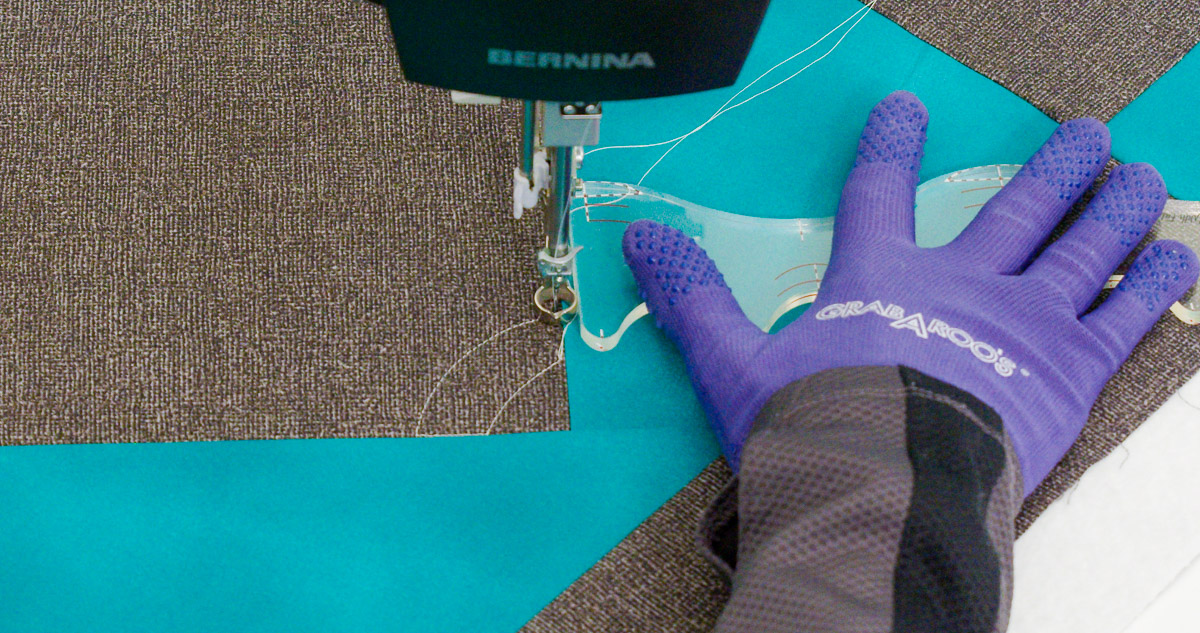
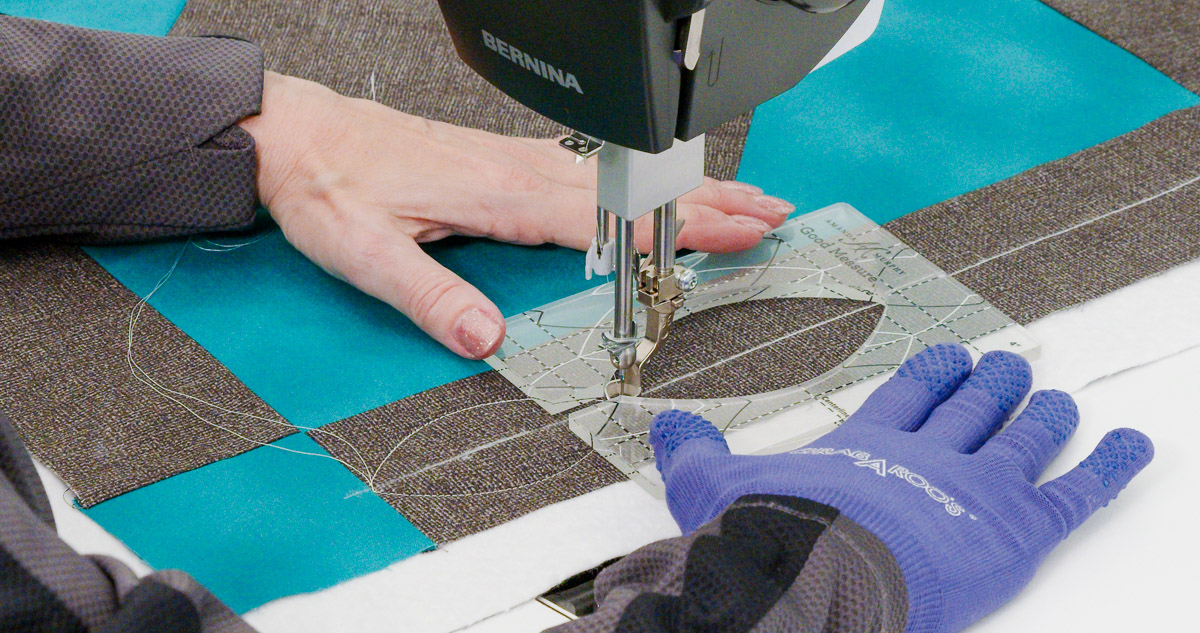
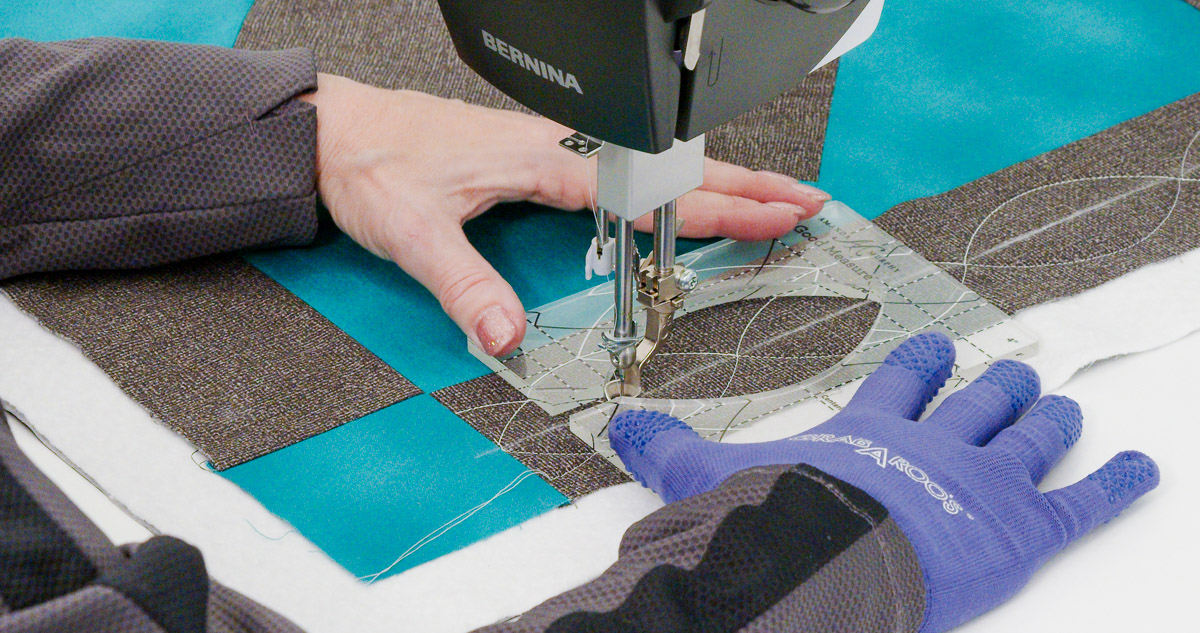
Step 2: Quilt the Center Square
BERNINA’s Essentials Ruler Kit comes with four different rulers and an informative instructional manual showing a variety of designs the rulers can create. The Squiggle ruler is perfect for quilting both shallow and deep wavy patterns.
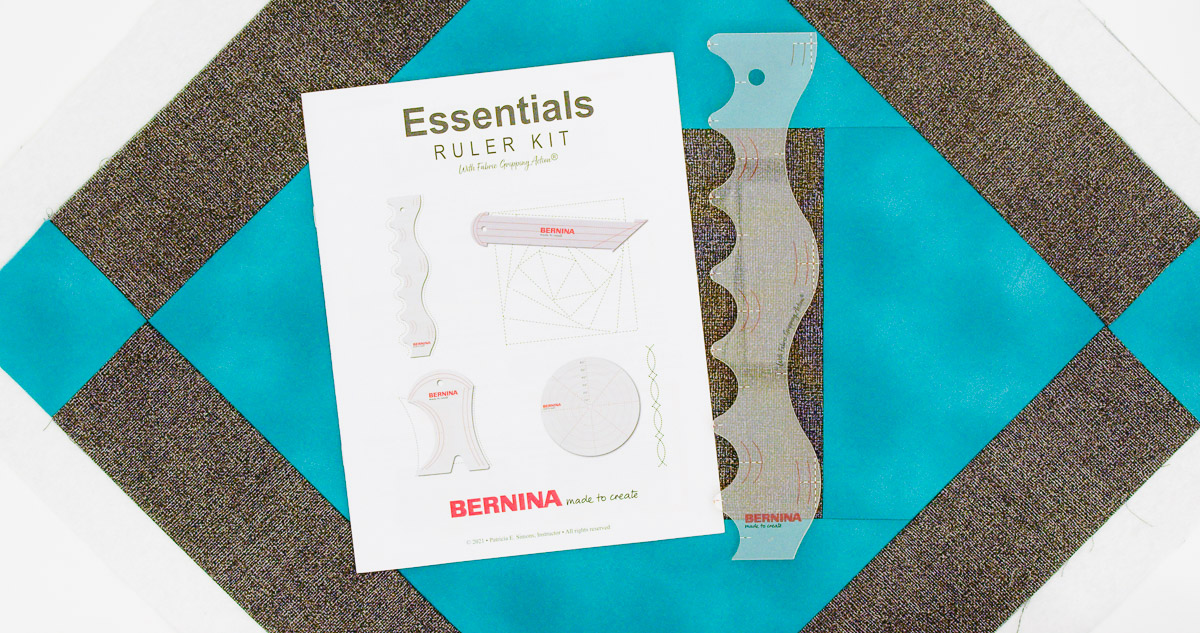
The 1/4″ thick rulers from BERNINA have fabric-gripping technology to help keep them in place while you stitch. Marked guidelines make it easy to align your ruler for repeating motifs.
To quilt the wavy crosshatch pattern across the center block, start in one corner and work diagonally across the block to the opposite corner. The design being created isn’t a true, perfectly aligned straight-line crosshatch. It’s more of an organic, imperfectly perfect wavy design, which is great for beginners since the eye doesn’t notice any imperfections.
Start by pulling up the bottom thread and knotting in the seam line, approximately 1” from the corner. Bring the ruler to the presser foot and stitch to the opposite seam line.
Using the straight end of the ruler as a guide, stitch in the seam line approximately 1” to establish spacing between the rows.
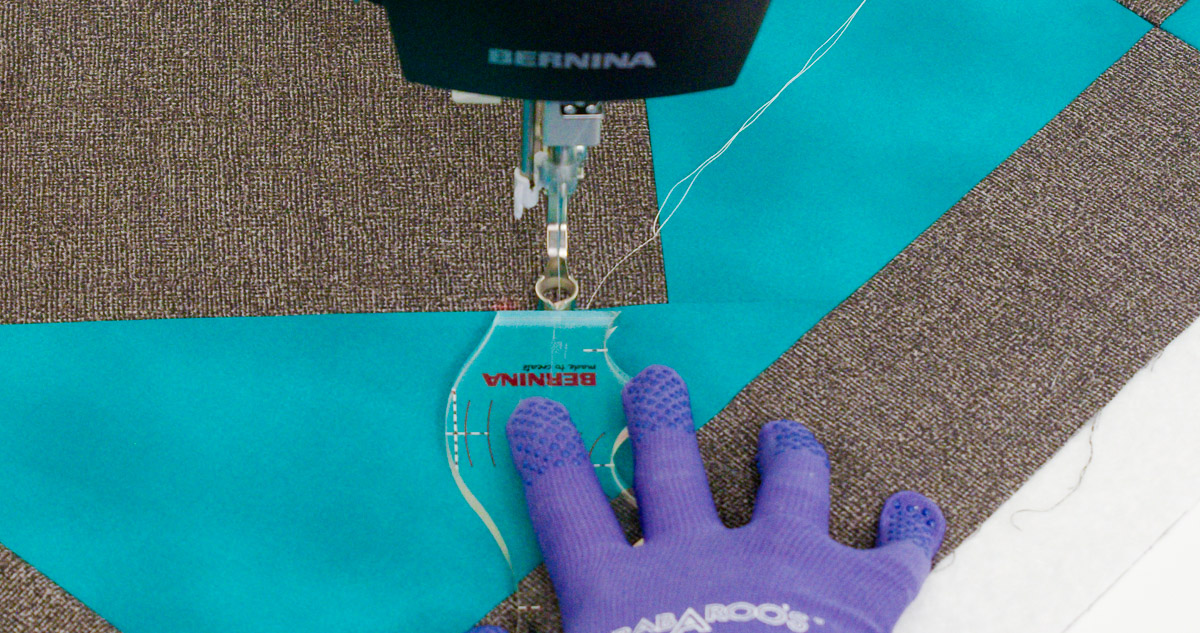
Reposition your ruler and quilt back across the center, stopping at the seam line with the needle down.
Again, rotate the ruler and use the straight end as a guide to stitch in the seam to move to the start point of the next row.
Continue quilting wavy rows diagonally across the center of the square. As you position the ruler, don’t focus on aligning the high points of the wave. Allow them to be slightly off from the previous row.
When you reach the opposite side, rotate the topper and stitch in the seam to establish a new start point. You will now quilt waves that cross the previously stitched waves.

Continue advancing your way across the center with additional quilted rows. Try to keep the spacing consistent from row to row.
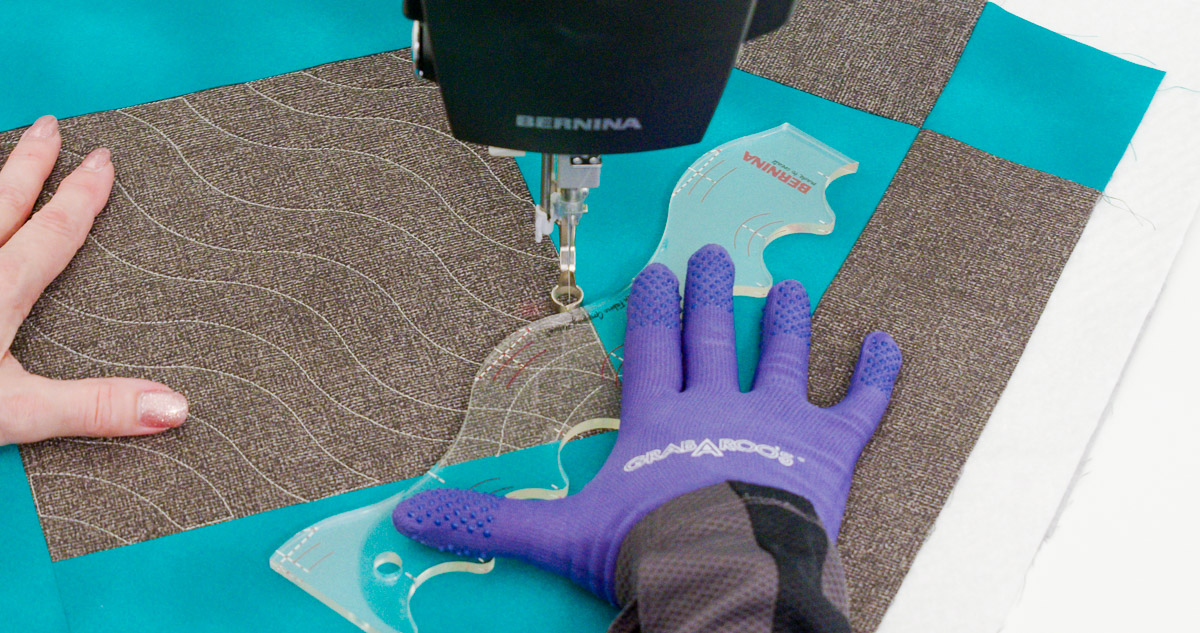
When you get to the widest portion of the center, your ruler may not reach all the way across. Simply quilt the distance that you can, stop with the needle down and reposition the ruler to continue quilting the row.
When you have reached the opposite corner, simply bring the bottom thread to the top and tie off.

This wavy crosshatch design is easy to stitch and creates a unique focal point for the center of the topper.
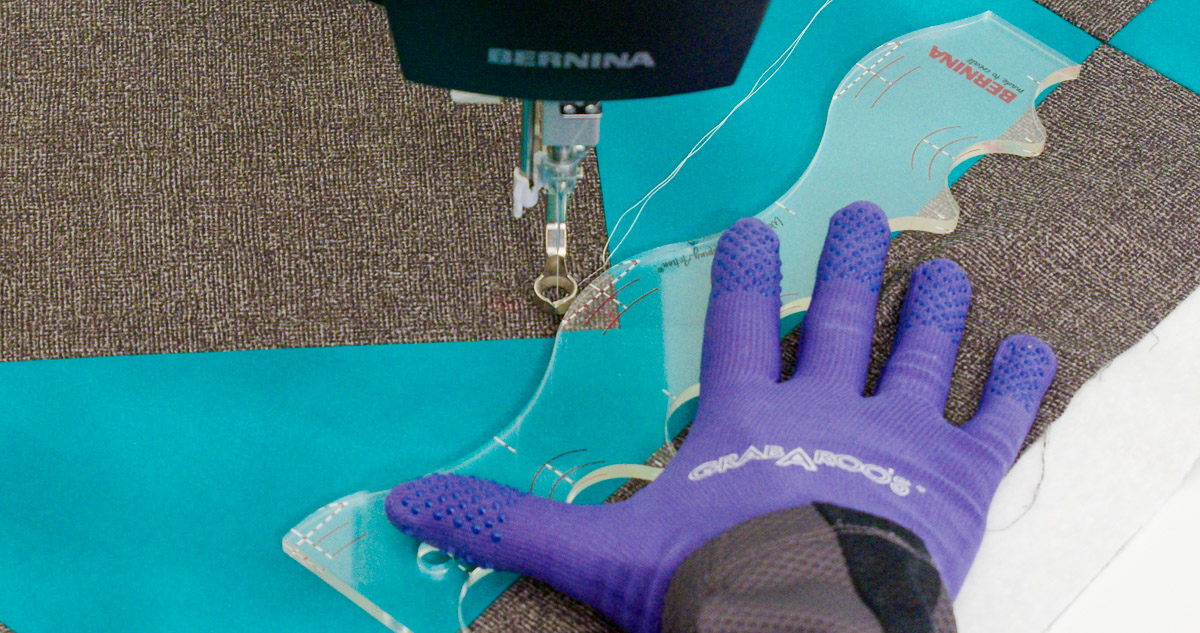
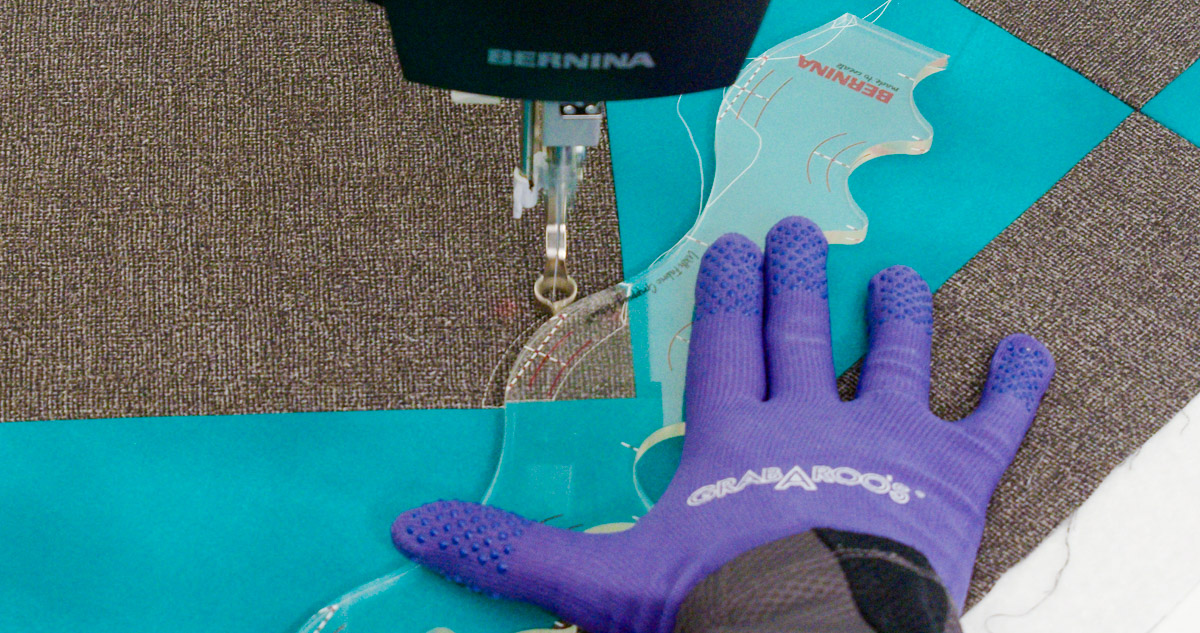
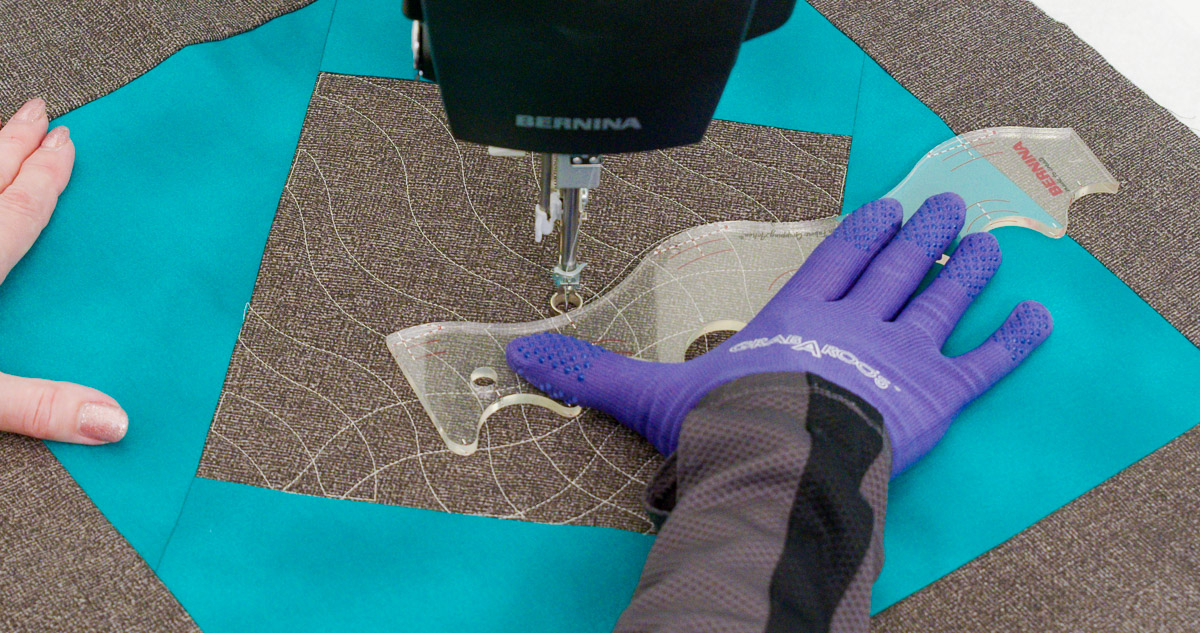
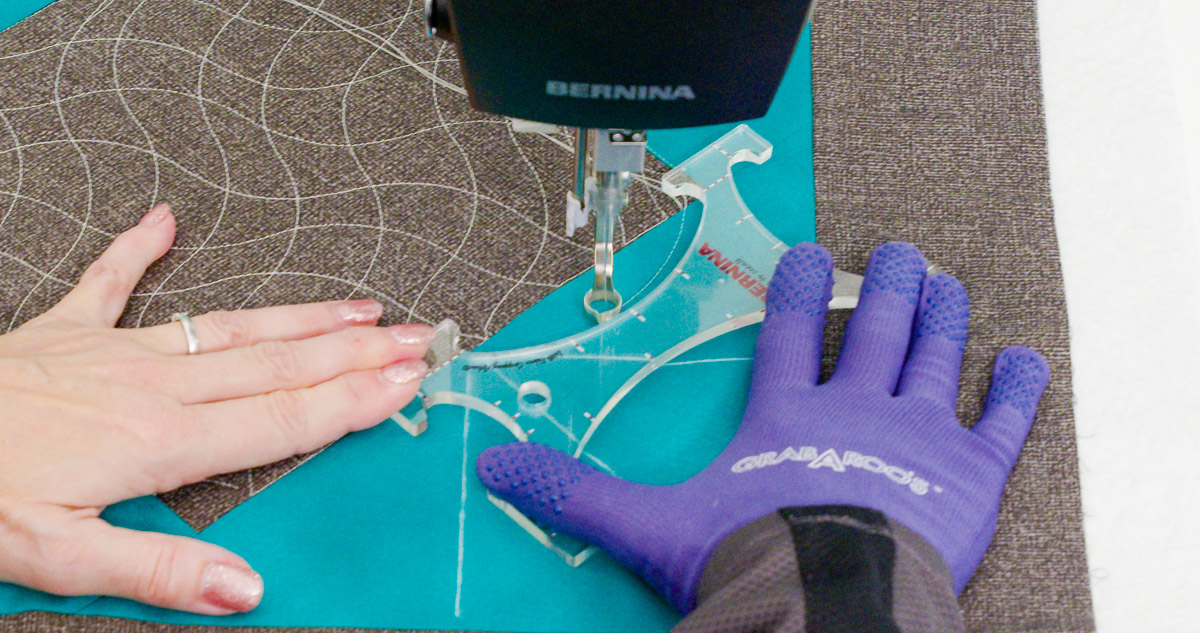
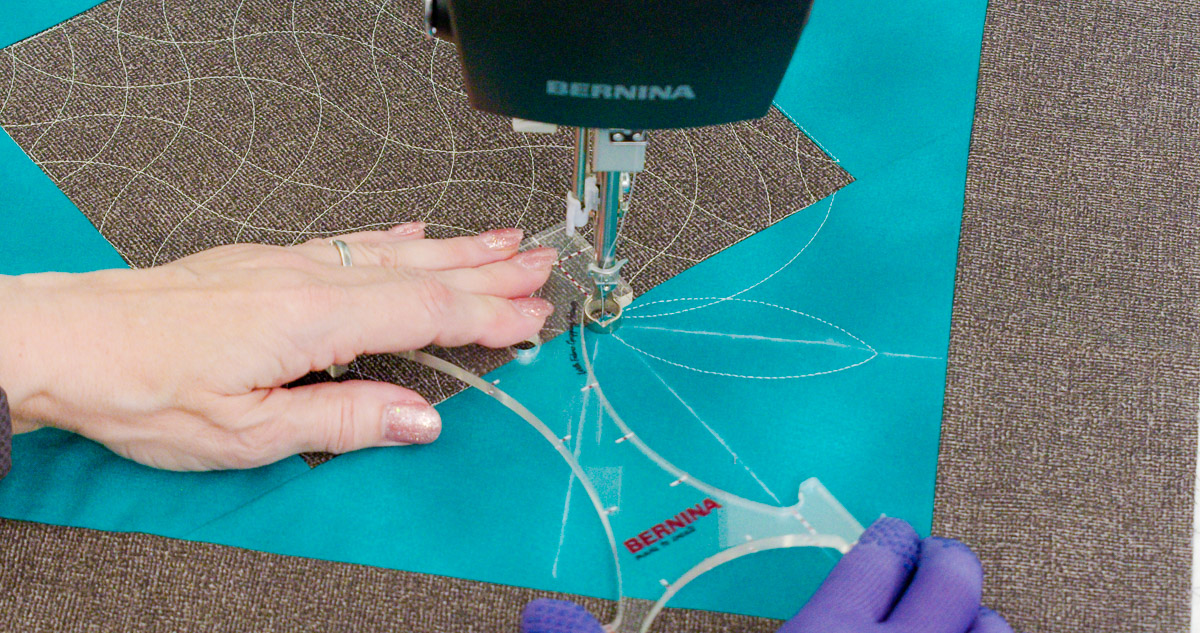
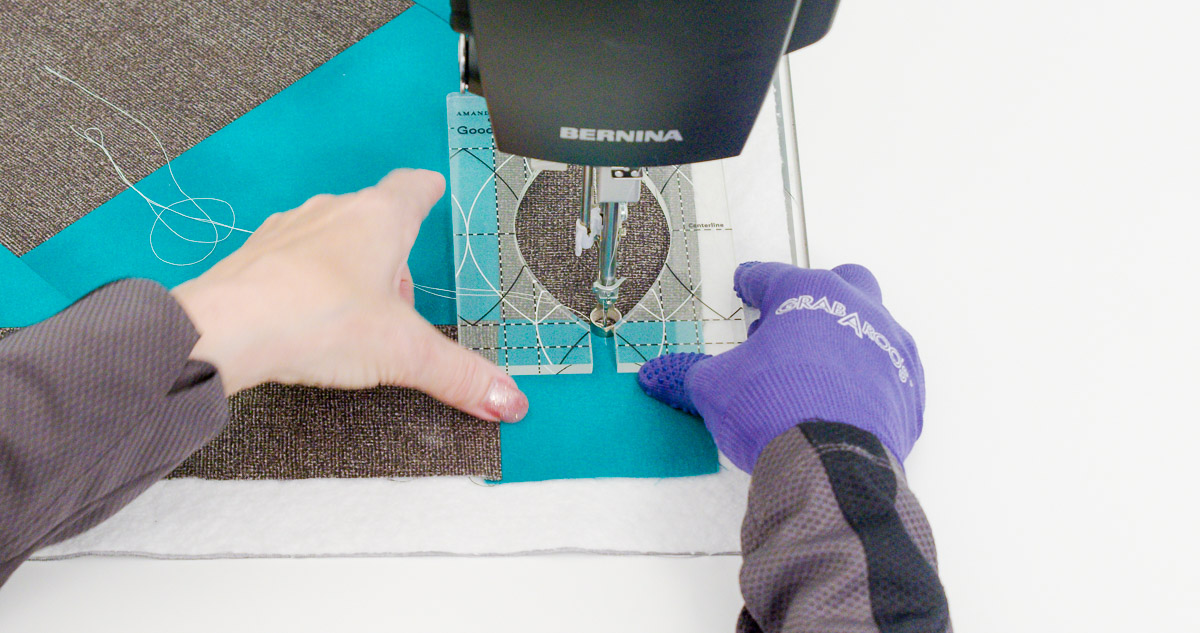
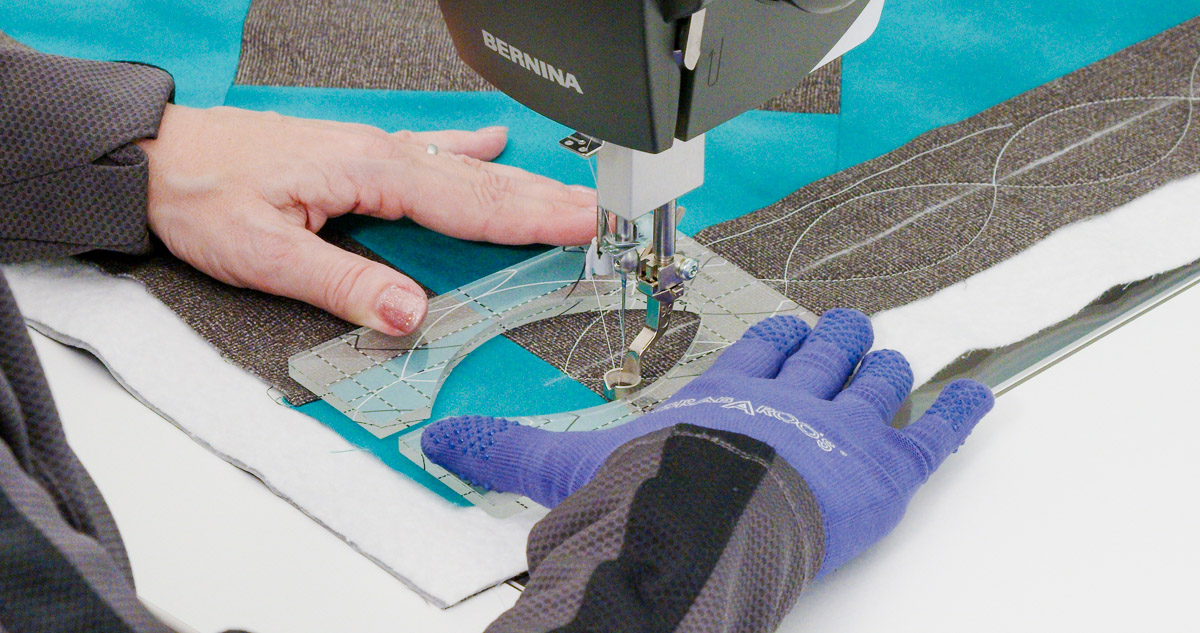
Step 3: Quilt the Setting Triangles
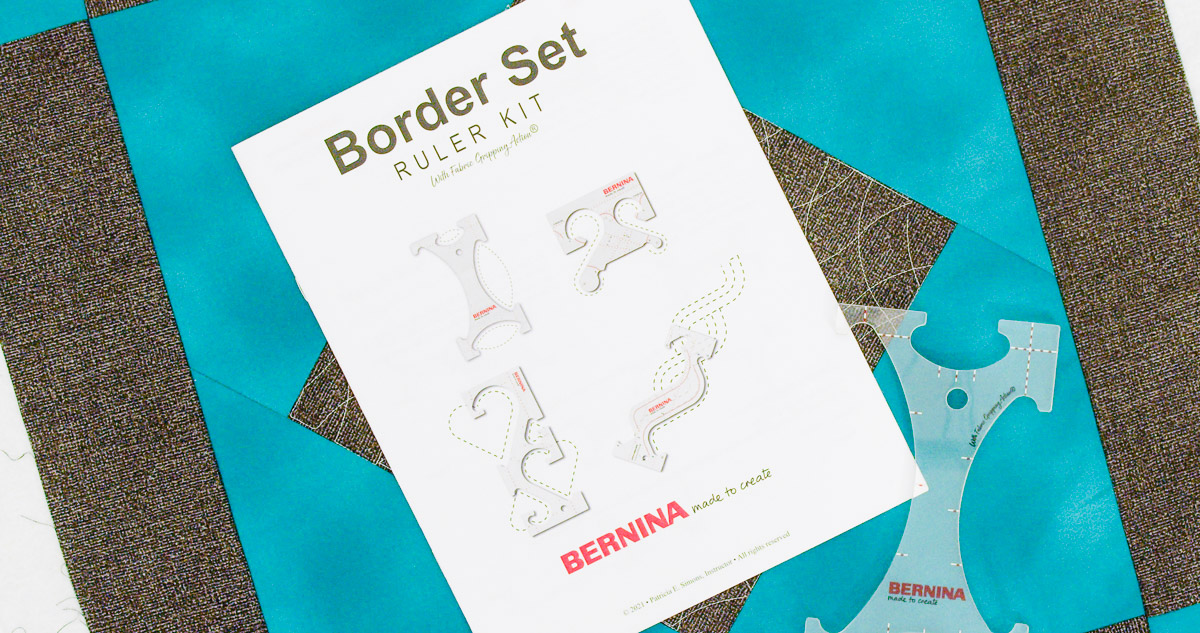
BERNINA’s Border Set Ruler Kit comes with four different rulers and an informative instructional manual showing a variety of ways each ruler can be used. In addition to pointed leaves and ovals, rulers in this kit can be used to quilt waves, cables, and hearts.
To quilt the arch-shaped design in the setting triangles, the first step is to mark orientation lines using a straight edge and a marking pen.
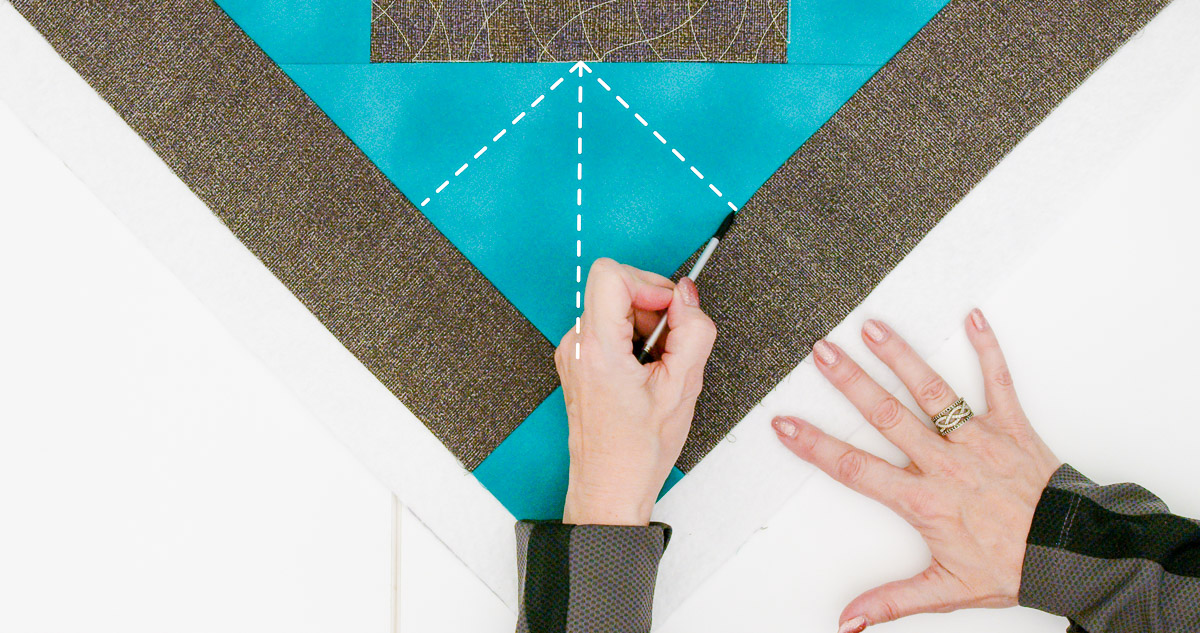
While it isn’t marked, the seam line between the triangle and center square will also serve as an orientation line for the design. To find the starting point, align one end of the ruler with the marked center and position the orientation lines on the ruler with the seam. Begin to the left of center, along the edge of the center block, and bring the bobbin thread to the top and secure.
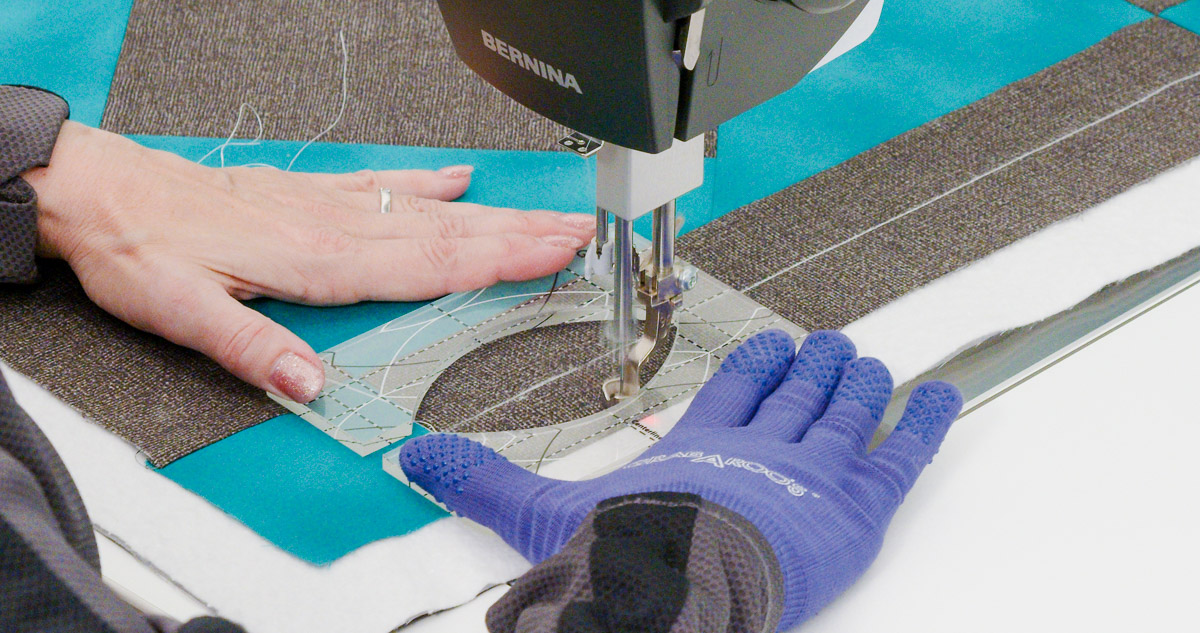
With the presser foot lowered, bring the ruler against it and begin stitching along the ruler to the center point.
When you get to the center point, stop with the needle down and reposition the ruler using the next adjacent angled orientation line.
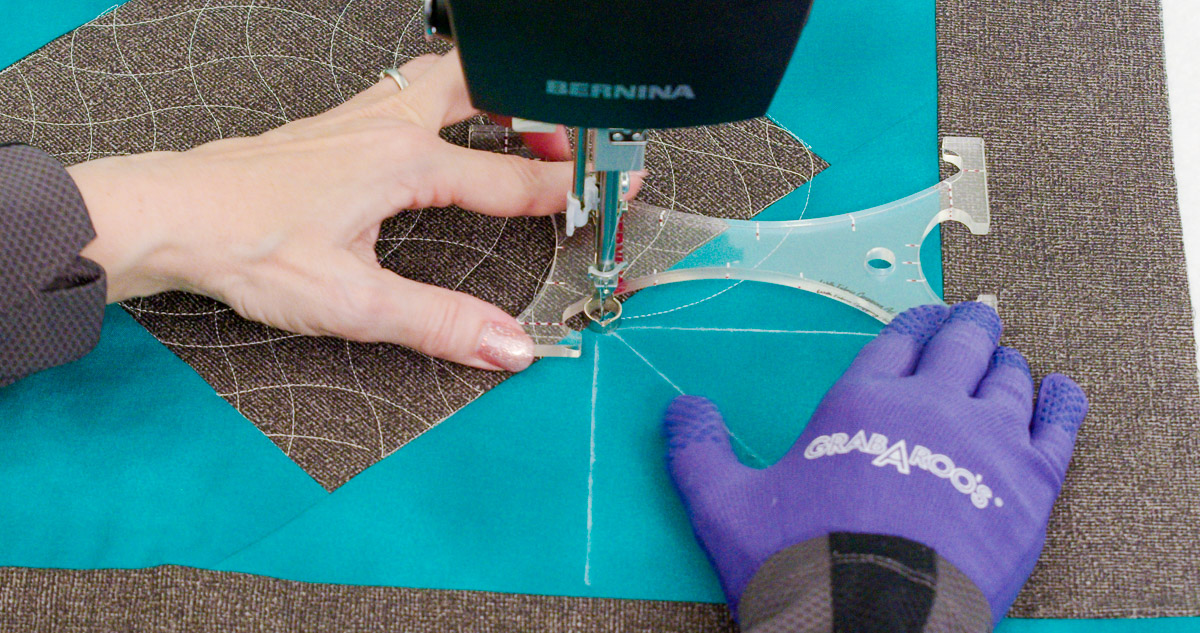
Stitch from the center out to the end of the ruler and stop with the needle down. Reposition the ruler to the opposite side of the orientation line and stitch back to the center, again ending with the needle down.
With the needle down in the center, reposition the ruler along the center orientation line making sure the registration marks on the ruler align with the marked line. Stitch out from the center to the end of the ruler.
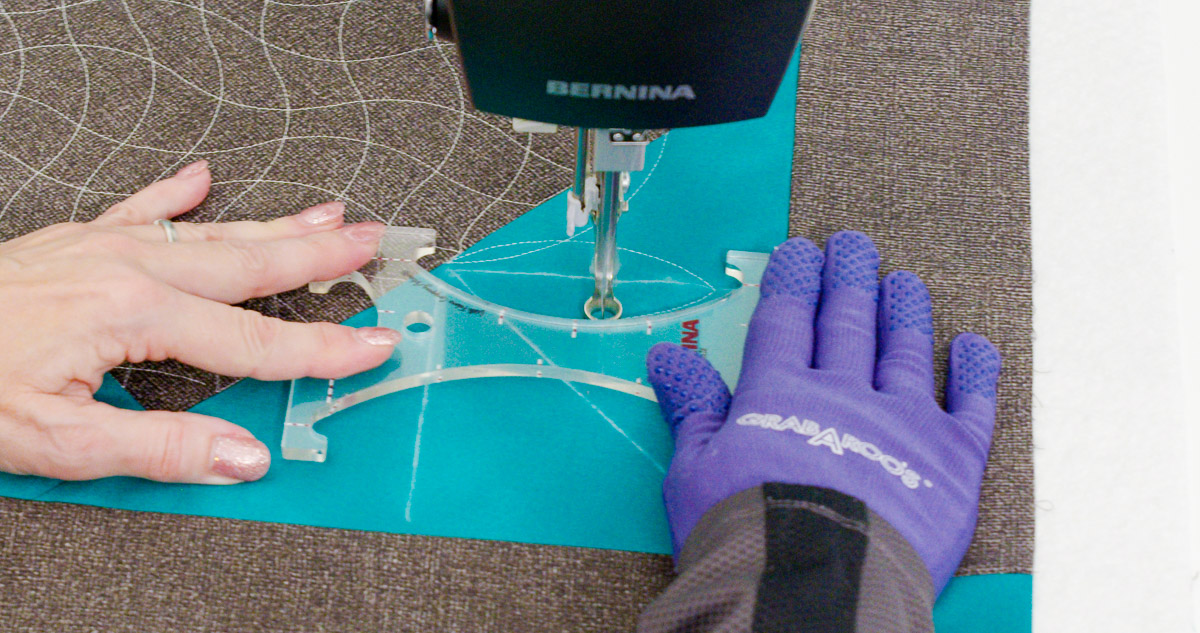
Reposition, then realign on the opposite side and stitch back to the center.
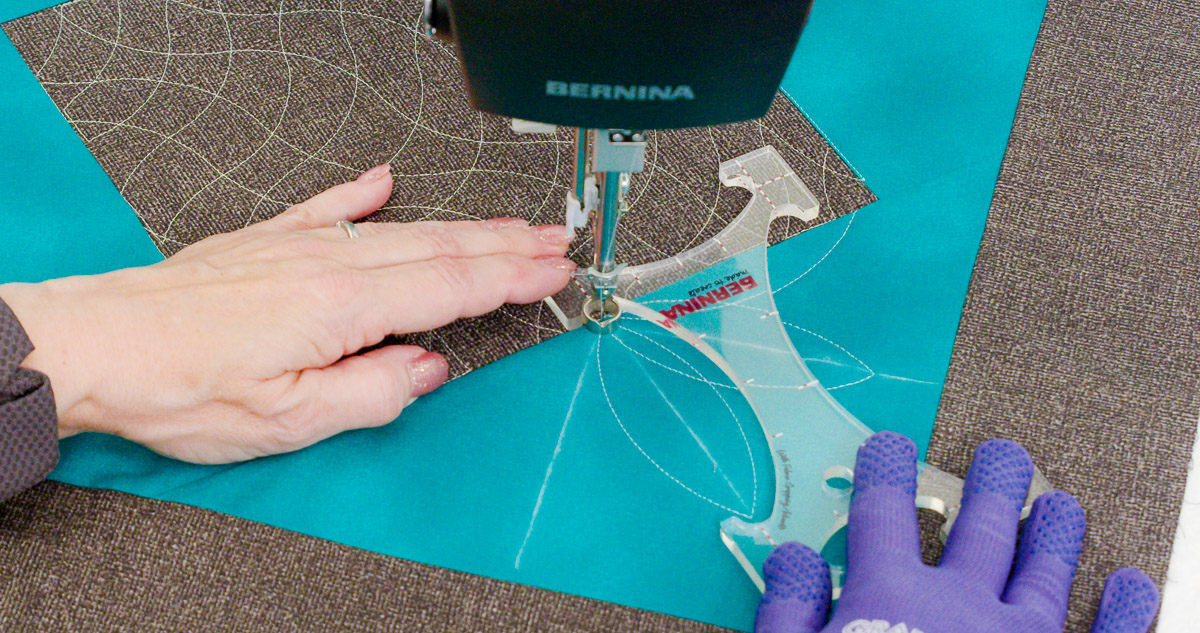
Continue the same process on the final angled line and opposite side seam to complete the design.
Repeat the same steps to stitch all four setting triangles.
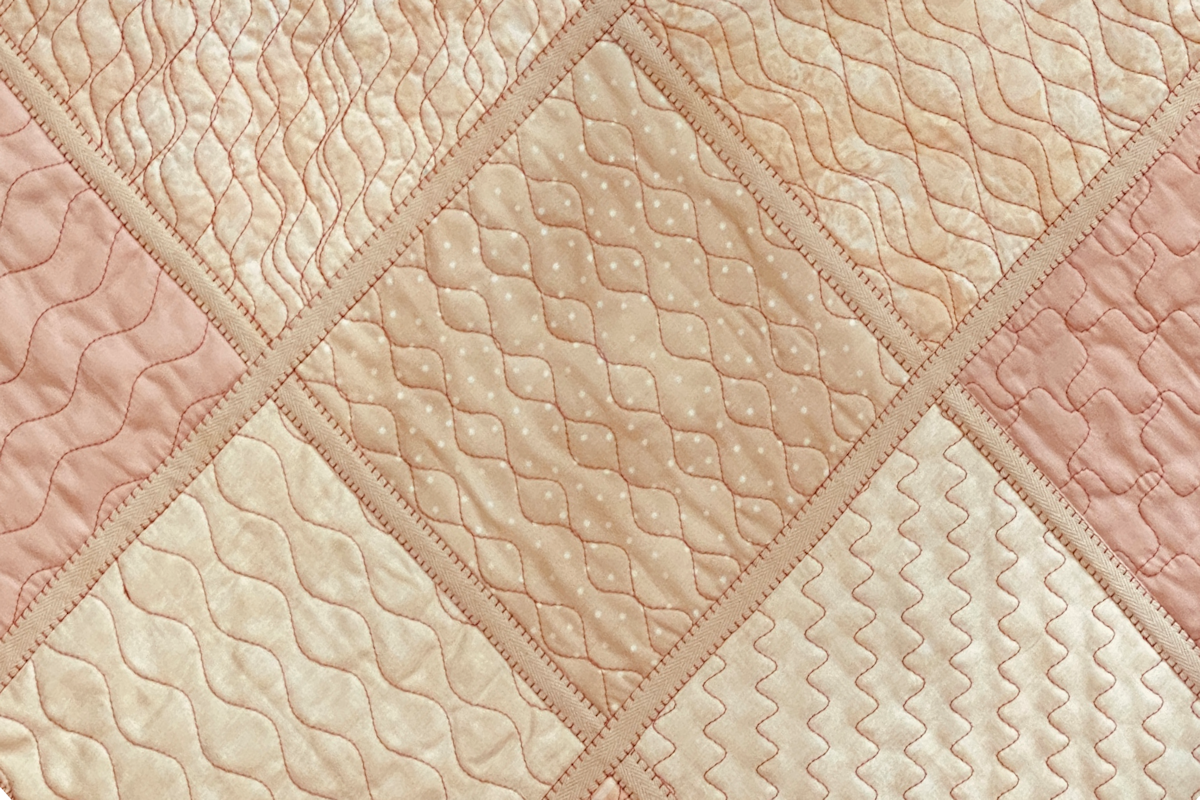
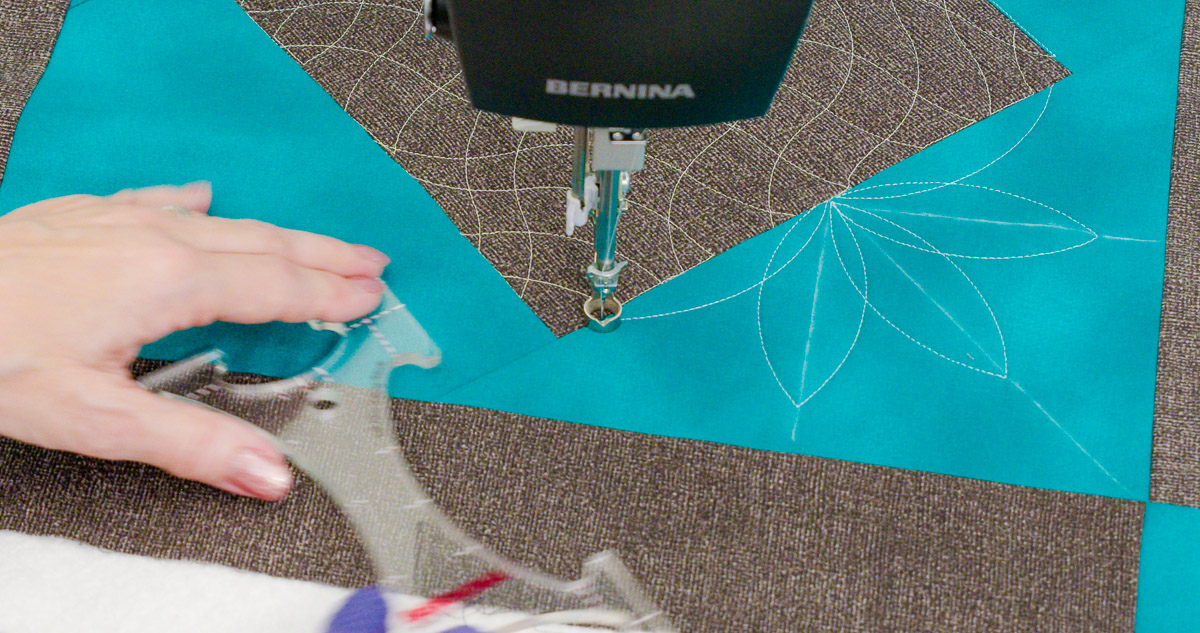
Step 4: Quilt the Borders
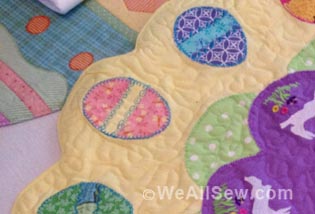
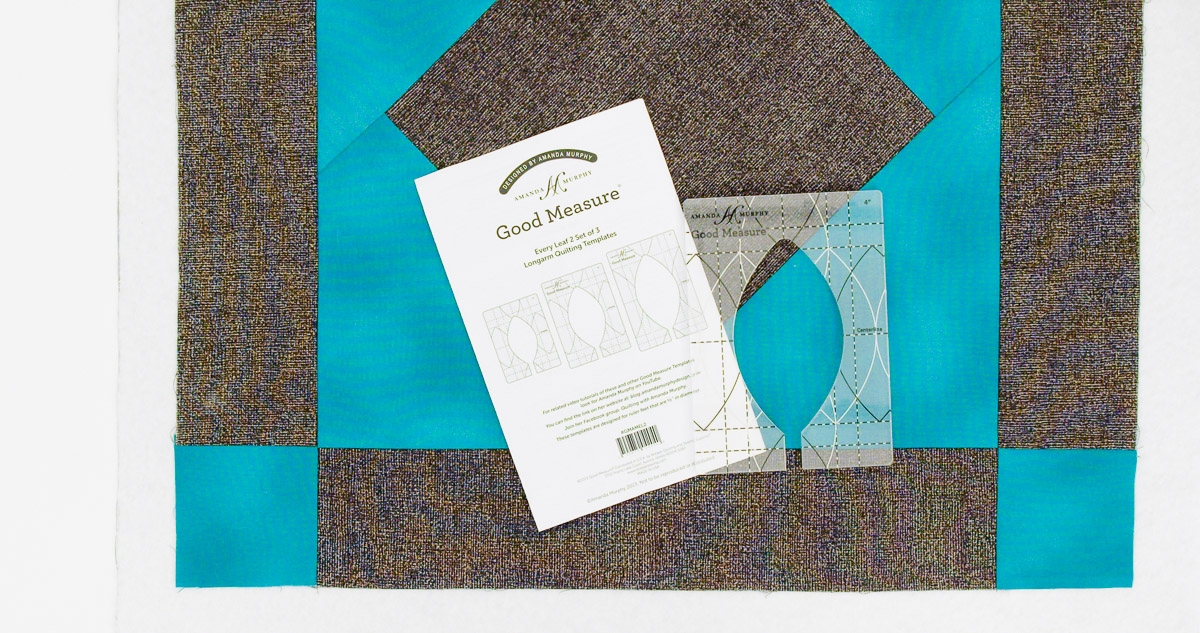
Next is the outer border. To quilt the interlocking oval border, use the Good Measure Leaf Ruler in the 4” size. The Good Measure rulers are designed by Amanda Murphy and the set contains rulers to quilt three different size leaves.
First, using a straightedge and marker, draw a line down the center lengthwise. Be sure to factor in the 1/4” seam allowance on the outer edge as you are measuring.
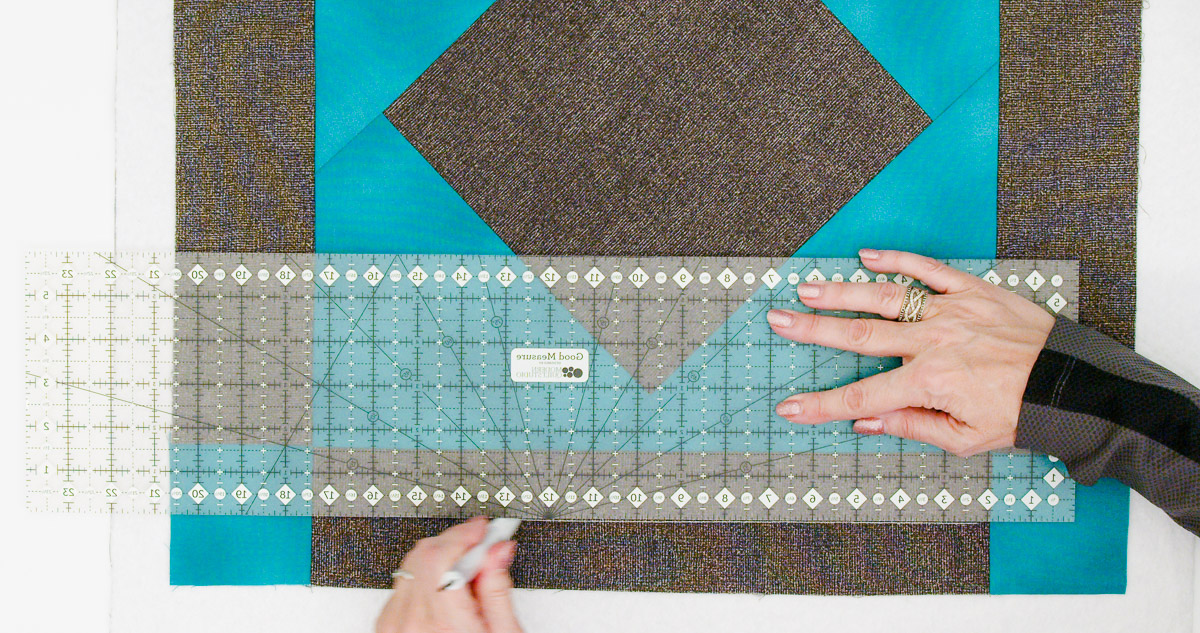
At one end of the drawn line, bring up the bobbin and secure your threads in the seam allowance. Position the ruler against the presser foot. Remember you are quilting 1/4” away from the ruler, so be sure to use the placement markings on the ruler and the orientation line.
Quilt around the inside of the leaf shape and return to the position where you started.
To link the shapes and get to your next start point, quilt back over your previous stitching on one side. When you get to the end, stop with the needle down.
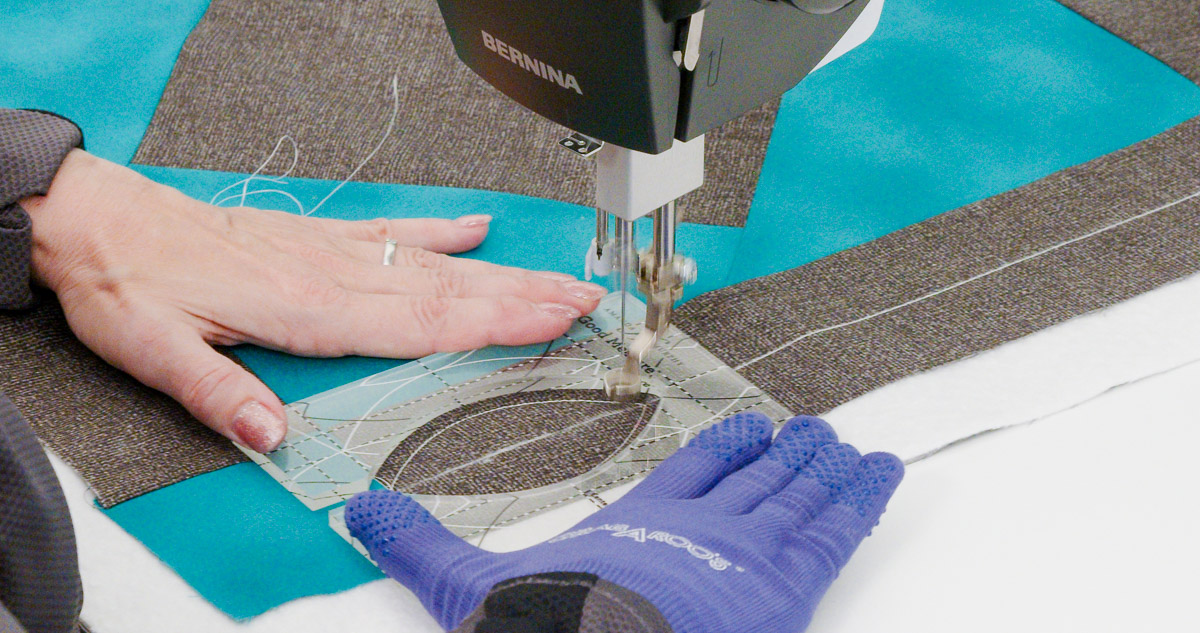
Reposition the ruler so the open end is against the presser foot and still aligned with the drawn line.
Repeat the process, stitching the entire inside of the leaf shape and stitching over one side to end on the opposite side. Continue this process until all the leaves have been stitched.
Next, using the registration lines marked on the ruler, realign the ruler so you can stitch half of the leaf shape.
Stitch around the partial leaf, then stitch in the seam line to go to the other side and back up to the top.
Reposition the ruler as before, keeping the ruler aligned with the drawn line.
Continue stitching leaf shapes until you reach the end and then stitch a partial shape to fill the remaining space of the border.
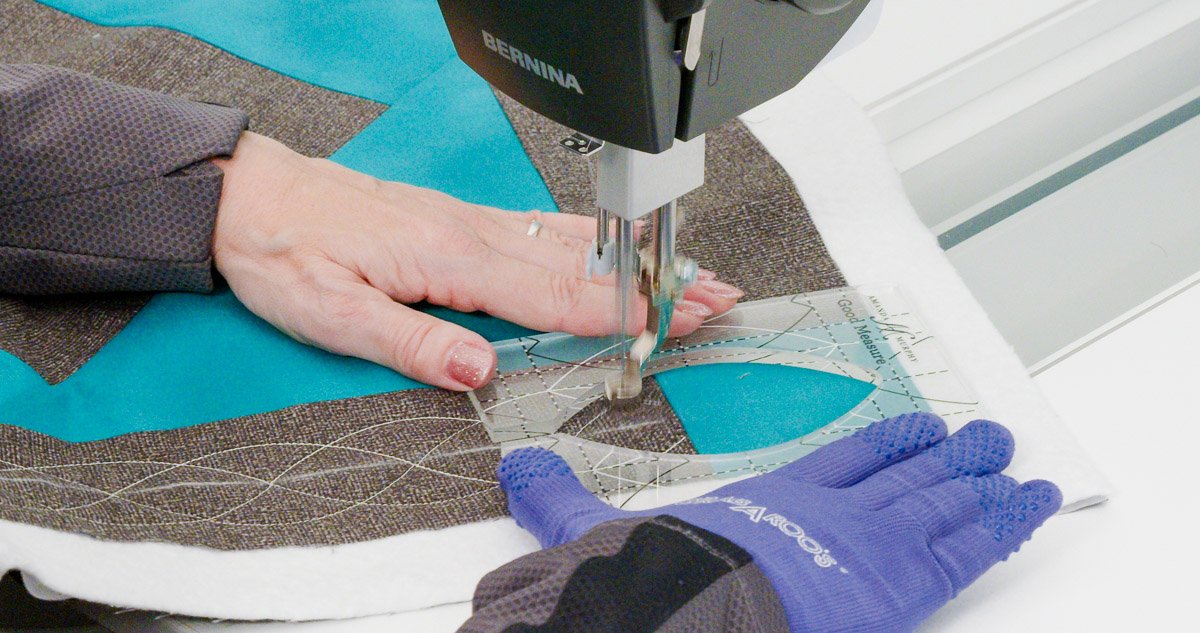
This interlocking pattern looks very intricate, but it is really easy to quilt by stitching one pass at a time. It is perfect for borders, sashing, or any straight lines on your quilt.
Repeat the steps to quilt each of the four borders. To quilt the four cornerstones, select a design of your choice and stitch it in the corner blocks. Be sure to draw registration lines as needed for the alignment of the ruler. The sample topper is shown with a variation of the Pointed Leaf design used in the setting triangles.
Finishing
If you are new to rulerwork, it takes a bit of time to establish the happy balance between too little and too much pressure of the ruler against the fence of the presser foot. You don’t want to “drift” off the foot by using too little pressure, but if you use too much pressure, it will be difficult to move the ruler and quilt. Stay as relaxed as possible. Take a break, if needed, and take a deep breath. It gets easier with practice!
When finished, trim the batting and backing even with the quilt top and then bind.