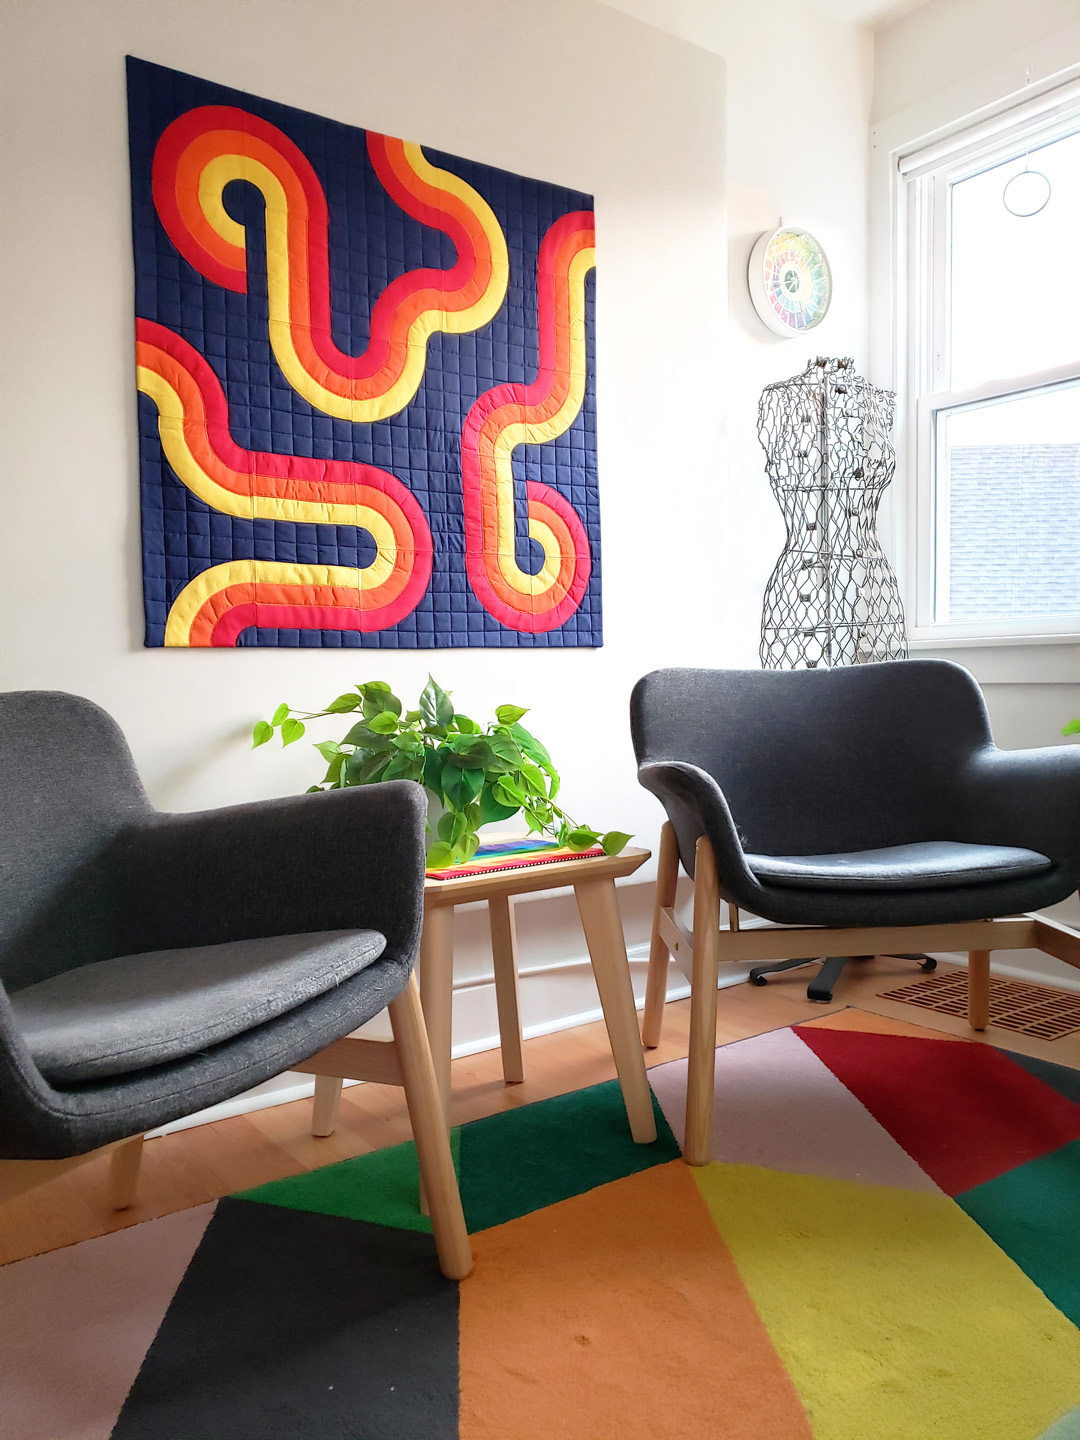
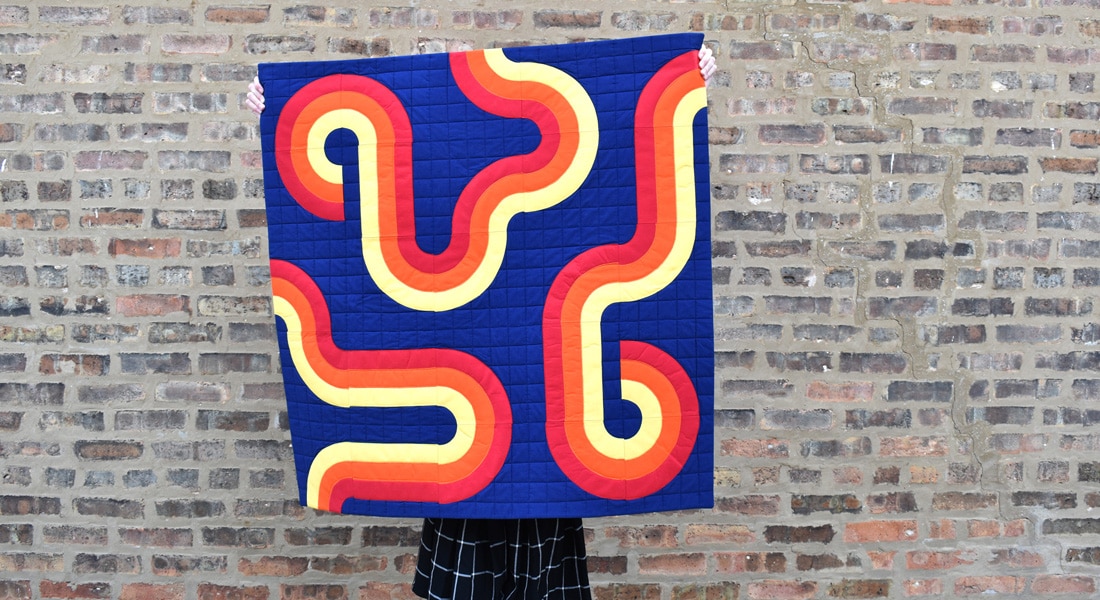
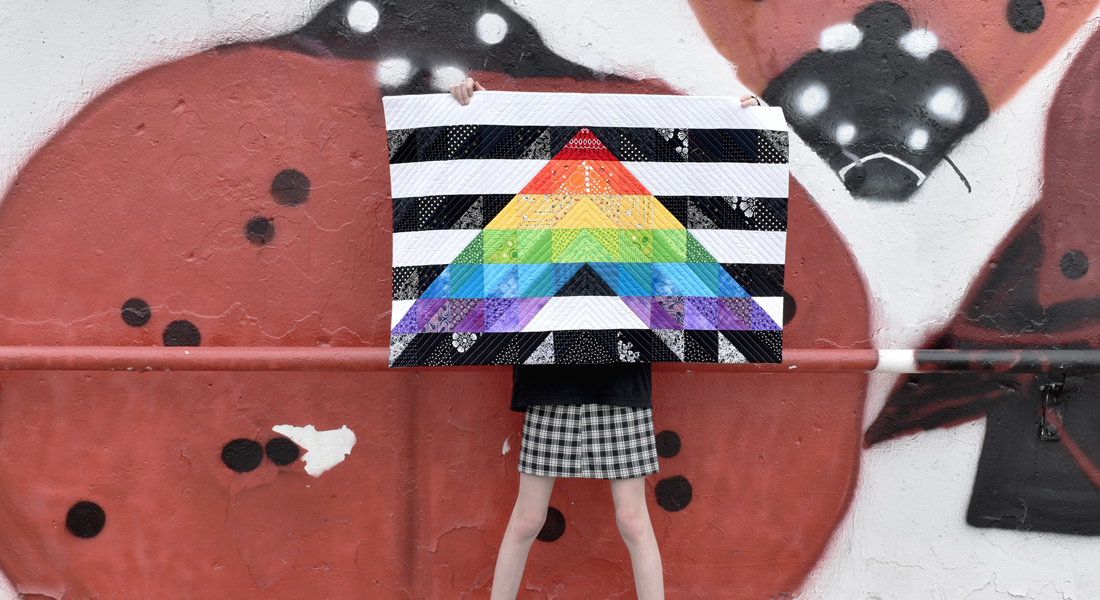
Curvy Lines Quilt Tutorial, Part 2
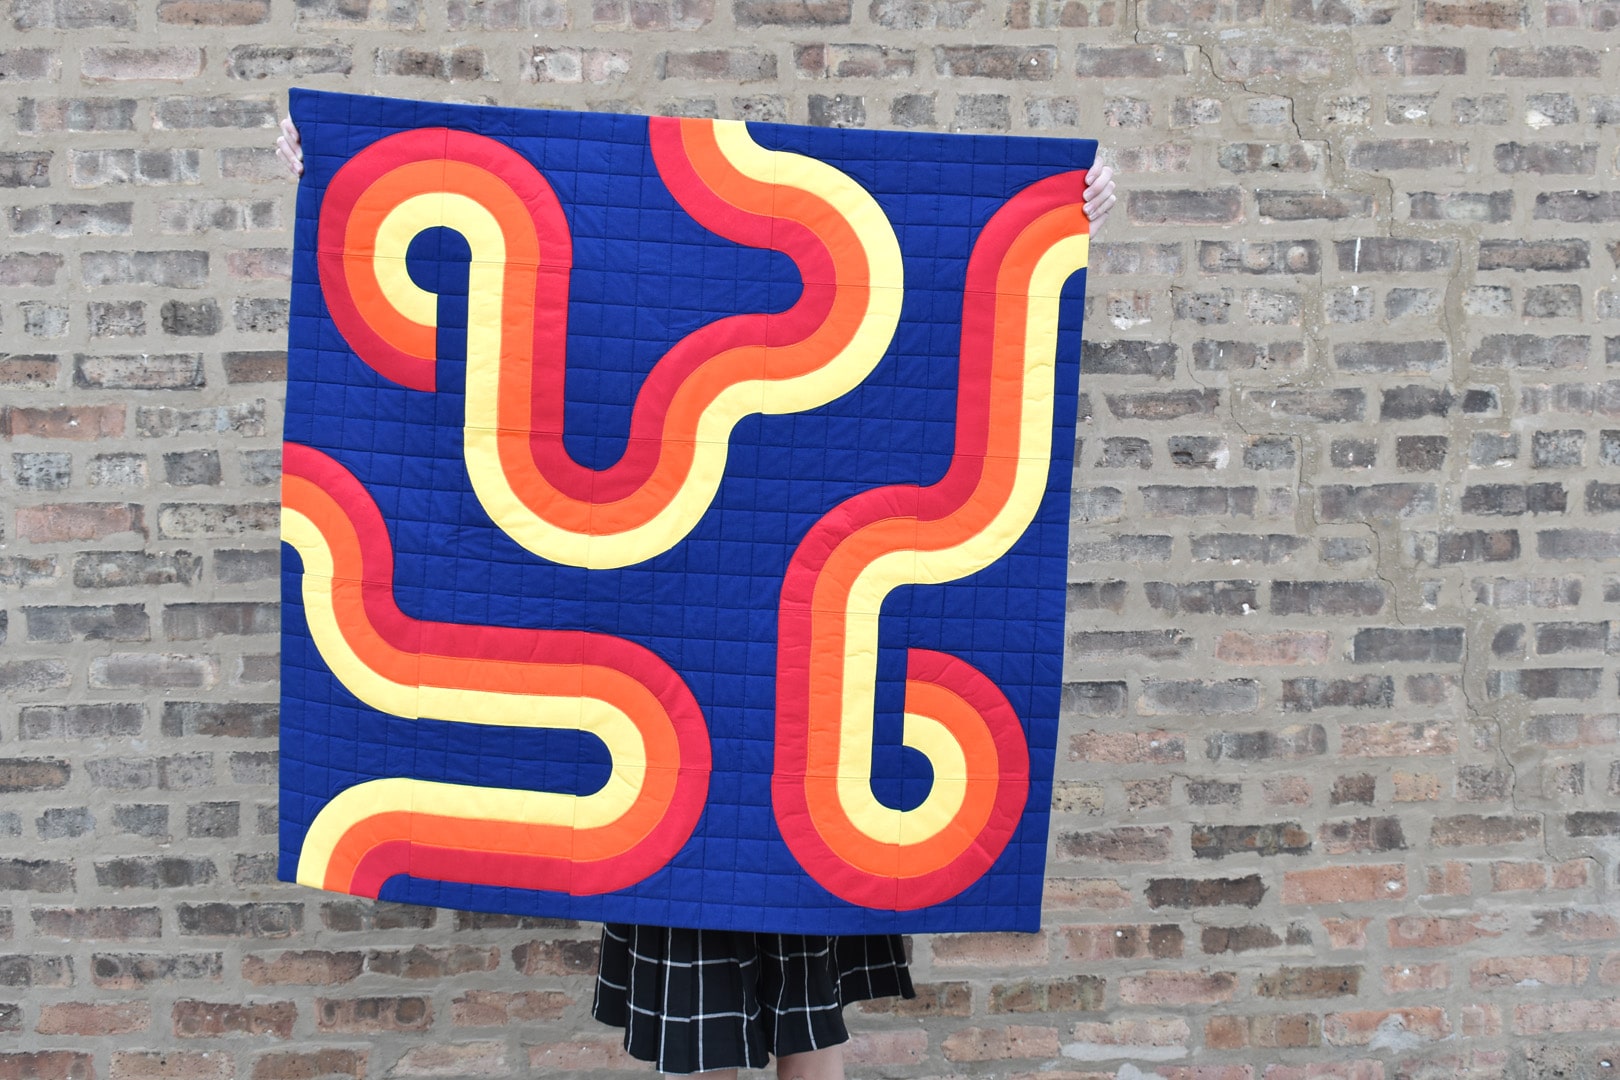
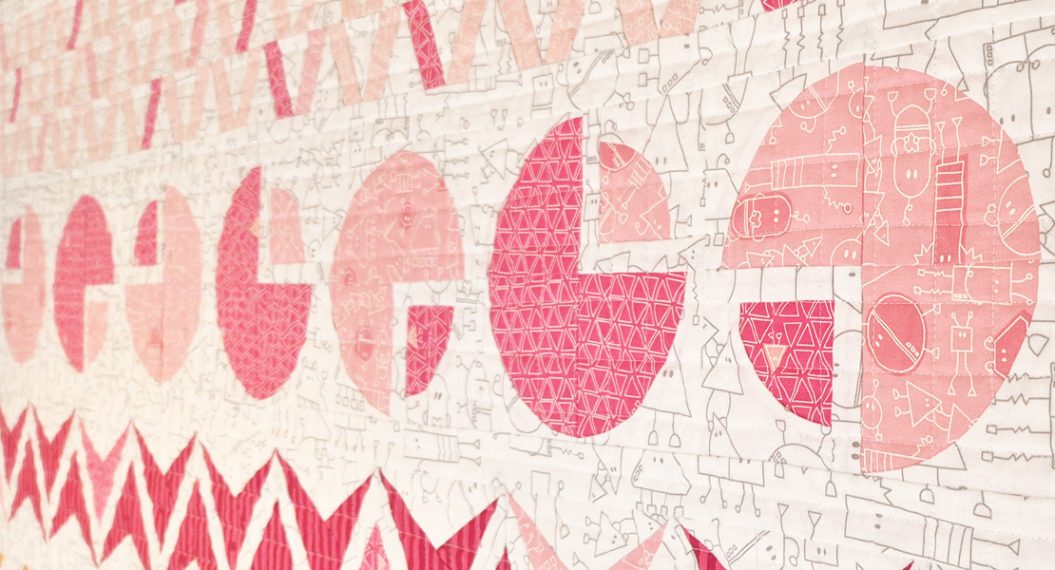
Simple striped appliqué blocks come together to create this fun, retro-looking Curvy Lines Quilt. The inspiration for this design came directly from big, bold 1960’s supergraphics designed by the likes of Barbara Stauffacher Solomon and Verner Panton, who used bright colors and simple shapes to create large-scale patterns. Follow along and I’ll show you how to make a Curvy Lines quilt in this two-part tutorial. In part one, learn how to make the simple curved and straight striped blocks that build the design with downloadable templates. In this post, find out how to finish the project with quilting and a facing.

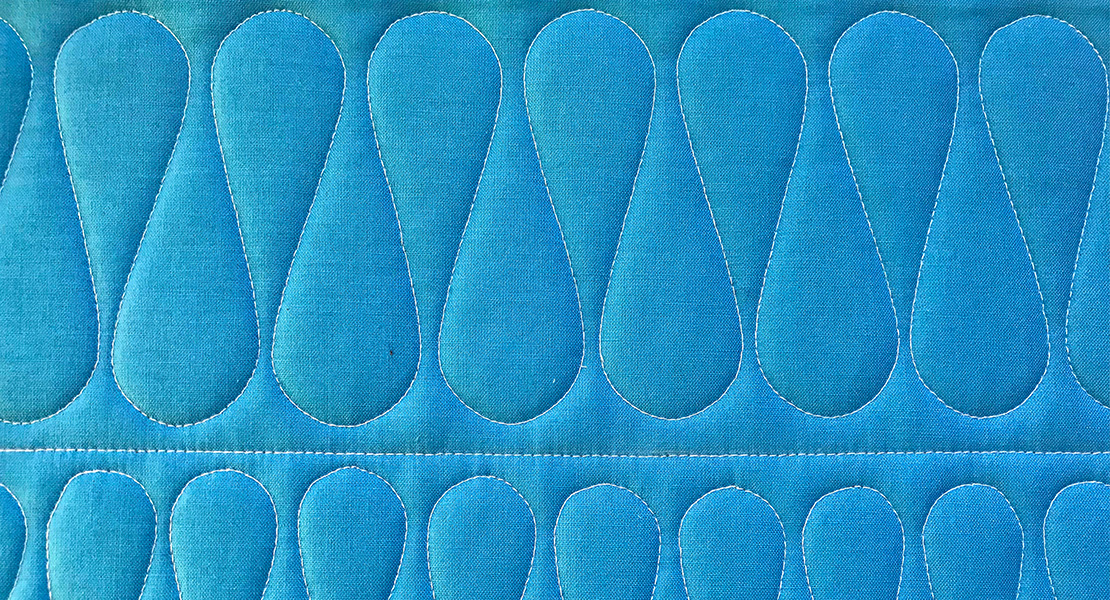
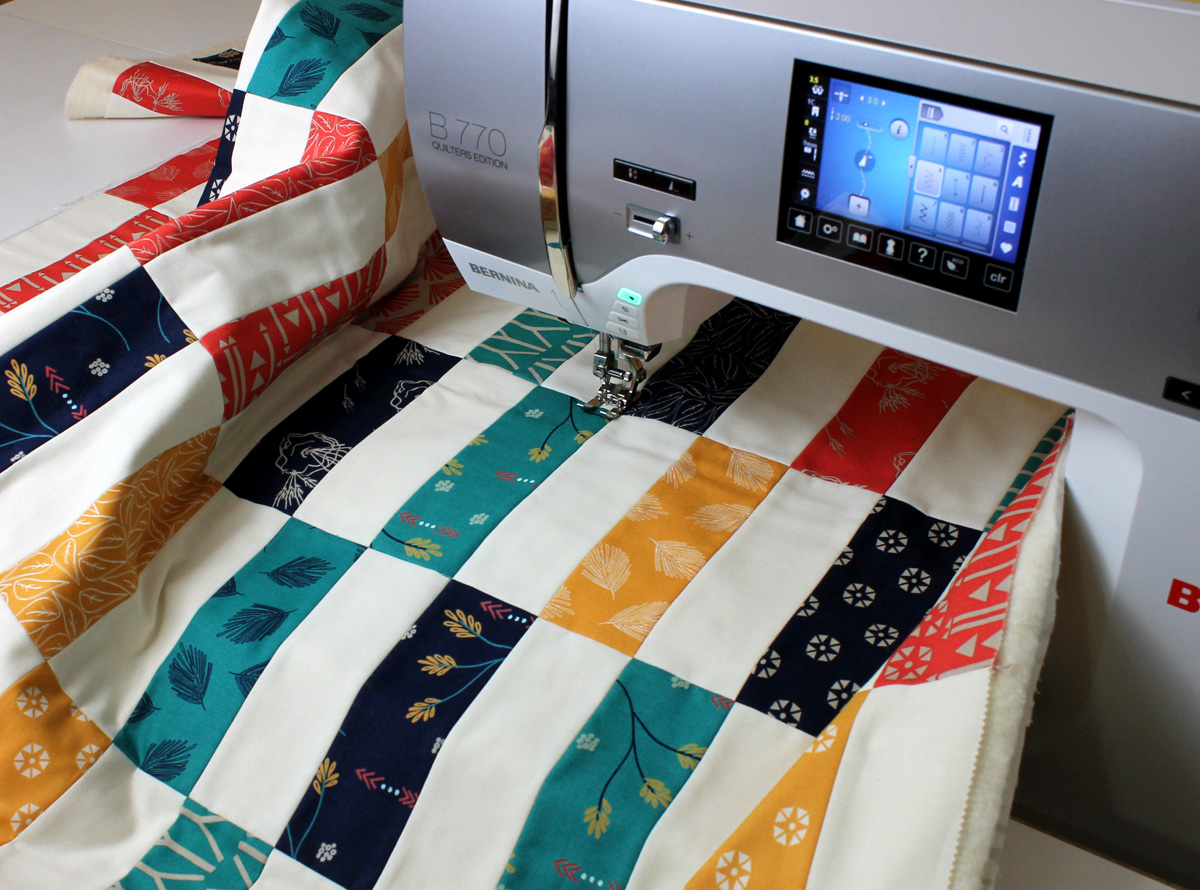
I quilted the background with a grid pattern, which makes the curvy lines pop. Quilting this grid means lots of stops/starts to quilt around the stripes, but I think the final look is worth it!

Read on to learn about using the Walking Foot #50 to quilt the grid and stop/start again around the curvy lines. Or you can quilt the Curvy Lines Quilt in your own way!
Basting the Curvy Lines Quilt
Every quilter has a favorite basting method, and I pin baste my quilts on a table.
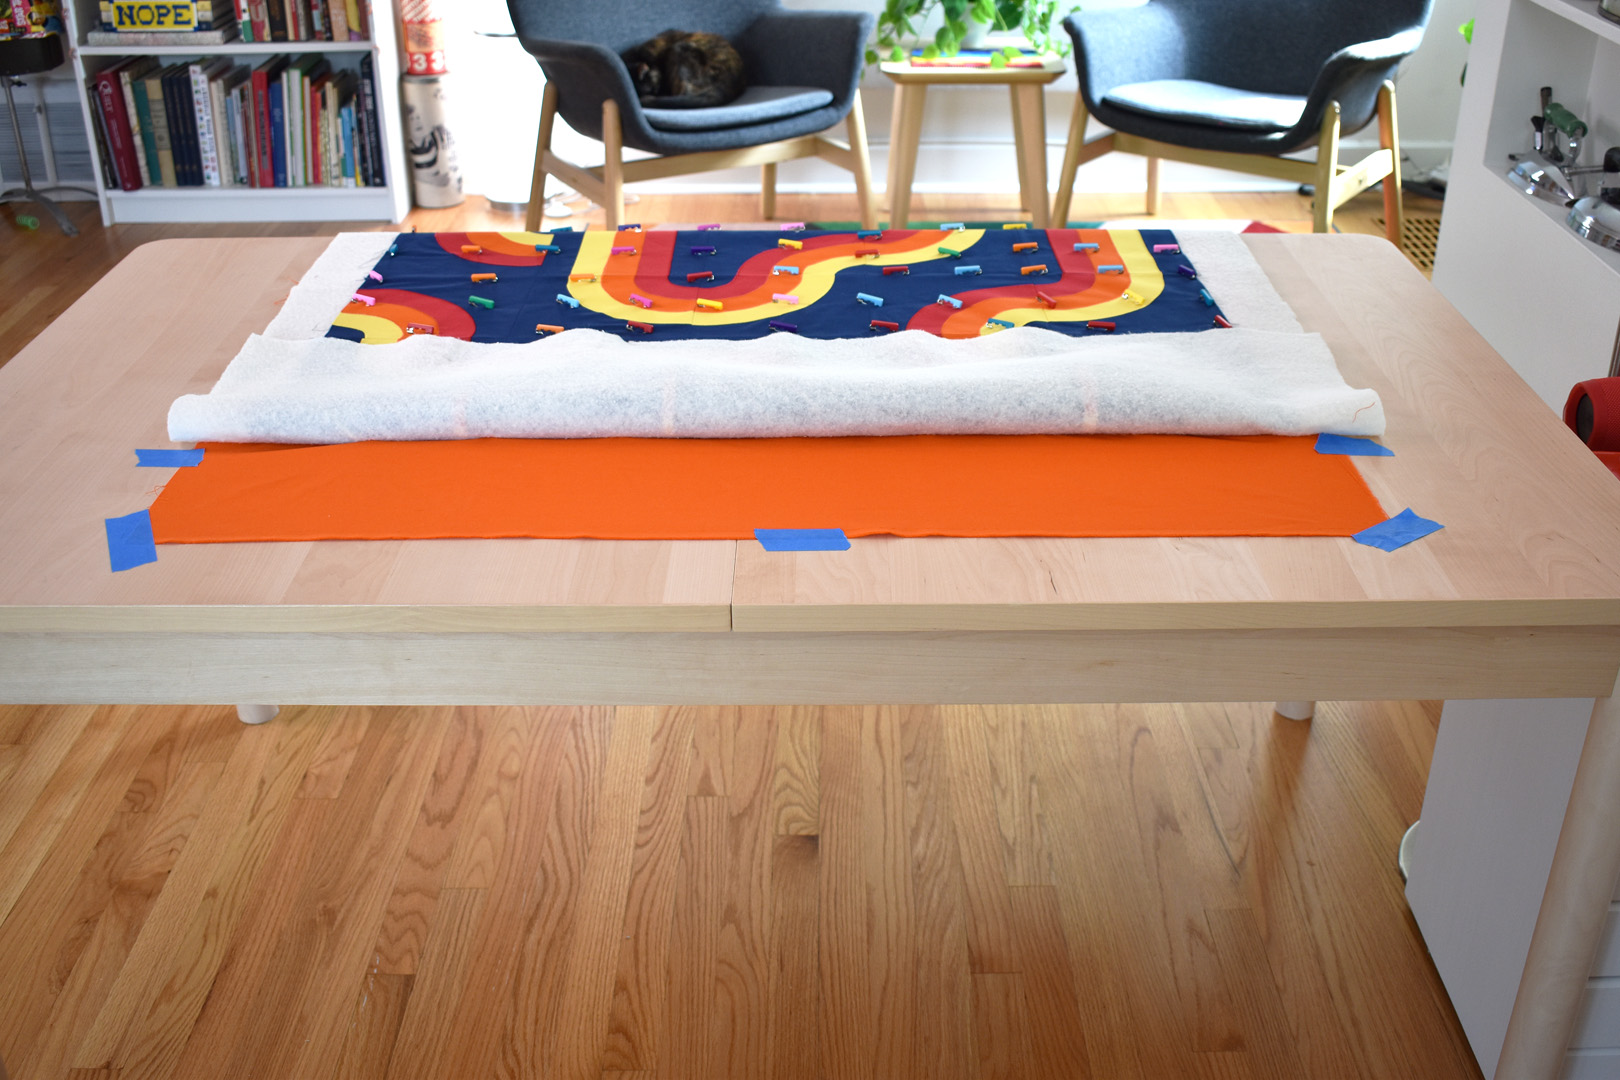
Make sure the backing fabric is cut a few inches larger than the quilt top. Cut the batting down to the same size as the backing. Gather your supplies to baste the quilt; I am using a table, quilter’s safety pins, and blue painter’s tape. Clean off the basting surface and have your pressed-and-ready layers close by.
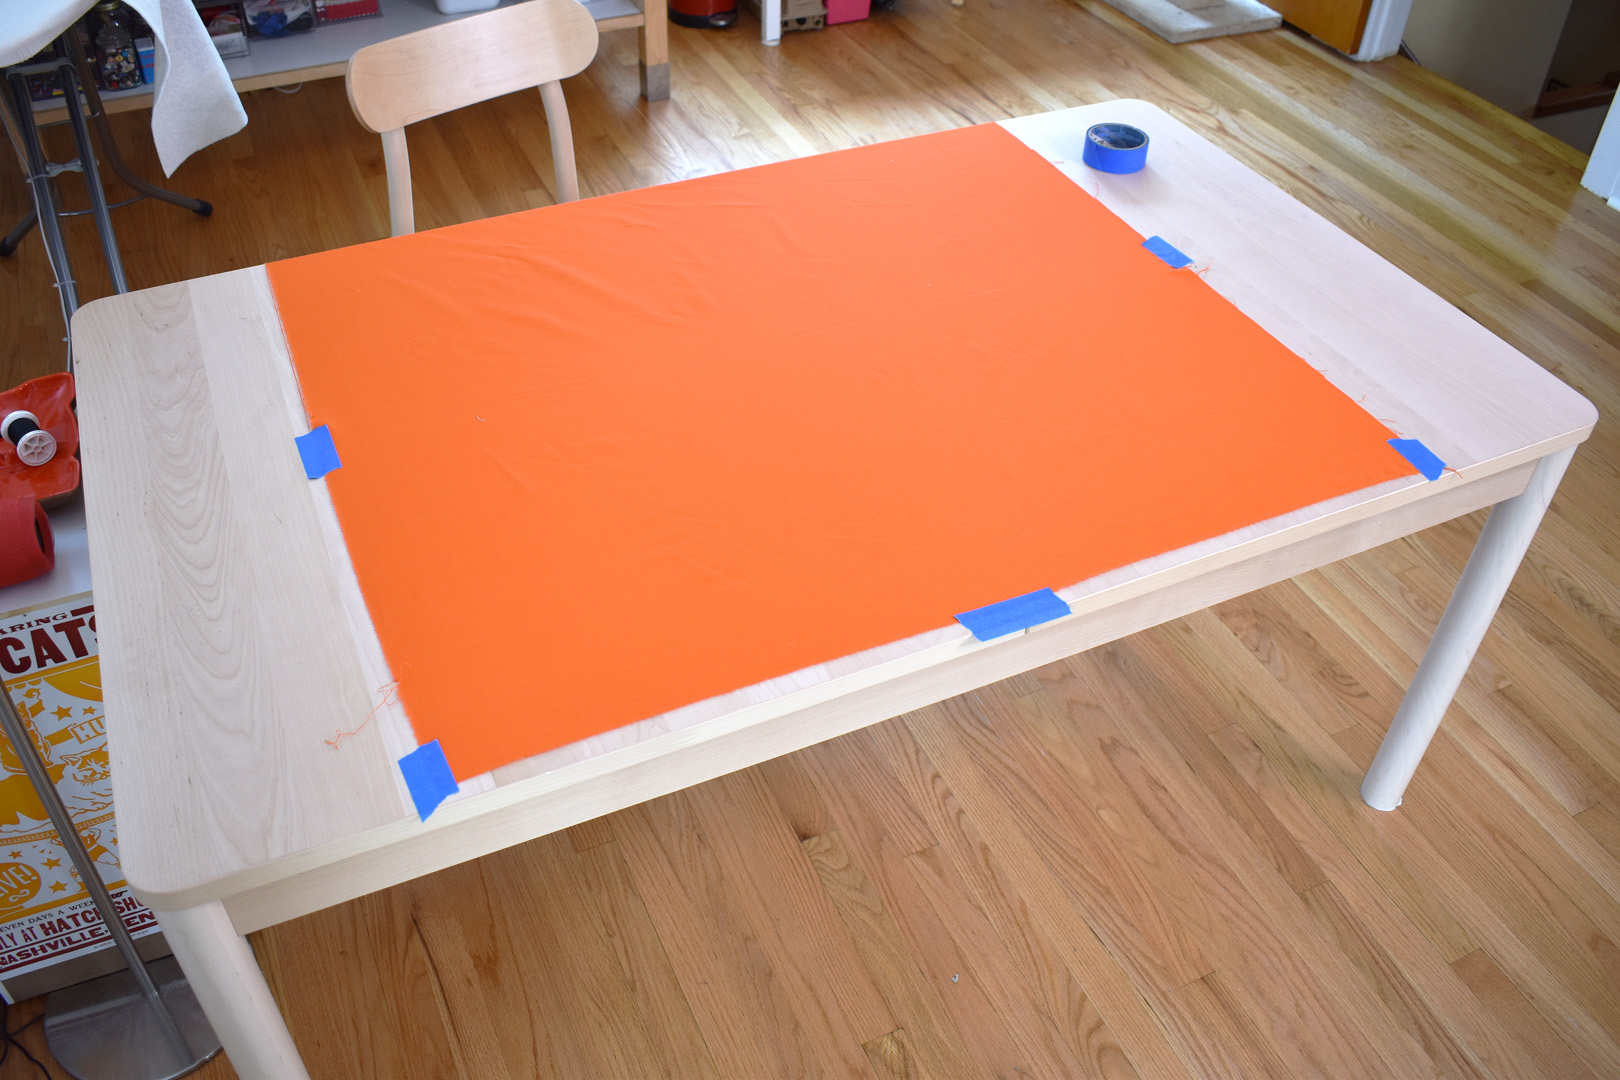
Begin by smoothing out the backing layer, right side down. The entire quilt backing is too large to fit on my table, so I start by basting as much as I can on the table (the rest is hanging down the other side of the table). The tape is meant only to hold the backing fabric in place and prevent puckers, try not to stretch or pull the fabric too much while taping it down.
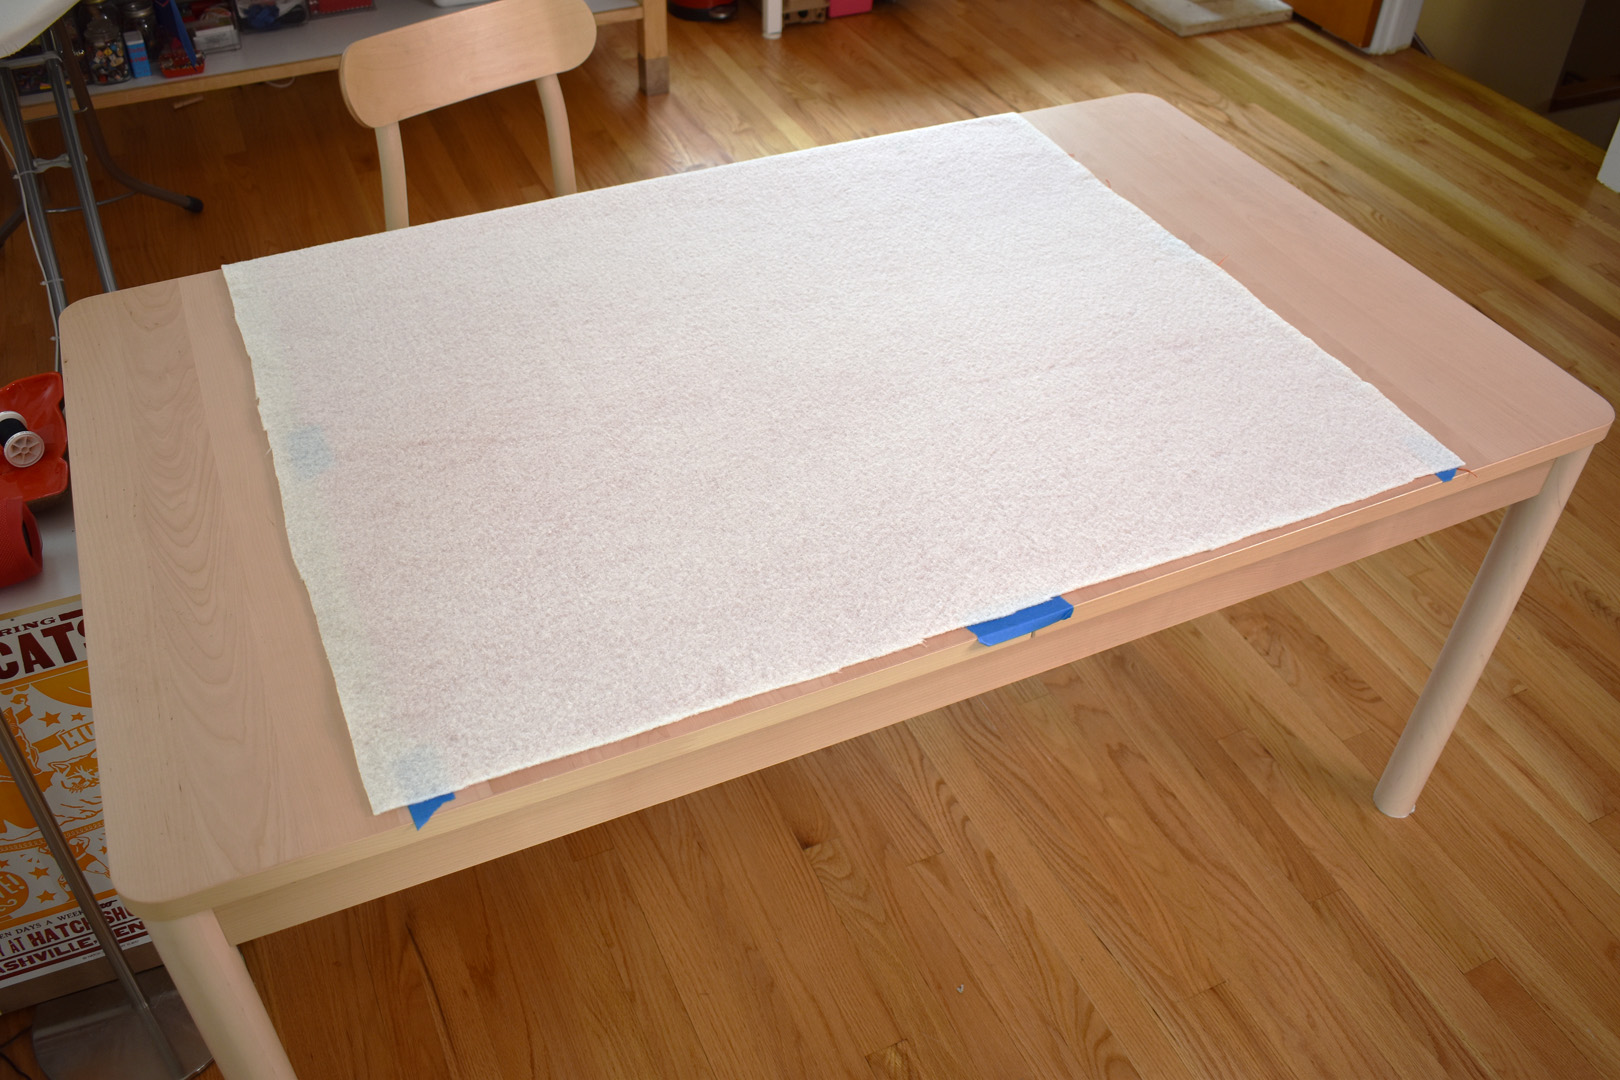
Place the batting on top of the backing fabric, centered as well as you can, and gently smooth out any wrinkles or puckers from the center out to the edges.

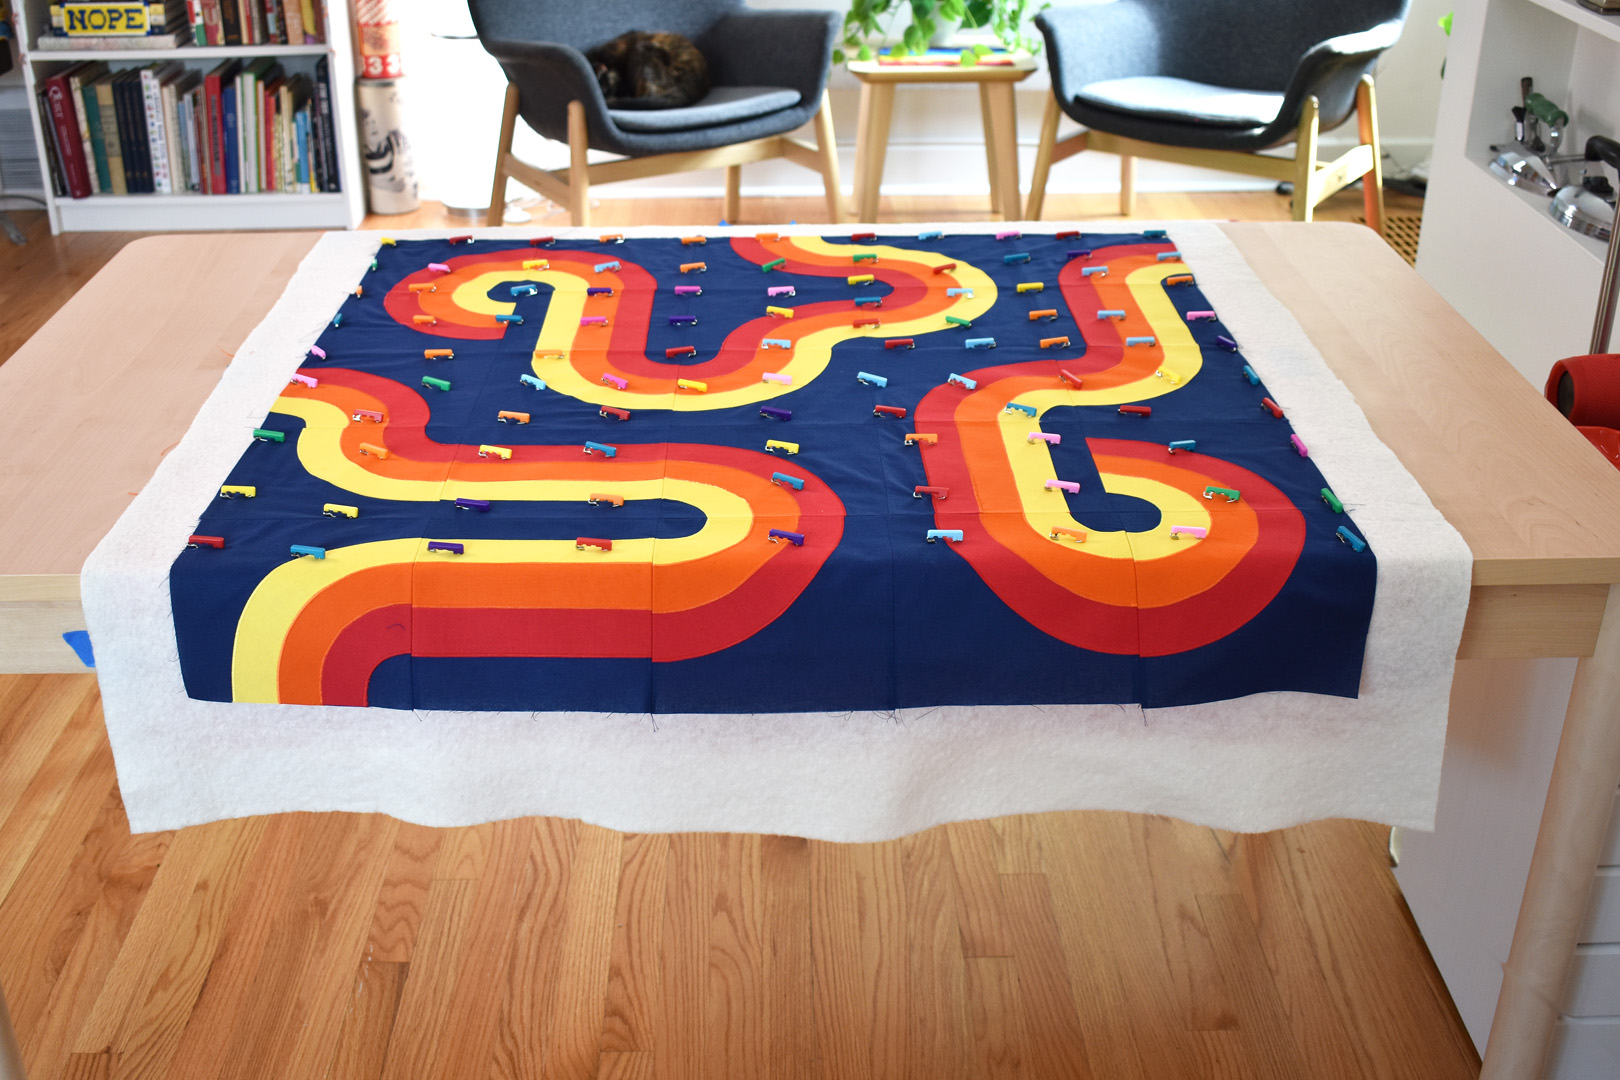
And finally, add the quilt top centered on the batting and backing. Since I am basting about 2/3 of the quilt on the table with the rest hanging over, I take a bit of extra time to make sure it’s all centered before beginning to pin baste.
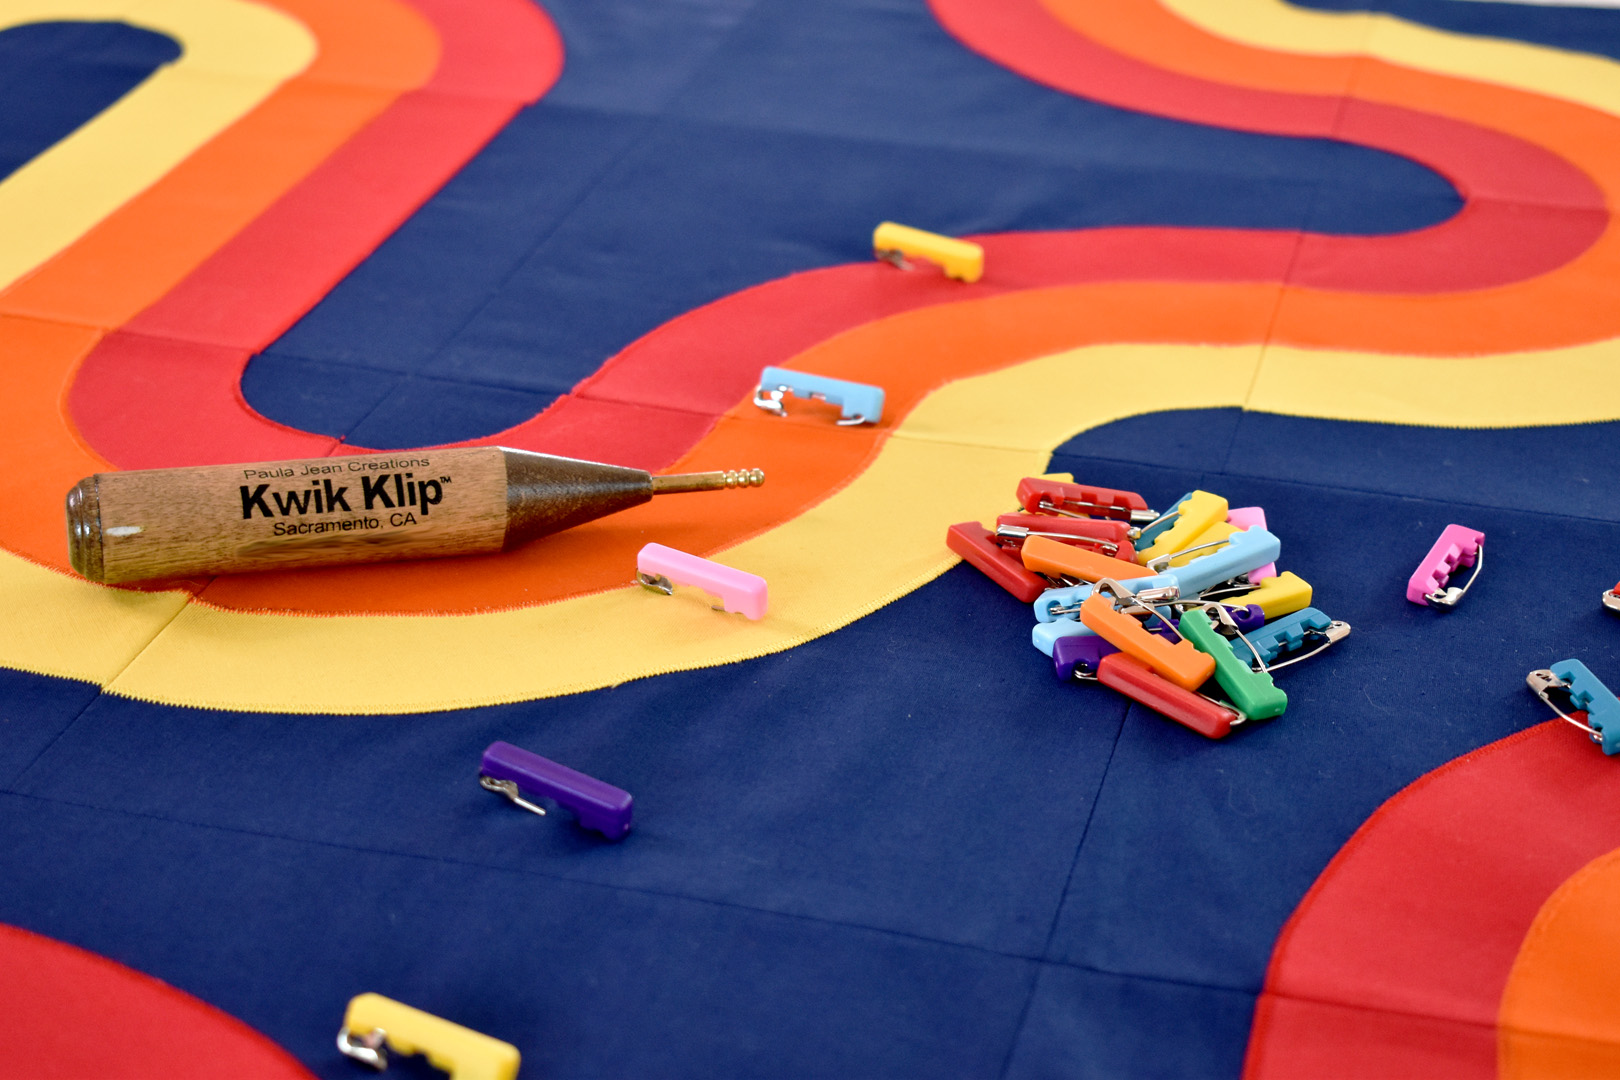
I pin baste the top using my finger-saving tools, pins with Quilter’s Delight Safety Pin Covers and a Kwik Klip safety pin closer.
When the quilt on the tabletop is basted, I carefully move the quilt over to finish basting the final section.
First, I remove the tape from the backing, then re-adhere the tape to the final portion of the quilt on the tabletop. Then I carefully smooth the batting and top over the backing and continue to baste.
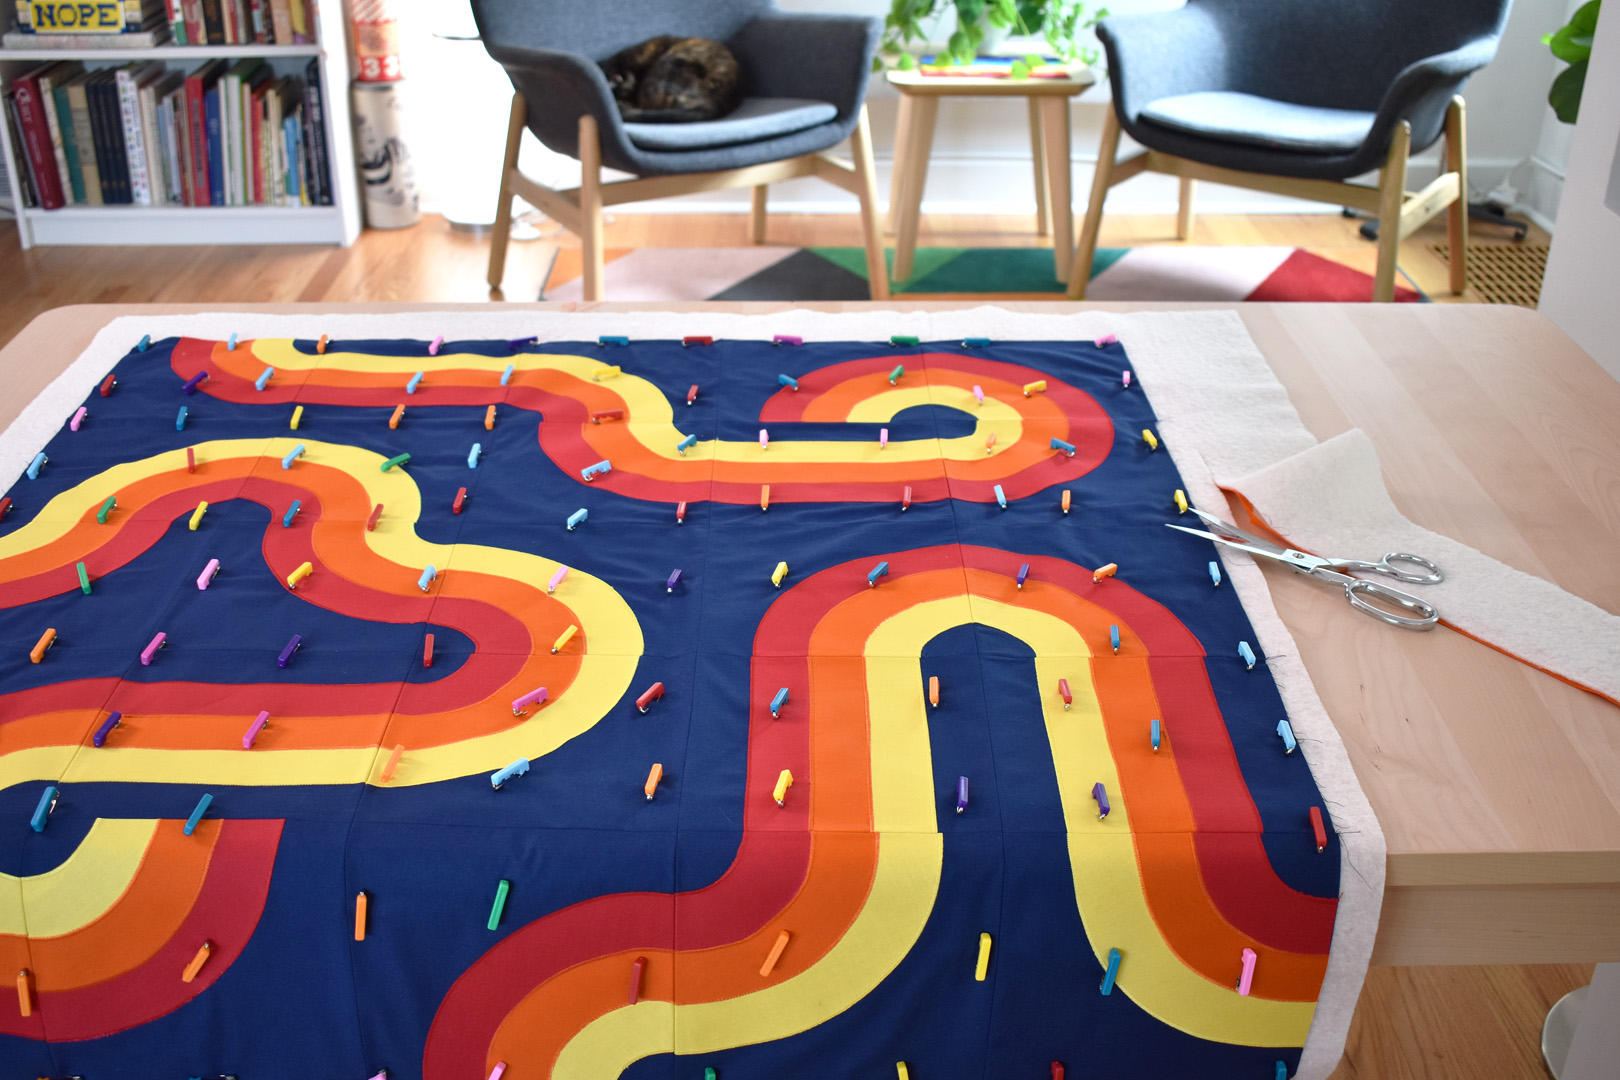
After the quilt is fully pin basted, I trim the extra batting and backing to about 1″ from the edge of the top to keep the bulk down during the quilting process.
Quilting the Curvy Lines Quilt
As mentioned above, feel free to quilt this project however you wish! Follow these steps if you’d like to create a gridded background on the quilt to really set off those curvy stripes.
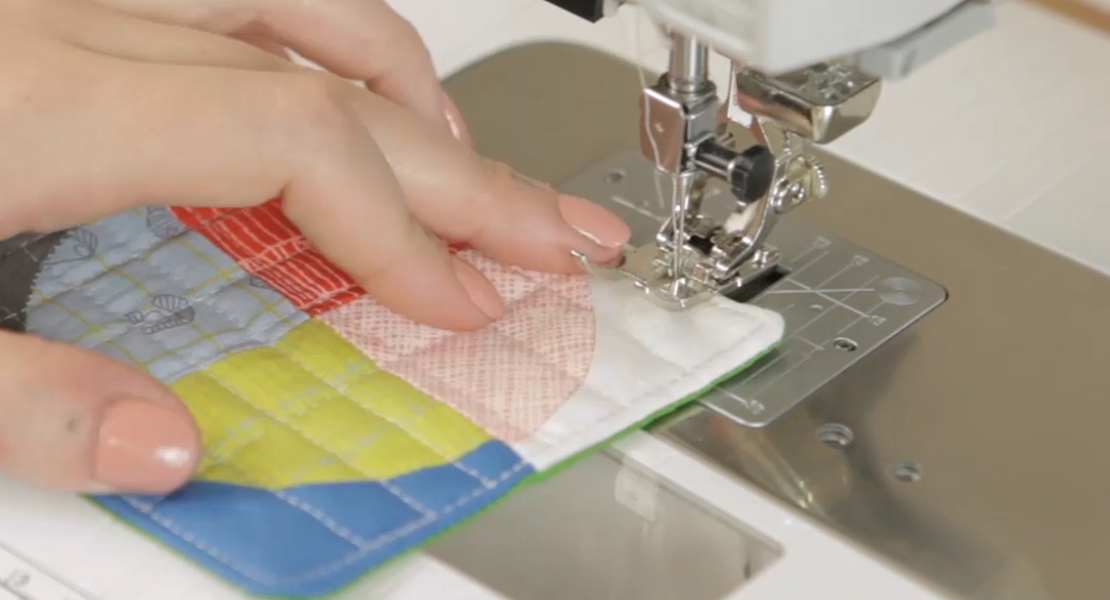
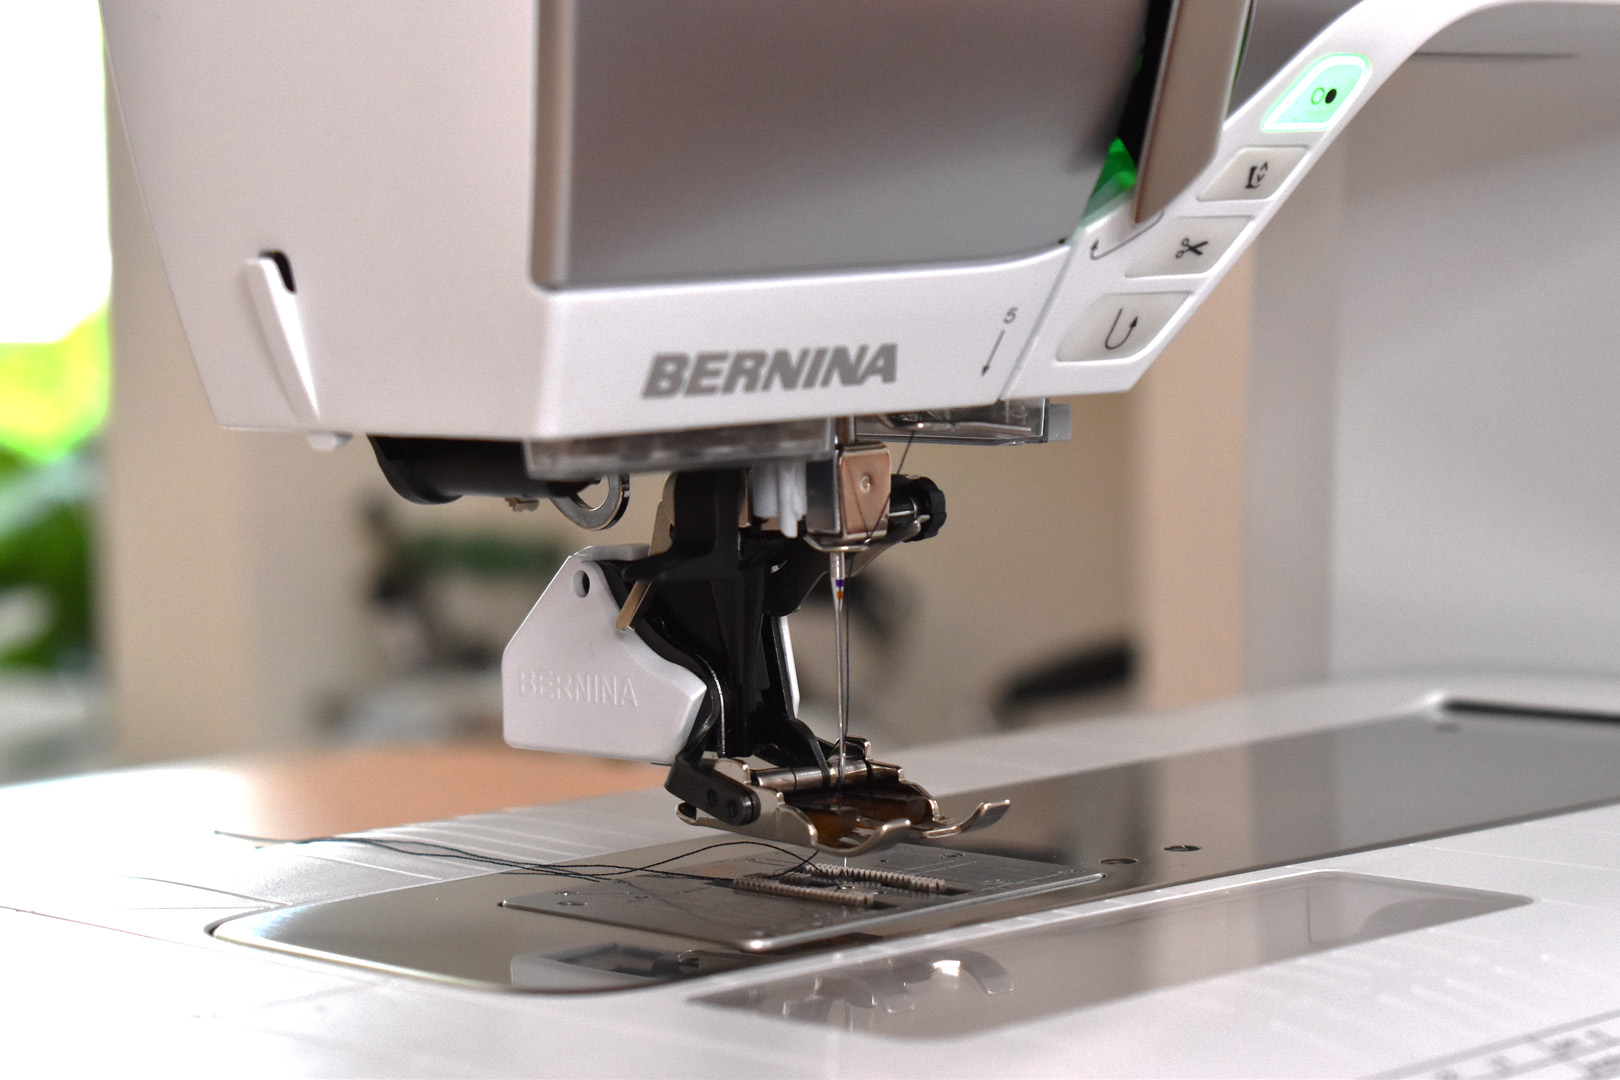
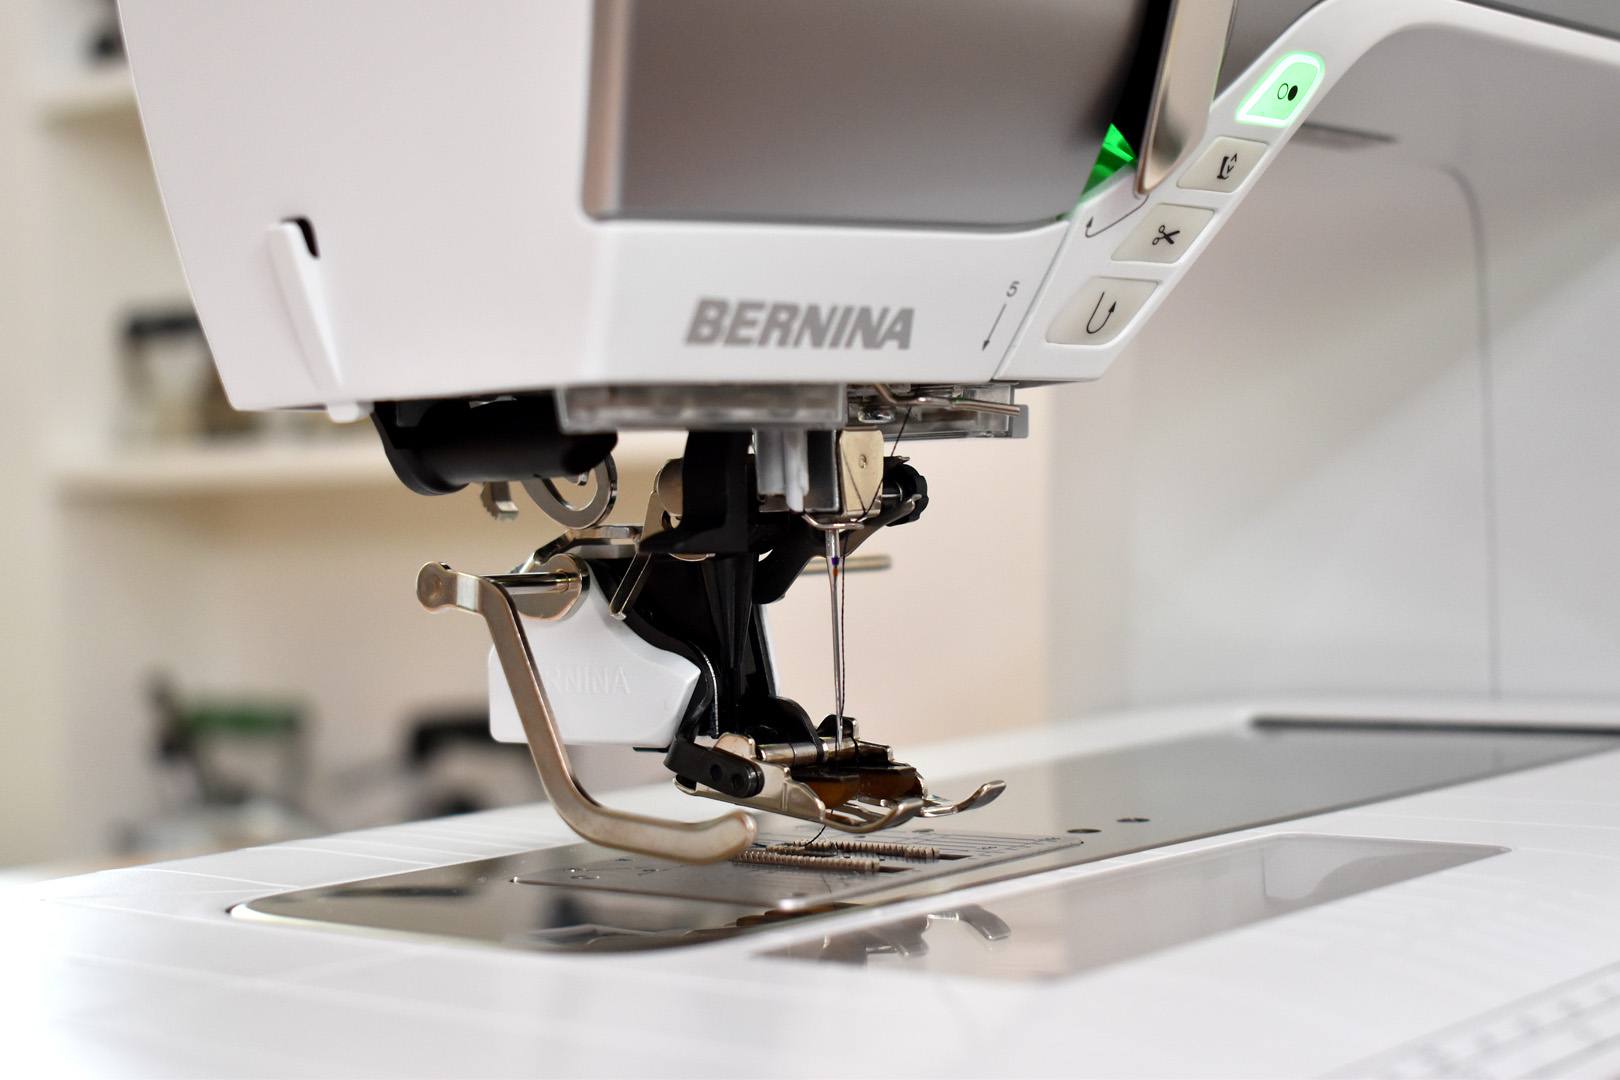
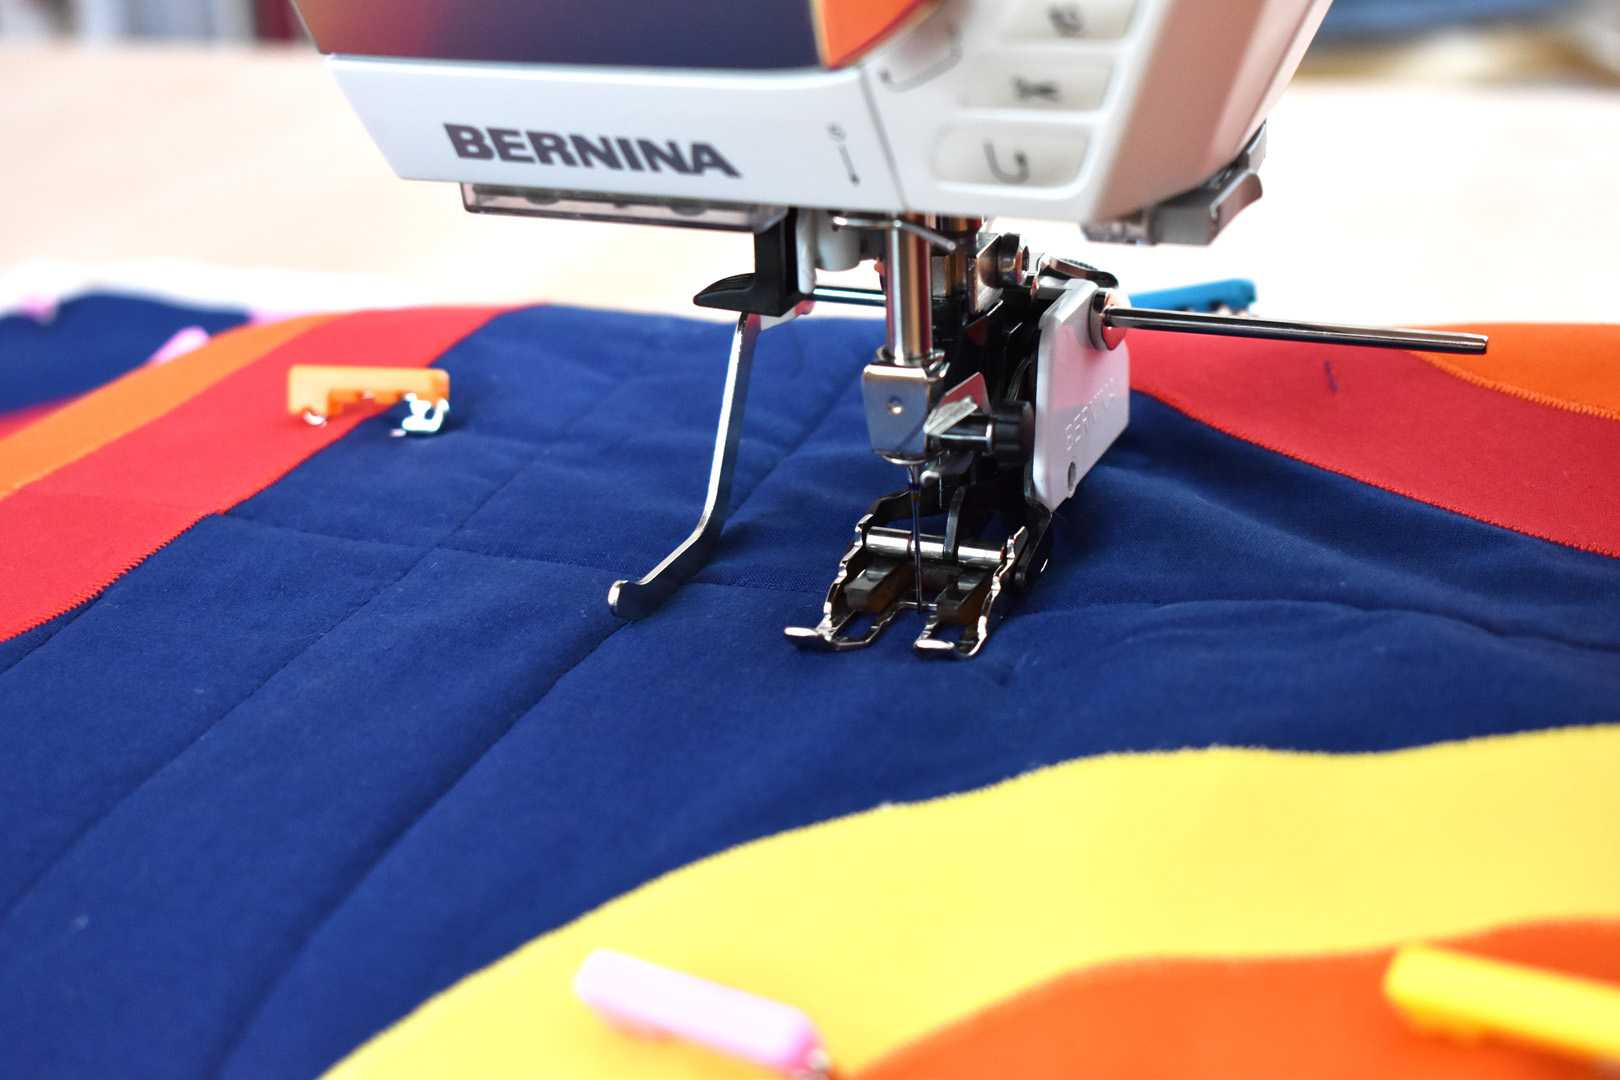
Set up your sewing machine with Walking Foot #50 and the open toe quilting foot. There will be many starts and stops in this process, and you’ll need the clear, open view this sole provides with the Walking Foot #50 to really see where your needle is going.
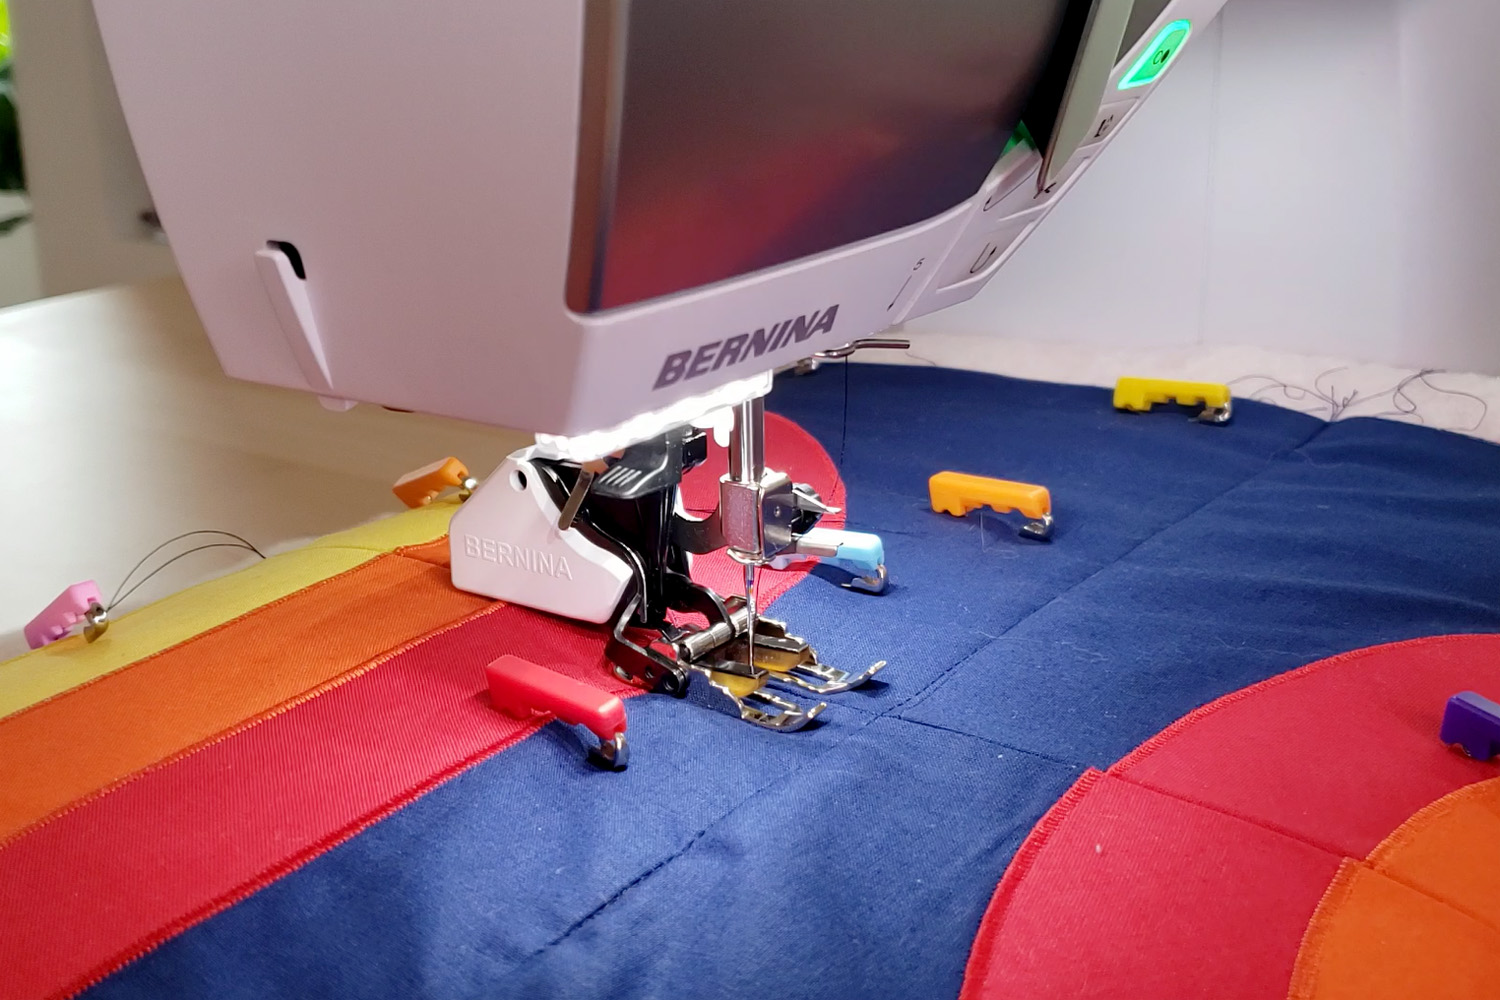
The first step is to stitch-in-the-ditch along the block seams in the background color. Each time you approach the curvy lines along a seam, you will stop and start again by bringing up the bobbin thread and cutting the thread tails long enough to tie and bury in the quilt later. Watch the video clip below to see this process in action, and follow along with the step-by-step instructions.
How to Start and Stop Quilting with the Walking Foot #50
Start Stitching with the Walking Foot #50
- To start straight line quilting in the middle of the quilt, begin by aligning the needle with the starting point. Hold tight to the needle thread with your left hand, and use the handwheel to lower the needle into the fabric at the start point.
- Still holding tight to the needle thread in the left hand, raise the needle with your right hand using either the handwheel or the needle up feature. The bobbin thread will come up through the fabric.
- Grab the bobbin thread, and pull both the bobbin and top thread underneath the Walking Foot #50, making sure you have at least 4″ of thread tails to tie-off later.
- Begin stitching.
Stop Stitching with the Walking Foot #50
- To stop straight line quilting in the middle of the quilt, begin by aligning the needle in the up position over the stopping point. Hold tight to the needle thread with your left hand, and use the handwheel to lower the needle into the ending point.
- Still holding tight to the needle thread in the left hand, raise the needle with your right hand using either the nad wheel or the needle up feature. The bobbin thread will begin to come up through the fabric.
- Use a stiletto, mini crochet hook, or dental tool to gently pull the bobbin thread up to form a loop. Grab the loop with the left hand and pull the thread out about 4″ away from the needle.
- Cut the loops formed by both the top and bobbin threads, making sure you’ll have enough tails to tie-off later.
The process of starts/stops might feel tedious at first, but you will find a rhythm and flow once you get started. You can choose when to stop and bury the thread tails (read on for a detailed how-to) during the process. I usually quilt for a little while, stop and bury threads, then go back to quilting for awhile, and so on until this step is finished.
How to Bury Threads on the Quilt Top
Burying threads brought up to the top of the quilt during stops and starts is a technique that will both keep the threads from popping out or coming loose later, and give the quilt a highly finished look. I’m demonstrating with threads from a later step because this yellow is so much easier to see than the dark blue. Apply these steps to any threads pulled up to the top of the quilt that you need to bury.
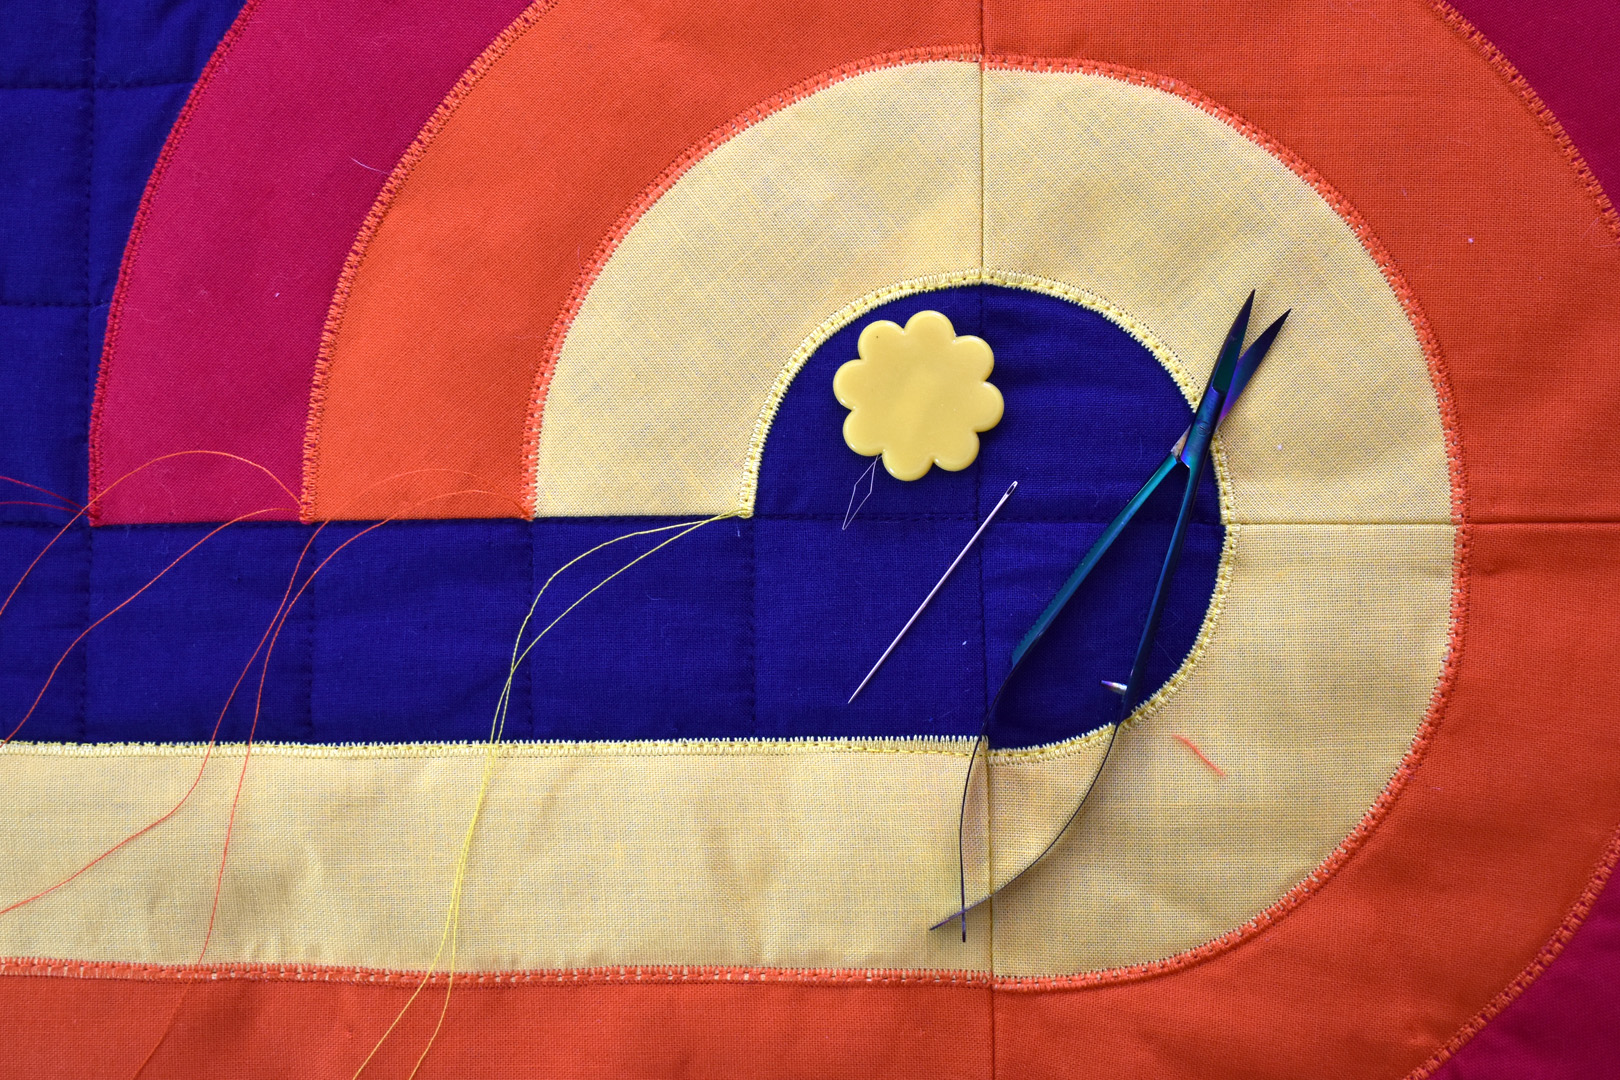
You will need a long needle, needle threader, and thread snips for this process.
First, tie a knot in the thread close to the quilt (about 1/8″ to 1/4″ away from quilt top). I use either the end of the needle through the knot or my finger on top of the knot to make sure it forms where I want it to.
Next, use the needle threader to pull the thread tails through the eye of the needle. Bury the needle right where the last stitch is in the threads you are burying. Making sure to keep the needle between the layers of the quilt (otherwise, your thread tails may poke out the back), bring the needle out a few inches away.
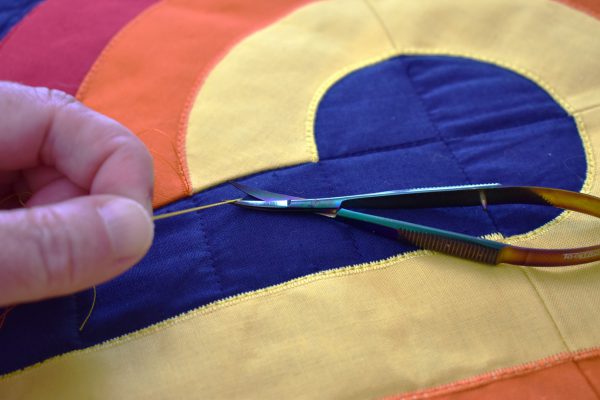
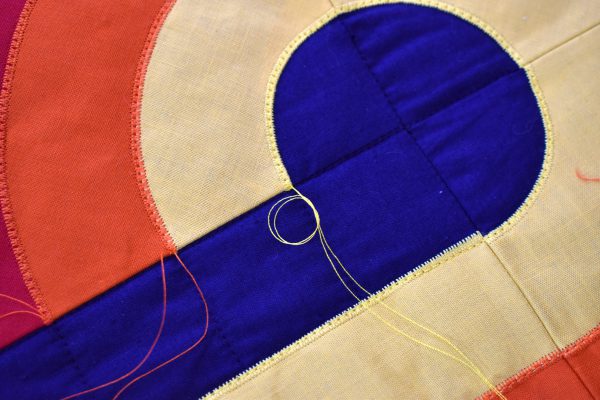
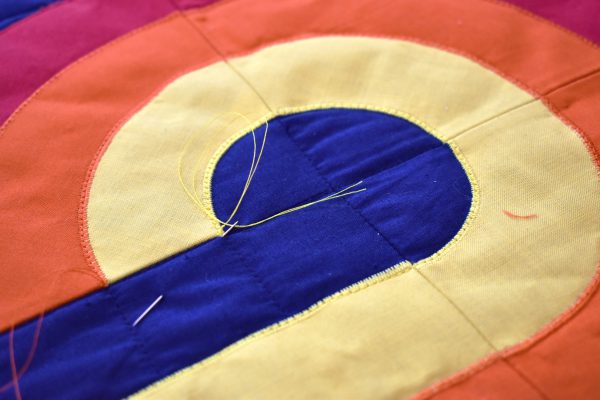
Give the thread tails a good tug until you feel the knot pop through the top layer of fabric. You might even hear the “pop” noise! The knot pulled through the top layer keeps the thread tails from working out or loosening at a later time.
And lastly, while still applying slight pressure to the tails, snip the extra thread away close to the quilt. The tails should then tuck away under the top layer. And there you have a perfectly hidden start or stop in your quilt!
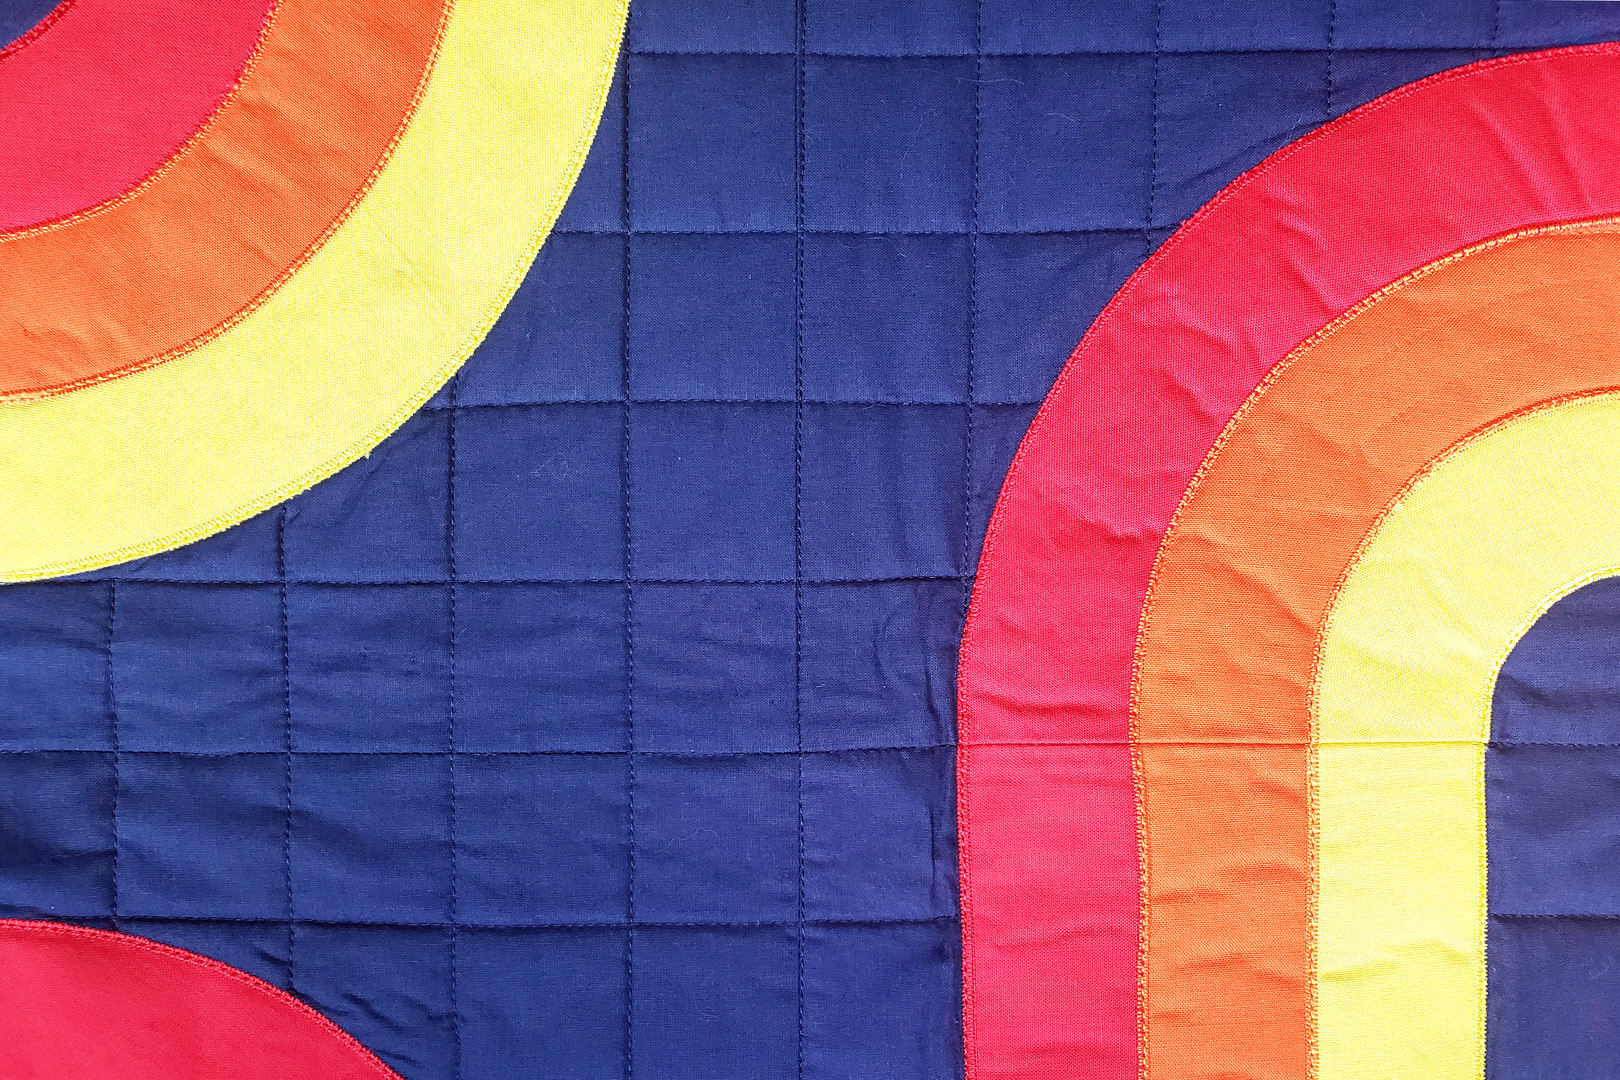
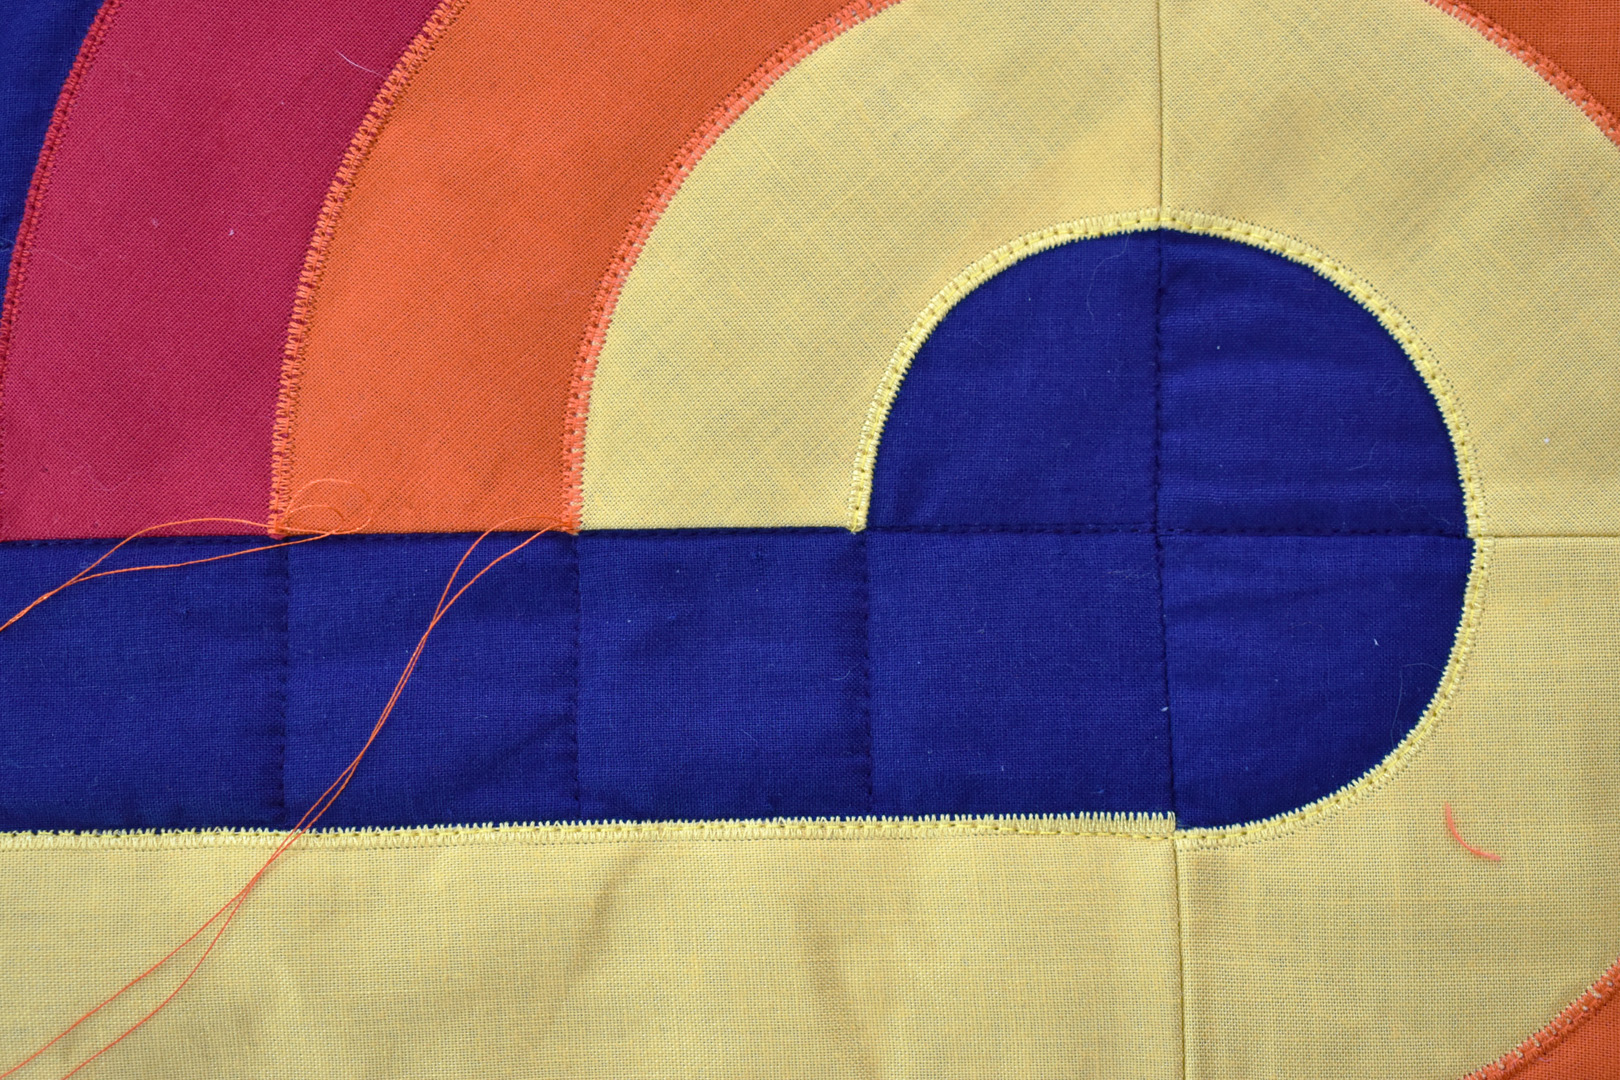
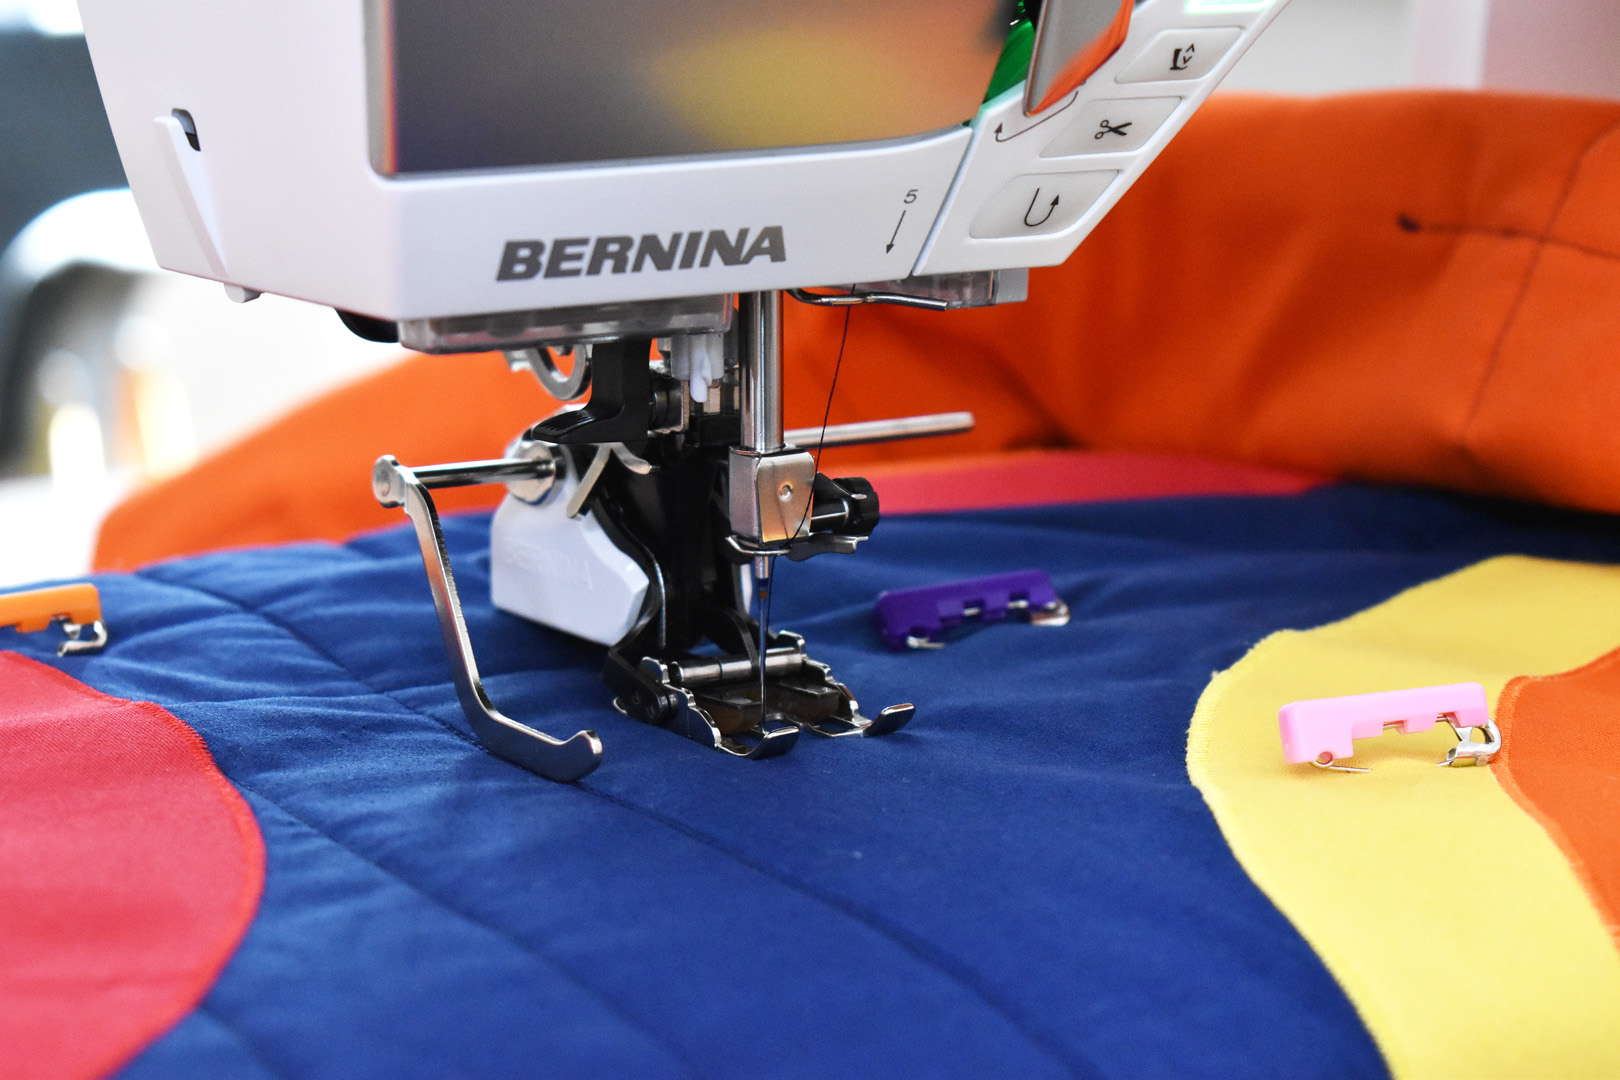
Quilting the Gridwork in the Curvy Lines Quilt
When finished with the stitch-in-the-ditch quilting, check the final block measurements. The finished blocks should measure 7 1/2″ x 7 1/2″ square. The gridwork across the background divides each block into 5 equal parts, each line measuring exactly 1 1/2″ from the others.
If your finished blocks measure much less than 7 1/2″, lines spaced at 1 1/2″ won’t fit evenly across the block. If this is the case you can do the math to find the ideal spacing. Take the total width of your finished blocks and divide that number by 5 to find the ideal spacing. You can mark the spacing across the blocks with a ruler and fabric marker, or you can use the Walking Foot #50 with guide to set the spacing – here’s how to use the guide.
Attach the quilting guide to the Walking Foot #50. Use a sewing gauge (or another very precise measure) to set the guide 1 1/2″ to the left of the needle. Thread the machine with dark blue thread to match the background color in the quilt.
Start sewing to the right of one of the stitch-in-the-ditch seams in the quilt. Align the blade along the quilted ditch and carefully sew down the quilt, making sure to start/stop when coming to the curvy lines (just follow the same instructions above for starting/stopping).
I like to quilt one patchwork section at a time, which is like sewing across from one stitch-in-the-ditch seam to the next. Then I stop, bury all the threads in the section, and move on to the next section. Keep quilting the straight lines all across one direction of the quilt until finished.
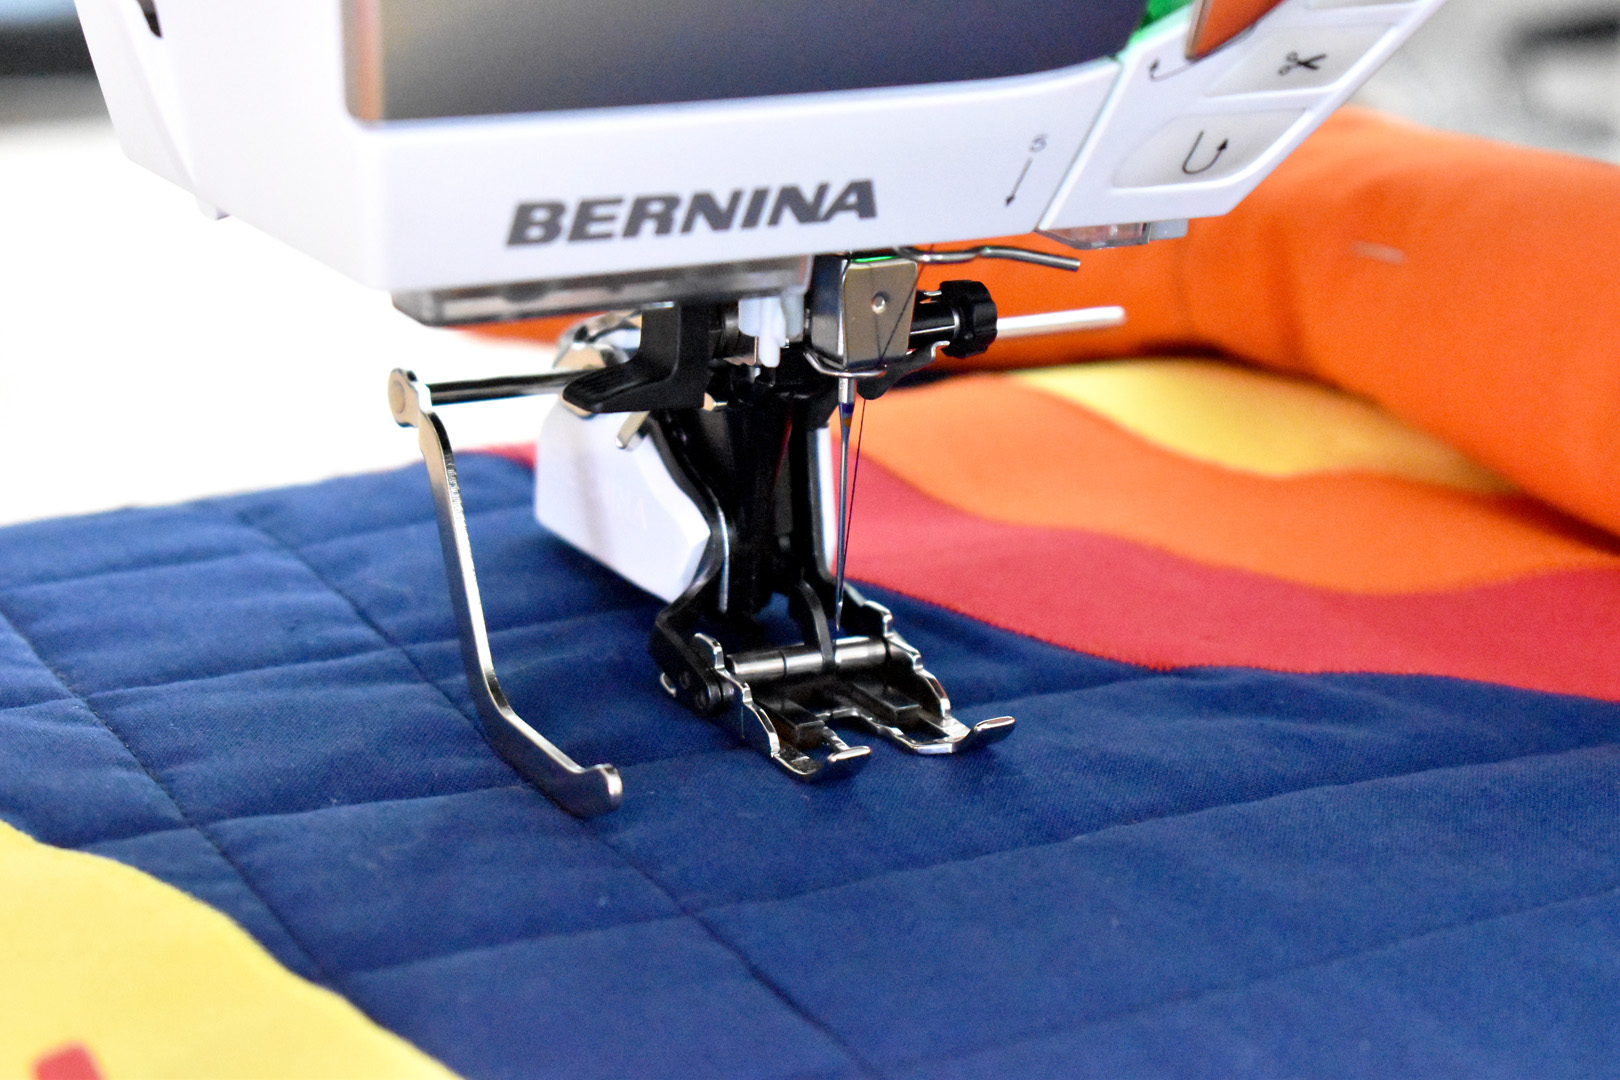
Repeat this process to quilt the straight lines in the other direction. When the gridwork is completely quilted I move on to quilting on the curvy striped lines.
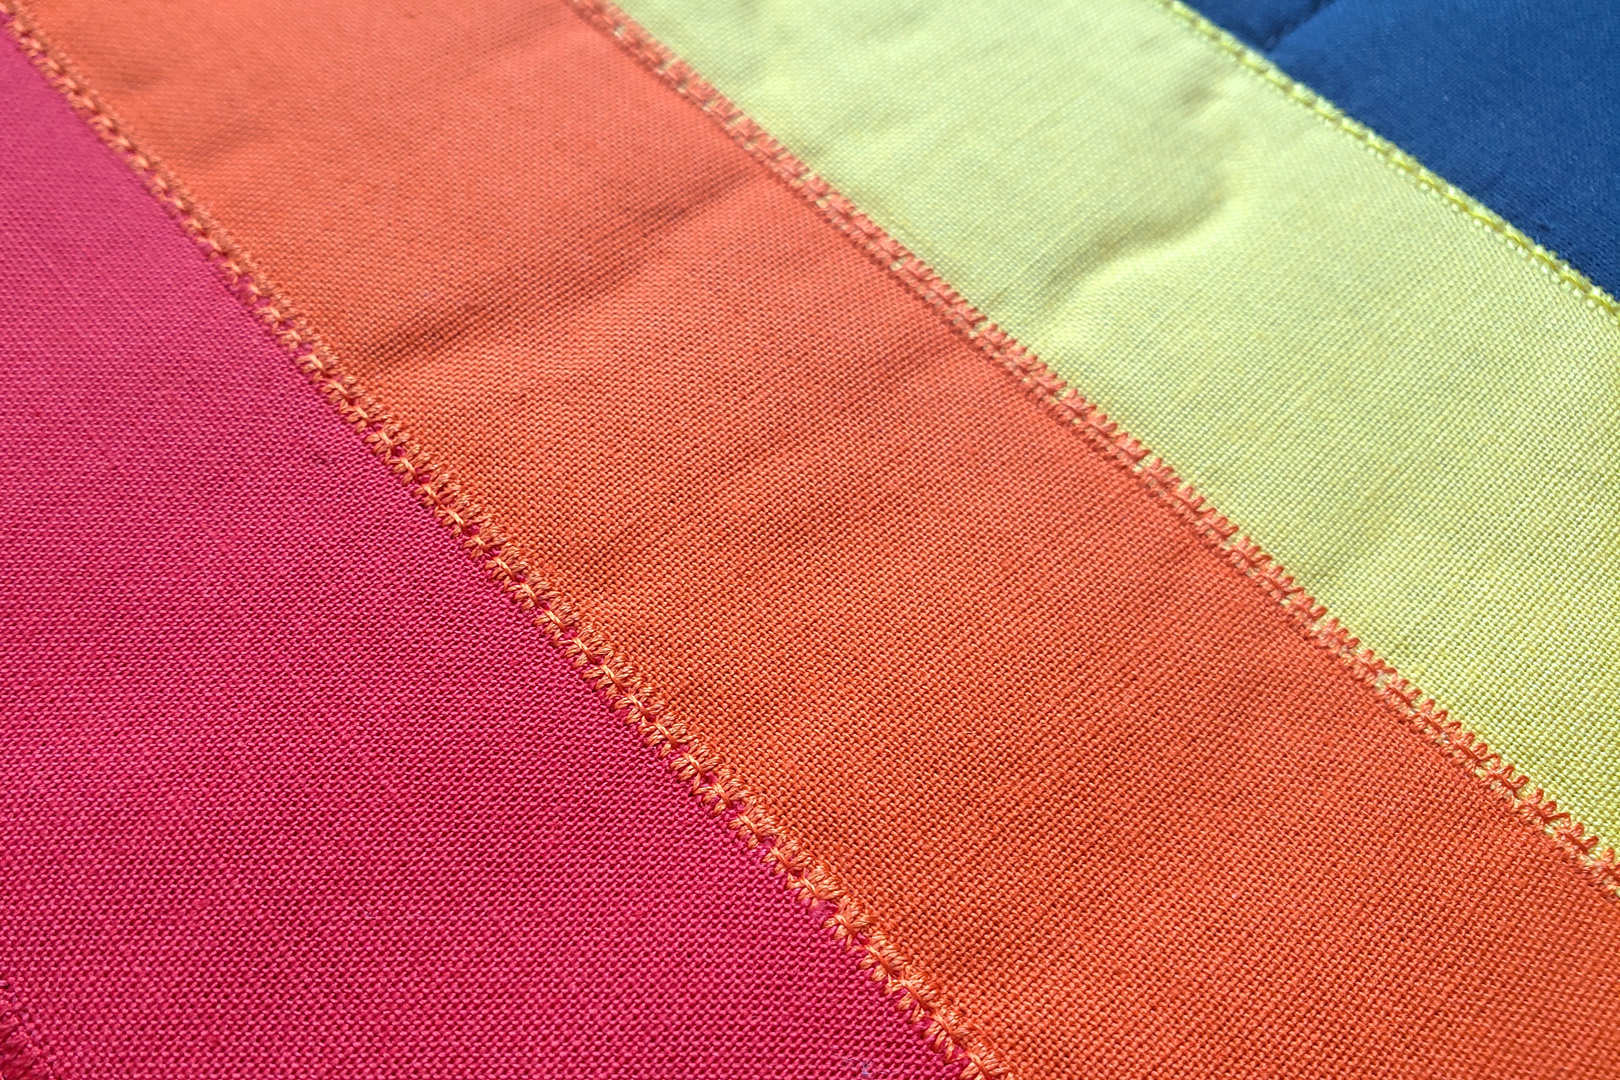
Quilting on top of the zigzag stitches creates a second layer that brings a bit of texture to the quilt. Remove the seam guide from the Walking Foot #50 for this step, you don’t need the guide and it will get in the way.
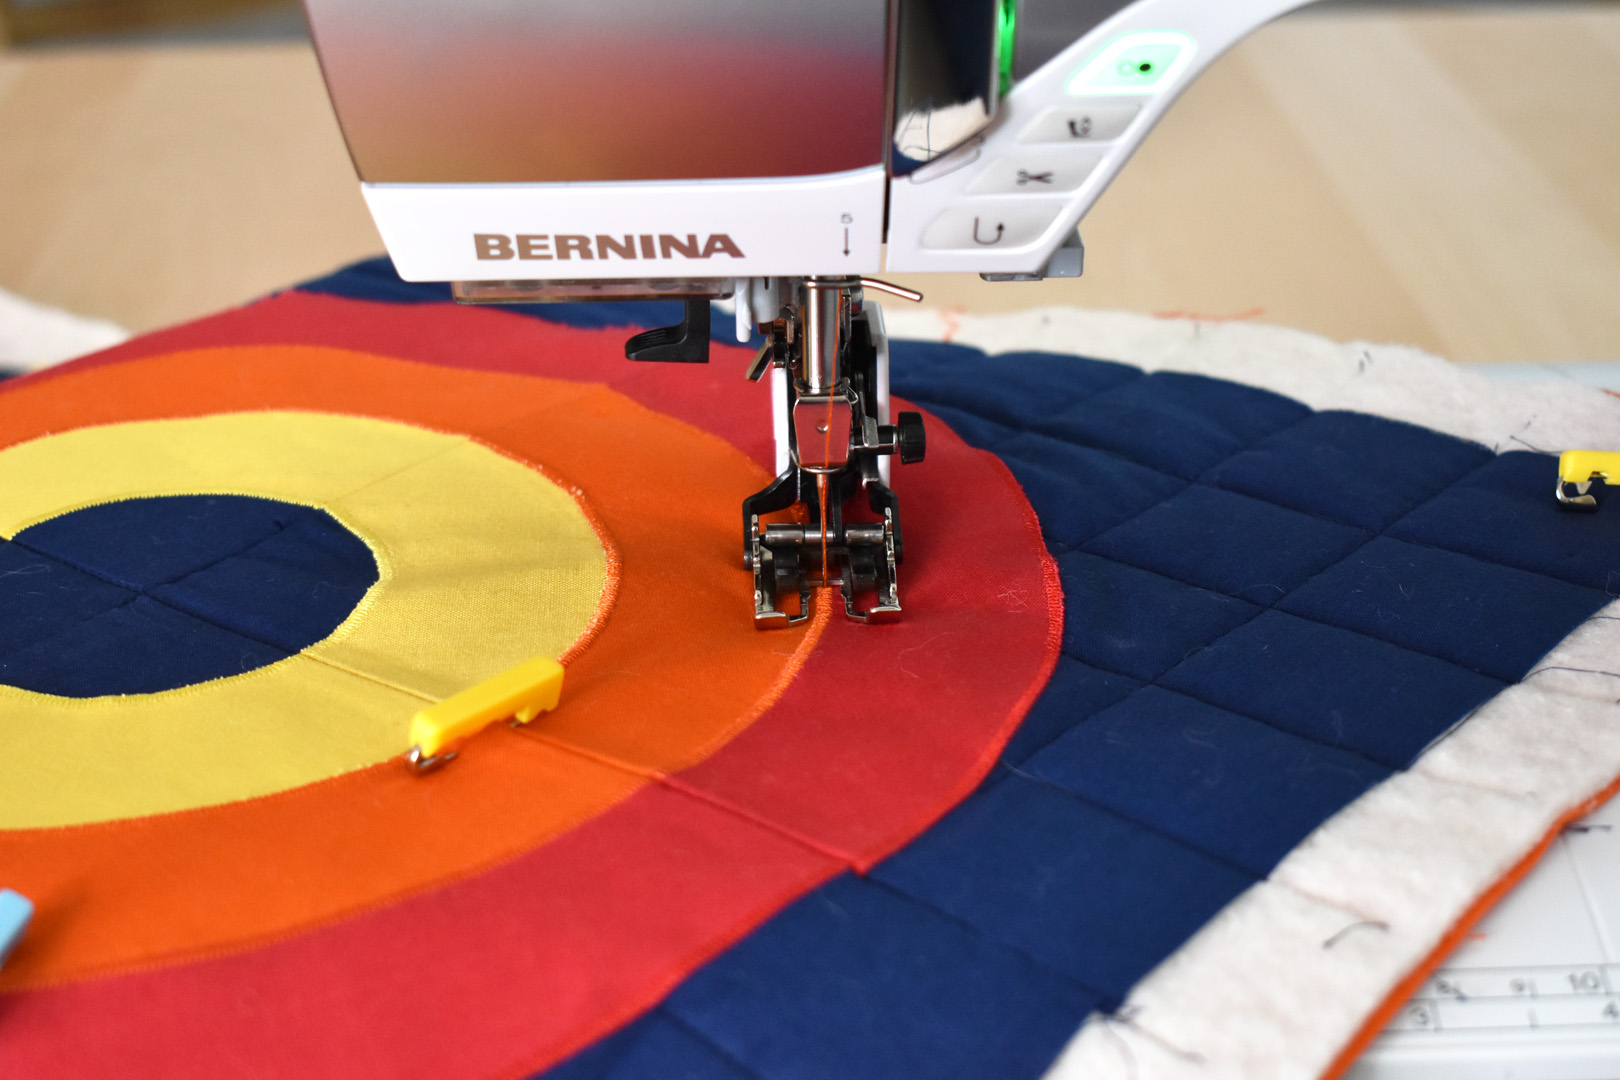
Thread the machine with the same thread that was used to create the zigzag over the appliqué shapes. When sewing this step, it’s a good idea to slow down and take your time. Aim to stitch right in the middle of the zigzag stitches.
You can see how I roll up and adjust the extra fabric during the quilting process to keep the bulk out of the way, and to keep the surface I am sewing on as flat as possible. Remember to switch colors for each of the stripes! You will have a few starts or stops in two of the curved lines where they dead-end in the blue background of the quilt. Just follow the directions above to tie-off and bury these threads when you are finished quilting all the curvy lines. I like to give the quilt a little steam pressing with my iron using press cloth before squaring-up and trimming the edges.
Finishing the Curvy Lines Quilt
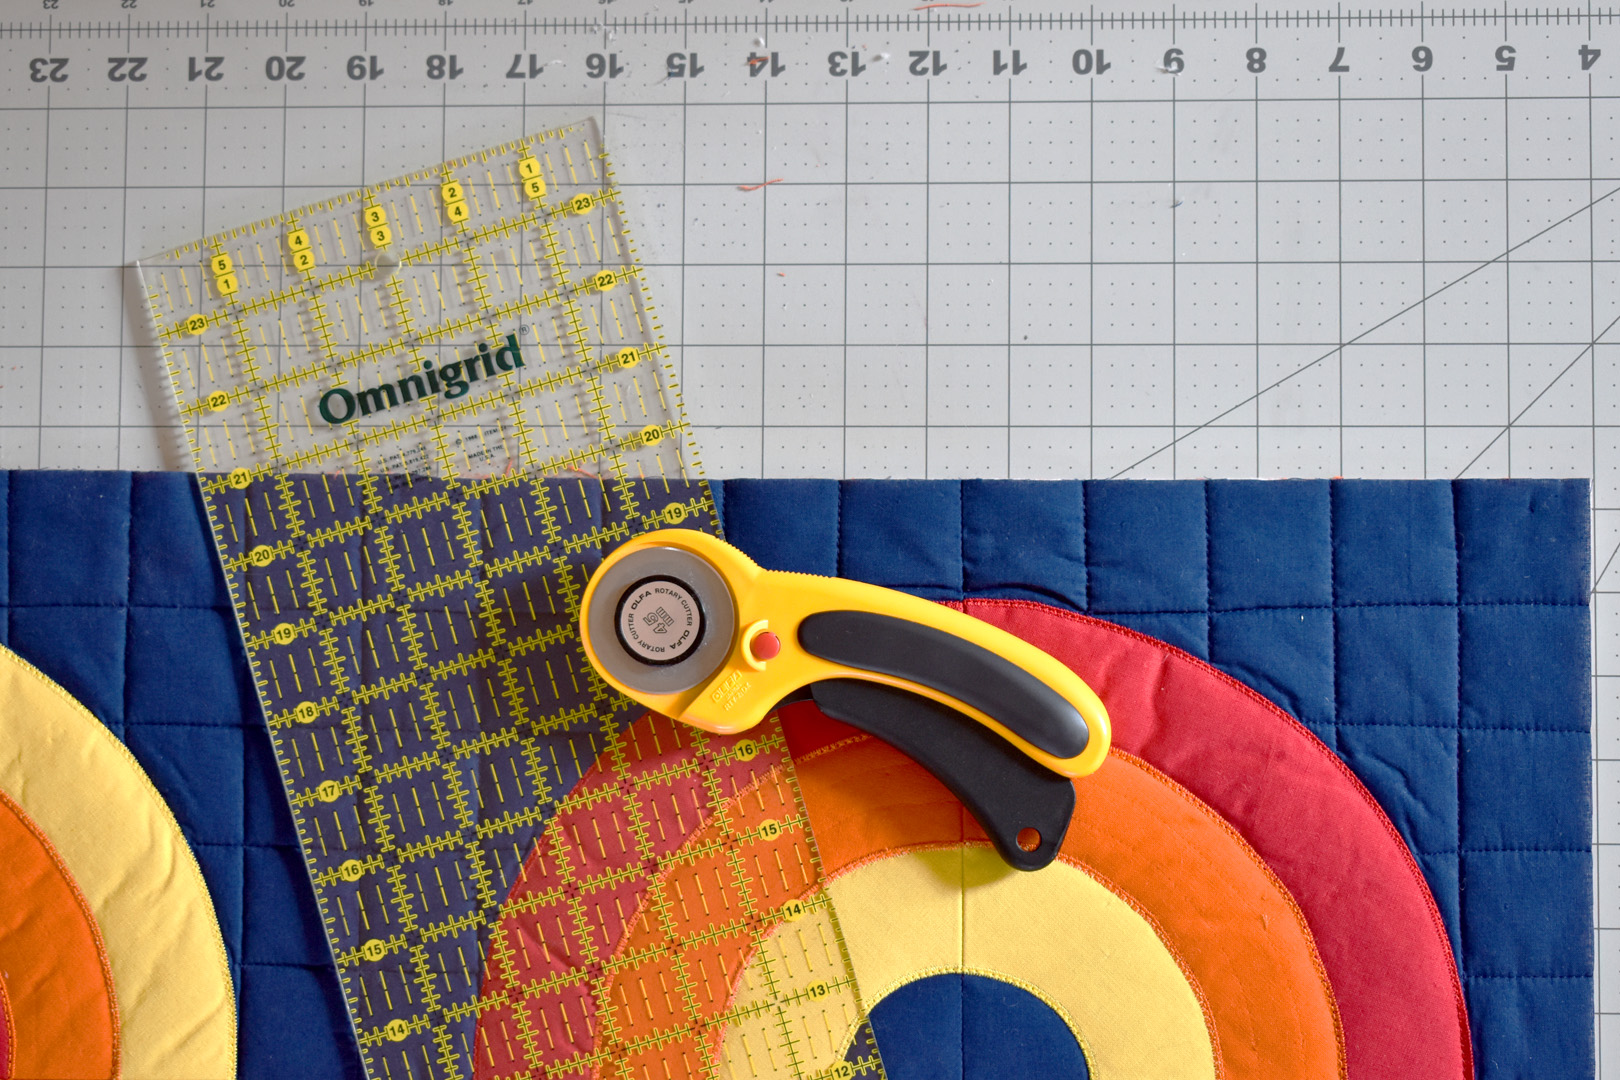
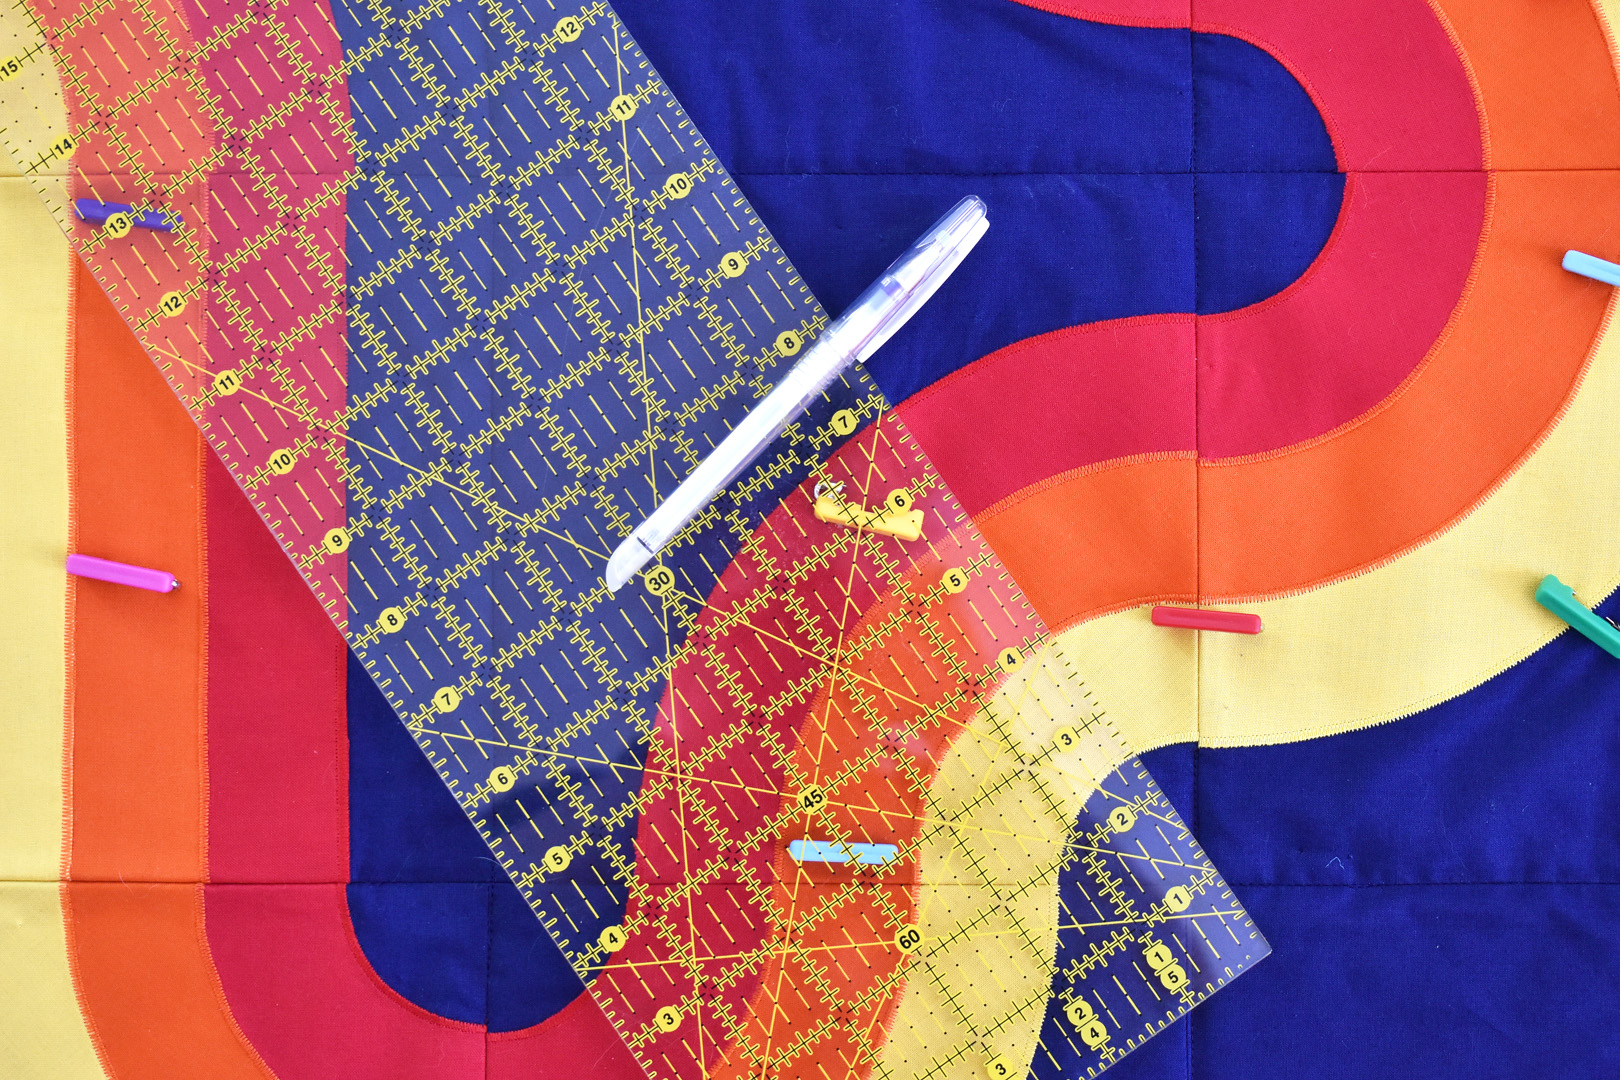
After quilting, use a long quilting ruler or straight edge with a large cutting mat and rotary cutter to trim and clean up the edges of the quilt. Make sure the quilt is squared-up by checking the corners carefully with the gridwork on the cutting mat.
I created a facing for this quilt, a kind of binding attached to the backside that looks invisible from the front. To make the facing, begin by cutting 4 width-of-fabric strips from the same dark blue backing fabric, each 2 1/2″ wide. Fold these strips in half the long way and press well. Cut the folded over strips to about the same width as the quilt. Then follow this detailed, step-by-step tutorial for how I make this binding in my mini-quilt tutorial here (scroll to the bottom of the post to find the “Making a Quilt Facing” section).
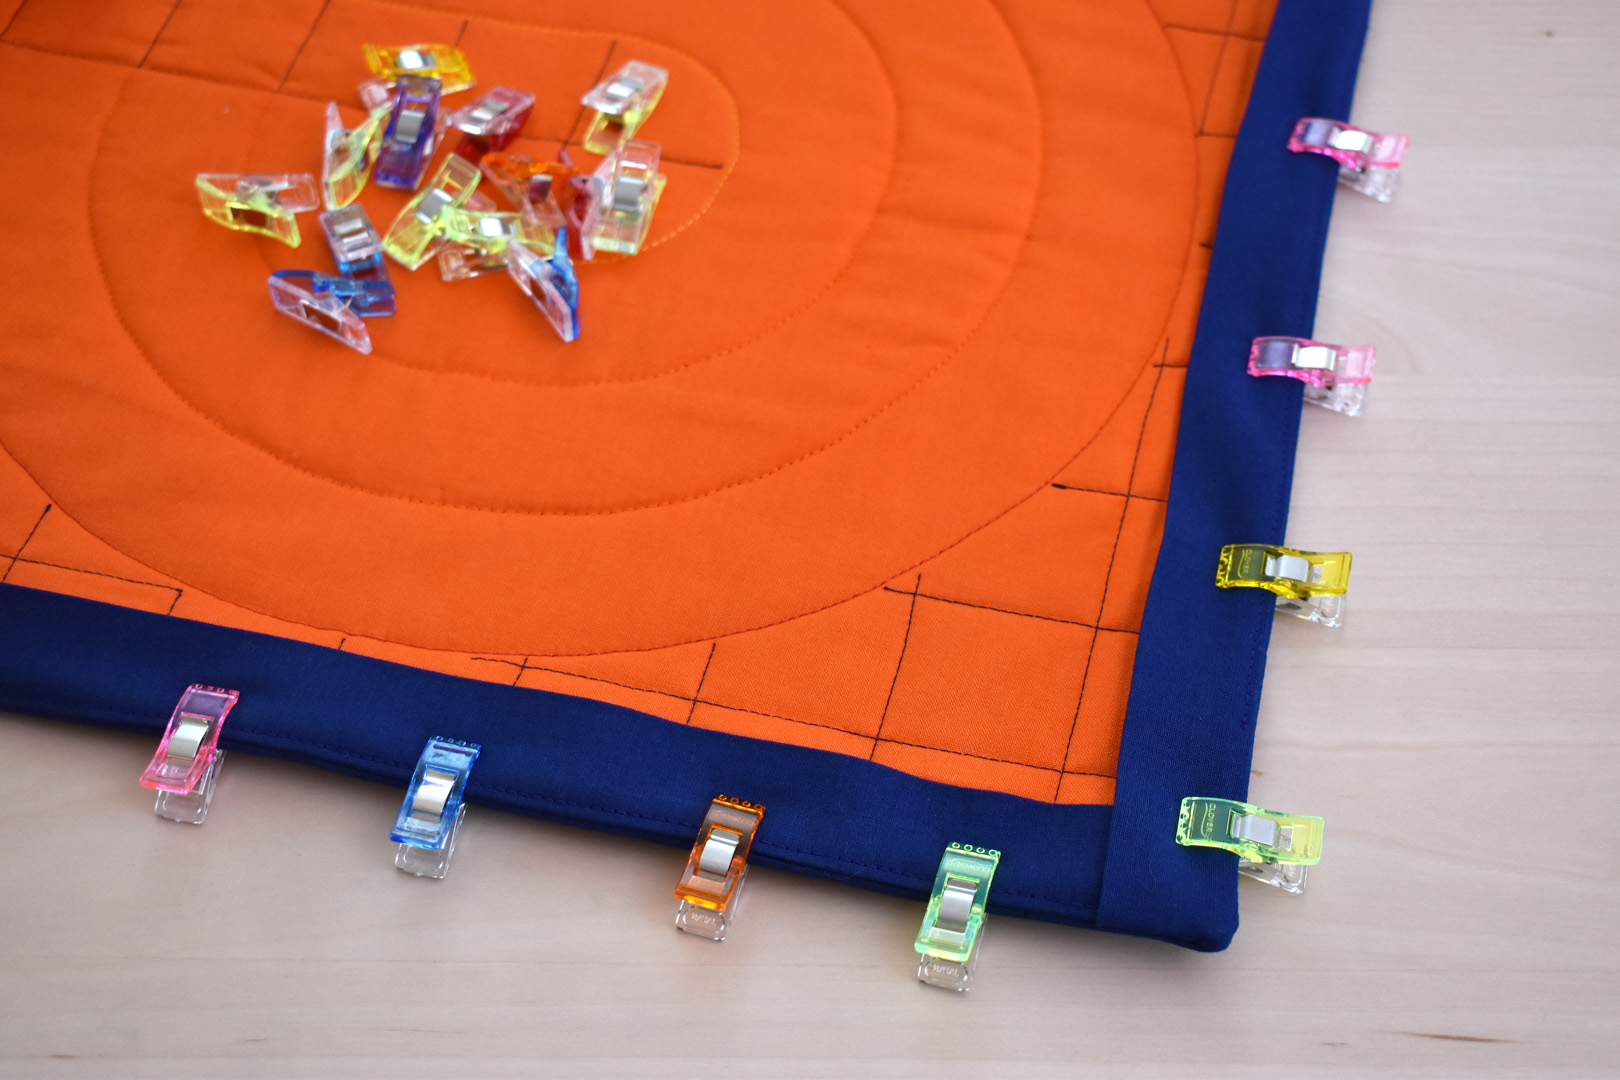
Once the facing is complete, secure the facing to the back side with hand stitches (I use a small blind stitch, but any stitch that won’t show will work). Give the facing a final pressing with steam and a press cloth.

Enjoy the finished Curvy Lines Quilt!