Curvy Lines Quilt Tutorial, Part 1
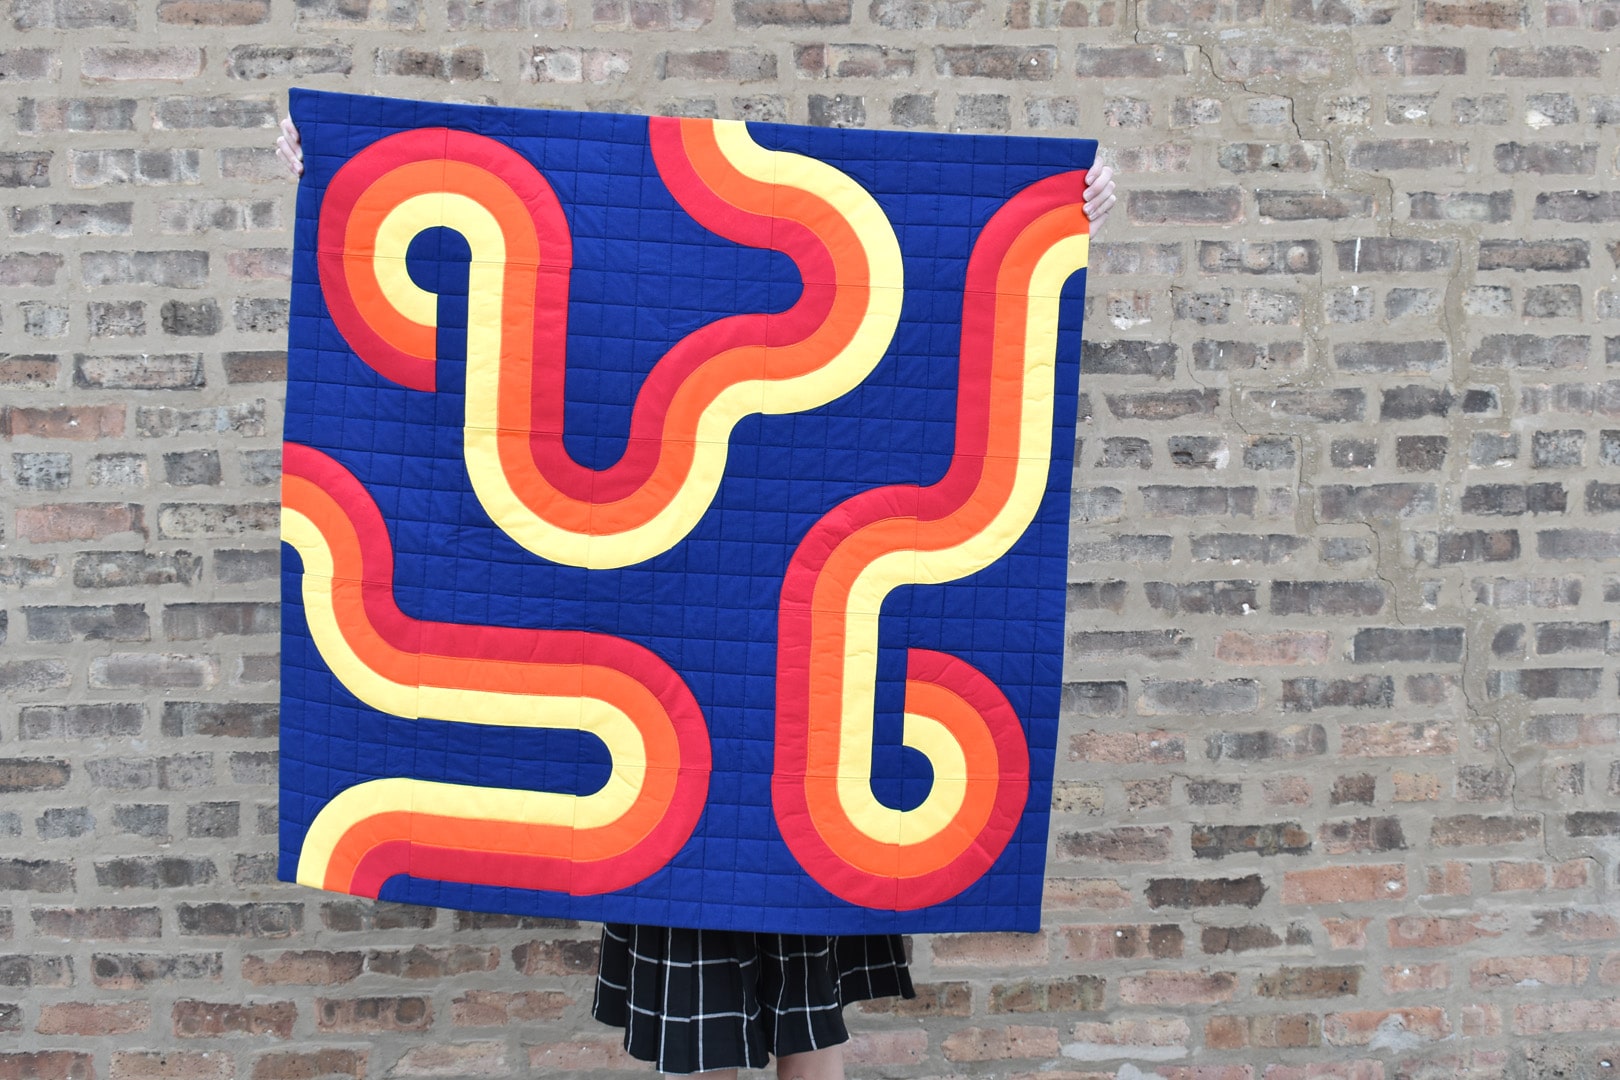
Simple striped appliqué blocks come together to create this fun, retro Curvy Lines Quilt. The inspiration for this design came directly from big, bold 1960’s supergraphics designed by the likes of Barbara Stauffacher Solomon and Verner Panton, who used bright colors and simple shapes to create large-scale patterns. Follow along and I’ll show you how to make a Curvy Lines quilt in this two-part tutorial. In this post, learn how to make the simple curved and straight striped blocks that build the design with downloadable templates. In the next post, find out how to finish the project with quilting and a facing. Read on to find the full list of materials and get started!
Materials to Make a Curvy Lines Quilt
- 1 1/2 yards fabric for background base blocks and facing (I used a dark navy blue)
- 1/2 yard each red, orange, and yellow fabric for appliqué stripes
- 1 1/4 yard backing fabric (I used orange)
- 1 1/2 – 2 yards Wonder Under by Pellon
- OESD Medium weight tear away stabilizer
- Thread in colors to match red, orange, and yellow fabrics (I used Isacord embroidery thread)
- All-purpose sewing thread matching background fabric (dark navy blue)
- 40″ x 40″ piece of 100% cotton quilt batting (or crib sized pre-cut batting)
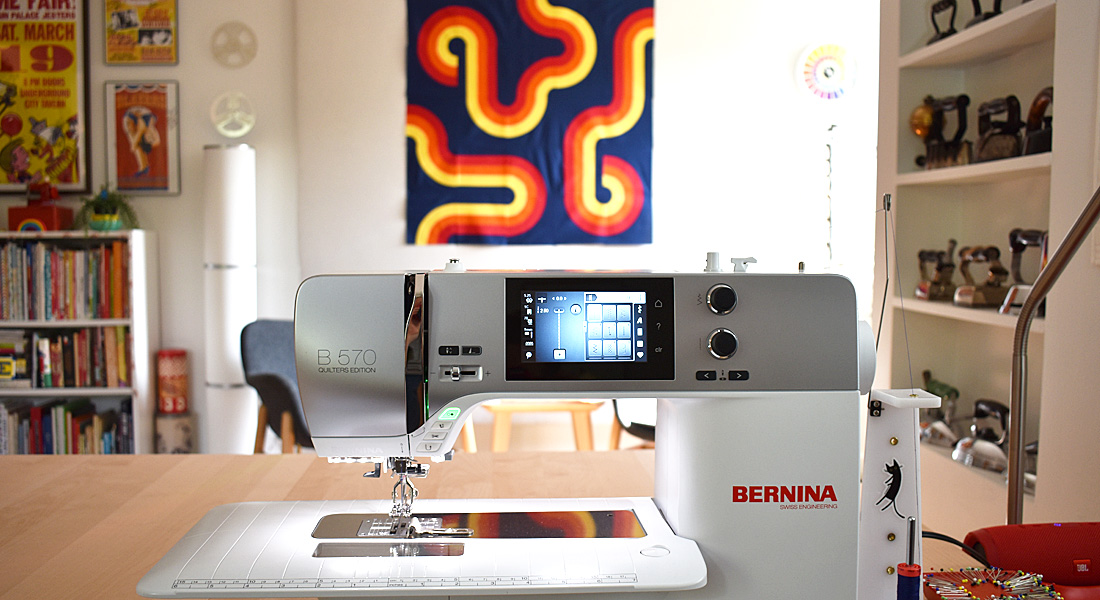
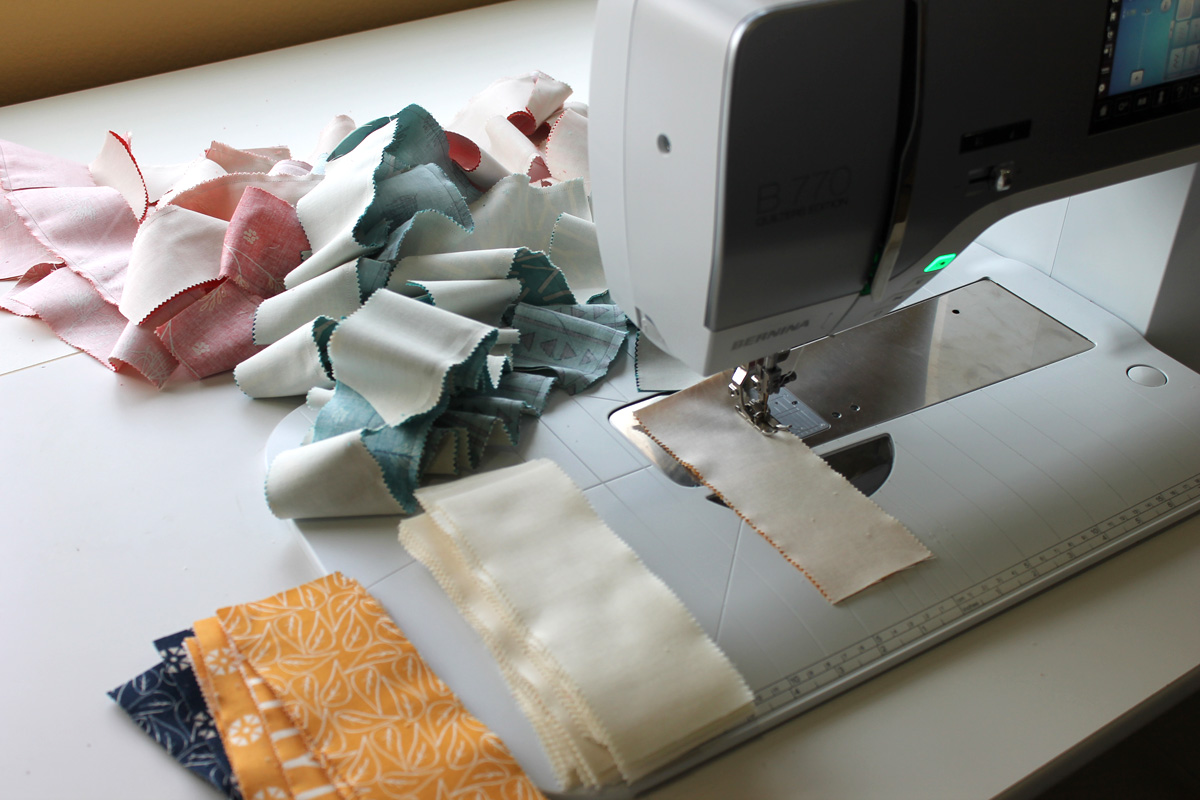
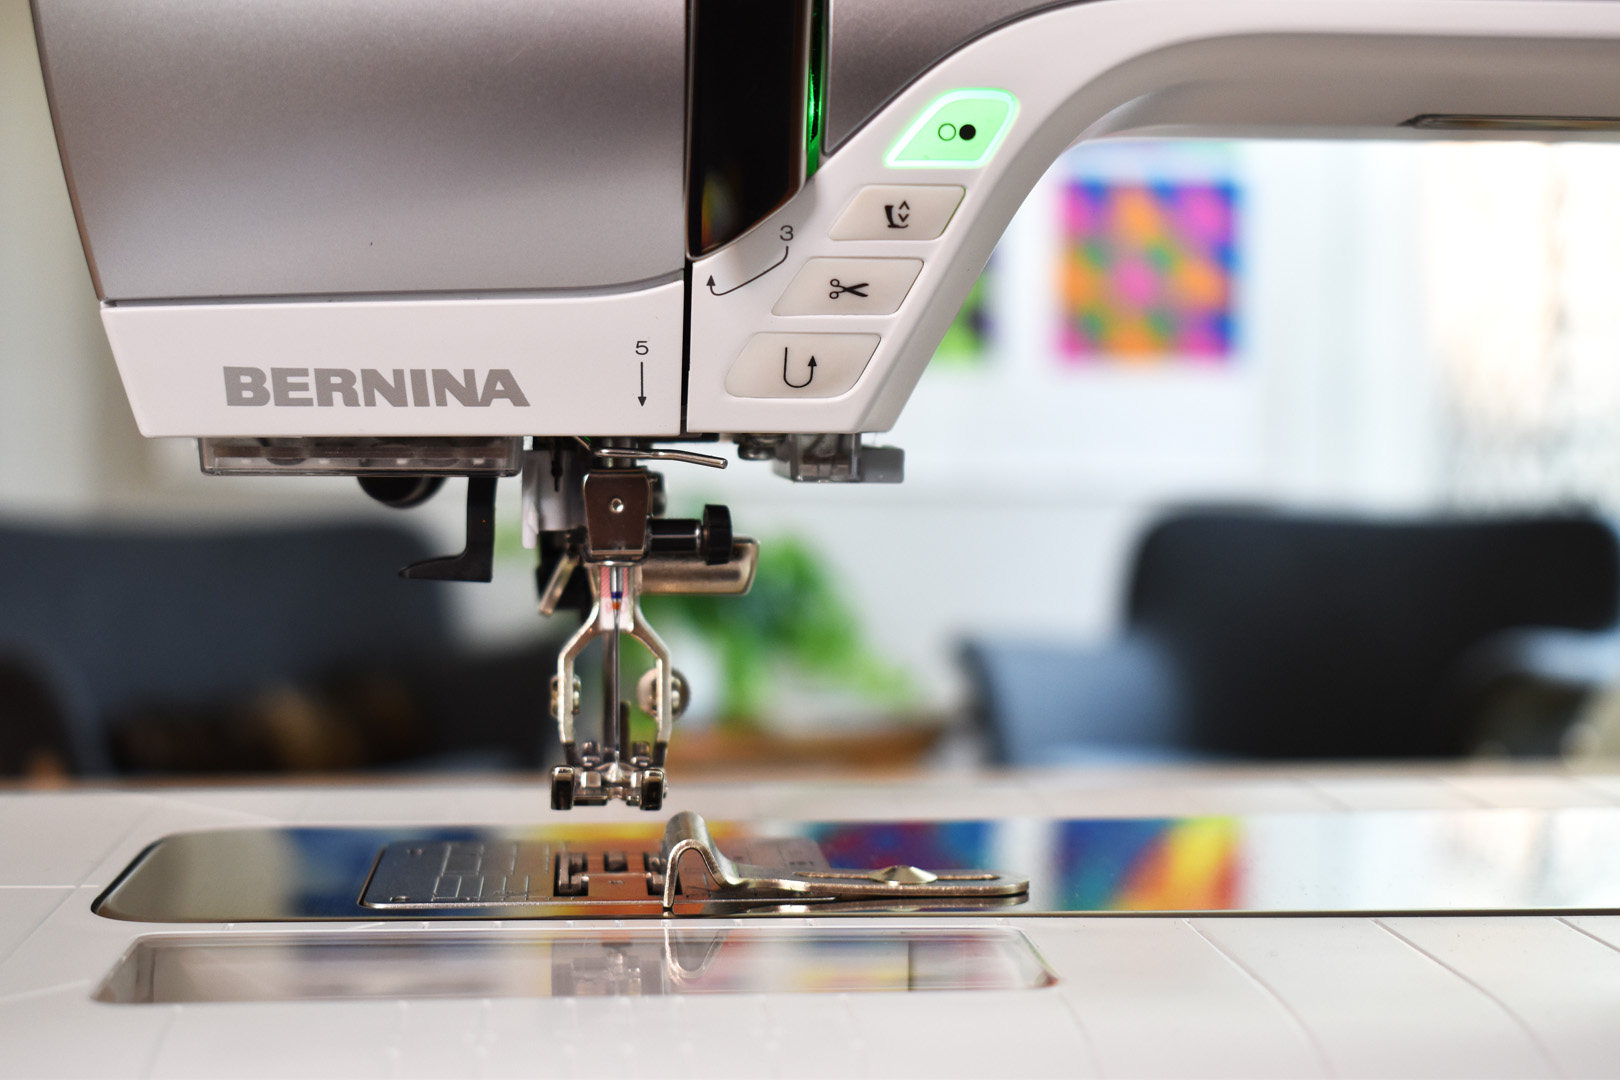
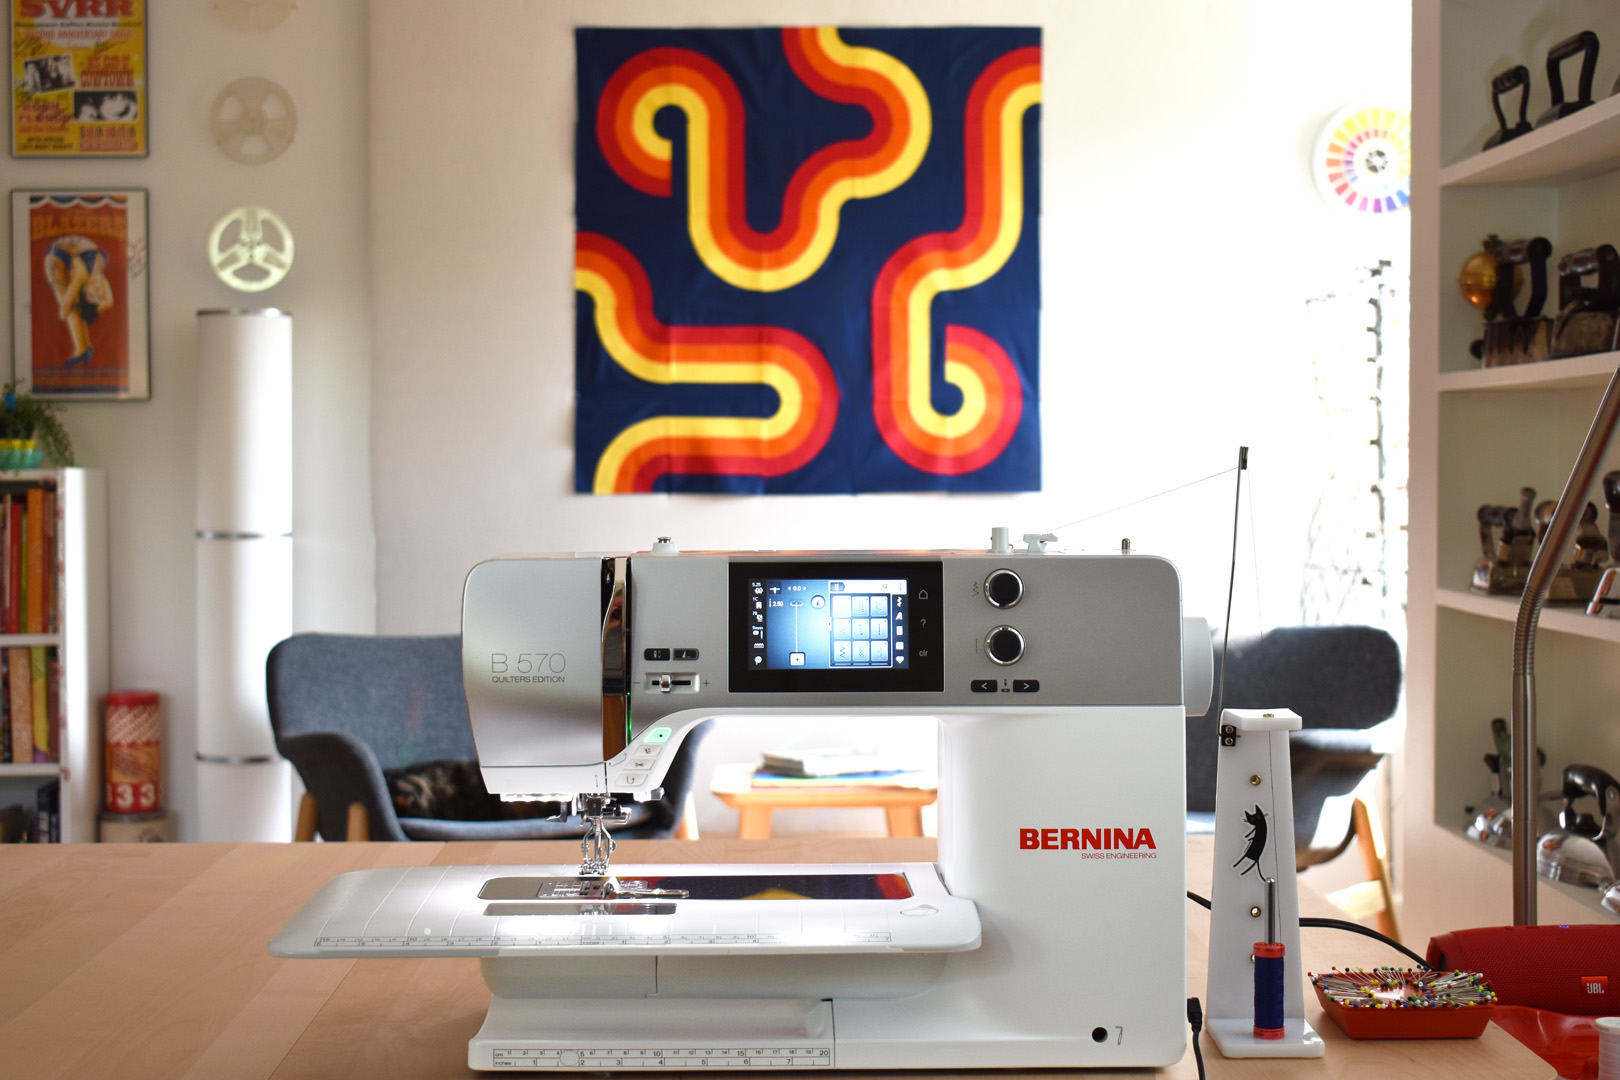
- Sewing machine (I use a BERNINA 570 QE)
- Appliqué foot #23
- Patchwork foot of choice (I use #97D with seam guide)
- Walking foot #50
- Pencil
- Lightbox (I use a Daylight Lightbox)
- Cutting mat/rotary cutter/quilting ruler
- Print out the Curvy Lines Quilt Templates here:
Create Appliqué Blocks for the Curvy Lines Quilt
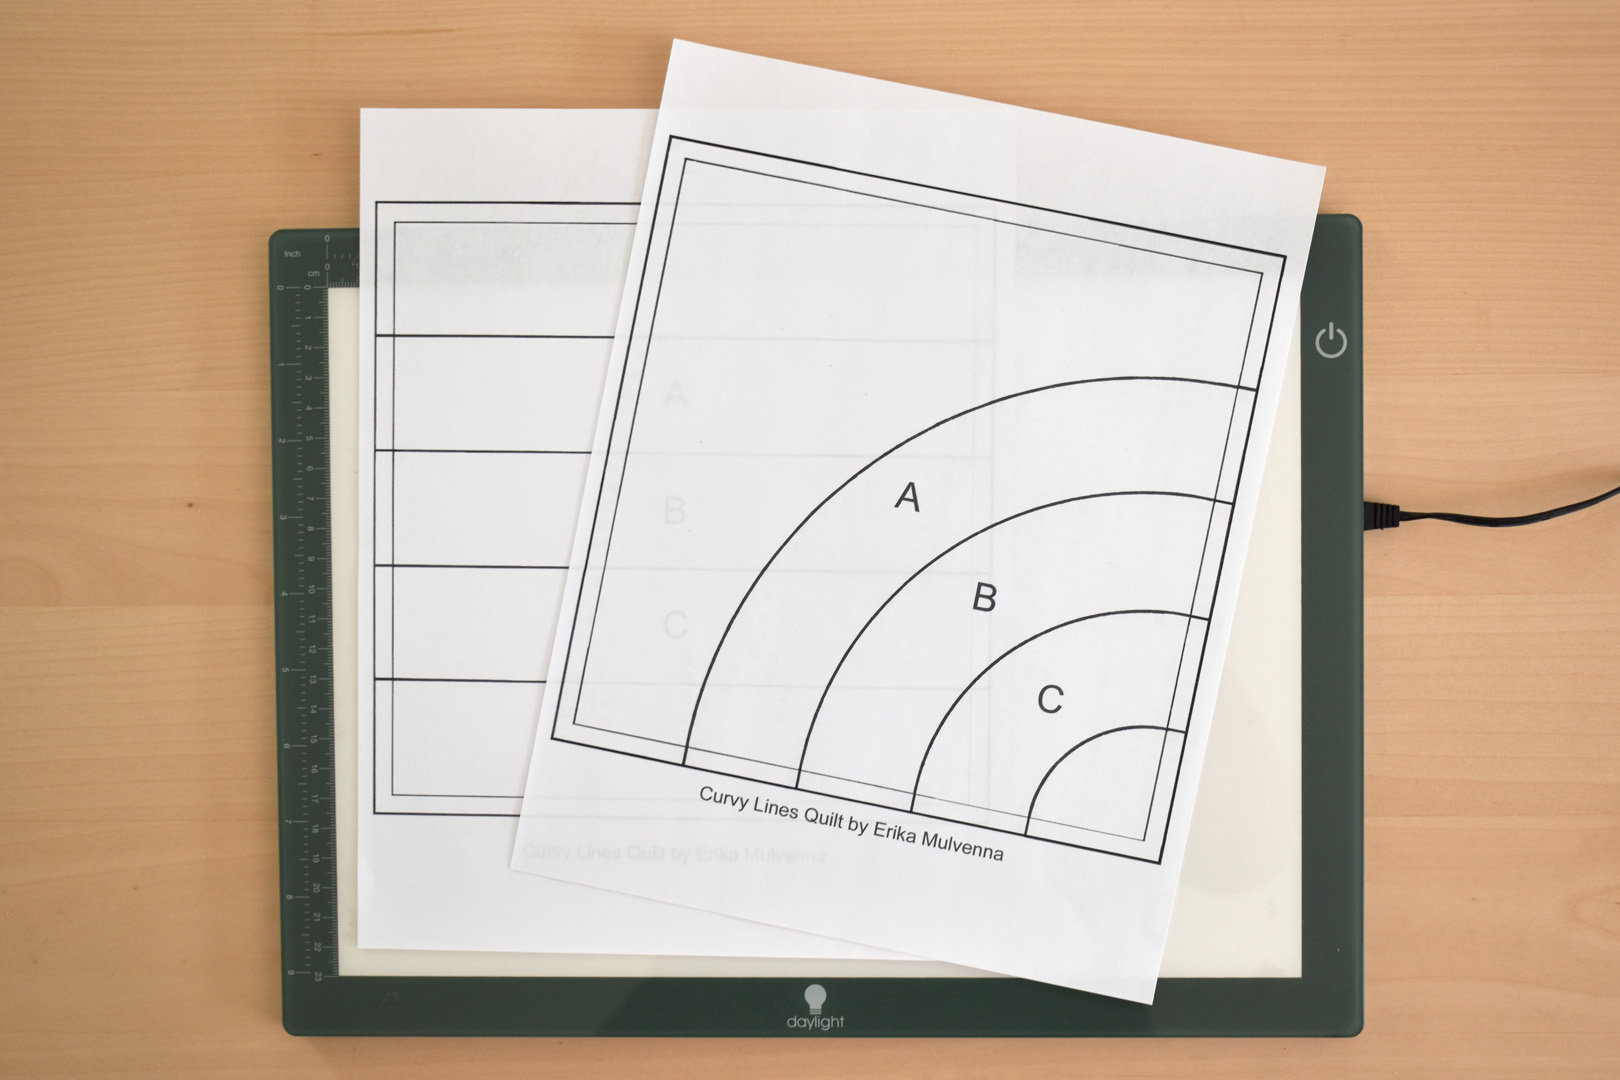
Print out the two Curvy Lines Quilt templates at 100%. Make sure not to “stretch to fit” when printing as this setting will distort the templates. You can double-check the templates by measuring the outside edge of the template after printing, which should measure approximately 8″ square. If one dimension is off on the printed template by + or – 1/8 of an inch, the template will still work for this process.
Prepare the fabrics for making the appliqué blocks. Press the blue, red, yellow, and orange fabrics. Using the rotary cutter, cutting mat, and quilting ruler, cut 25 squares 8″ x 8″ of the dark navy blue fabric (the background color in the quilt), being mindful to cut as precisely as possible.
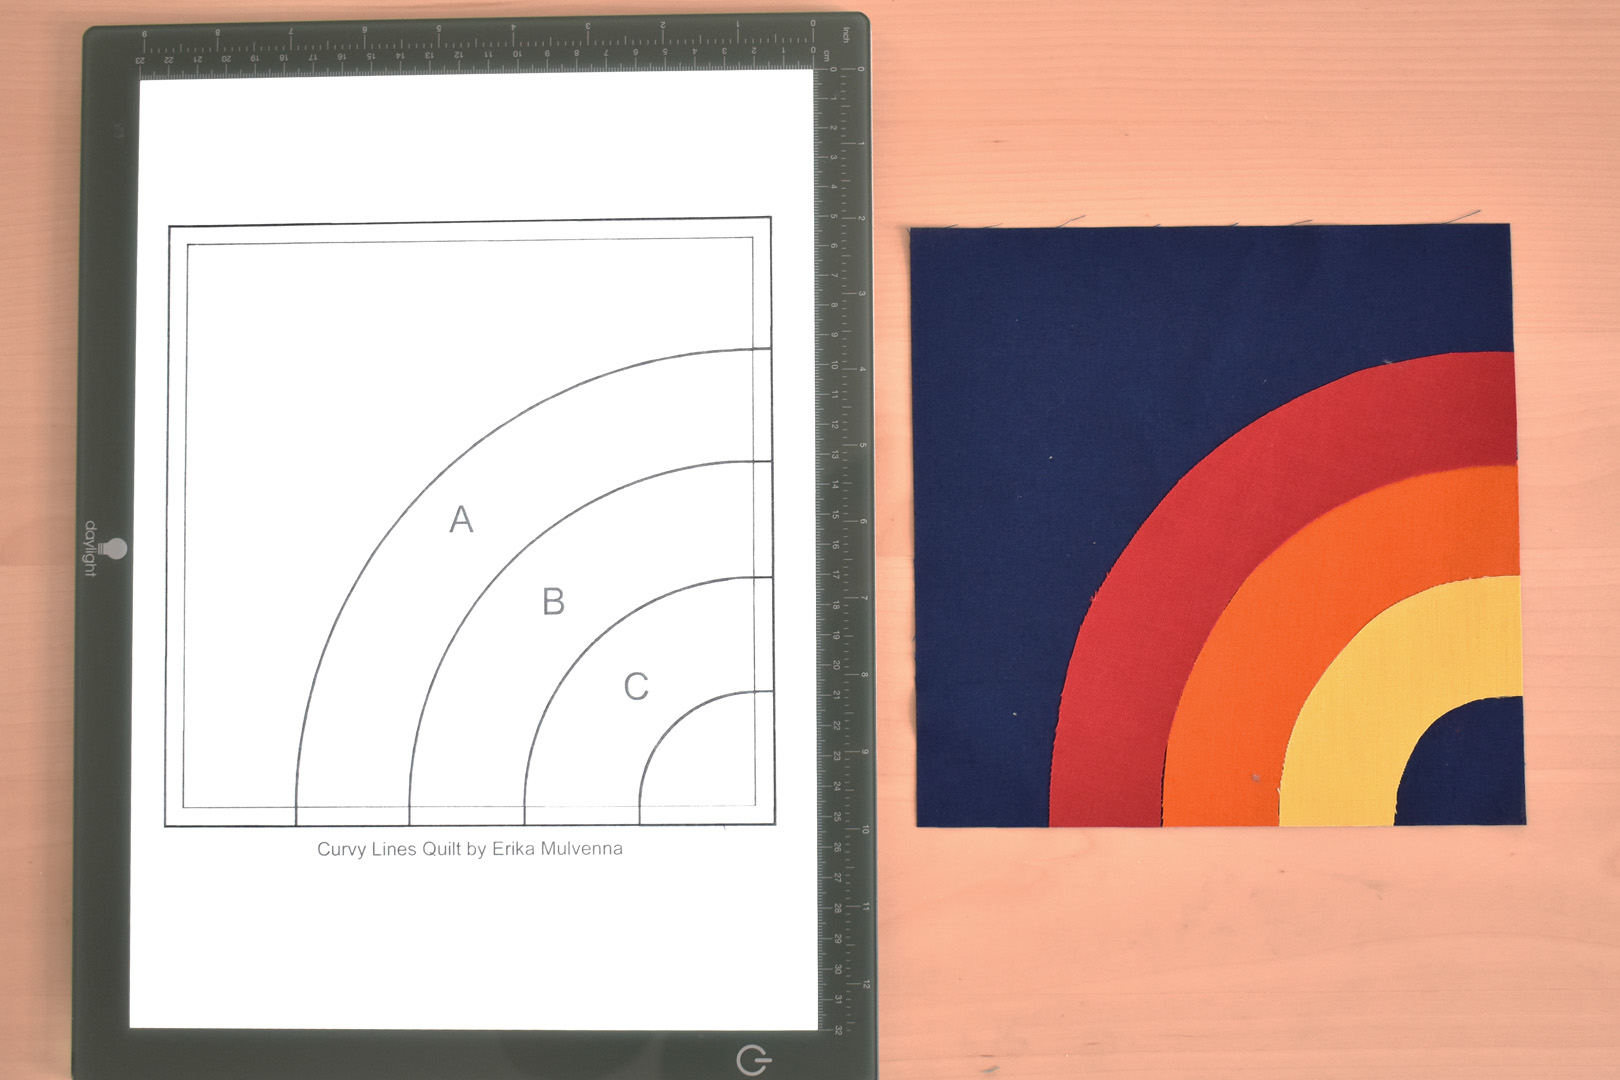
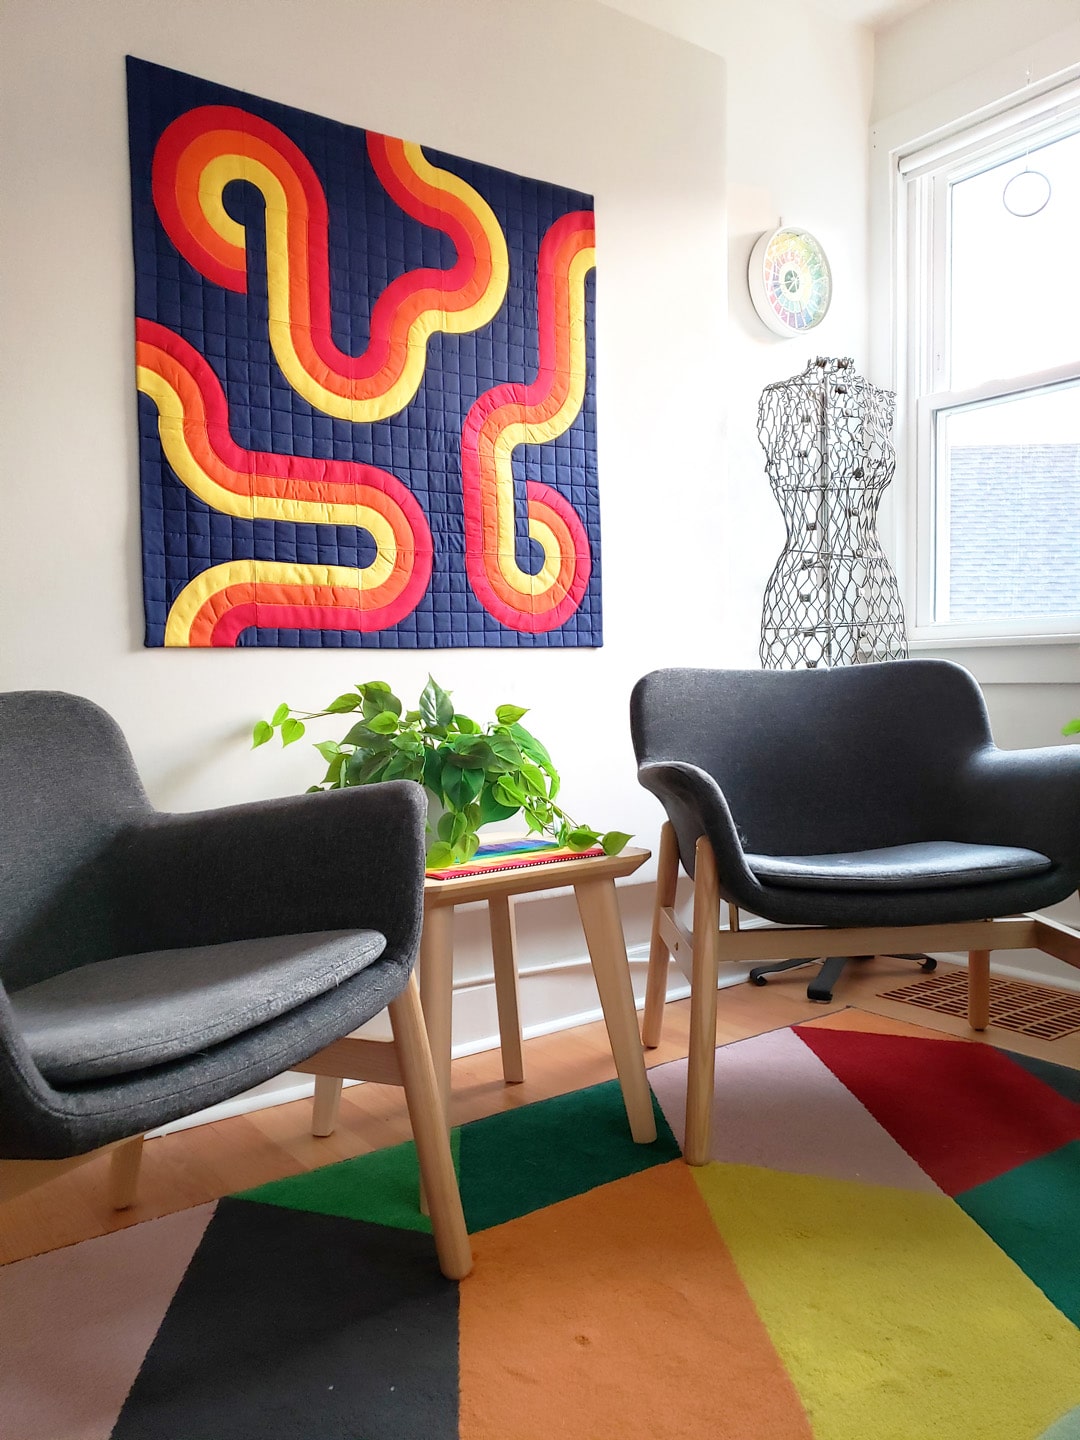
Use the lightbox, the template, and the Wonder Under to create the cut-out appliqué shapes. You will be creating three different-looking blocks for the Curvy Lines Quilt, seen in the photo below.

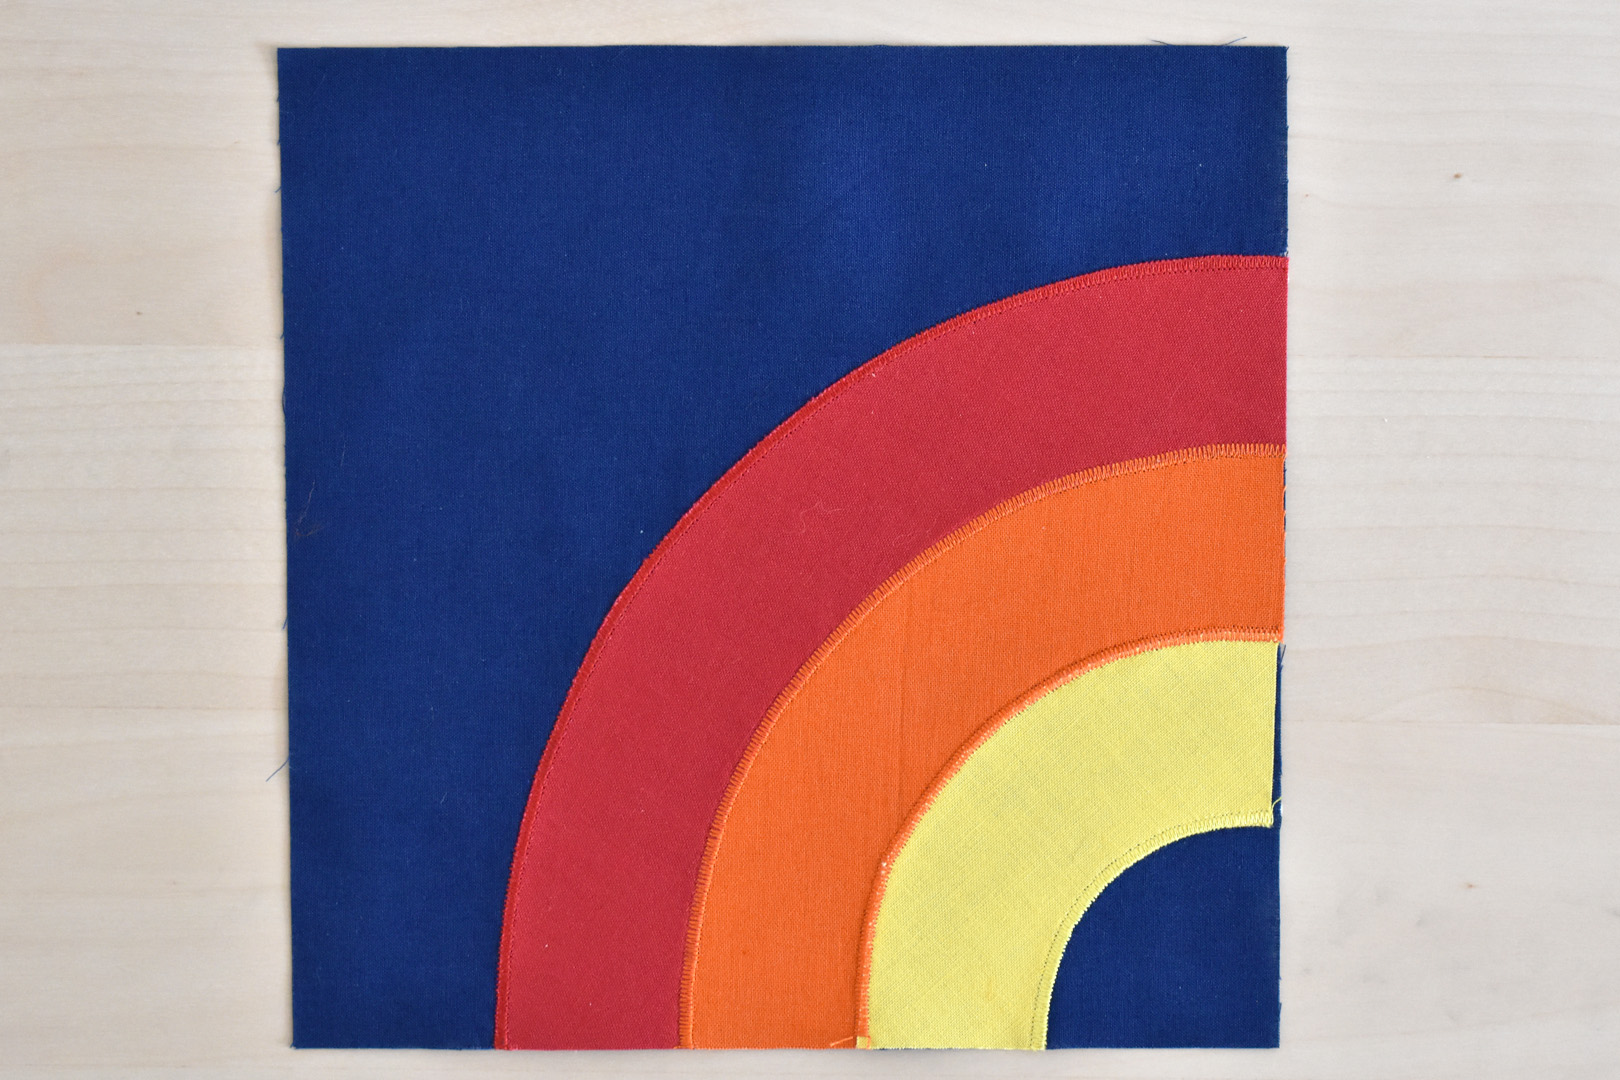
From left to right, block #1 is curved with red at the top, orange in the middle, and yellow at the bottom. Block #2 is three stripes with orange in the middle. Block #3 is curved with yellow on the top, orange in the middle, and red at the bottom.
- For block #1, create a total of 13 blocks
- For block #2, create a total of 5 blocks
- For block #3, create a total of 7 blocks
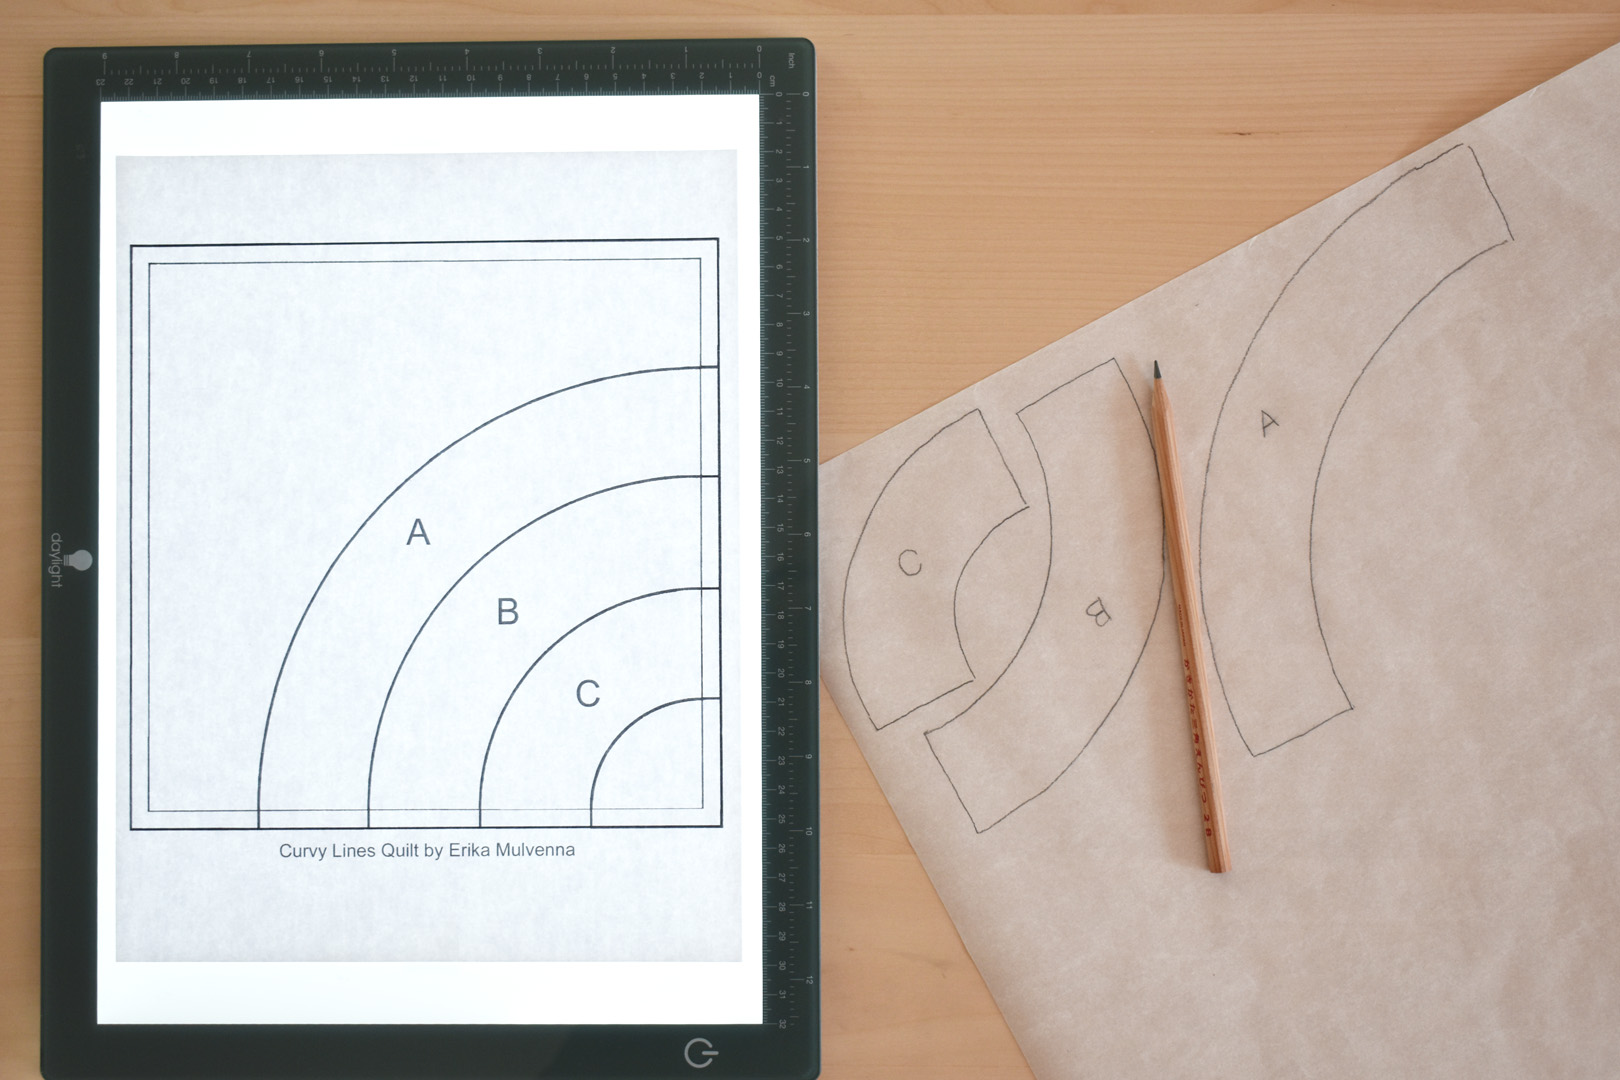
To create block #1, use the curved template with A in red, B in orange, and C in yellow. Place the template on the lightbox and trace each of the shapes A, B, and C on the paper backing side of the Wonder Under. Be sure to trace around the outer edge of each shape A, B, and C with your pencil. Tip: since you are creating a total of 13 of block #1, you can trace 13 of each A, B, and C shape at the same time.
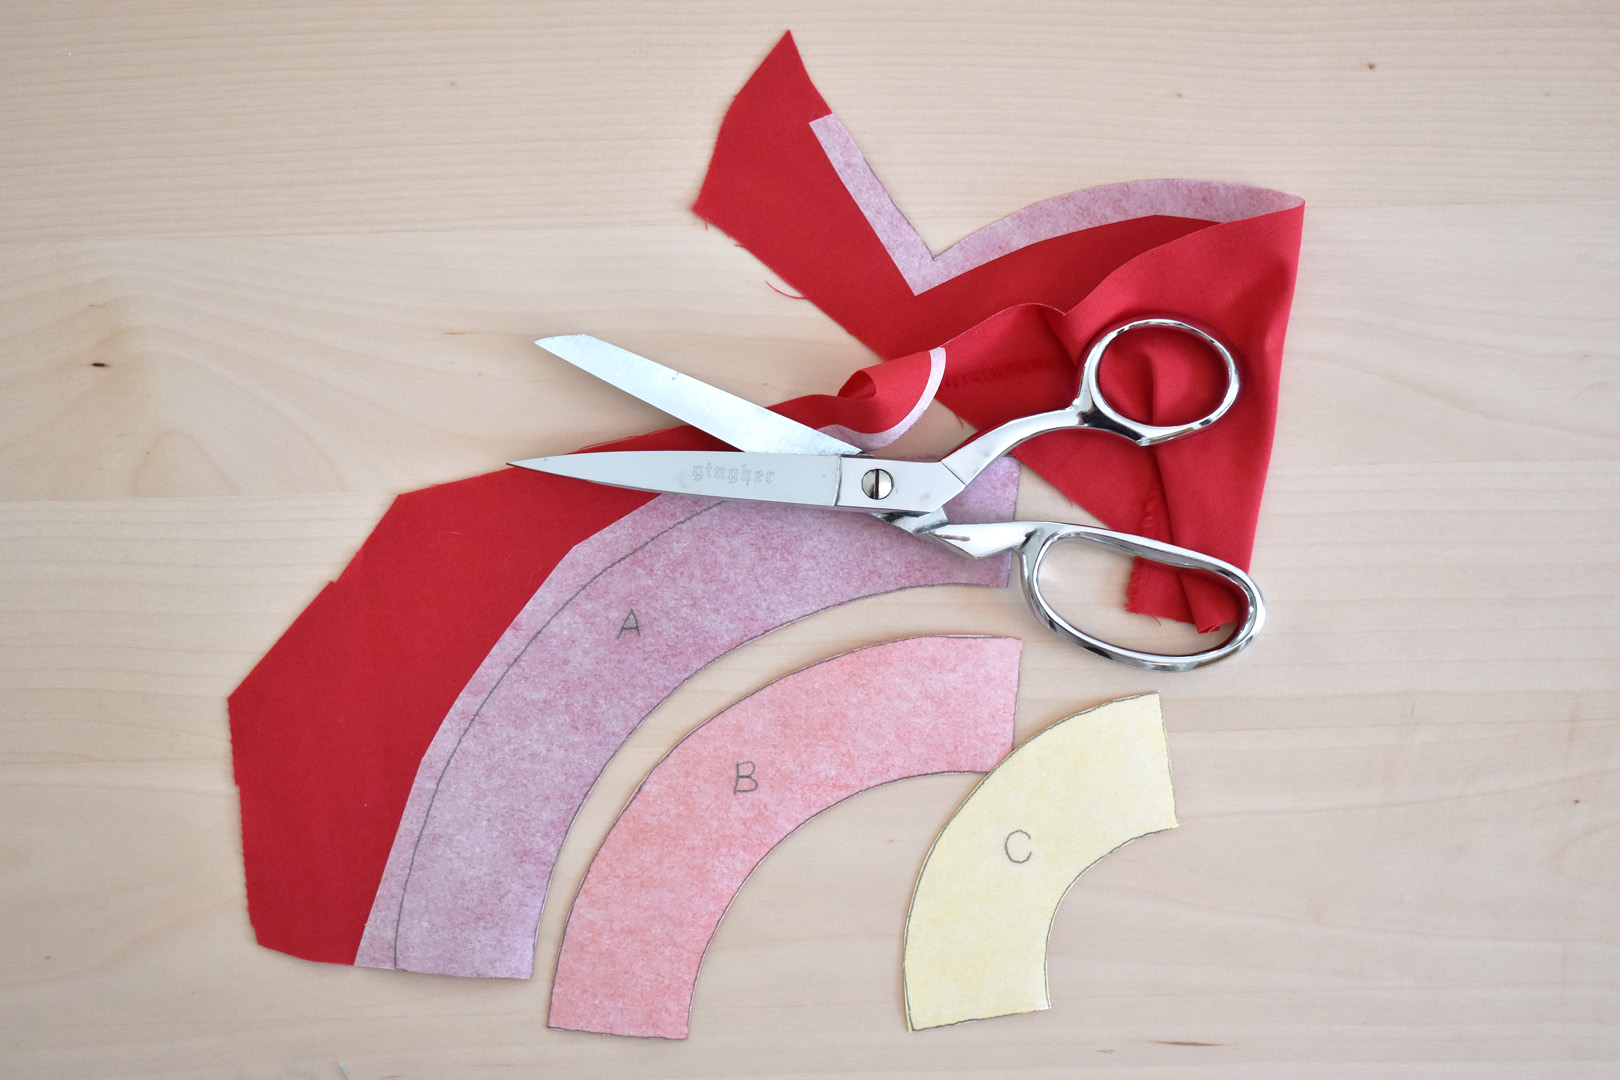
Following the manufacturer’s instructions for using the Wonder Under, cut out around the traced shapes leaving at least 1/4″ around the pencil line, and fuse to the back of each color of fabric. Carefully cut around the traced pencil line on each shape.
Grab one dark blue block of fabric and one shape each; A in red, B in orange, and C in yellow.

Place the square of dark blue fabric directly on the template. The lightbox makes it easy to see the shapes through the fabric for the next steps.
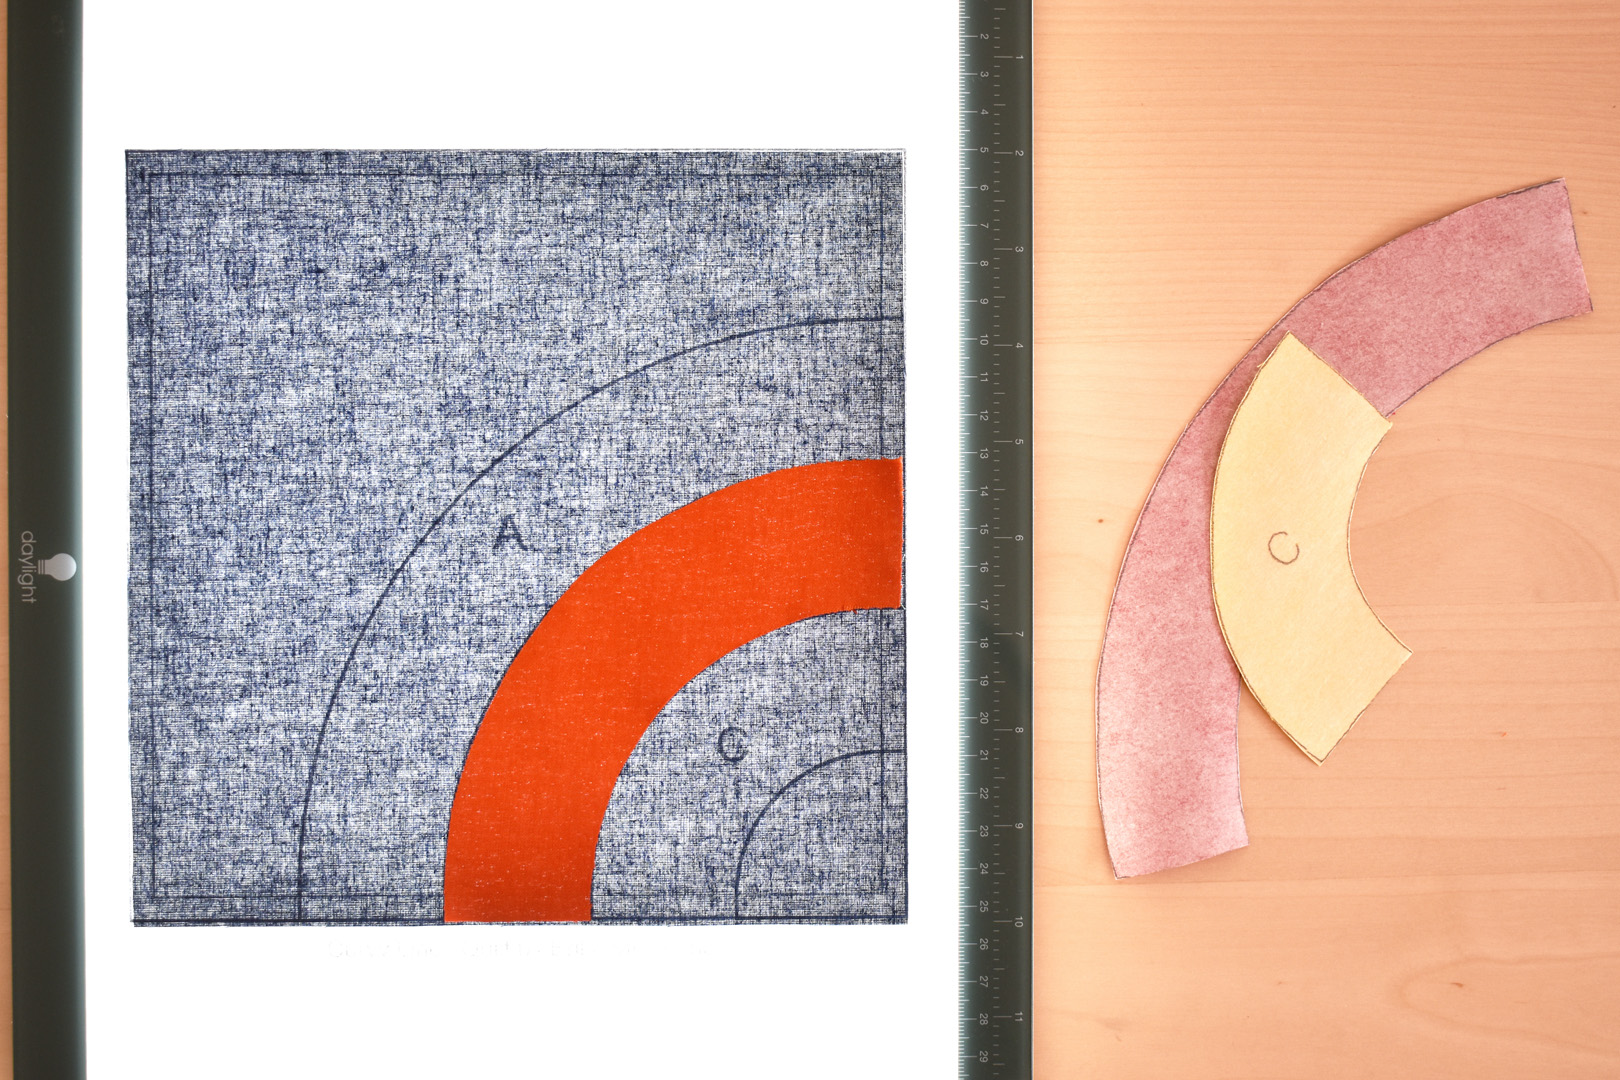
Begin with the orange color, carefully peel the paper backing from the fabric and place fusible side down, using the template markings as a guide.

Then add the other stripes to align with the template. It’s okay if your stripes slightly overlap each other at this point, or they may simply butt up against each other. When you have all three shapes aligned, carefully move the fabric block with the stripes to your ironing board to press the appliqué shapes in place.
You now have completed one block #1! Continue on until you have completed 13 total of block #1. Follow the same steps above to create 5 of block #2 with the straight stripes template, using red for shape A, orange for shape B, and yellow for shape C. Create 7 of block #3 using the curved template, using yellow for shape A, orange for shape B, and red for shape C.
When you have finished fusing the basic blocks above, stitch the raw edges of the appliqué shapes following the instructions below.

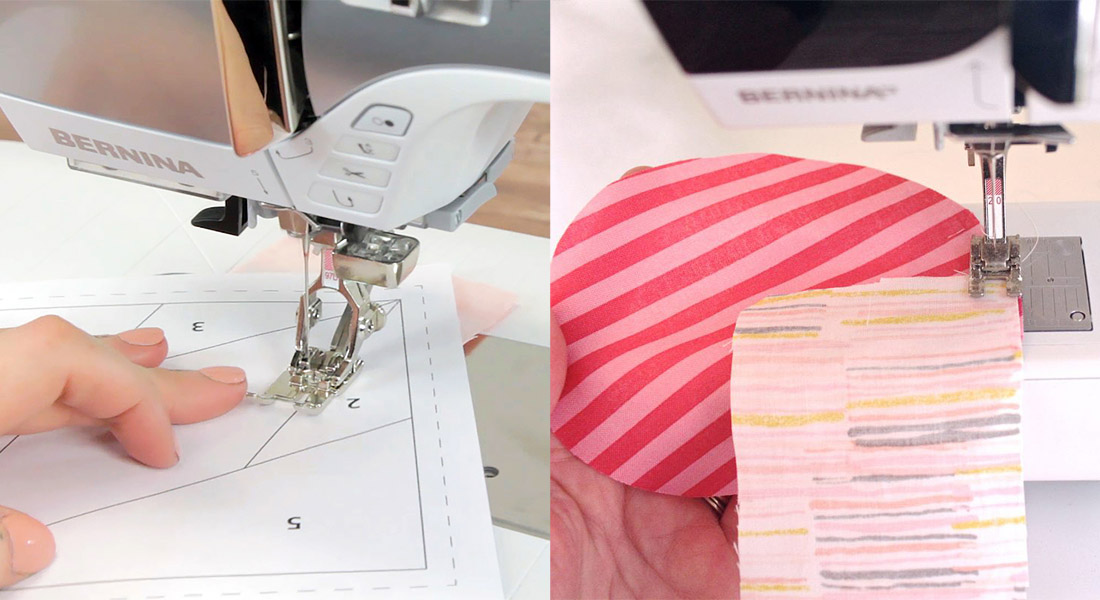
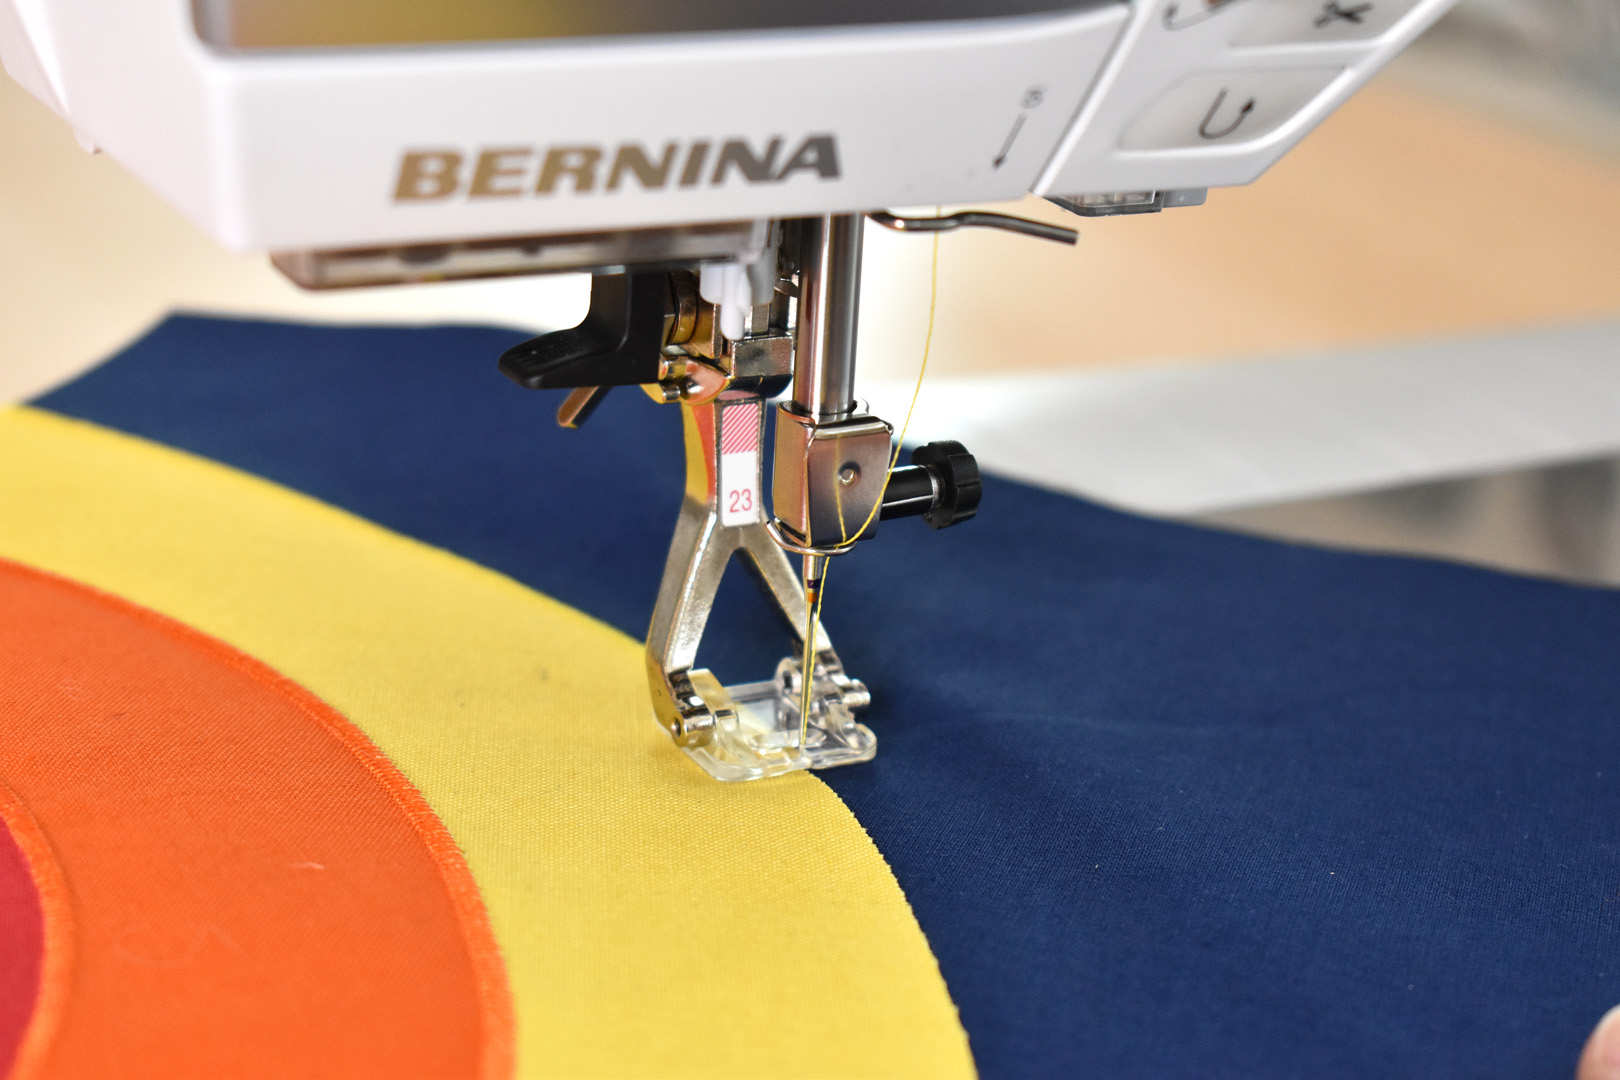
Set up your sewing machine to stitch down the edges of the appliqué shapes. I use Appliqué foot #23, the zigzag needle plate, and sew with Isacord embroidery thread in colors to match the appliqué shapes.
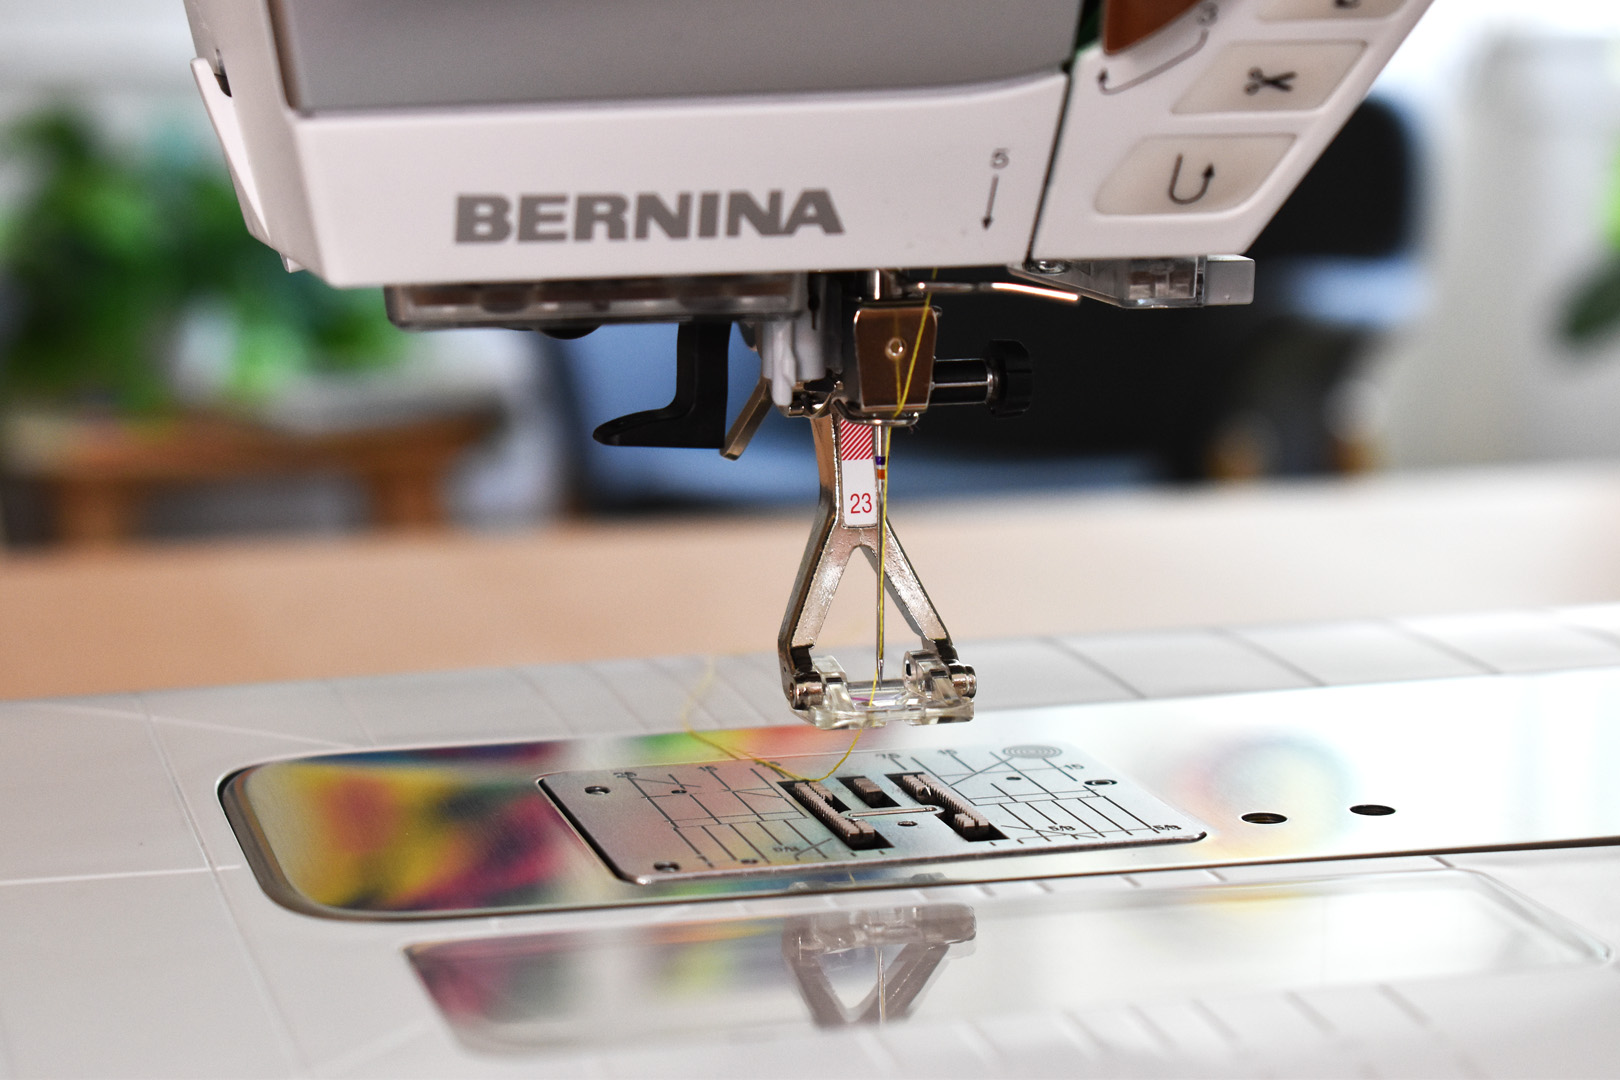
The BERNINA Appliqué Foot #23 is specially engineered to allow a clear view while providing space for dense zigzag or satin stitches to form under the foot. Learn more about this amazing foot in this tip post here.
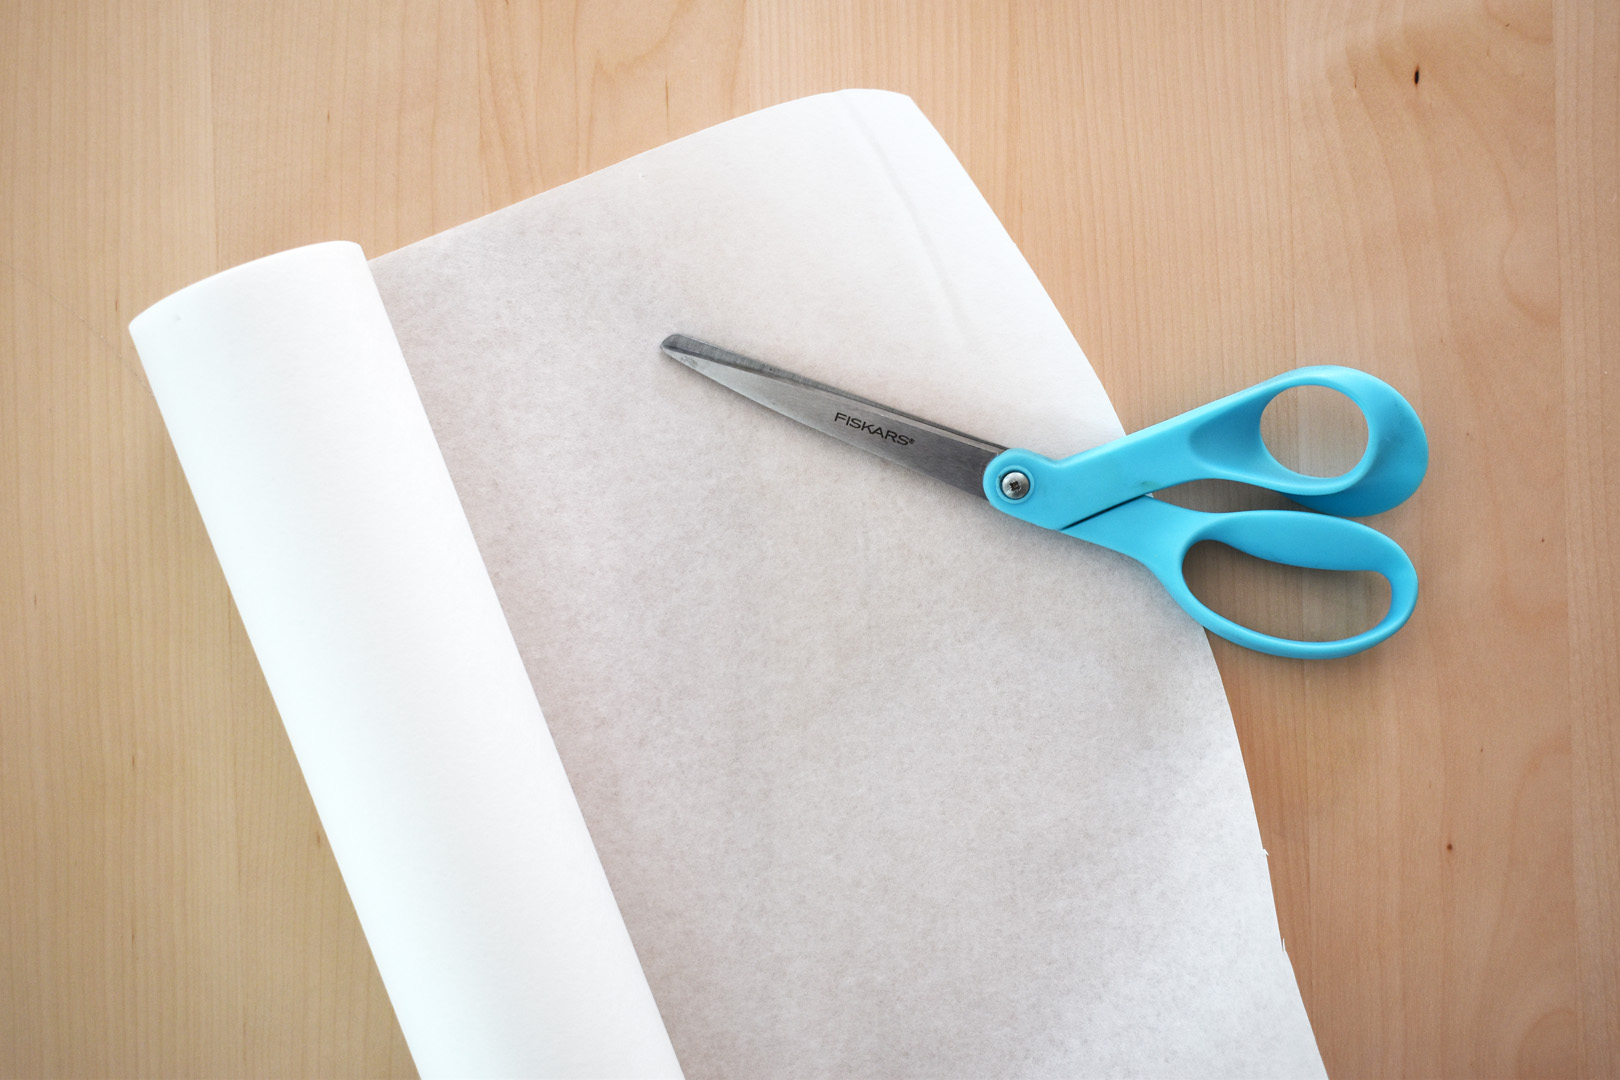
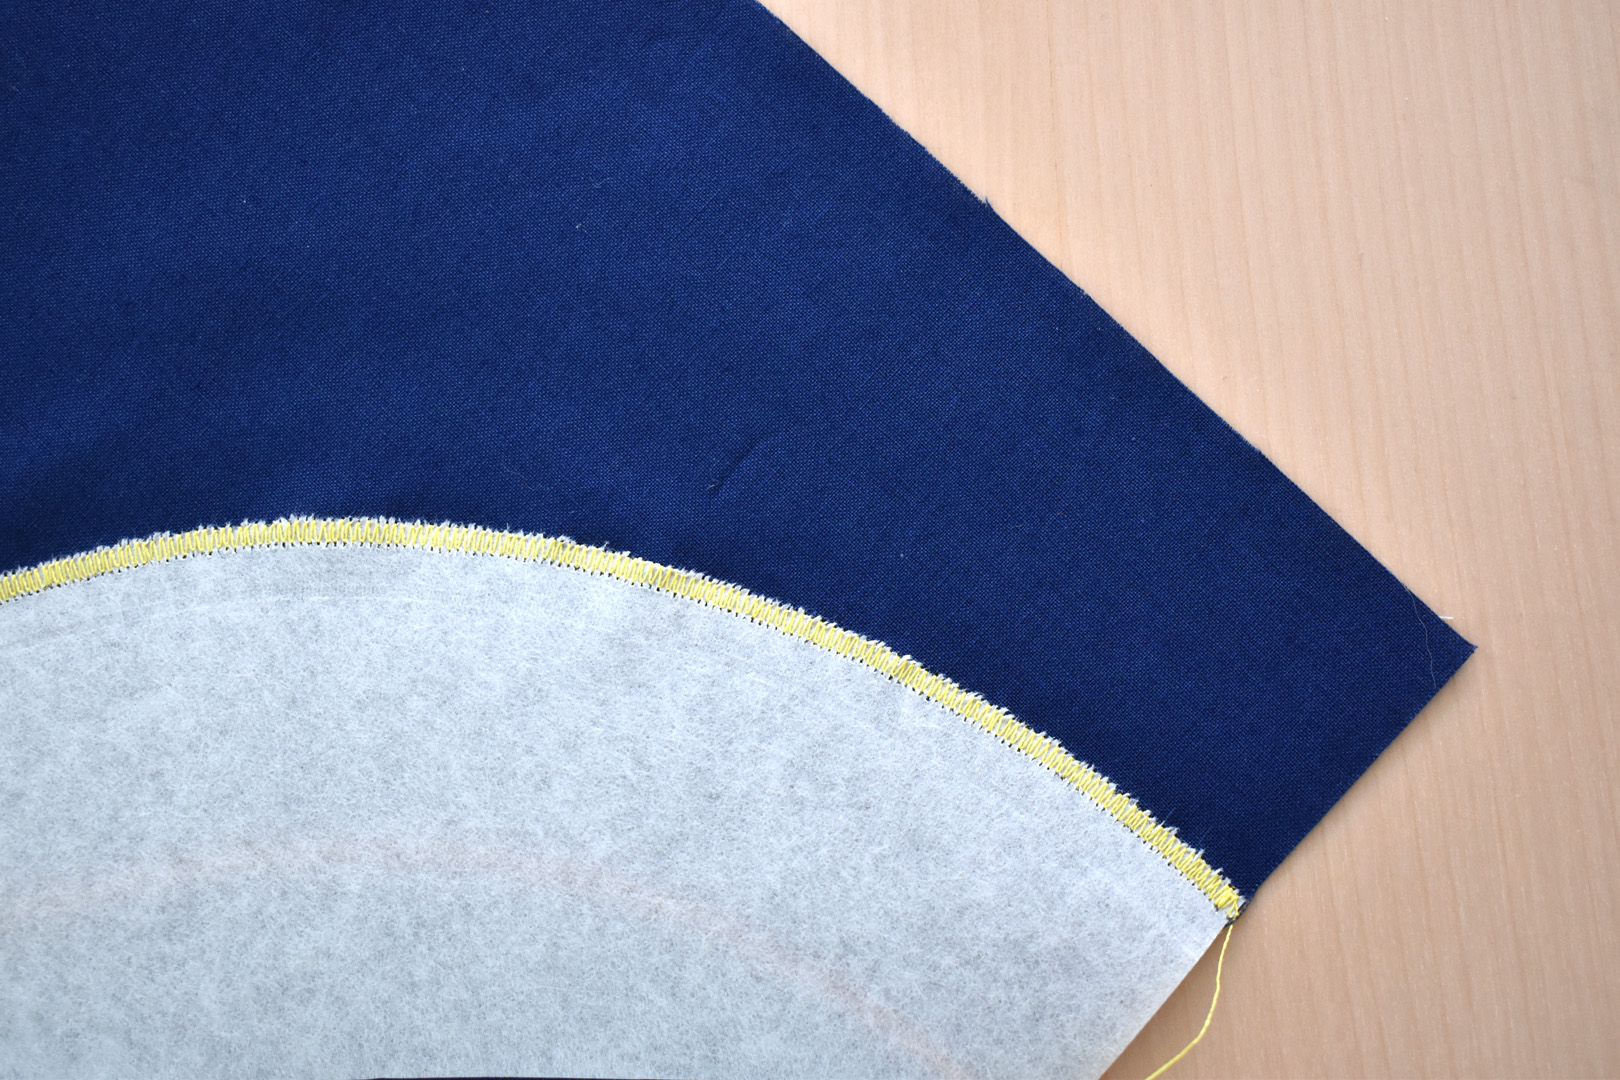
When stitching with a zigzag or satin stitch, use a stabilizer to help prevent the fabric from bunching up or tunneling. I am using a medium-weight tear-away stabilizer. Cut to fit underneath each block before stitching. If you feel like you want to secure the stabilizer to the block, use pins from the top, or a small amount of washable fabric glue or spray temporary adhesive.
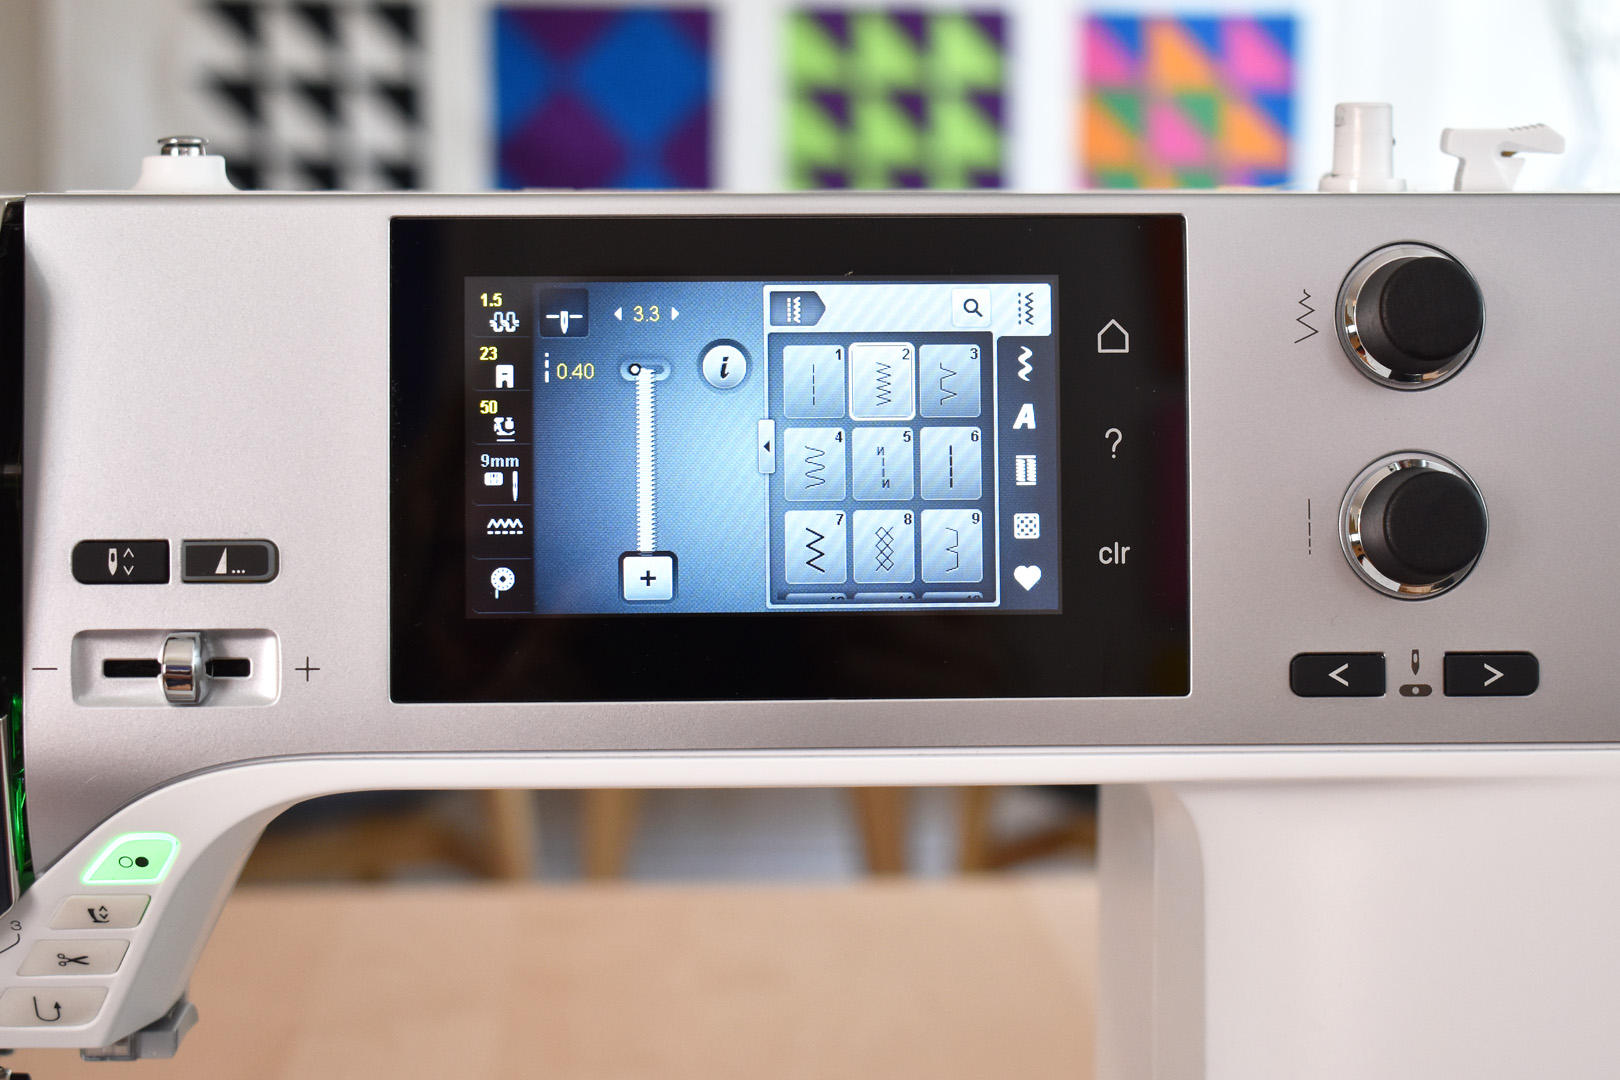
Update your machine settings to create a zigzag stitch that is close together, will generously cover over the raw edge of the appliqué shapes, but that won’t too much bulk to the blocks. After testing some stitches on my machine, I use a zigzag stitch at 3.3 mm width and about 3.5 to 4mm length. I also lower the top thread tension so that the bobbin thread is pulling a bit more to the back, leaving the top thread looking nice and smooth. When you’re happy with the test stitches, begin sewing the edges of the appliqué shapes with matching thread.
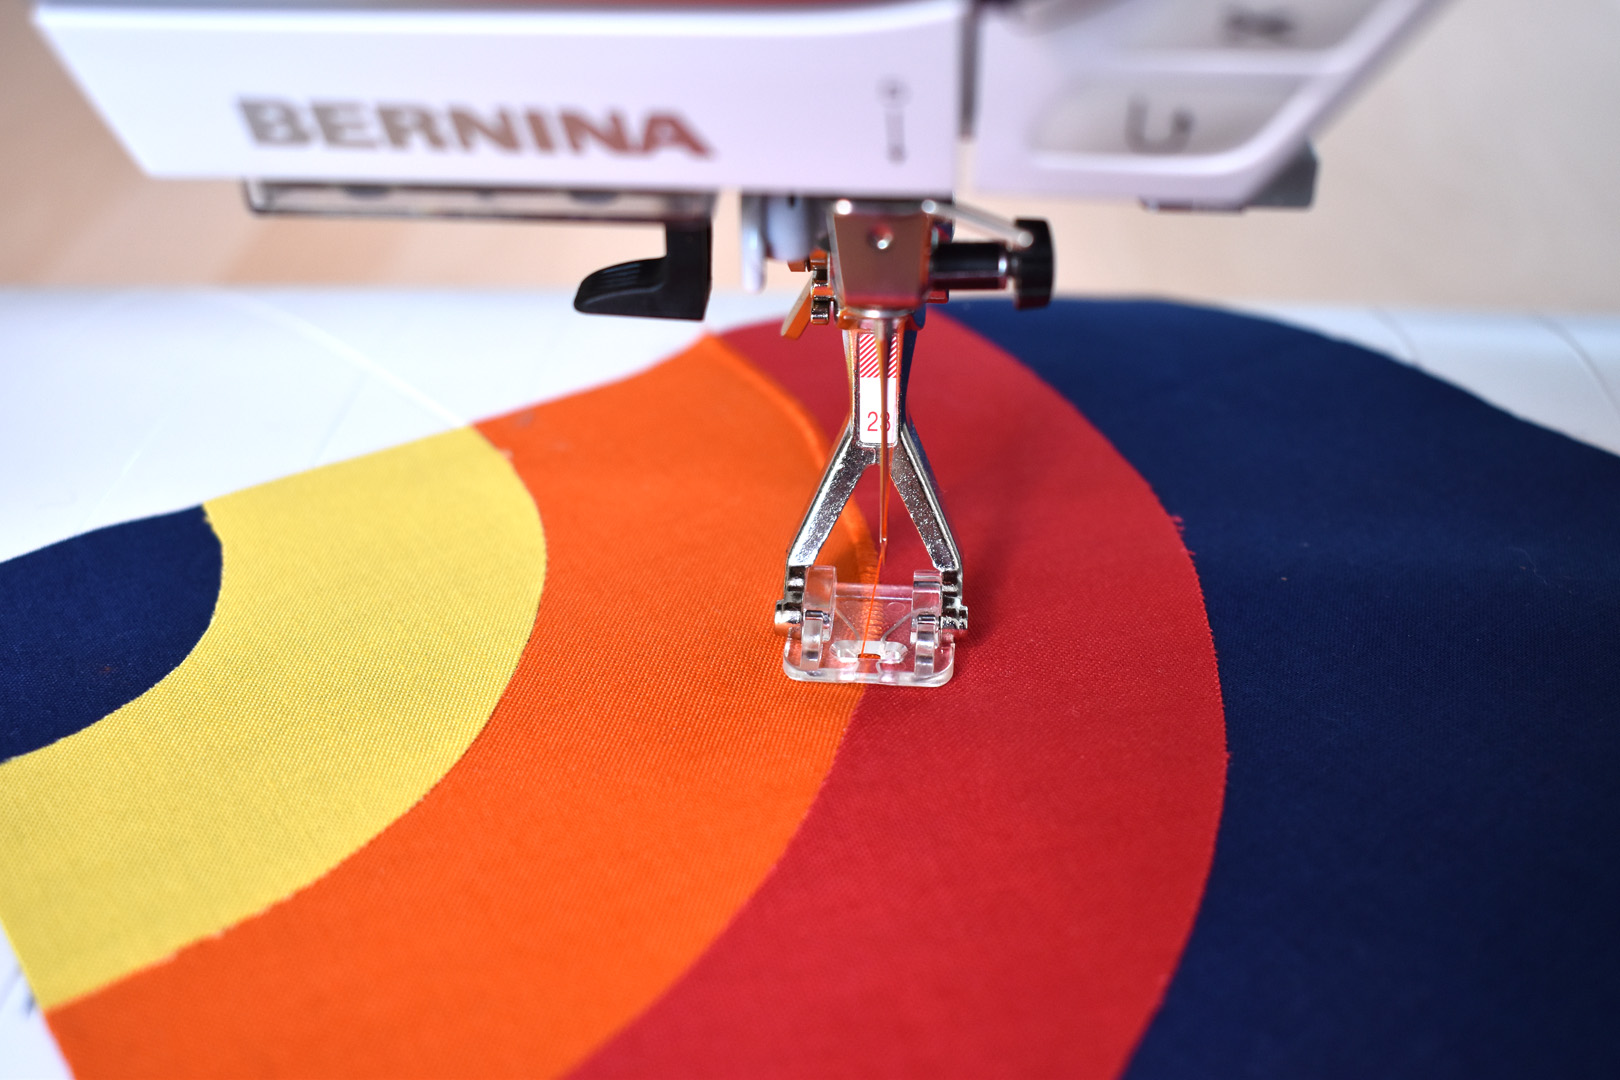
I use orange thread on both sides of the orange stripe. Since the orange shape butts against or even overlaps a bit with the other shapes, I aim to sew the zigzag stitch directly in the center of where the two shapes meet.

I stitch the orange shapes on all the blocks, block #1, block #2, and block #3. This makes it easier to save steps of changing thread color for each block.

When sewing on the outside shapes, I align the foot so that the zigzag stitch is just covering the outside edge of the appliqué shape. Appliqué Foot #23 makes it very easy to see exactly where you are sewing!
Continue until all blocks are stitched over the edges of the appliqué shapes.
As a last step, carefully tear away the stabilizer from the back of the blocks.
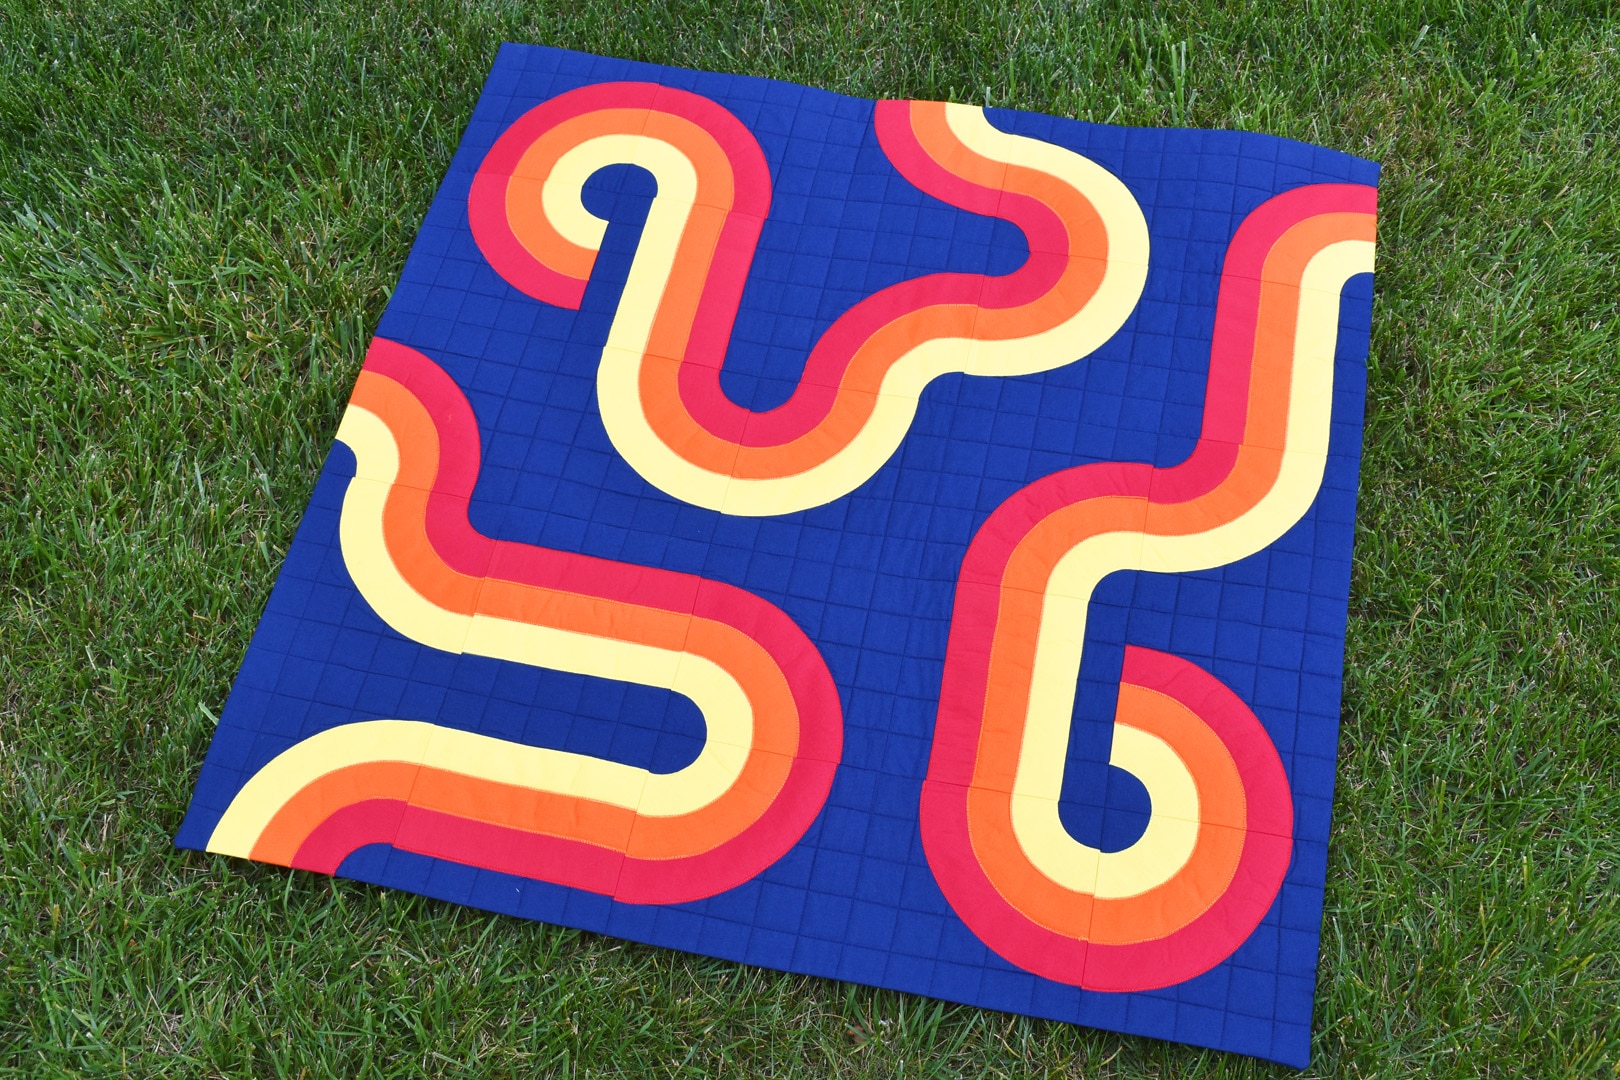
Now with all blocks completed it’s time to lay out the quilt design! Be very mindful when placing the blocks together that the orientation of each block is key to the final design. The design won’t come together just right if one or more of the blocks is flipped in the wrong direction. Look closely at the photo below, and layout the blocks in this way.
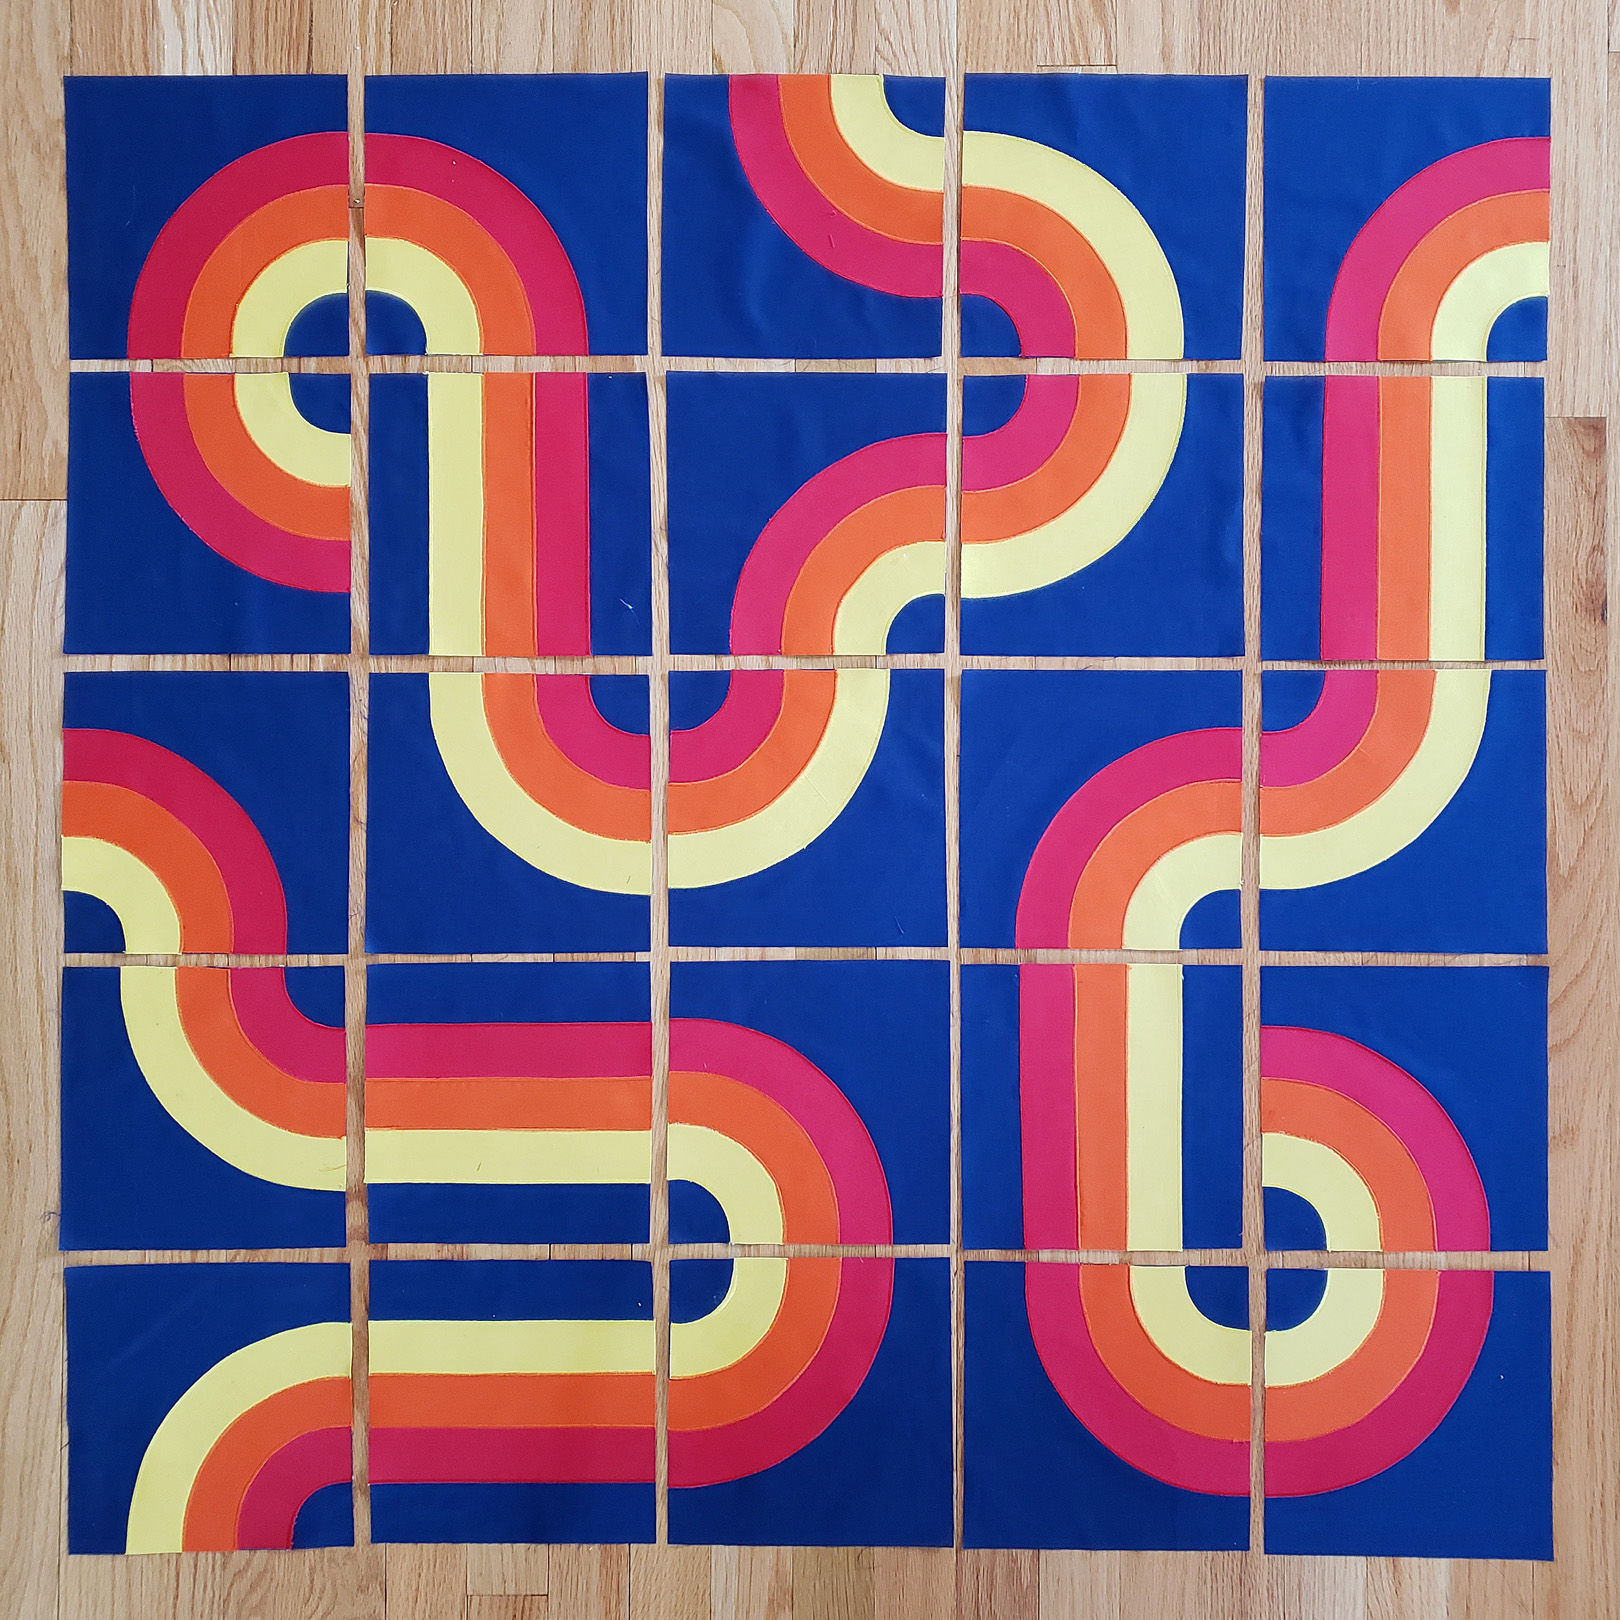
- First row: block #1, block #1, block #1, block #3, block #1
- Second row: block #1, block #2, block #1, block #3, block #1
- Third row: block #1, block #3, block #3, block #1, block #3
- Fourth row: block #3, block #2, block #1, block #2, block #1
- Fifth row: block #3, block #2, block #1, block #1, block #1
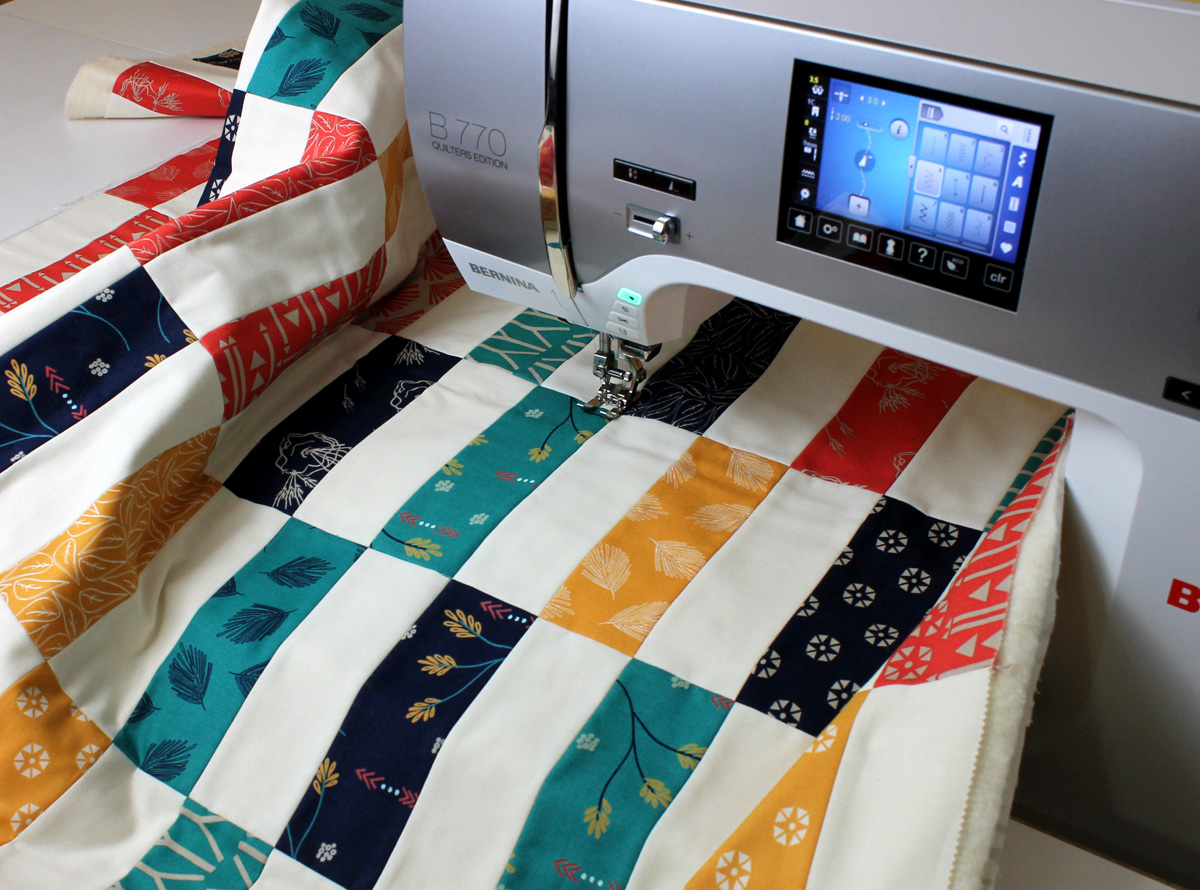
Get ready to stitch the blocks together. I use Patchwork foot #97D with the seam guide, the straight stitch needle plate, and all-purpose sewing thread in a dark blue to match the background block color.
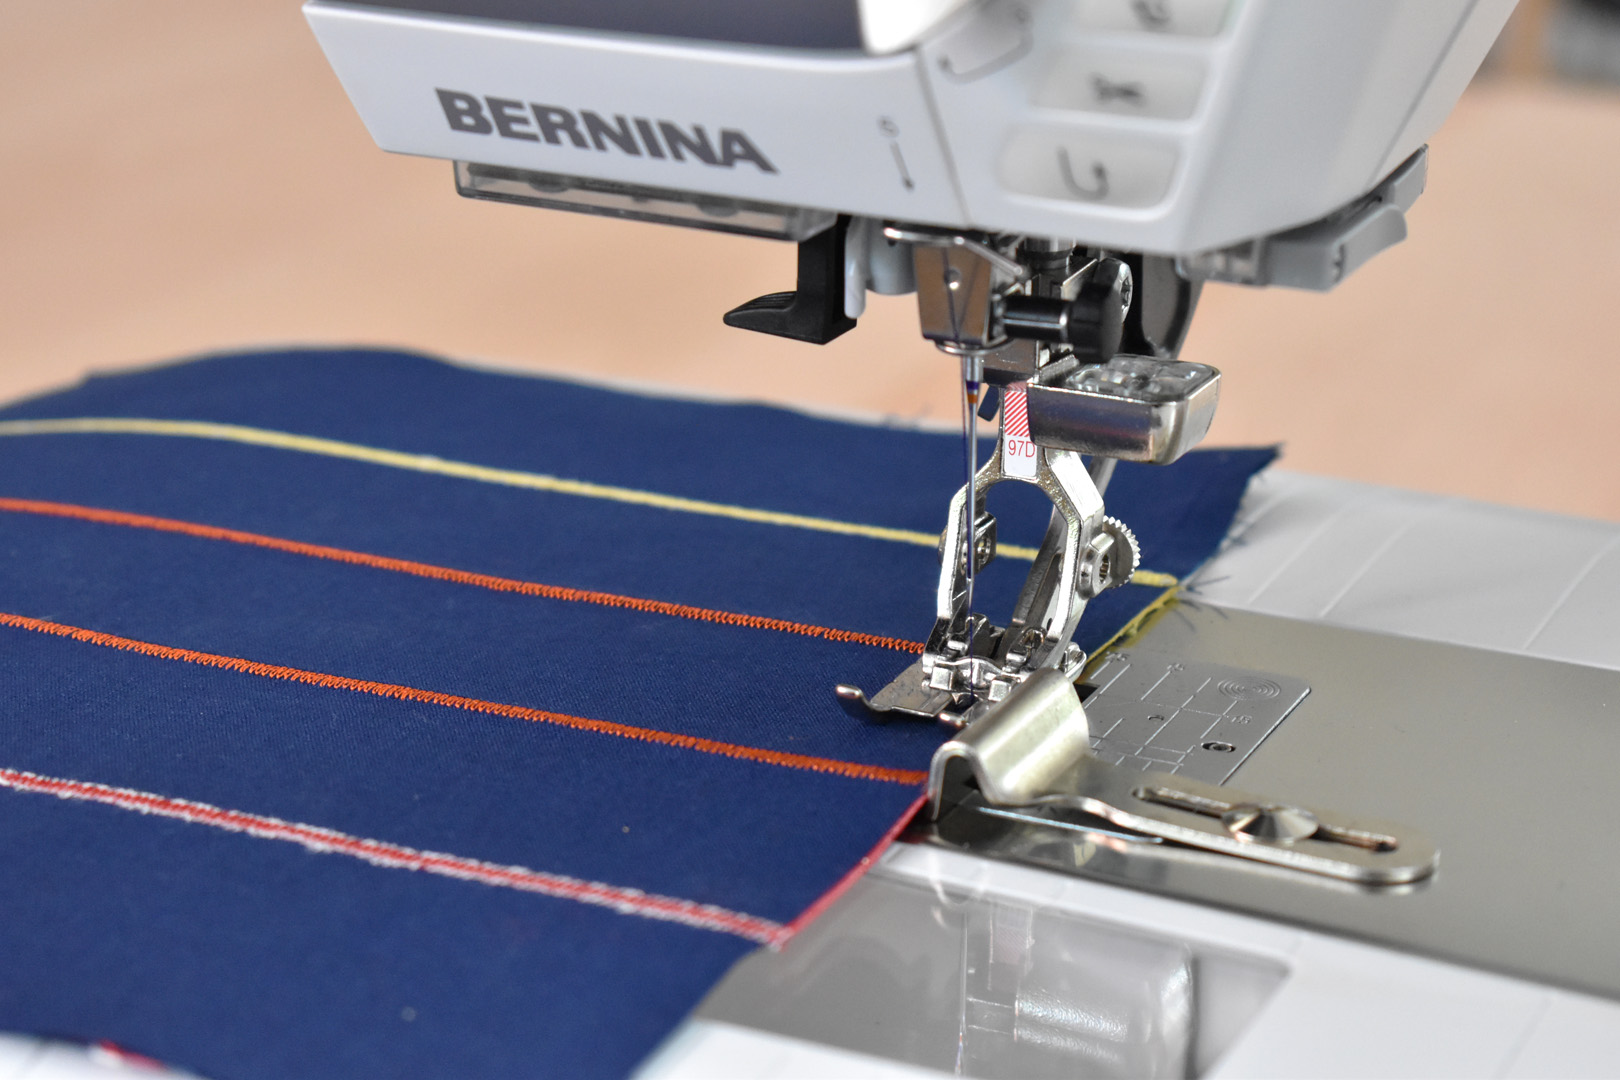
Begin by sewing blocks together across each row. When lining up the block seams, try to make sure the stripes are matching up as closely as possible.
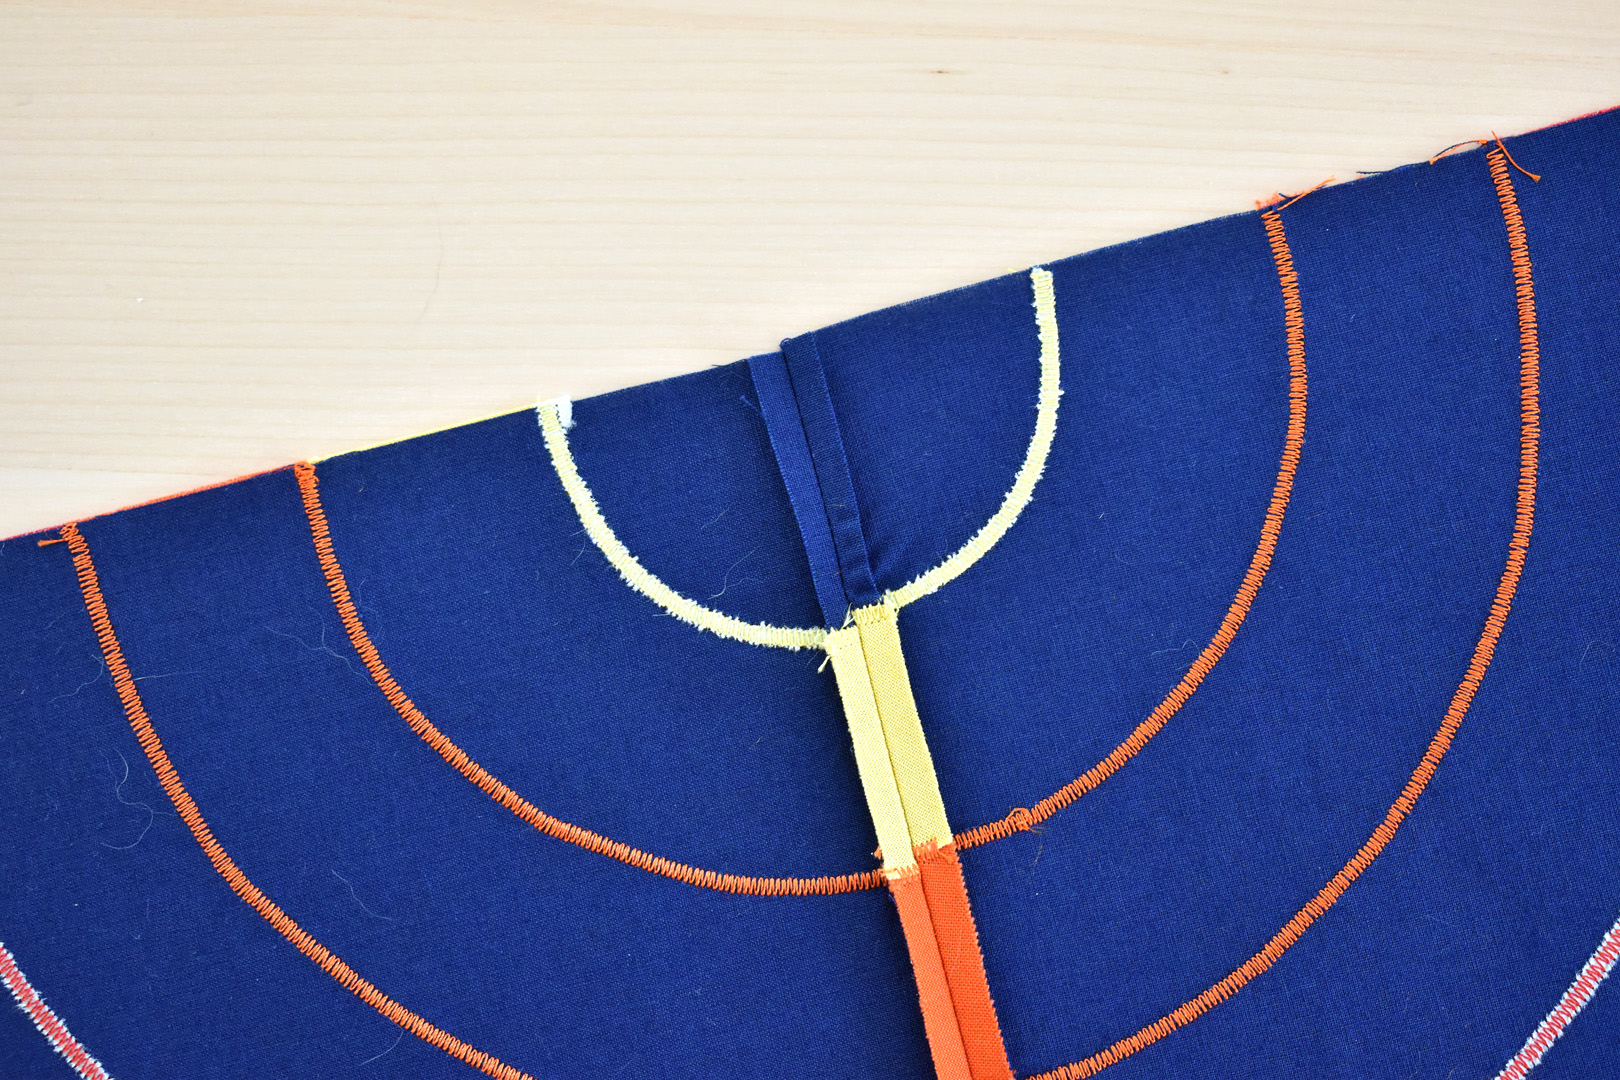
Press the seams open as you sew. After sewing all the blocks together in rows, stitch rows together. Again, pay attention to the stripes matching as you pin and sew each row.
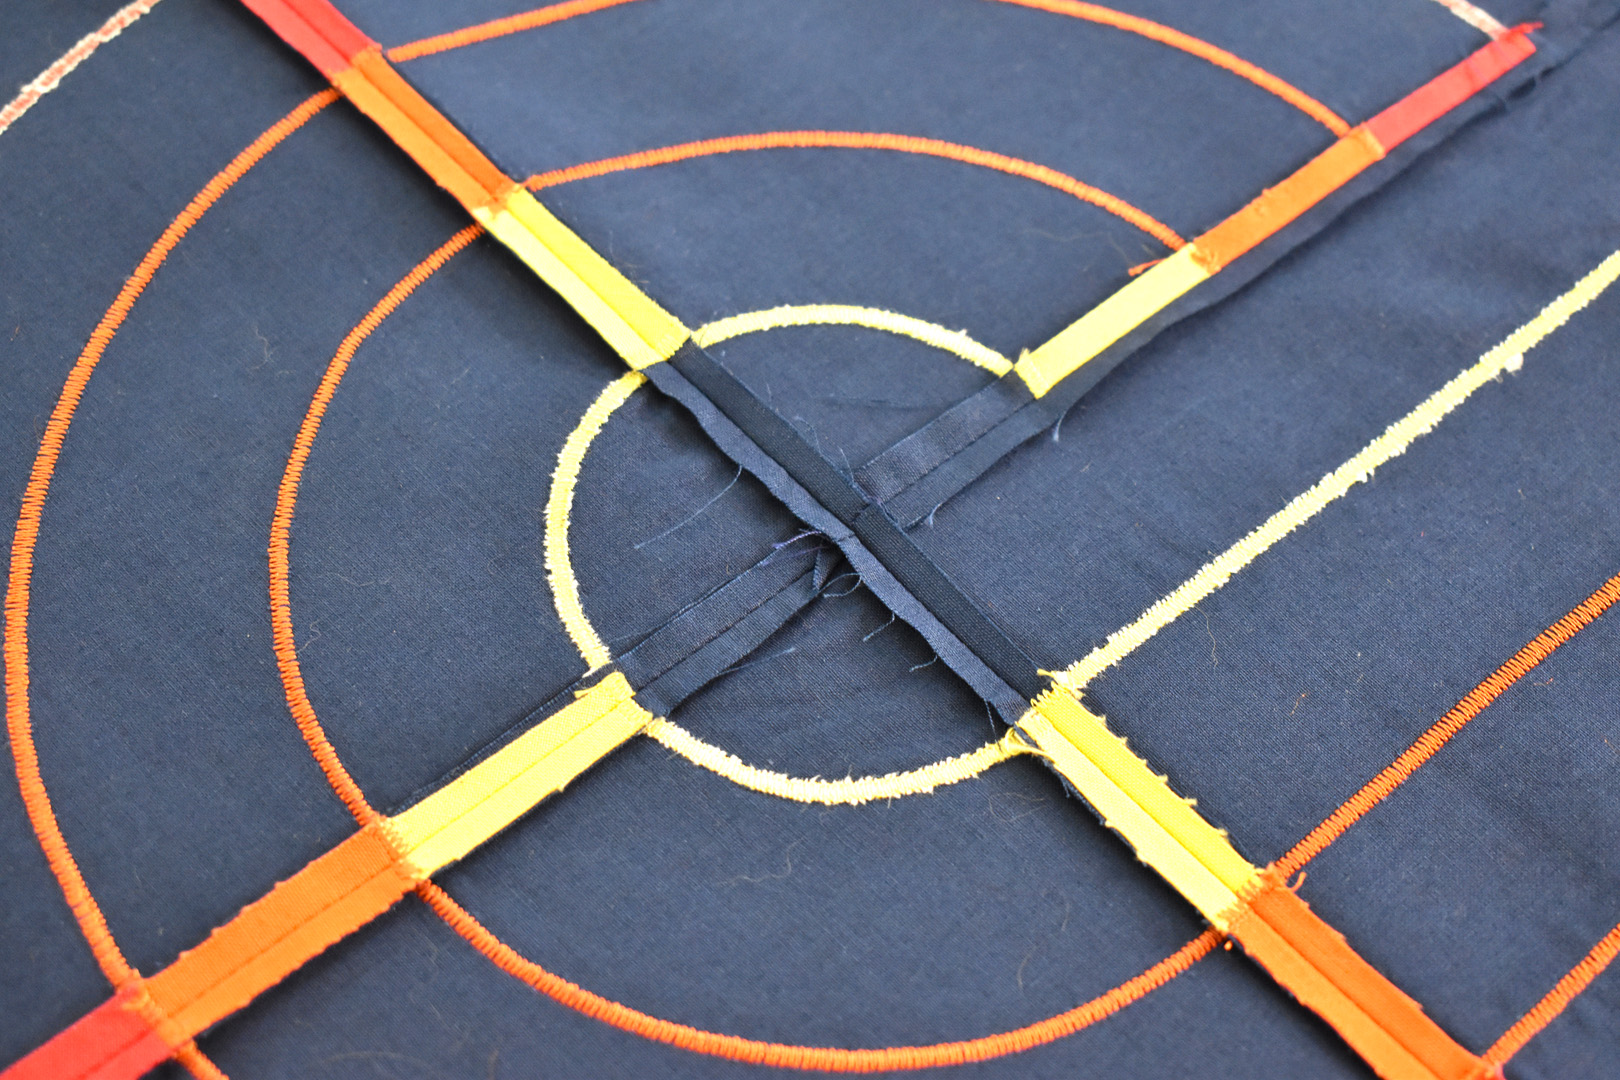
Press seams open after sewing all rows together.
The top of the quilt is now complete!
Join me in the next post to learn all about finishing the Curvy Lines Quilt. I’ll show you how to baste, quilt, and finish the edges with a facing to keep the front of the quilt looking like the curvy lines run right off the edges.