Log Cabin and Saw Tooth Star Blocks Quilt
Size 75” by 91”
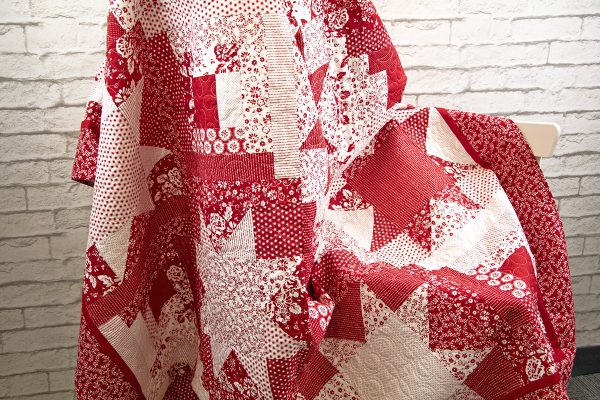
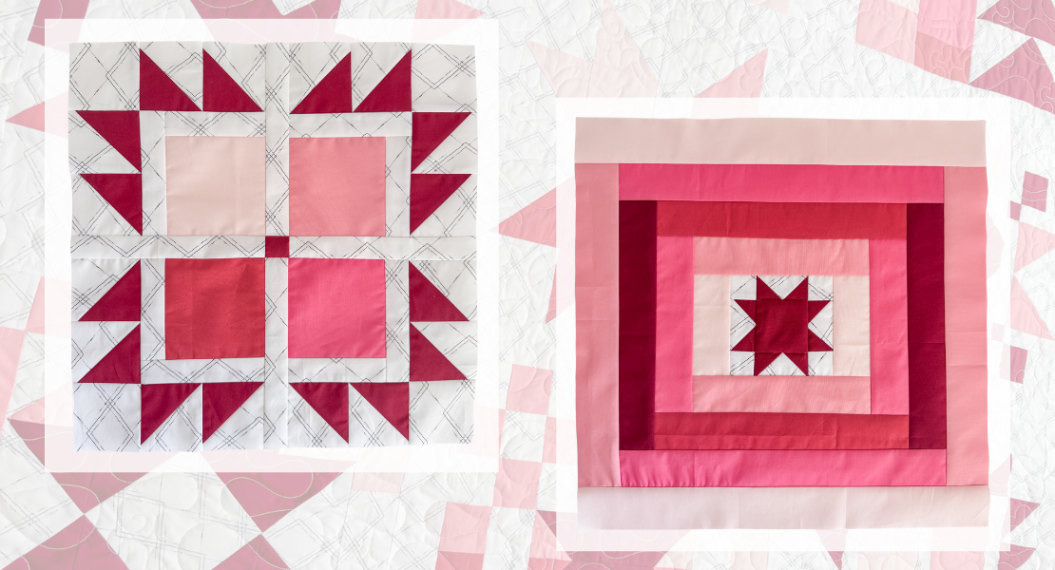
I don’t know about you, but I love a red and white quilt. I also love traditional blocks. When I was asked to create a pieced project that was red and white, I knew exactly what I needed to do. I have always loved the log cabin block and the saw tooth star block. I first went to BERNINA V8 Embroidery Software and opened the Quilter program to find the blocks I wanted. Of course, if you don’t have the program you can draw it out on graph paper or use any quilt designing program you have.
Supplies needed to Create the Log Cabin and Saw Tooth Star Blocks Quilt
Fabrics
I used Riley Blake’s So Ruby by Carina Gardner for all fabric on the top of this quilt
- Saw Tooth Star Blocks – ½ yard each of 6 red print fabrics and 6 white print fabrics
- Log Cabin Blocks – One 2 1/2” strip set (sometimes known as a Jelly Roll—2 ½” x width of fabric strips) with both white print and red print fabrics
- Center of Log Cabin Block – 1/3 yard of red fabric
- Inside Border – 1/3 yard of red fabric (this border will be pieced)
- Outside Border – 2 ½ yards of fabric for a non-pieced border
- Binding – ½ yard
- Backing 2 ½ yards of 108” wide white fabric
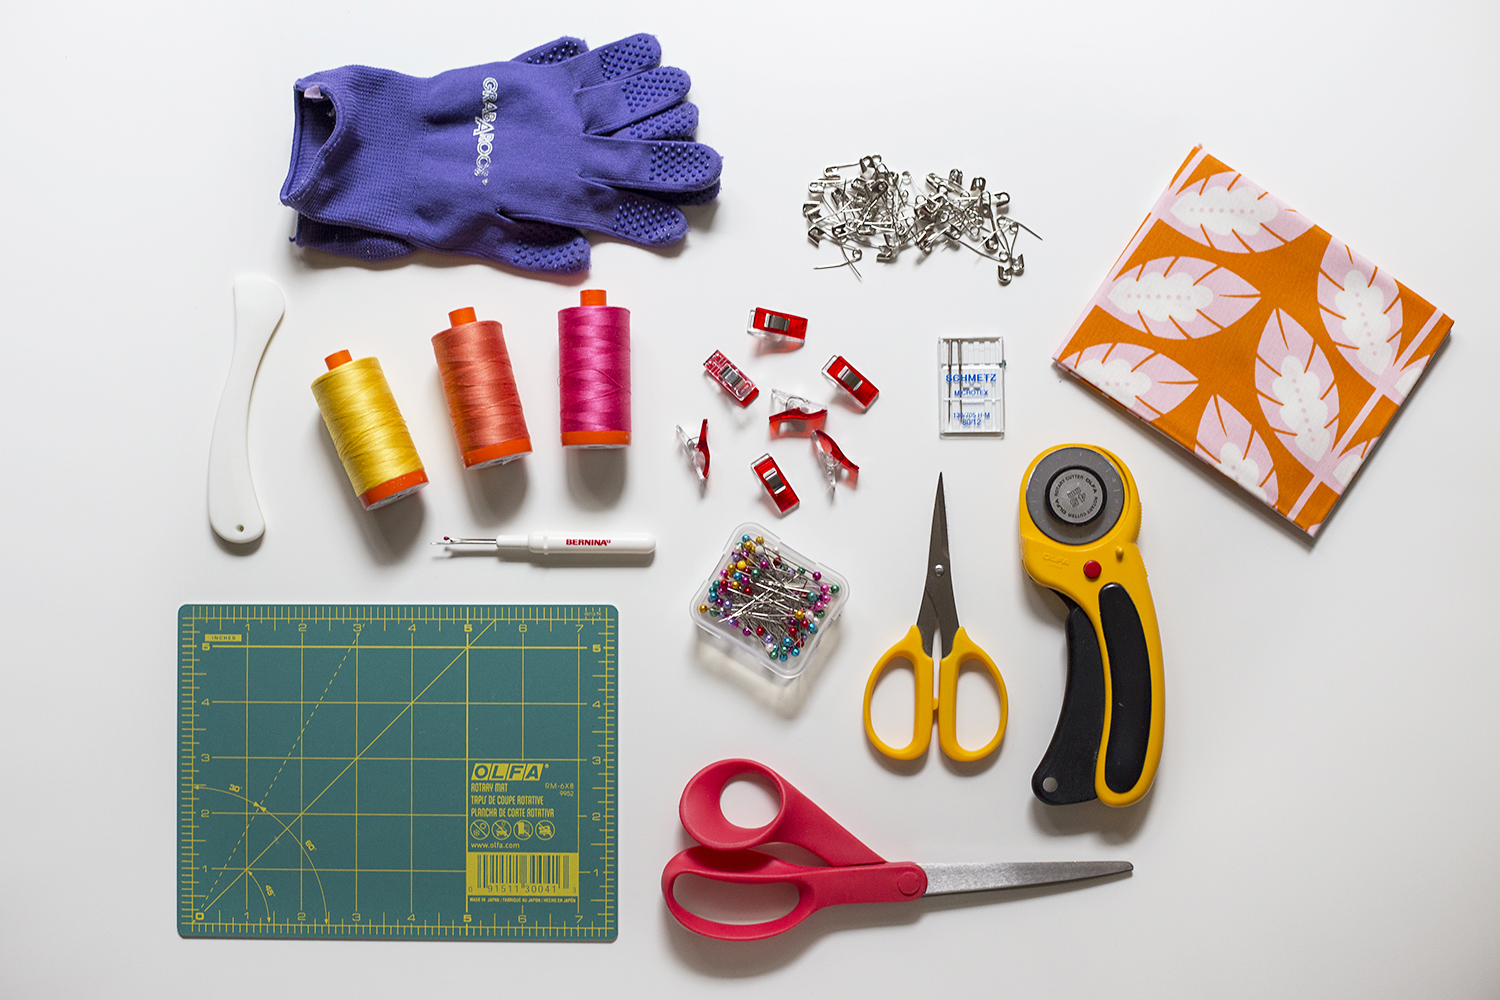
Supplies
- Batting (I used 50/50 Bamboo Cotton Blend by Eversewn)
- Thread to piece
- Thread to quilt
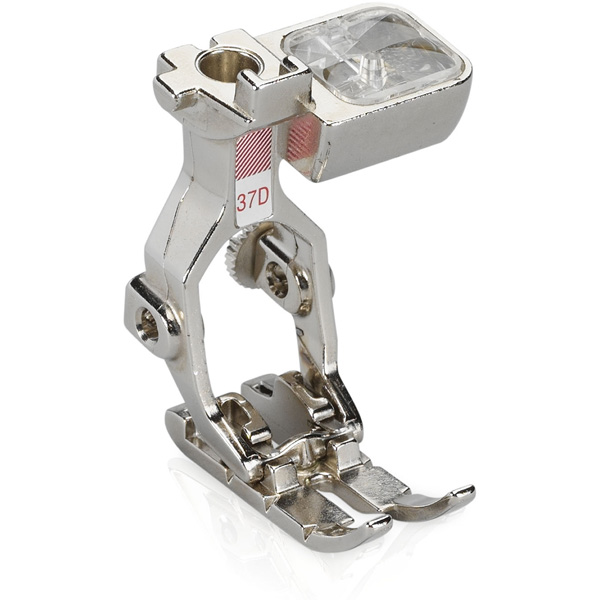
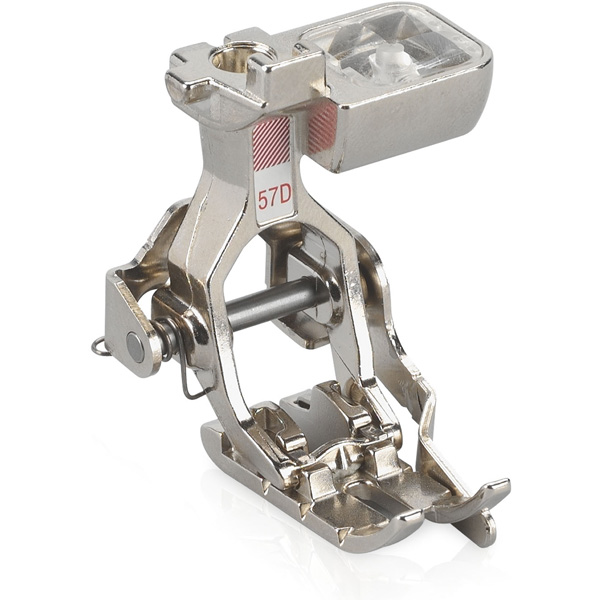
- BERNINA Patchwork Foot #37/37D, #57/57D, or #97/97D
- Rotary cutter
- Cutting ruler
- Cutter mat
I decided I wanted each of my blocks to be 16 inches finished size, with a three quarter inch finished inner border and a 4-1/4 inch finished outer border. This will make my quilt 75 inches by 91 inches. This will also make the strips in my log cabin blocks to be cut at 2 ½ inches wide, which is the perfect size for a pre-cut 2-1/2″ strip set.
Cutting information
YOU WILL NEED 5 WHITE SAW TOOTH STAR BLOCKS
For each White Saw Tooth Star Block
Cut:
4 white prints 4-7/8” x 4-7/8” squares
sub cut on diagonal to make 8 small triangles
1 white print 8 ½” x 8 ½” square
2 red print 6 ½” x 6 ½” squares
sub cut on diagonal to make 4 larger triangles
4 red print 4 ½” x 4 ½” squares
YOU WILL NEED 5 RED SAW TOOTH STAR BLOCKS
For each Red Saw Tooth Star Block
Cut:
4 red prints 4 7/8” x 4 7/8” squares
sub cut on diagonal to make 8 small triangles
1 red print 8 ½” x 8 ½” square
2 white print 6 ½” x 6 ½” squares
sub cut on diagonal to make 4 larger triangles
4 white print 4 ½” x 4 ½” squares
YOU WILL NEED 10 LOG CABIN BLOCKS
For each Log Cabin Block
Cut:
Red print fabrics 2 ½” wide by 16 ½”, 14 ½”, 12 ½”, 10 ½”, 8 ½” and 6 ½”
White print fabrics 2 ½” wide by 14 ½”, 12 ½”, 10 ½”, 8 ½”, 6 ½” and 4 ½”
10 center red fabric 4 ½” x 4 ½” square
The Inner Border
Cut:
Cut 8 strips width of red fabric by 1 ¼”
For the Outer Border
Cut:
Cut 4 strips by length of red fabric by 4 ½” wide
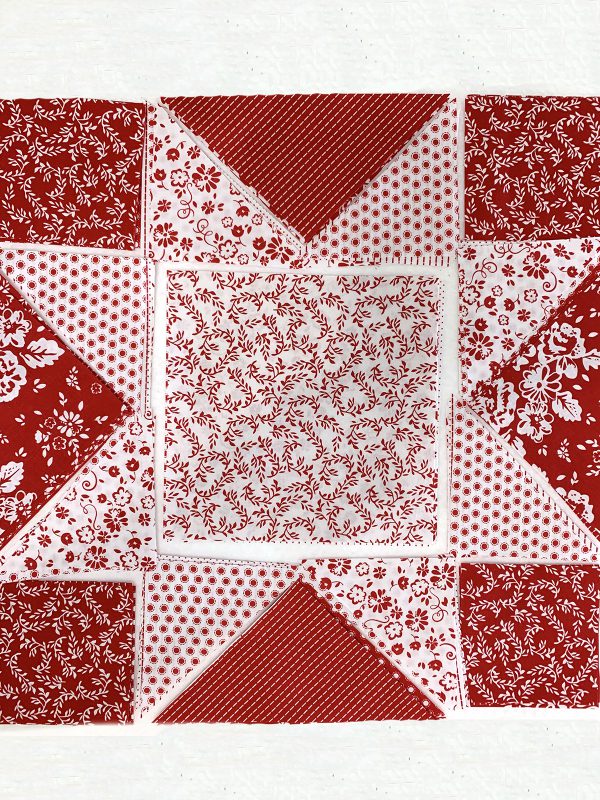
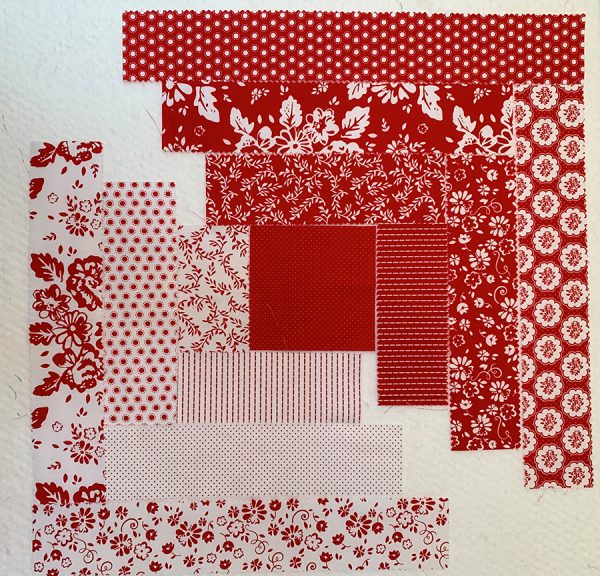
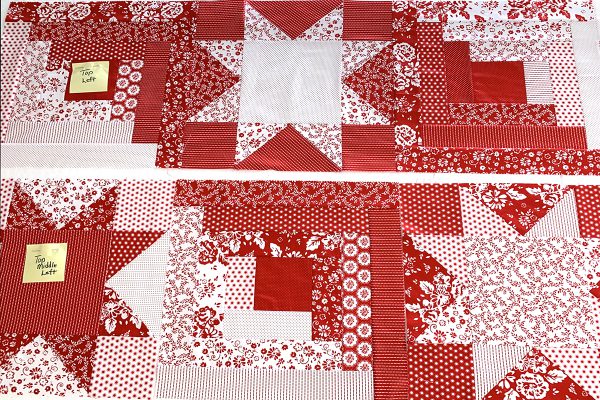
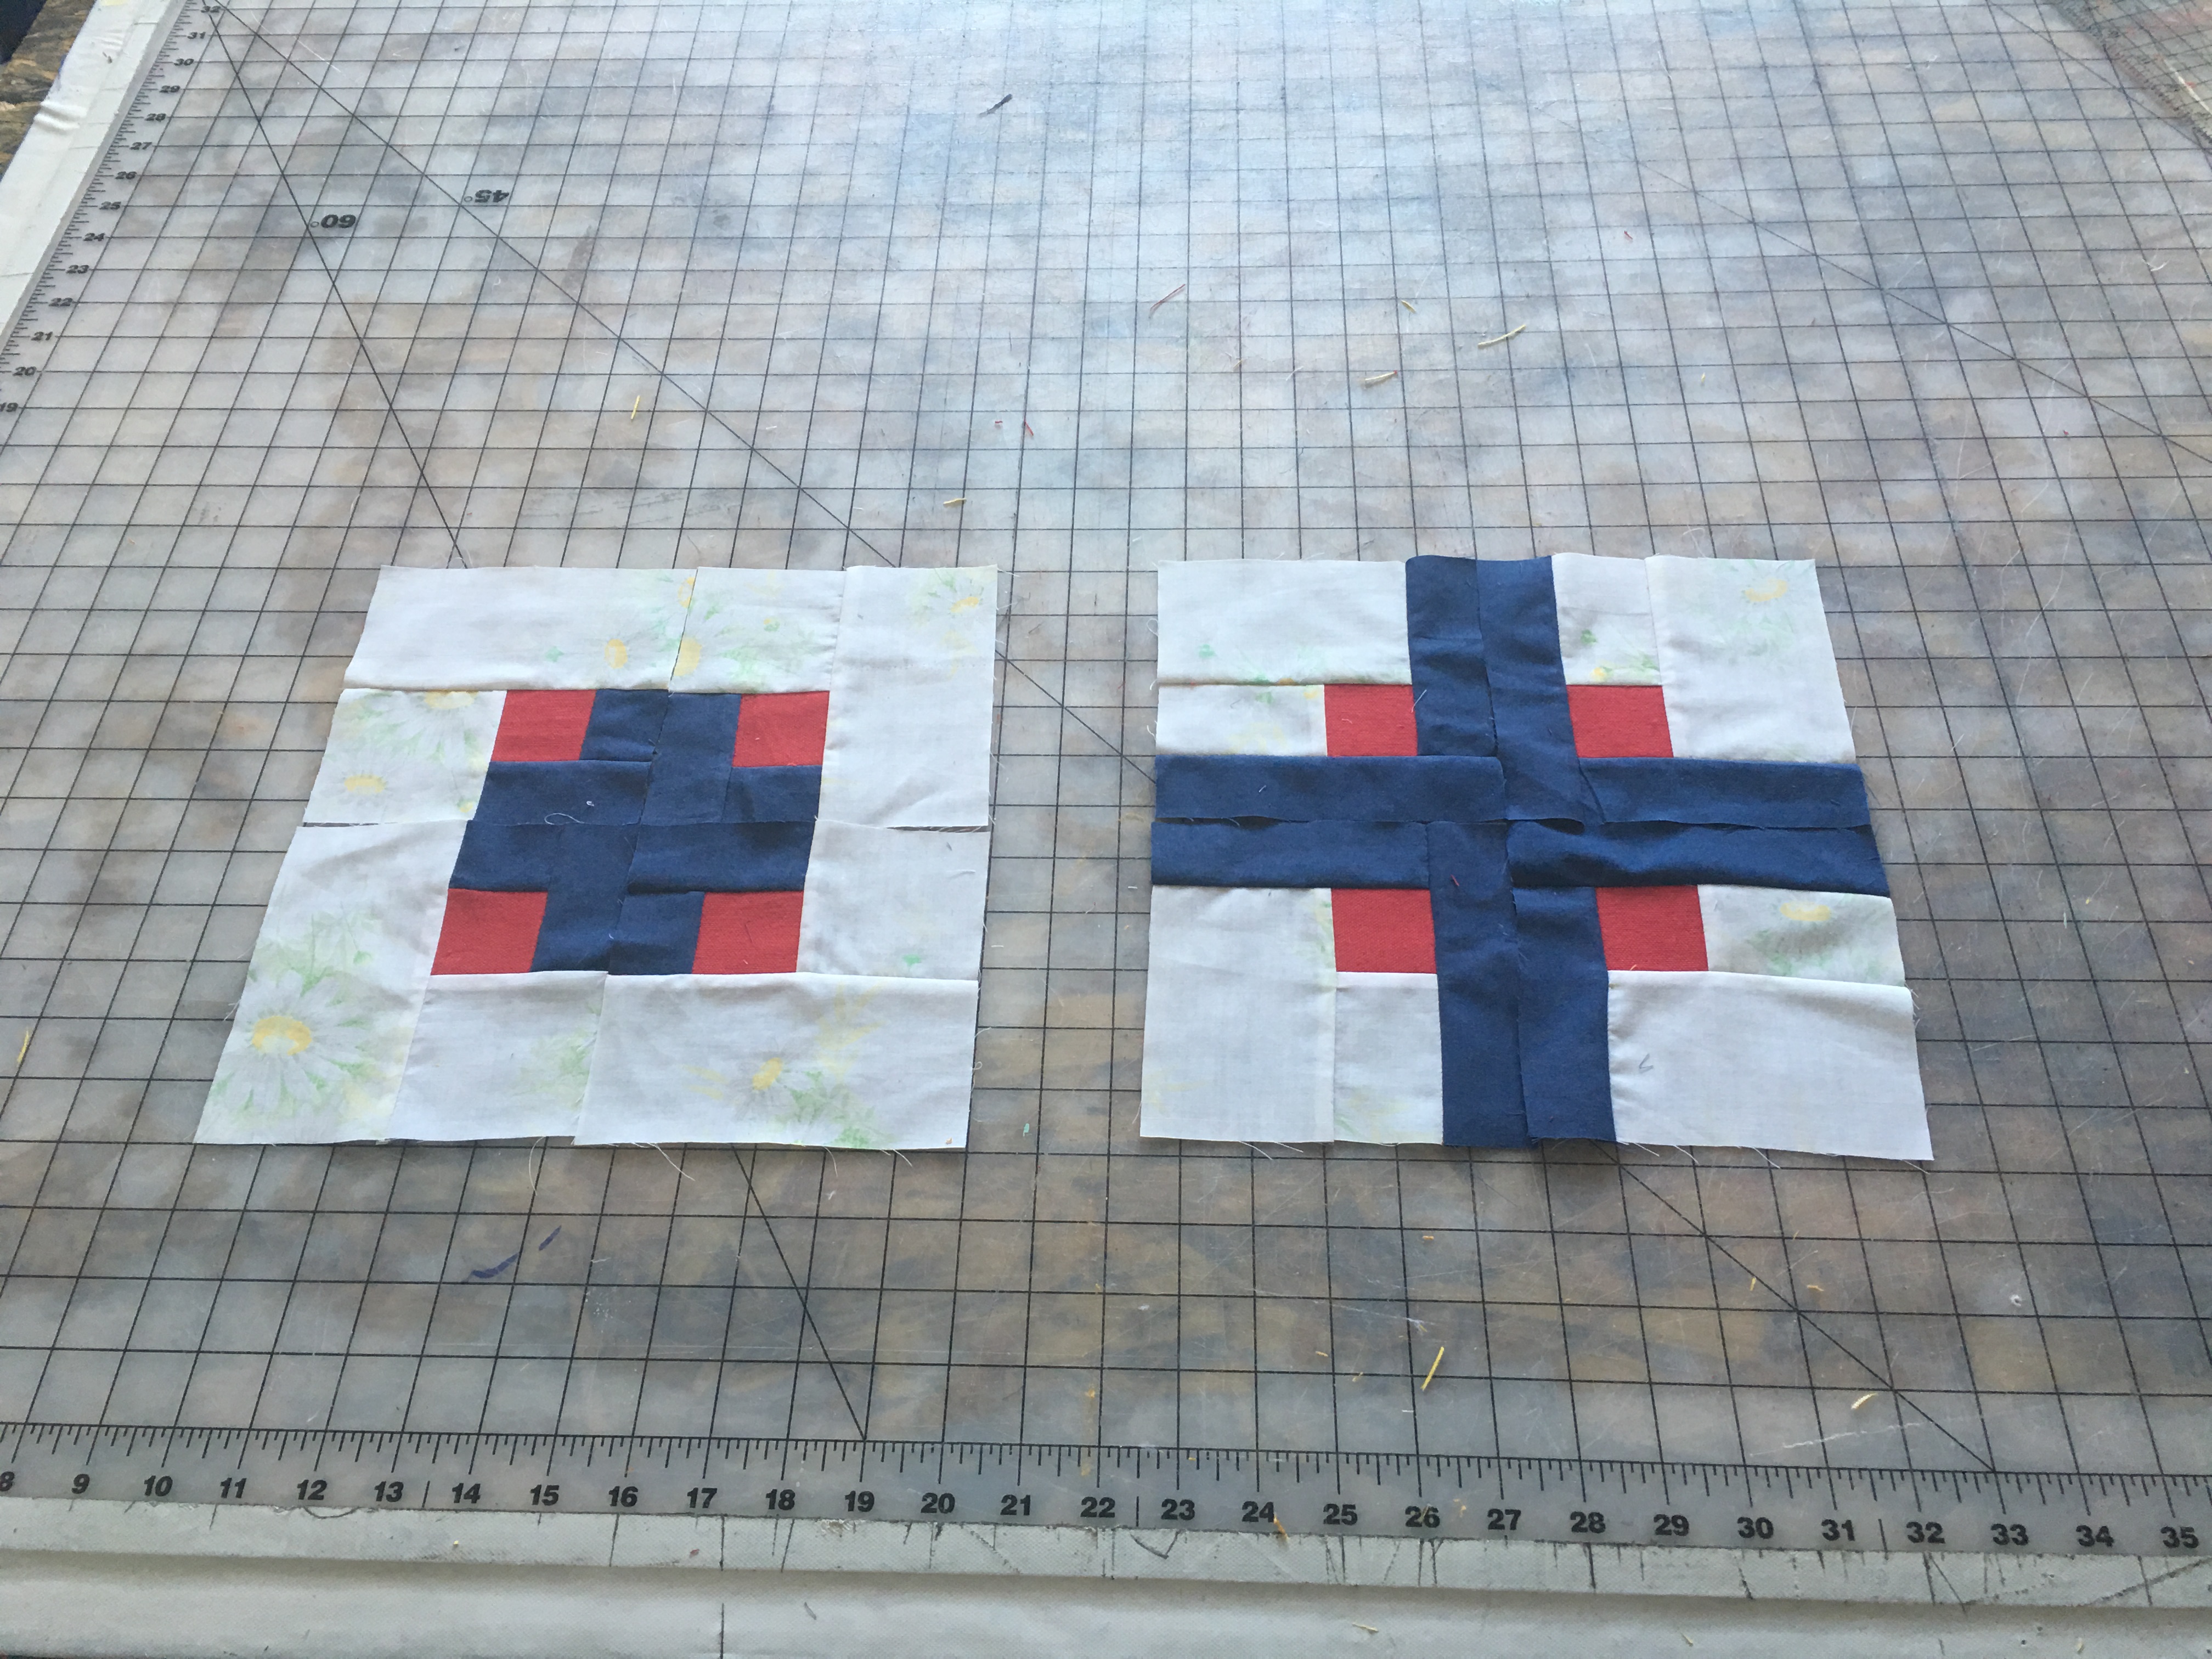
When I had all the pieces cut, I laid them out on a design board. This helped me know for sure which piece went where. This also helped me mix up the printed reds and the printed whites to get a scrappy look. I stitched together to create five of each block. Pressing seams in one direction as you go on all blocks.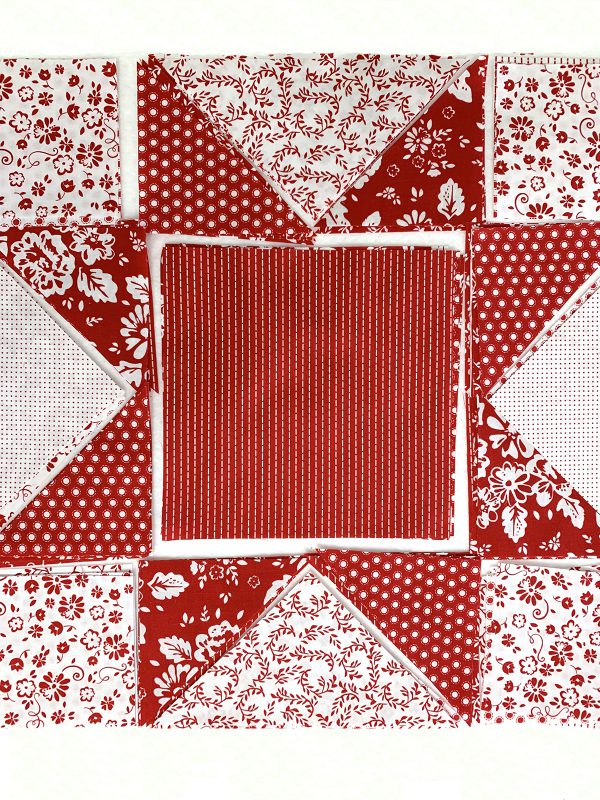
How to Stitch Saw Tooth Star Blocks
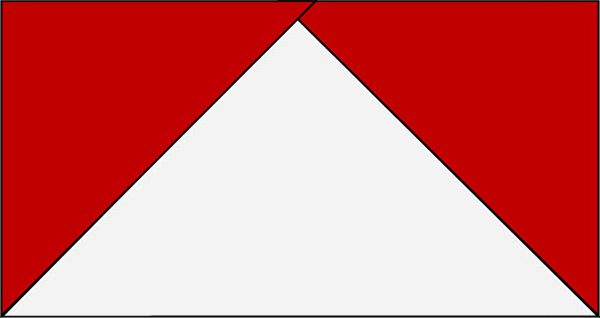
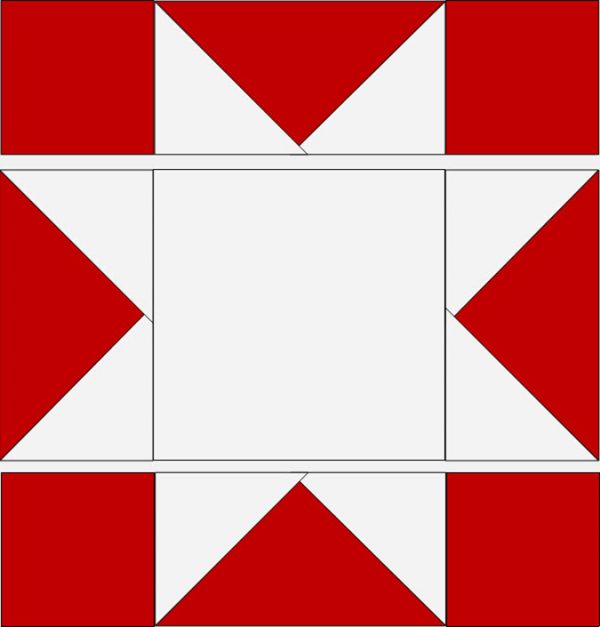
- Using a BERNINA Patchwork Foot, stitch the small red triangle to each side of the large white triangle (from Red Saw Tooth fabrics) to make a rectangle that measures 4 ½” x 8 ½”.
- Make four of these units for each for the red star blocks.
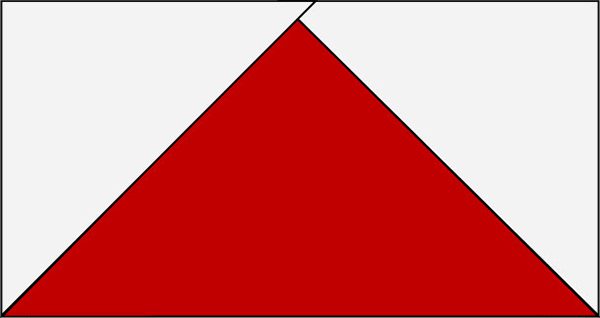
- Stitch the small white triangle to each side of the large red triangle (from White Saw Tooth fabrics) to make a rectangle that measures 4 ½” x 8 ½”.
- Make four of these units for each for the white star blocks.
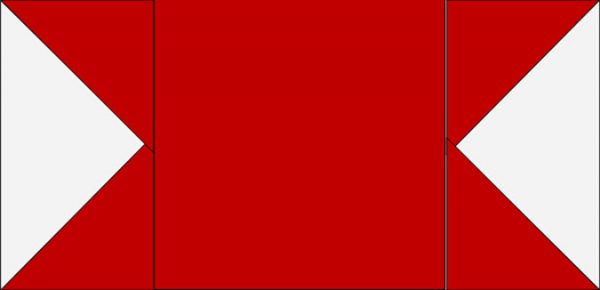
- Stitch a white 4 1/2″ square from red star block fabric to the short sides of each rectangle as below. Stitch two of these units for each red star block.
- Stitch a red 4 ½” square from white star block fabric to the short sides of for each white star rectangle. Stitch two of these units for each white star block.
- Stitch the other two red star 4 ½” X 8 ½” rectangles to each side of the 8 ½” red square (from red star block fabric) as below. The rectangle should measure 16 ½” X 8 ½”. Stitch one unit for each red star block.
- Stitch the other two white star 4 ½” X 8 ½” rectangles to each side of the 8 ½” white square (from white star block fabric) as below. The rectangle should measure 16 ½” X 8 ½”. Stitch one unit for each white star block.
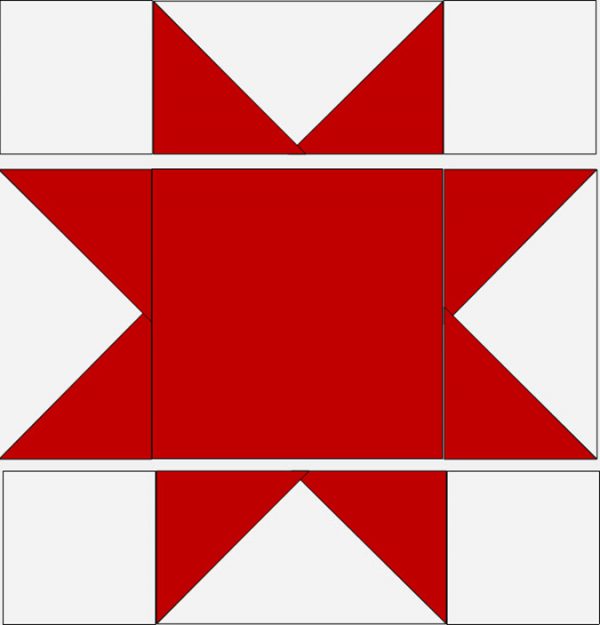
- Stitch rows together as below for each red star. Make a total of 5 red star blocks
- Stitch rows together as below for each white star. Make a total of 5 white star blocks
- Set these blocks aside.
How to Stitch a Log Cabin Block
I like to lay these out on a design board too. This just helps me make the scrappy look I enjoy so much.
- Use an accurate quarter inch foot stitch to stitch strips on.
- You will be creating a total of 10 Log Cabin blocks.
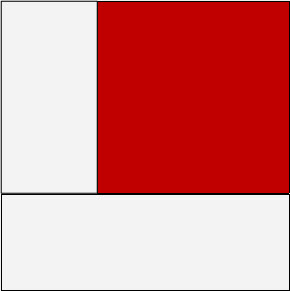
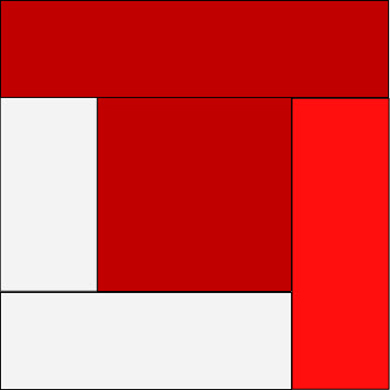
- Start in the center with the 4 ½” red square and stitch the 4 ½” x 2 ½” white rectangle to the left side.
- Take the 6 ½” white strip and stitch it to the bottom.
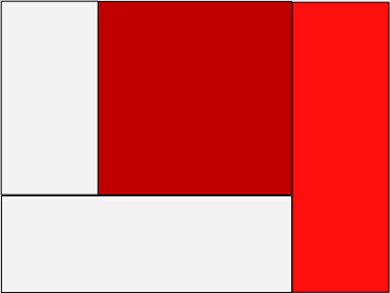
- Take the 6 ½” red strip and stitch it to the right side.
- Take the 8 ½” red strip and stitch it to the top.
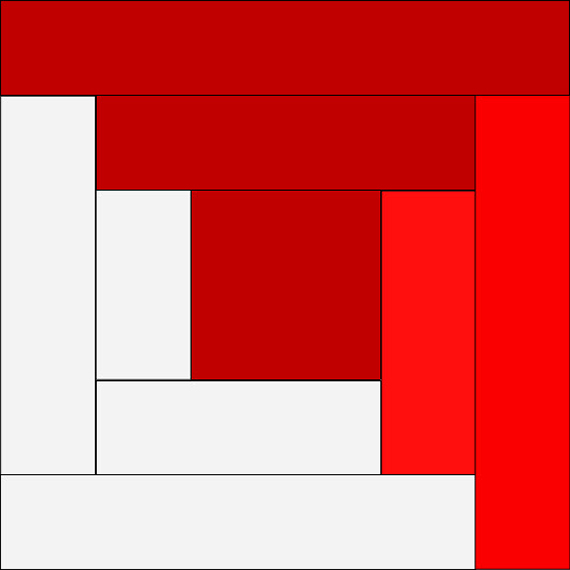
- Continue around the block counter clockwise stitching on the strips
- White 8 ½”
- White 10 ½”
- Red 10 ½”
- Red 12 ½”
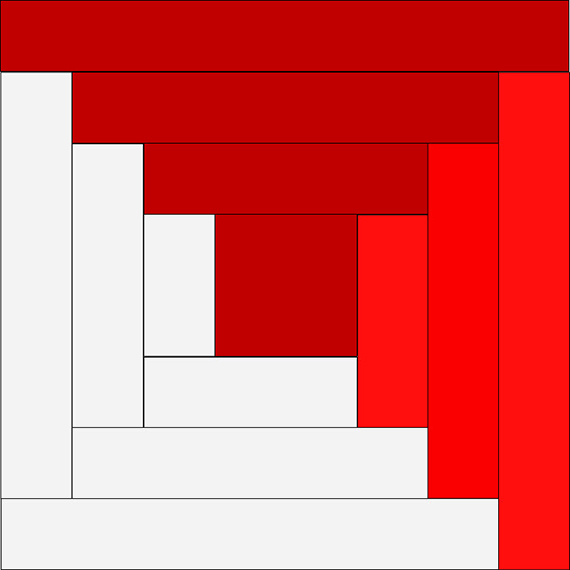
- Continue around the block counter clockwise stitching on the strips
- White 12 ½”
- White 14 ½”
- Red 14 ½”
- Red 16 ½”
- Create all 10 log cabin blocks in the same manner.
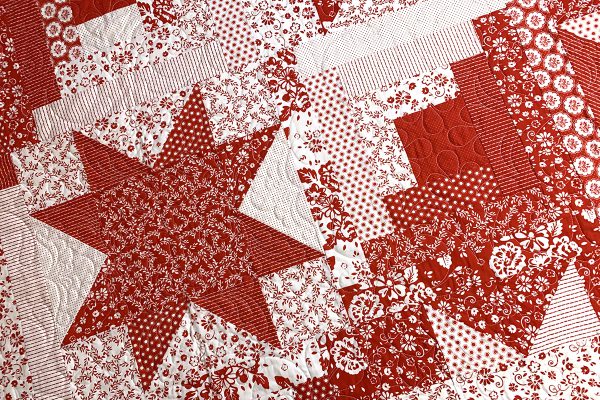
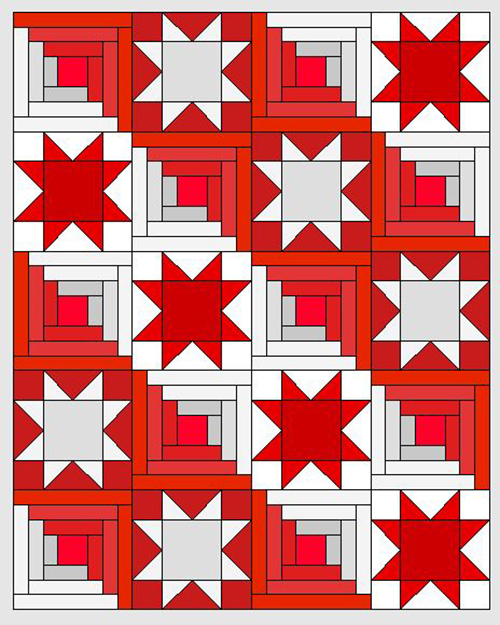
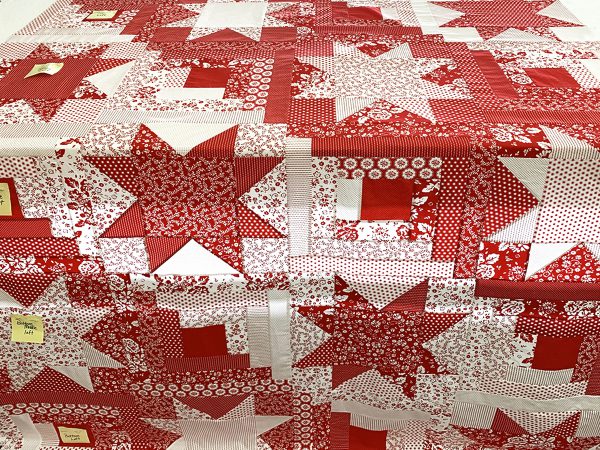
- Place blocks on design board or a bed in the layout you see below if you want the same as mine. Please feel free to be creative.
- Mark rows and stitch together. I like to mark my rows so that it is easier for me to keep them where I originally placed them.
- When you have stitched the five rows stitched, stitch those rows together.
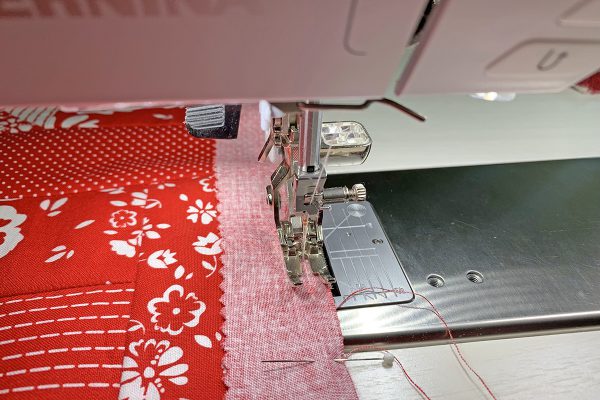
- Still using the quarter inch foot, stitch the inner border to the two sides. Be sure to measure the length at the center of your pieced top to get the measurement for the side borders. I do pin the border on to make sure I can work in any fullness if it is needed. Using BERNINA Dual Feed is also help if you have a machine with that function.
- With the side inner border stitched on and pressed, measure across the center of quilt top including the side borders; this will be the length measurement for the top and bottom inner border.
- Stitch the top and bottom inner borders on, pinning if needed.
- Stitch on the outside borders in the same way, starting with the sides and then the top and bottom.
- Quilt your project in your favorite way, bind and enjoy it all year or at the holidays.
What you might also like
4 comments on “Log Cabin and Saw Tooth Star Blocks Quilt”
-
-
Thank you Julie. They are some of my favorite too. Can’t wait to see you quilt!
-
-
I have always wanted to stitch a log cabin quilt and a star quilt, and here it is. Two in one! Perfect quilt to make for my oldest grandson. Thanks, MM
-
Two of my favorite also. So glad you like it.
Happy Quilting,
Denise
-
Leave a Reply
You must be logged in to post a comment.









So pretty! I love red and white quilts and those are two of my favorite blocks also!