Garment Sew Along Part I: Garment Sizing and Fabric Selection
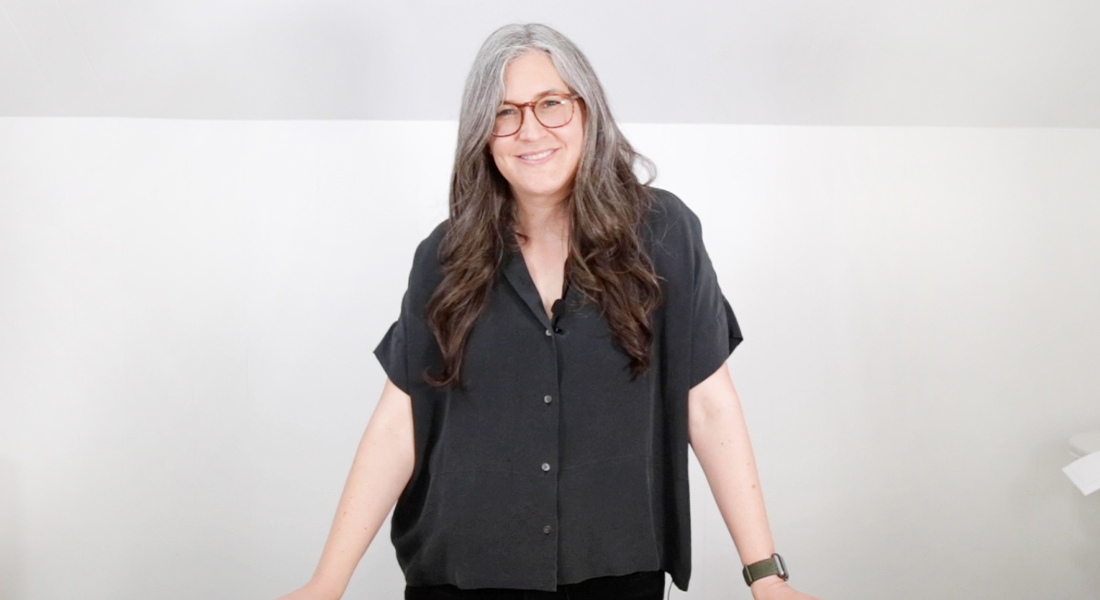
Hello everyone and welcome to the garment sew-along series! My name is Megann Freese, and I am an Associate Educator for BERNINA of America. I have a background in fashion and garment sewing, and I wanted to share some of my knowledge with all of you!
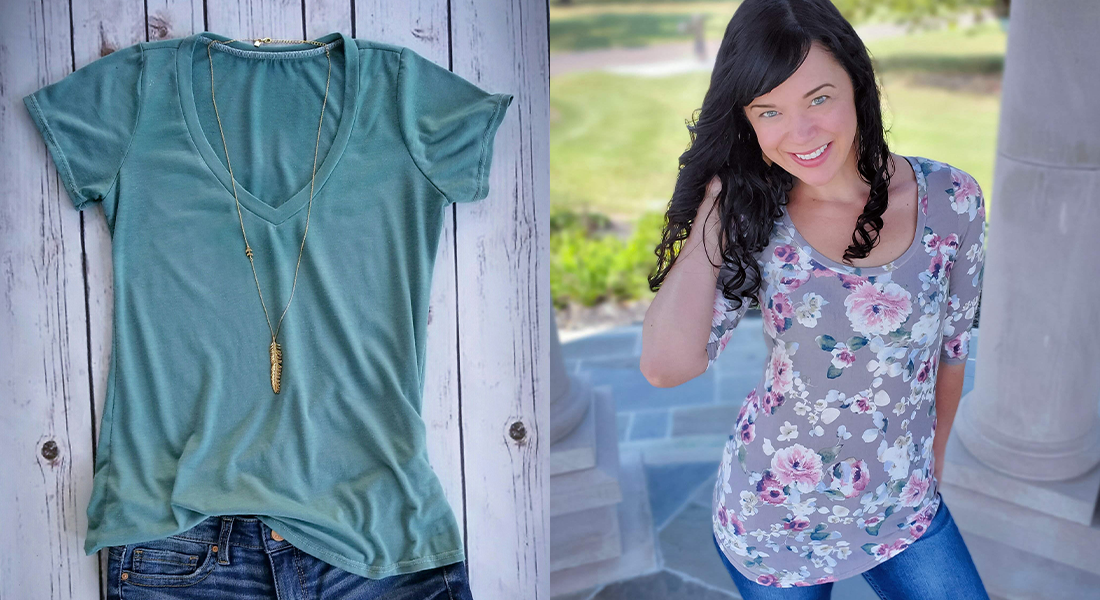
In each blog post of the series, I will discuss a construction element (or several elements) of the Grainline Studios Archer Button Up pattern. One of the many great things about garment making is that most of the information I talk about here will apply to all garments that you make down the road—not just this particular pattern. But to best prepare for the other eight posts in this series, be sure to have the Grainline Studios Archer Button Up pattern. Later in this post, you will find the other materials needed to create this shirt. I chose the button up for this series because it is a rather simple top, but it comes with several variations that can be used to style it up or down depending on your wardrobe.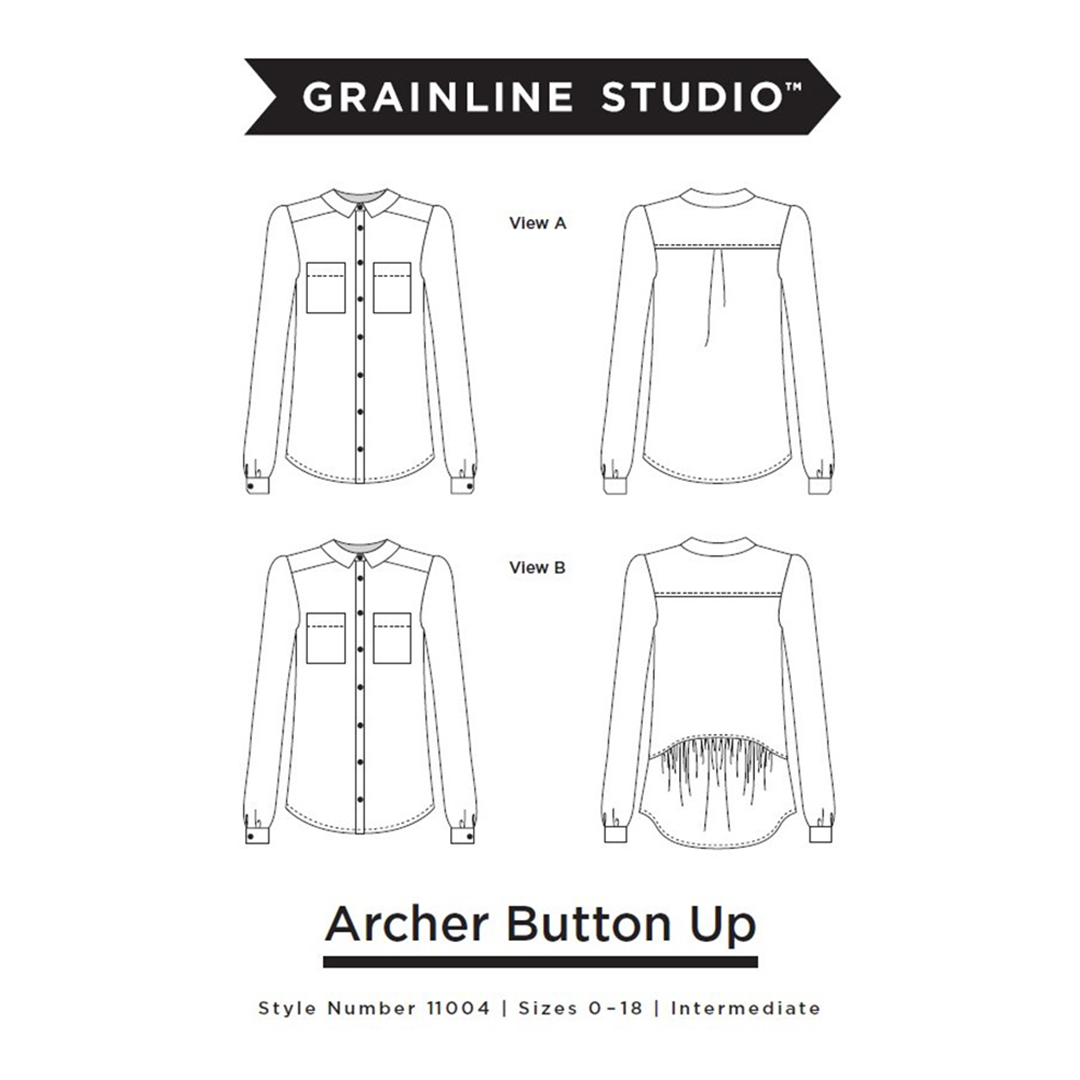 For this blog today, there are several things on the agenda. First, we will talk about selecting a pattern, and then finding the right size in that pattern based on your measurements. I have included helpful tips that I personally use for measuring. And lastly, we will discuss fabric selection and other components needed for the construction of this button up!
Picking the Pattern
Picking a pattern should be based on several things. To make is simple, I have made a checklist:
- What are your wardrobe needs?
- What is your closet lacking?
- What level of sewing are you at?
- What is your time frame for this sewing project?
When picking the pattern, it is very important to know your measurements. Patterns that can be bought at local fabric or craft stores come in a range of sizes, but most packaging only contains half of the available sizes. For example, the same pattern could be broken up into three packages, one containing sizes 0-8, one containing sizes 10-16, and one containing sizes 18-24. Knowing your measurements and finding the right size will also help you purchase the correct amount of fabric. This next section discusses how to find and achieve accurate measurements.
Finding the Right Size
Sizing is always evolving and is rarely consistent. It changes from one retail store to the next, or even one pattern to the next, with little to no correlation among them. Do not be alarmed if you are looking at a pattern and the sizes do not match your ready-to-wear clothing sizes. That is what is so great about sewing your own clothes! Patterns are just the baseline. From there, any pattern can be adjusted to fit you, your body, your style, and your wardrobe perfectly! The information that follows will help you measure the body accurately to find the perfect size in the pattern.
Begin by navigating to the pattern measurements. This is usually located on the back of the pattern packaging, and can also be found in the instructions for the garment.
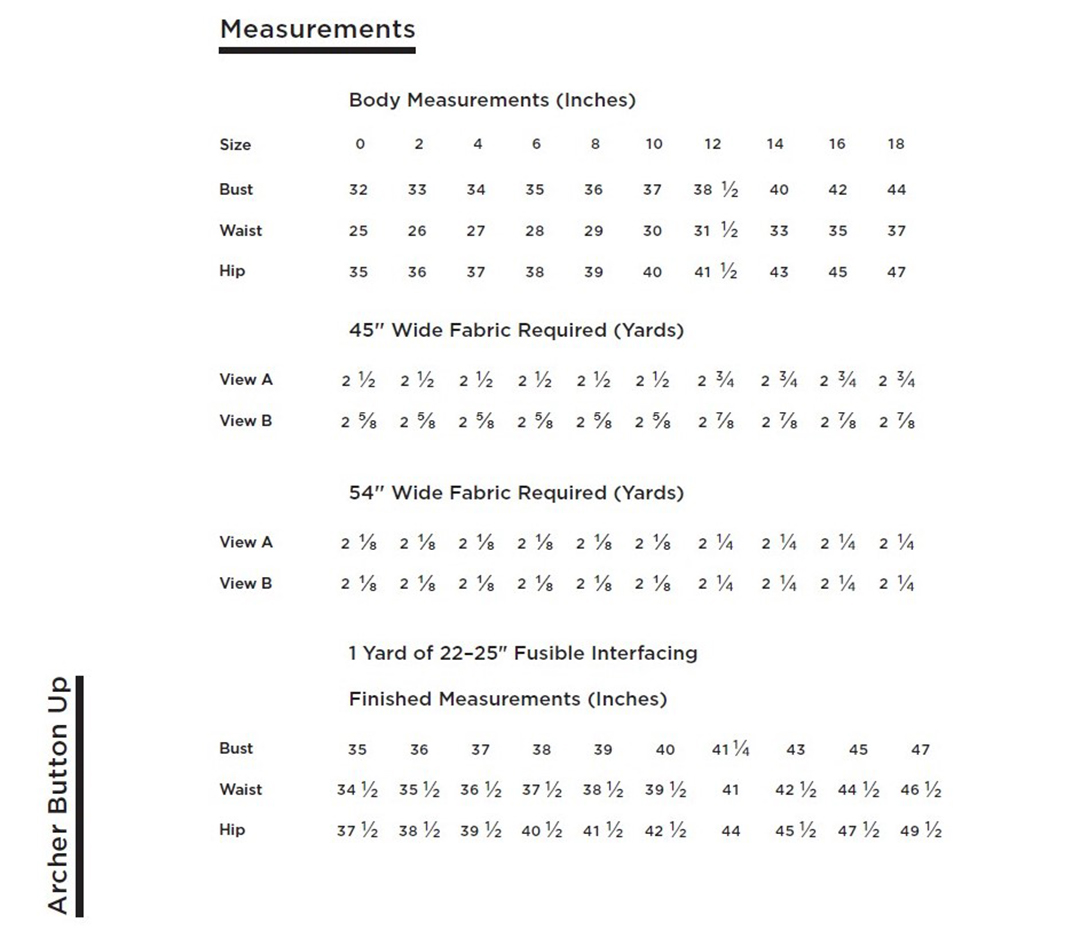
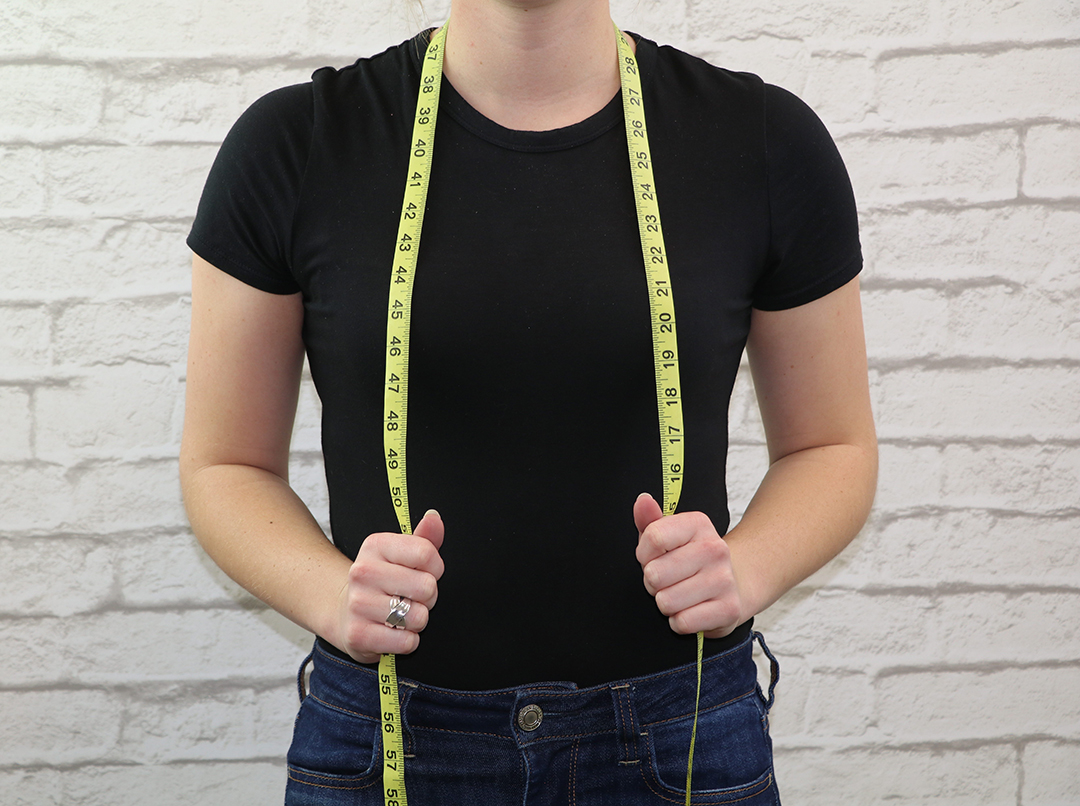
There you will find the guideline measurements that will assist you in finding the correct size. We take these measurements using a standard tape measure. Patterns measure in inches. Begin measuring at the top of the body and work down. The Archer Button Up uses three points of measurement: bust, waist, and hips. I have included measurements for more garments than just this button up.
Sizing Measurements
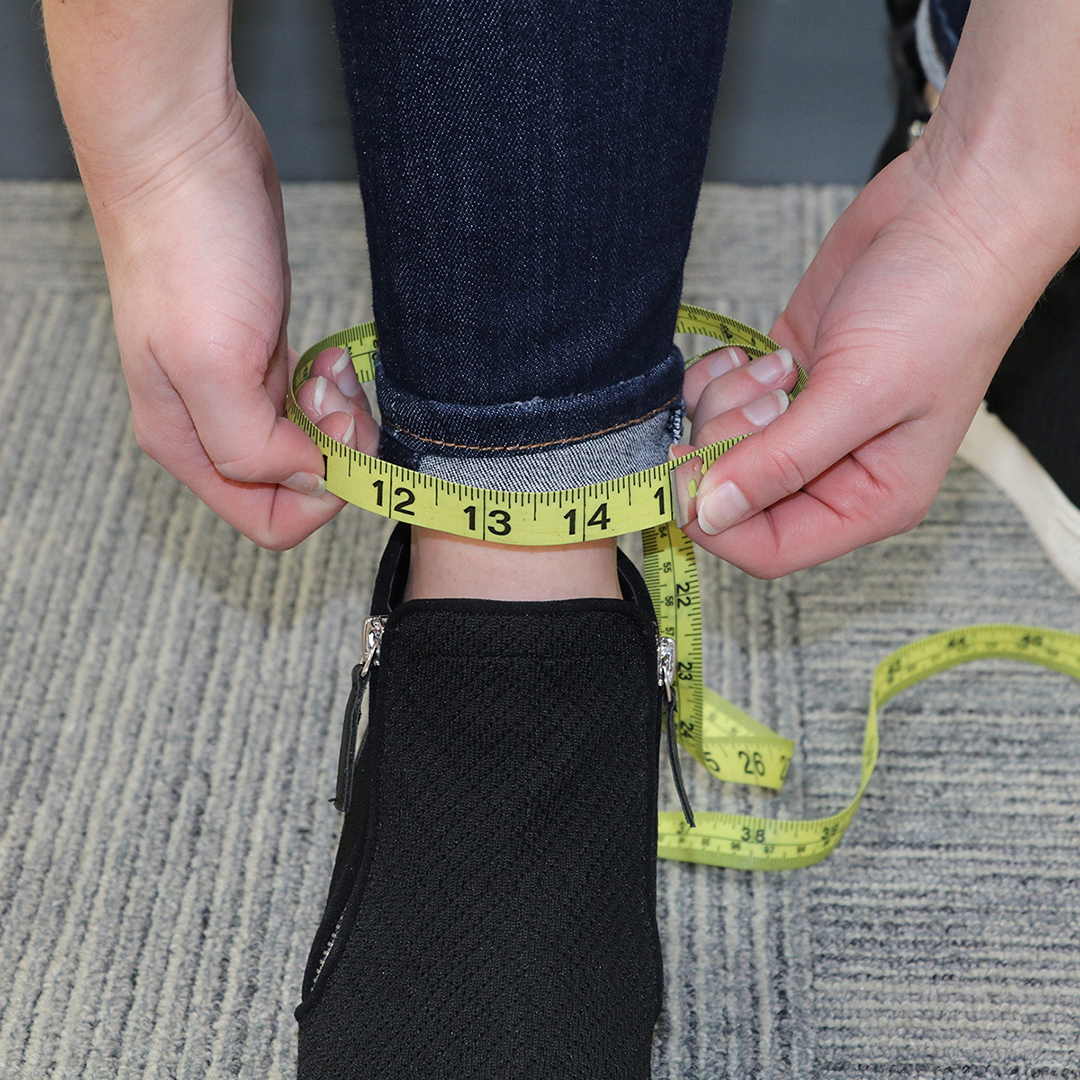
Too loose vs. too tight
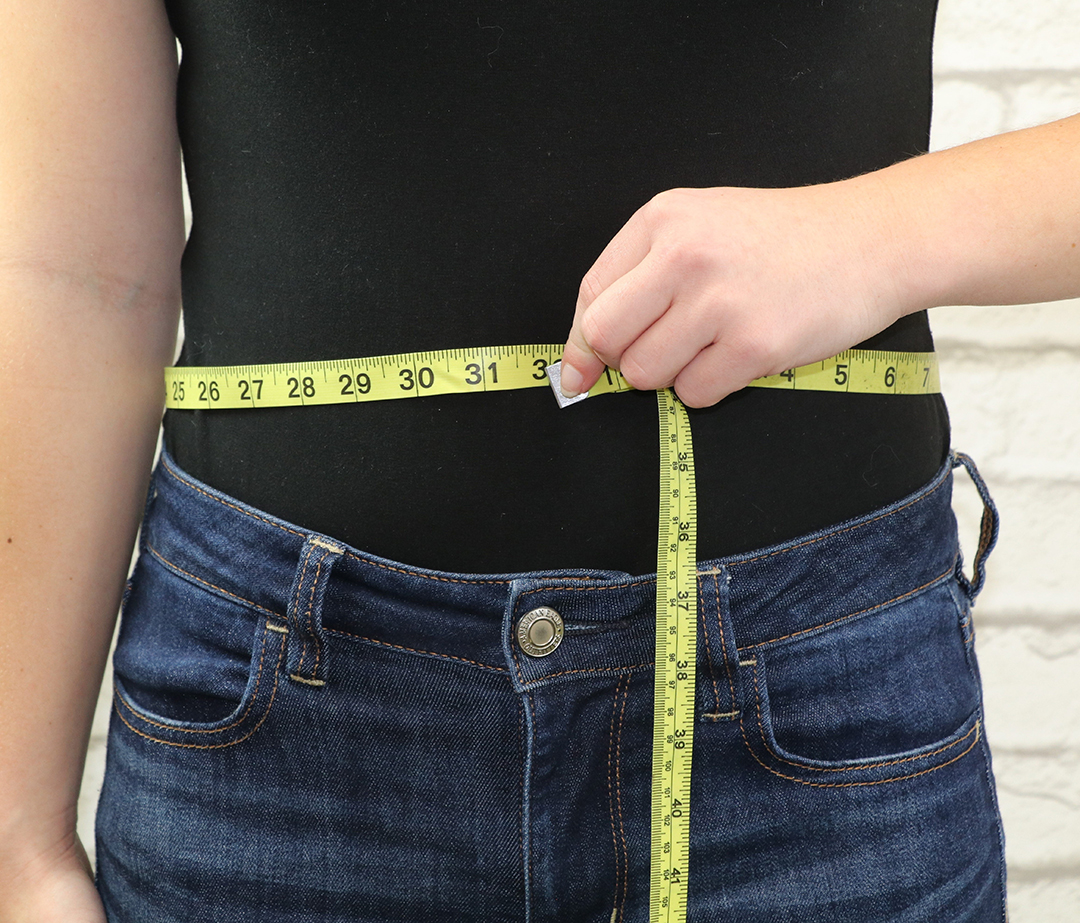
Above are images of what NOT to do when measuring. Be sure that the tape measure is snug around the area being measured, but not pinching. If the tape measure causes bunching of the skin or clothing, it is drawn too tight. If the tape measure is not even all the way around the body, or is not taut, the measurement is inaccurate.
Bust
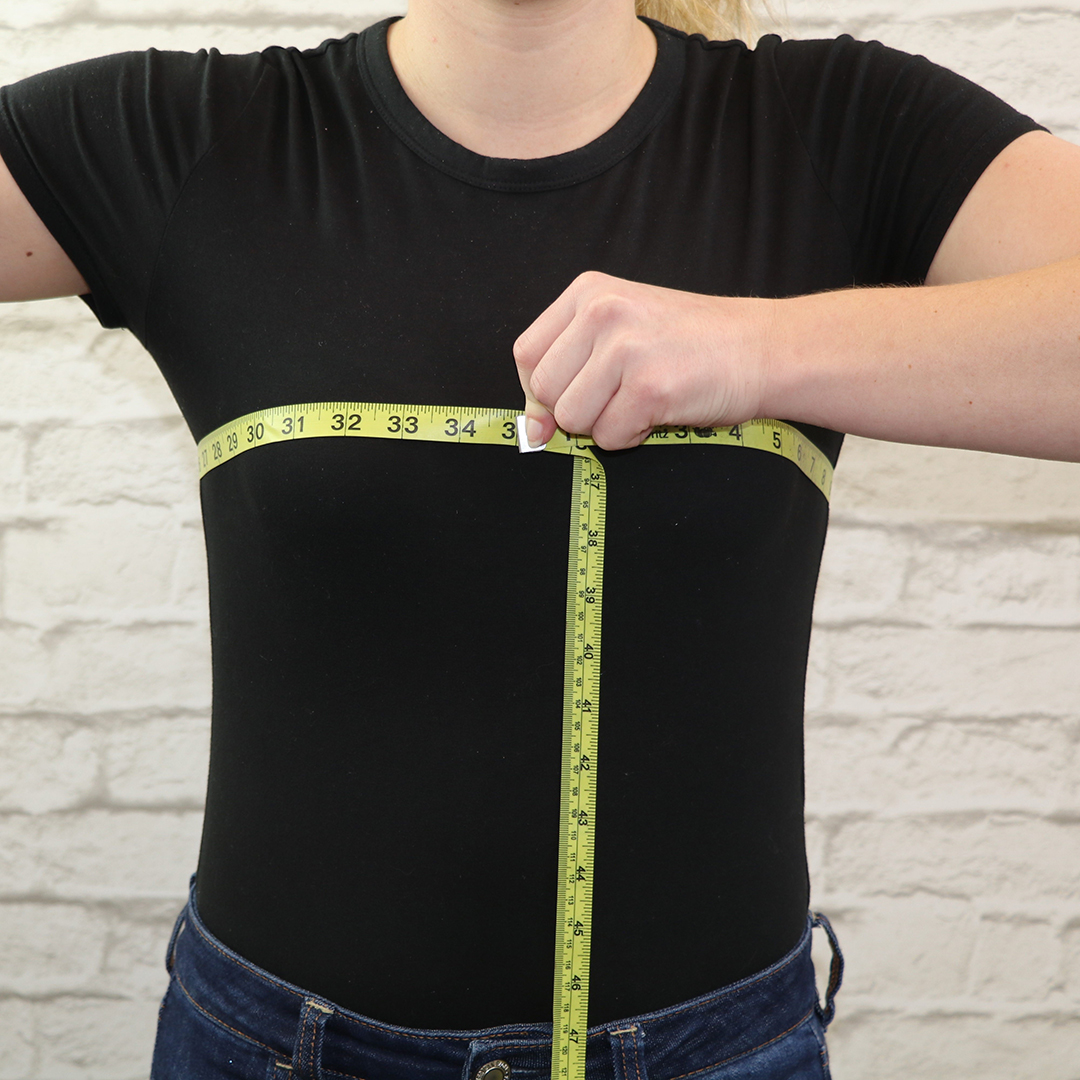
Make sure the tape measure is at the fullest part of the bust.
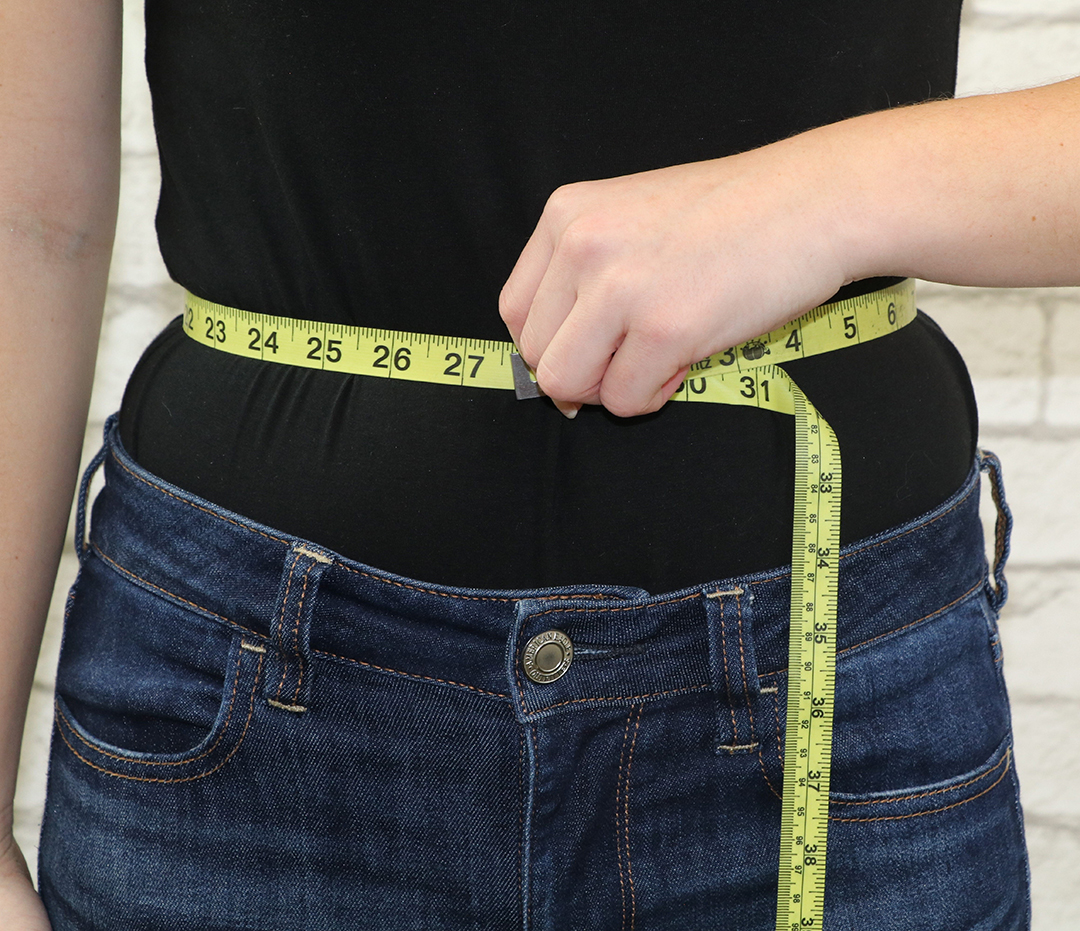
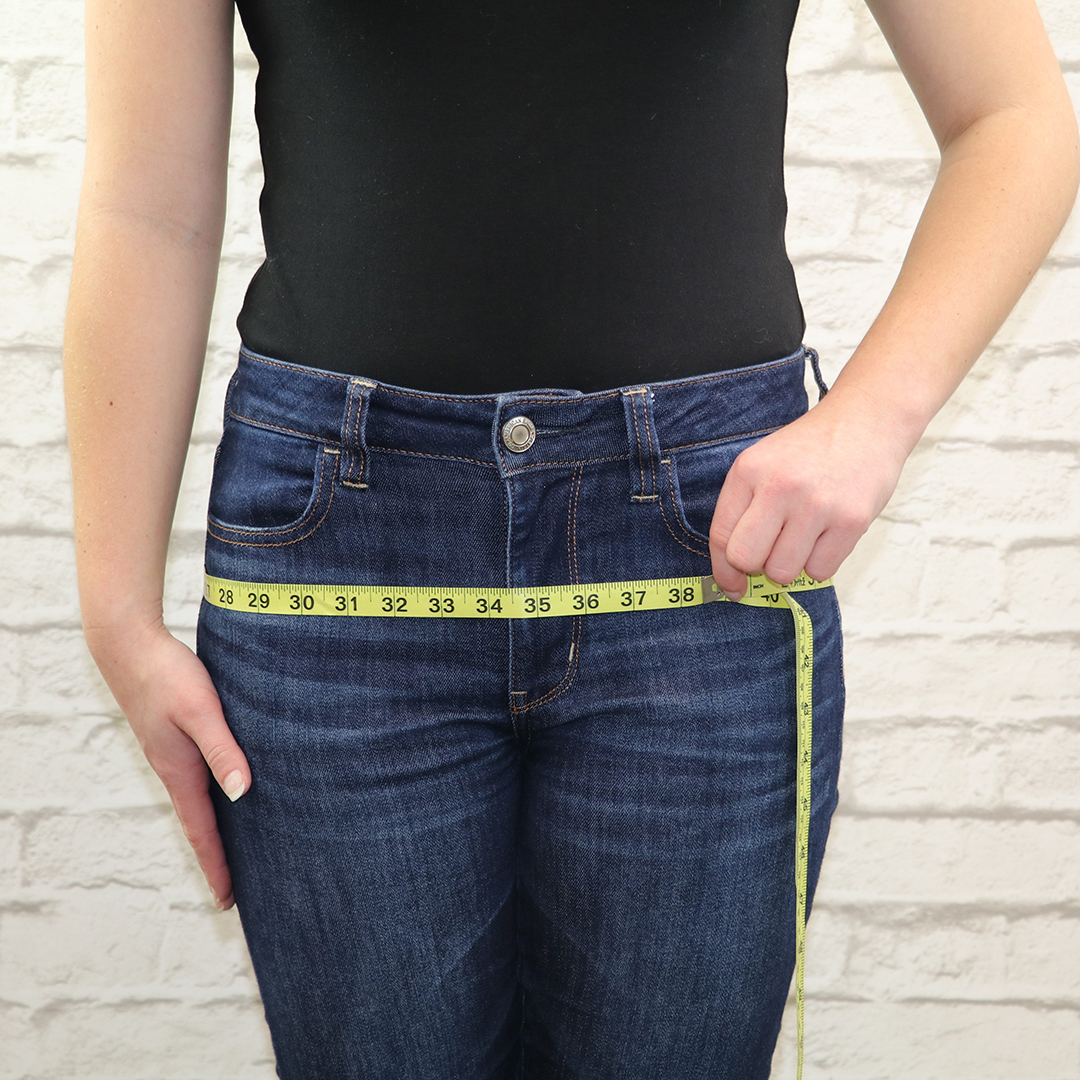
Waist
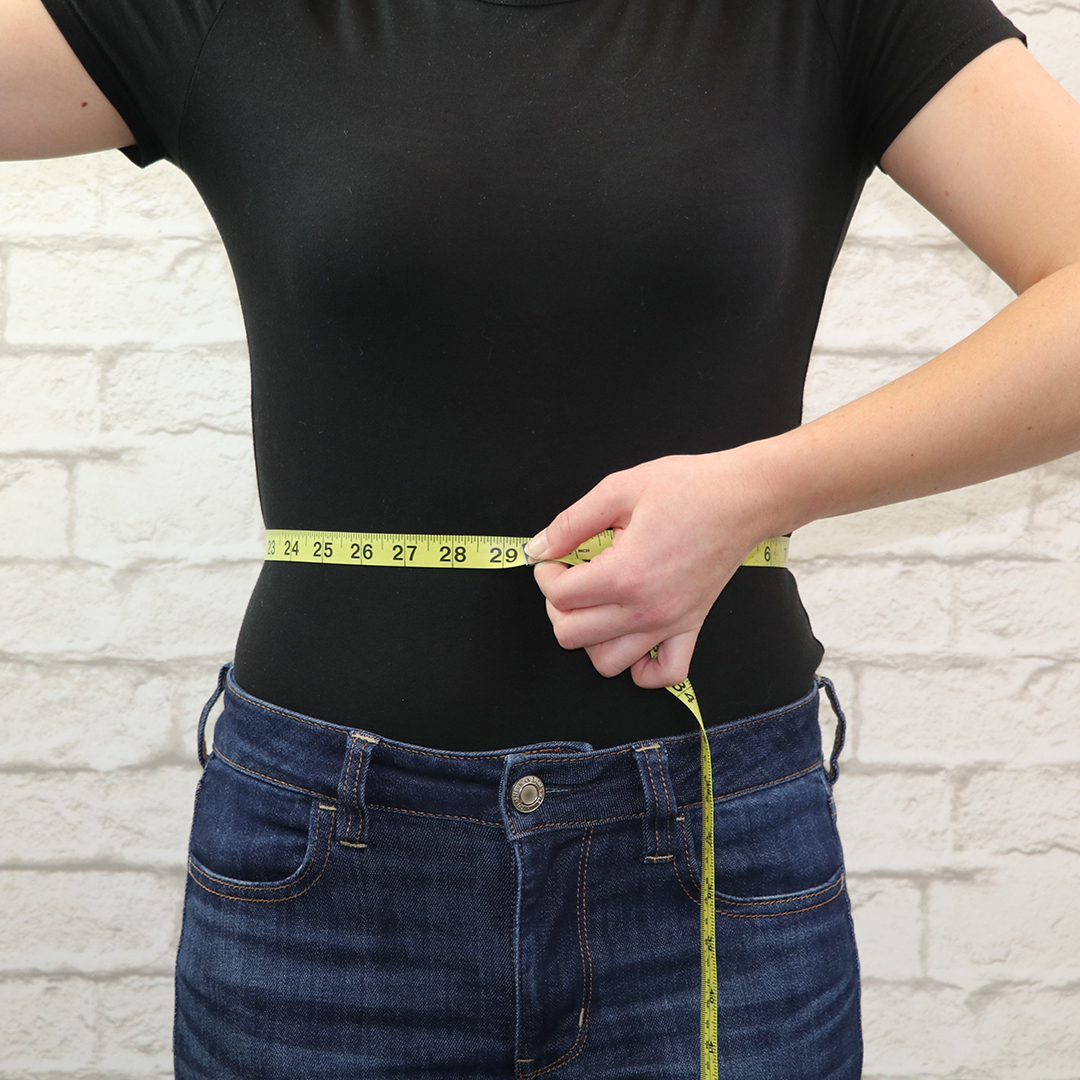
It is often difficult to distinguish between the waist and the ‘natural waist’ that patterns use. The ‘natural waist’ is essentially the narrowest part of the torso. My trick for measuring this is to “put your hands on your hips”. The top part of the hand lands in the natural curve. This works very well when measuring others.
Too high vs. too low
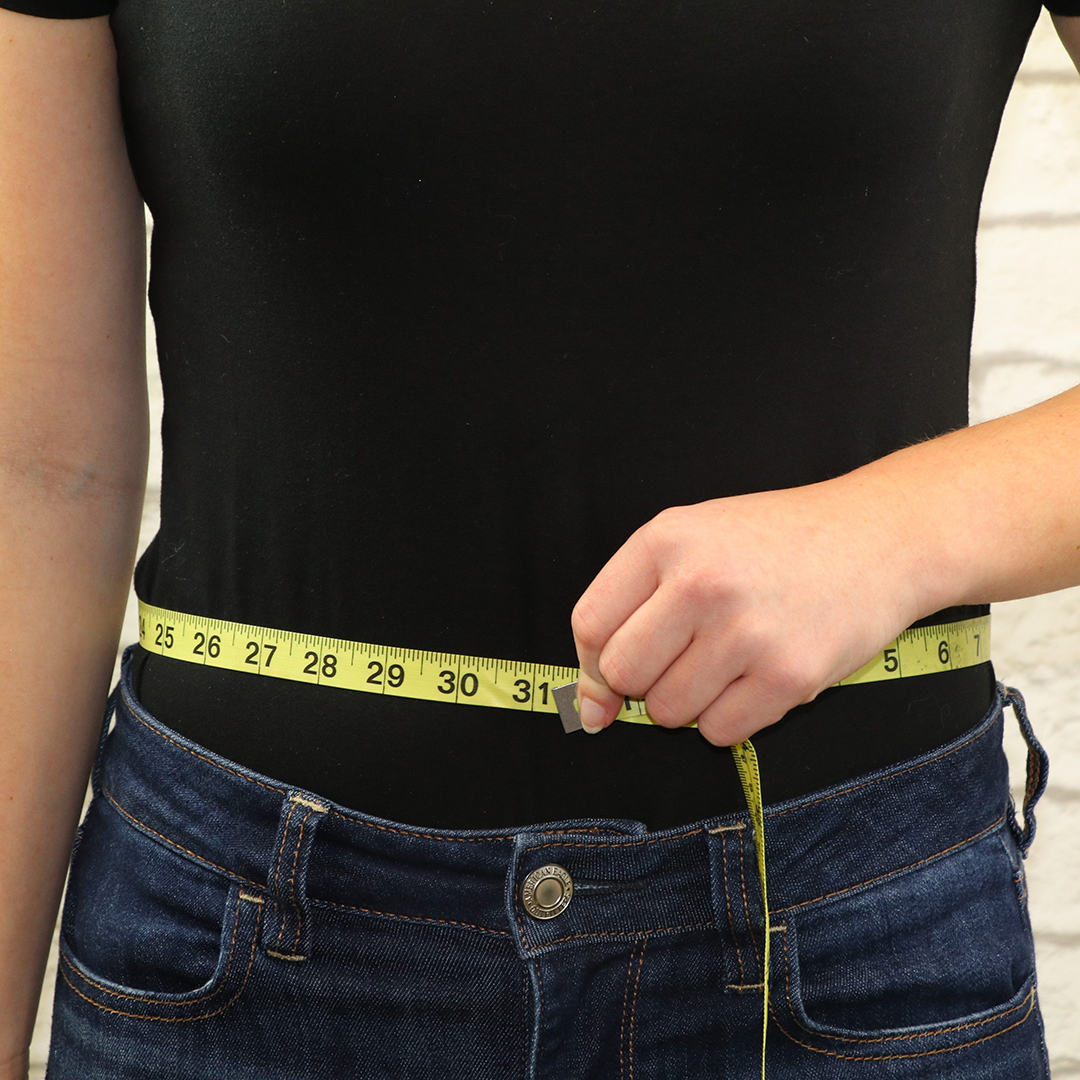
There are incorrect ways to measure the waist. Above are images of what NOT to do. Although high-waisted garments are very popular right now, the tape measure should still not be taken around the ribs. Low rise jeans are also popular, but do not take a waist measurement at the hip bone.
Hips
Typically, the hip measurement is taken 7”-9” below the natural waist. Measure around the fullest part of the hips, keeping the tape measure even and taut all the way around the body.
Back – neck to waist
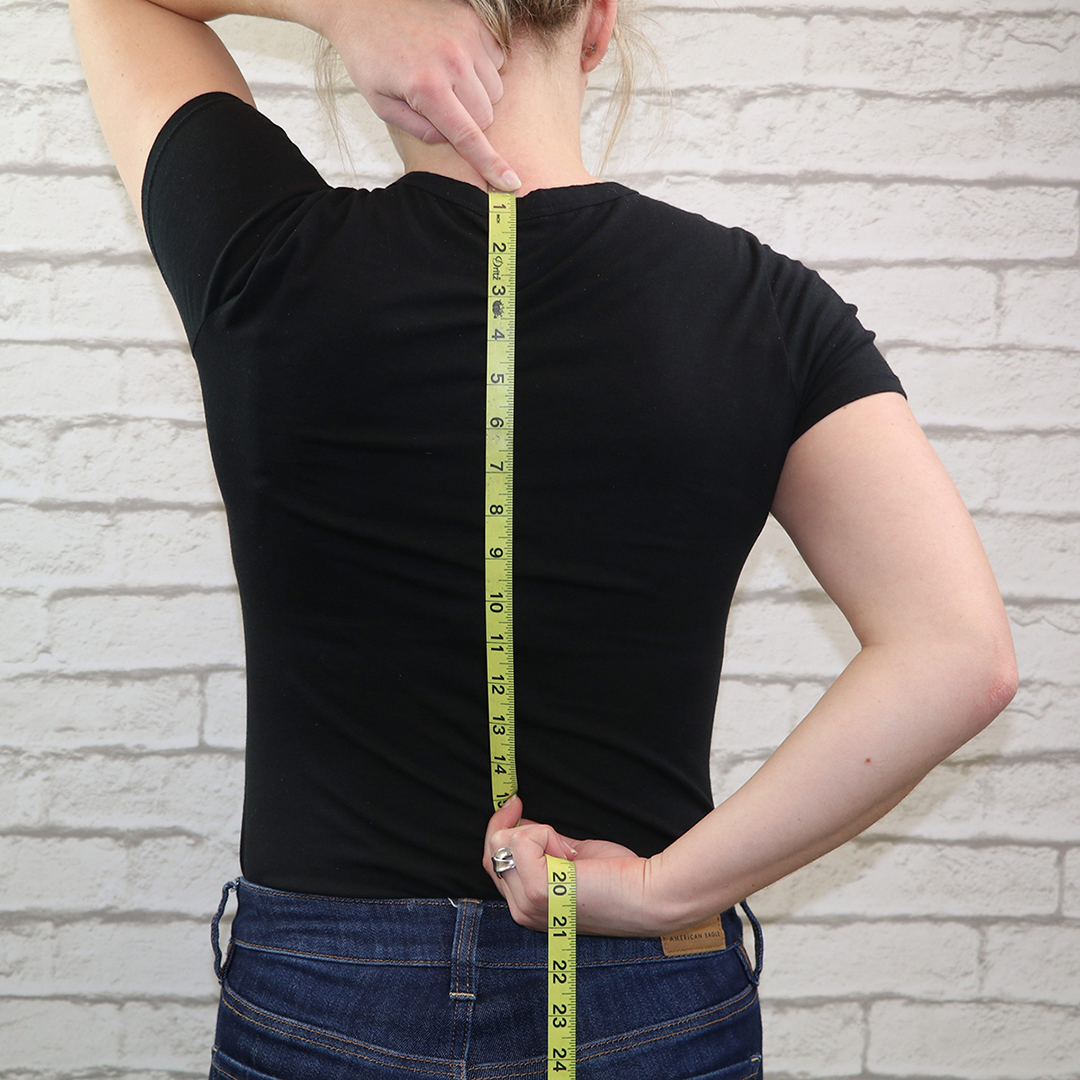
The point on the neck that you are looking for is the first major bone at the top of the spine that sticks out. Lean your head slightly forward to feel the bone stick out. This measurement is usually necessary for proper fitting of dresses, coats, and jackets.
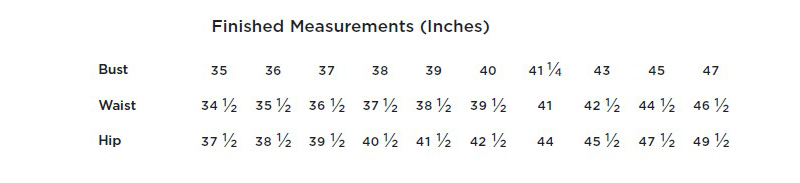
Finished Measurements
Back – length from base of neck
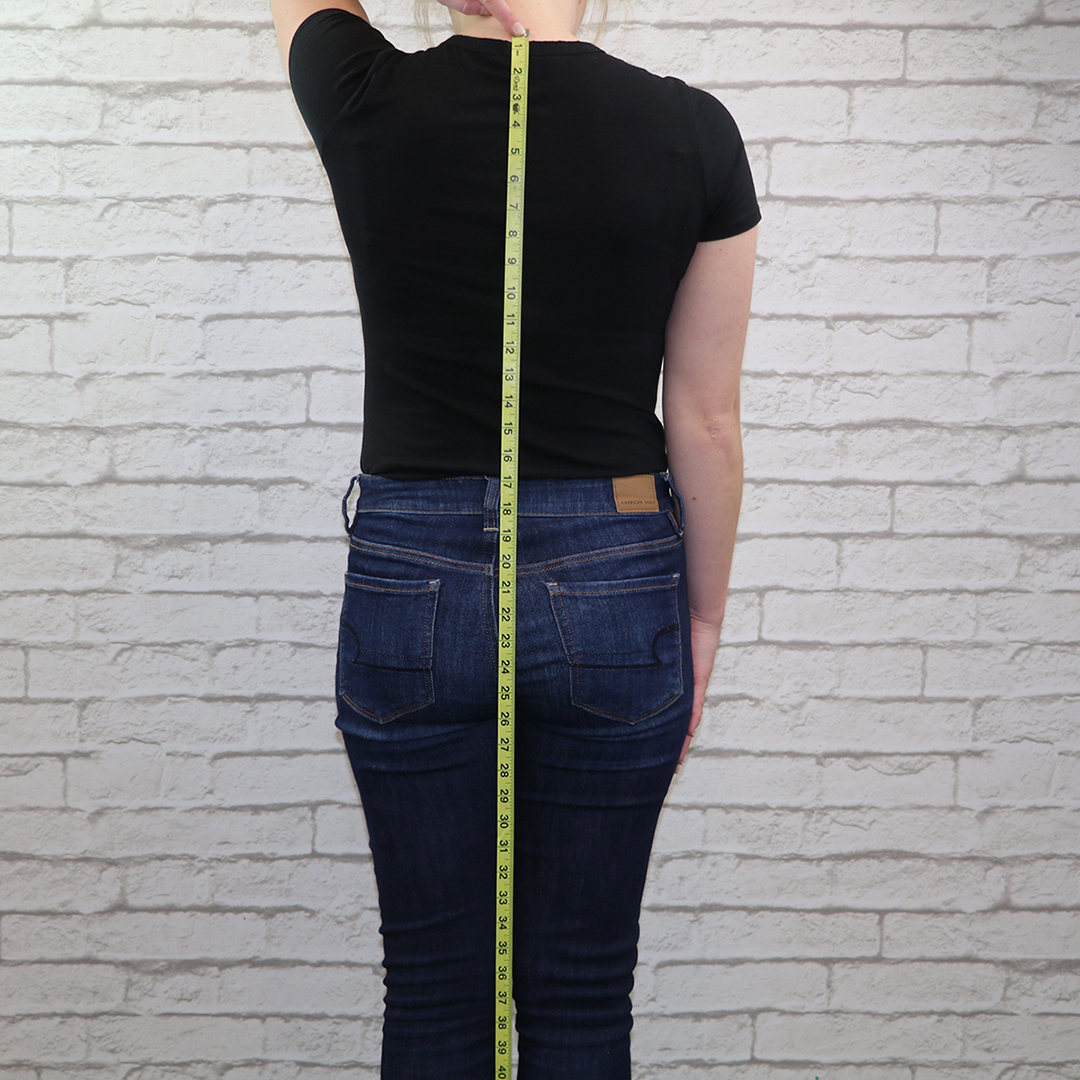
As a finished measurement, this shows where the garment starts, and where the hem ends. The neck bone discussed earlier is usually the position of the top closure on a dress, or where the collar of a shirt sits.
Side length
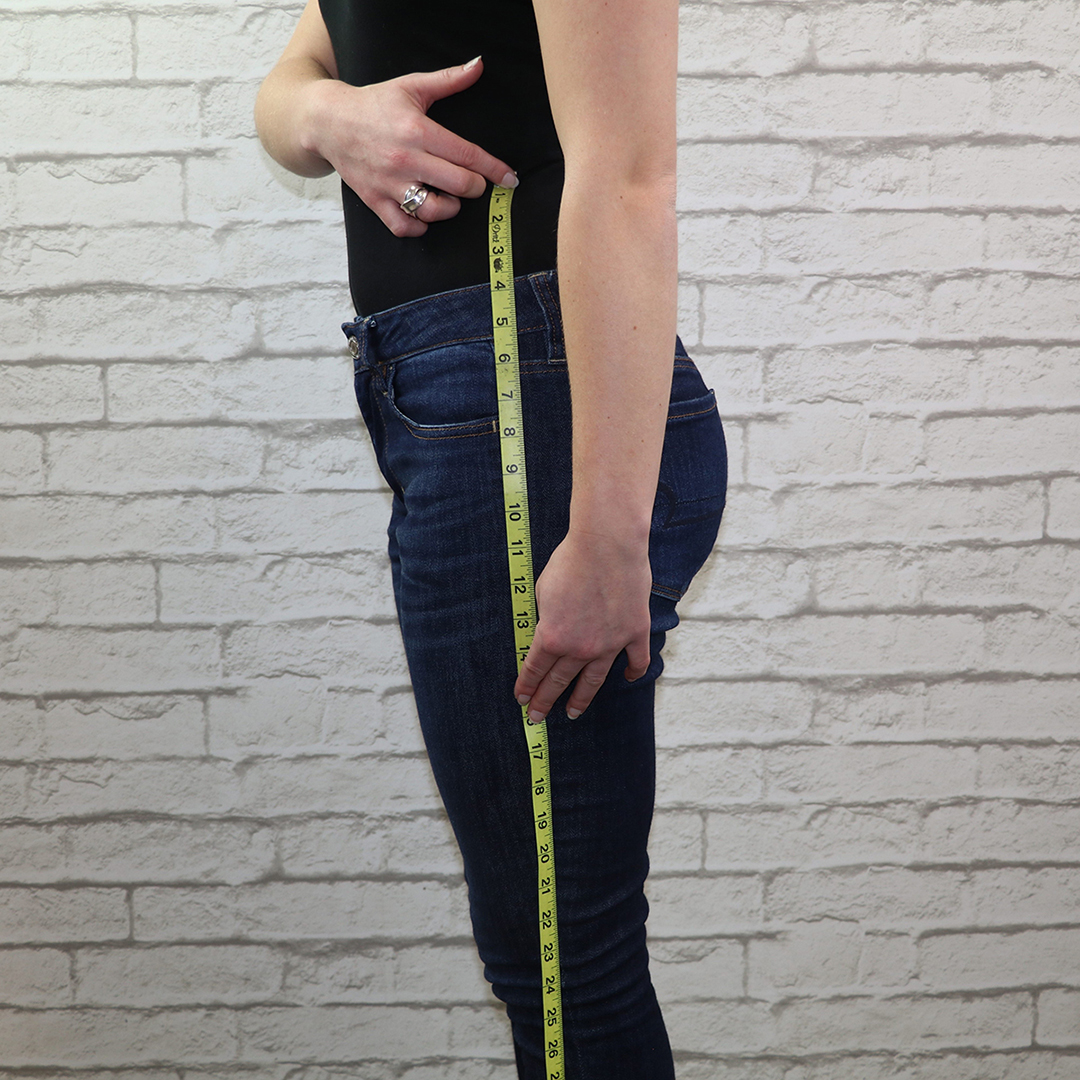
Another name for this would be waist-to-finish measurement. If you are measuring for a fitted dress that has a waistband which sits at the natural waist, it is important to get this measurement correct, or at least feel comfortable with where the measuring tape hits.
Leg width
This demonstrates the circumference of the finished hem at the bottom of a pant leg.
Tips and Tricks for Sizing and Measuring
- It is better to go a size larger if your measurements fall between two sizes. I find it much easier to take in the seam on clothing, rather than trying to find the wiggle room to let it out seams. Patterns typically use a 5/8” seam allowance. Although this seems like a lot, but it still may not be enough if you have to let a seam out. This is also true if your measurements vary greatly between the measurements. For example, if your waist and hips match with two different sizes on the pattern, go with the bigger size.
- Always check what the finished measurements will be. Those finished measurements could persuade you to use a different size than what you previously determined, make adjustments to certain pieces of the pattern, or even use a different seam allowance. Below the measurement chart, there are finished garment measurements.
- If after doing the initial measurements, you are still unsure of what size to choose, it would be beneficial to hold a tape measure around the body at the finished measurement. It gives an impression of what the final fit would be like.
- Whether measuring yourself or others, the mirror is your friend. A mirror helps you to be able to see if the measuring tape is sitting evenly, and if you are measuring in the correct areas. It is also helpful when measuring others so they can see what the finished garment fit would be.
- If measuring someone else for a garment, be sure that the person is standing up straight. Have them first take a deep breath in and release it. This will relax them into their natural posture for the most accurate reading. Have them look straight ahead. Use a mirror to show them where hems will finish. Leaning forward only causes hems to appear shorter.
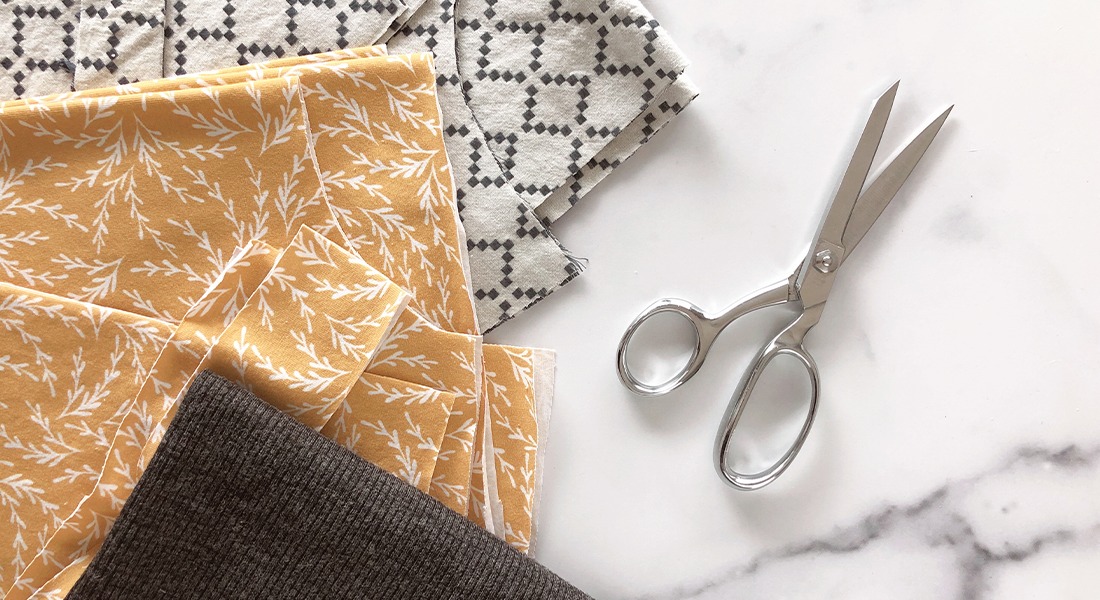
Picking the Fabric
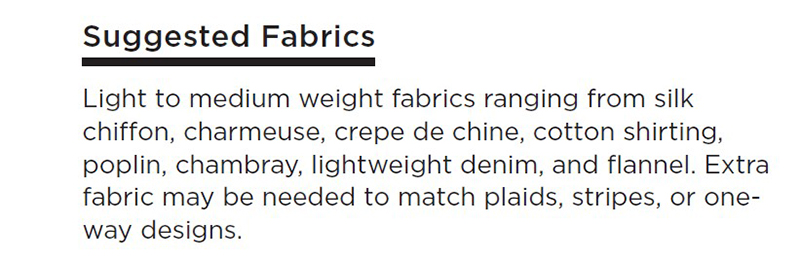
Pattern makers do a good job of listing the viable fabric options for that particular garment. Look at the pattern we will be using for this garment sew-along. Within the first few pages of instructions you will find a section titled ‘Suggested Fabrics’.
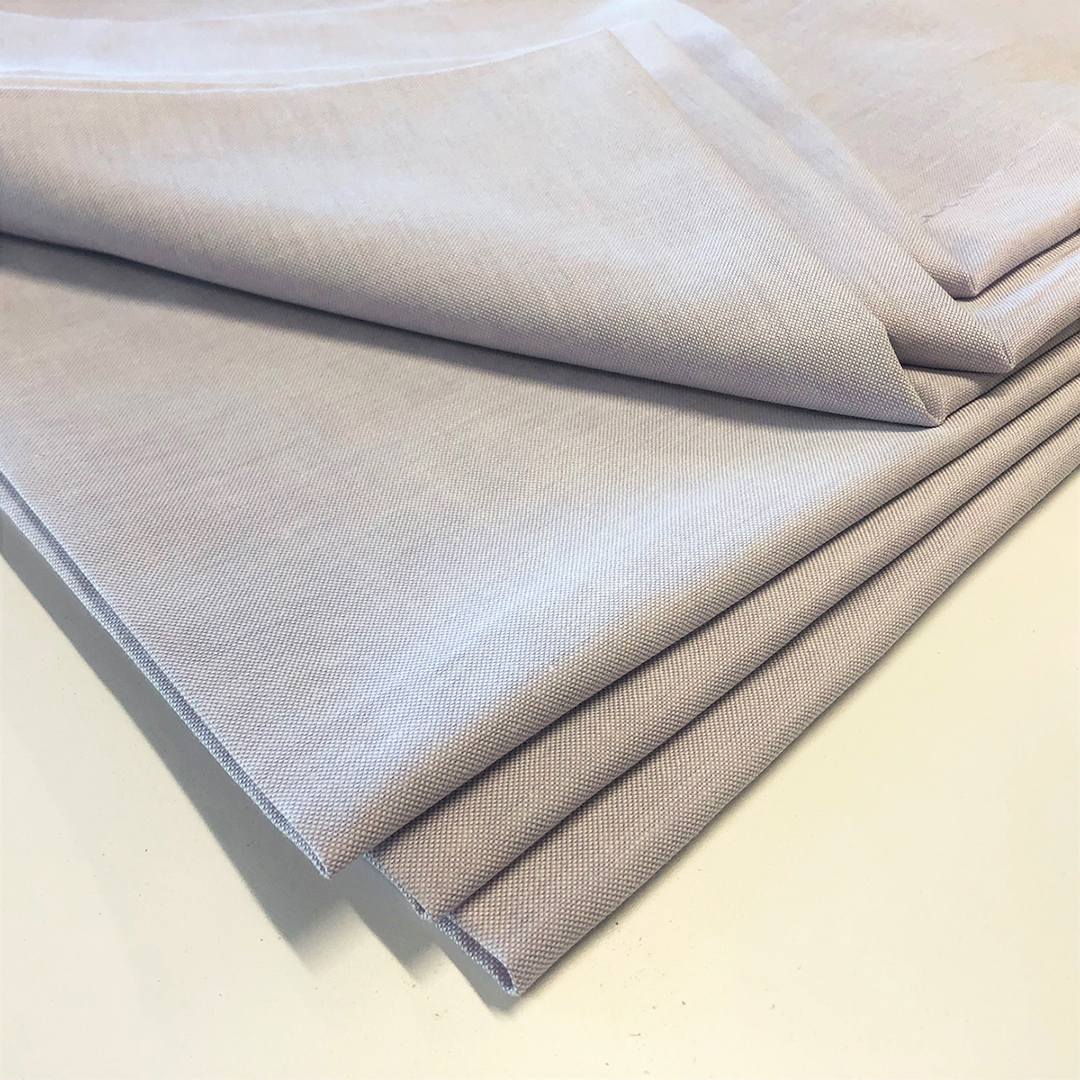
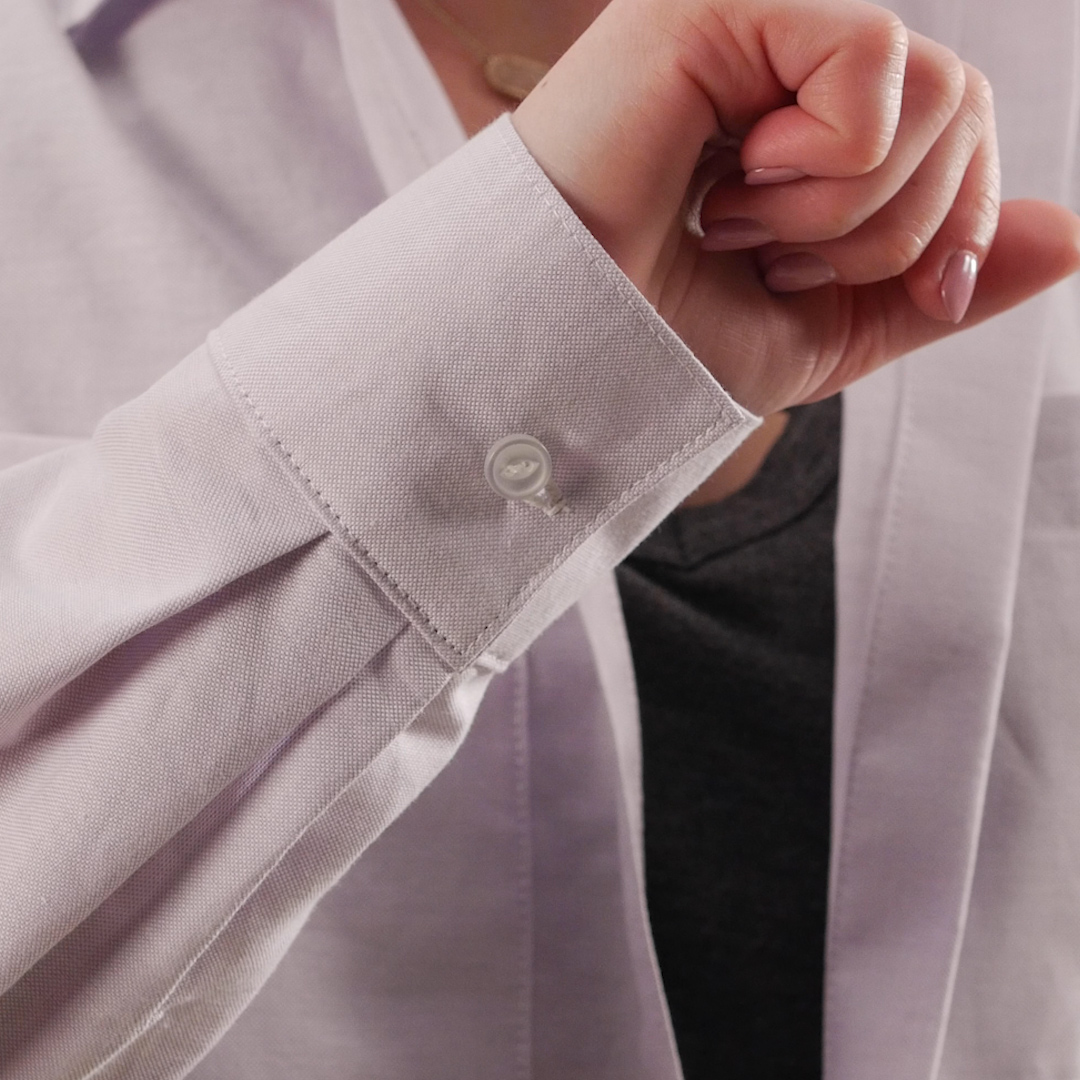
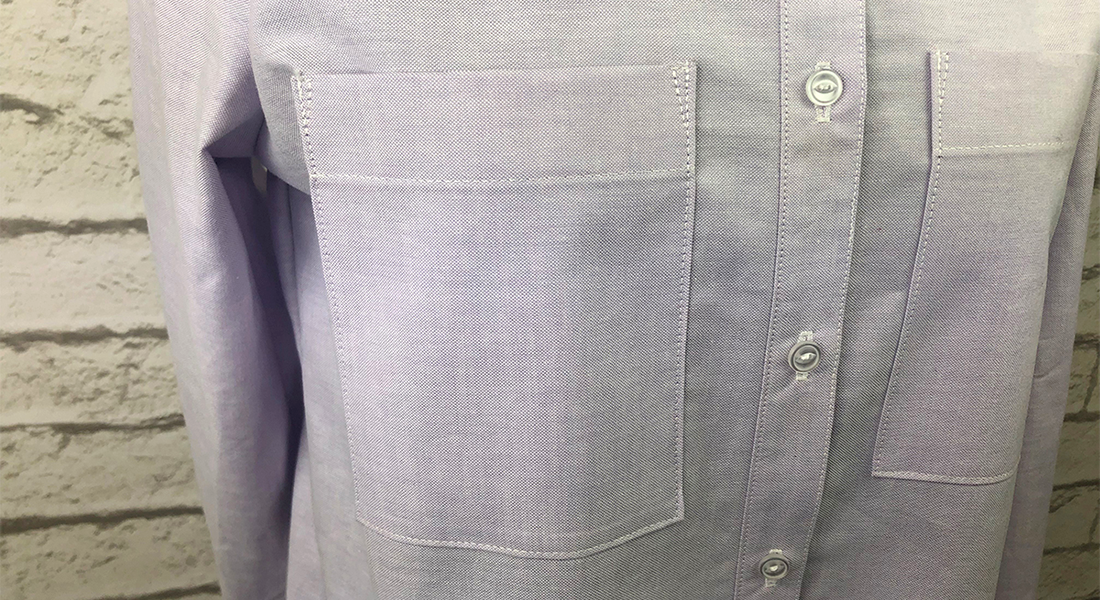
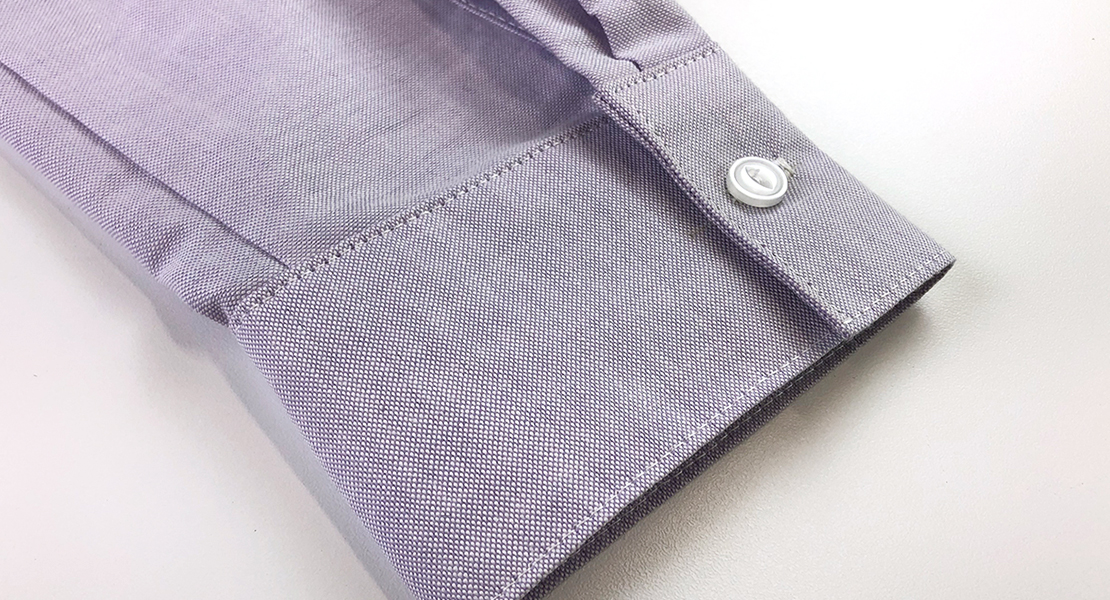
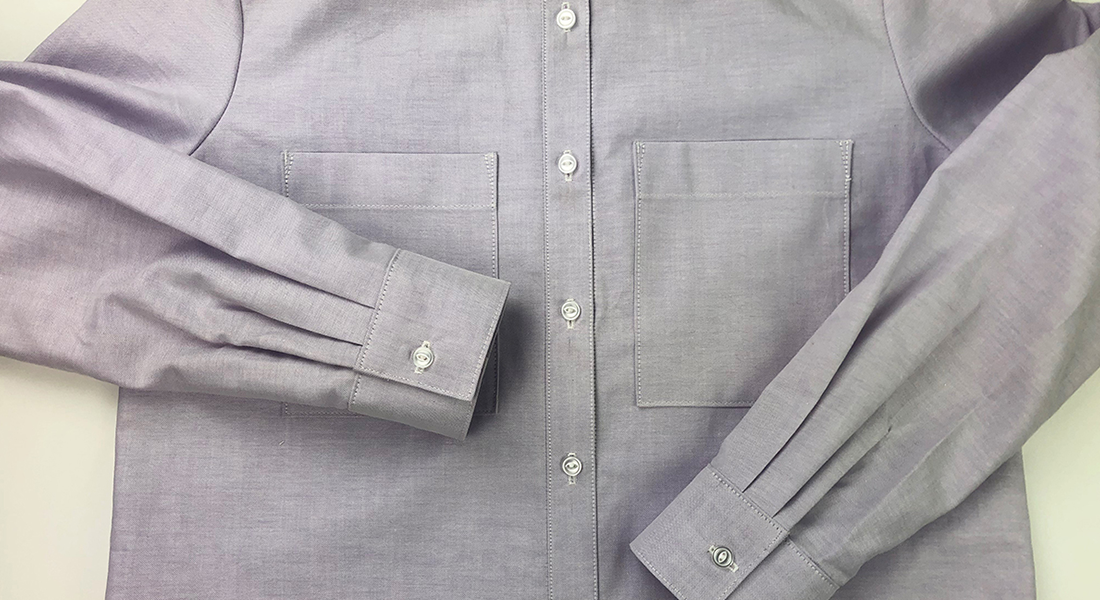
I have chosen a light purple cotton oxford shirting with which to construct this shirt. You may feel like veering off from the list of suggested fabrics. All fabrics have their own properties, such as drape, stretch, colorfastness, and luster to name a few. Each property can affect the final look of the garment you are creating. In this section, we will review factors that should be considered in fabric selection—natural versus synthetic, what you want to care for, what will work in your wardrobe, and what is best for the pattern are some guideline factors. First, let’s talk about the difference between natural fibers and synthetic fibers.
Natural
Natural fibers come from both plants and animals. Cotton, flax, linen, hemp, maize, ramie, and jute come from plants. Wool, mohair, and angora are a few fibers produced from animals. Natural fibers go through several processes before they ever become fabric. Fibers are harvested, cleaned, sometimes soaked in water, and even combed through. These fibers can be staple (short) or filament (long). Determining if they are short or long determines how they are spun into yarns, then finally woven into fabric. Check by taking a single yarn from a piece of cotton fabric. If you unravel it and look closely, you will see small ‘hairs’ coming out from several directions. Each of those ‘hairs’ is a single fiber.
Some cotton fabrics that I love sewing with are chambray, denim, gingham, and corduroy.
Synthetic
Other terms for synthetic are man-made or manufactured fibers. These types of fibers cannot be found in nature, but rather are created through chemical processes. Such fibers include acetate, acrylic, nylon, polyester, rayon, spandex, fleece, and faux fur. Synthetic fibers are filament because of the way they are created. A chemical mixture is made for each fiber, and is forced through small holes on a spinnerette, forming long, filament strands of fibers.
Blends
Manufacturers not only produce fabrics from natural fibers and fabrics from man-made fibers, but they produce fabrics made by mixing the two together. More and more we are seeing blended fabrics. This type of fabric is created by twisting or spinning a combination of different fibers together into yarns, which are then woven into fabrics. Combining the fibers this way gives the fabric properties from both. So a cotton/polyester blend has some cotton fibers in it and some polyester fibers in it, and possess properties of both. While cotton is great for absorbency and softness, polyester is great for wrinkle-resistance.
Care
Another factor to think about is the care of the garment. What kind of conditions will it go through? Will the seams be under a lot of stress? Will the garment be washed frequently? All things to consider before purchasing! After choosing the fabric, it should be cleaned in the conditions that the shirt will eventually go through before you actually cut it out and construct it.
This is where I should remind you to get extra fabric and TEST it first. Start by washing, drying, and ironing a small section of the fabric. This will give you an idea of how it will react and will determine if you should continue on with your project. If you decide not to test the fabric and just go ahead and make the garment, you run the risk of the garment shrinking, stretching, or becoming distorted the very first time that it gets washed. Nothing is worse than putting in valuable time and effort to make something, just for it to not fit after the first washing!
Other Factors
- Use the size you selected in the pattern to determine how much fabric you need to get. If the fabric is only 45” wide, you will need more yardage to cut all the pattern pieces out successfully than if your fabric is wider.
- If you are new to sewing, it may be best to start out using a fabric that does not have a lot of design to it. Matching plaids and other designs can be difficult, especially if you are not sure of the layout and piecing of garments.
- The fabric should be something that you are comfortable wearing. Think about the seasons and conditions you will wear it through.
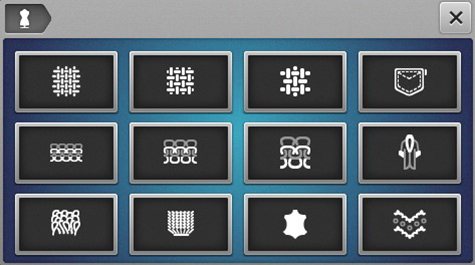
- Consider what types of fabric you enjoy sewing on. A great feature that comes with certain BERNINA sewing machines is BERNINA Creative Consultant. If unsure of how to sew on a particular fabric, open BERNINA Creative Consultant, select the fabric being used, and it will list information including type of needle, stitch, type and weight of thread to use, and the recommended presser foot. Then, with one touch, confirm the selection and the machine will automatically adjust the settings. Get the perfect stitch every time!
Interfacing
Once the fabric selection has been made, the next step is to find interfacing to match. Interfacing is not always used in garment construction, but it is very typical for collars, waistbands, in between plackets where buttons and buttonholes will be attached and sewn, as well as cuffs. Interfacing adds the extra level of stiffness and stability that gives the fabric a crisp look once the garment is finished.
There is a variety of interfacings available, each being their own type and weight, but looking at the pattern will help determine what should be used. Determine what pieces will be supported by interfacing, and look at what is suggested (this information will be located near the fabric recommendation).
One of the first differences is sew-in interfacing versus fusible interfacing. Sew-in is attached to the garment by sewing it between pieces of fabric. Fusible interfacing is pressed onto the wrong side of the fabric piece before it is sewn. The other difference is the weight of the interfacings. It can go from sheer weight to heavy weight.
For this shirt, the pattern calls for fusible interfacing on the collar, collar stand, the cuffs, and the front button bands. It is your choice how stiff you want those pieces to be. Lighter weights will be less stiff, and vice versa with the heavier weights. The best thing to do is match the weight of the interfacing to the weight of the fabric. I will be using a medium weight interfacing throughout, because I do not want a lot of stiffness in this more relaxed button up.
Thread
Like interfacing, thread should match the fiber type and weight of the fabric. Thread is very much up to personal preference. I frequently use Aurifil thread, and will be doing so for the rest of the sew-along. I typically use 50 weight for general garment construction and 40 weight for topstitching and edgestitching. Occasionally I will break out 28 weight for buttonholes because of the thickness it provides.
Buttons
The Archer Button Up pattern calls for nine 3/8” to 1/2” buttons of your choice.
Final Notes
I hope that you now feel comfortable taking accurate measurements, finding the correct size for you or the wearer of the garment, and that you pick a fabric that you love!
In the next post, we will address pattern markings, cut out the pattern pieces, and alter the pattern to fit you. To prepare for the rest of this sew-along series, you will need to purchase the Grainline Studios pattern for the Archer Button Up using your measurements as detailed above.
The next step is to select your fabric. Based on that selection, you will need interfacing that has a matching weight. Finish the process by grabbing thread, buttons, and your favorite sewing notions. See you next time!
Garment Sew-along
Part 1: Garment Sizing and Fabric Selection
Part 2: Pattern Cutting, Markings and Fitting


What you might also like


34 comments on “Garment Sew Along Part I: Garment Sizing and Fabric Selection”
-
-
Thank you for bringing this to my attention! Do know that the future posts for this sew-along will include tips and tricks for garment sewing that will apply to all clothing!
-
-
Hi Where do we purchase the pattern from? I went to the site and it appeared to be set up for businesses, not an individual’s purchase. Thank you
-
If your local fabric store does not carry the pattern, it can be purchased from the Grainline Studio website – https://grainlinestudio.com/
Happy Sewing!-
Please read all comments and amke sure what you report is accurate. One must be a store or studio before purchasing is allowed. I was able to purchase my pattern on Amazon.
-
Hi there! Here is a direct link to the product on the Grainline Studio website: https://grainlinestudio.com/collections/tops/products/archer-button-up-shirt?variant=22533586387026
-
-
-
I just purchased mine on Amazon.
-
-
Where can I get this pattern? It is not available for individual consumers on their website
-
If your local fabric store does not carry the pattern, it can be purchased from the Grainline Studio website – https://grainlinestudio.com/
Happy Sewing!-
Purchased mine on Amazon.
-
-
-
I followed the link but not able to put pattern into cart for purchase. Since I am not a retailer or wholesaler, how do I purchase the pattern
-
If your local fabric store does not carry the pattern, it can be purchased from the Grainline Studio website – https://grainlinestudio.com/
Happy Sewing!
-
-
I haven’t sewn in awhile. It would be nice to make this. I find I have problems with the armholes not fitting properly. I thank you for this information. My granddaughter has been wanting to start making her own clothes because of her size. This will be a nice refresher coarse for me!
-
I cannot wait to see what you and your granddaughter create! Be sure to share is on our community page!
-
-
Awesome lesson! Would love to see men’s wear lessons also, please.
-
Thank you for the suggestion!
-
-
I have recently purchased a new Bernina 590 machine with the Creative Consultant. Unfortunately I do not know exactly what fabrics the symbols are referring to. Could you give me a place of reference. This looks like a great feature that I would use over and over.
-
Congratulations on your purchase! I hope you are enjoying your B 590 so far. There is actually a built-in ‘Help’ function on the machine. When you are in Creative Consultant, touch the ‘?’ icon to the right of the screen then touch the fabric on screen that you have a question about. This program will tell you what the icon on screen represents, and give examples of that type of material. Happy Sewing!
-
-
Thank you, got the pattern bought.
-
polyester or cotton thread for clothing?
-
It is really up to your personal preference! Since I am using an Oxford cotton to make this top, I will be using Aurifil cotton thread.
-
-
Excellent tutorial! I’ve sewn for many years, but I’ve not sewn in many years, also. Therefore, I’ll probably need all the help you’re offering. I do have 1 question, though. If my basic bust measures 34″-36″ long, what size should I go for? (Hint: I don’t wear a bra or sport top!) Thank you ? for any advice and/or suggestions you have.
Cheryl Masters-
Hi Cheryl,
Great question! This top tends to run true to size, but it has a natural loose fit. I would look at the finished measurements to determine what would work best for you, but I would probably go with a size 4.
-
-
Very concise. thank you!
-
Would it be easy to make this shirt longer than the picture on the pattern?
-
My body measurements are 34-28-34 (bust-waist-hip). I wear my clothes on the looser side, which size do you think I should make? Thank you
-
Hello! This shirt is designed with a looser, straight-cut fit. I would recommend starting bigger and sizing down as you find necessary. I would say start with a size 6.
You can definitely make the shirt longer! You will need to adjust front pieces 1 and 2, and back piece 6 or 7 (depending on which design you are doing). These pattern pieces should have a line in the middle labeled LENGTHEN OR SHORTEN HERE. Just be sure to increase the length evenly on all the necessary pieces. Here is a blog post to help with that: https://weallsew.com/garment-sew-along-part-2-pattern-cutting-markings-and-fitting/-
Thank you so much!
-
-
-
One more question, I ordered 100 % cotton fabric. If I wash and dry it in the dryer, is that what it means to shrink the fabric?
-
Yes, that is it! And it is definitely recommended! You want to be sure to wash the fabric how you would wash the garment before cutting anything out.
-
-
I just purchased a 570 QE and have been trying out the Creative Consultant. I have chosen a 6.5oz cotton denim fabric and am using a button up men’s shirt pattern to follow along with. I have the 50 weight cotton thread for top and bobbin thread. The Creative Consultant recommends the polyester Mettler 100/2 thread. Do you find that you need to change the preset tensions when you use the 50 weight cotton thread?
Also, I agree with an earlier comment that I hope to see more men’s garment sewing. I would love to make a outerwear vest for my husband.
Finally, I find the details of your parts very informative and look forward to getting to the rest. Thank you for your time.-
Hi there! I am glad to hear that you are finding the information useful.
With Creative Consultant, the machine is suggesting what thread, needles, and presser feet to use. That does not mean that you have to use what it is suggesting. Since you are using the same thread (and thread weight) in the top and bobbin, you have a balanced stitch. I rarely have to adjust my tensions when using a balanced stitch. Plus, you are using a sturdy material. You should be good to go with the default tension settings, however, I always recommend a test stitch on the material so you can determine if you like the look of it.
-
Leave a Reply
You must be logged in to post a comment.

It would have been nice if you had been size inclusive in your pattern choice.