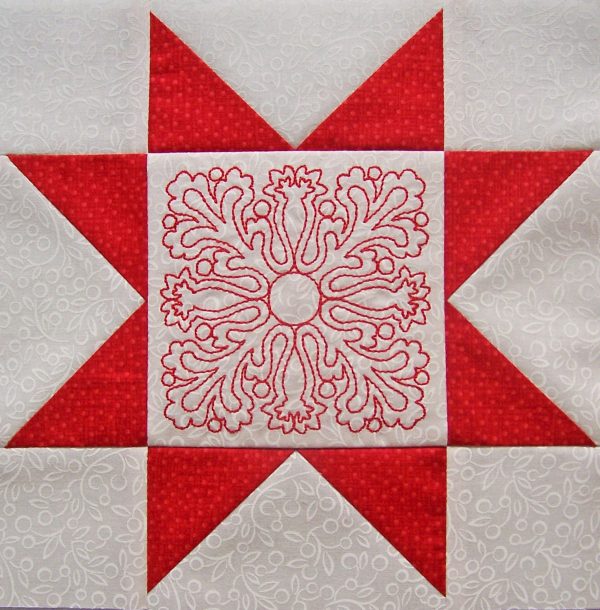
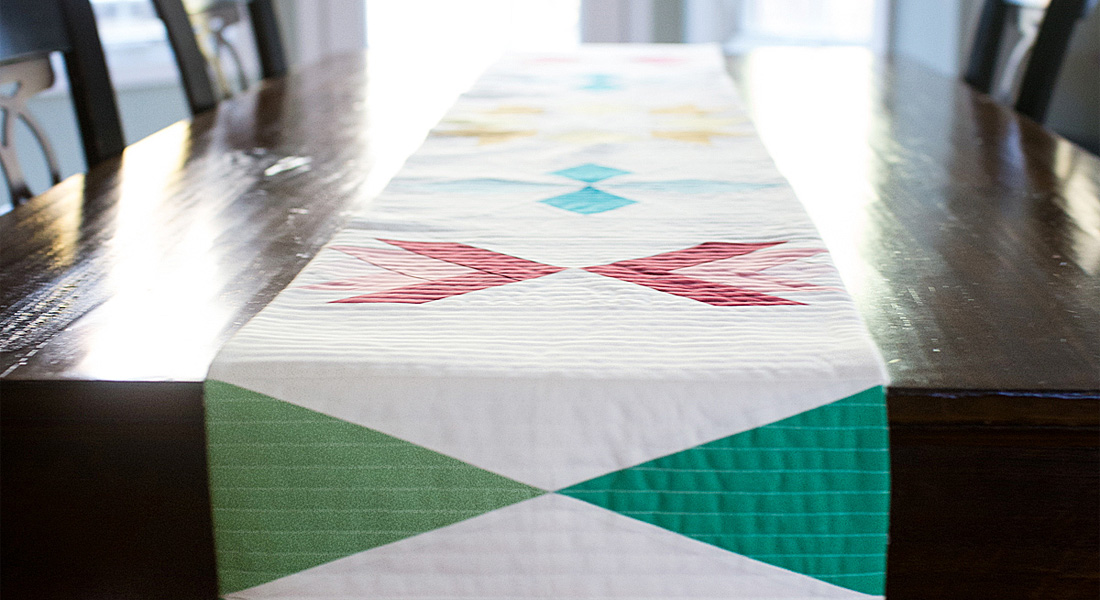
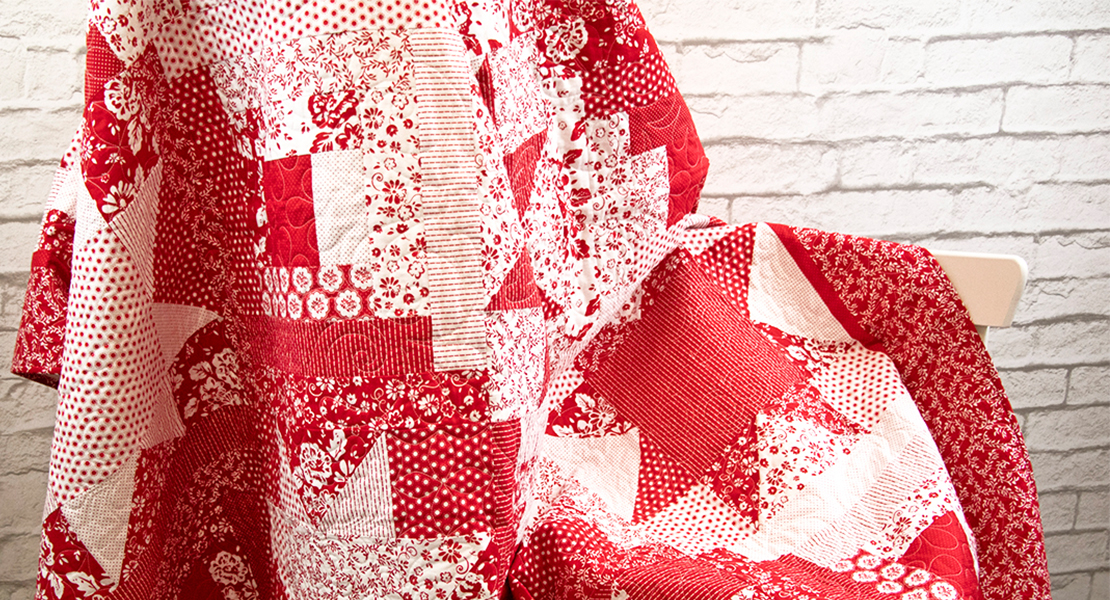
Aurora Feathered Star Quilt Block Tutorial
Author, teacher, fabric designer and BERNINA Ambassador Nancy Mahoney shows you how to create an Aurora Feathered Star quilt block in this tutorial.
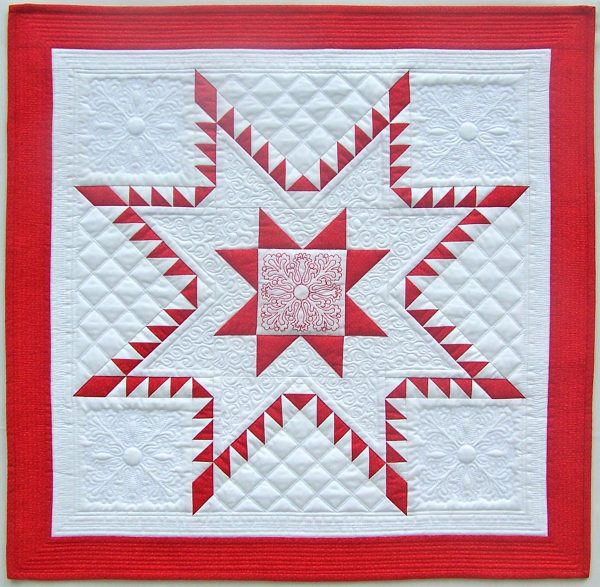
Finished size: 27″ square
Materials for Aurora Feathered Star Quilt Block Tutorial:
- Yardage requirements based on 42″ wide fabric
- 1-1/8 yard of white print for block and inner border
- 1 yard of red print for block and outer border
- 1 yard of fabric for backing
- 32″ x 32″ square of batting
- 7″ x 9″ rectangle of OESD Wash Away Embroidery Stabilizer
- White or cream Mettler 50-wt thread for patchwork
- White Mettler 60-wt thread for quilting
- Red Isacord thread for machine embroidery
- Monofilament for quilting
- Sewing Machine (I used my BERNINA 780)
- Patchwork foot #37/#37D or #97/#97D)
- Machine embroidery foot #26
- Free-motion quilting foot #24
- Walking foot #50
- Sharp 80/12 needle for patchwork
- Embroidery needle for machine embroidery
- Quilting needle 75/11 for quilting
- Twin needle 80/12 for quilting
- Straight Stitch plate
- 5mm or 9mm Stitch plate
- Medium hoop for machine embroidery
- Oval hoop for machine embroidery
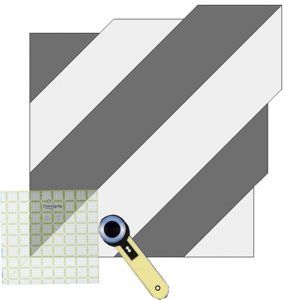
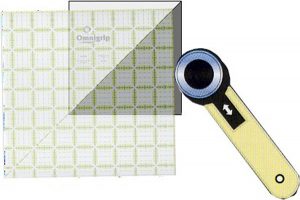
- 6″ square ruler with diagonal line
- Dissappearing fabric marker or pencil
Cutting:
From the white print, cut:
• (3) squares, 9″ x 9″
• (4) squares, 1-7/8″ x 1-7/8″; cut once diagonally to yield 8 half-square triangles (label as A1)
• (4) squares, 2″ x 2″; cut once diagonally to yield 8 half-square triangles (label as B1)
• (4) squares, 6-1/8″ x 6-1/8″ (label as D)
• (1) square 11-1/4″ x 11-1/4″; cut twice diagonally to yield 4 quarter-square triangles (label as E)
• (4) squares, 4-7/8″ x 4-7/8″; cut once diagonally to yield 8 half-square triangles (label as F)
• (4) rectangles, 2-1/2″ x 4-1/2″ (label as G)
• (4) squares, 2-1/2″ x 2-1/2″ (label as H)
• (1) rectangle, 7″ x 9″ (label as I)
• (4) inner-border strips, 1-1/2″ x width of fabric
From the red print, cut:
• (3) squares, 9″ x 9″
• (8) squares, 2-1/2″ x 2-1/2″ (label as H)
• (1) strip, 1 ½” x width of fabric
• (4) outer-border strips, 2-1/2″ x width of fabric
• (3) binding strips, 2-1/4″ x width of fabric
Making Triangle Squares:
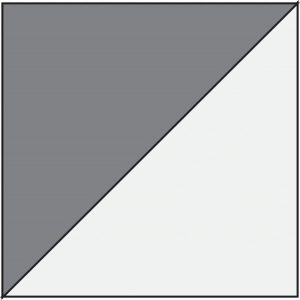
1. Layer 1 white 9″ square and 1 red square right sides facing up with raw edges aligned. Cut the squares in half diagonally.

2. Cut 2-1/4″-wide strips, measuring from the center cut. Do not discard the small triangles!
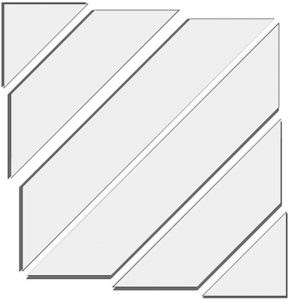
3. Separate and rearrange the strips, alternating the colors. Using a 1/4″-wide seam allowance and offsetting the strips as shown, join one set of strips, making sure the lower edge and one adjacent side have straight edges. Press the seam allowances toward the darker fabric. (You’ll get 2 strips sets from each pair of squares.)
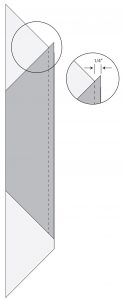
4. Beginning at the lower left corner, align the 45° line on the square ruler with the seam line. Each unit will require 4 cuts. The first and second cuts are along the side and top edges of the ruler. Cut the 2 sides and remove the unit from the strip set.
5. The third and fourth cuts are made along the remaining 2 sides. To make these cuts, rotate the segment and align the cut edges with the required measurement on both sides of the ruler and the 45° line on the seam. Cut the remaining 2 sides of the unit.
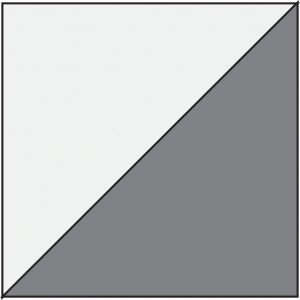
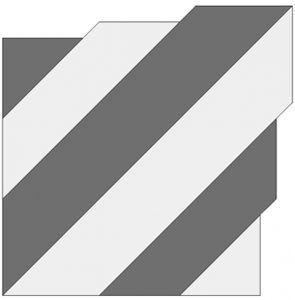
6. Make a total of 6 strip sets. Cut (28) 1-1/2″ x 1-1/2″ units and label as A. Cut (36) 1-5/8″ x 1-5/8″ units and label as B.
Making the Feathered Star Units:
Unit A
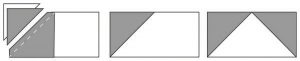
1. Fold the red 1-1/2″-wide strip in half, wrong sides together. Using a ruler marked with a 45° line, trim the end of the strip at a 45° angle. Measure 1-5/8″ from the freshly cut edge to cut 2 diamonds. Cut a total of 4 C diamonds and 4 reversed C diamonds.
2. Sew a red C diamond and a white A1 triangle together as shown to make a diamond unit. Sew a red CR diamond and a white A1 triangle together to make a reversed diamond unit. Press seam allowances toward the diamonds. Make 4 of each unit.

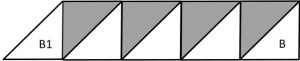
3. To make the feather rows, join 1 diamond unit and 3 A triangle-square units to make a short feather-row. Join 1 reversed diamond unit and 4 A triangle-square units to make a long feather-row. Make 4 of each unit.

![]()
4. Each triangle-square unit should measure 1″ from seam to seam. On each diamond, measure 2-7/8″ from the seam line to the tip of the diamond (see diagram following step 5); trim off the tip of the diamond.
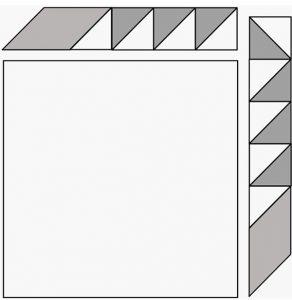
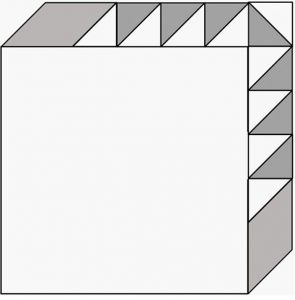
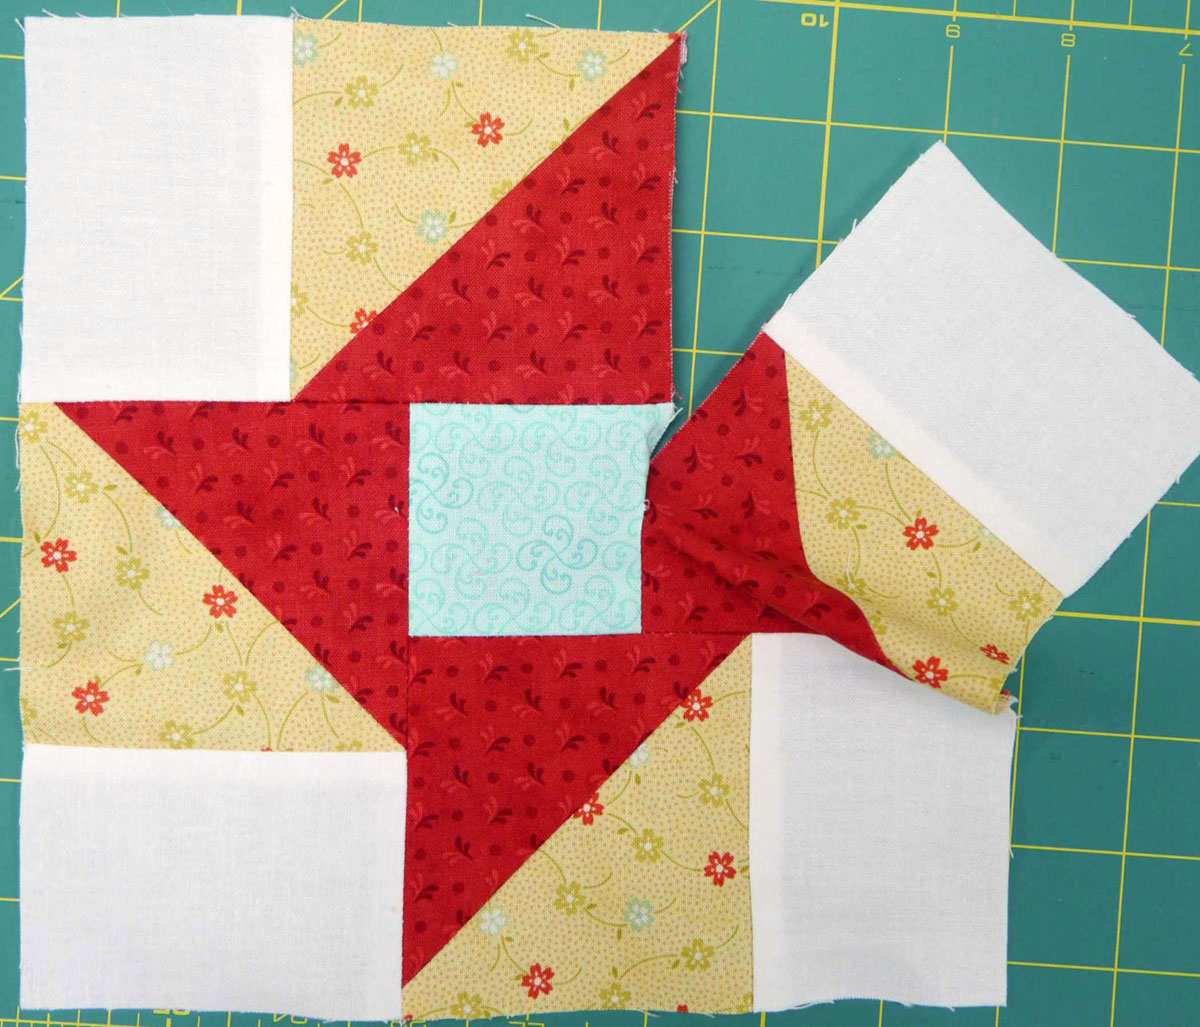
5. With right sides together, sew a short feather-row to a white D square. Sew a long feather-row to an adjacent side of the square. Press all seam allowances toward the square. Make a total of 4 A units.
Unit B
These units are constructed using a partial seam technique.
1. To make the feather rows, join 4 B triangle-square units and 1 white B1 triangle to make a short feather-row. Join 5 B triangle-square units and 1 white B1 triangle to make a long feather-row. Press all seam allowances toward the dark triangles. Each triangle-square unit should now measure 1¹/8″ from seam to seam. Make 4 of each unit.

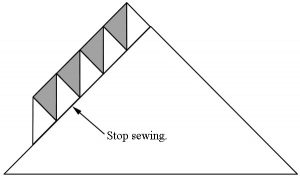
2. With right sides together, sew a short feather-row to a white E triangle stopping about 1″ from the end of the feather-row with a backstitch. Sew a long feather-row to an adjacent side of the triangle, stopping about 1″ from the end of the feather-row with a backstitch. Press all seam allowances toward the triangle.
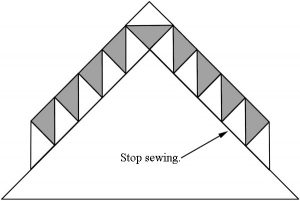
3. To complete unit B, sew 2 white F triangles to the unit as shown. Make 4 B units.
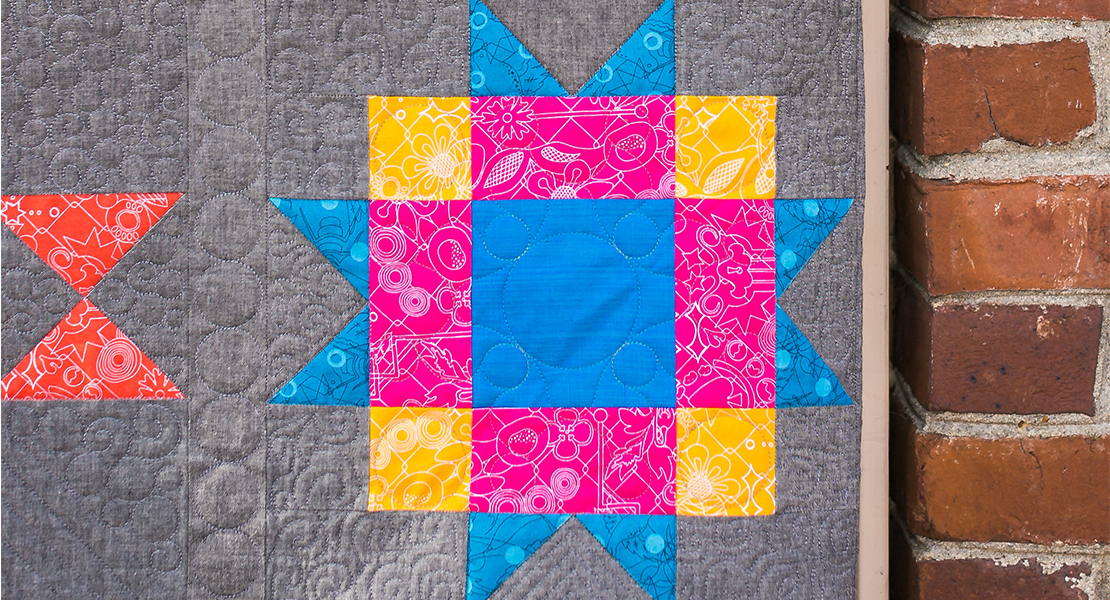
Making the Sawtooth Star Block:
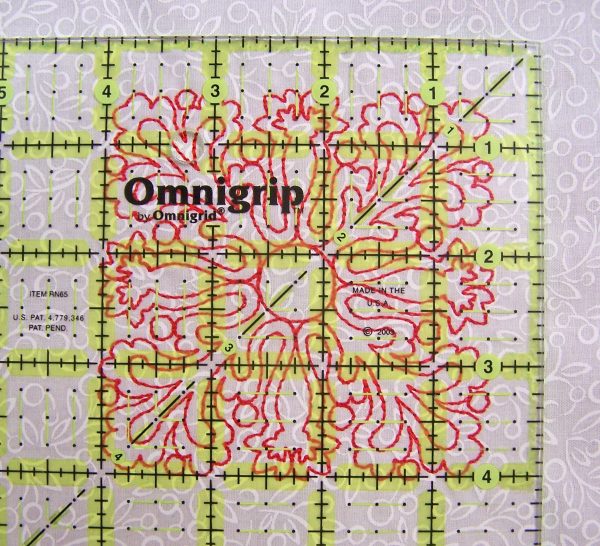
1. Attach the embroidery module. Install an embroidery needle and an embroidery foot. Thread the machine with red thread. Select an embroidery design; on my B 780, I selected BD554 and reduced the size to 92 x 92 mm, or 84% of the original. Refer to the manual for your machine for help setting up your machine.
2. Place the white I rectangle on top of the stabilizer. Then place the layered rectangles in a medium hoop. Embroider the design.
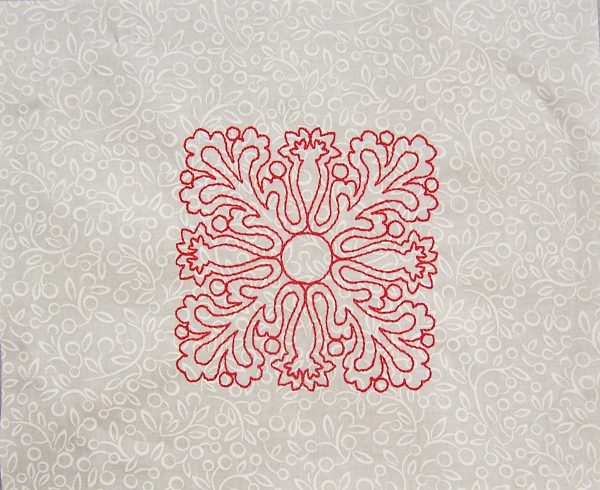
3. Follow the manufacturer’s instructions for removing the stabilizer. Centering the design, trim the white rectangle to measure 4-1/2″ x 4-1/2″.
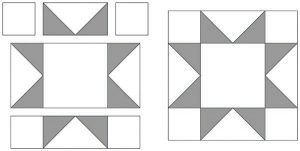
4. Draw a diagonal line from corner to corner on the wrong side of each red H square. Layer a marked square on one end of a white G rectangle, right sides together. Sew on the marked line and trim the excess corner fabric leaving a ¹/4″ seam allowance. Press the seam allowances toward the resulting triangle. In the same way, sew a marked square on the opposite end of the rectangle to make a flying-geese unit. Make 4 units.
5. Lay out the flying-geese units, 4 white H squares, and the embroidered square. Join the pieces into rows and then join the rows to complete the block. Make 1 block.
Completing the Block:
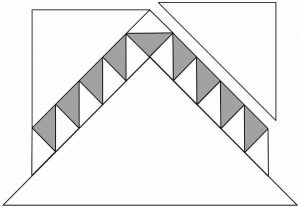
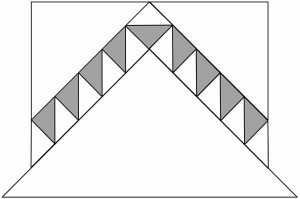
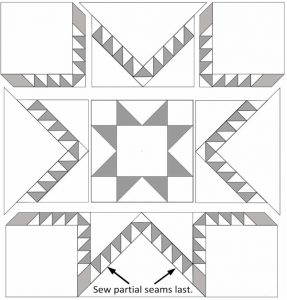
Arrange 4 A units, 4 B units, and the Sawtooth Star block in 3 rows as shown. Join the units in rows sewing the partial seam last. Join the rows, completing the partial seams last.

Assembling the Quilt:
1. Measure the center of the star block from side to side. Cut two white inner-border strips to this length and sew them to opposite sides of the block.
2. Measure the center of the star block from top to bottom, including the side borders. Cut two white inner-border strips to this length and sew them to the top/bottom of the block to complete the inner border.
3. Repeat steps 1 and 2, using the red outer-border strips to attach the outer border.
Quilting:
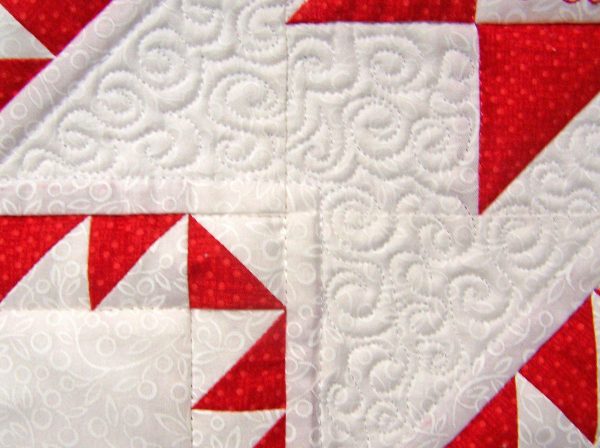
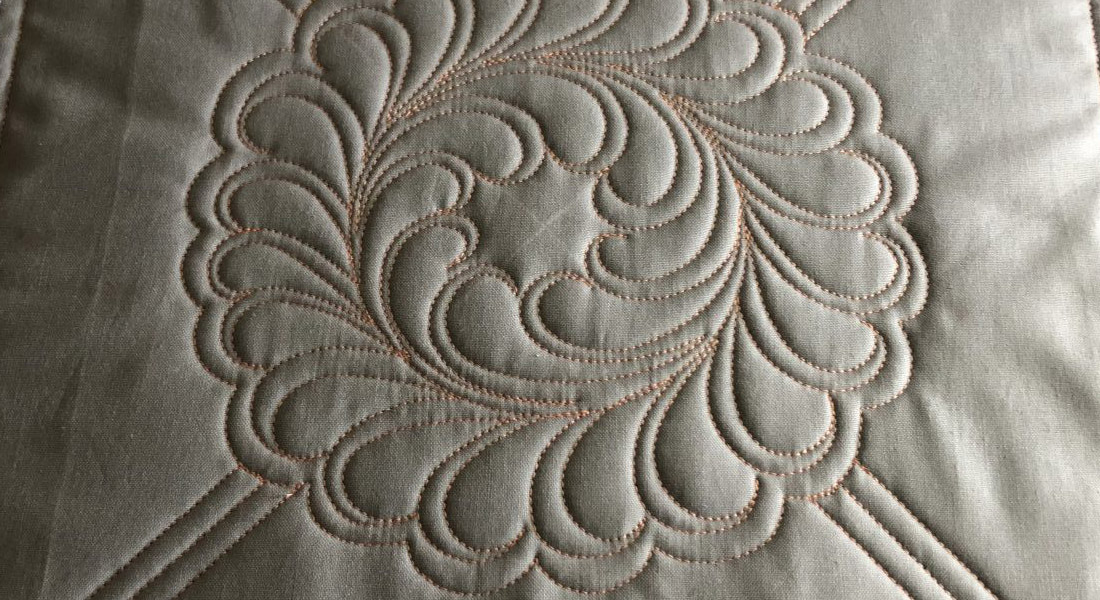
1. Layer the quilt top, batting and backing; baste. I used a walking foot, quilting needle, and monofilament to stitch-in-the-ditch. I changed to white thread and stitched straight lines in the inner border. White thread and a free-motion foot were used to quilt a tiny swirl design in the large white star.
TIP: Reduce the top tension when using monofilament. I set the tension to 1.5 on my machine. Be sure to return the tension to the normal setting when using regular thread.
2. To quilt a diagonal grid in the large white triangles, I marked lines using a removal marker.
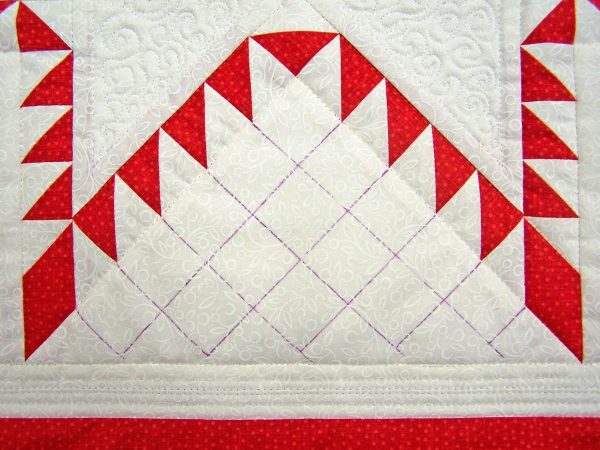
3. Then, I installed a twin needle, a walking foot, and white thread. Use the marked lines as a guide to stitch the grid. TIP: Be sure to use a 5mm or 9mm stitch plate when using a twin needle.

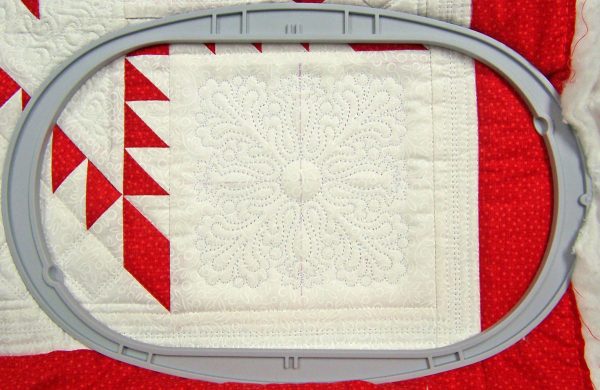
4. To quilt the large white squares, attach the embroidery module. Install an embroidery needle and an embroidery foot. Thread the machine with white thread. Select an embroidery design; on my B 780, I selected BD554 and increased the size to 115 x 115 mm, or 105% of the original.
5. Using a removable marker, mark the center of the white square. Center a white square in an oval hoop.
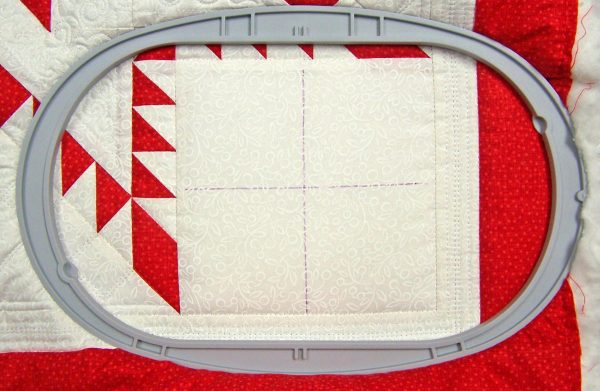
6. Stitch an embroidery design in the center of each white square.
7. To complete the quilting, I used a walking foot, quilting needle, and red thread to quilt straight lines in the outer borders.
Finishing the Aurora Feathered Star Quilt Block:
1. Trim the backing and batting even with the quilt top. Stitch the red binding strips together end to end using diagonal seams. Fold and press the resulting long strip in half lengthwise with wrong sides together. Stitch to the quilt front, matching raw edges and mitering the corners.
2. Fold the binding to the back of the quilt and hand stitch the folded edge to the quilt back.
Used Products


What you might also like


10 comments on “Aurora Feathered Star Quilt Block Tutorial”
-
-
Nancy has outdone herself this time. This is both beautiful and inspiring!
-
Just beautiful, thank you for the great tutorial and pattern, I will definitely be making this as a wall hanging for Christmas.
-
Thank you for all of your beautiful patterns and tutorials. I’m ready to start gifts for 2016!
-
This is beautiful ! Thank you so much for sharing it !!
-
Very beautiful! Thank you for step by step instructions, I’m new to my embroidery machine & learning. Very helpful.
-
I am totally lost with the instructions. In number 4, with the strip set, what is the size of the initial square that you are cutting from the strip set that you made from the nine inch square? Then you are cutting that square again? What are you doing with the remainder of the unit, rotating it round and cutting more? At what point are you cutting 1 5/8 versus 1 1/2 inch squares? Help!!
Leave a Reply
You must be logged in to post a comment.

I love this wall quilt and imagine making more blocks for a bed size quilt. Thanks for a great pattern!!!