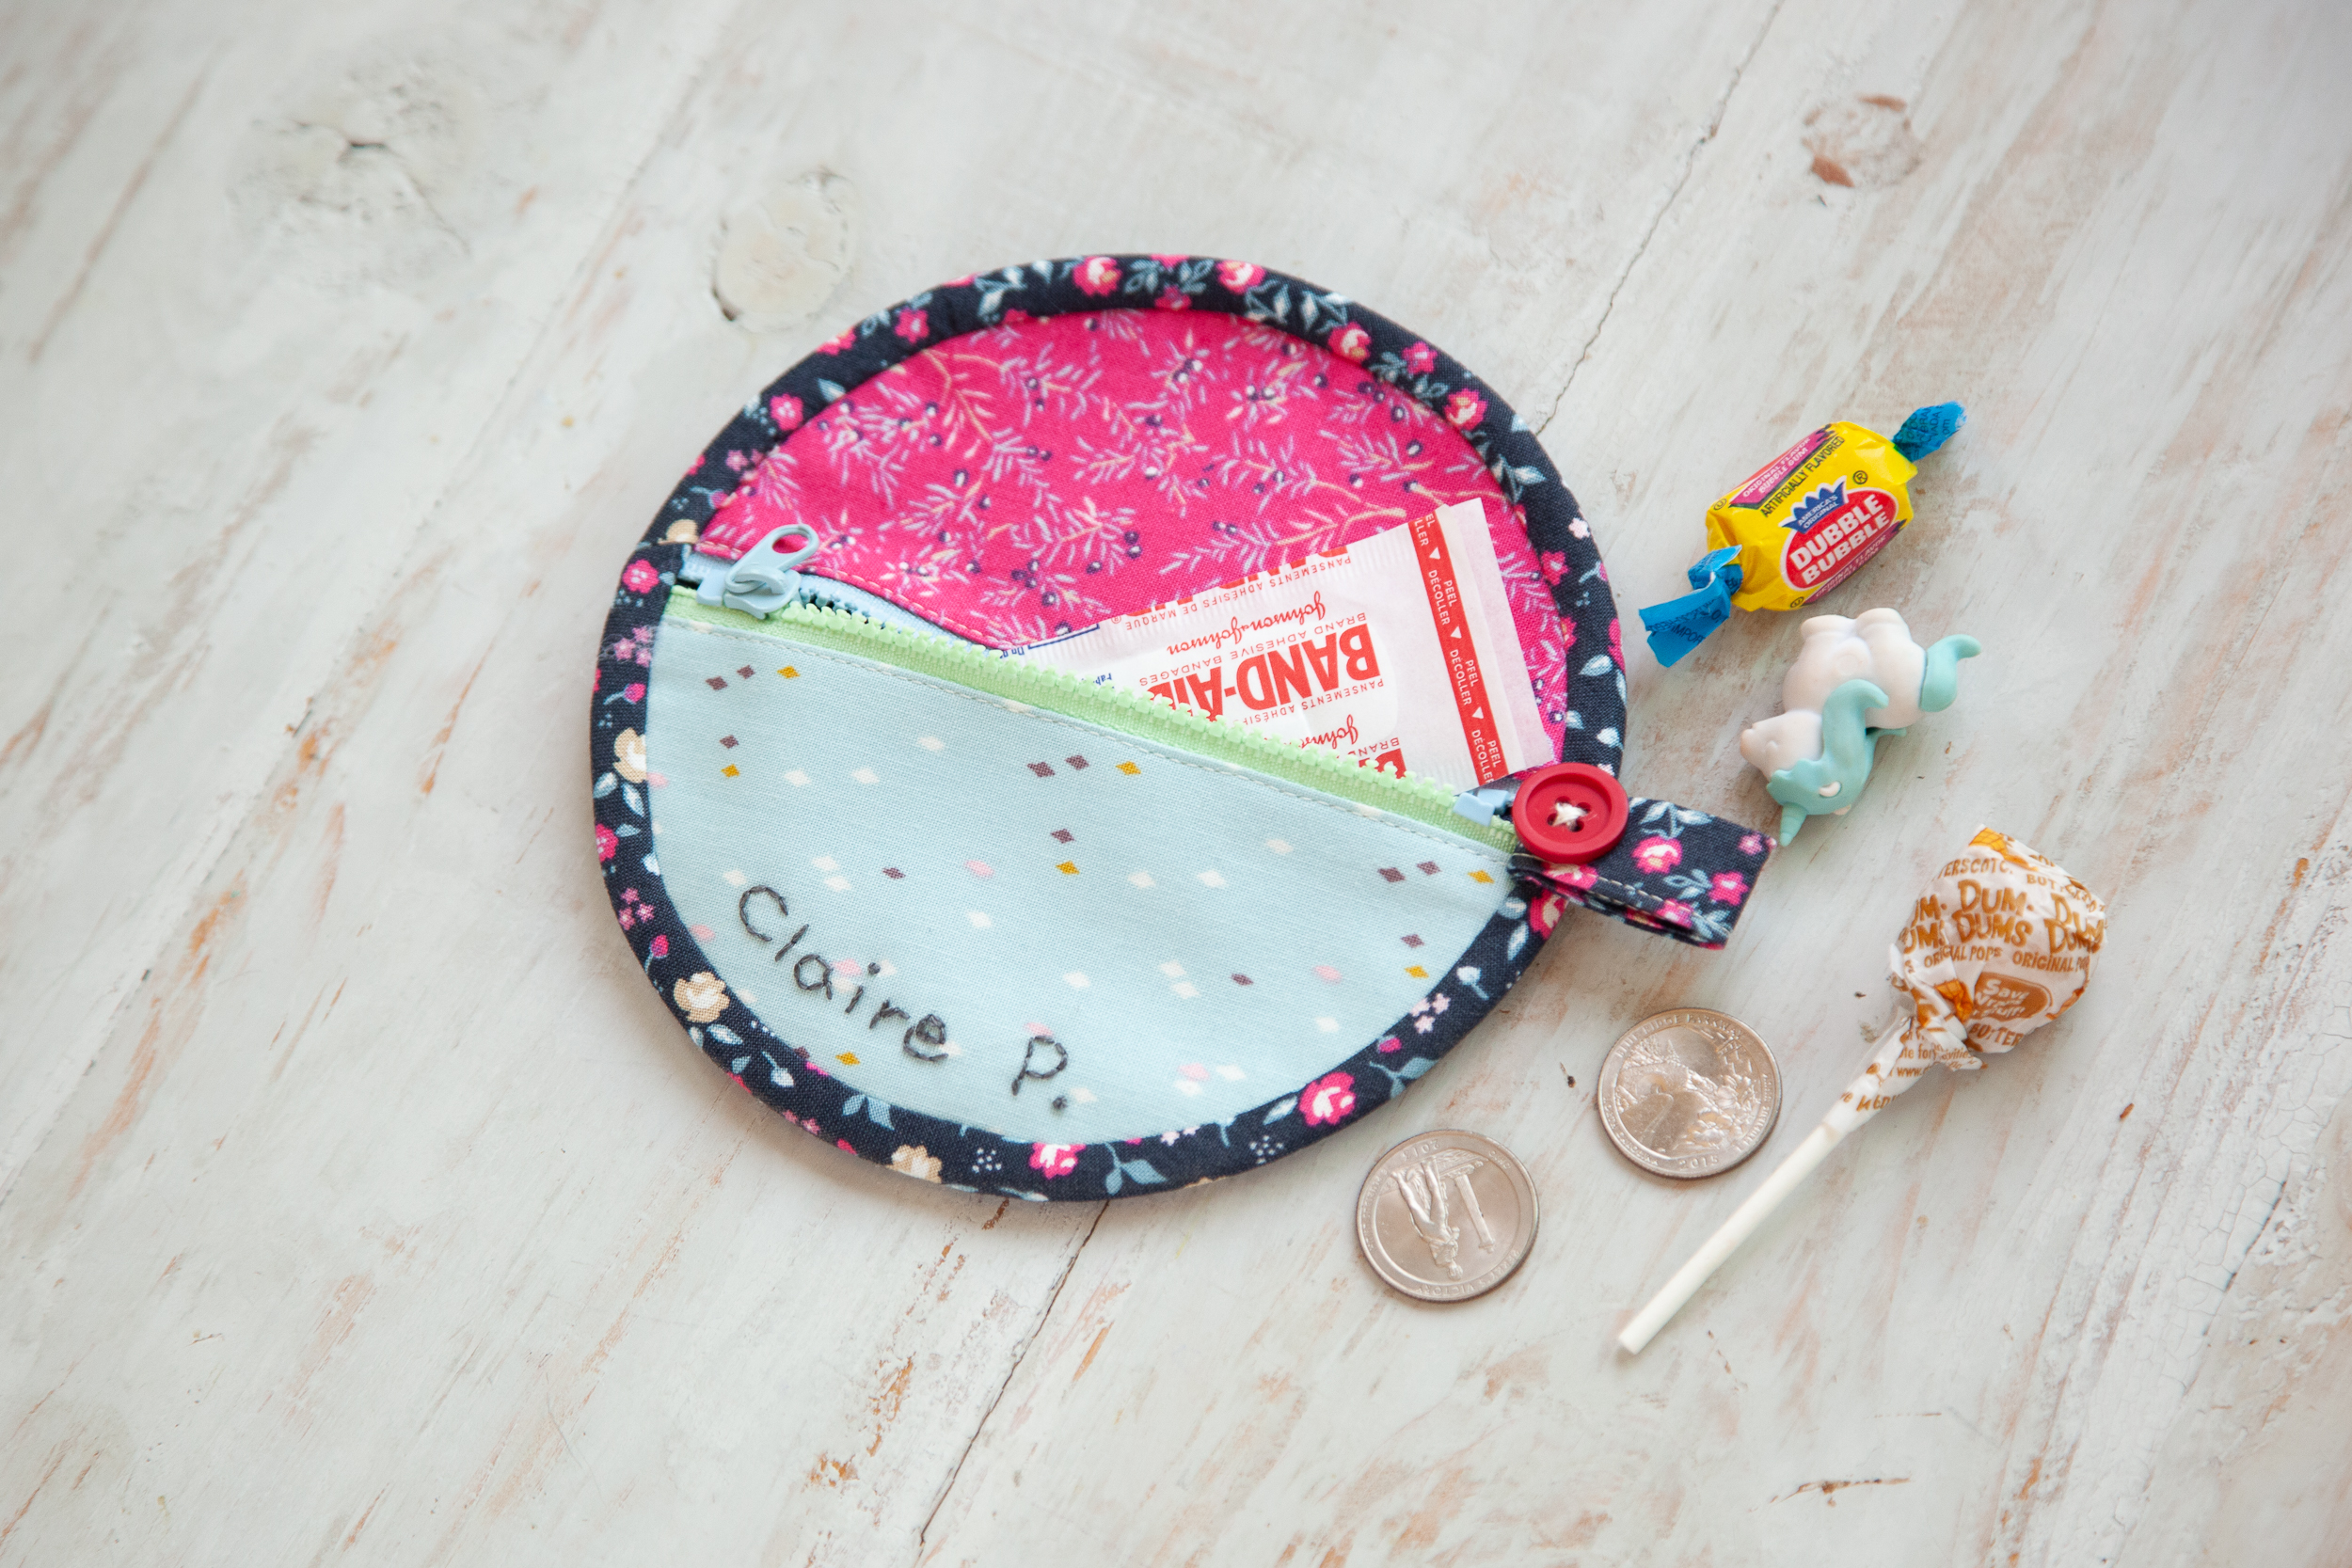
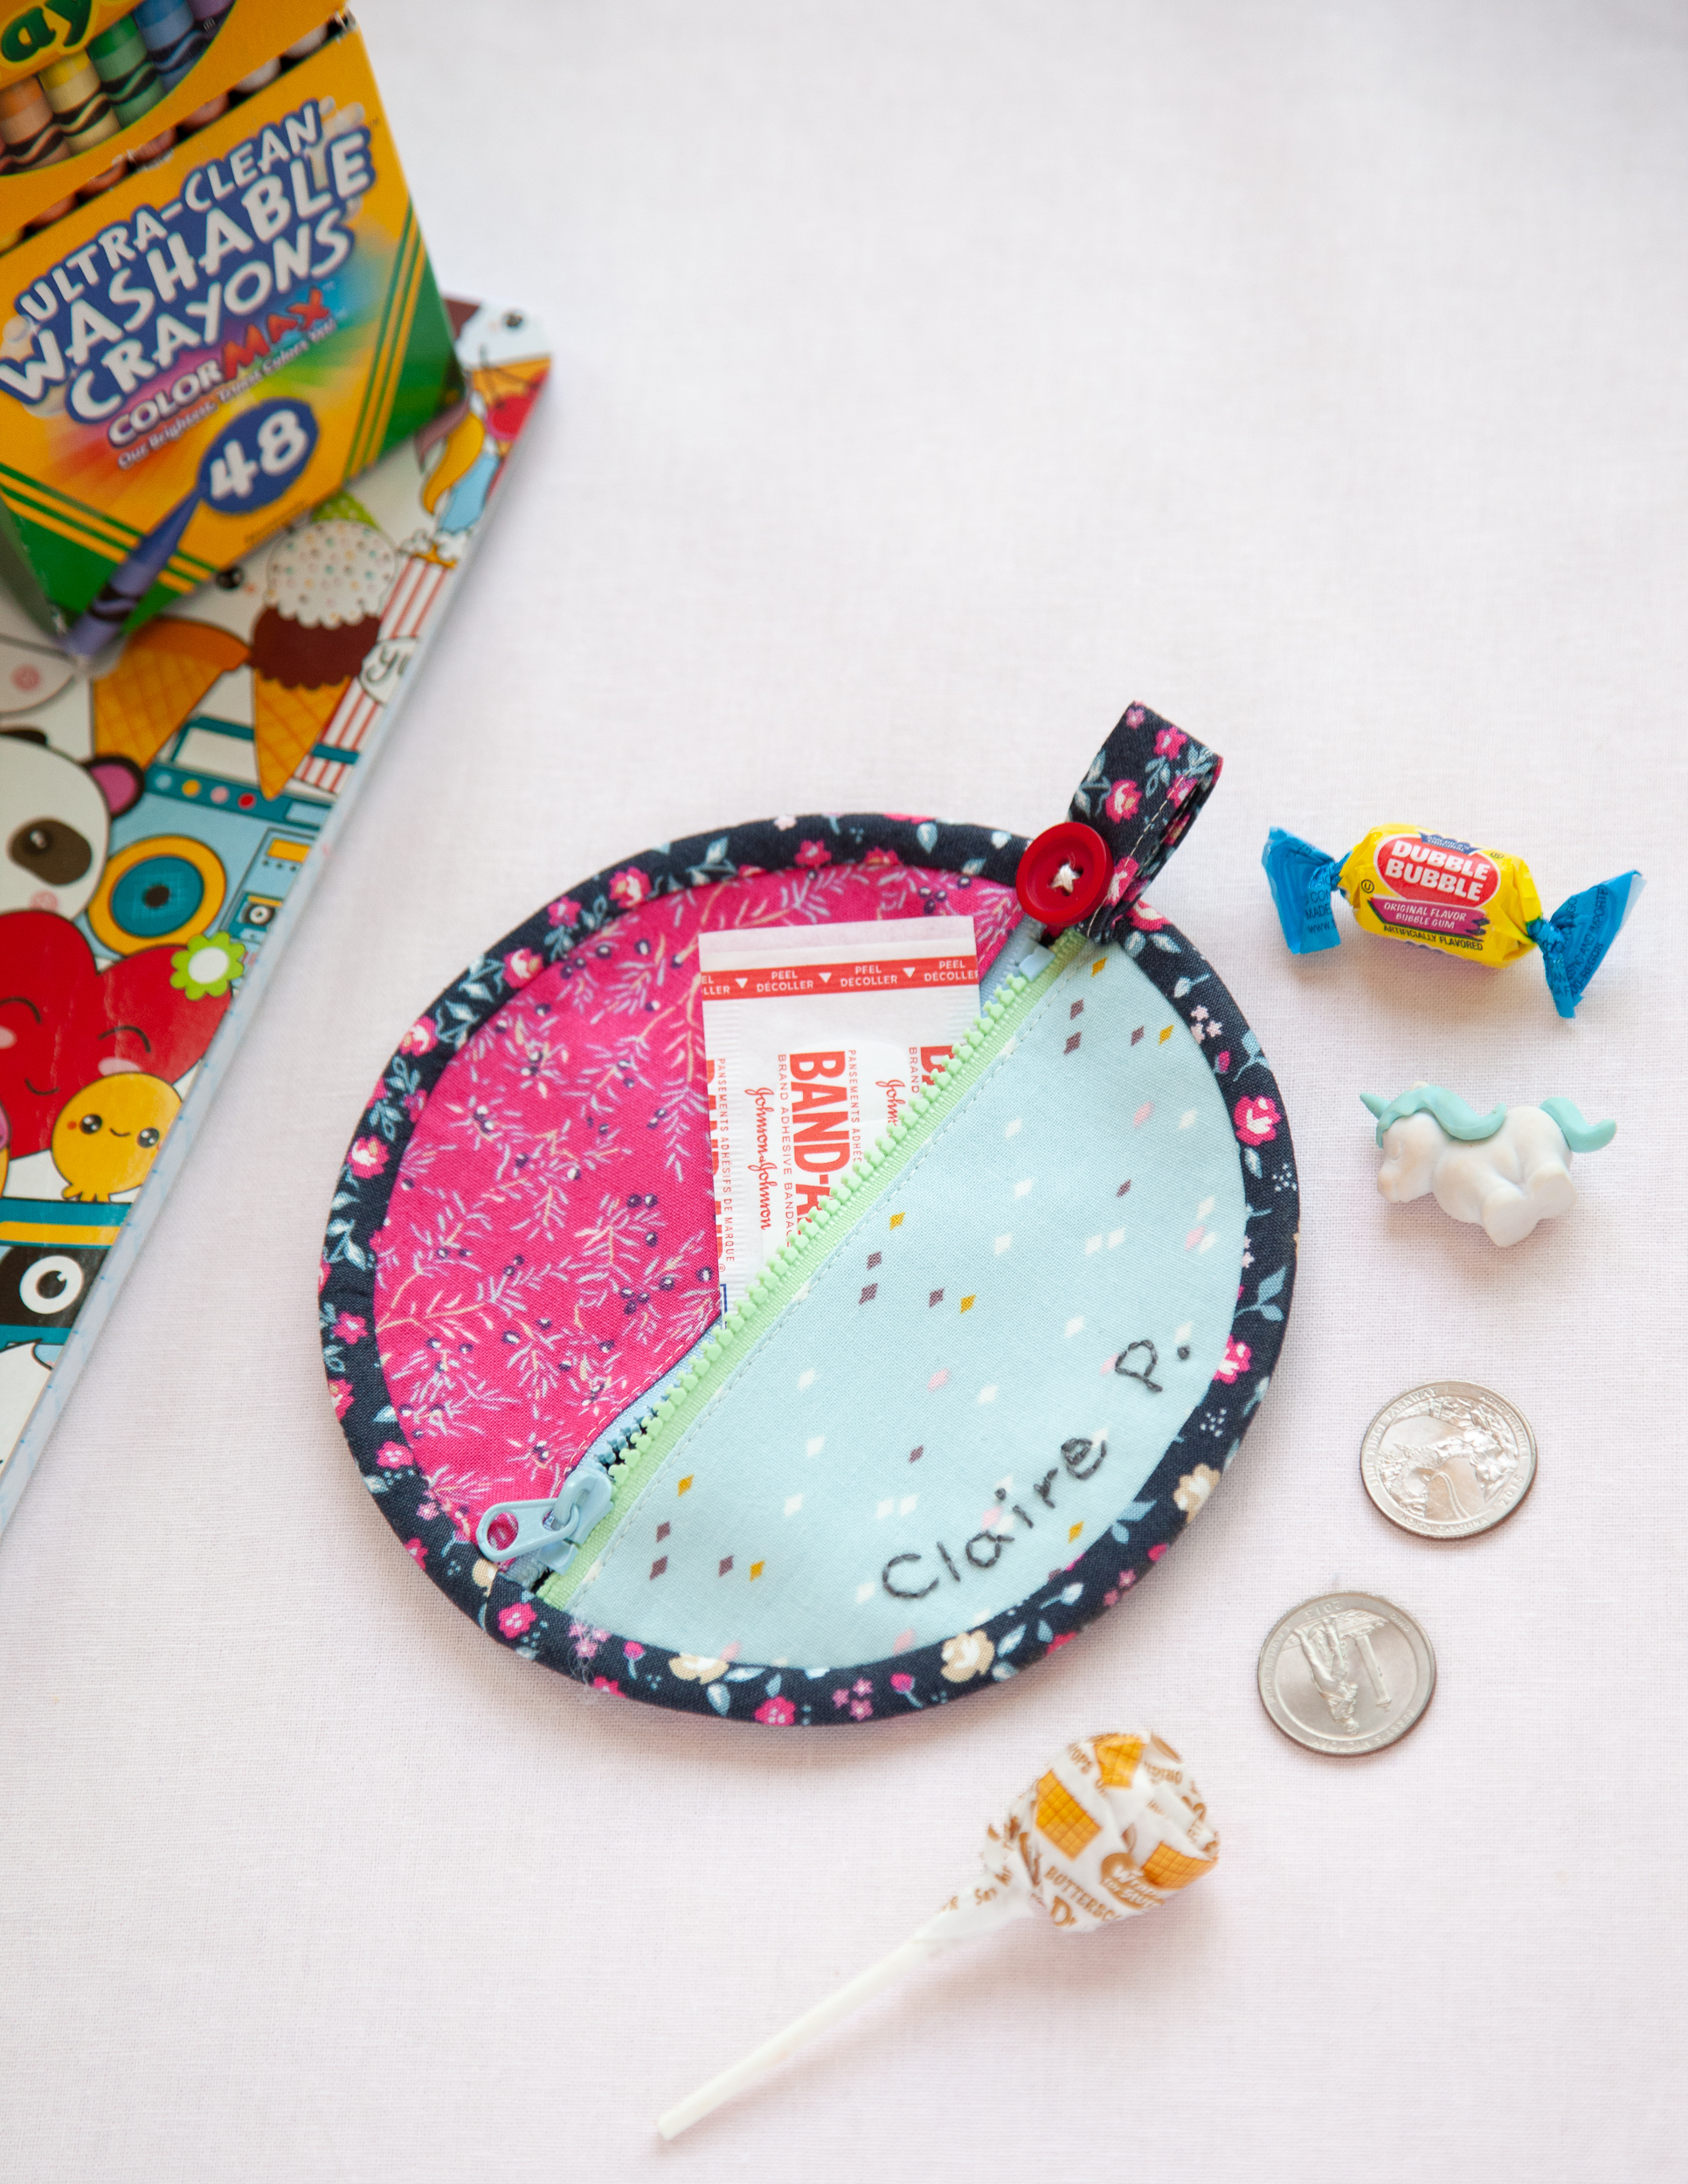
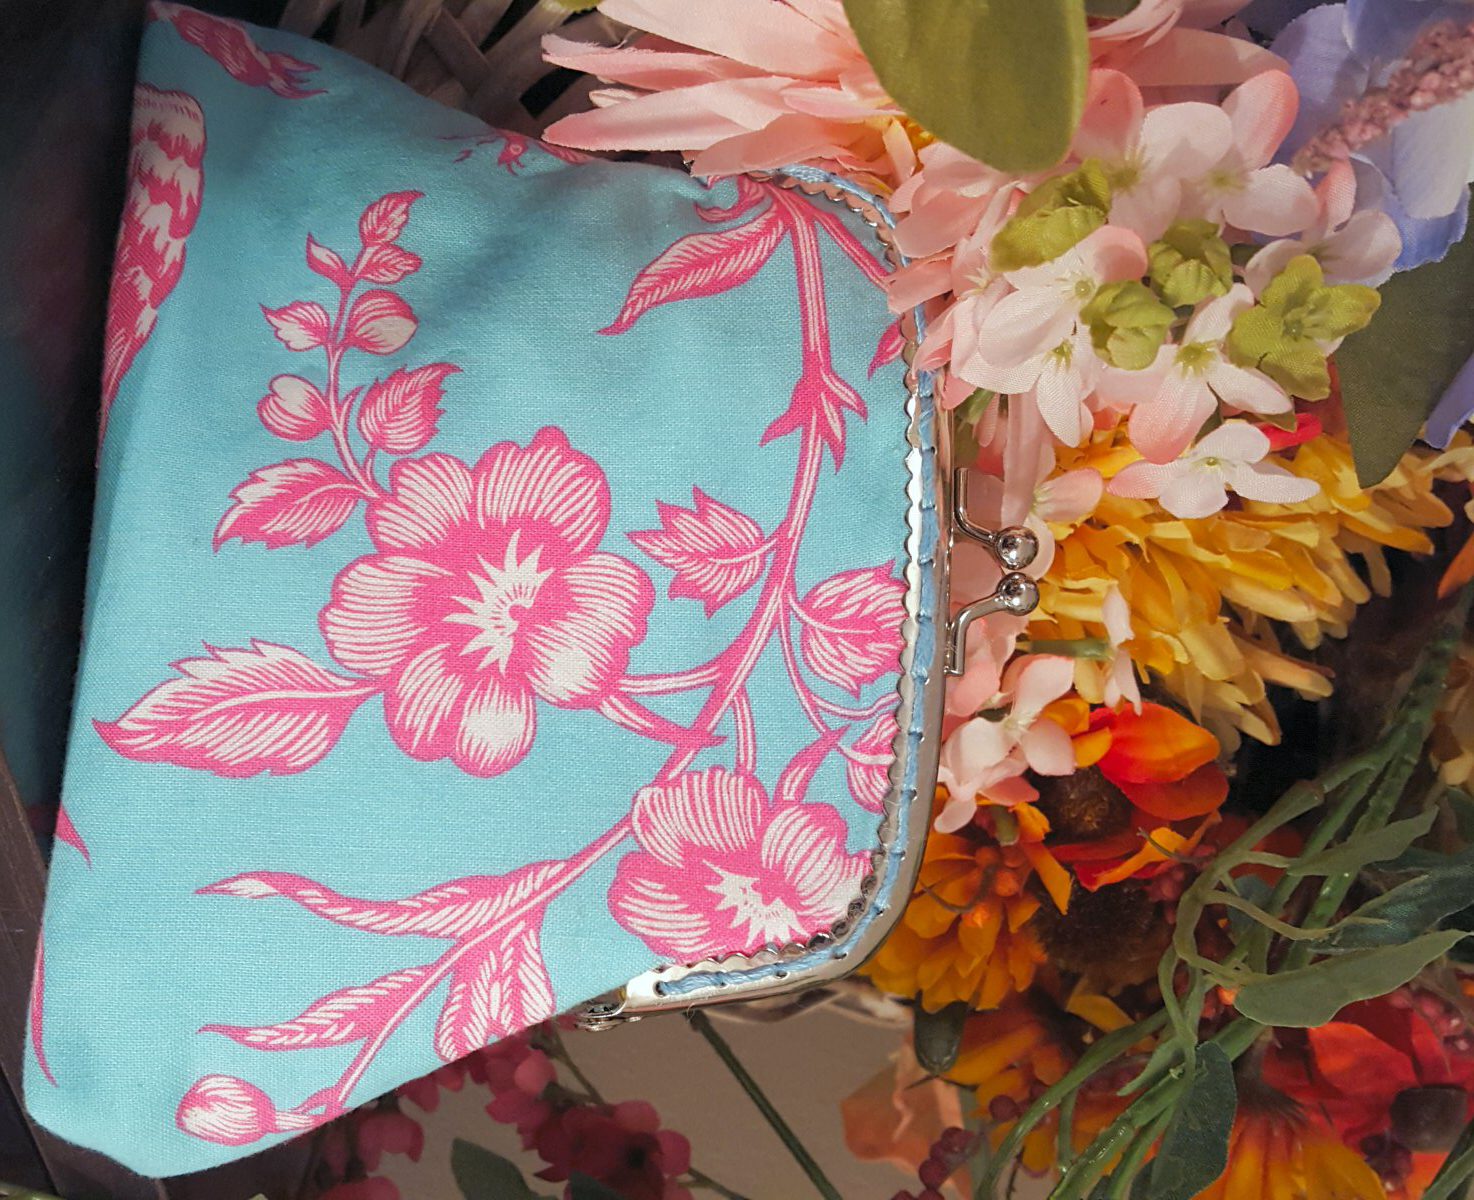
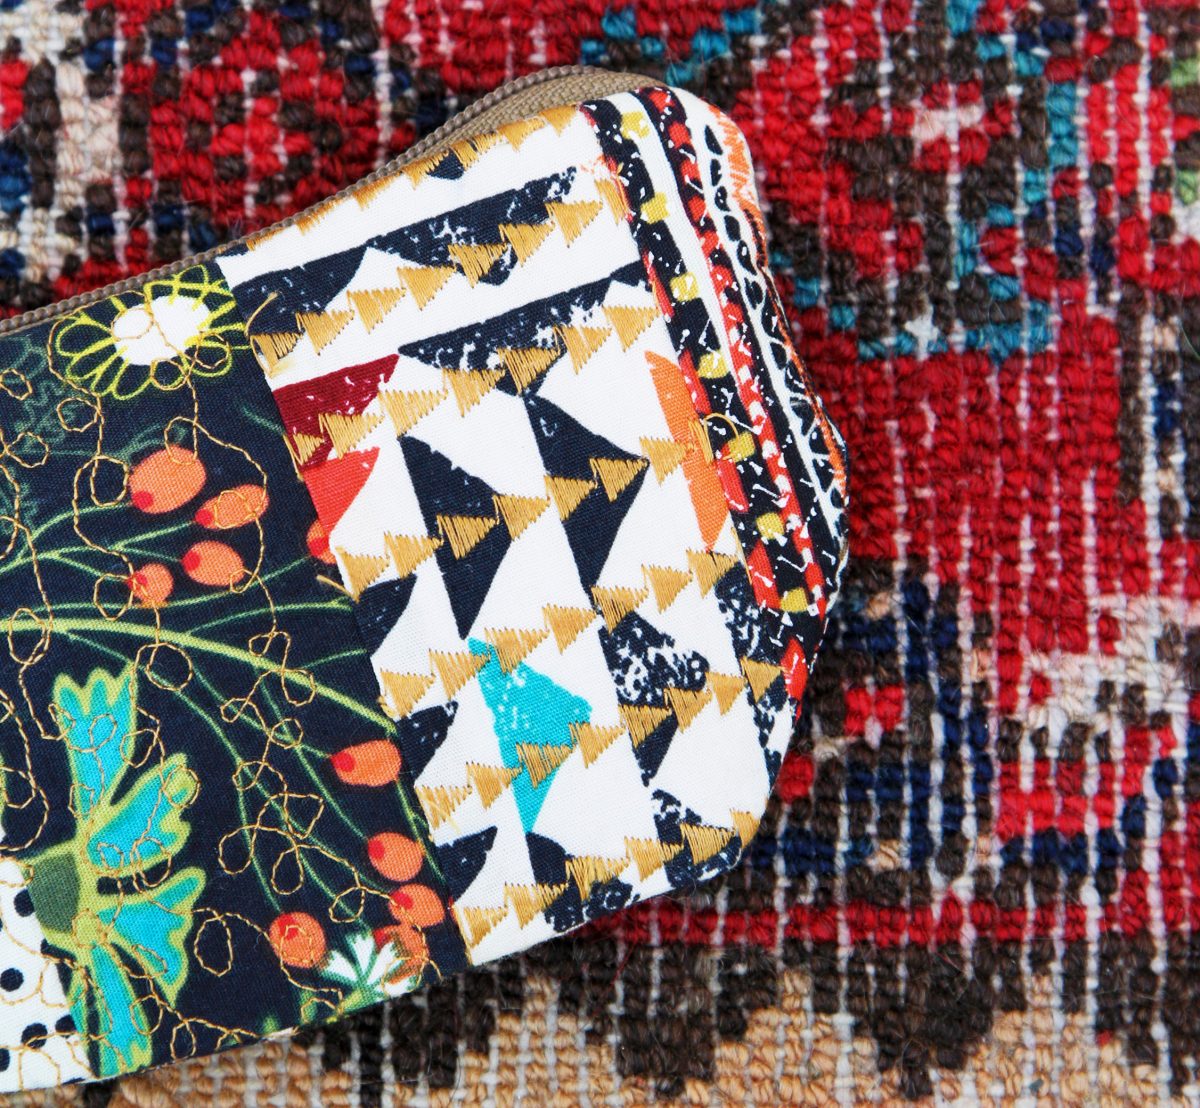
Back to School Mini Purse

Hello WeAllSew readers,
It’s Minki Kim, and you can find me on Instagram @zeriano and on MinkiKim.com. I design fabric for Riley Blake Designs and I have my own line of sewing patterns.
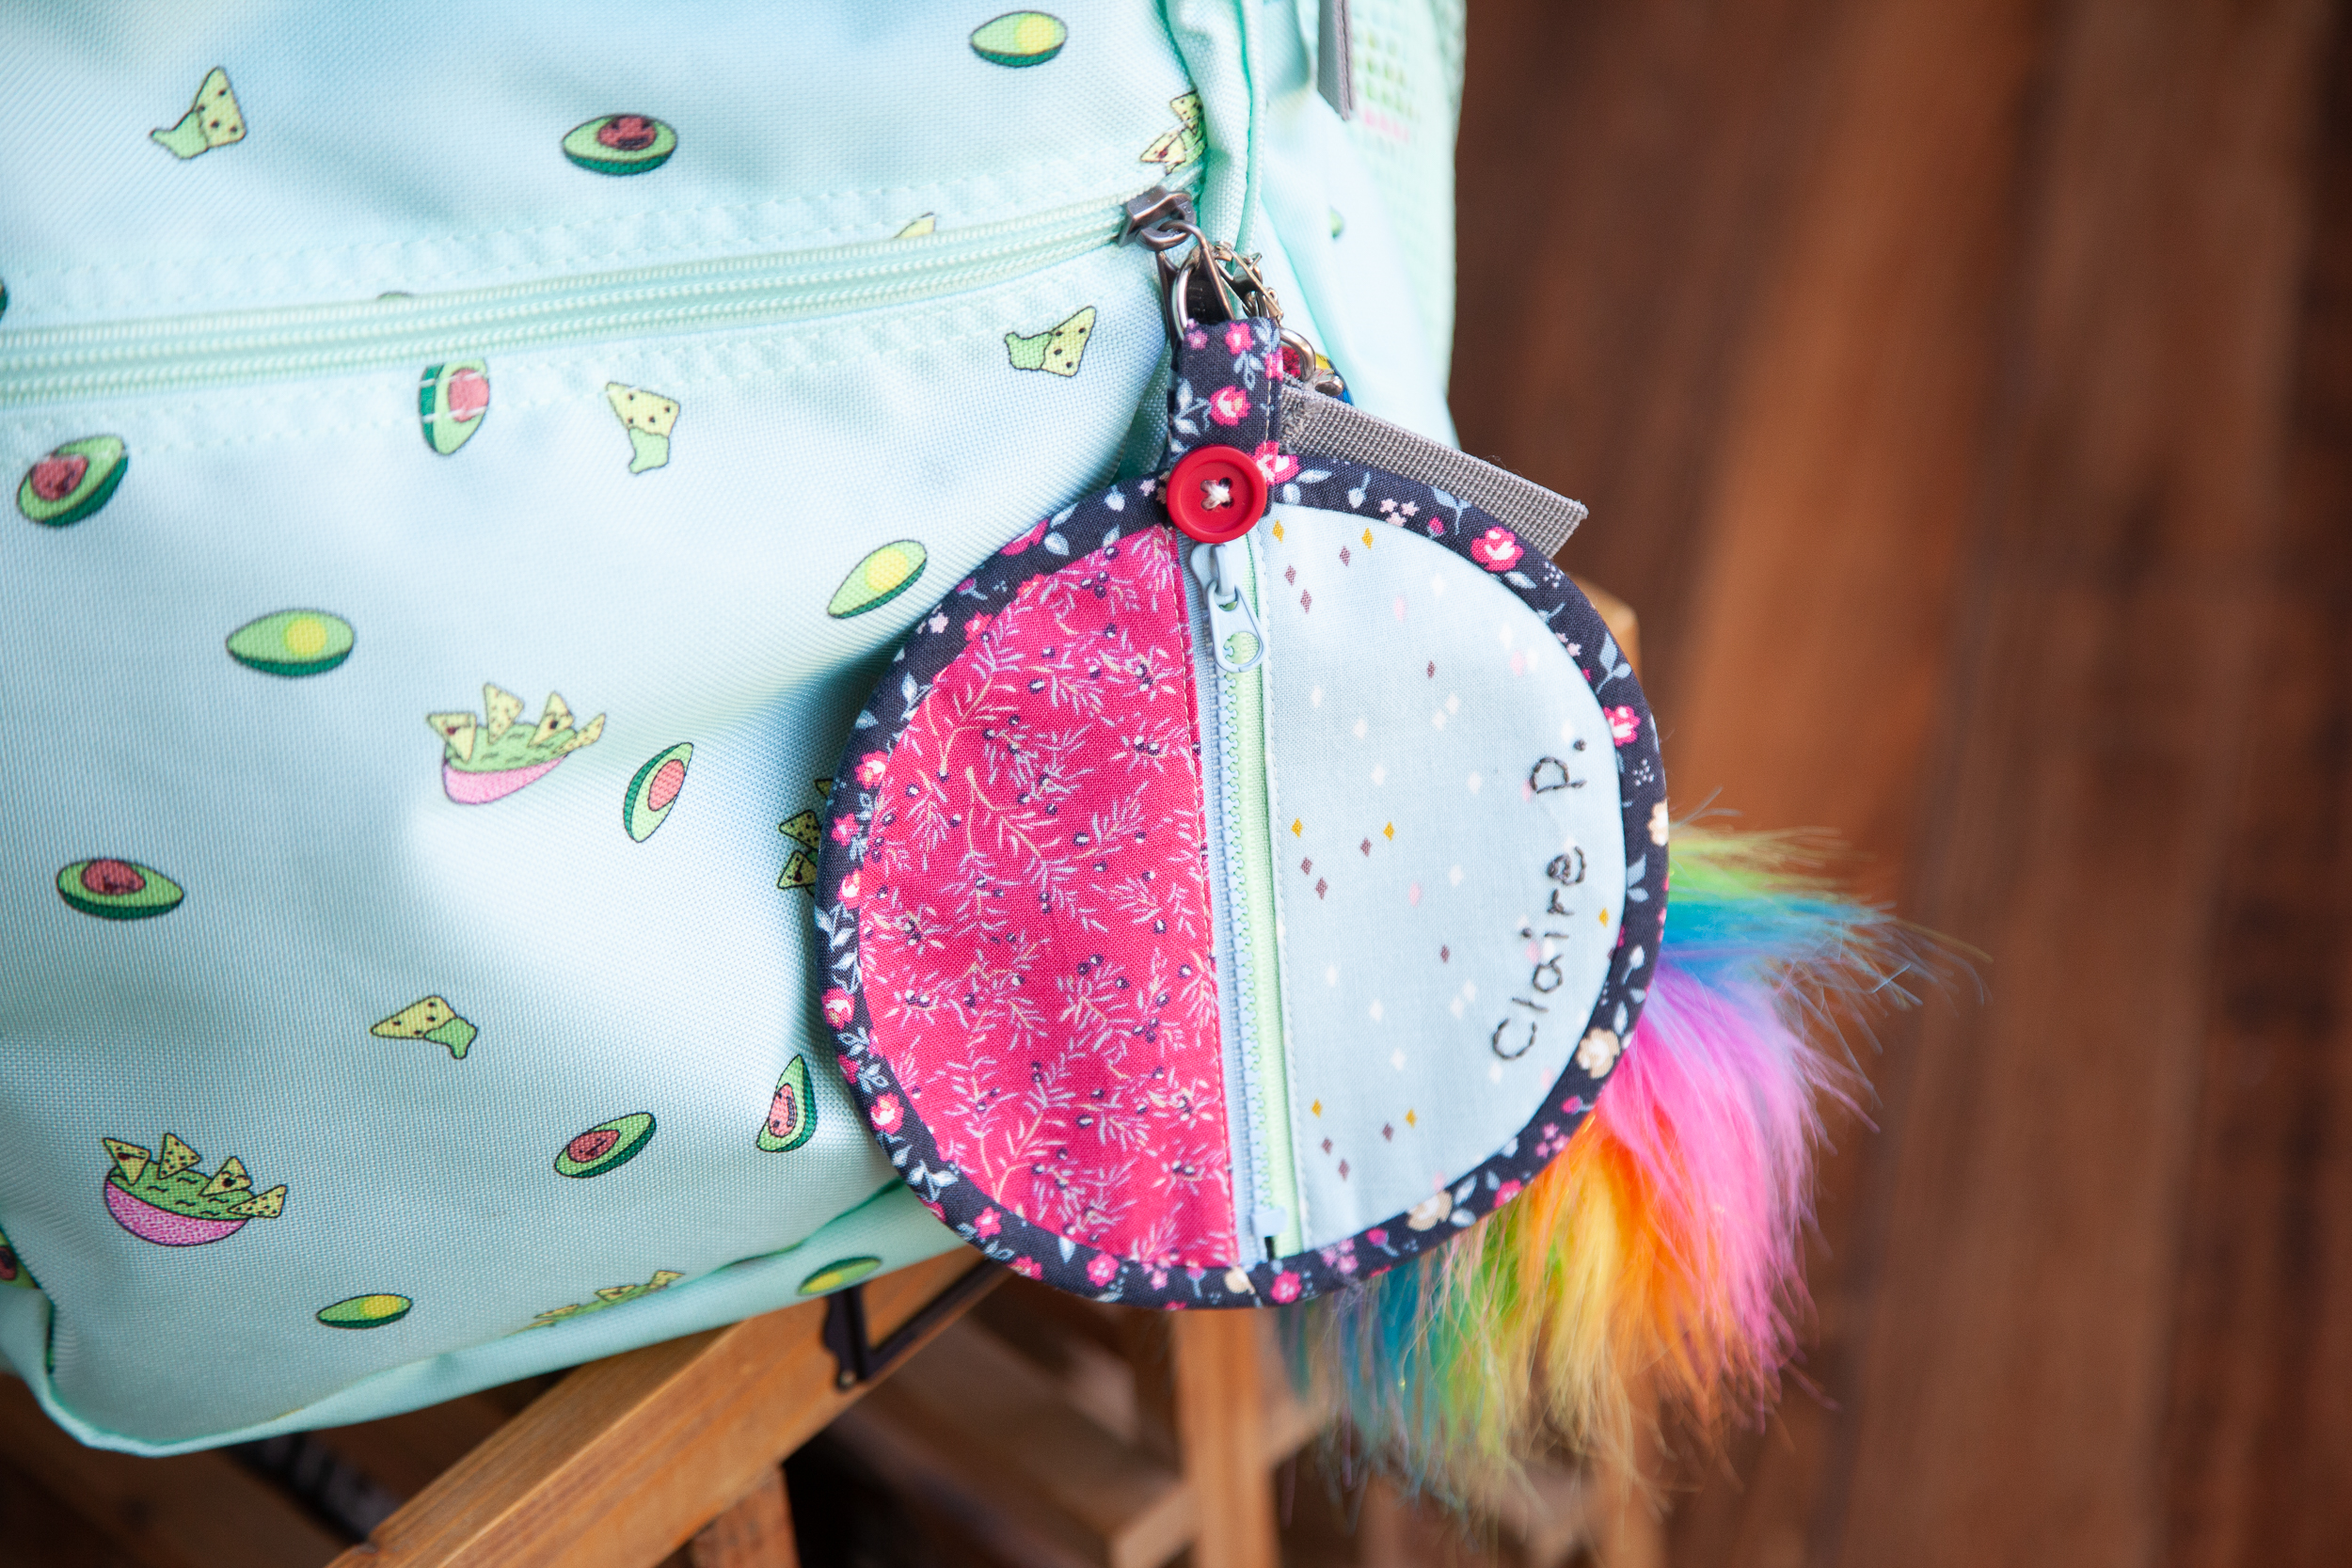
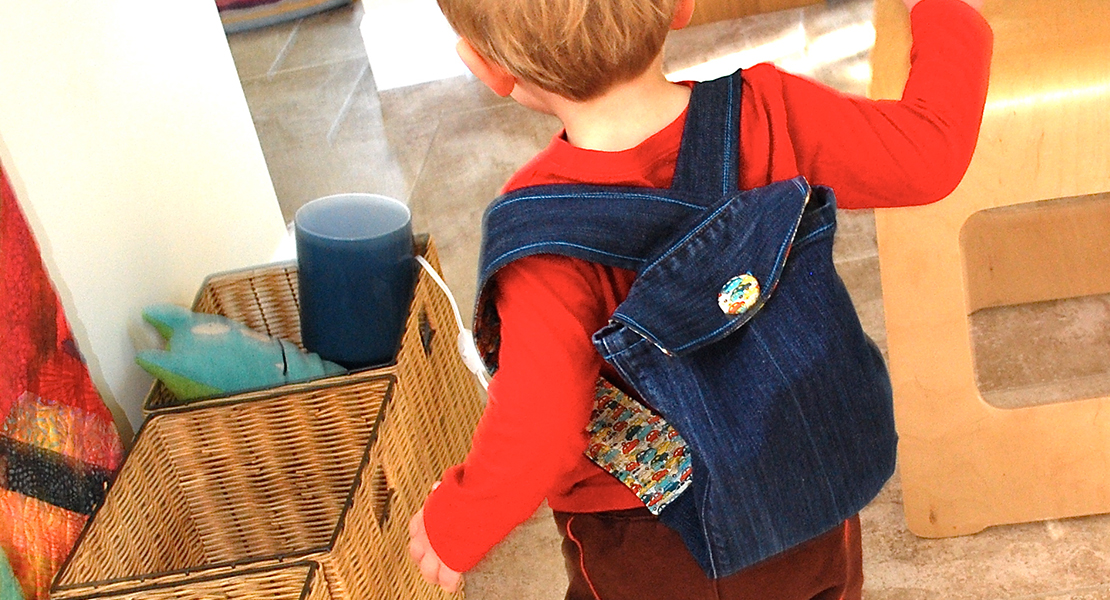
With Back-to-School just around the corner, I would like to share my quick and easy mini purse that can be attached to your kids’ backpacks. This is perfect for all of you who have huge stashes of scraps and not a lot of time.
Fill it with some coins for a gumball machine and a bandage or a little toy that your kids want to carry with them all the time. This purse would make a perfect surprise for your little one on the first day of school!
Materials to Sew Back to School Mini Purse
Finished size: 5 1/2″ diameter
Fabric: my Someday collection for Riley Blake Designs
- 6” square cotton print A for purse front
- 6” square cotton print B for purse front
- Fat quarter cotton print C for purse back, zipper tab and binding
- Fat quarter fusible interfacing such as Pellon 950F
- zipper – 5”
- woven label such as my Someday Woven labels
- button
- embroidery thread
- Download the Back to School Mini Purse pattern here
- basic sewing supplies
Cutting
- from print C, cut: one (1) 6” x 12”, one (1) 1 1/2” x 22” binding strip (*make sure to cut bias binding), one (1) 2” x 3”
- from fusible interfacing, cut: two (2) 3” x 6”, one (1) 6” x 6”
Note: All seam allowances are 1/4″ unless otherwise noted.
Preparation
1. Fuse the interfacing on the wrong side of the fabrics, aligning one side. Press in half with wrong sides together and set aside.
Attaching the Zipper
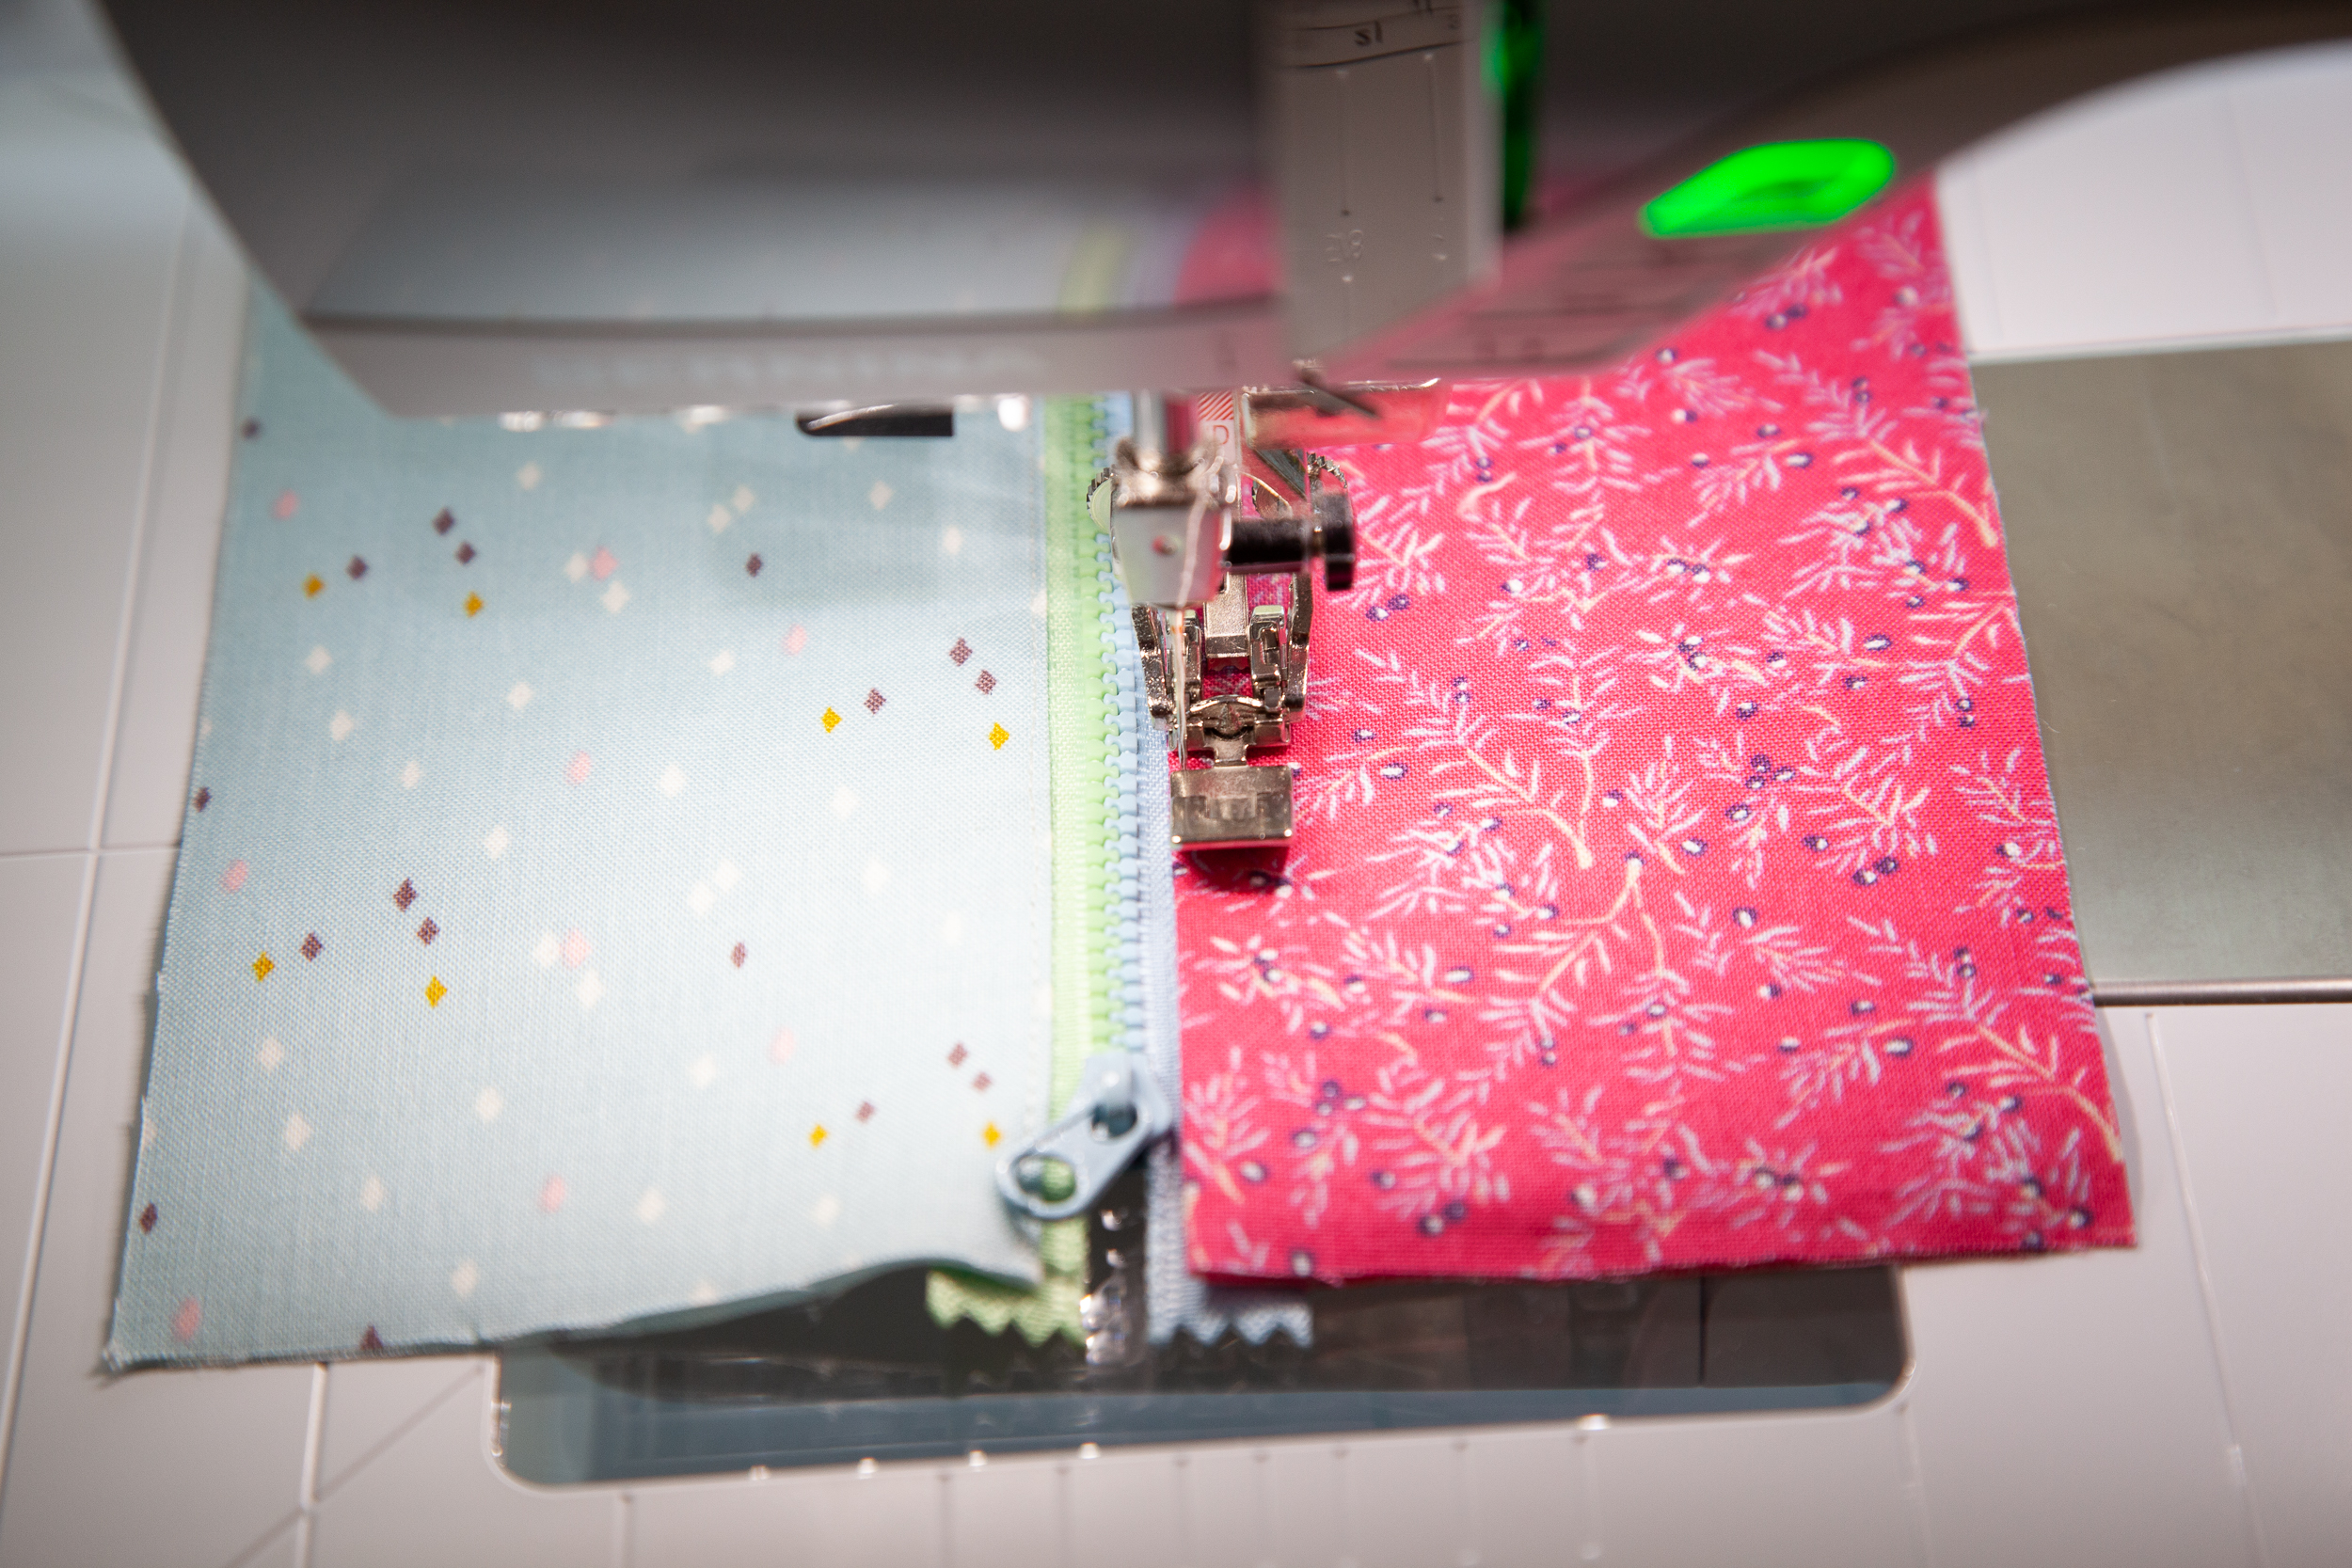
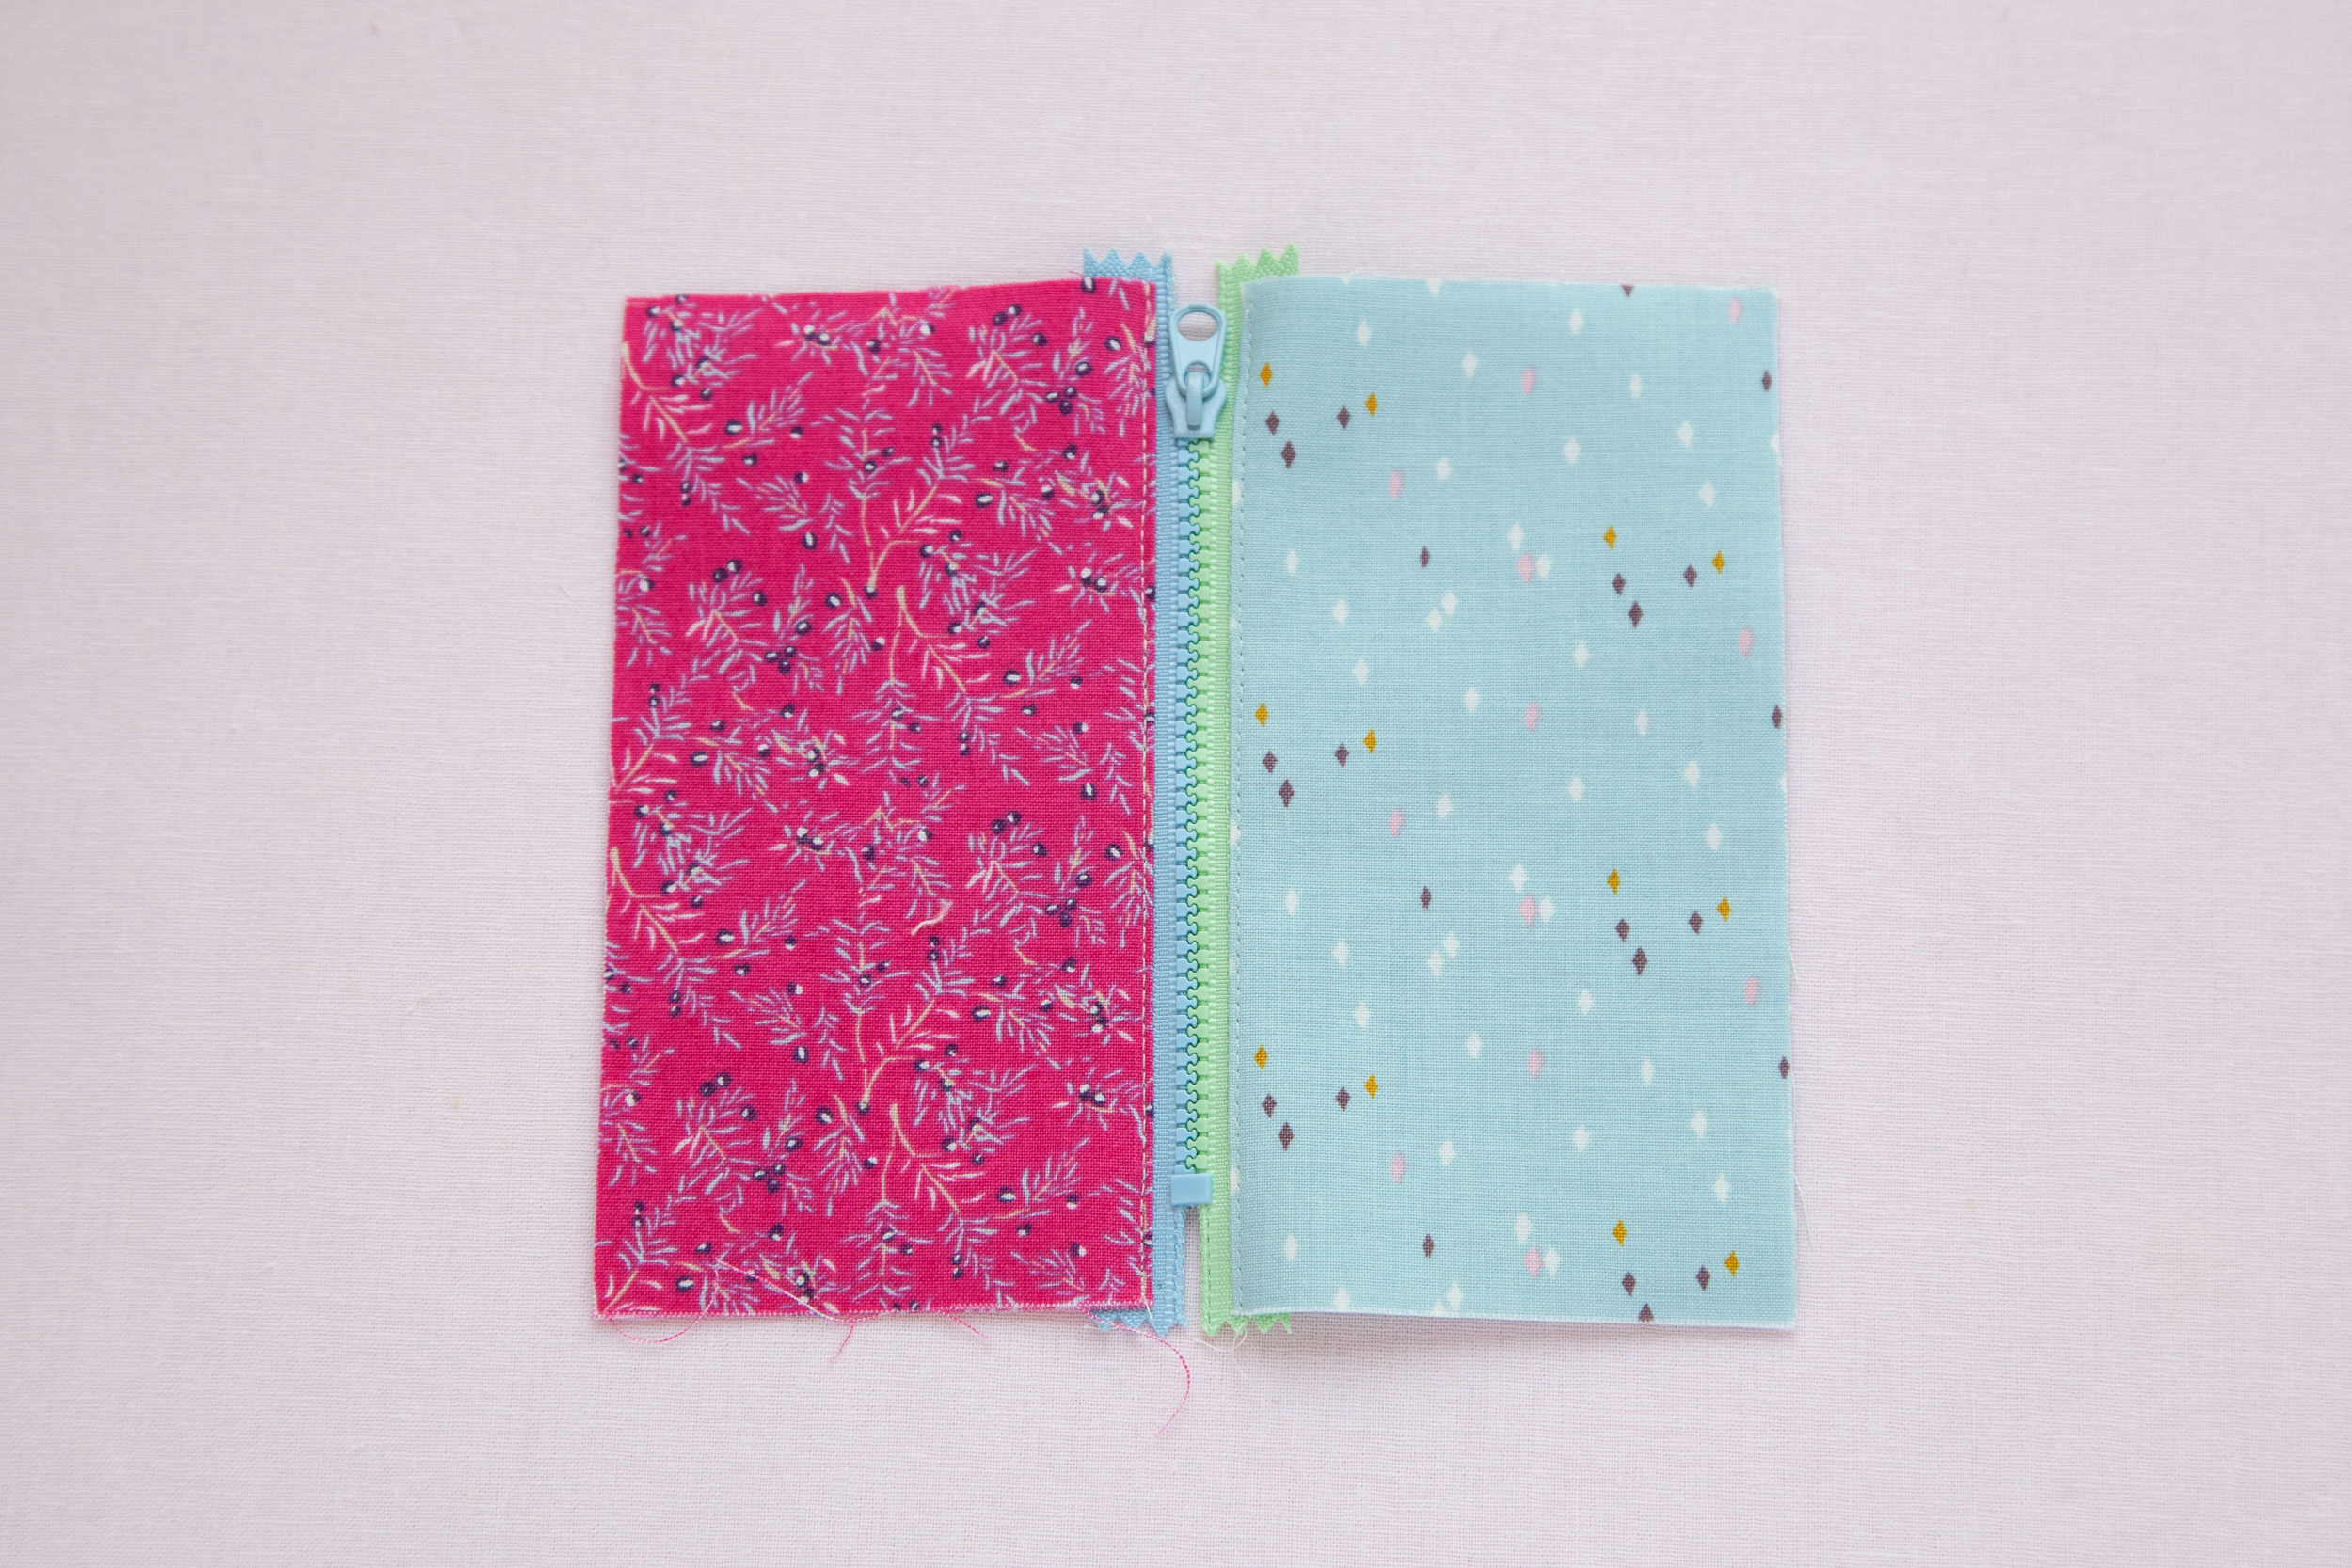
1. Place print A on top of the zipper. Pin in place and sew using a zipper foot. Repeat with print B for the other side of the zipper.
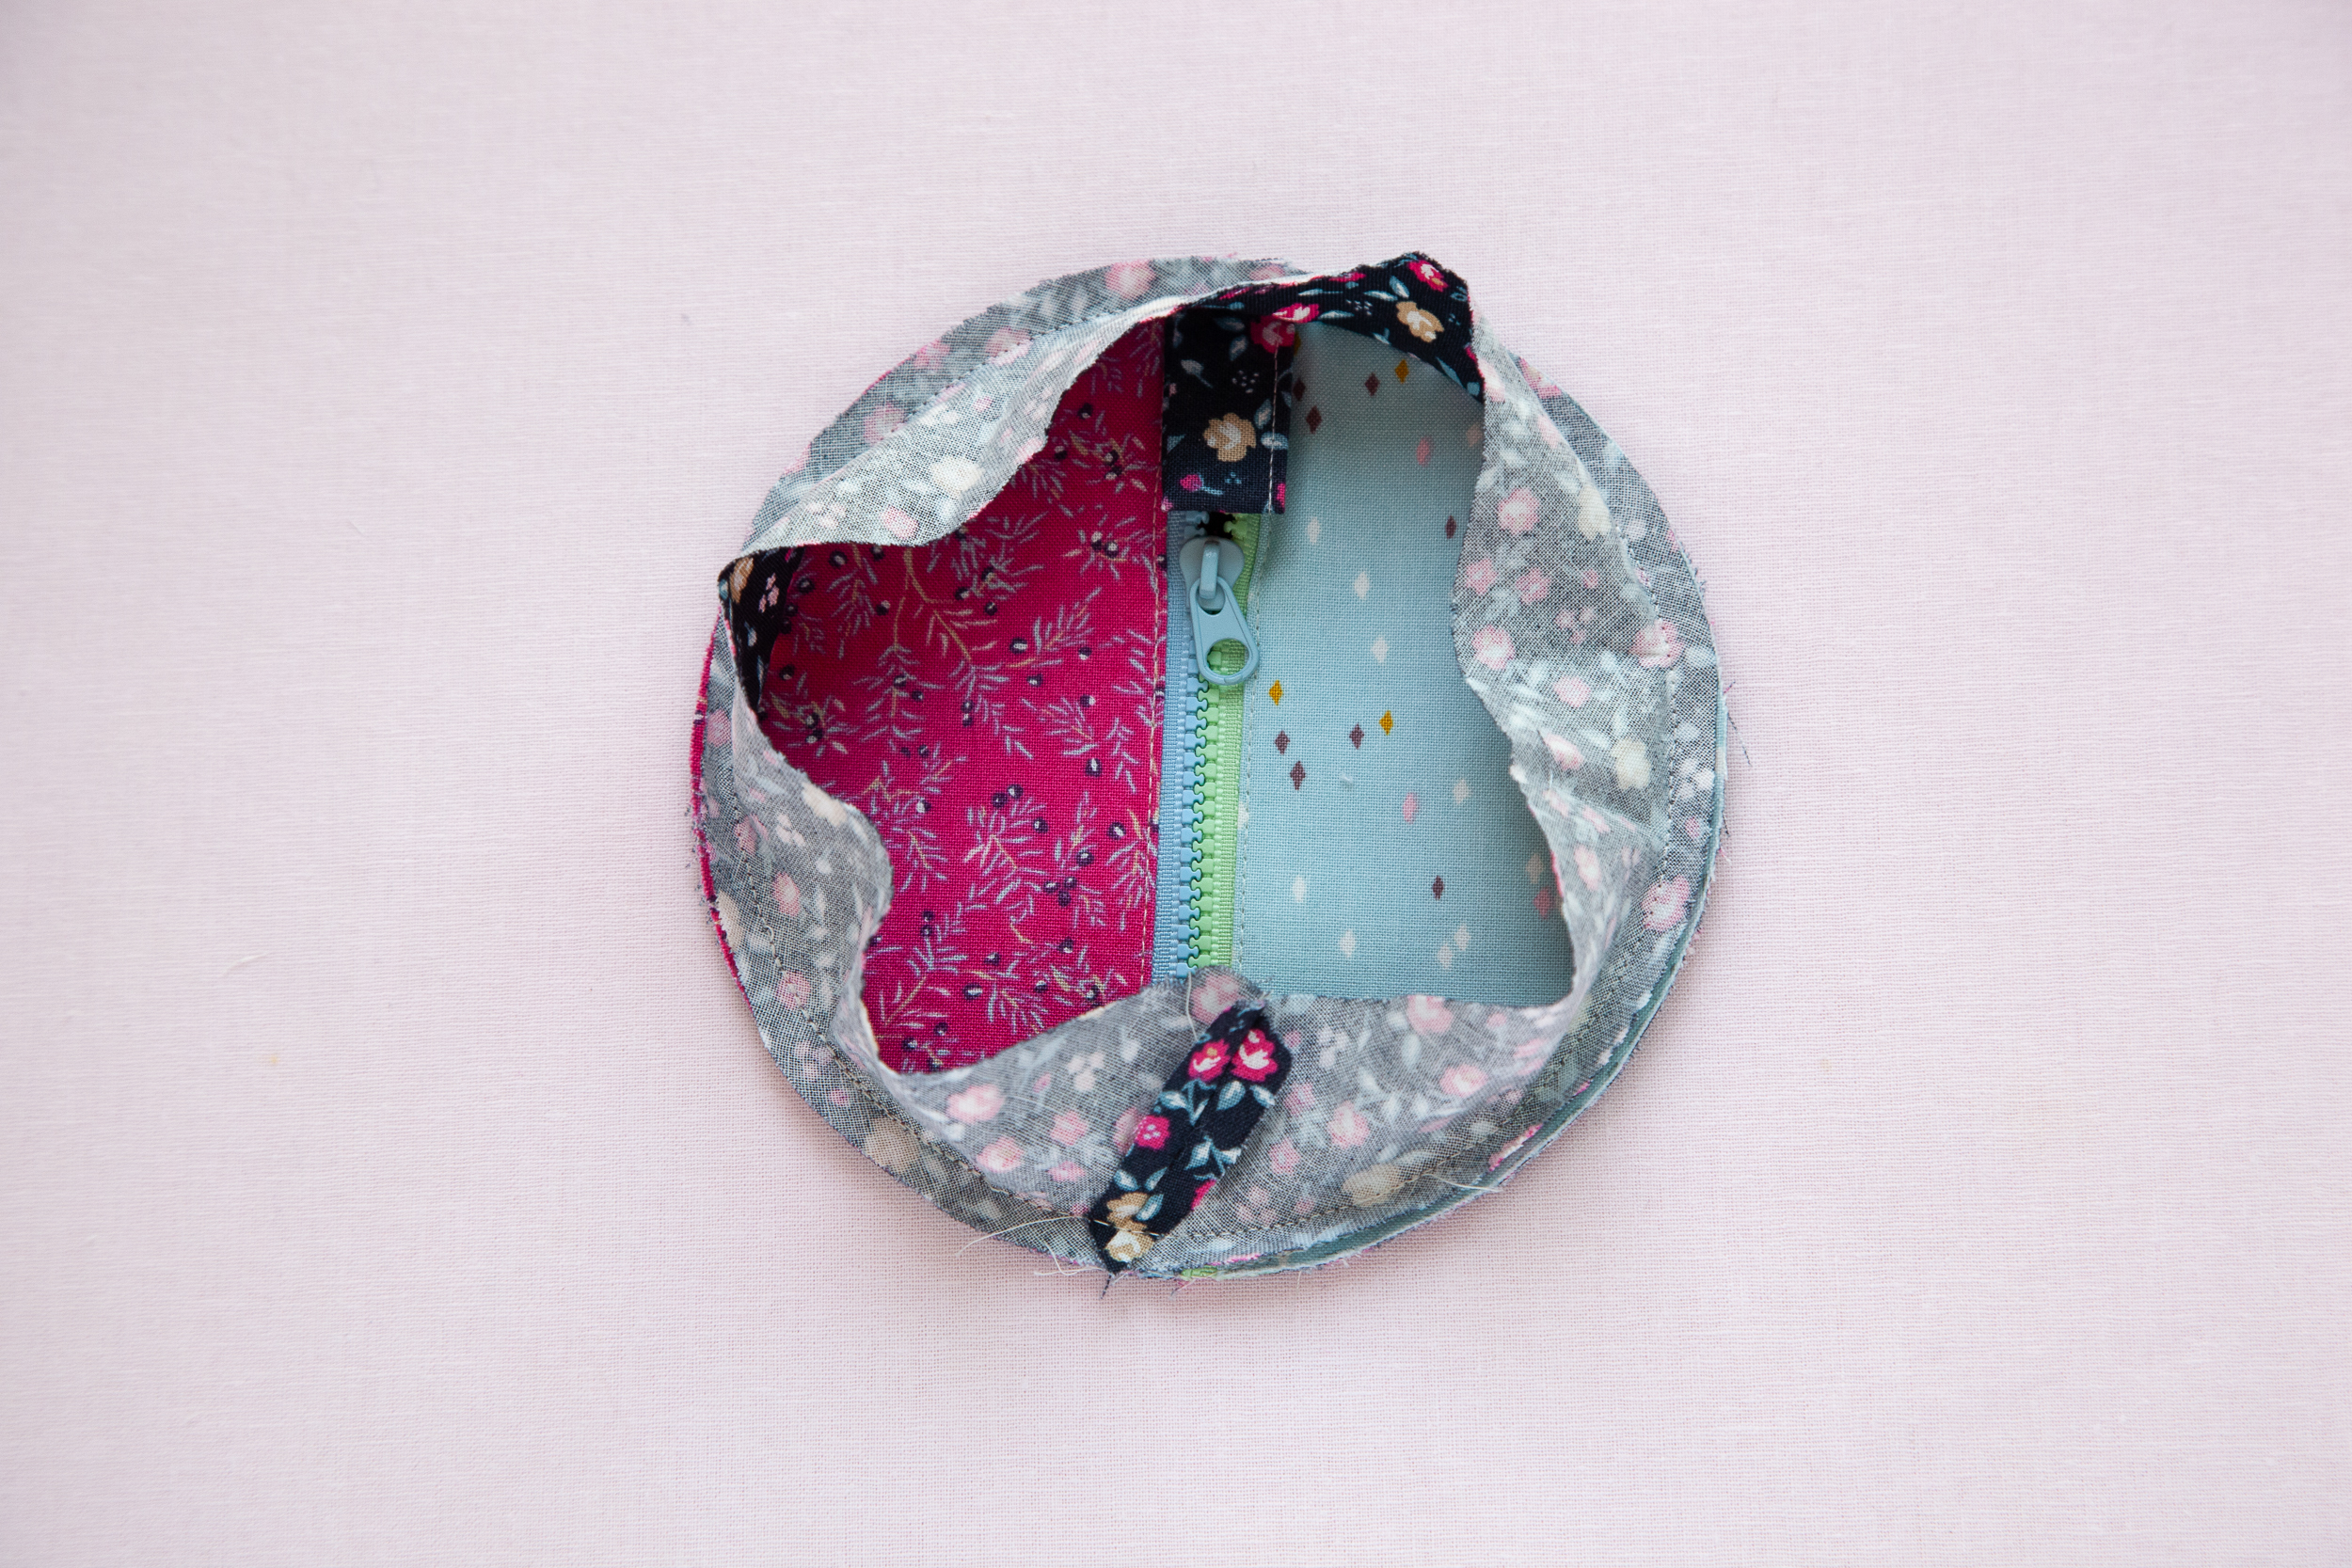
Assemble
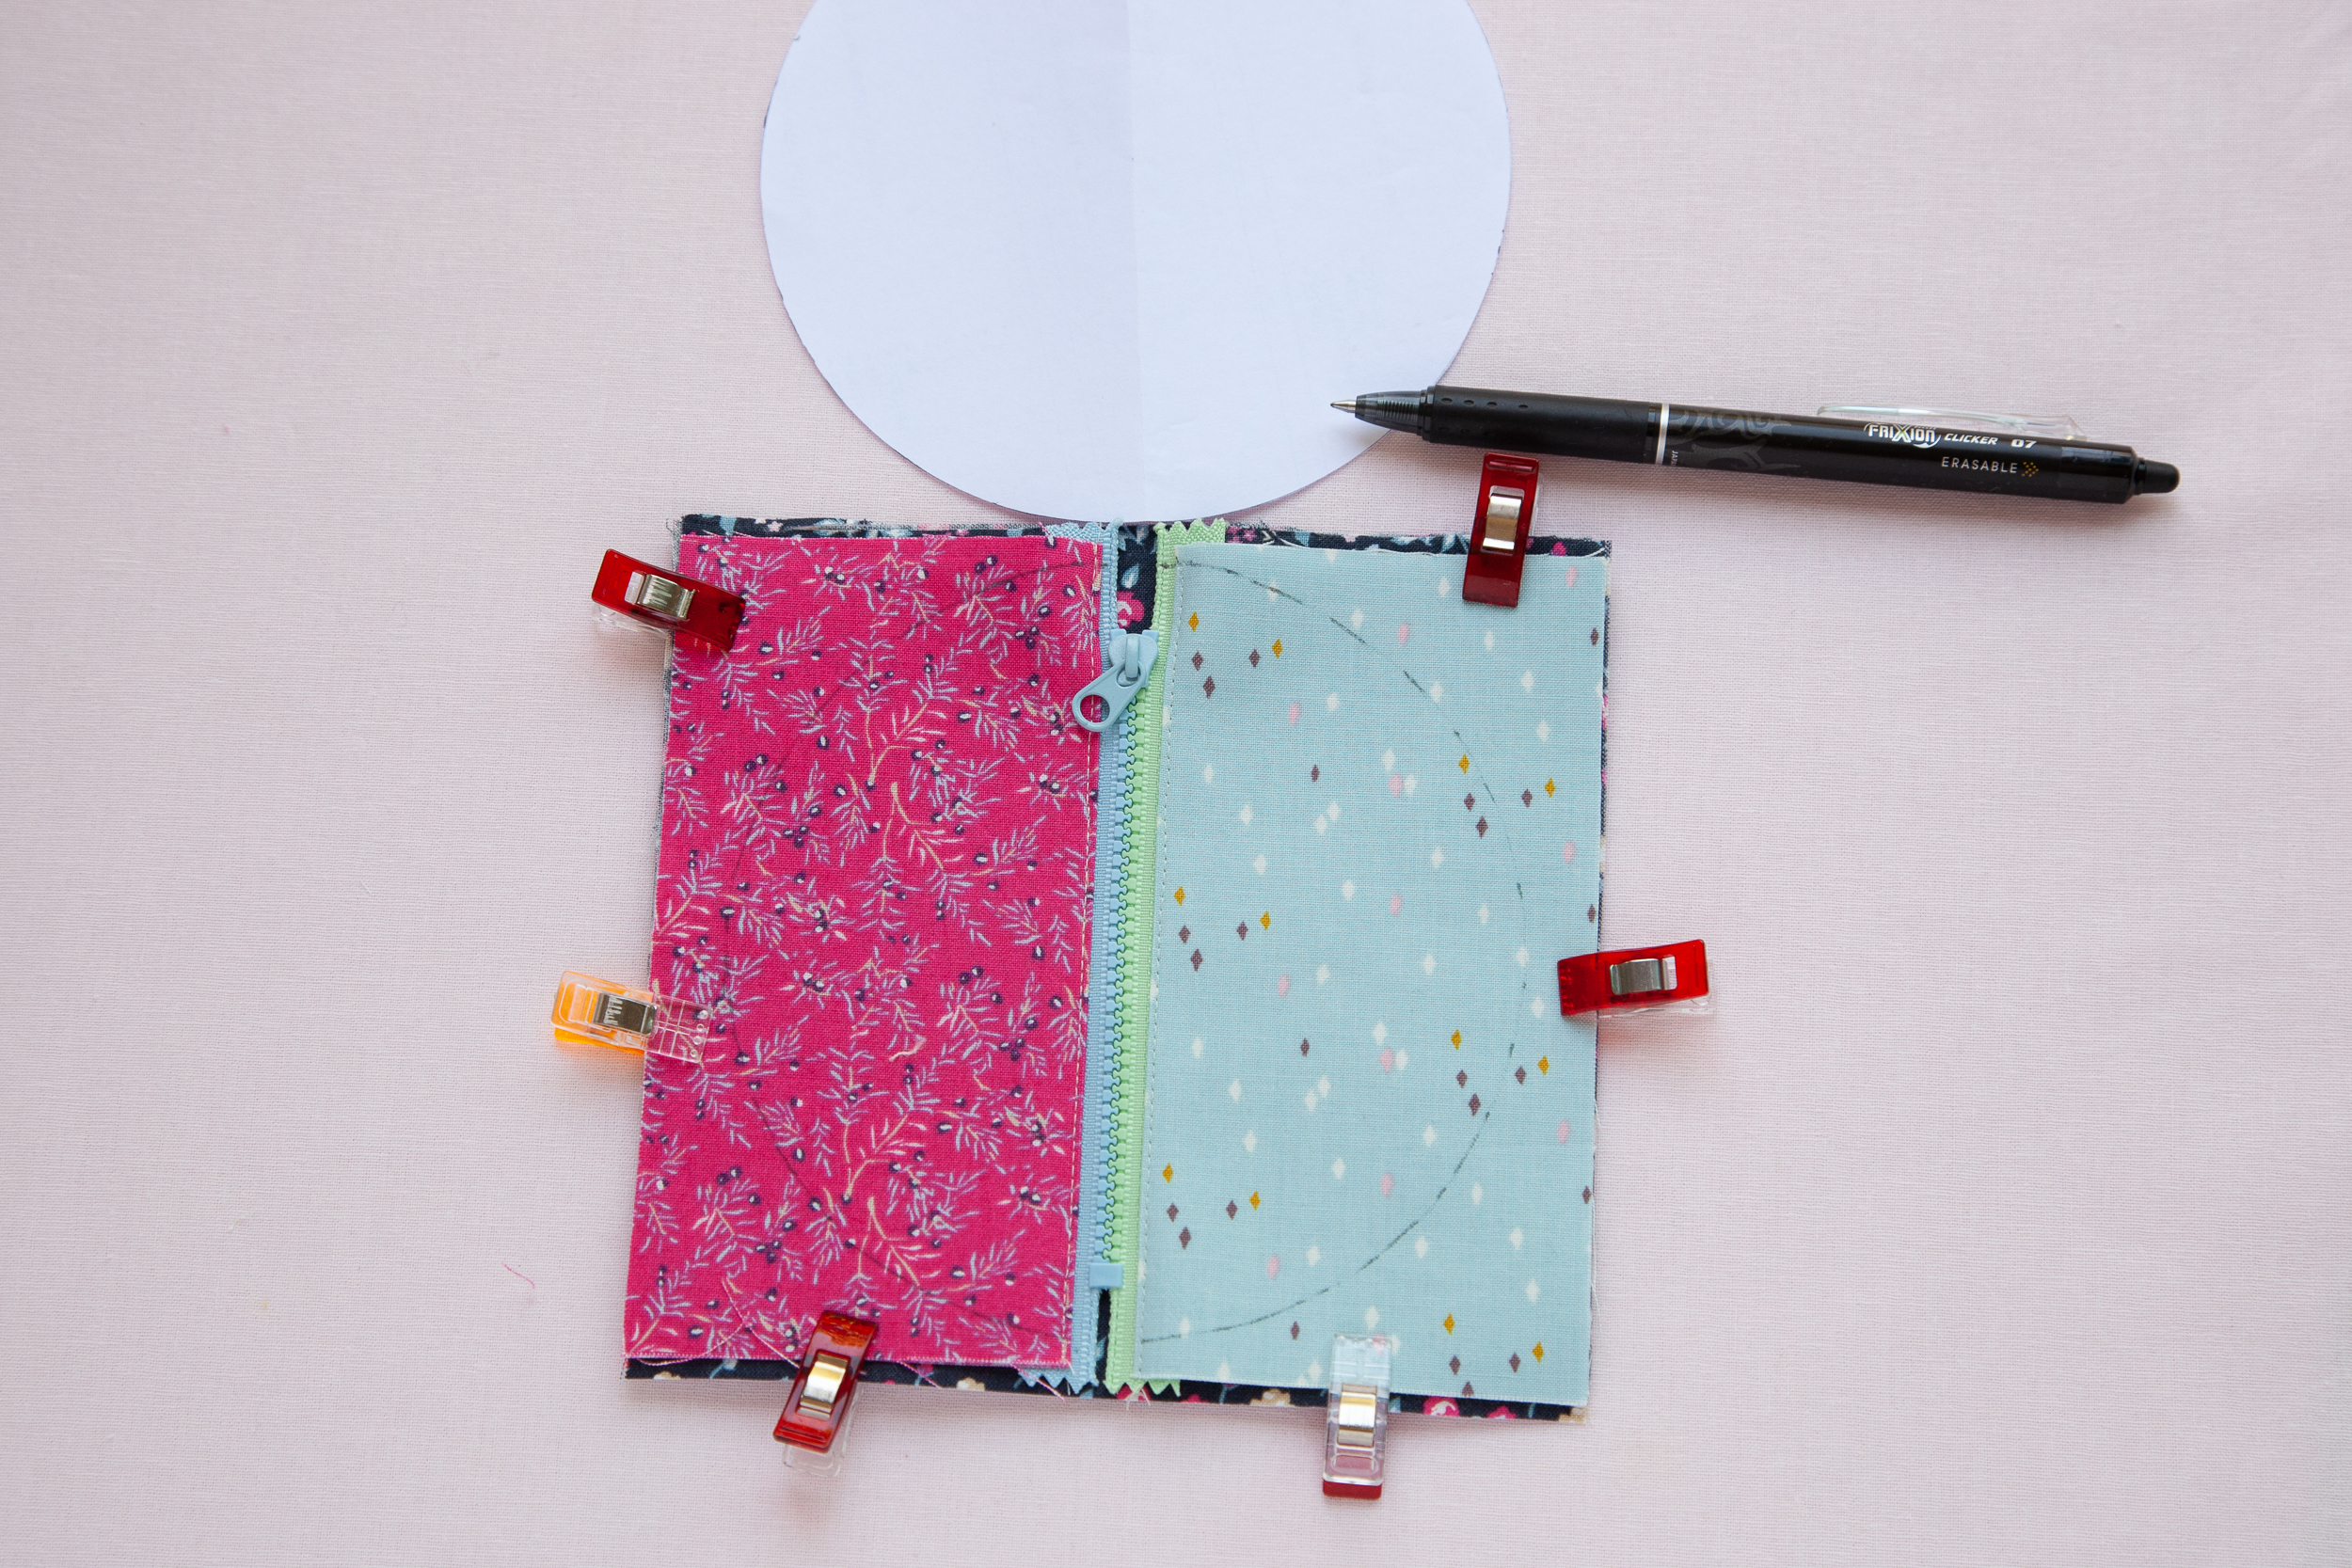
1. Pin the purse backing and purse front together. Print the pattern and cut out. Place the pattern on the purse front aligning the center by folding the pattern in half. Trace the pattern using a fabric marker.
2. Fold the 2” x 3” print C strip in half lengthwise with wrong sides together, and press. Unfold and bring the long raw edges toward the center crease on the wrong side of the fabric. Press. Fold in half lengthwise again and re-press.
Topstitch along the long edge of the strip.
Fold the tab in half and place on top of the zipper.
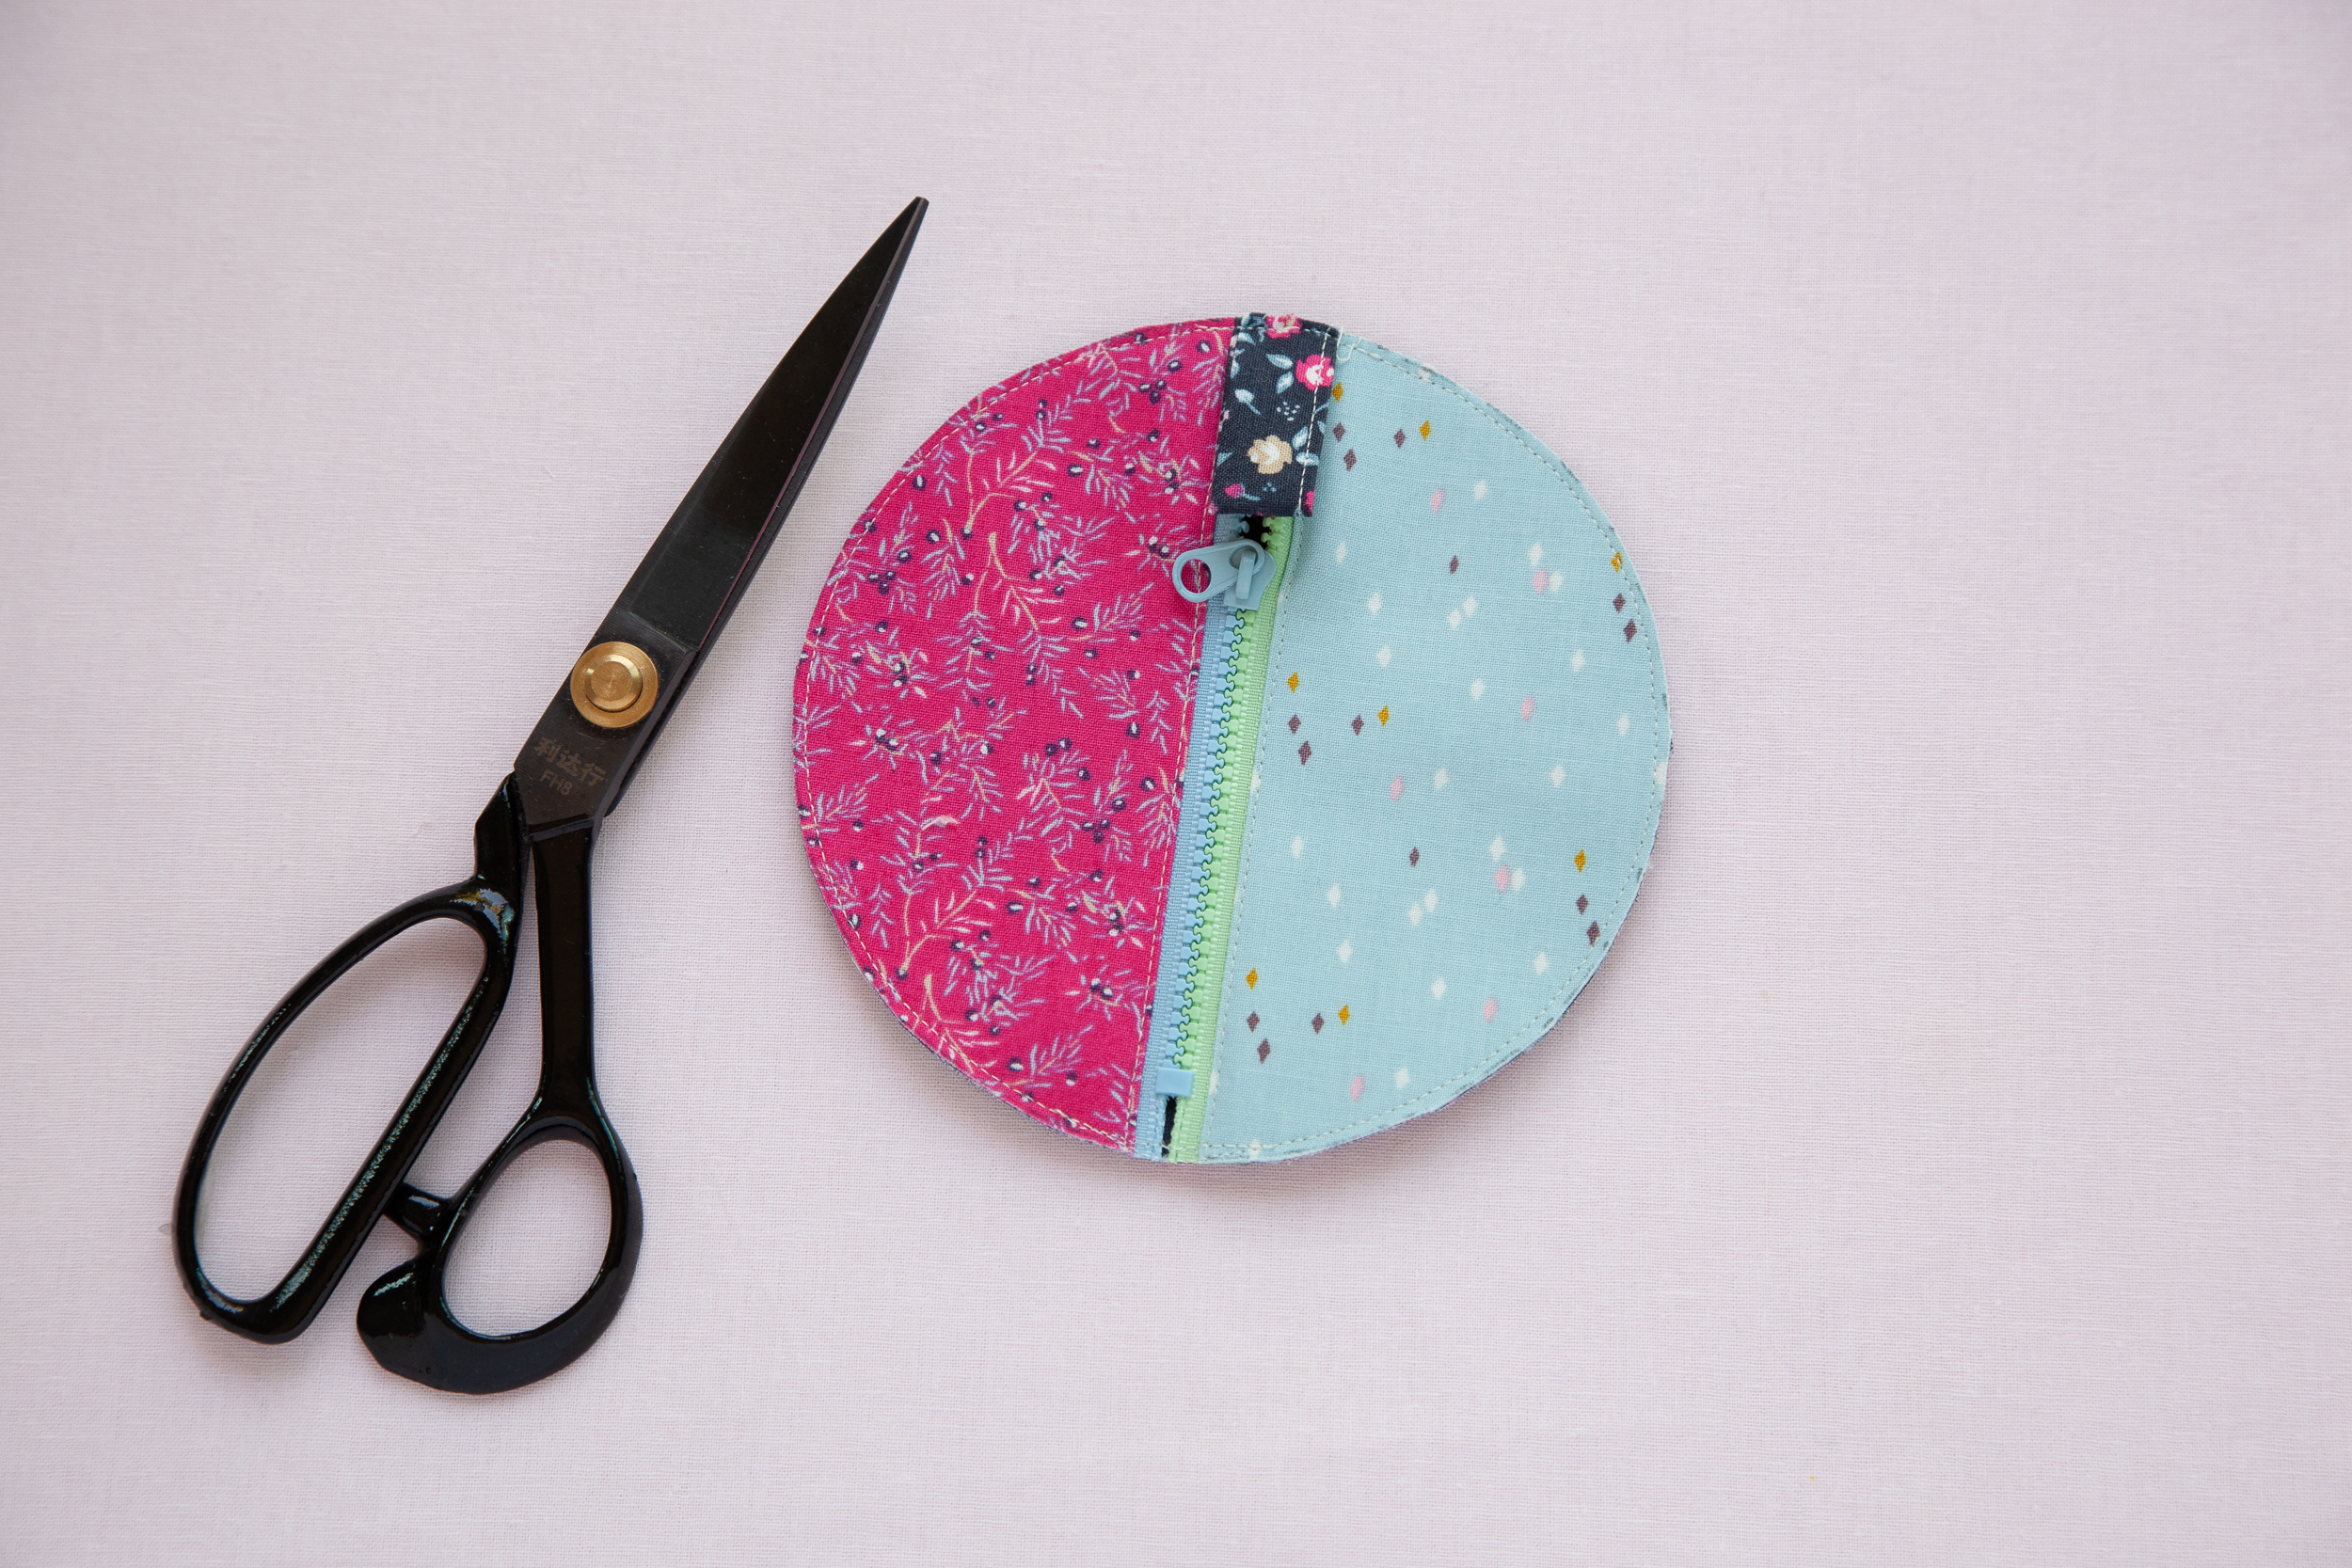
Sew 1/8” inside from the pattern through the layers to secure. Trim the excess using a pair of scissors.
3. Sew the binding to the purse front.
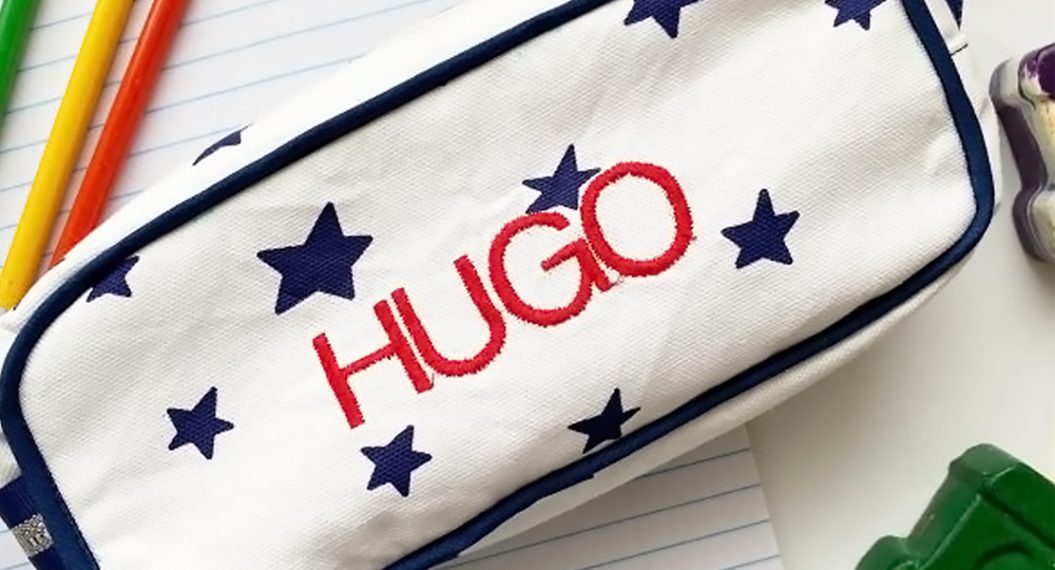
4. Fold the binding to the back of the purse and hand stitch in place. Stitch your child’s name on the front using three strands of dark embroidery thread. Hand sew a button (optional).
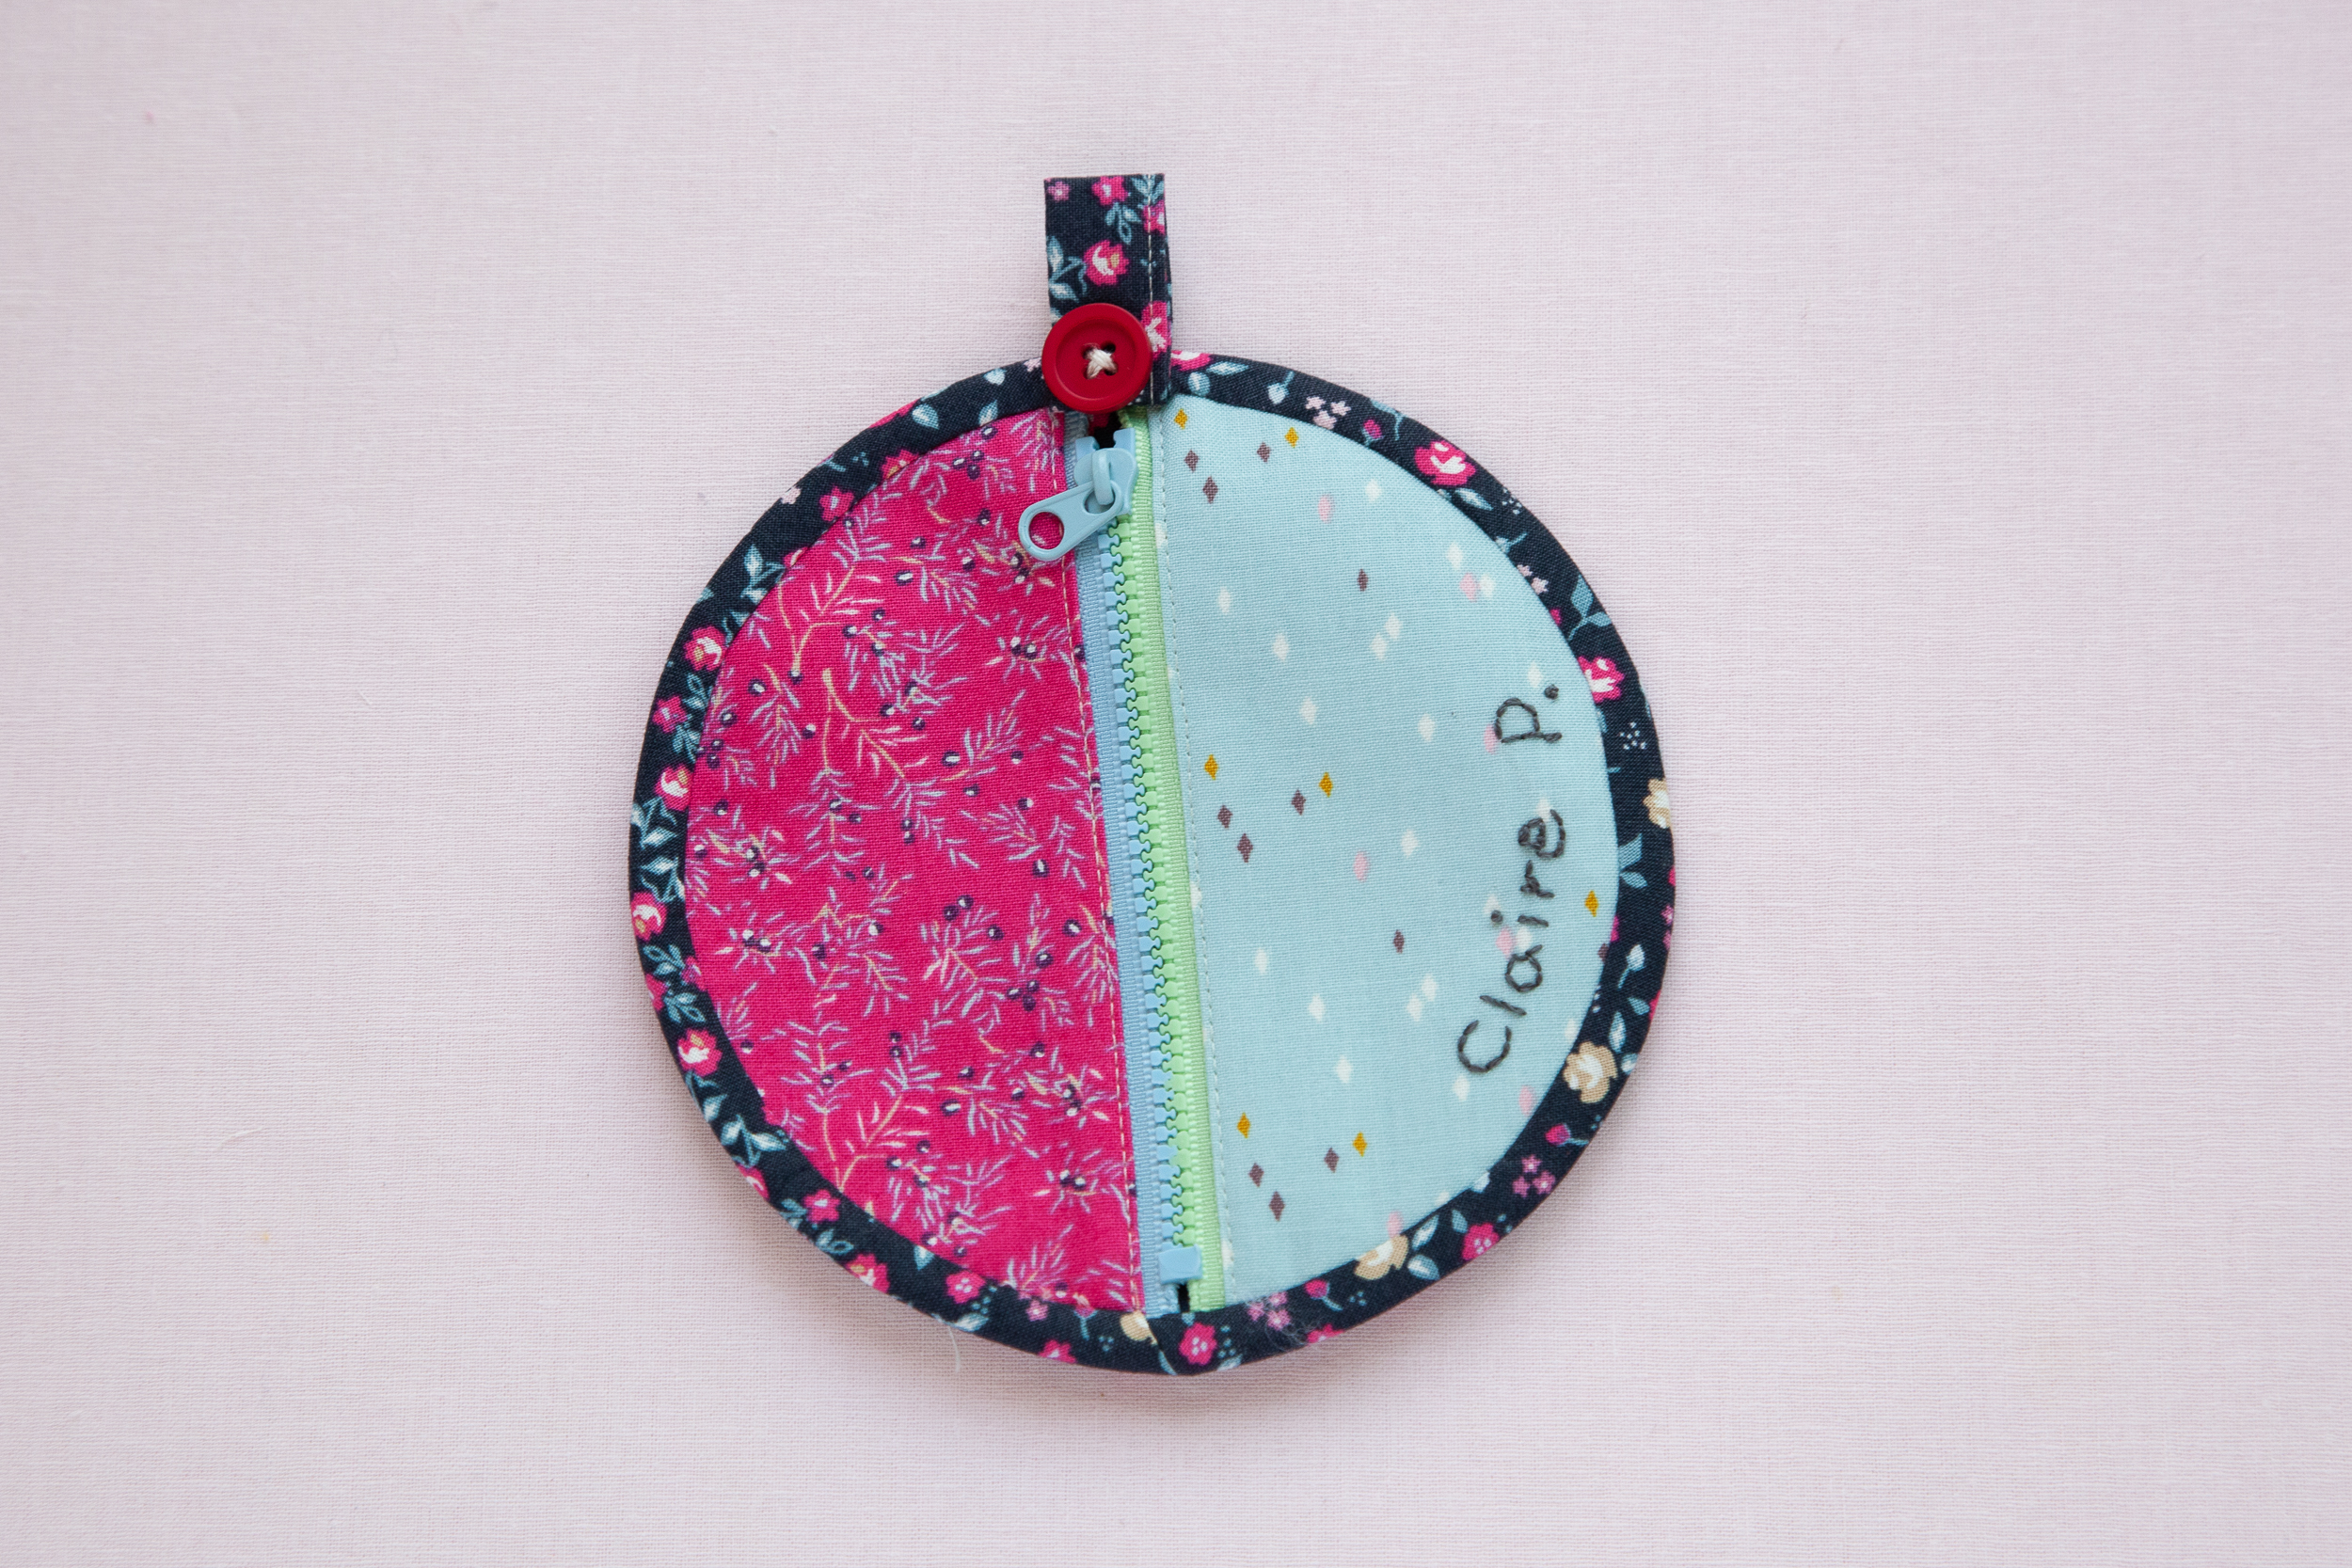
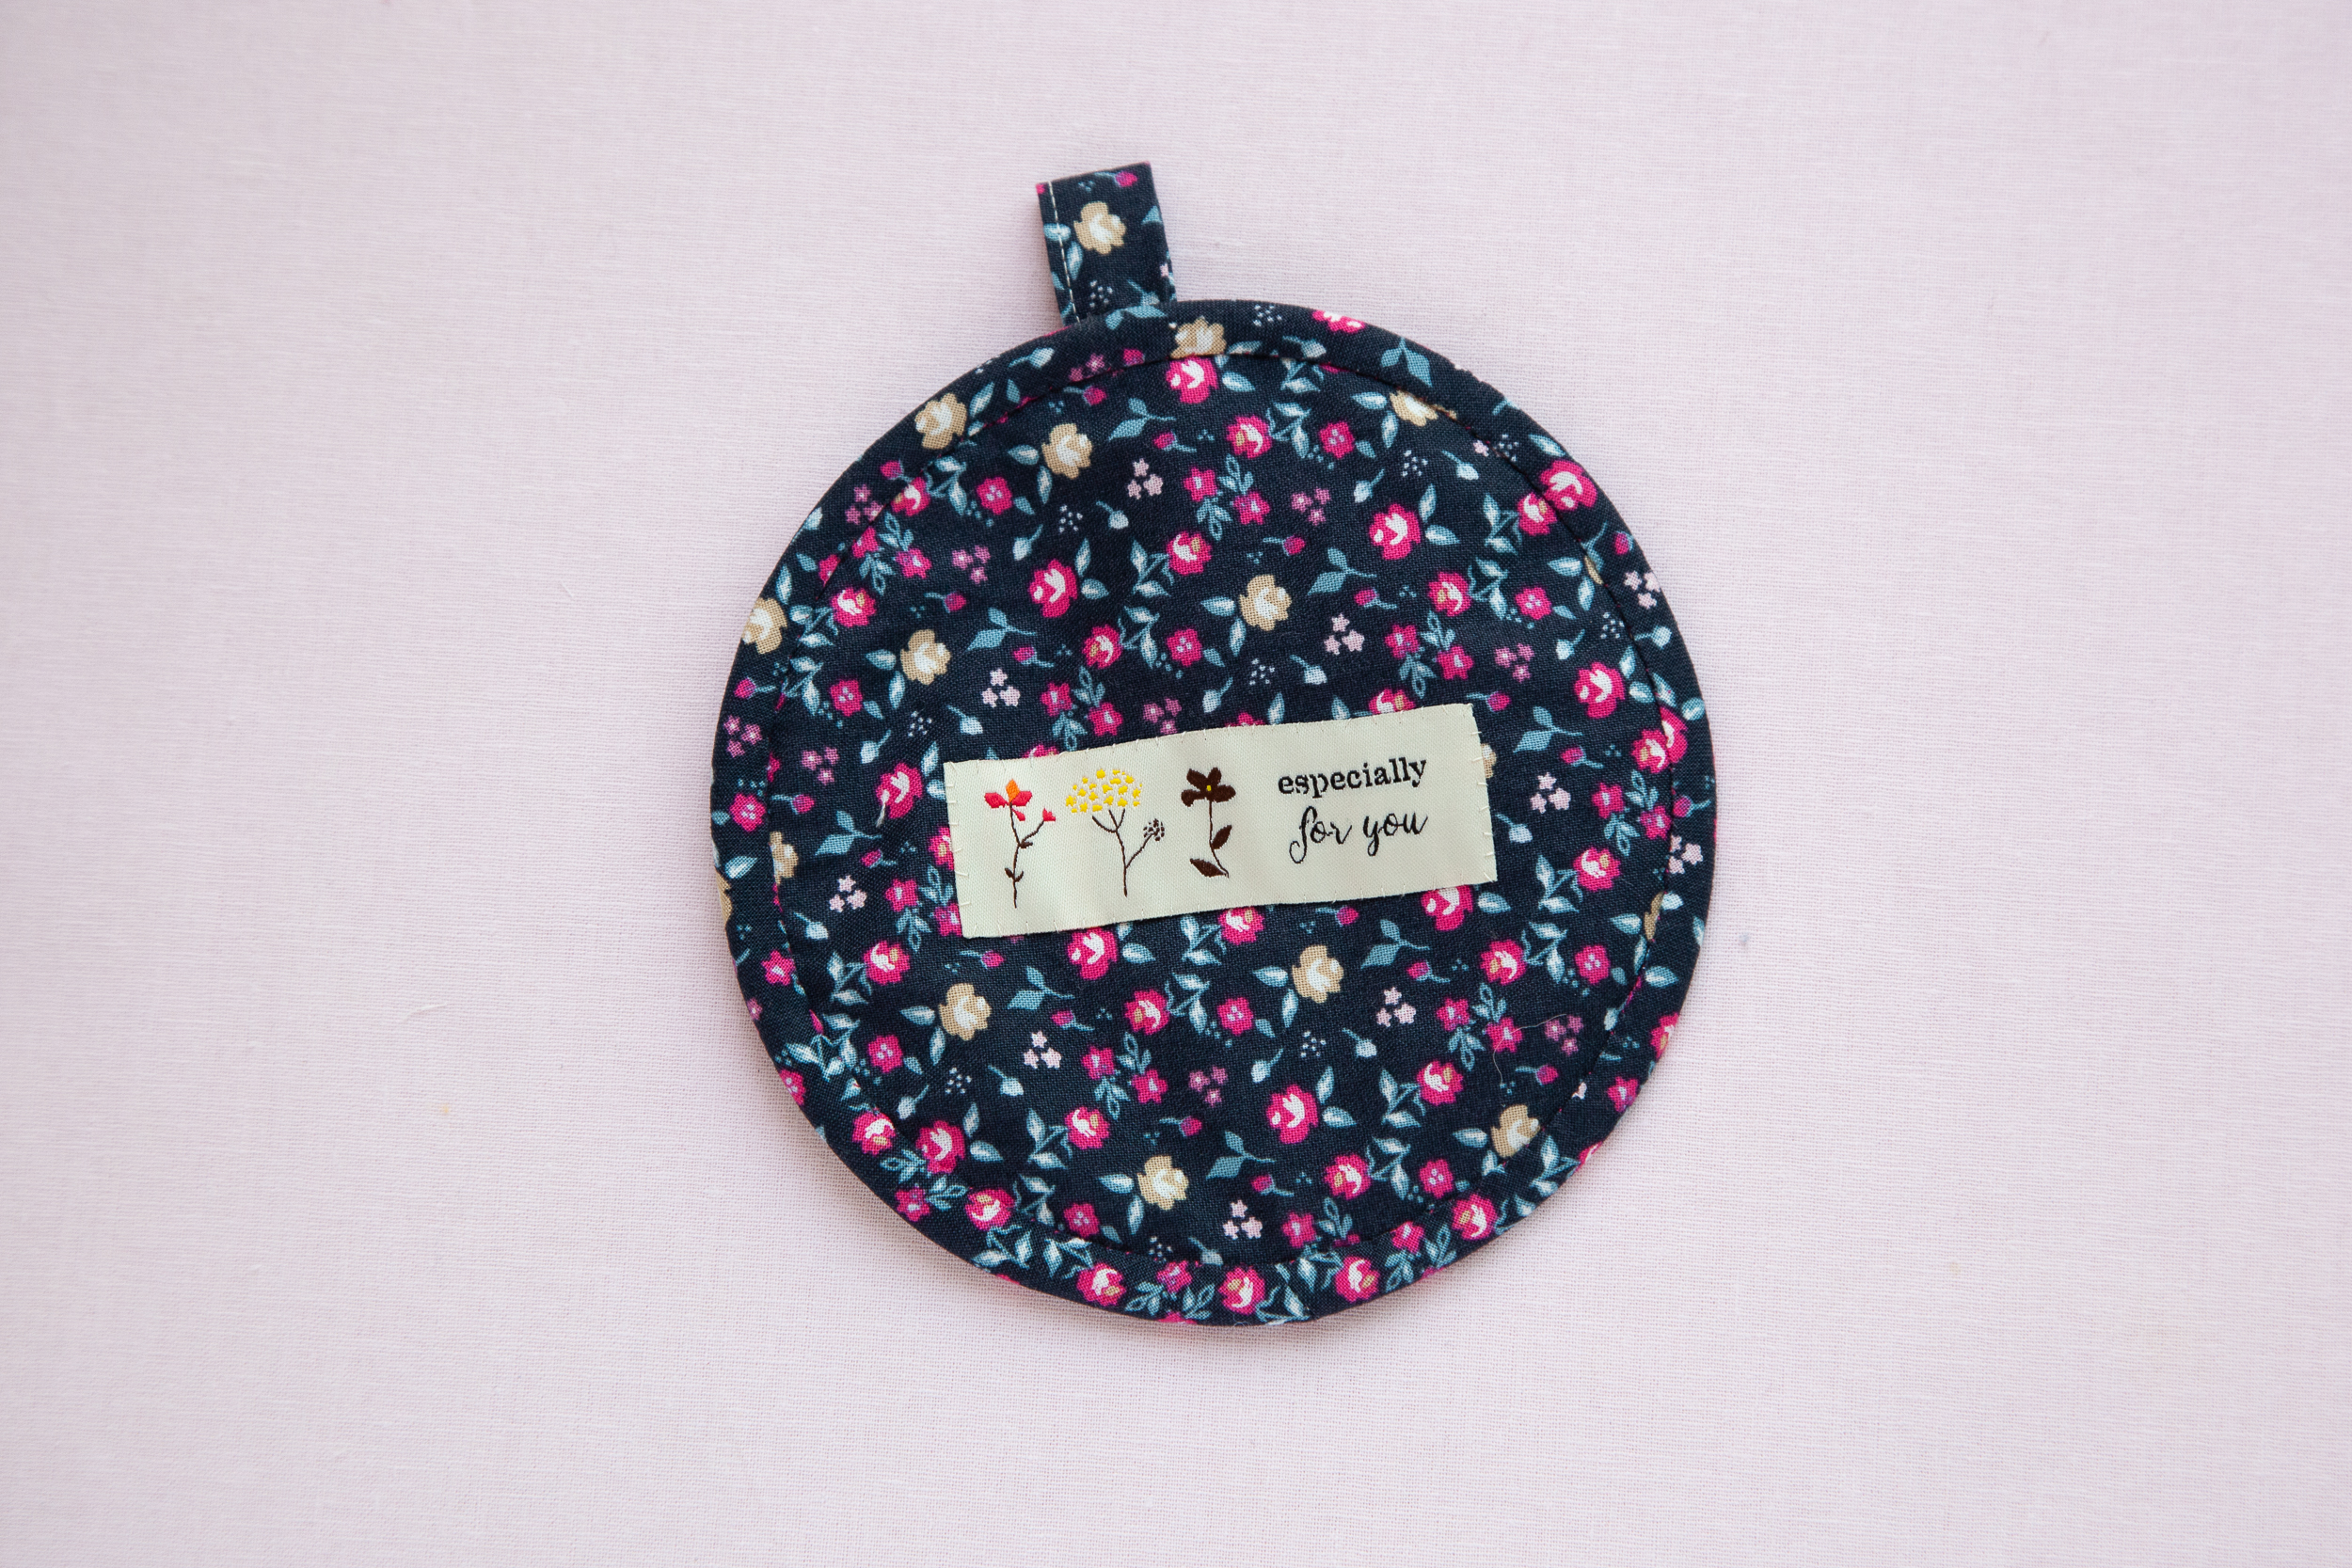
I attached a woven label to the backing using a quick whipstitch (optional).

You can find more bag and pouch patterns at my shop sewingillustration.com.
My new book Zakka from the Heart will be out this October from Stash Books. I can’t wait to put it in your hands and hope to share more when it’s the time!


Love this can’t wait to sew one for my niece she is going to love it