How to Create a Fabric Collage Art Quilt From a Photo
My name is Leni Levenson Wiener; I am a BERNINA Ambassador and author of several books—and best known for making art quilts from photos. Why from photos? I can’t draw! So if I can see it, I can capture it with my camera and create it. I don’t need to figure out all the perspective, proportion or the light source. Today I am going to introduce you to my technique. You can find more detailed information (including a workshop in a book) in my most recent book Pictorial Art Quilt Guidebook.
Creating an art quilt fabric collage from a photograph is not difficult. For this tutorial, I will be using a very simple example so you learn the basics. These basics do not change even when the photo is much more complex—just break up the photo into manageable pieces and treat each one in the same way.
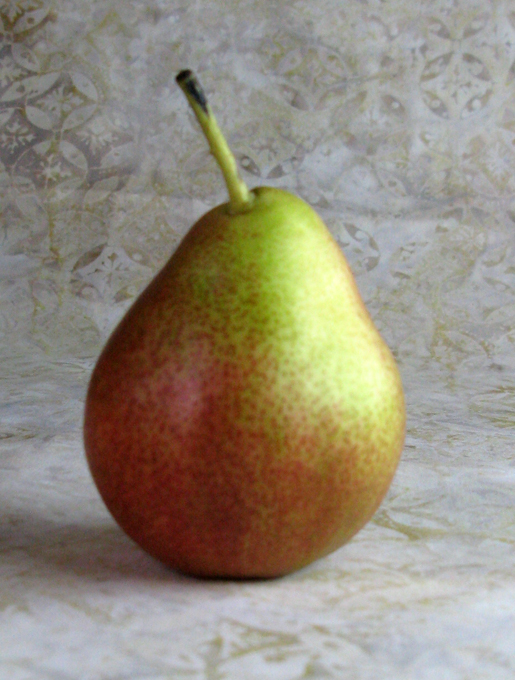
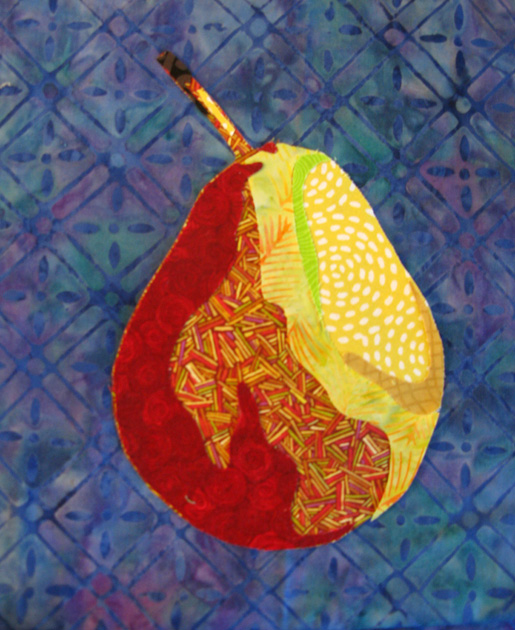
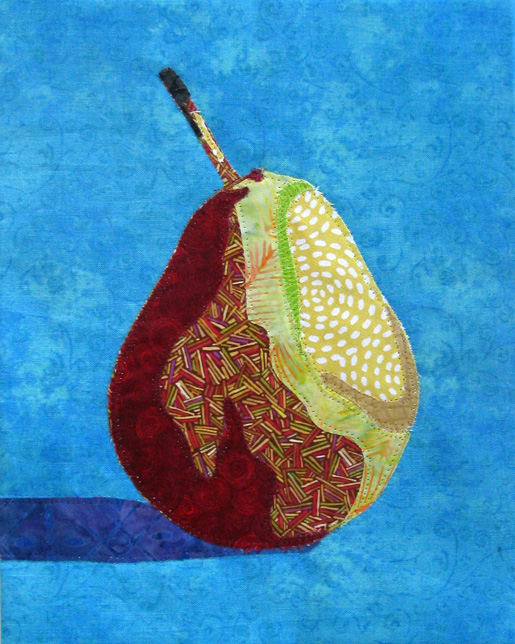
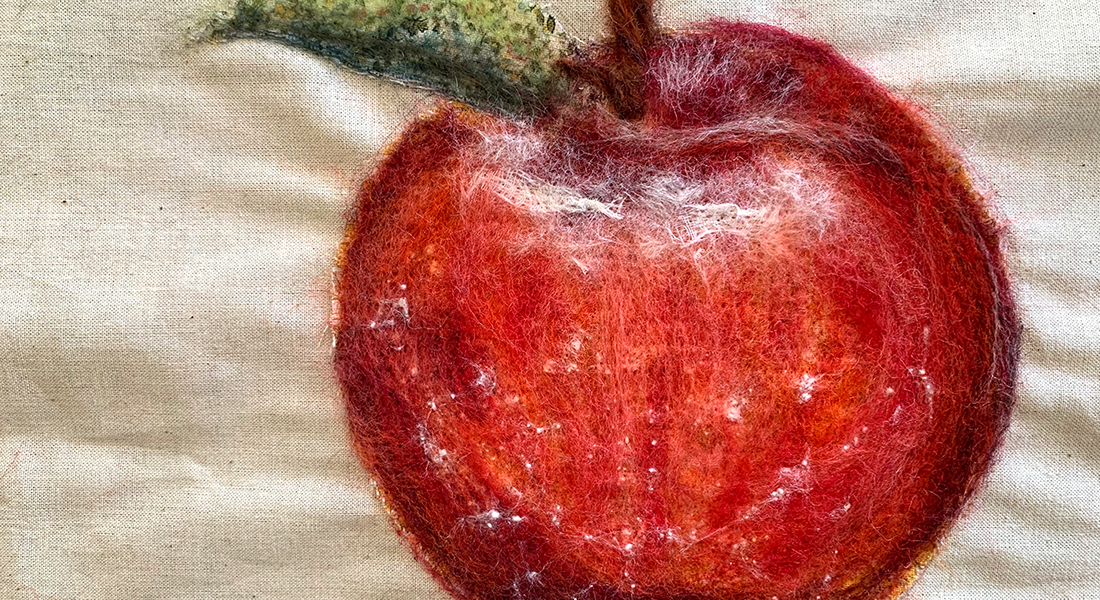
I always start with a photo. I take lots of photos that I save in computer files by type (landscapes, seascapes, animals, people, etc). For this project, I have chosen to use a photo of a single pear. I love their color and shape (and think they are delicious with almond butter, but that is another story for another time!).
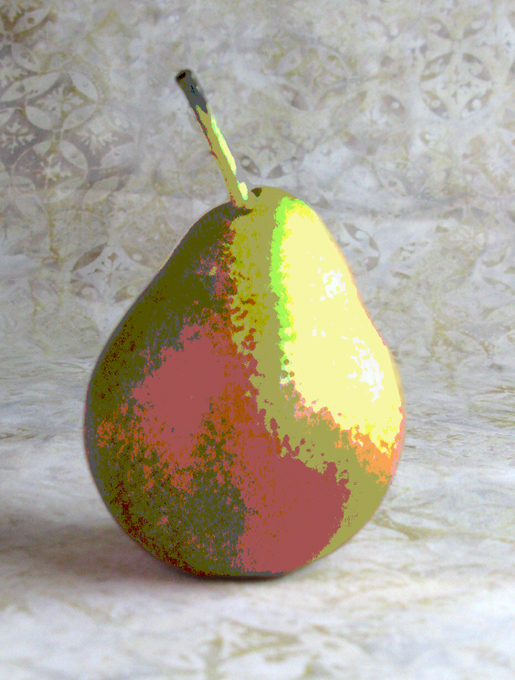
The first thing I do is simplify the photo using a computer program—either Photoshop (or Photoshop Elements using the cutout filter) or a free downloadable program called Gimp (using the color to posterize function). Both programs will allow you to reduce the number of visible colors in the photo to show clear color distinctions which are easy to follow as your pattern—and allow you to control the level of detail in your art quilt. In this case, I used Gimp (at posterize level 5) to create this simple pattern (if you are intimidated by the computer part, I have a pattern service on my website www.leniwiener.com). I print this pattern in the size of my finished artwork—in this case, sized to fit on a single piece of paper.
One thing to keep in mind is that these programs can sometimes change the color a bit, so I still refer to the original photo for my color choices. What I use the pattern for is value. Value refers to the relative light/medium/dark of each color to the others, and gives the illusion of depth and dimension. Think black and white photo, and you will have a good understanding of values.
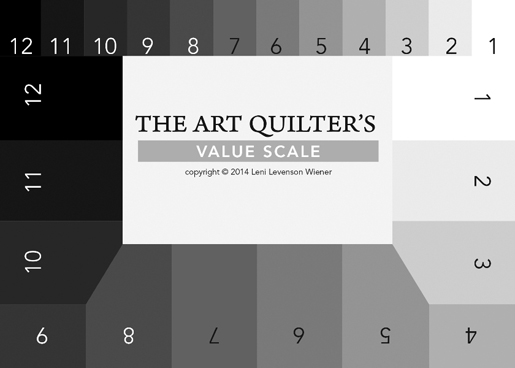
Many art quilters will print their photo in black and white in order to see value changes, but that can be problematic when two different colors are the same value—they look alike in the black and white photo and can often blend together. So instead, I have developed a gray scale value card that helps me determine what the value is in the photo and then I find a fabric in the same value. Keep in mind that the gray scale value card (laminated cards are available from my website) is just a selection of gray values, there is nothing magical about any of the numbers I use.
Let’s start with the lighter red area in the pattern. Holding the gray scale value card next to that area of the photo, I can see the gray value that is closest is somewhere between a #6 and a #7 (this is an art, not a science).
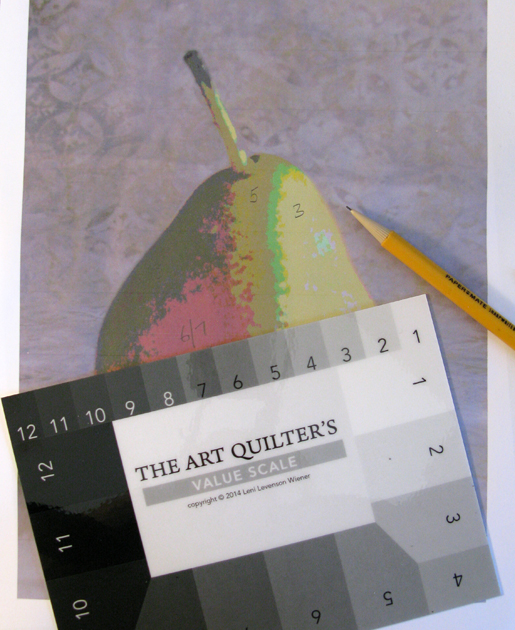
I write that number onto that area on the pattern and go to my fabrics to look for a fabric the color I want that is also a # 6 or #7 value. I do that for all the values/colors in the pattern.
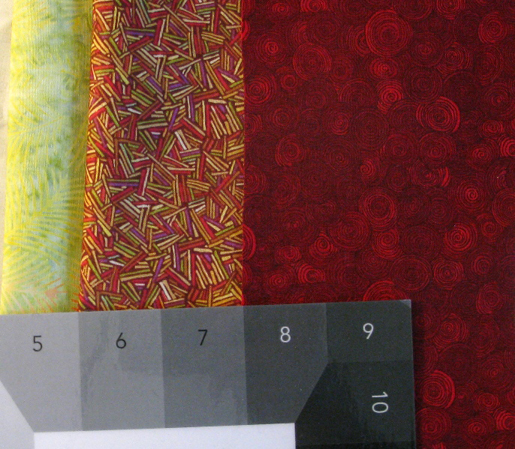
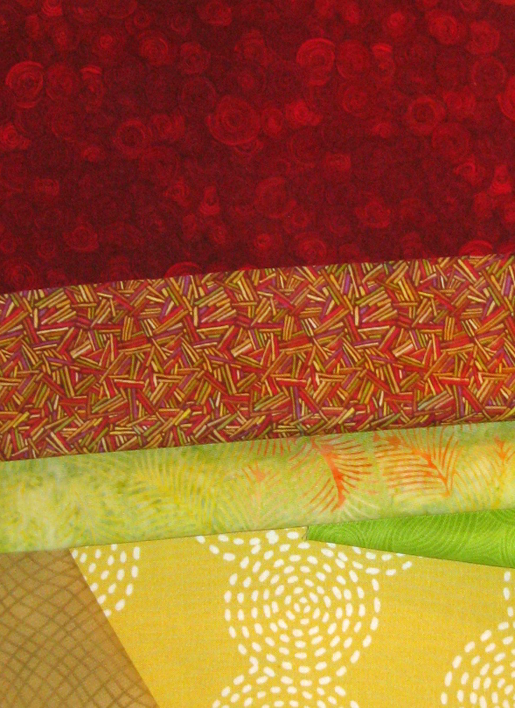
I have identified the darker red area as an #8, the next red area somewhere between a #6 and #7, the first green area as a #5 and the lighter area as a #3. Those two little color changes around the lightest area—one looks green and the other sort of pink–can either be included or just blended into the #5 piece. I think they are interesting so I will use them. They look to be around a #4 or #5 as well but in different colors. Have fun with color and pattern—the more unexpected the pattern, the more interesting your finished artwork will be. Just look at the fabrics I have chosen—very un ”pear-like” aren’t they? The layering of pattern and color makes the finished product so much more exciting than translating it directly.
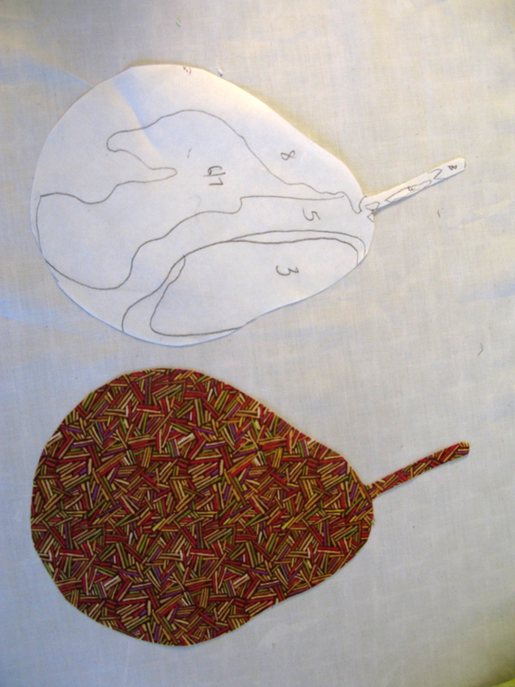
Now that I have chosen my fabrics, I can begin constructing my pear. I will start with the largest area of color, in this case the #6/7 red, and cut the entire pear out of that fabric. This will allow me to use it as a foundation and layer the rest of the fabrics on top of it, insuring that nothing slips around while I sew. It also means the finished pear will be self-contained, which makes it easy to audition on different backgrounds.
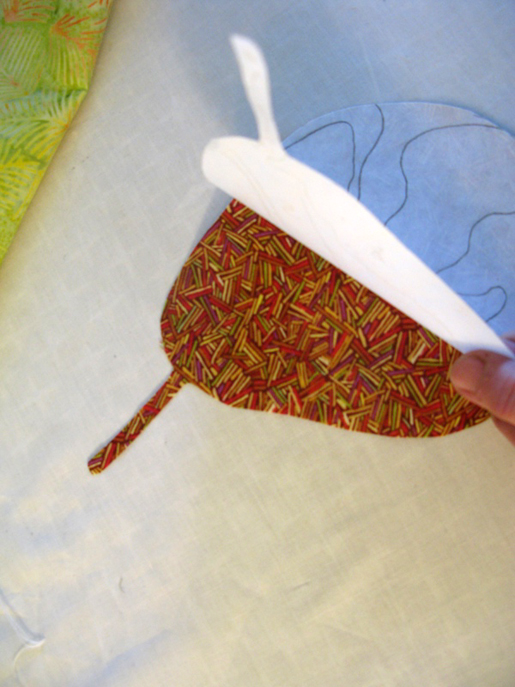
I start with freezer paper. I love freezer paper—it has a glossy side and a dull side. Using a lightbox or window, I place the freezer paper on top of the pattern dull side up and trace around the main shape with a mechanical pencil.
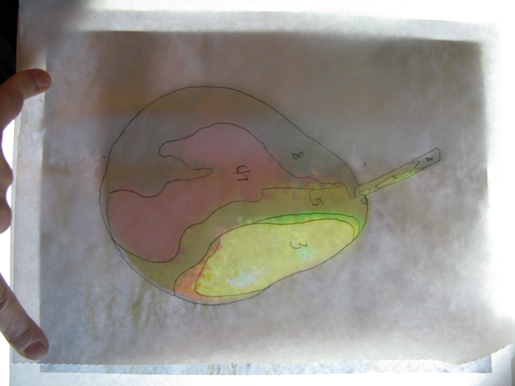
Don’t worry about all the little giggy-gaggy lines the pattern creates, just smooth those lines into something easy to cut out.
When I place this freezer paper drawing on top of the right side of my fabric and press for a few seconds with a warm iron, the glossy side will stick to the fabric.
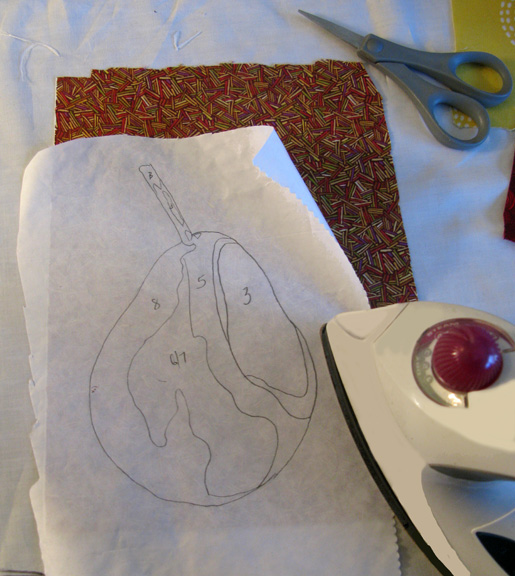
Now I can easily cut around the drawn shape and fabric together, and when I pull the fabric away from the paper—I have my foundation.

I repeat the process now for the #8 piece, using the same piece of freezer paper. Once I have cut away the #8 piece, the remaining freezer paper pattern helps me line up the placement on my foundation.
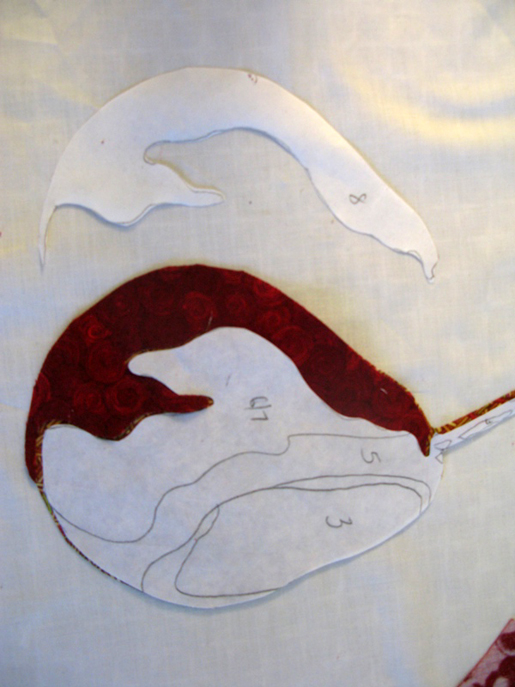
It is already starting to look like a pear!

I continue along for the rest of the shapes, using the same piece of freezer paper when I can and layering them on top of the foundation until I am done.
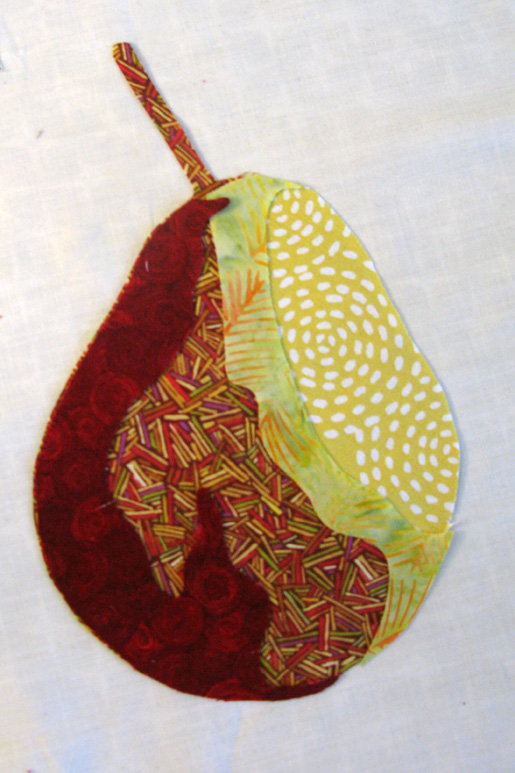
Remember those last two pieces along the edges of the #3 area? They are optional, but I decided to put them in.
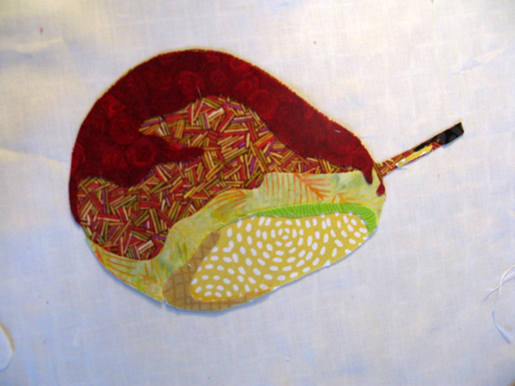
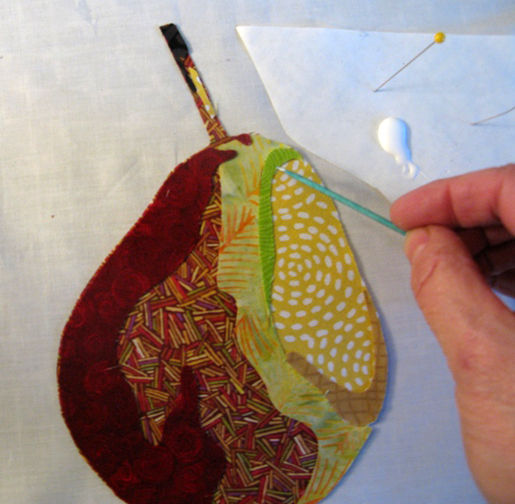
Now I can look at it and evaluate. Anything I don’t like I can change. Once satisfied, I use a toothpick to place tiny dabs of fabric glue under the pieces to hold them in place.
Now my pear is a single unit. If I were working with a more complex photo, I might have lots of these individual units that would eventually be put together to reinterpret the photo. I can audition the pear on different backgrounds to decide what I like. Here are some fabrics I considered:
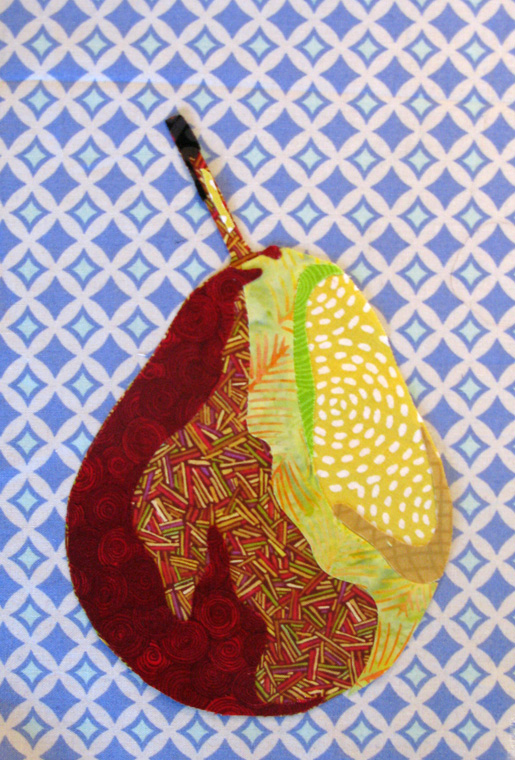
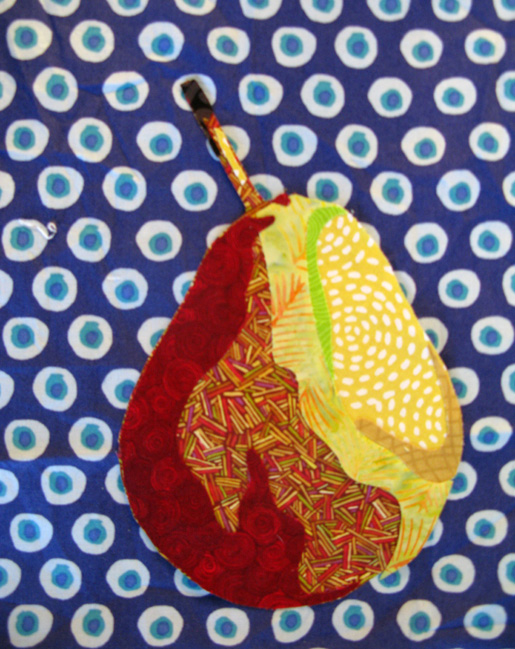
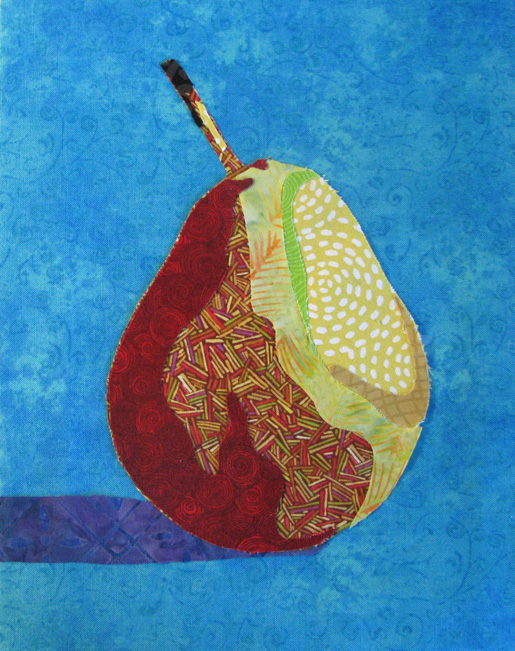
I have decided to use a nice turquoise fabric. Don’t forget that little shadow, it “grounds” the pear to the background. Place the pear and shadow on the background and glue in place.
You have the choice of using batting and a cotton backing or no batting and a more substantial backing fabric—I like to use cotton canvas (also called cotton duck) and no batting (always press the cotton canvas with a hot iron before you use it—it shrinks).
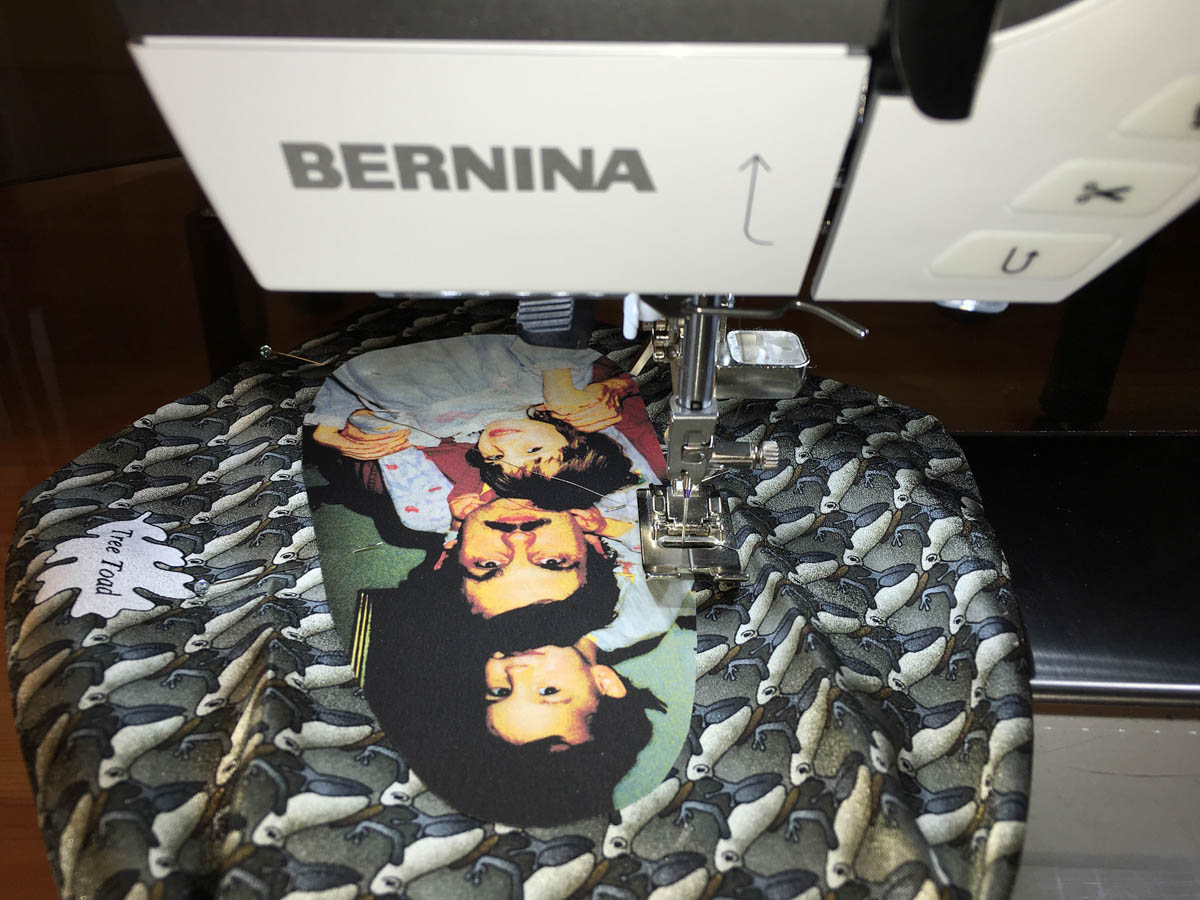
The functional sewing is next. I use either a straight stitch (when I want the edges to fray and have a little texture) or a zigzag when I want to encase the raw edges. Here I am using a zigzag with a clear mono-filament thread and free-motion stitching. Don’t worry if you are new to free-motion, the thread disappears, and no one will ever see your mistakes (and of course, if you have the BERNINA Stitch Regulator, all your free-motion stitching is perfect anyway).
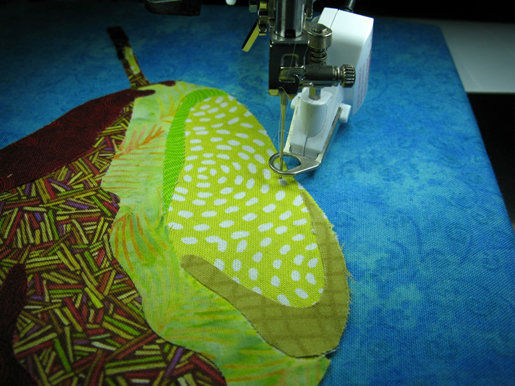
Drop your feed-dogs and use the BERNINA Stitch Regulator or a darning foot to stitch around all the raw edges. Here is a tip: for most fabric colors, the clear mono-filament thread works great, but for very dark colors it will leave a reflection, so for those areas, use smoke mono-filament. I never use mono-filament in the bobbin—your preferred bobbin thread in a neutral color will give the mono-filament something to “grab onto” for a better stitch.
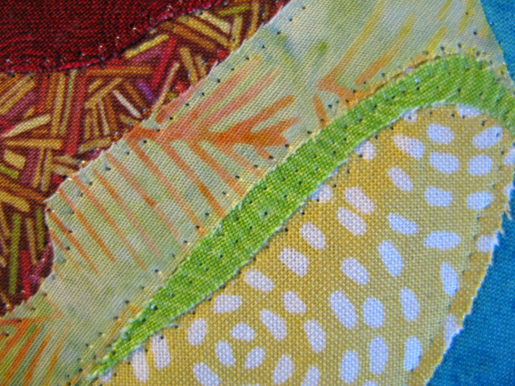
The functional stitching is done, and the art quilt is ready for quilt stitching if you wish; finish the edges and you have a fabric collage from a photo.


19 comments on “How to Create a Fabric Collage Art Quilt From a Photo”
Great instructions – very straight forward, particularly for beginners like me.
Very good tutorial ~ thanks.
So glad you enjoyed it, thanks!!!
I have wanted to make an art quilt for years but didn’t know where to start. Thanks for heading me in the right direction!
so glad i got you started! if you have questions along the way send me an email and i would be happy to help. you can find my email address on my website under contact: http://www.leniwiener.com
Thank you for the tutorial. It’s easy to read and understand. I’ll be trying this as soon as I’m happy me from holiday. Will use a photo from holiday but start small. ?
thanks for your comment. when you get back from your holiday, send me some of the photos you like and I will help you decide what will work best and make a pattern for you.
I have always wanted to do a picture quilt of my kids and was lost at how to do the shading. i love your instructions and will start on one after the holidays. thanks for sharing.
Send me the photo at Leni@leniwiener.com and I would be happy to help with the pattern. Mention that you posted the comment here so I know who you are.
Dear Ms. Leni,
Thank you very much for your kind tutorial. I have lots of patch and i found you blog. Could you please help me to create the pattern of my photo?
I really appreciate if you make it the most easy pattern for a beginner. Do you think it is possible to use only 4 colour for a photo?
I would like to know how to do the cutting of the pieces digitally. Is there a process that uses a computer program to parse the various values into shapes that you can separate, and use a different tool to laser cut them with? I am a painter interested in rendering my paintings in fabric.
I never work with laser cutting (or any kind of template cutting for that matter) so I am not aware of a tool or program that would do that for you. But if you find one please let me know. Using the freezer paper method is pretty simple and straightforward, if you don’t have a light box you can use a window during the day. If you want specific help with a project, email me at Leni@leniwiener.com and I would be happy to help–and curious to see how you envision using this for in another artistic genre!
Not quite a laser solution, but have you looked at BERNINA’s CutWork tool? BERNINA DesignWorks software can read in vector images as well as bitmaps. So you could use Adobe Illustrator to vectorize your image if needed first, then import that or the original scan/photo of your art into DW to create a CutWork file. Then use the CutWork tool to cut out the pieces. The tool can cut multiple layers at once as well as pre-fuzed fabrics so is fairly quick. Starching the fabric also helps for clean cuts.
Interesting. I don’t know why you would need to cut more than one piece at a time, though, unless you were making multiples of the same image. But this is what makes creativity so wonderful, everyone gets to do things in the way that makes sense to them. No right way, no wrong way. If you do use this cutwork tool to make an art quilt, please email me a photo–you can reach me via the contact page on my website http://www.leniwiener.com–I would love to see what it does. And thanks for the info, I will certainly check it out.
Can you use this same technique with a portrait ?
Absolutely! If you go to my website http://www.leniwiener.com you will see that most of what I do are portraits and body language. The idea here was a simple example of how the technique works–portraits are done the same way but there are most pieces involved so it would have been too complex to show in a short post. But the principles are the same, the image is simplified in either photoshop or gimp and then the values are identified, fabrics chosen, and it all goes together the same way. For more complex images than this, I break the image into sections I call “elements” and work one at a time. So a portrait, for example might be 1. the face, 2. the hair, 3. the shirt, 4. the background. Get the idea? Need specific help, email me a Leni@leniwiener.com and I am happy to help you get started.
Thanks for the tutorial.
Question: What’s the maximum number of layers of fabric that you could lay on top of each other? Don’t want it to look like one of those 3D topographical maps I did so poorly on in grade school!
TIA
Hi Tia, thanks for your question. I know you are kidding about the 3D topographical map but lately I have been experimenting with dimensional works mounted on canvases that do feel like topographical maps! But seriously, cotton is pretty thin and without fusible underneath (which I don’t use but some people like it–but it does add thickness) I can go four layers without thinking much about it. If the layers start to feel too thick, I peel the top layer back and trim what is underneath to lighten things up a bit.