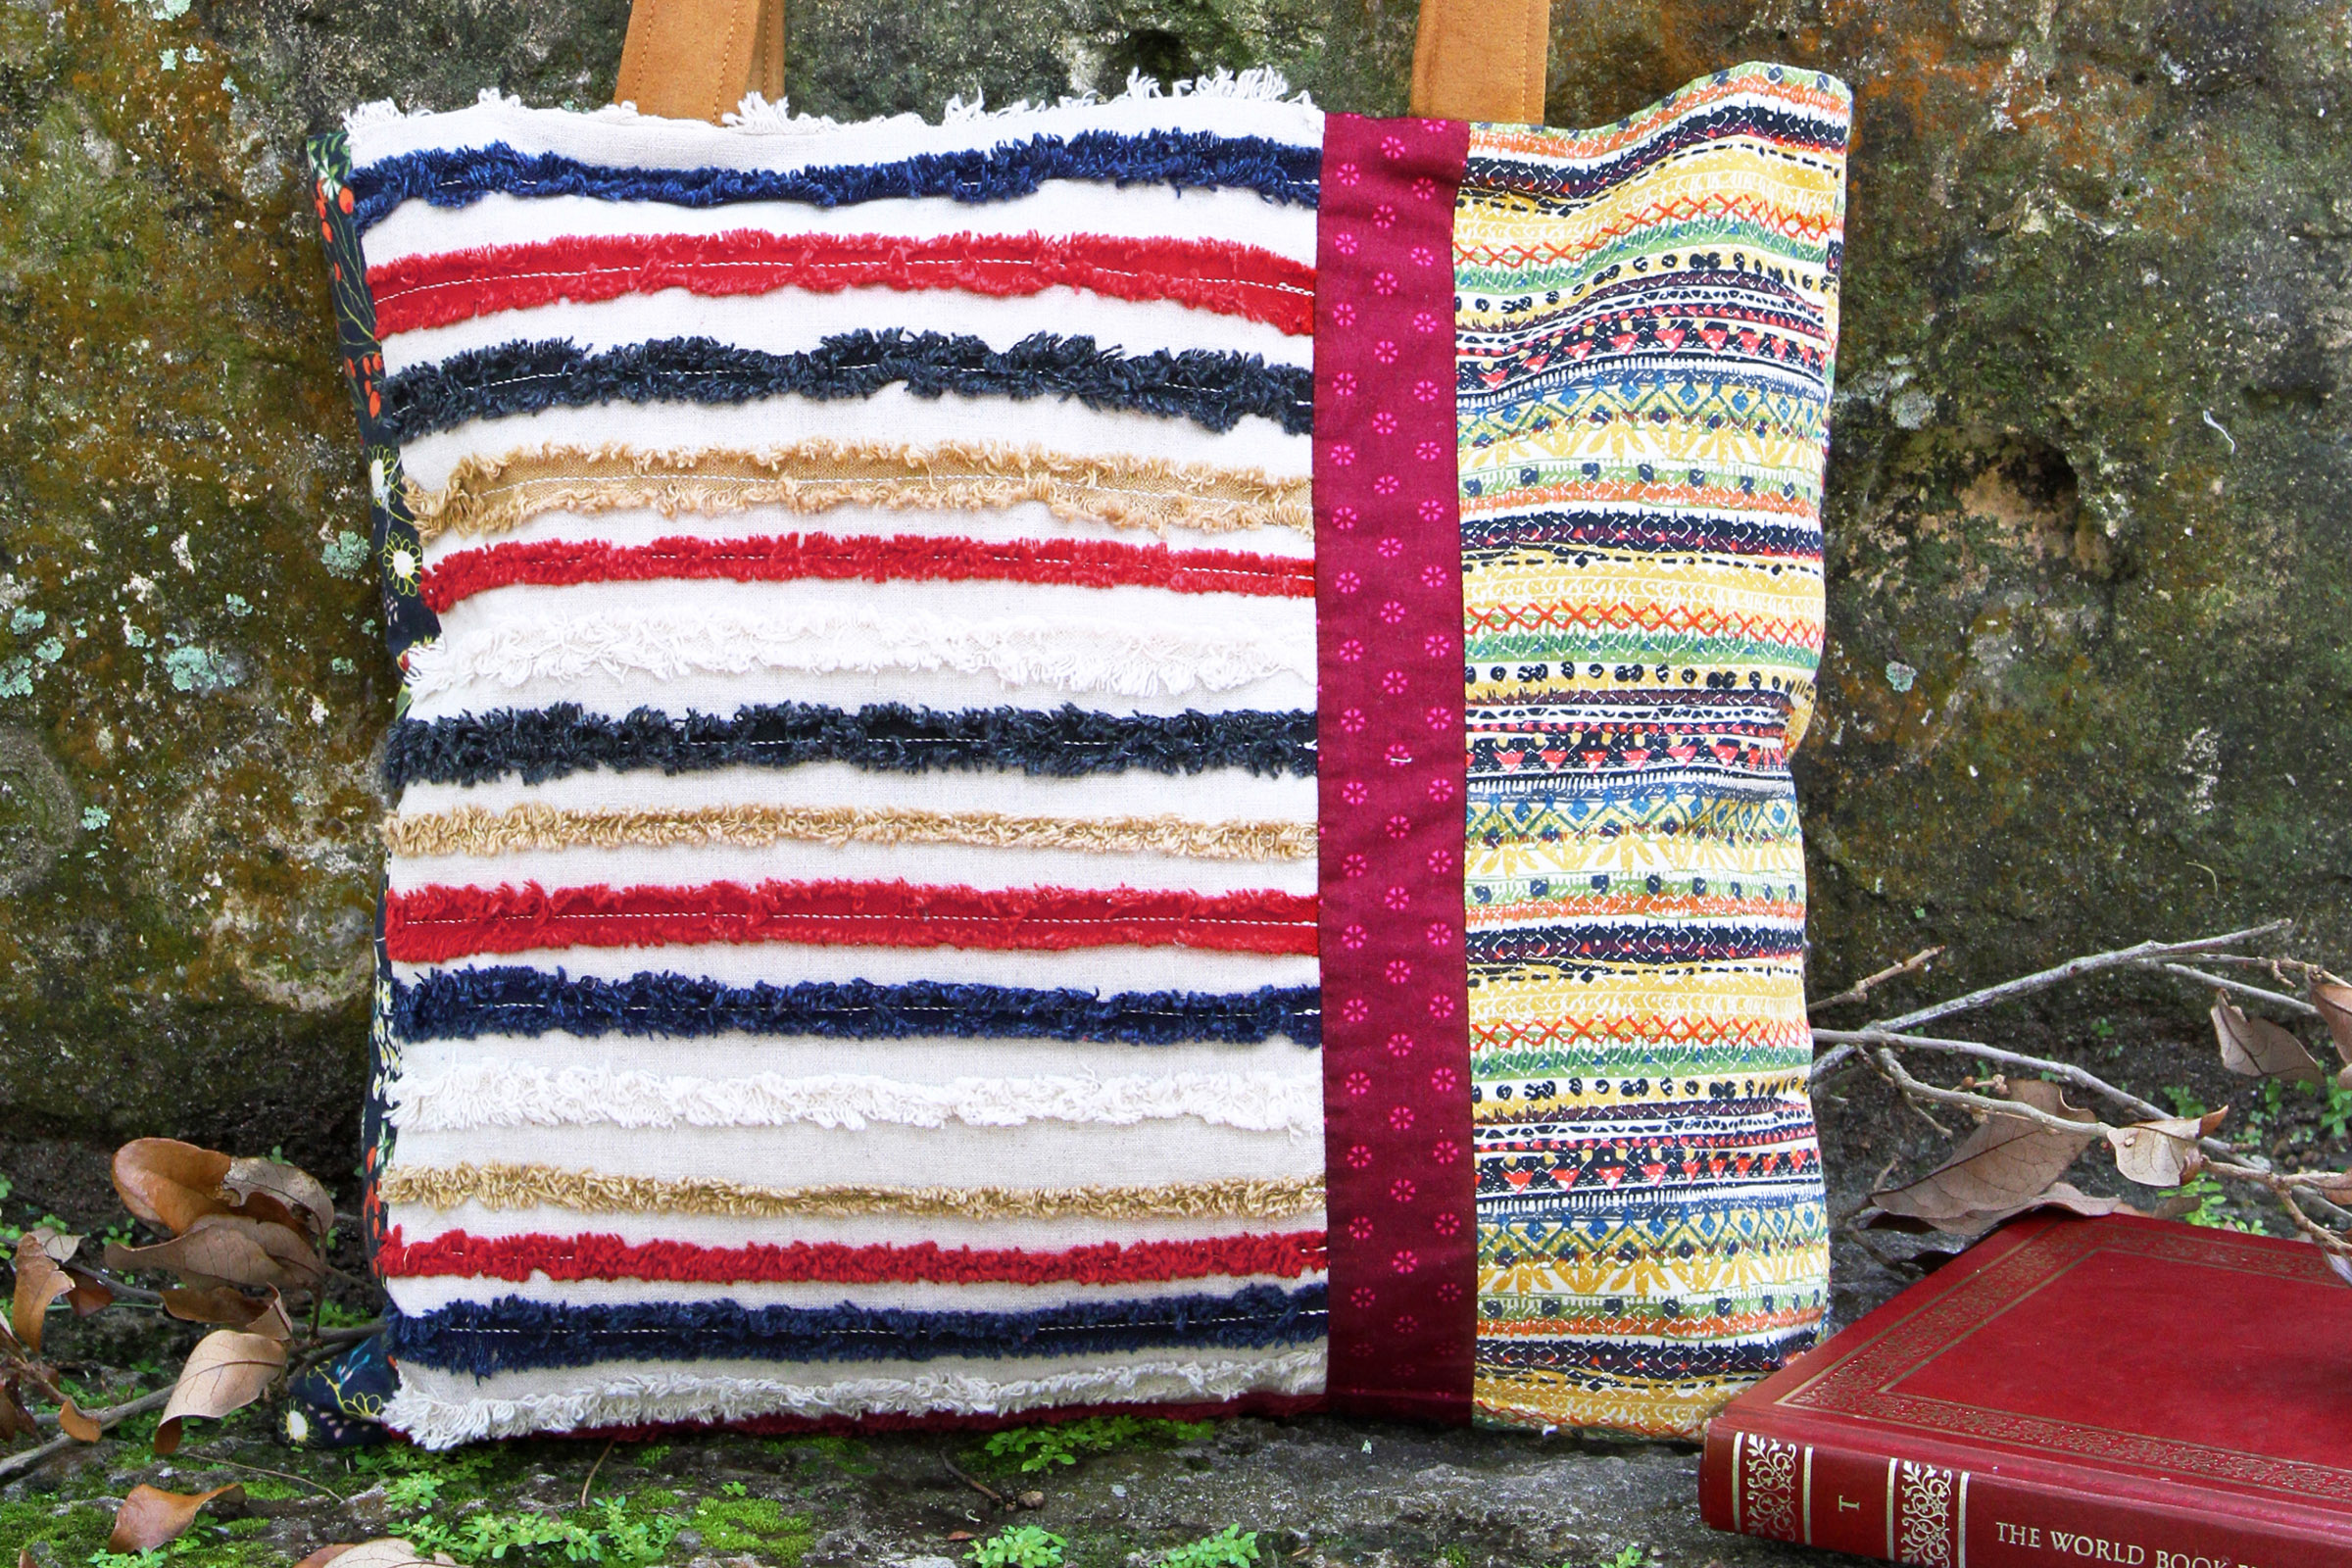
Personalize Your Tote with a Photo Quilt Block
Among the propositions that the voters approved in California this past November was Prop 67 that banned grocery and other stores from providing single-use plastic or paper carryout bags. Now, you either pay for them or bring your own bags with you to the supermarket. This ban was designed to cut down on the plastic in landfills. There have been several posts on “WeAllSew” on how to make a fabric tote. This post shows how to create a personalized embellishment from one of your own pictures to place on your fabric tote. You can use a digital image from a cellphone, point and shoot, or another digital camera to create a photo quilt block.
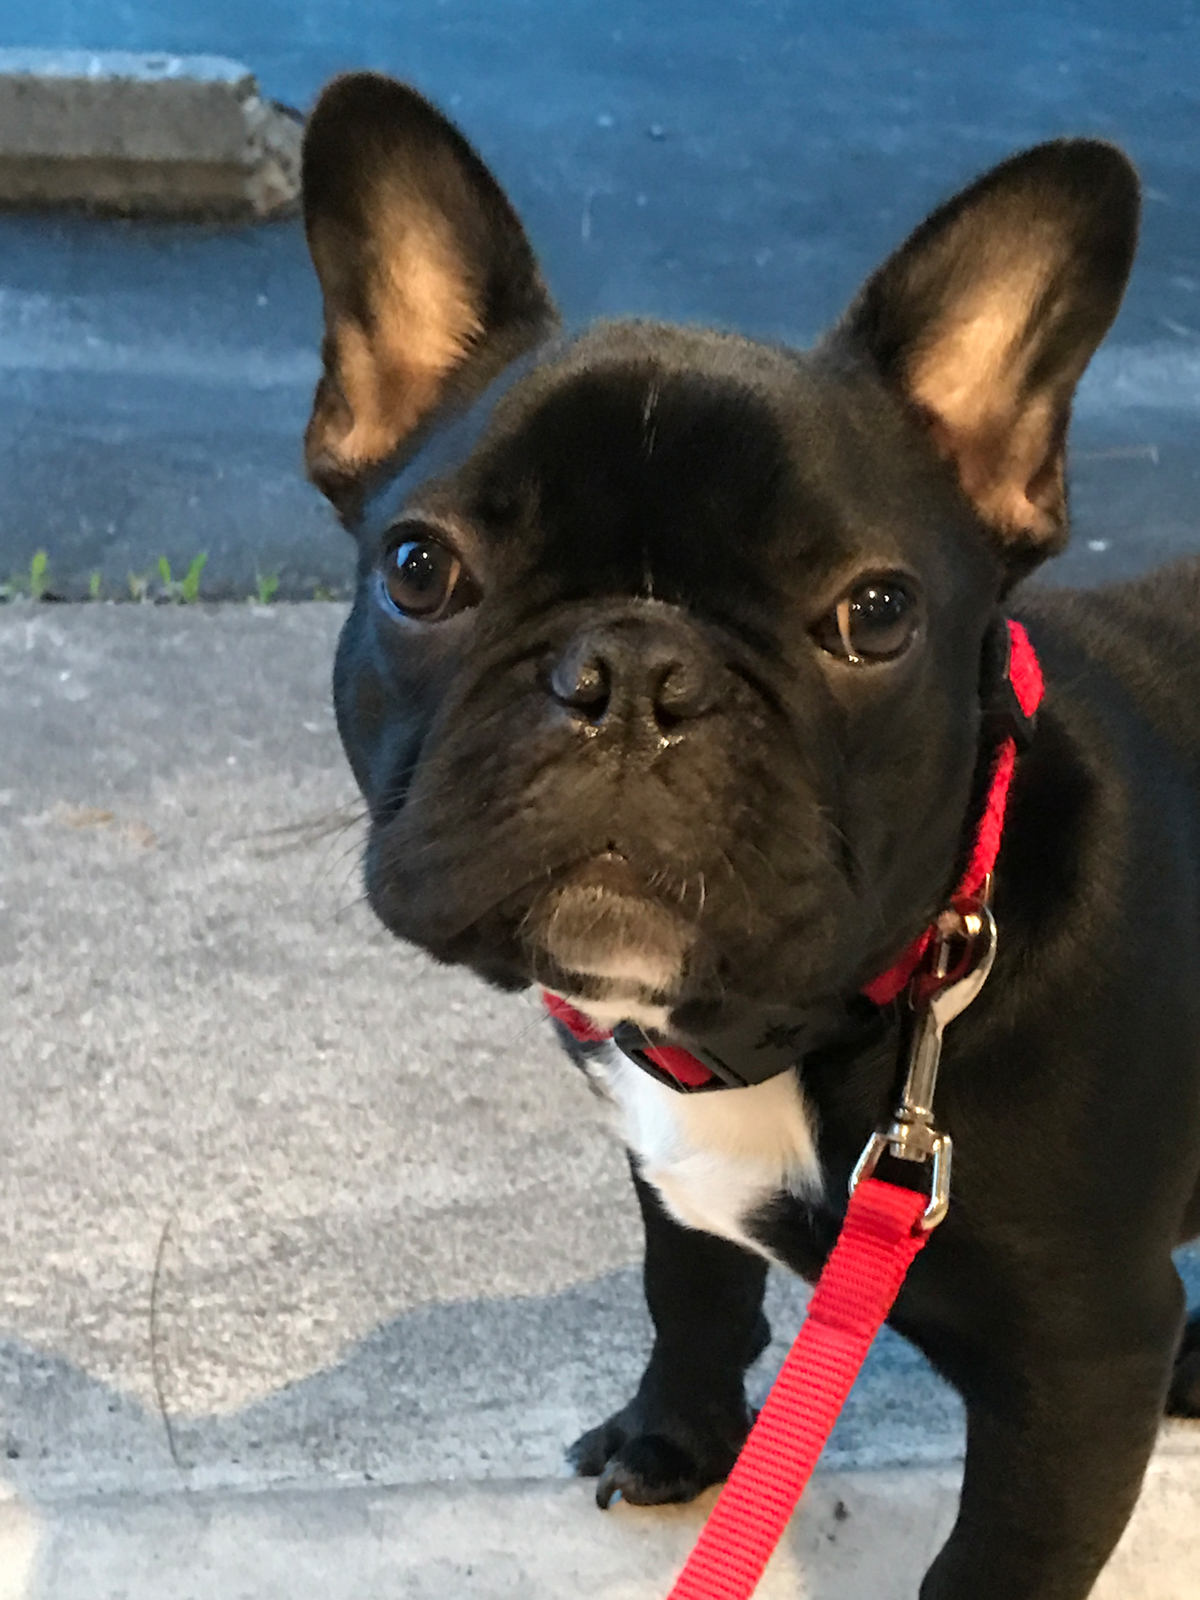
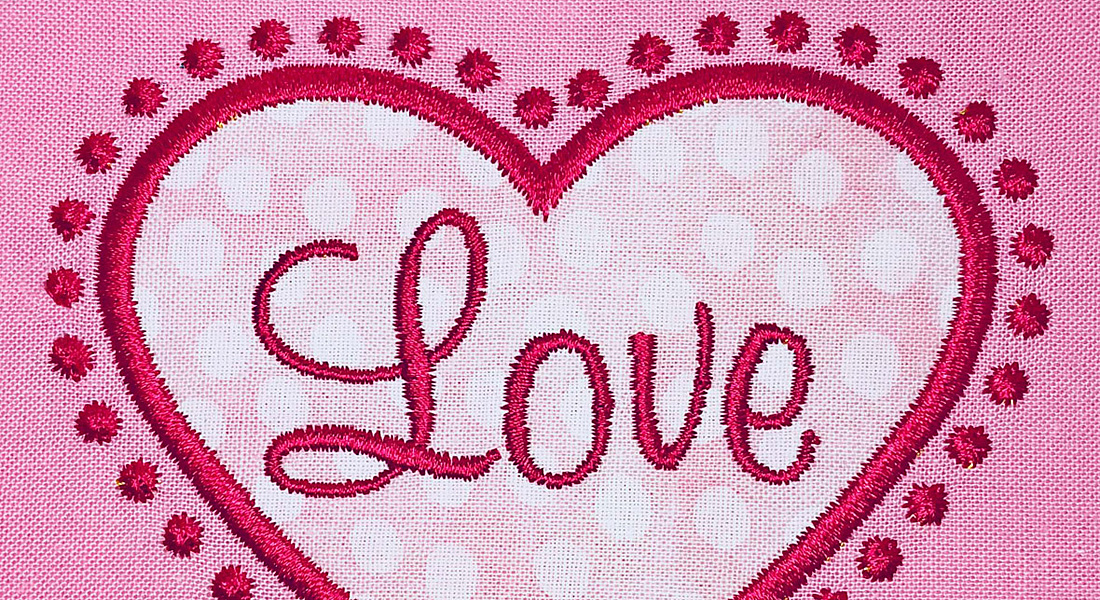
Since Valentine’s Day is just around the corner, I decided to create a quilt block with an image of my friend’s new French Bulldog puppy in a heart. Here is how to stitch the quilt block of Louie.
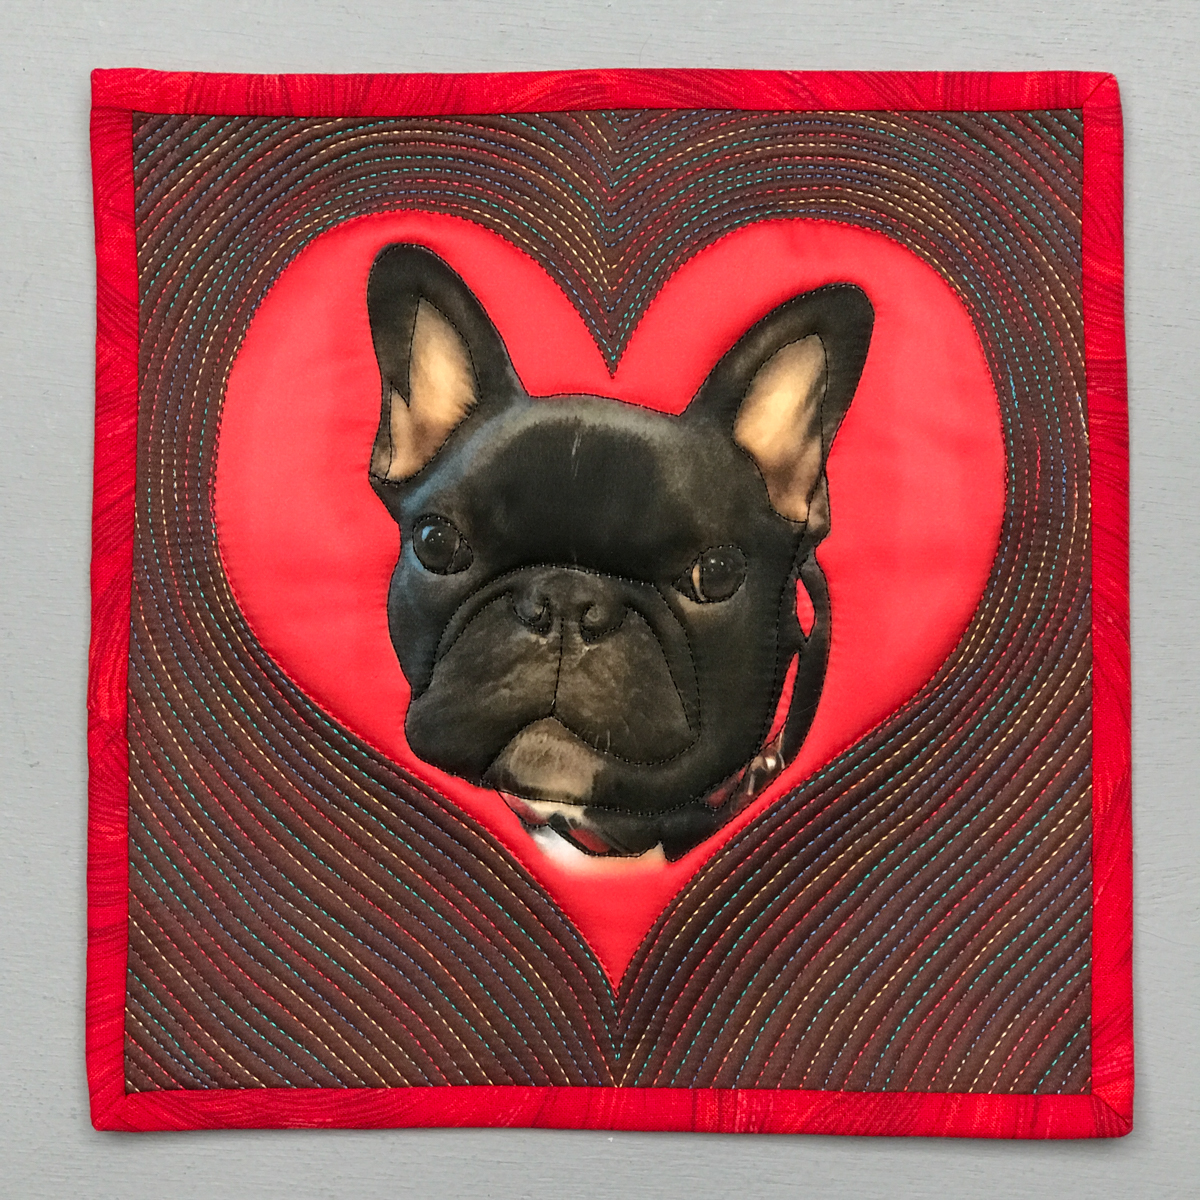
There are only 10 steps to stitching this quilt block using a printed inkjet fabric sheet.
Step 1
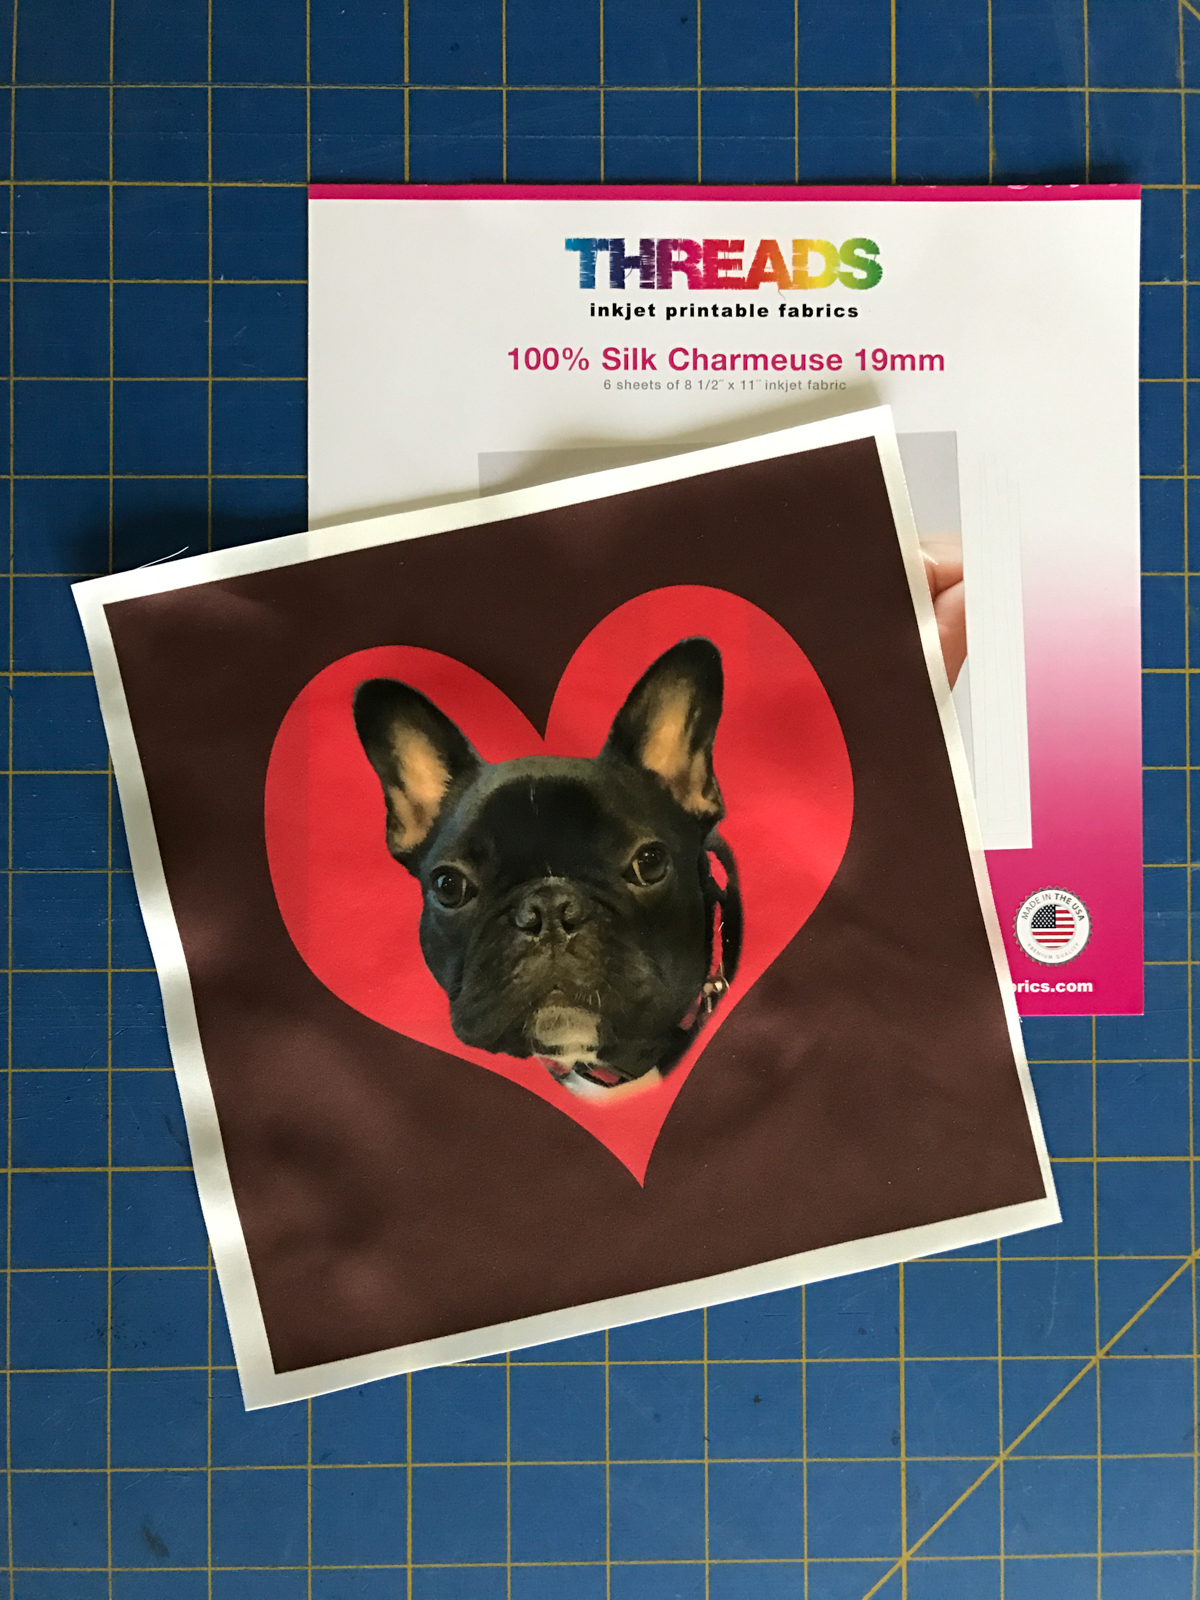
Once your fabric sheet has come out of your ink jet printer, let it dry. For this project, I used a sheet of 8.5 x 11-inch Threads 100% Silk Charmeuse inkjet printable fabric available from BREWER. This gave me an 8-inch square with a ¼-inch seam allowance.
Step 2:
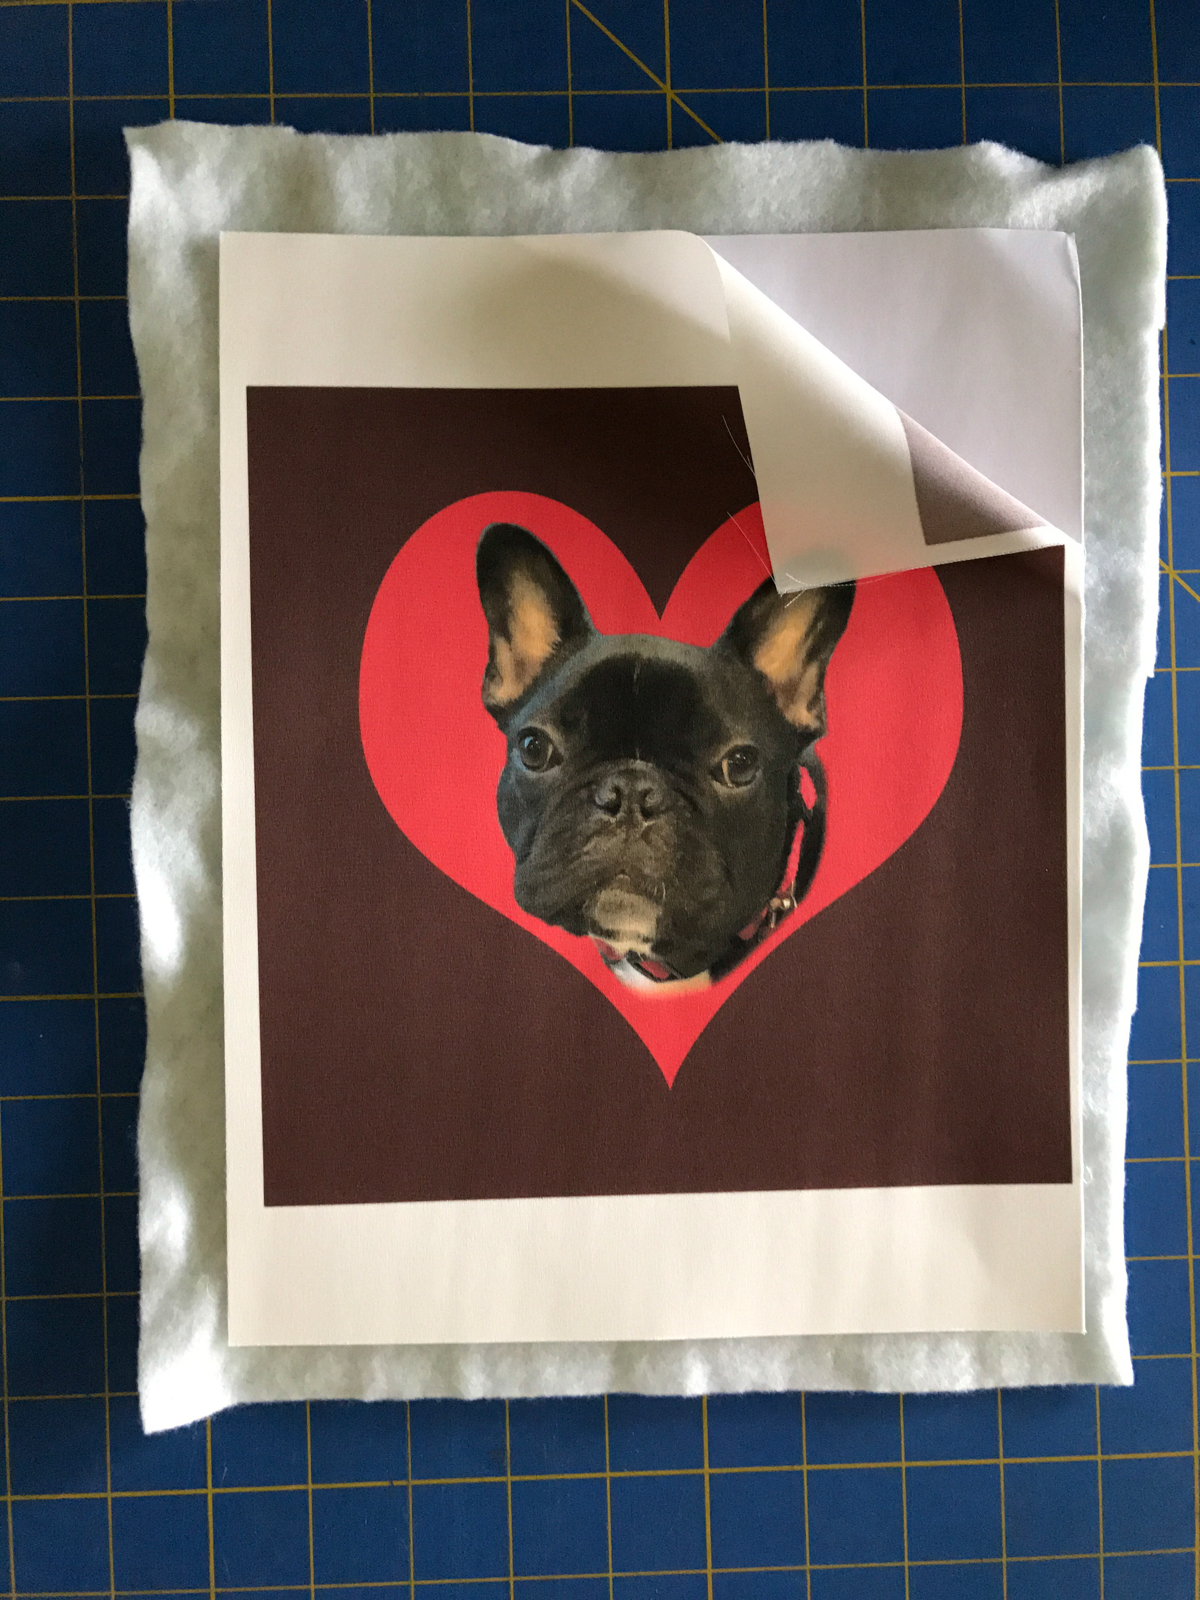
Cut a piece of batting slightly larger than the sheet. I used Dream Green, a polyester batting made from recycled plastic bottles in keeping with the goal of “Quilting Green.” Peel the fabric off the paper backing on the inkjet printable fabric.
Step 3:
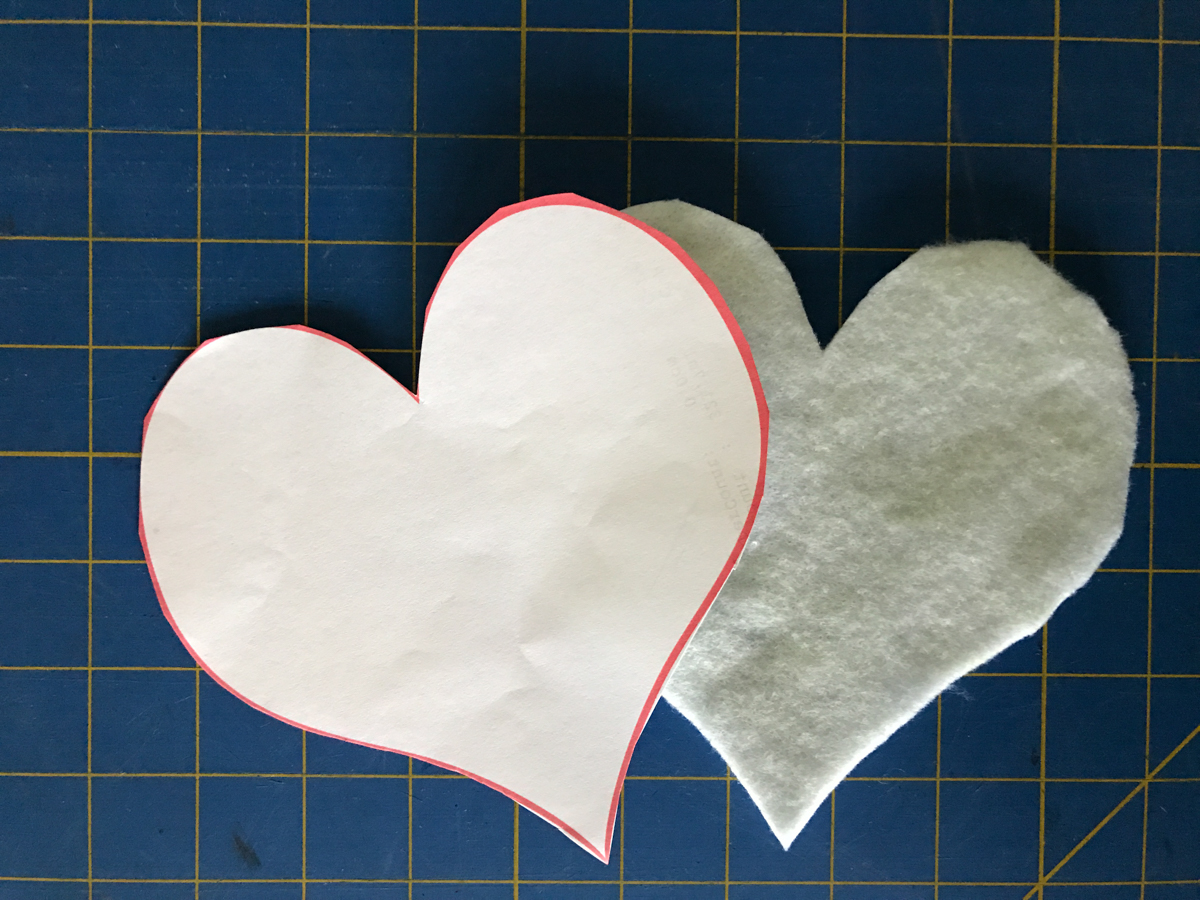
Using a paper template of the heart, I cut out an extra piece of the Dream Green batting in the shape of the heart.
Step 4:
Using 505 Spray adhesive and a light box, I placed the heart shaped piece of batting to the back side of the printed piece of silk fabric. The extra piece of batting was to increase the three-dimensionality of the center of the block.
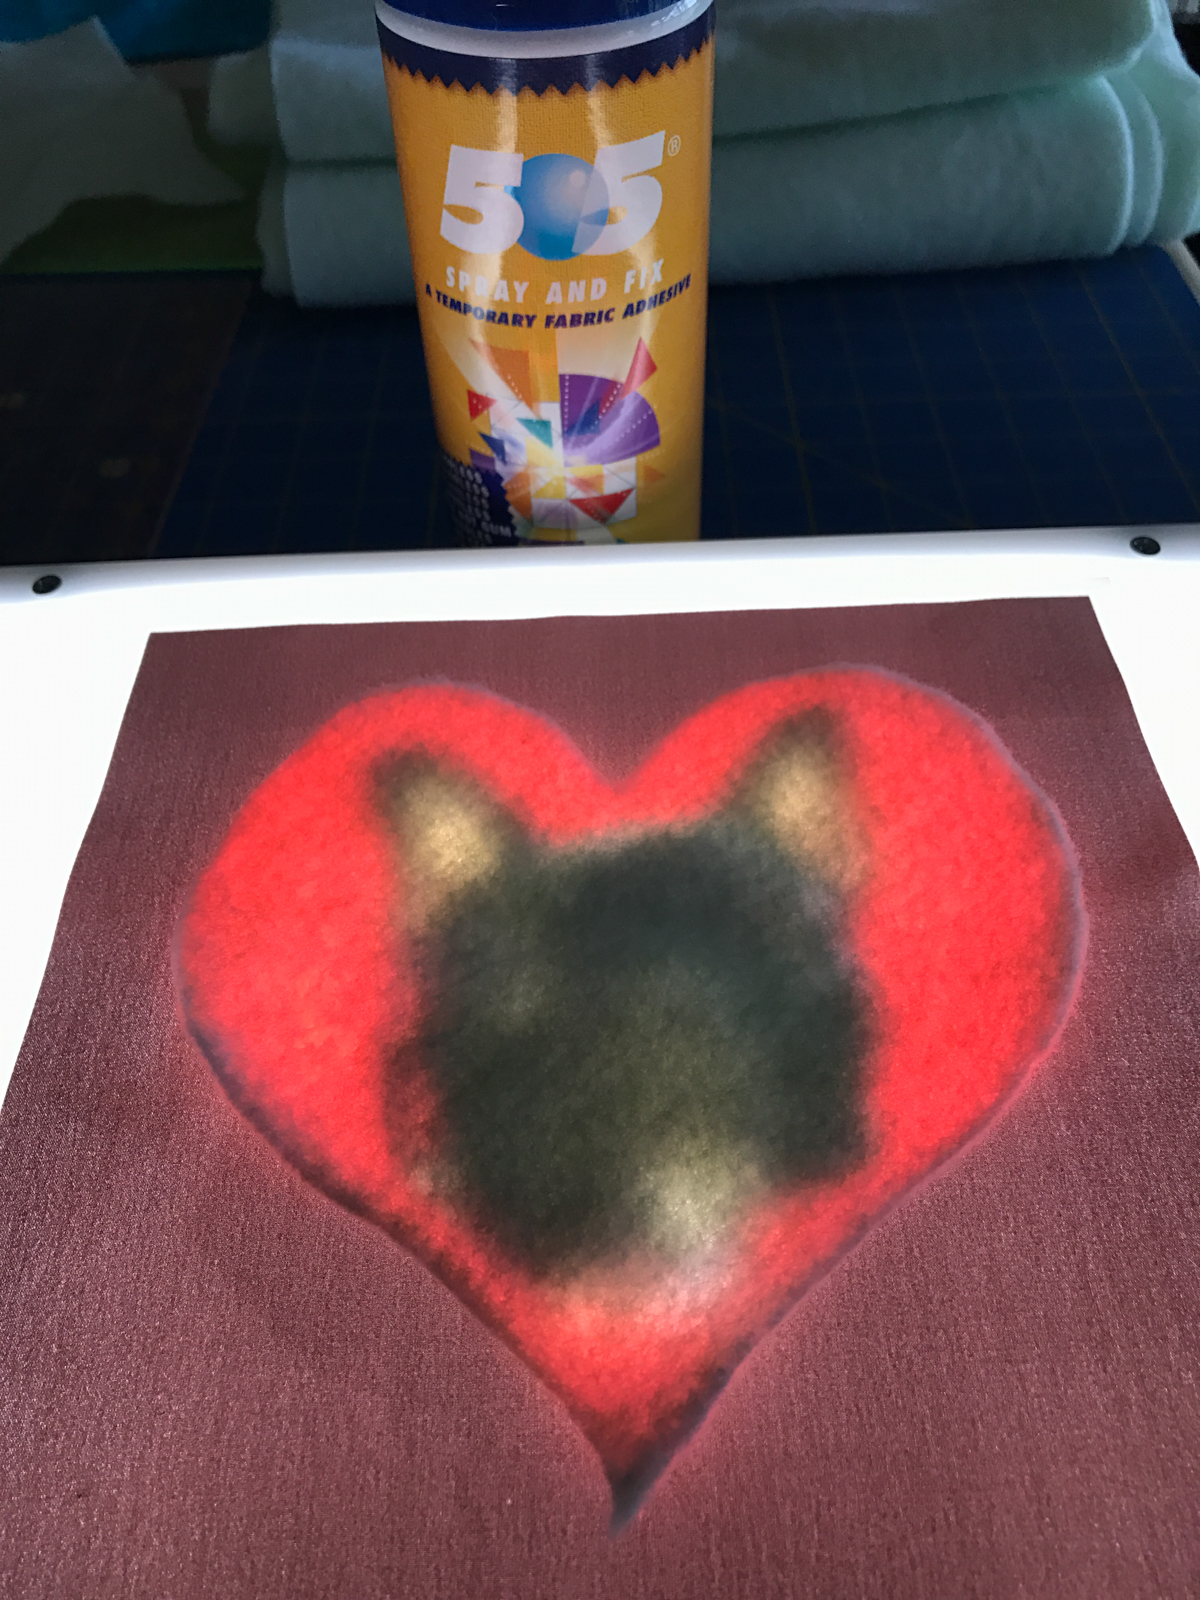
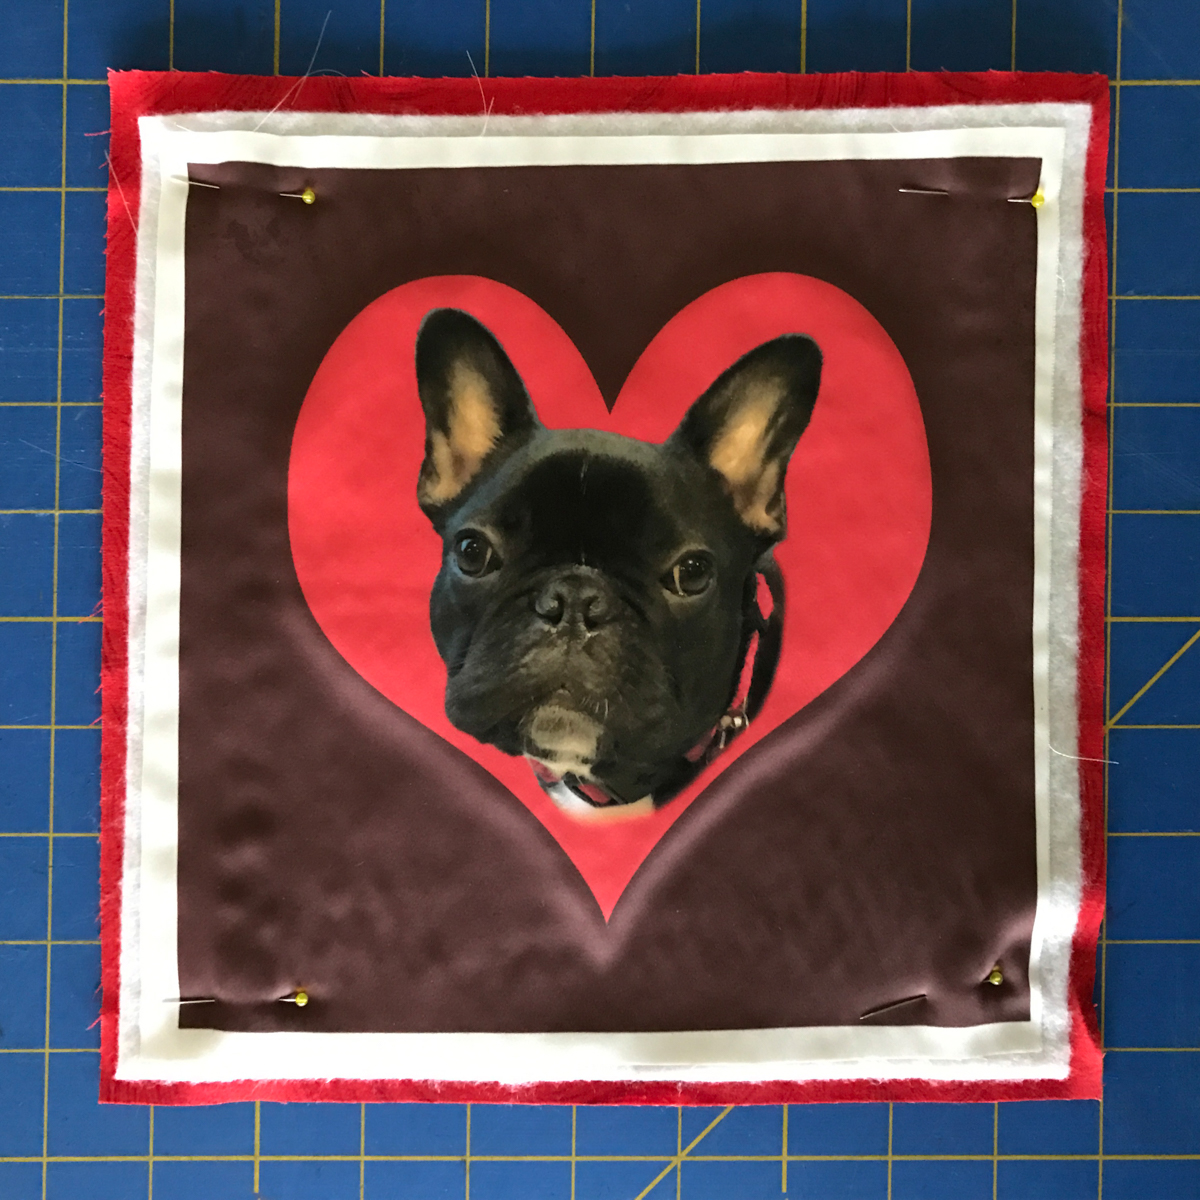
I also used the spray adhesive to create my quilt sandwich and I pinned the four corners for additional stability when stitching.
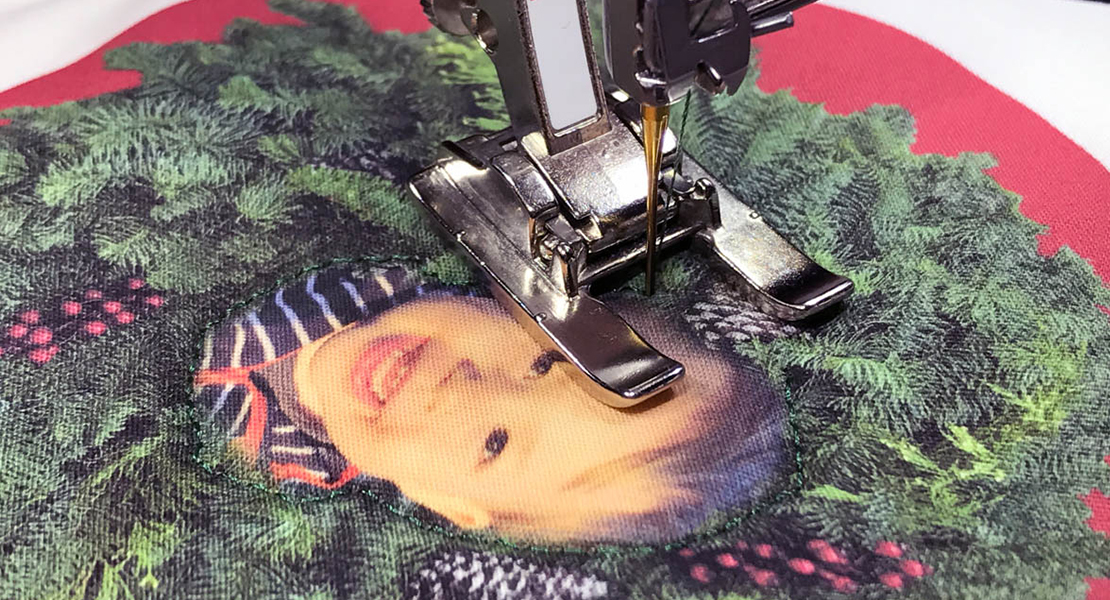
Step 5:
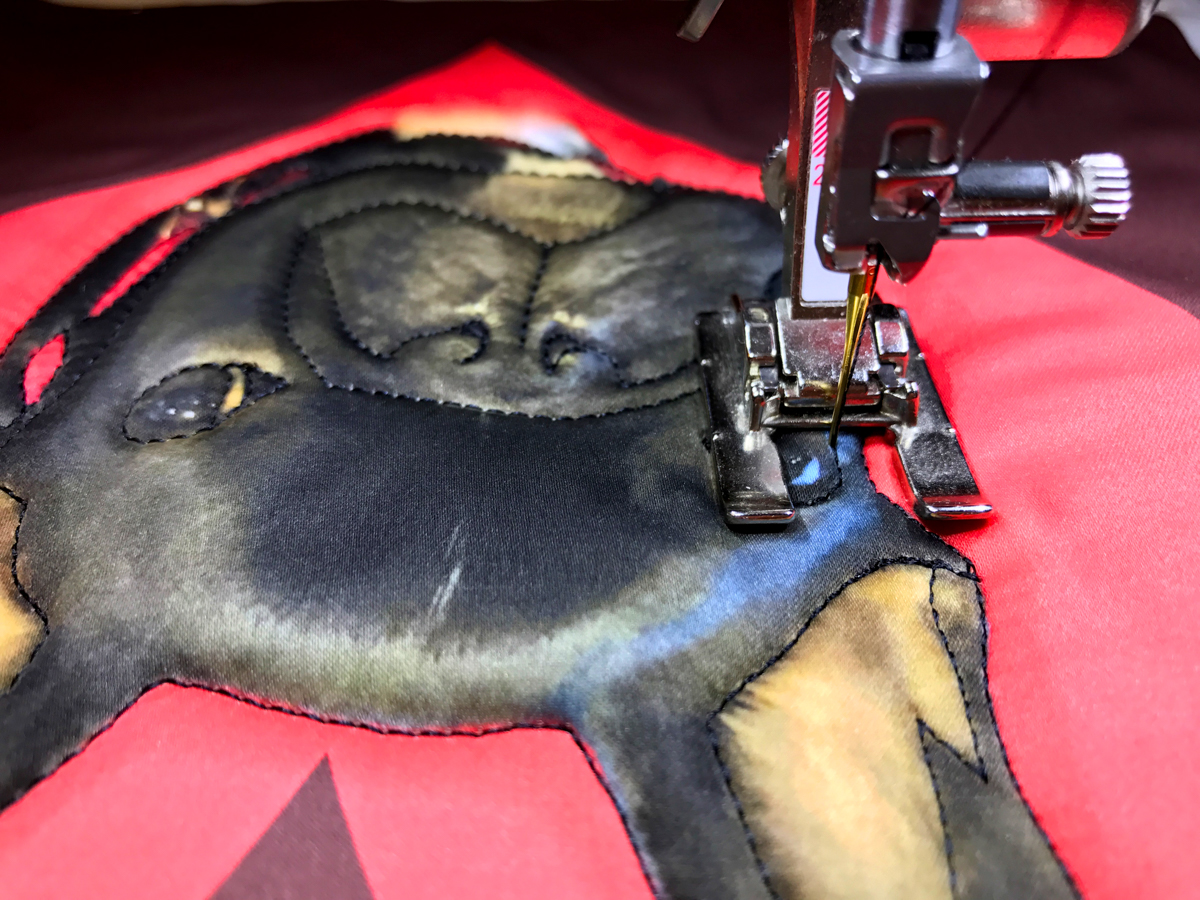
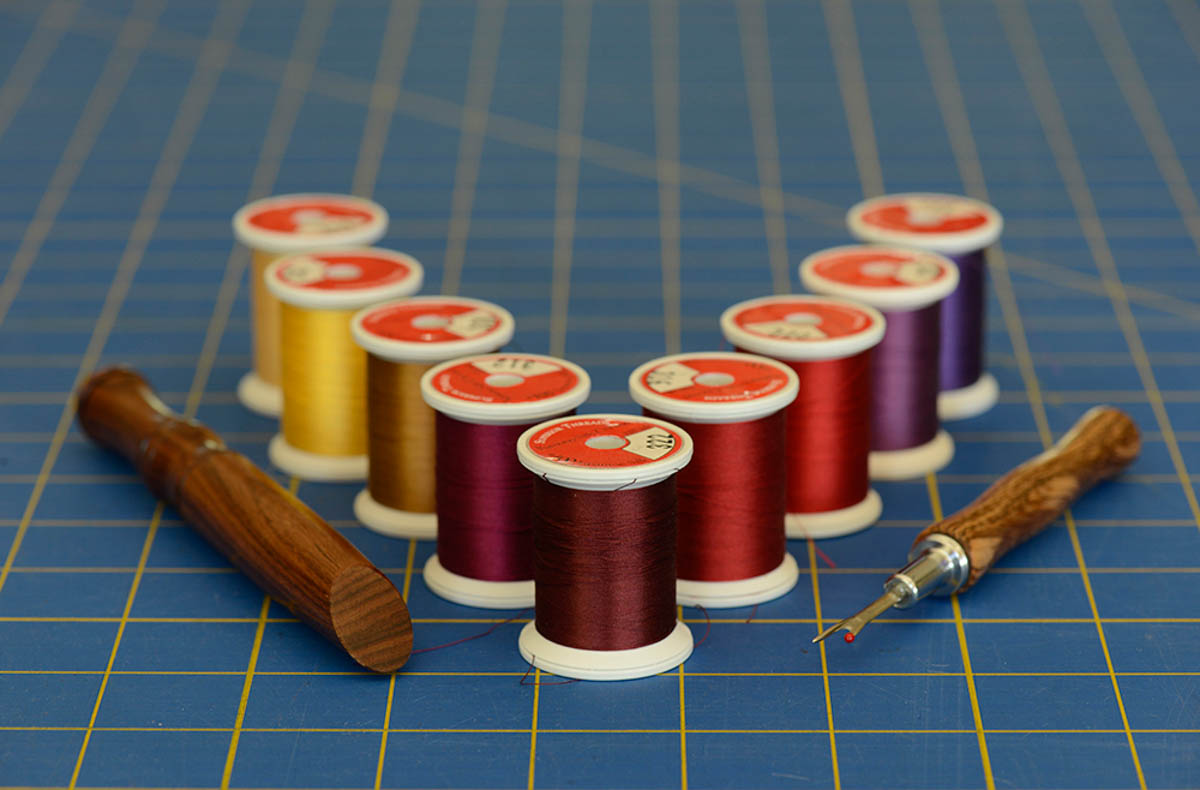
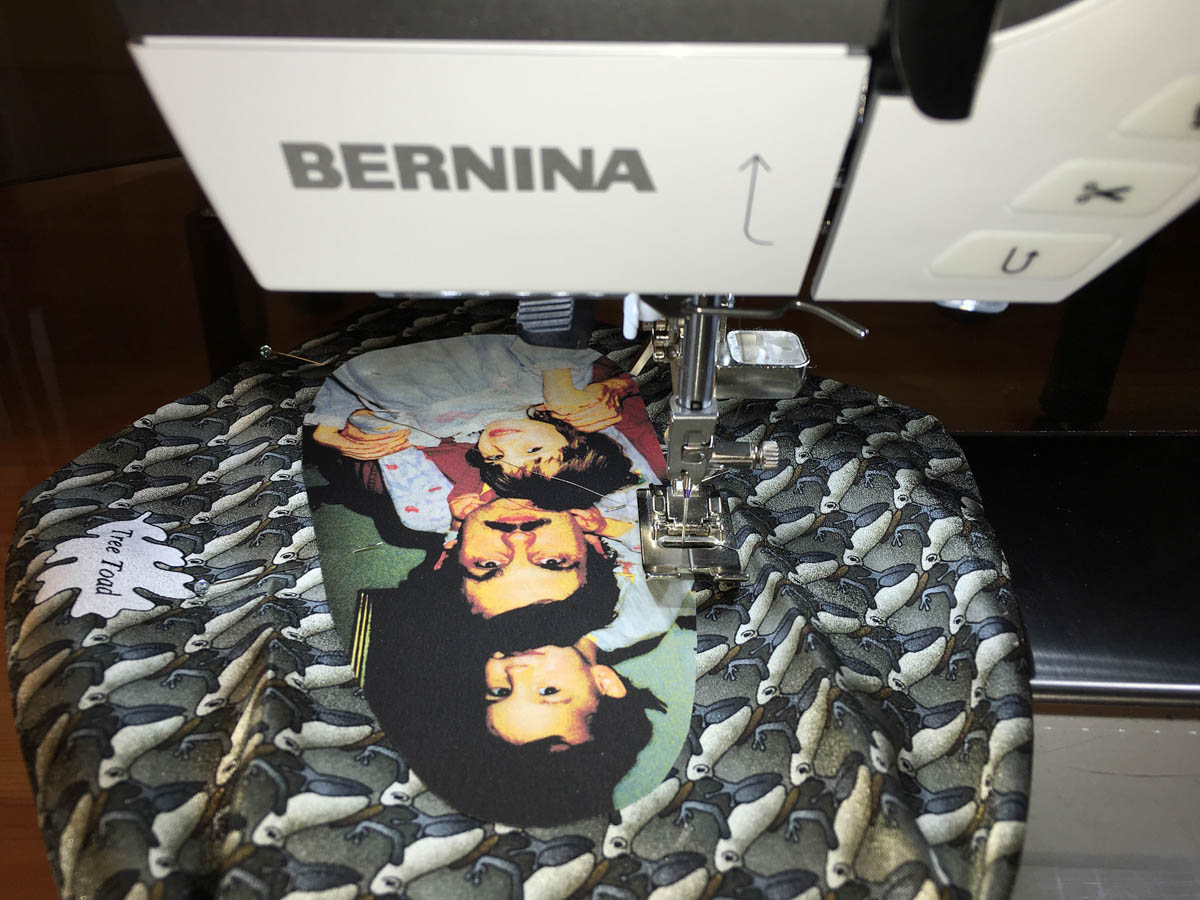
First, stitch the image in the center of the block. Because I wanted a lot of visibility in stitching close to the center image, I used the Open Embroidery Foot #20. My sewing machine is a BERNINA 770 QE, and one of the things I enjoy about it is the hover function. Using it, I could accurately stitch around Louie’s face on the heart and the details in his face. Since Louie’s coat is almost black I used Isacord 40 polyester thread, color: 0020 Black for both my top and bobbin threads.
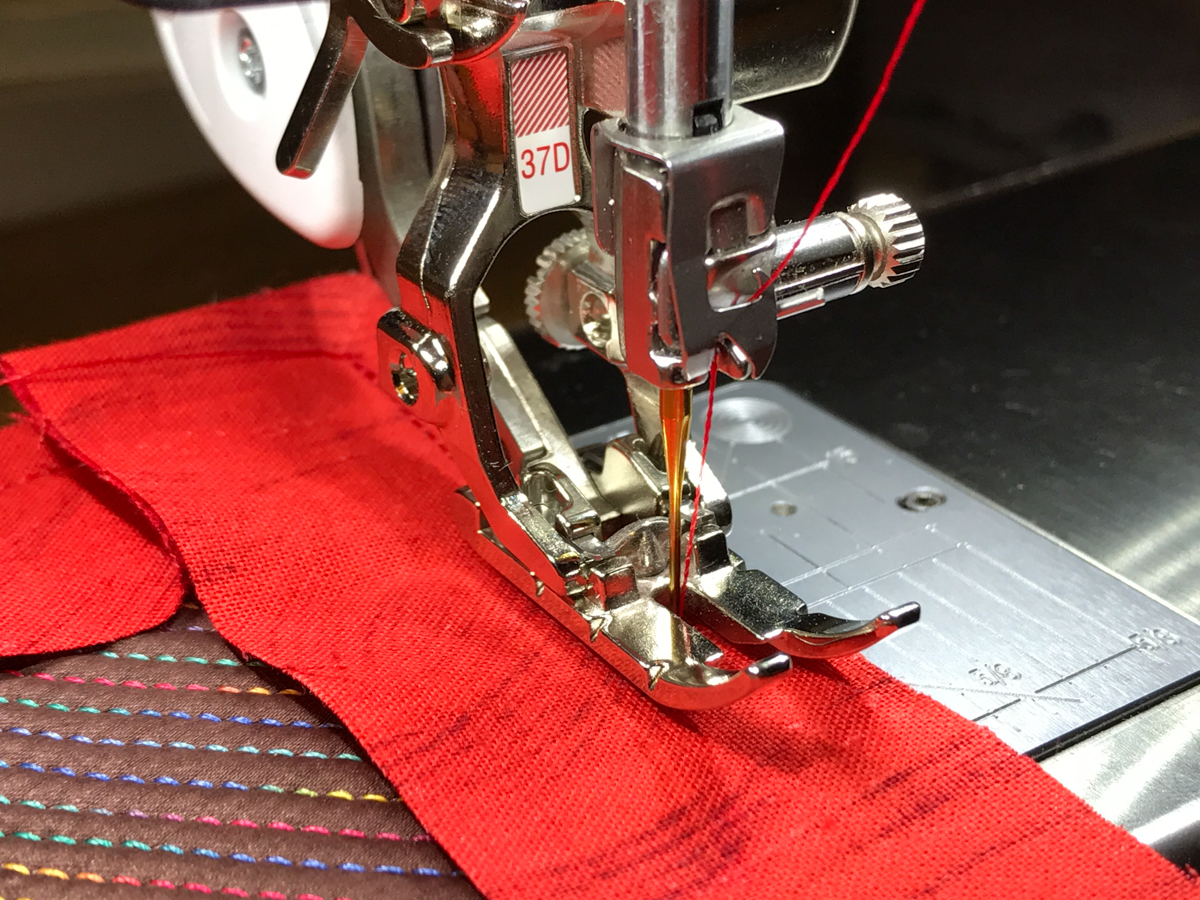
Step 6:
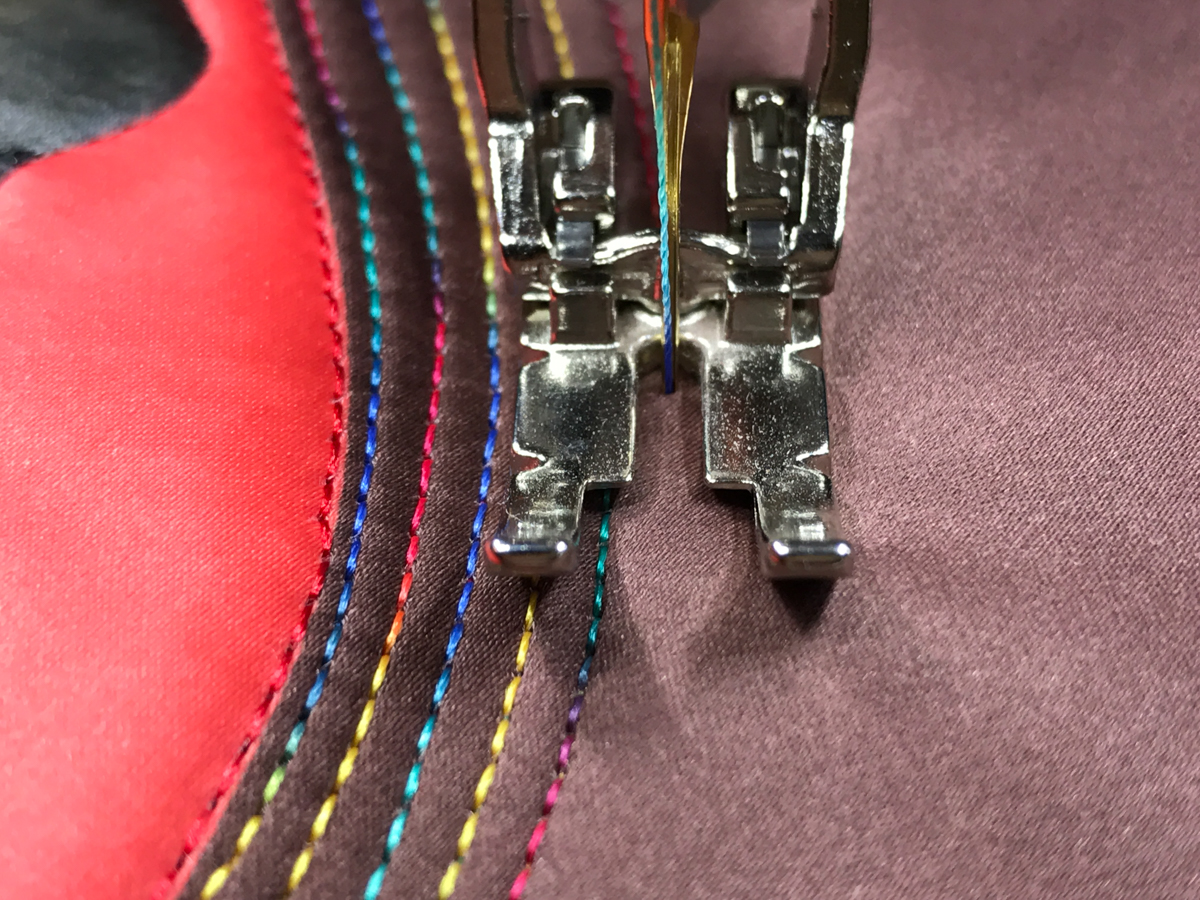
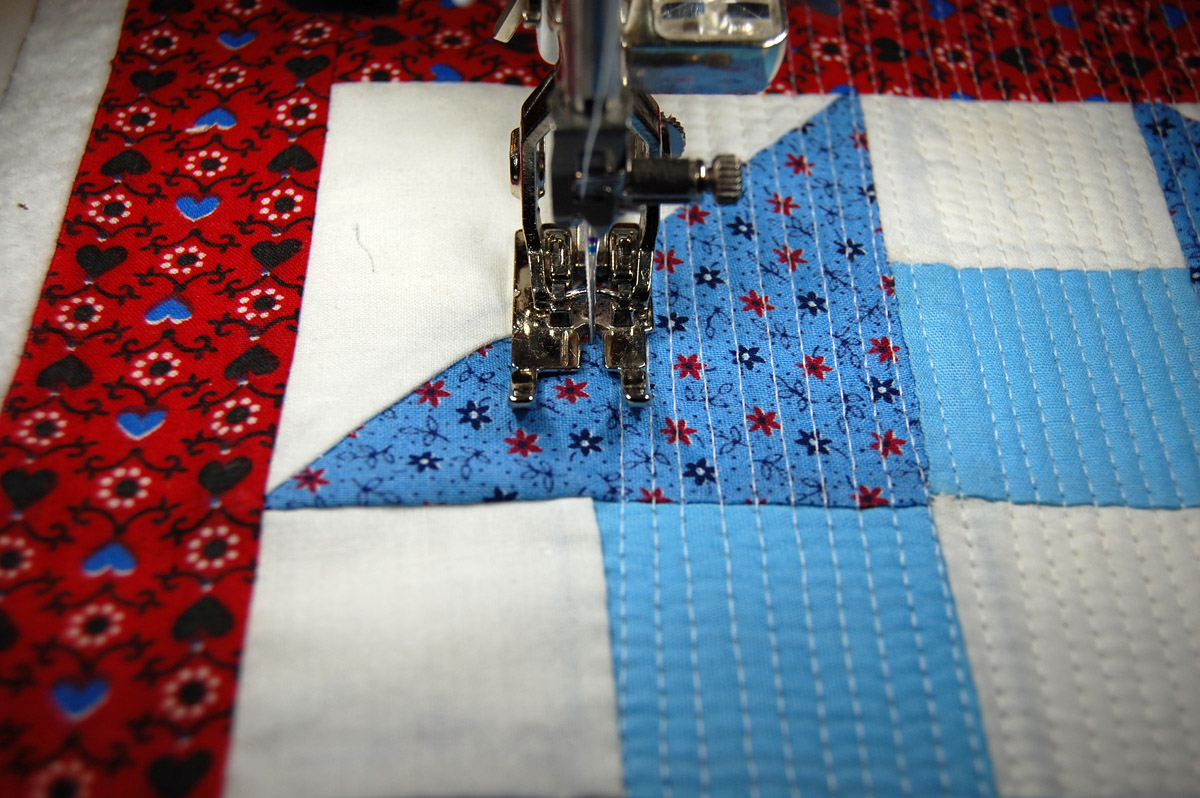
Switching to the Patchwork Foot #37 D, I echo stitched around the heart using Isacord 40 polyester thread, color: 1903 Lipstick and Isacord 40 Variegated thread, color: Rainbow. Again, I used the same thread, both top and bobbin.
Step 7:
Once I finished stitching the background, it was time to square up the block.
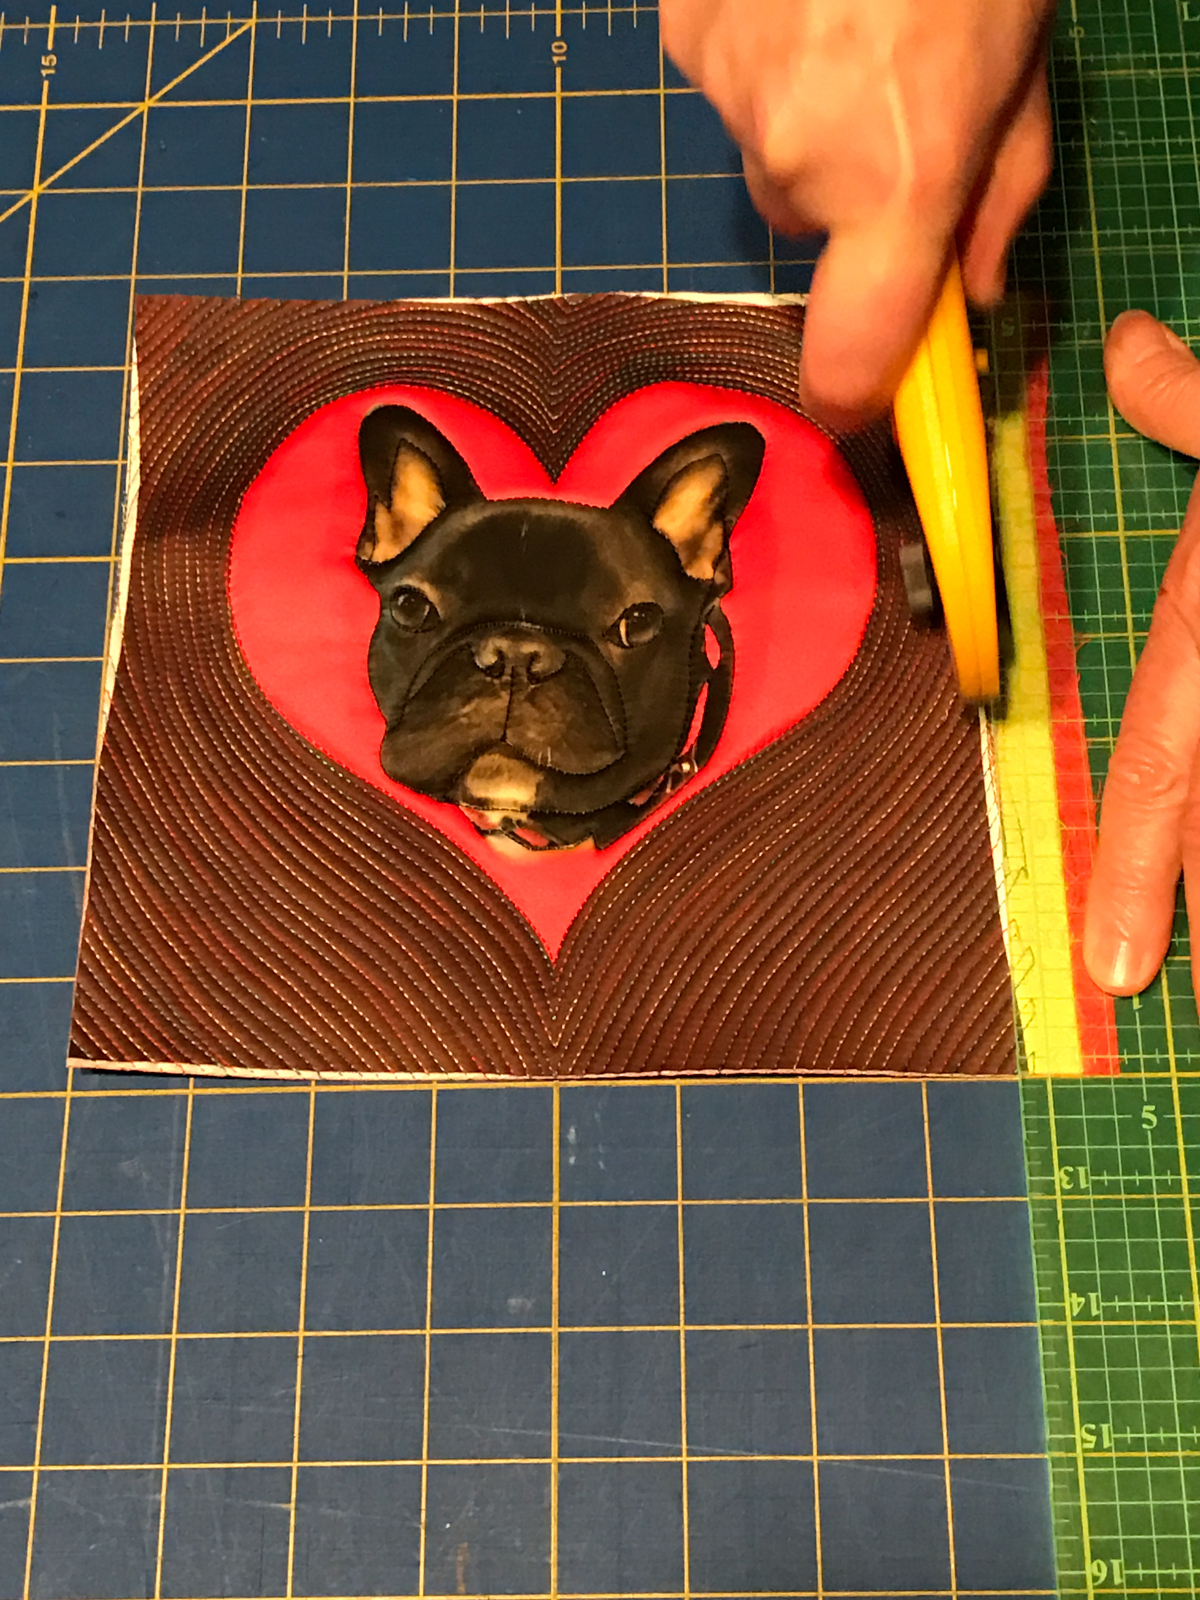
Step 8:
I used the same fabric as on the backing for my binding. The binding strip was cut 1 ¼-inch wide and I engaged the dual feed on the Patchwork Foot #37 D to stitch it to the top of the quilt block.
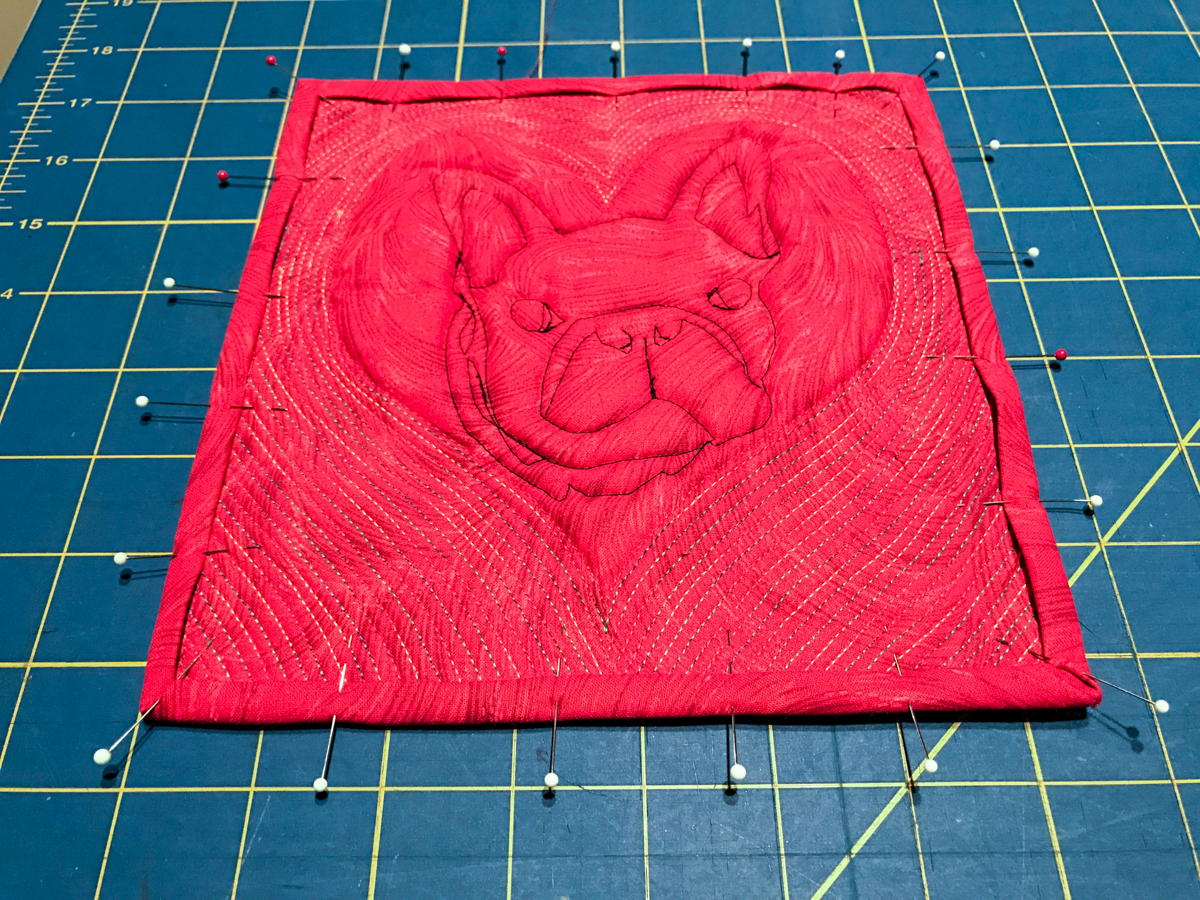
Step 9:
The binding was folded over on the back and pinned to hand-stitch it to the back.
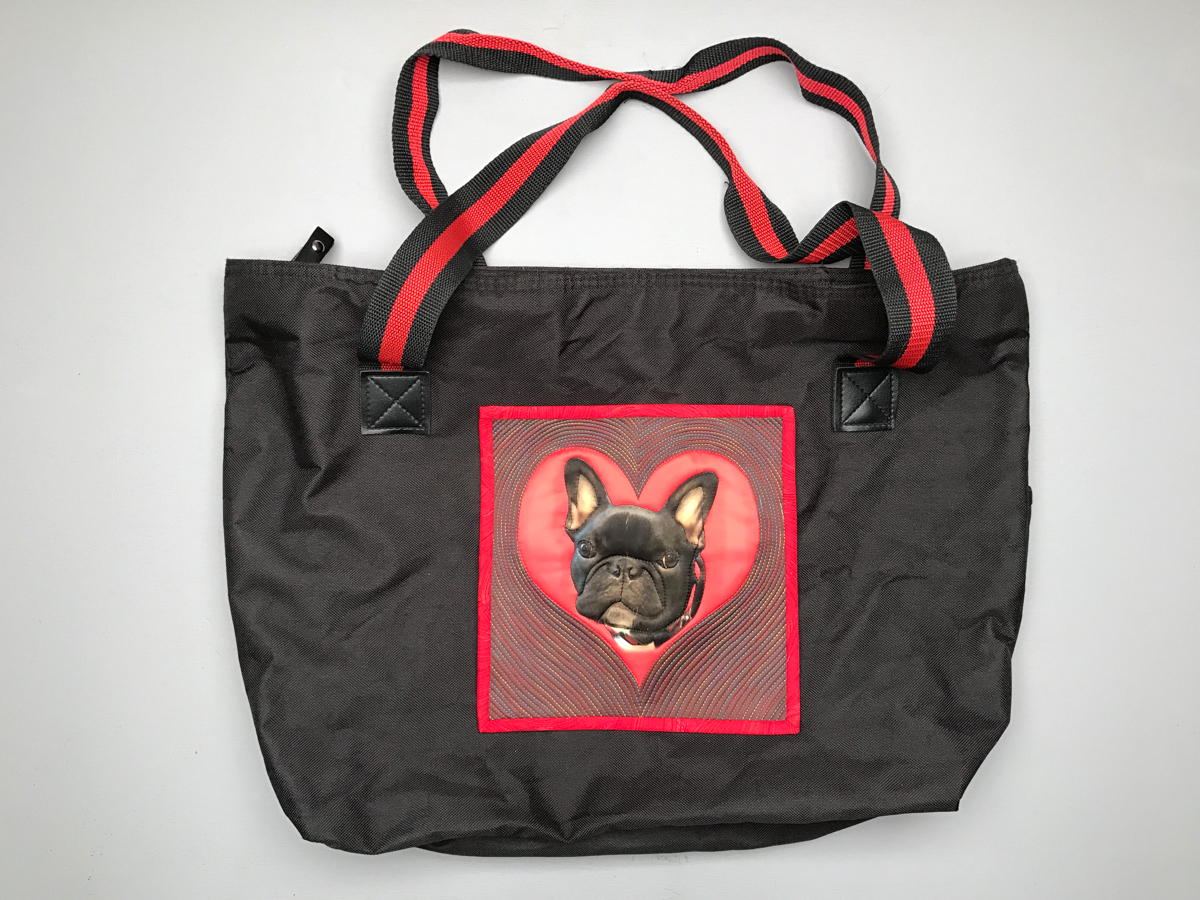
Step 10:
Using the same color thread as was used to stitch the binding, Isacord 40, color: 1903 Lipstick, whip sew the block to your tote.
There are a variety of software programs and apps that you can use to process a digital image and print it on a fabric sheet. For this project, I used Adobe Photoshop Elements (PSE) to create the personal imagery that I printed on a sheet of Threads, the silk fabric sheet. I like PSE because it allows me to use Layers to create the imagery that I print for the fabric in my art quilts. If you want to try the process I used to make the fabric sheet of “Louie in the Heart” you can download a trial version of the latest version (PSE 15) from the Adobe website.
Here’s How to create a heart in Photoshop Elements in 8 steps
Step 1:
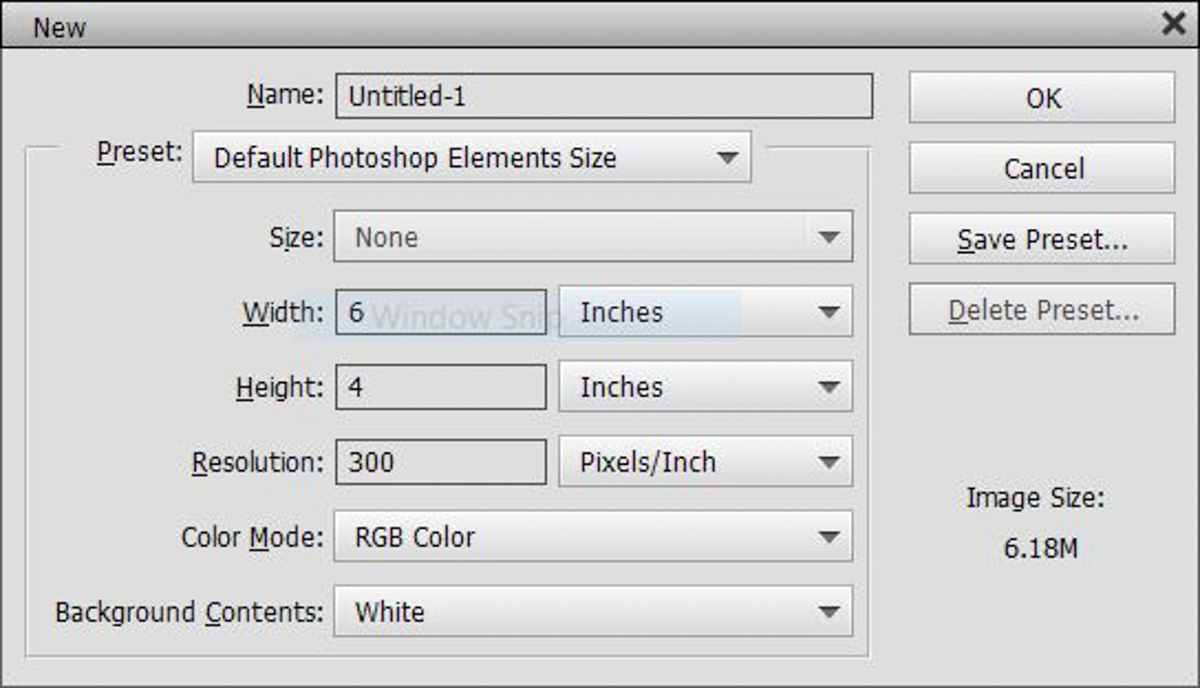
Open the PSE Editor to create a new blank file. Here is the format for the commands I will use in this part of the tutorial: File>New>Blank File. This means that you go to the File drop down menu at the top of the window. The command to follow is New. Sliding down to it opens a side menu box, then slide over to Blank File. This opens the dialog box for a new blank file. If you are used to using keyboard commands Ctrl+N will shortcut this and open the new blank file dialog box. Here is the dialog with the default settings.
Step 2:
Change the settings to the file size you want for your heart image. In this case I changed them to six inches by six inches at 360 ppi. I use 360 ppi because that is the native resolution of my Epson photo printer. Other photo printers like Canon and HP have a native resolution of 300 ppi.

Step 3:
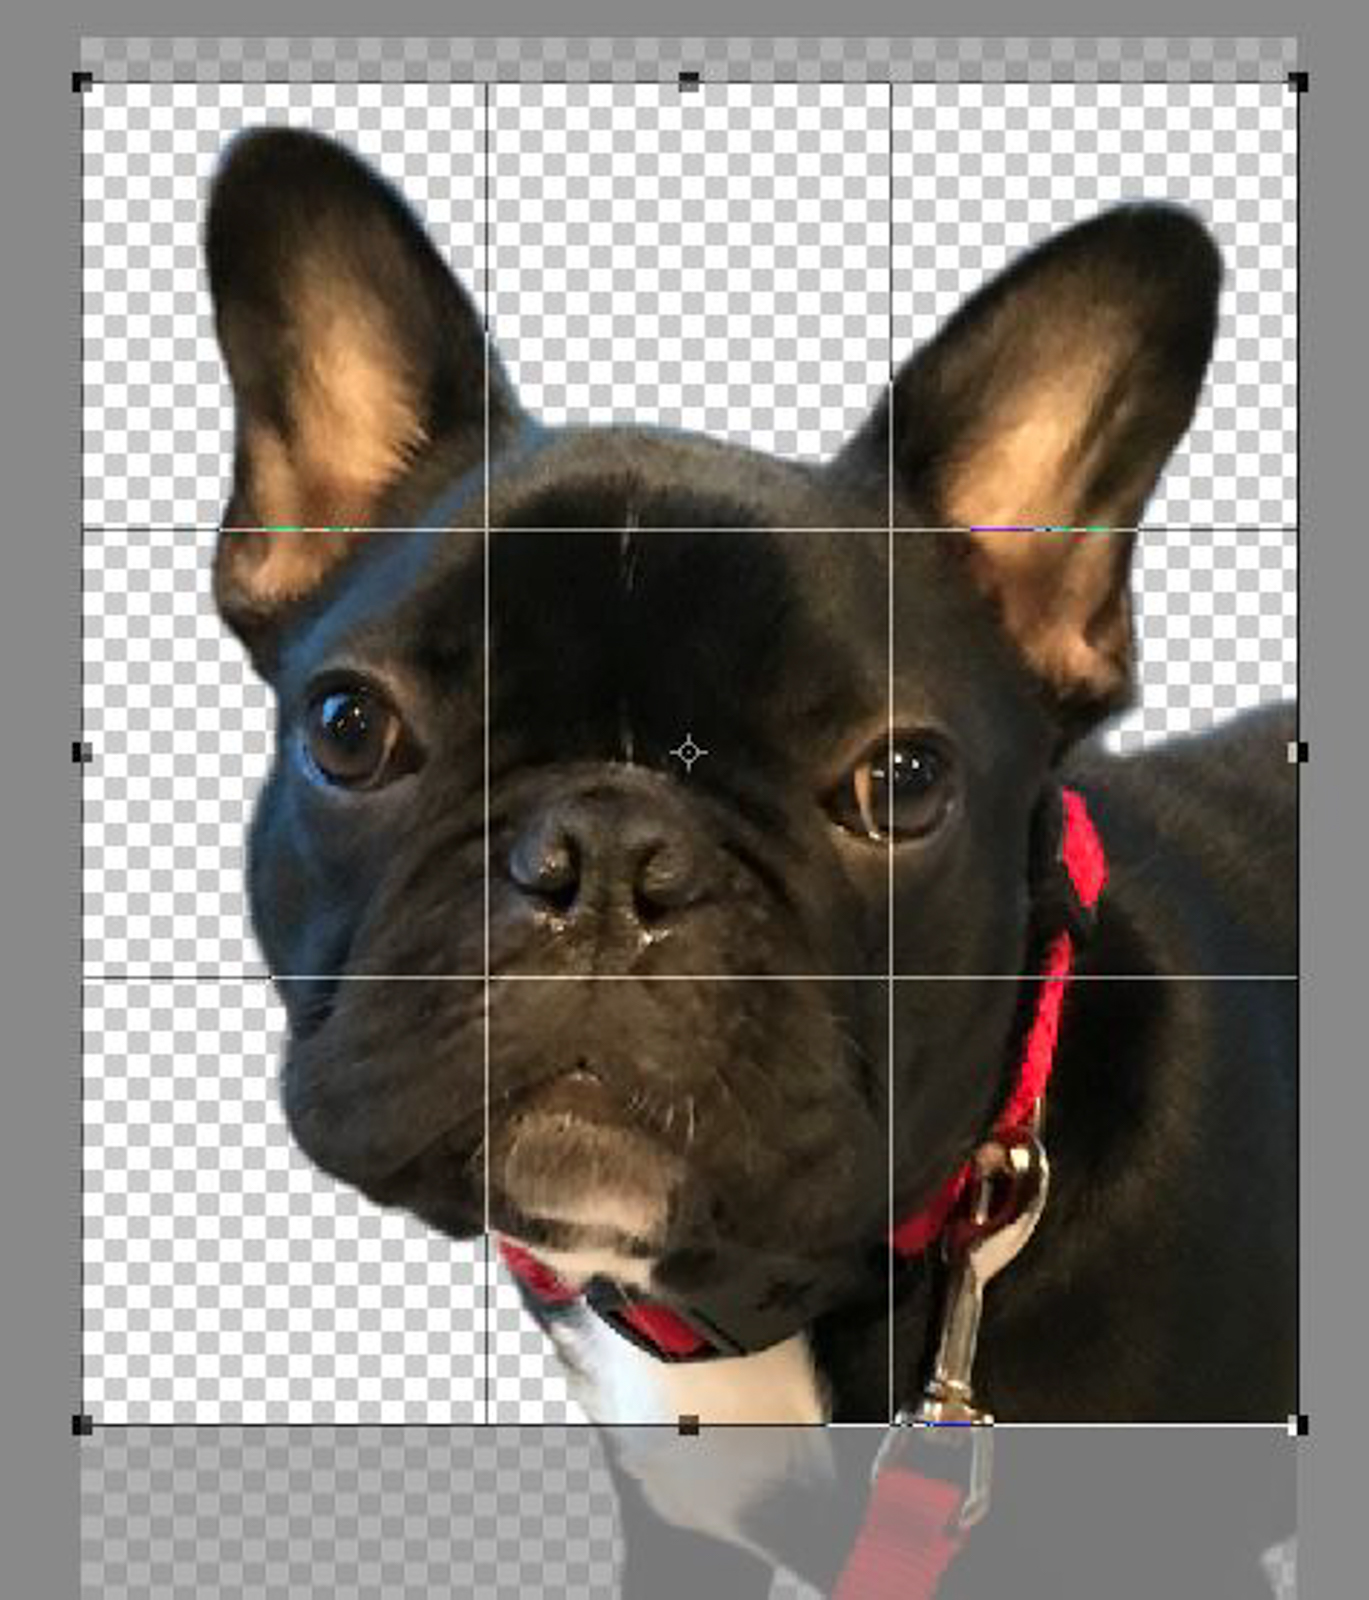
Clicking the OK button opens a six by six-inch square in the Editor. Place a grid over the white square View>Grid or Ctrl+’. Choose the Crop tool (C) from the side menu. This opens the tool bar at the bottom of your screen. The Crop icon is highlighted, and next to it is the Cookie Cutter icon. Click on the Cookie Cutter and to the right of it, the first shape is the Heart Card. To the right of the Heart is another drop down menu: select Fixed Size. Set the Width and Height to 6 in. Check the box From Center. Place your cursor in the center of the grid and click. The outline of a heart will appear on the screen. Click on the Green Check Mark or press Enter on your keyboard to get the Heart image.

Step 4:
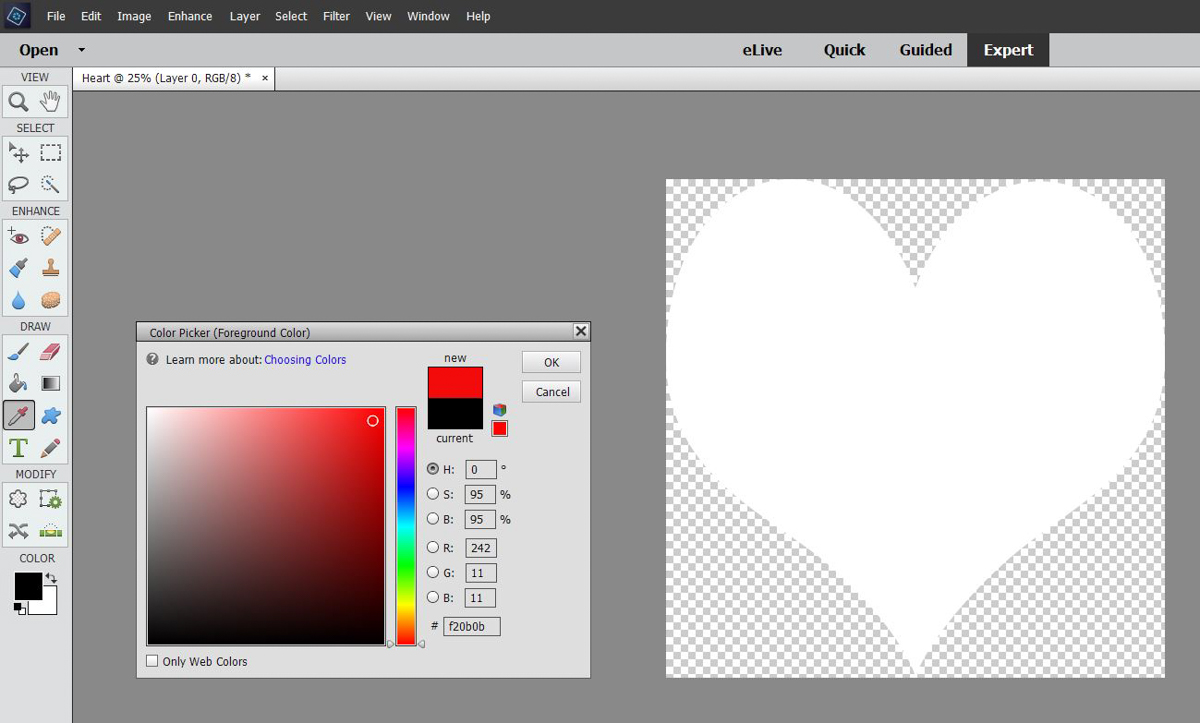
Remove the grid View>Grid or Ctrl+’ and you have a white heart on a transparent background. To change the color of the Heart, click in the black Color box at the bottom of the side menu. This opens the dialog box for the Foreground Color Picker. Use your cursor to select a color in the large color box. I selected a traditional red color. Click OK to select this new color.
Step 5:
Next select the Paint Bucket tool (K) and click inside the Heart to change the color to red.

Step 6:
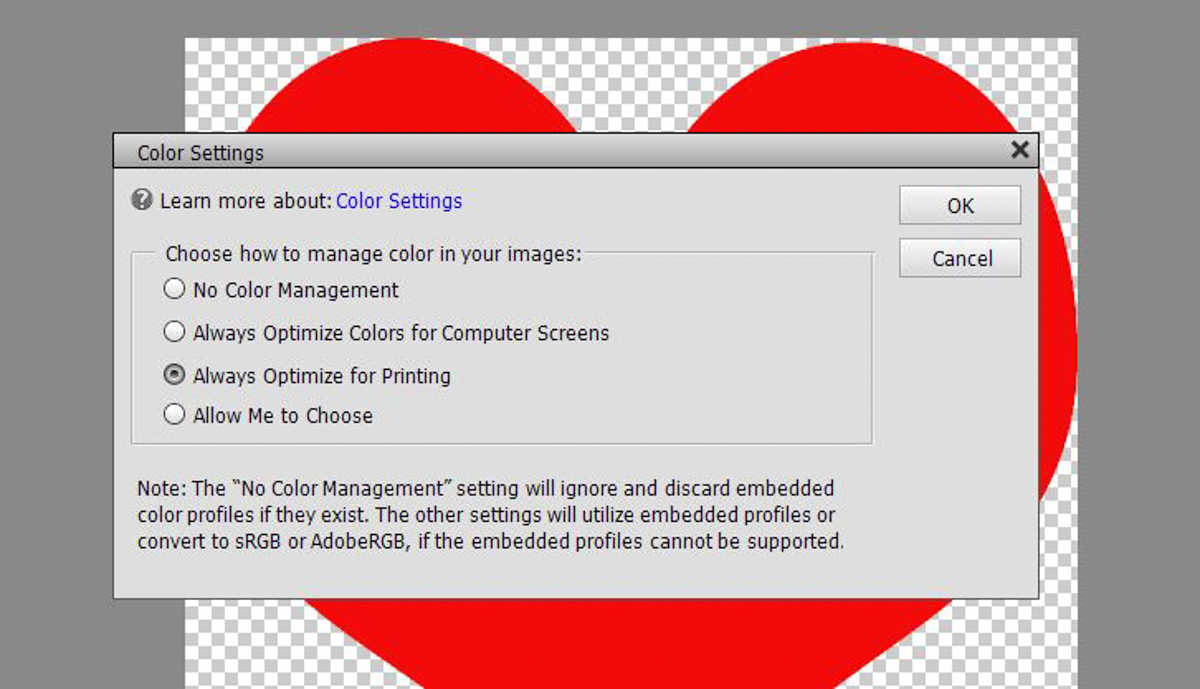
Before I save the image of the Heart, I make sure that my color settings are optimized for printing. Edit>Color Settings (Shift+Ctrl+K). Once this selection has been made, the PSE Editor will remember it for future work.
Step 7:
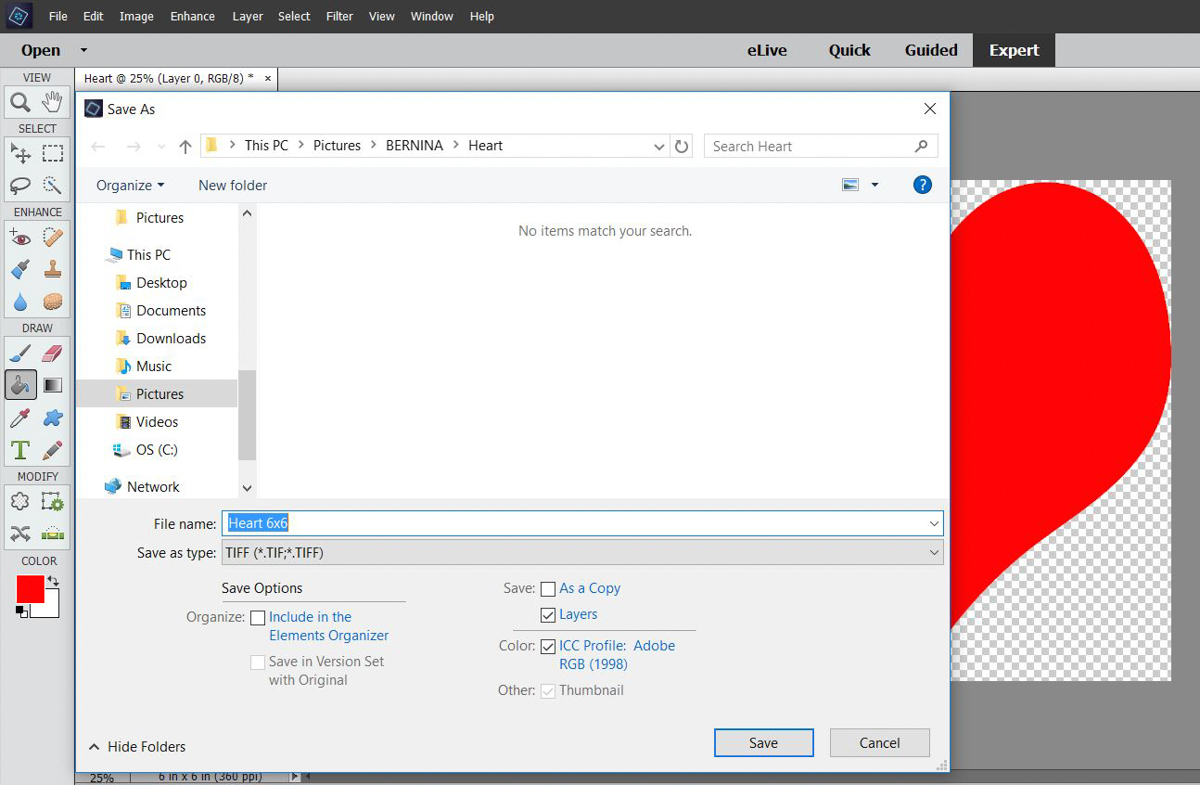
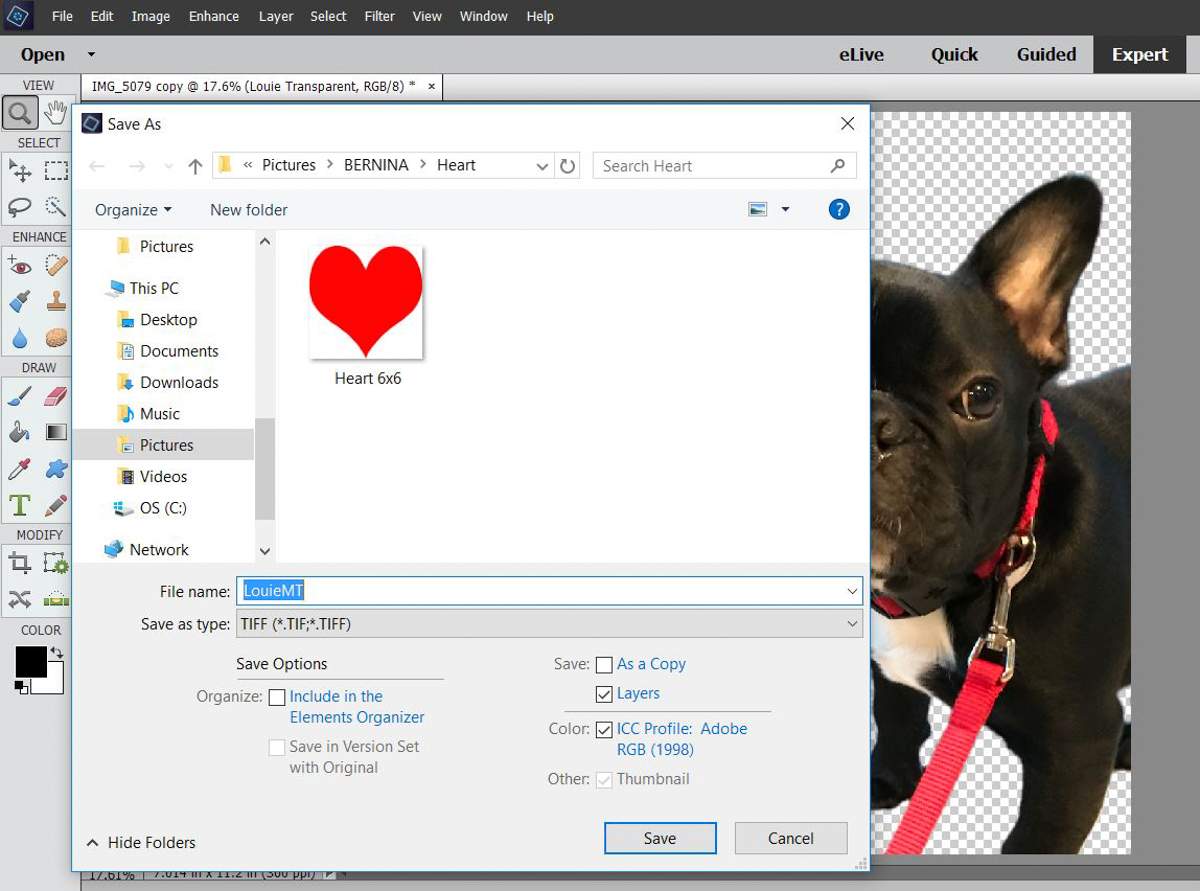
I saved the file with a name that lets me know its size and in the TIFF format, as that will preserve the transparent layer. I also uncheck the “Include in Elements Organizer” box. If you use the Elements Organizer, then you want to leave it checked.
Step 8:
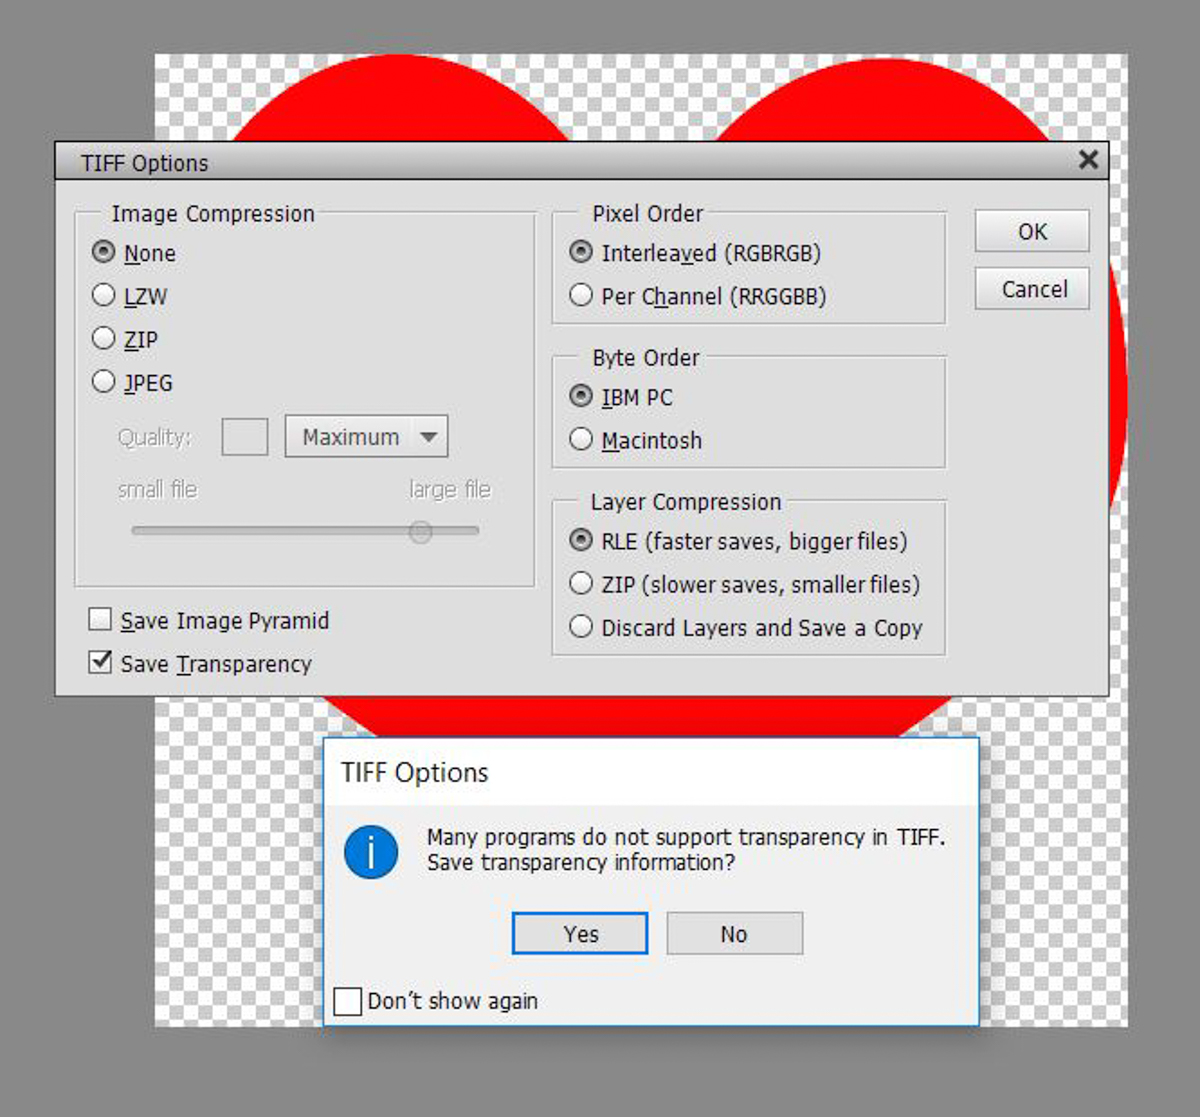
Clicking Save opens the TIFF Options dialog box. Check Save Transparency and this opens another smaller Tiff Options dialog box that asks “Many programs do not support transparency in TIFF.” And asks “Save transparency information?” Click YES because Elements does support transparency information. You can also check the “Don’t show again” if you do not want to be bothered with this dialog box in the future.
How to process an image to place it in the middle of the heart using Adobe Photoshop Elements.
This works for pictures of your family, friends and pets.
Step 1:
For the center of the heart I selected a photo of “Louie” that I took with my cellphone (iPhone 7+). Louie is a French Bulldog puppy that belongs to a friend of mine. The nice thing about an image like this one is it does not have to be perfect, because I can remove unwanted background from the photo using PS Elements.
Step 2:
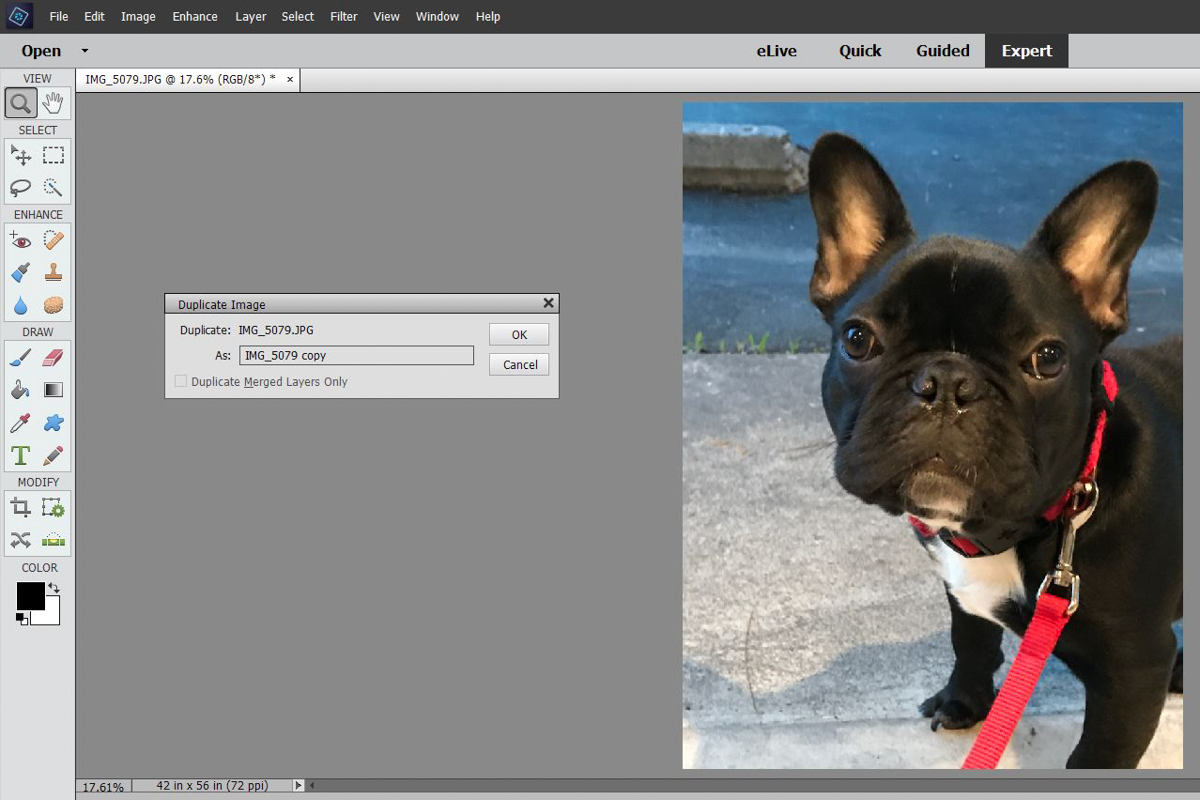
The first thing I do is to make a copy of the original, File>Duplicate. I then close the original image and work on a copy. This way, if I make any mistakes I am working on a copy and have not harmed the original photo.
Step 3:
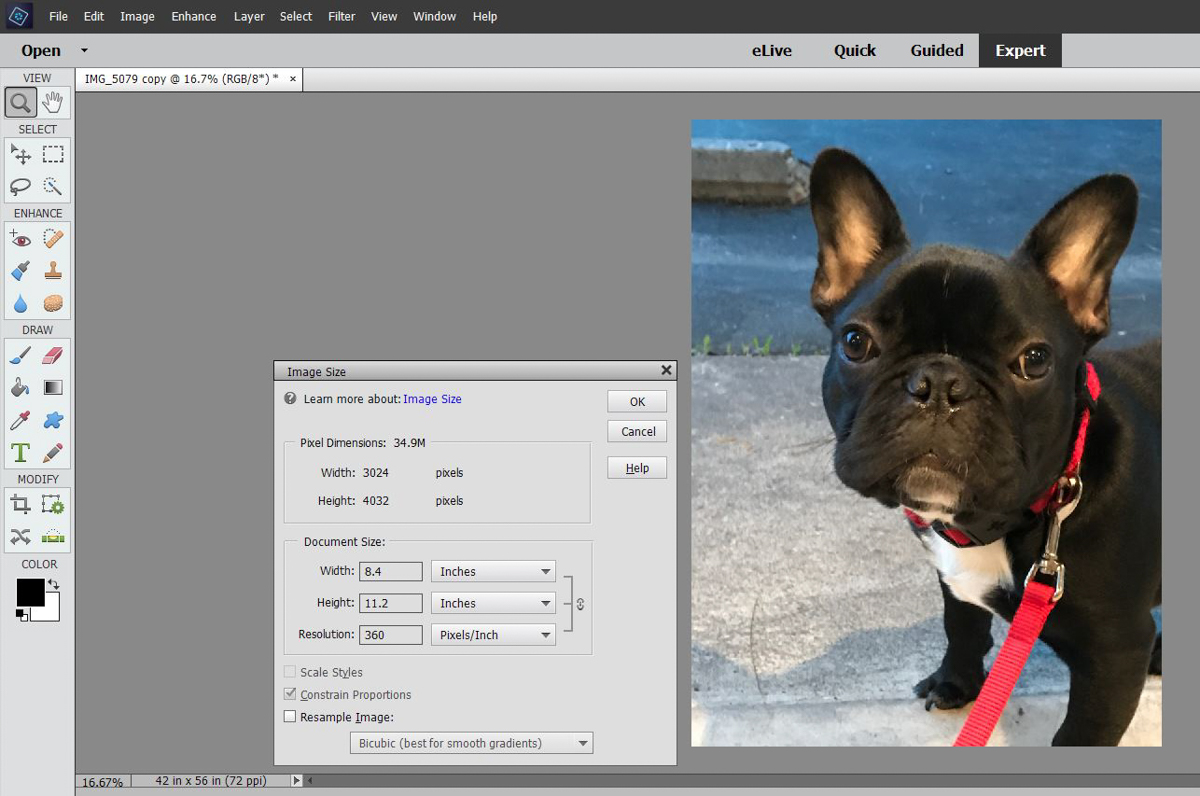
Next, I change the document size to my printer’s native resolution. Image>Resize>Image Size (Alt+Ctrl+I). Note that the Resample Image box is UNCHECKED. This keeps the original file size, changing only the information about the size at 360 ppi. In this case, the image is 8.4 x 11.2 inches at 360 ppi.
Step 4:
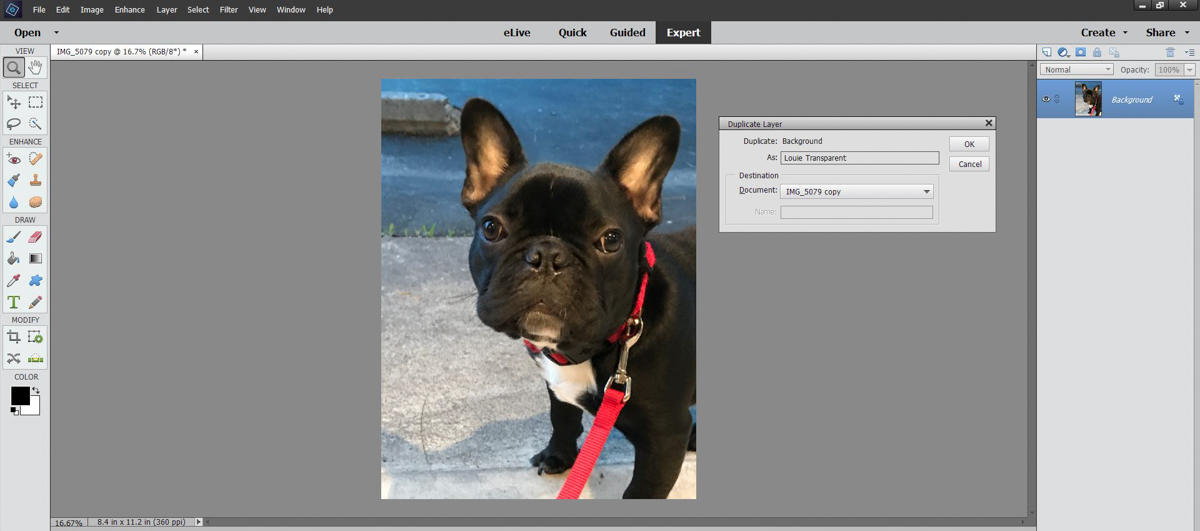
Open the Layers palette Windows>Layers (Fn+F11). Right click on the Background layer and Duplicate Layer. You have the option of naming the layer in the Duplicate Layer dialog box. I chose to name the layer “Louie Transparent.”
Step 5:
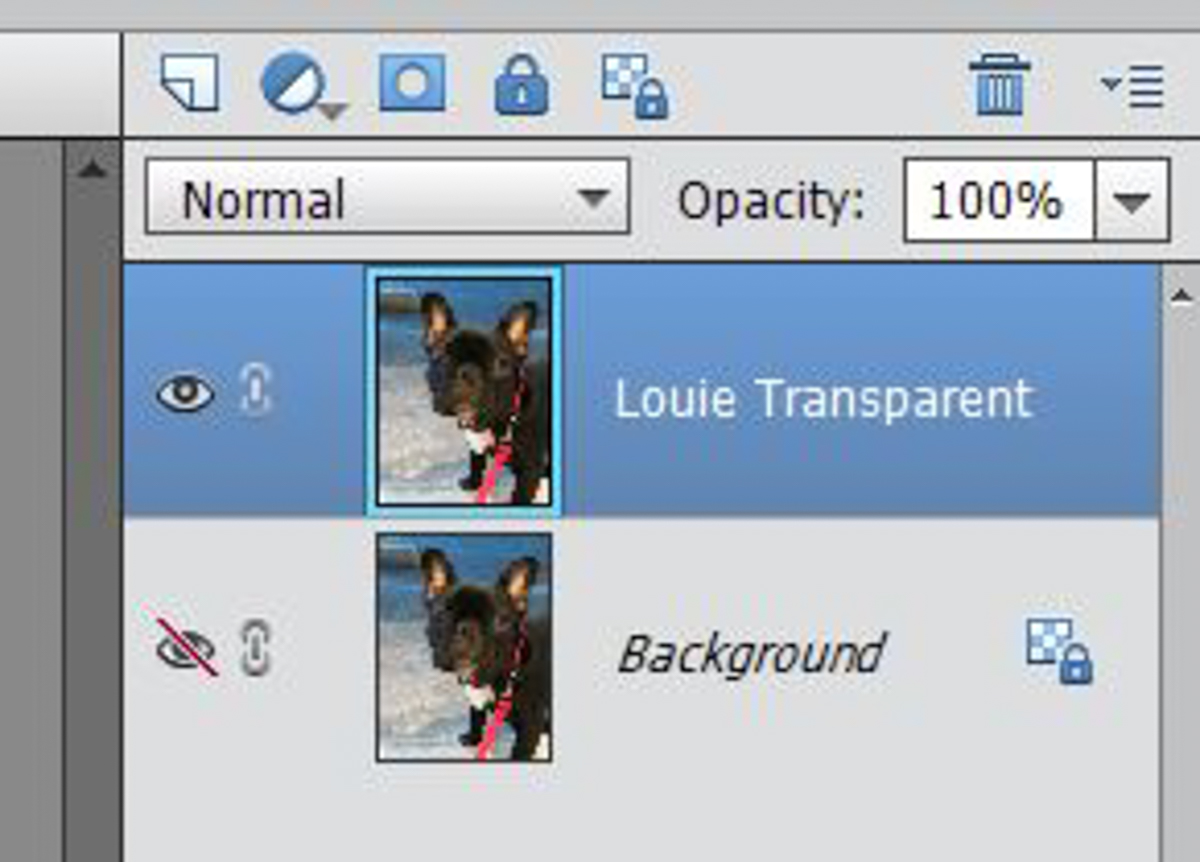
Turn off the “eyeball” in front of the background layer.
Step 6:
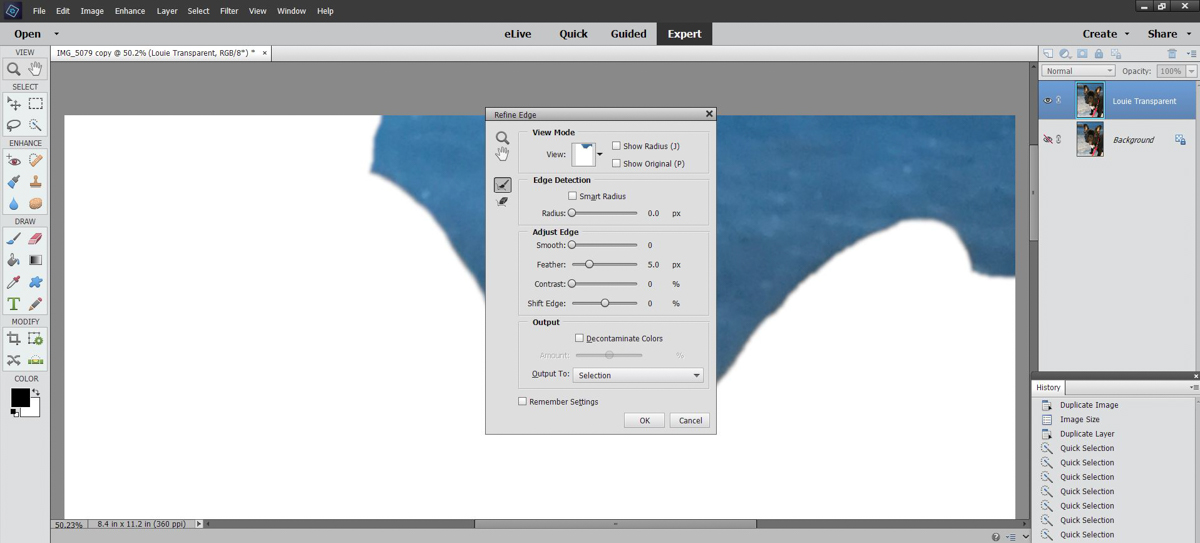
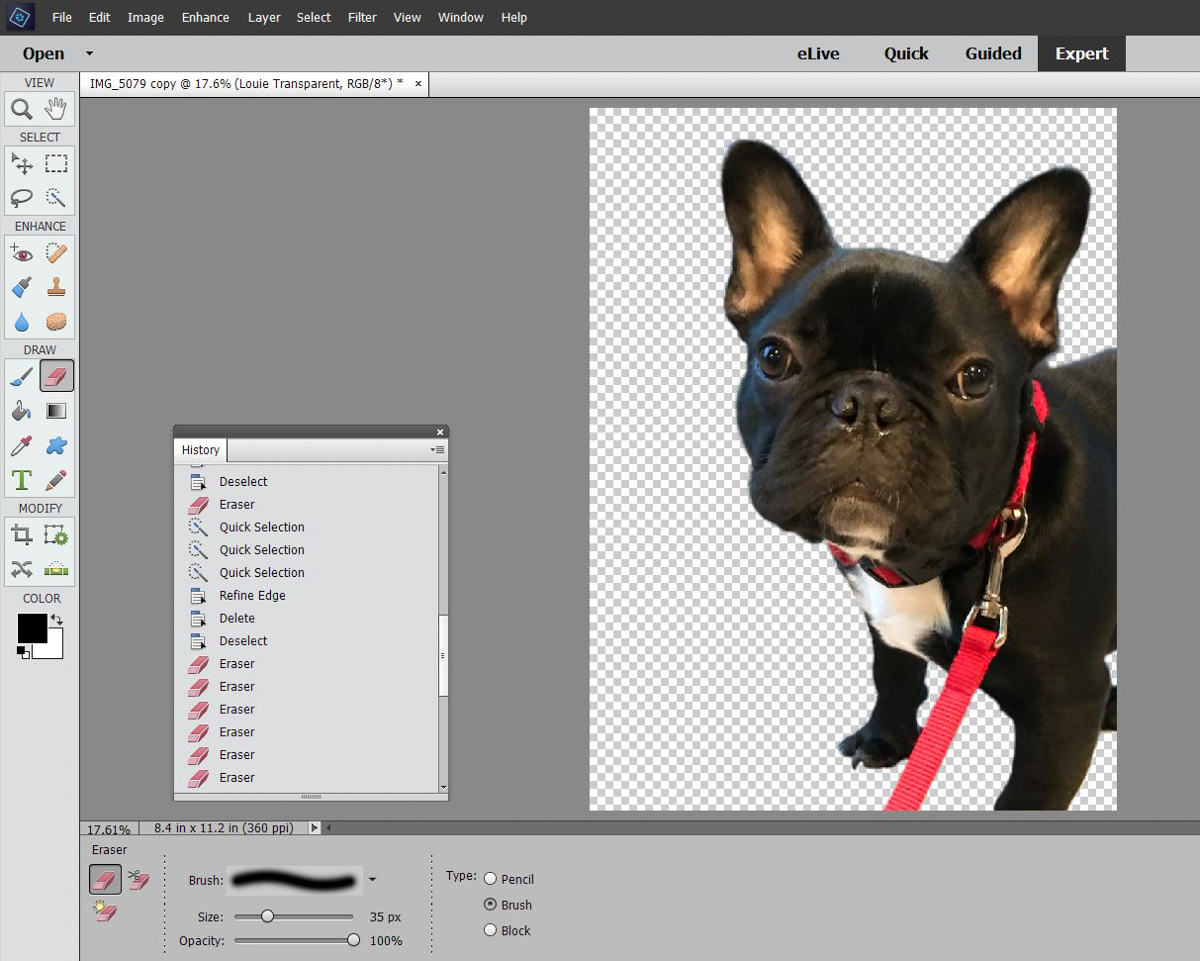
Open the History window and place it in the palette at the right. Window>History (Fn+F11) The History window shows each of your actions and makes it easy to back up or undo any of the actions you make. Using the Quick Selection tool (A) drag it across the area you want to remove. I used a soft round 50 brush at 50 pixels. Clicking on Refine Edge allows you to adjust the edge of the selection. Here I feathered it at 5 pixels.
Step 7:
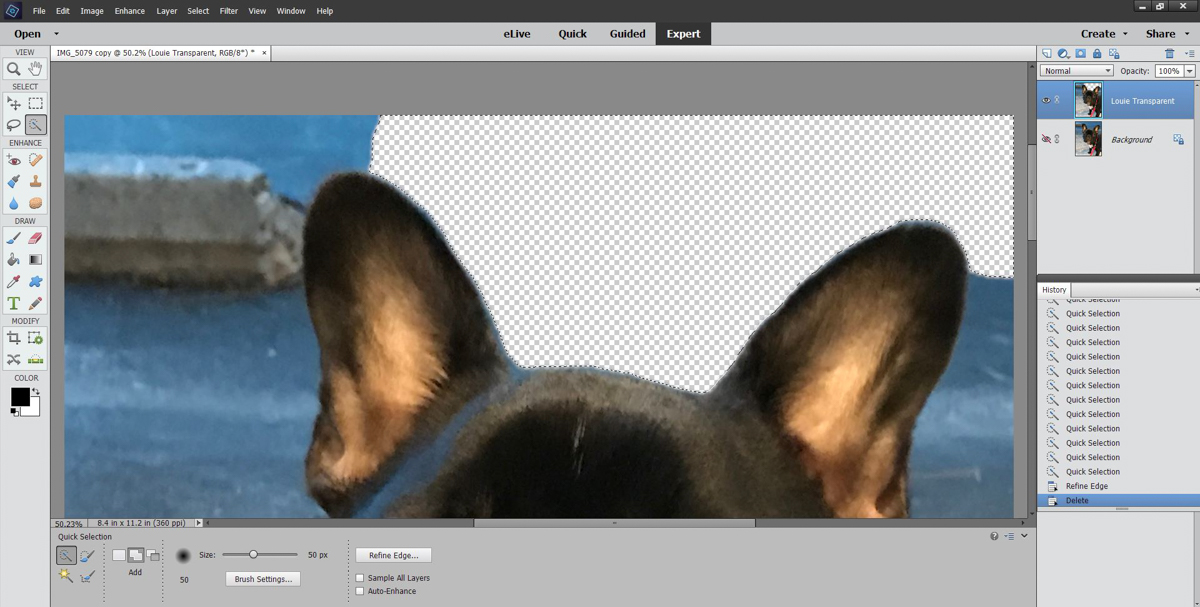
Once you are satisfied with the selection, click the Delete key to remove the background.
Step 8:
Continue to remove the background. You can also use the Eraser tool (E) to clean up your selections or to remove small sections of the background. If you are using the Eraser after using the Quick Selection tool, you need to Deselect (Ctrl+D) the image first.
 Step 9:
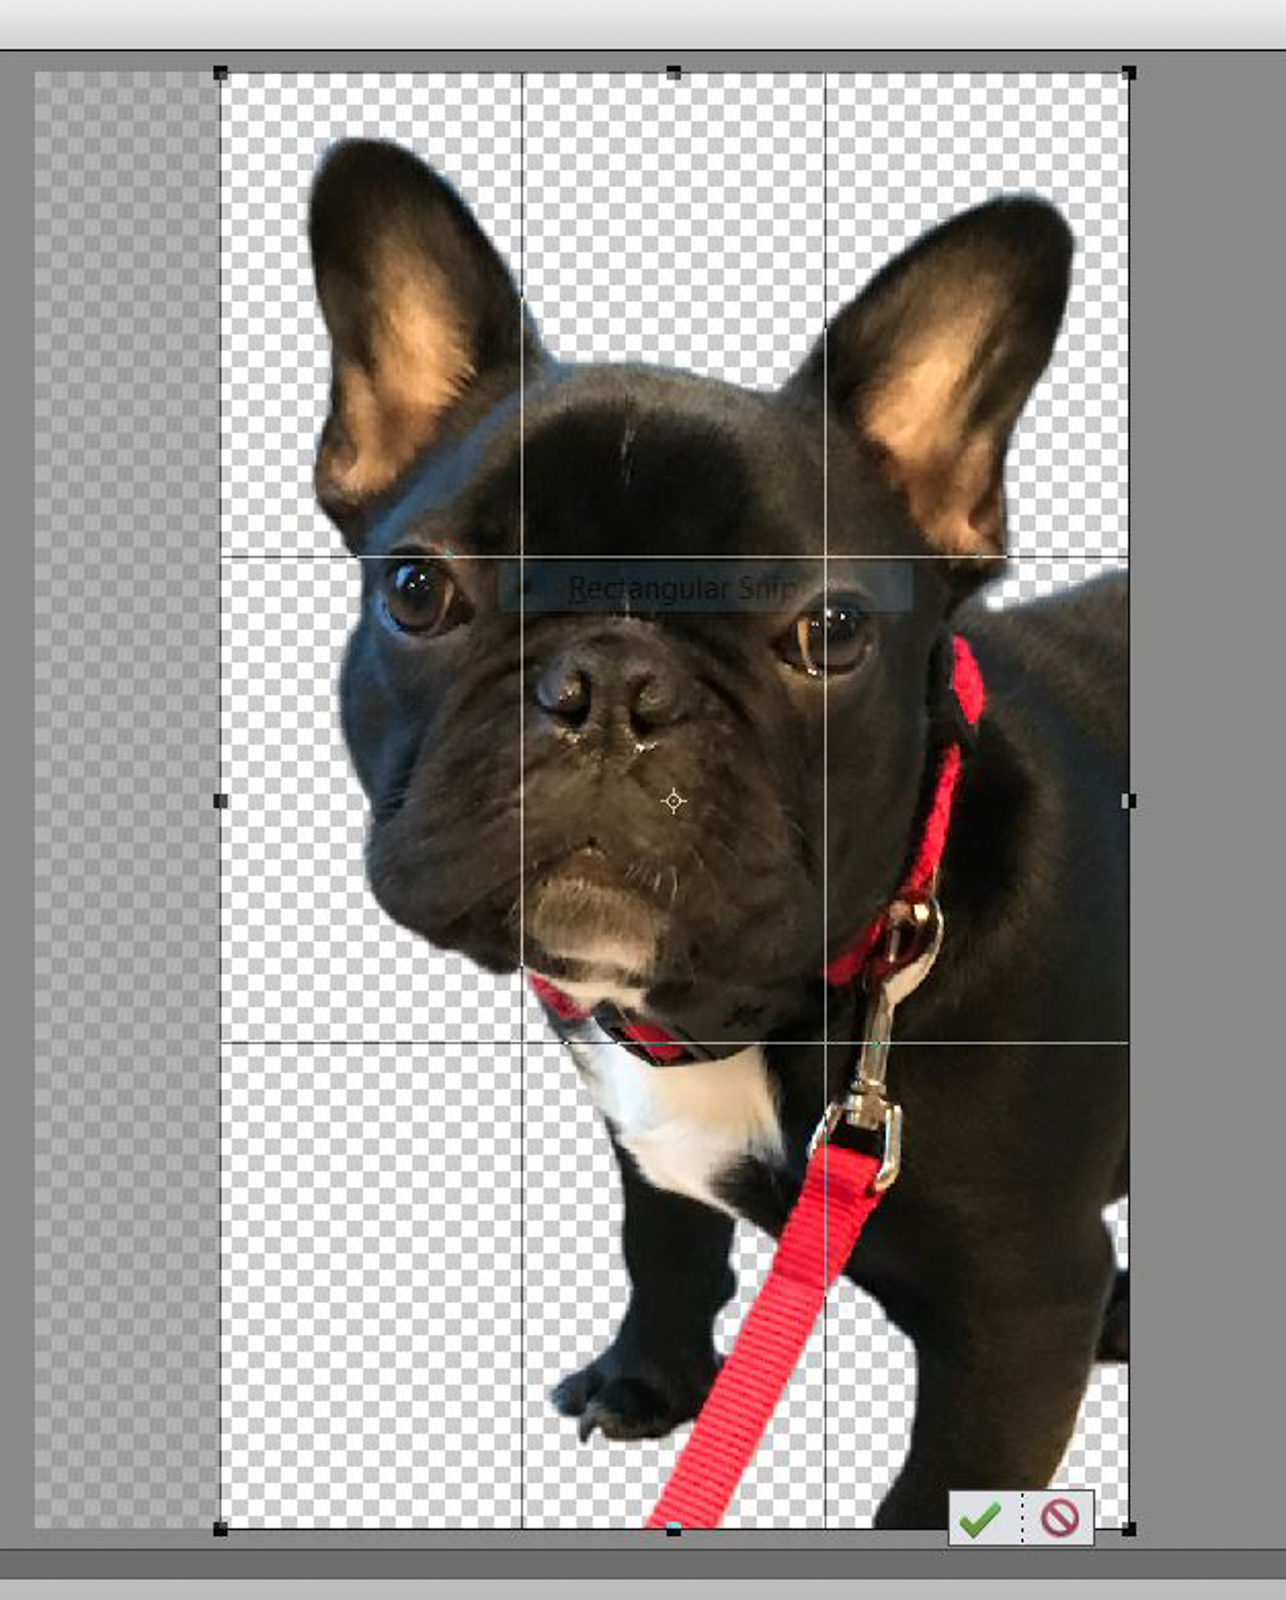
Next use the Crop (C) tool to remove the excess background on the left side of the image.
Step 10:
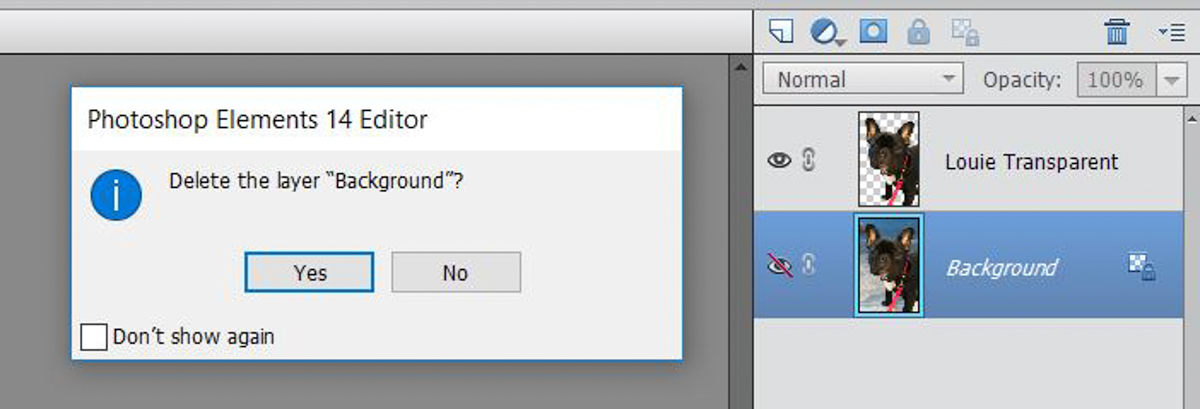
Delete the Background Layer.
Step 11:
The iPhone image has a color profile of Display P3. Convert this to Adobe RGB. Image>Convert Color Profile>Convert to Adobe RGB Profile. Save the file with the transparent background. I chose to call it “LouieMT.tif.” The MT I use to designate the file as a Master with a Transparent background.
Step 12:
If the Tiff Options dialog box opens notifying that layered files increase file size, click OK. Transparent files are layered files and it is OK if they are larger.

Step 13:
Make a duplicate copy of your new Master file, File>Duplicate, and then close the original. Crop the copy to a shape that will better fit in the heart.
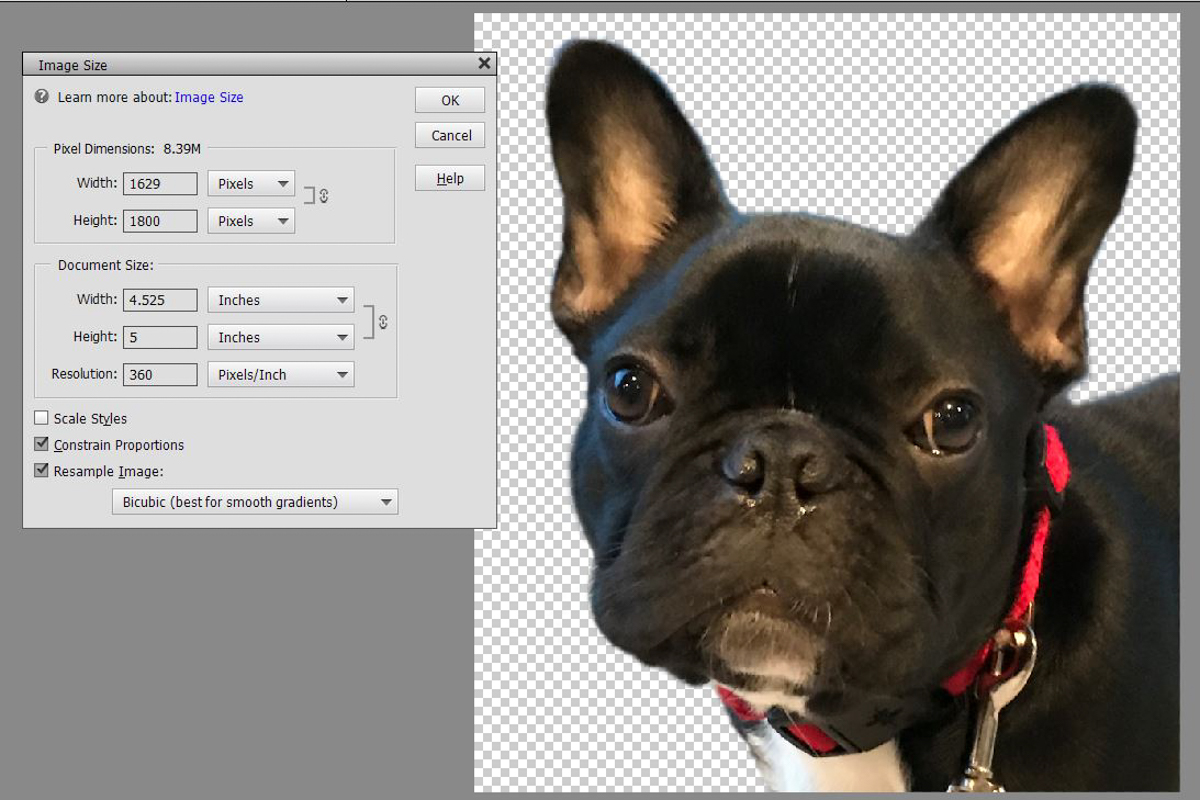
Step 14:
Resize the cropped image to a size that will fit in the heart. Image>Resize>Image size (Alt+Ctrl+I). This time the Resample Image box needs to be checked. I chose 5 inches-high which made the file 4.525 inches wide.
Step 15:
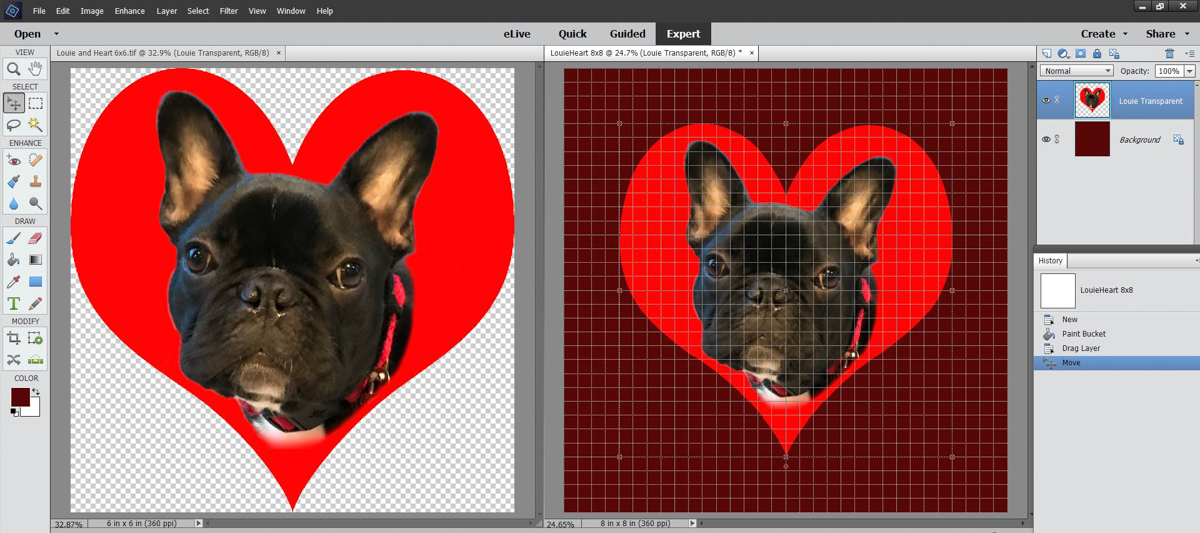
Save this file. I called it Louie MT 4-5×5.tif. Open the Heart image. Go to Window>Images>Tile. This places both files open in the Editor. Click in the image of Louie to make it the active window. From the Layers palette drag the image of Louie onto the Heart. Adjust the position of Louie in the Heart with the Move tool (M).
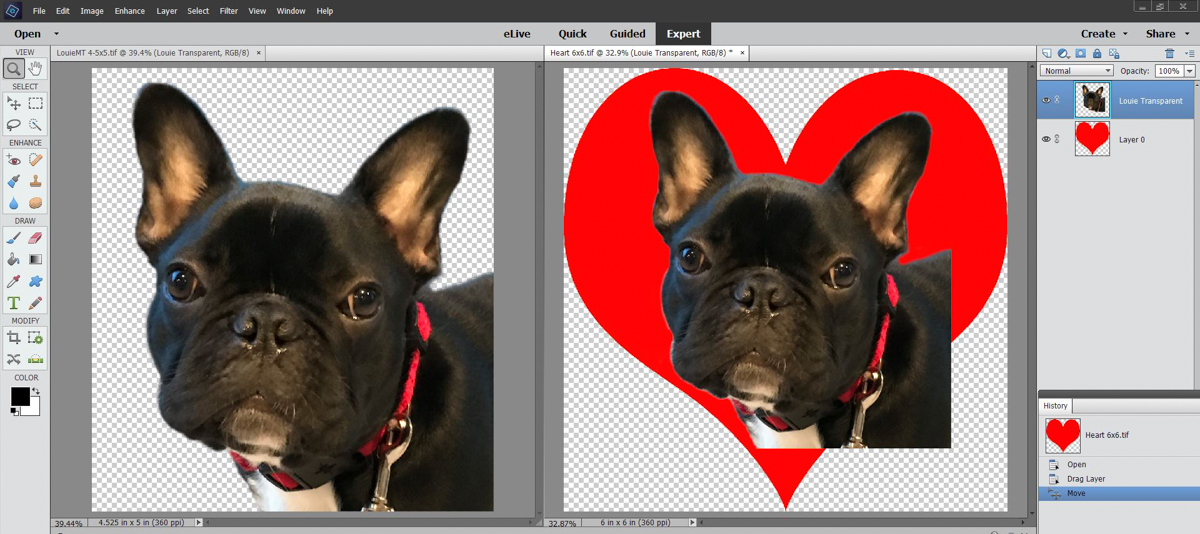
Step 16:
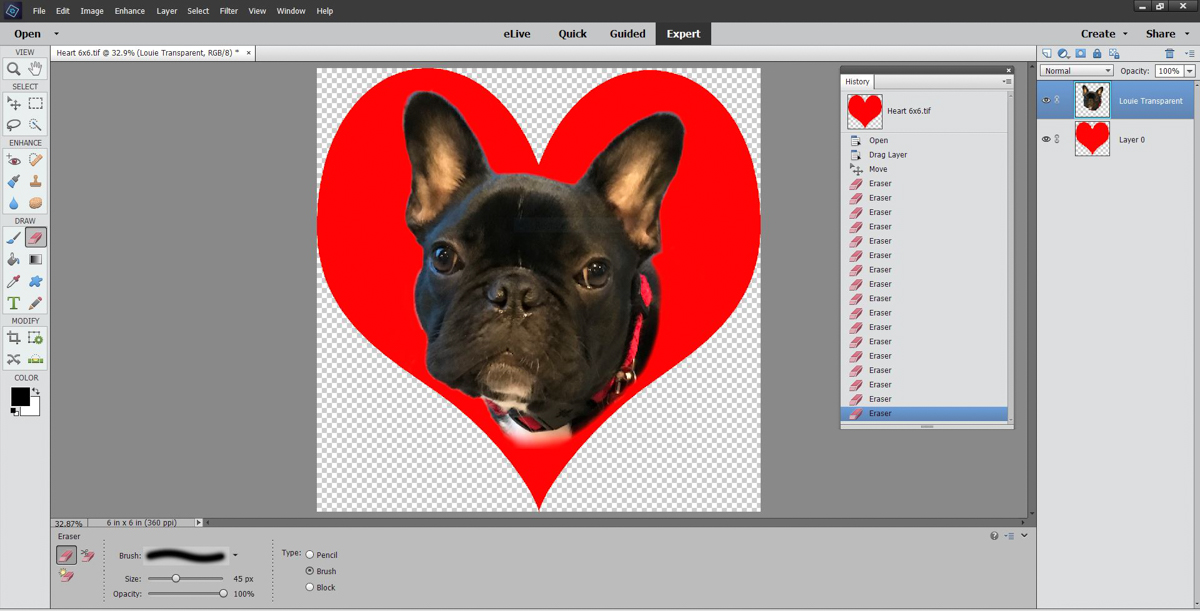
Close the Master image of Louie. Using the Eraser tool (E) remove any part of the image that you don’t want. I started with a 200-pixel soft brush and then moved in closer with smaller brushes, 65-pixel and then 45-pixel soft brushes. I made short strokes making it easy to back up in the history if I did not like one of my erasures.
Step 17:
Next I merged the file, Layer>Merge Visible (Shift+Ctrl+E) and saved the file as Louie and Heart 6×6.tif. I opened a new blank file 8 x 8 inches and colored it maroon. The size of the file allowed me to print it on a standard inkjet fabric sheet that is 8.5 x 11 inches and have a quarter inch seam allowance around the image. I highlighted the image of Louie and the Heart, and from the Layers palette bin dragged the image onto the new background. With the Grid over the image View>Grid (Ctrl+’), Using the Move tool I centered “Louie in the Heart” on the maroon background.
Step 18:
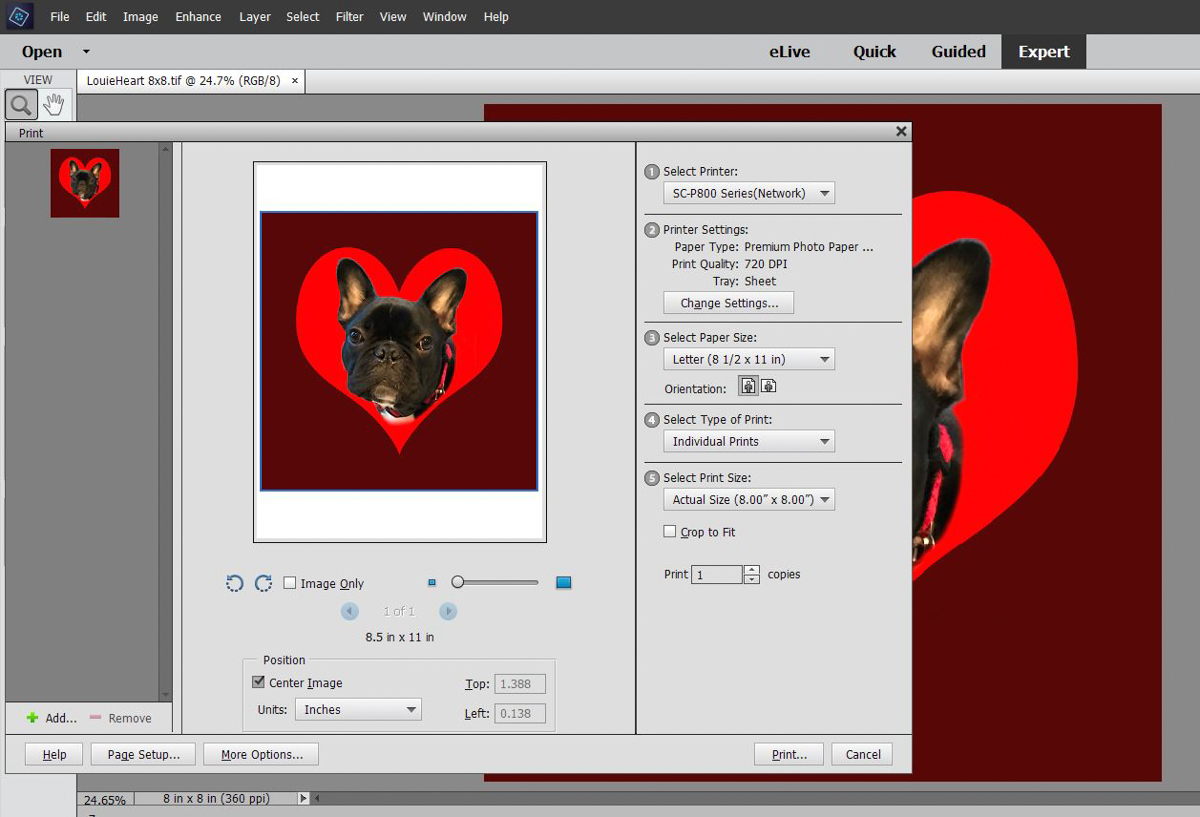
Go to the top menu bar Layer, and drop down to “Flatten Image.” The flattened image takes up less space and is ready to be printed. To open the print dialog box File>Print (Ctrl+P). It is important to change option 5 Select Print Size from the default 4″ x 6″ size to the Actual Size of your file.
Step 19:
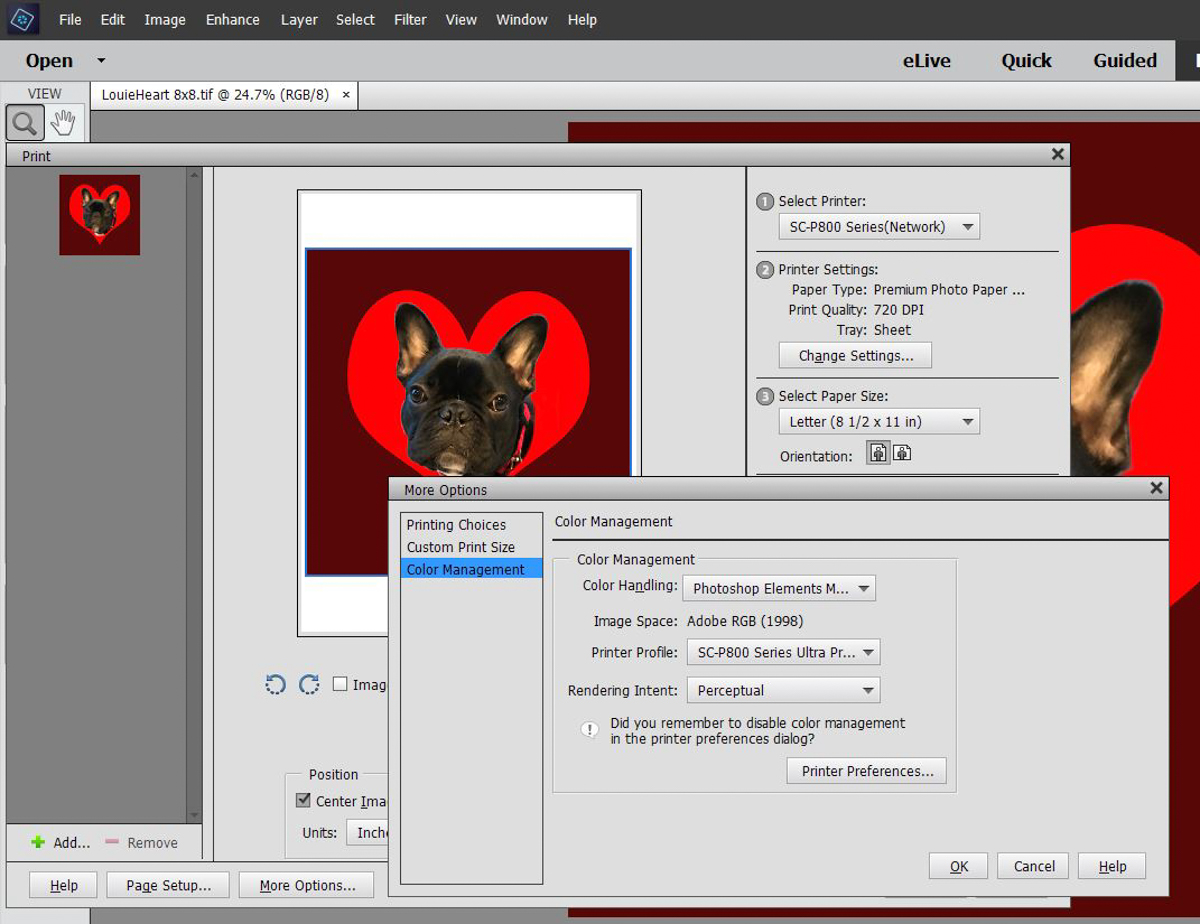
At the lower left corner of the Print Menu is a box “More Options.” Click on it and go to the third choice on the bottom, Color Management. The default Color Handling is to let the Printer Manage Colors. This seldom produces the results that you want. Change this to Photoshop Elements Manages Colors. This is one of the most important things you can do to get good color on your fabric sheet. If your printer has profiles, select the one for Ultra Premium Presentation Matte paper. Rendering Intent should be Perceptual. Printer Preferences will take you to the Advance Settings.
Step 20:
You can also reach the Advance Settings from the Print Menu Option 2 Printer Settings. Click the Change Settings window and in that window click on Advanced Settings. Here are the Media Settings I use. Media Type: Ultra Premium Presentation Matte. Since we are letting PSE manage the color, the setting for Mode is “Off (No Color Adjustment).” These are the settings that I use with my printer. The settings on this menu will vary according to the printer that you are using. You may not have all the options that are shown here. Click OK until you get back to the main print menu. Clicking Print gets the inkjet fabric sheet printing. I chose to use a Threads Silk Charmeuse printable fabric sheet. Threads inkjet printable fabric sheets are available from BREWER.


What you might also like


3 comments on “Personalize Your Tote with a Photo Quilt Block”
-
-
How could this be done on V8 for those of us that do not have Photoshop?
-
I love this guy Louie! and the bag is amazing, where can I find the tutorial for making the bag?
Leave a Reply
You must be logged in to post a comment.

This would have been a perfect exercise for the Bernina v8 software. Wondering why you chose not to use it or even have it as an alternative.