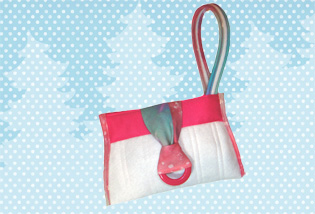
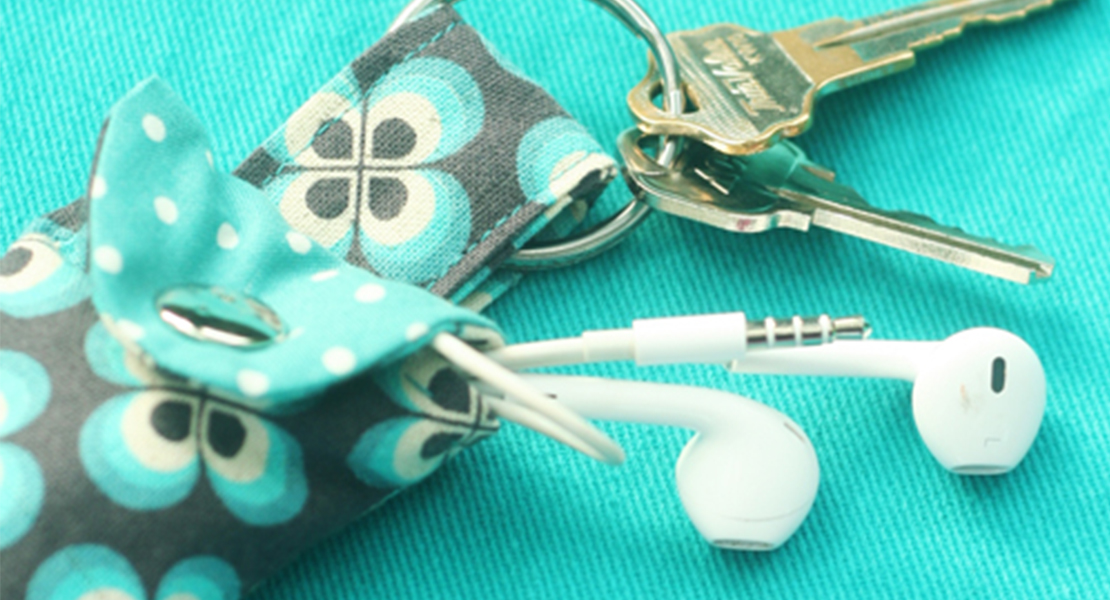
DIY Customized Key Wristlet
Use decorative stitches already built-in to your sewing machine to make a simple, custom key wristlet.
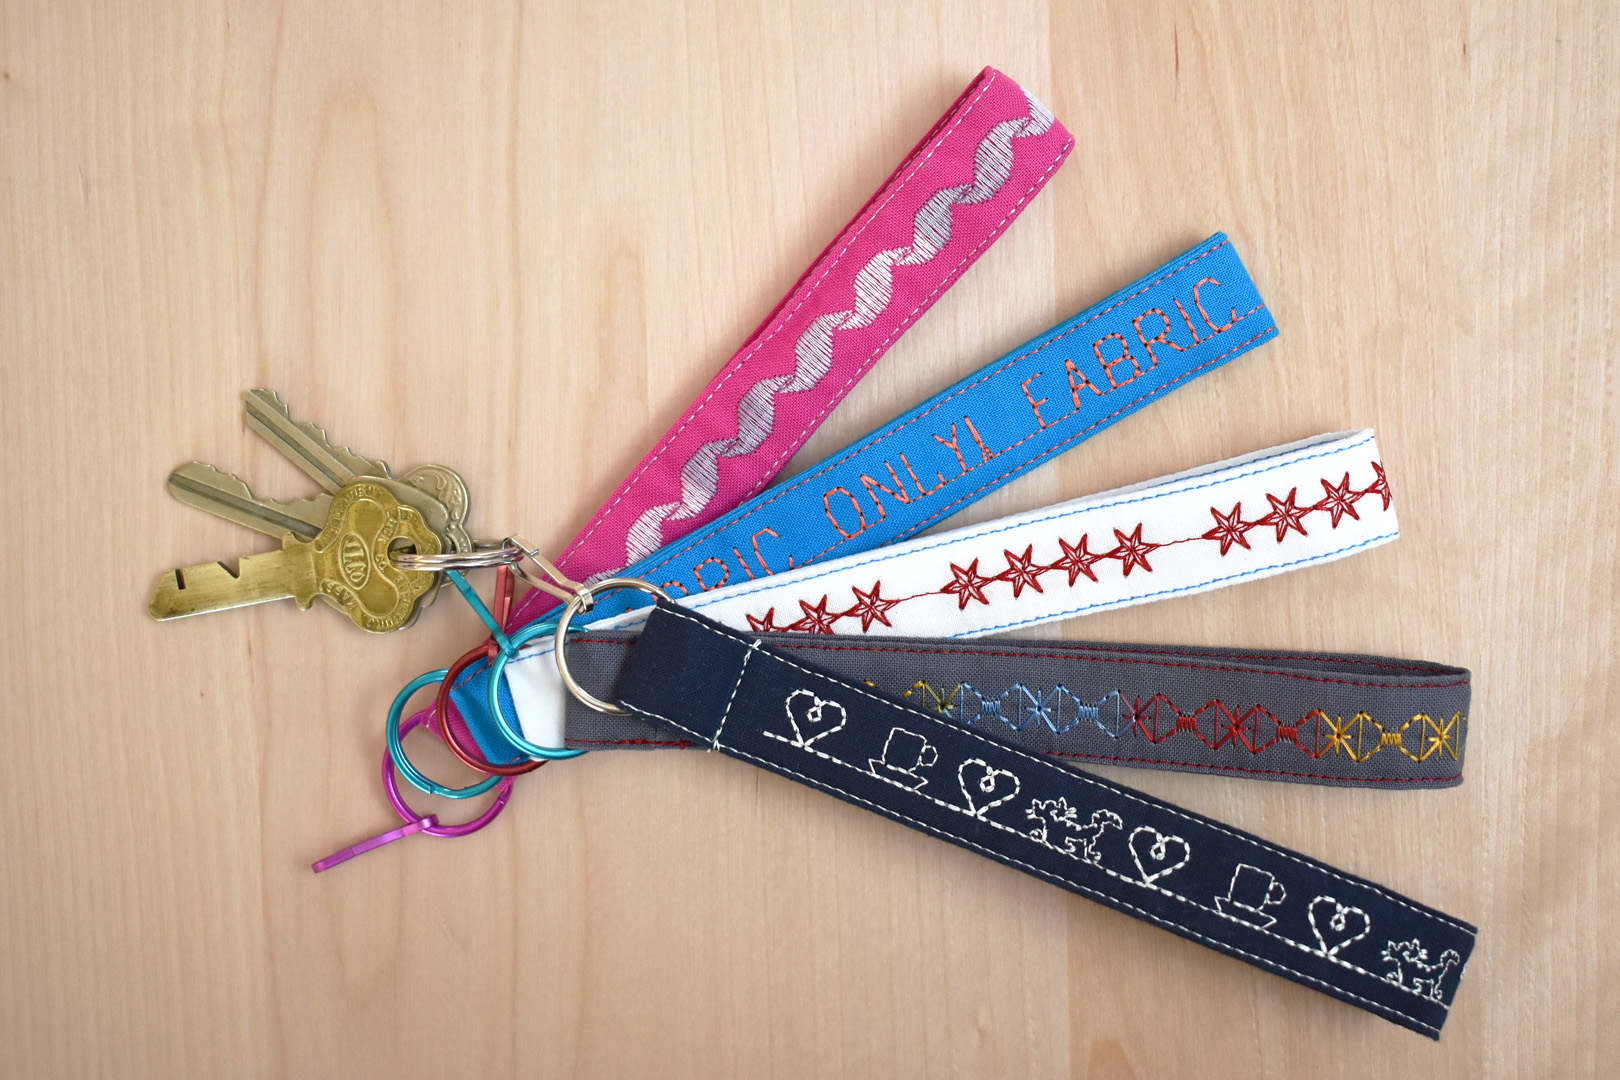
These key holders are so easy to create and personalize, they make great little gifts for any person – and for any occasion.
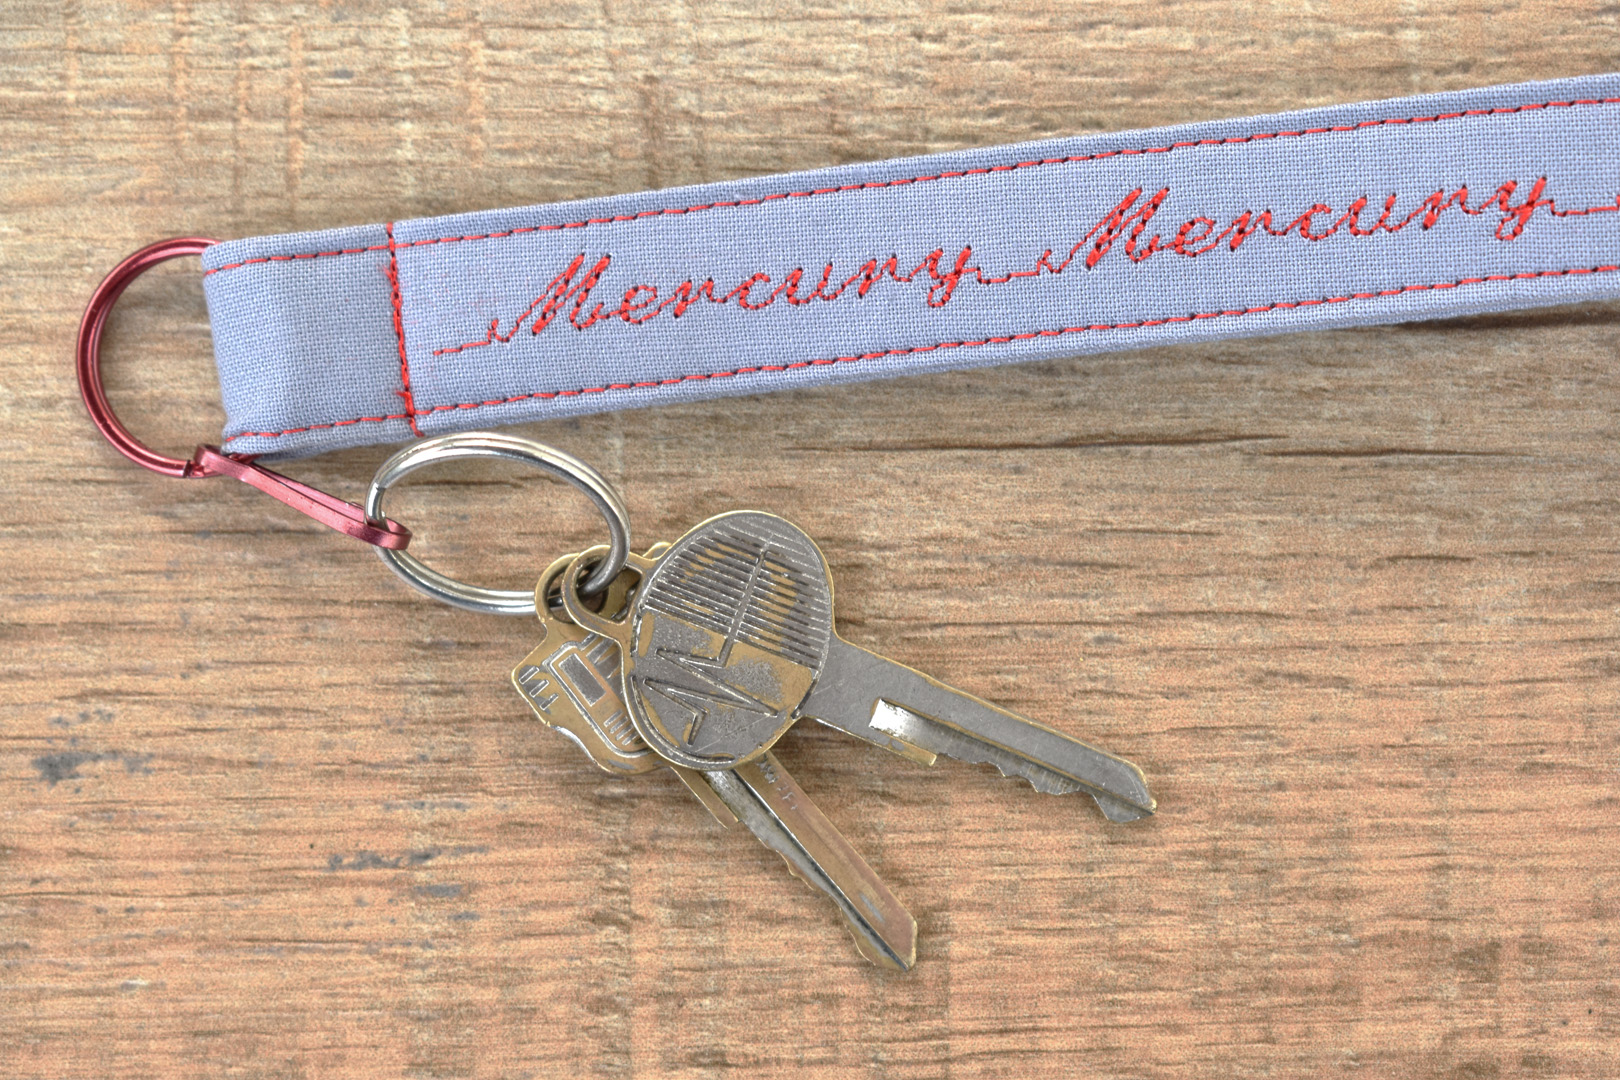
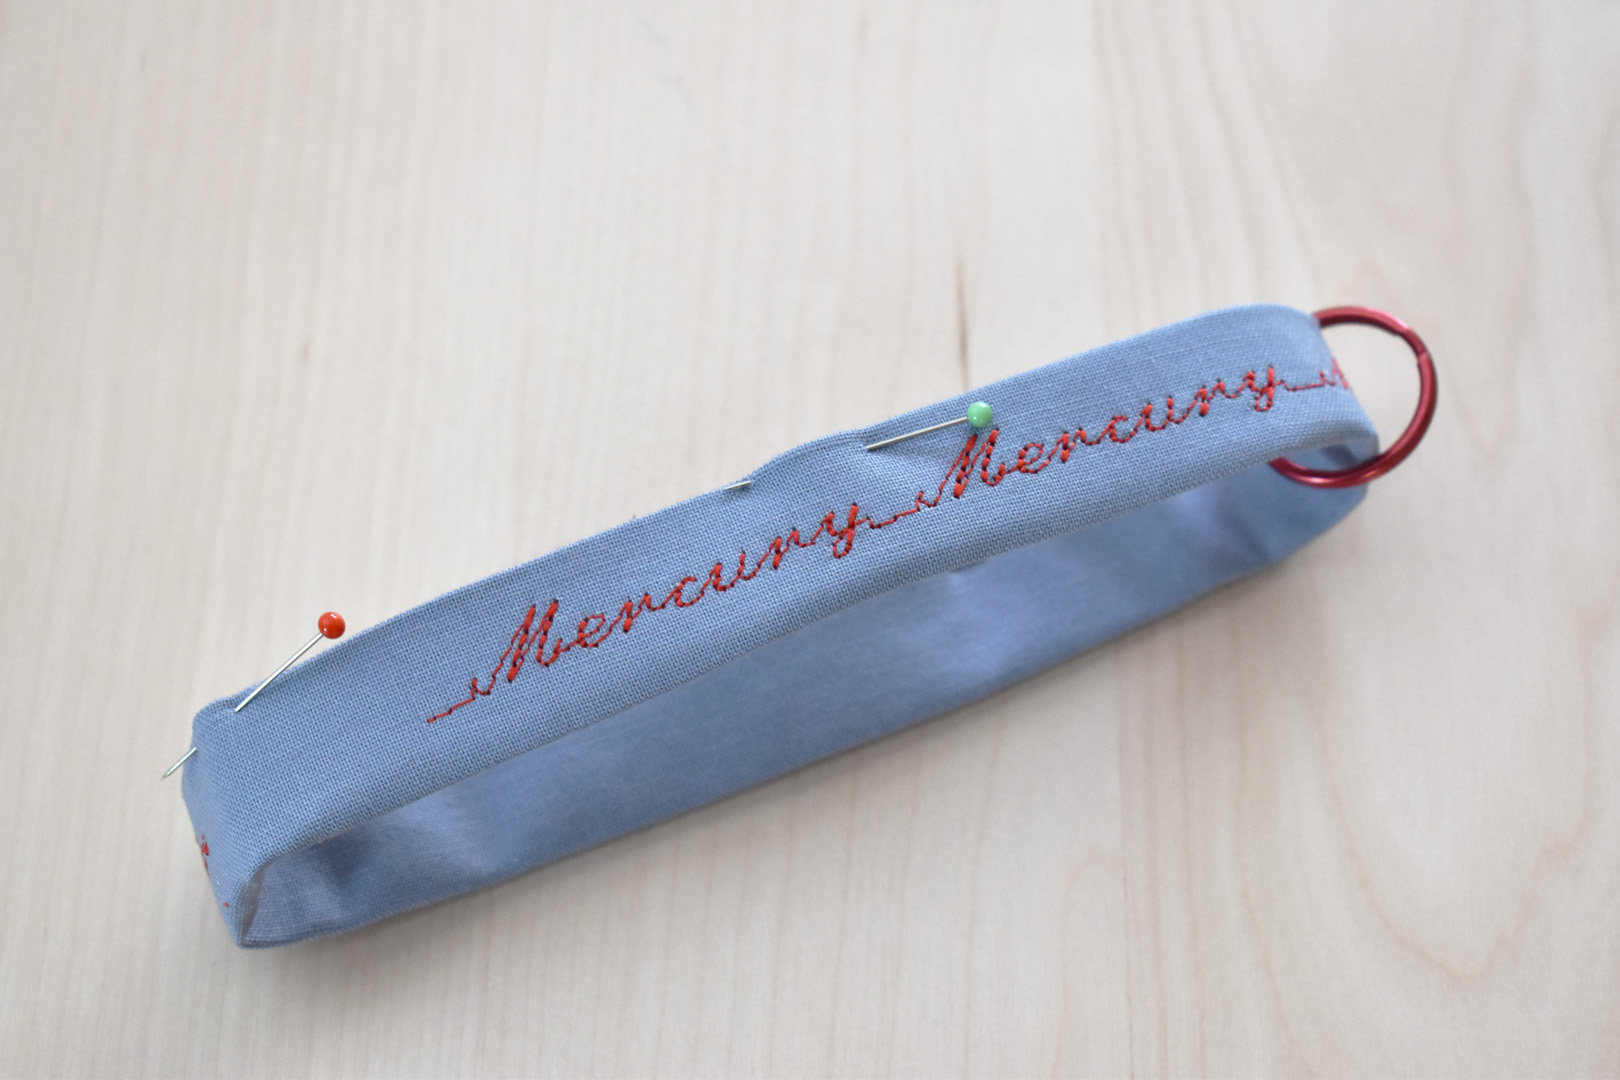
I made one for the keys to my vintage Mercury, and I’ll show you all the steps to make a custom key wristlet of your own. You just need a few specialized presser feet, your sewing machine, and a few other supplies to get started.
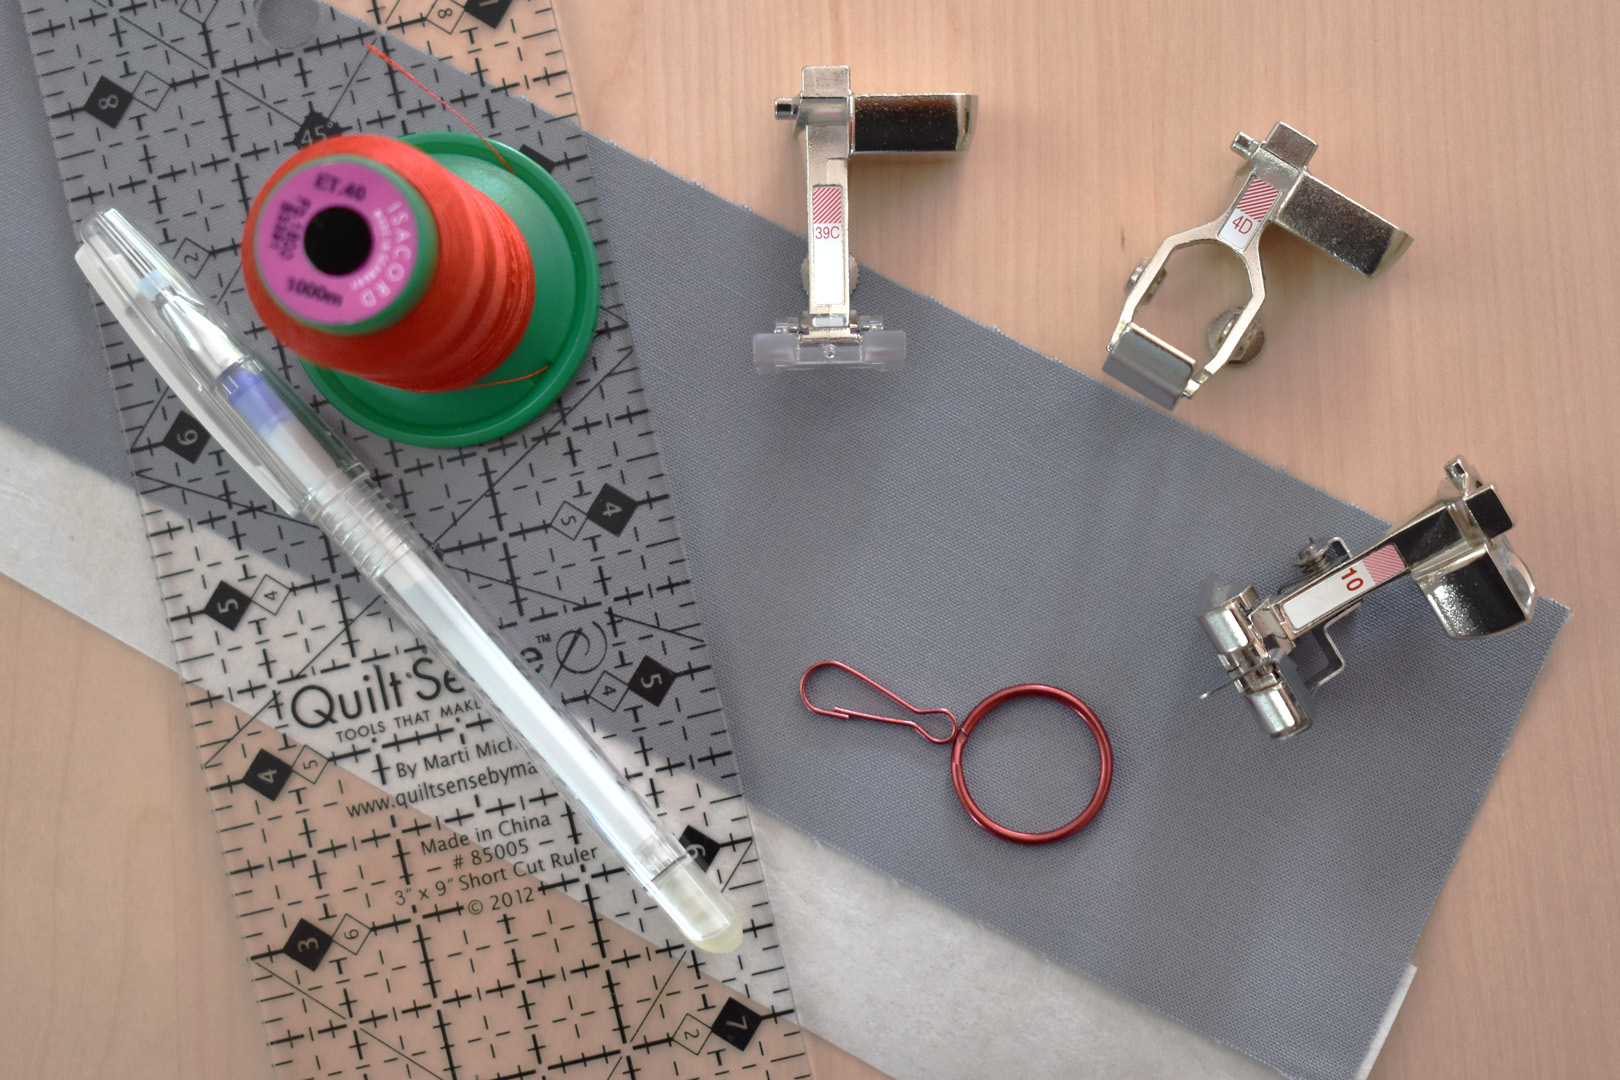
Materials to Make a Customized Key Wristlet
- Sewing machine (I use a BERNINA 570 QE)
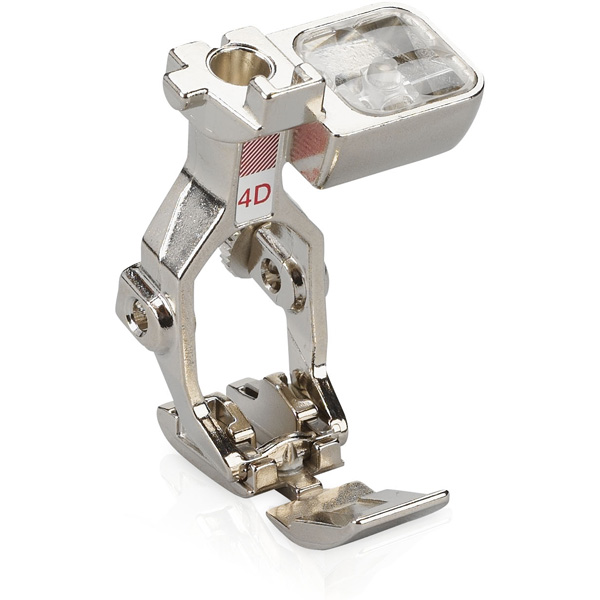
- Embroidery Foot with Clear Sole #39/#39C
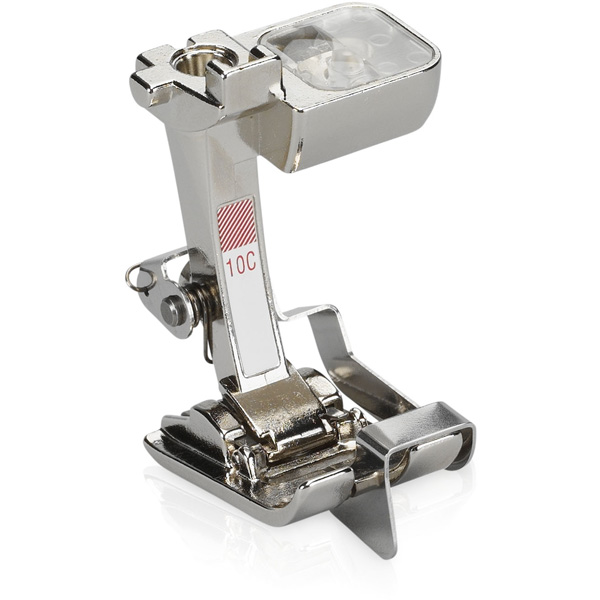
- Edgestitch Foot #10/#10D
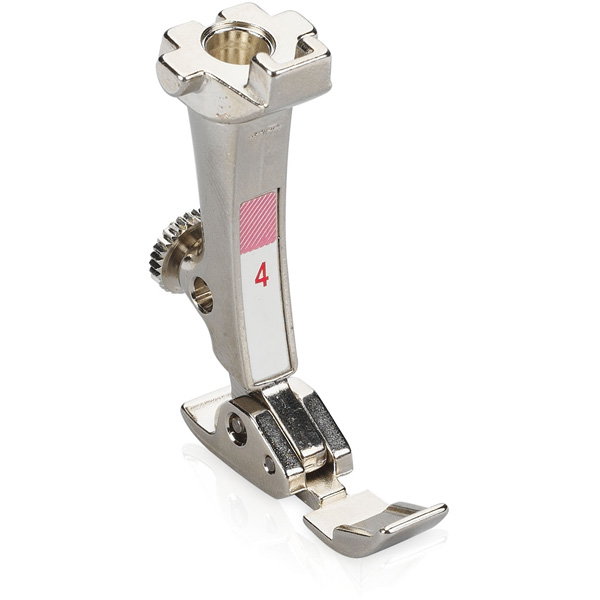
- Zipper Foot #4/#4C/#4D
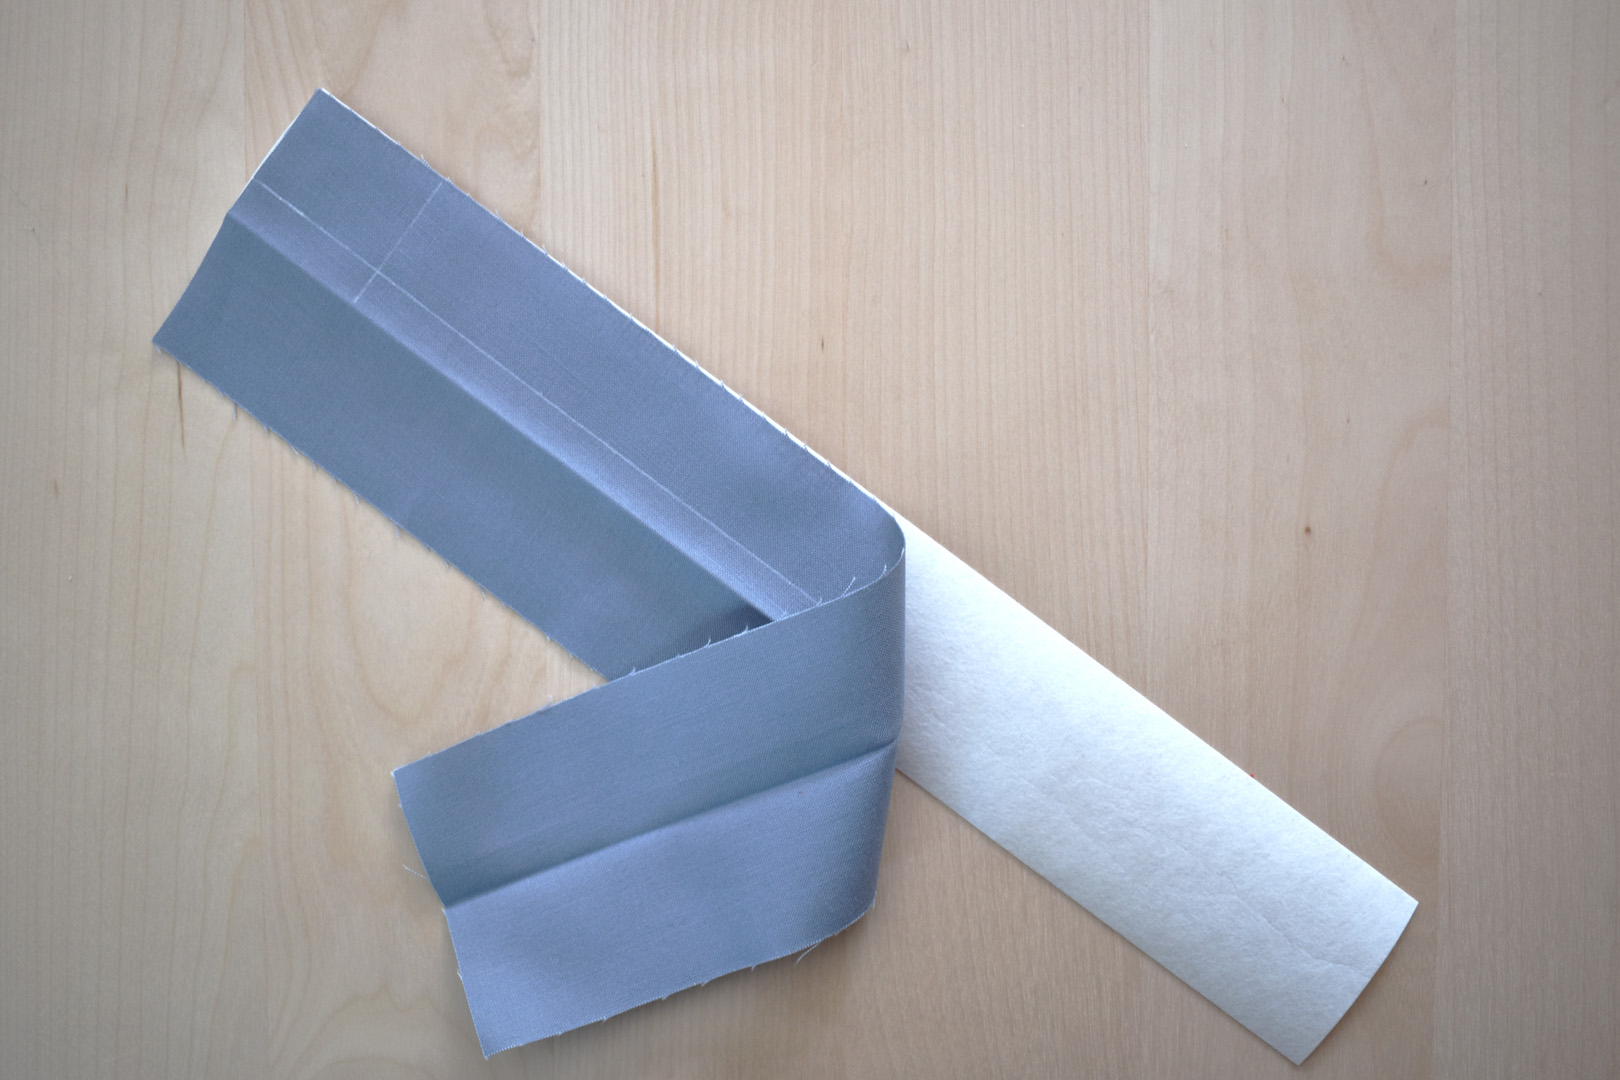
- Scrap of solid colored, medium weight woven cotton 3″ x 13″
- Medium weight cut-away stabilizer
- Rotary cutter, cutting mat, and ruler
- Iron and pressing surface
- Fabric marking pen/pencil and clear ruler
- 3/4″ split ring and lanyard clasp
- Good quality 100% polyester embroidery thread
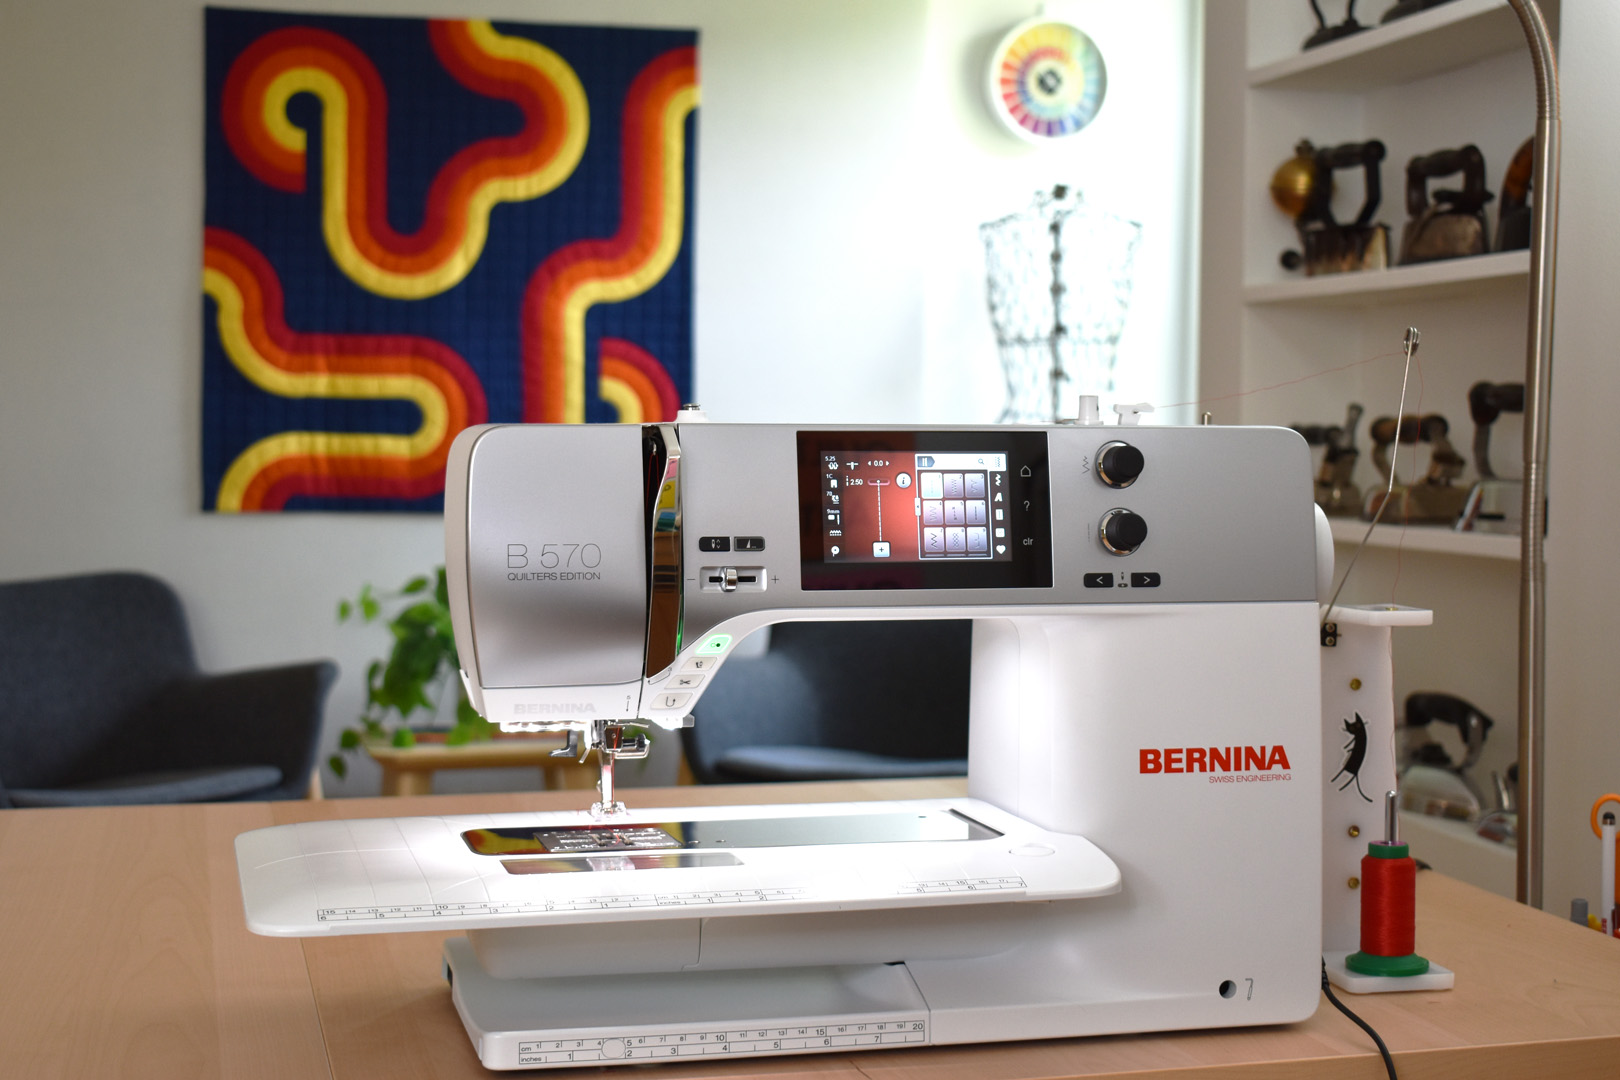
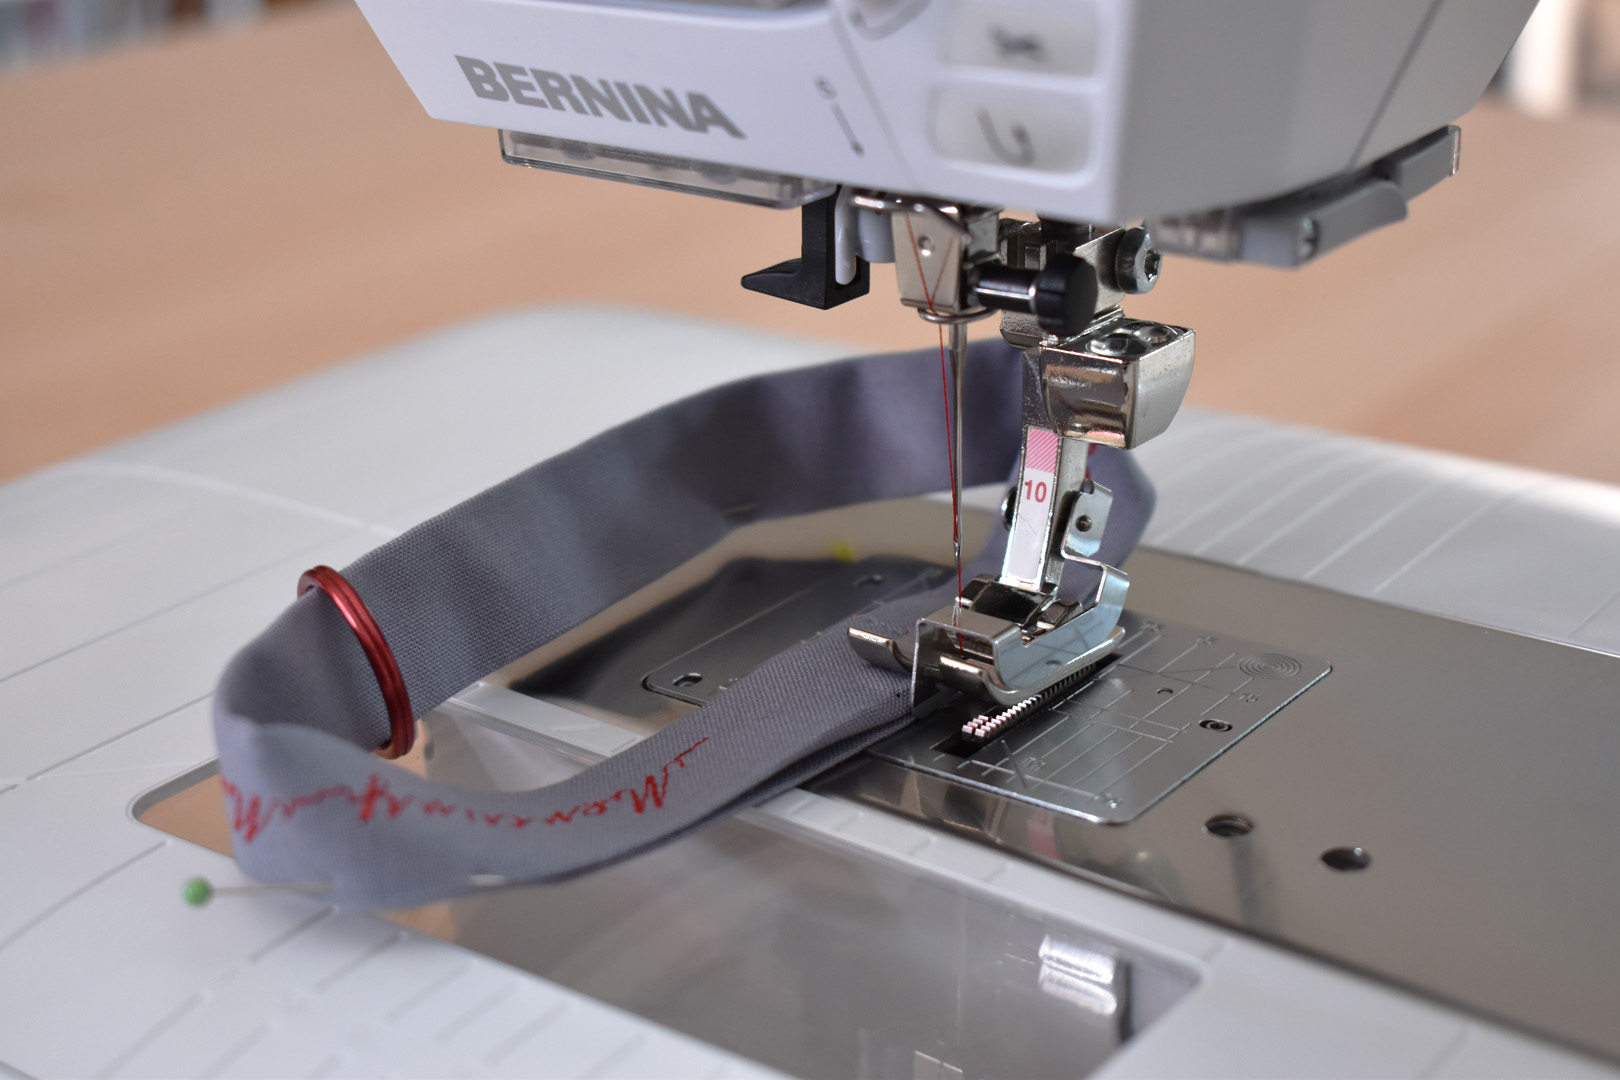
Set up your sewing machine for decorative stitching. I’m using a clear foot with markings to help guide the stitches, the Embroidery foot with clear sole #39C. Read more about Embroidery Foot #39C and decorative stitches in this tip post here at WeAllSew.
Cut your scrap of fabric to exactly 3″ wide and 13″ long. It’s best to use a solid-colored fabric so the stitches will really show up. Decorative stitches will disappear into a busy fabric print.
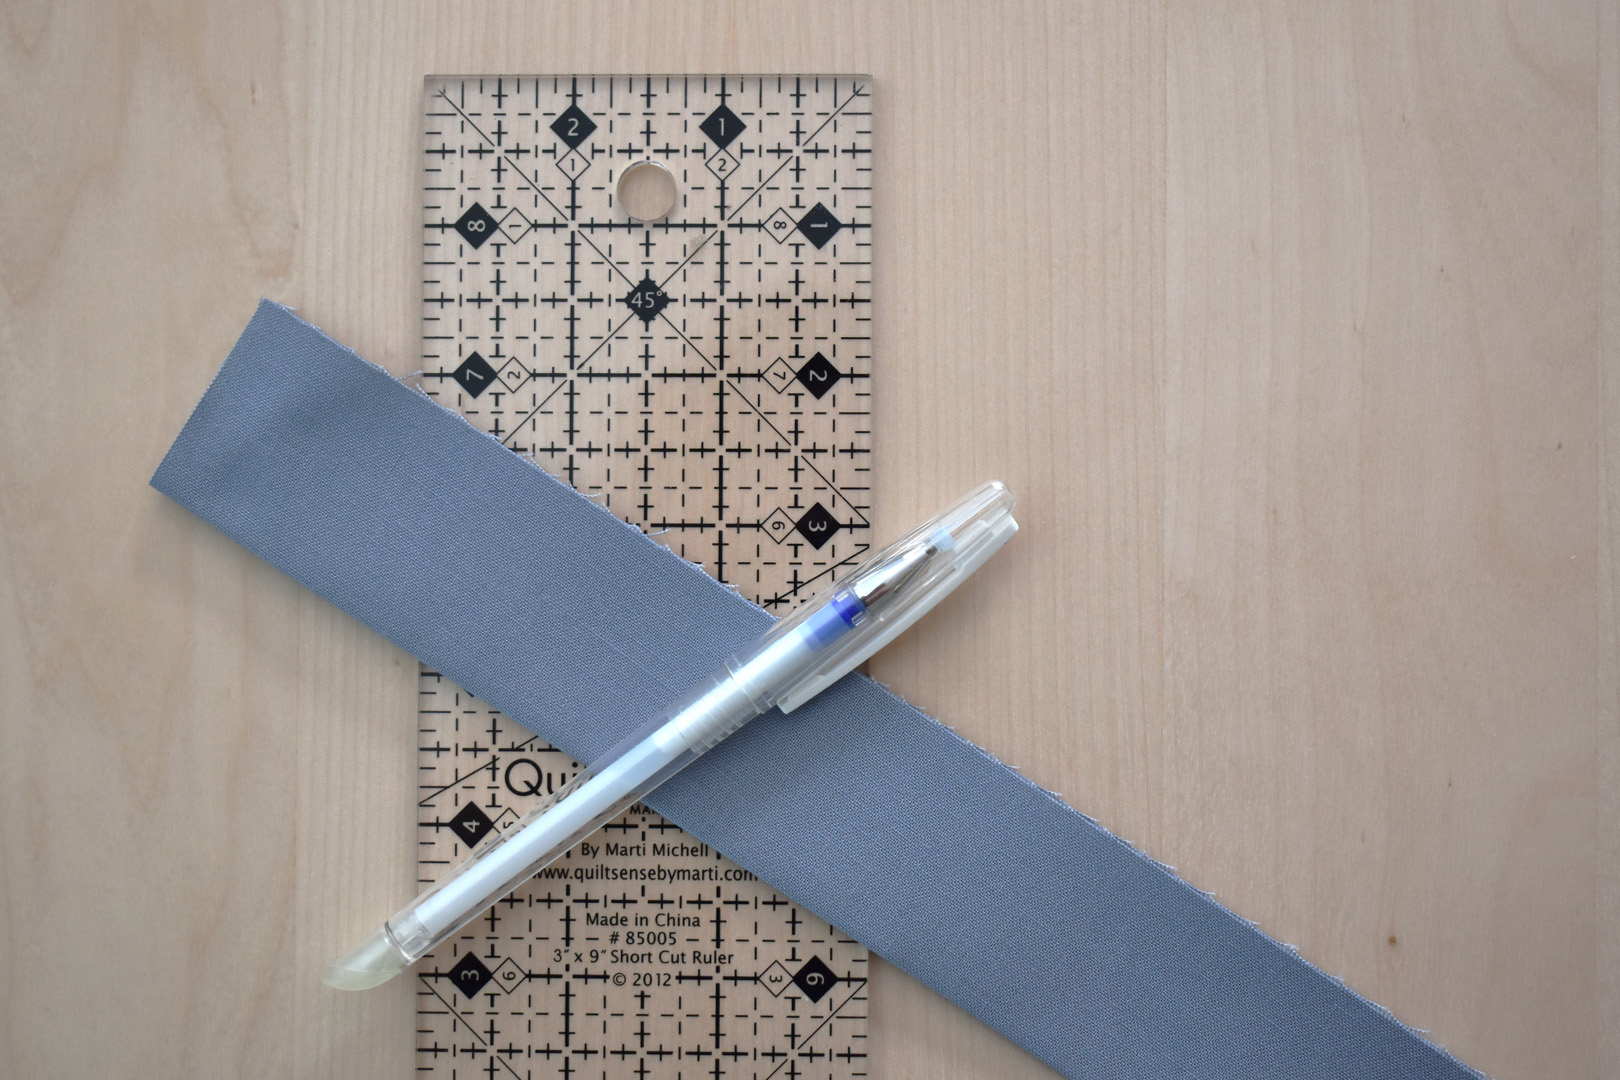
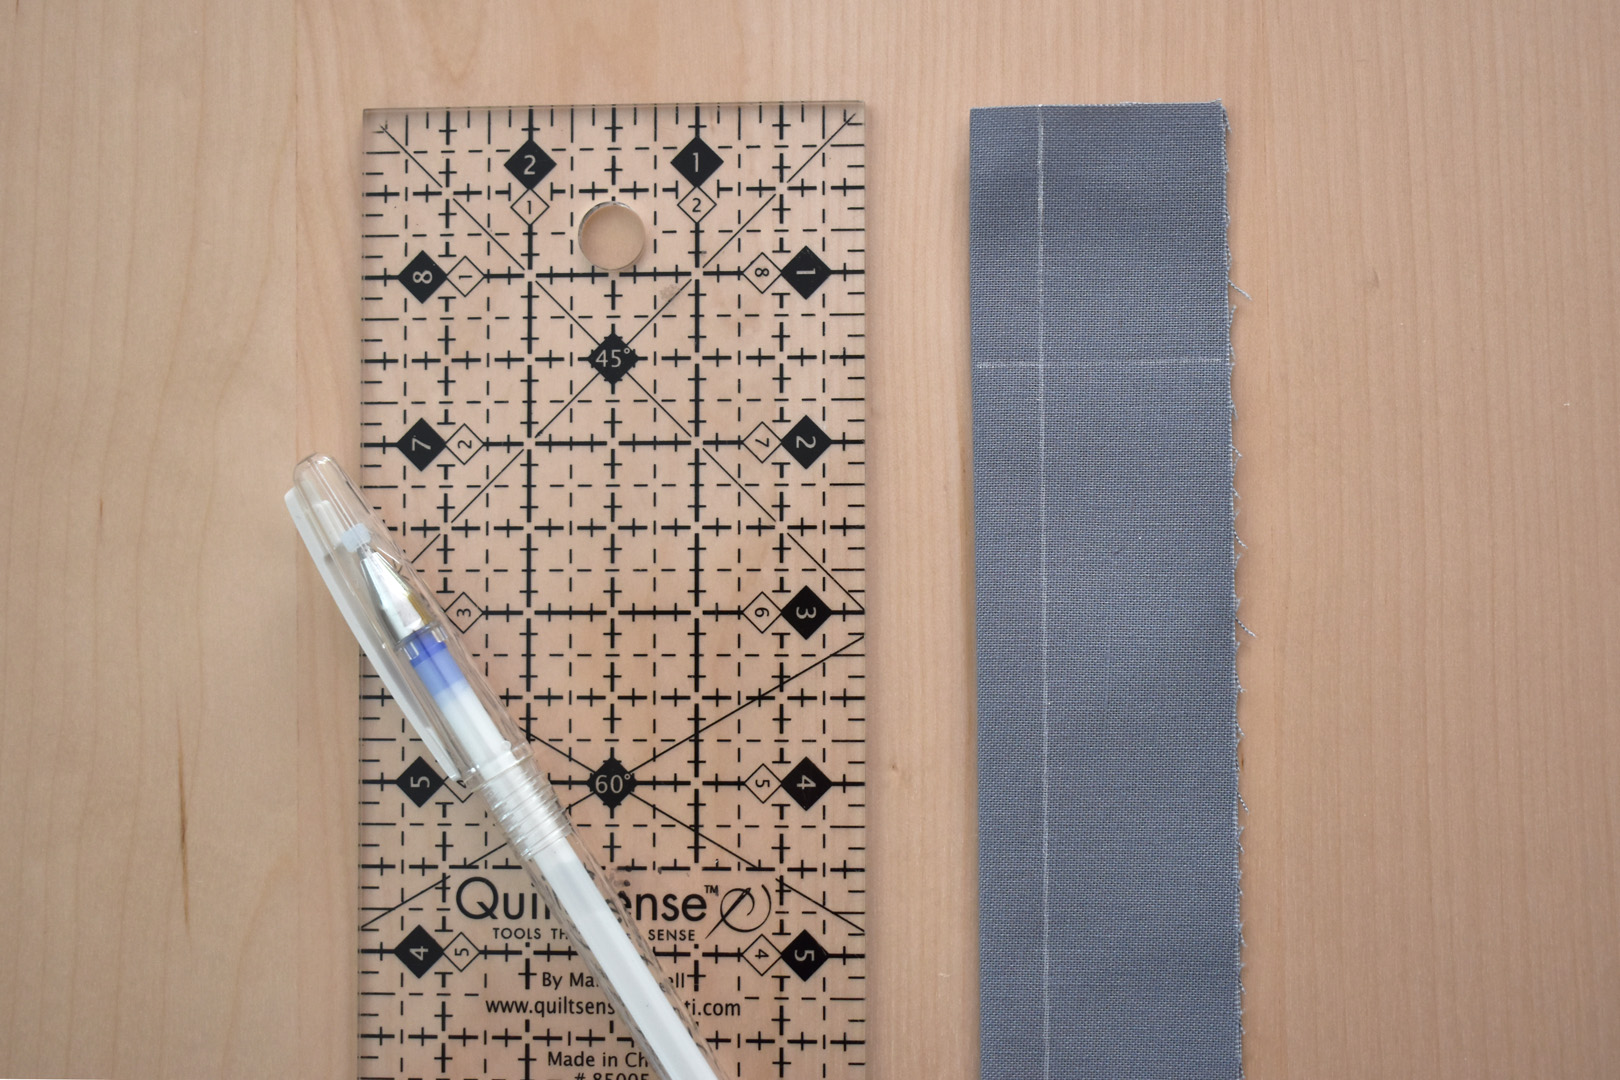
Fold the fabric strip in half the long way, matching up raw edges, and press a good crease down the strip. Use a fabric marking pen or pencil that will disappear from your fabric for this step. Be sure to test the pen or pencil first on a scrap to make sure it will thoroughly disappear.

Find the “eighths” marks on your ruler, and line up the 3/8″ mark along the folded edge of the strip. Mark 3/8″ line from the folded edge down the full length of the strip.
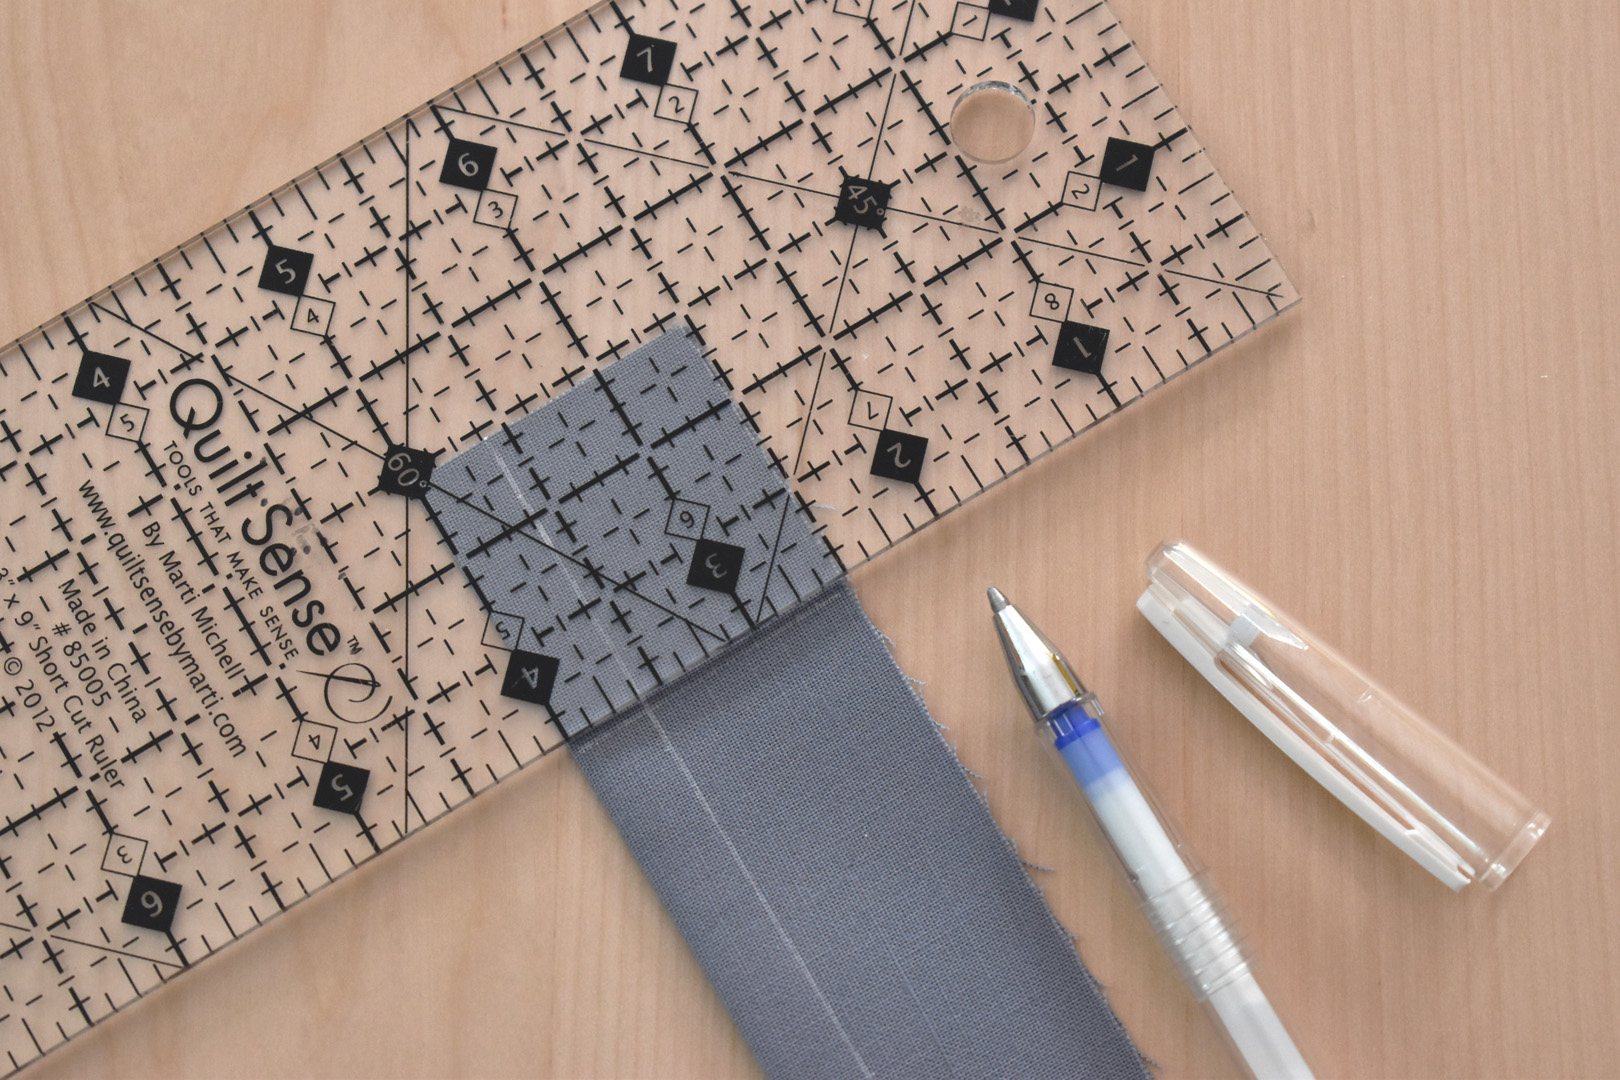
Next, mark a straight line 1 1/2″ down from the top of the strip. This will be the starting line for the stitches.
Now that the strip is ready for adding stitches, it’s time to pick out your decorative stitch design or lettering.
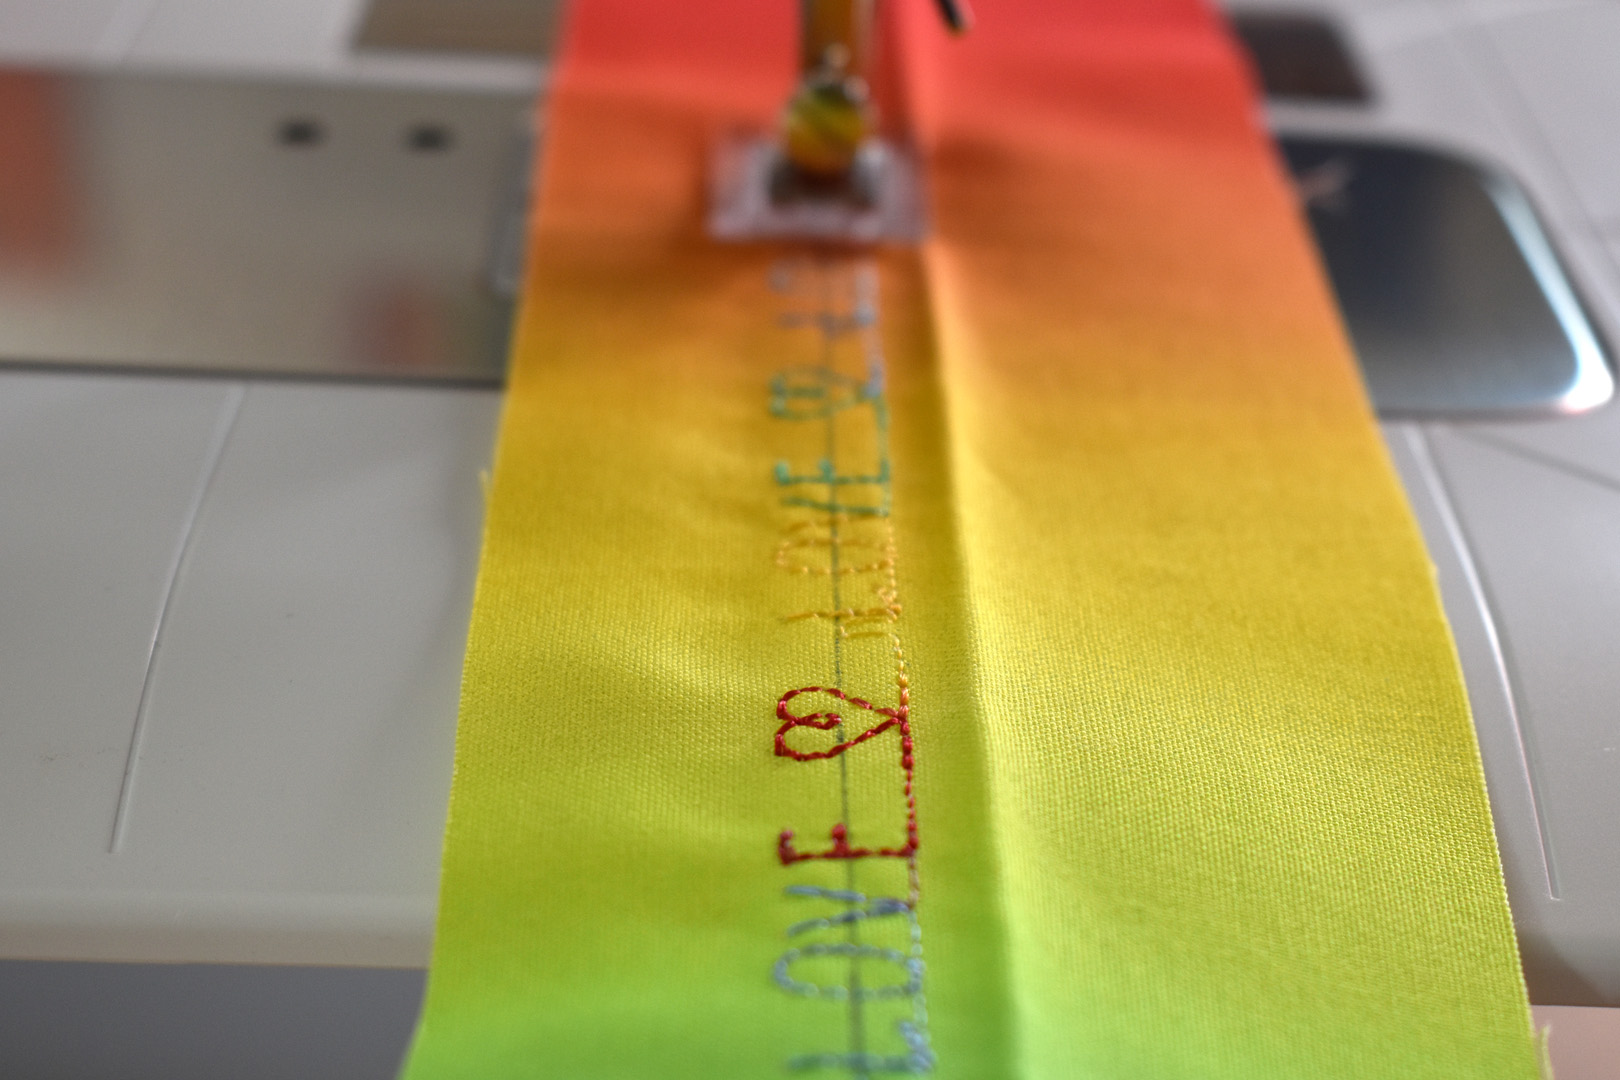
Most BERNINA sewing machines have some built-in decorative stitches, and some include alphabets. The art of combining different, individual stitches in your BERNINA is accomplished using the Memory or Combi mode function. To find out how to use the Combi mode feature to create these “stitch recipes” take a look in your user’s manual. You can read more about making stitch recipes in this BERNINA Just Sew It! online class. Or watch this BERNINA tutorial for using Combi mode on YouTube.
I made a quick video below to show you how I use the Combi mode in my B 570 QE to create the word “Mercury” for my wristlet.
Tip: When creating words or letters to stitch on your key wristlet, begin with a space to give you a stitch or two to work with when pulling the threads to the back in a later step.
Use a 2″ strip of medium-weight cut-away stabilizer under the fabric to help support the stitches (so the fabric doesn’t tunnel or pucker while sewing). The stabilizer will also add some stability to the key wristlet. The 2″ strip is just wide enough to align with the right raw edge of the strip to perfectly support the stitching.
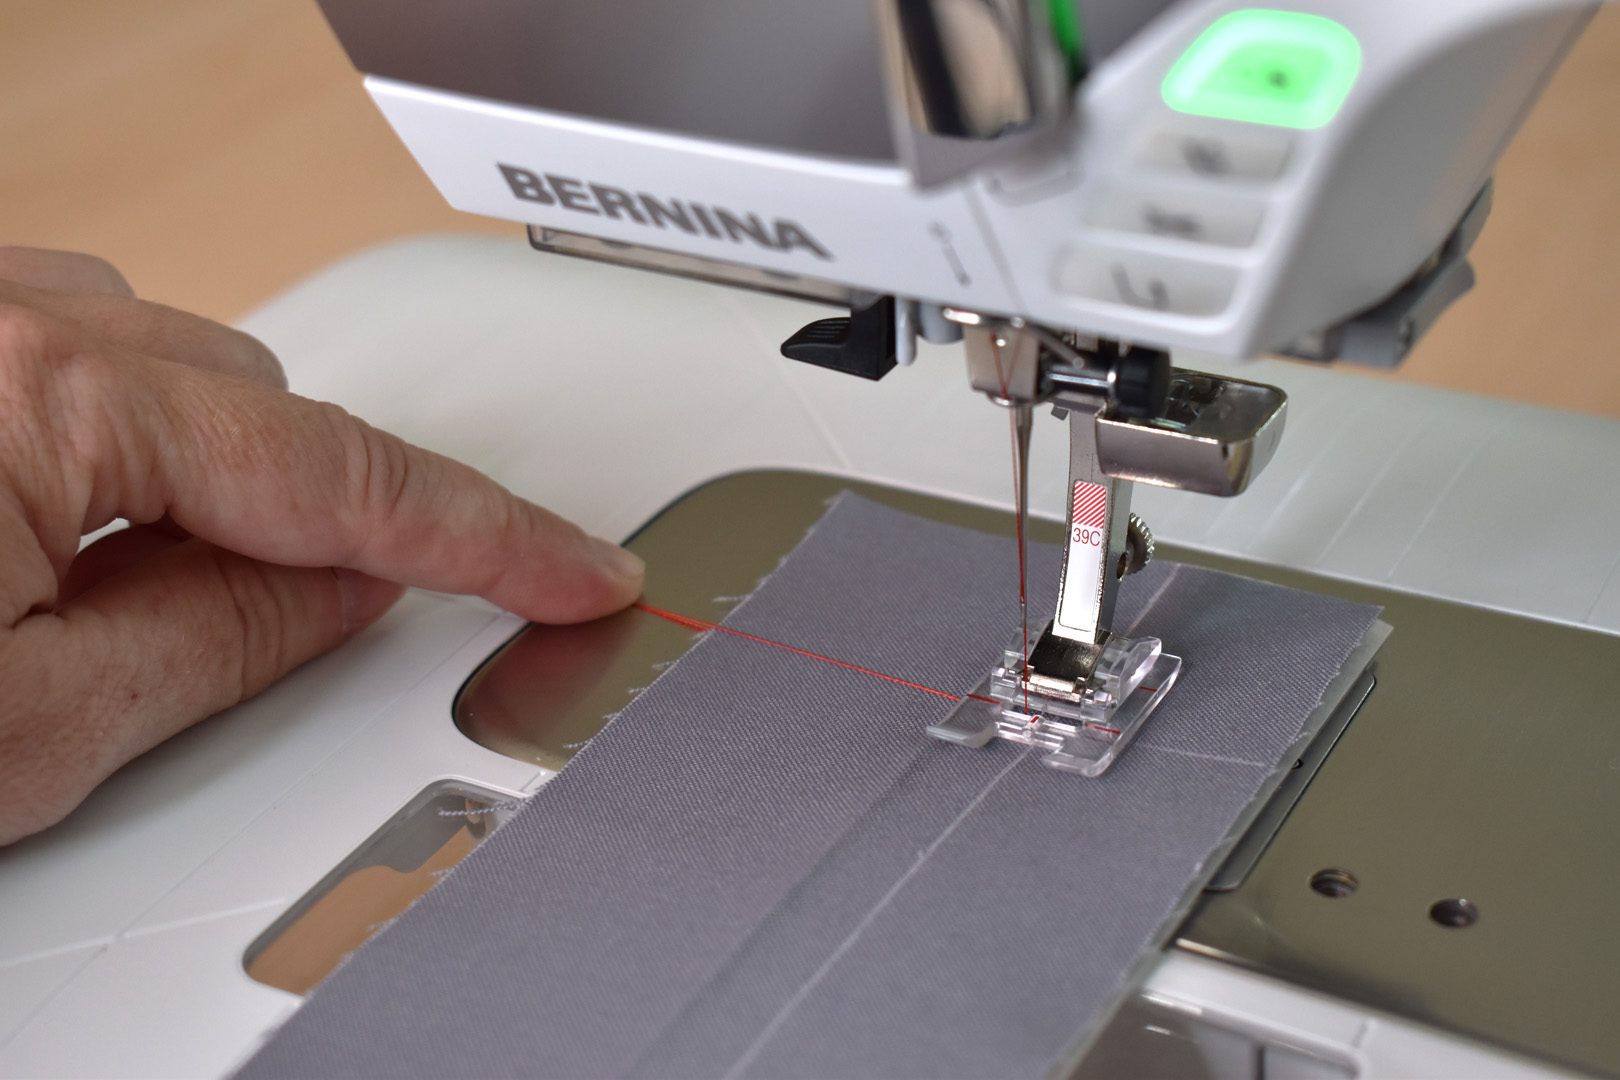
Use the markings on foot #39C to align the foot over the marks on the strip perfectly. Center the front mark with the long line, and the two marks on the side of the foot with the line 1 1/2″ down from the top of the strip. Pull both the top and bobbin threads out to the side and hold them tight as you begin stitching. Stitch all the way to the other end of the strip.
When sewing decorative stitches, your job is to very gently guide the fabric to make sure the center mark of the foot stays on the centerline drawn on the fabric.
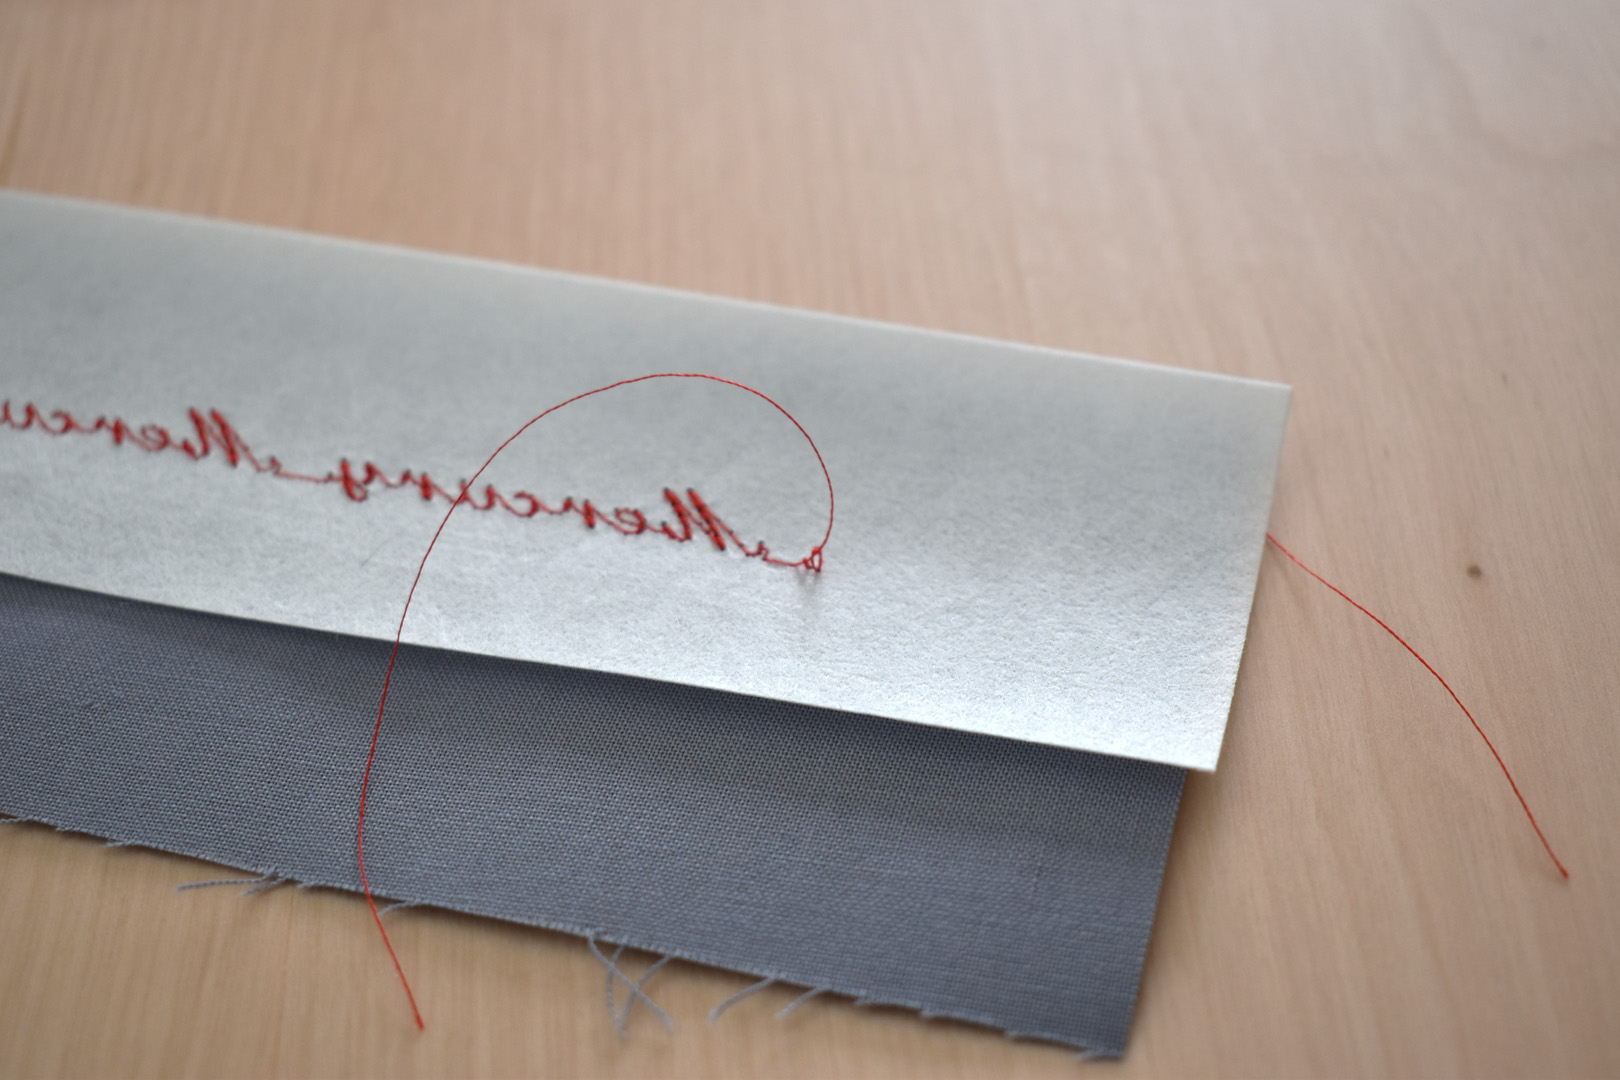
Flip the fabric over to the back after stitching, and pull up on the bobbin thread. This will form a loop with the needle thread. Pull up on the needle thread and pull it all the way to the back of the project.
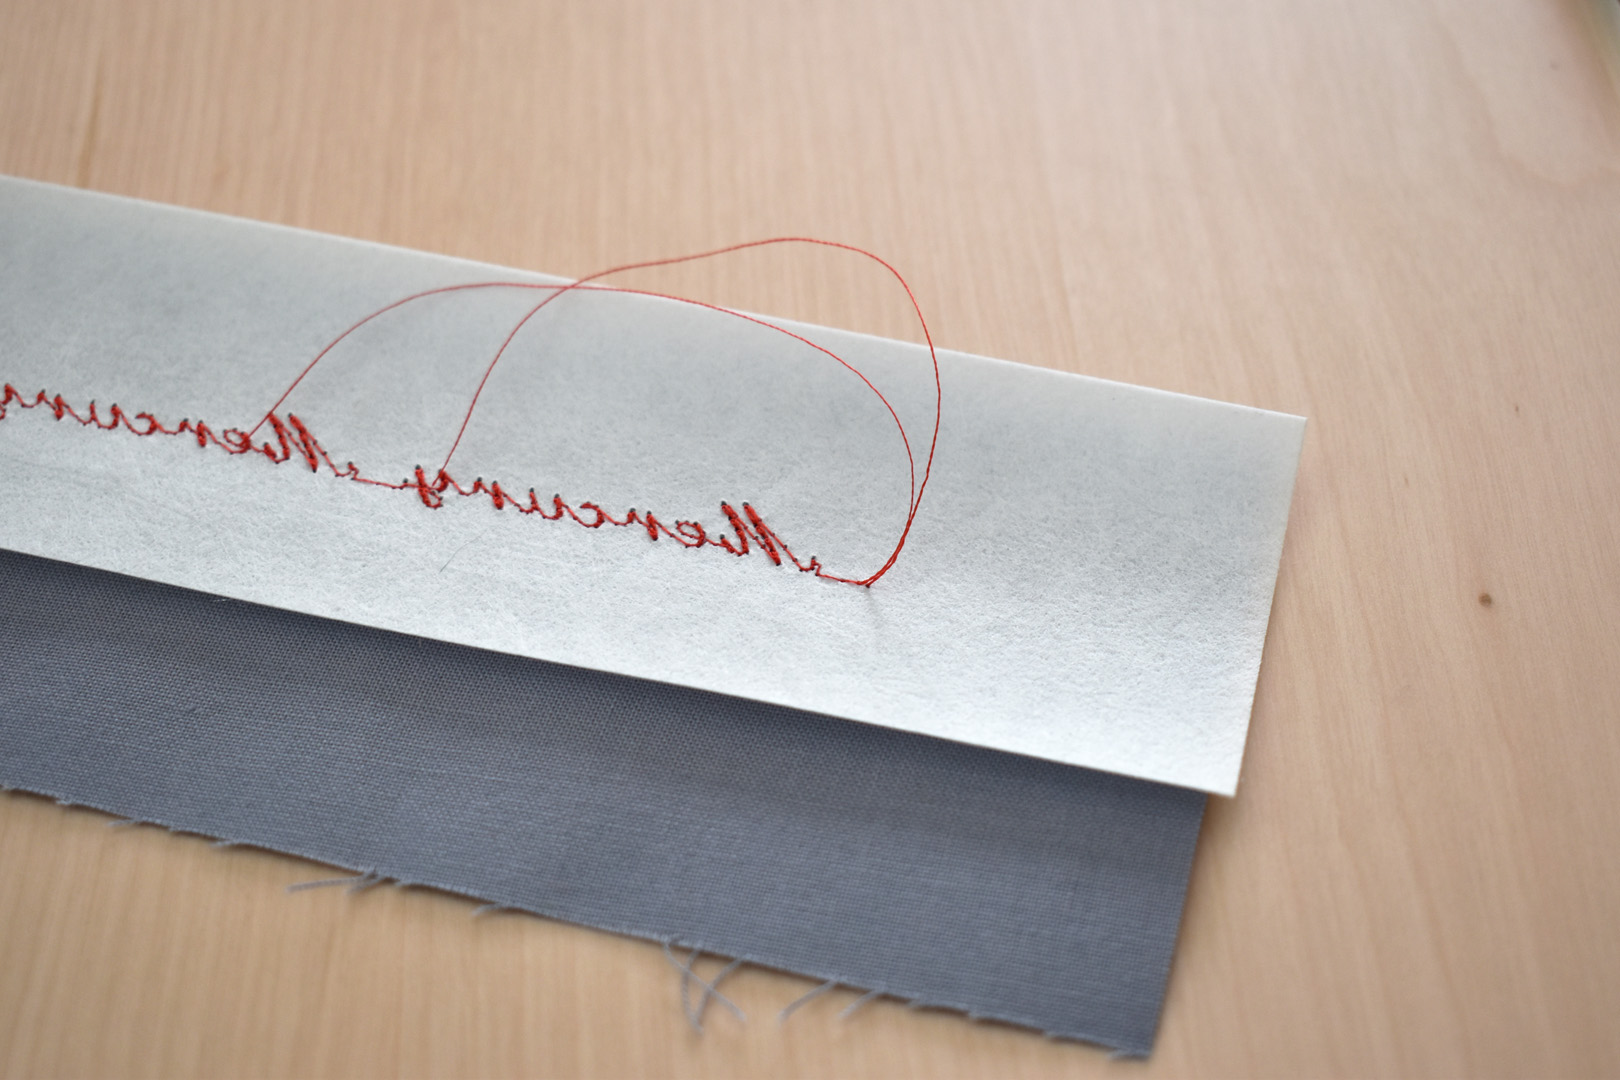
Tie a secure knot with the two threads. You can either leave the threads as-is and fold them into the wristlet, or cut the threads down to about 1/2″ away from the knot.
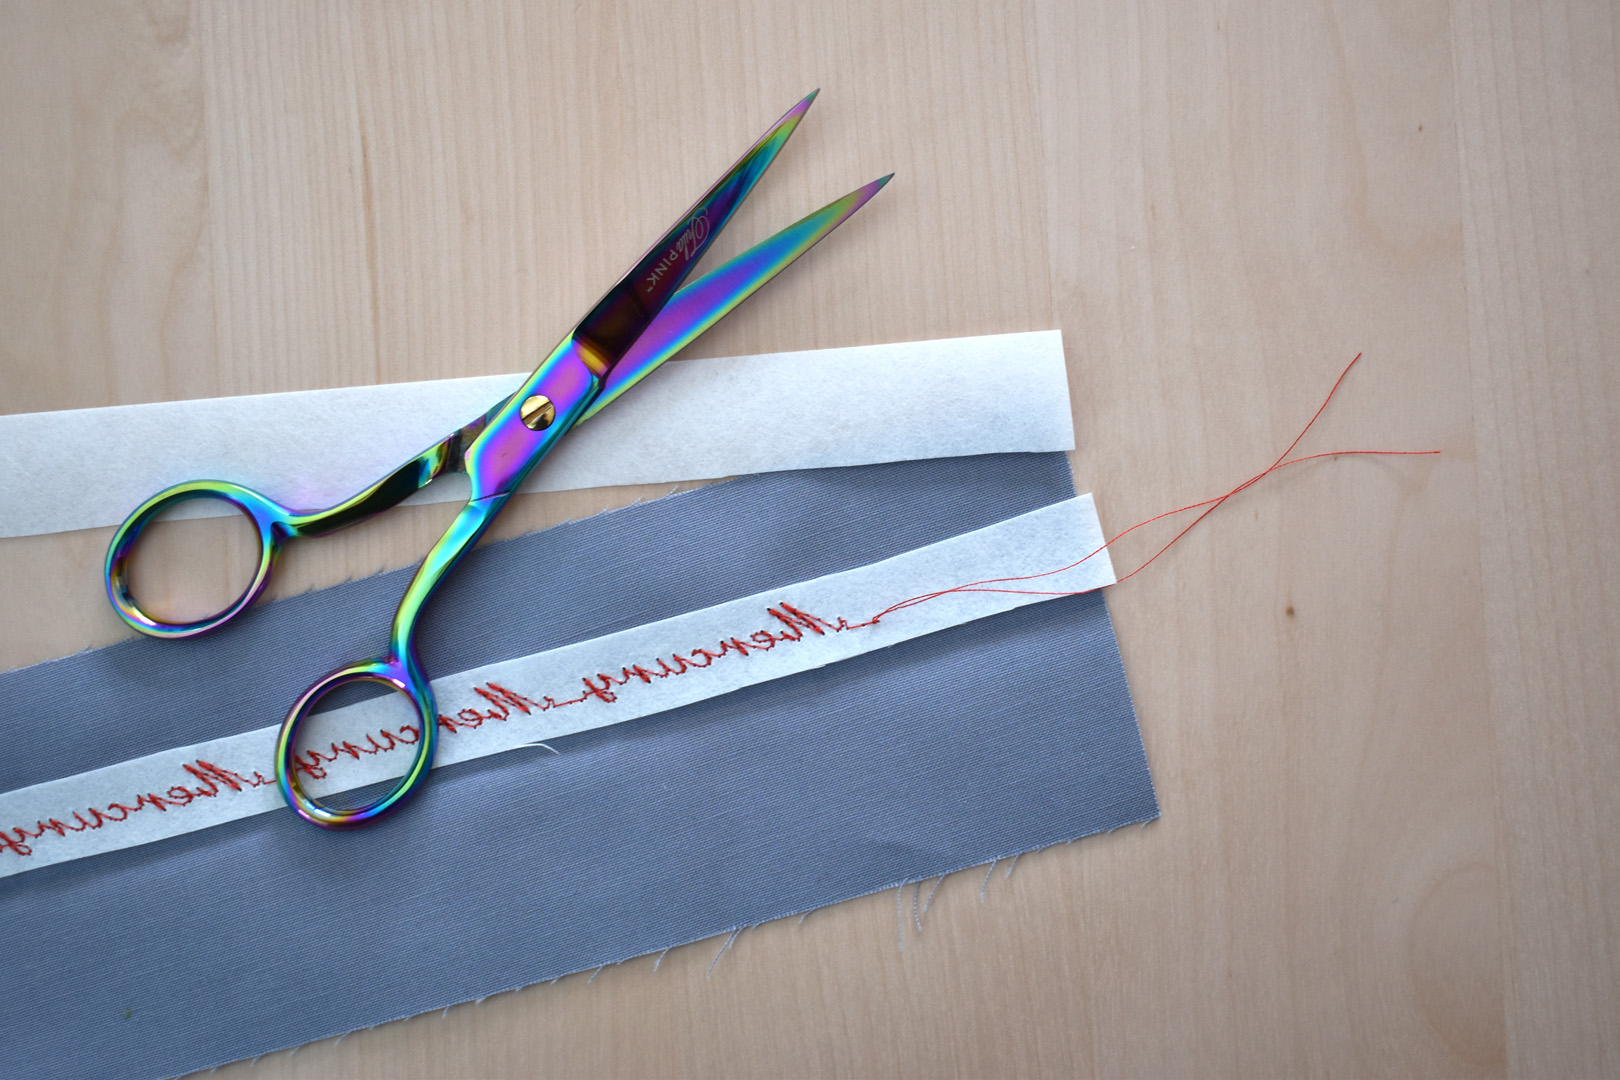
Cut the extra stabilizer away from the top and bottom of the stitching, all the way to the top end of the strip.
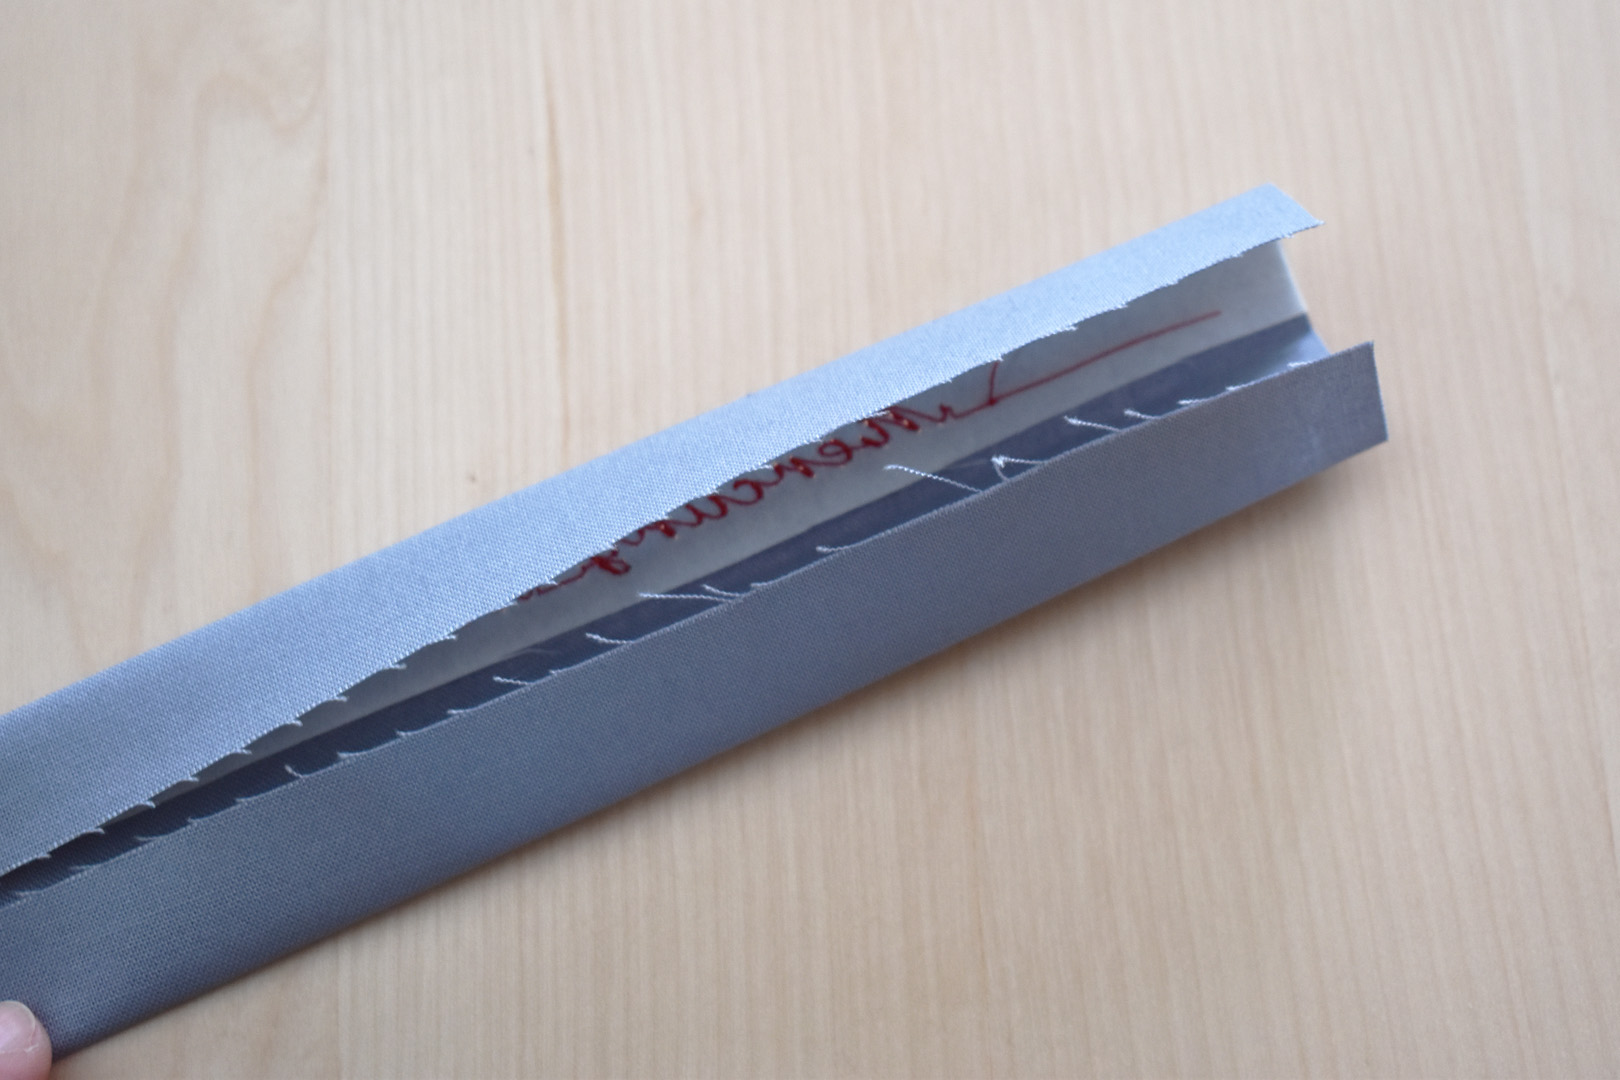
Use your iron to press the two long, raw edges in to meet the original crease line in the center of the strip. The stabilizer should be cut short enough to allow for easy folding over of the strip – if you find there is some stabilizer still in the way, trim shorter before pressing.
The strip should easily fold over to create a 1/2″ strip with the stitches centered in the strip. Press the strip well. If you are using a fabric marking pen that disappears with heat, the lines should vanish during this step.
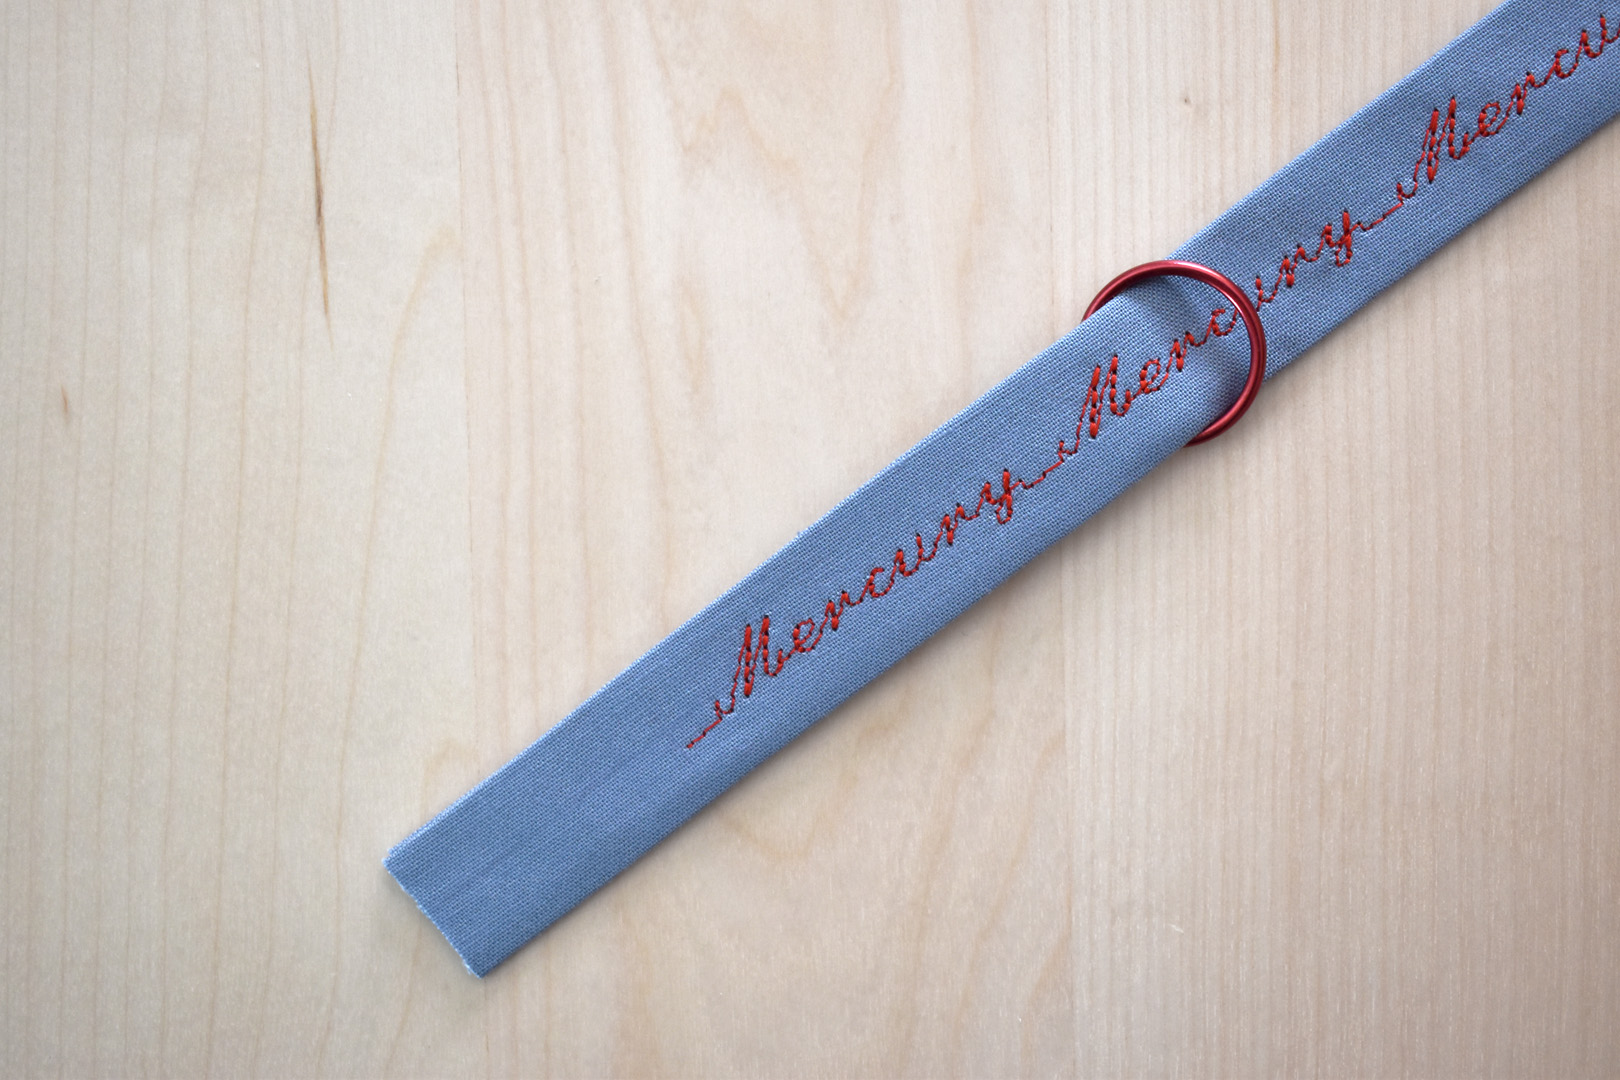
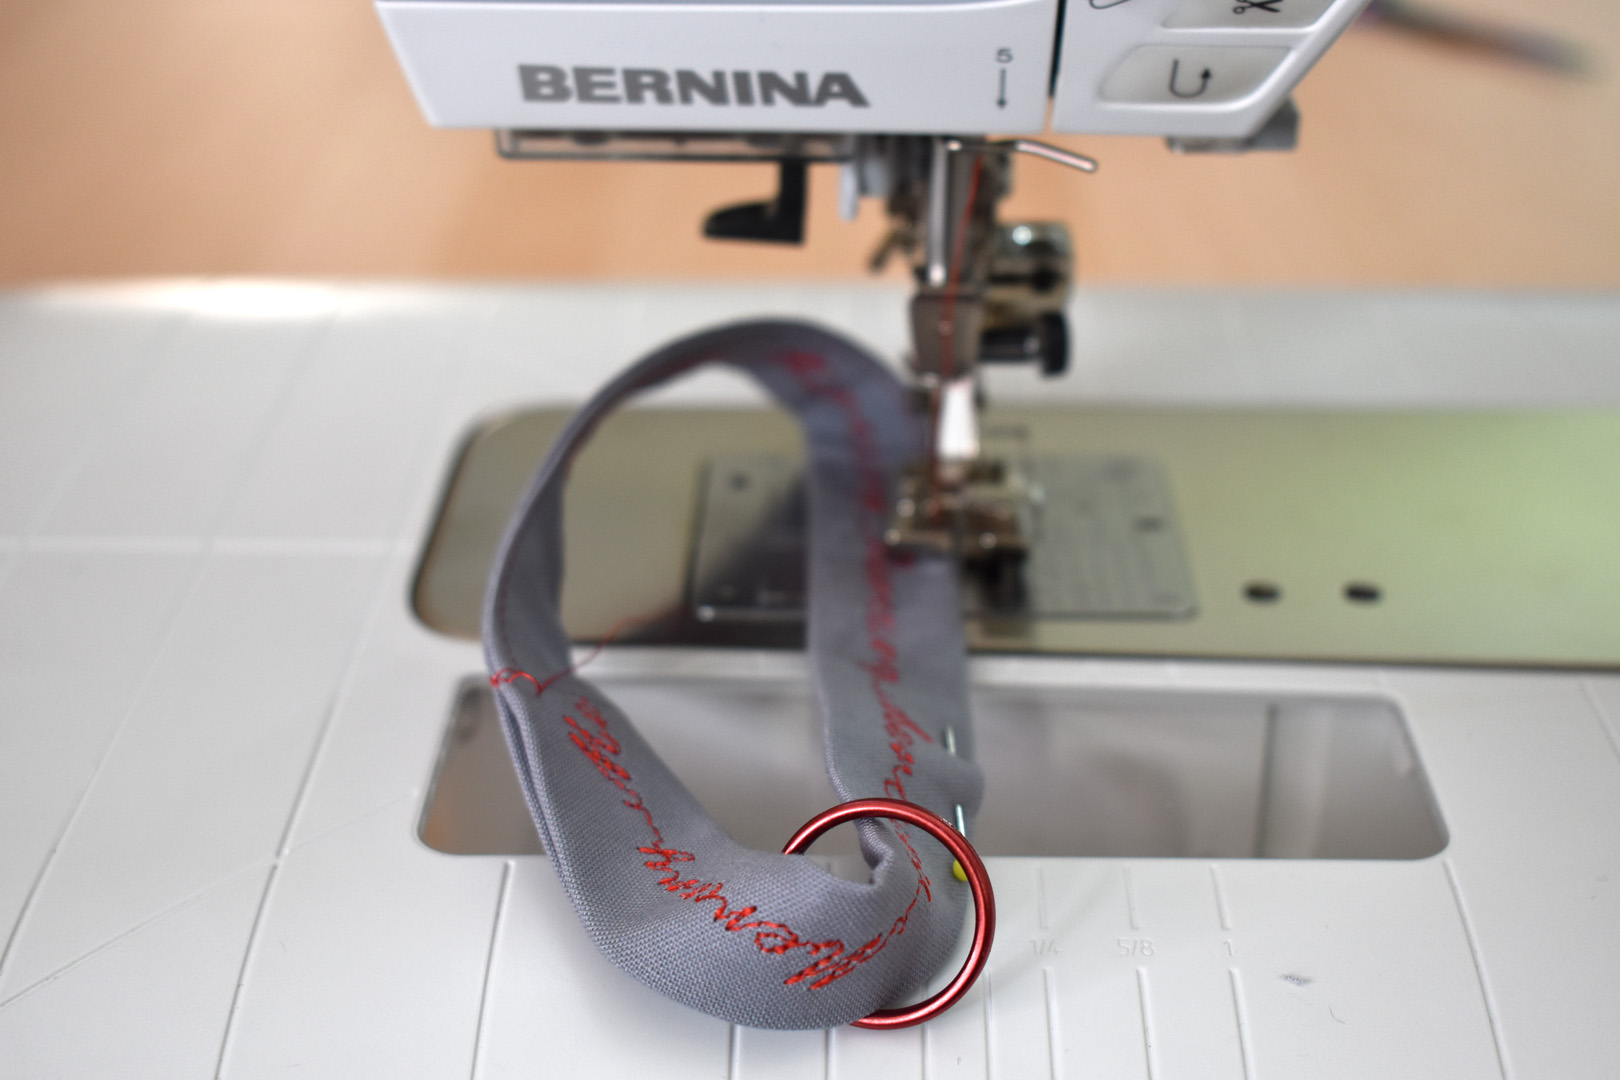
Feed the folded strip through the 3/4″ split ring.
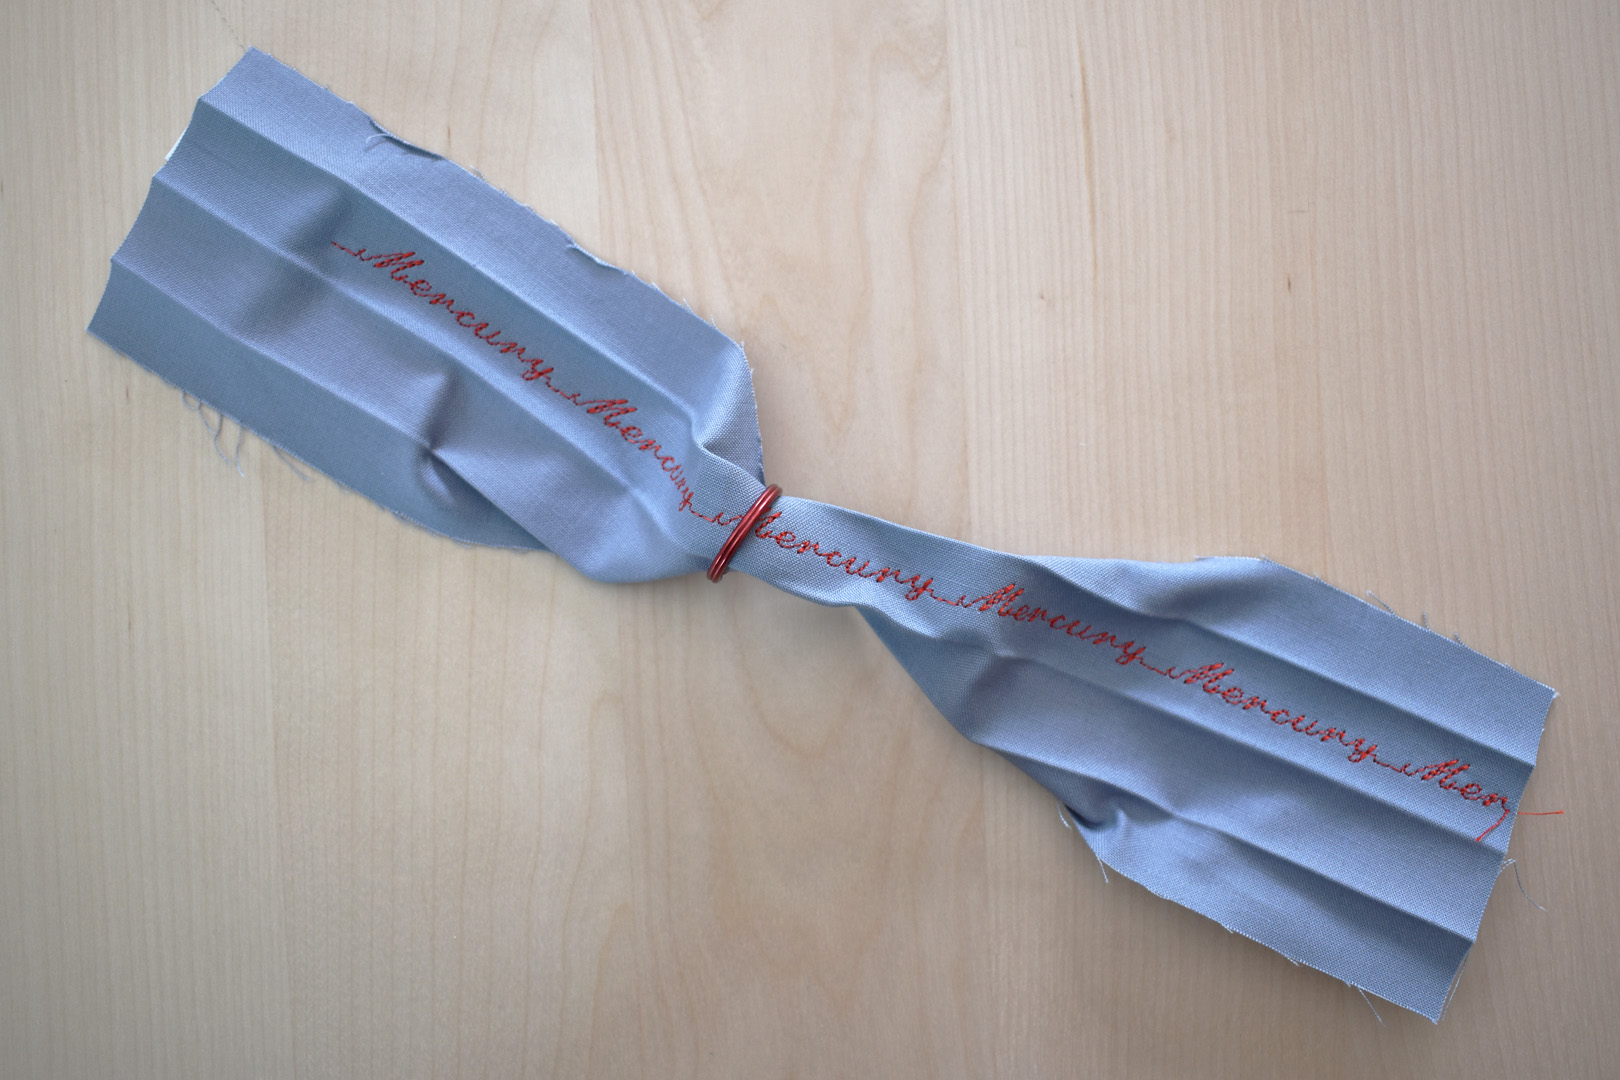
With the split ring in the center of the strip, unfold both ends.
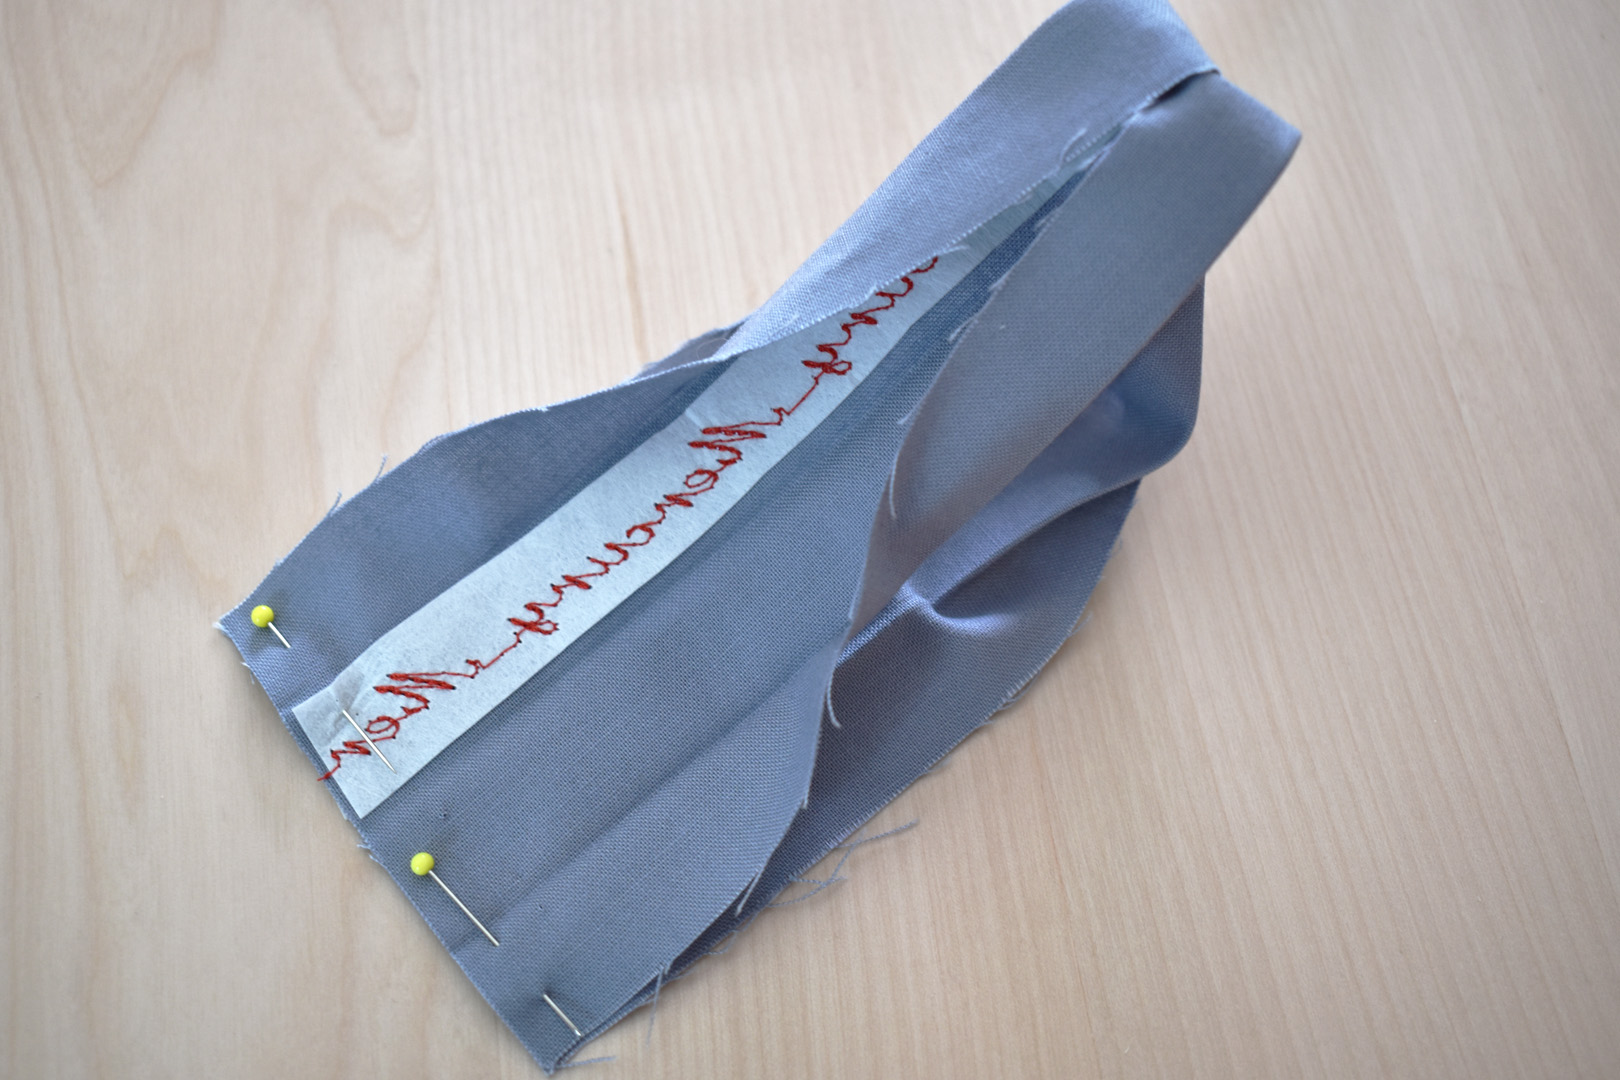
Fold the open ends right sides together, matching the raw edge. Pin together, making sure not to twist the strip.
Stitch across ends with a 1/4″ seam.
Using your fingers, gently press the seam open and re-fold the strip together.
Place a few pins in the folded strip to hold it in place.
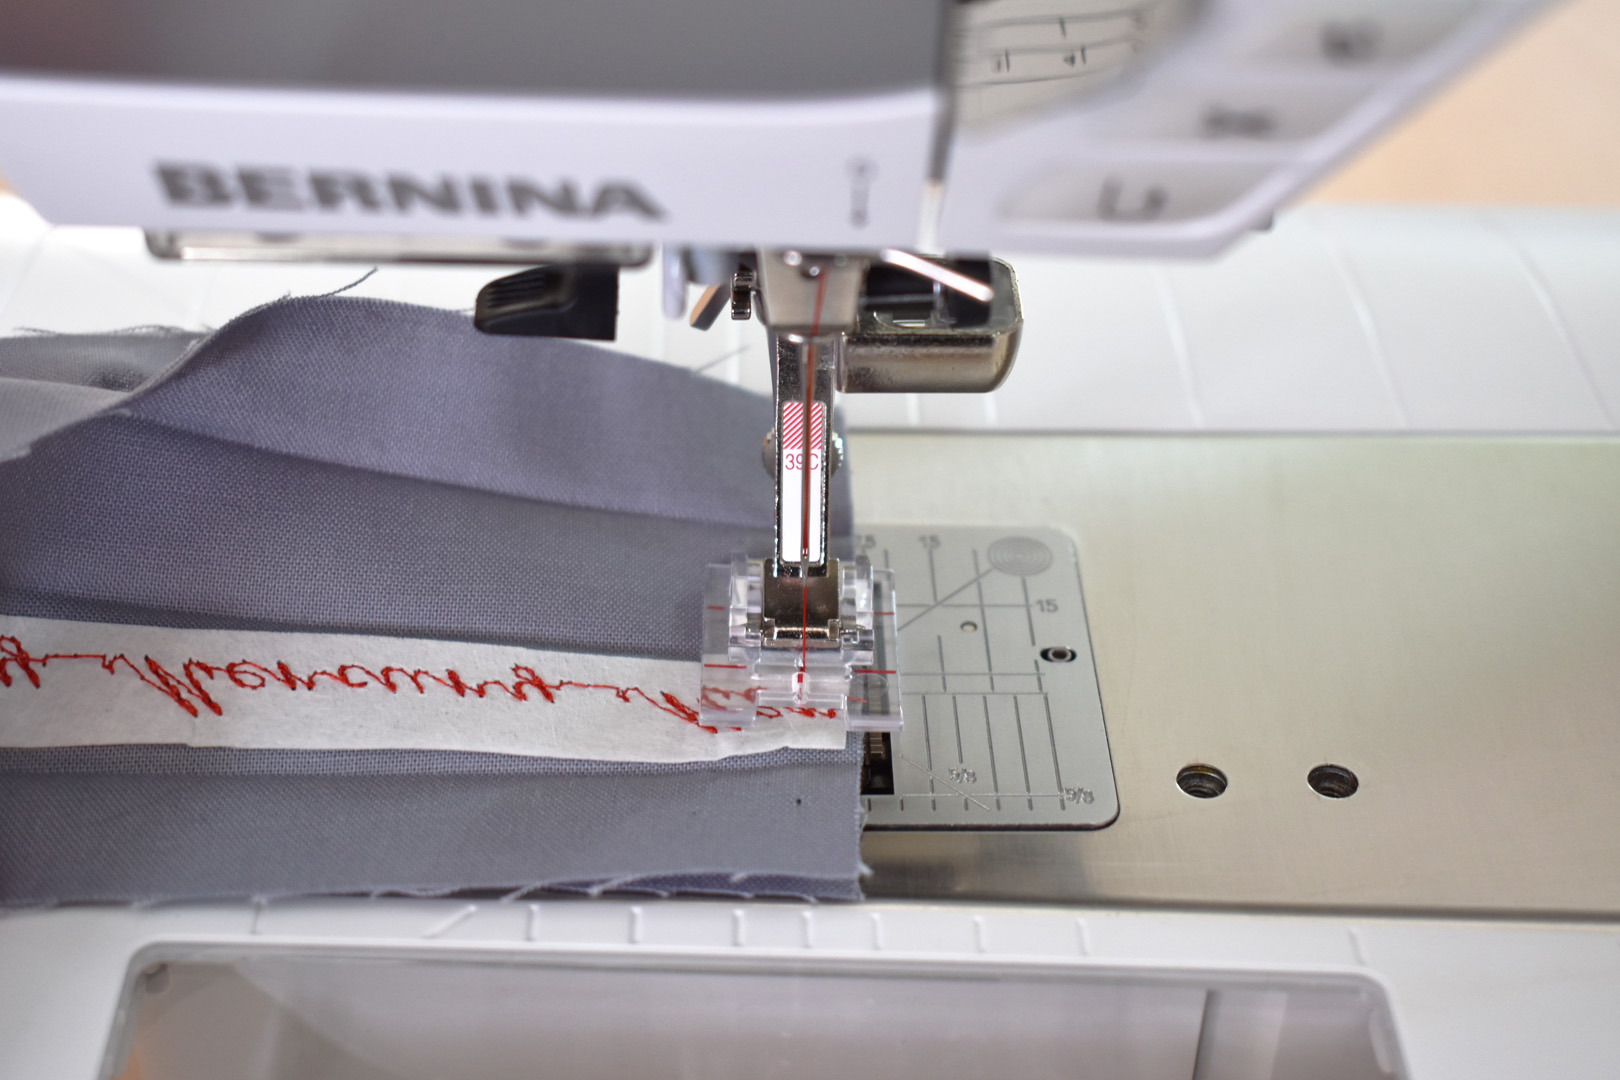
Using Edgestitch foot #10, stitch the opening in the wristlet closed. Move the needle position 2 clicks to the left (this is -2 needle position on the B 570 QE). Start edgestitching at the seam, taking a few backstitches to secure the thread before sewing around the strip.
Keep the split ring away from the foot and needle as you sew. Finish stitching when you reach the starting point by the seam, and take a few backstitches to finish.

Next, edgestitch the folded edge of the wristlet in the same way.
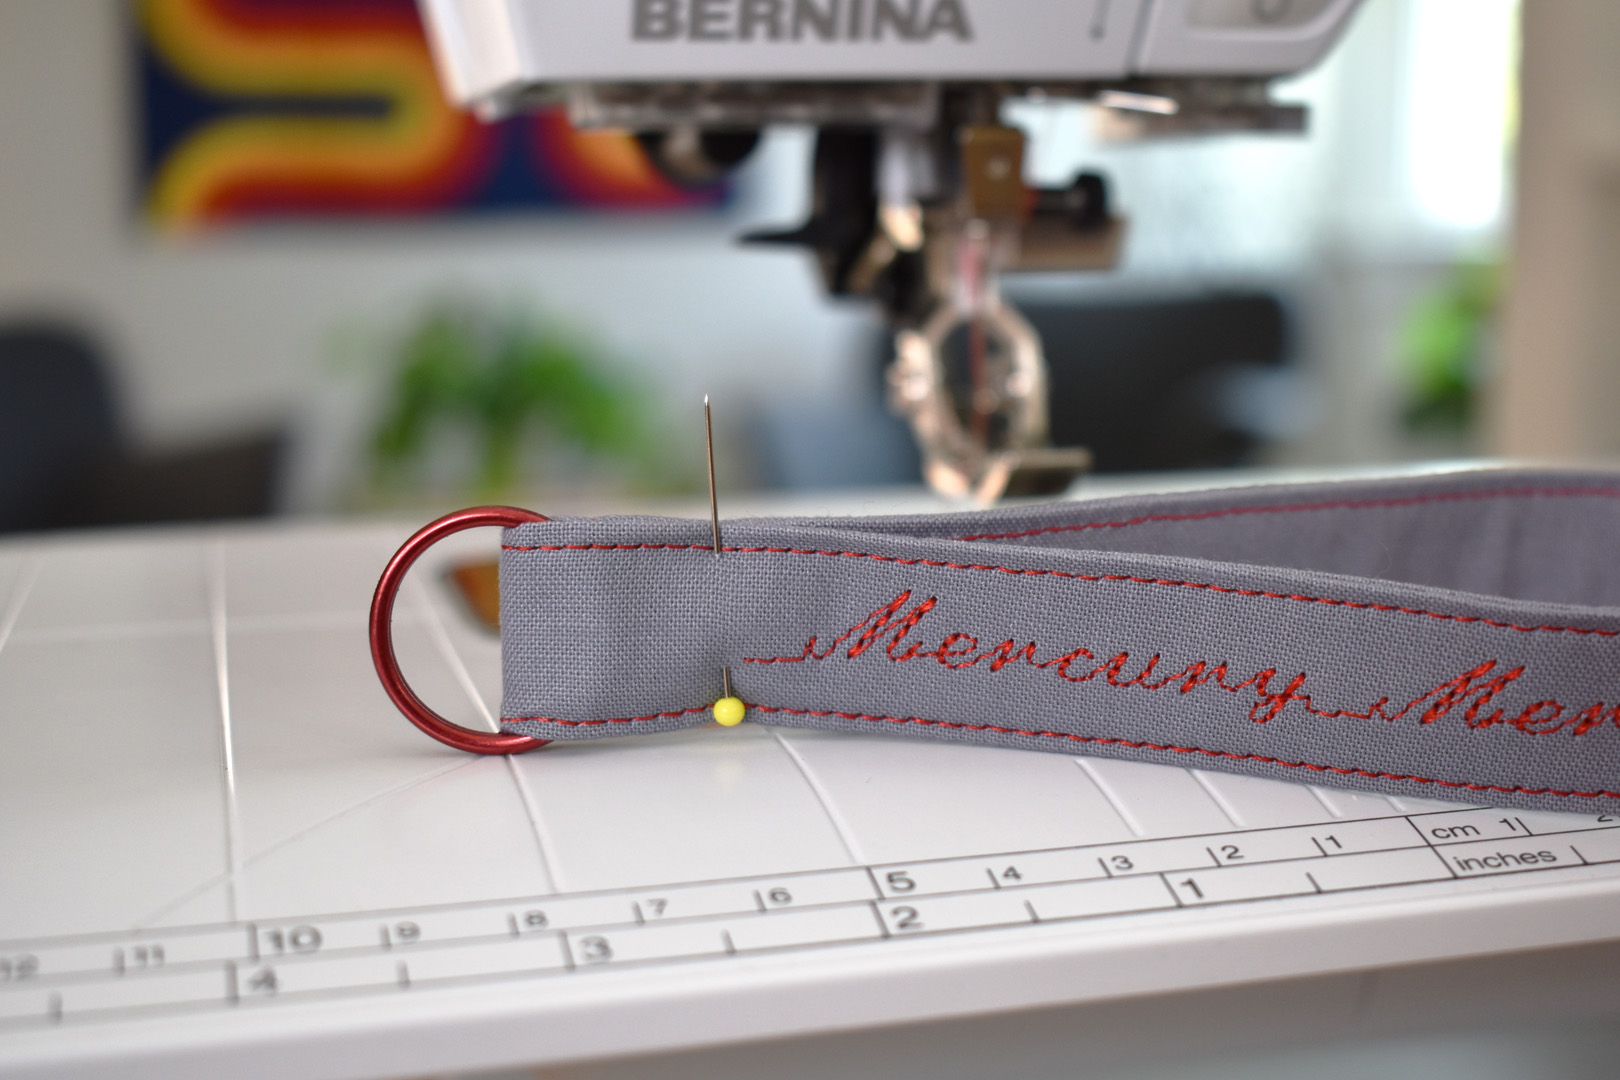
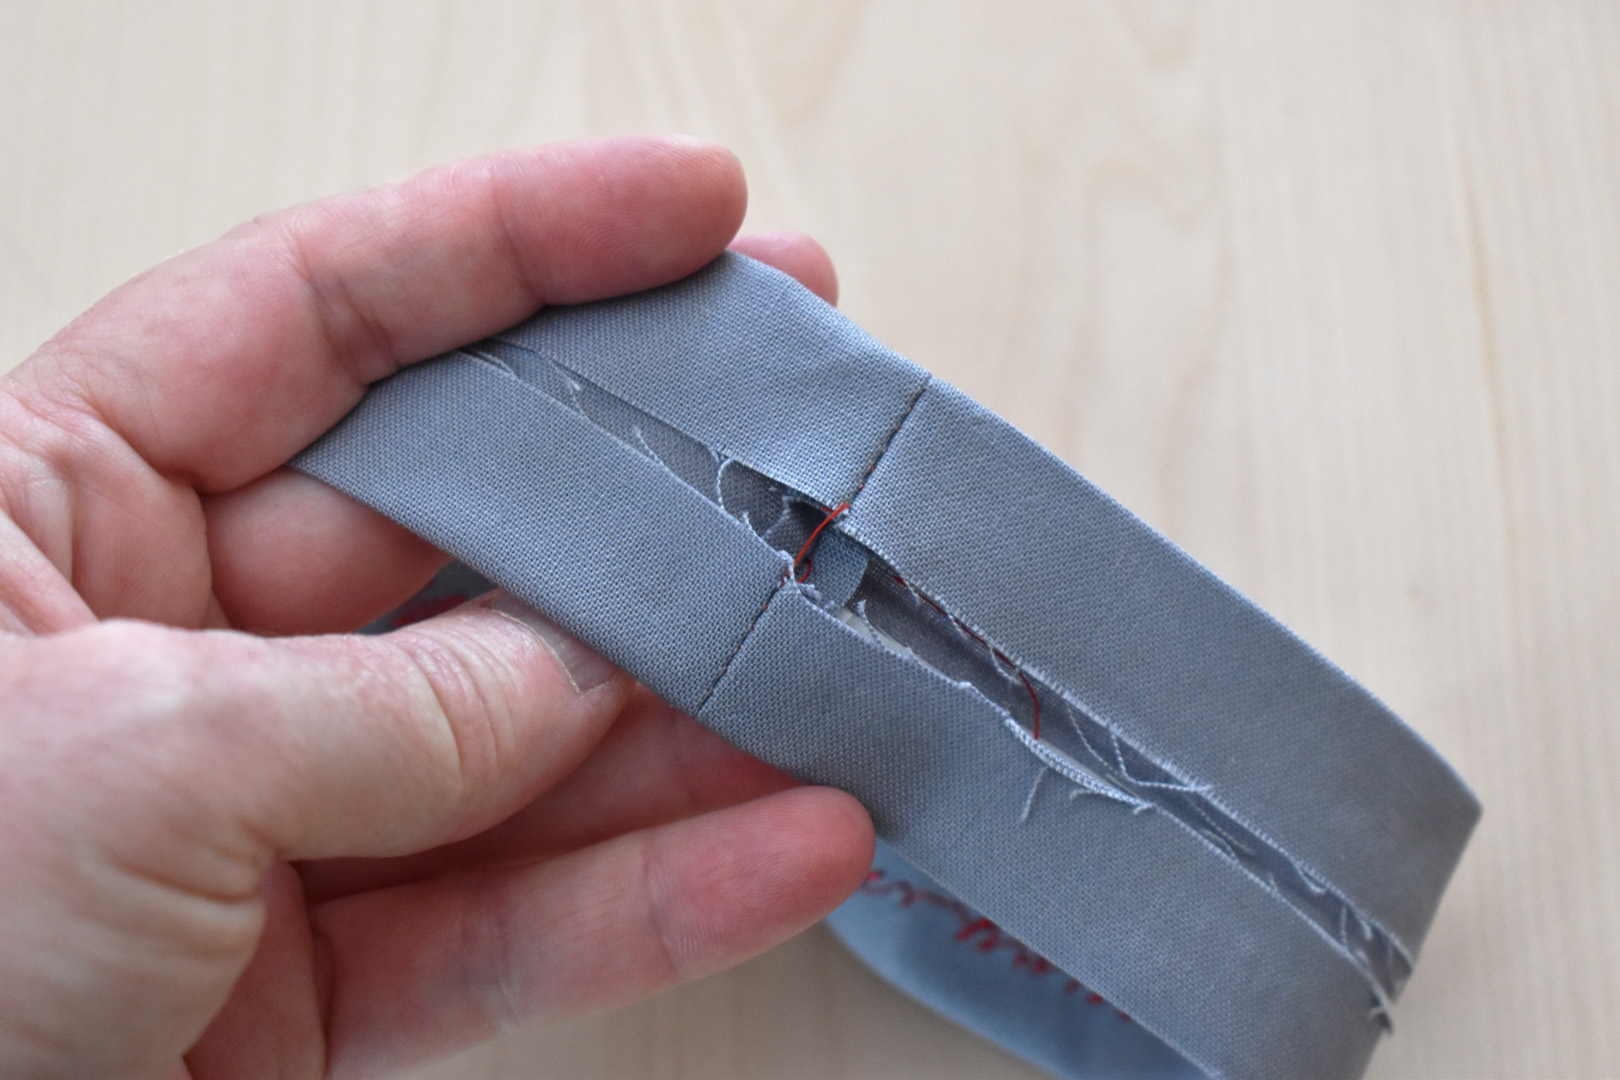
Switch to the Zipper foot #4/#4D for the final step, and move the needle position to the far left. Move the split ring to the seam end of the strip, and fold the strip over with the seam edge at the back (about 1/4″ away from the ring). Pin to hold in place.
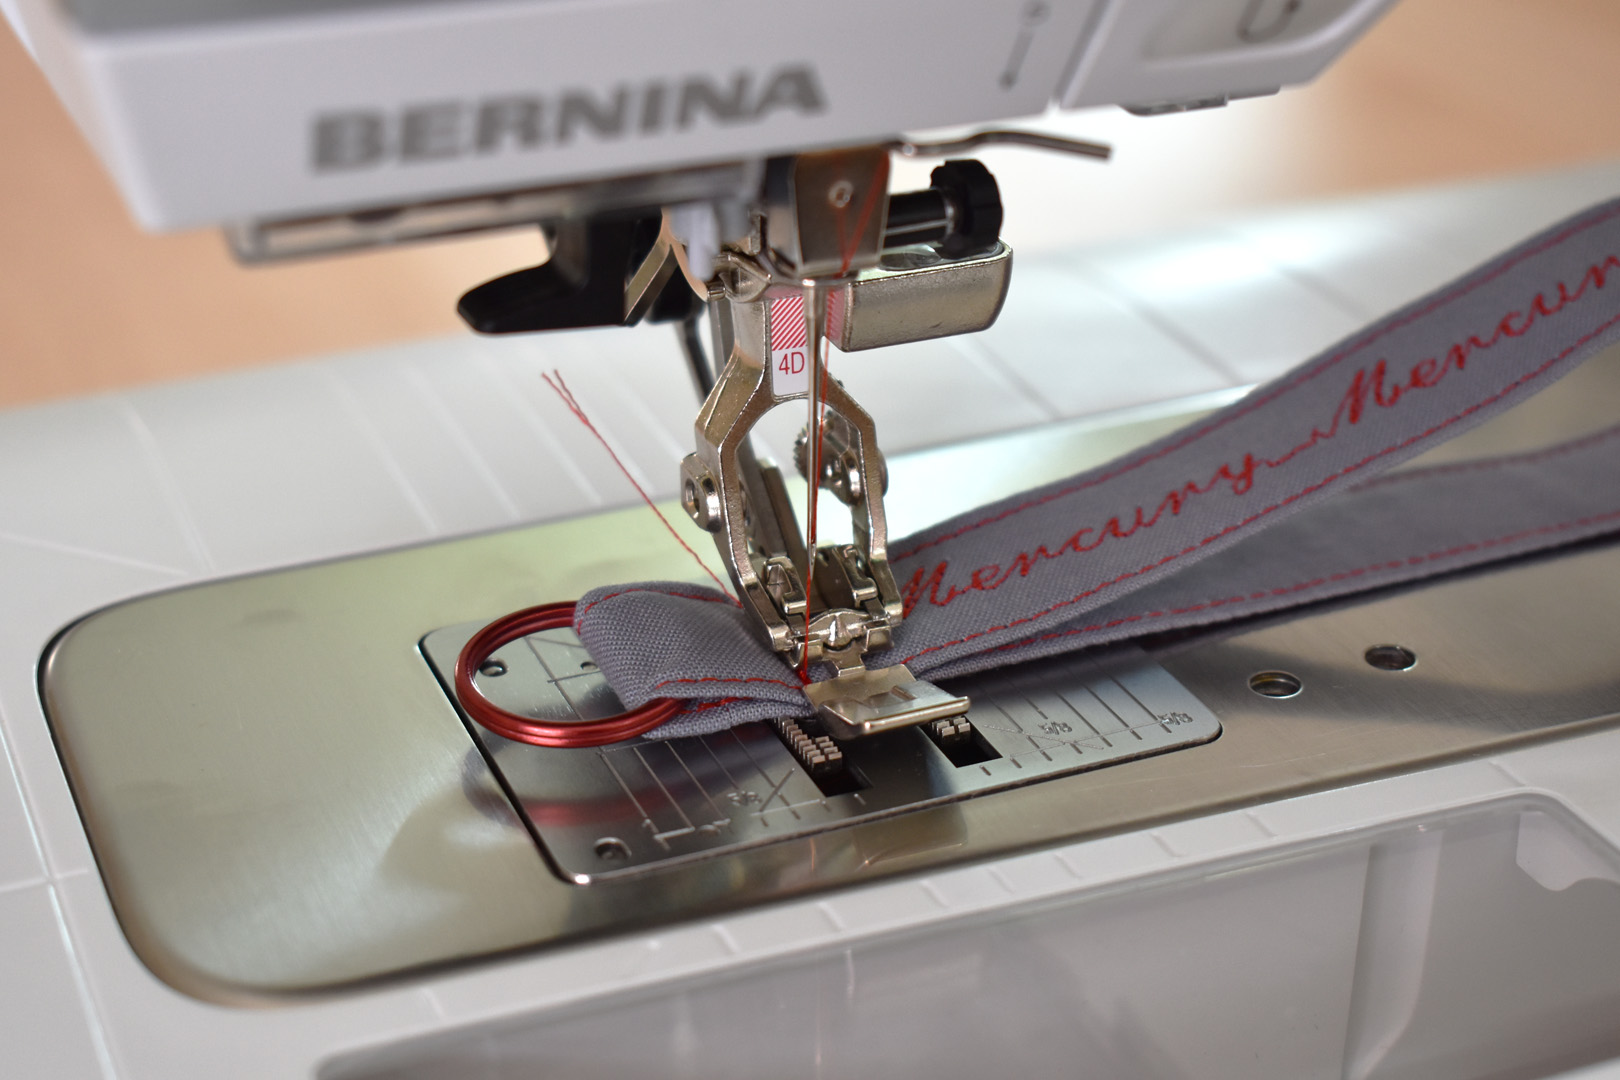
Make sure the needle is at the far left position to clear the zipper foot. Stitch 1/2″ away from the ring to secure, backstitching to create two full lines of stitching.

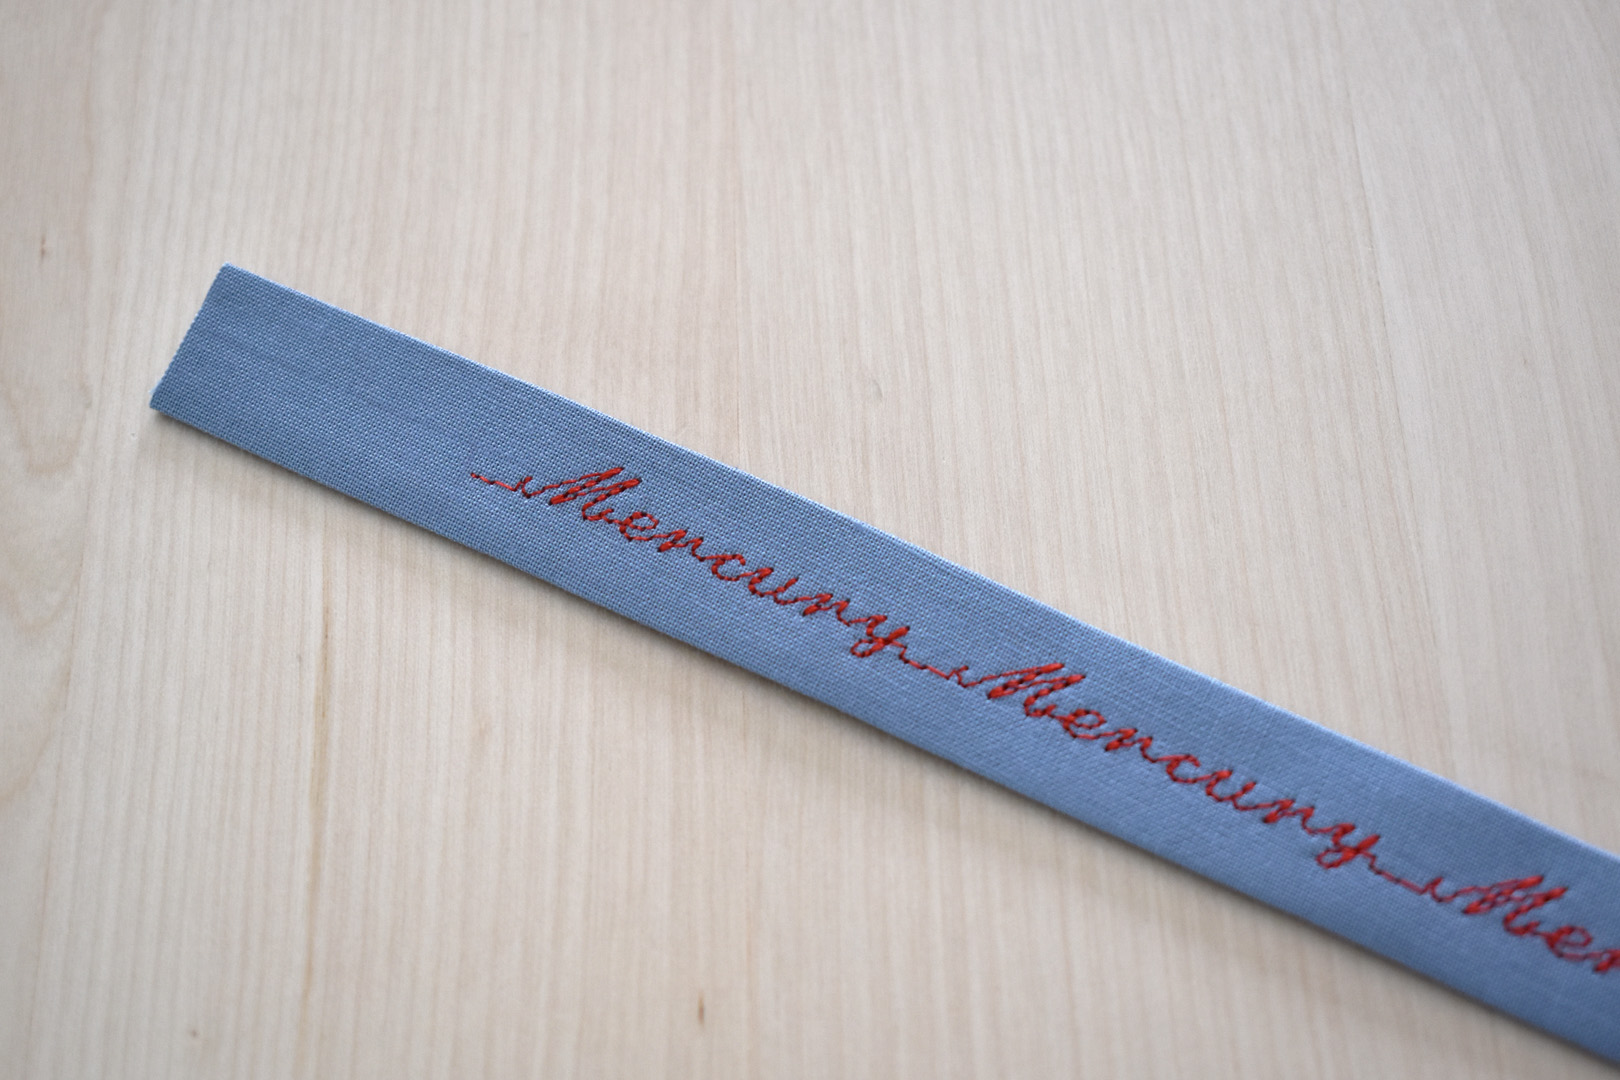
Trim threads, add the lanyard clasp, and your key wristlet is ready for action.
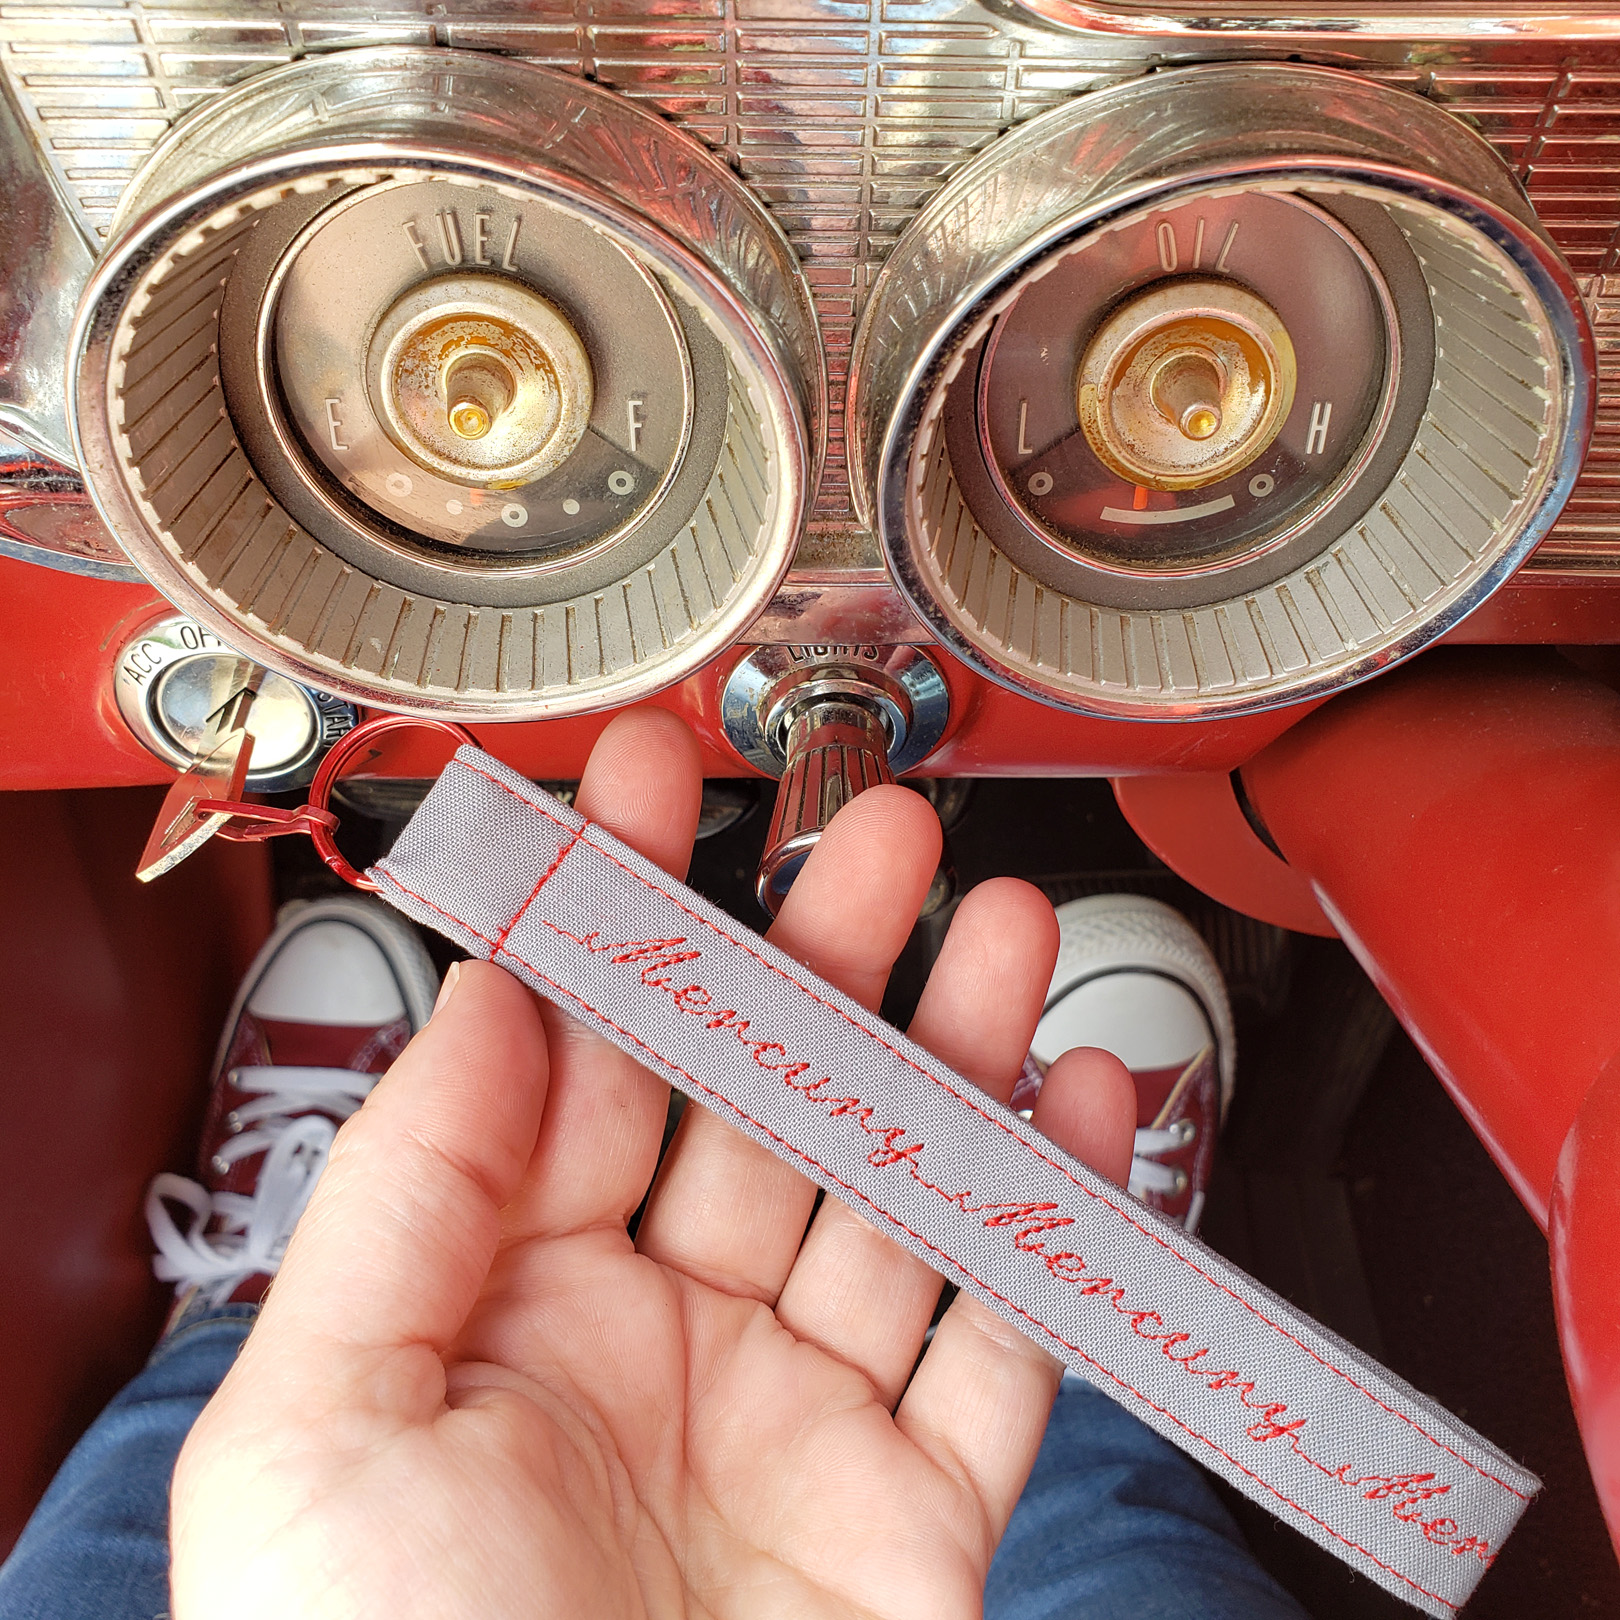
My Mercury wristlet perfectly matches my car, and now it’s easy to find my keys!
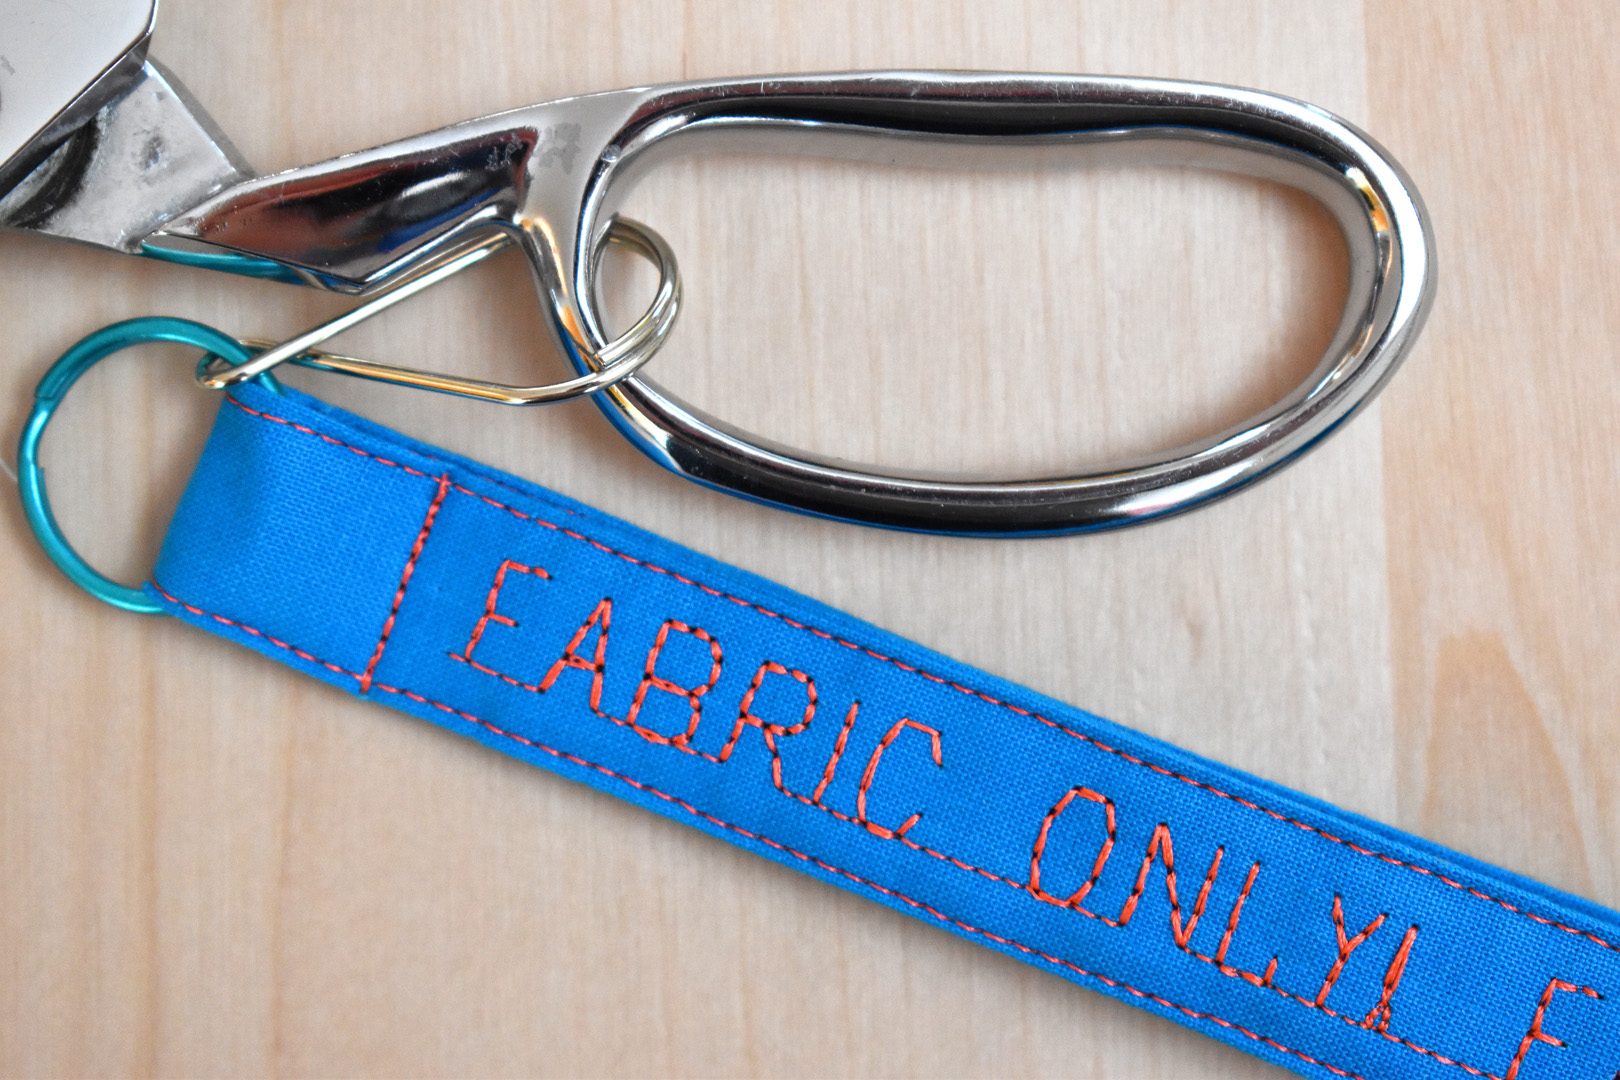
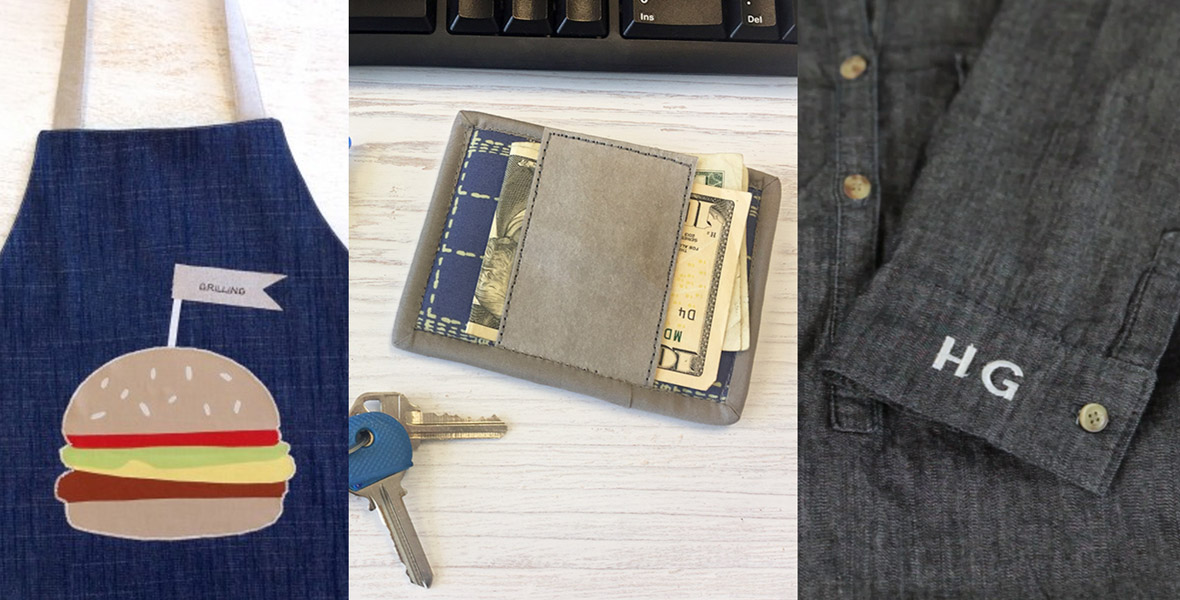
I also discovered that you can add a simple figure “8” split ring to your wristlet, and you’ve got the perfect label for your fabric shears.
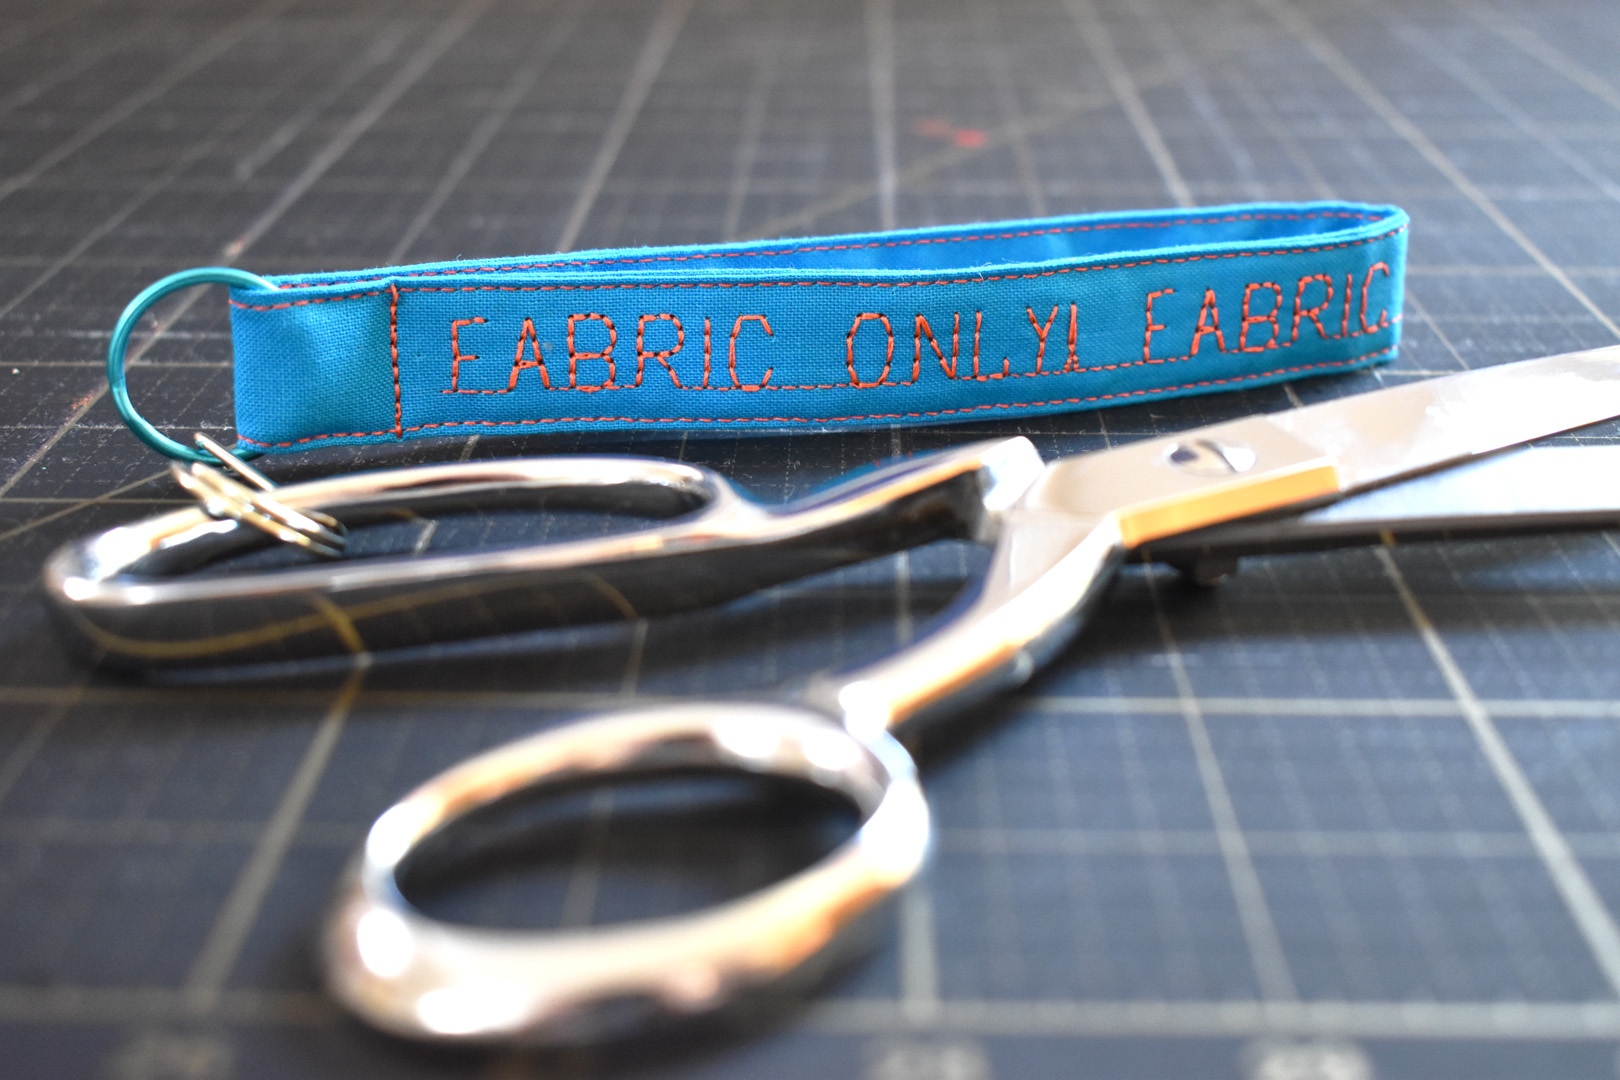
Nobody can ignore this warning!
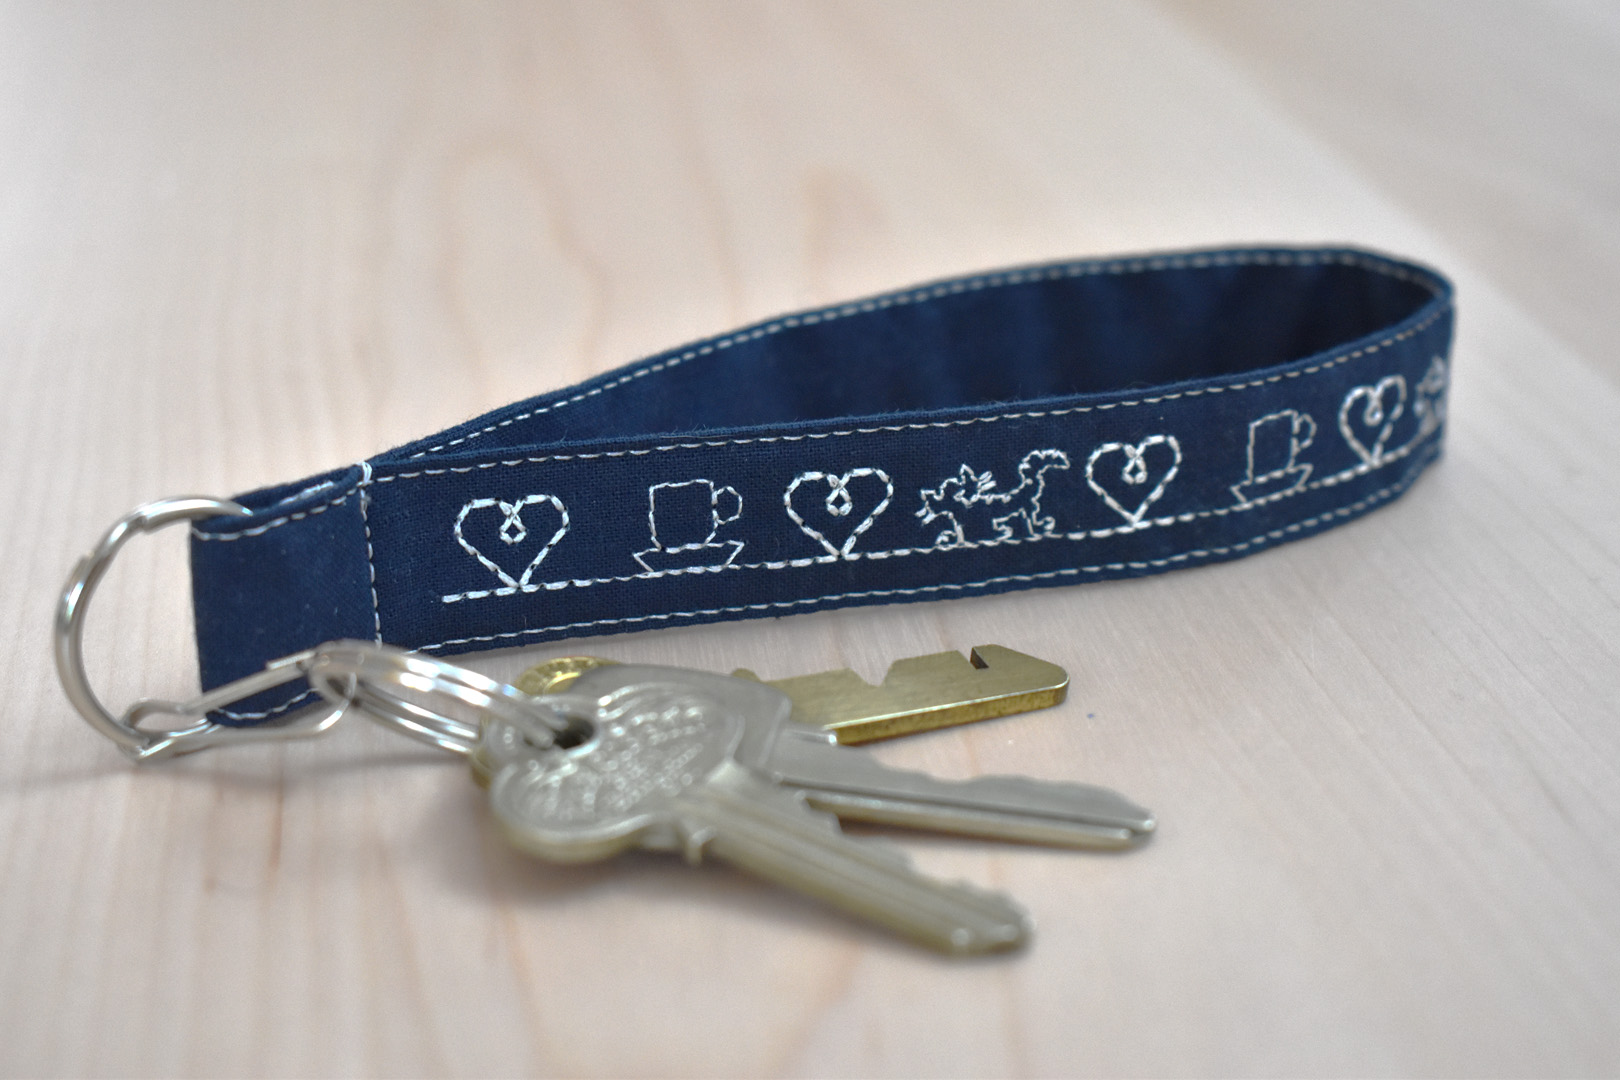
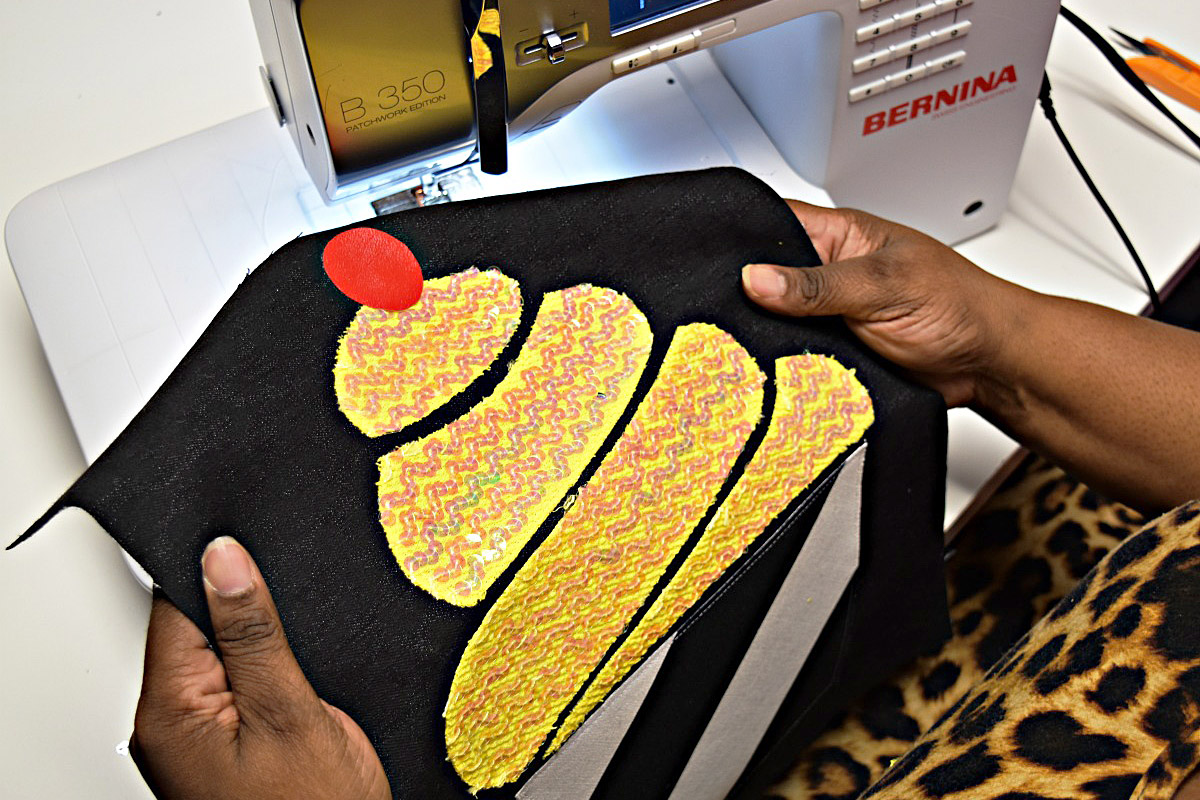
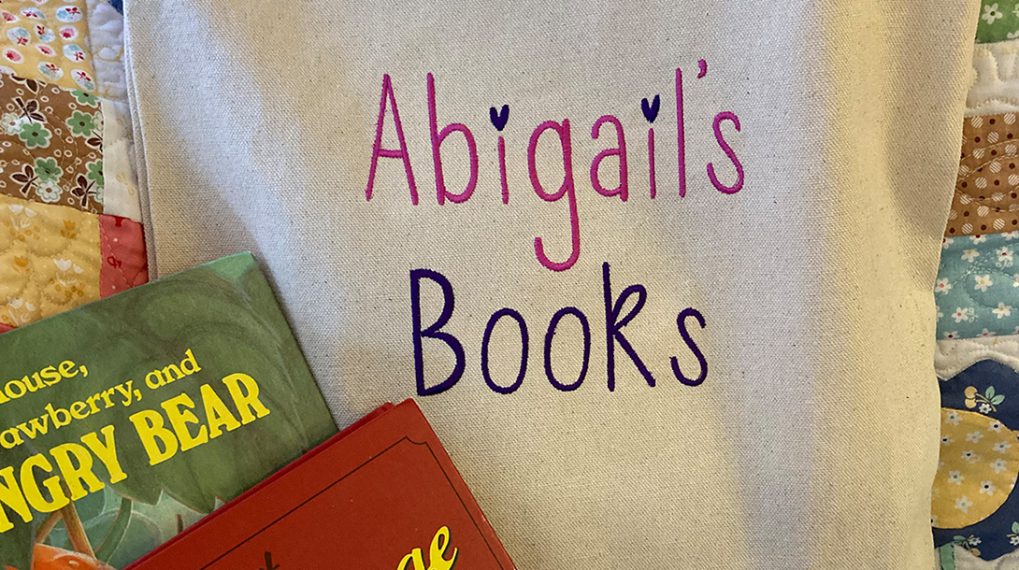
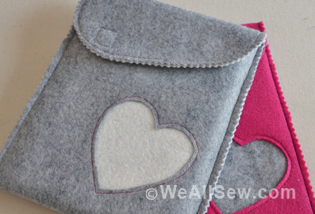
If you don’t have lettering stitches, you can still create a custom wristlet that reflects someone’s personality – like ❤ tea and cats. I hope you have fun making a few wristlets of your own for yourself or to share!
Used Products


What you might also like


15 comments on “DIY Customized Key Wristlet”
-
-
Hello! Thank you for sharing! Please be sure to leave your comment on our giveaway post to get your entry in: https://weallsew.com/bernina-presser-feet-for-all-of-your-sewing-needs/
-
Two questions-you say where to start sewing the decorative stitches, but you don’t say where to stop and I wasn’t quite sure where the seam was when you sewed the split ring in – is it not centered? Thanks, really cute and with a lot of uses as you demonstrated.
-
Hi @marabshapiro, thanks for checking out the tutorial! In the tutorial I mention that after starting the decorative stitches to stitch all the way to the other end of the strip of fabric. I didn’t worry if the pattern was finished stitching or not, as this end of the strip will end up in the seam and at the “back” of the wristlet when the split ring is sewn in place. The split ring isn’t sewn exactly on the seam line – rather the seam is moved to the back of the split ring. This makes a definite “front” to the wristlet where you stitch design can be seen starting about 1/2″ away from the split ring. Enjoy!
-
-
-
-
Jeans #8, for sure! I’d absolutely love to win this prize! So much fun!
-
Hello! Thank you for sharing! Please be sure to leave your comment on our giveaway post to get your entry in: https://weallsew.com/bernina-presser-feet-for-all-of-your-sewing-needs/
-
-
My favorite feet are 37,10, 50, use them all every week.
-
Hello! Thank you for sharing! Please be sure to leave your comment on our giveaway post to get your entry in: https://weallsew.com/bernina-presser-feet-for-all-of-your-sewing-needs/
-
-
I love all of the variety that we have to choose from but my favorite is the 97D, it makes sewing
so much easier.-
Hello! Thank you for sharing! Please be sure to leave your comment on our giveaway post to get your entry in: https://weallsew.com/bernina-presser-feet-for-all-of-your-sewing-needs/
-
-
I love the walking foot!!
-
Hello! Thank you for sharing! Please be sure to leave your comment on our giveaway post to get your entry in: https://weallsew.com/bernina-presser-feet-for-all-of-your-sewing-needs/
-
-
97D for piecing (or 37D) but my new absolute favorite is 10D. Makes machine binding on quilts a breeze!
-
New owner. This is an easy learning project and quick gift. Always find We All Sew tutorials helpful. Please, can you share where you found the squeeze figure eight split rings?? Thanks!!
Jill
-
Hi Jill, thanks for checking out my project! I found a bag of fun, multi-colored split rings in the craft store (near the lanyard making supplies), and these figure “8” rings were included. Cheers! – Erika
-
Leave a Reply
You must be logged in to post a comment.

I could not love without #97