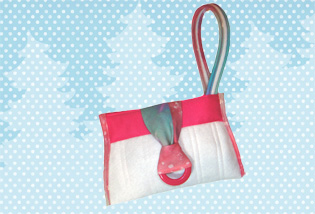
How to Make a Cupcake Wristlet
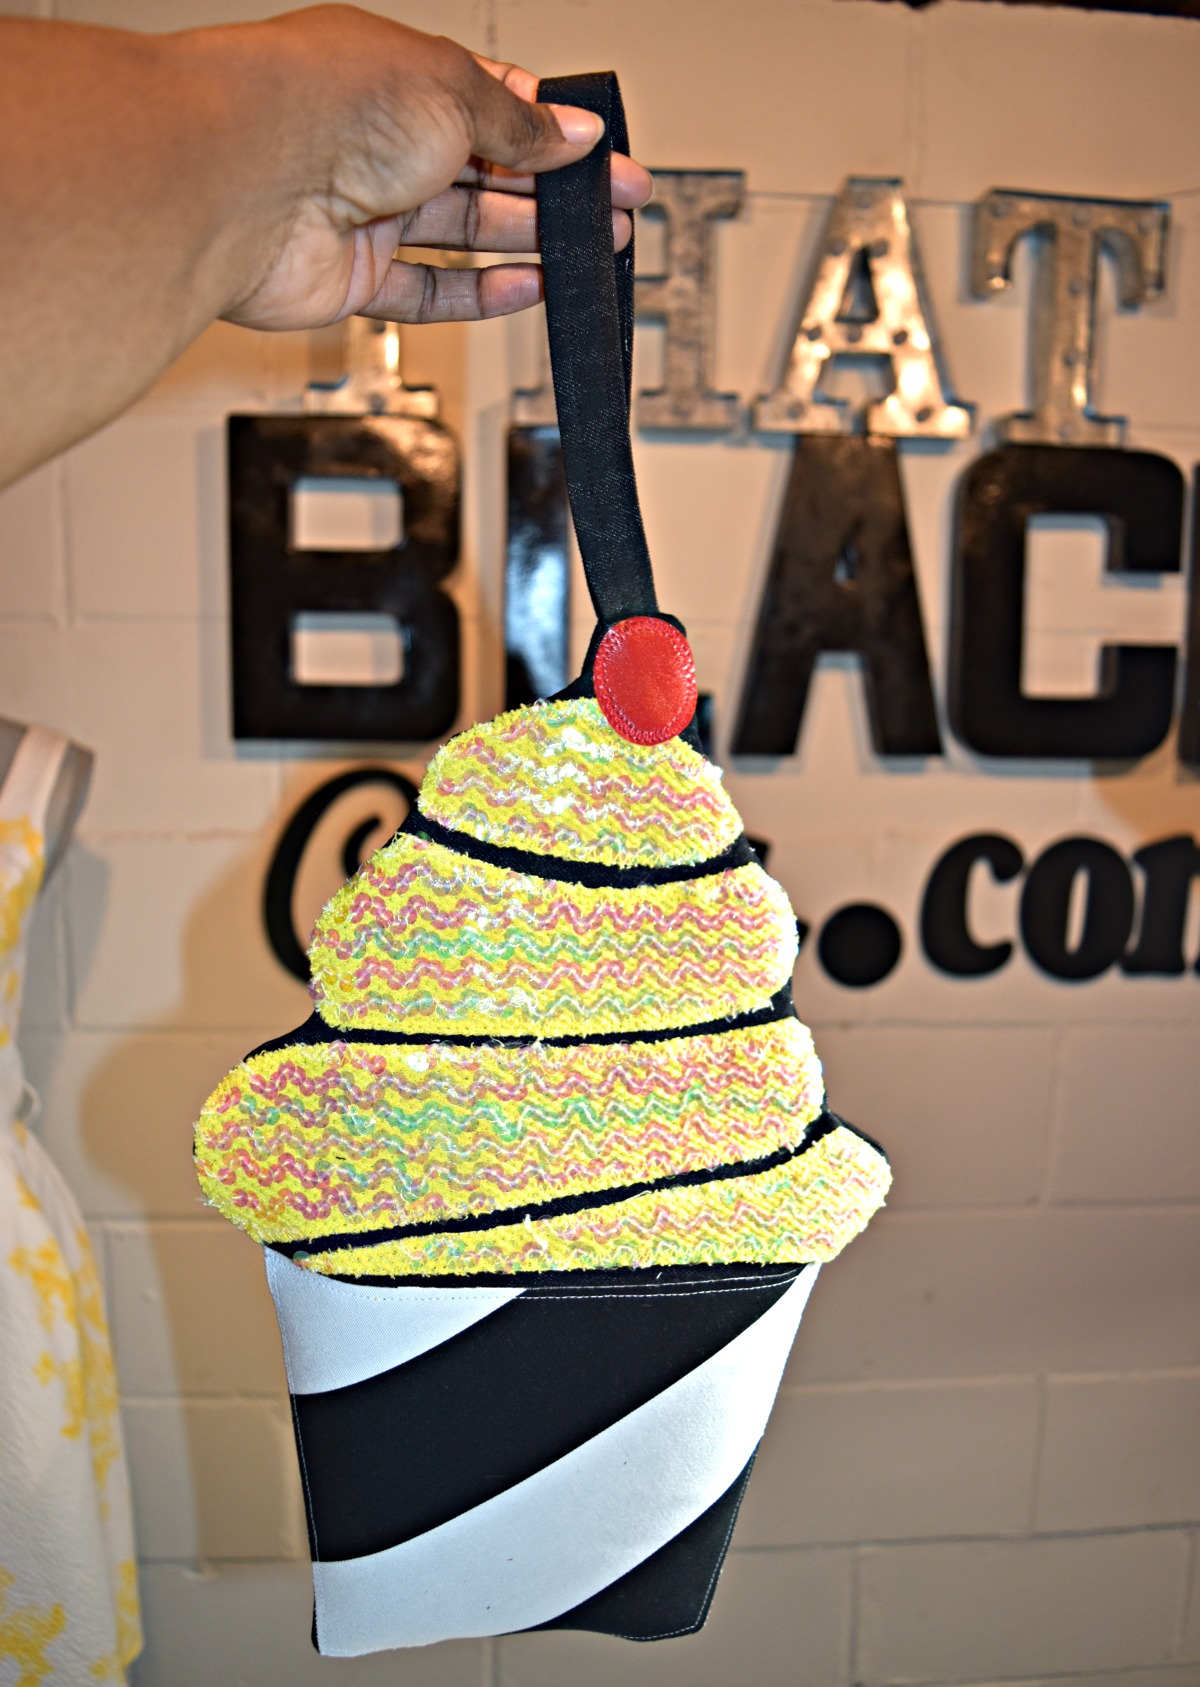
Looking for a purse to carry around? Why not a cupcake wristlet? Let’s make cake!
Materials to Make a Cupcake Wristlet
- 1 – 9″ zipper
- 2 – 18″ x 15″ pieces of dark fabric. I used black denim, you will need a fabric that has structure like a denim, twill or canvas.
- 1 – 9″ x 10″ piece of fabric for the frosting. I used a sequin fabric.
- 1 – 7″ x 9″ piece of striped fabric for the cupcake bottom. I used a stripe twill.
- 4 – 5″ x 2″ pieces of fabric for the zipper tabs. I used black denim.
- 1- 2″ x 2″ piece of red fabric for the cherry. I used faux leather for the cherry.
- 1 – 14″ x 2″ piece of fabric for the strap. I used black denim.
- A fusible adhesive
- BERNINIA 350PE
- Download the Cupcake Wristlet Pattern
Step 1: Cut out your paper pattern pieces. Trace the cupcake top and bottom pieces onto the back of the fusible adhesive.
Step 2: Apply the fusible adhesive to the backs of the cupcake frosting and bottom.
Step 3: Cut out your cupcake frosting and the cupcake bottom.
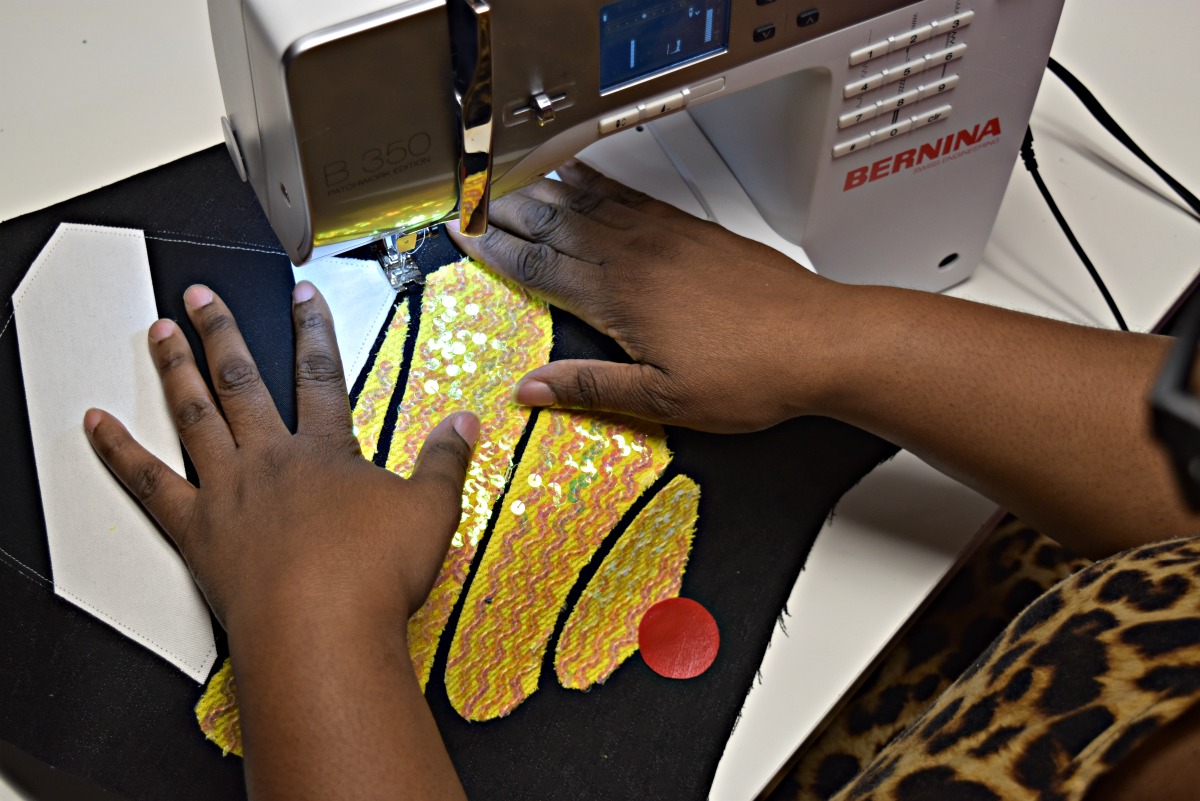
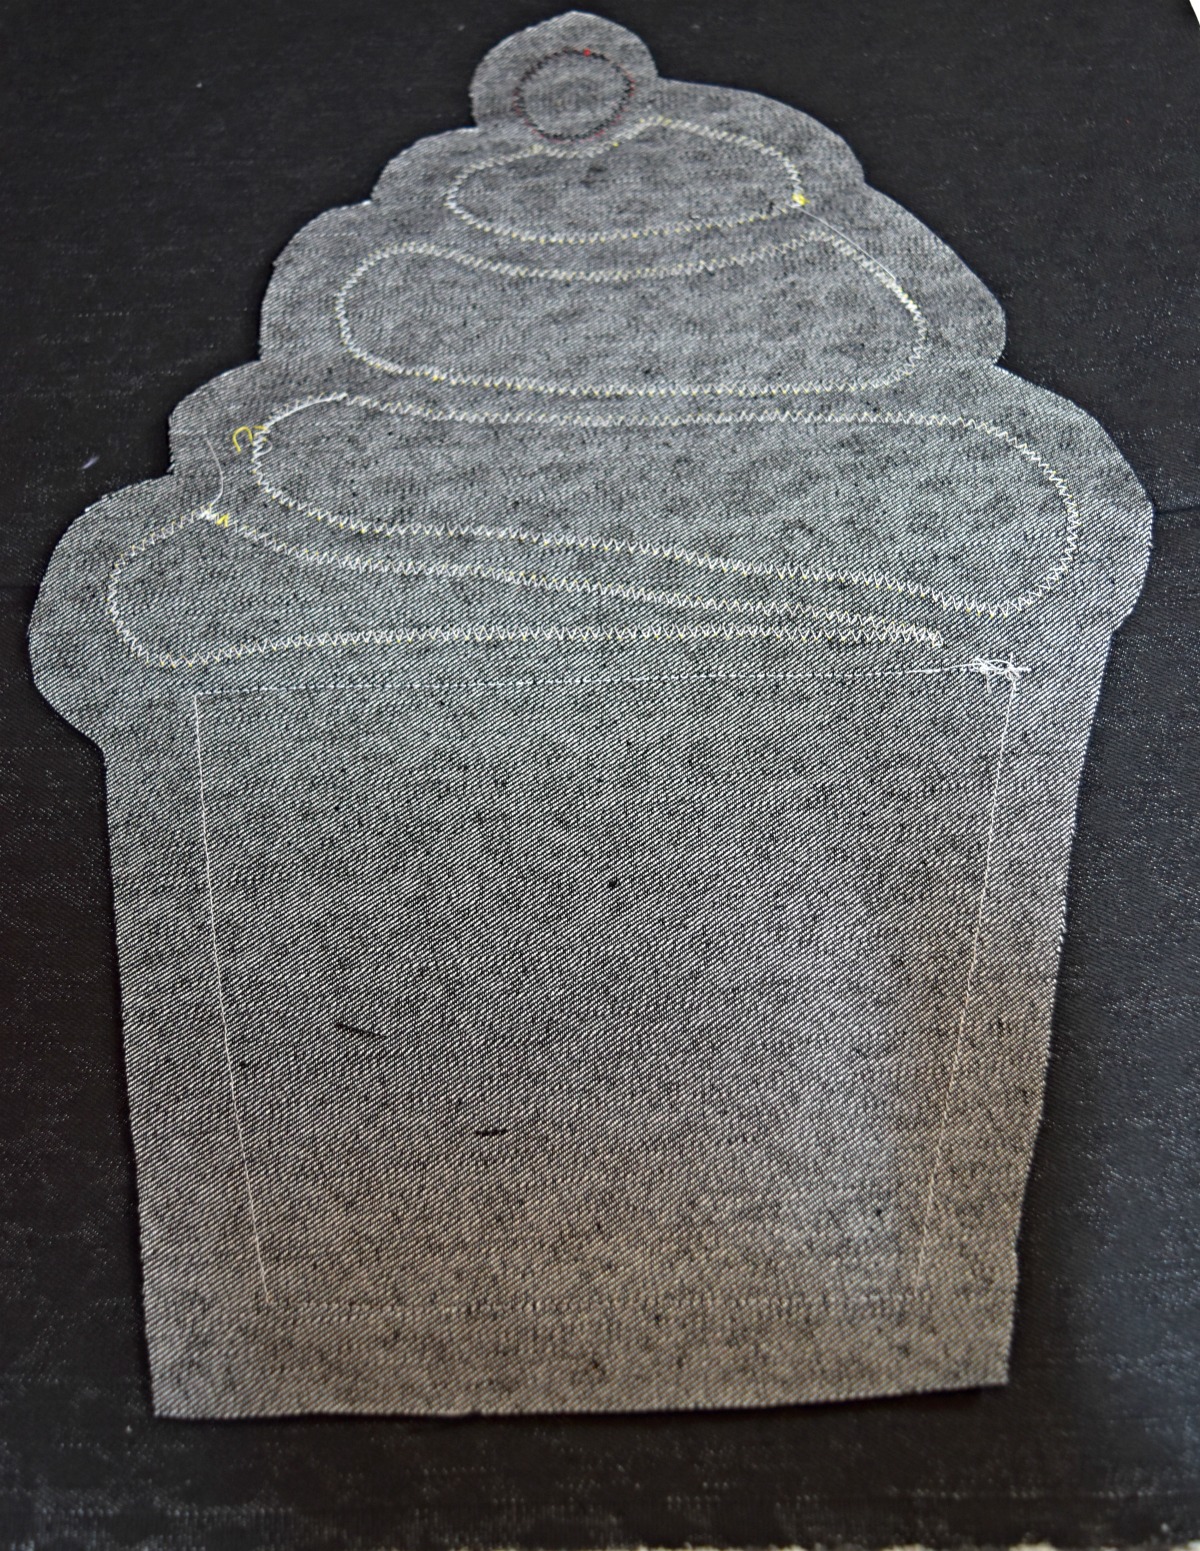
Step 4: Place the cupcake parts on one piece of the 18″ x 15″ background fabric and fuse to the fabric. Make sure you leave spacing between the frosting layers so that the dark background fabric will look like and outline. Now stitch the cupcakes pieces to the background fabric. I stitched about 1/4 ” from the edges, using a straight stitch on the bottom and a zig-zag stitch on the sequin fabric.Use the coordinating threads to your chosen fabrics.
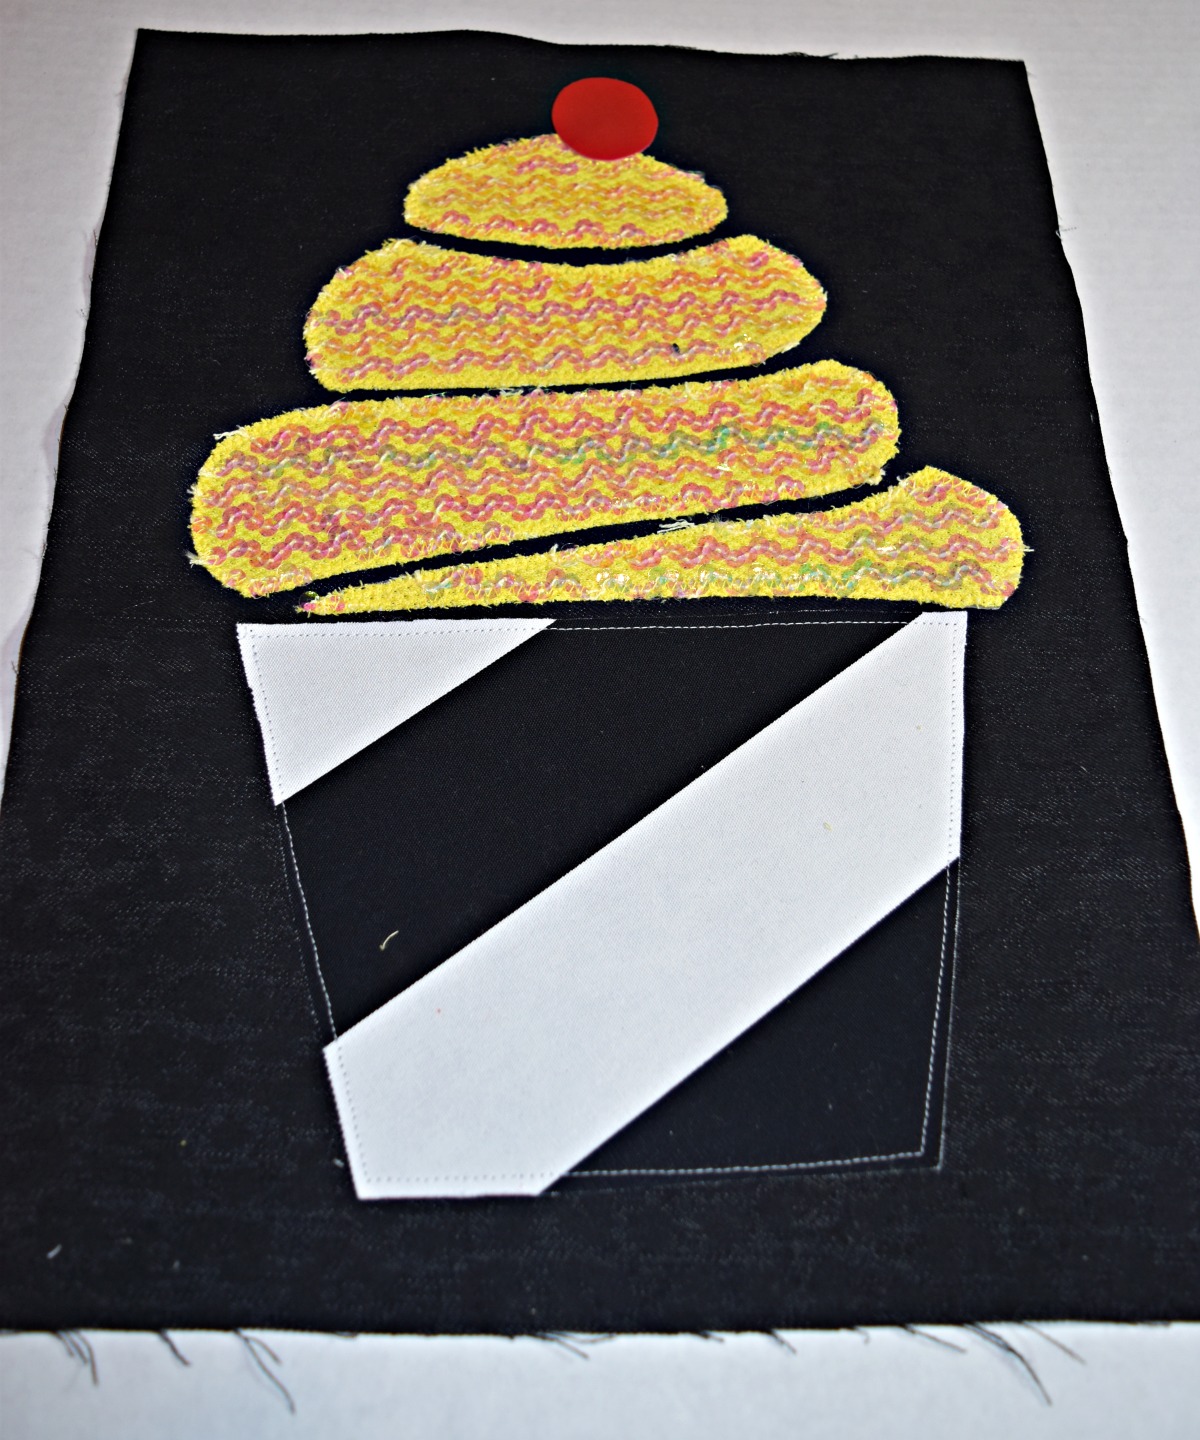
Step 5: Now trim around the cupcake leaving 1″ seam allowance. This is the front of the wristlet. Now put this piece to the side.

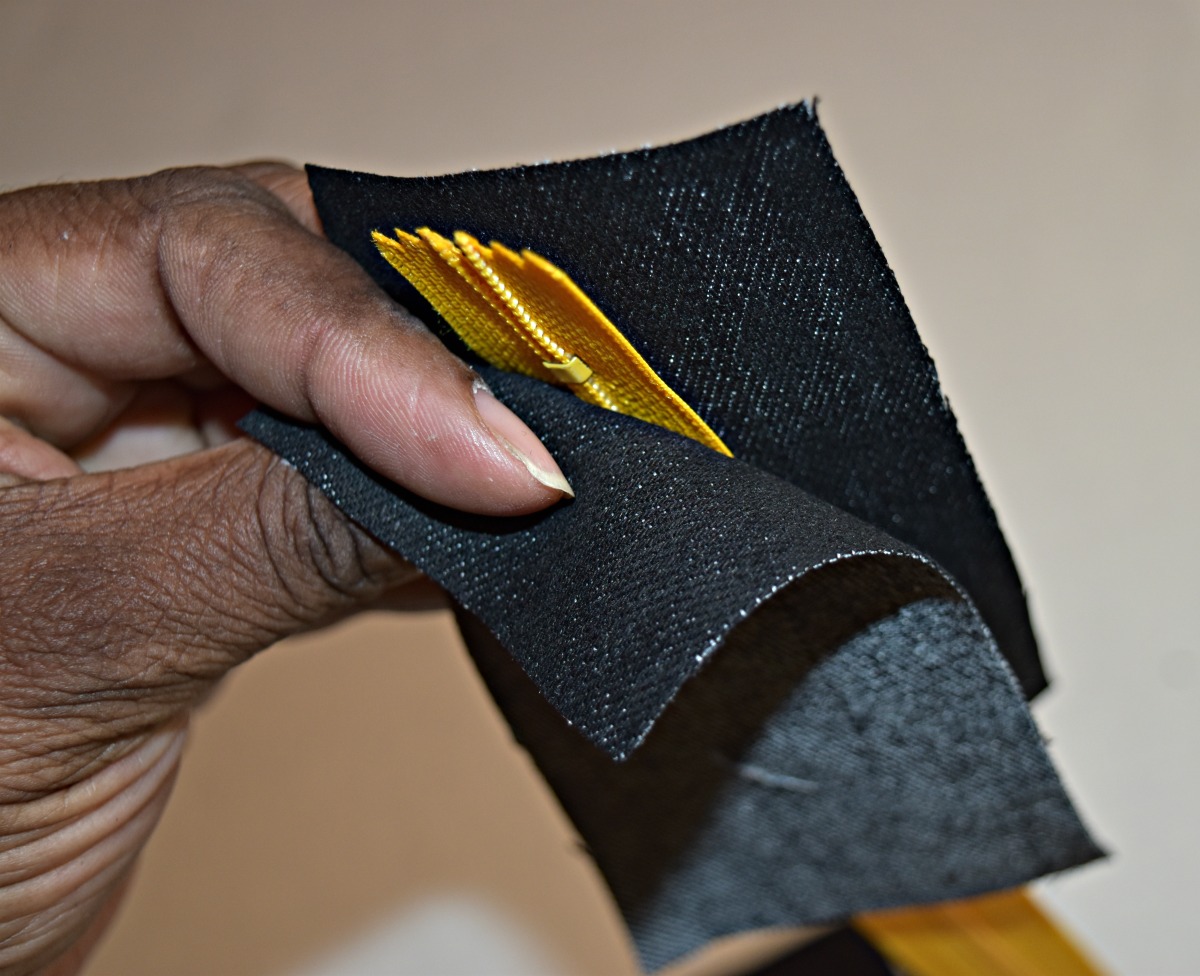
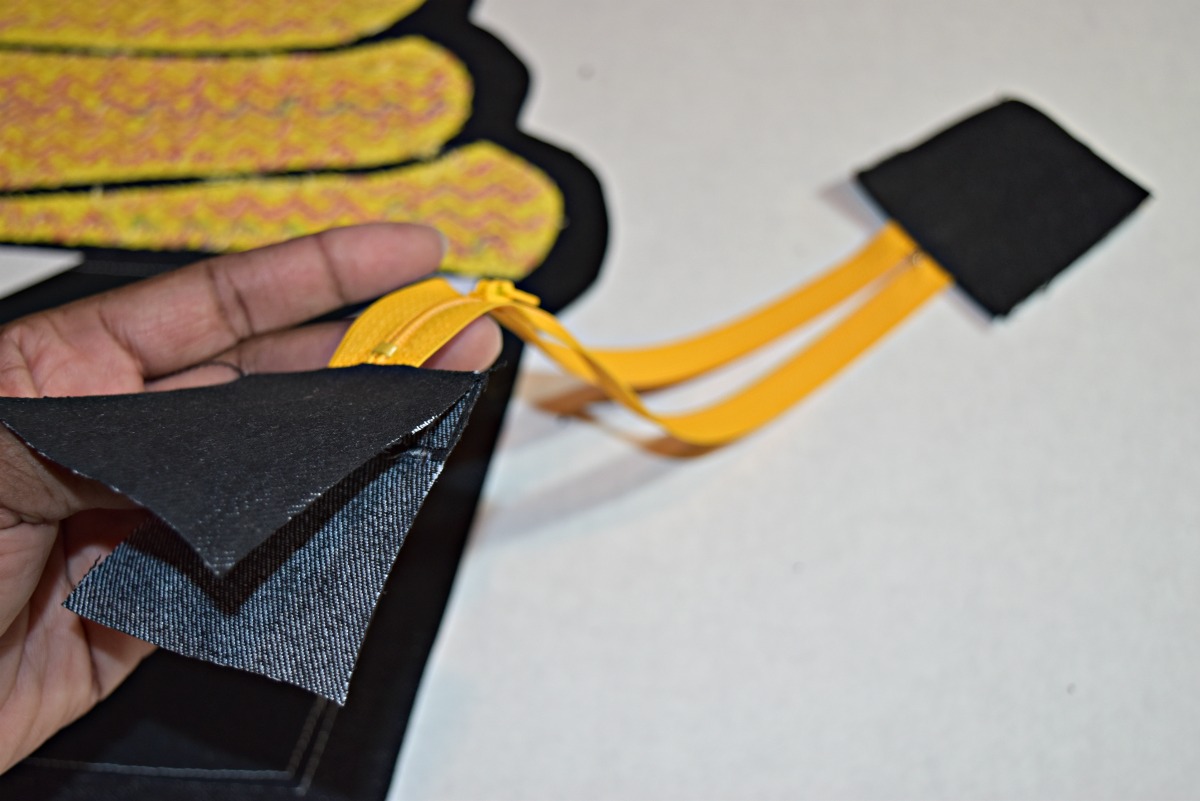
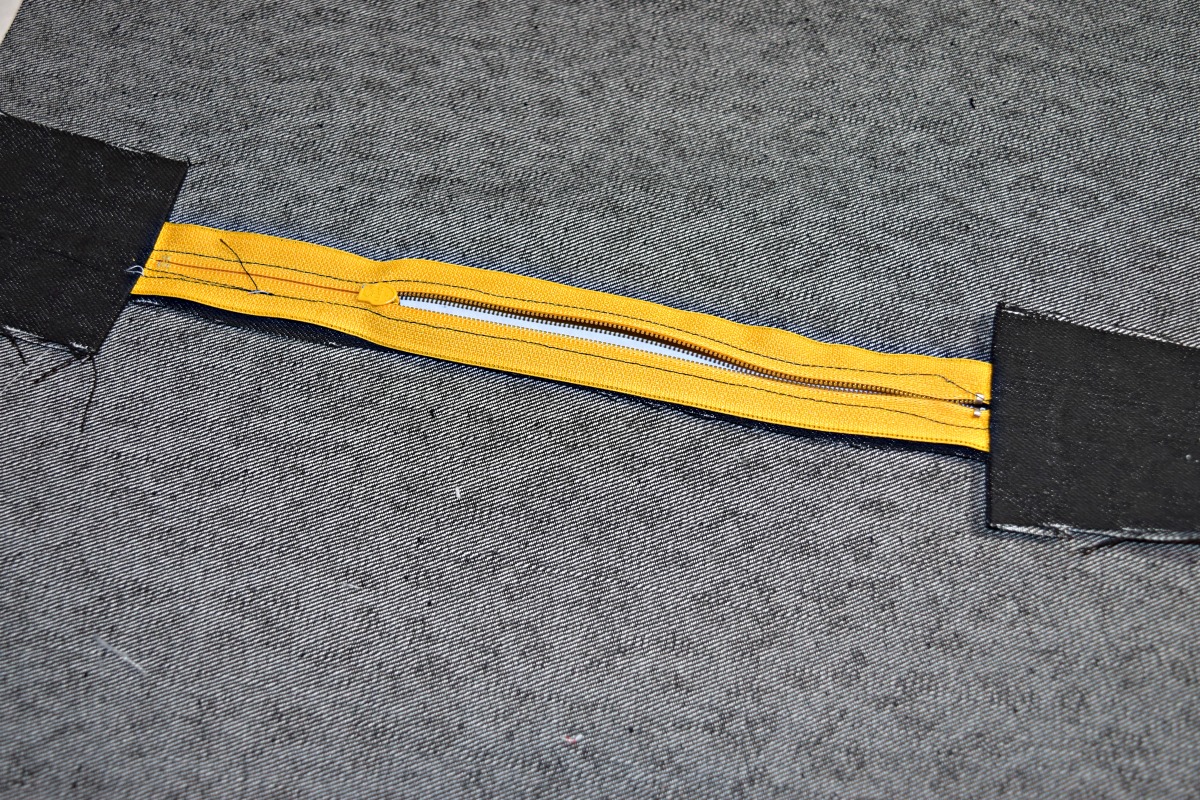
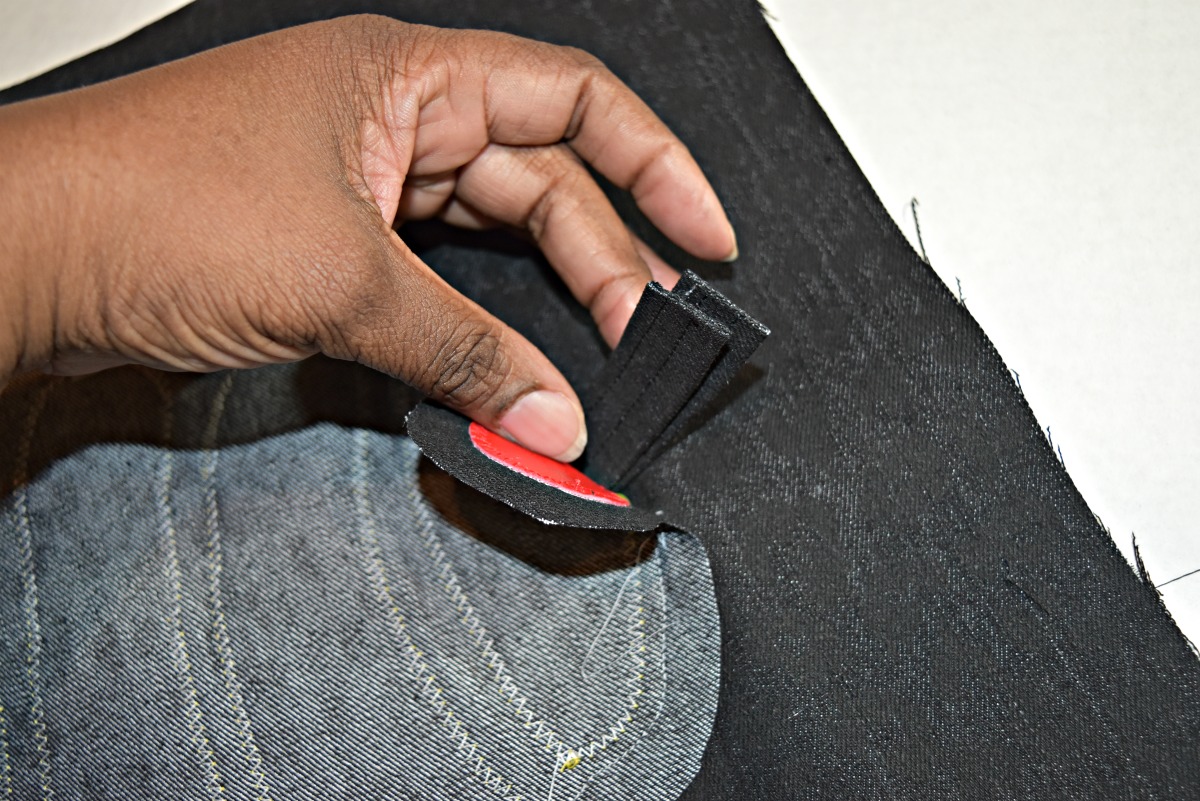
Step 6: Let’s add the end tabs to the zipper. Sandwich the zipper between the tabs as shown on each end. Stitch as close as you can get to the zipper closing at one end and the zipper closing at the other end. Flip the tabs back as shown and press.

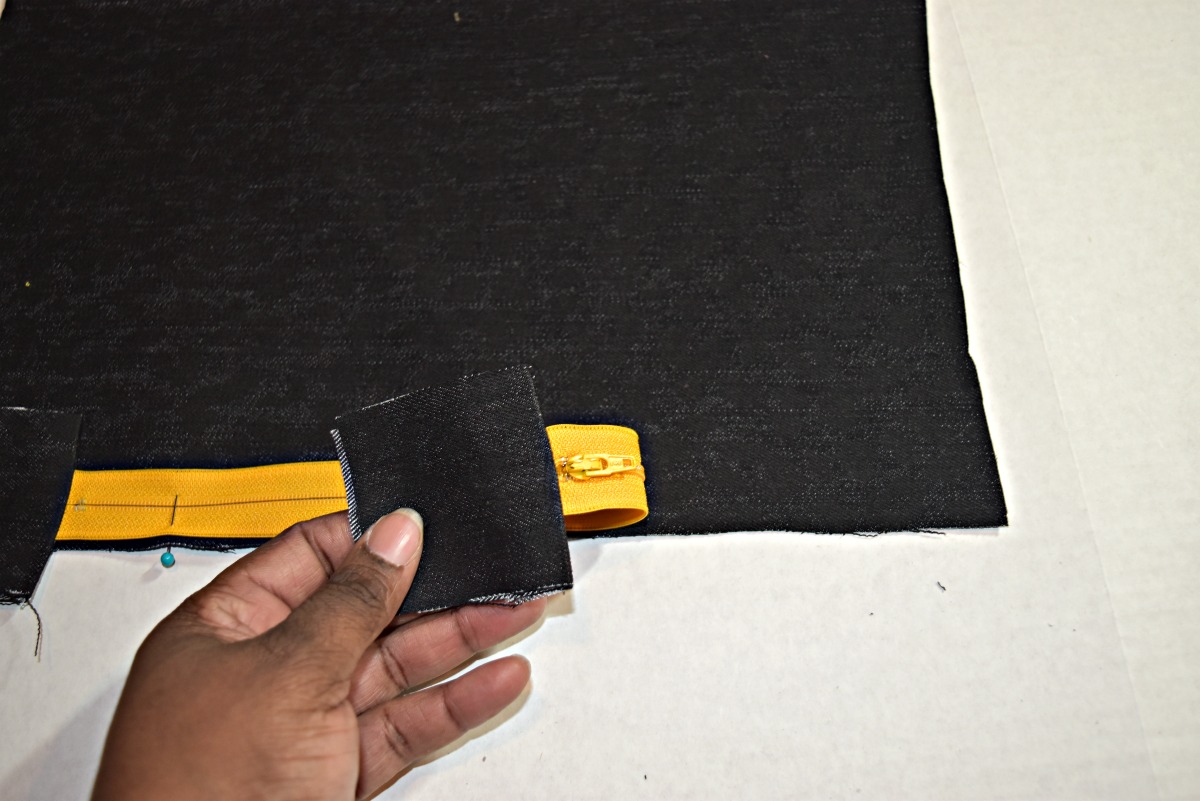
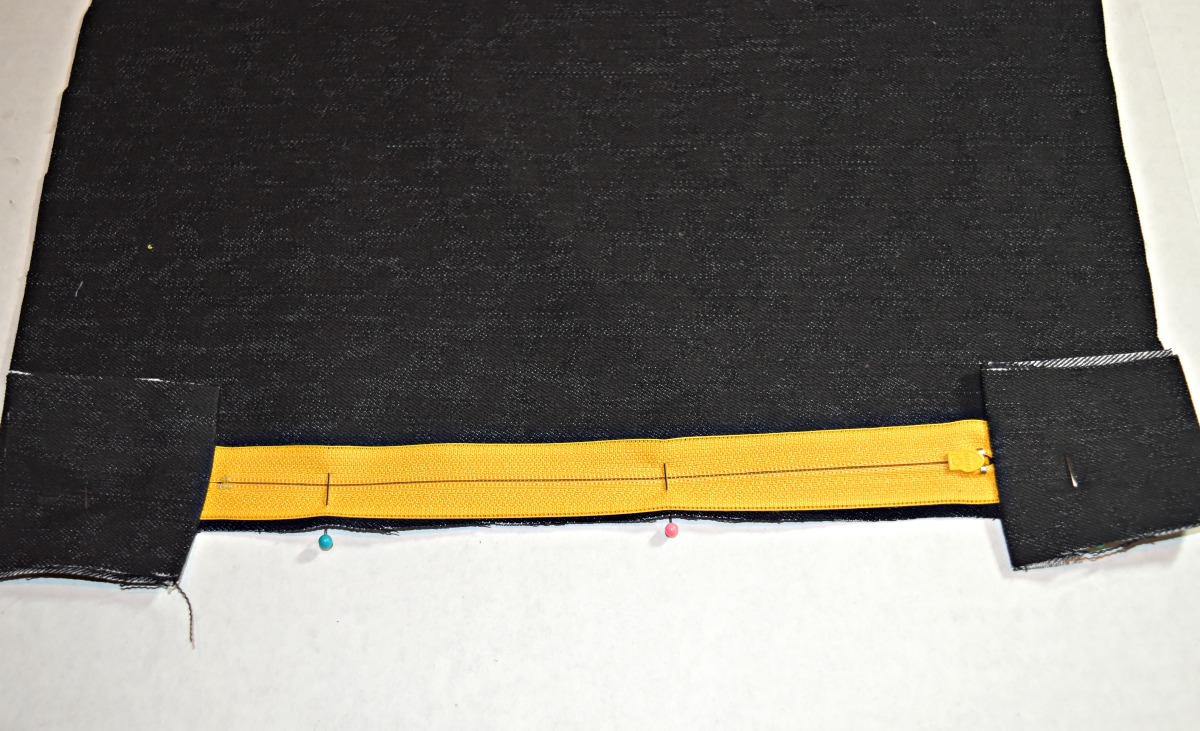
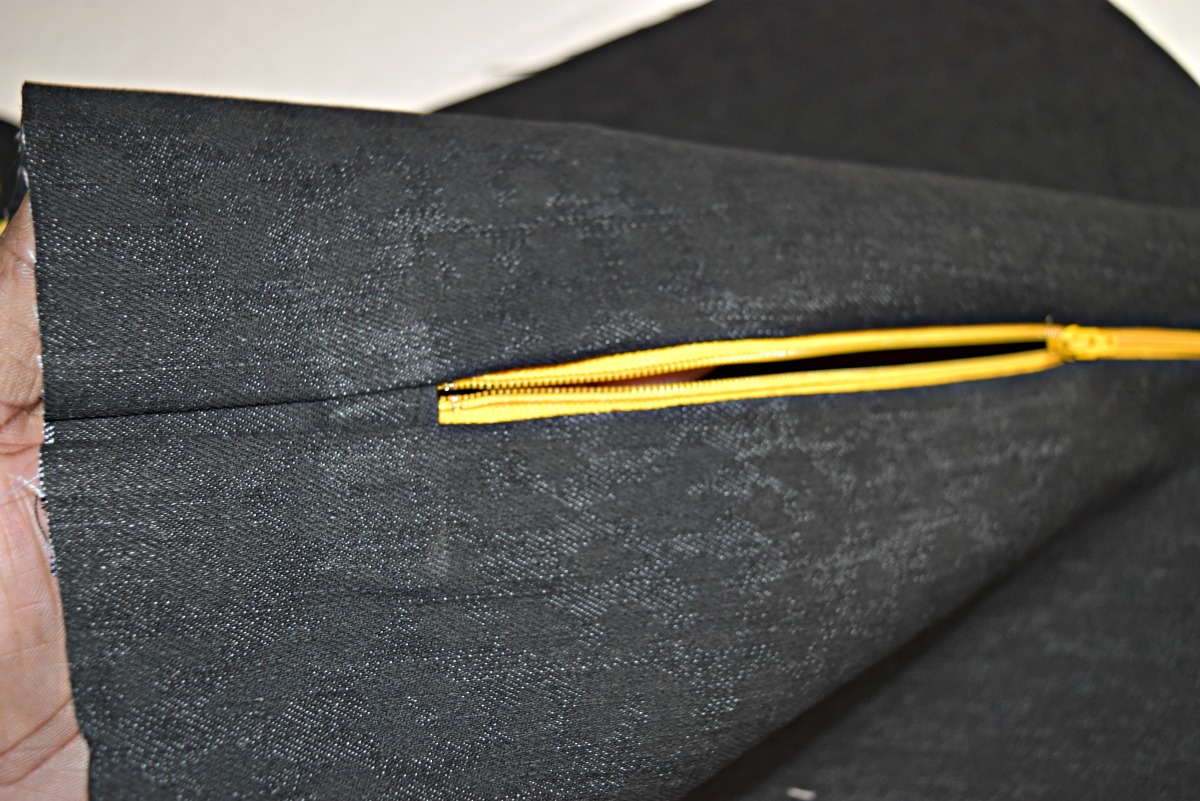
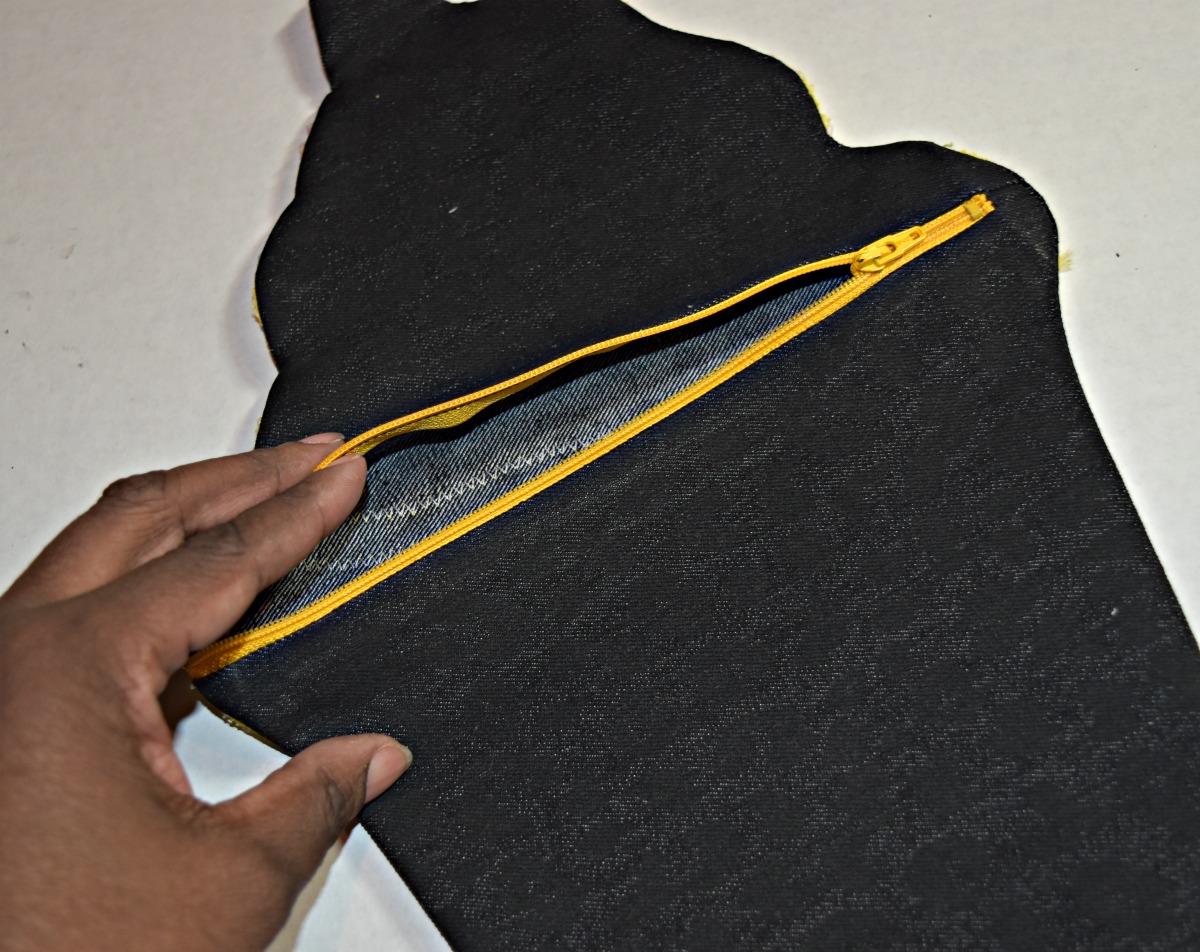
Step 7: Cut the other piece of 18″ x 15″ fabric in half across the middle. You are going to attach the zipper across the middle of one longest side of this piece of fabric. With the fabric right side up , center the zipper along the edge, right side down as shown and stitch close to the zipper. Now repeat the process with the other side of the zipper and the remaining piece of fabric. Now press.
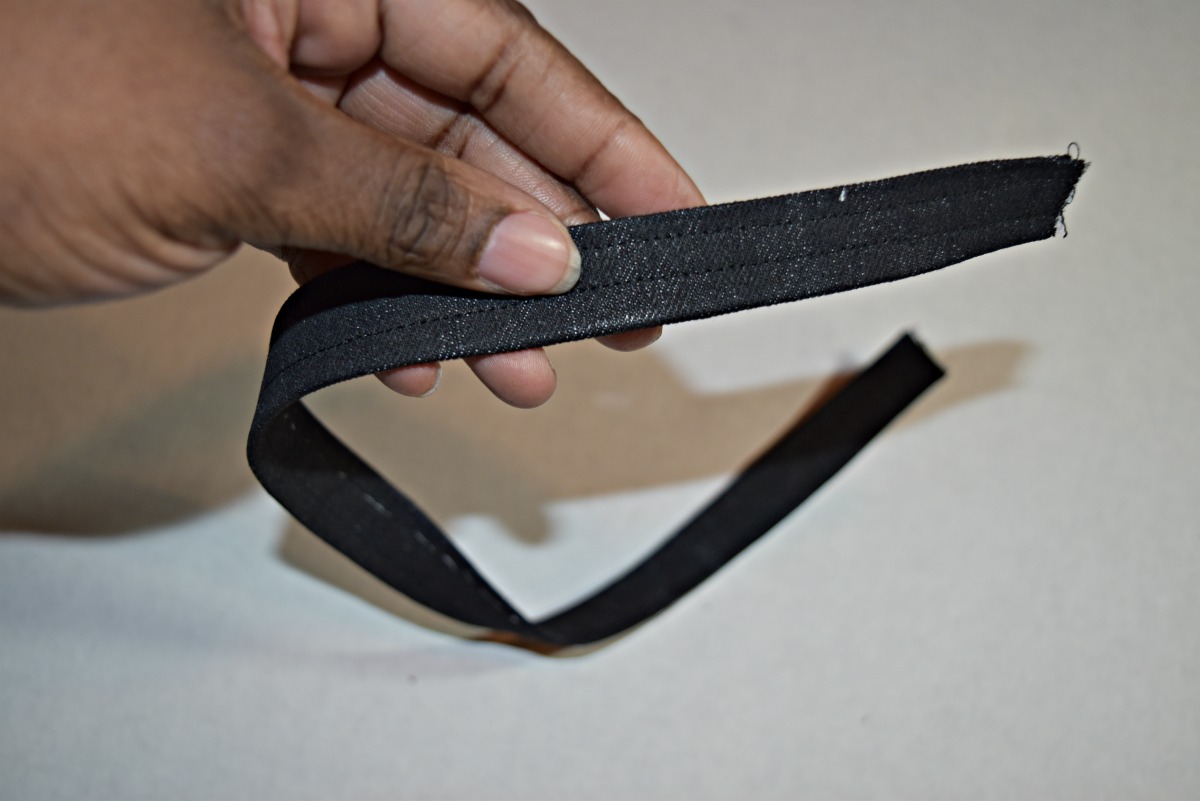
Step 8: Let’s make the strap the wristlet. Take the 14″ x 2″ piece of fabric for the strap and fold it in half, open it up and fold both edges into the middle fold line, now fold it in half and top-stitch through all layers. You can cut the strap to make it shorter at this time.
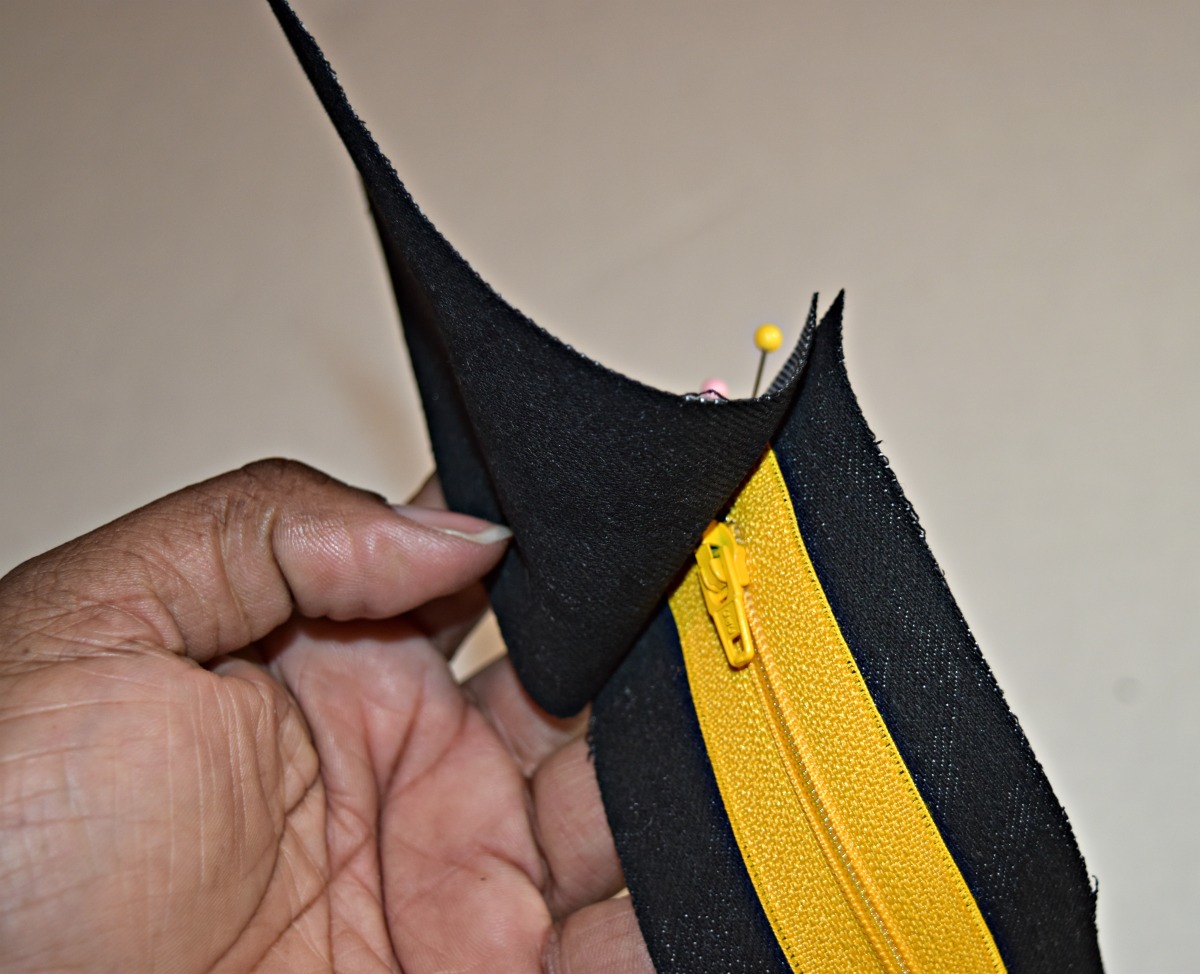
Step 9: Lay the Cupcake front facing down on top the piece with the zipper and place the zipper at the widest part of the frosting and pin in place. Make sure the zipper is open so that you can turn the purse to the right side. Fold your strap in half and place it in the seam (I placed my trap at the top with the cherry, but you can add it anywhere). The strap should be on the inside of the wristlet sticking through the seam allowance to catch in the stitching.
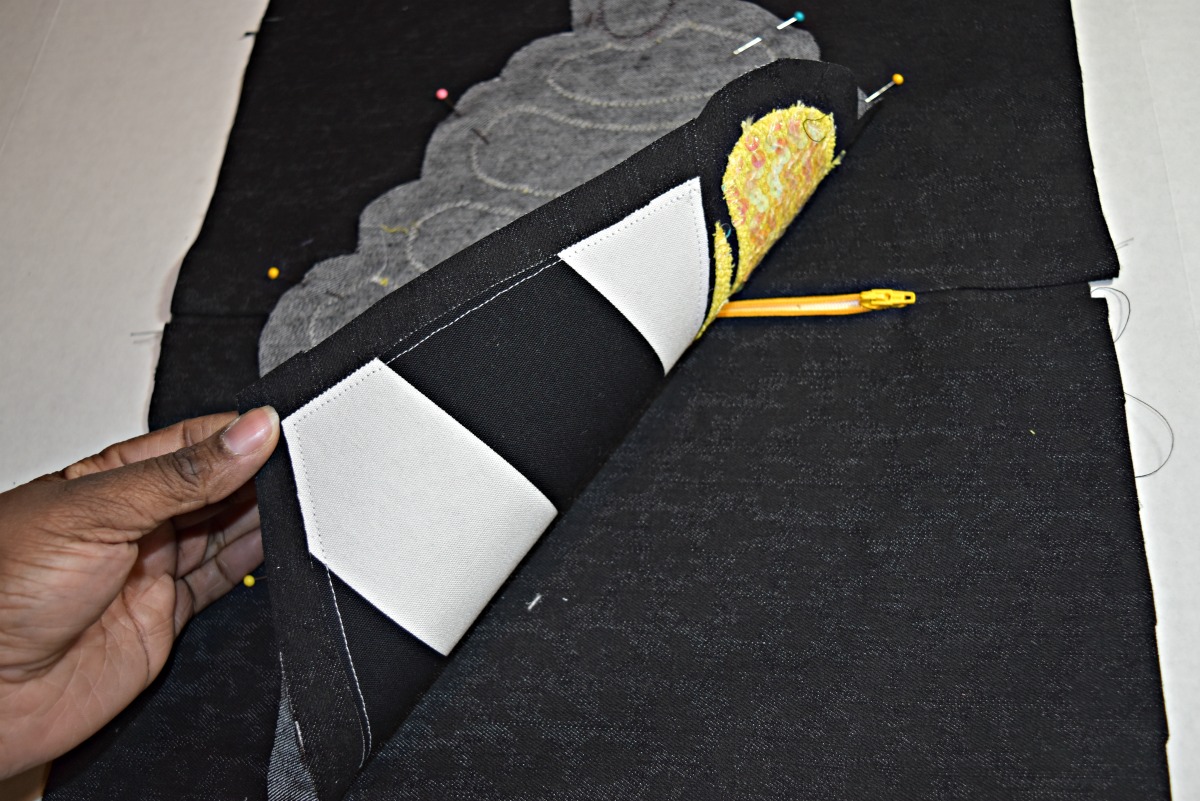
Step 10: Now stitch all around the cupcake about 1/2″ from the edge, making sure you don’t catch the zipper pull. Trim the edges and clip into the frosting corners and turn over to the right side a press.

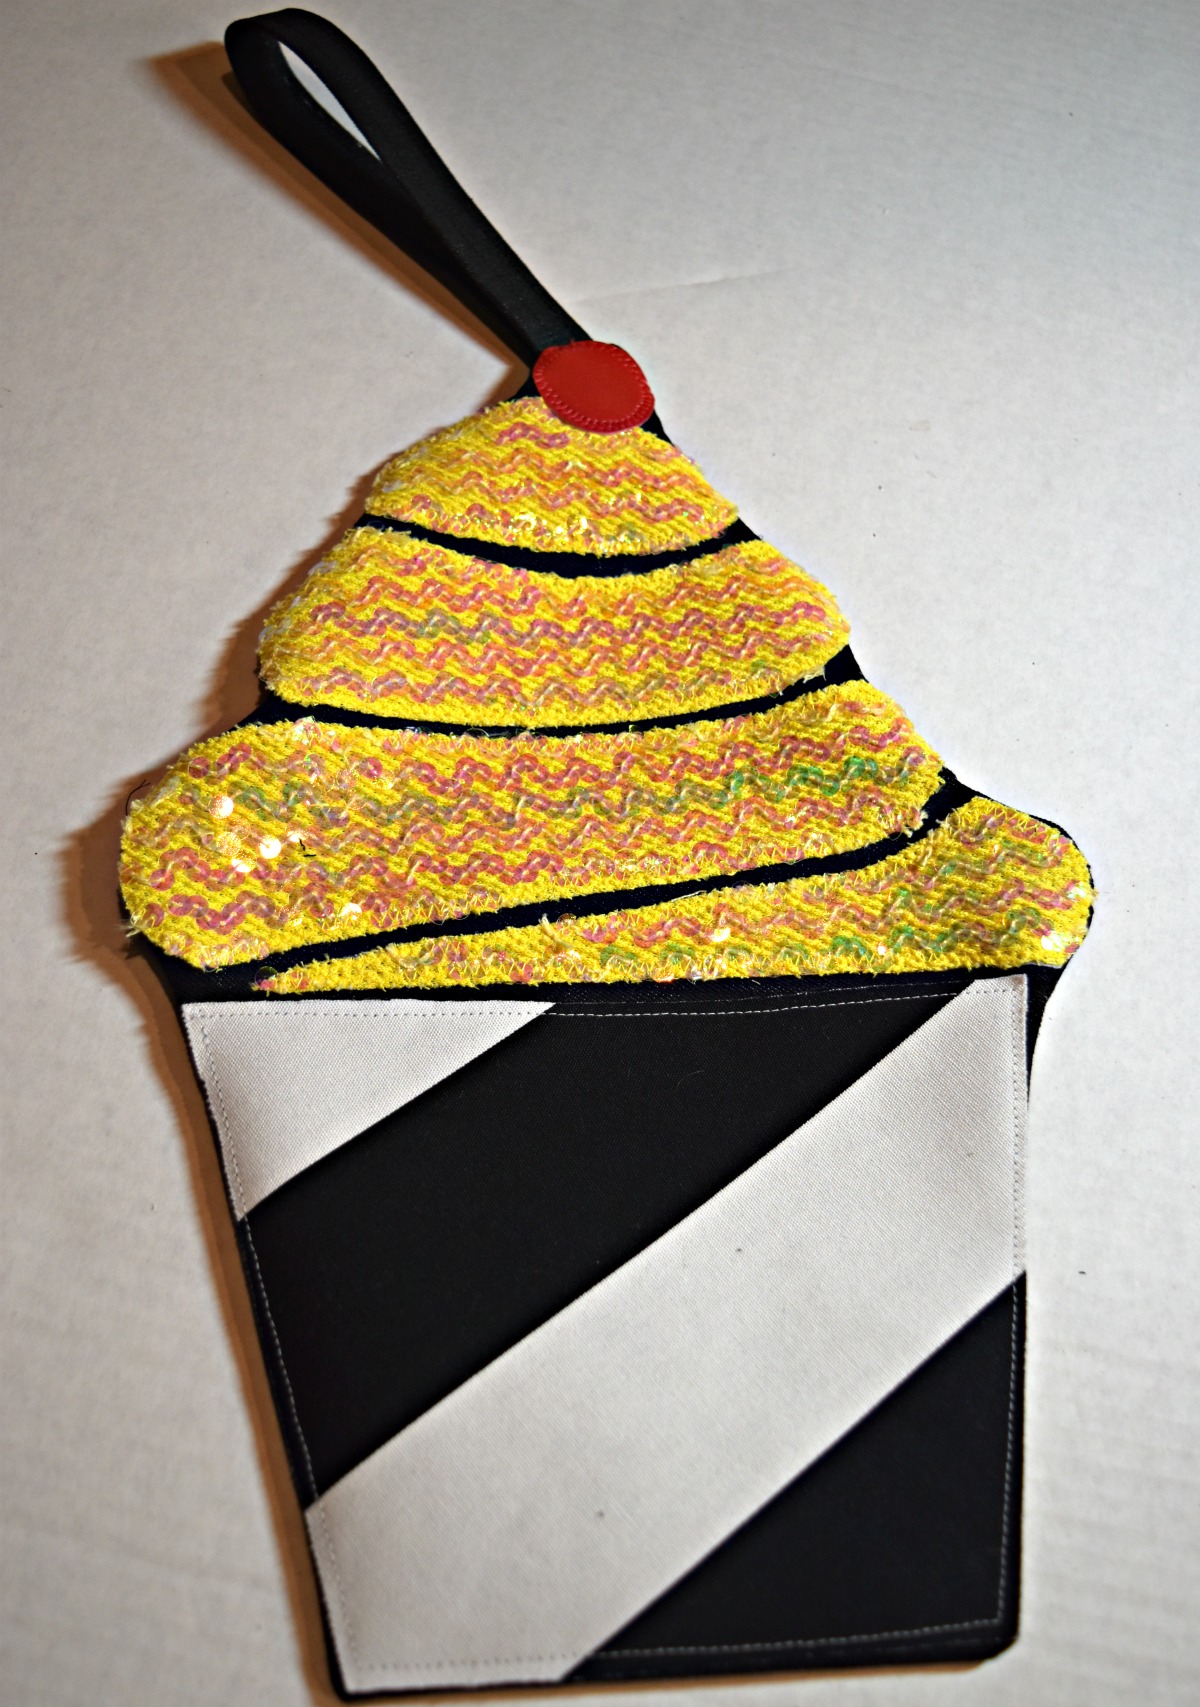
I hope you’ve enjoyed this fun DIY as much as I did. You can also embellish your cupcake with toppings, the fun possibilities are endless!
Used Products


What you might also like


One comment on “How to Make a Cupcake Wristlet”
Leave a Reply
You must be logged in to post a comment.

Must ttry the wristlet. Kambrook