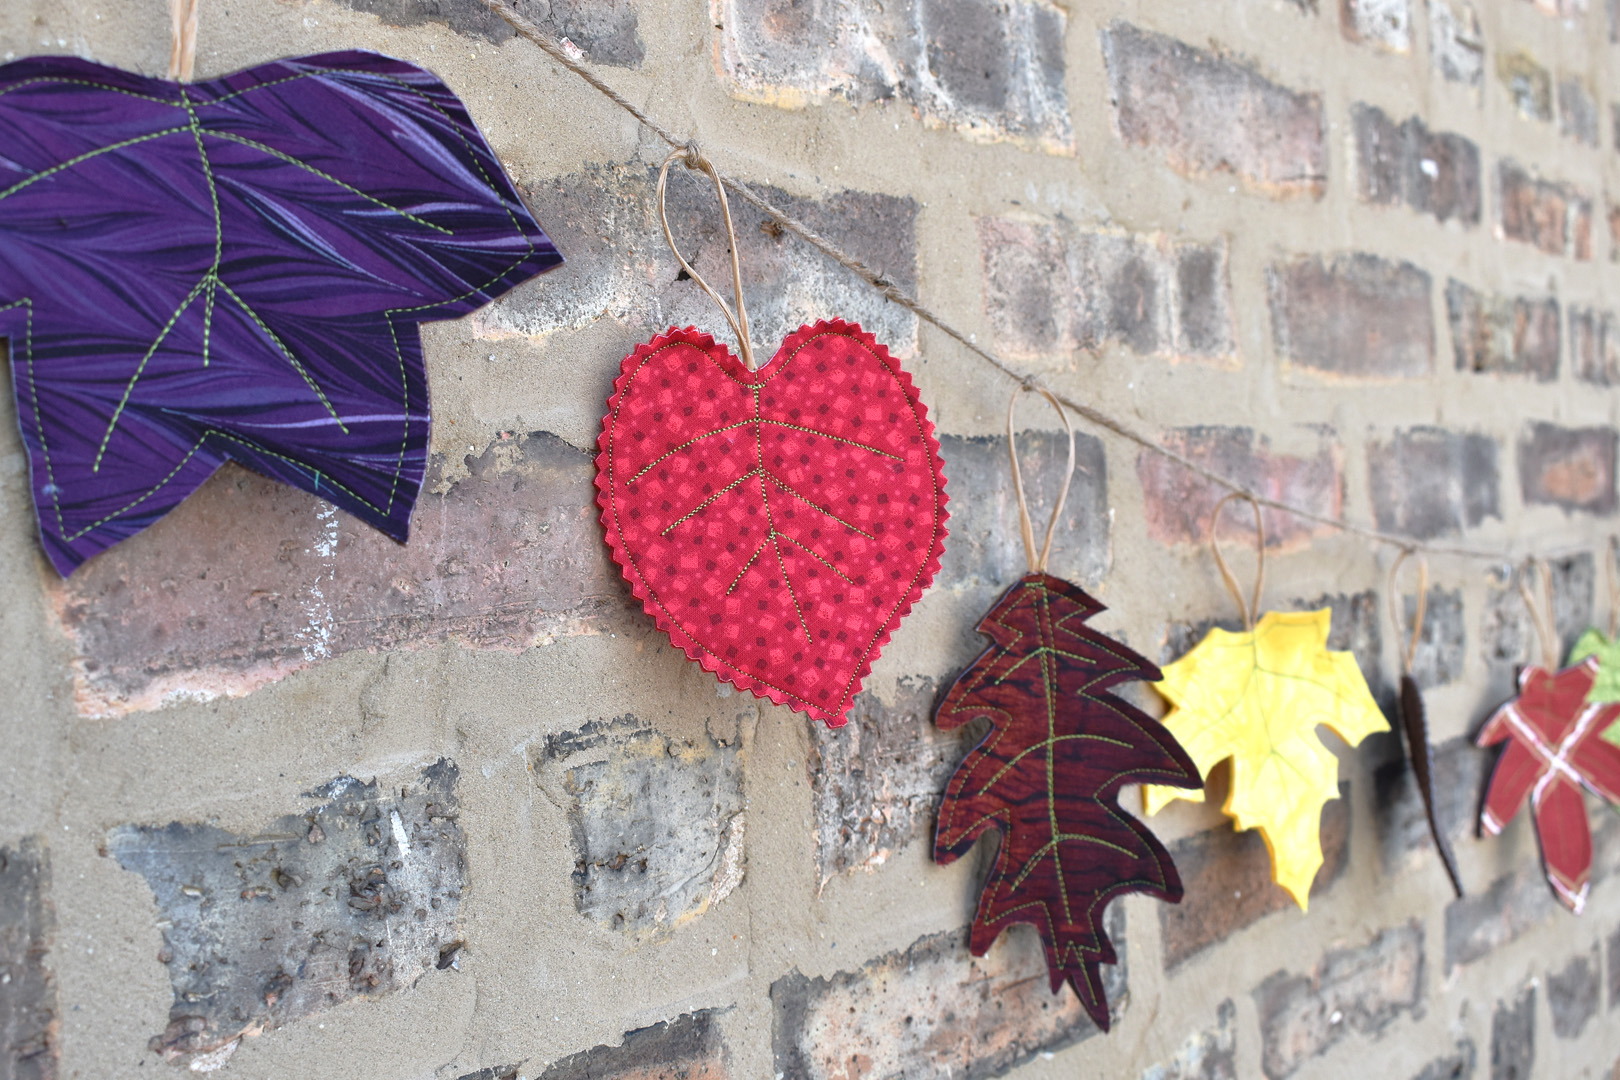
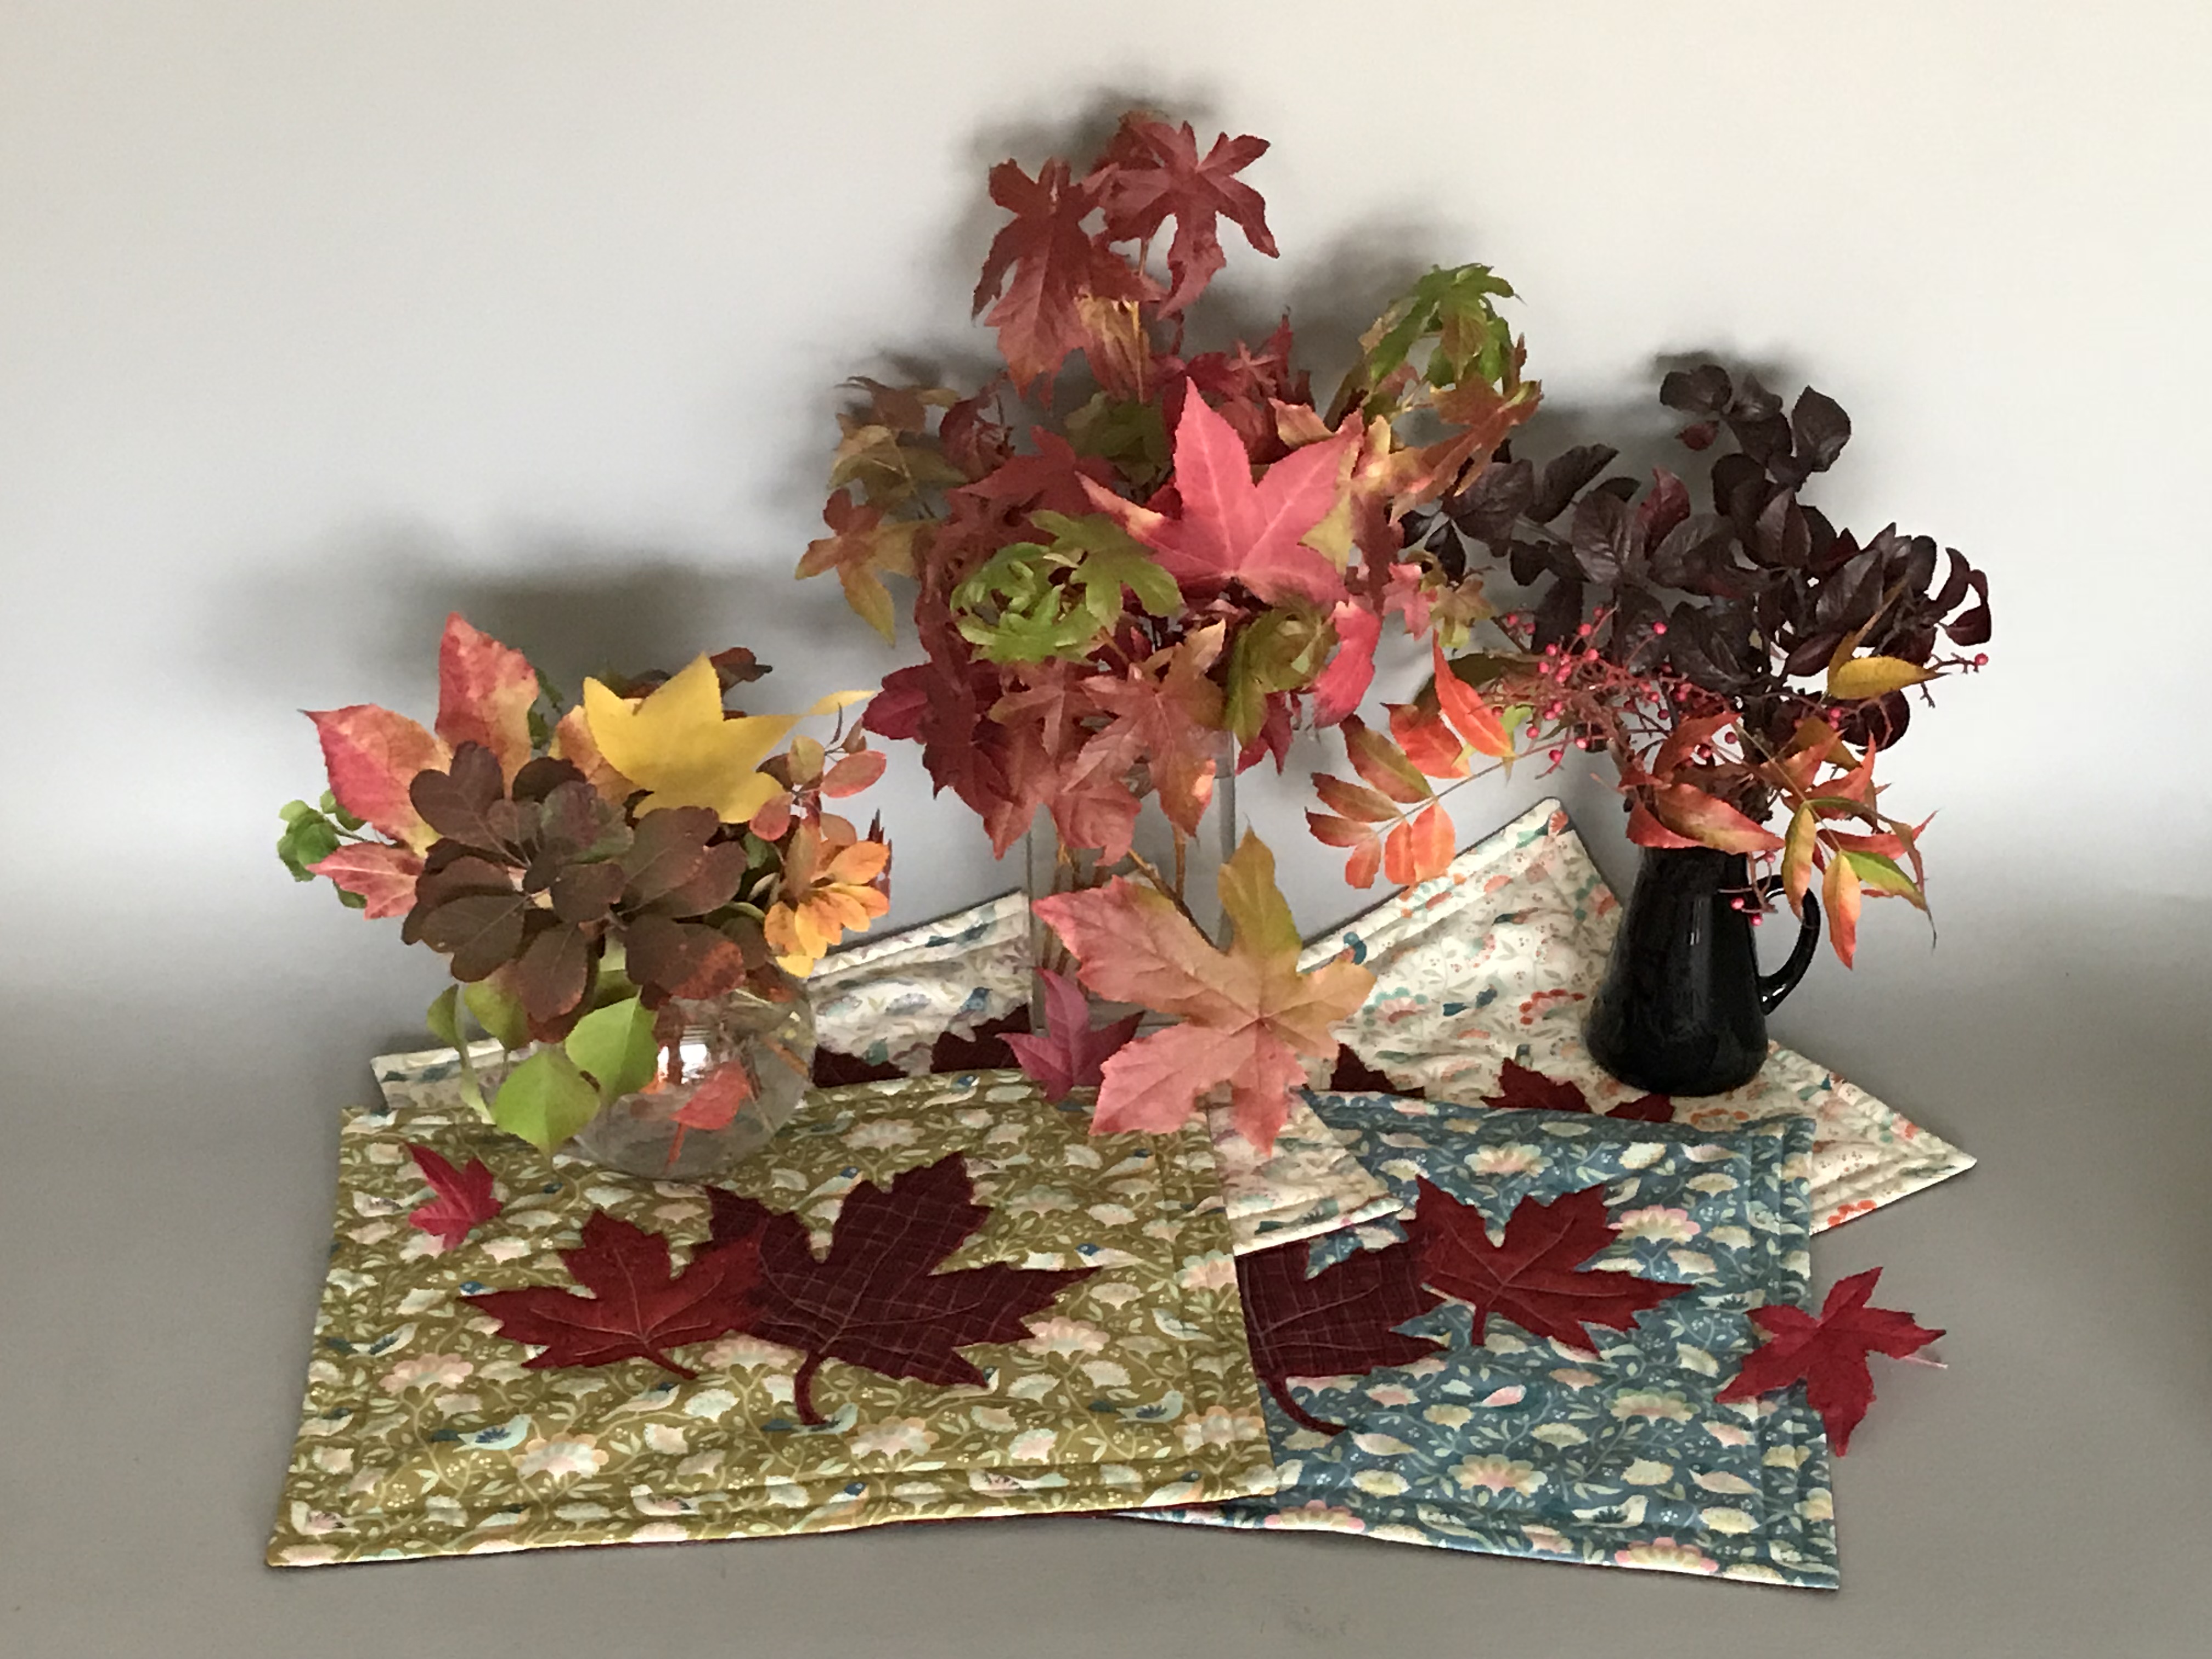
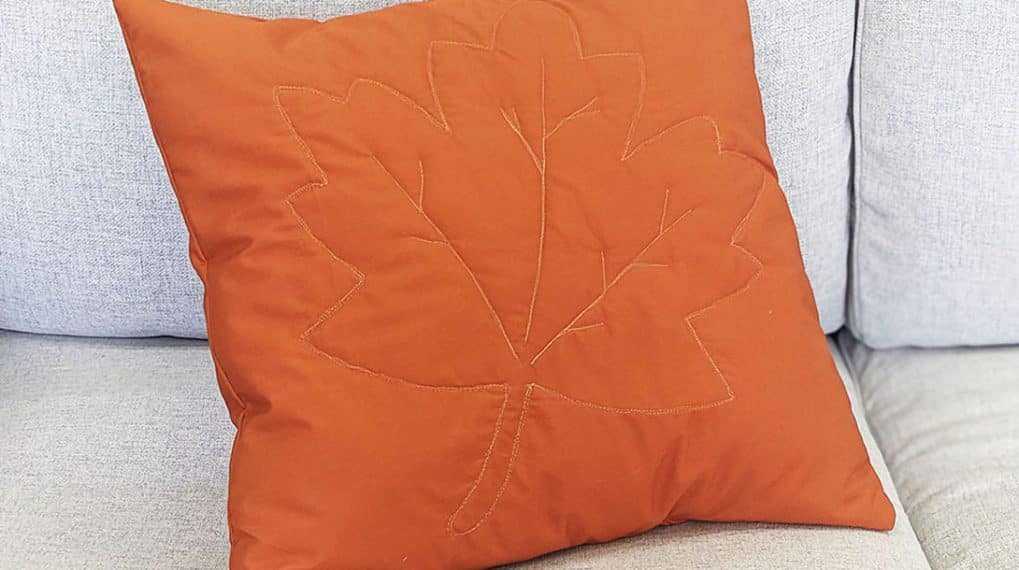
DIY Fall Leaf Décor
Use your sewing machine to make a bunch of forever fall leaves to decorate your home this season. Grab a handful of fall colored fabric scraps and a few other craft supplies, and follow along with this tutorial to make a fall leaf garland, trivet, and table runner.
Materials to Make Fall Leaf Décor
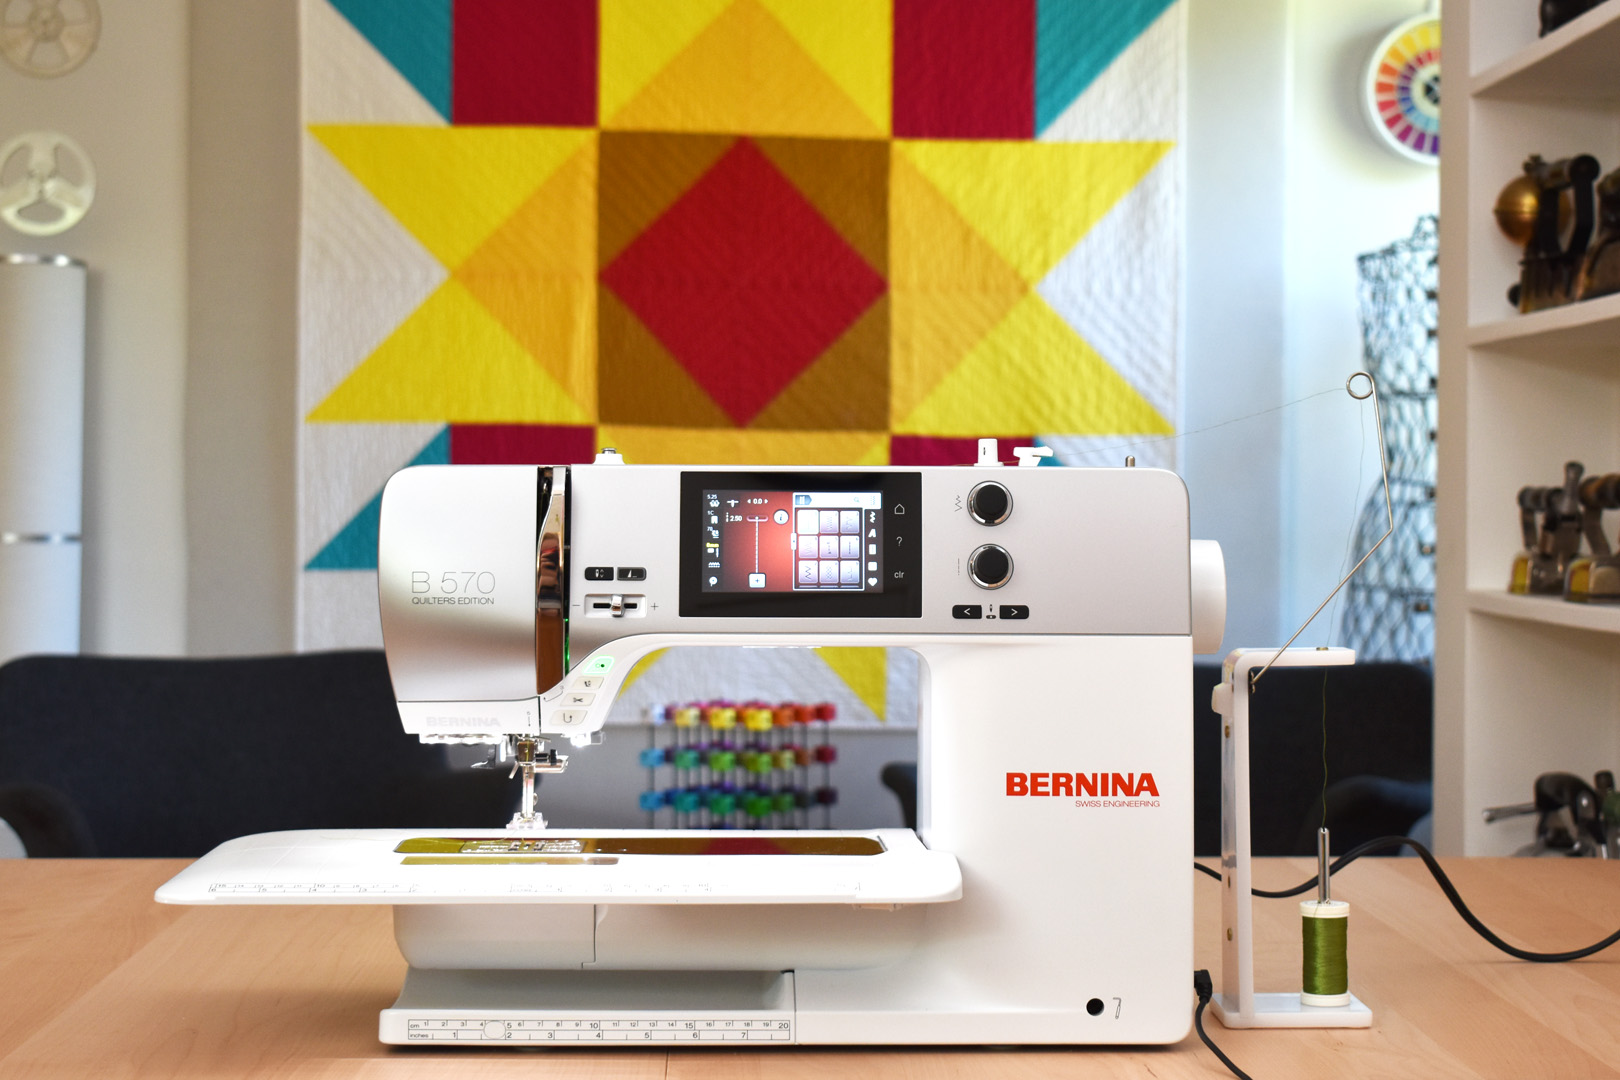
- Sewing machine (I use a BERNINA 570 QE)
- Straight stitch needle plate
- Embroidery Foot with Clear Sole #39C
- Scraps of fabrics about 6″ x 7″ in fall colors (red, orange, golden yellow, warm green, brown)
- 3 yards of Pellon 808 Craft-Fuse (will make one garland, one trivet, and one table runner)
- 72″ washable craft felt: 1/4 yard each of red, orange, golden yellow, warm green, and brown
- Isacord polyester embroidery thread in Moss Green 5934
- Sewing pins
- Sharp fabric shears
- Thread snips
- Download and print the Fall Leaf Templates
- For garland: household jute twine and polypropylene tying rope
- For trivet and table runner: OESD AquaMesh wash-away stabilizer 10″ wide

How to Sew Fall Fabric Leaves
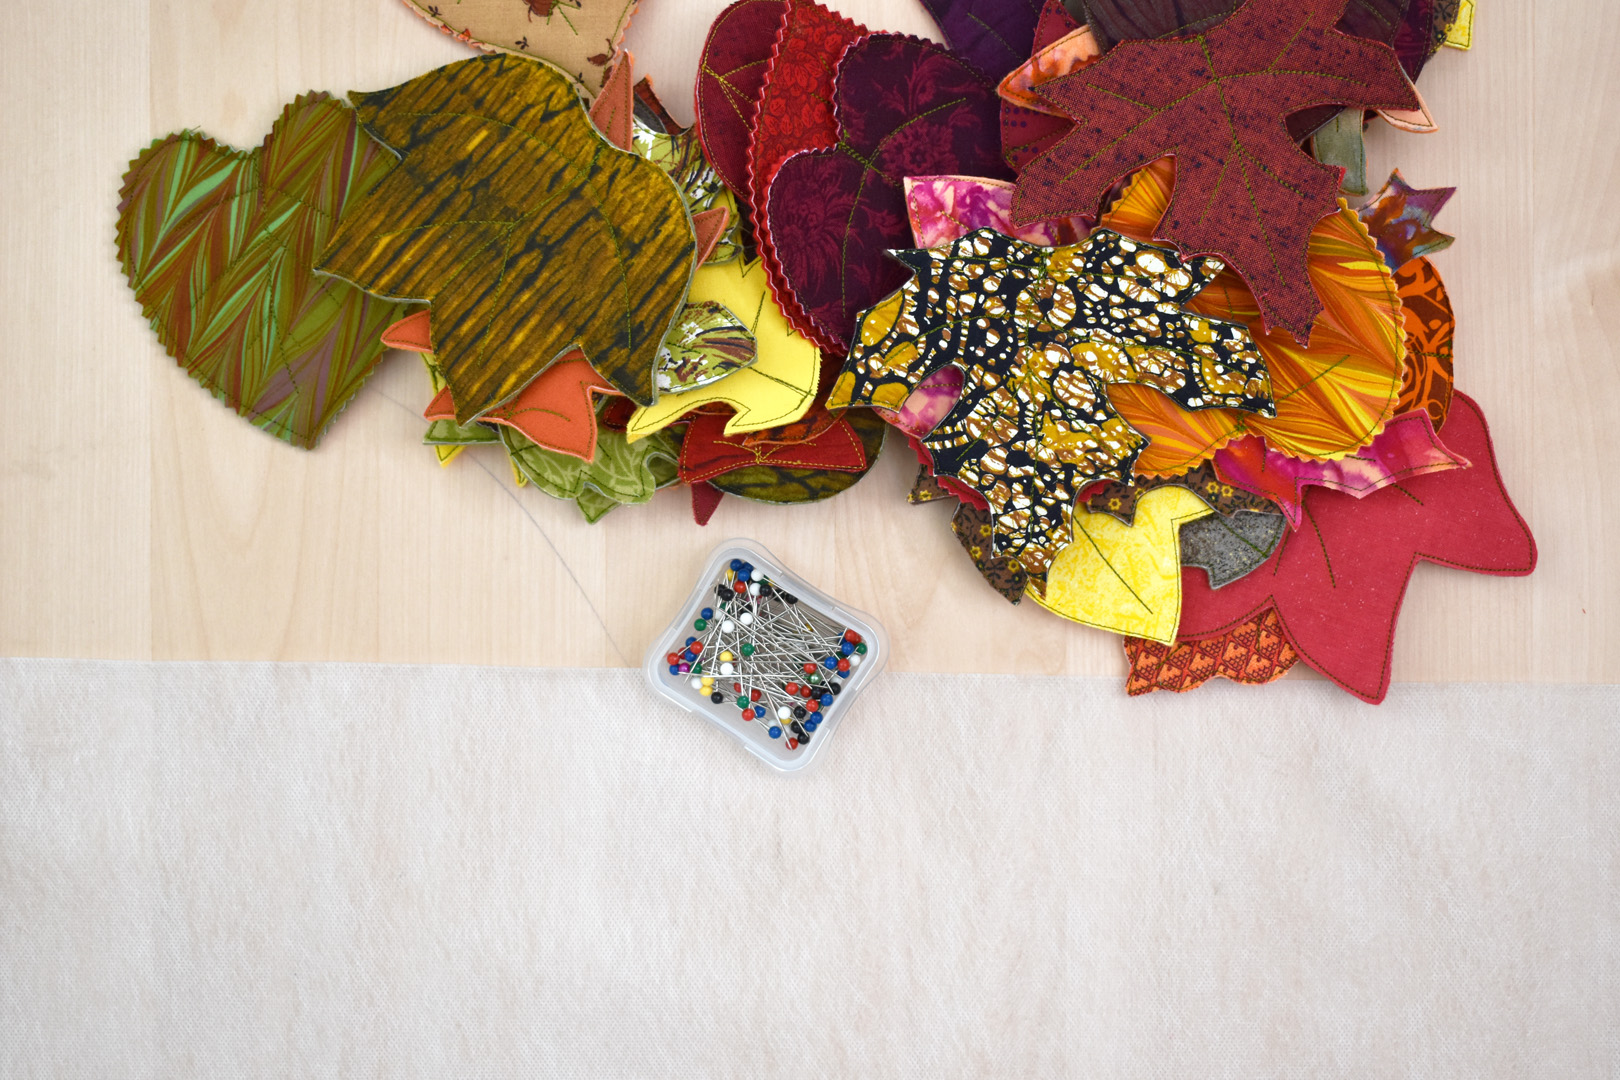
Follow these simple steps to make one fall leaf. The materials list includes enough supplies to make leaves for one 6-foot leaf garland, trivet, and table runner.
- Garland: make 12 leaves with polypropylene loop stems
- Trivet: make 16-20 leaves without stems
- Table runner: make 36-40 leaves without stems
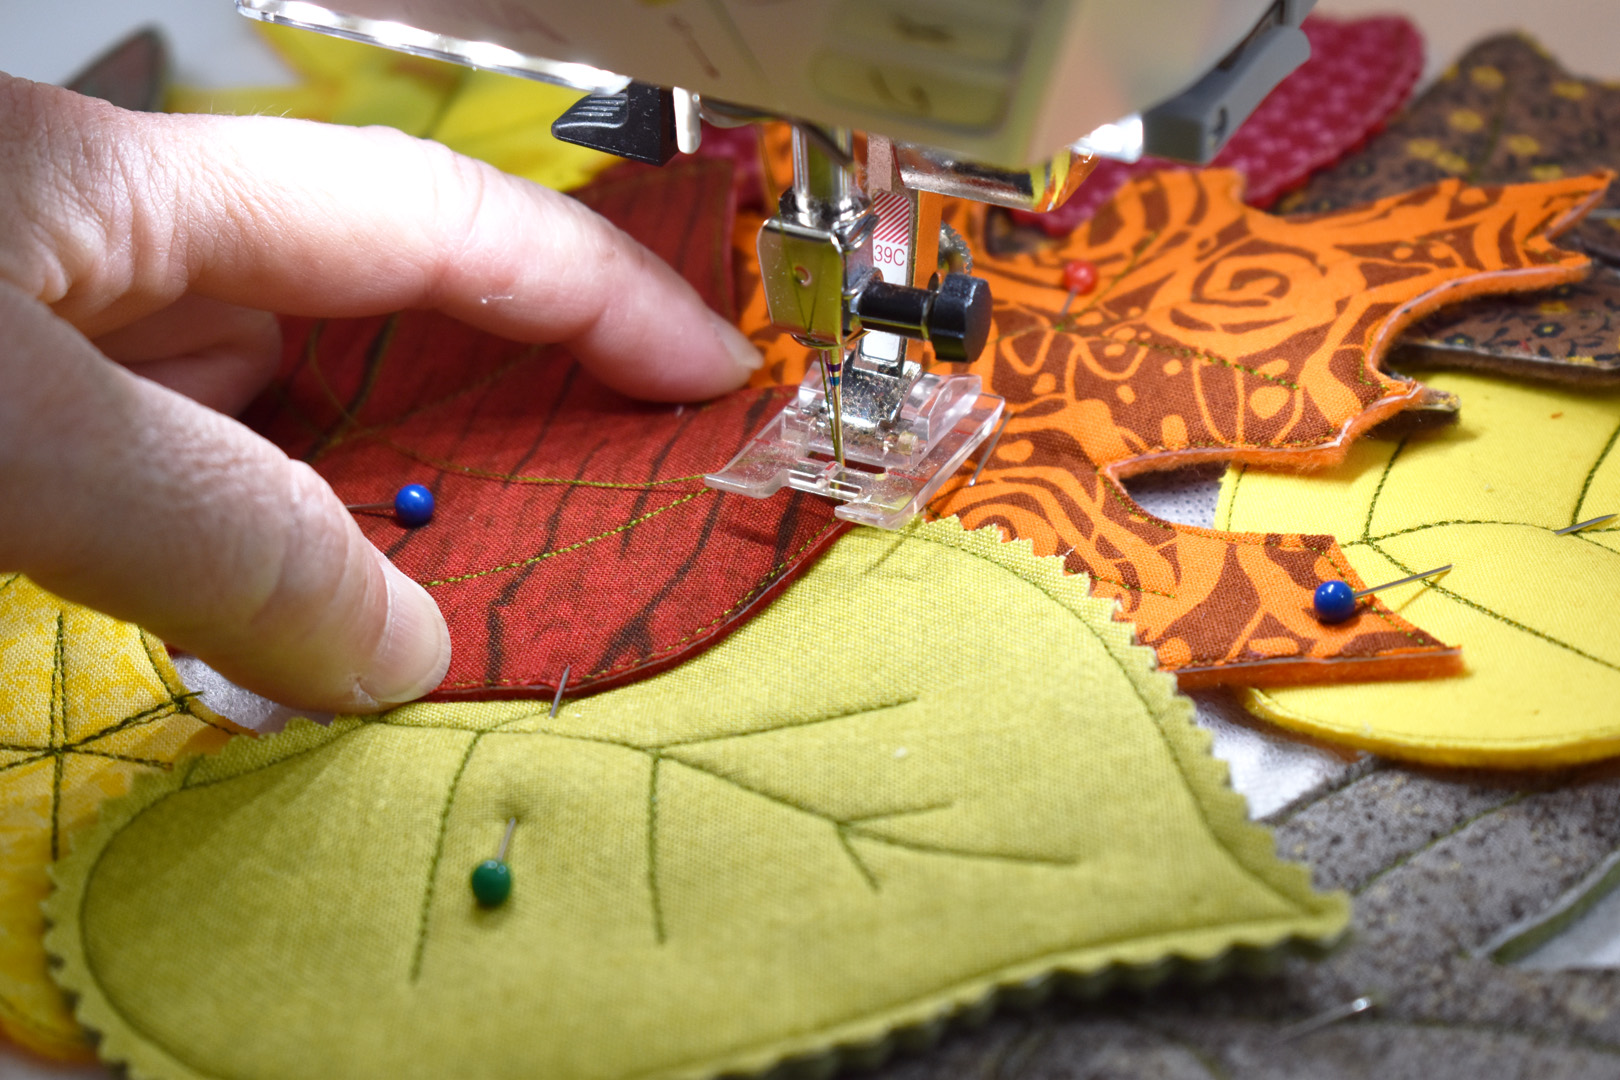
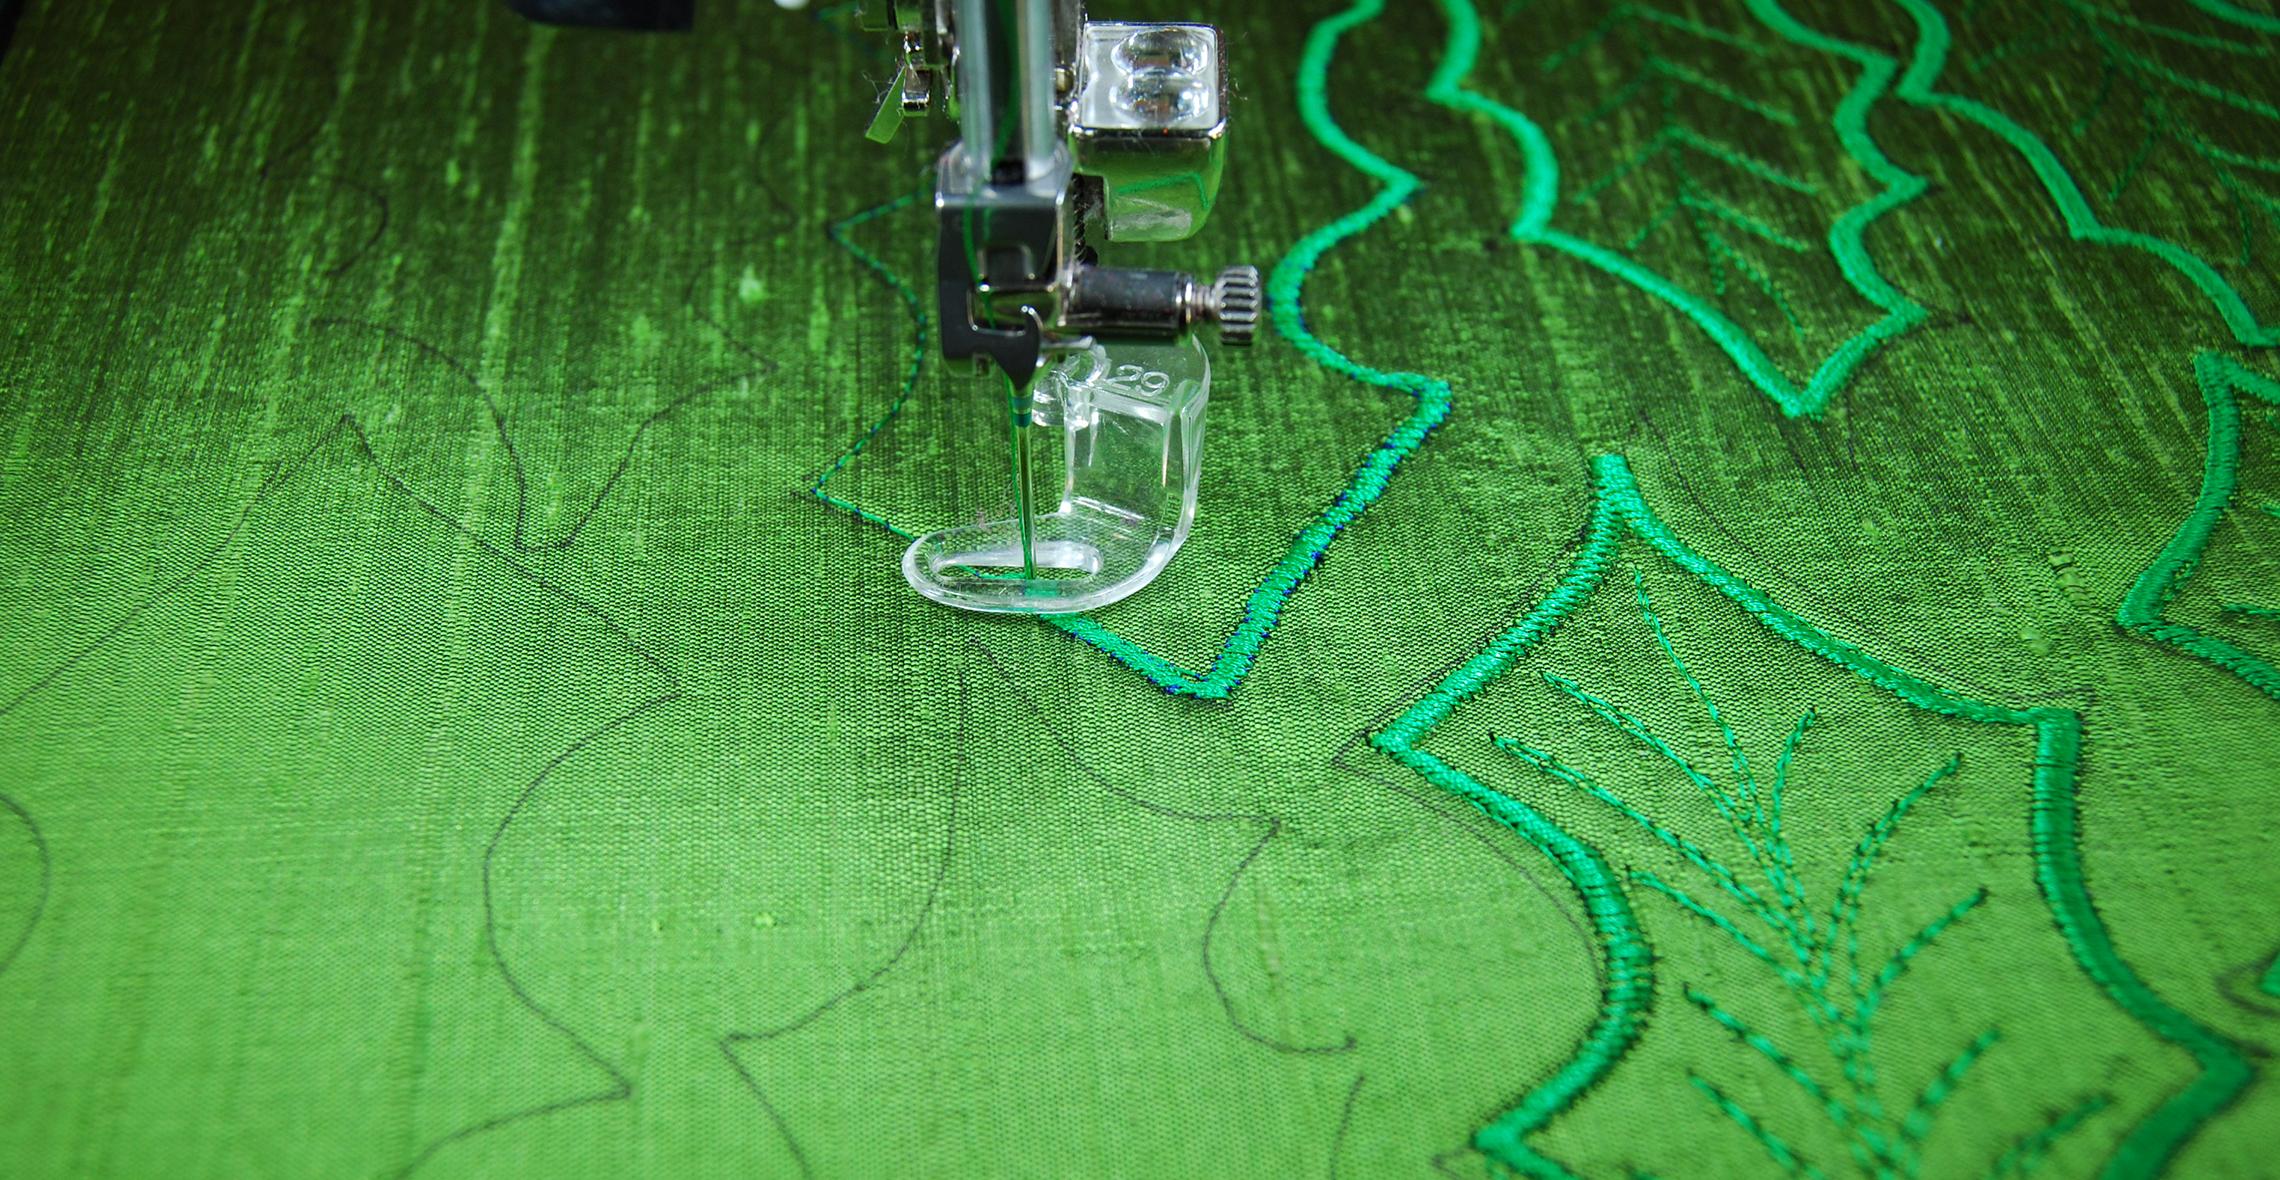
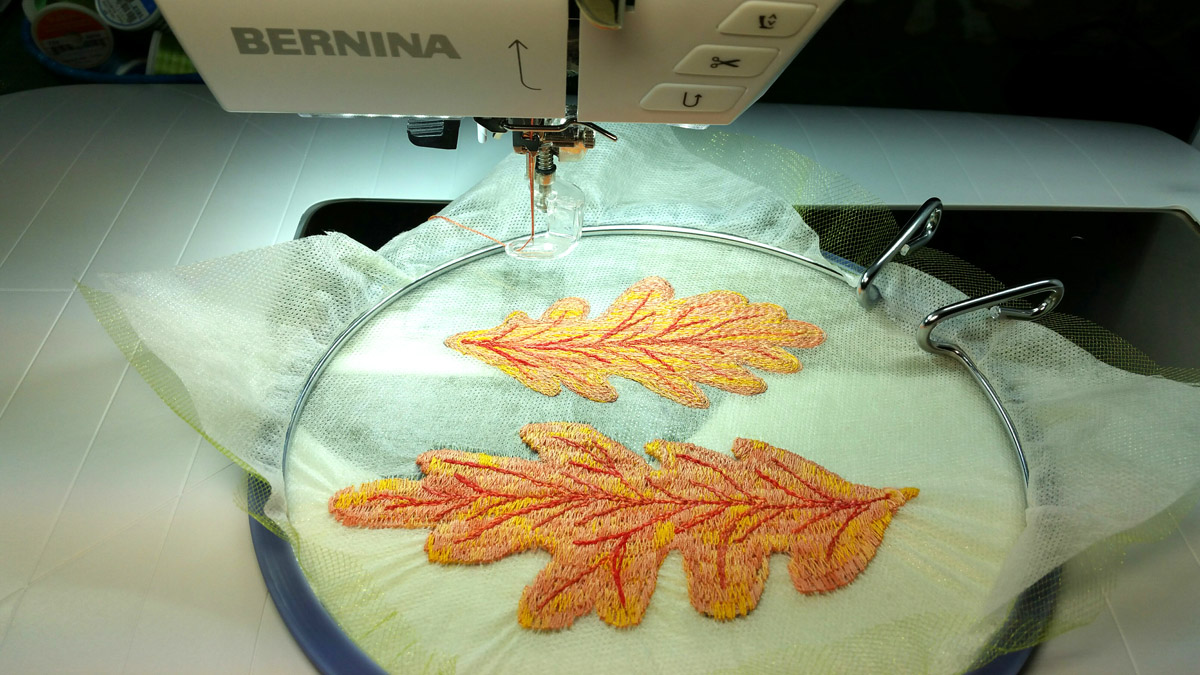
Set up your sewing machine to sew the leaves. Use a straight stitch needle plate, a sharp sewing machine needle size 90/14, and polyester embroidery thread in a warm green like Isacord color Moss Green 5934.
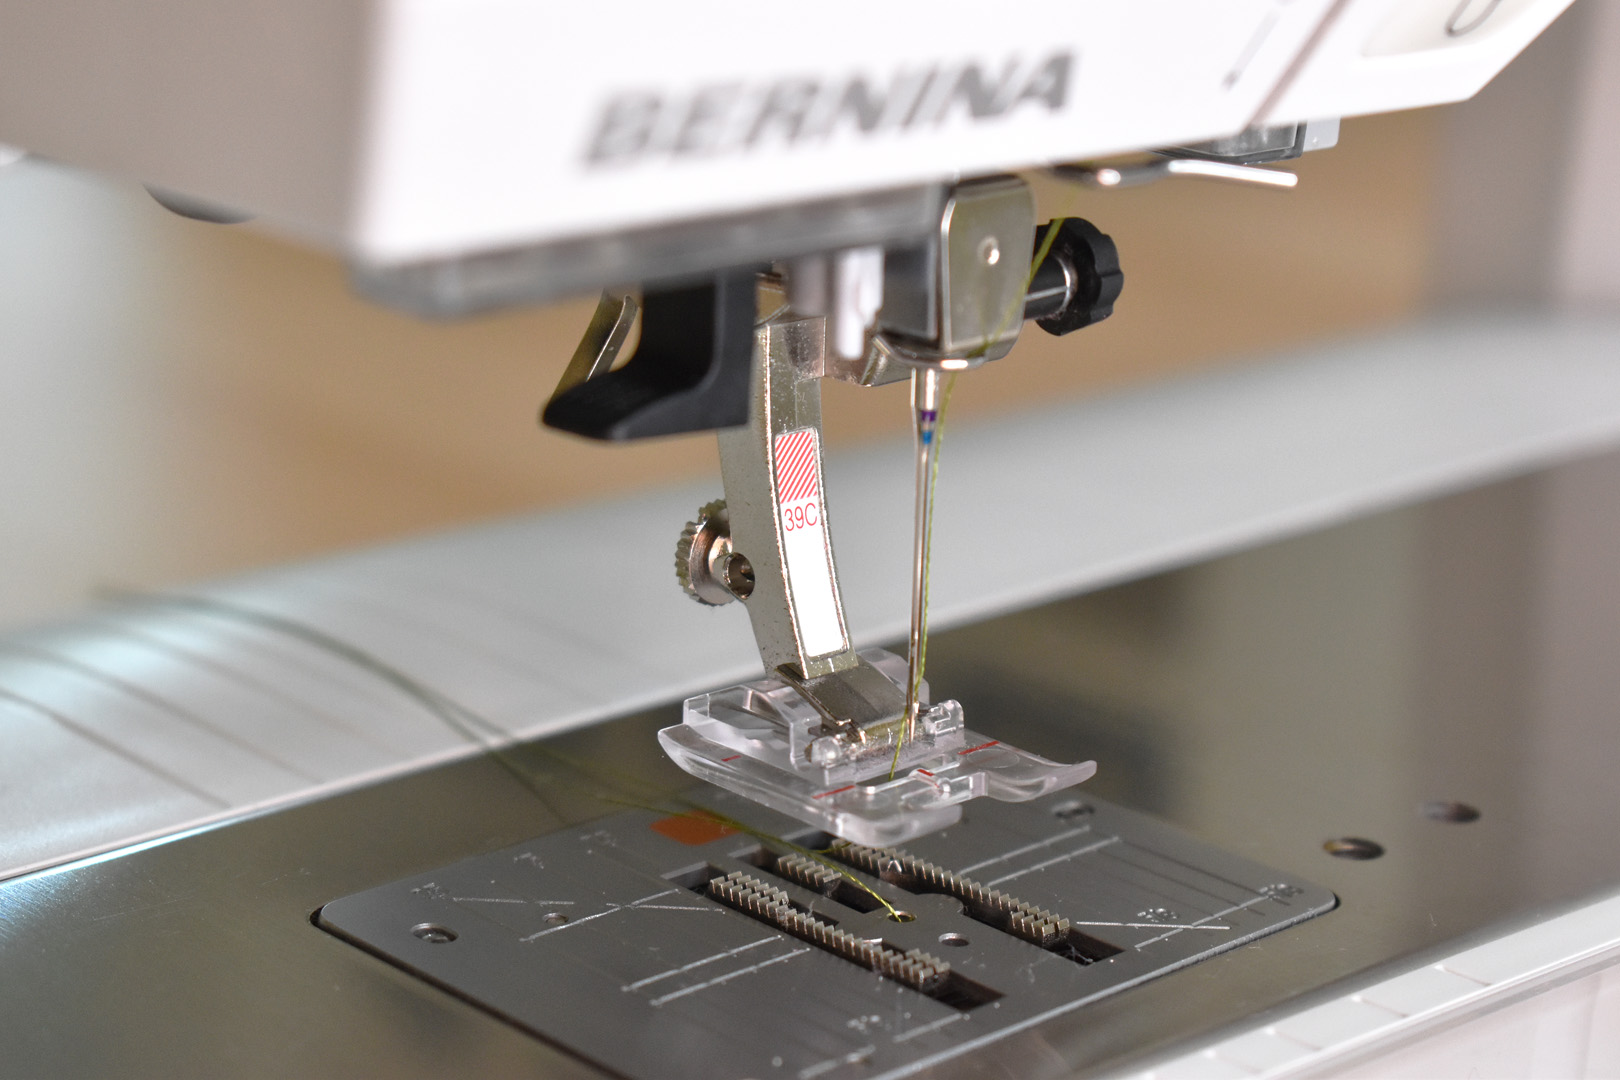
Use a clear presser foot to help you see exactly where you are sewing, such as the Embroidery Foot with Clear Sole #39C.
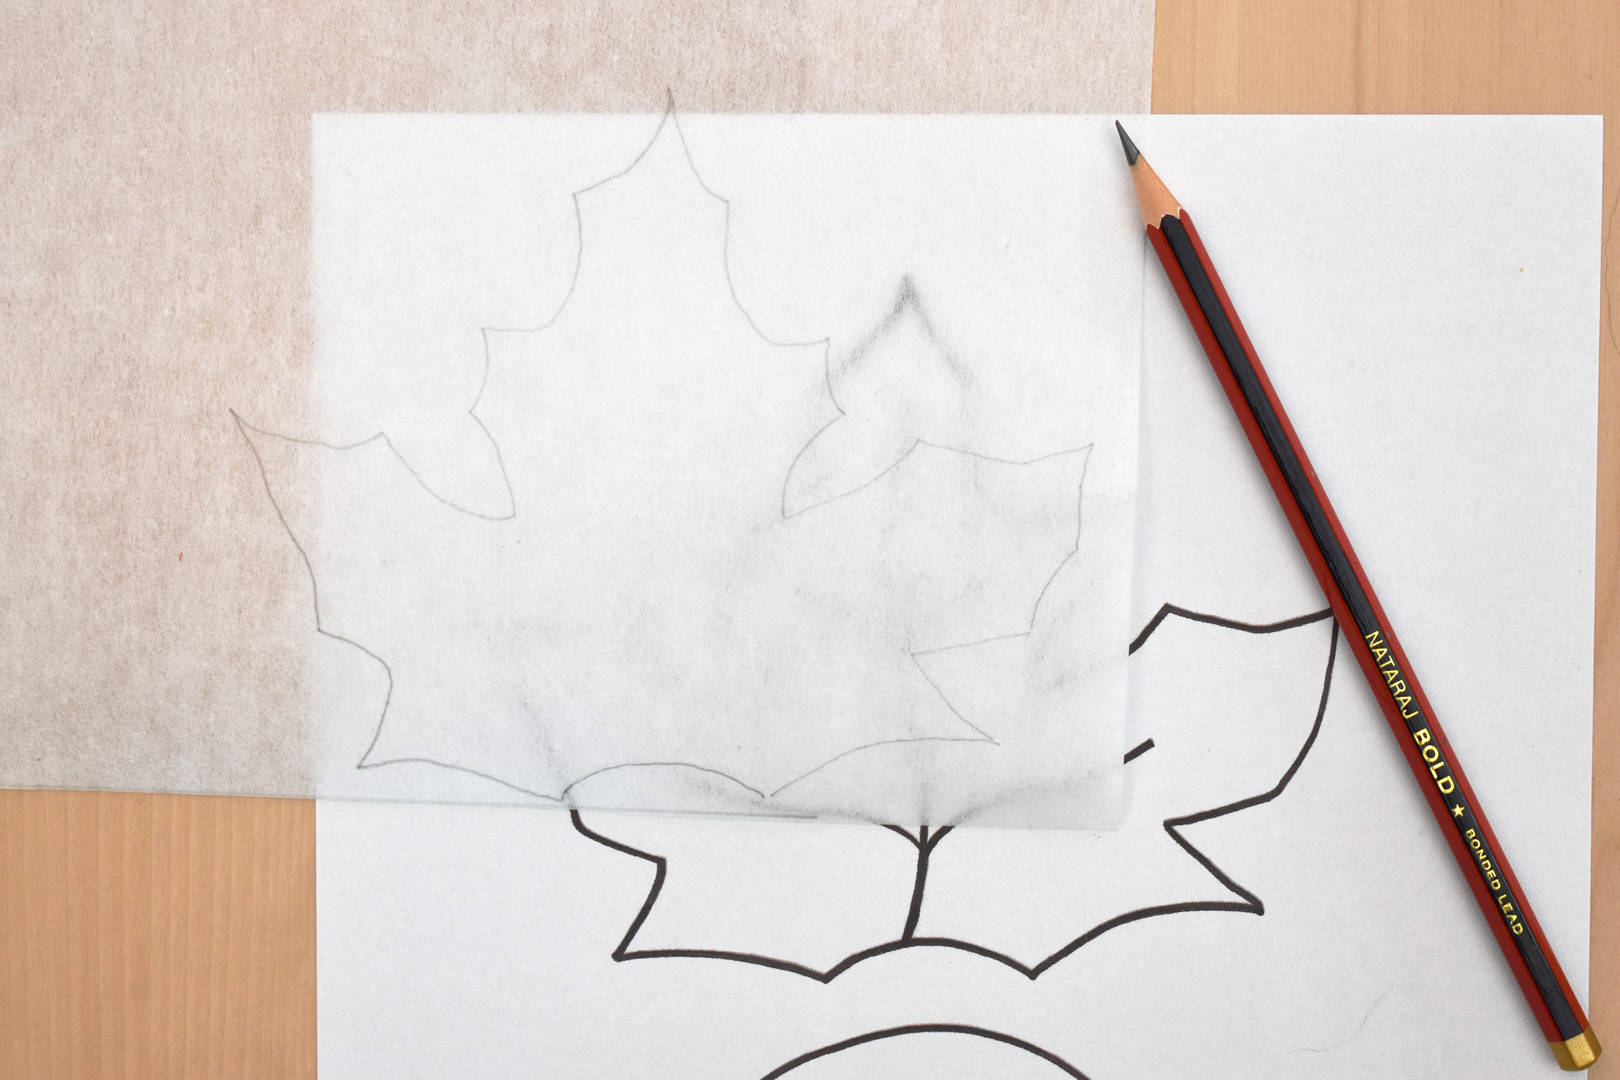
Download and print the fall leaf templates at 100% (do not shrink to fit page). On the non-fusible side of the Craft-Fuse (the fusible side looks slightly shiny) trace the outline of a leaf with pencil.
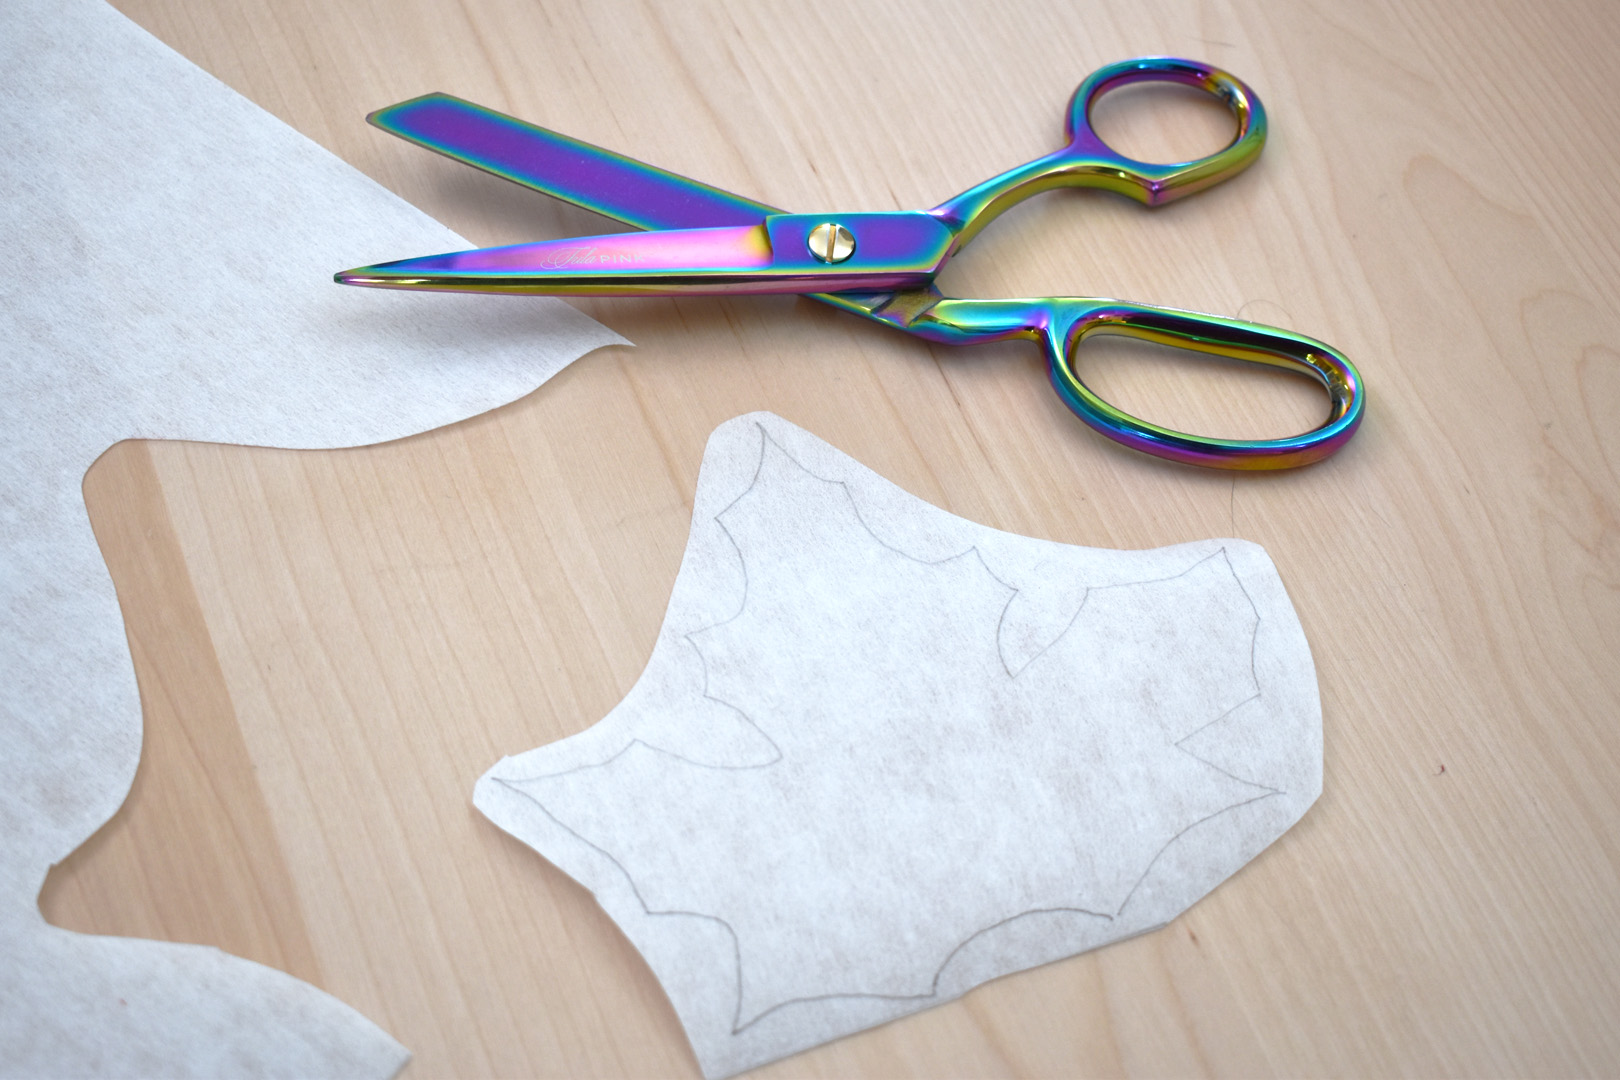
Cut around the outline of the leaf shape leaving at least 1/4″ around the shape.
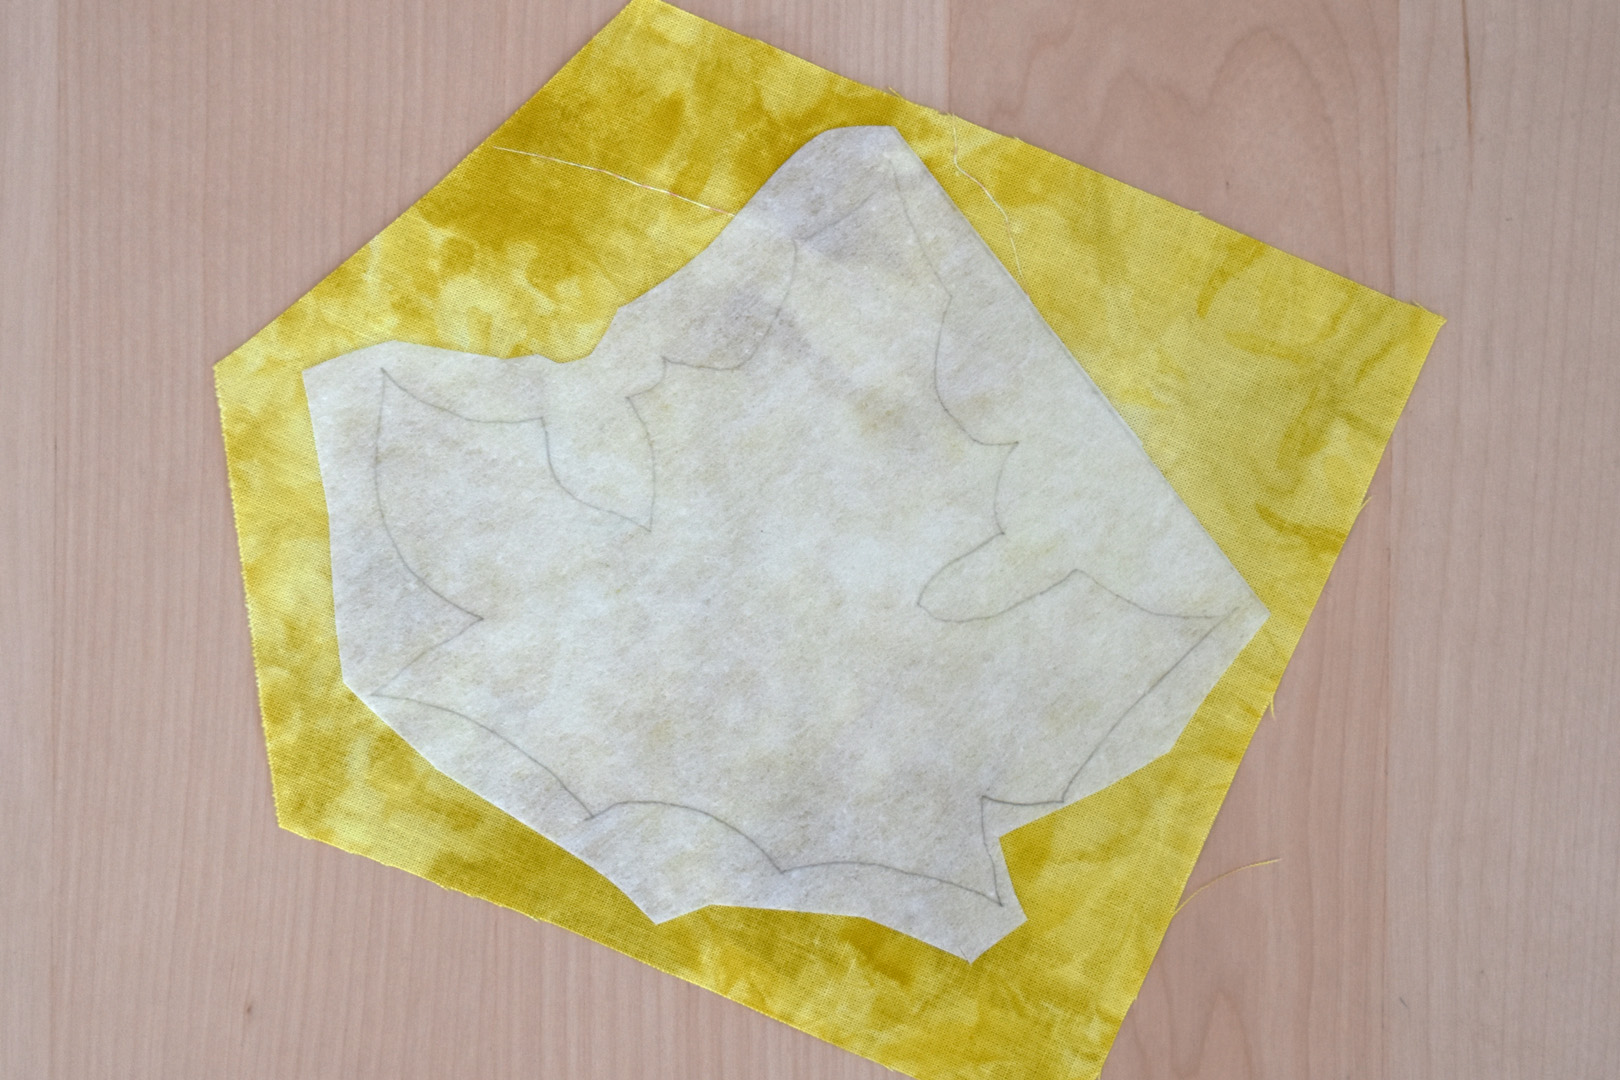
Cut a fabric scrap to size, about 6″ x 7,” and press the Craft-Fuse to the wrong side of the fabric scrap.

Cut out the leaf shape following the traced pencil lines with a pair of very sharp shears.
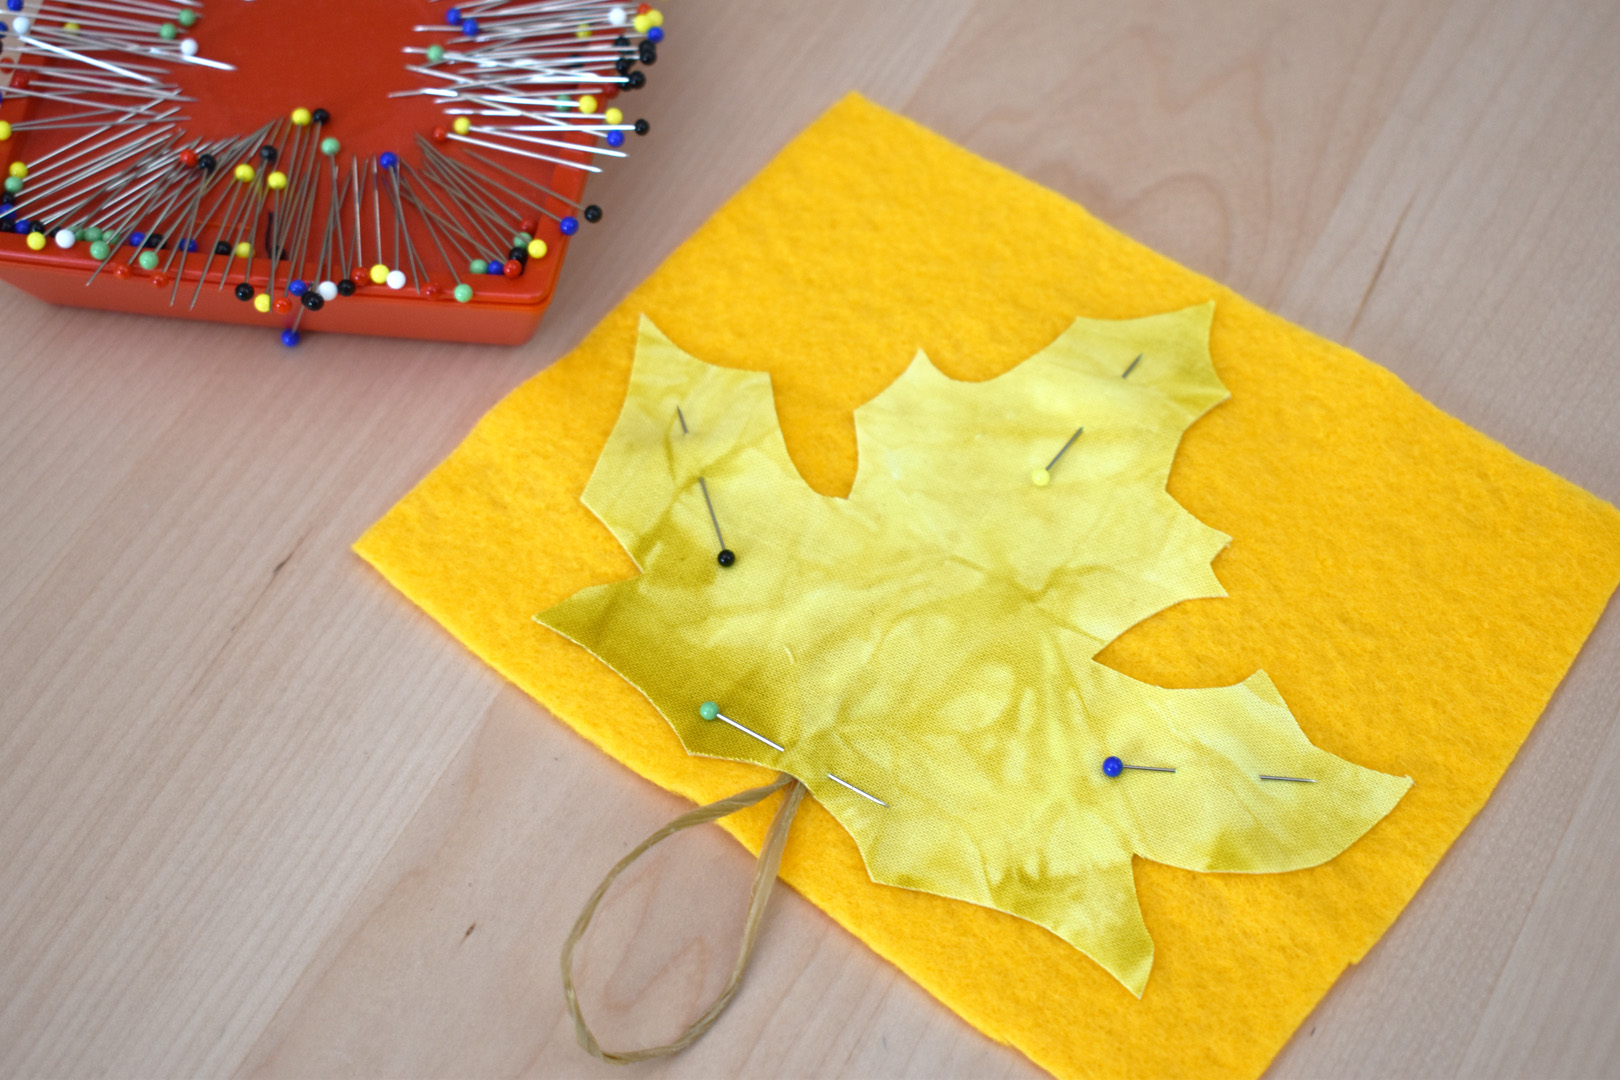
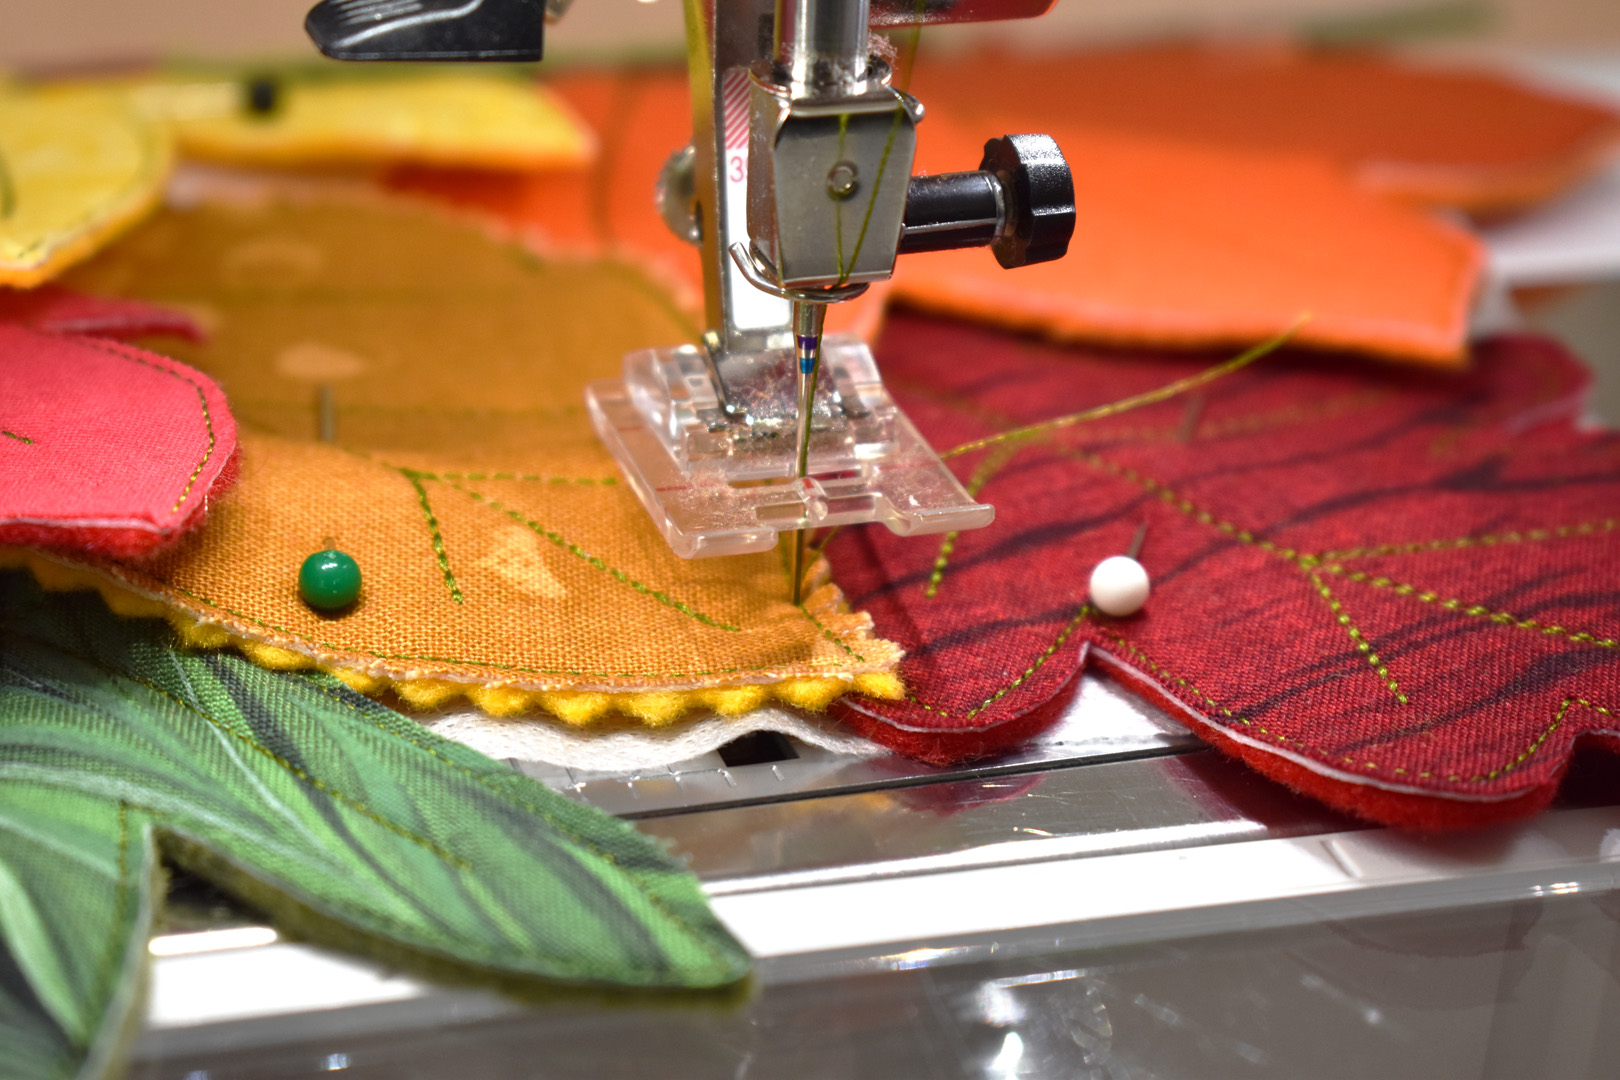
Cut a corresponding colored felt square slightly larger than the leaf shape, and pin the fabric leaf on top of the felt, wrong sides together. Leaves for the trivet and tablerunner do not need a stem. To create the stem for the garland leaves, cut a 6″ piece of polypropylene tying rope, fold it in half, and place about 1/2″ of the ends in between the felt and fabric at the base of the leaf. Pin in place.
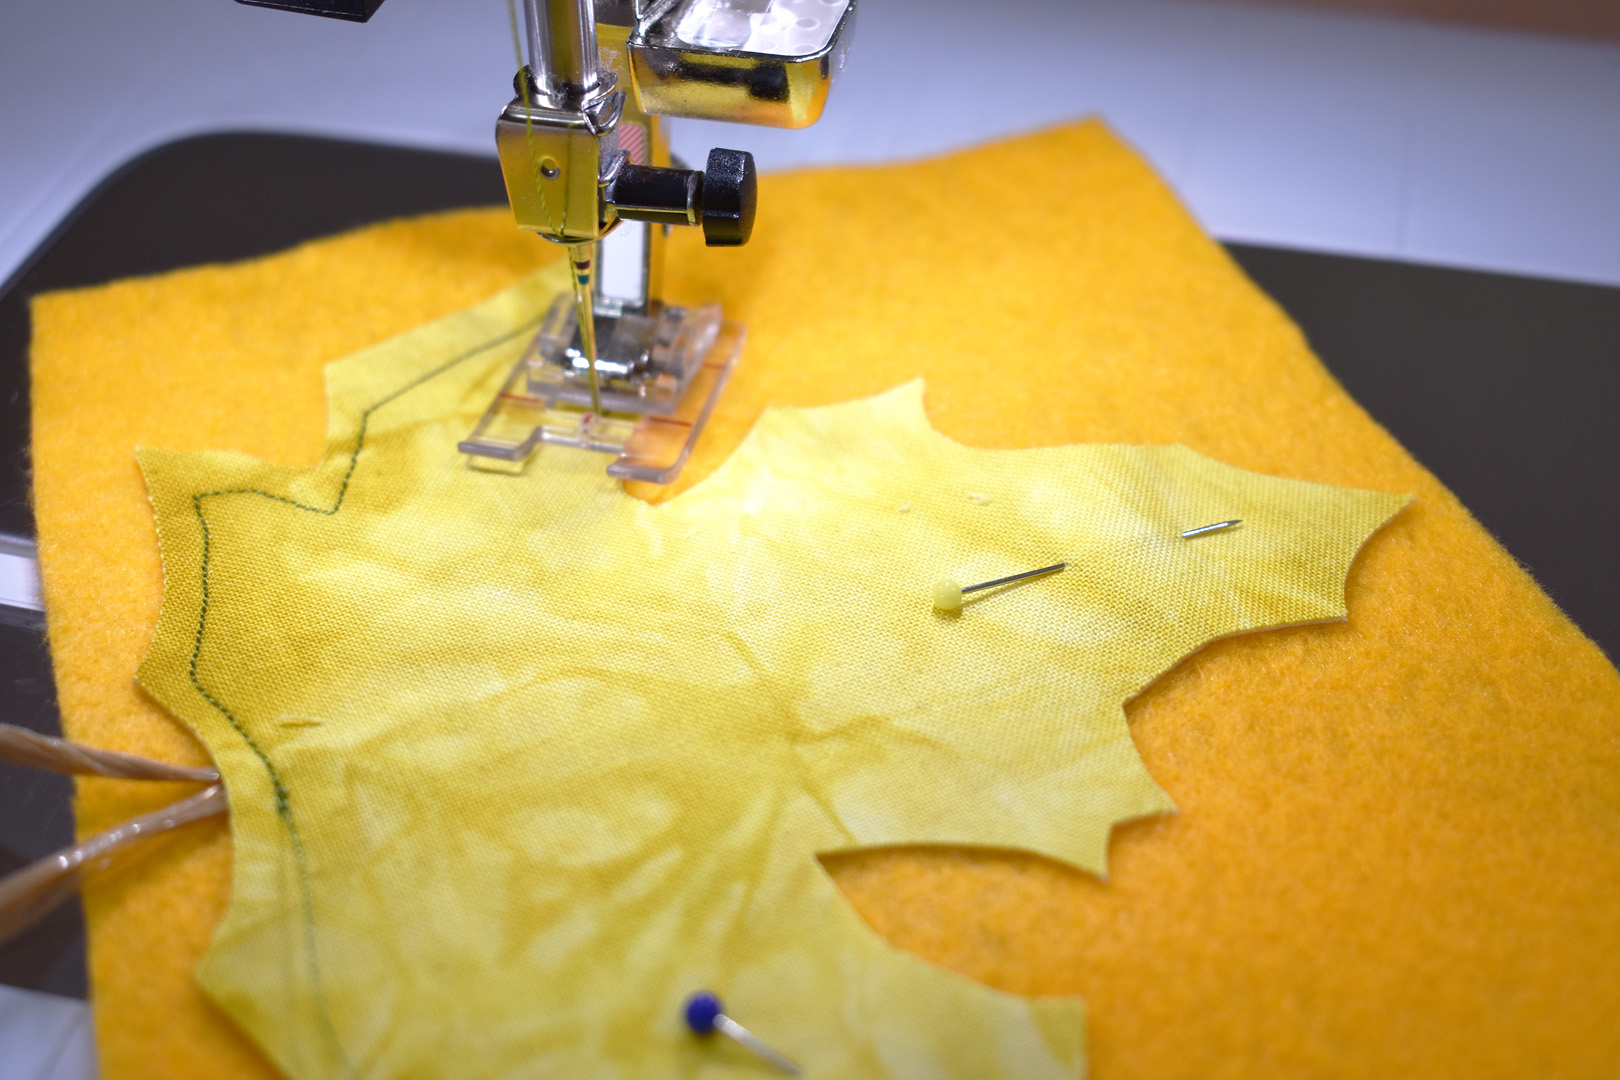
At the sewing machine, use a small straight stitch (less than 2.0mm) to sew all around the leaf. Start stitching at the base of the leaf, and follow around the edge about 1/8″ to 1/4″ from the edge. Her is where using a clear foot really helps you to see where you are sewing.
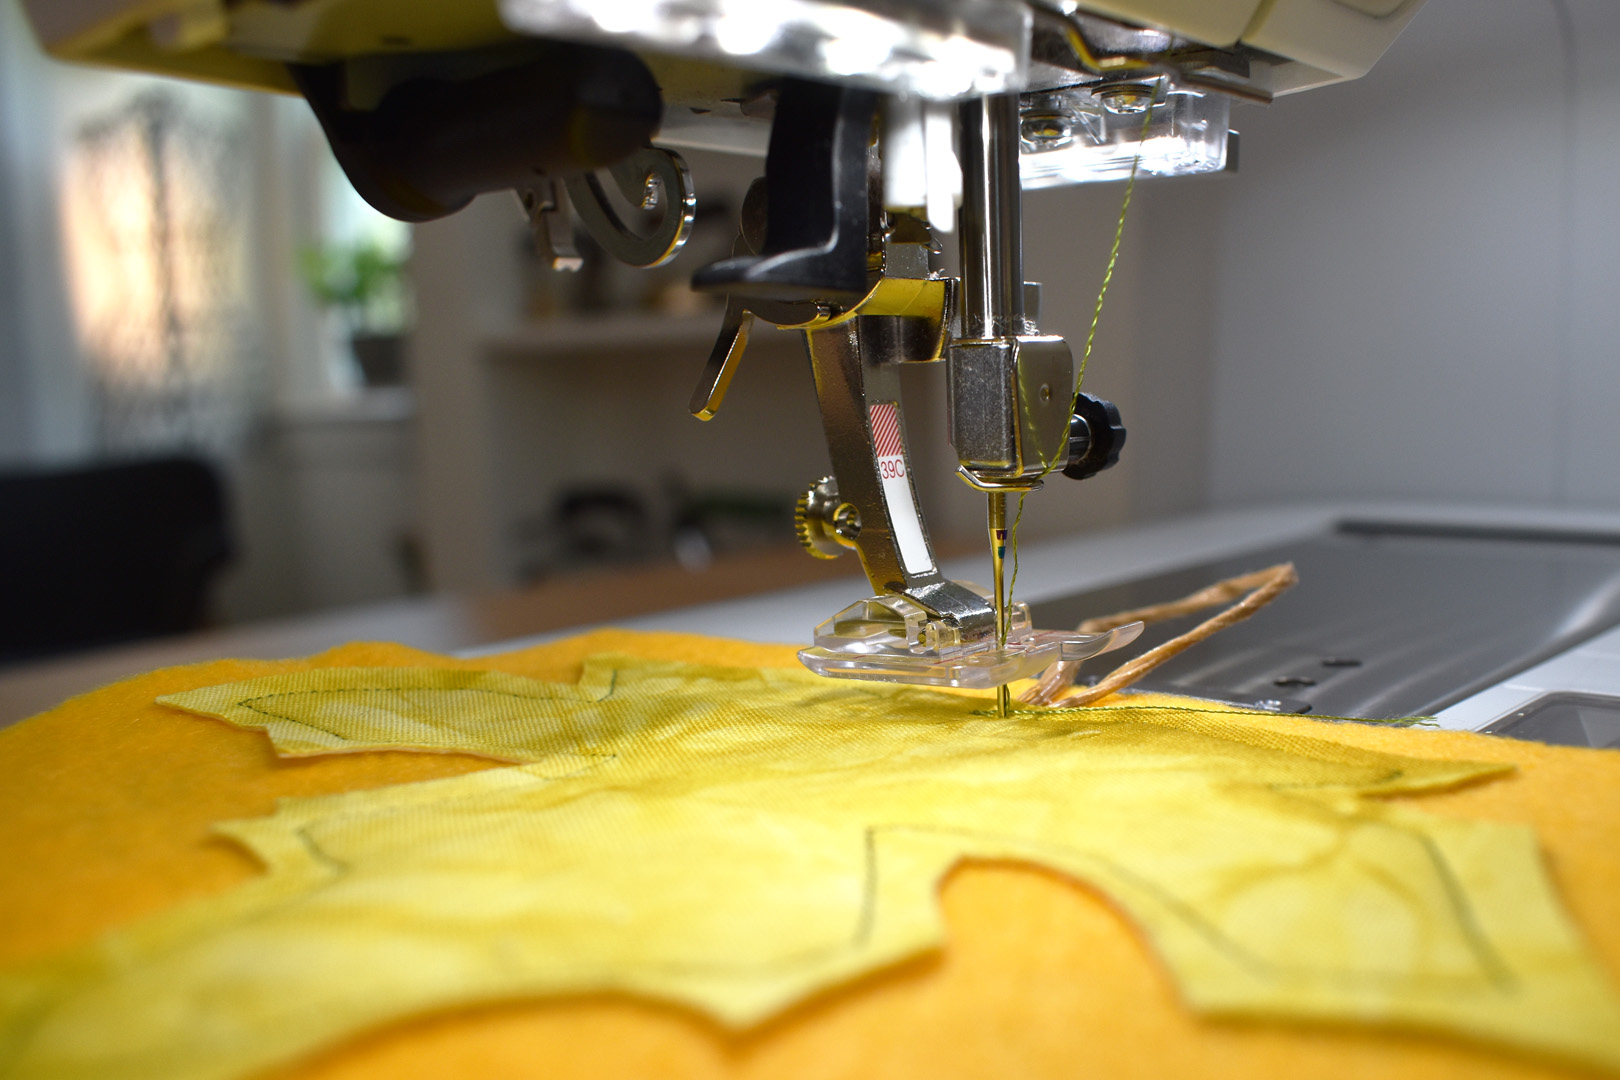
If your BERNINA has the Hover feature, use it to help you pivot in all the corners with the needle down. After sewing all around the outer edges of the leaf, pivot at the base of the leaf and turn to sew the veins in the leaf.
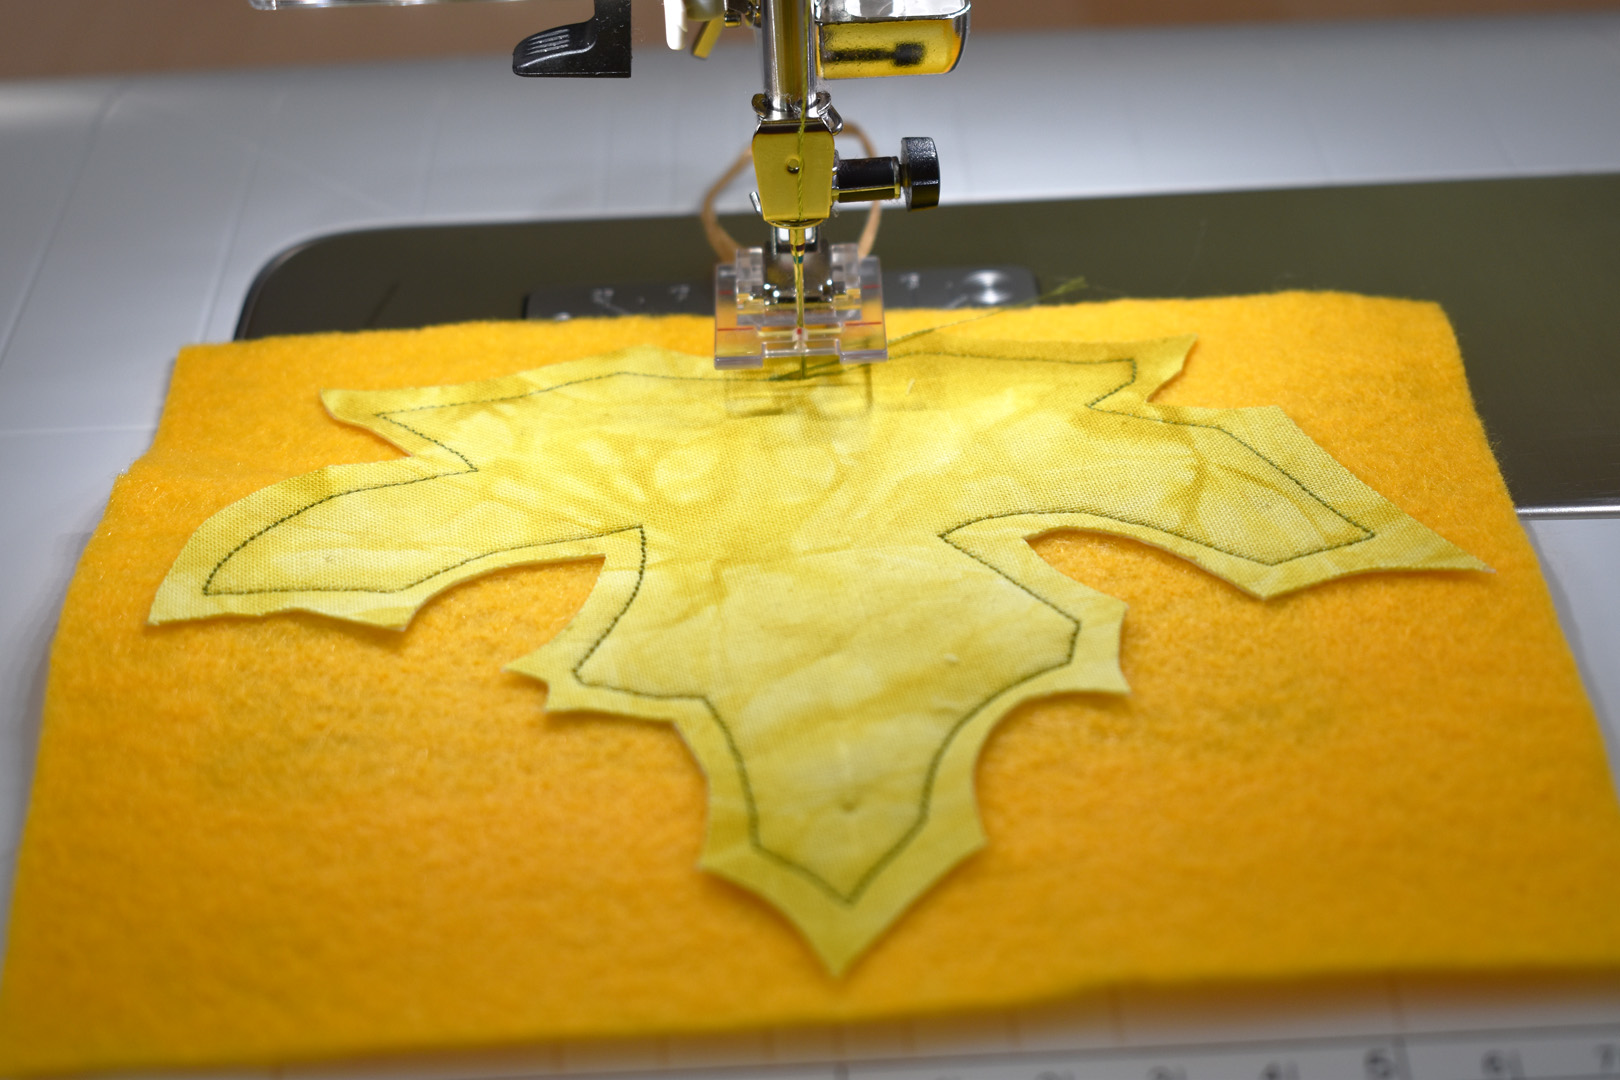
I sew the veins free-hand, but if you need a line to follow you can draw the veins on the leaf with a disappearing fabric marker or pen. Refer to the leaf templates to see the leaf vein placement.
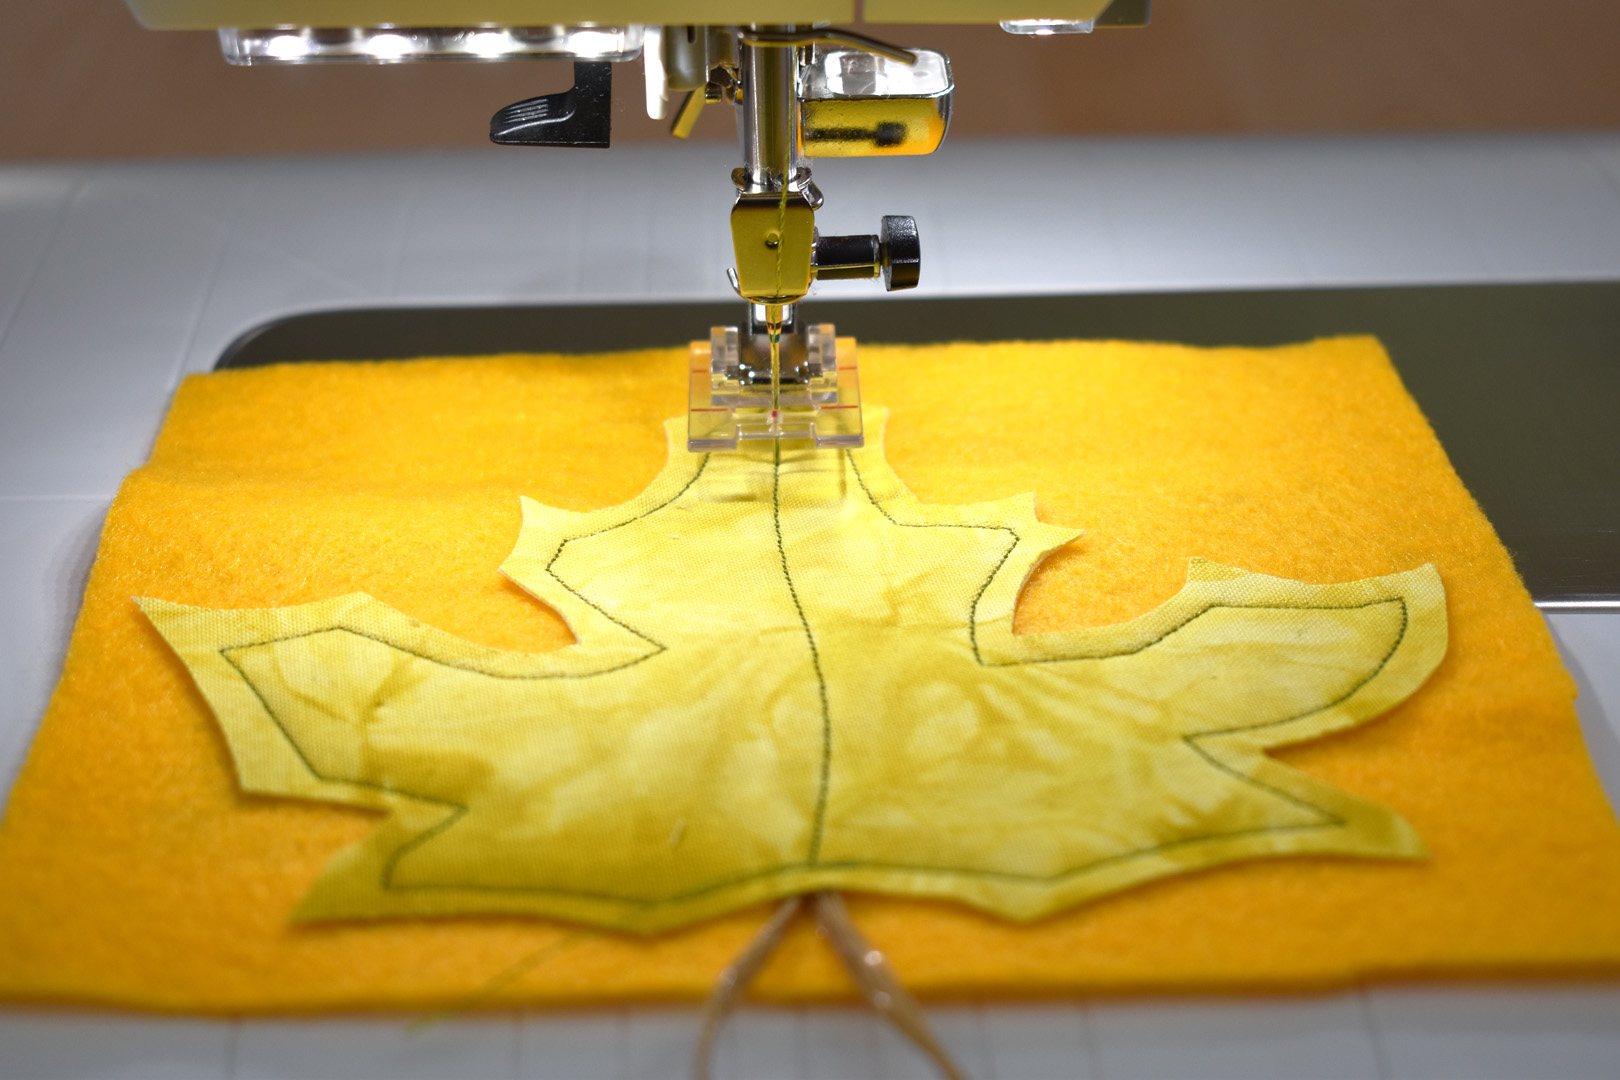
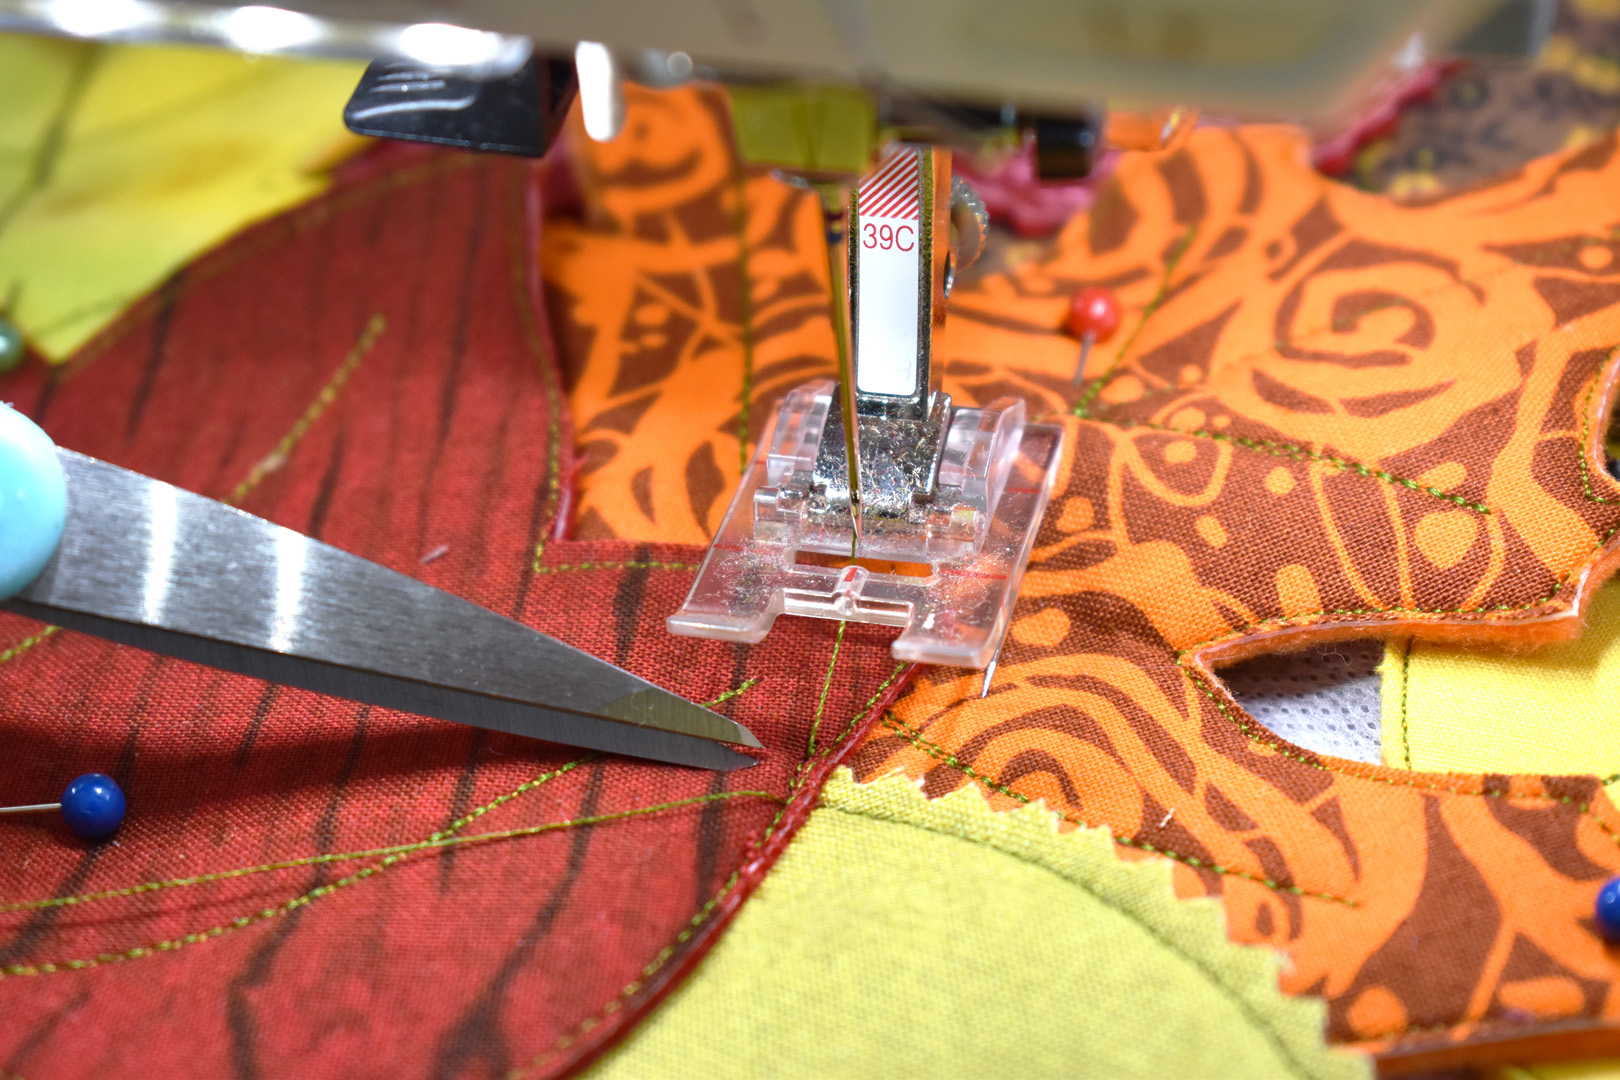
After sewing to the end of the leaf, pivot and start sewing back along the same line. Stop at the first vein lines to pivot and sew these first lines.

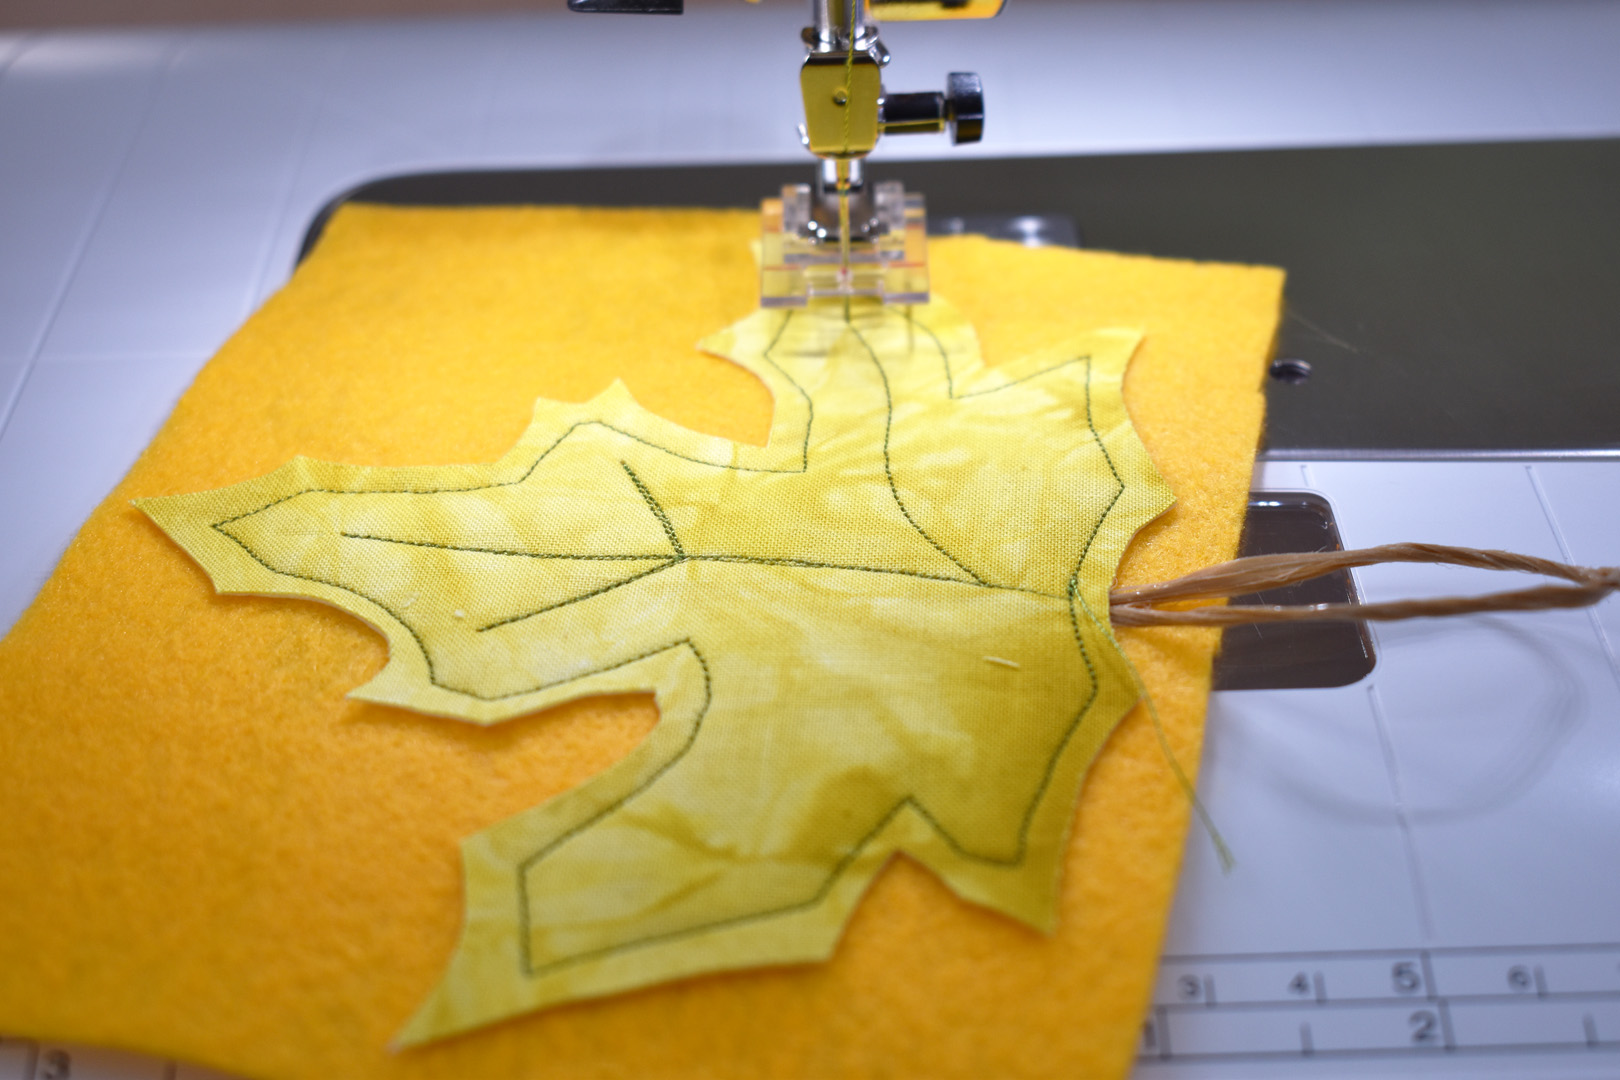
Continue sewing lines for the leaf veins, and finish up sewing back at the base of the leaf. Backstitch before removing the leaf from the sewing machine.
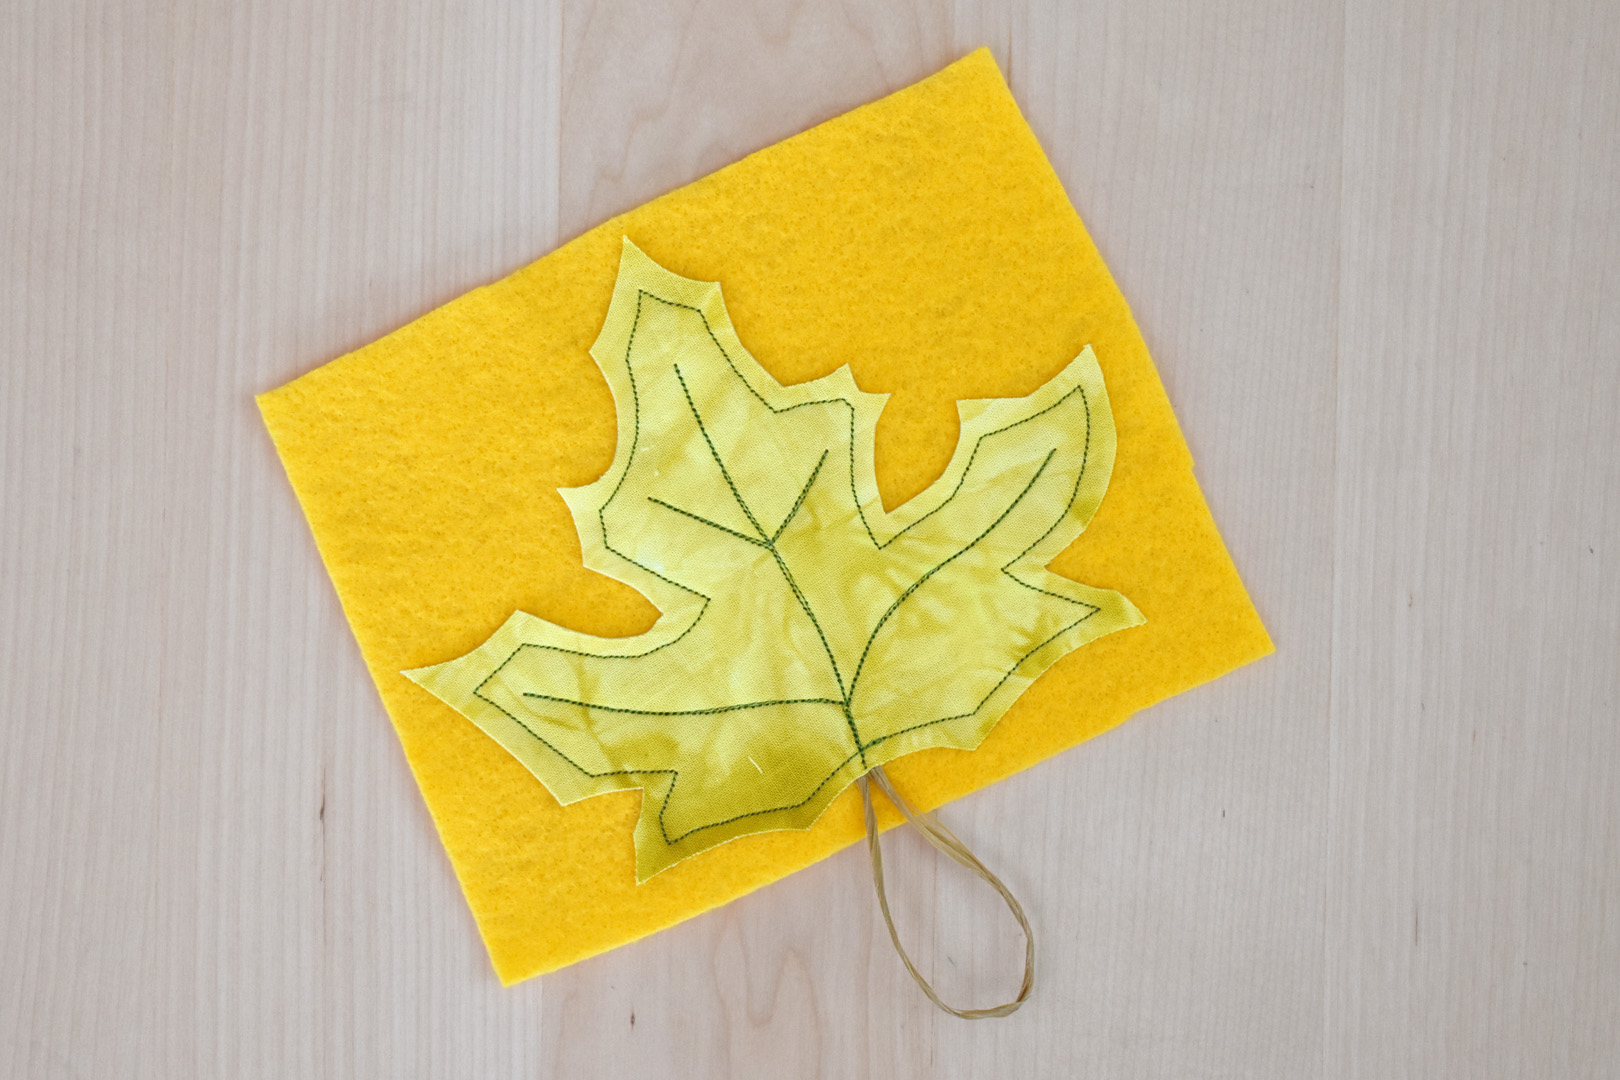
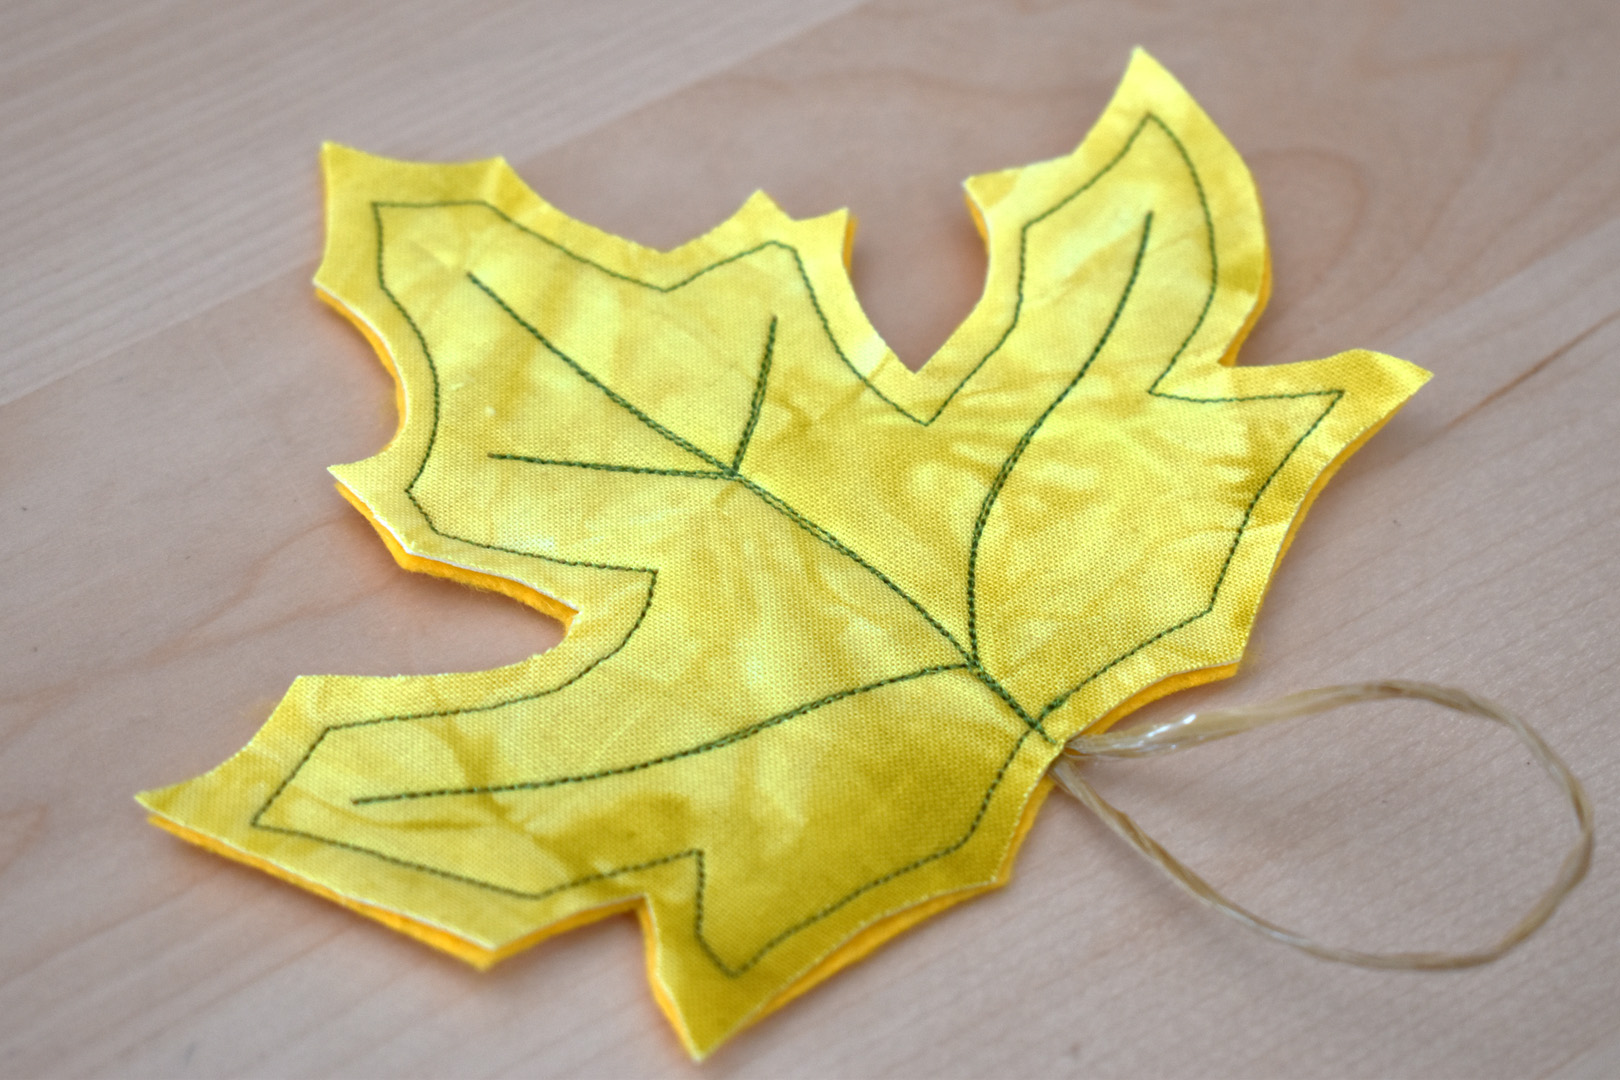
Cut away the extra felt, moving the stem forward and out of the way to keep from cutting the loop.
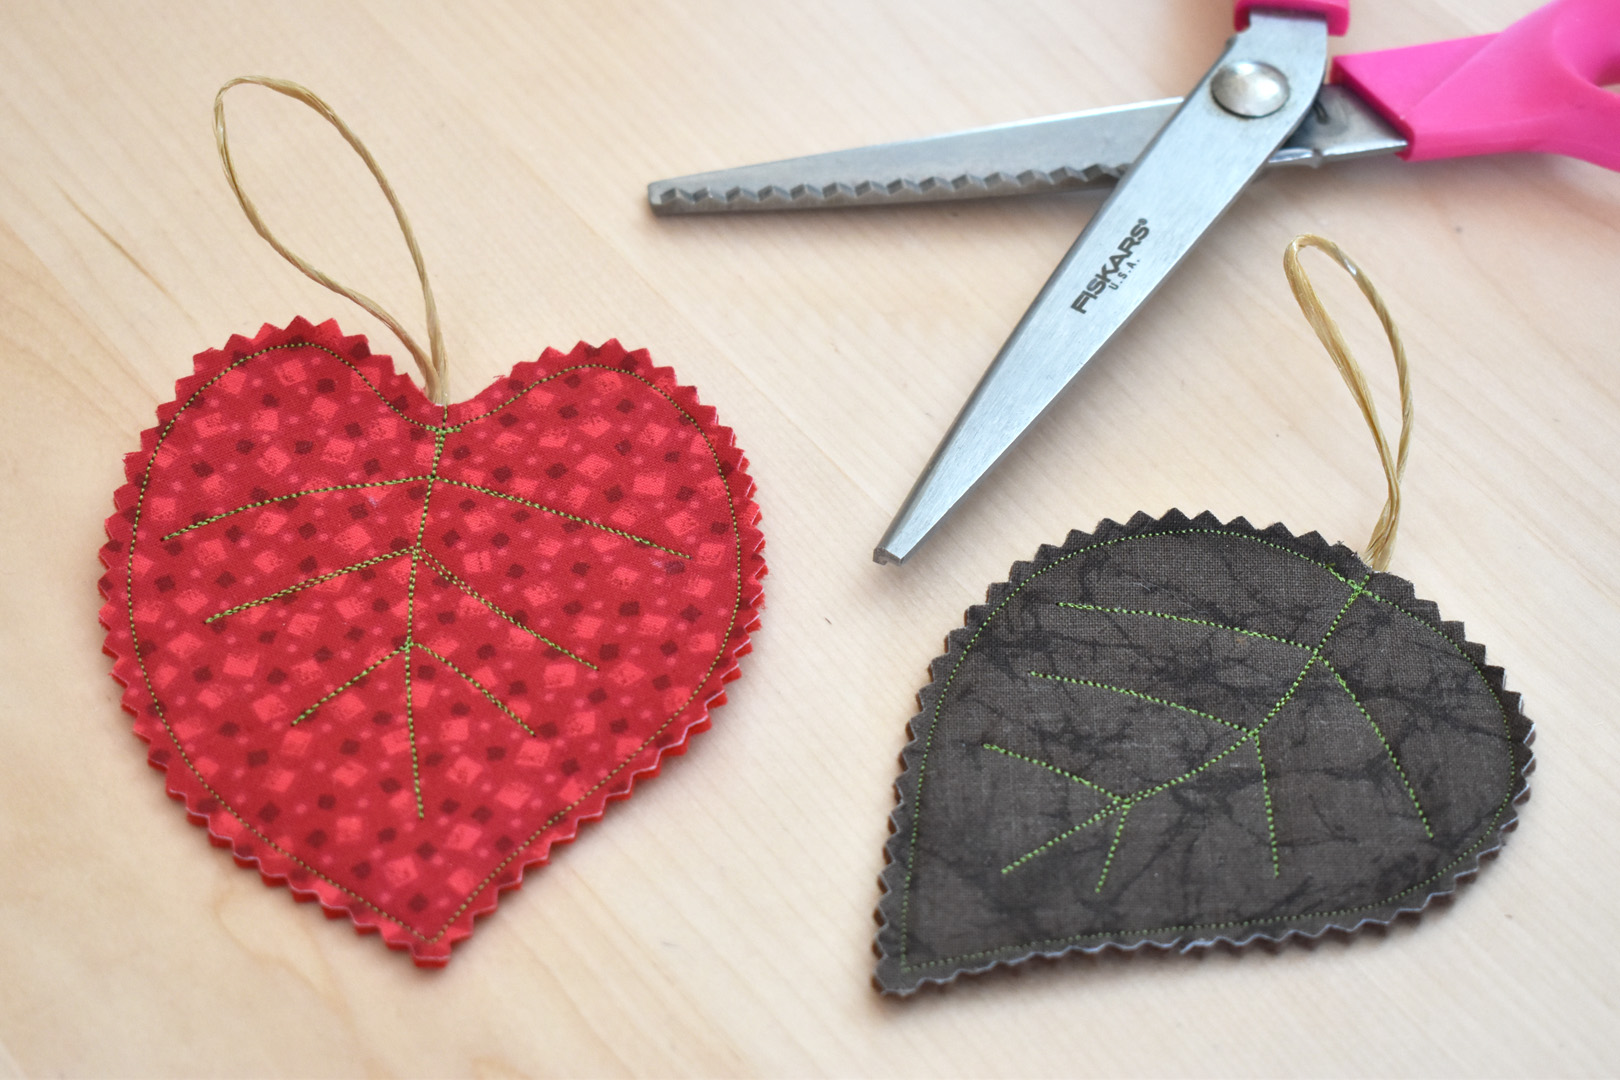
If you have pinking shears, use them to cut the edges of the Birch and Linden leaves for a little variety!
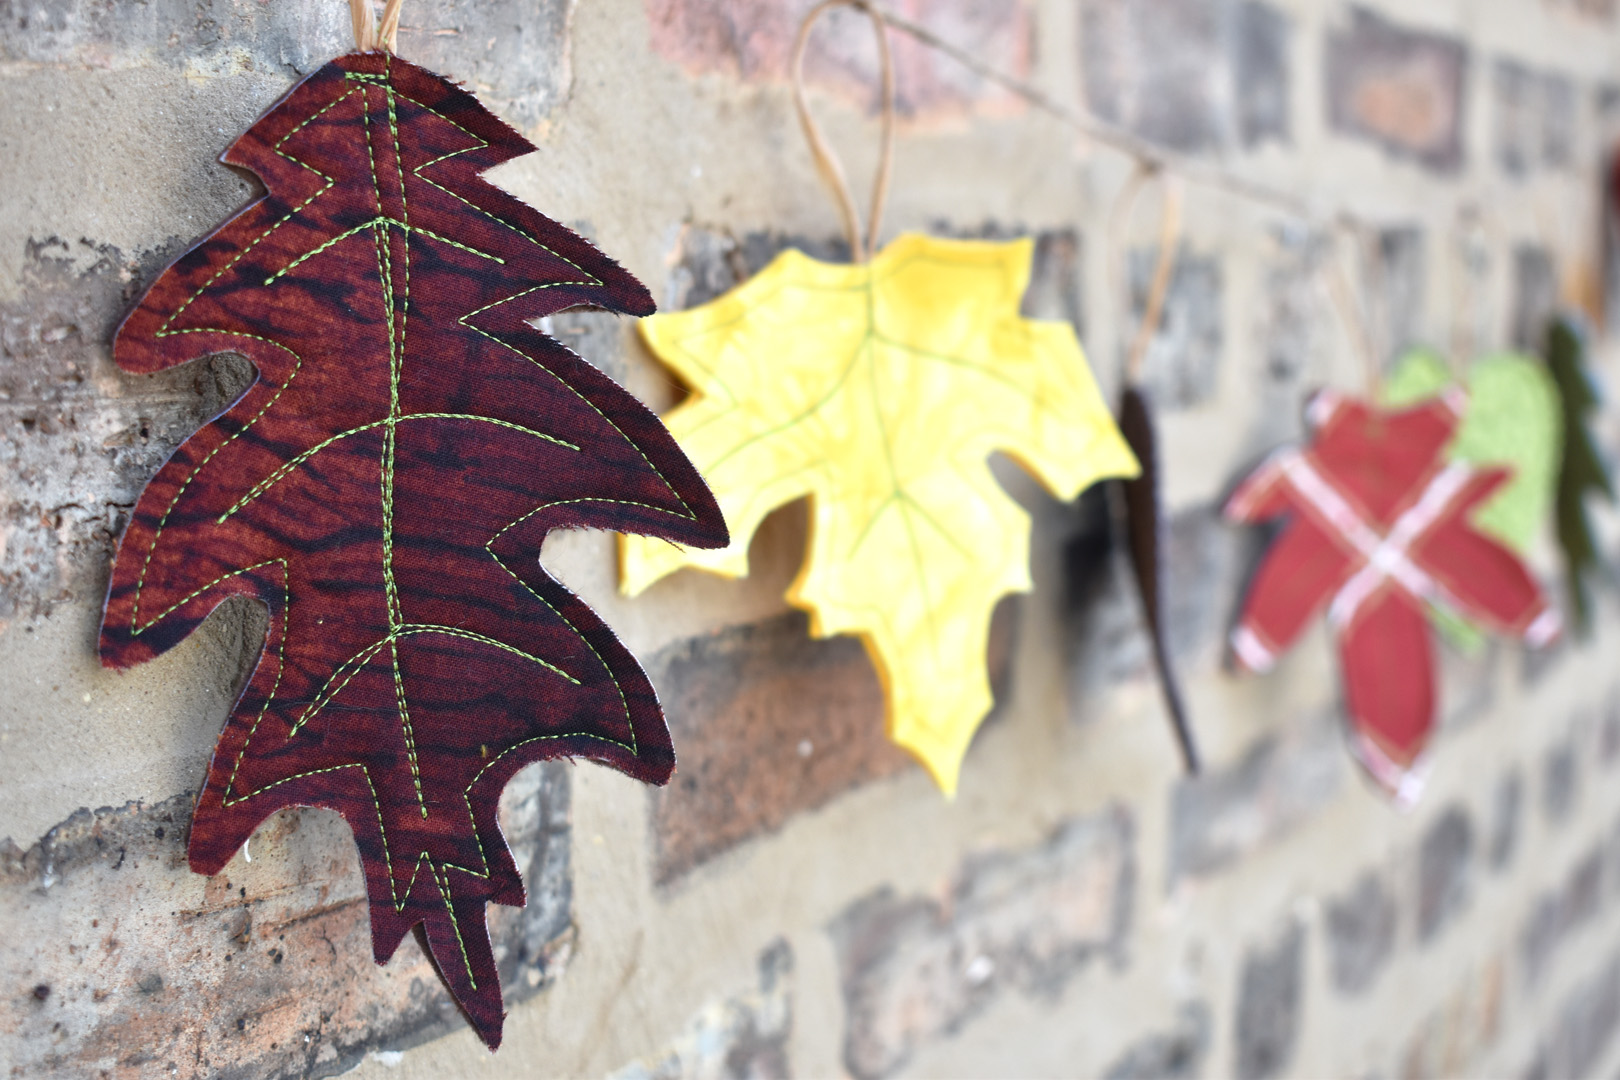
How to Make the Fall Leaf Garland
Use the templates to create 2 of each type of leaf in various colors, each with a stem loop. Cut an 8-foot-long piece of the household jute twine, finished garland will measure about 6-foot plus loops on each end.
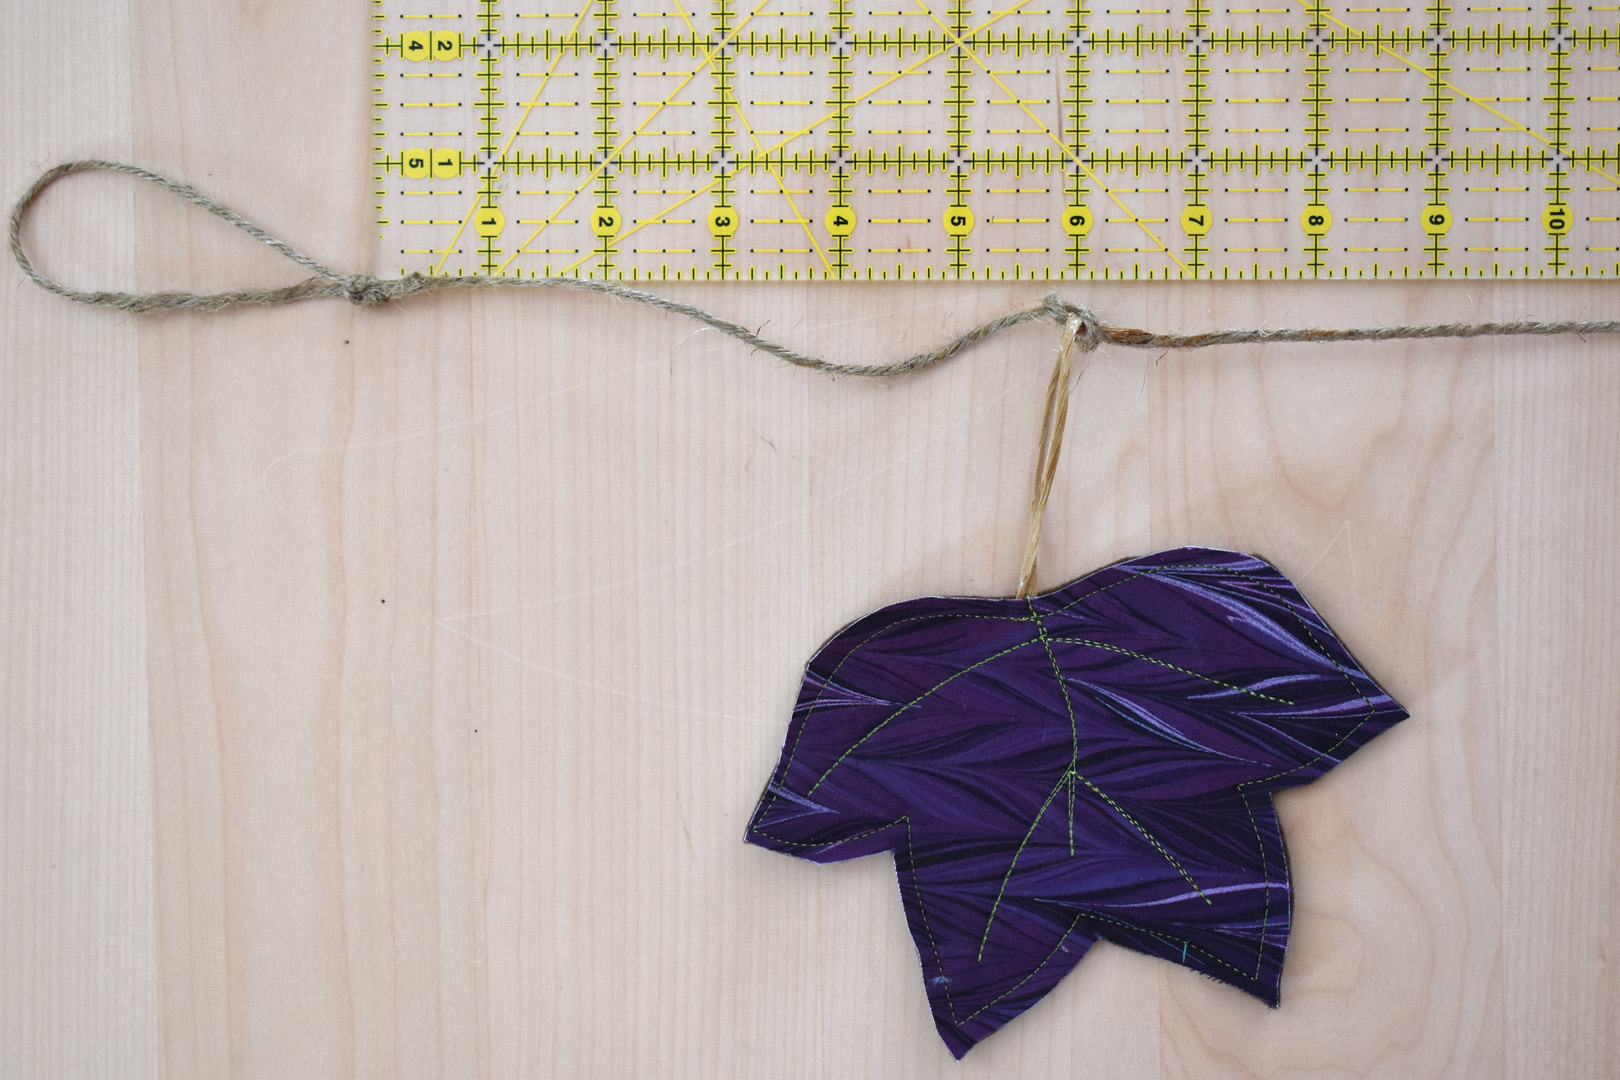
Tie a loop in one end of the twine, then string one leaf on the end. Tie a knot in the twine to secure the leaf 6″ from the loop end.
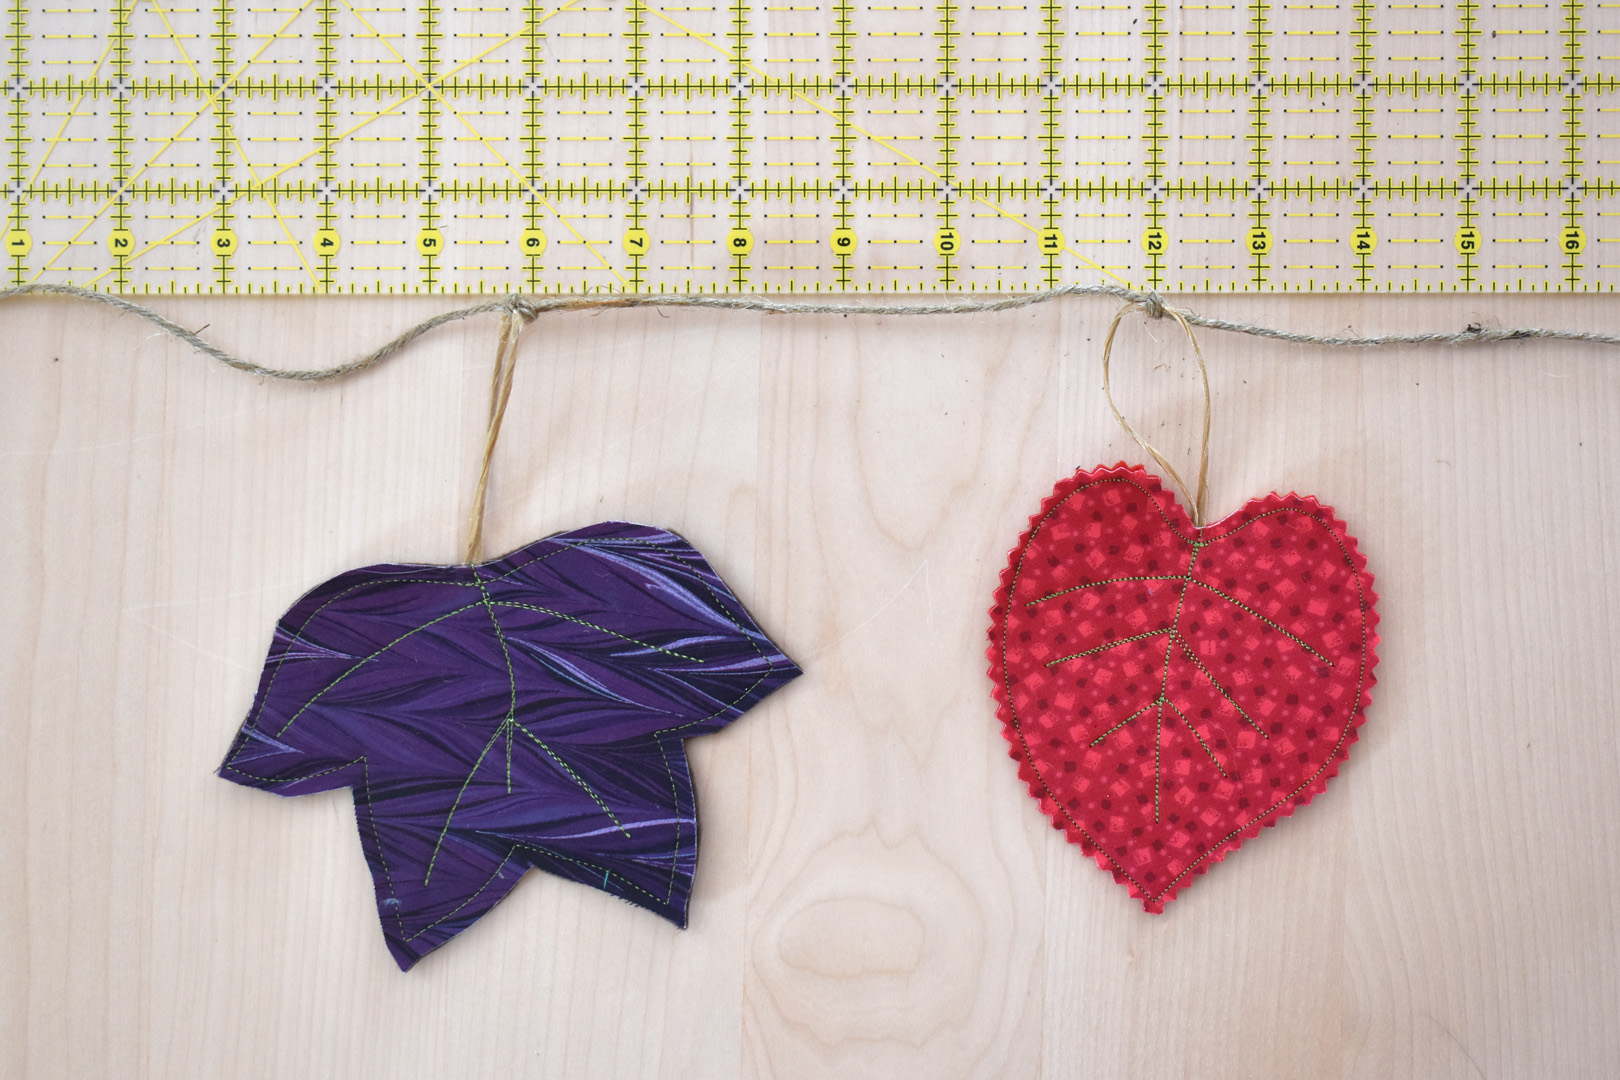
String another leaf on the twine, and knot it 6″ from the last leaf. Continue adding leaves and knotting them 6″ apart from each other.

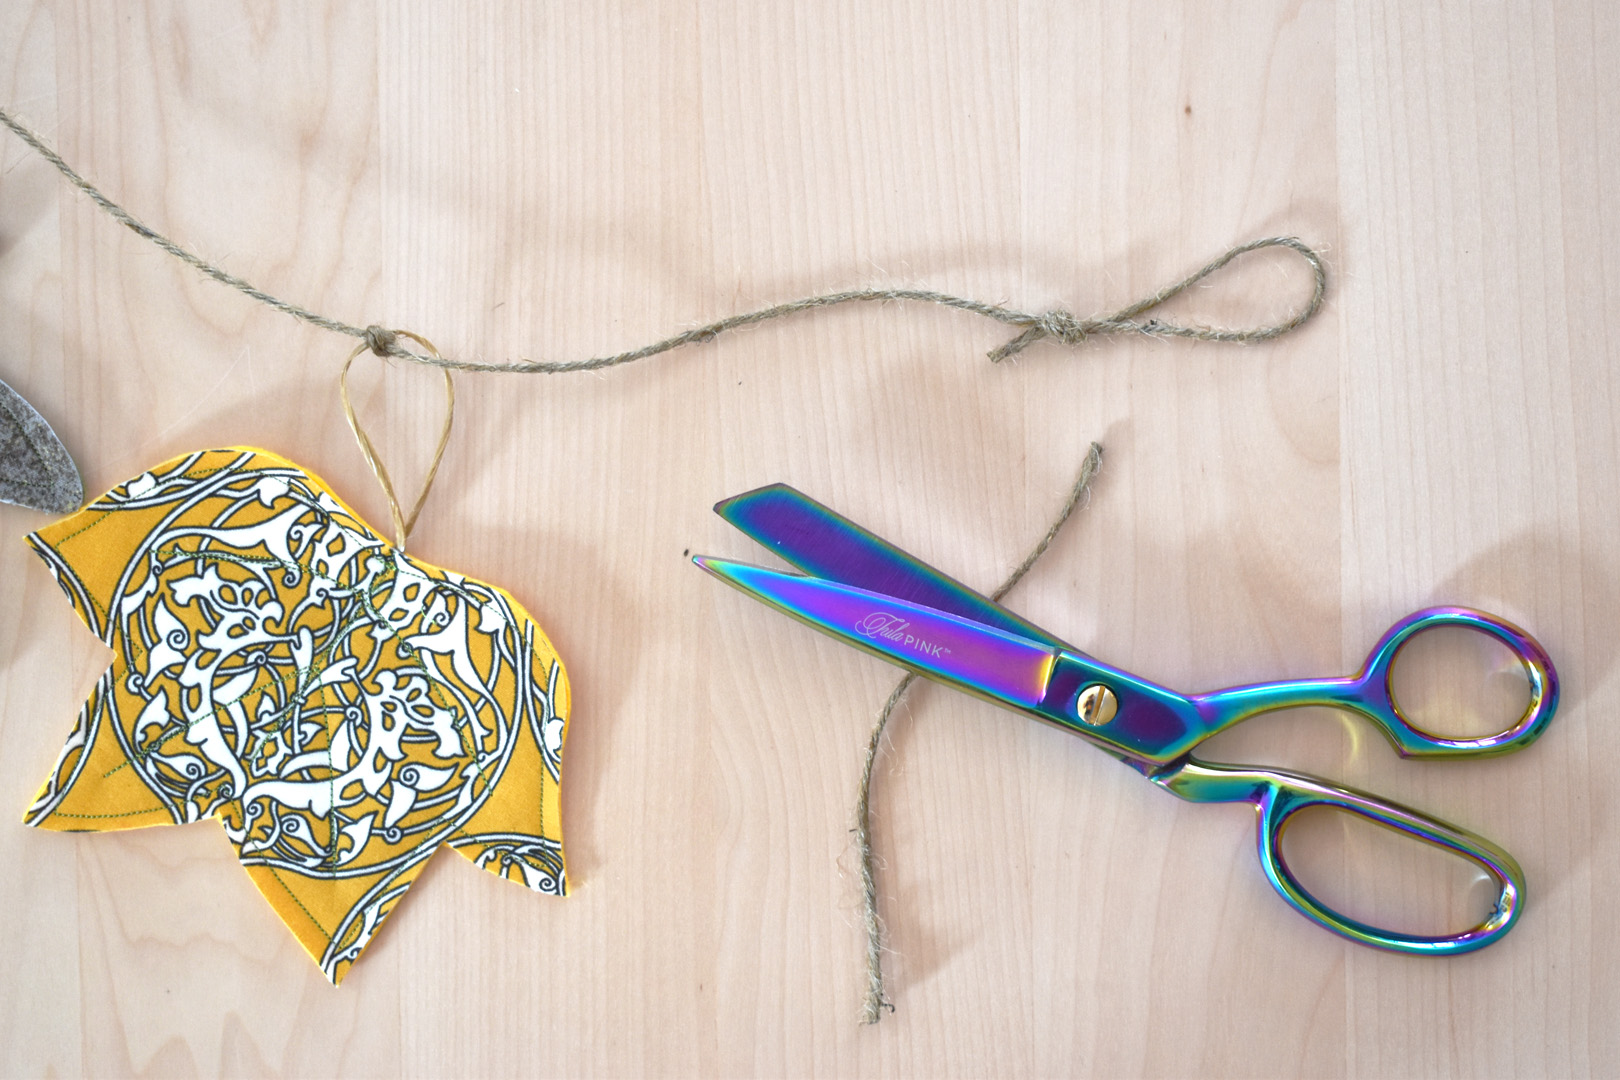
After stringing the 12 leaves, tie a loop in the end of the twine 6″ away from the last leaf. Cut off any extra twine.
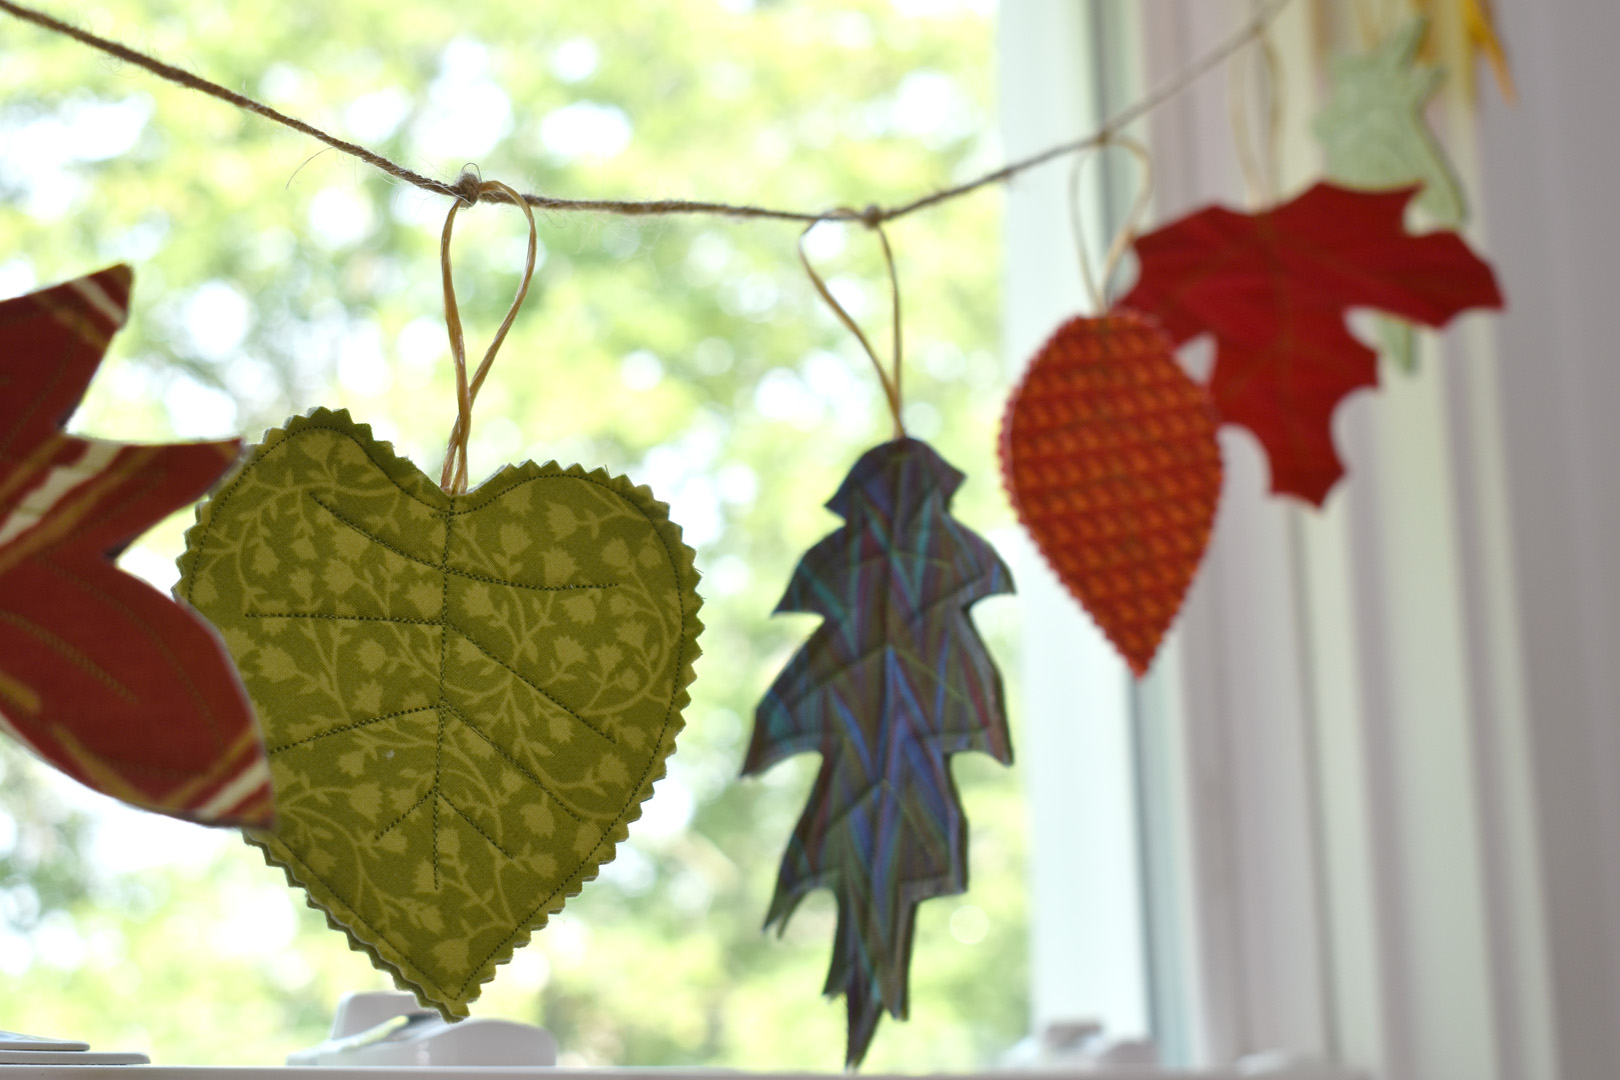
Hang the leaf garland and enjoy it inside or out!
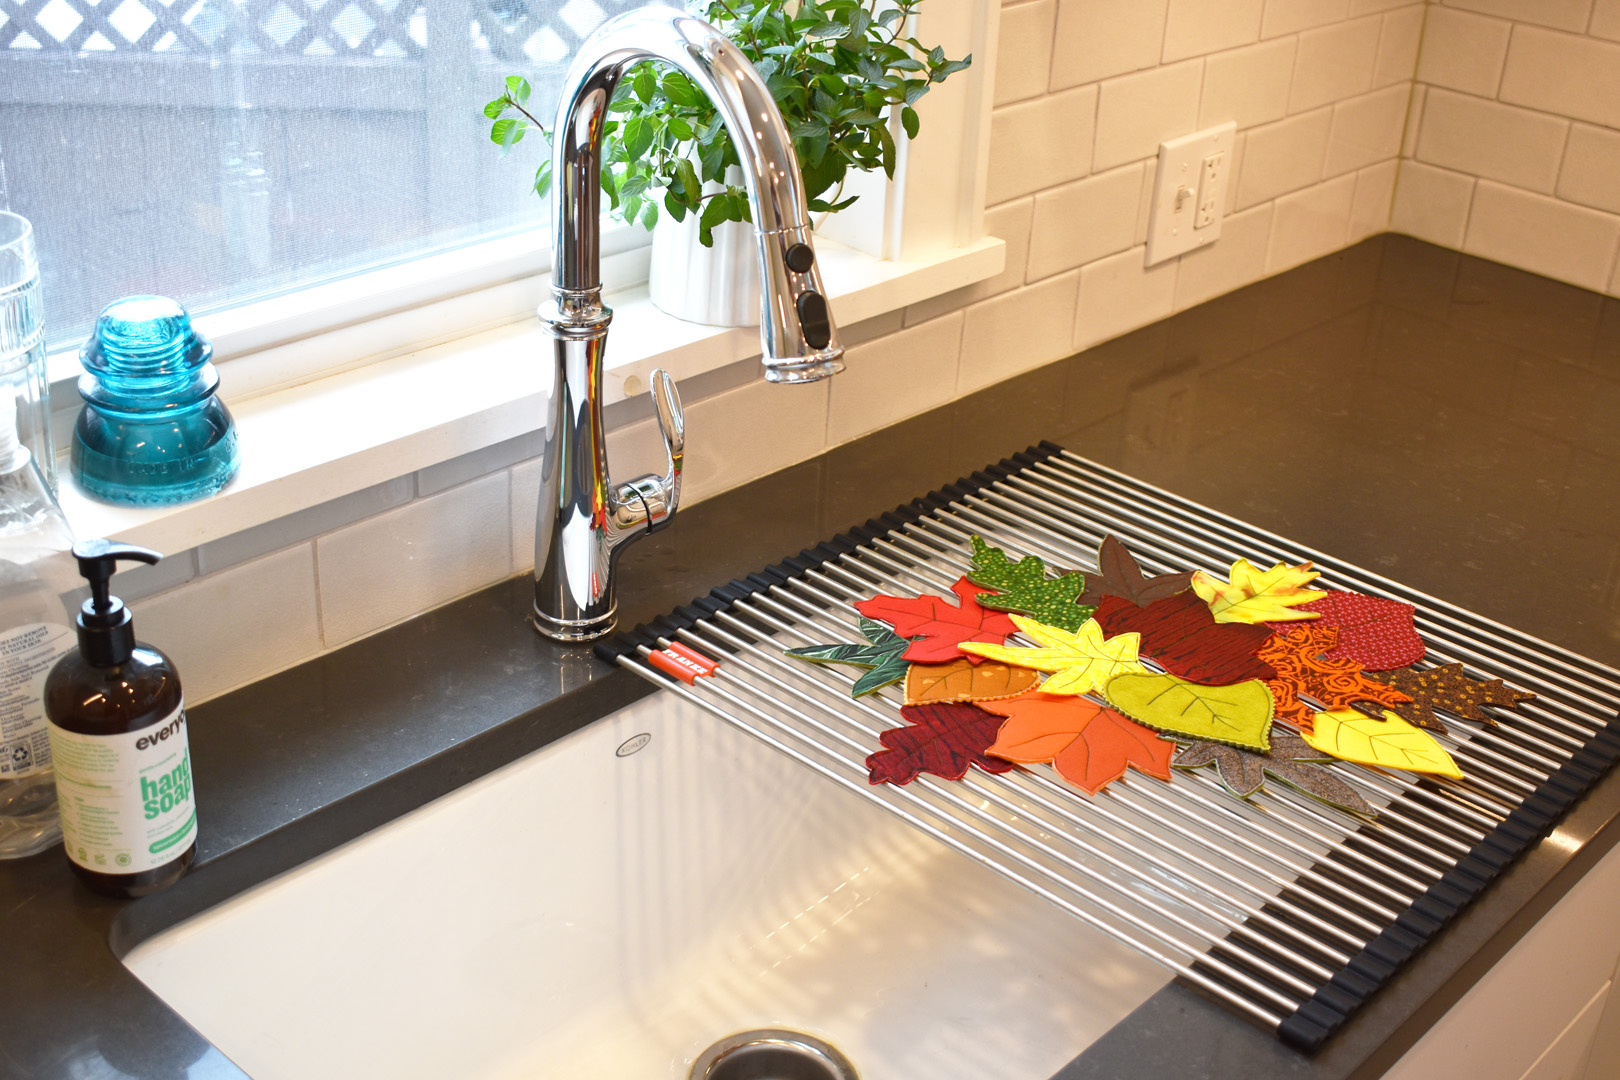
How to Make a Fall Leaf Trivet
You will need 16-20 leaves without stems to create the trivet, one 14″ piece of the 10″ wide OESD AquaMesh wash-away stabilizer, sewing pins, and blue painter’s tape (optional).
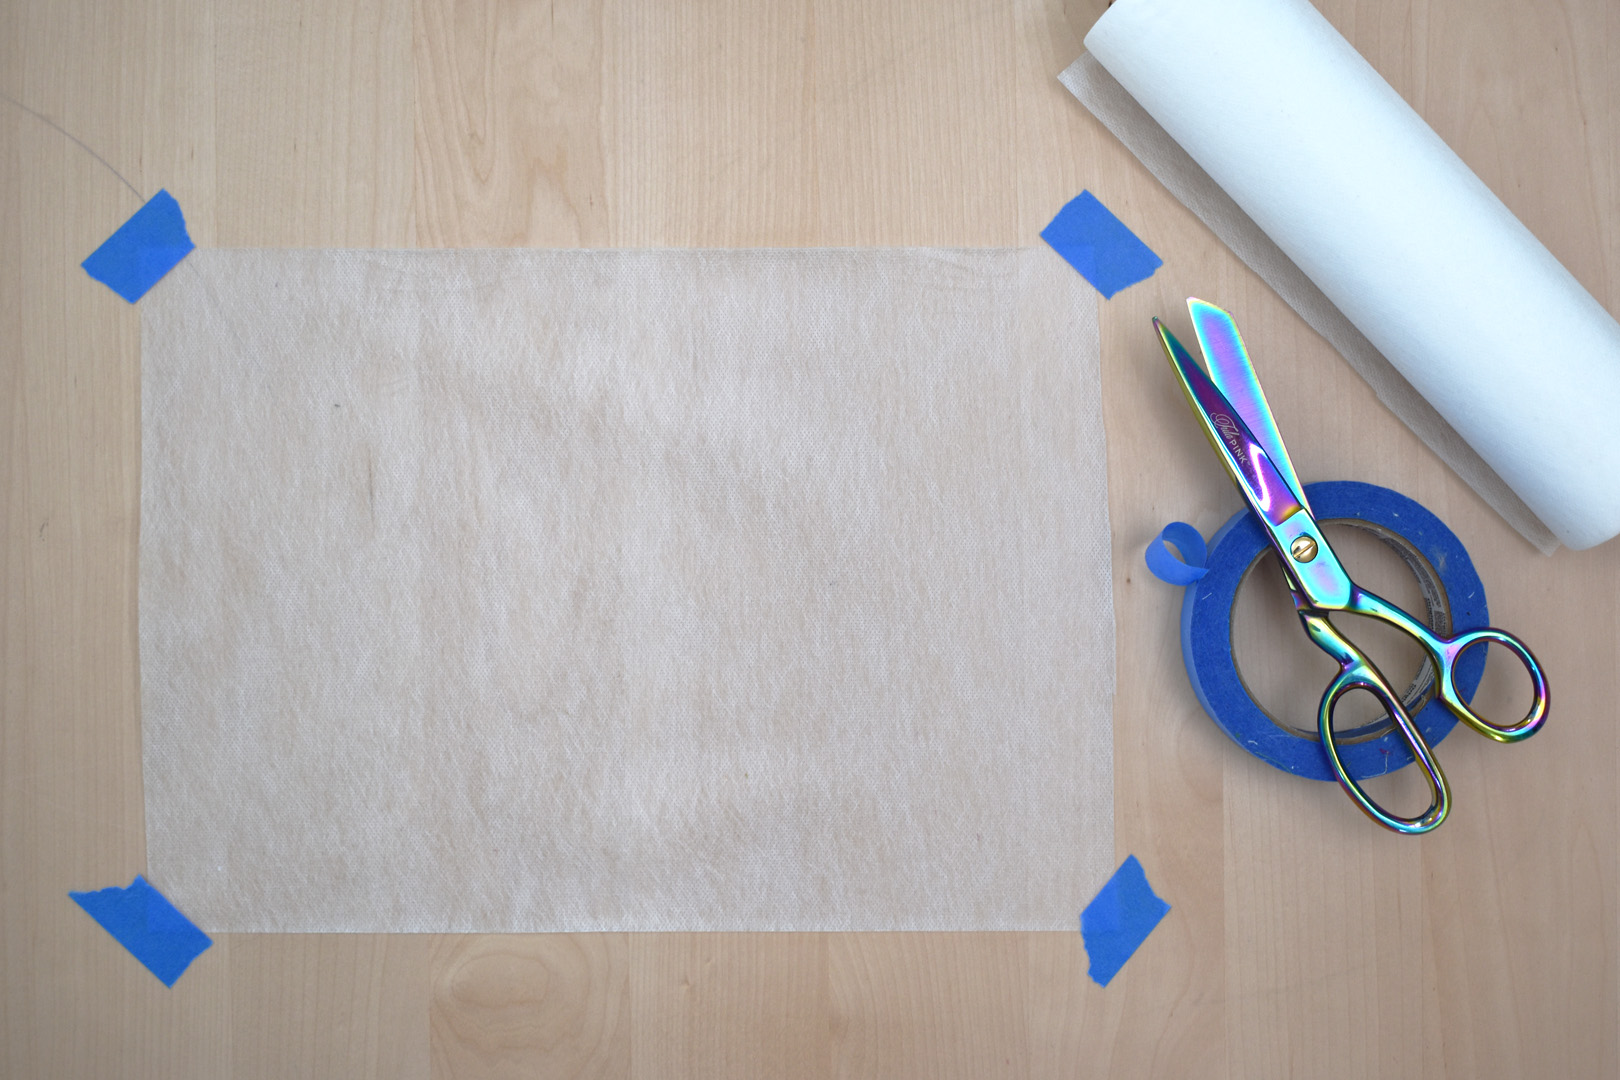
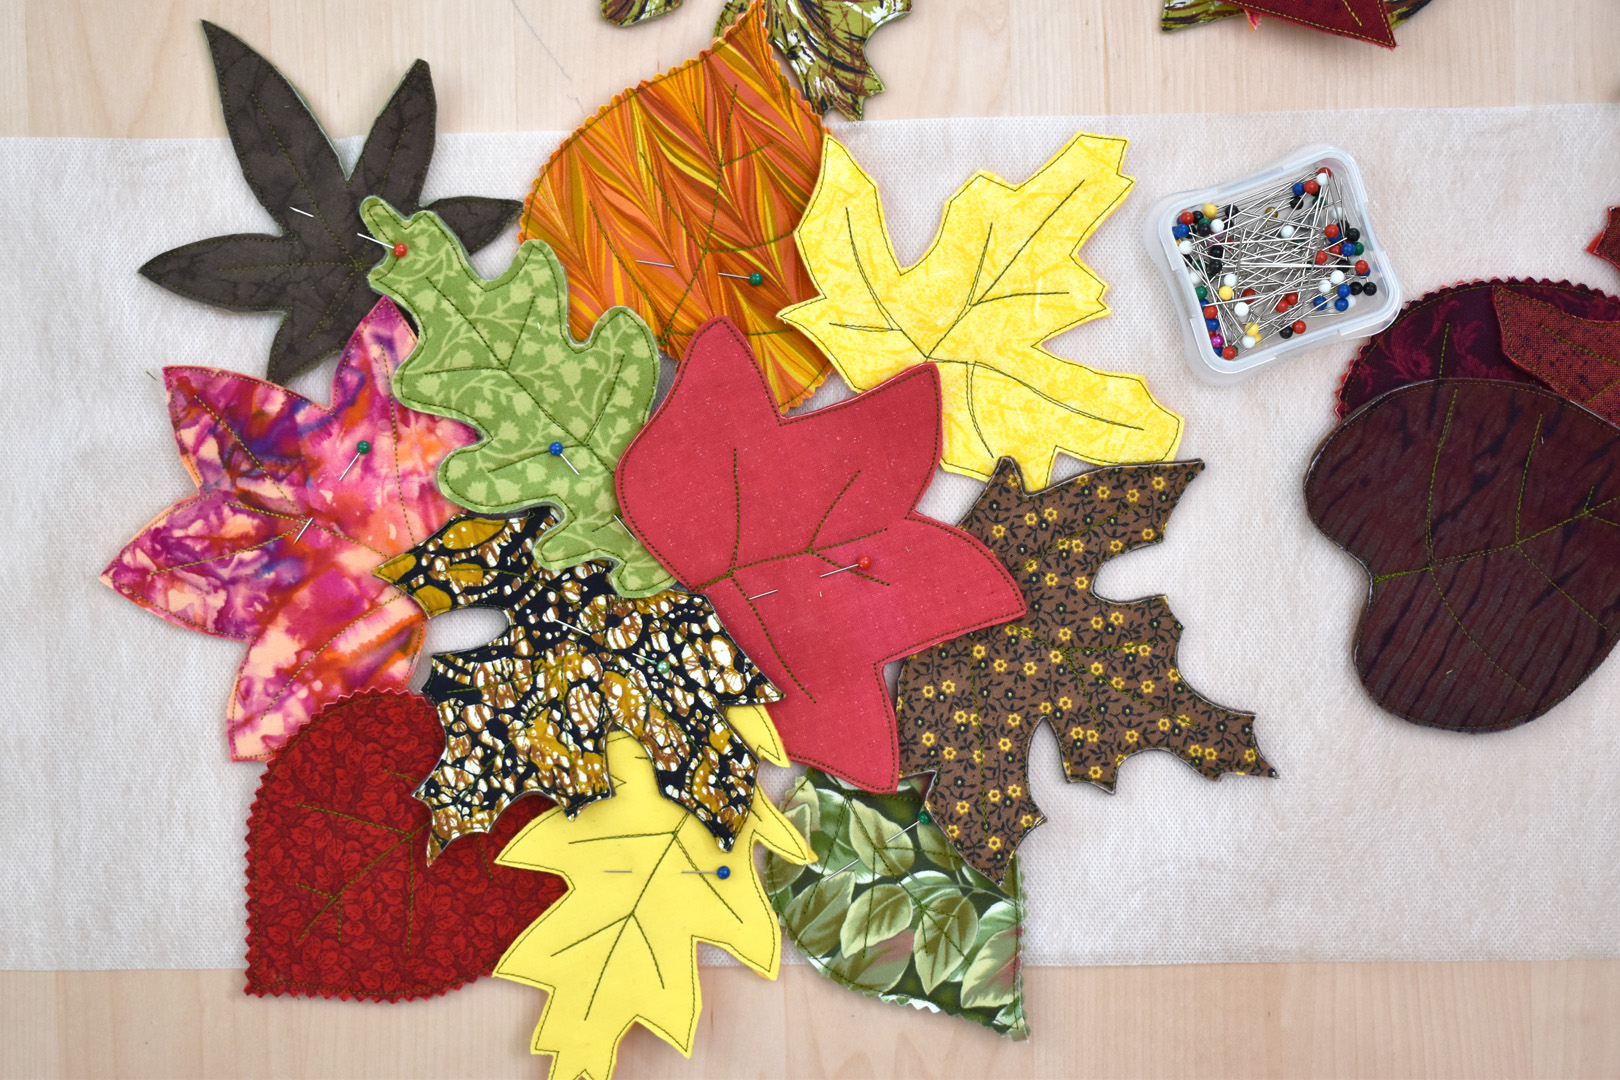
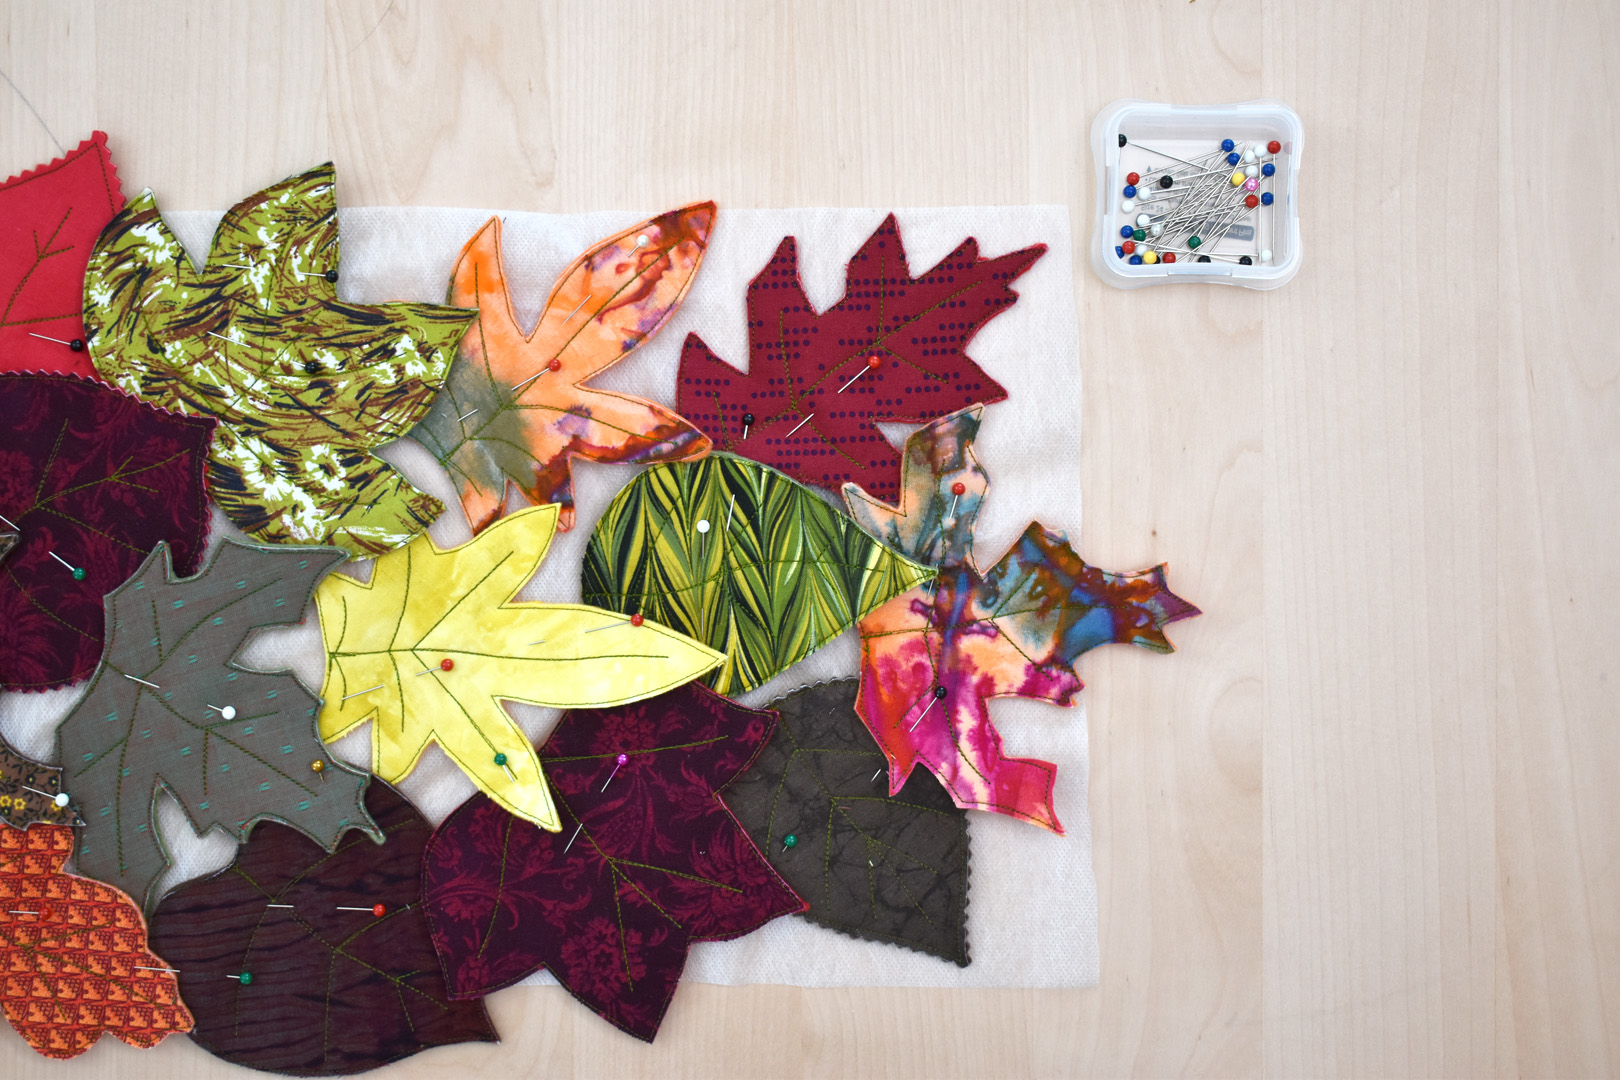
Creating the leaf layout for the trivet is a totally organic process, and you’ll be moving the leaves around on top of the stabilizer until you like the way they look. Using a bit of blue painter’s tape to hold the stabilizer will help, but isn’t necessary.
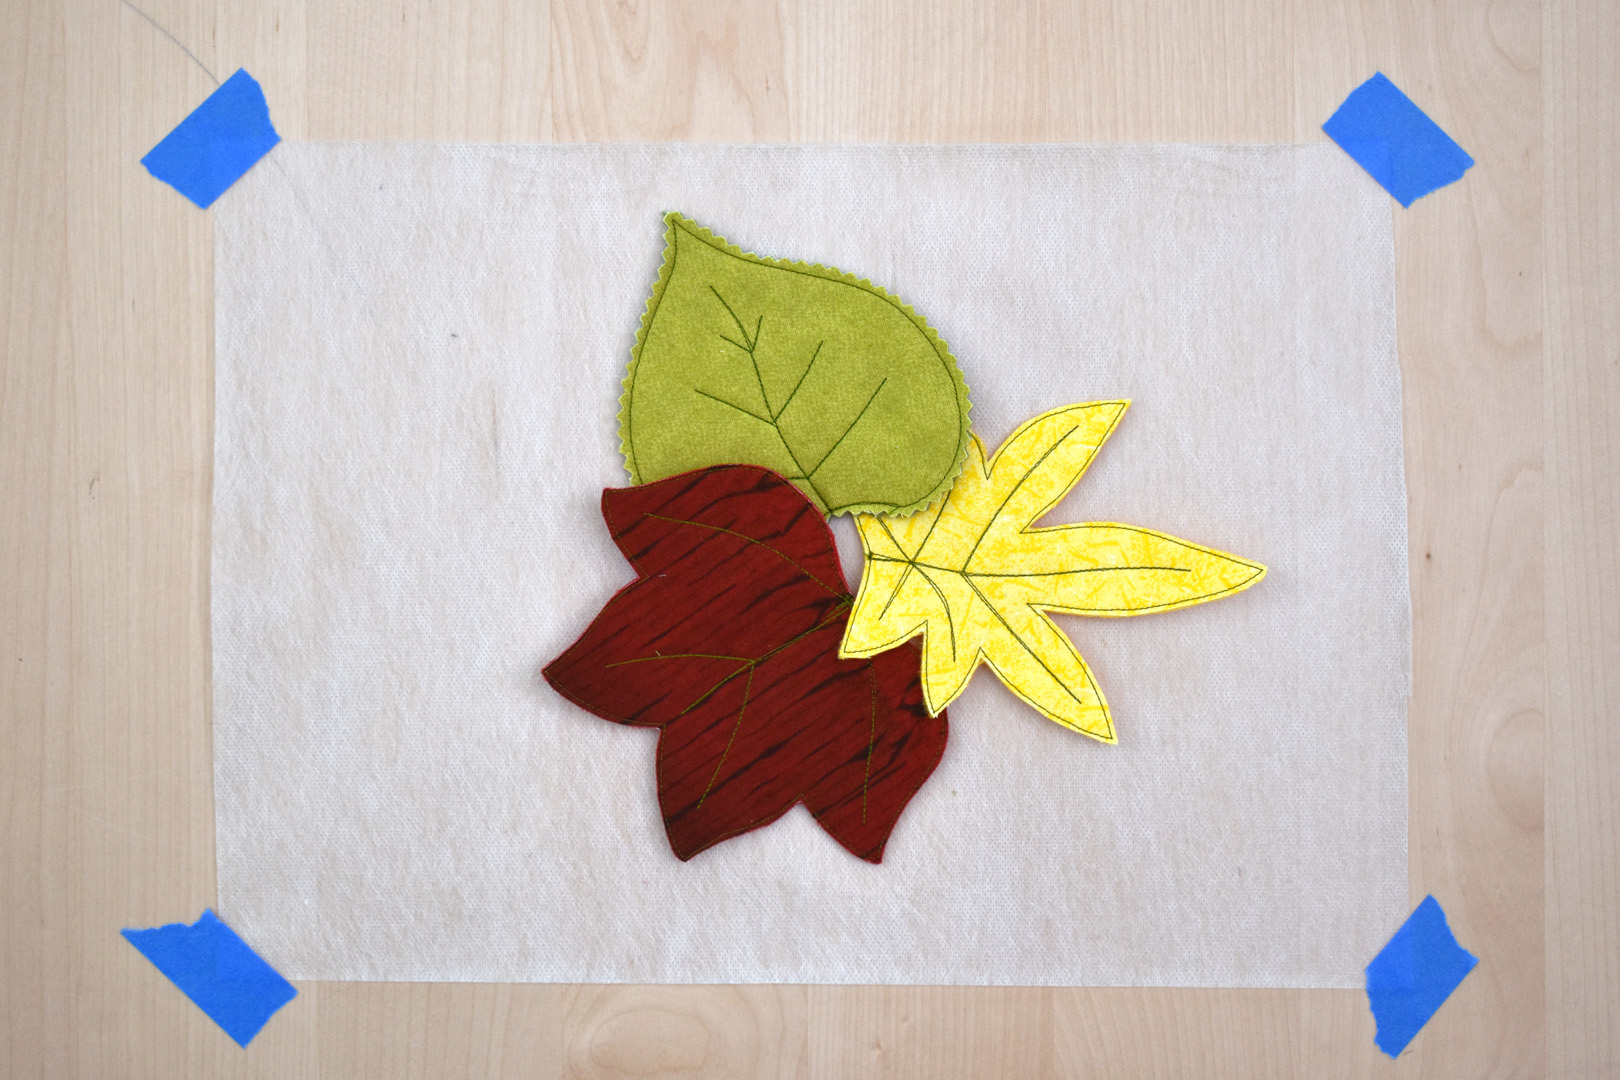
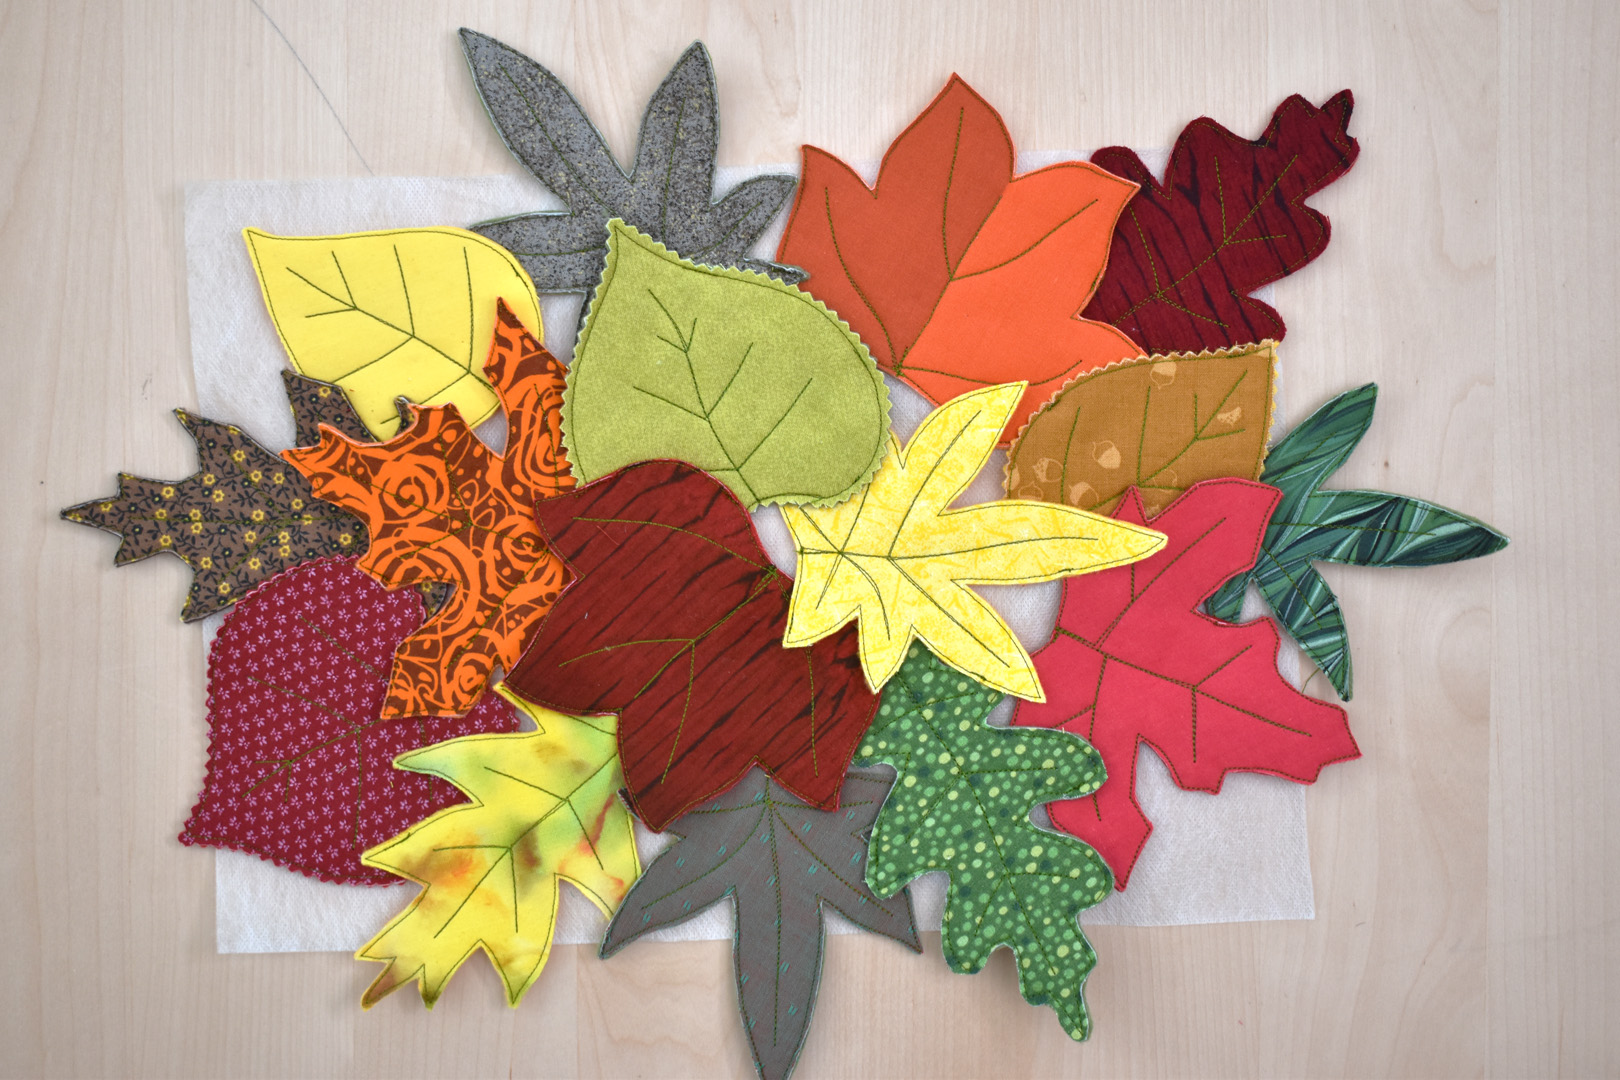
Start with three leaves in the center of the stabilizer, and overlap them as pictured.

Use long sewing pins to hold the leaves down on the stabilizer when you have them placed exactly how you like them.
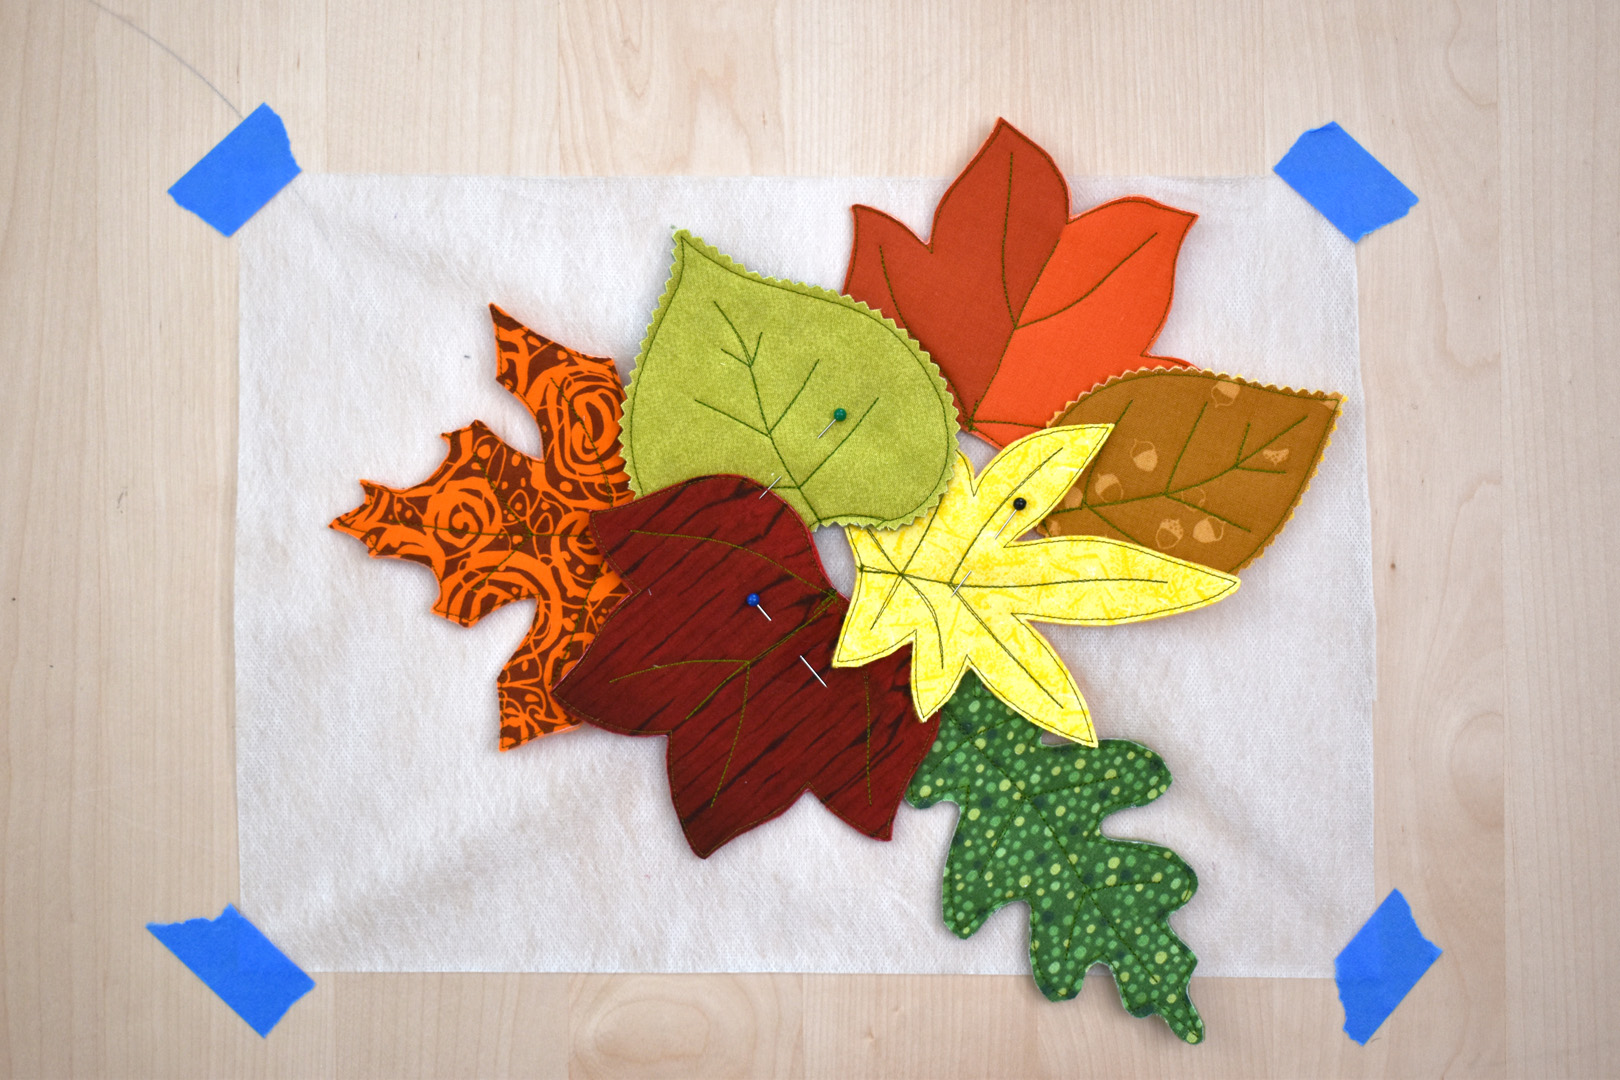
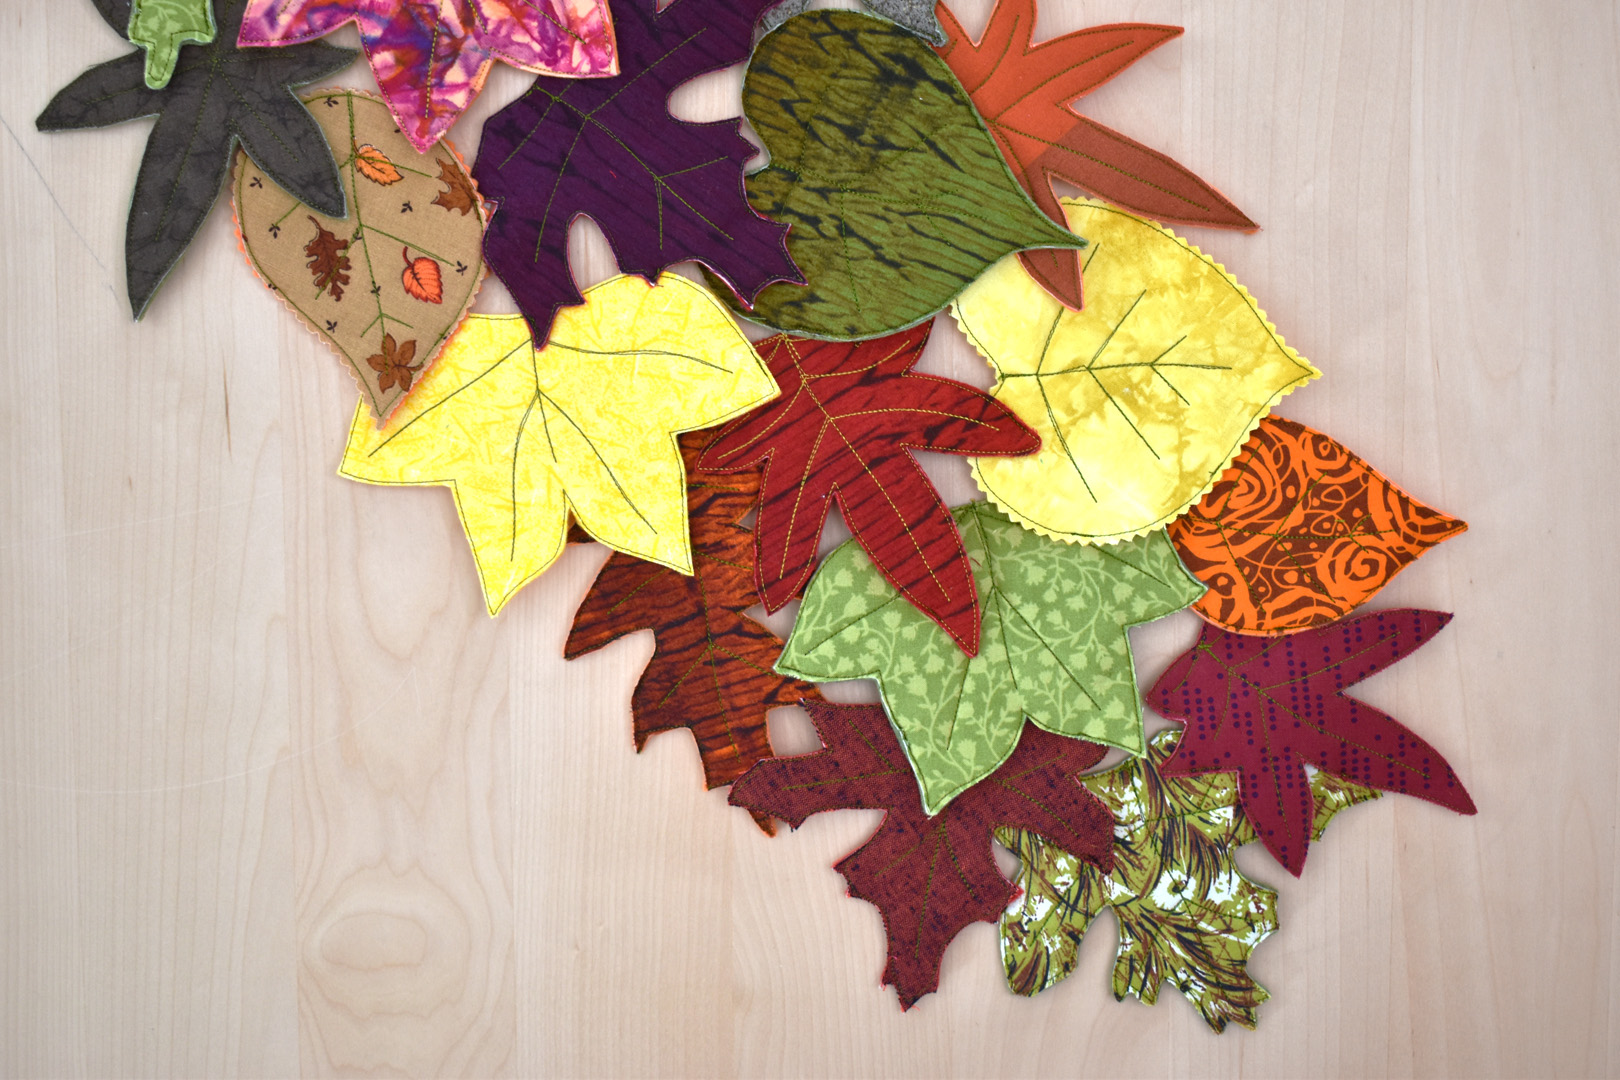
Start adding more leaves, placing them underneath the center leaves. As you continue to add leaves, moving them around, make sure to slide them underneath the other leaves to create the overlapping effect.
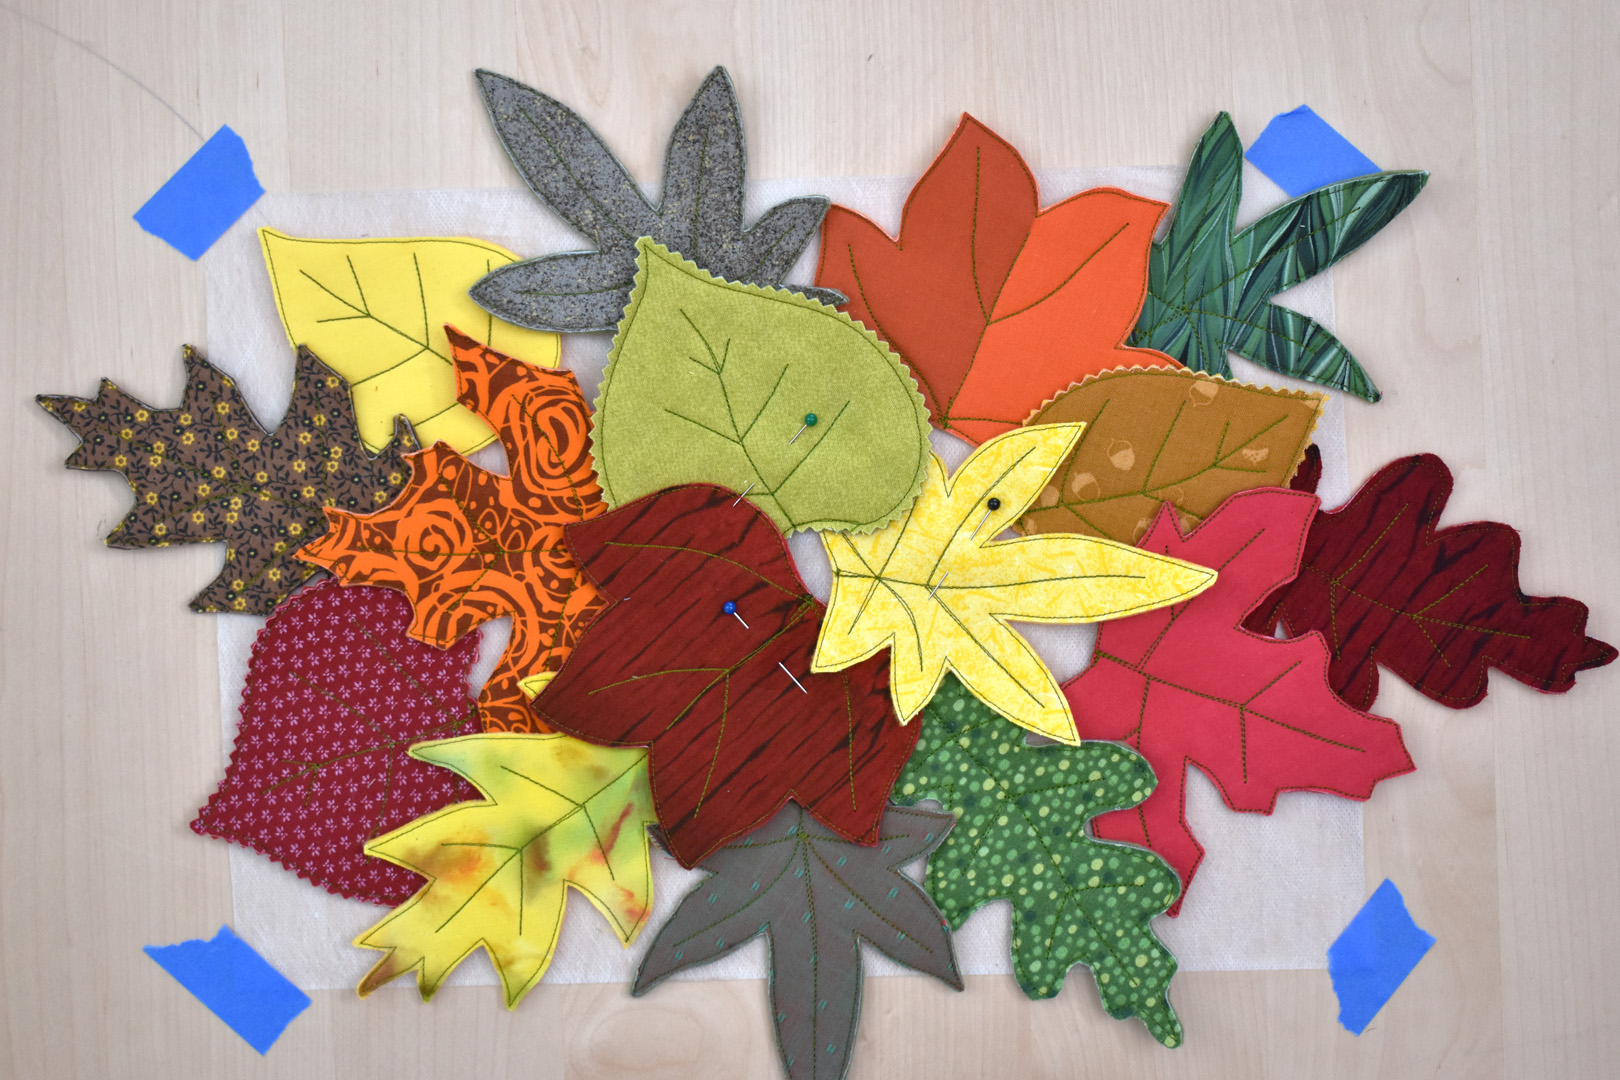
Take your time with this process, and find an arrangement that you really like. The leaves can extend a bit past the edge of the stabilizer, and you can make the overall size of the trivet larger or smaller depending on how many leaves you add.
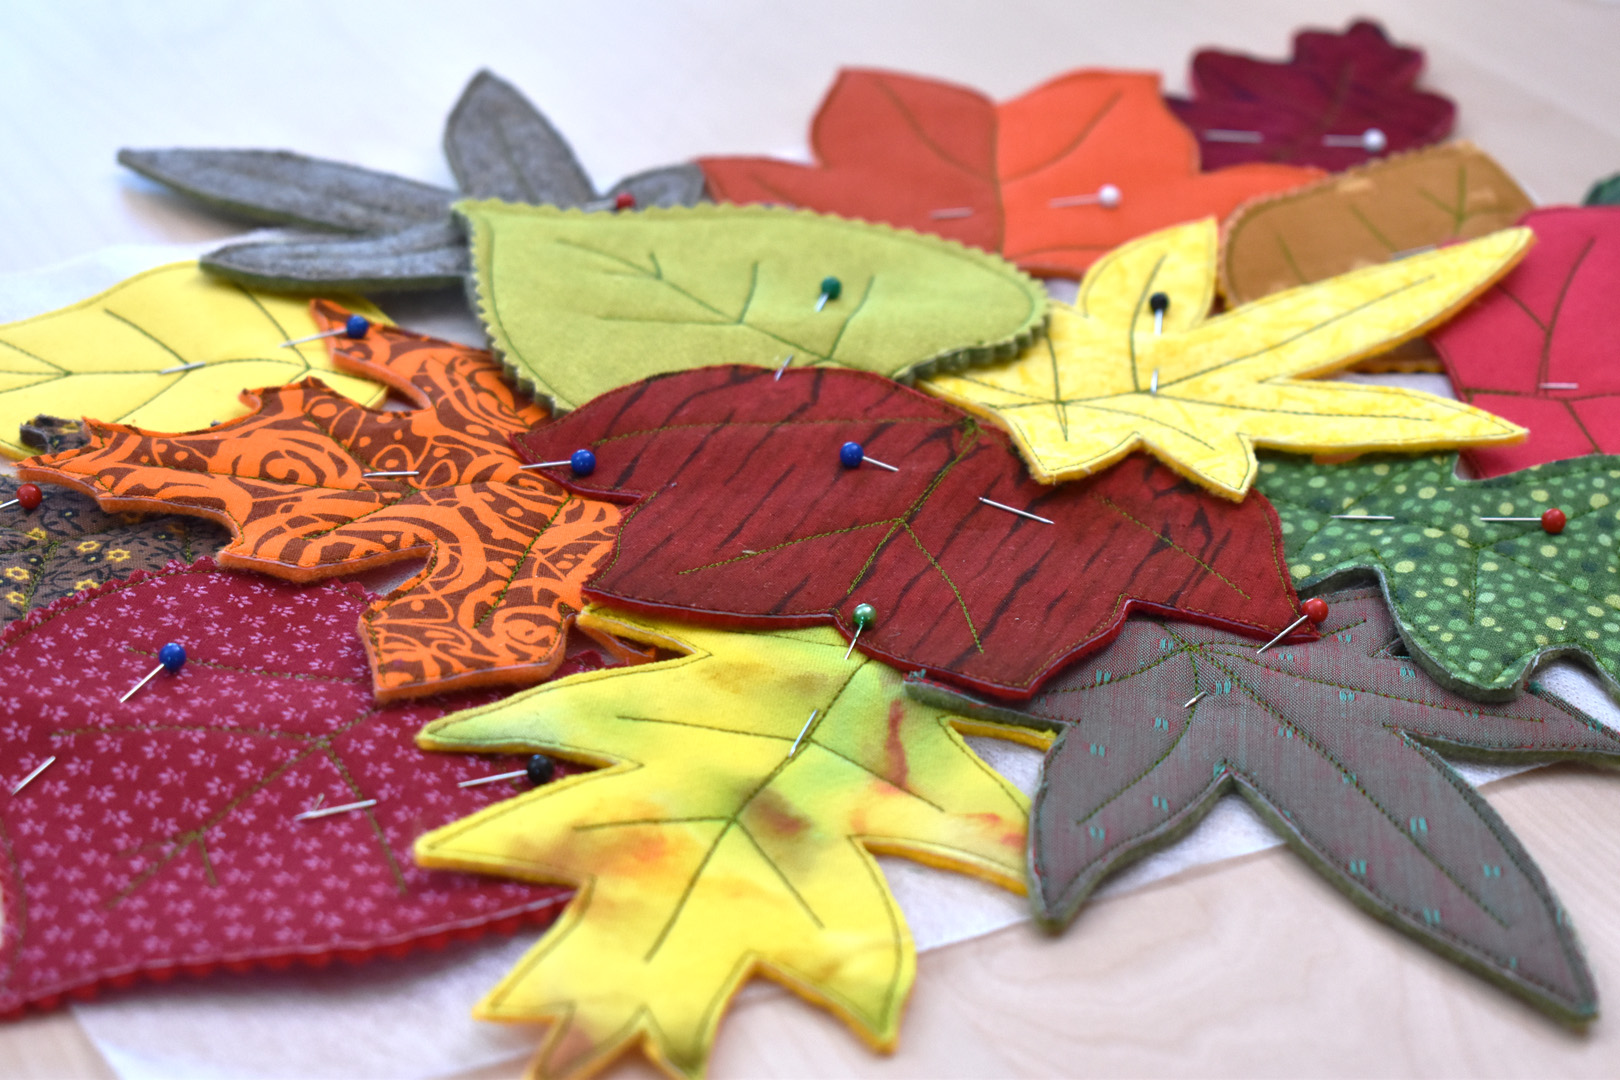
Pin all the leaves down to the stabilizer well. The pins will help hold everything together on top of the stabilizer while you tack the trivet together with the sewing machine.
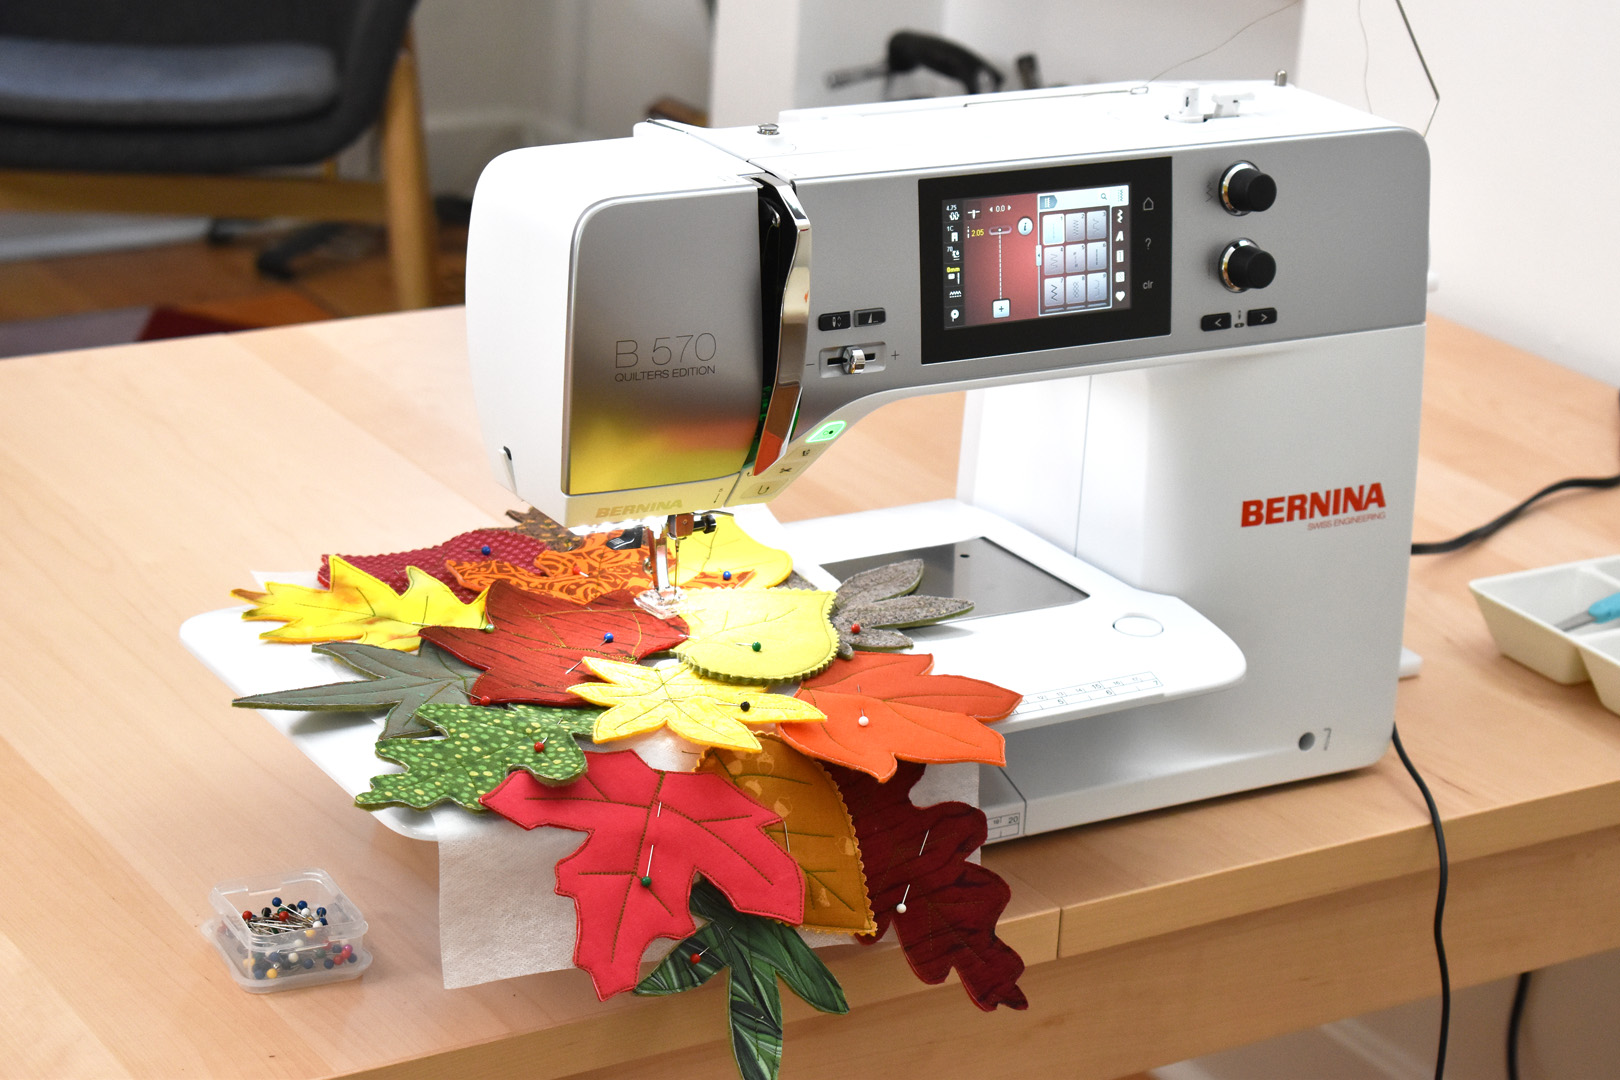
Use the same settings as above on the sewing machine to tack the trivet together.
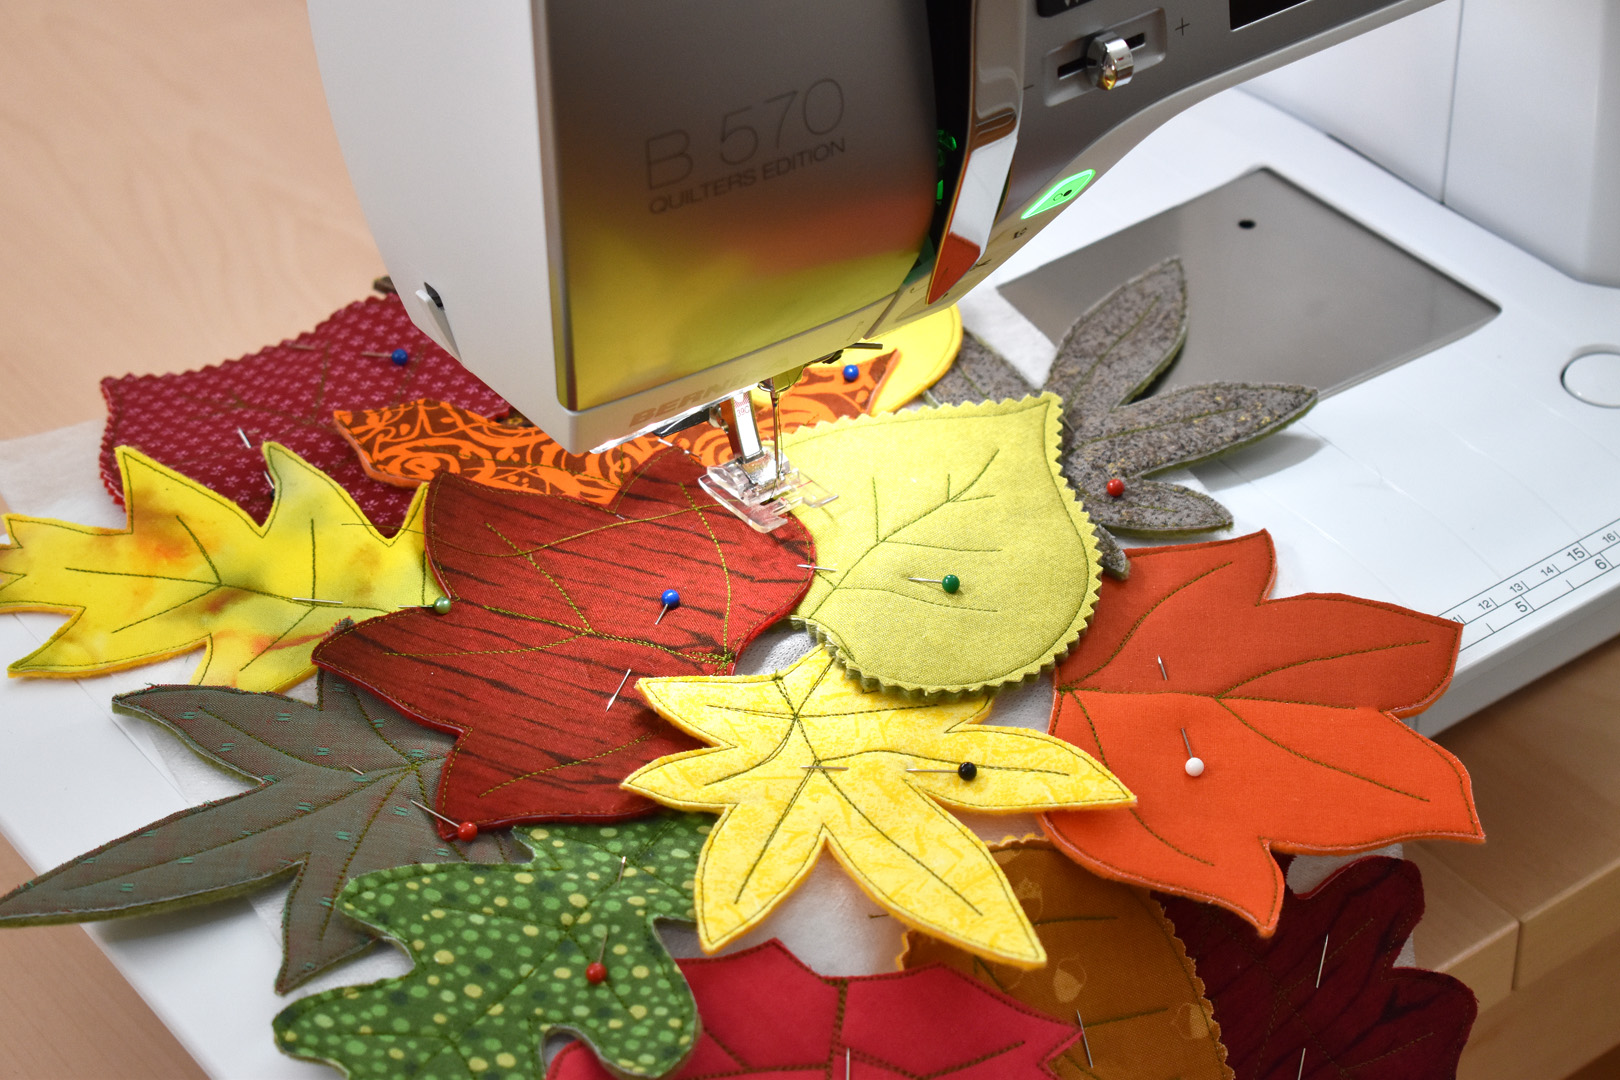
The goal is to create short runs of straight stitches from 1/4″ to 1/2″ long in several places to hold the leaves together. Placing these short runs of straight stitches over the existing stitching on the leaves helps to hide the tacking stitches.
Begin in the center of the trivet with the three overlapping leaves. Pick one place where the leaves overlap, and lower the needle to meet an existing line of stitching.
Stitch forward about 1/4″ to 1/2″, then backstitch the same distance.
Cut the threads close to the stitching. You will now have a short line of straight stitching tacking the layers together.
Keep moving around the trivet, tacking the leaves together in spots where they overlap. See the photo below of the trivet back to get an idea where I placed the tacking stitches. The goal is to tack just enough to hold the trivet together without leaving any leaves flapping around.
Tip: when you think you are finished tacking, start carefully removing the pins. Try to wiggle some of the leaves around, they should feel secure and not freely flapping off the trivet. If you find a place that needs another tacking stitch, add it now while you are removing pins.
This is the back showing how many tacking stitches I added. They don’t show as much from the front of the trivet.
Cut away the excess stabilizer, carefully cutting around the stitches.
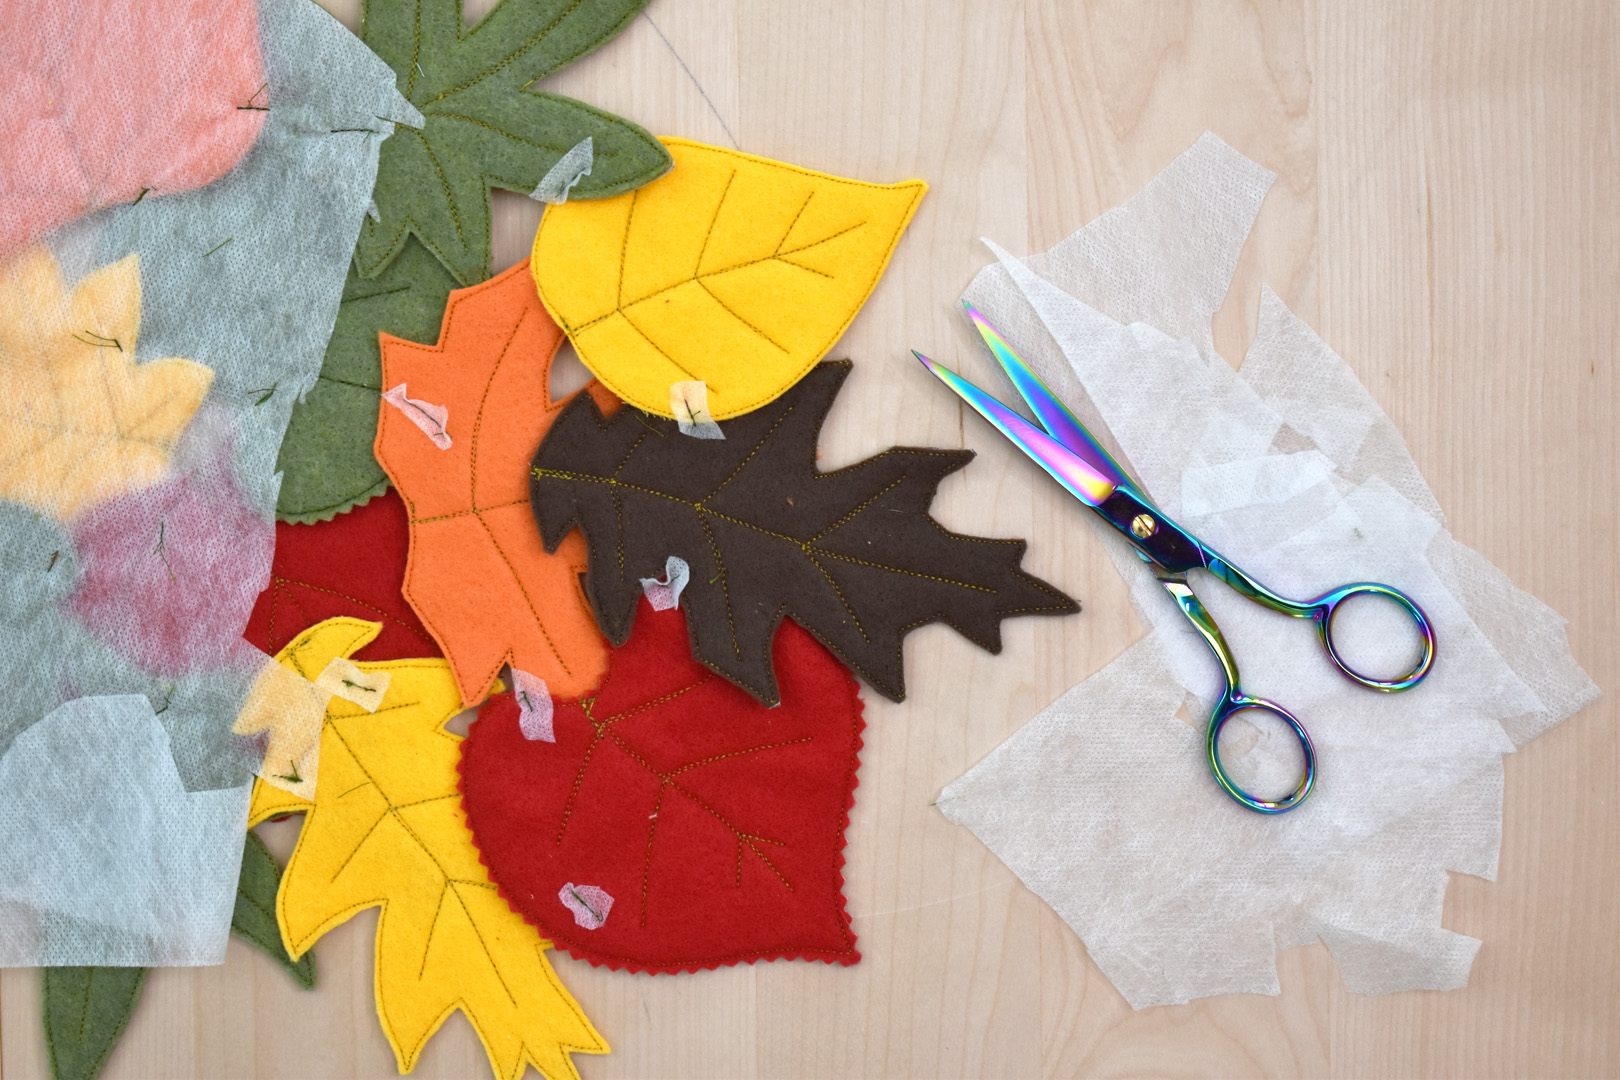
To remove the last bits of wash-away stabilizer, take your trivet to a clean sink along with a bath towel.
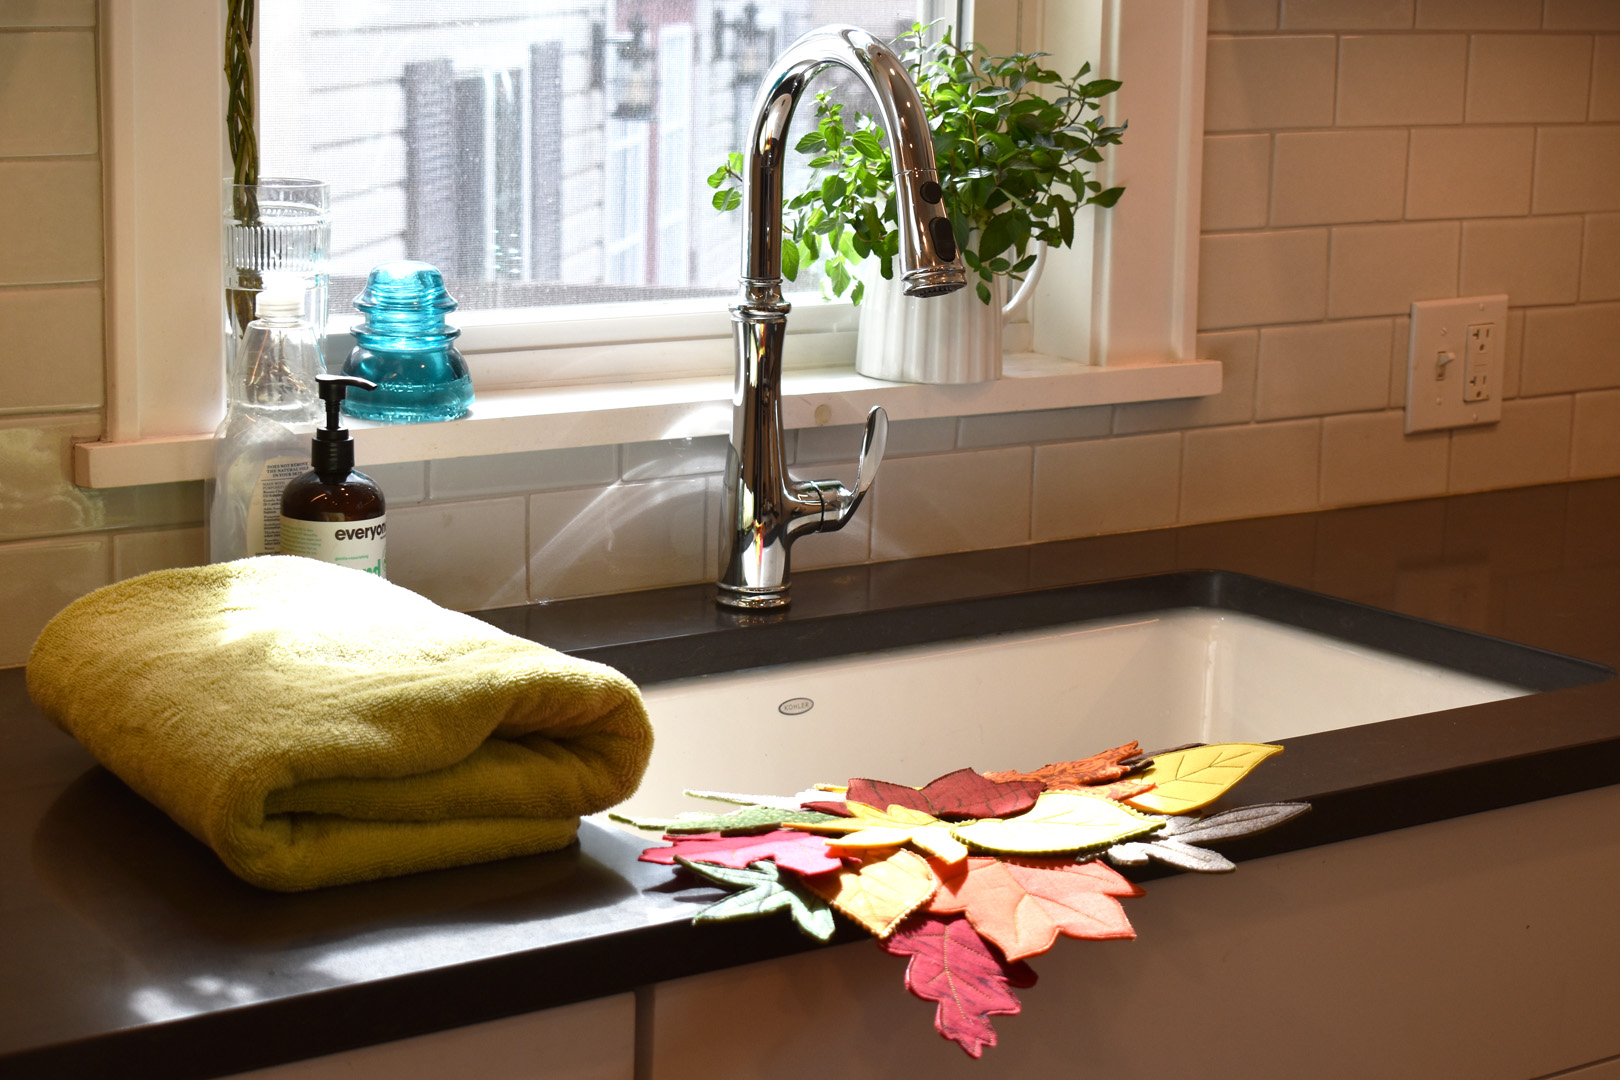
Place the trivet in the sink right side down.
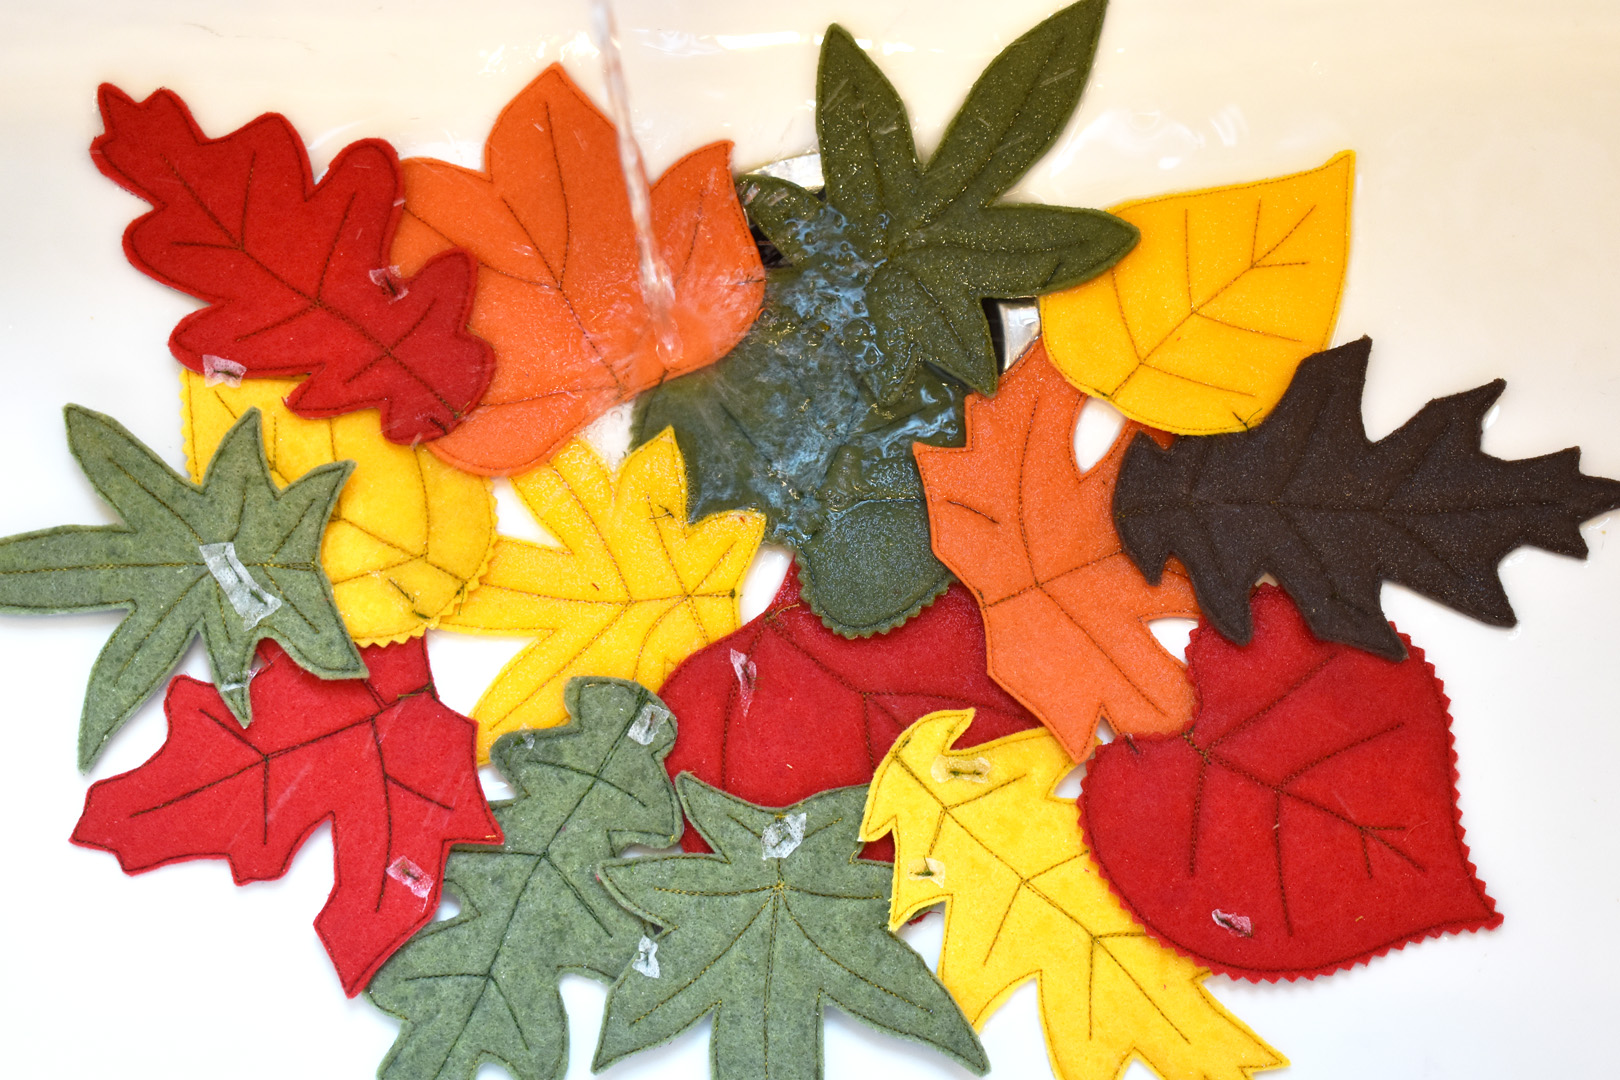
A rinse with warm water will instantly dissolve the remainder of the stabilizer.

When all traces of the stabilizer have washed away, gently blot the trivet with the bath towel. Do not wring or squeeze the trivet.
Let the trivet dry on the counter top or a flat dish rack.
And your trivet is ready to use!
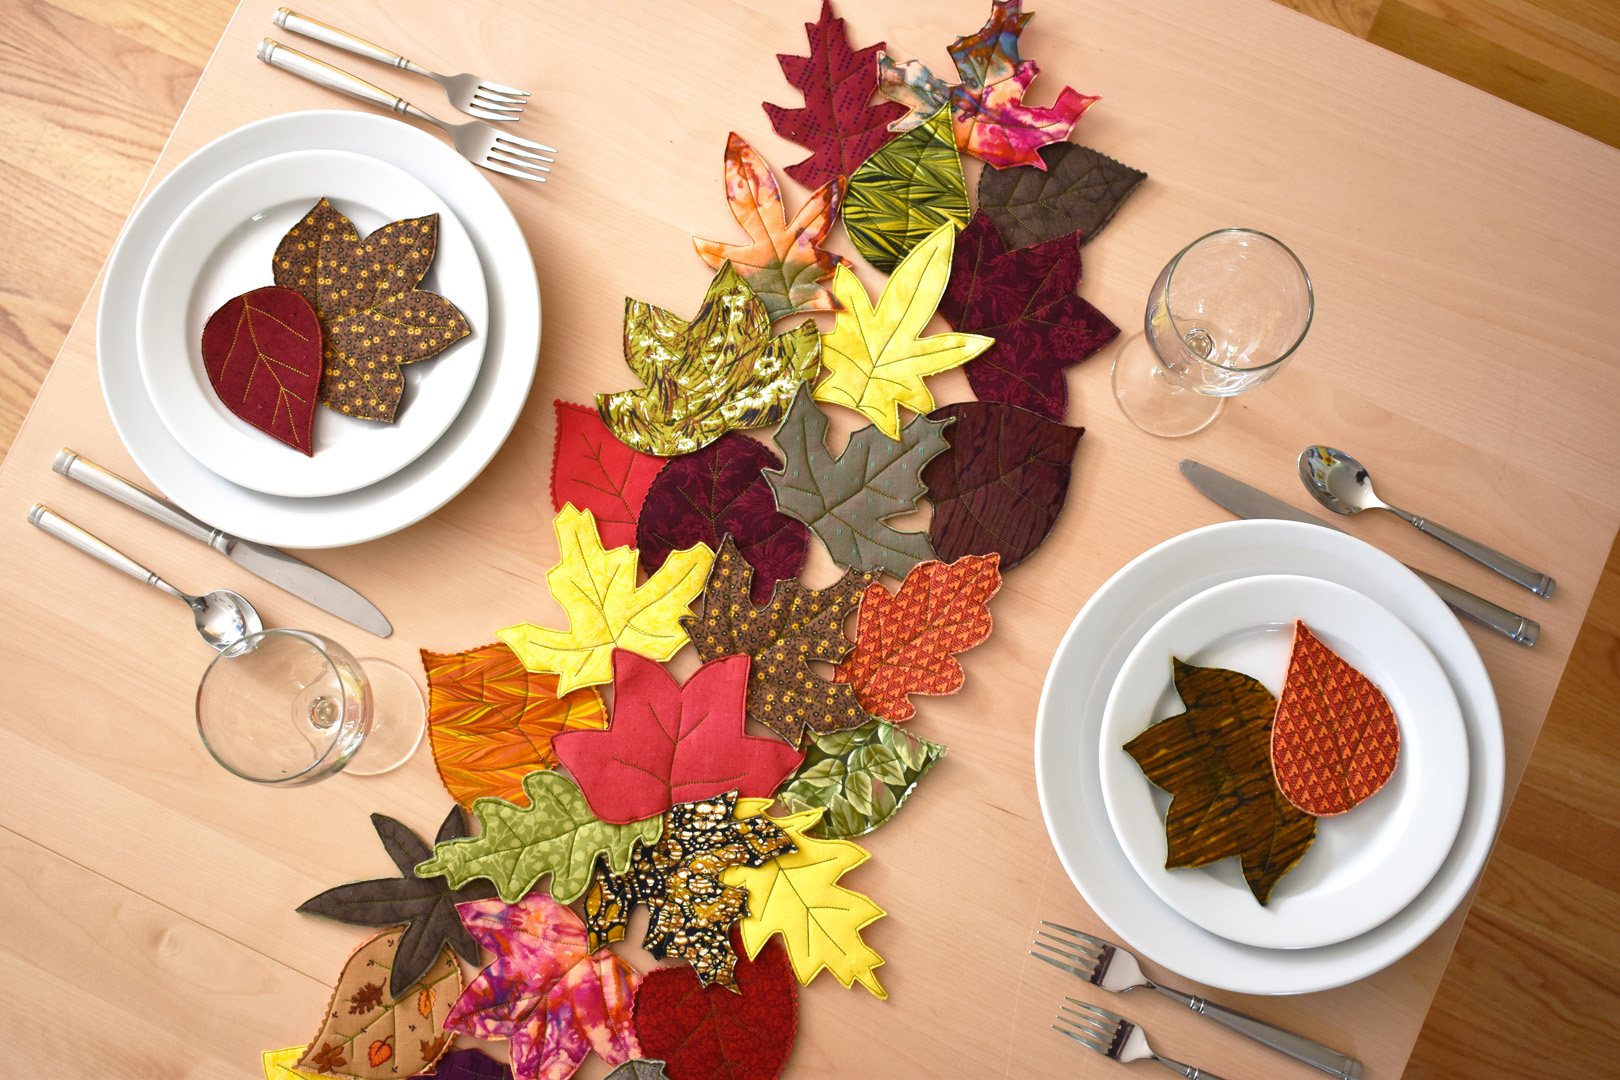
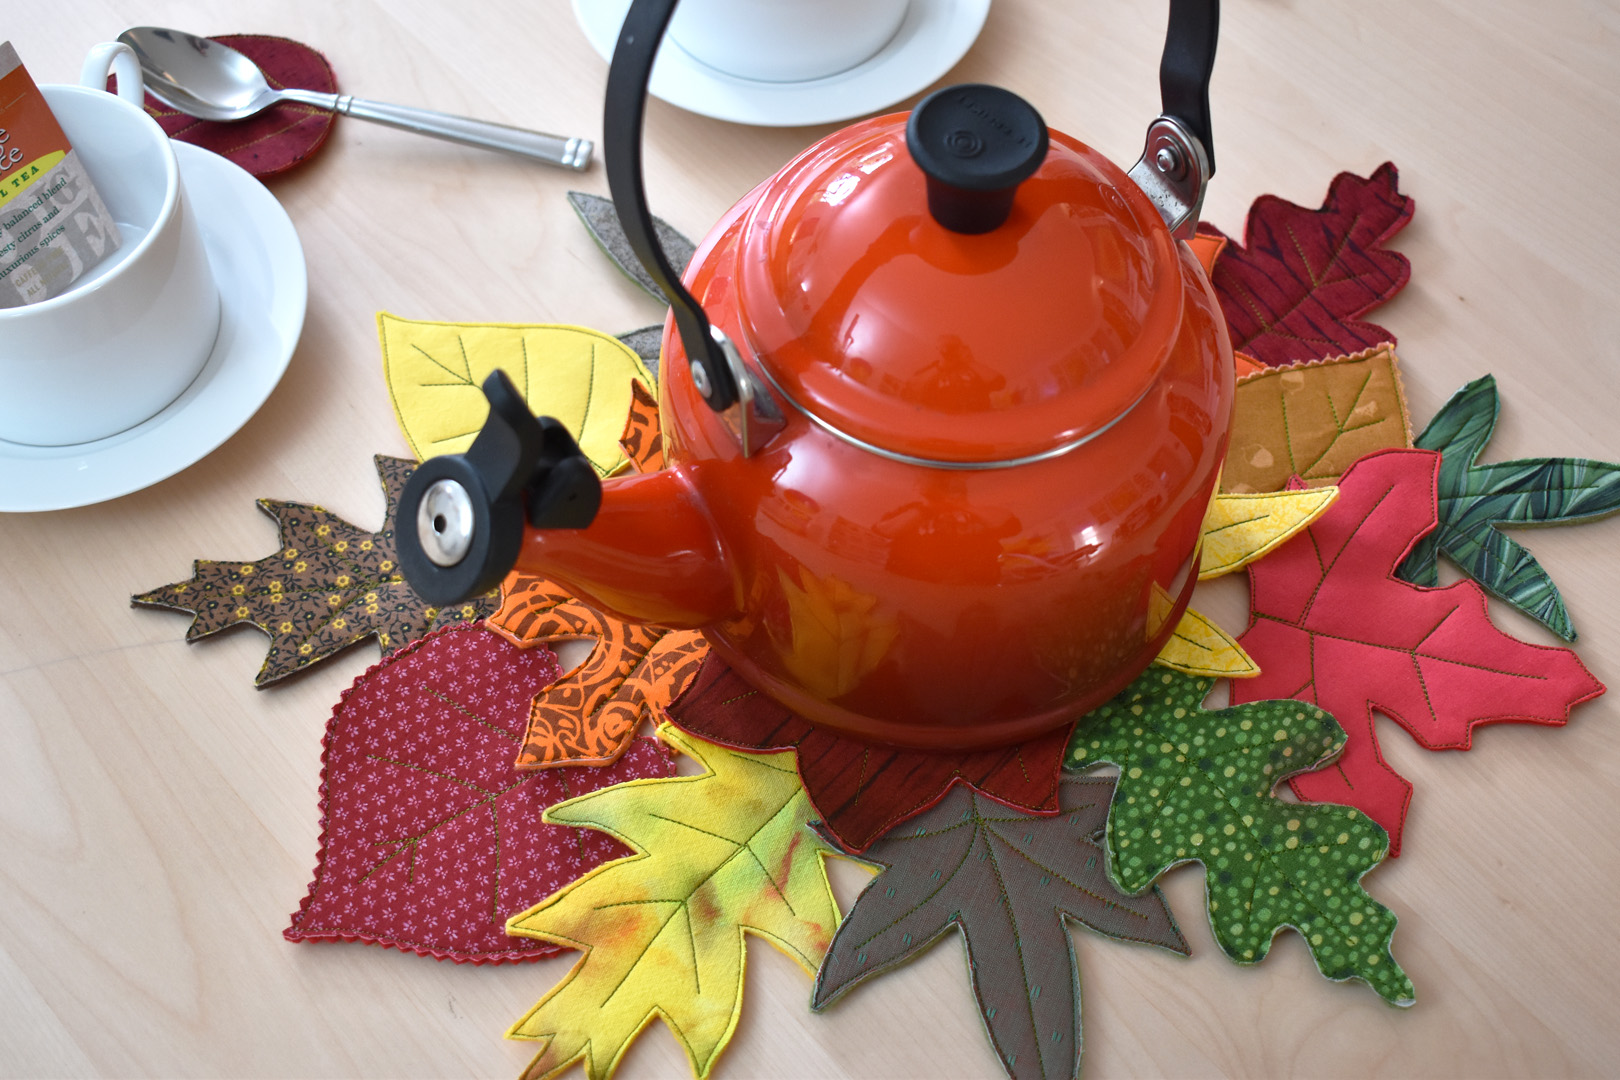
How to Make a Fall Leave Table Runner
You will need 36 – 40 leaves without stems to create the table runner, one 42″ piece of the 10″ wide OESD AquaMesh wash-away stabilizer, sewing pins, and blue painter’s tape (optional). The table runner is made using the same techniques as the trivet, refer to the directions above.
Lay out the 42″ piece of stabilizer, and tape the corners down with blue painter’s tape if you wish. Grab all of your leaves and long sewing pins to start laying out the leaves.

Start with a few leaves overlapping in the center of the stabilizer (use a long ruler or tape measure to help find the center). Pin in place.
Start adding more leaves, overlapping as you go (see instructions for trivet for details), letting some leaves stick out over the edge of the stabilizer.
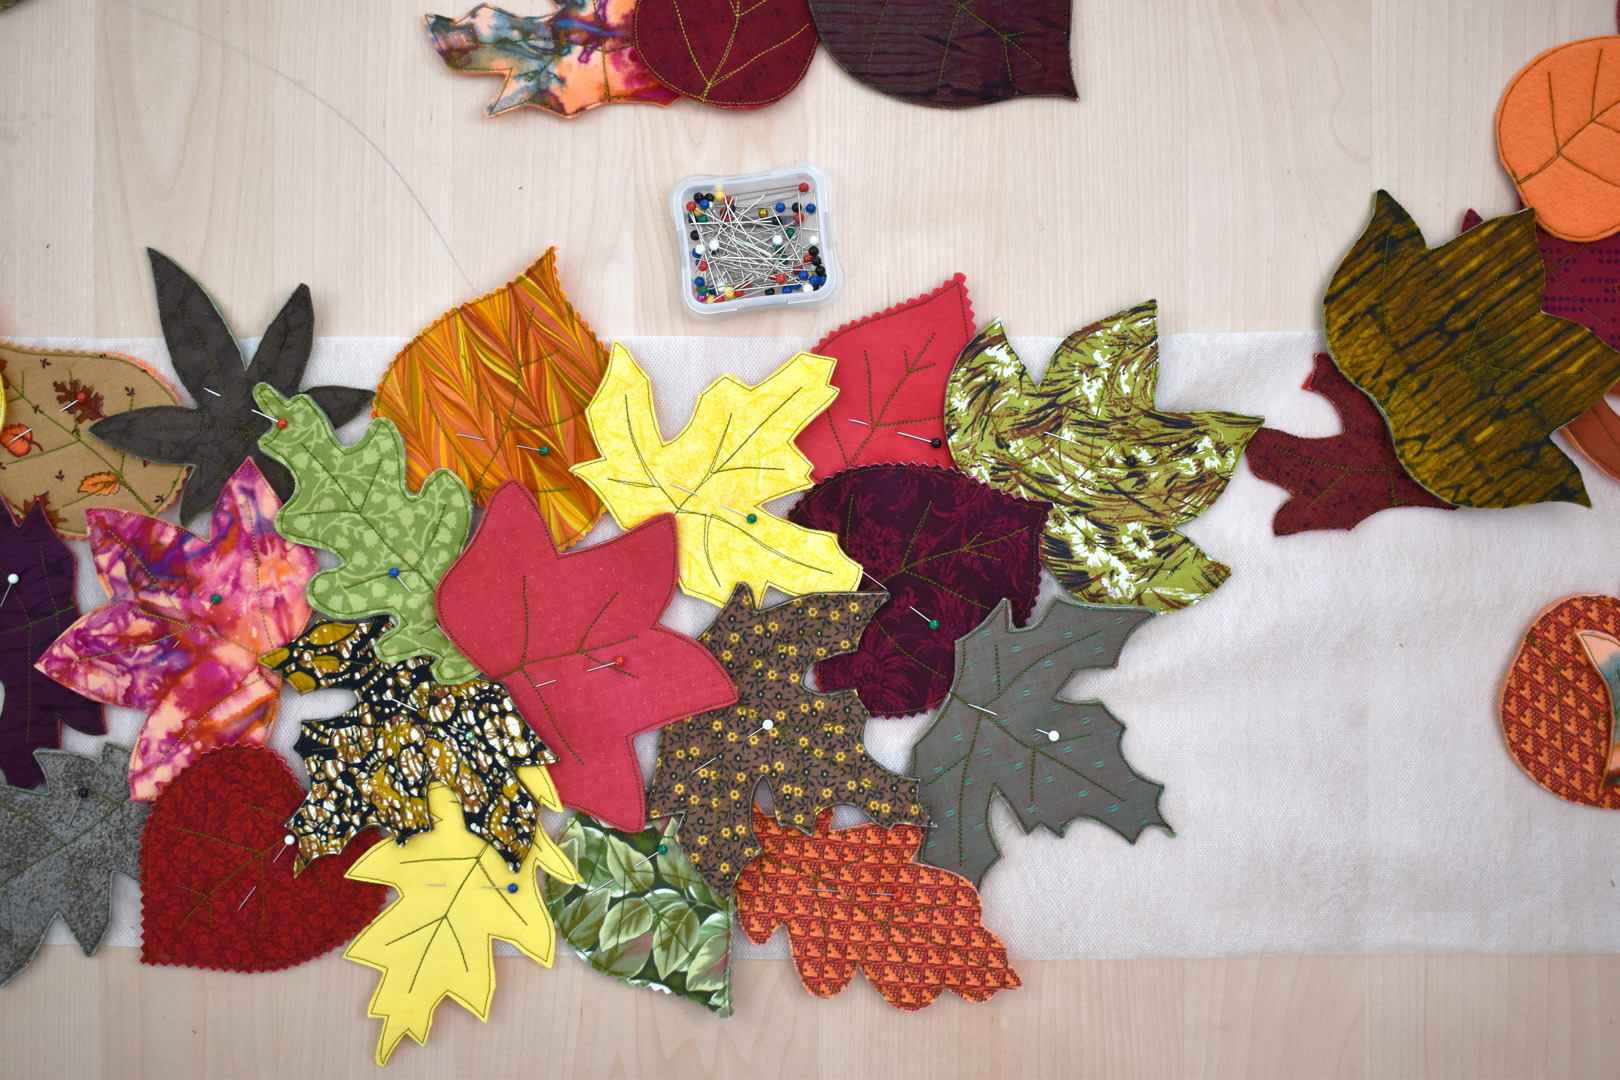
Taper both ends of the table runner to a point with one leaf. I spent a lot of time looking at the overall design with the leaves before I pinned them down, making sure the mix of colors looked good and there weren’t too many leaves of the same color next to each other.
Pin the leaves down to the stabilizer to secure, and tack sew on the sewing machine following the instructions for trivet above.
Finish off by trimming extra stabilizer and rinsing away the last bits.

And your table runner is ready! I had a few leaves left over from making my table runner, and used them as a bit of extra flair when setting the table. Enjoy!


What you might also like


4 comments on “DIY Fall Leaf Décor”
-
-
Great project! Thanks
-
Thanks so much, @BERNIEMAX, I’m so happy that you enjoyed the project! Cheers – Erika
-
-
Fab project but please tell me why is the washable fabric necessary Can you not overlap and sew without the stabiliser Not sure what the stabiliser is doing
Leave a Reply
You must be logged in to post a comment.
Thank you! I love these ideas! If possible, please share this idea earlier in the fall in 2023. I’ve committed my sewing time to other projects this year.