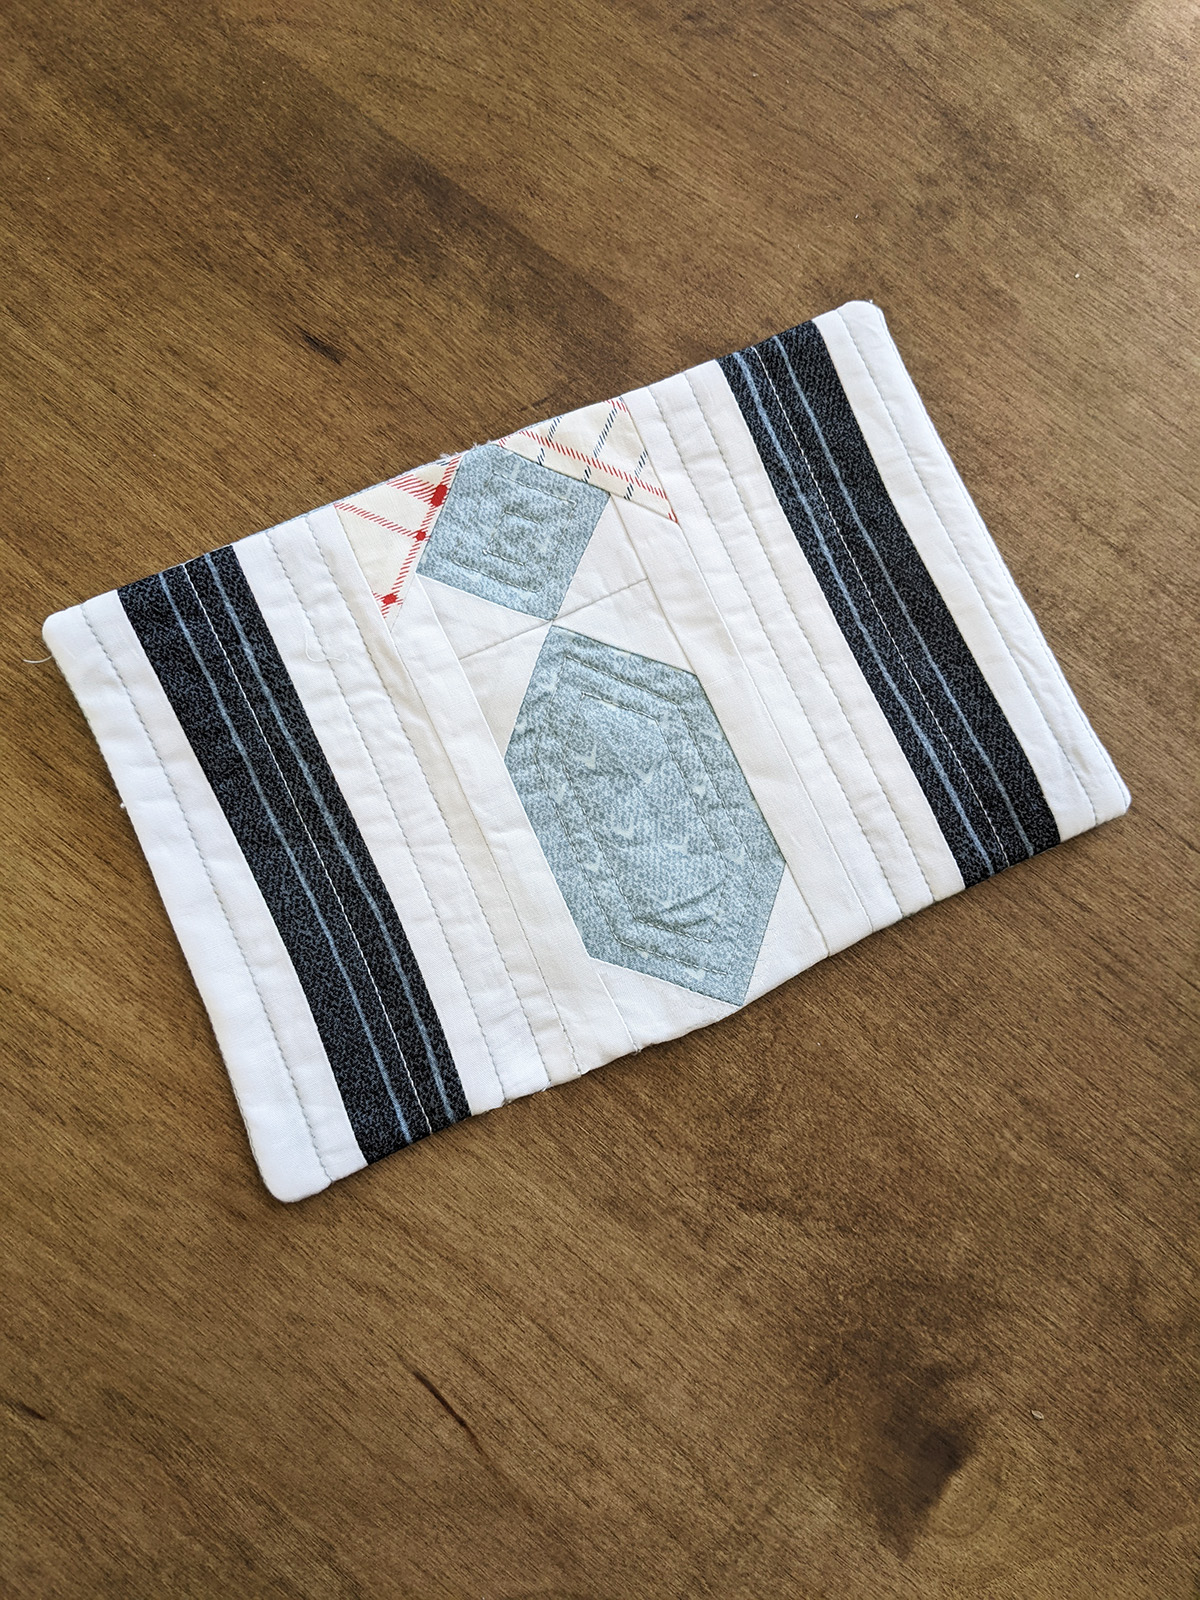
Father’s Day Mug Rug
Hello, my fellow makers,
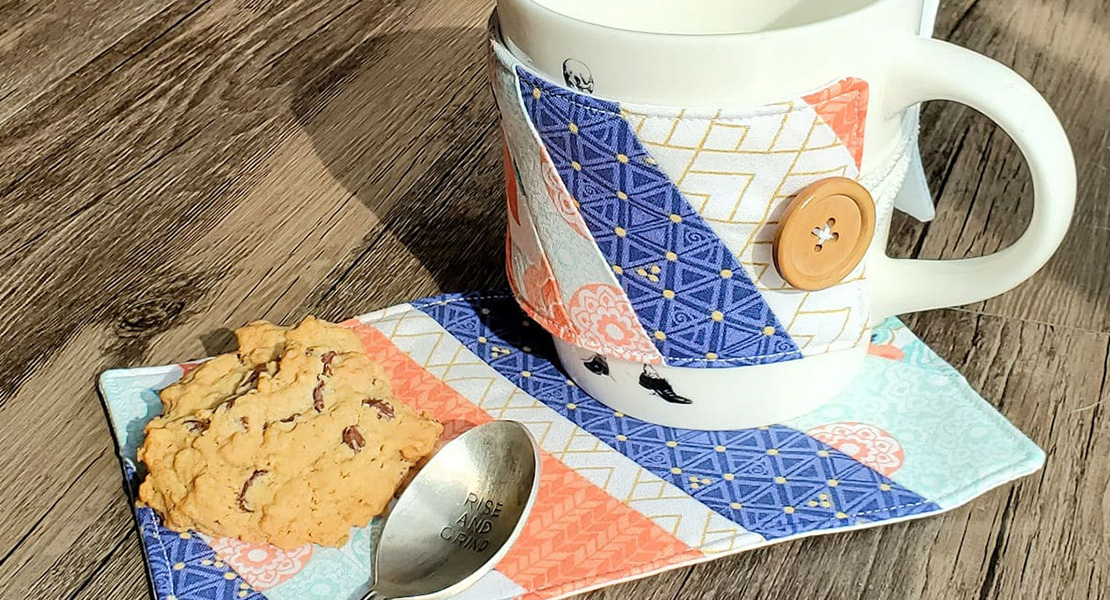
Father’s Day is around the corner and if you are looking for ideas for dad, then this mug rug is the ideal gift! Whether it is for his morning coffee while reading the news, or for his afternoon teas with some sweet or savory treat, this project will remind him of how much you love him and care for him and will treasure it forever.
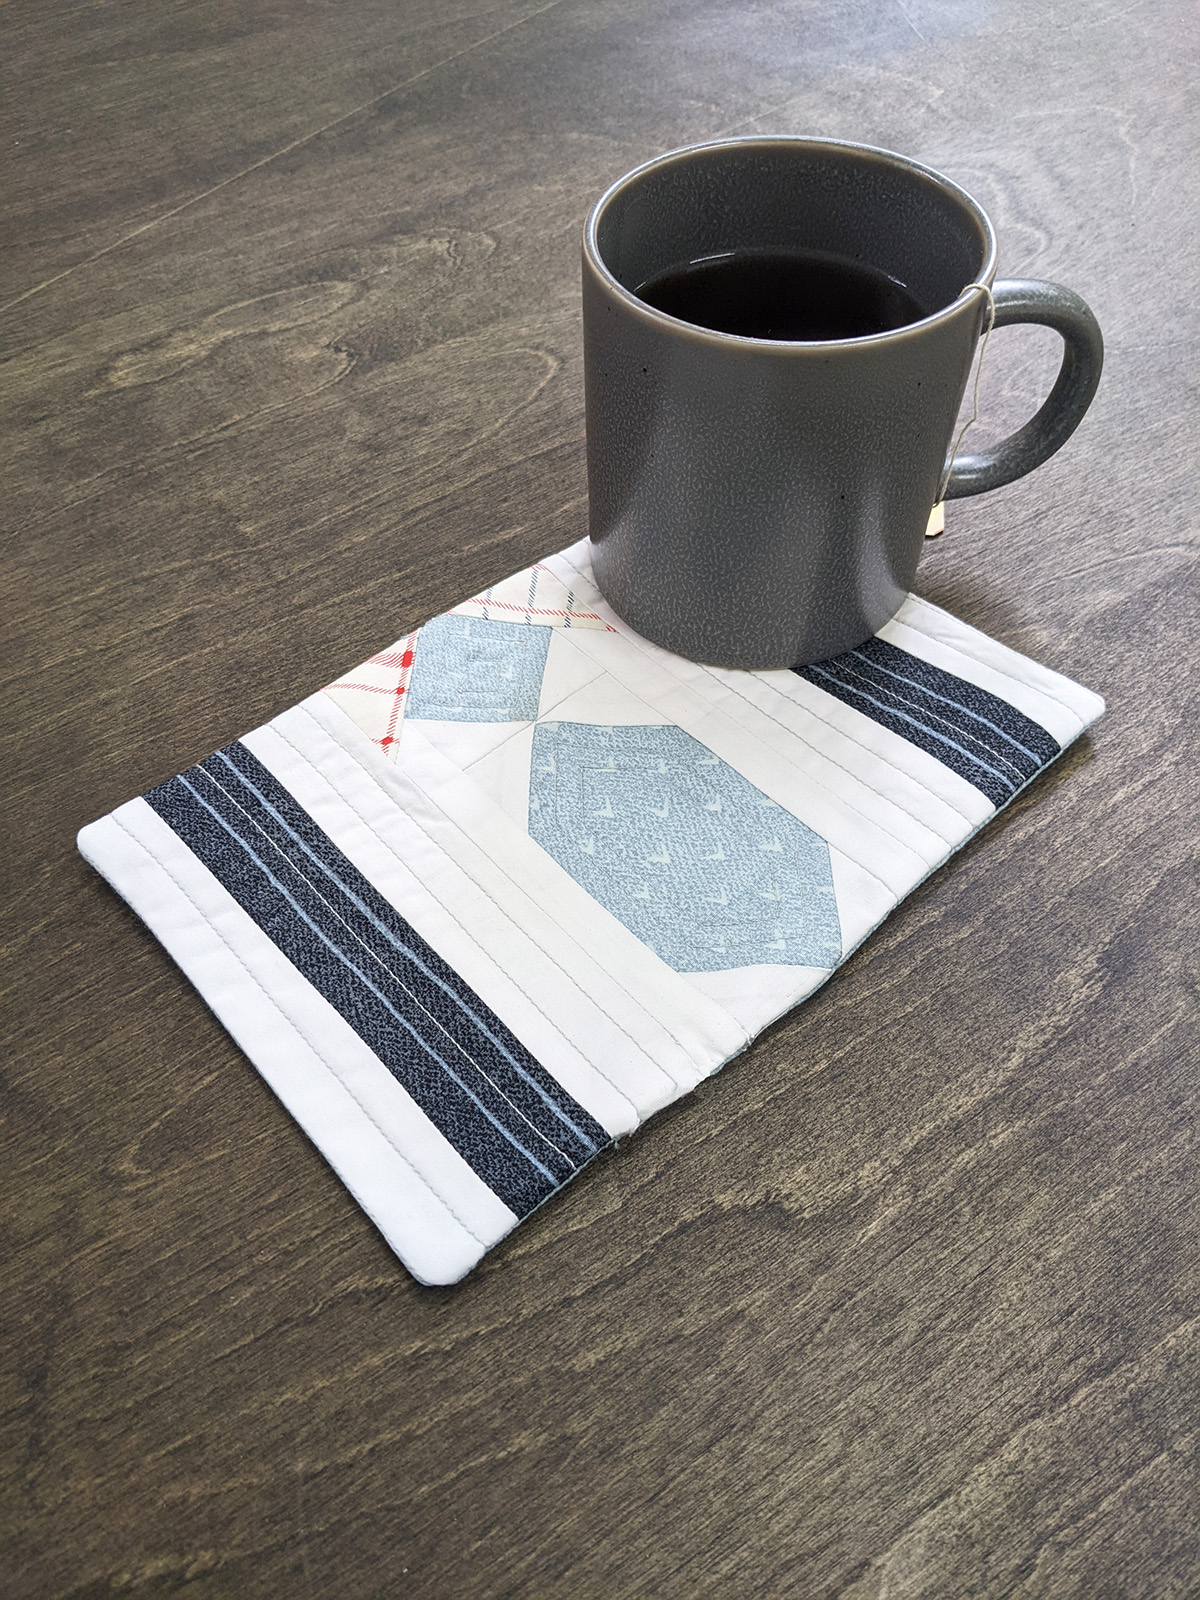
This fun and easy project features Katarina Roccella’s Twenty collection, Maureen Cracknell’s Cozy & Magical combined with our Art Gallery Fabrics Pure Solids Snow.
Have fun making this project!
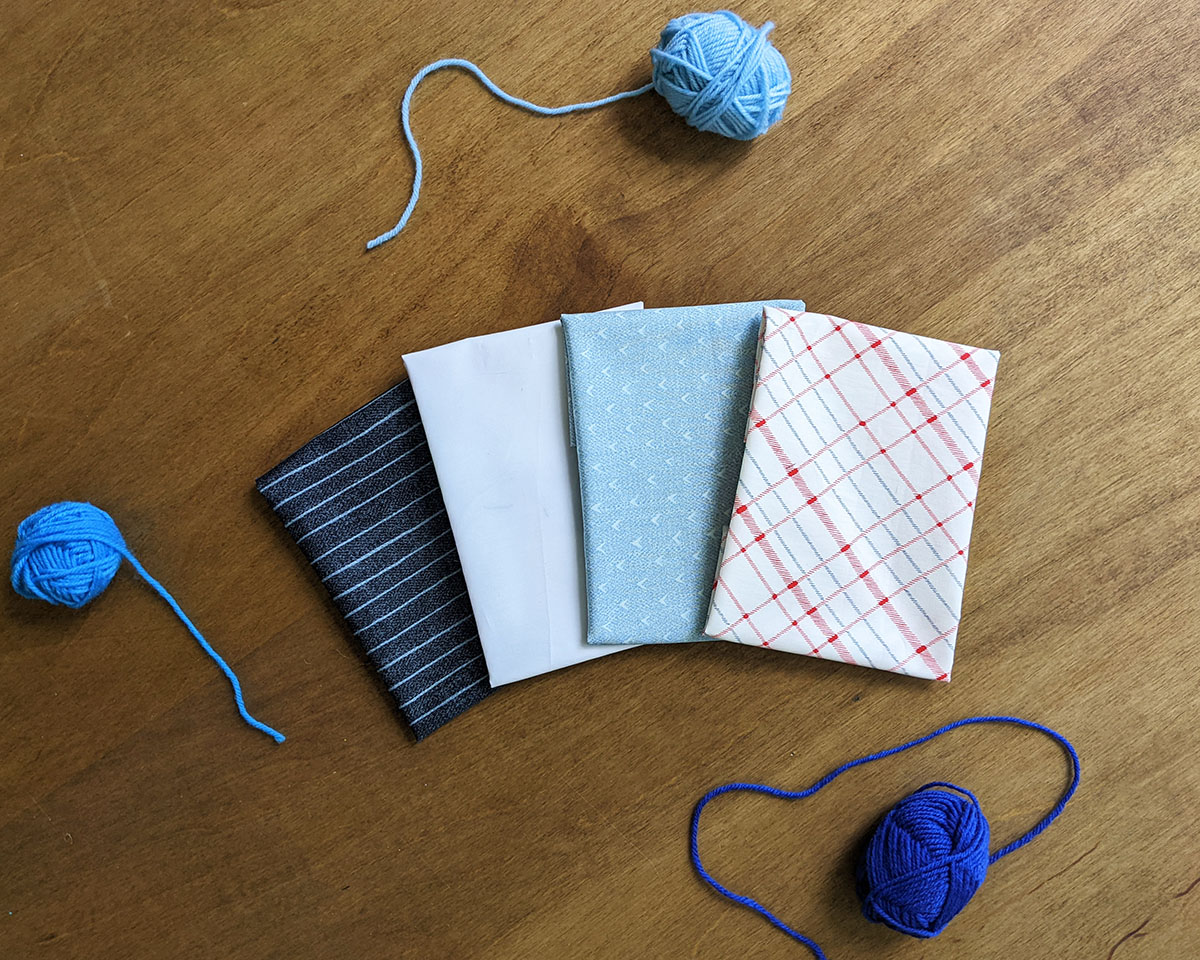
For this project, you will be using Fat Eighths for all fabrics. You will have leftover fabric perfect for another mug rug or any desired Fat Eighth-friendly project.
- Fabric A TWT-20218 F8
- Fabric B TWT-20212 F8
- Fabric C CMA-25129 F8
- Fabric D PE-433 F8

Additional Materials to Sew the Mug Rug
- One (1) 11” x 8” of batting
- Coordinating quilting thread
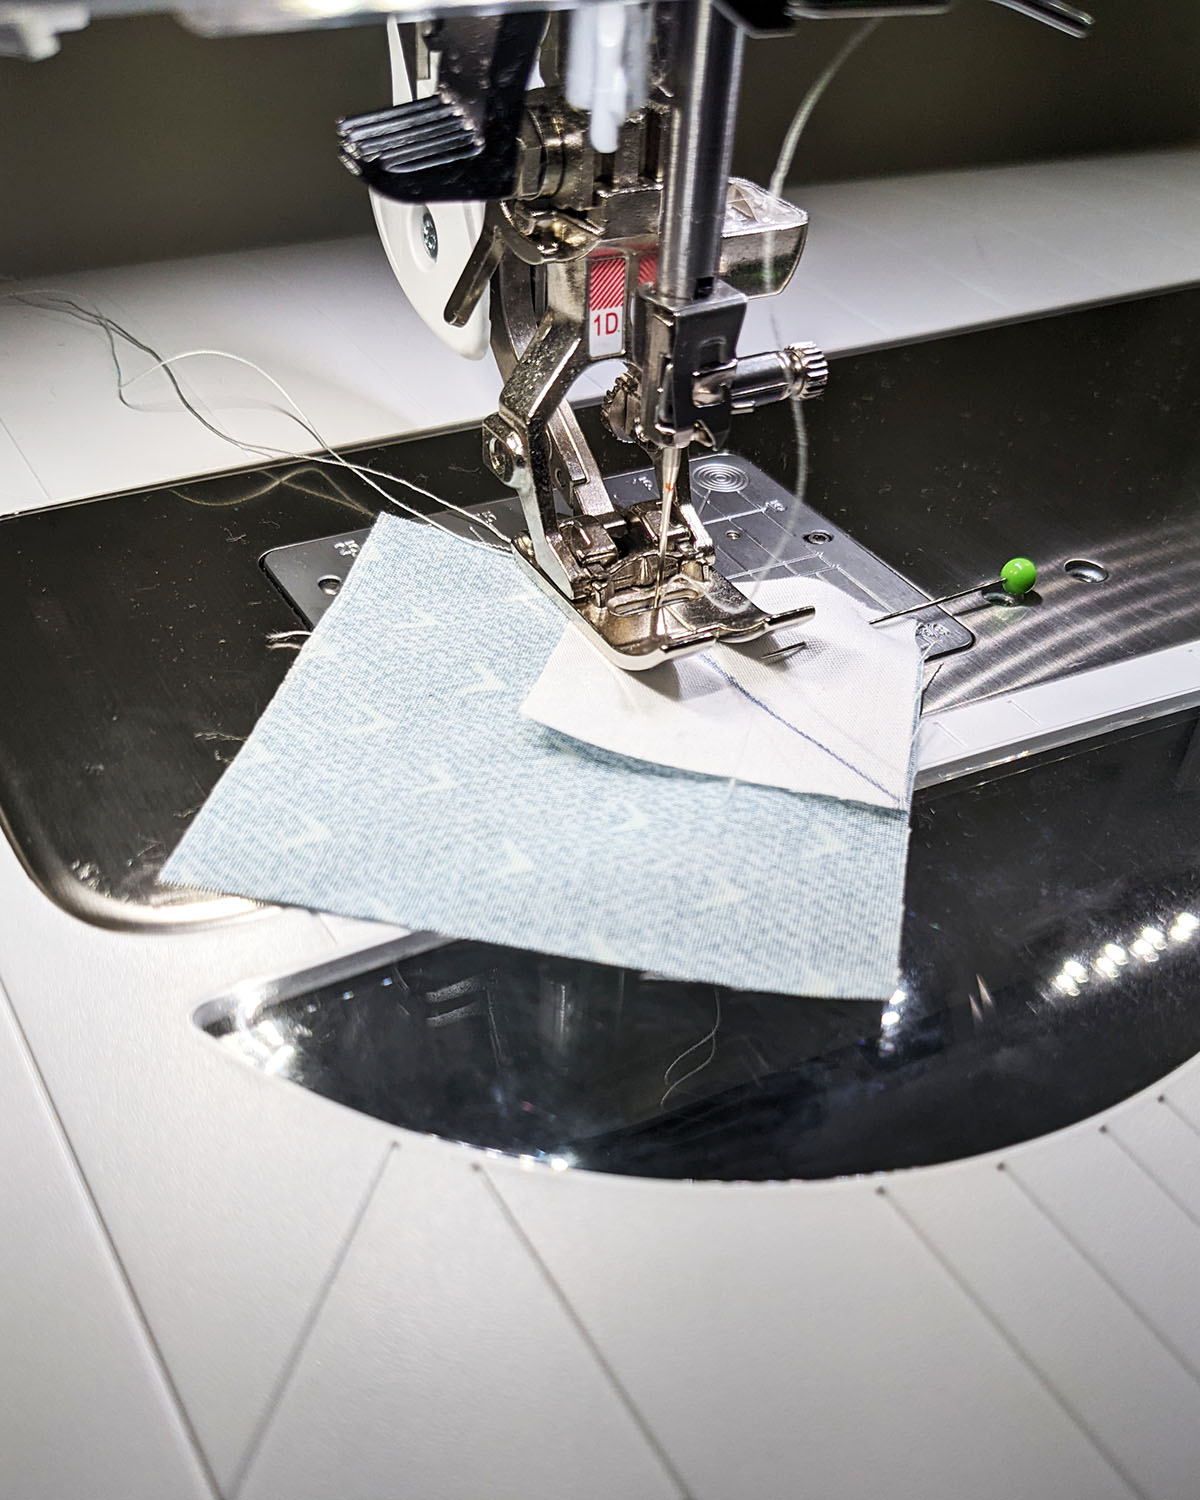
- Reverse Pattern Foot #1D
- Needle and thread
Cutting Direction
- Two (2) 6 1/2’’ x 1 1/2’’ strips from fabric A
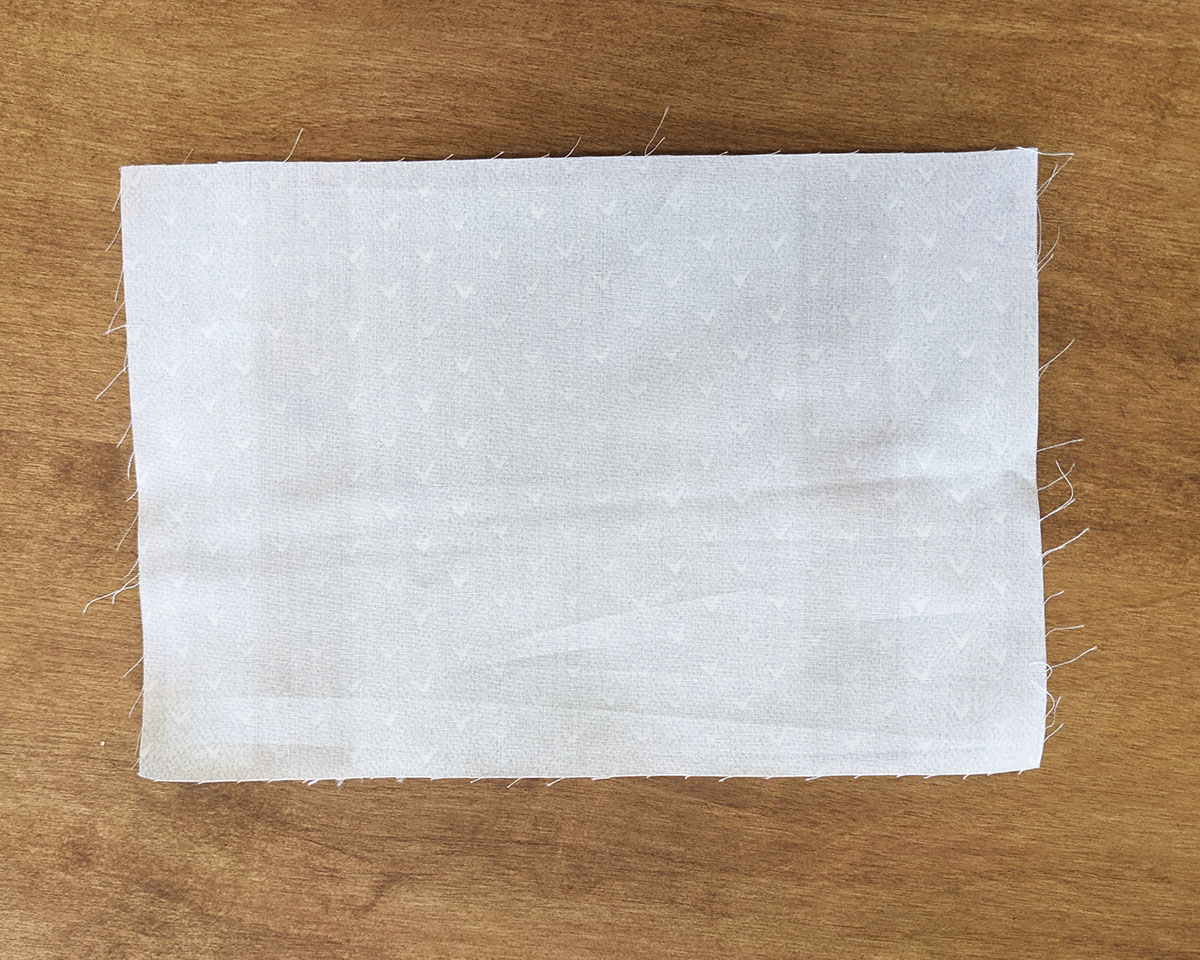
- One (1) 9 1/2’’ x 6 1/2’’ rectangle from fabric B (backing)
- One (1) 2 1/2’’ x 4 1/2’’ rectangle from fabric B
- One (1) 2 1/2’’ square from fabric B
- Two (2) 2 1/2’’ squares from fabric C
- Four (4) 6 1/2’’ x 1 1/2’’ strips from fabric D
- Two (2) 6 1/2’’ x 1’’ strips from fabric D
- Six (6) 1 1/2’’ squares from fabric D
Instructions to Sew the Mug Rug
Step 1:
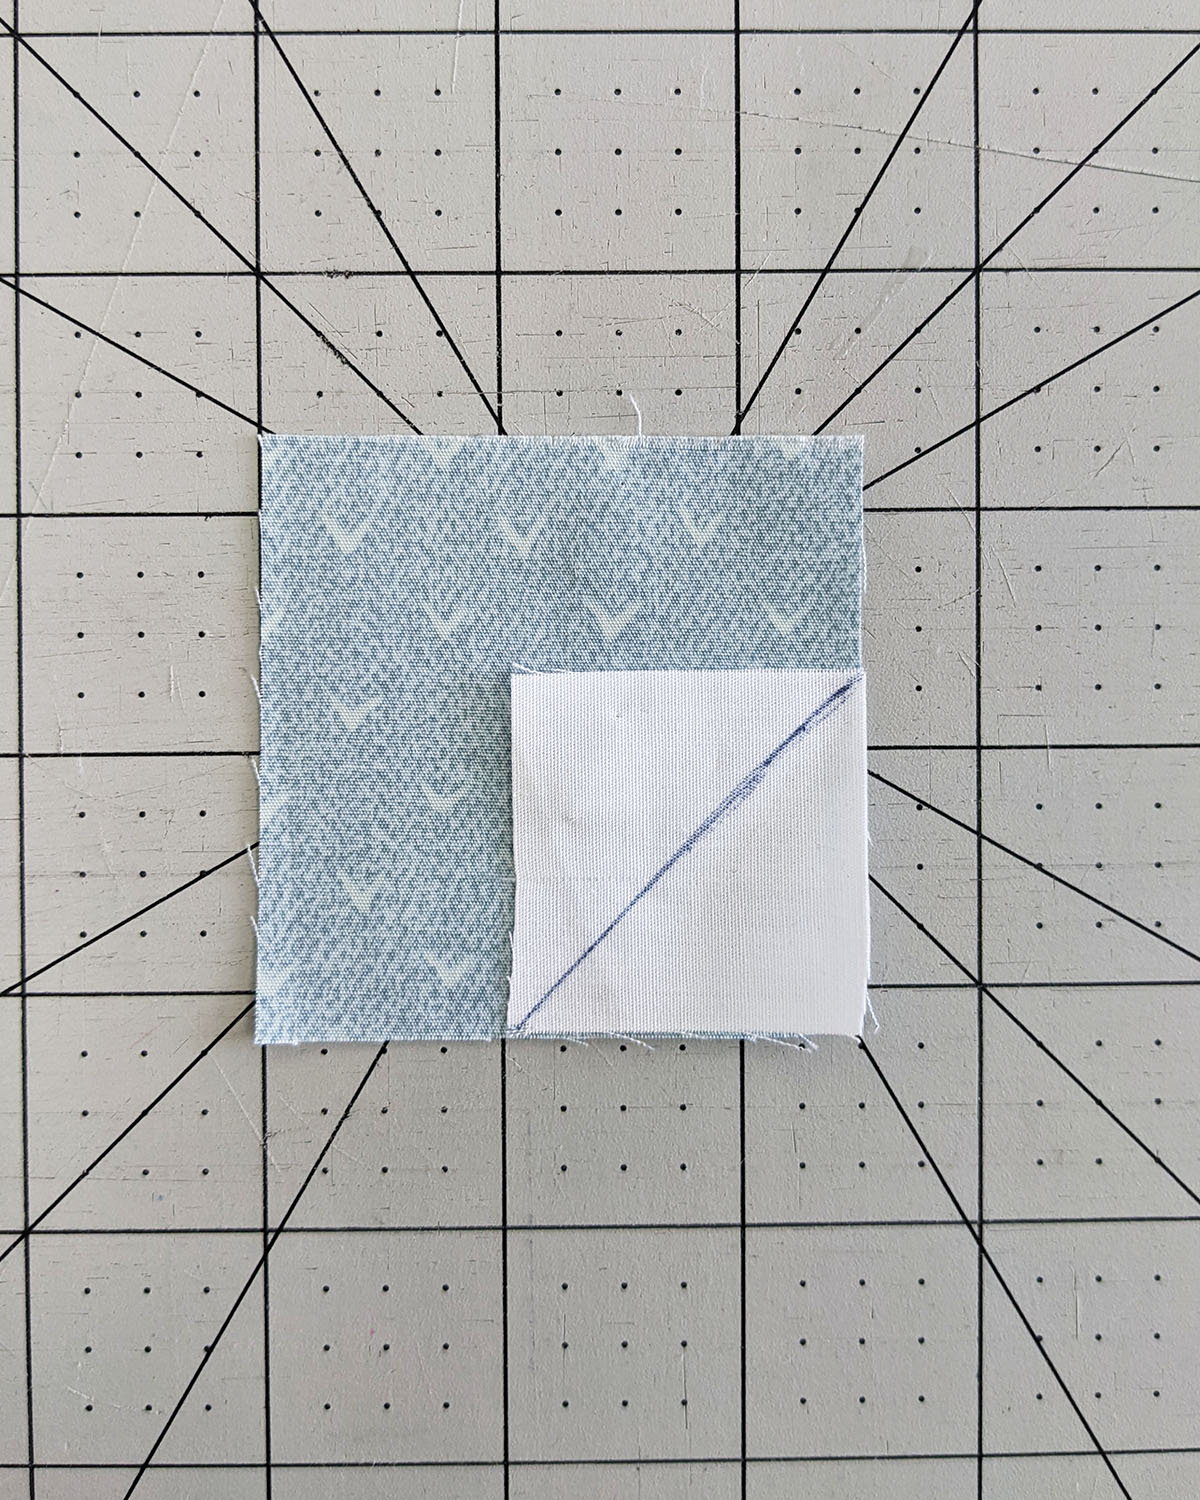
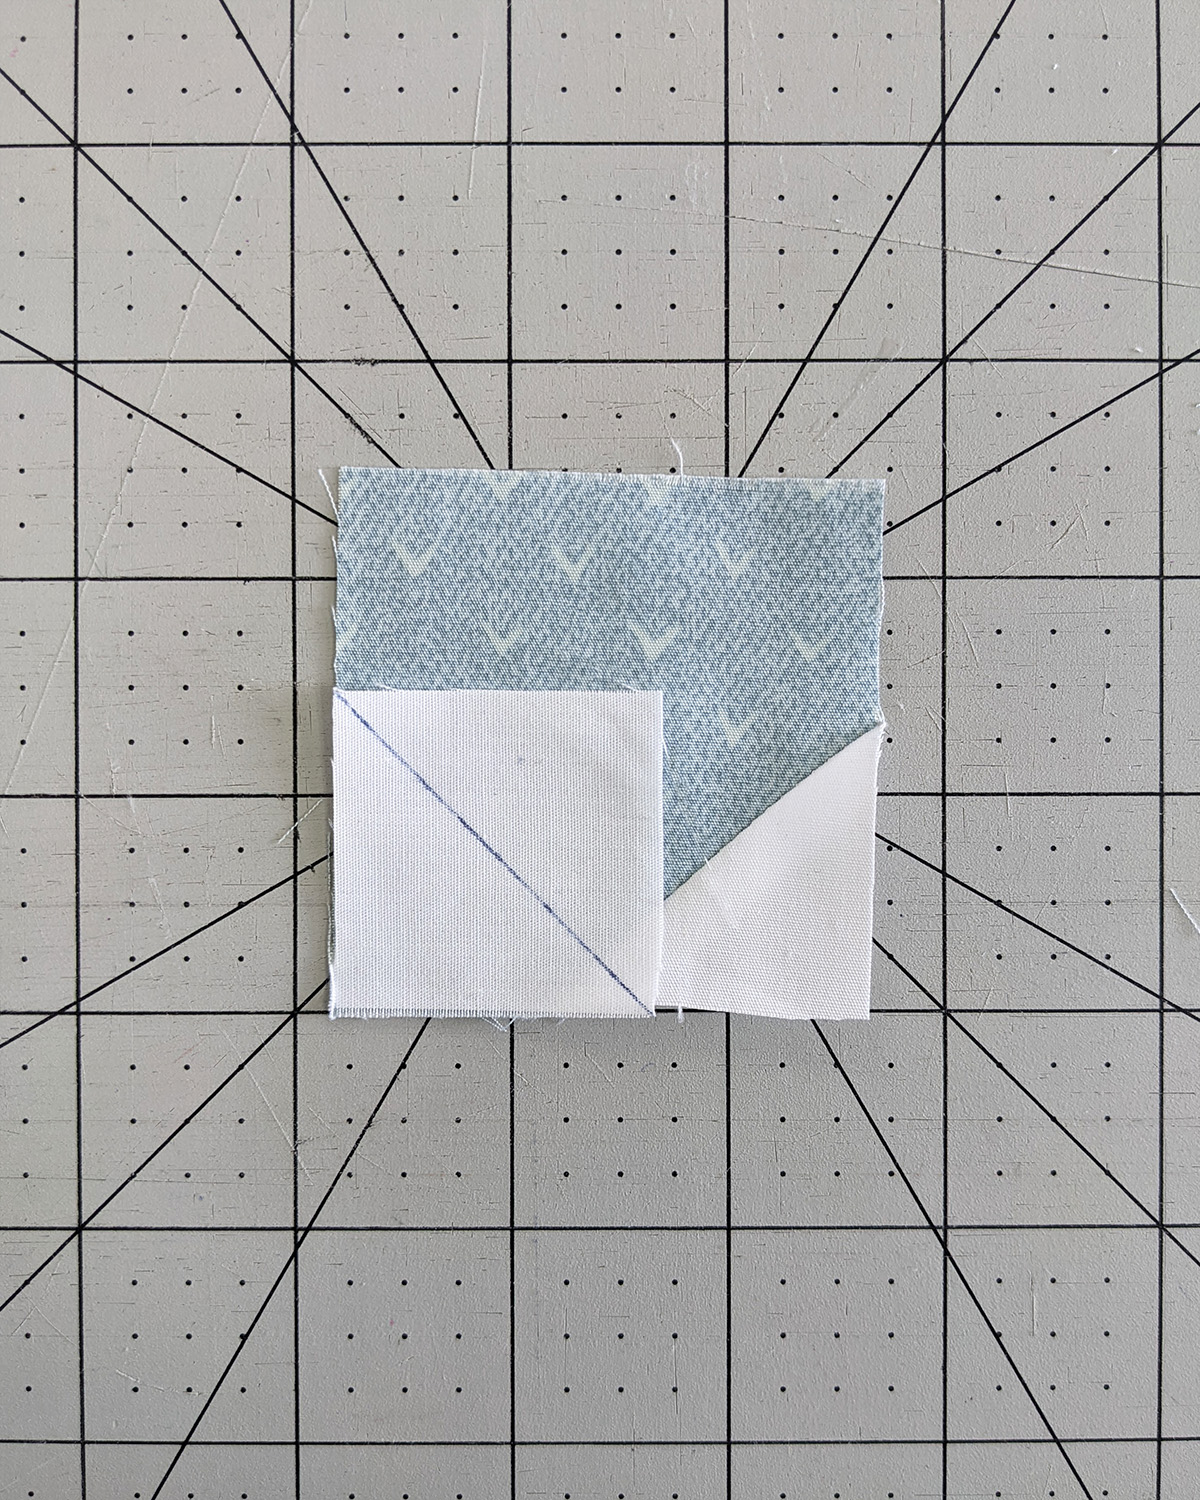
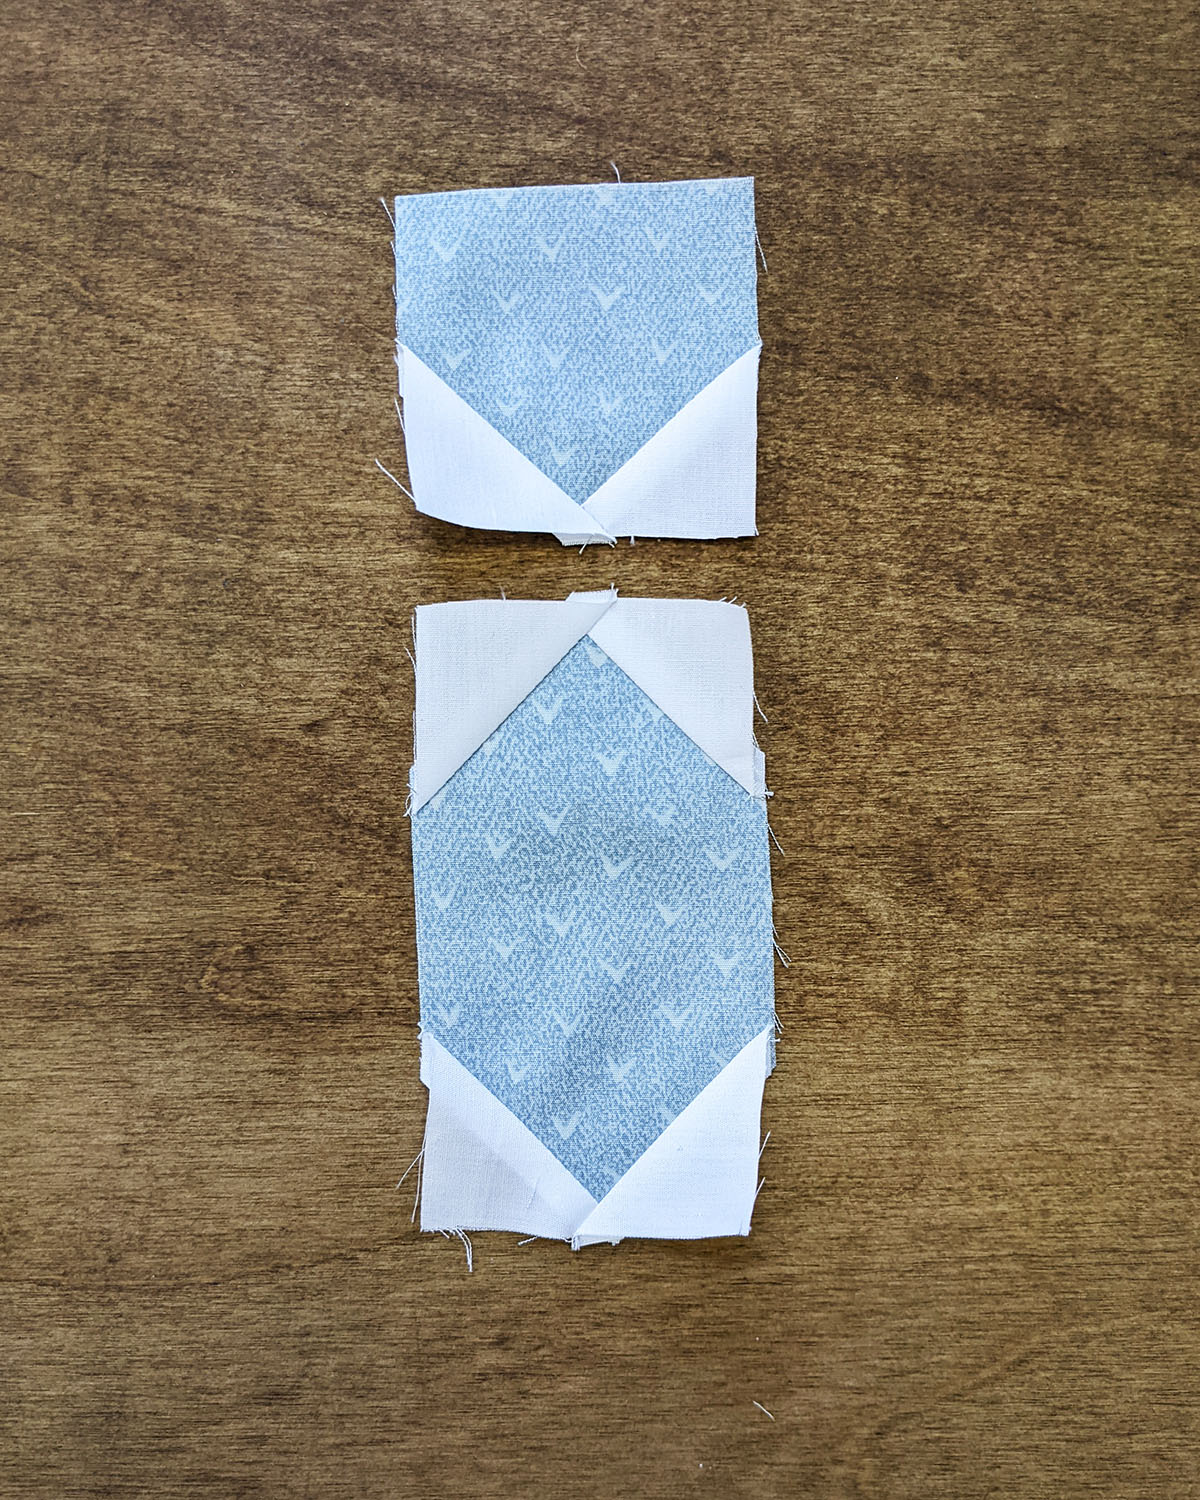
Start by taking one (1) 2 1/2’’ square from fabric B and two (2) 1 1/2’’ squares from fabric D.

Place one (1) 1 1/2’’ square from fabric D, right sides facing, on the left side of fabric B square.
Sew at the diagonal and trim away living 1/4’’ seam allowance.
Take the other 1 1/2’’ square from fabric D and place it on the bottom right square right sides facing.
Sew at the diagonal and trim away leaving 1/4’’ seam allowance.

Step 2:
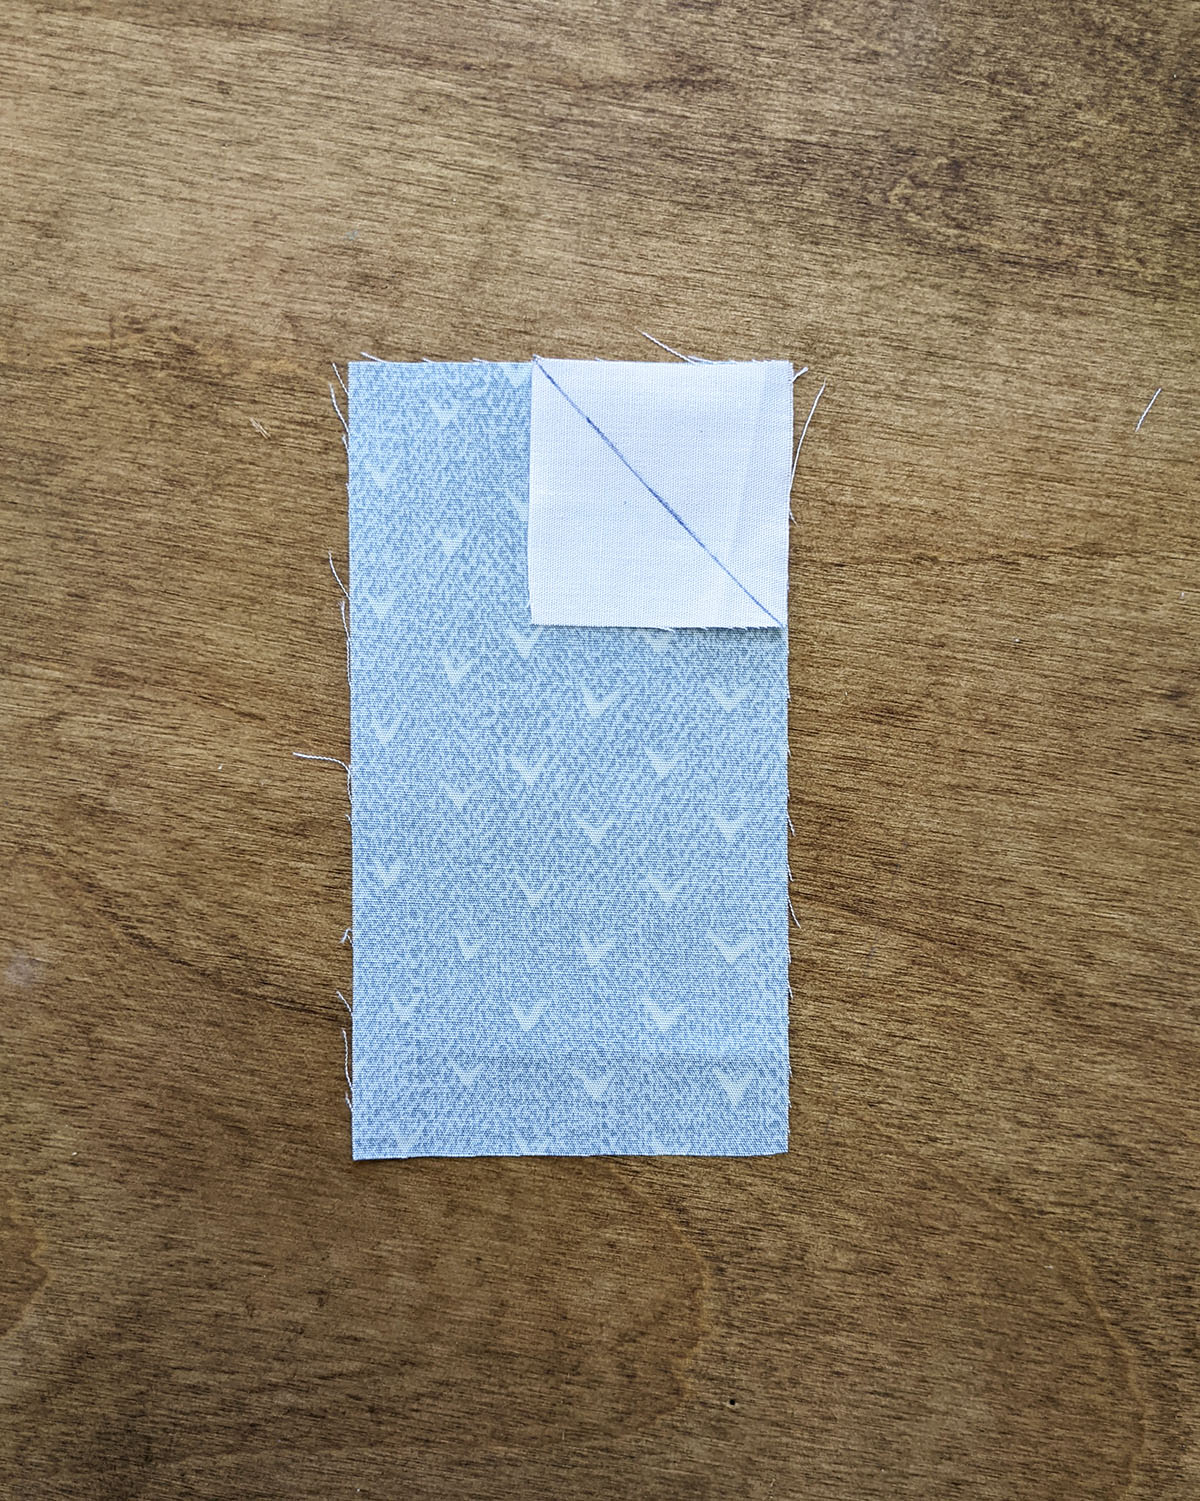
Take one 2 1/2’’ x 4 1/2’’ rectangle from fabric B and four (4) 1 1/2’’ squares from fabric D.
Repeat the same process as your previous block but this time on all four corners.

Step 3:
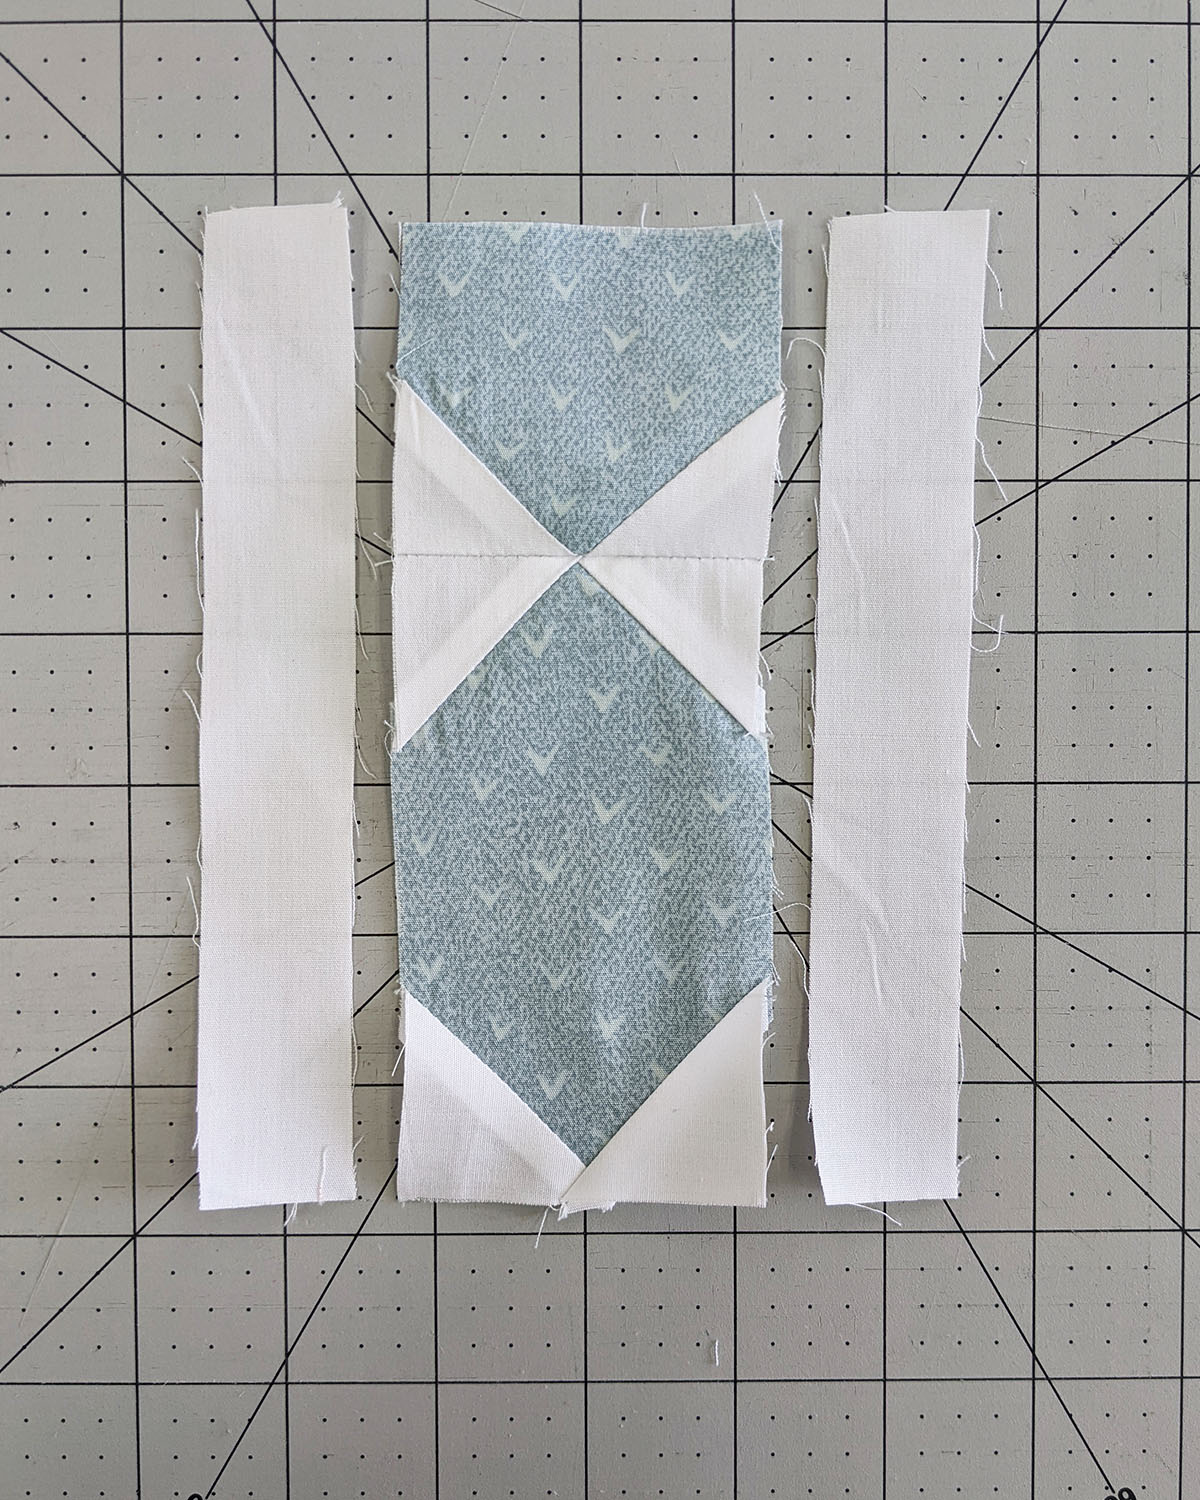
Now join both pieces together.
Step 4:
Take two (2) 6 1/2’’ x 1’’ rectangles from fabric D and join them on each side of the assembled piece.

Step 5:
Take two (2) 2 1/2’’ squares from fabric C.
Place one (1) square right rides facing on the top right corner of the piece.
Sew at the diagonal, then trim away leaving about 1/4’’ seam allowance.
Repeat the same process by placing the other 2 1/2” square from fabric C on the top left corner of the unit.
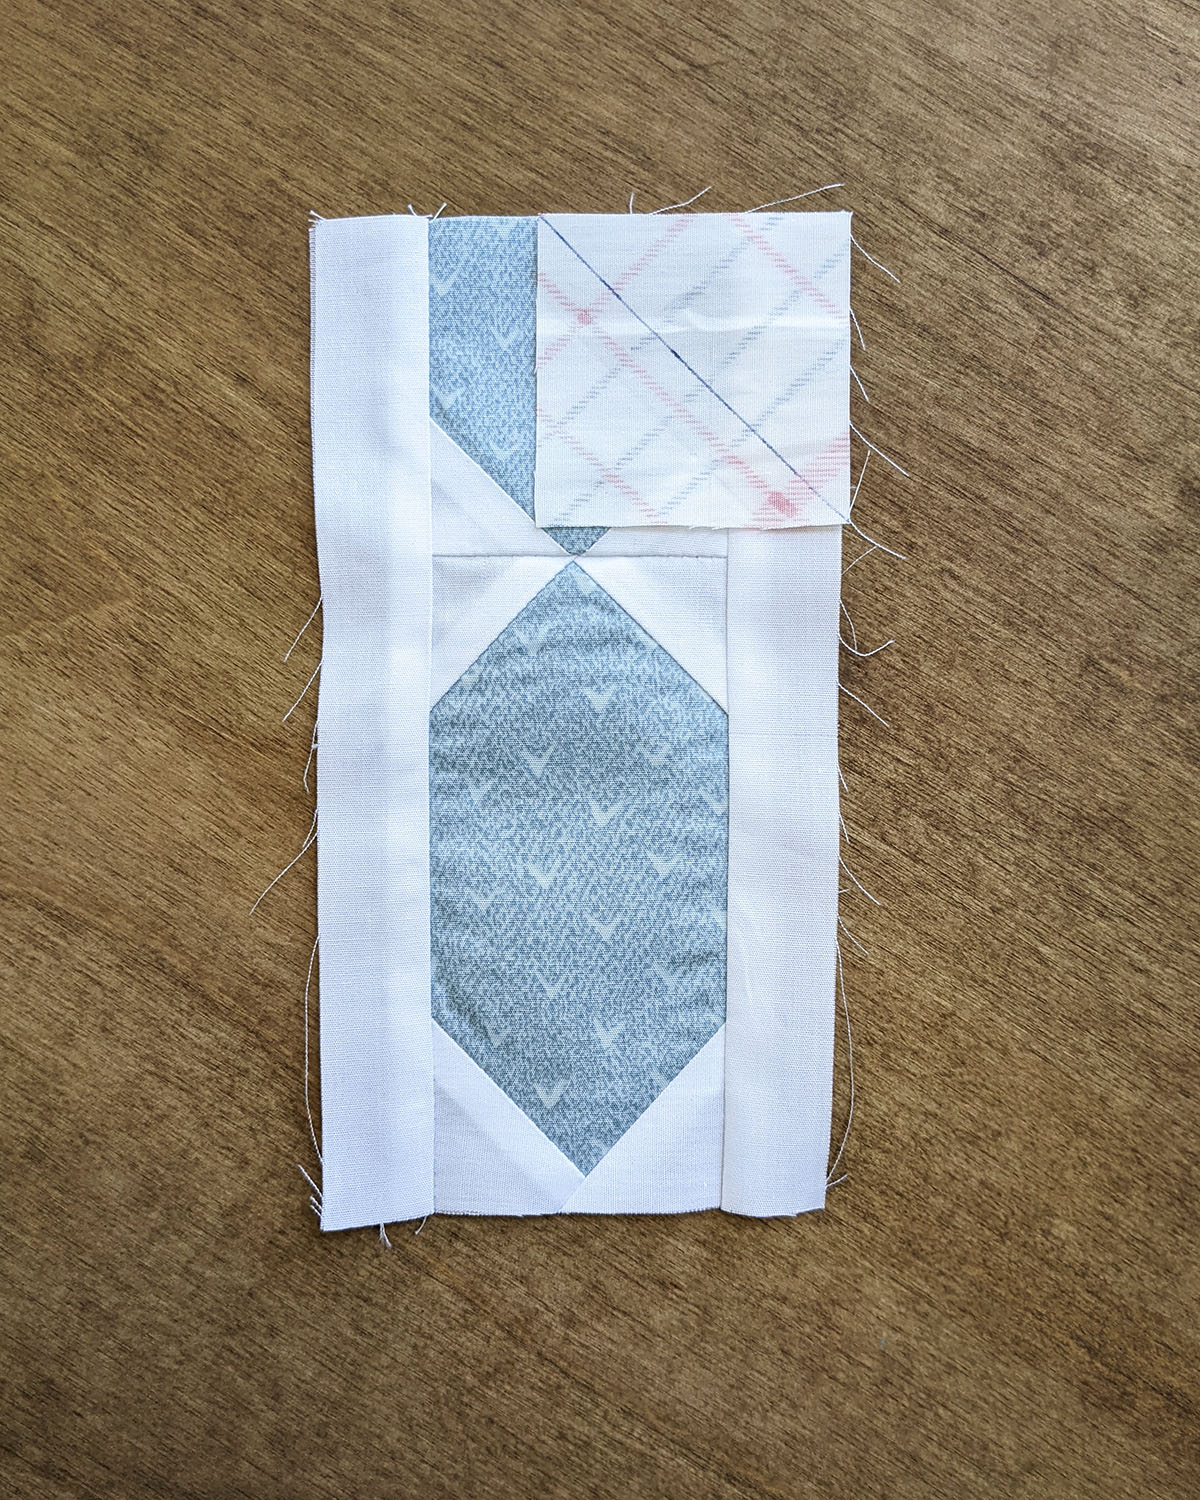
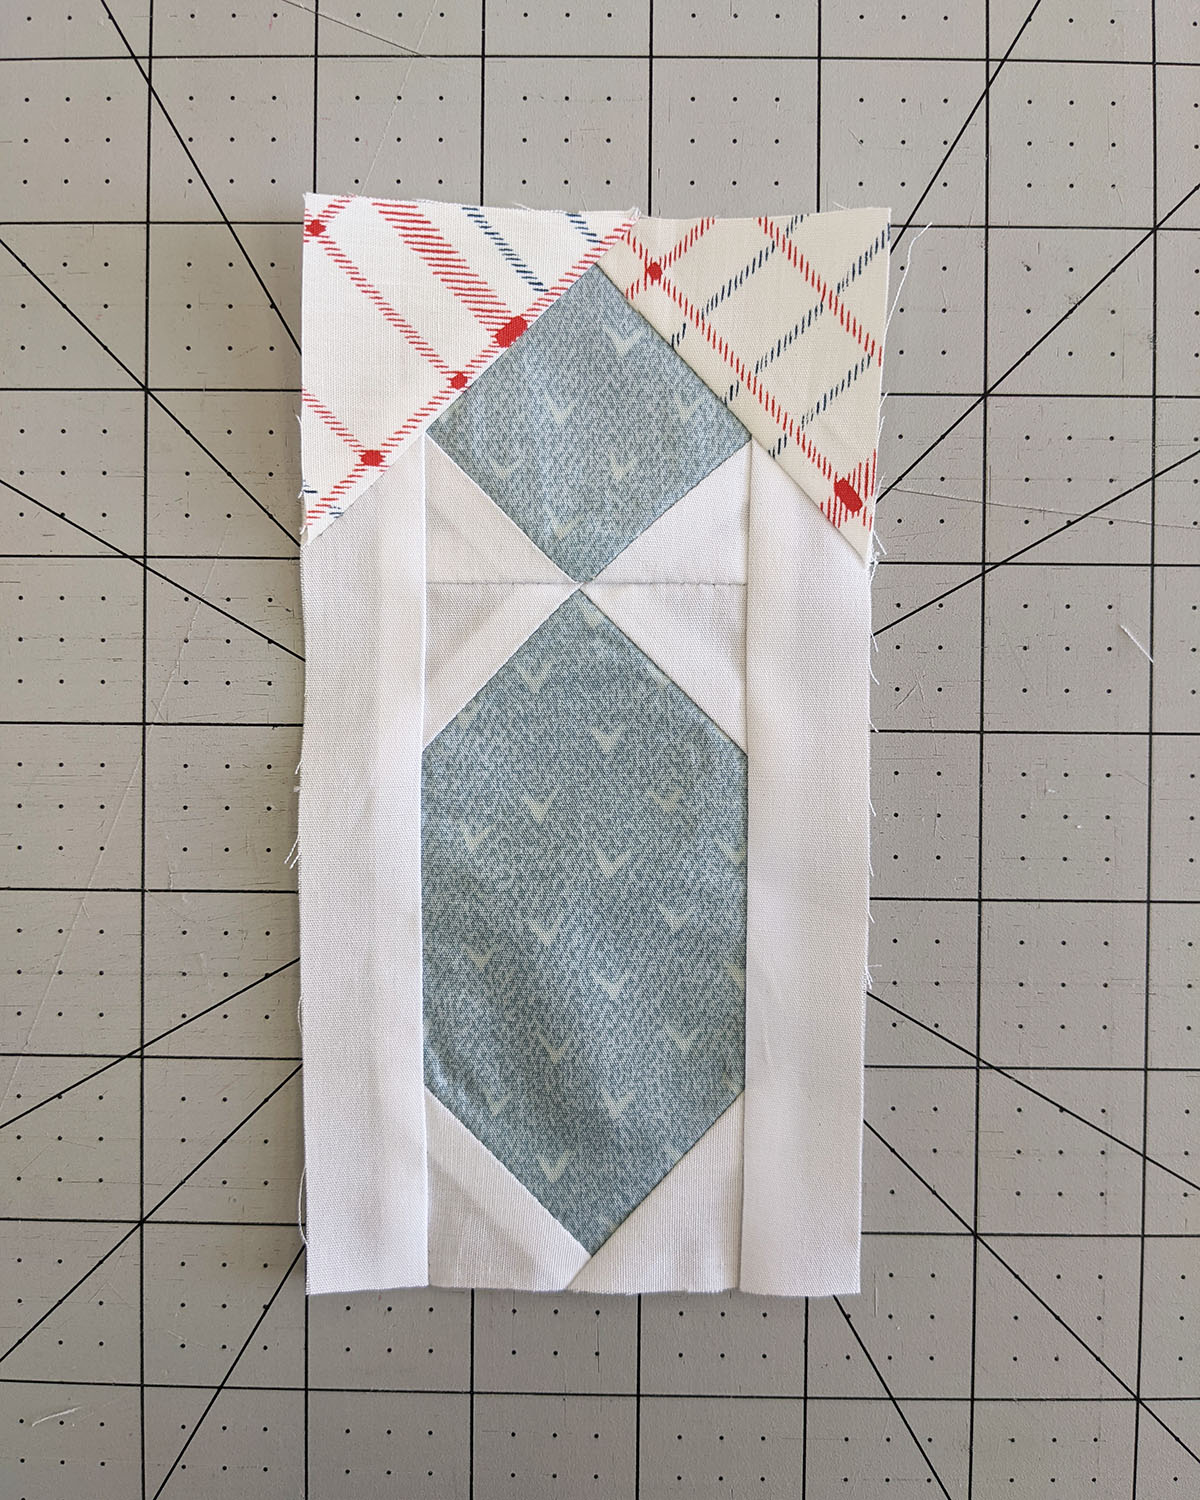
Step 6:
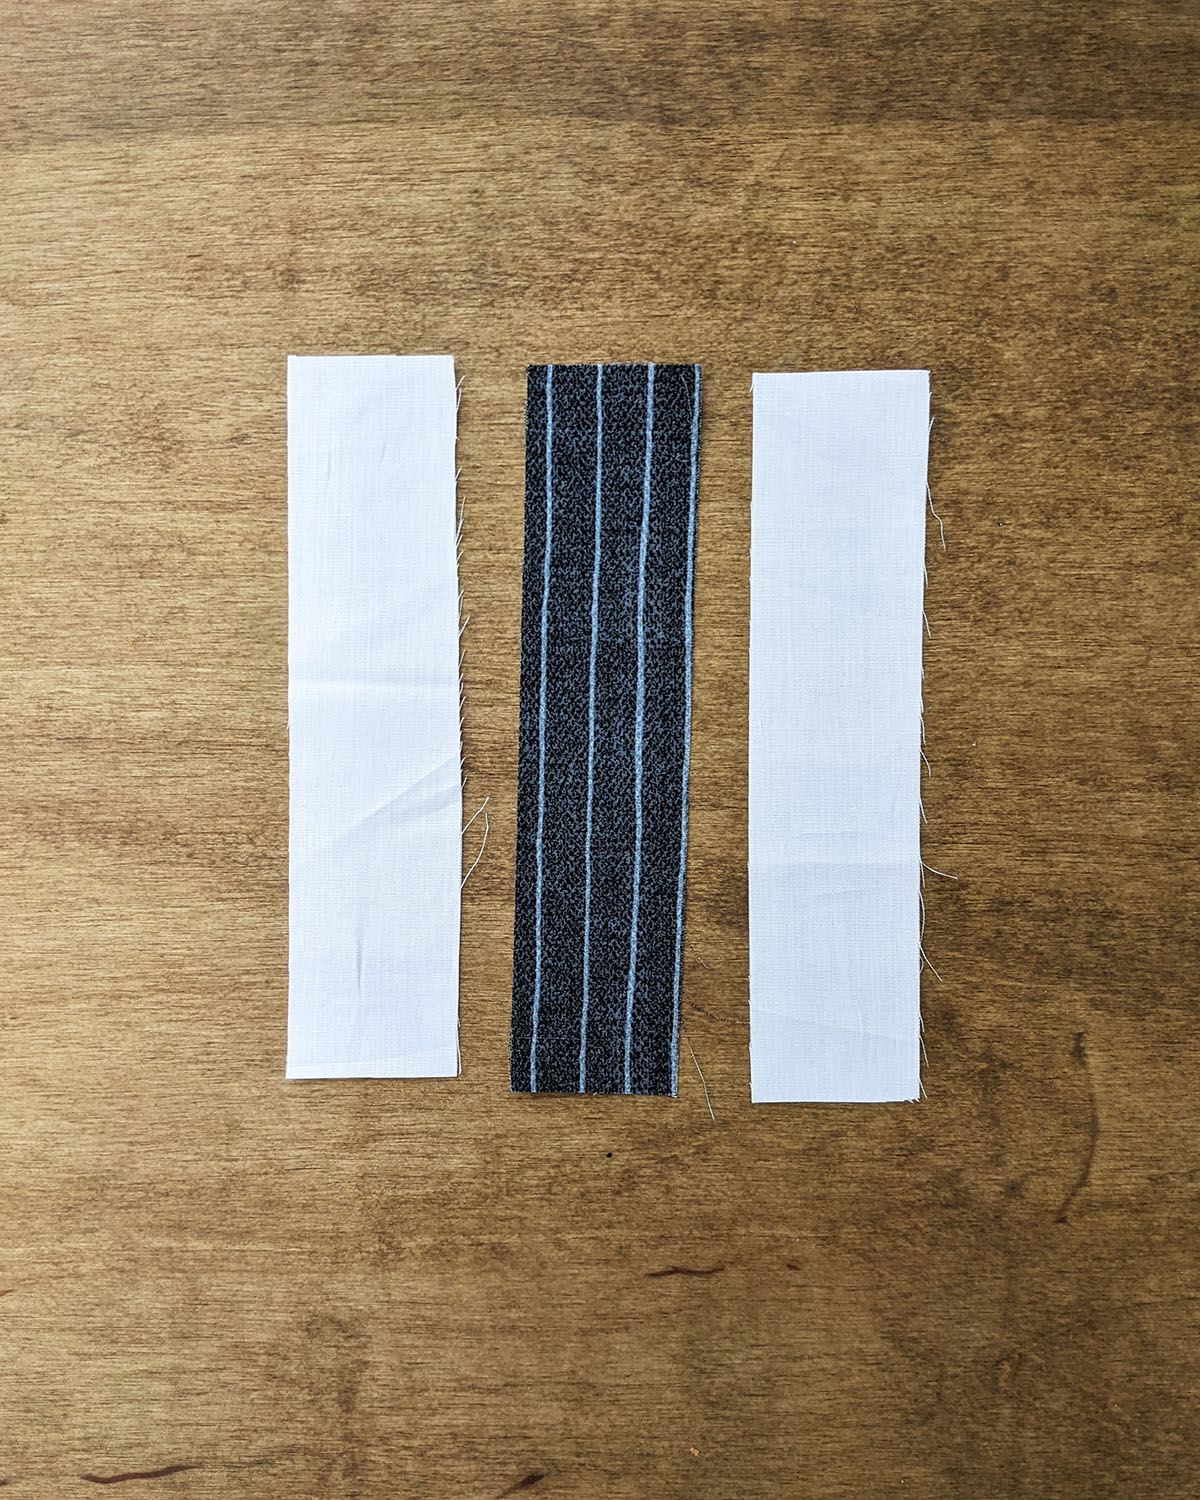
Join one (1) 1 1/2’’ x 6 1/2’’ strip from fabric A and D and two (2) 1’’ x 6 1/2’’ strips from fabric D.
Repeat the same construction for the other trips.
Step 7:
Join all three (3) pieces together.
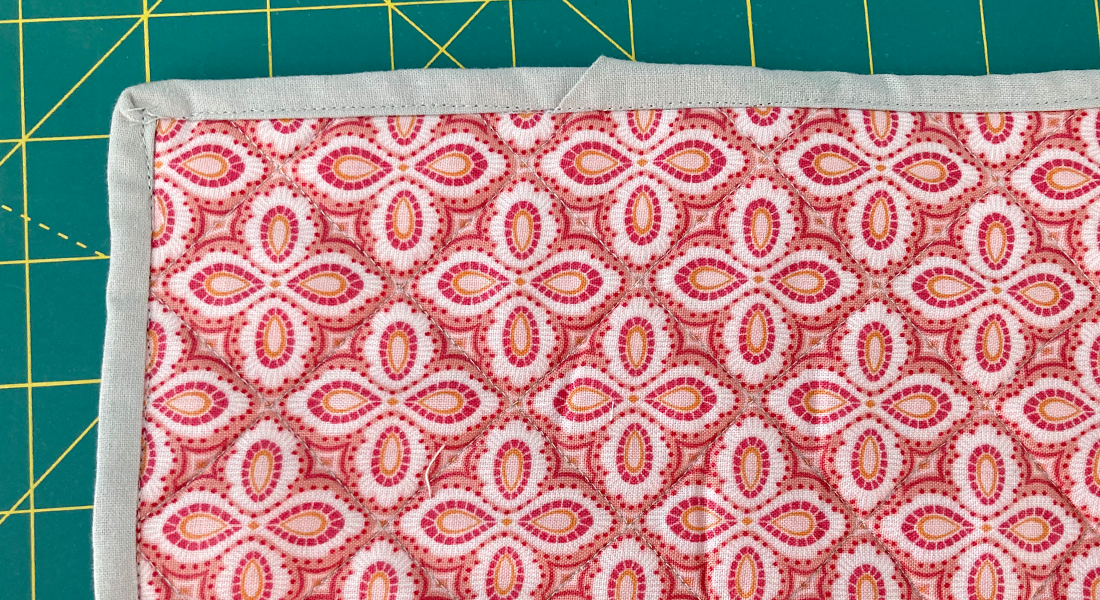
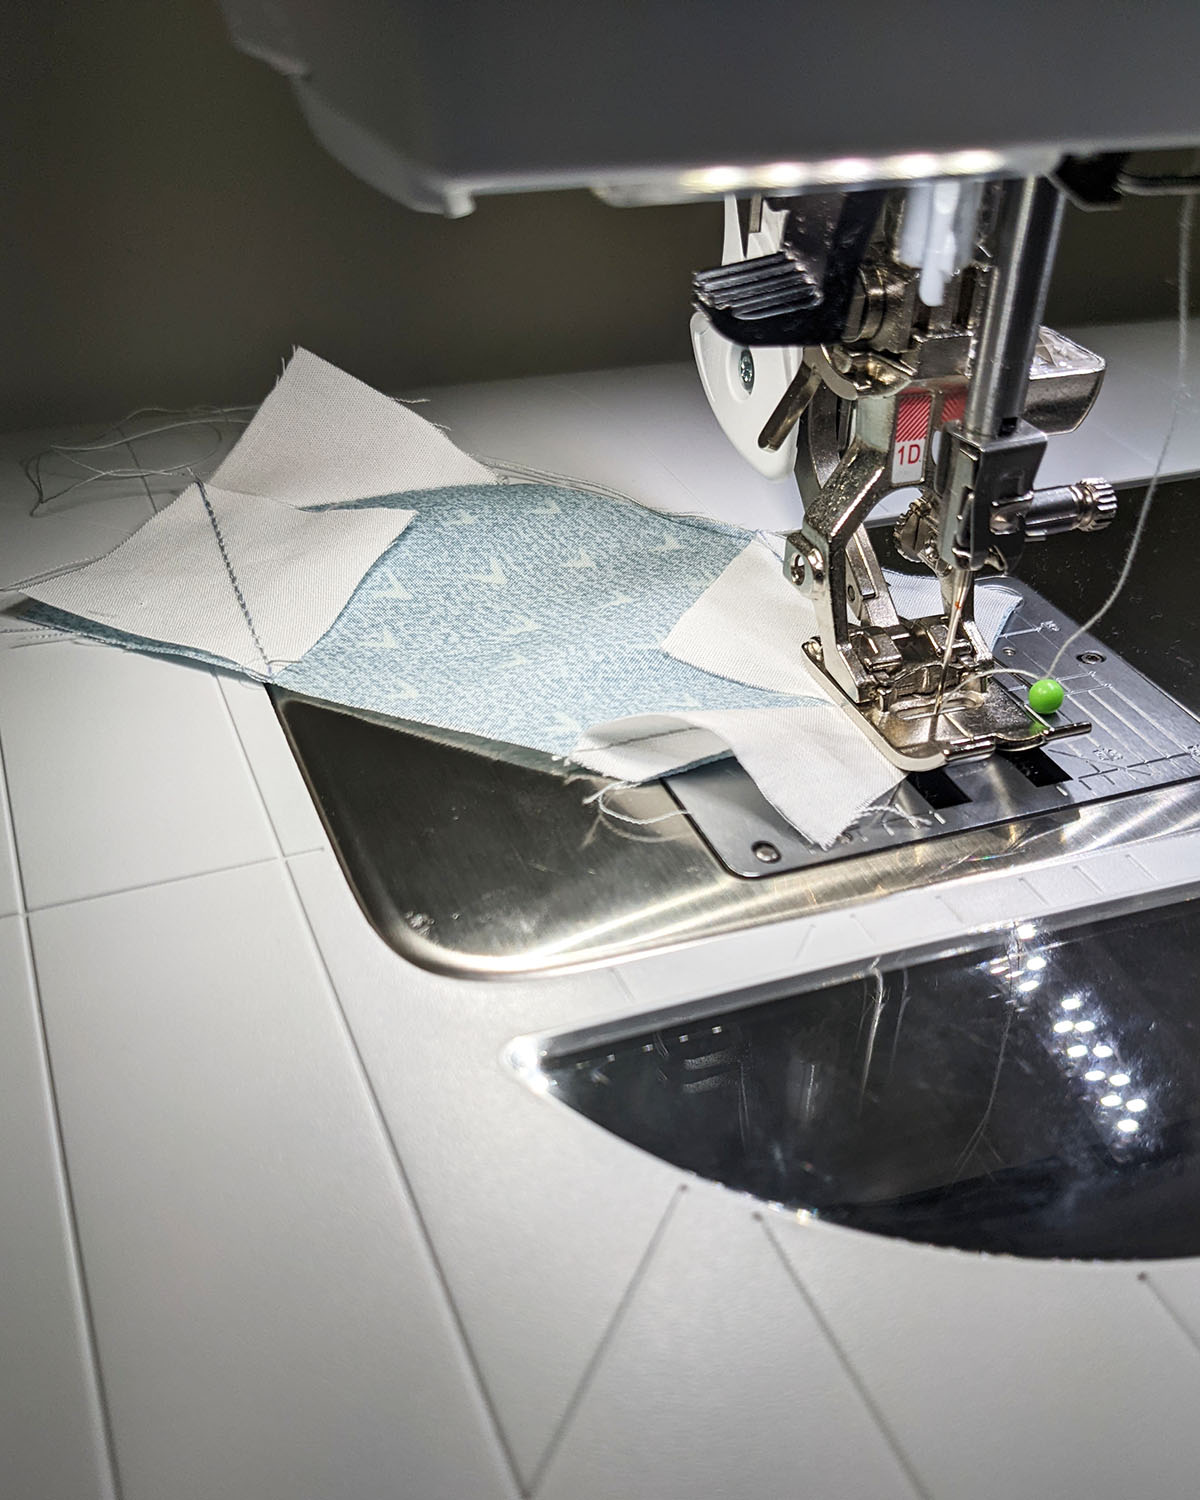
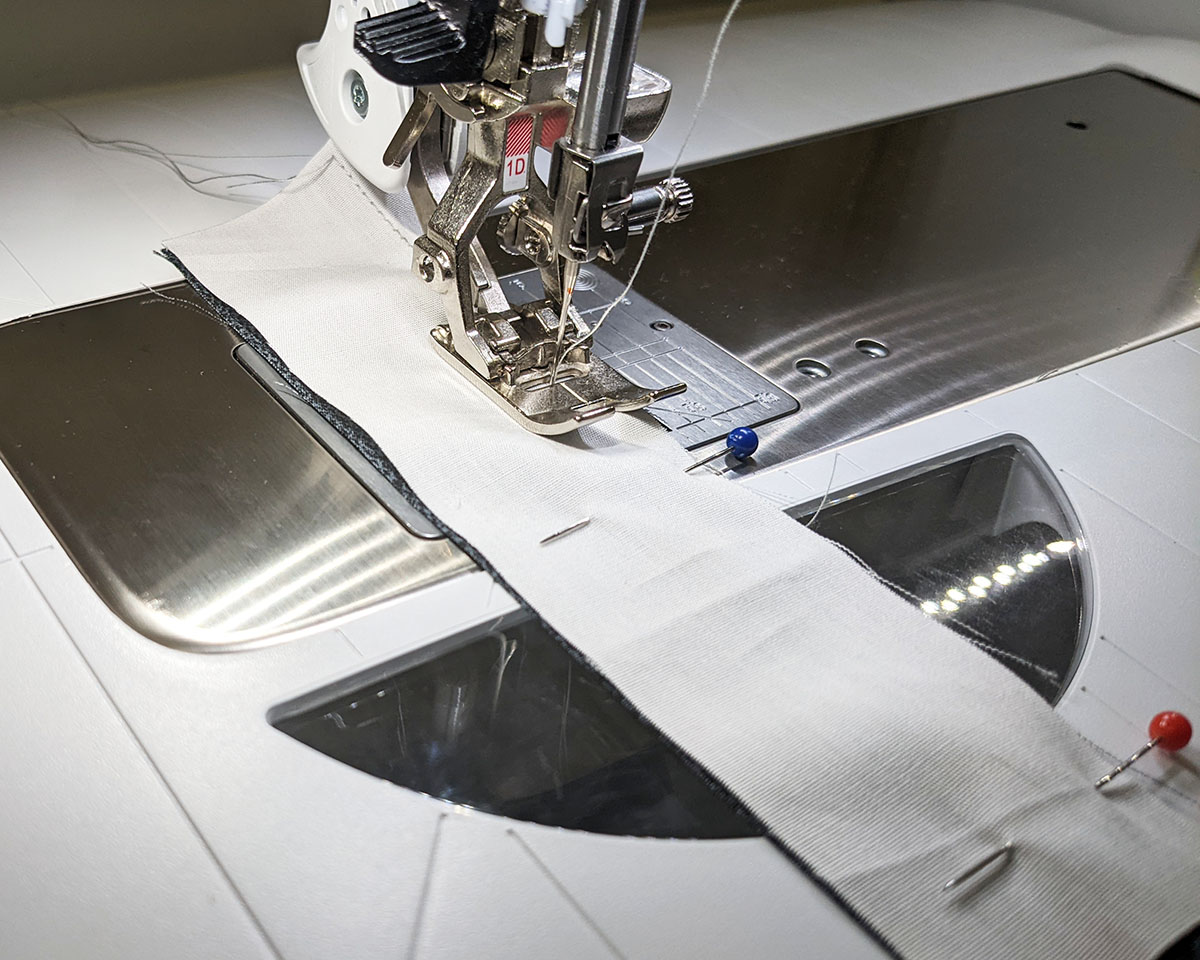
Take batting and quilt as desired.


I decided to trace vertical lines on the white strips at about 1/4” distance, and some echo quilting inside the tie. Using the Reverse pattern Foot #1D I was able to make perfect stitch lines.
Step 8:
Once you have quilted your piece, take one (1) 9 1/2’’ x 6 1/2’’ rectangle from fabric B and place it right sides facing.
Pin in place and sew all around leaving about 3’’ of opening.
Flip your piece, press and sew the opening close by hand.
Happy Father’s Day!!!