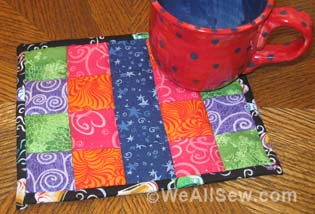
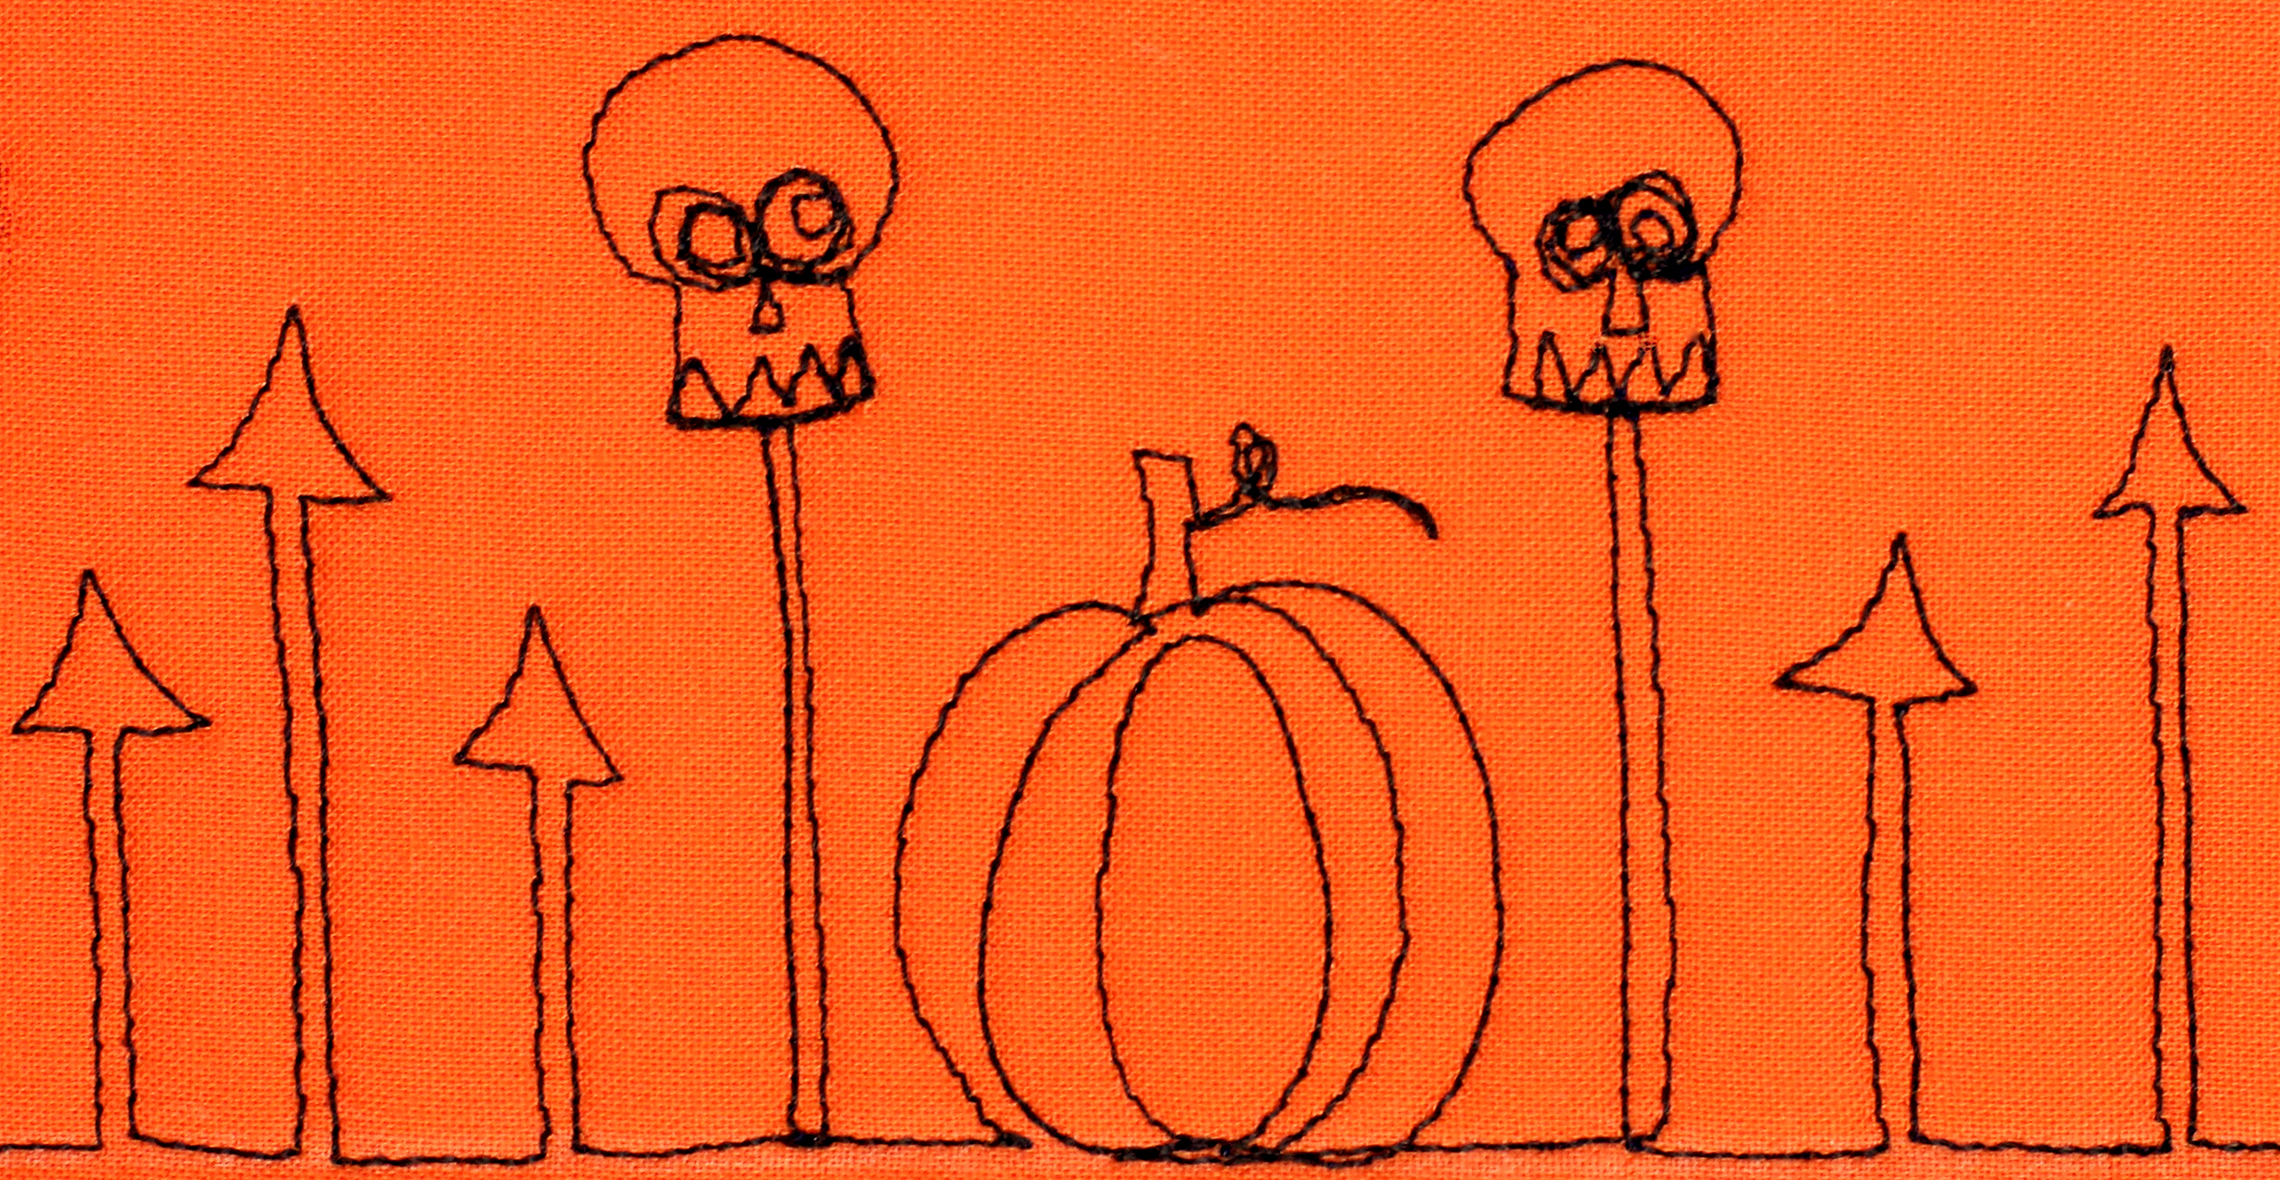
Sugar Skull Mug Rug
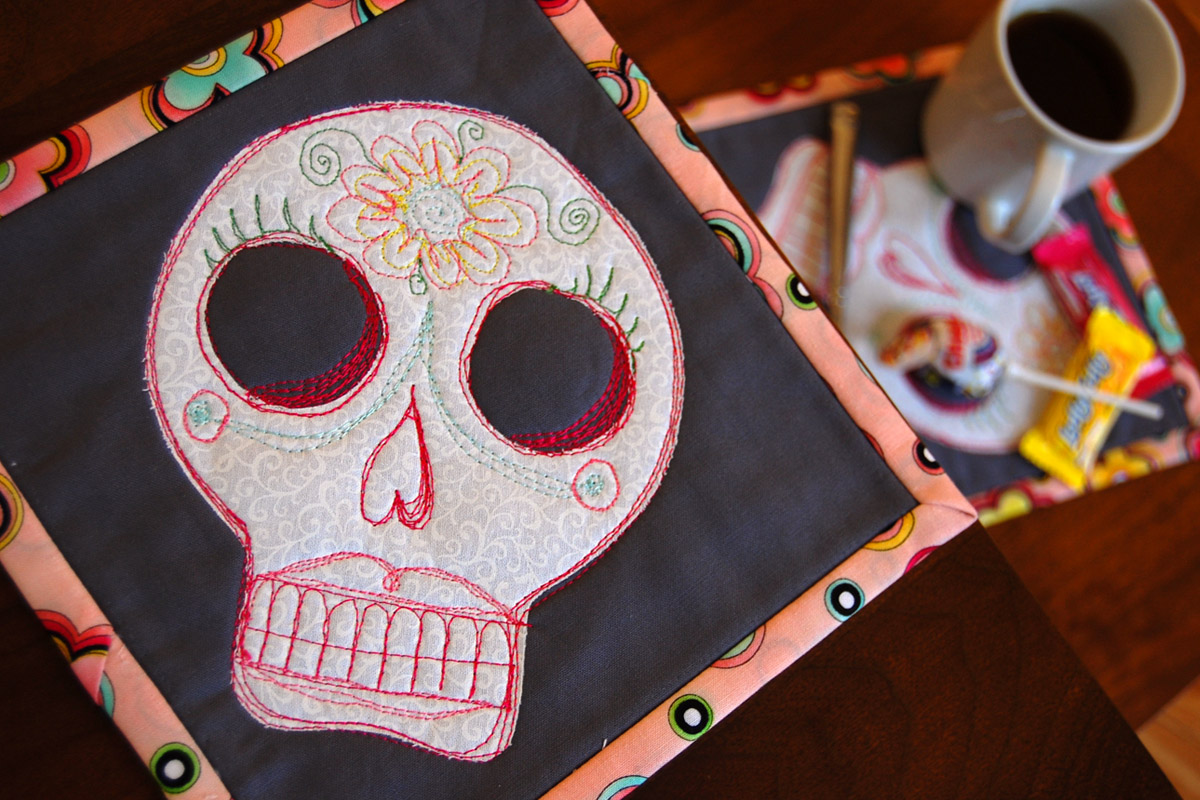
These little Sugar Skull Mug Rugs are the perfect project to help practice your free-motion quilting skills. Perfect lines are not required! Make a set to celebrate Halloween, Dia de los Muertos, or any day you are feeling a little spooky.
Materials to make a Sugar Skull Mug Rug
- One 8″ x 8″ square of white 100% cotton woven fabric (or white-on-white print) for skull
- One 8″ x 8″ square of gray 100% cotton woven fabric for background
- One 9″ x 9″ square of fabric for backing
- One 9″ x 9″ square of cotton batting
- One fat quarter or quarter yard of bright colored 100% cotton printed fabric for binding
- Paper backed fusible webbing
- A selection of bright colored threads
- Sewing machine (I use a BERNINA 770 QE)
- Darning foot #9 (or use your favorite free-motion quilting foot)
- Reverse pattern foot #1D (or Walking foot #50)
- Straight stitch needle plate
- Scissors and basic sewing supplies
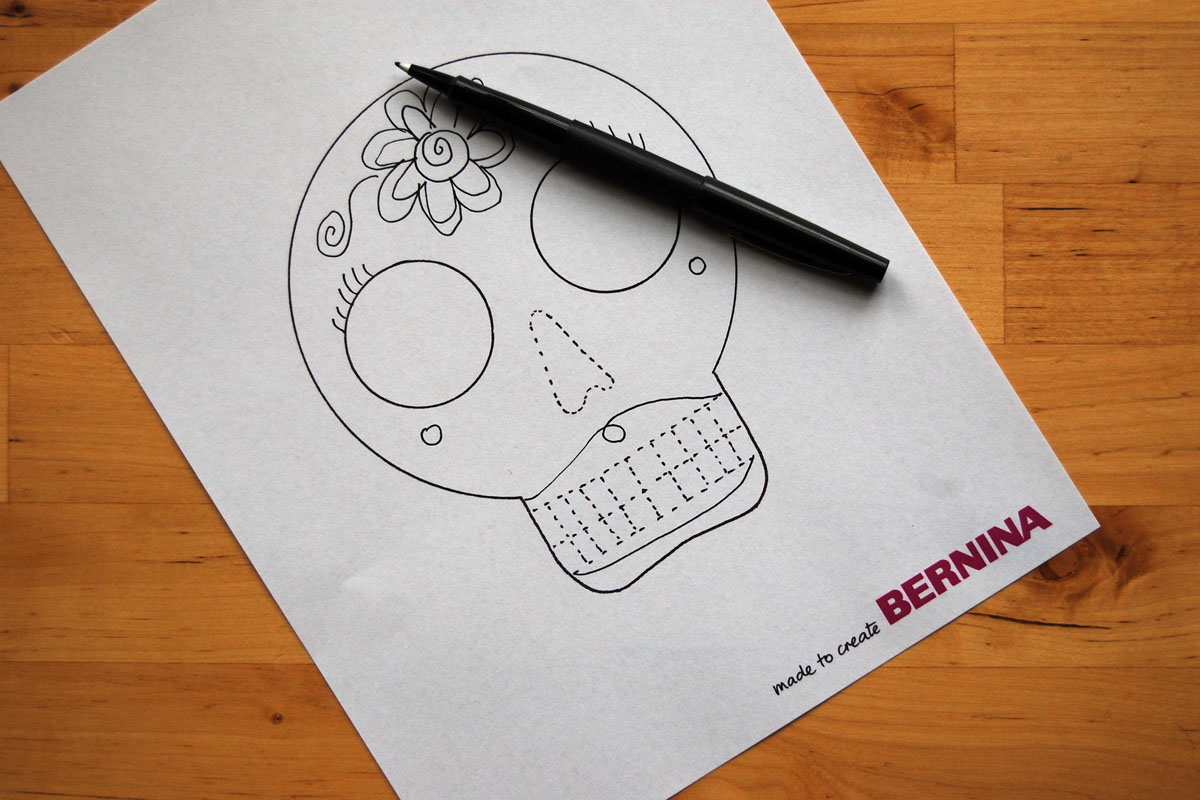
- Printed Sugar Skull Pattern
Gather together your supplies and be sure to read all the instructions before getting started.
Print out the Sugar Skull Pattern above, and place the fusible webbing on top of the pattern, paper backing side up. Trace only the solid lines outlining the skull and eyes on the paper backing of the fusible webbing.
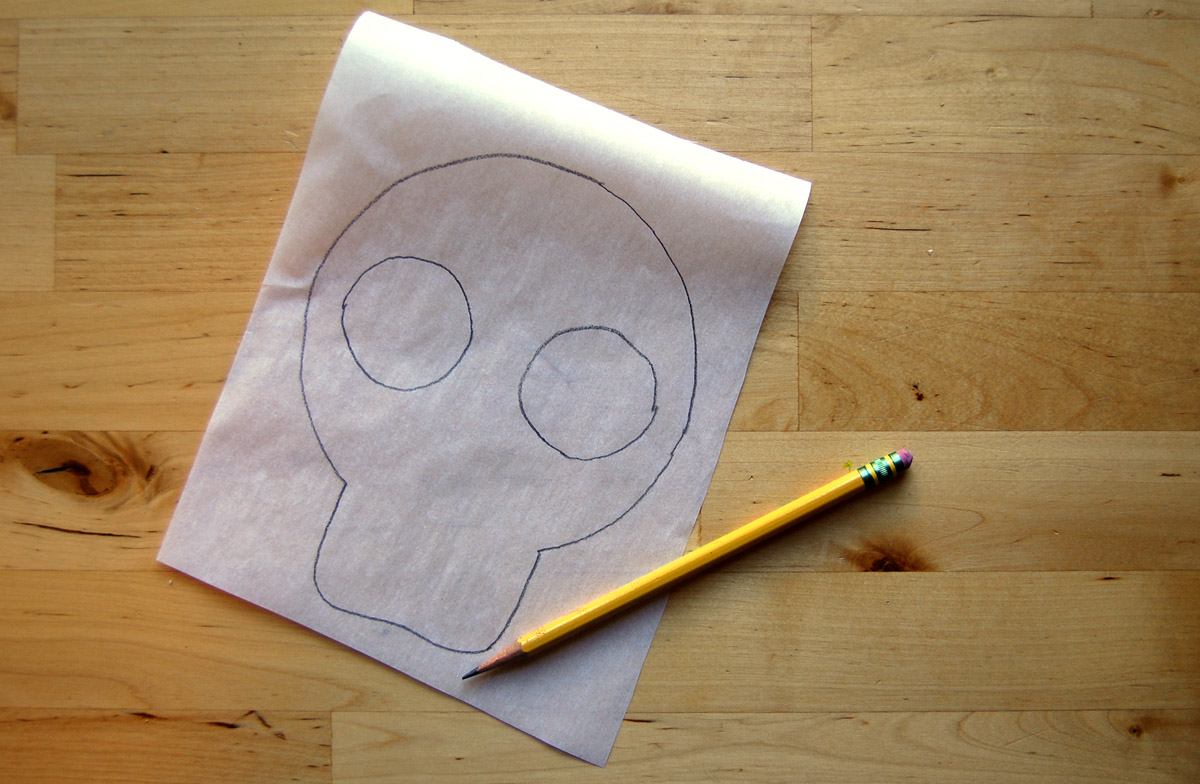
Don’t cut out the skull yet! Following the manufacturer’s directions, fuse the webbing to the wrong side of the white cotton square.
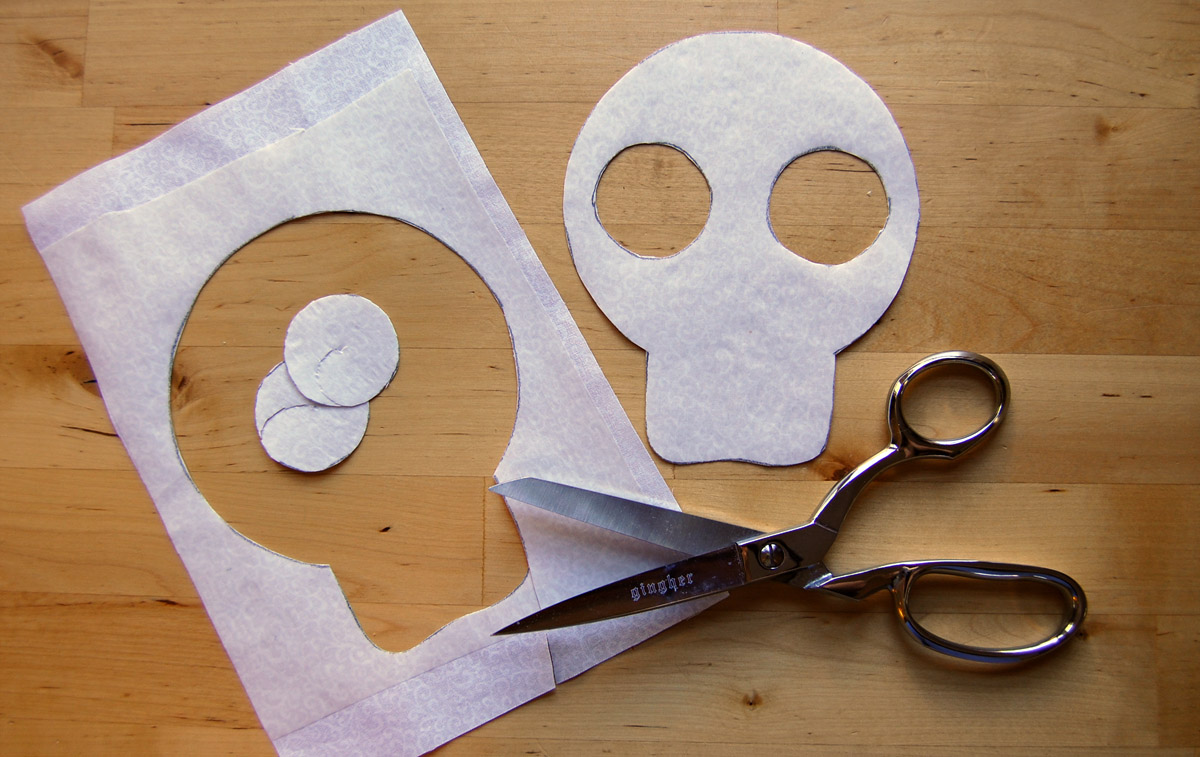
Now, carefully cut out the skull and eyes from the fused fabric. Gently peel off the paper backing from the skull, and center it on the grey fabric square. Following the fusible webbing directions, fuse the skull to the grey fabric.

Grab the backing square, batting and fused skull squares.
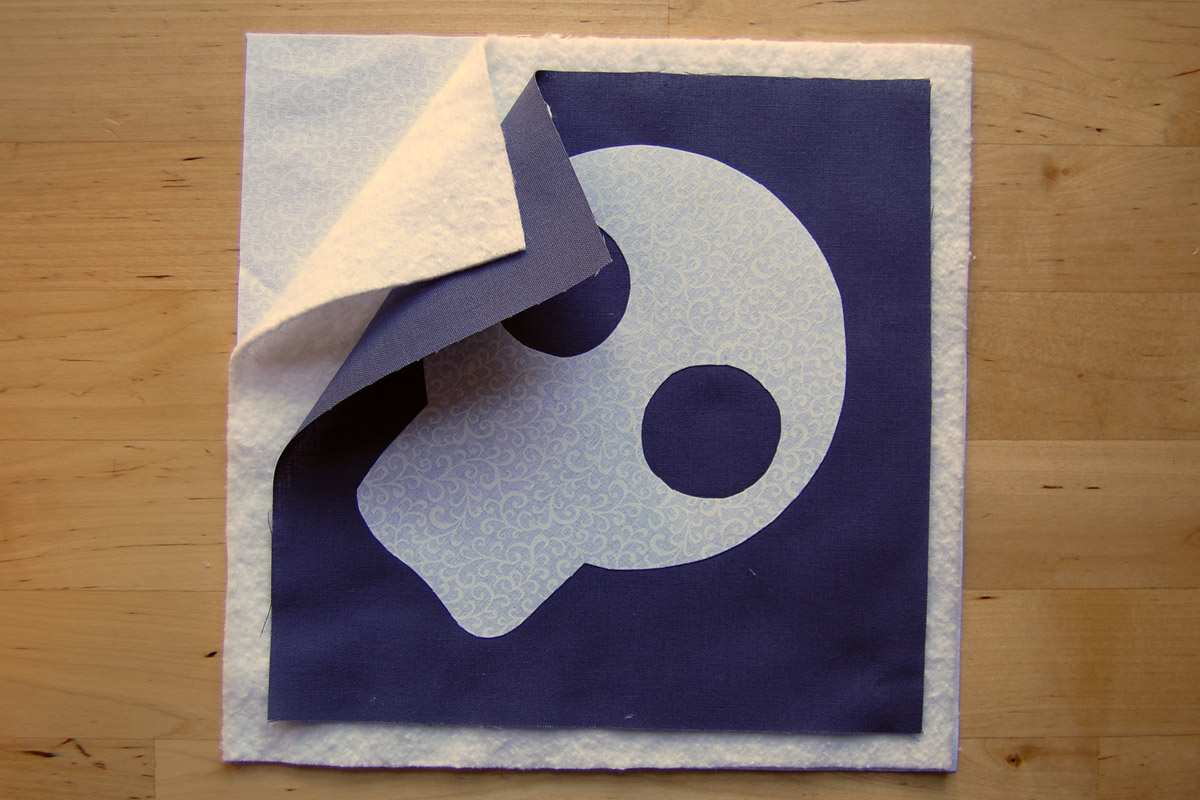
Create a “quilt sandwich” with the three layers. Start with the backing fabric wrong side up, then layer the batting, and end by centering the skull square on the top of the sandwich. I use temporary spray adhesive to hold the layers together for quilting, but you can use long straight pins or safety pins, too.
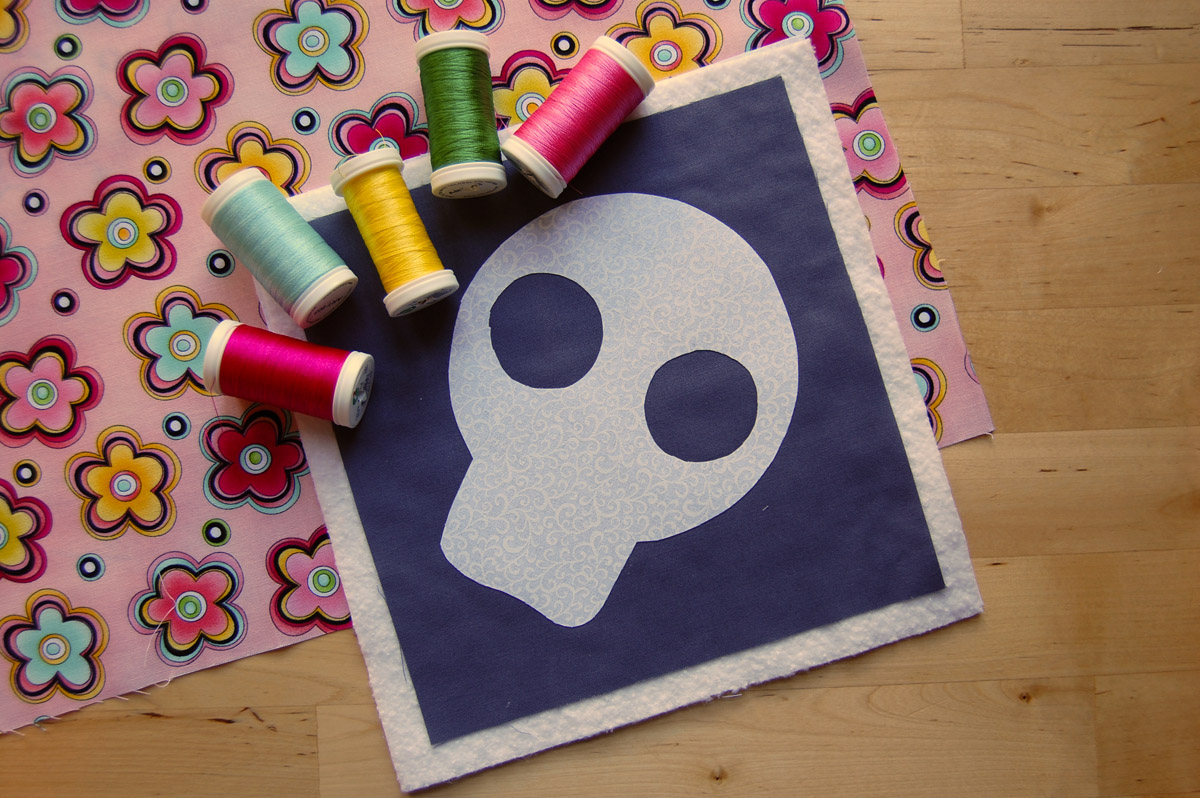
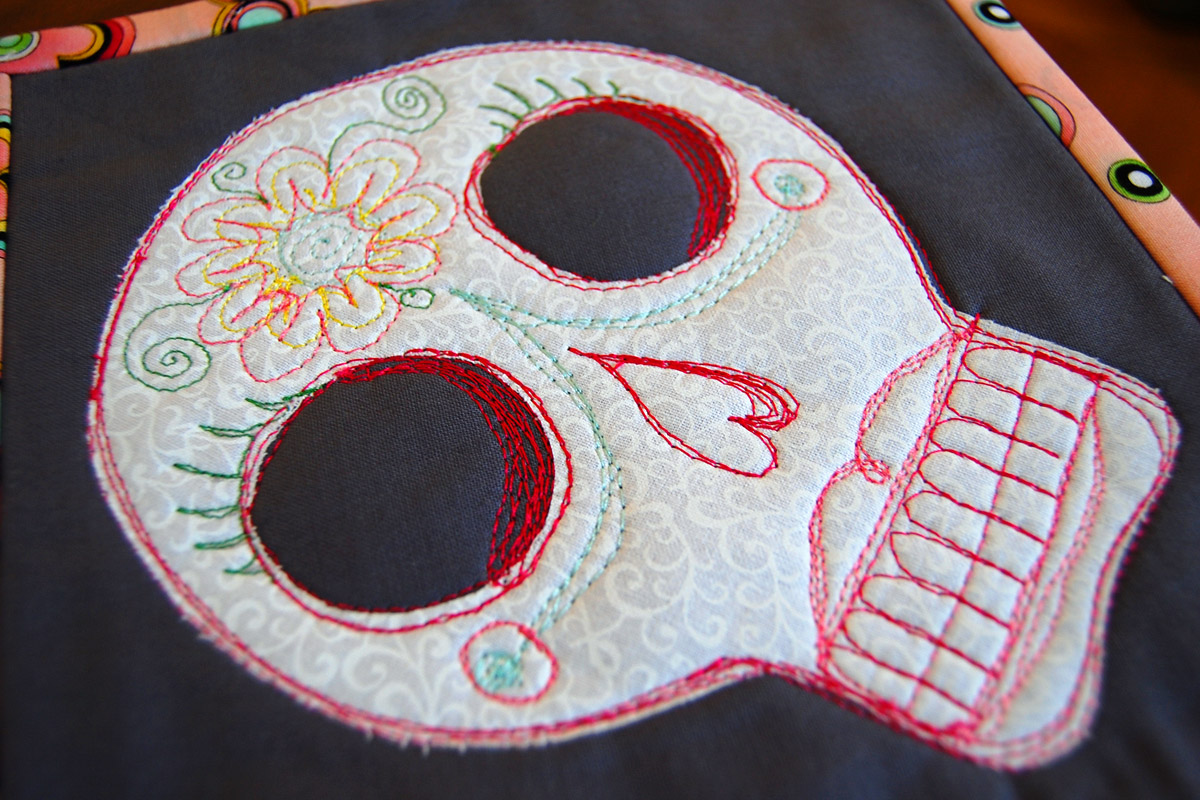
Grab bright thread colors that coordinate with the fabric you’ve picked out to be the binding for the mug rug. I picked out a few darks and lights to “sketch” my sugar skull.
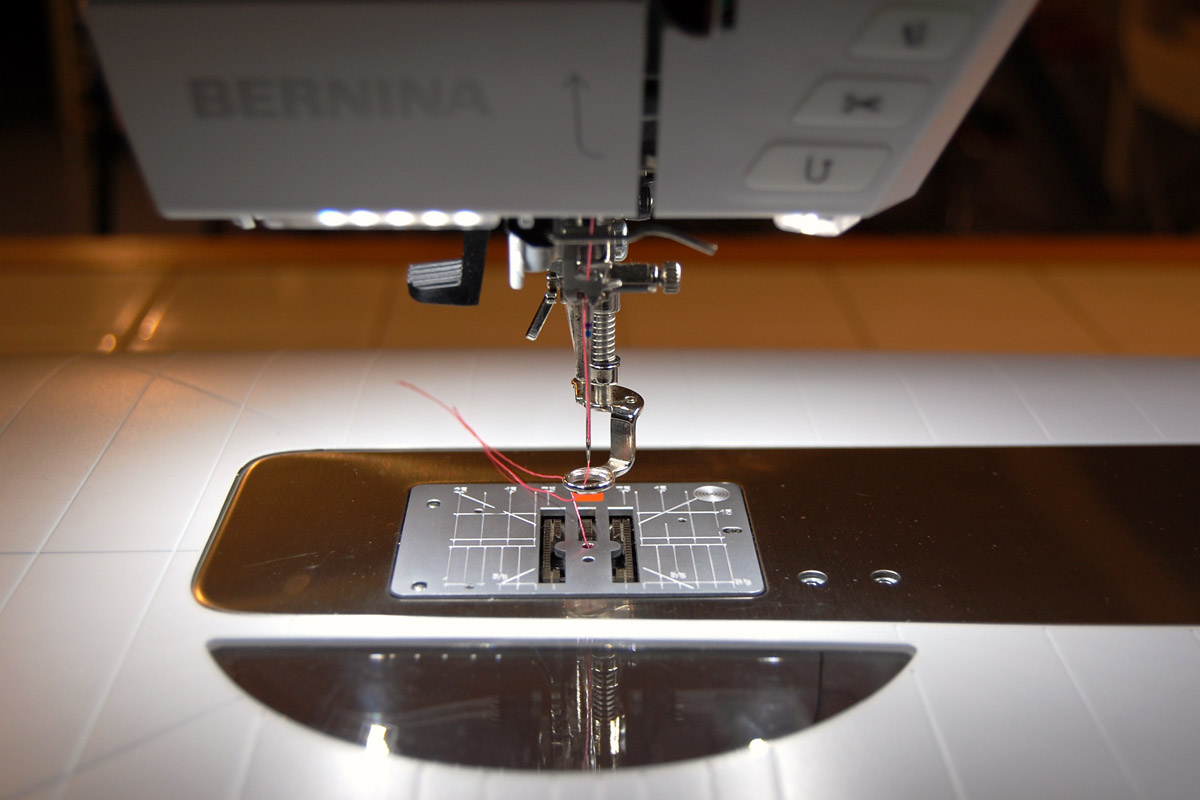
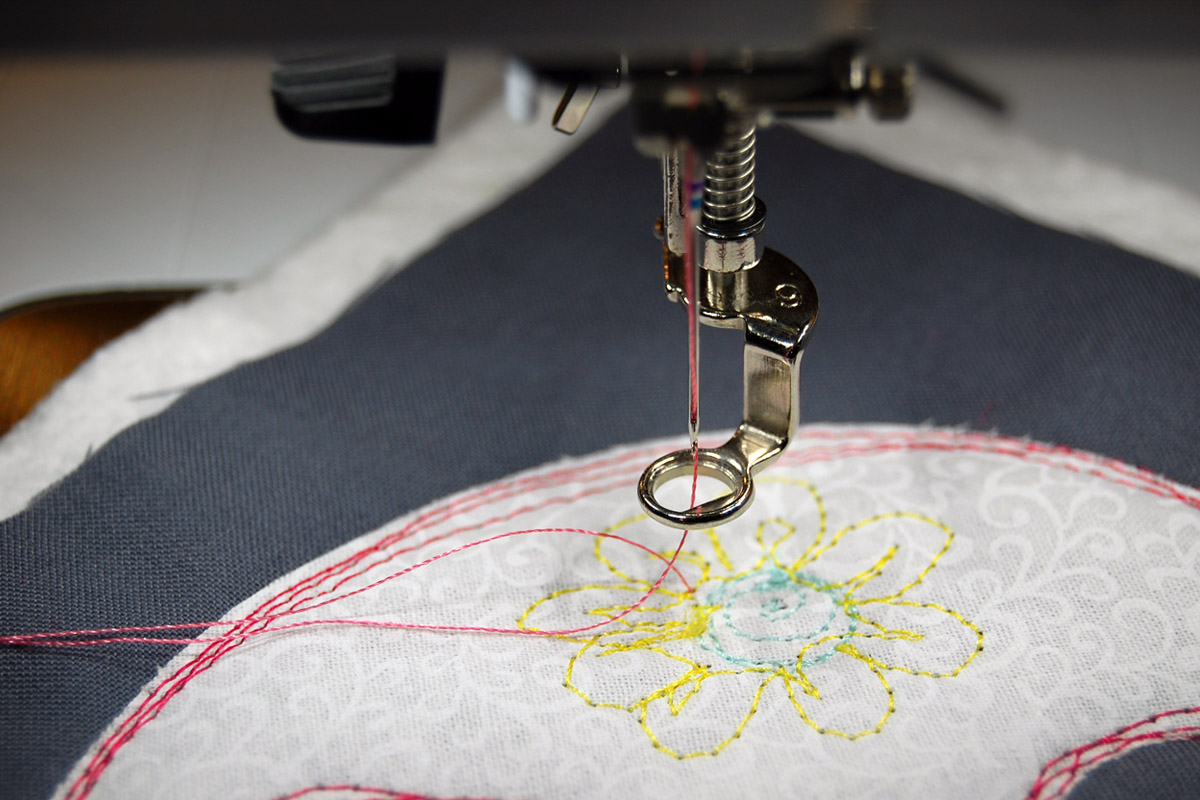
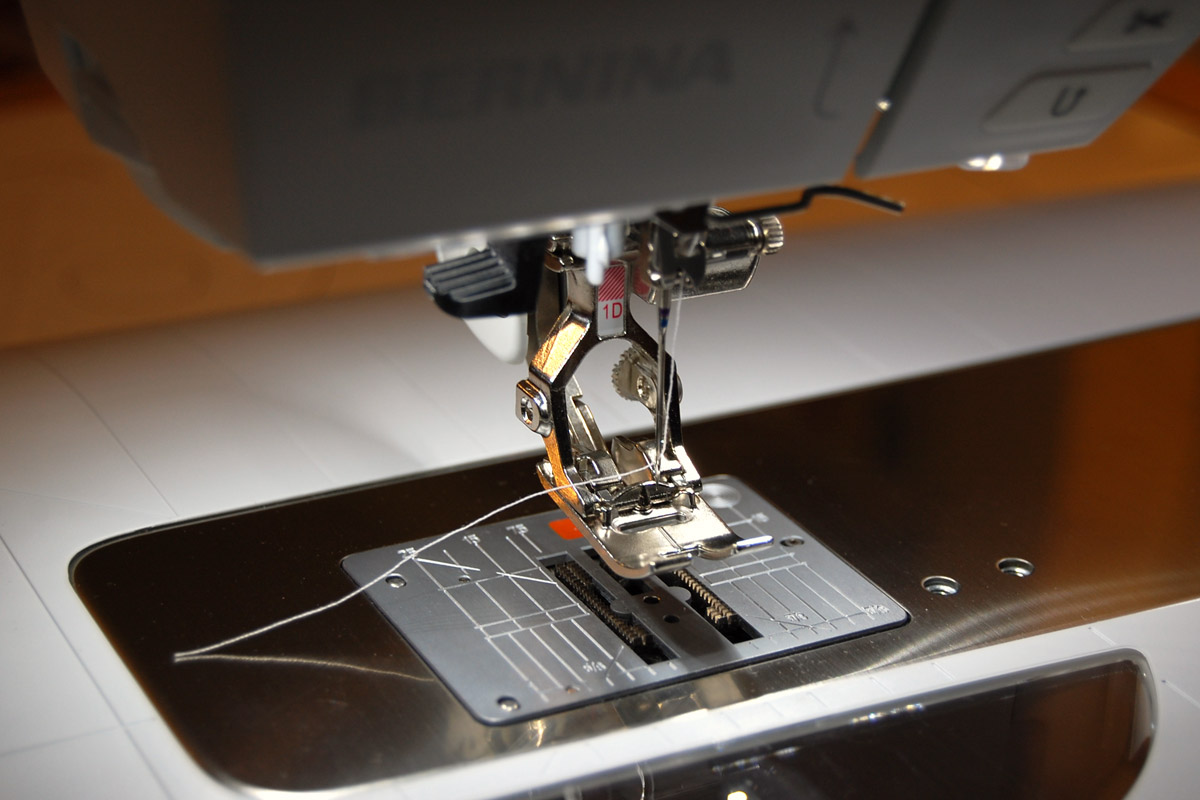
Set up your sewing machine for free-motion quilting. Use a straight stitch needle plate, and your favorite free-motion quilting foot. I like to use the Darning foot #9. Wind the bobbin with the same color you are using for the top thread. (If you’re using white fabric for the backing like I am, it looks pretty cool to see your design stitched out on the back!) Be sure to lower the feed dogs before beginning. Practice with a scrap sandwich of fabric and batting to make sure your tension settings look good.
TIP: If you’re wondering what type of designs to sketch on your sugar skull with free-motion stitching, use the printed out pattern to draw a few practice designs before getting started. The pattern has teeth and a nose to get you started!
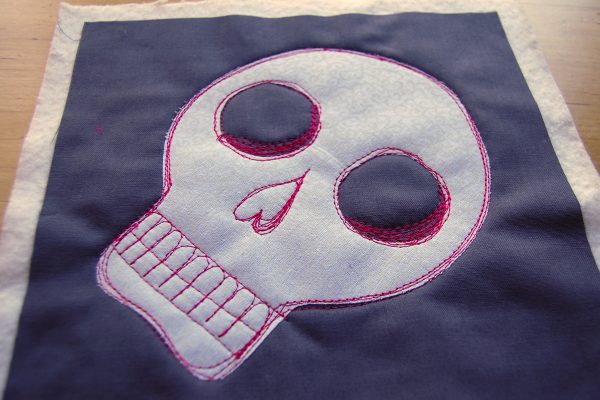
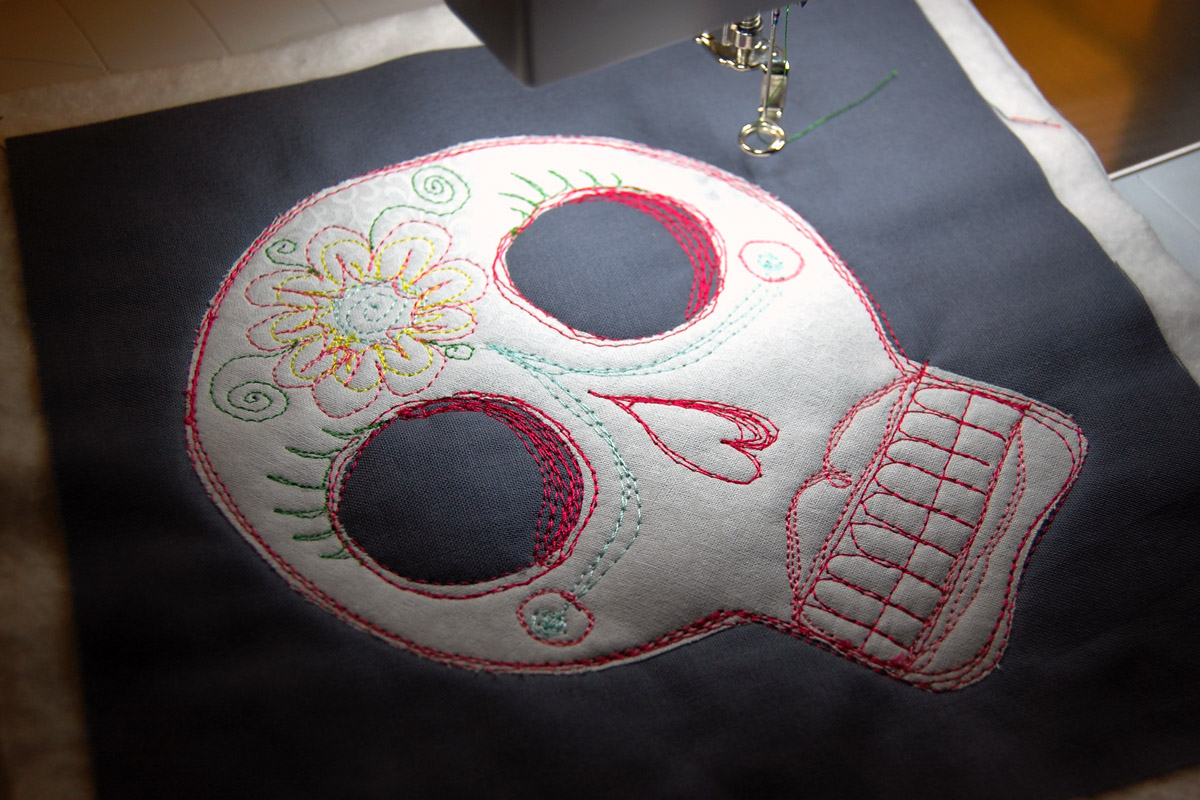
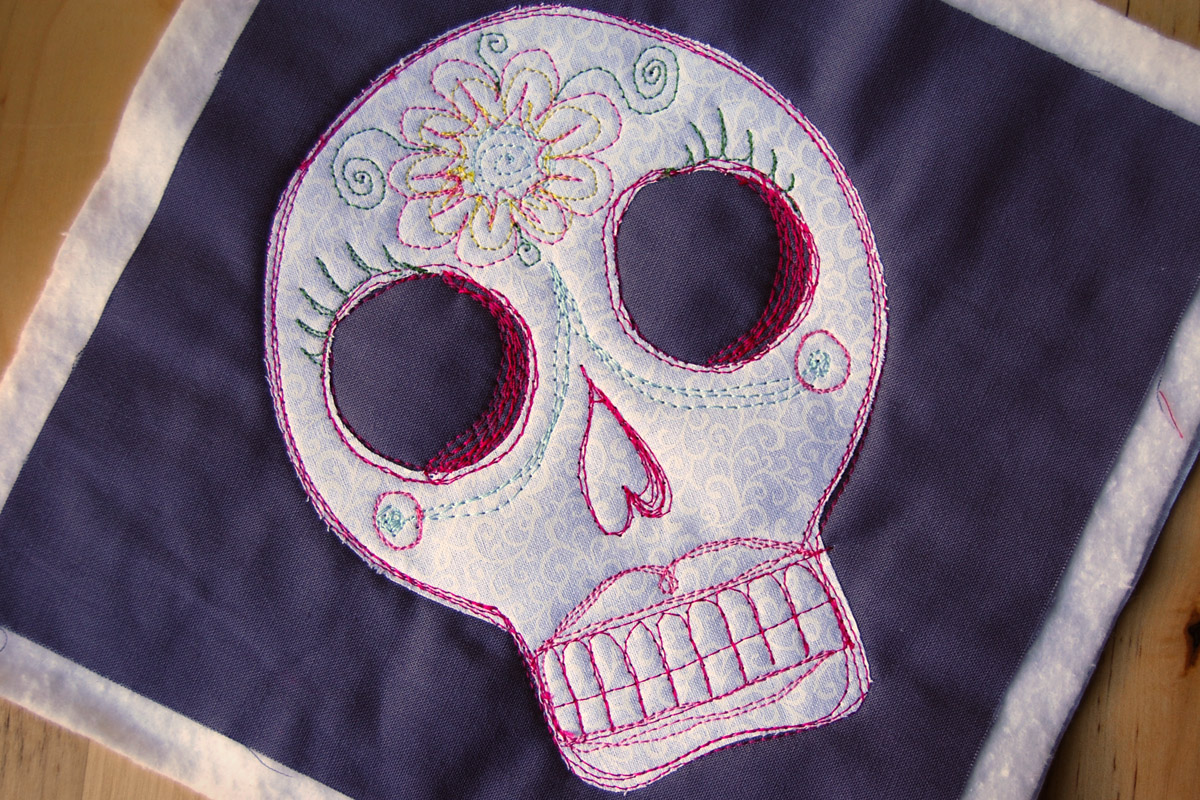
Begin with a dark color, and outline the skull, the eyes, nose, and teeth. Don’t worry about being exact with the lines! Add two or three lines of stitching, a little wonky is better—this adds interest to your skull.
TIP: Here’s how I start/stop sewing with free-motion quilting on this project. First, I bring up the bobbin thread from the bottom of the project. To do this, hold on to the top thread from the needle, drop the needle all the way down and bring it up again to grab the bobbin thread. Pull both threads to the side. When you begin stitching, sew several stitches in place before starting to stitch, and cut the tails.
When coming to the end of a design, take a few stitches in place before raising the needle. Cut threads after removing from machine. Do this each time you start/stop a different design or change colors when stitching your skull.
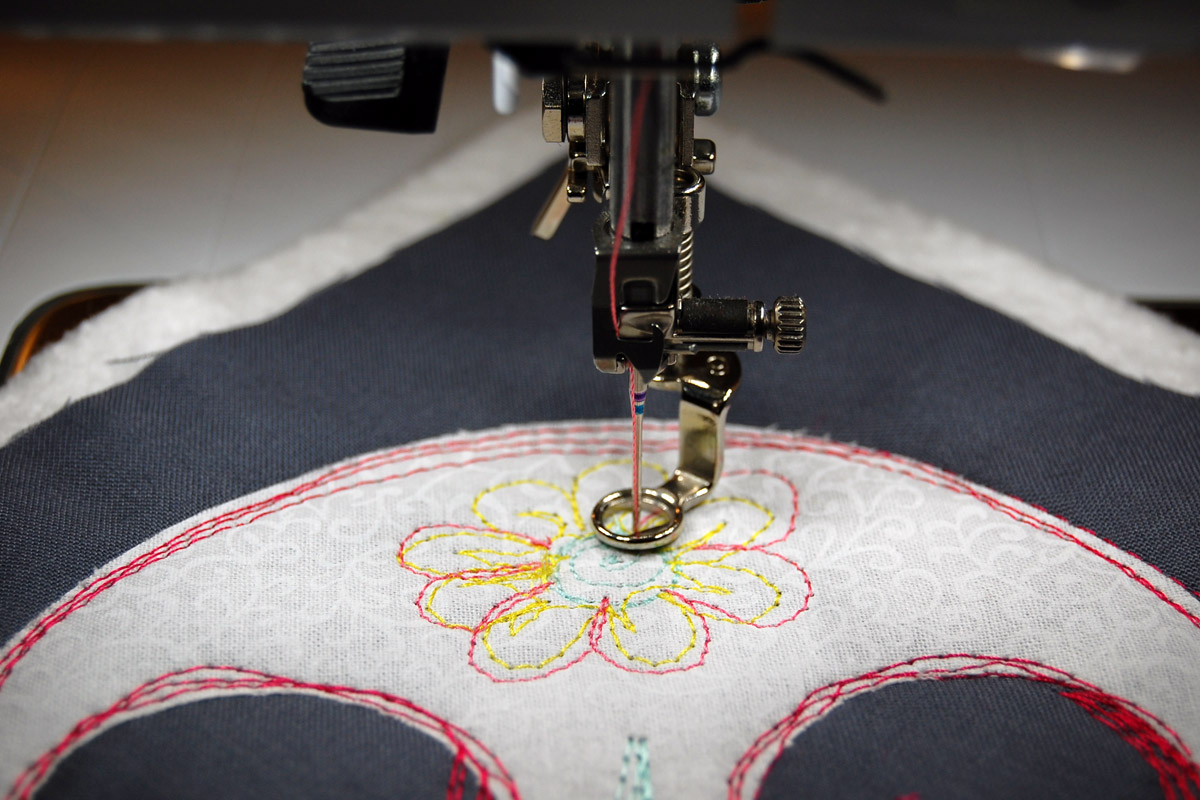
Continue changing colors and stitching designs. Have fun, you can stitch whatever you want on your skull! Try flowers, hearts, stars, or whatever you choose.
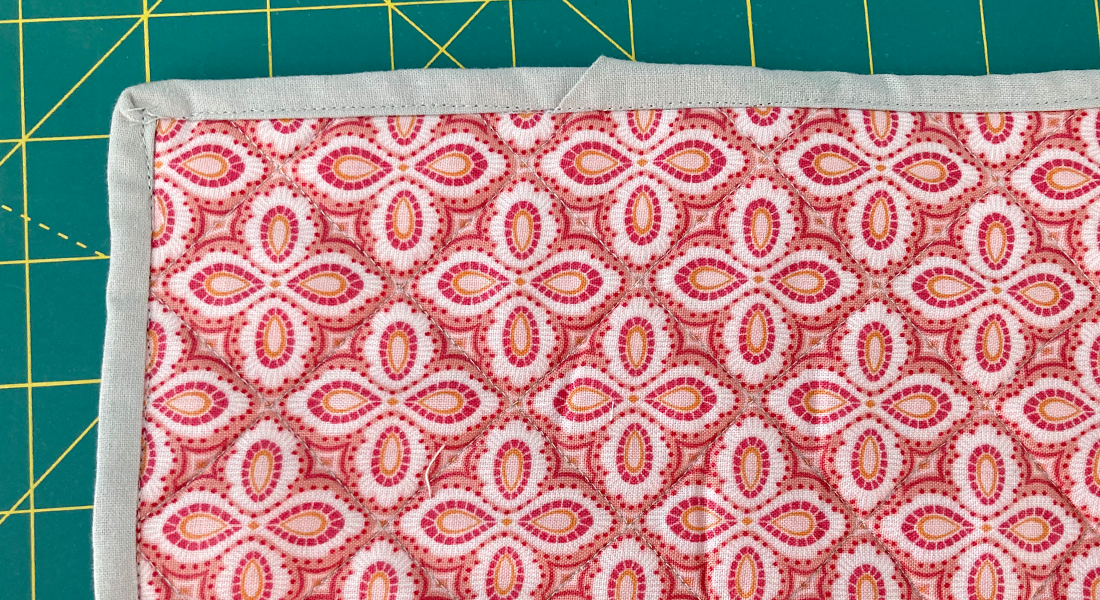
When you’ve finished free-motion quilting your skull, remove it from the sewing machine and trim off the excess batting and backing fabric from the sides.
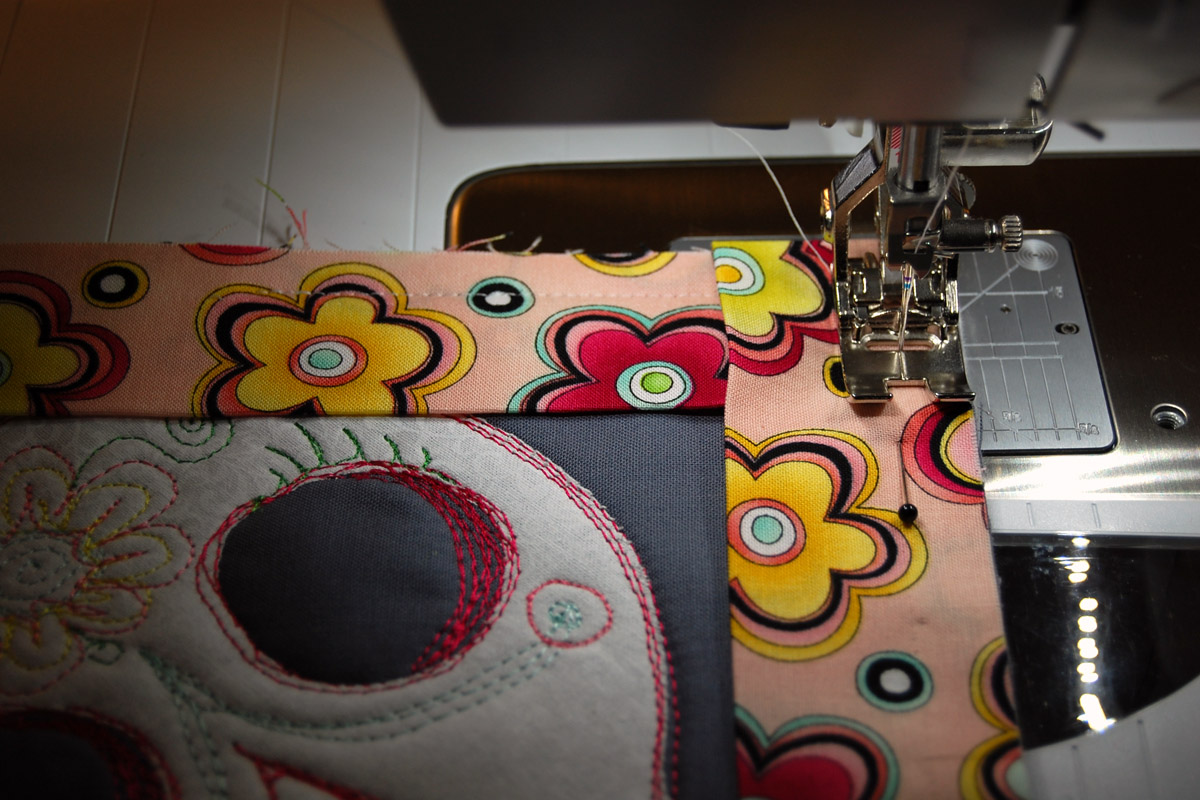
Switch from your free-motion quilting set-up to sew the binding: raise the feed dogs and replace the Darning foot #9 with Reverse pattern foot #1 with Dual Feed engaged. If you don’t have Dual Feed, you can use the Walking foot #50 to sew the binding.
I am using the double fold binding method to bind the mug rug, check out this tutorial if you are not familiar with how to create this type of binding. Cut the binding 3″ wide on the straight grain of the fabric.
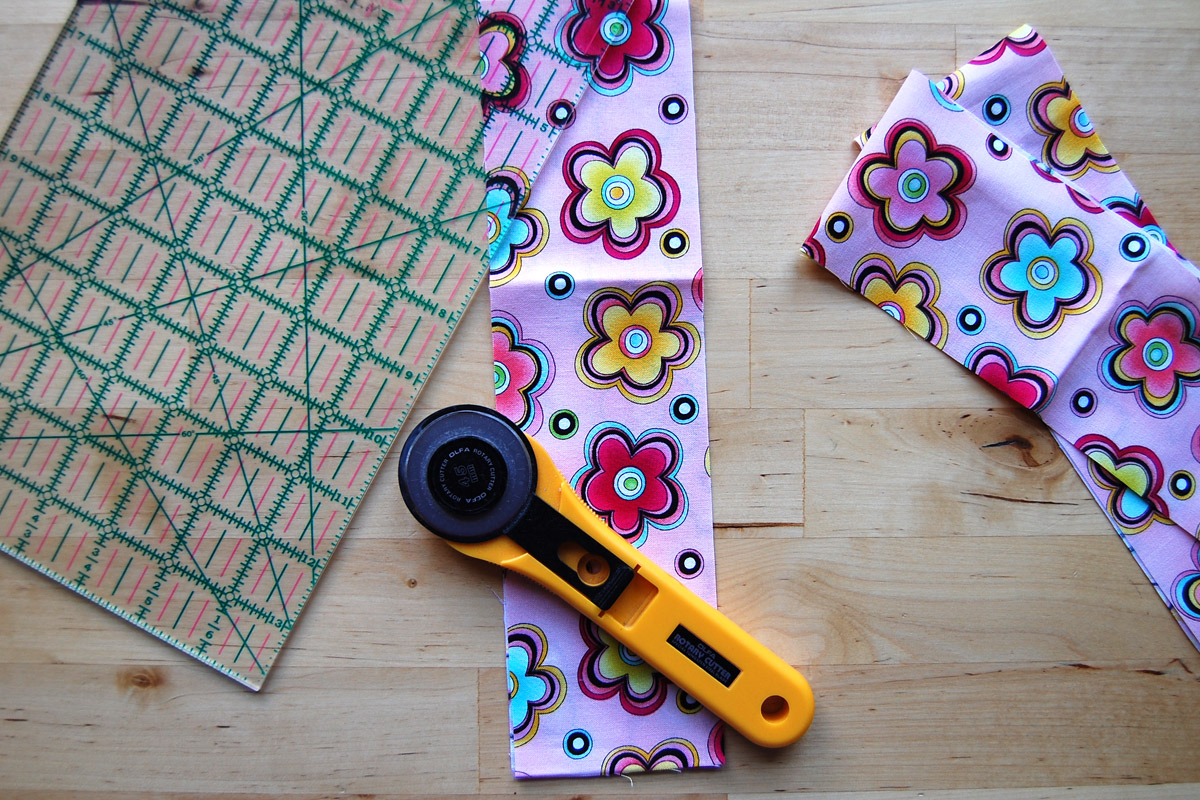
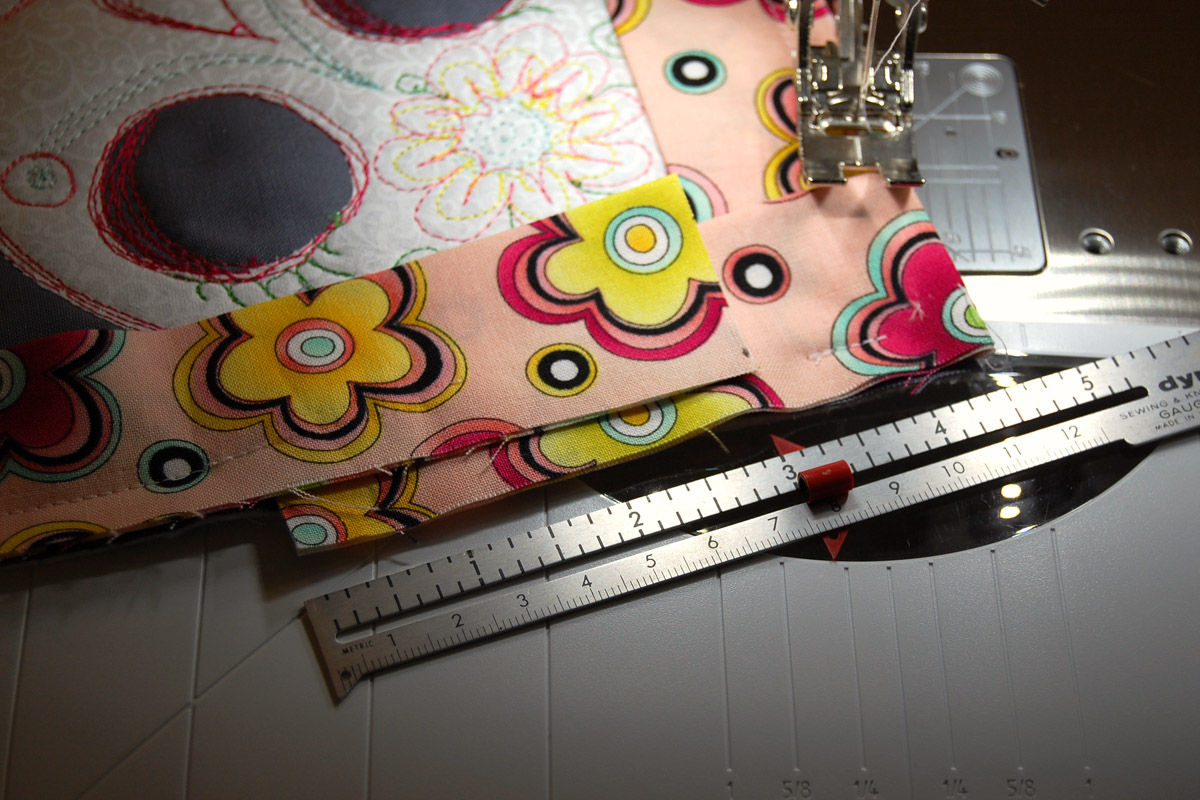
You will need approximately 45″ of binding. To join two pieces together, overlap two ends at a right angle, and pin.

Stitch across the joined pieces at a 45 degree angle.
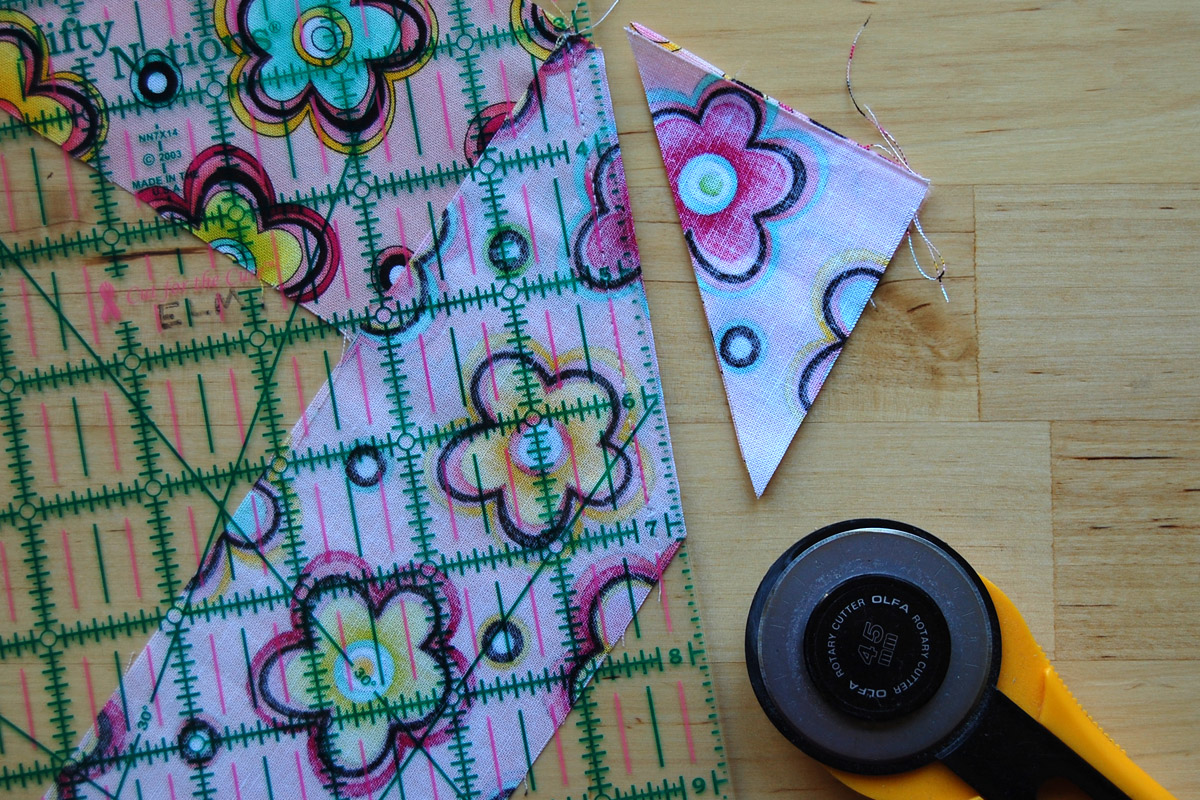
Cut away the extra fabric 1/4″ away from the stitching. Press the binding well. First press seams to one side. Next, press the binding in half, wrong sides together.
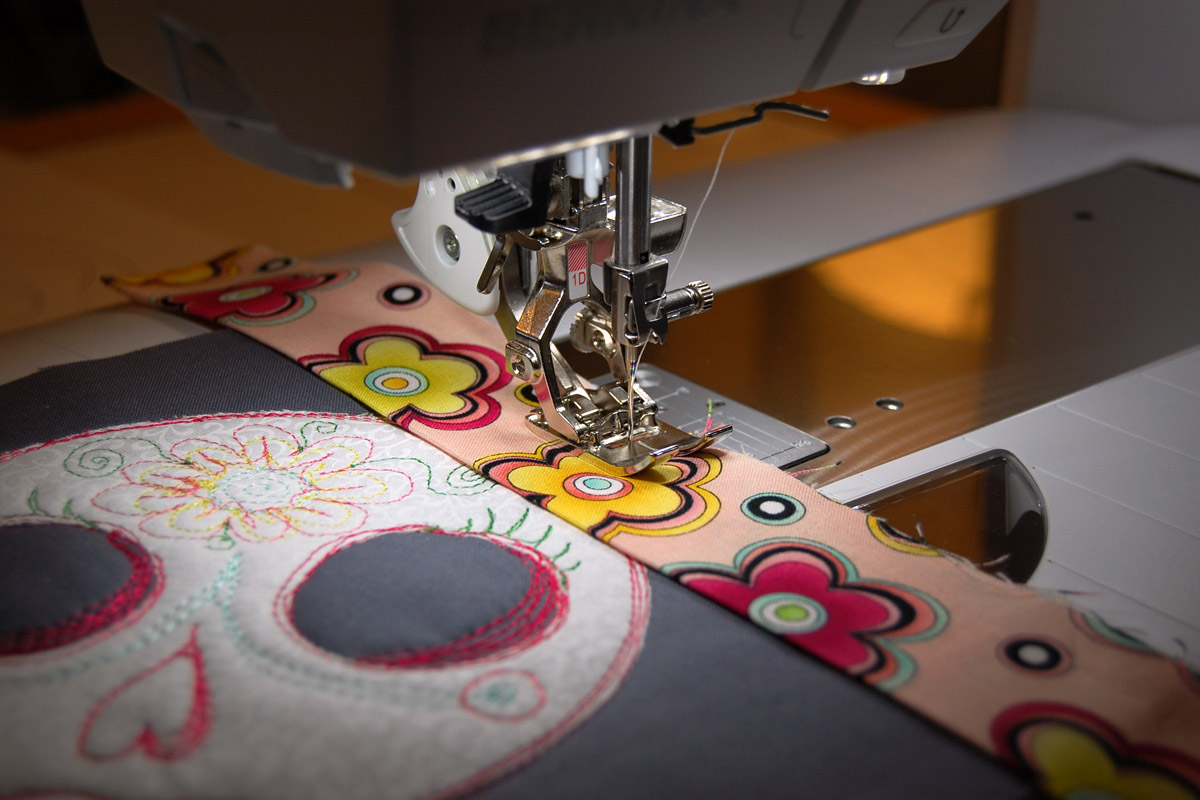
Match up raw edges of binding to raw edges of the mug rug, and leave about 5″ of binding free before starting to stitch. Begin stitching more than half-way down one side of the mug rug. Stitch at 3/8″ from the edge.
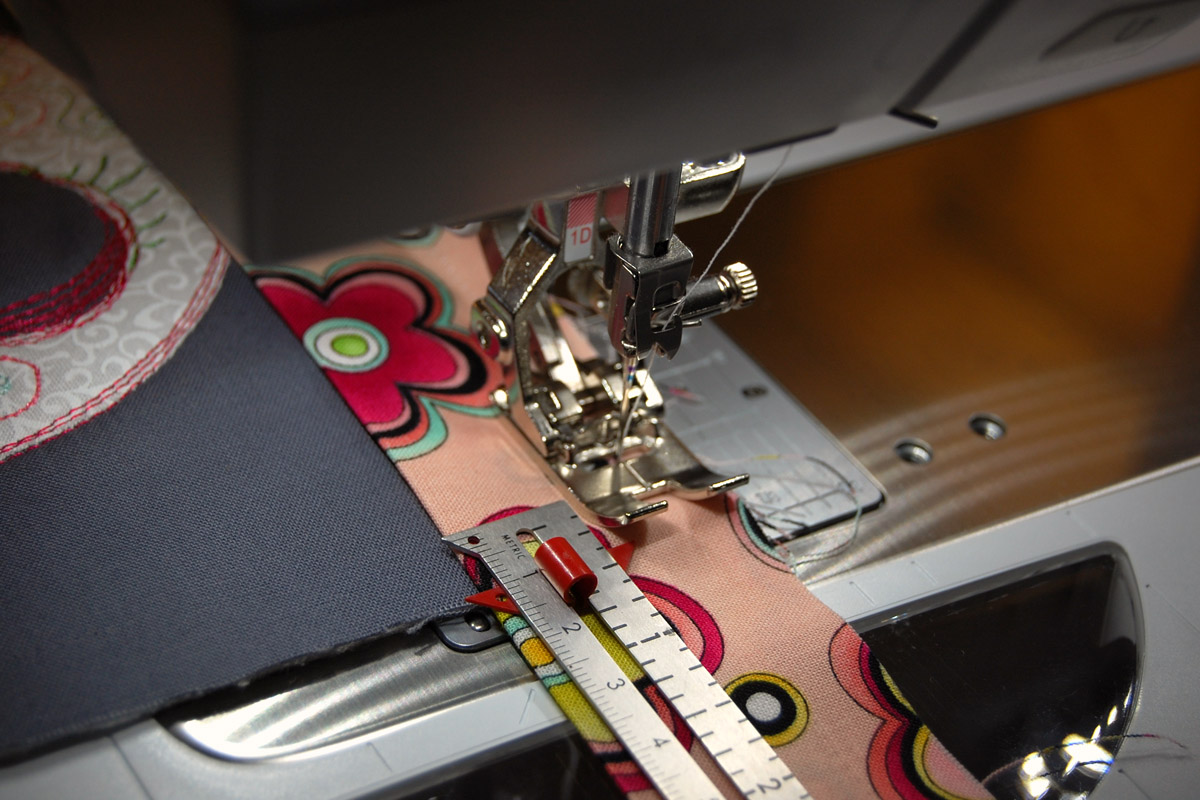
To create the mitred corners, stop stitching when you reach 3/8″ from the edge. Take a few backstitches and remove from the sewing machine.

Turn the binding back at a 45 degree angle.
Flip the binding back over to meet the next edge; the fold created should meet up with the edge of the project.
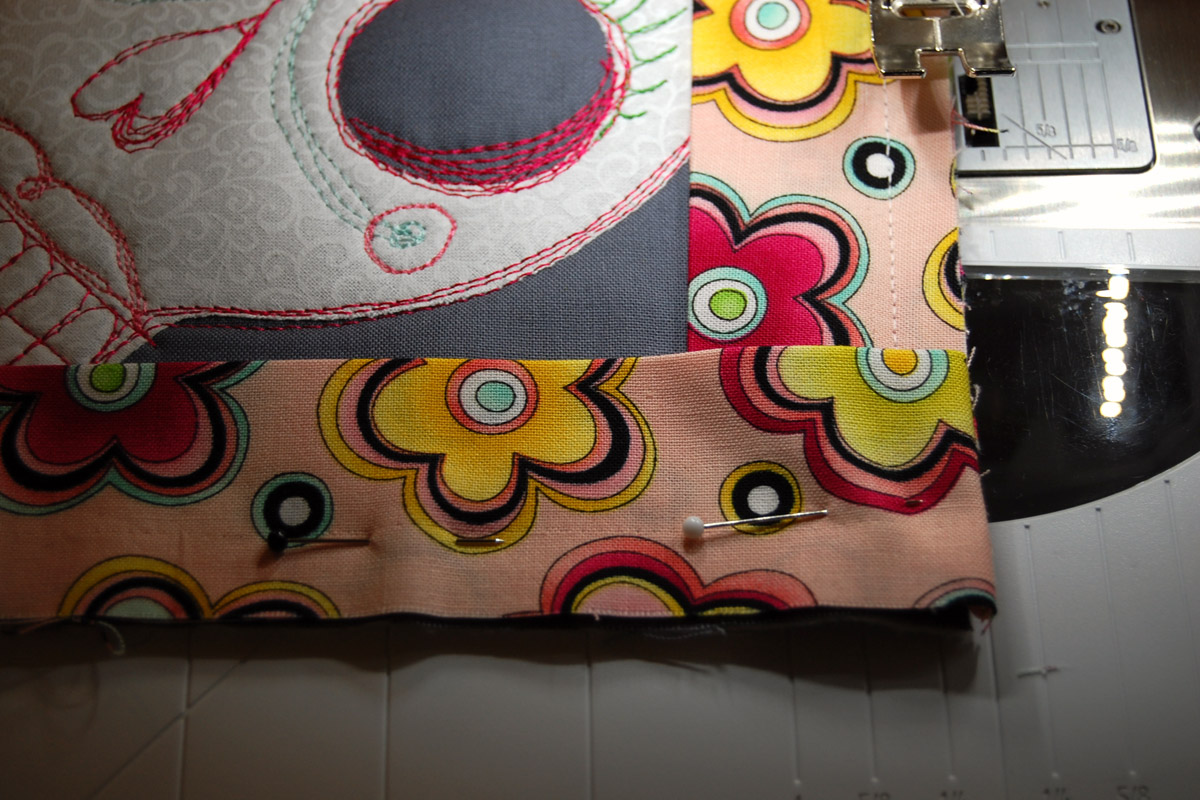
Start stitching 3/8″ from the edge, backstitching when you begin. Continue sewing, finishing all corners as above. Stop stitching 4-5 inches before the starting point.
Cut the tails of the binding to overlap exactly 3″. You can sew the ends together as in the tutorial linked above, or overlap the ends in a right angle and stitch.

Flip the seam out to make sure the binding is sewn correctly and finished at the right length to lie flat when sewing. Adjust if necessary. Press this section of binding flat, and stitch down.
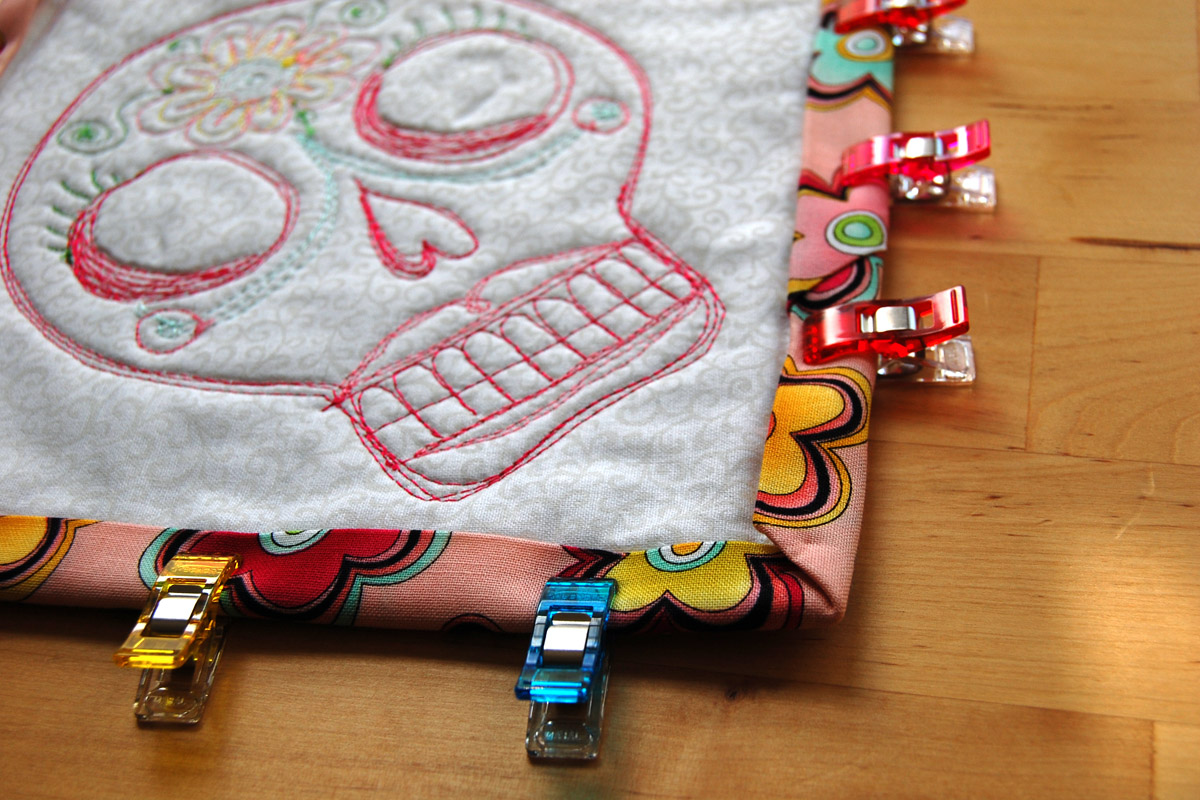
Flip the binding to the back of the mug rug, and press the corners into neat miters. Secure the binding in place (you can use pins, I prefer these clips because I am less likely to poke myself with a pin!).
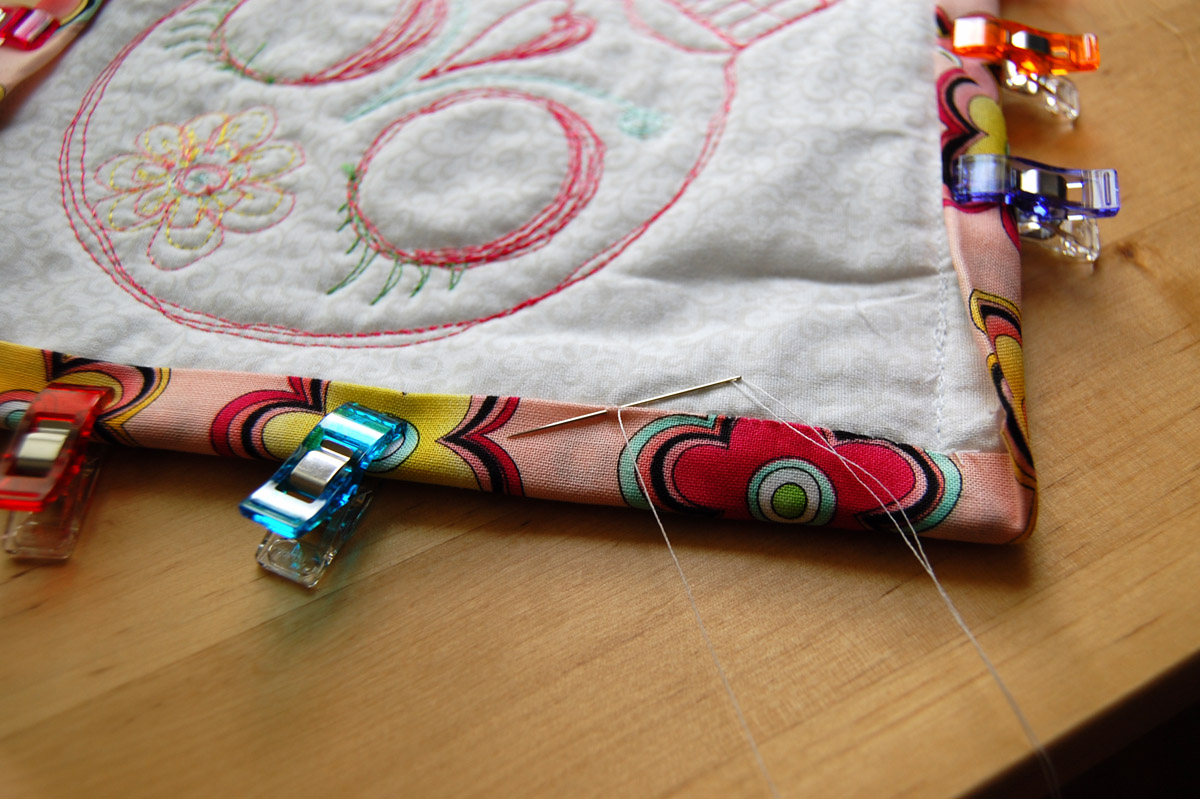
Hand-stitch with needle and thread. I use a teeny-tiny hem stitch to finish the binding. Give you Sugar Skull Mug Rug a final pressing, and you’re ready to go!
Have fun creating your own personalized Sugar Skull Mug Rugs! I’d love to see what you make with this project, please share photos here at the WeAllSew Community!