How to Embroider a Pajama Bag Pillow for Kids
Sewing a child’s pajama bag pillow – with personalized embroidery on the front – is a fun, yet practical, project as it becomes a pillow once the little one’s pajamas are stored inside. Its dual purpose makes it especially useful on a camping trip as it saves space, keeps pajamas cleaner by being tucked inside the pillow, and makes the morning routine quick and easy, allowing for more family time exploring outdoors.
Hello everyone! It’s Sharon Madsen from Sharon Sews, a sewing enthusiast and instructor. You can connect with me on YouTube and Instagram, where I share sewing tips, projects, reviews, and fashion sewing ideas.
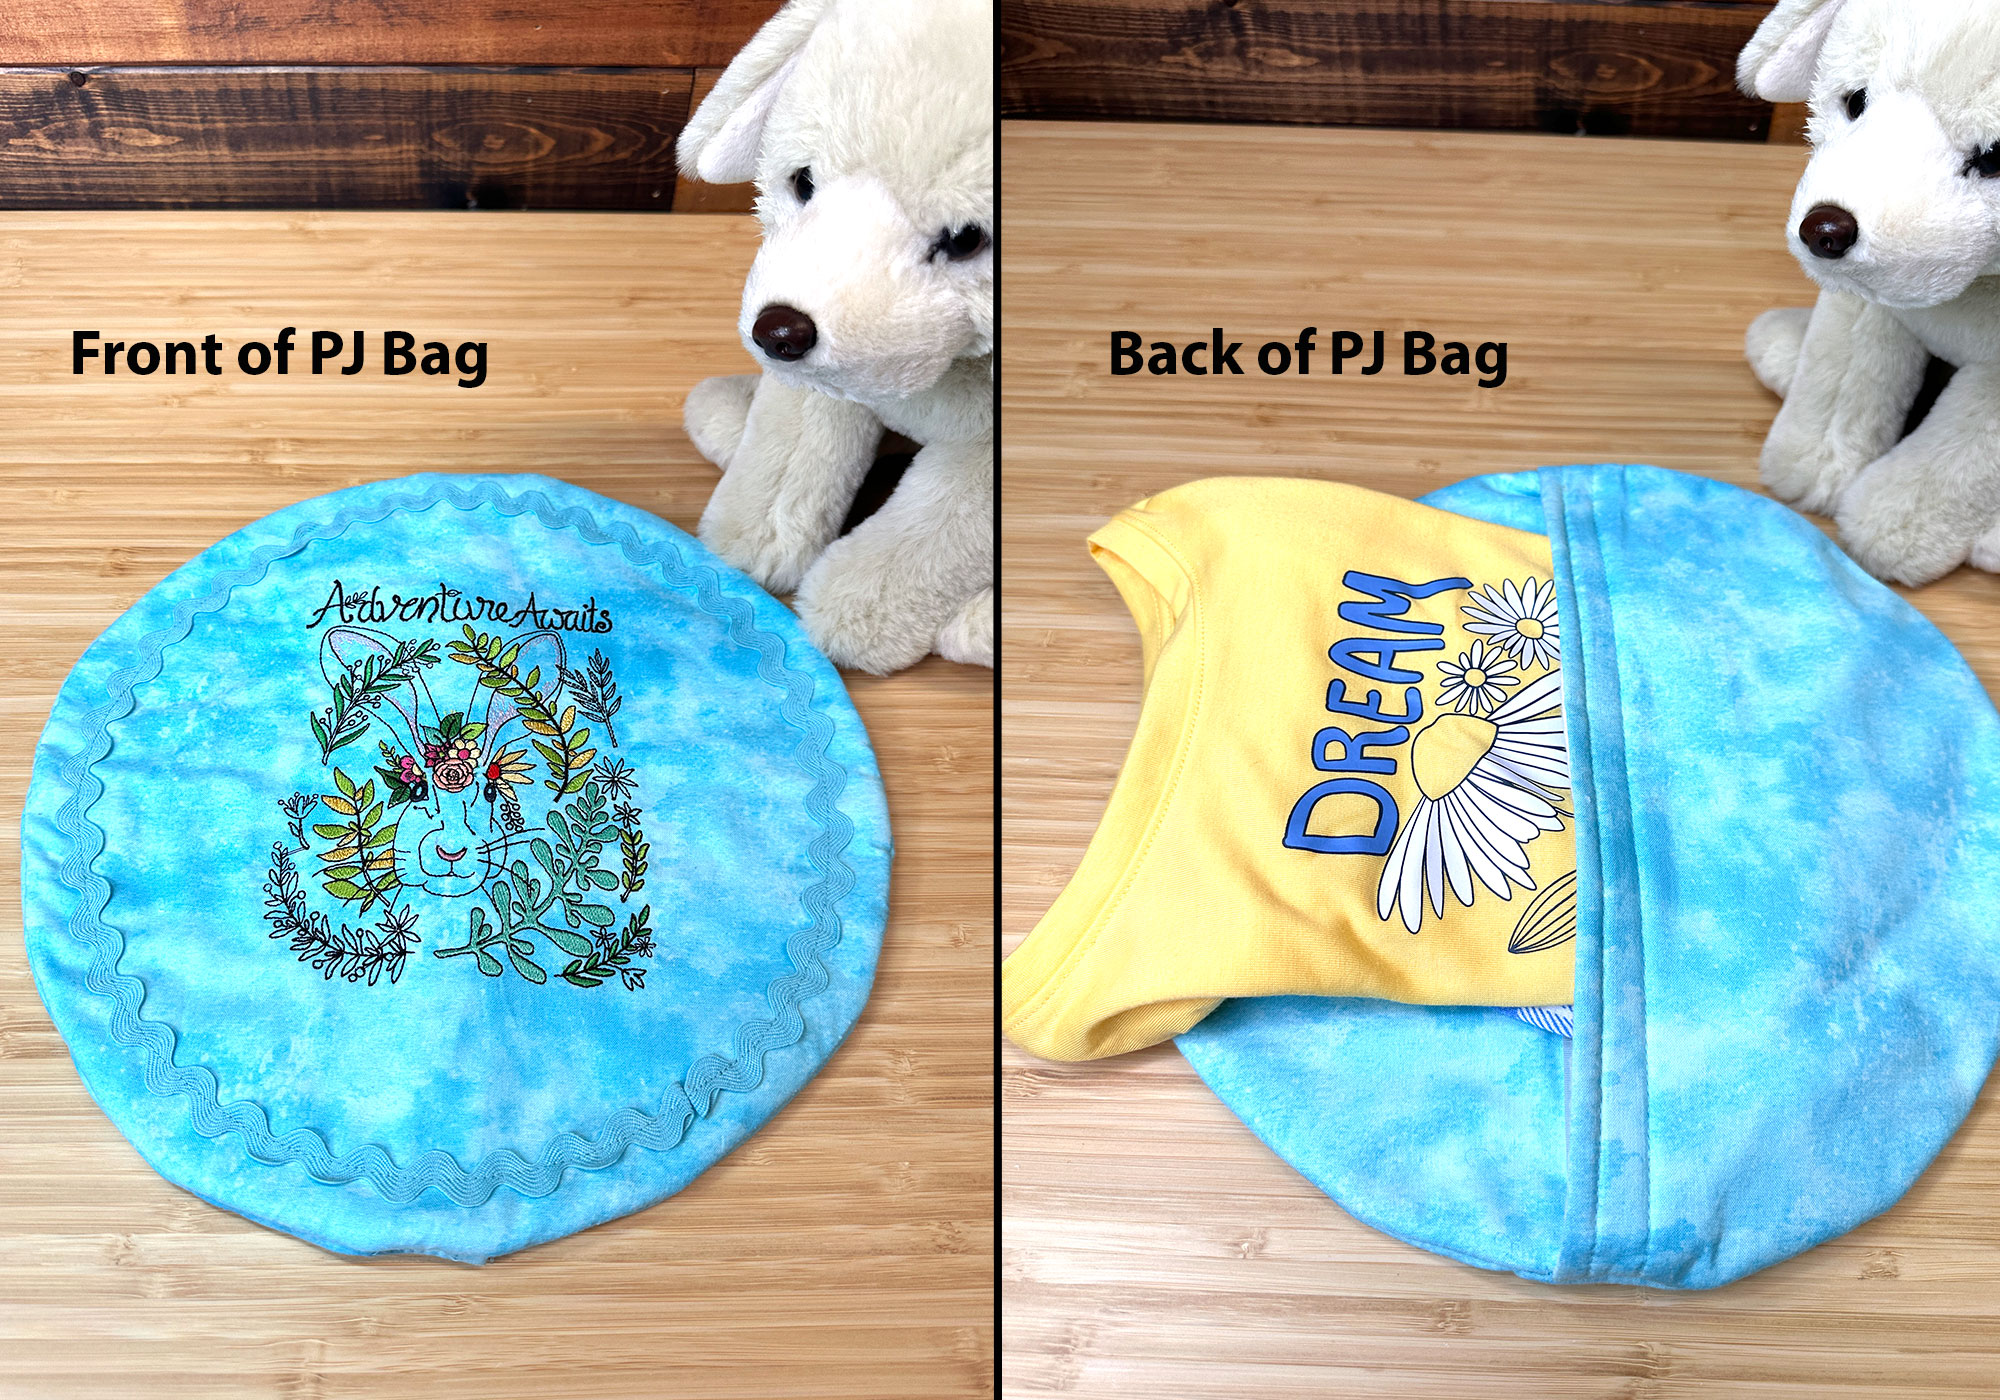
The pajama bag has a hook and loop opening in the back that the child can easily open and close themselves when putting their pajamas inside in the morning or taking them out at bedtime.
Let’s get started.
Materials for the Child’s Embroidered Pajama Bag Pillow
- Sewing and embroidery machine – I used my BERNINA 770 QE PLUS
- Quilting cotton – 1/2 yard or two fat quarters
- Fleece – 1/2 yard
- Hook and loop tape (sew-on) – 10-1/2″
- Rick rack trim – 1 yard
- Coordinating all-purpose thread
- Scissors
- Pins or clips
- Ruler
- Chalk or removable fabric marker – I used the OESD Perfect Pencil
- Iron and pressing surface
- Paper to create circle template – I use Bienfang Tracing Paper as it’s lightweight and transparent.
- Pencil or pen to draw the circle template
- Paper scissors to cut out circle template
Materials to Embroider the Child’s Pajama Bag Pillow
- Embroidery module – I used my Embroidery Module L – with Smart Drive Technology
- Tear Away Stabilizer
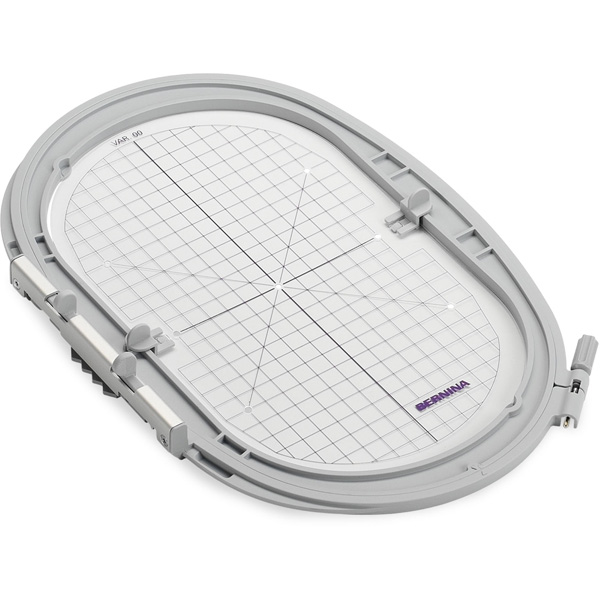
- Large oval embroidery hoop
- Droped-Shaped Embroidery Foot #26
- 80/14 embroidery needle
- Bobbin thread – I used OESD expert embroidery bobbin thread 60 wt
- Embroidery thread – I used Isacord embroidery thread, colors per the design
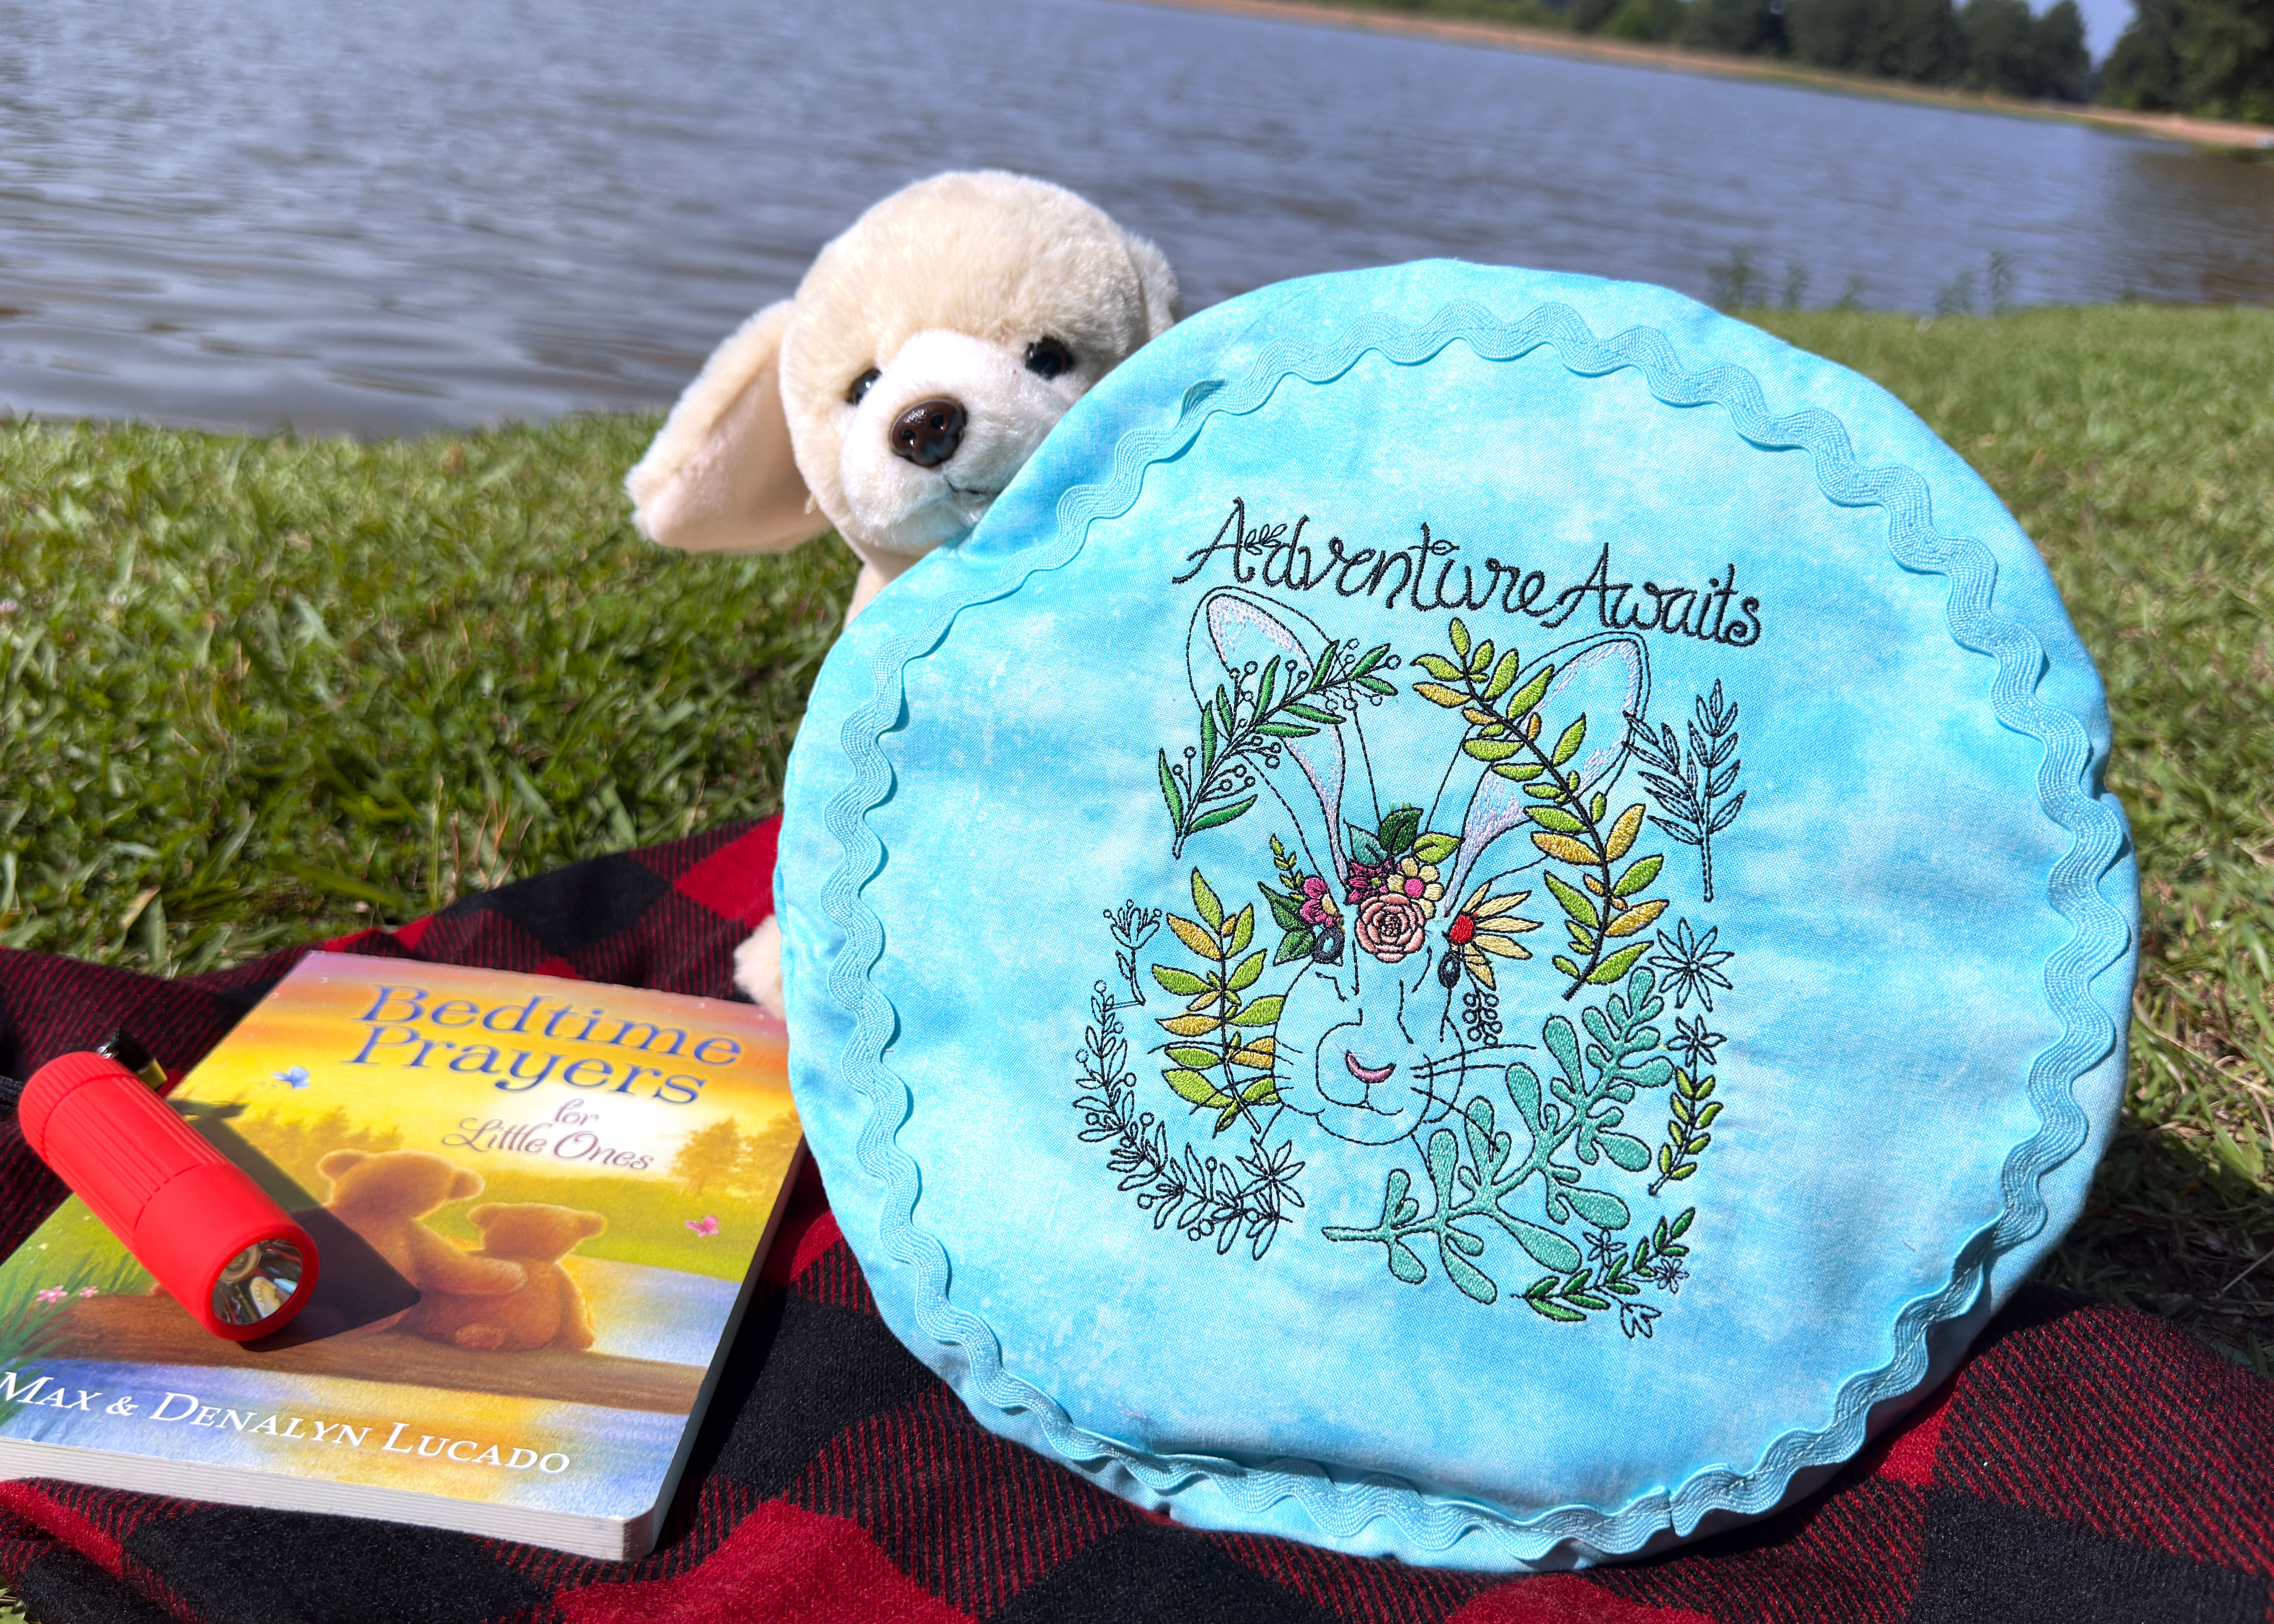
- Embroidery design – Adventure Awaits (provided by OESD)
- Small scissors to snip threads
Instructions to Make the Embroidered Pajama Bag
Create the Pattern for the Pajama Bag
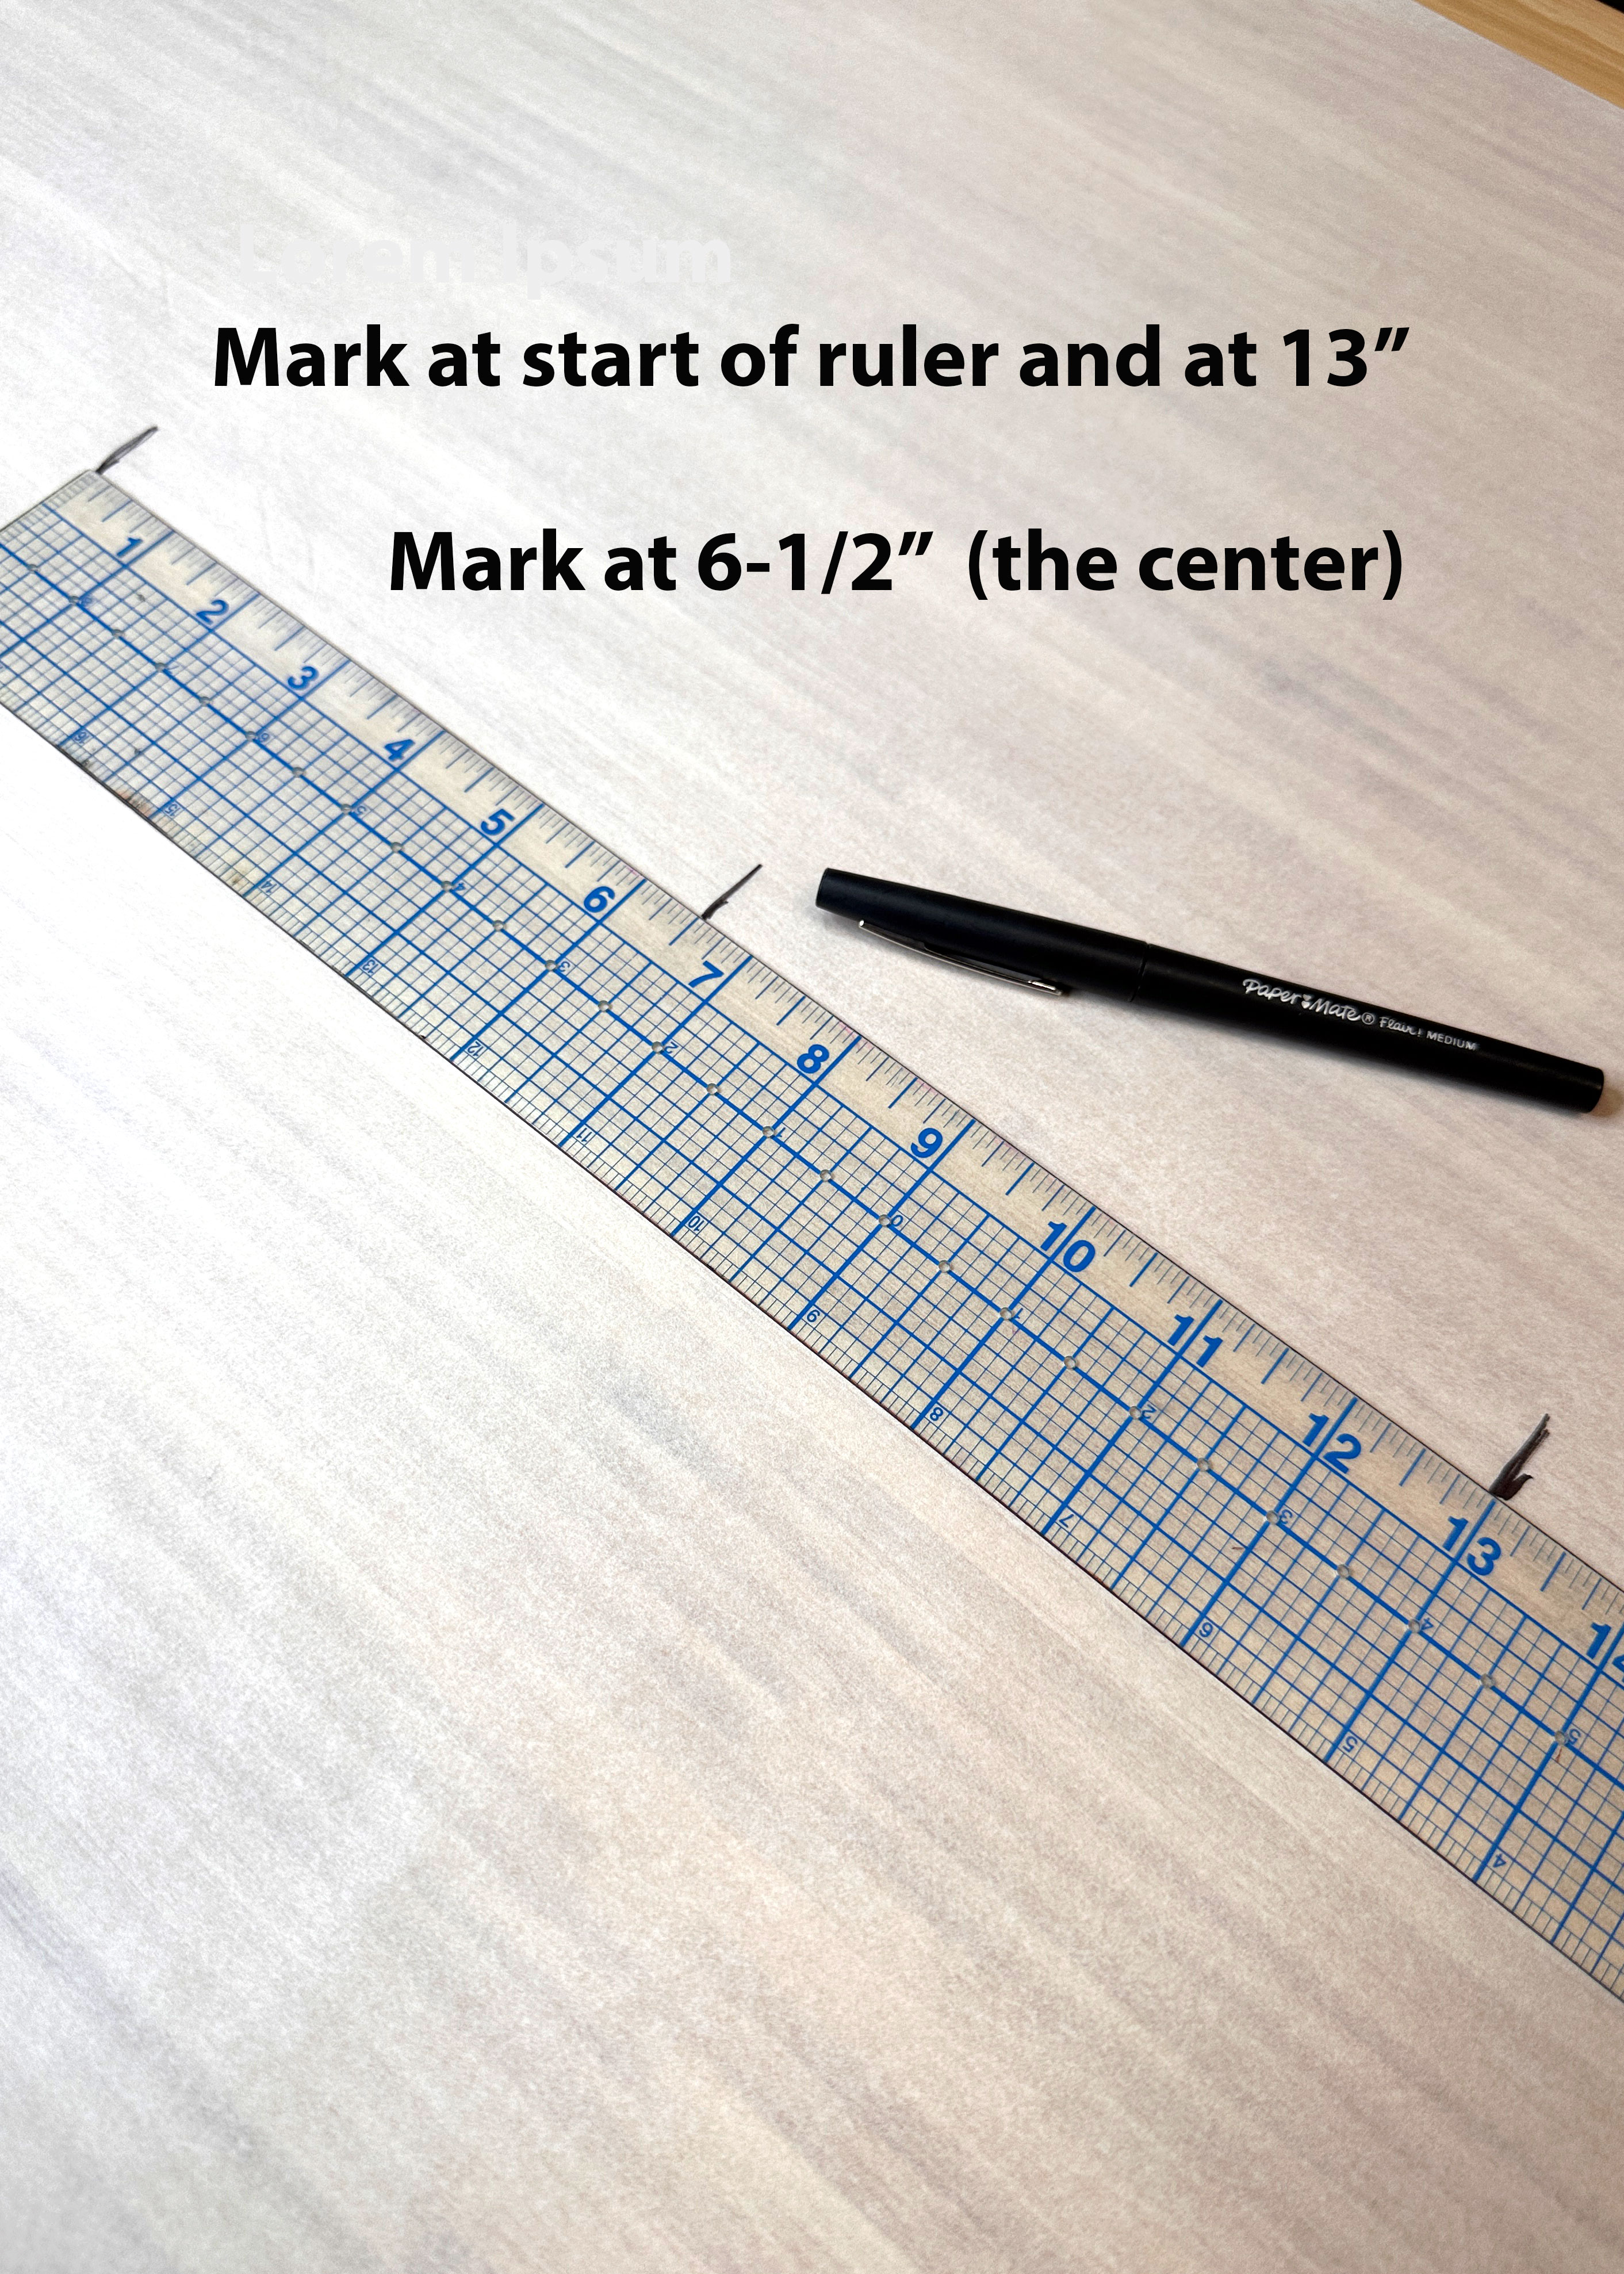
The circle for this project is 13″.
Place paper on a flat work surface. Place a ruler on top of the paper and make a mark at the beginning of the ruler, a mark at 6-1/2″, and a mark at 13″. The 6-1/2″ mark is the center of the circle.
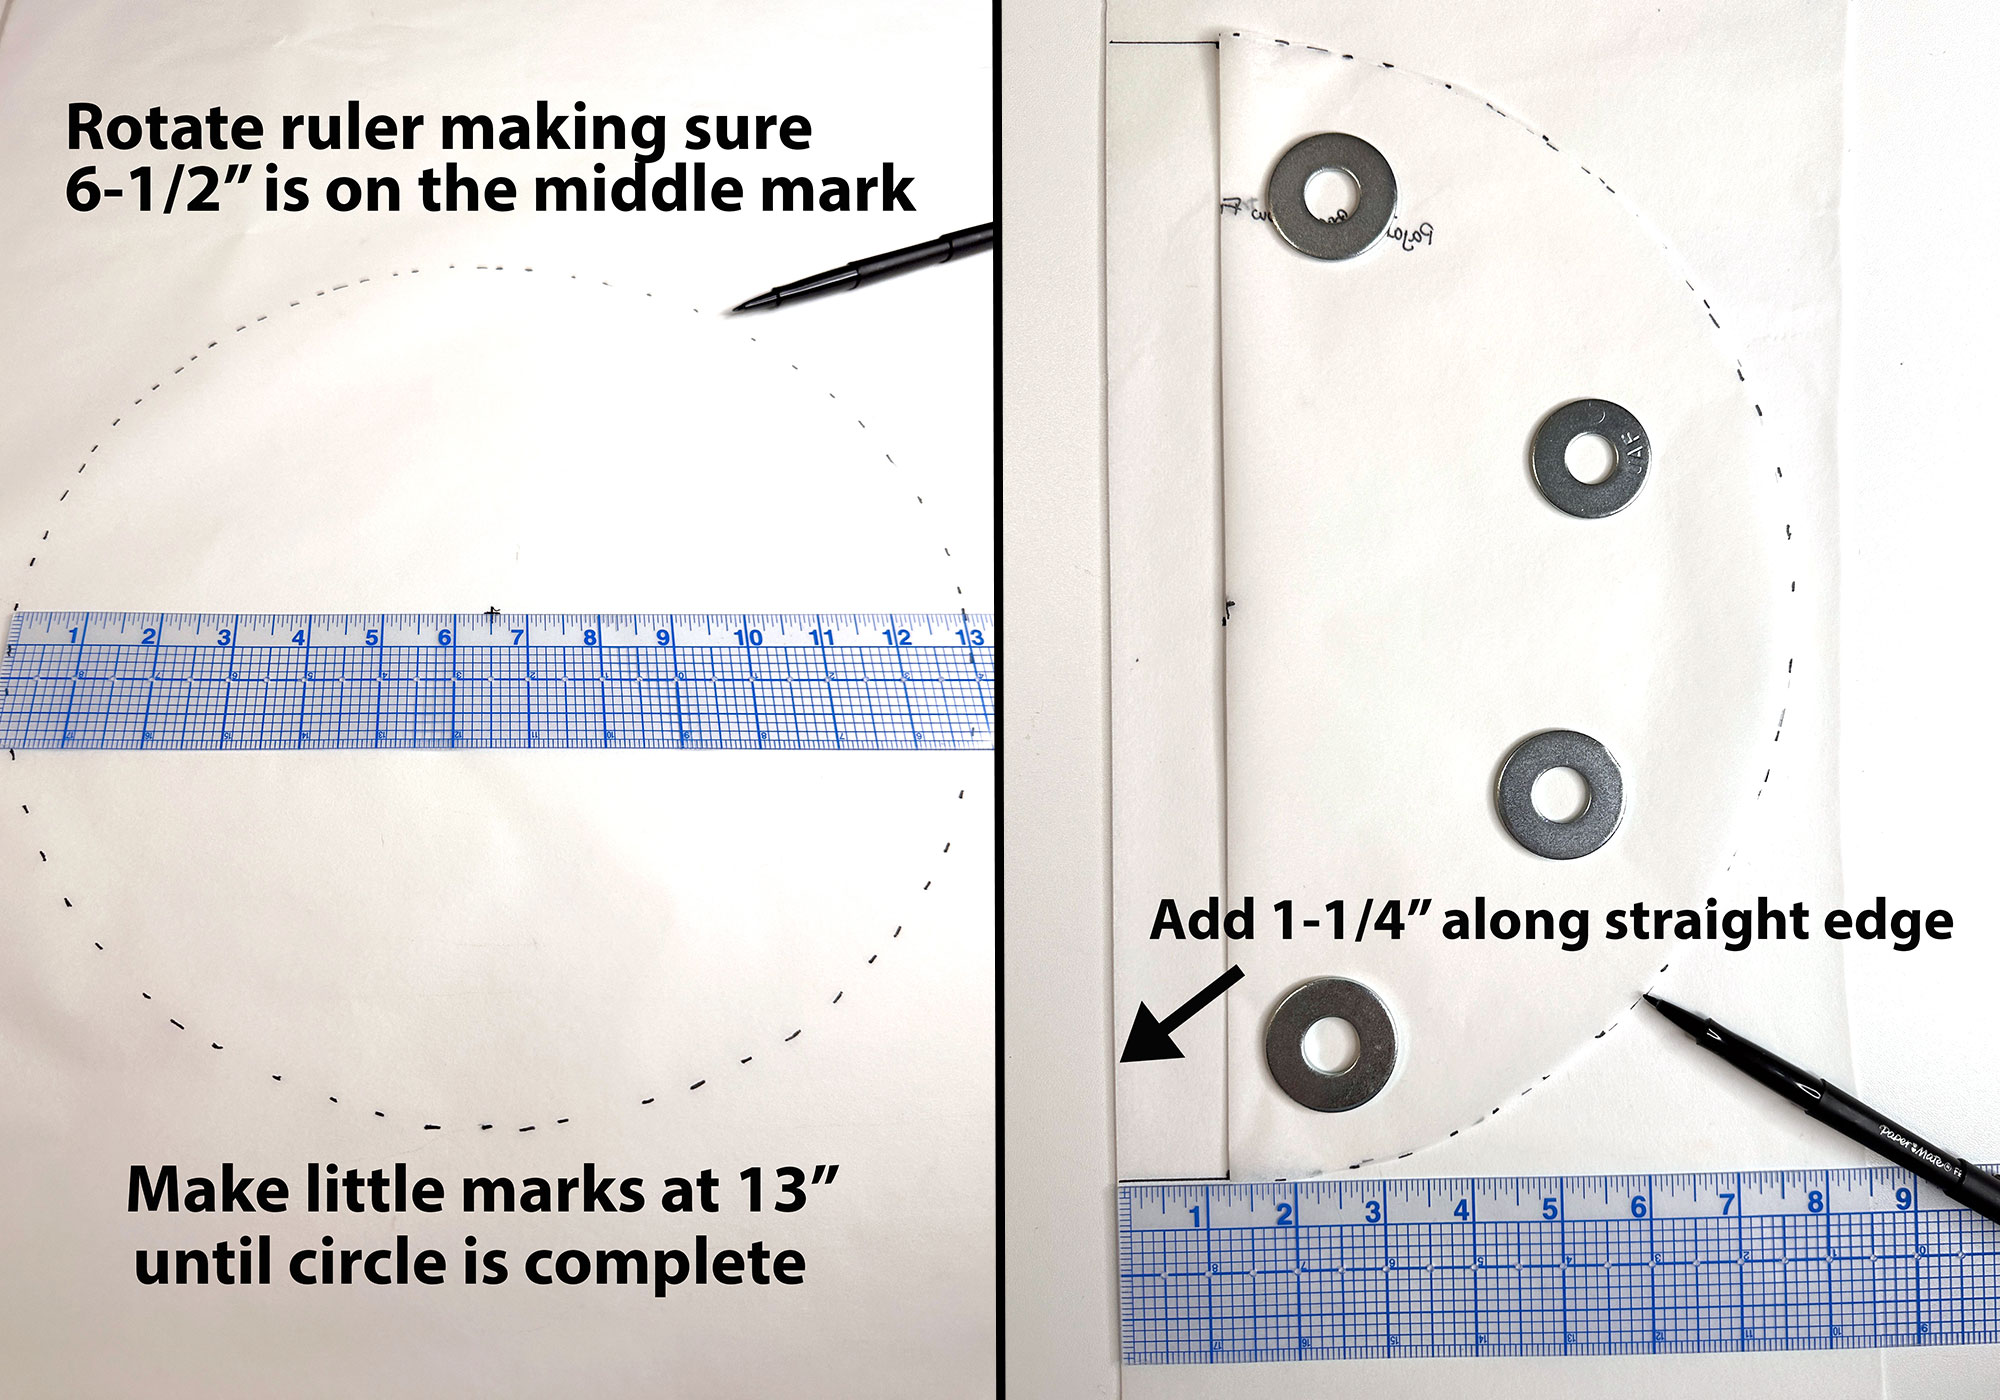
Rotate the ruler, making sure the 6-1/2″ remains on the center mark. As you rotate, make small marks until the entire circle is completed. Connect the marks to finish the circle and cut out. This is the front pattern piece for the pajama bag.
Fold the circle in half and place on another piece of paper. Add 1-1/4″ to the straight edge and trace around the half circle. This is the back pattern piece for the pajama bag.
Prepare the Fabric and Machine for Embroidery
Prewash the fabric for the pajama bag the same way the finished bag will be washed.
Clean and oil your machine, attach the embroidery module, the embroidery foot #26, and a new 90/14 embroidery needle. Put on straight stitch plate, lower the feed dog, and insert a bobbin wound with embroidery bobbin thread.
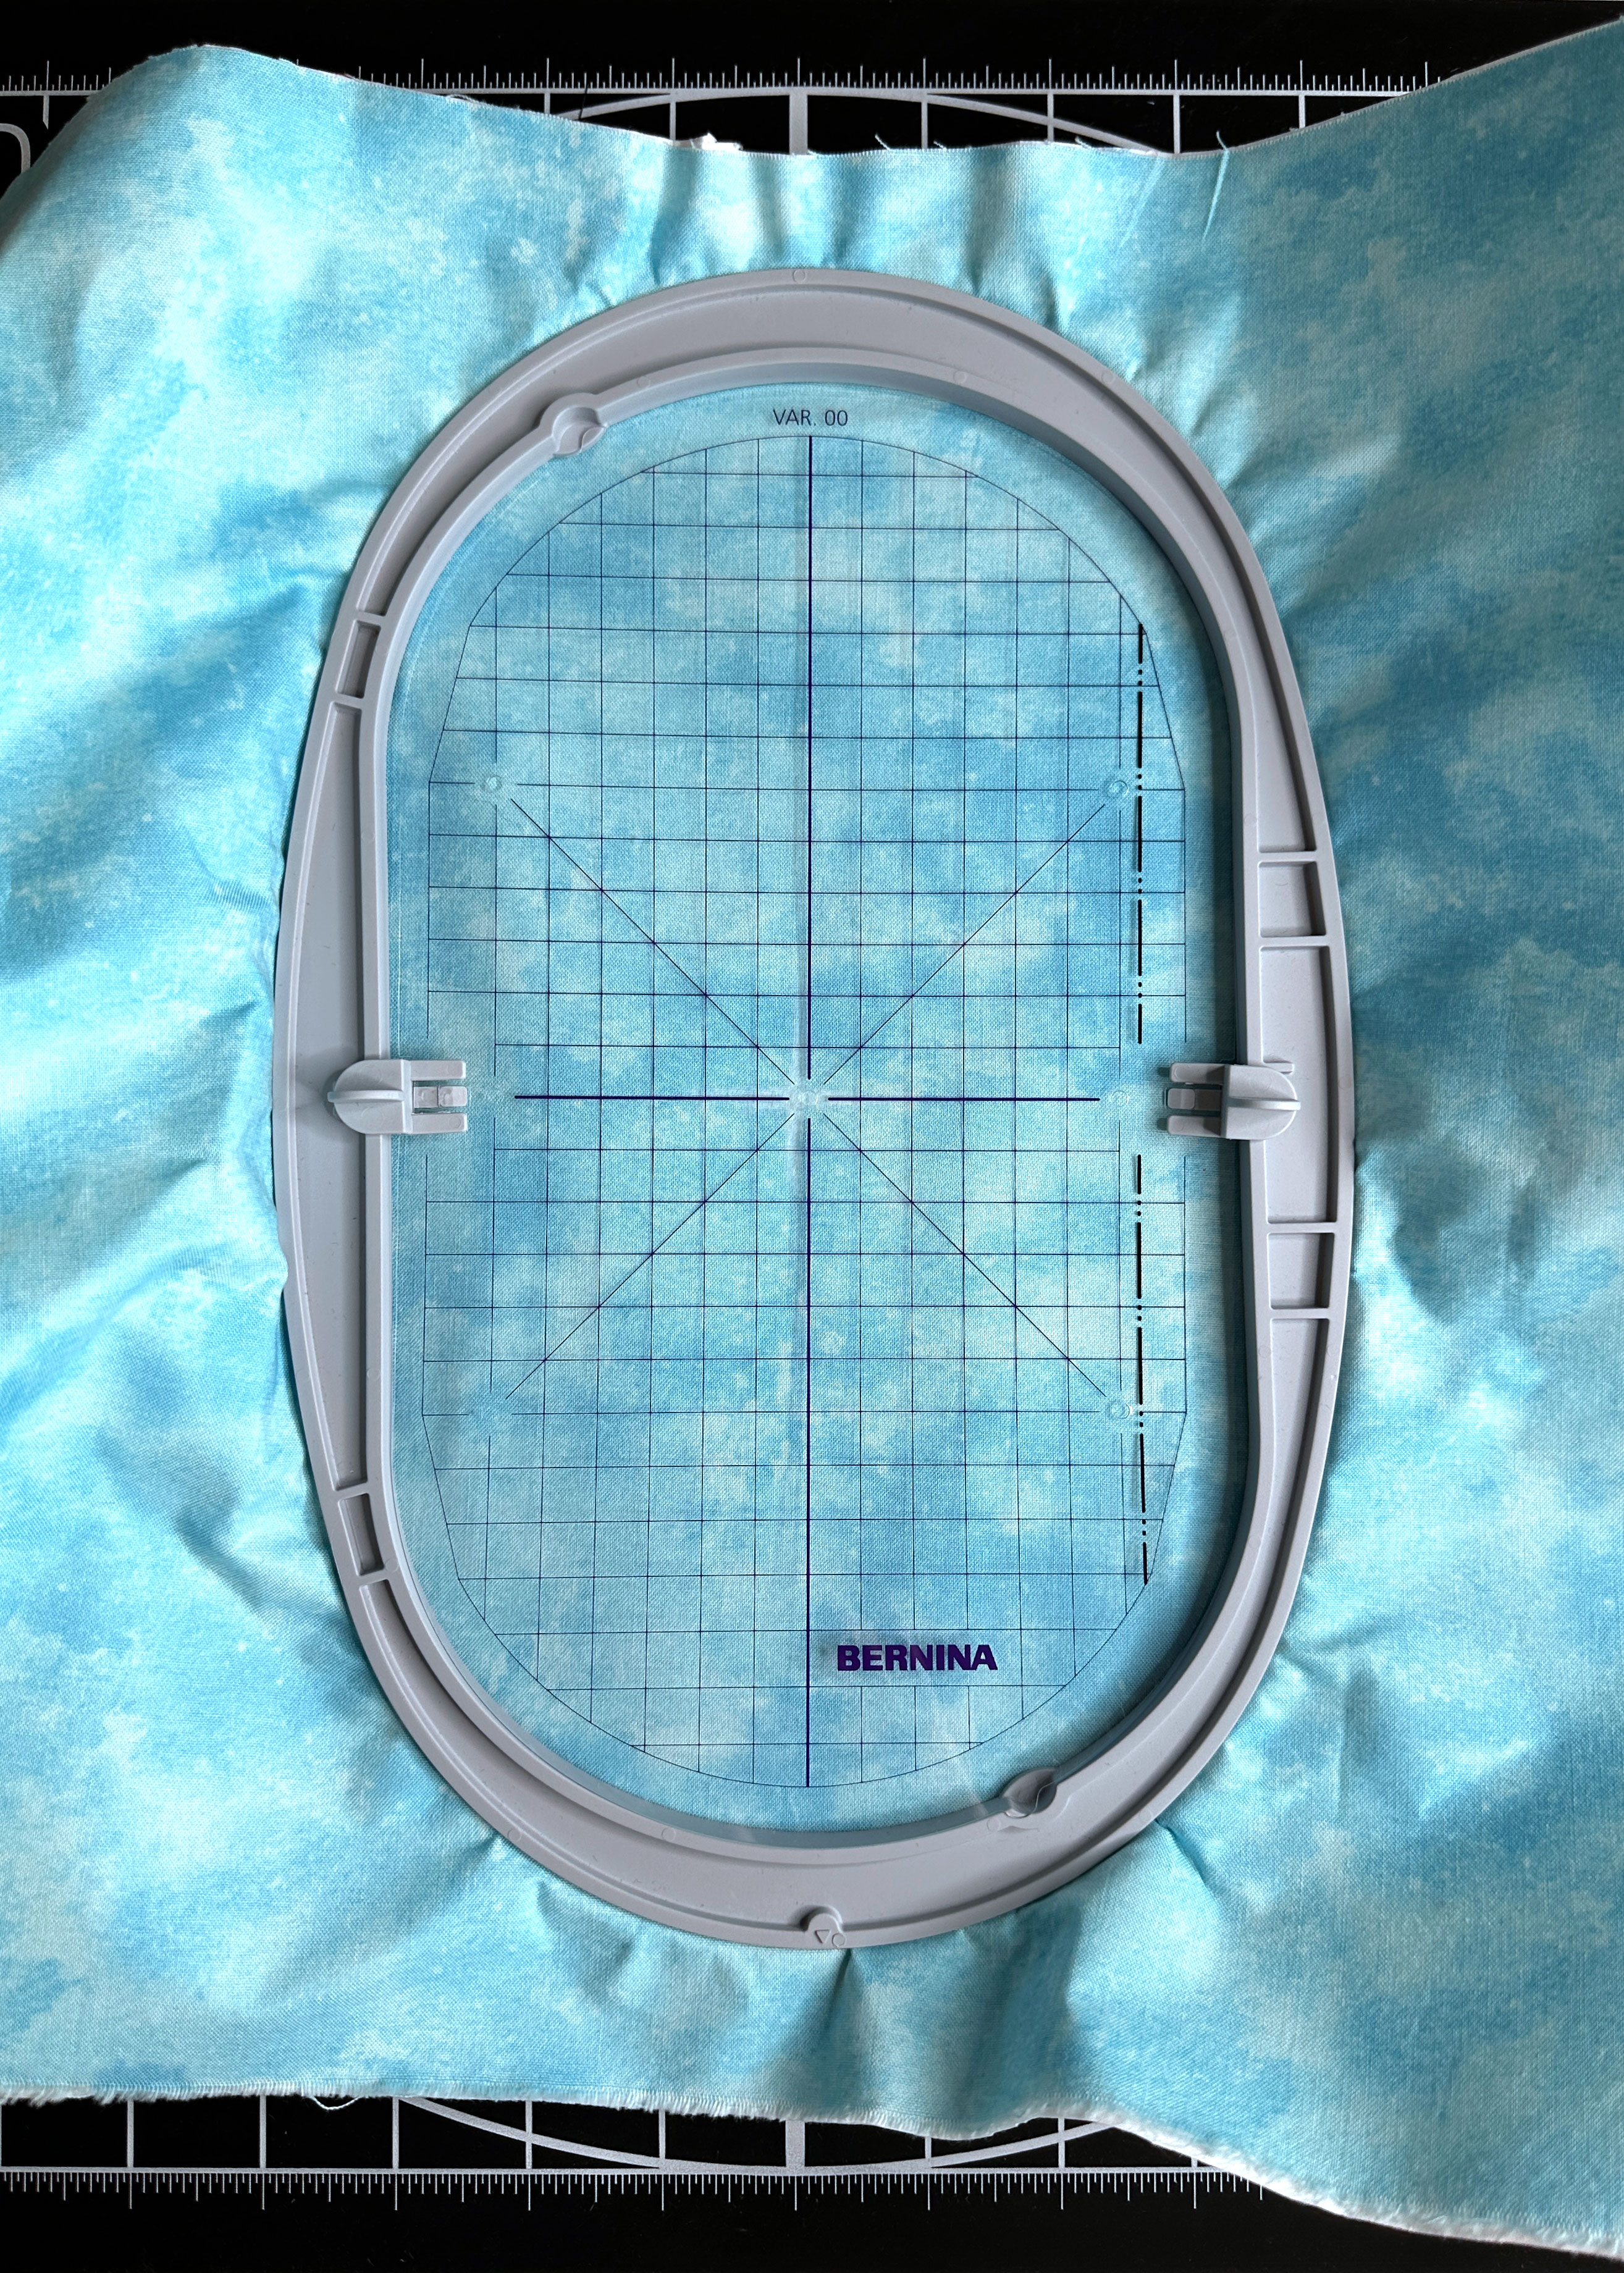
Cut a piece of quilting cotton 14″ x 14″ and mark the center using chalk or removable fabric marker.
Next, apply stabilizer to the back side of the fabric. With my quilting cotton, I used two layers of OESD Ultra Clean & Tear stabilizer. Hoop the fabric in the oval hoop using the hoop template to center the fabric.
Embroider the Design on the Pajama Bag Front
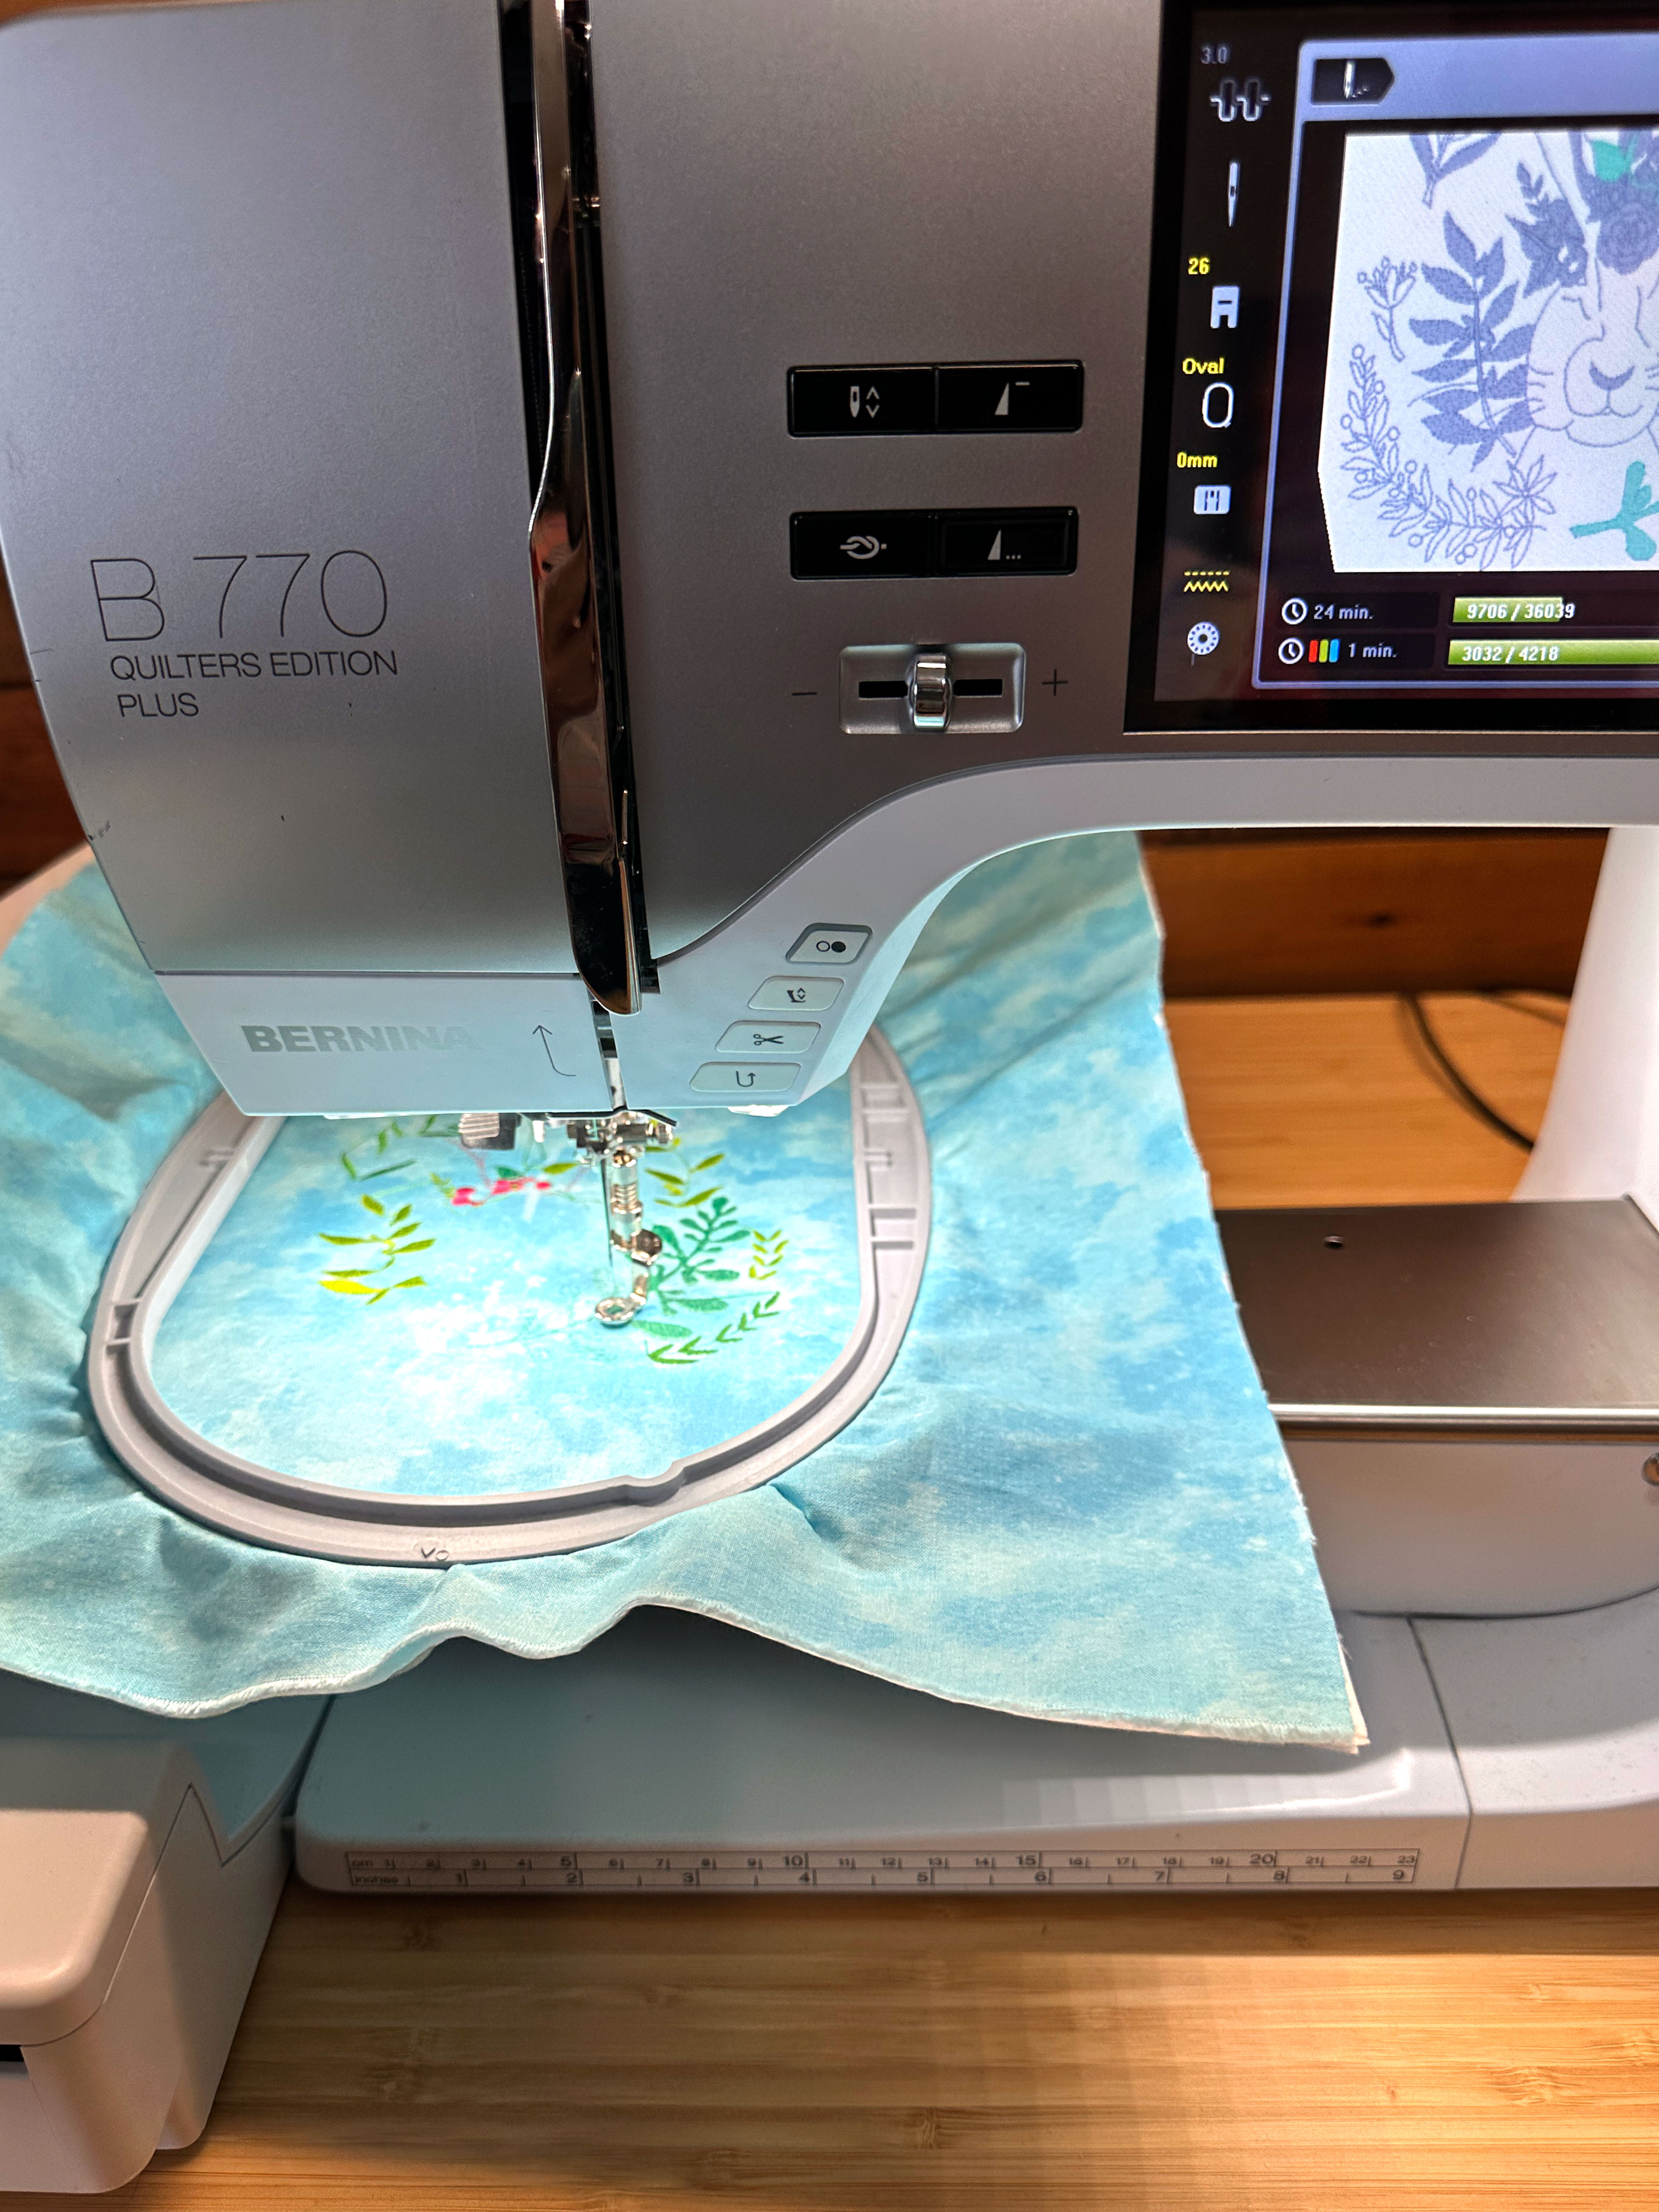
Choose a design to embroider on the center front of the pajama bag, making sure it will fit in the oval hoop. I used “Adventure Awaits” which measures 5.34″ x 6.69″.
Verify the design is centered and fits in the hoop by selecting the “I” to access the Information menu, touching the Check icon, and then touching each corner arrow (which moves the needle to the outer corners of the design). Then press the green “Go” button to begin the embroidery process, changing thread colors when prompted.
Once the design is done stitching, remove the hoop, and carefully remove the stabilizer from around the design.
Optional: When done embroidering the design, press using OESD’s Perfect Embroidery Press Cloth, which helps press puckers out of the embroidered fabrics and prevents the embroidery texture from getting crushed. Place the design face down on the press cloth and press the wrong side.
Sew the Pajama Bag
The seam allowance is 1/2″ for the pajama bag.
Replace the embroidery foot with the Clear Sole #34 foot, put on the 9mm stitch plate, and raise the feed dog.
Cut Out the Pajama Bag Pieces
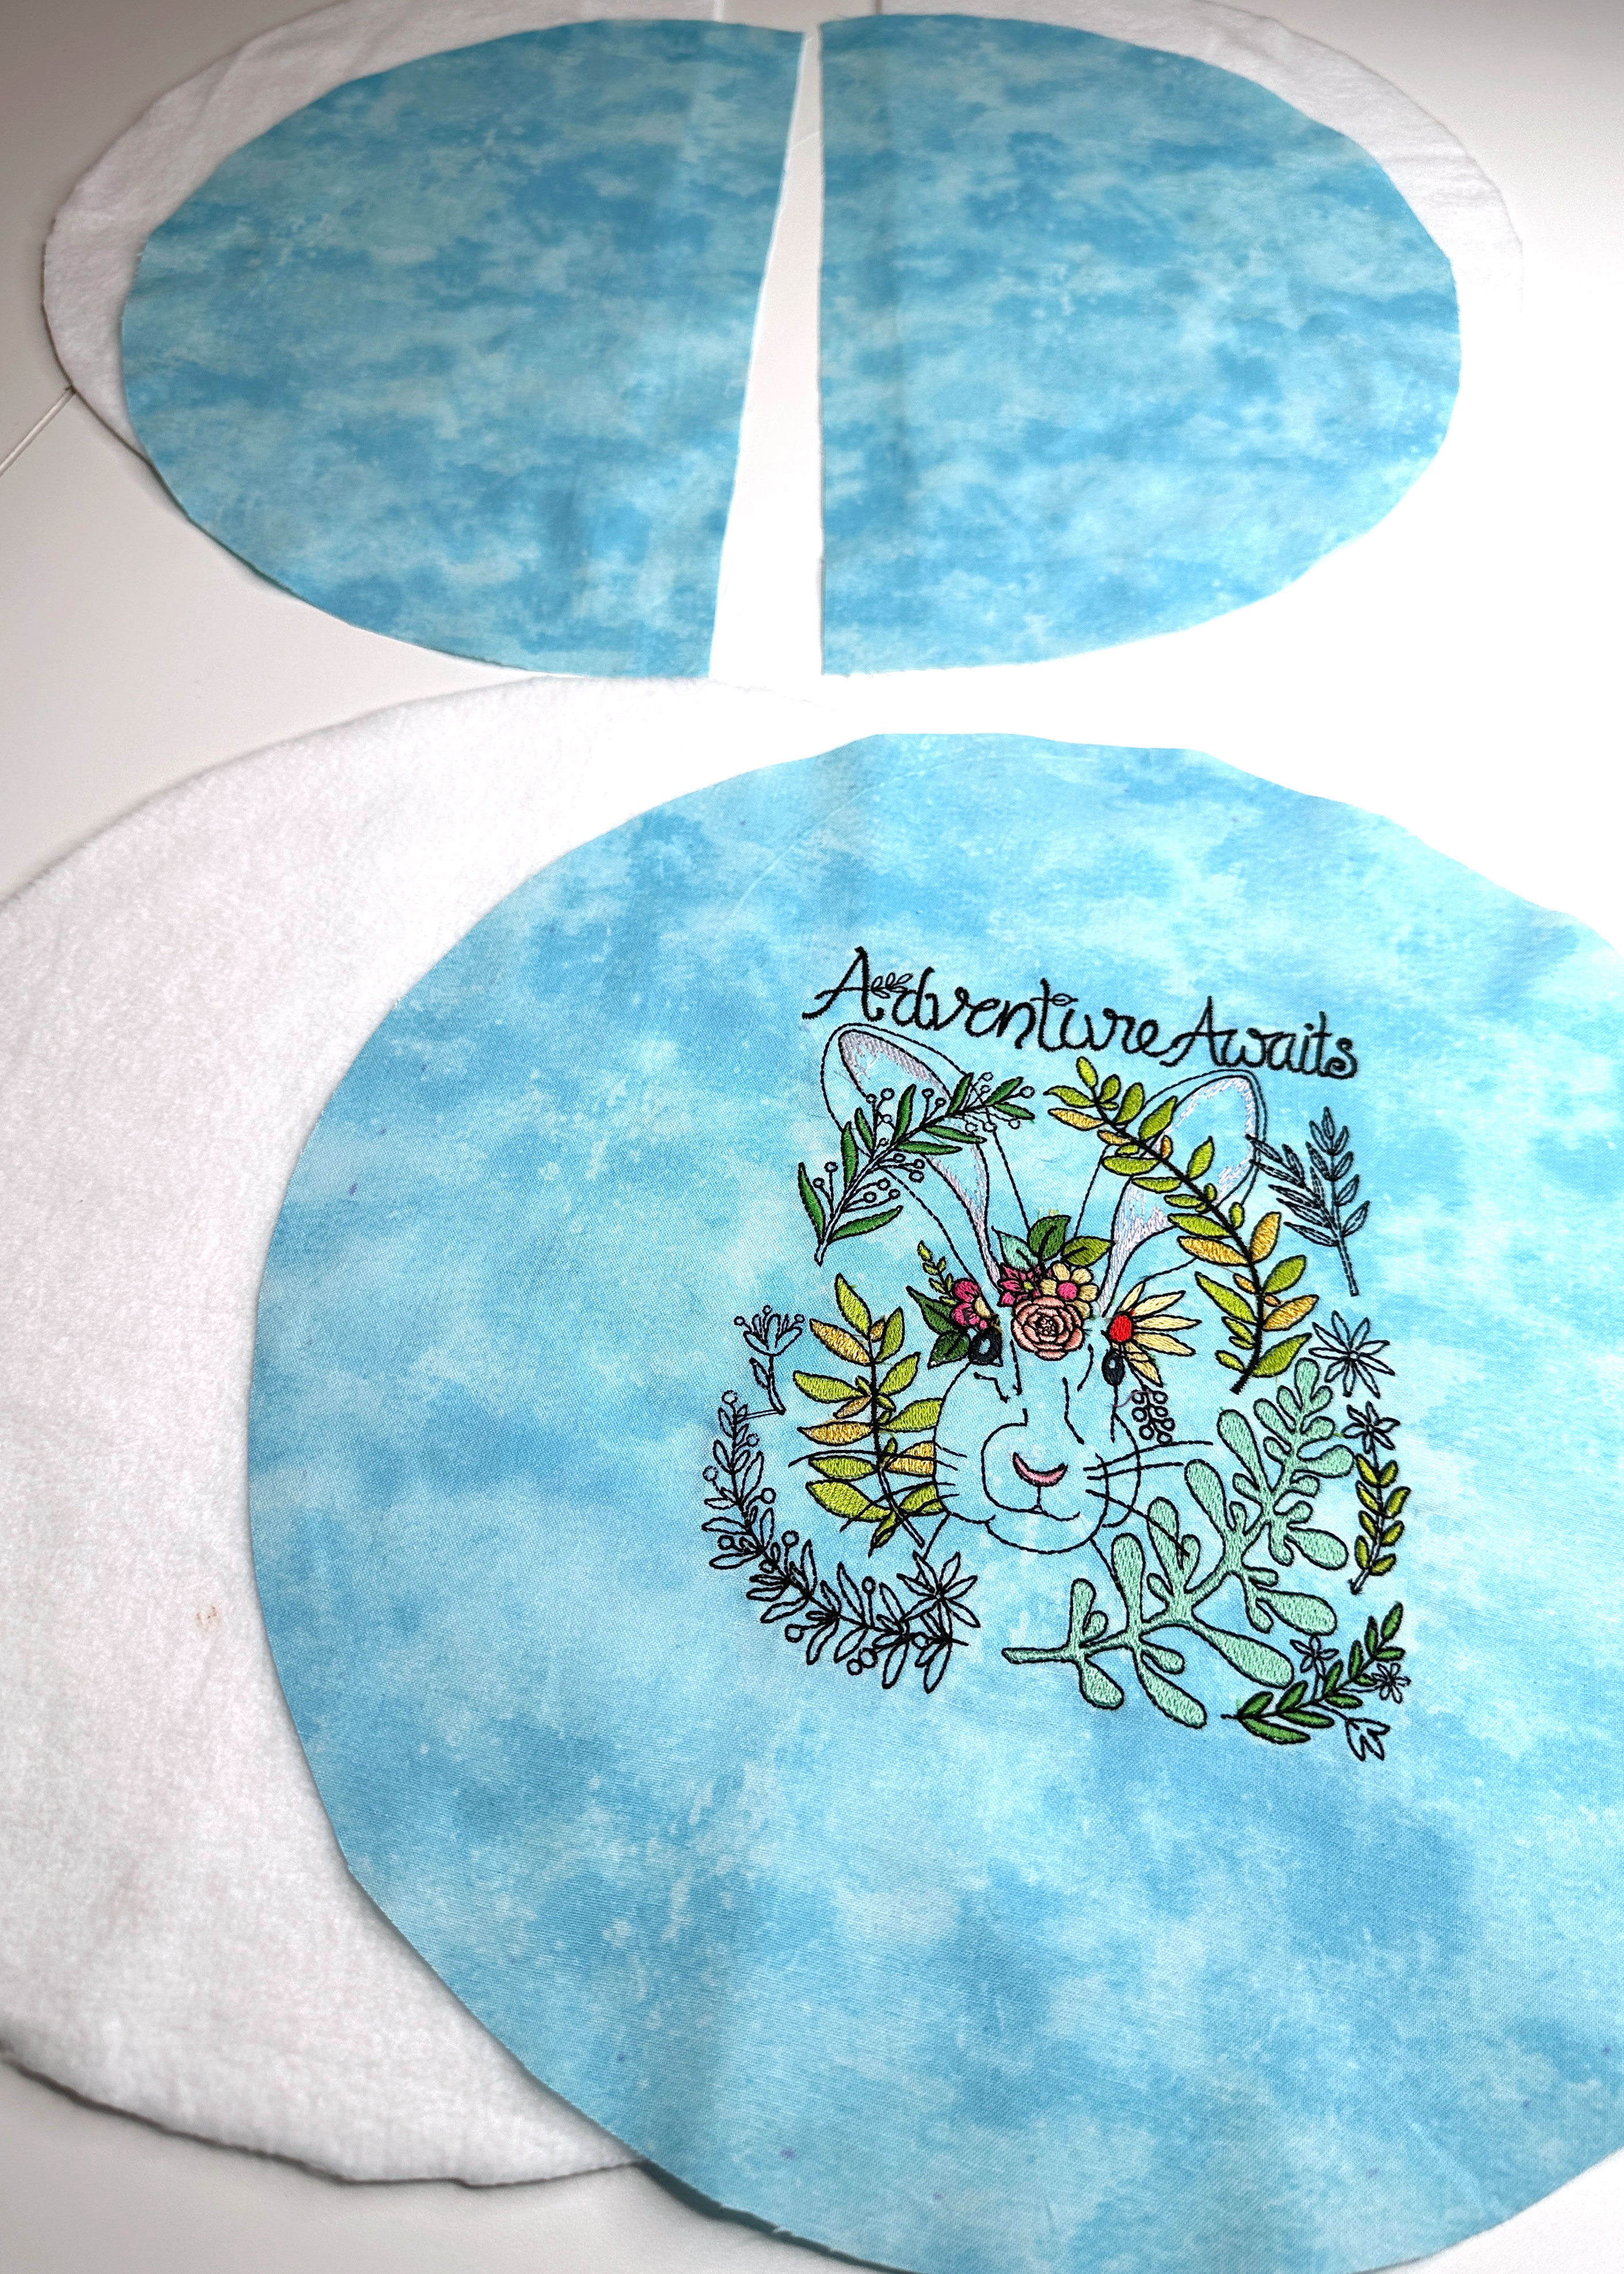
Using the round pattern piece, cut one from the embroidered fabric, making sure the embroidery design is centered. I can easily see through the tracing paper I used to create the paper pattern, making it easy to center the embroidered design. Cut one piece of fleece using the round pattern.
Cut two backs from fabric and two from fleece using the half-circle pattern piece.
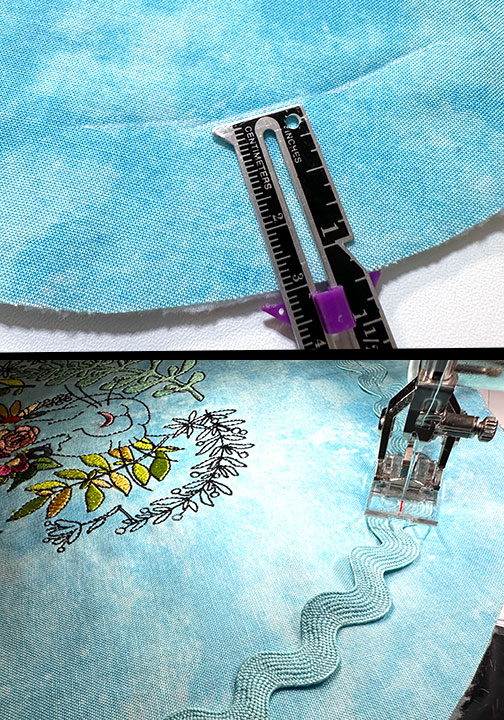
Add Rick Rack Trim to the Pajama Bag Front
Place the round fabric on top of the round fleece with the embroidered design facing up. Measure and mark 1-1/4″ from the edge all around the circle. Place rick rack trim over the marked guideline and stitch in place.
Optional: Use a decorative stitch and sew on the marked guideline instead of rick rack.
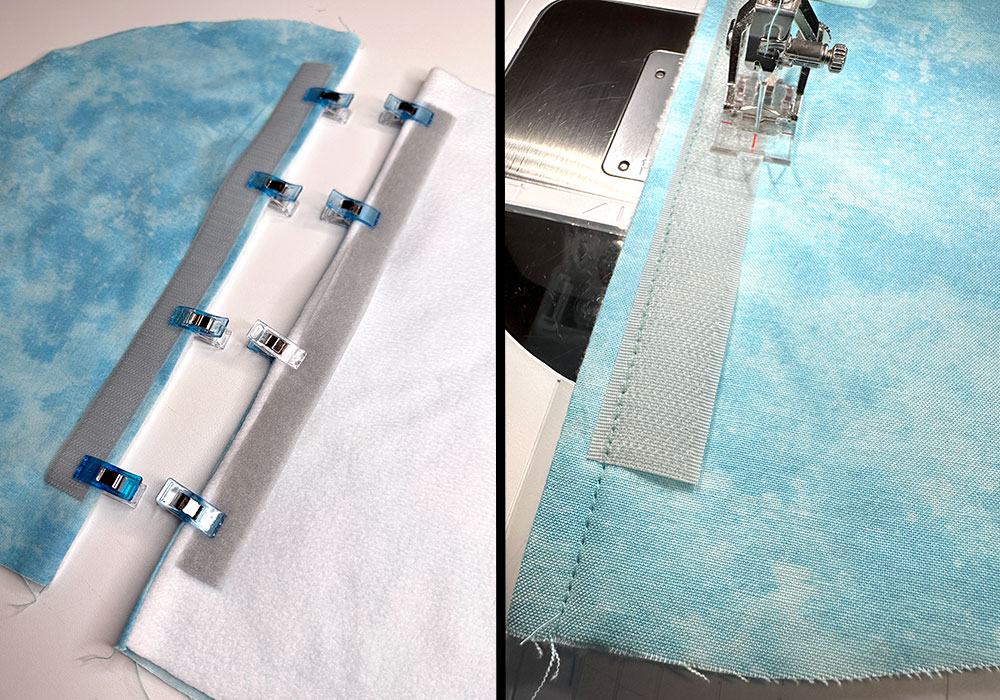
Sew the Pajama Bag Back Pieces and Add Hook and Loop Tape
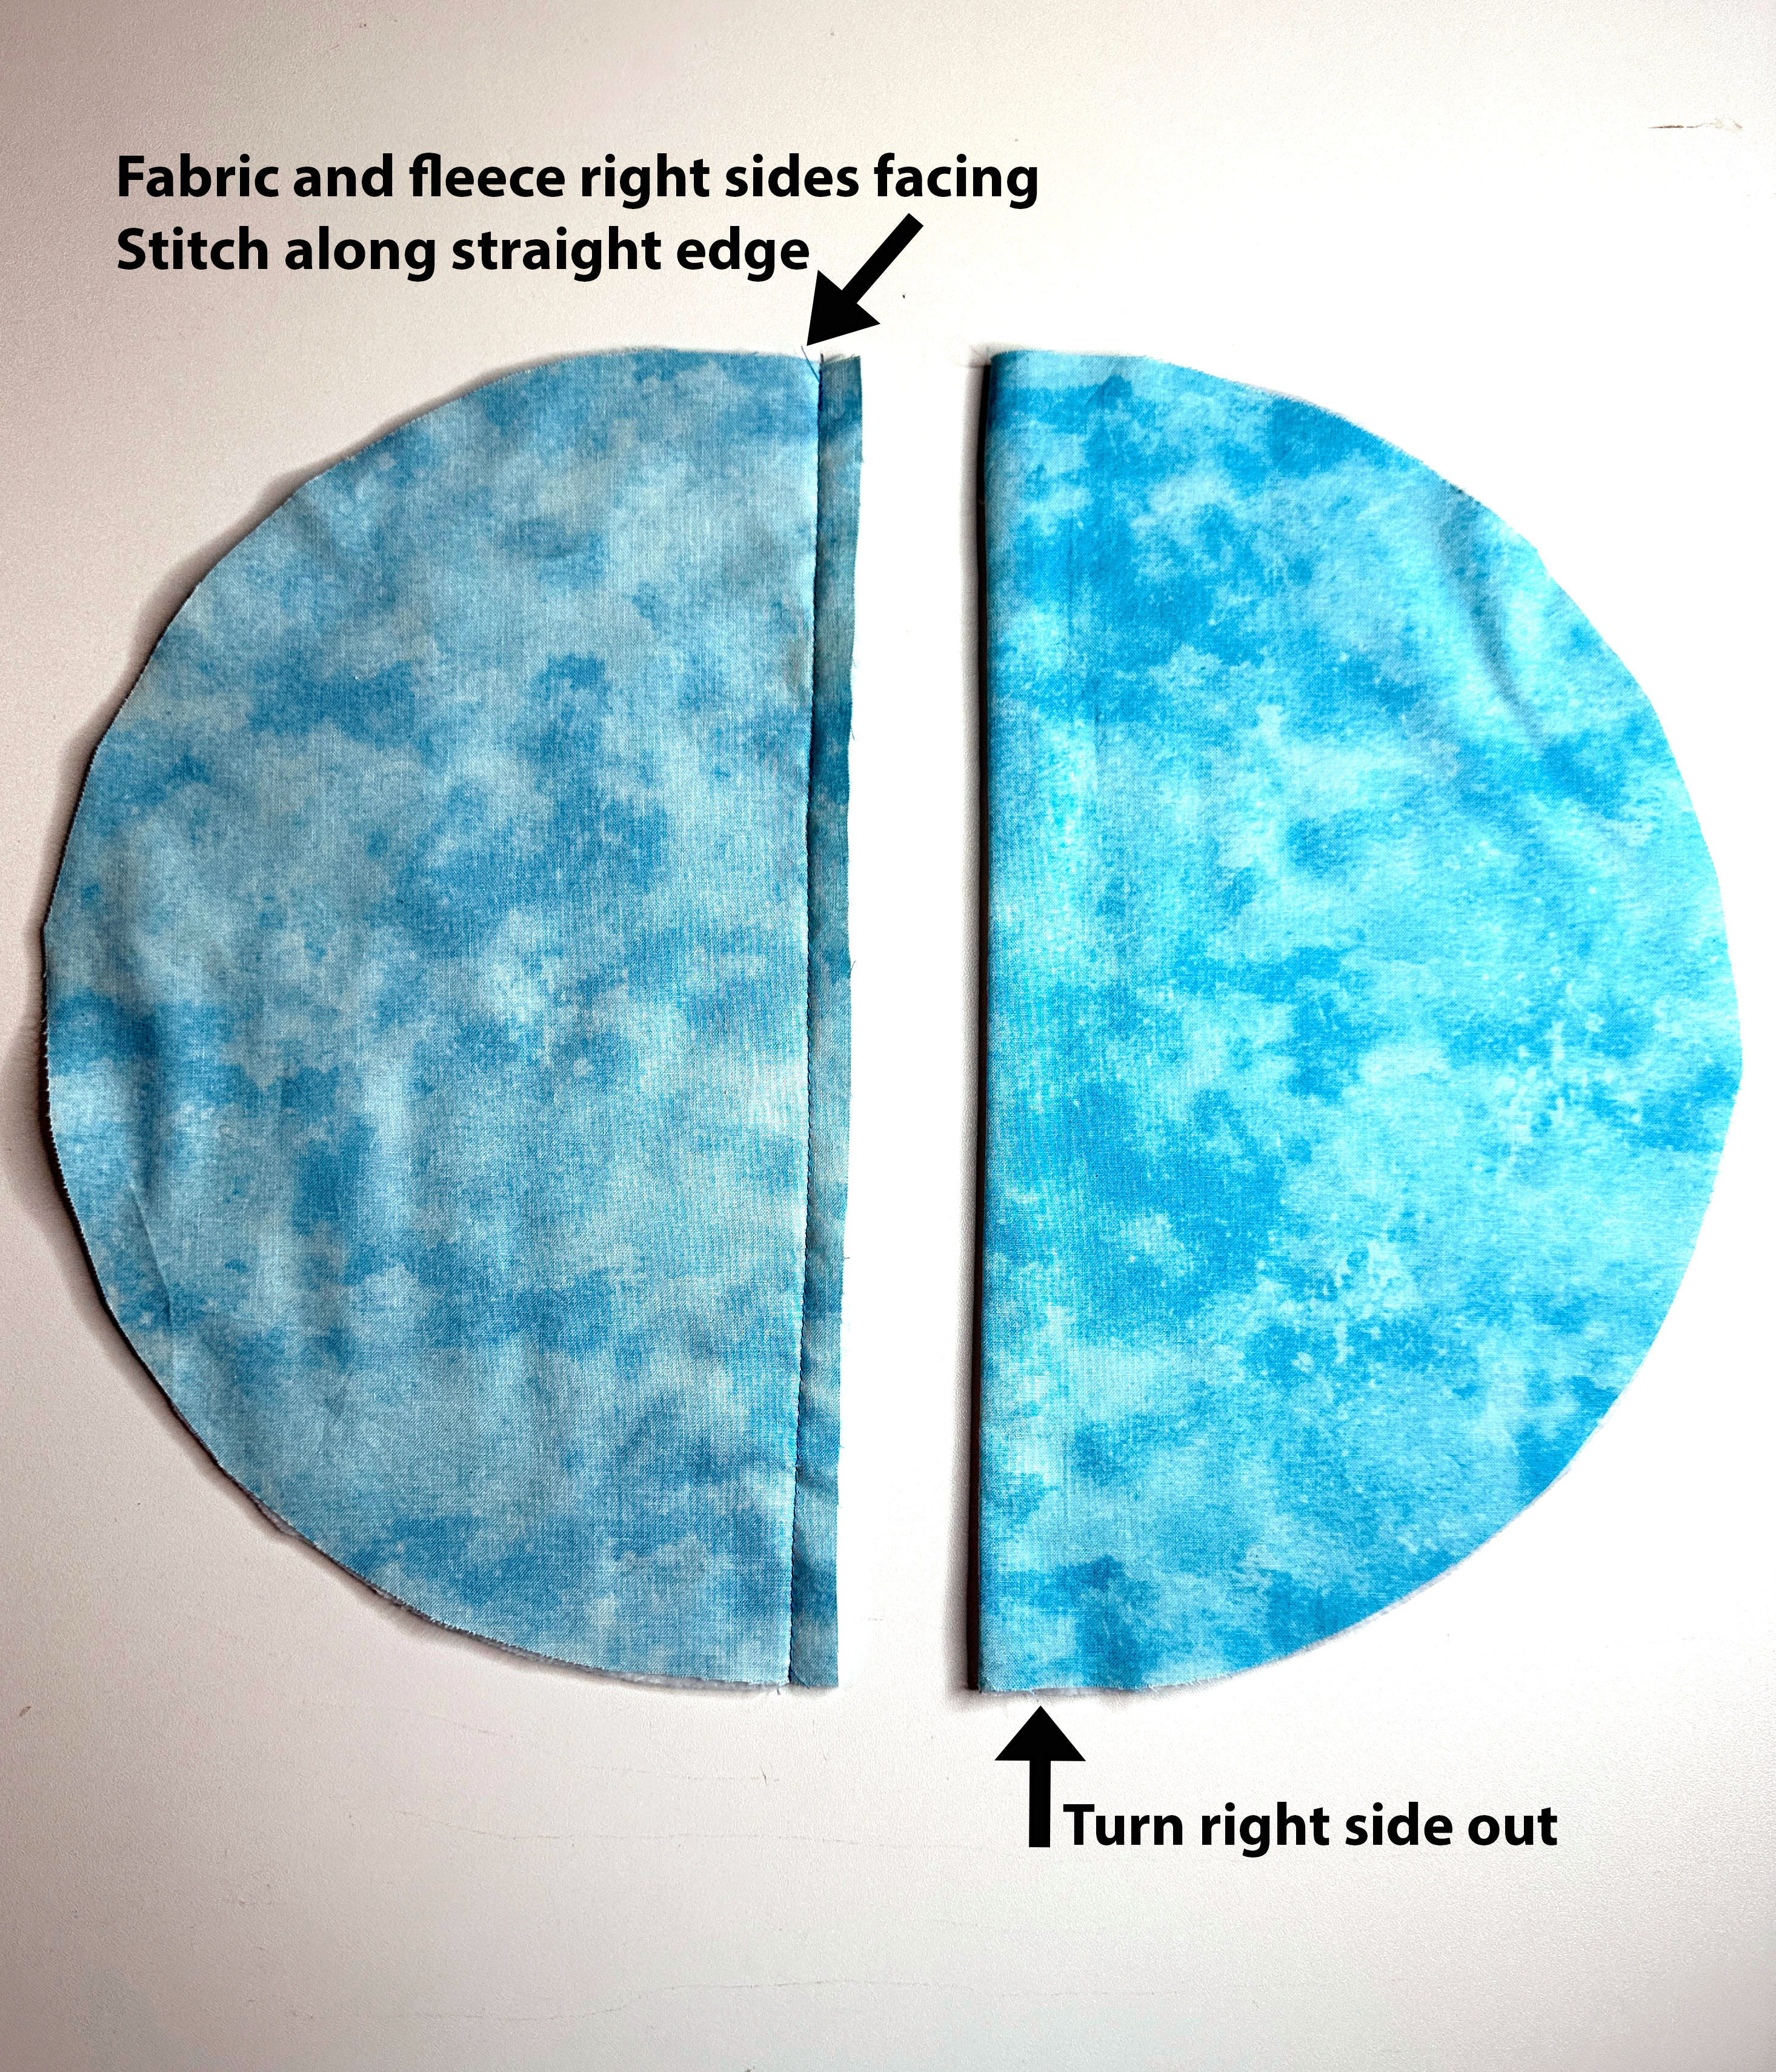
Place one fabric and one fleece half circle together with right sides facing, aligning the straight edge, pin (or clip) together, then stitch using a 1/2″ seam allowance. Repeat for the other half circle. Turn right side out and lightly press.
Measure and mark 1-1/4″ from the top and bottom edge of the right side of one half circle, and on the wrong side of the other half circle.
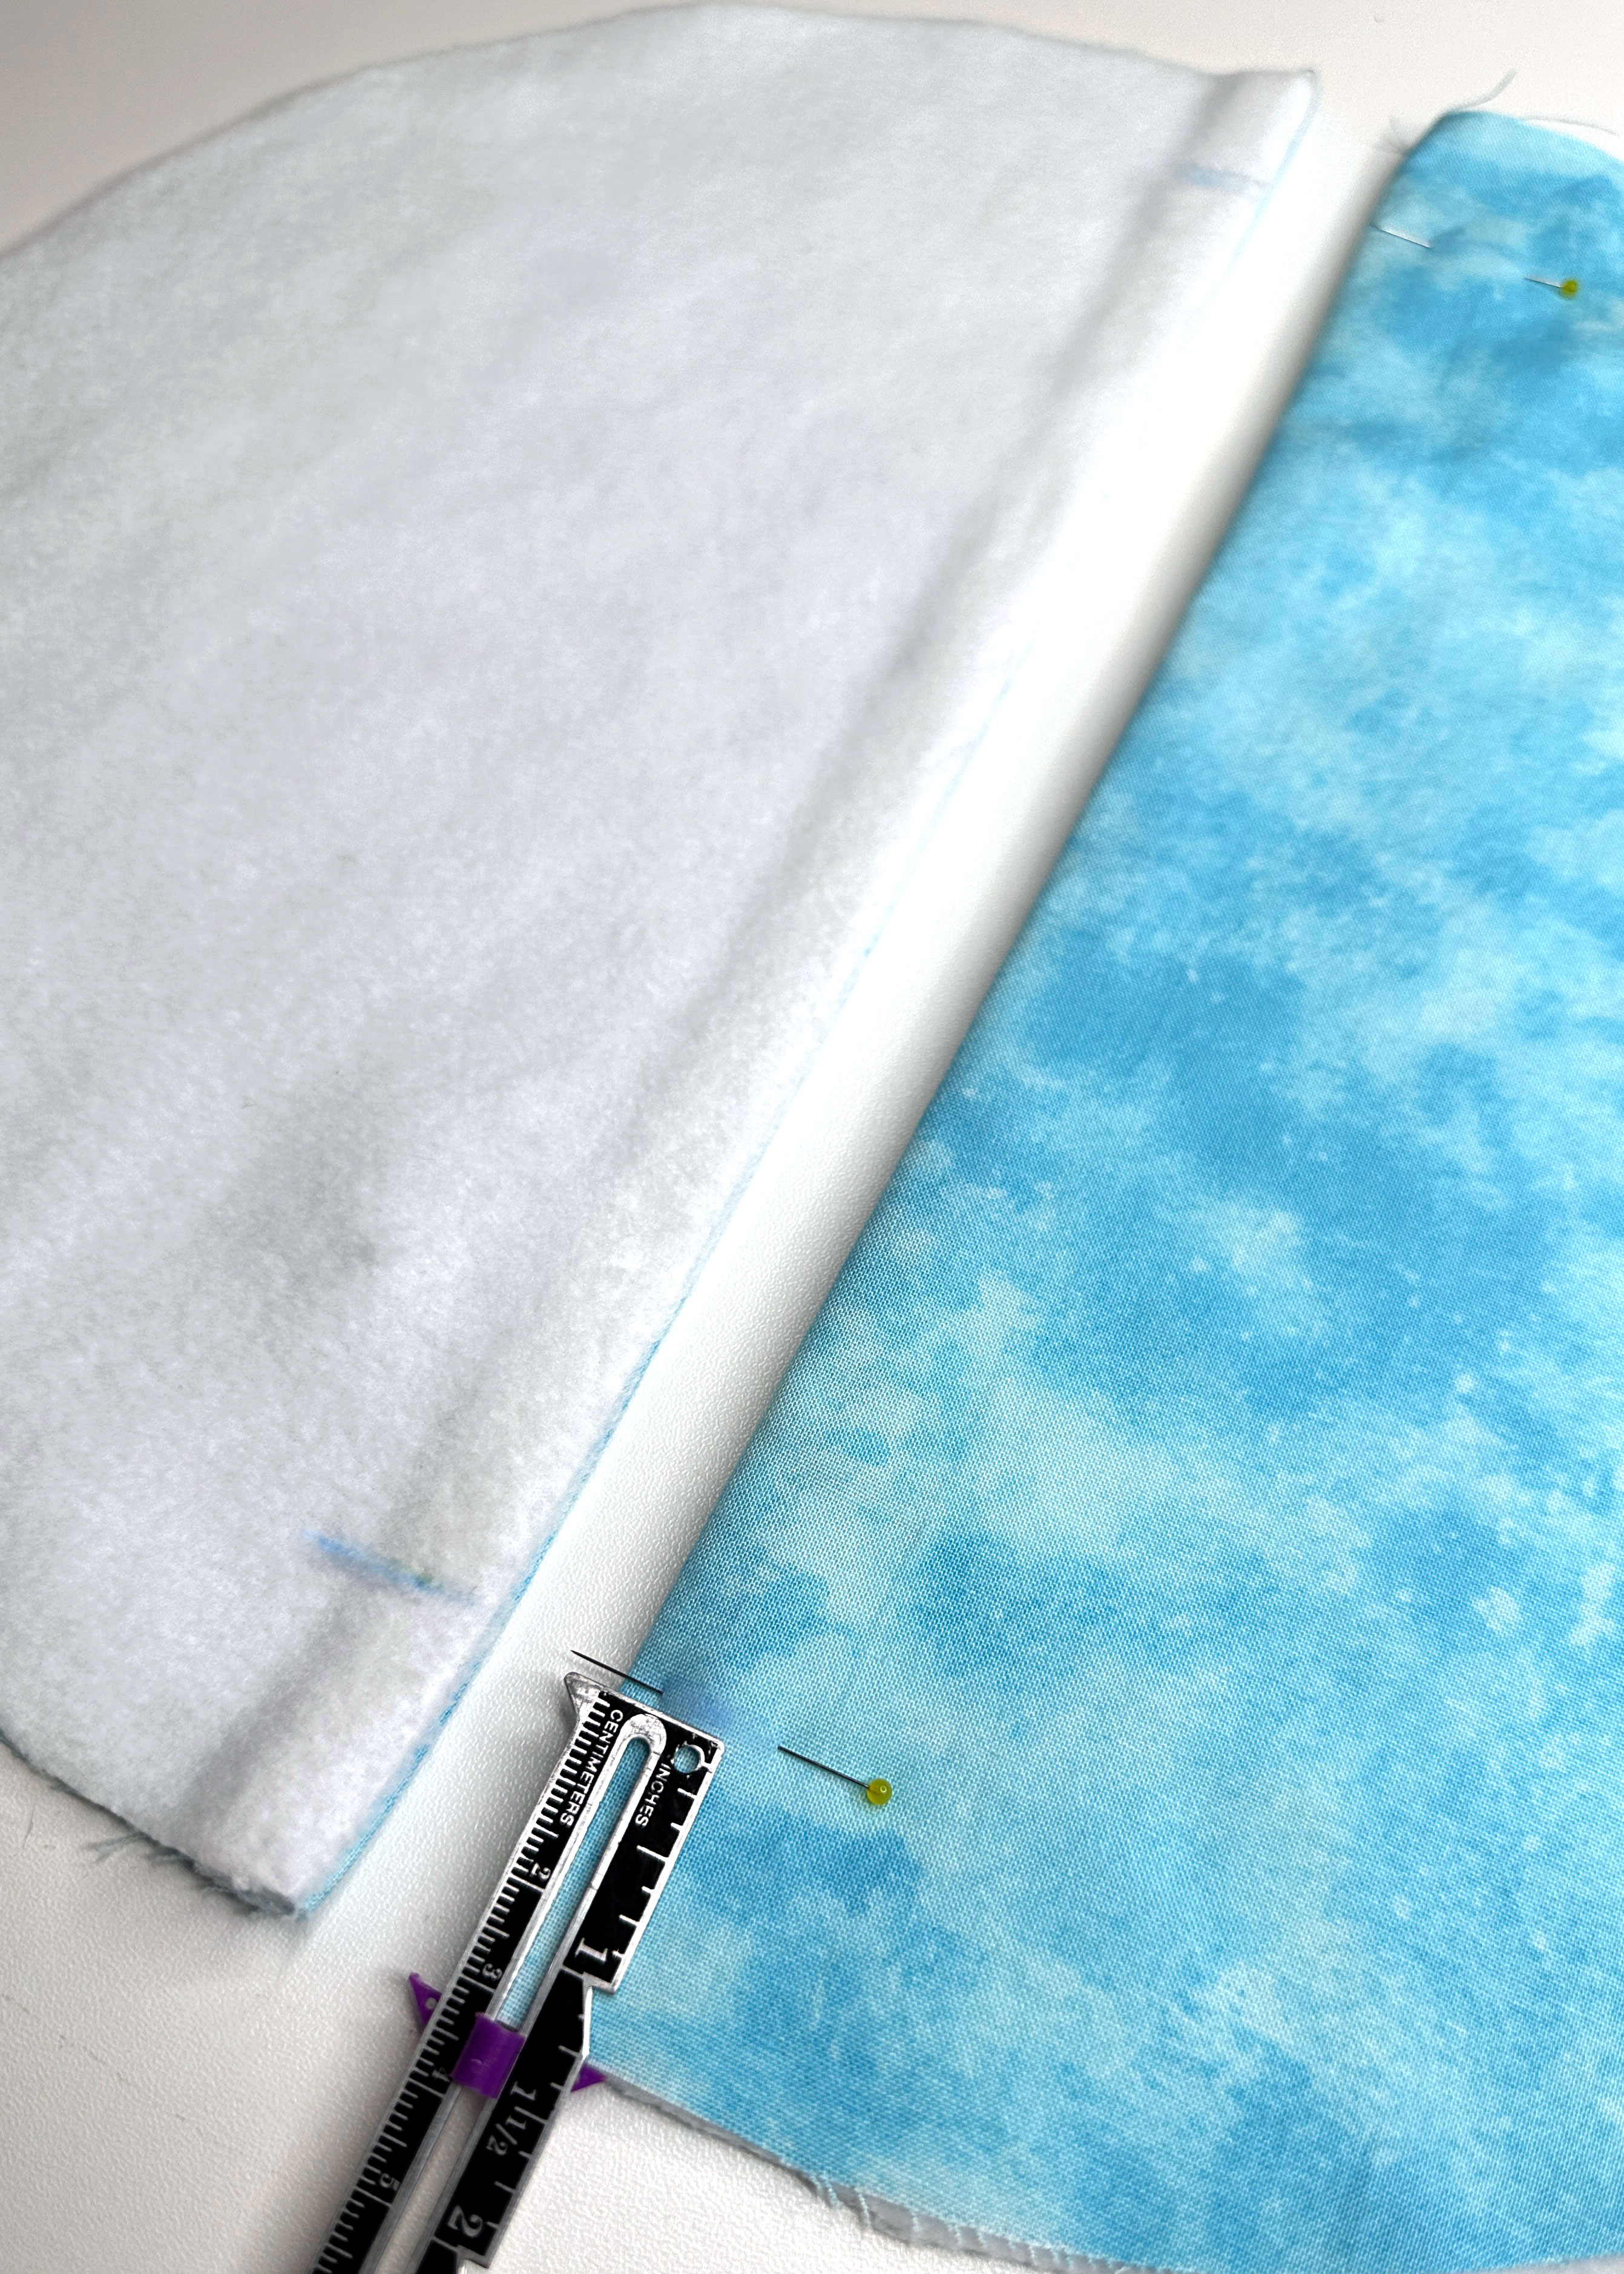
Cut a piece of hook and loop tape 10-1/2″ long. Position the hook and loop tape in between the marks, 1/4″ from the long edge, with the loop side (soft side) on the fleece and the hook side (scratchy side) on the fabric. Clip to hold in place, then stitch along each long edge of the velcro.
Overlap the right side back over the left side by 1-1/4″. It should be overlapped enough to create a circle the same size as the front circle. Baste the two overlapped edges together.
With right sides together, pin (or clip) the front and back circles together. Stitch around the circle using a 1/2″ seam allowance. Finish the seam with a wide zig-zag stitch. Turn the pajama bag right side out through the velcro opening in the back.
Ta-da! Done!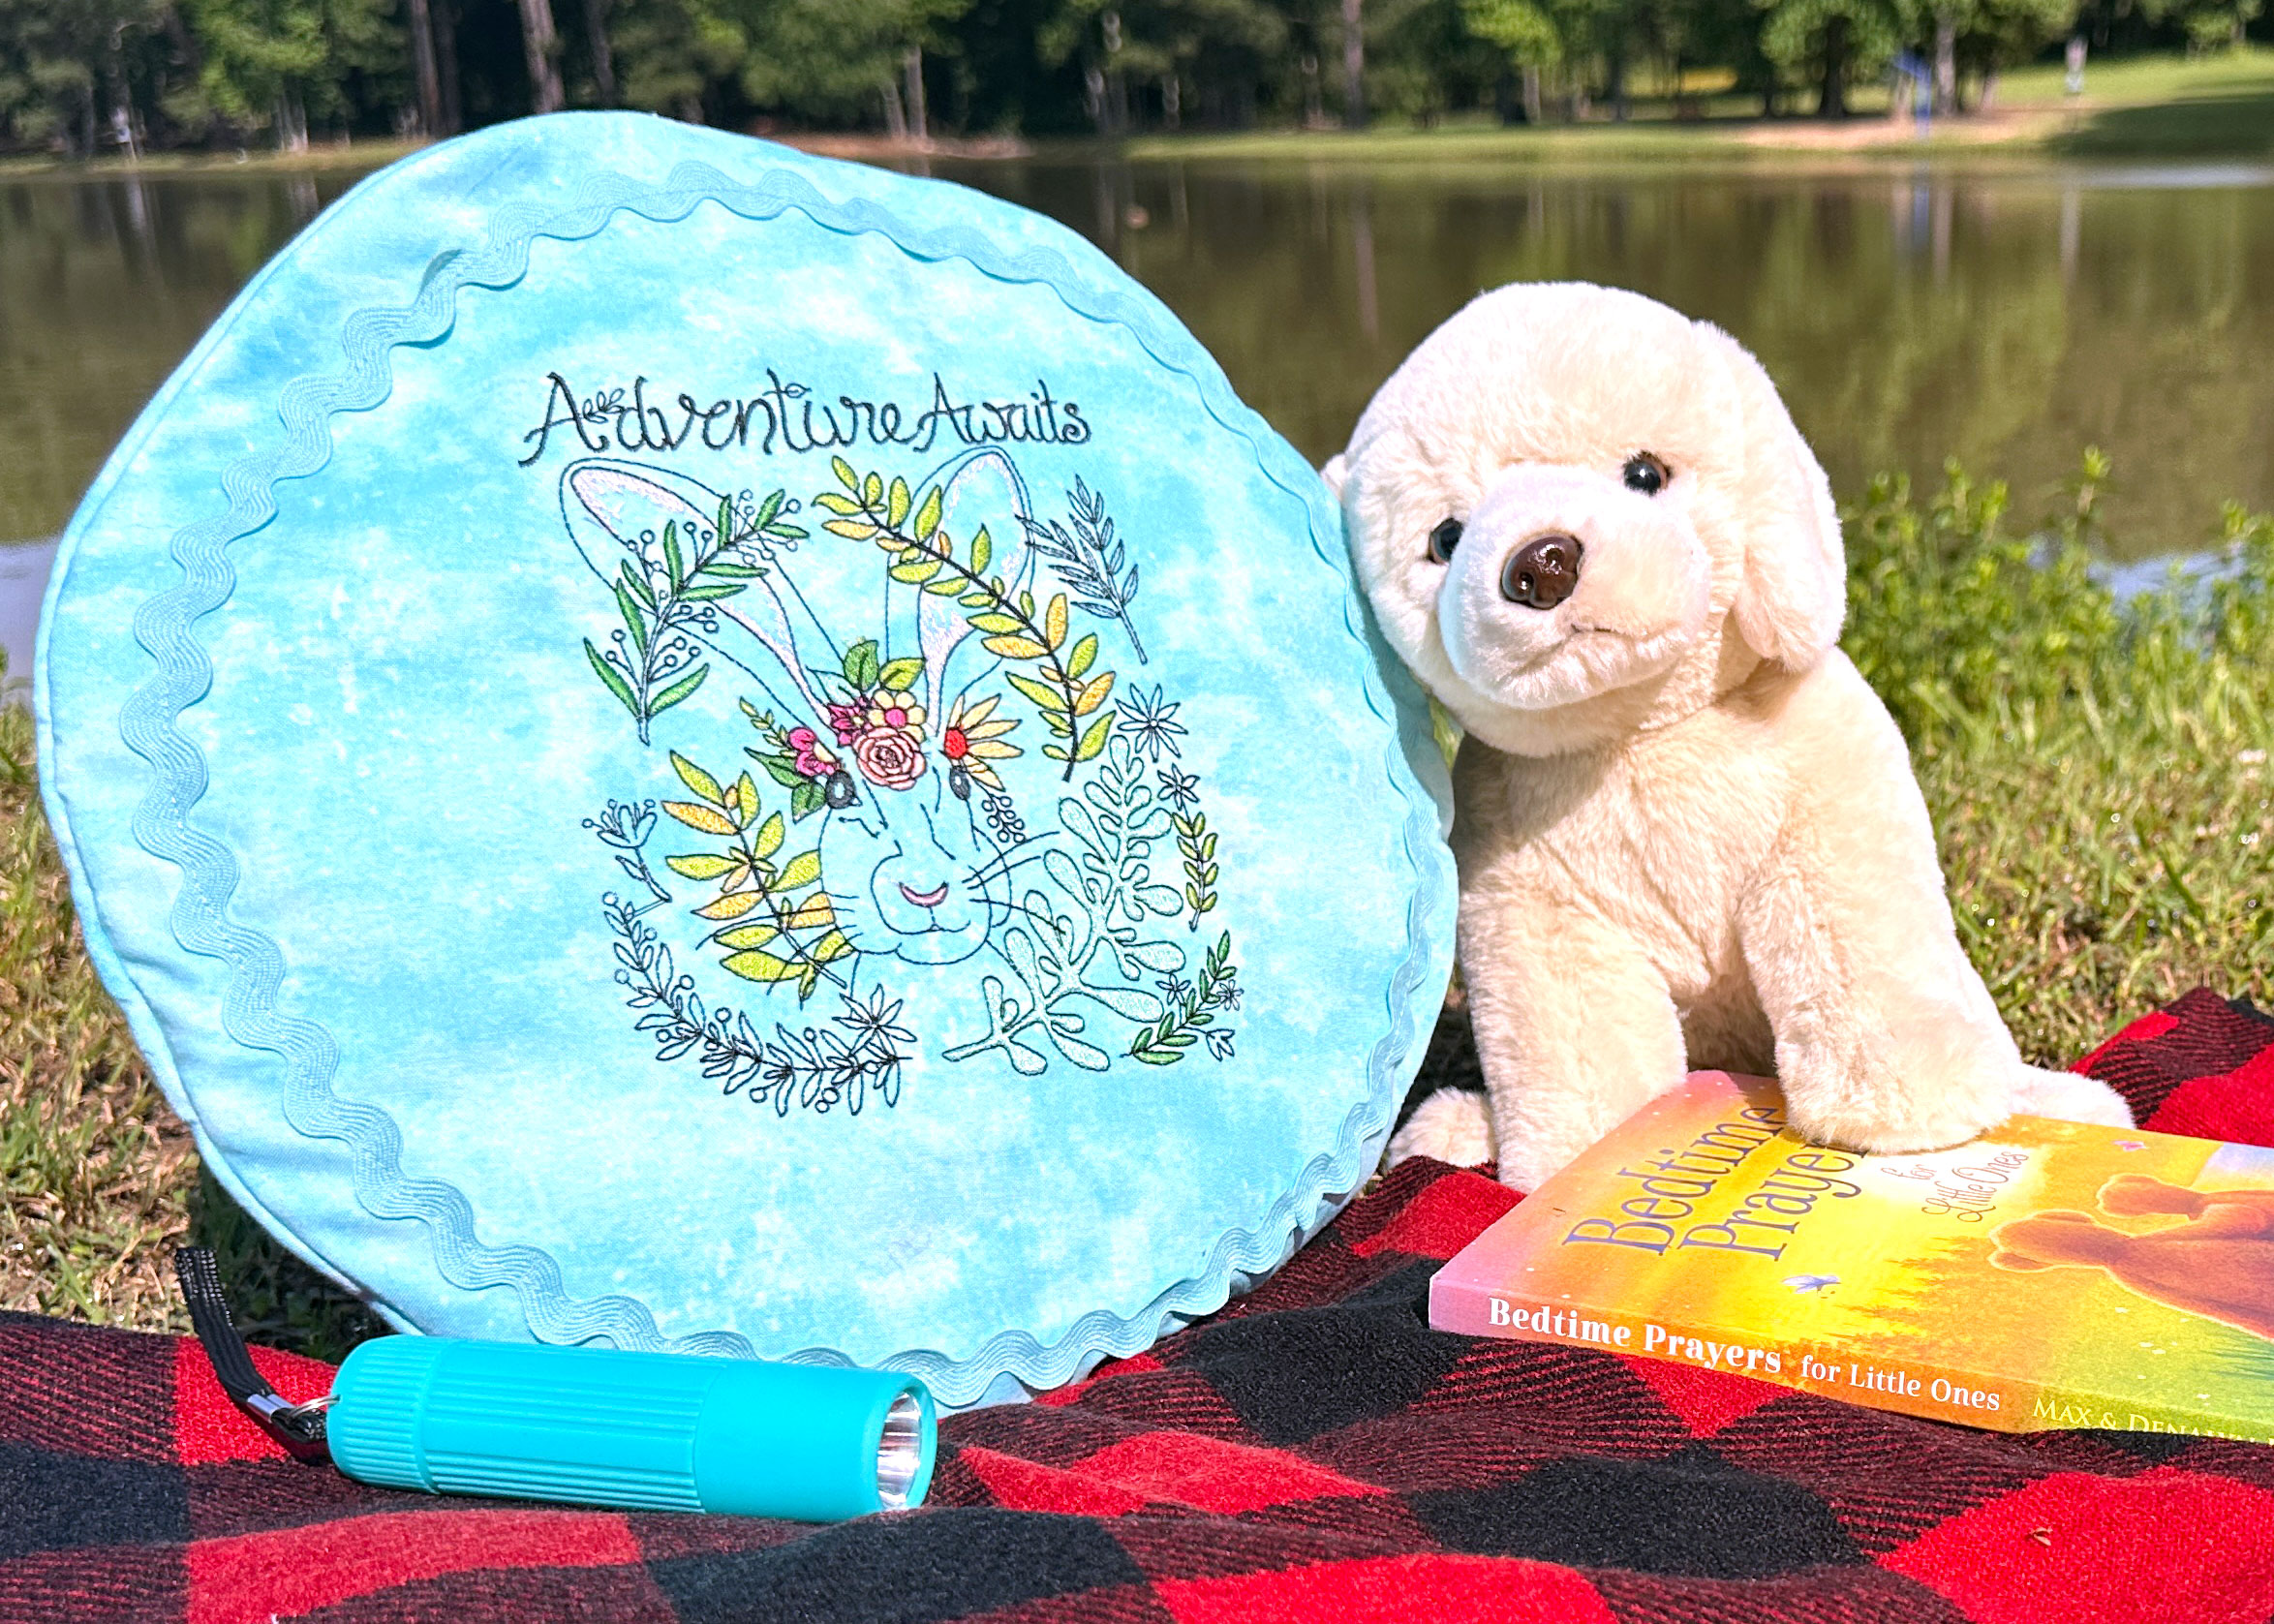
Now that the pajama bag is done, why not sew a personalized embroidered bucket hat to coordinate with the pajama bag?
Whether you’re camping in the great outdoors or under a blanket draped over the kitchen table, this sweet pajama bag will be a great addition for your next adventure!