How to Make a Spirals and Flowers Pillow
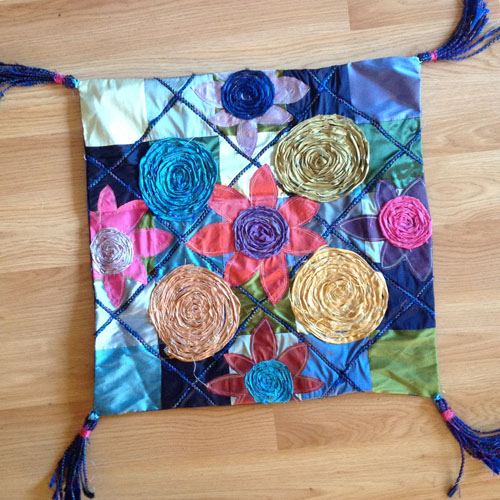
Here’s a pillow made by Linda Teufel (Dragon Threads Publishing) from the book Silk Unraveled by Lorna Moffat/Dragon Threads Ltd. It’s a great project for using up silk scraps or small pieces. A beginner level project, you can’t really make a mistake due to the freeform nature of the embellishments.
Supplies
- Assorted colors of silks. I used 4-1/2″ square pieces in a 5 x 5 format for the base but you can use assorted size pieces and patch them together to get the desired size of your pillow. Intersections don’t need to match and all pieces don’t need to be the same size. Think of it as a color base that will be decorated.
- Silk for backing, as needed for your finished size. Can be two different colors.
- Zipper for back if desired to use instead of overlapping back section.
- Regular sewing thread – cotton or cotton/polyester thread
- Variegated threads – one or two colorations to complement or contrast with your fabrics.
- Chalk marker
- Large couching foot or open toe foot (BERNINA Open Embroidery Foot #20C)
- Quarter-inch foot, optional (BERNINA Patchwork Foot #37)
Step 1) Create the pieced background.
Stitch all the pieces together however you like using 1/4″-wide seam allowances and regular thread. Press flat.
Square the top to your desired size plus seam allowances. (I added 3/8″-wide seam allowances to mine.)
Step 2) Add the embellished grid lines.
Draw some diagonal lines on the top with chalk. I centered the first set of lines from corner to corner and spaced them 6″ apart. Then I drew more lines, also 6″ apart. Turn and do the same for the other direction.
Cut or tear an inch-wide (or narrower) length of silk in color that you want for the grid lines. Hopefully you can tear a piece long enough to cover your chalk line, but if not you can always piece it.
Using the widest open toe foot that you have – I used Open Embroidery Foot #20C – and variegated thread, position the first strip at the end of a line and secure it with few stitches.
Set a wide and long zigzag and use your fingers to twist and roll the silk so it is between the zigzag stitches; stitch, creating the effect of couched cording.
If you need to join a second strip, just twist the end of the first one with the end of the new strip and keep zigzagging.
Repeat for all the lines going in one direction. Then turn and complete the lines in the other direction, just crossing over the intersections.
Step 3) Add the spirals and flowers.
Decide which squares will have spirals and which will have flowers. Or use any other shape you desire – maybe hearts?
Spirals
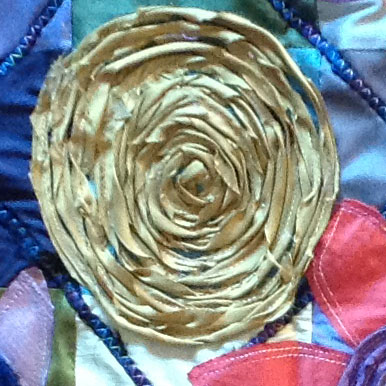
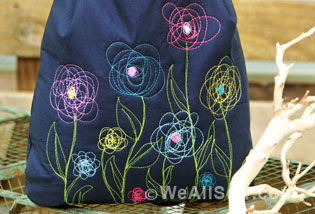
Select your thread color. Tear a narrow strip (1″ wide or less) of silk. Place end in the middle of a square and catch with a few stitches to hold. You can do this with a free-motion foot and feed dogs down or with a quarter-inch foot such as Patchwork Foot #37.
Continue to stitch the strip into a spiral, holding the strip in place as you sew. At the end overlap the end of the strip with the previously stitched round.
Go over the stitching twice if desired. Don’t worry about the raveling; just let it be as part of the handmade feel of the piece.
Flowers
Cut a square slightly bigger than the gridded square on the pillow. Fuse the back of the silk with Steam-A-Seam 2 or a similar adhesive product.
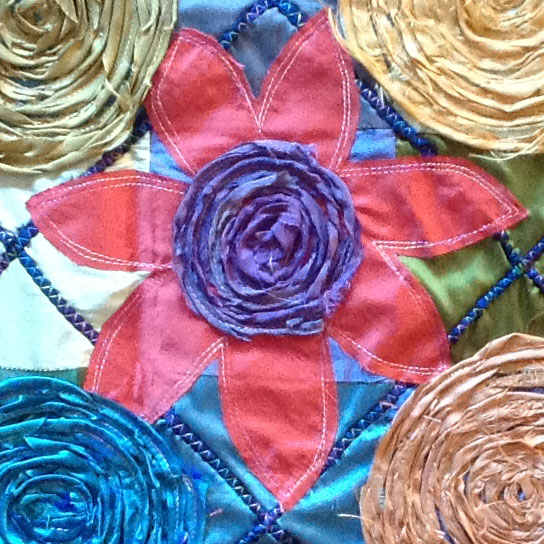
Freehand draw a flower with seven or eight petals and cut it out exactly. Peel off the backing paper.
Place the flower inside the square; it’s okay to overlap the lattice lines. Fuse well.
Stitch around the outside edges of the petals with variegated thread. Then stitch a second row close to first; it’s okay to overlap in areas.
To make the rosette in the center of each flower, cut short narrow strips of silk and stitch small spirals. You can use two colors of silk here, twisting them together and treating them as one “strand.”
Step 4) Make the tassels.
The tassels can be many colors and not just a single one as on my sample. Use up all your scraps!
Tear 1/2″-wide strips of silk. Put on the wide open toe foot and set up your machine with variegated thread. Set the zigzag stitch to its widest width and a length of 3 mm.
Roll and twist the strip between your fingers and lay it under the center of the foot, letting the zigzag stitches fall on either side of the strip without stitching into it; you want the stitches to wrap around the strip to form a “cord.” Repeat to make enough strips for four tassels.
Cut the strips twice the desired length of your tassel. I cut my “cords” 11″ long and used seven (7) strips in a bunch for each tassel.
Fold the cords in half and use a scrap of silk or ribbon to tie tightly in the middle.
Fold the bundle over and, with regular thread in a hand sewing needle, stitch through one cord and then wrap the thread around the bunch a few times, go through a cord, then pull tight and let the needle hang.
Cut a small piece of silk and wrap it around the thread. Take the needle and stitch the silk edges together and sew a bit through one cord to hold everything in place.
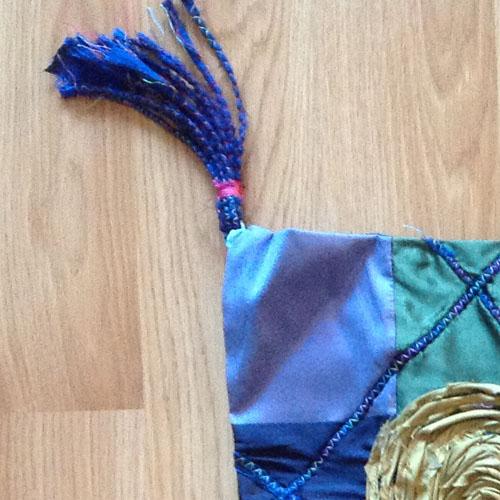
Attach tassels to the corners of the pillow, with the tassel on the body of the pillow and the ribbon diagonally at corner. Baste in place.
Step 5) Construct the pillow.
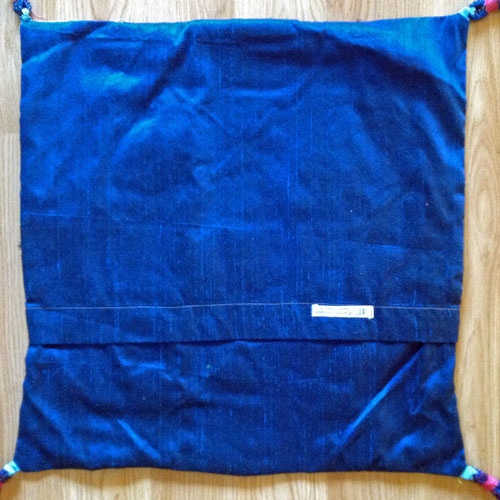
Prepare the back of the pillow by inserting a zipper between two pieces of silk, or by hemming the overlapping edges of two larger pieces of silk. Cut the pillow back to the same size as the pillow front.
Place the backing right sides together over the pillow top; stitch around all edges, making a short diagonal over the tassel ribbons at the corners.
Turn right side out and press.
Washing instructions: Soak the pillow in the sink with Woolite, rinse well, and hang to dry. Press.
This project is from the book, Silk Unraveled, by Lorna Moffat/Dragon Threads, Ltd.
Visit Lorna at her Facebook page or Etsy shop.




![Is that big, bold scrap of fabric staring at you? This quilt square is designed to let a large print fabric shine. This simple block is quick to make and easily stitched into a pillow. With a bit more fabric you can turn it into a placemat or table runner. The perfect project for turning fabric scraps into something bold and beautiful. Geometric Quilt Block Pillow Supplies Large scraps or fat quarters of 100% cotton quilter's fabrics: One large print One light solid or small print One medium solid or small print One dark solid or small print 1/2 yard of white cotton fabric for the pillow lining 1/2 yard of fabric for the pillow back Coordinating thread 14" square pillow form Universal or Sharp needle, size 75/11 1/4" foot (BERNINA Patchwork Foot with Guide #57) Straight stitch foot (BERNINA Straight Stitch Foot #13) Zigzag foot (BERNINA Reverse Pattern Foot #1) or overlock foot (BERNINA Overlock Foot #2) Rotary cutter and self-healing cutting mat Clear acrylic gridded ruler Download and print the Geometric Quilt Block Pillow Cutting and Piecing Diagrams: [download id="90"] Step 1) Cut the fabric pieces. Accurate cutting helps avoid crooked, puffy, or uneven seams in your quilt block. Use a self-healing mat, a clear acrylic gridded ruler, and a rotary cutter to cut the pieces for your quilt block. Rotary cutters Rotary Cutting Tips Self-healing mats come in different sizes. 24" x 36" is a good size to have, but if you don't have a dedicated sewing space or don't plan to use it often, try an 18" x 24" mat instead. Acrylic rulers also come in many shapes and sizes. A standard 6" x 24" ruler is a good start, and I've also found a 12-1/2" x 12-1/2" square ruler to come in very handy. Rotary cutters are measured by the size of the circular blade in millimeters. A 45 mm rotary cutter is perfect for making the kind of straight cuts needed for this project. Use the grid on your cutting mat to help square up fabric pieces when needed, but when measuring to cut the pieces be sure to use the gridlines on the acrylic ruler. Hold the ruler firmly on top of the fabric, and use a steady, firm, pressing motion when cutting with the rotary cutter. Cut one of each pattern piece from the corresponding fabrics (also see downloaded Cutting Diagram): Piece #1 - Light solid or small print, 4" x 3" Piece #2 - Dark solid or small print, 4" x 5" Piece #3 - Light solid or small print, 4" x 2-1/2" Piece #4 - Large print, 9-1/2" x 9-1/2" Piece #5 - Light solid or small print, 2-1/2" x 9-1/2" Piece #6 - Dark solid or small print, 14-1/2" x 2-1/2" Piece #7 - Medium solid or small print, 14-1/2" x 3-1/2" Step 2) Piece the block. Set your sewing machine for a straight stitch about 2.5 mm long. Attach a quarter-inch foot, such as BERNINA Patchwork Foot with Guide #57, to your sewing machine. The blocks will be sewn together using a 1/4"-wide seam allowance. Stitching an accurate 1/4"-wide seam will help your block come together with nice, straight seams and avoid pieces not fitting together as you sew on. Geometric Quilt Block Pillow Patchwork Piecing Tips Us a quarter-inch foot to help you keep the correct seam allowance width. The BERNINA Patchwork Foot #37 is designed specifically so that following the edge of the foot will create a 1/4"-wide seam allowance. BERNINA Patchwork Foot with Guide #57 is similar to foot #37, but adds a metal guide at the side of the foot to help you like up your fabric piece exactly at the edge of the foot. Attach a seam guide to the bed of your sewing machine along the 1/4" seam allowance mark on your stitch plate, then place the edges of your fabric pieces against the guide as you sew. Alternatively, place a piece of blue low-tack painter's tape along the 1/4" seam allowance mark on your stitch plate as a guide for your fabric. Piecing Diagram Geometric Quilt Block Pillow Start by stitching Piece #1 to Piece #2 along one 4" edge. Press the seam allowances to one side. Next, sew Piece #3 to Piece #2 along one 4" edge as shown in the diagram; press after stitching. Geometric Quilt Block Pillow Continue adding pieces to the block as shown in the diagram, pressing each seam as you go. Tip: When pressing seams, be sure to press DOWN with the iron as opposed to "ironing," or pushing the iron back and forth over the seam. Ironing (back and forth motion) can cause straight seams to go crooked. Pressing straight up and down with the iron will help your seams stay nice and straight. Press all seams again from the back of the block when finished. Geometric Quilt Block Pillow The finished block should measure 14-1/2" x 14-1/2". Geometric Quilt Block Pillow Step 3) Construct the pillow cover. Cut one 14-1/2" x 14-1/2" square of fabric for the pillow lining. Cut two 11" x 14-1/2" rectangles of fabric for the pillow back. Create a 2" hem along one edge of each 11" x 14-1/2" pillow pocket piece: Turn under 1" along one long edge; press. Turn under an additional 1"; press. Geometric Quilt Block Pillow Topstitch close to the inner edge of the folded hem with a straight stitch, using either a multi-purpose foot or a straight stitch foot. Geometric Quilt Block Pillow Layer and pin the pieces of the pillow together: Begin with the 14-1/2" square of white cotton for the lining. Add the finished patchwork block, right side up, matching all edges. Add one pocket pillow back, right side down, matching the raw edges. The finished hem will be about 5" from the other end of the pillow. Add the other pocket pillow back, right side down, on the opposite edge. The hemmed edges will overlap. Geometric Quilt Block Pillow Pin around all four edges of the pillow. Set your sewing machine for a straight stitch of 2.5 mm long. Stitch around all four sides of the pillow using a 1/2"-wide seam allowance. Trim all seam allowances to 1/4". Attach an overlock or zigzag stitch foot to your sewing machine. Set your machine for a zigzag or overlock stitch and sew over the raw edges to keep them from unraveling. Geometric Quilt Block Pillow Turn the pillow cover right side out, gently pushing each corner from the inside to turn it. Insert the 14"-square pillow form through the opening in the back of the pillow cover. If needed, use a little fiberfill to help fill out the pillow corners. Geometric Quilt Block Pillow Geometric Quilt Block Pillow](https://weallsew.com/wp-content/uploads/sites/4/2014/01/Geometric-Quilt-Block-Pillow-WeAllSew.jpg)
