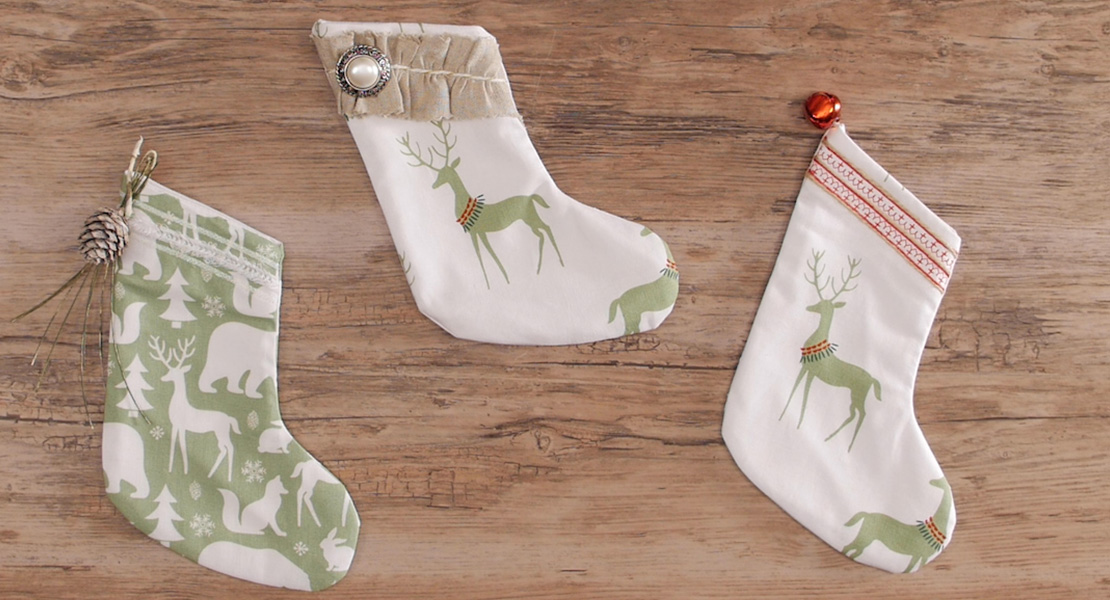
How to Make “Jingle All the Way” Stockings
Our family was in dire need of new holiday stockings, so I set out to make some super-fast but cute stockings. This is what I came up with.

I used my Color Me Happy ombre stripe. This fabric was awesome to use but won’t be available till Spring 2014. But no worries–I’ll give you a few guidelines on how to make your own ombre stripe at the end of the instructions.

Supplies
- Outer fabric: One 12½” x WOF (width of fabric) strip
- Lining fabric: One 12½” x WOF strip
- Fusible batting: Enough to fit the outer fabric piece
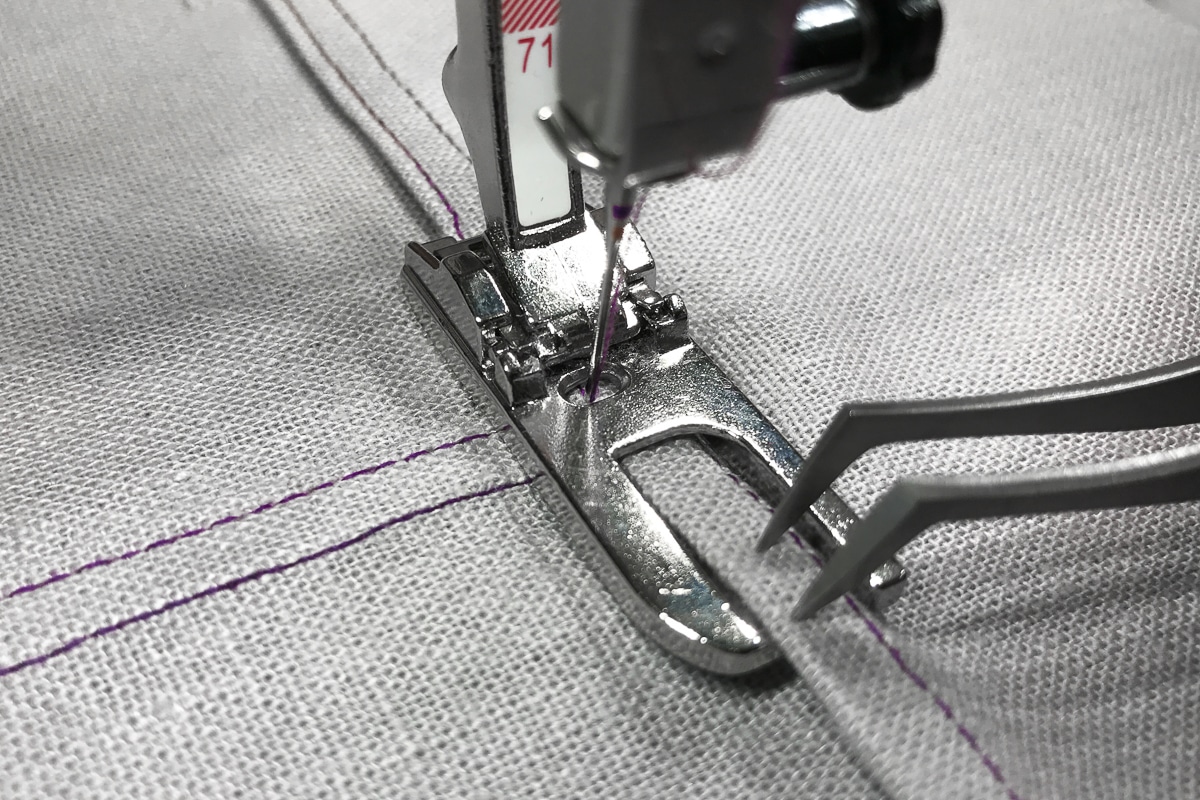
- Walking foot (BERNINA Walking Foot #50)
- ¼” foot (BERNINA Patchwork Foot #37 or Patchwork Foot with Guide #57)
Step 1) Assemble the stocking template.
Download and print the stocking template: Jingle_All_the_Way_Stocking_pattern_-_121814.pdf
Tape the pieces together as indicated to make one large stocking pattern piece.
Use paper scissors to cut the pattern from the paper.
Step 2) Cut the fabric pieces.
Cut away the lightest shade from your ombre fabric; this will leave you with two panels of the remaining three shades of color. The lightest shade will be used to make the hanging tag, so don’t discard those pieces.
Cut one 3″ x 6″ rectangle from the lightest shade of ombre fabric (the one you just cut off the ombre panel).
Cut two panels just slightly bigger than the stocking template from the lining fabric (about 15½” to 16″ by 12½”).
Step 3) Assemble the stocking.
Adhere fusible batting to the wrong side of the ombre fabric panels following the manufacturer’s instructions.

Using a walking foot, quilt parallel straight lines horizontally across the fabric. I used the outer edge of my walking foot as my guide for stitching evenly-spaced lines. Quilt both ombre panels.

Trace the stocking template onto the wrong side of one of the outer panels.

Flip the template over and trace it onto the wrong side of the second outer panel.
Cut out stocking shapea leaving at least ¼” seam allowance outside your drawn linea.
Note: The drawn lines are the stitching lines, not the cutting lines.

Repeat these step to trace the stocking pattern onto the inside lining pieces.
Cut out the stocking shapes leaving at least ¼” seam allowance from your drawn line.

Lay out your outer and lining stocking shapes right side up with the bottoms of the stockings facing each other.

Place the stocking pieces right sides together – the quilted outer lining to the other quilted outer lining, and the inside lining to the other inside lining – and pin the bottoms of the stockings in place.
Note: Before you pin, make sure the ombre lines line at the edges of the outer stocking pieces. If they don’t, move them slightly so they do match, and then pin the edges in place.
Using a ¼” foot, sew ONLY the bottom part of your stocking on the drawn line from the heel to the toe.

Repeat for the inside lining.
Open and lay flat when done.
Place your stocking lining and your stocking outer panel right sides together. Sew the two stockings together along the top edge. (This is just like what we just did with the bottom part of the stocking.)
Position the two linings pieces to the right side and the two outer panels to the left side as shown in the photo:

Make sure the ombre lines match up, as well as the seam at the top of the stocking.
Pin down the open edges on both sides of the stocking, leaving a 5″ gap along the back straight edge of the stocking lining.

Starting at the front toe of the lining, stitch along the drawn line all the way to the toe of the quilted side ending at the beginning of the previously stitched seam.

Repeat for the other side, this time starting on the quilted heel of the stocking. Don’t forget to leave a 5″ opening in the lining for turning; backstitch each end of the opening.

Clip along the curved part of the stocking by the toe. Make sure you don’t clip your sewn line!

Gently pull your stocking right side out through the opening in the lining.


Sew the opening in the lining closed.
Stuff the lining into the quilted outer body of the stocking; press.
Step 4) Make the hanging tab.
Fold the 6” x 3” rectangle in half lengthwise, wrong sides together ; press with an iron to create a crease down the middle.
Unfold the strip and fold two short edges under ¼”; press.

Fold the raw edges in to meet the creased center line.

Refold the strip, encasing the raw edges.

Topstitch all four edges of your tab, sewing about 1/8″ from the edge.

Fold the tab in half and place it inside the middle back side of the stocking.
Place the lower edge of the tab about ½” from the top of the stocking; pin in place. Secure it by sewing a square at the end of the tab. Add a stitched “X” to make it even more secure.


BONUS: How to Create Your Own Ombre Stripe Fabric
Supplies
¼ yard each of 3 different shades of the same color fabric
Instructions
Cut two 5½” x 12½” rectangles from each fabric piece.
Sew one light, one medium, and one dark strip together, arranging them from light to dark. Repeat for the remaining three strips.
Press the seam allowances open.
You now have two ombre stripe fabric pieces! Each one should measure approximately 12½” x 15½”.
Note: When constructing your stocking, cut the tab from the lining fabric.


One comment on “How to Make “Jingle All the Way” Stockings”