How to Sew a Kids Busy Book, Part 1: Rainbow Page
Welcome to Month One of the BERNINA Busy Book series. We are going to have so much fun learning about popular BERNINA feet, useful sewing techniques, and how to make the engaging Busy Book pages. By the end of this 10 month series, you will be on your way to making your own pages with your own ideas. In month 10, I will show you how to put your Busy Book together in a way that you can add, remove, and rearrange pages.
Let’s get started with the first month. Each page will be 10” x 10’” finished. For the background fabric, you can select fabric each month or all at once. If you want to coordinate your background fabric, pre-cut 10” squares (sometimes called 10×10’s or Layer Cake) are nice options. These fabric sets have 42 pieces of 10” x 10” fabric from the same fabric collection. You’ll have lots of fabric leftover to make pages in the future. Or you can buy 2 yards of the same fabric to create the same background for every page.
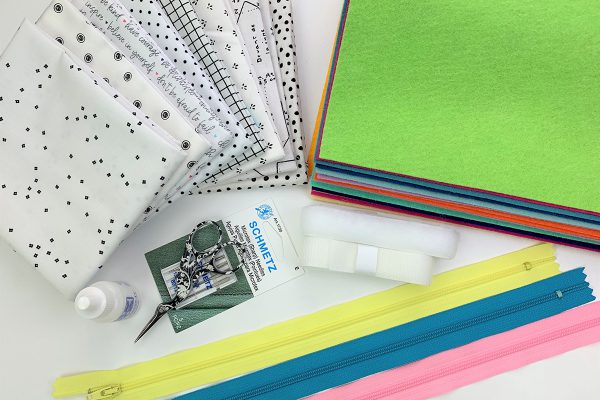
Materials to Create a Busy Book Page
- 10” x 10” background fabric (purchase 3 yards if making all page backgrounds the same)
- 10” x 10” OESD Ultra Clean and Tear Fusible Stabilizer
- 50 weight thread
- Rotary cutter & ruler
- Rotary cutting mat
- Scissors
- Iron and pressing mat
- Roxanne Glue-Baste-It or similar glue stick/pen
- Temporary fabric marker
- Pins
Additional Materials for Rainbow Page
- 7 colors of felt (rainbow colors)
- White felt
- 50 weight thread in matching colors
- Microtex Needle 80
- ¾” Velcro roll (hook and loop tape)
- Heat N Bond Lite
- Rotary ruler 10” square or larger
BERNINA Machine and Feet
- BERNINA 590 E
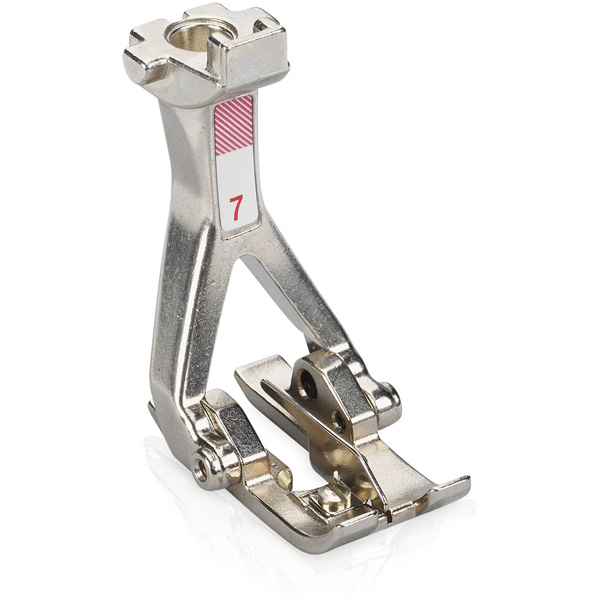
- Tailor Tack Foot #7
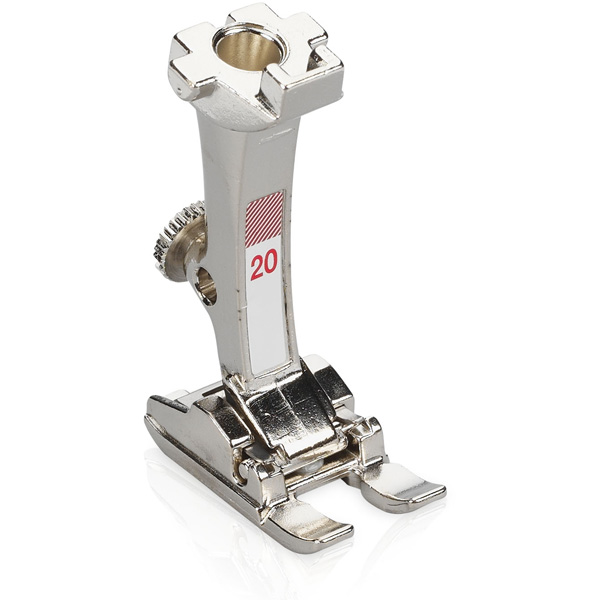
- Open Embroidery Foot #20/20C/20D
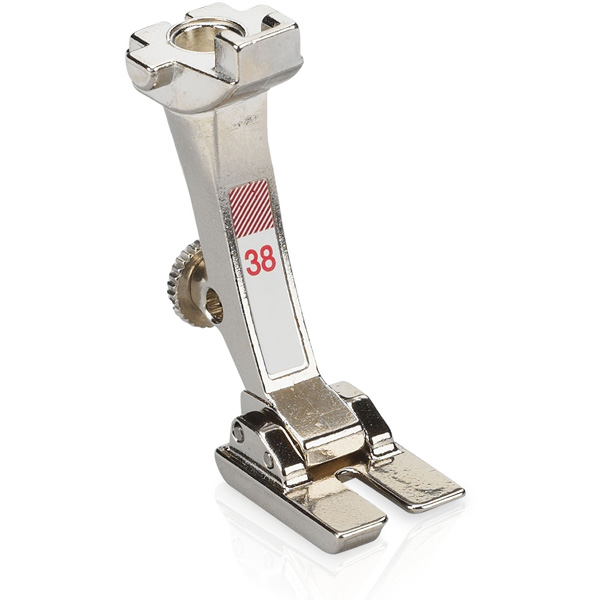
- Piping foot #38
Choosing Background Fabric for Each Page
There are a few options when choosing the background fabric for each busy book page. The simplest option is to find one fabric for all the pages. Purchase 3 yards so you have plenty if you decide to use it for binding or you make additional pages in the future. Another option is to purchase 10” square pre-cut fabrics (sometimes called layer cake). This precut set comes with 42 coordinating pieces of 10” x 10” fabrics, usually from the same fabric collection. Your third option is to buy coordinating fat quarters. Around 10 will be plenty, as you can cut at least 2 pages from each fat quarter. I purchased black and white fat quarters for my busy book. Lastly, you can choose fabric as you go. If deciding everything up front is not your style, select fabric for one page at a time.
Choosing Felt for Each Page
If you have been sewing and crafting awhile, you probably have felt laying around. Collect your felt pieces and get ready to use them! If you need more felt or don’t have any, browse the felt selection on etsy.com. I found some nice felt color collections in a wool/rayon blend that is resistant to pilling and pulling, easy to cut, and affordable. Because the blend didn’t stretch as much as other felt, it was much easier to sew also.
Background Page
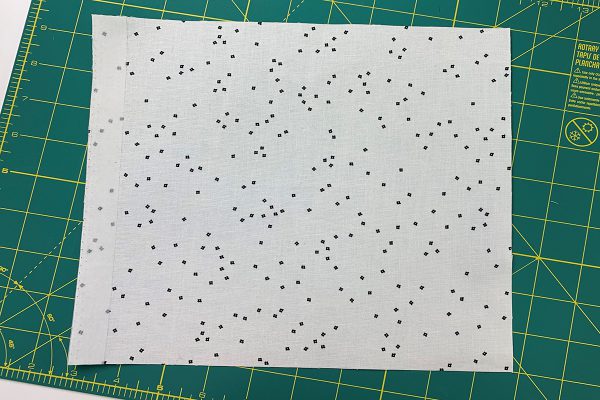
Press your 10” x 10” fusible stabilizer to your background fabric with a dry iron for a few seconds until the fabric adheres to the stabilizer. I am using OESD Clean & Tear Fusible Stabilizer. One side of each page will have buttonholes to insert ribbon or binder rings. Add a strip of temporary adhesive tape down the left or right side, depending which way the page will face. The tape will remind you to leave this area clear of embellishments.
Rainbow
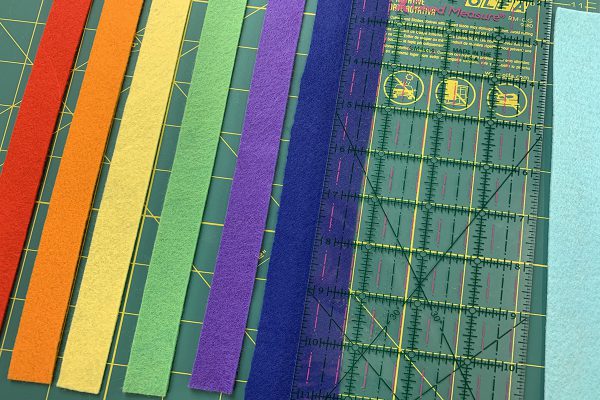
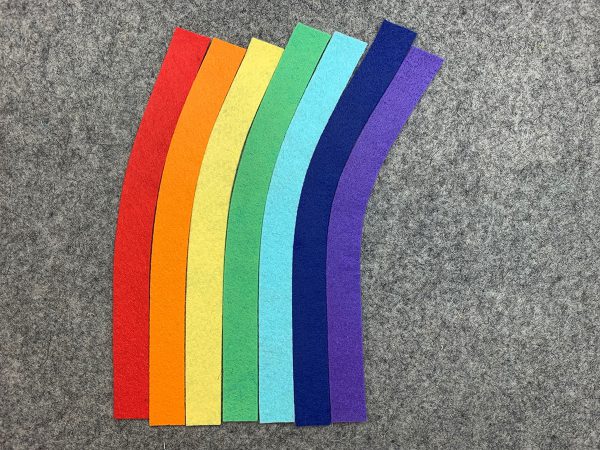
Decide your 7 felt colors. Cut each color 3/4” x 10”.
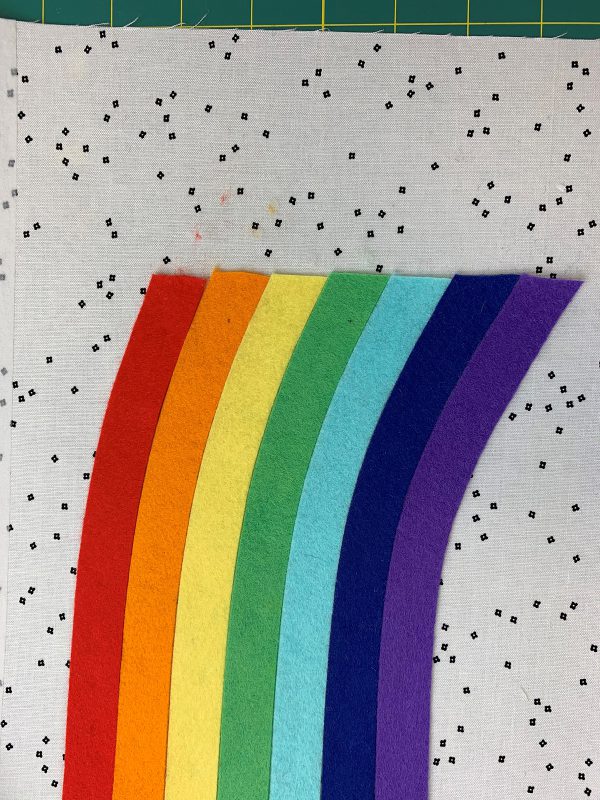
Felt is flexible and can be molded with an iron and a little steam or Best Press. On your ironing mat (preferably a wool mat), place your strips in a row. Slightly curve them to the right and press with steam or Best Press. Curve them a little more and press again until you have a nicely arched rainbow. Let strips cool to maintain shape.
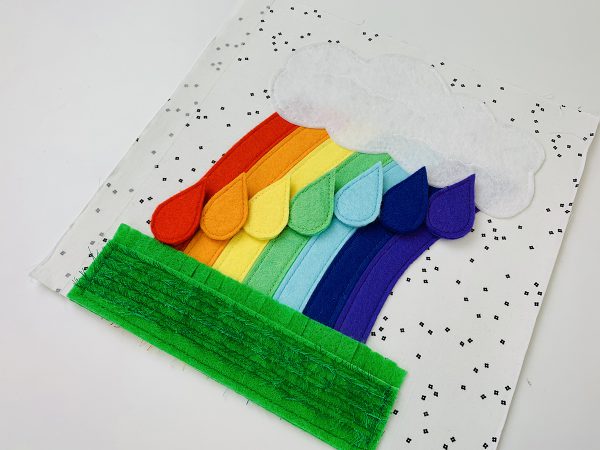
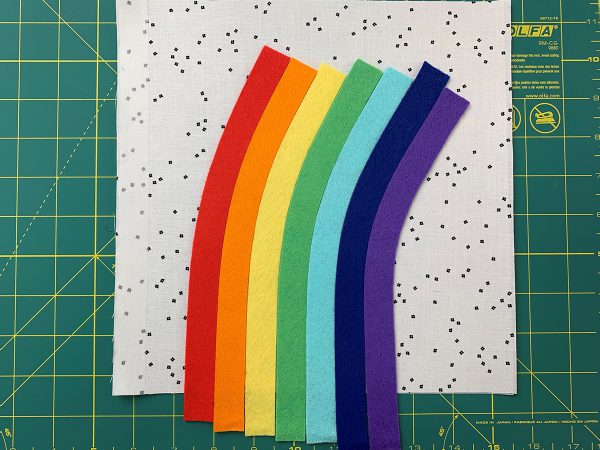
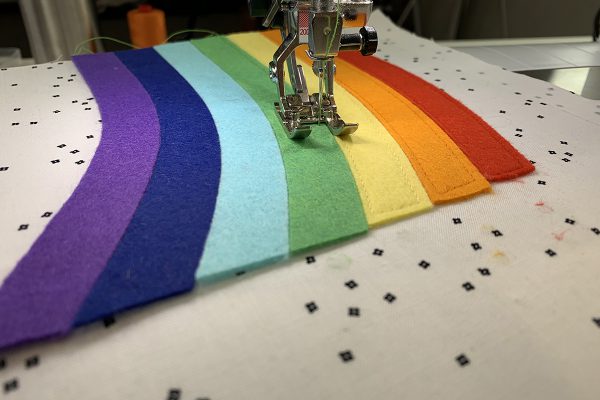
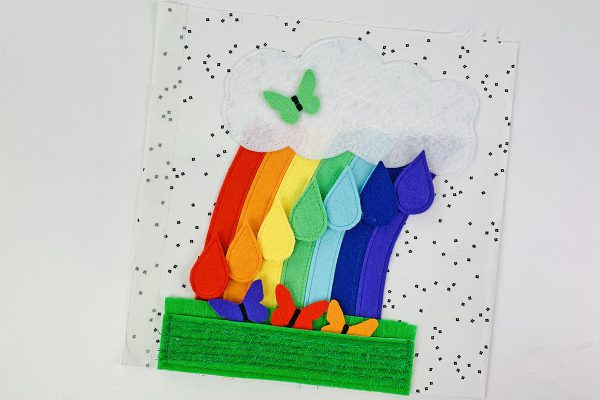
Place your rainbow onto the busy book page. Adjust and center the strips until they look similar to the picture below.
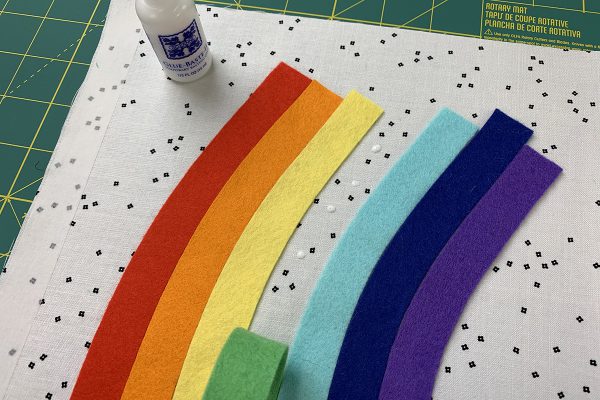
Carefully fold down half a strip and place dots of glue to secure the felt. I am using Roxanne Glue-Baste-It temporary glue. Fold bottom of strip to the top and glue other half of strip. Do the same for rest of felt strips. Keep everything as snug as possible. Set page aside.
Raindrops
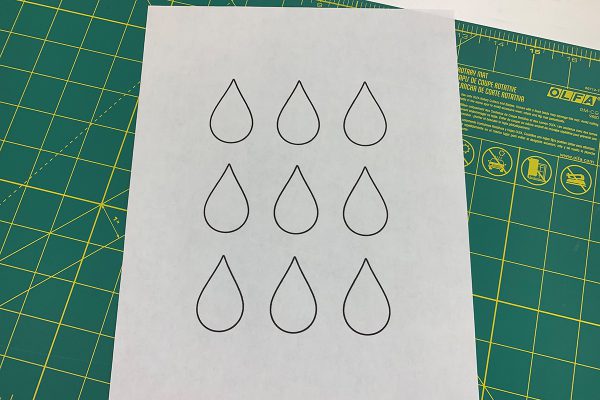
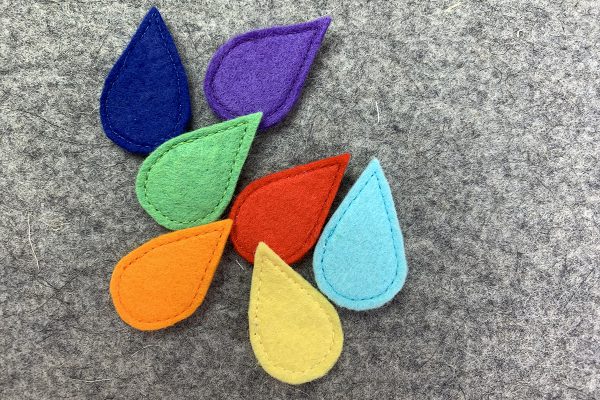
Draw or find and print a free raindrop template. You will need 7 raindrops. You can draw these freehand, or find a graphic online. I found mine by searching Google for raindrop templates. In the printer settings, decrease the size until you get a raindrop that is about 1 1/2” x 1 3/4”.
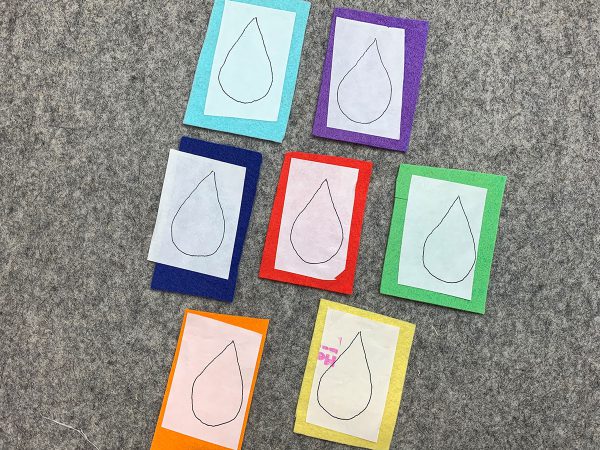
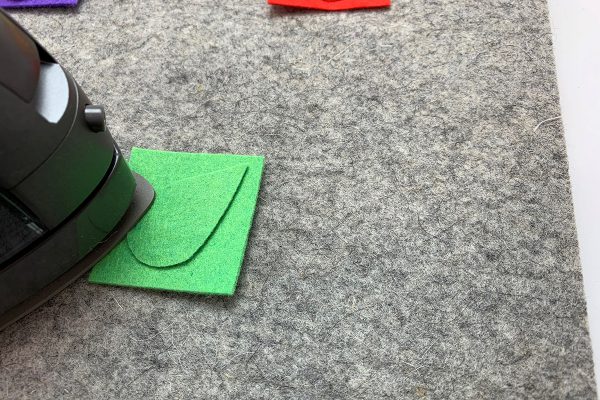
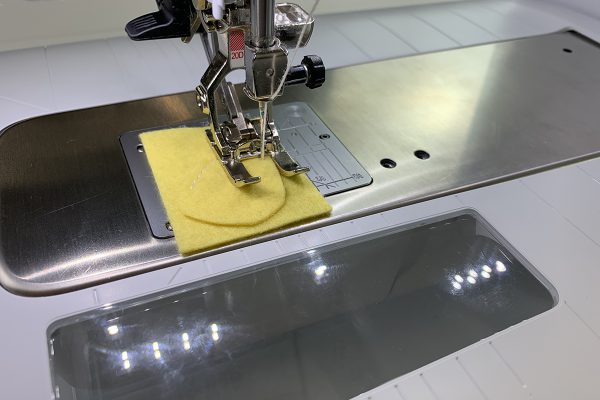
Place your template under the Heat N Bond fusible and trace the raindrops. Do not use a Frixion pen as the lines will disappear when we use the iron. Cut the Heat N Bond into rectangles around the raindrops. Don’t cut on the drawn lines yet. Set your iron to medium without steam. Place the adhesive side of Heat N Bond onto matching rectangles of the felt colors in your rainbow. Press for a few seconds at a time until the entire adhesive has bonded to the felt. If you bonded the adhesive correctly, the paper liner will come off easily.
Let cool and cut out your raindrops. Set aside.
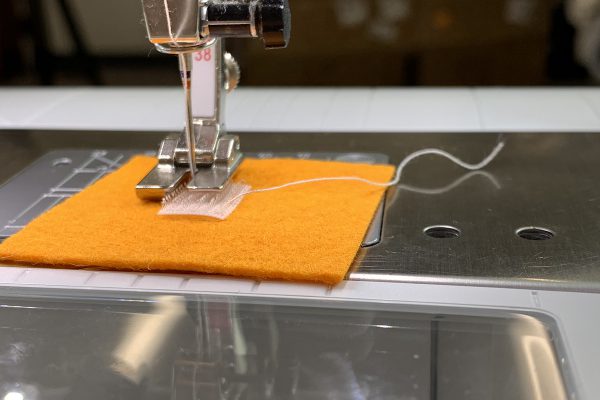
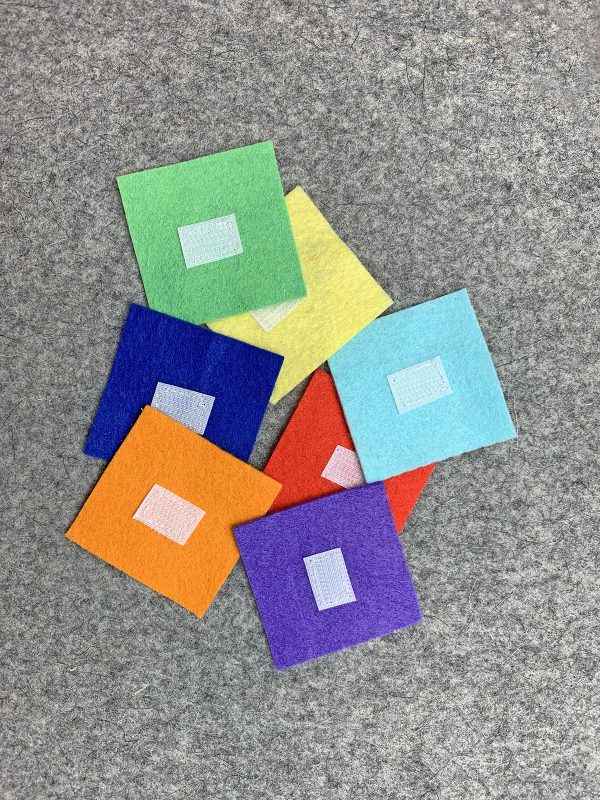
Cut 7 hook and loop pieces about 1/2” long from your 3/4” roll. Cut 2” x 2” felt squares of the same colors as the raindrops. Attach BERNINA Piping Foot #38. This foot is sometimes called the “uneven foot” because the right side of the foot is higher than the left side, which makes it great for uneven sewing surfaces. Piping, thick trims, and Velcro are easy to sew with this special foot. Select Needle Stop Down so you can turn the corners without the fabric shifting. Sew the Velcro with the right side of the foot on top of the tape and the left side on riding beside it. You can add a dab of glue and use a stiletto to keep the Velcro in place while sewing. Also, take advantage of your Free Hand System when turning corners. I am sewing on the hook side of the tape (rather than the loop side), but it really doesn’t matter for this application.
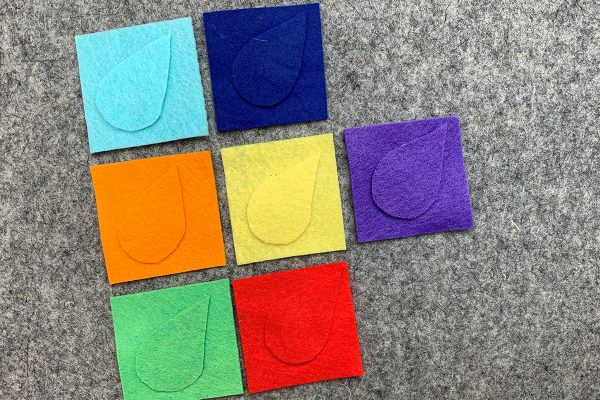
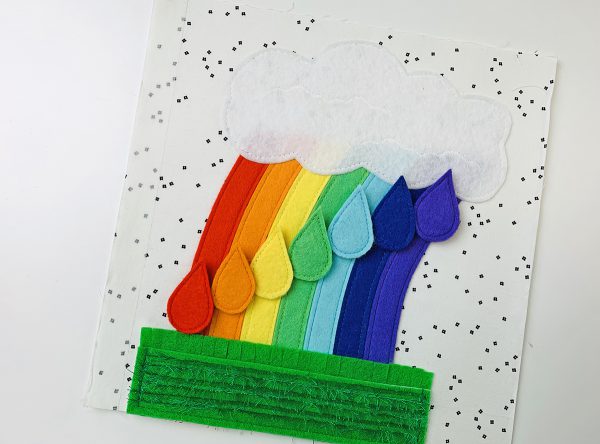
Place all your felt squares with Velcro side down. Remove the paper lining from the raindrops. If you bonded adhesive correctly, the paper liner will come off easily. If it does not, press a little longer. Place raindrops with adhesive side down on top of felt squares matching the colors.
Press with an iron until raindrop has bonded to back. With my iron, I found it was best to press the whole piece for about 6-8 seconds. Then, I pressed along edges. Usually, you would not have to press the edges but the bulky Velcro on the back piece didn’t allow the edges to bond well. Also, you can turn the piece upside down and press around the tape. Set raindrops aside.
Fluffy Cloud
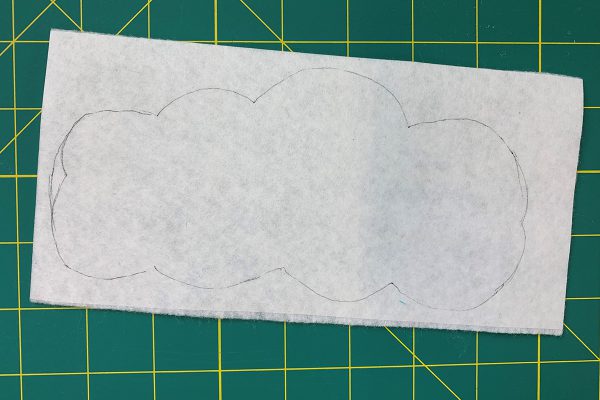
Iron a 4” x 8” OESD Ultra Clean & Tear Fusible to a 4” x 8” white felt. On the fusible paper, draw a fluffy cloud. The cloud should cover most the 4” x 8” piece.
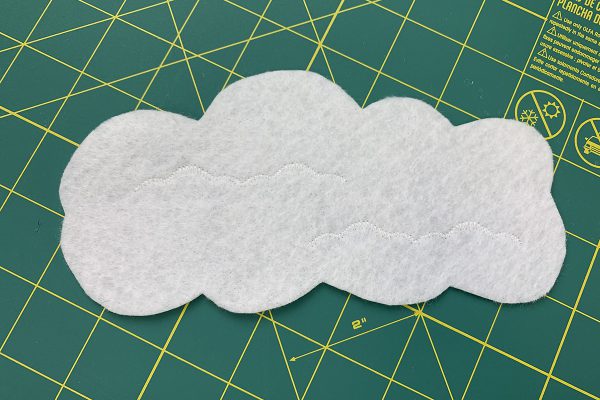
Cut out the cloud.
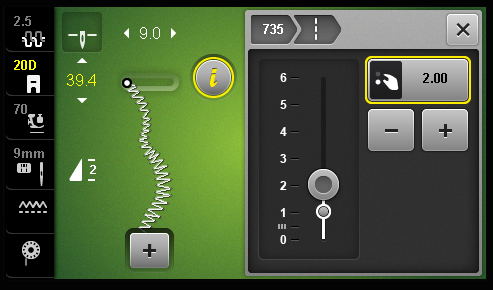
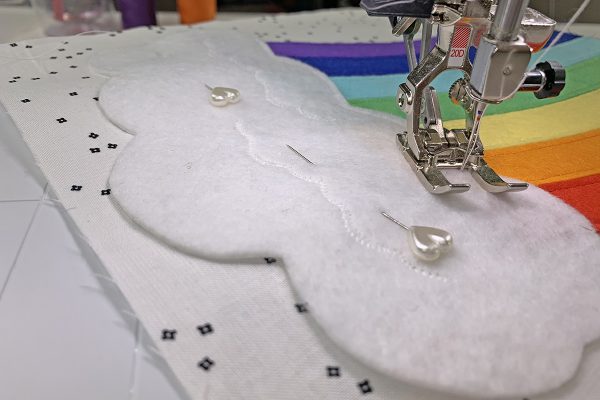
Attach BERNINA Open Embroidery Foot #20/20C/20D. This foot is great for decorative stitches and anytime you need to see your stitches while sewing. Select stitch #735. Select Information icon. Select Pattern Repeat, enter 2, and hit green check to confirm. Now, toucht the stitch length on the screen to open the stitch length box. Increase stitch length to 2. Notice on the left side of screen, the stitch length shows 39.4 mm. The stitch length is 2 mm but the length of one decorative stitch is 39.4 mm.
Using a white or a light blue 50 weight thread on top, sew the decorative stitch in 2 random places on the cloud. Set aside.
Position your cloud on the background page over the top of the rainbow and make sure everything looks good. With a Frixion pen (you will want these marks to disappear), mark dots at the bottom of the cloud at concave points.
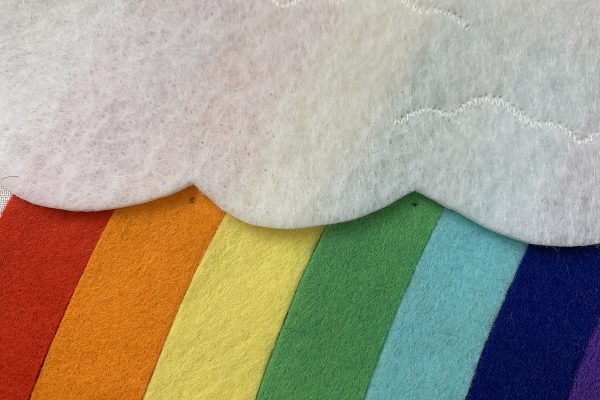
Remove cloud and trim the strips above the marks. We are trimming the felt so the bright colors are not noticeable under the white cloud. Use iron to remove dots after trimming.
Green Grass
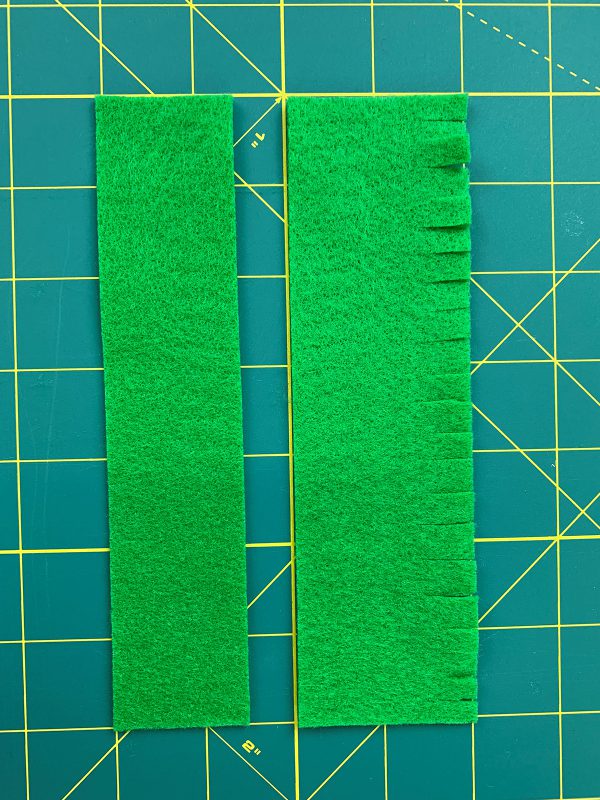
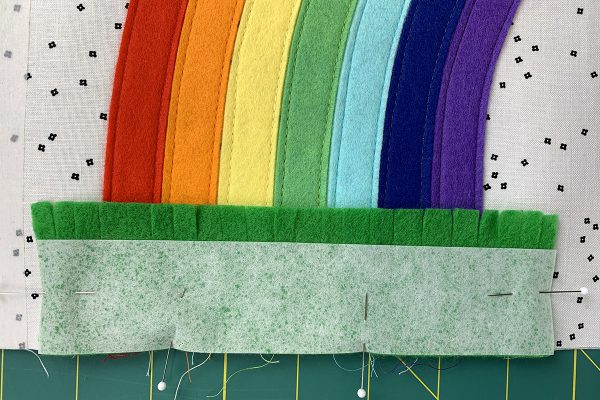
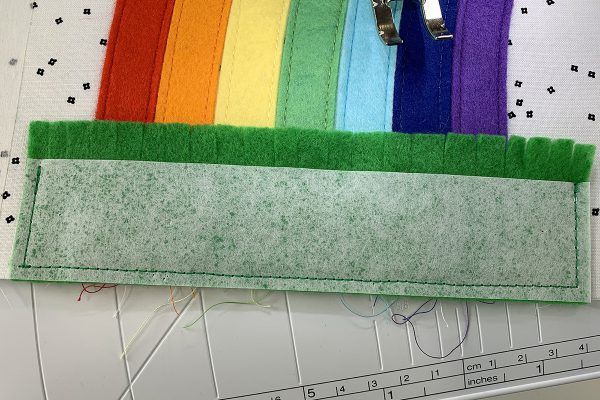
Cut 2 pieces of green felt – 2” x 7” and 1 1/2” x 7”. Take the larger piece and snip across the long side about 1/4” to 1/2” down.
Cut two pieces of OESD Clean & Tear Fusible Stabilizer 1 1/2” x 7”. Take one piece and press onto the smaller piece of felt. Set aside the other piece with the clips.
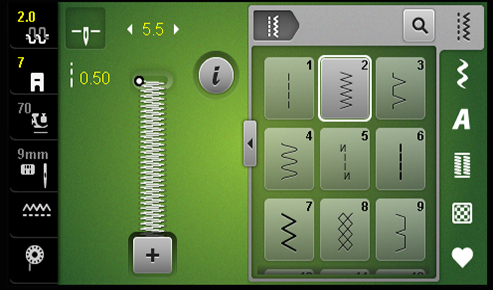
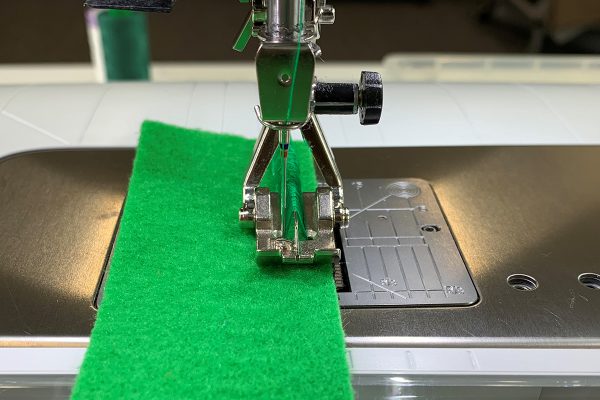
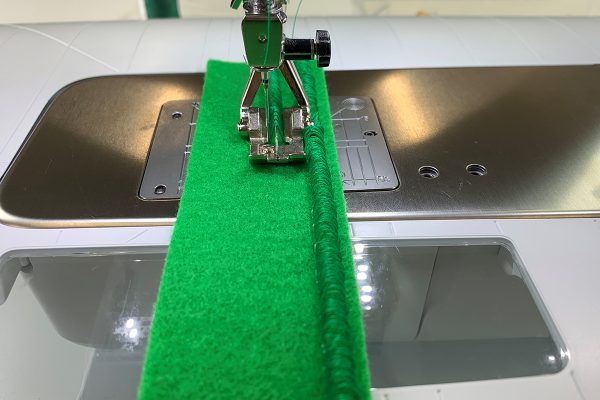
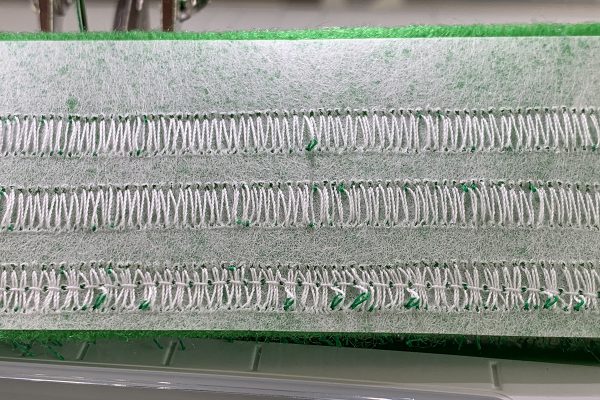
Attach BERNINA Tailor Tack Foot #7 to your machine. As well as for marking seam lines, Tailor Tack Foot #7 is used for sewing embellishments, imitation hemstitch, fringe, and 3D effects. Select Tailor Tack Foot #7 on your machine screen and Zig Zag Stitch #2. Change stitch width to 5.5, stitch length to .5 and decrease upper tension to 2. These settings are what worked for me and are my recommendations. Depending on your thread and needle, you can make adjustments with a BERNINA–it’s what we call Total Stitch Control! Using green thread, sew with the right edge of felt lined up with the edge of the foot. This will place your felt edge at the 1/4” mark on your needle plate.
Sew 3 rows lining up the foot with the previous row.
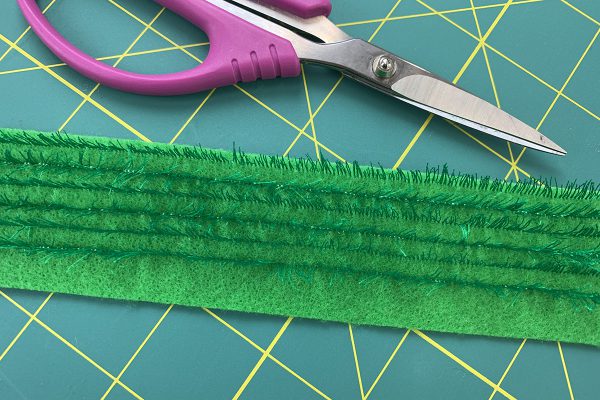
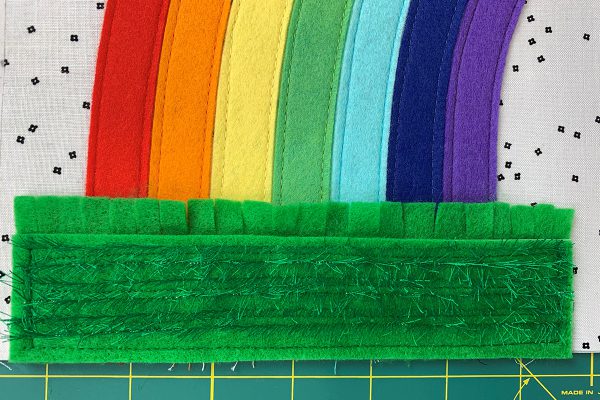
I love this foot for creating texture! Carefully cut the thread through the tunnels using sharp scissors. Because the thread has been cut, it’s not secure so don’t pull on it! This is what it will look like so far.
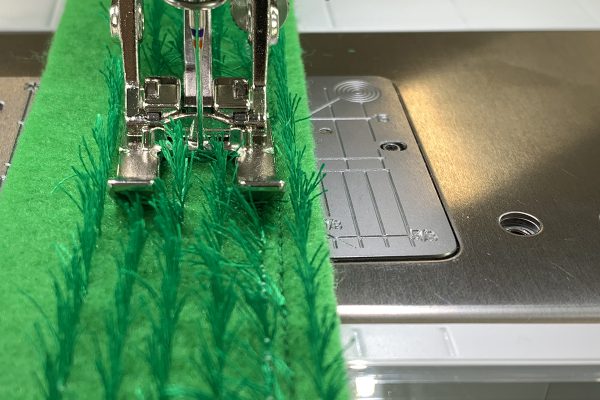
Reattach Open Embroidery Foot #20/20C/20D and select Straight Stitch #1. Notice how the settings are the same as you left it–Temporary Altered Stitch Memory! Change the stitch length to 2 mm. Sew down the middle of the rows to secure the threads. Don’t worry if you sew over some of the “grass blades”.
The bottom row shows how the straight stitch secures the zig zag stitches.
Putting it all Together
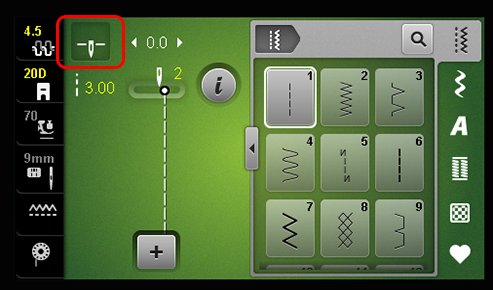
Find a thread color to match each rainbow strip which will also match the coordinating raindrop. You should still have Open Embroidery foot #20/20C/20D attached. Select Straight Stitch #1, move needle position to 2 and increase stitch length to 3. On my machine, I could see some of the white bobbin thread peeking through the felt, so I decreased my top tension to 4.5. Also, make sure Needle Stop Up/Down function is in down position (see icon at top left corner of machine screen). This way when you stop sewing, the needle will be down preventing your fabric from shifting around.
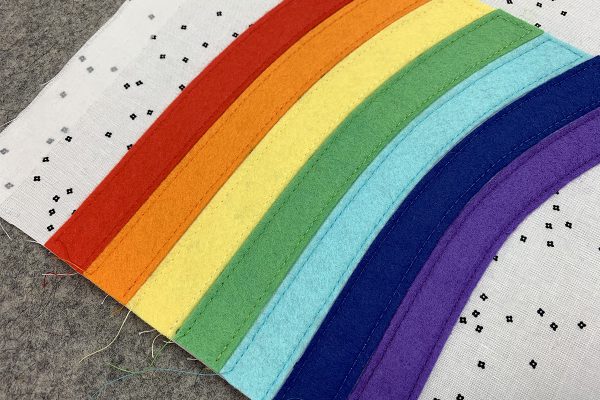
For each color strip, start at bottom of the page on the right side. With the inside of the right toe lined up against the felt, sew up the strip, across the top end, and back down using a stiletto to push the felt strips together. (NOTE: If you sew the matching rainbow strip and raindrop at the same time, you will have fewer thread changes. See the instructions in the step below.) Continue in the same way with each color.
Before you edgestitch the rainbow strips, you might want to trim 1/2” off the bottom of strips to leave room for binding
It’s not necessary to sew the raindrops together since we fused them with Heat N Bond. But, my BERNINA makes a beautiful edgestitch and I want to show off the stitch quality! Find the same color raindrop and edgestitch with the matching thread. For the raindrops, I turn down my machine speed and use the Free Hand System!
Trim the excess felt around your raindrops.
Find your fluffy cloud. Position the cloud where it looks good covering the top of the rainbow. Make sure the cloud is at least 3/8” away from raw edges of page since you need to save room for finishing the edges of your page. Pin the cloud in place. Edgestitch around the cloud in the same way as the rainbow. Your straight stitch should still be set to needle position 2 and stitch length 3. With a BERNINA, your stitch settings will remain until you turn off the machine, even if you leave that stitch screen. We call this Temporary Altered Stitch Memory.
Find your 2” x 7” green felt piece with the snipped edge. Press the second piece of fusible stabilizer onto this piece just below the snipped edge. Position at the bottom of rainbow matching the raw edges. Pin. (The stabilizer is positioned facing out because I am using it to create a slick surface. I found it difficult to place the raindrops in the grass because the hook and loop tape was catching against the felt. I already had the stabilizer out so it was a quick fix. I’m sure it can be done in other ways. Be creative and have fun!)
Depending on how you choose to bind the pages, you might want to pin the grass 1/2” above the bottom edge of page.
You should still have Open Embroidery Foot #20/20C/20D on your machine. Select Straight Stitch #1 and change stitch length back to 3 mm. Here, you can sew around all 4 sides or 3 sides if you want an extra pocket between the rainbow and the green strip.
Add your grass piece on top and sew 3 sides to form a pocket matching bottom raw edges.
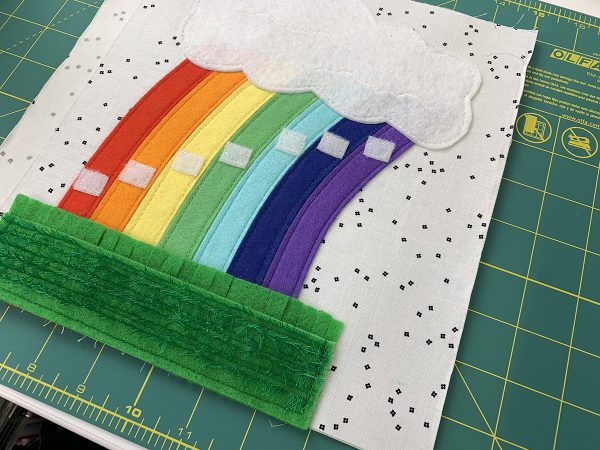
With Piping foot #38, sew 1/2” hook and loop pieces to each rainbow strip. I secured them with glue first and used my stiletto to keep them in place while sewing all 4 sides.
Congrats on your completed busy book page!
For extra pizzazz, add butterflies to your page. Find a free template to trace onto Heat N Bond. Then, fuse Heat N Bond onto felt. Cut out butterfly and stitch the body with a satin stitch. Add Velcro to back. I hope you enjoyed creating this busy book page and learning about new BERNINA feet and features. Continue with us on our busy book journey. See you in Month 2! Enjoy!
Kids Busy Book Series
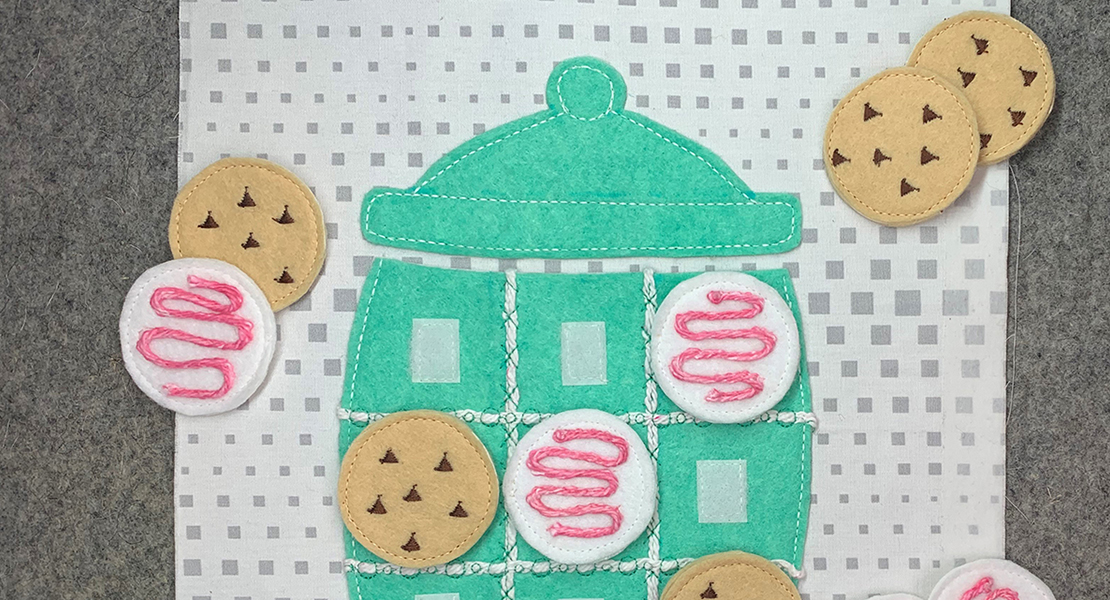
Part 4: Cookie Jar Tic Tac Toe
What you might also like
22 comments on “How to Sew a Kids Busy Book, Part 1: Rainbow Page”
-
-
Thank you! I am so glad you like the tutorial. Who are you making it for?
-
Amen!
-
-
Thank you! I am excited to follow along.
Debi-
I’m so glad you are making the pages!
-
-
This is adorable, the cutest busy book I have ever seen! I agree with sanswick12. Is there any way to release these sooner since we are all at home with the time and energy to really get a book done? Please!?
-
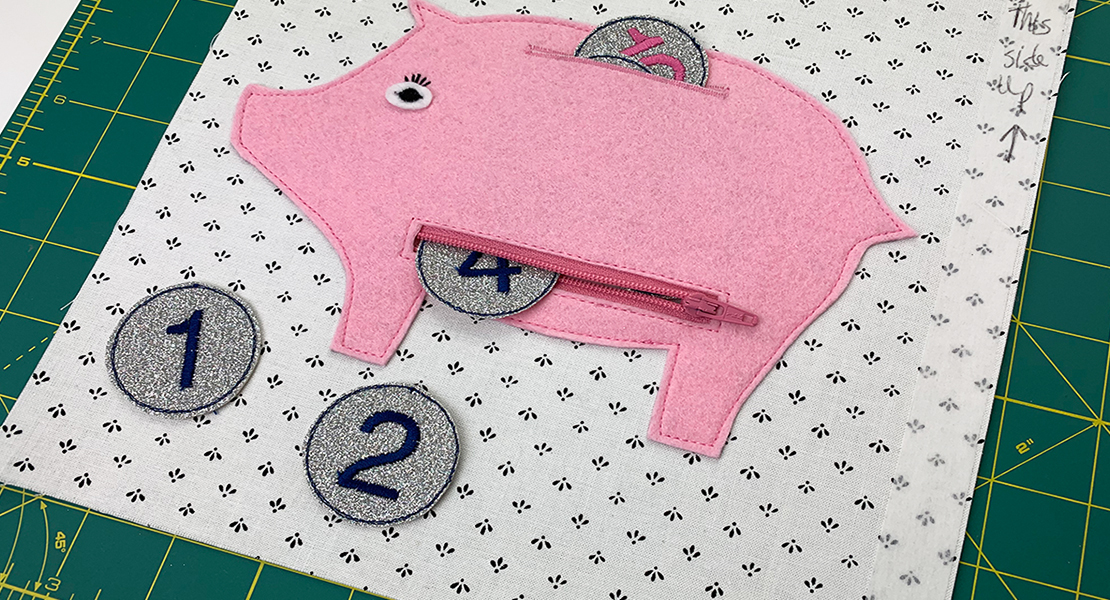
Thank you so much! I’ll see what can be done. The second page is ready and on WeAllSew called Piggy Bank.
-
-
Is there any other fabric I can use in place of felt? I want to make this for my 5 great granddaughters and knowing their mommies, they will want to throw them into the washer to clean. ???
-
Wow! 5 great granddaughters! How fun! I would recommend to spot clean the busy book but we can never know what will happen when we make something and give it as a gift. If you think the pages might be put in the washer, prewash your materials and use a felt that does not have wool in it. There are many kinds of felt out there now. Acrylic felt found in most craft stores can be washed without shrinking. Felt is used in most busy books because it doesn’t fray. You can cut and fuse it easily and it comes in all different colors!
-
-
Sorry if this is a stupid question but do we remove the stitch and tear behind the cloud (and pig) before we sew them to the “page” fabric? I love the project, such fun, youngest grandchild Harry will so enjoy playing with it. its a win win situation, I have the fun of making it and he gets to play with it!
-
Hello! There are no stupid questions! I did not remove the stabilizer but you can remove it if you don’t want the extra stiffness. The background page has stabilizer on it too so that will help when sewing the pig and cloud if you decide to remove it. So glad you are enjoying making the busy book pages! Upload a picture on our WeAllSew.com Community tab when you finish the pages!
-
-
Love the project BUT can’t figure out how to download the directions. Having to go back and forth between the computer and the sewing machine is awkward and time consuming ???
Margi Hamilton
-
Hello. When you go to print the blog post, there should be an option to save as pdf. You can save as pdf and print what you need. Or you can copy and paste the directions you want directly from the blog. Many sewists are not printing tutorials anymore but using a tablet or laptop to have near their sewing machine. If you follow a lot of tutorials online, it’s a great investment.
-
-
So thankful for this project! The pages are wonderful! A preschooler would love this! I am just beginning now in June so a little late to the party. Just completed the rainbow page but plan to complete all the pages. Thank you!
-
Great! So glad you are enjoying the pages and I hope whoever receives the book does too!
-
-
I am looking forward to making this for my grandson, but will be doing so between my other sewing jobs. Should I download the instructions or will this be available for some time?
-
Hello. The blog posts will be available on weallsew.com indefinitely. No worries!
-
-
I am just getting started with the first page instructions. If the hook and loop sticks to the felt, is it really necessary to put the Velcro pieces on the rainbow? Won’t the raindrops with the hook and loop on them stick to the felt itself?
I just love this book! I’m going to make it for my granddaughter for Christmas!
-
If that works, I don’t see why not! I think the hook side will stick better if you don’t want to add the other side to the rainbow. Great tip!
-
Thank you for your response. I tried it without the loop side, and it does not work as well. I added the other side of the Velcro.
-
-
-
The directions for this super cute book says use a Bernina 590 E. Can you use a Bernina 770 QE?
-
Definitely! Some of the decorative stitch numbers might be different but you can always use something similar and play around with the different stitches. Also, there are a couple pages that use the machine embroidery module. You can always do hand embroidery or create your own version!
-
Leave a Reply
You must be logged in to post a comment.








OK this is way too cute to be once a month! We are all stuck at home let’s do it once a week or twice a month!!!!!