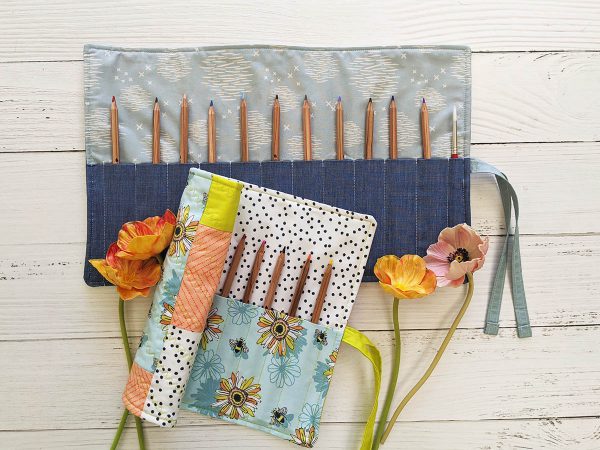
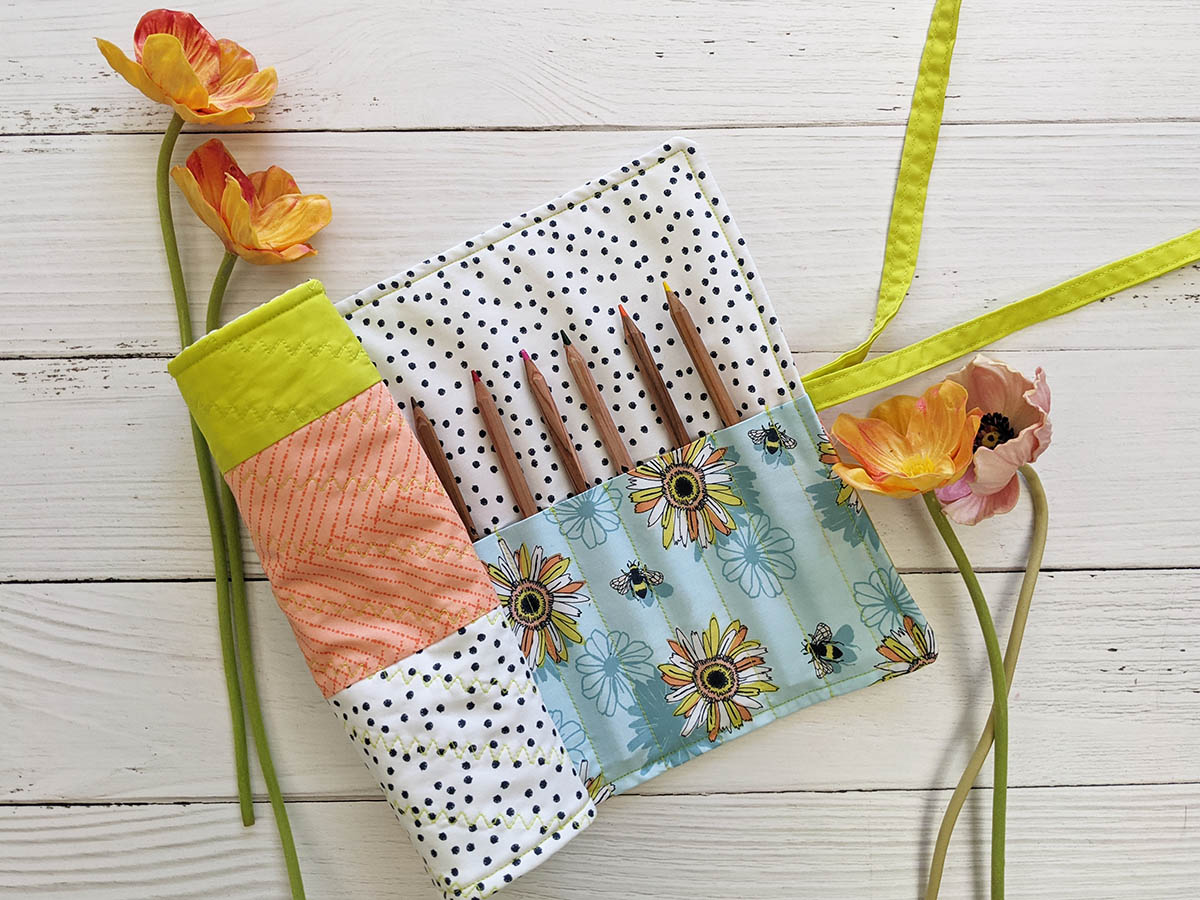
How to Sew Back-to-school Pencil Rolls
Hello fellow makers,

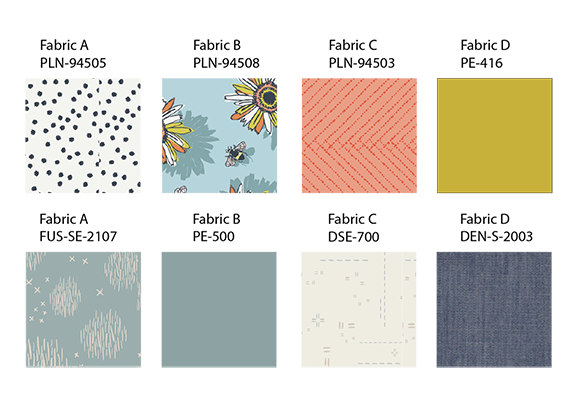
Fabric Requirements
Pencil Roll 1:
- Fabric A PLN-94505 FQ
- Fabric B PLN-94508 Fat 8
- Fabric C PLN-94503 Fat 8
- Fabric D PE-416 FQ
Pencil Roll 2:
- Fabric A FUS-SE-2107 FQ
- Fabric B PE-500 Fat 8
- Fabric C DSE-700 Fat 8
- Fabric D DEN-S-2003 FQ
 Additional Materials to Sew the Pencil Rolls:
- Two (2) 20” x 15” squares of batting
- Coordinating quilting thread
- Reverse Pattern foot #1D
Cutting Instructions
Pencil Roll 1:
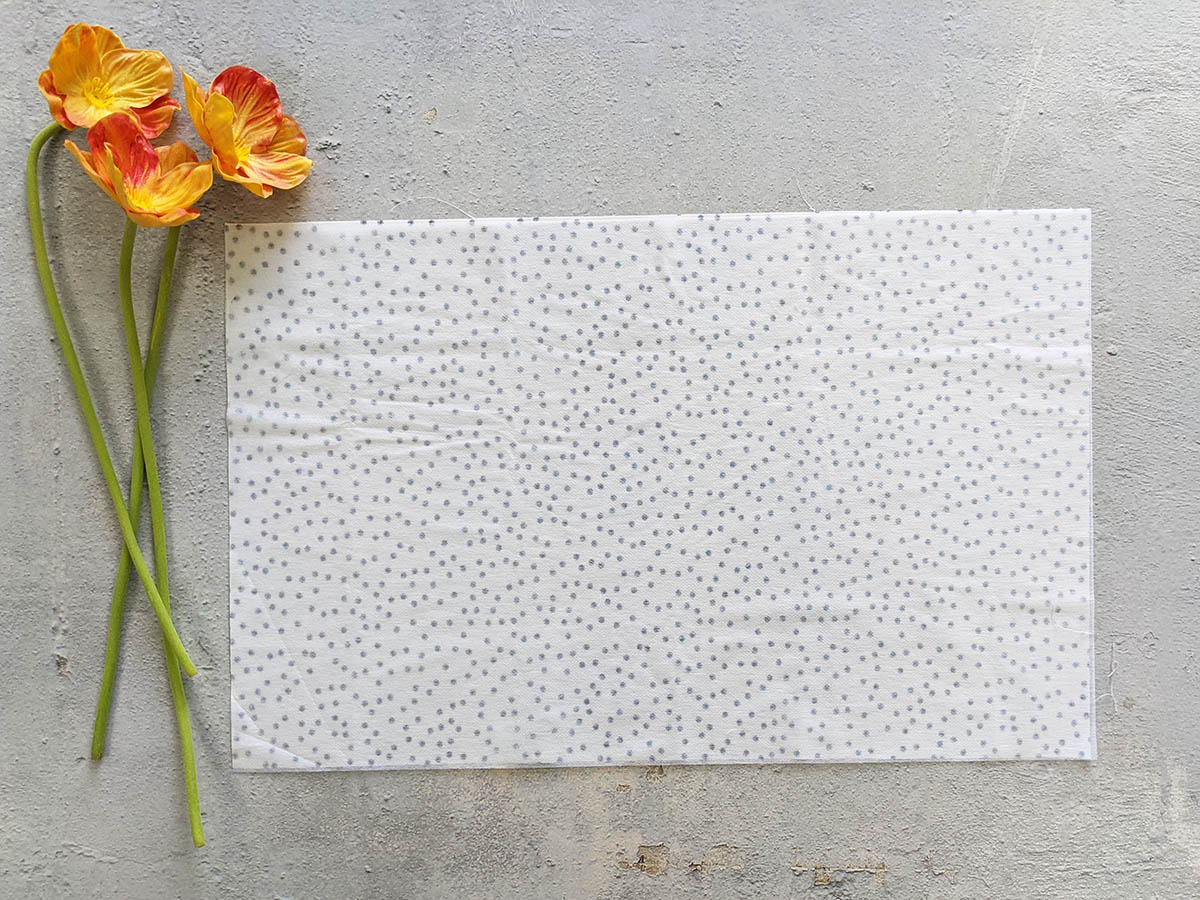
- One (1) 16 1/2’’ x 10 1/2’’ rectangle from fabric A.
- Two (2) 6 1/2‘’ x 4 1/2‘’ rectangles from fabric A.
- One (1) 16 1/2’’ x 10’’ rectangle from fabric B.
- One (1) 8 1/2‘’ x 4 1/2‘’ rectangle from fabric B.
- One (1) 6 1/2‘’ x 4 1/2‘’ rectangles from fabric C.
- Two (2) 6 1/2‘’ x 2 1/2‘’ rectangles from fabric C.
- One (1) 4 1/2‘’ x 2 1/2‘’ rectangle from fabric C.
- One (1) 6 1/2‘’ x 4 1/2‘’ rectangles from fabric D.
- One (1) 6 1/2‘’ x 2 1/2‘’ rectangles from fabric D.
- Two (2) 9 1/2’’ x 3’’ strips from fabric D.
Pencil Roll 2:
- One (1) 16 1/2’’ x 10 1/2’’ rectangle from fabric A.
- Two (2) 6 1/2‘’ x 4 1/2‘’ rectangles from fabric A.
- Two (2) 6 1/2‘’ x 2 1/2‘’ rectangles from fabric B.
- One (1) 4 1/2‘’ x 2 1/2‘’ rectangle from fabric B.
- Two (2) 9 1/2’’ x 3’’ strips from fabric B.
- One (1) 8 1/2‘’ x 4 1/2‘’ rectangle from fabric C.
- Two (2) 6 1/2‘’ x 4 1/2‘’ rectangles from fabric D.
- One (1) 16 1/2’’ x 10’’ rectangle from fabric D.
Now, let’s get started on how to construct one of the pencil rolls!
Steps to Sew a Pencil Roll
Step 1:
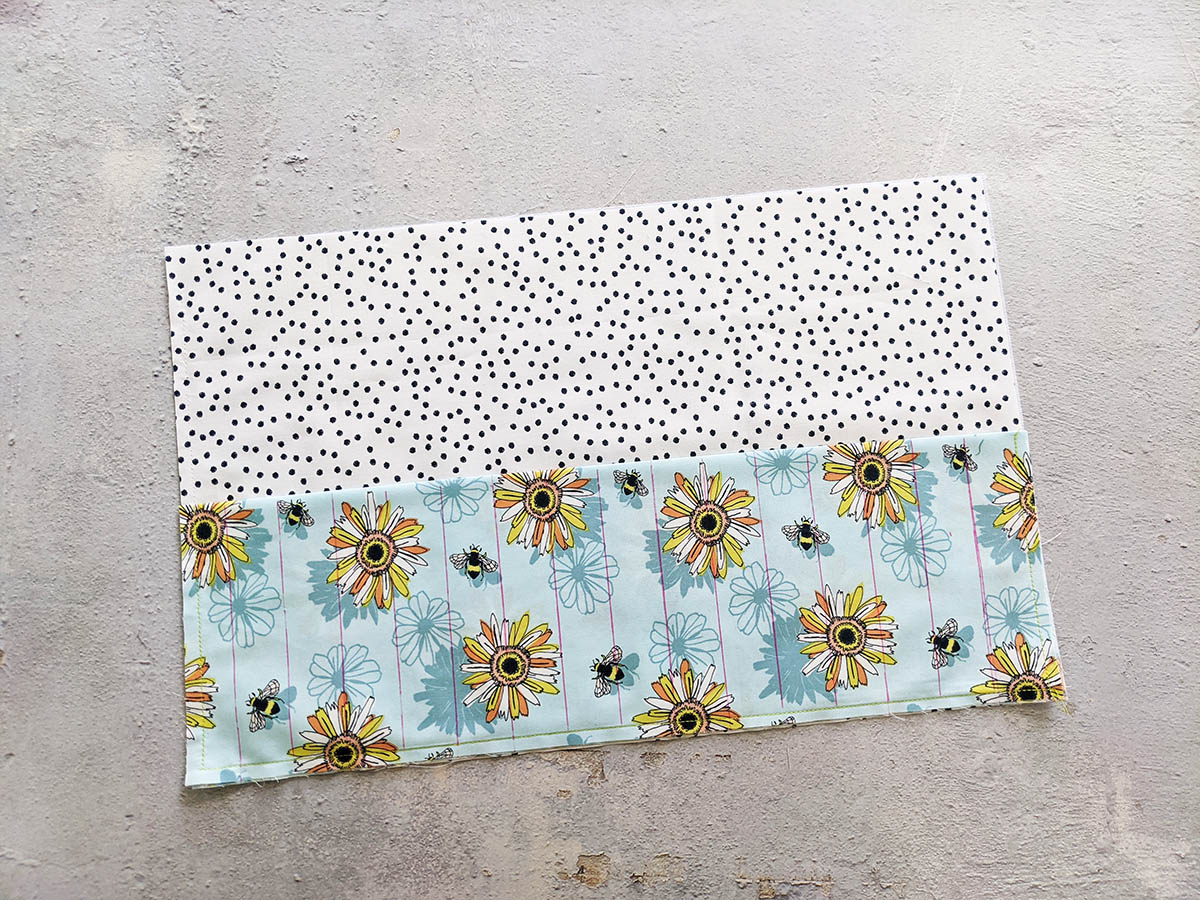
Bring one (1) 16 1/2” x 10 1/2” rectangle from fabric A and one (1) 16 1/2” x 10” rectangle from fabric B.
Place lightweight interfacing on the wrong side of fabric A.
Fold fabric B rectangle widthways and press.
Then, place it on top of fabric A and pin the sides and bottom in order to hold your pieces.
I decided to base stitch the three sides of my piece in order to prevent my fabrics to shift while making my slot.

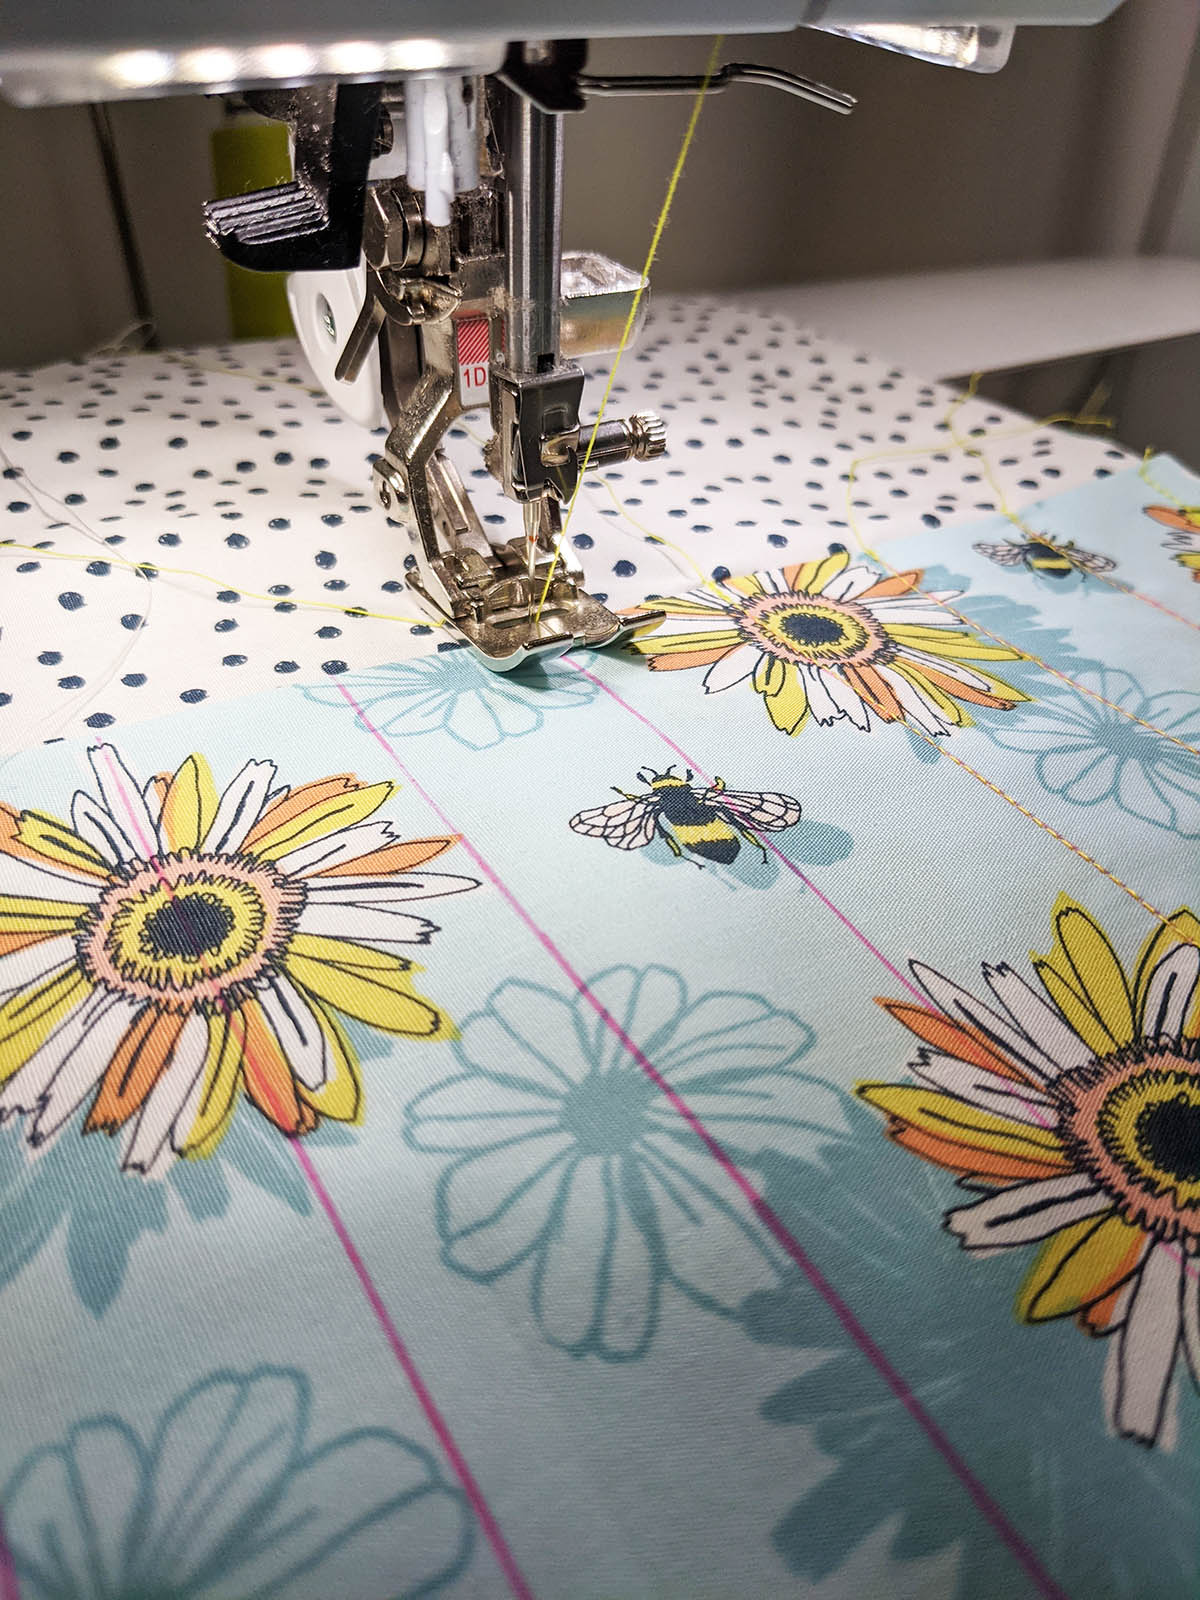
Step 2:
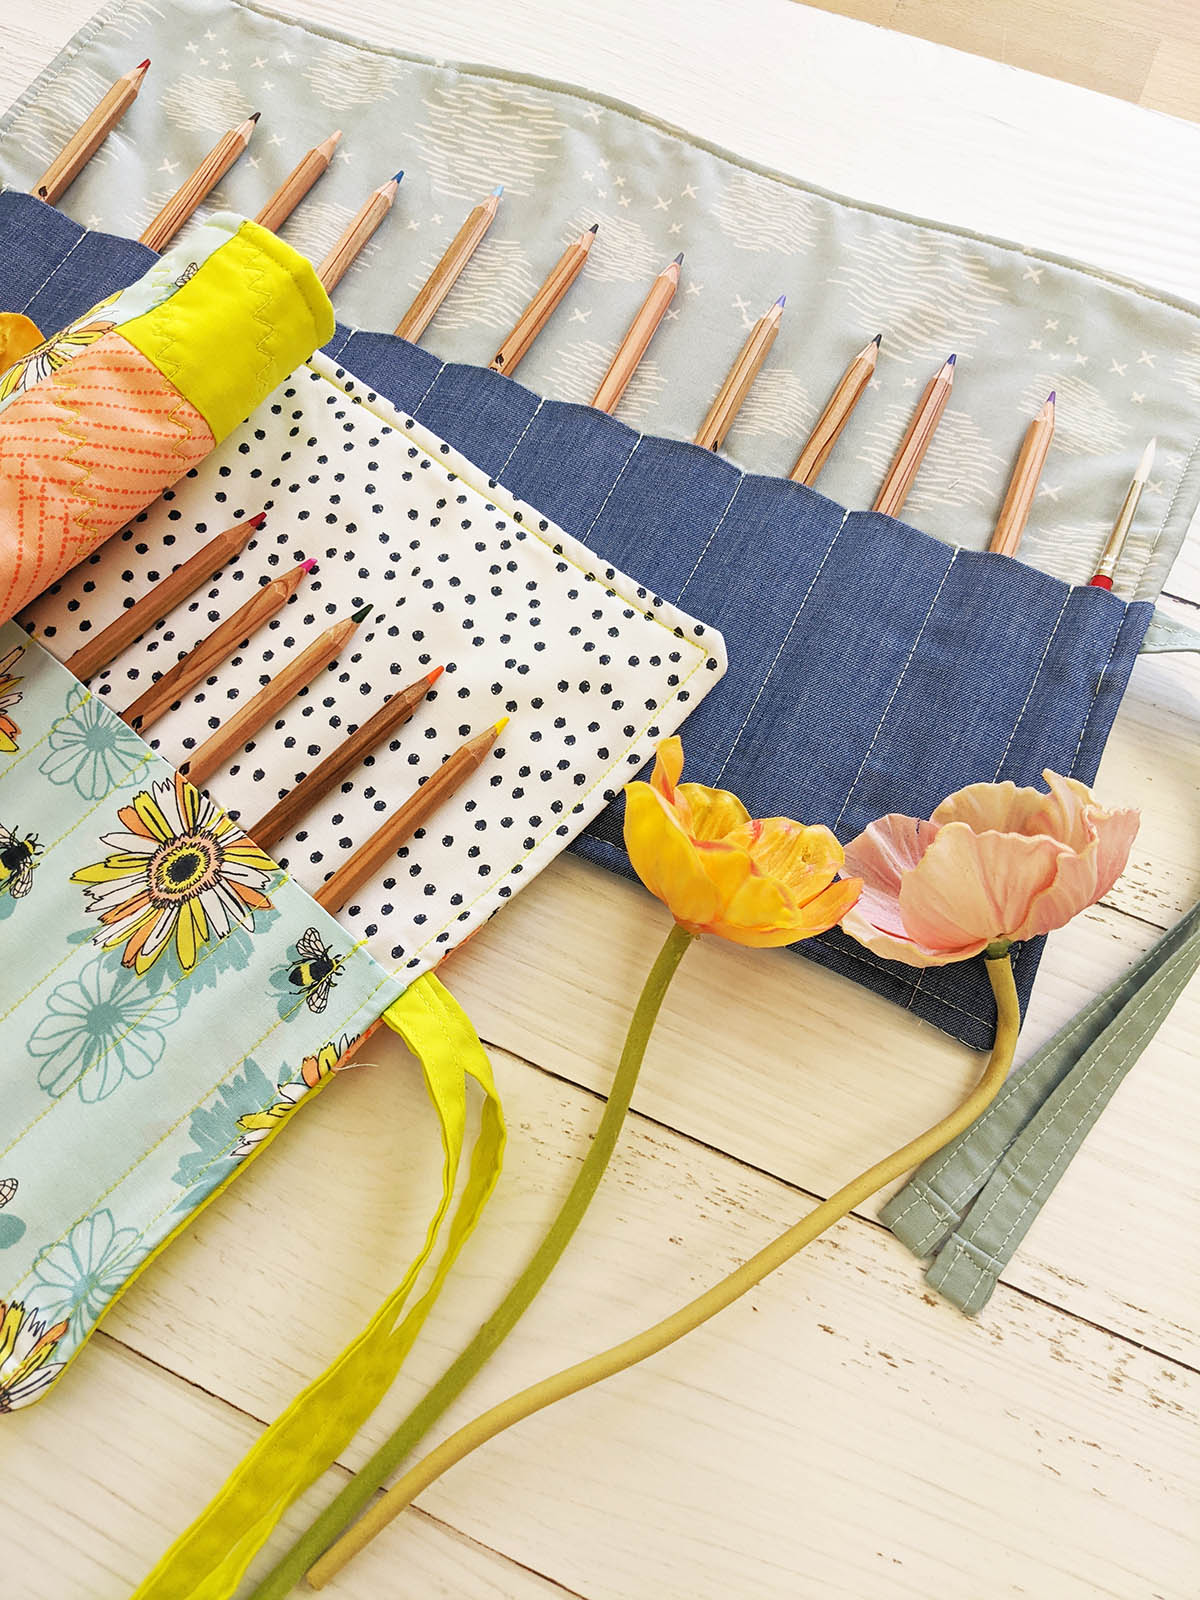
Mark lines for the pencil slot at about 1” starting from one of your edges. Then continue marking in order to have about 14” slots for the pencil.
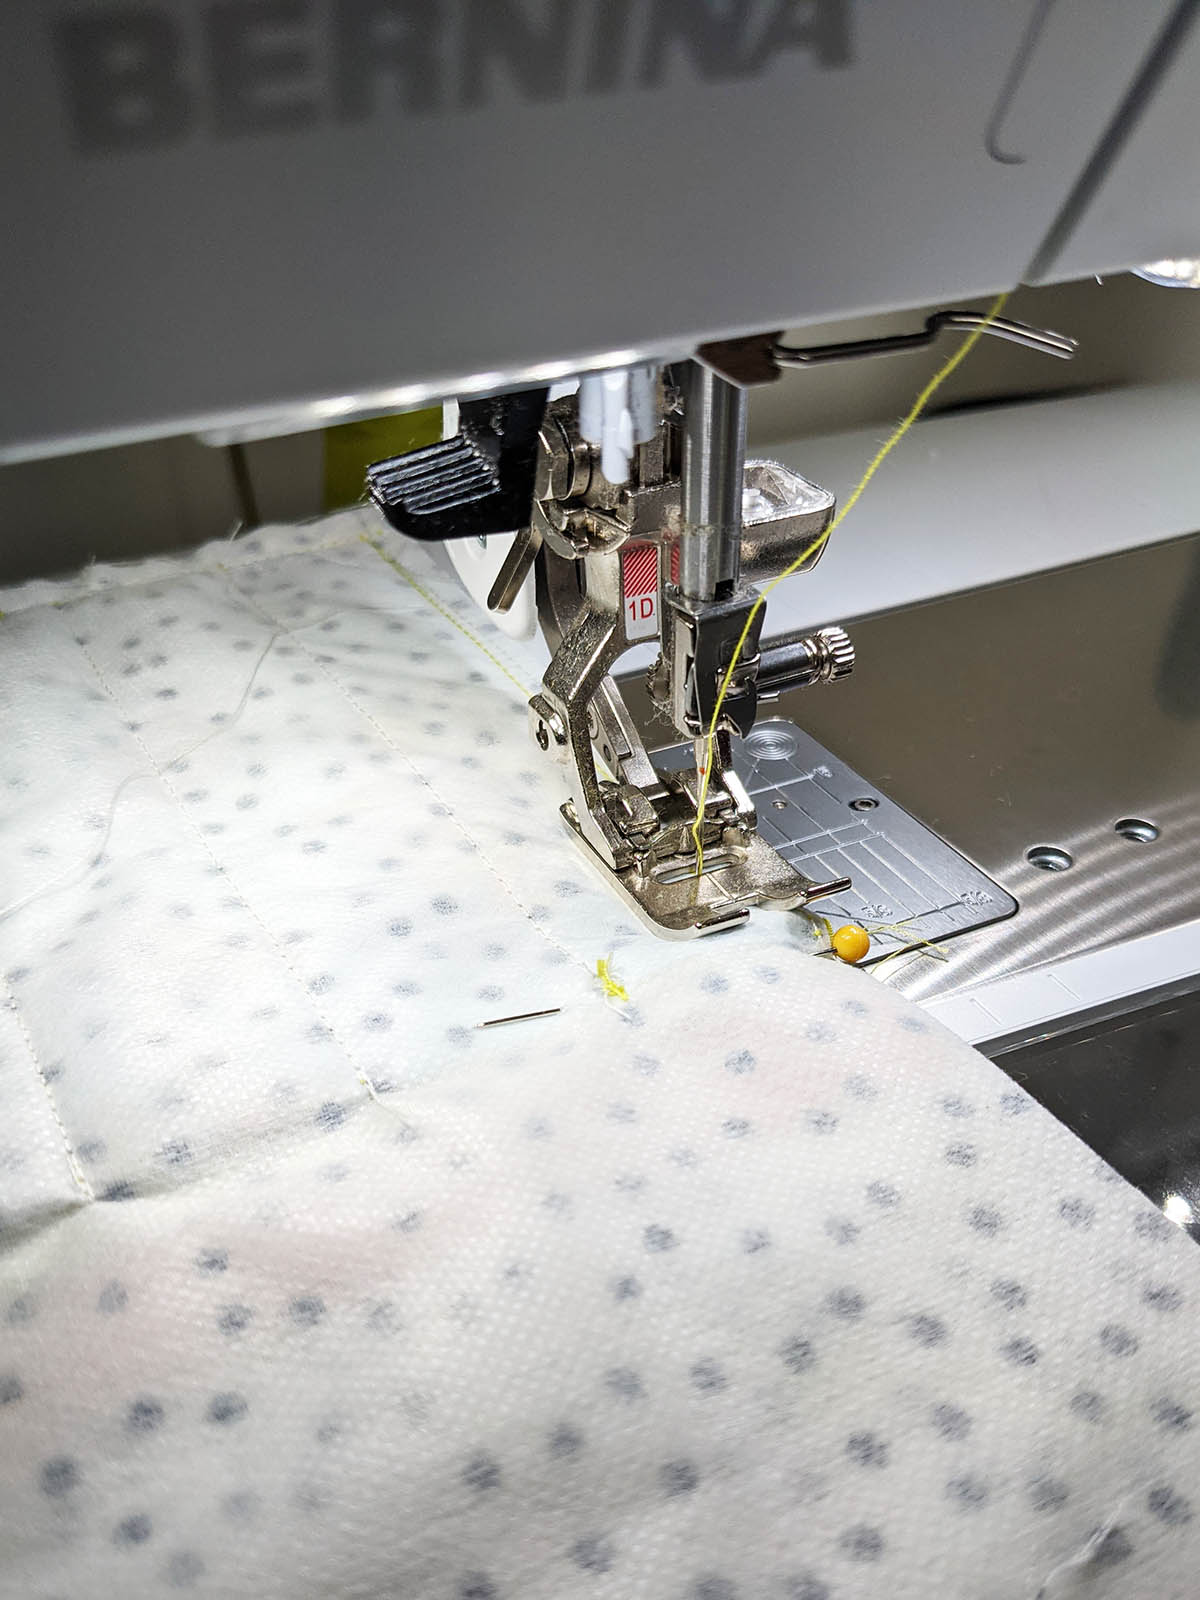
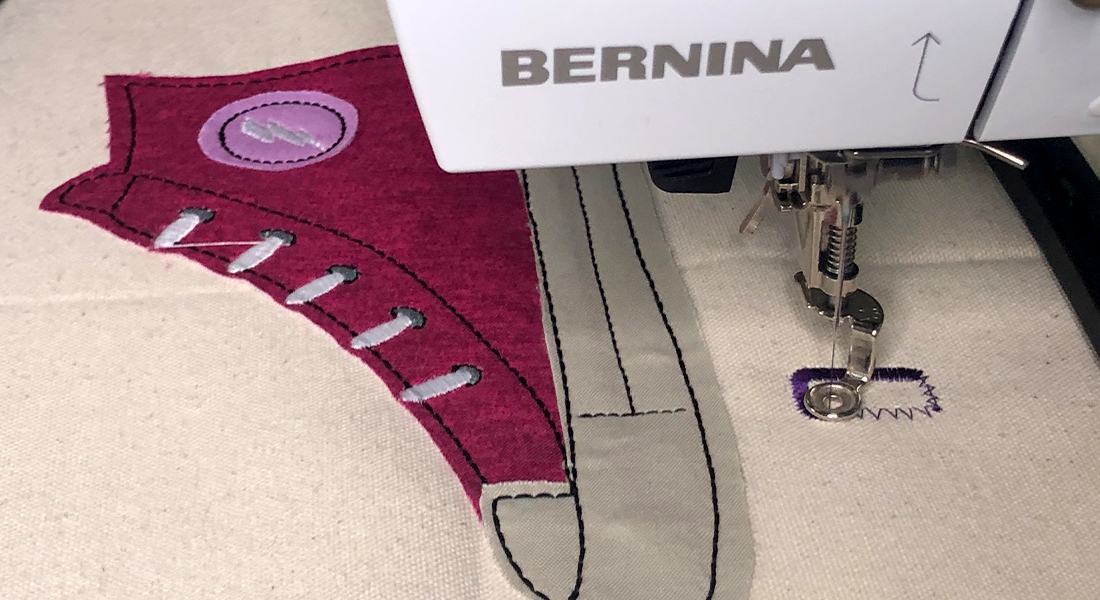
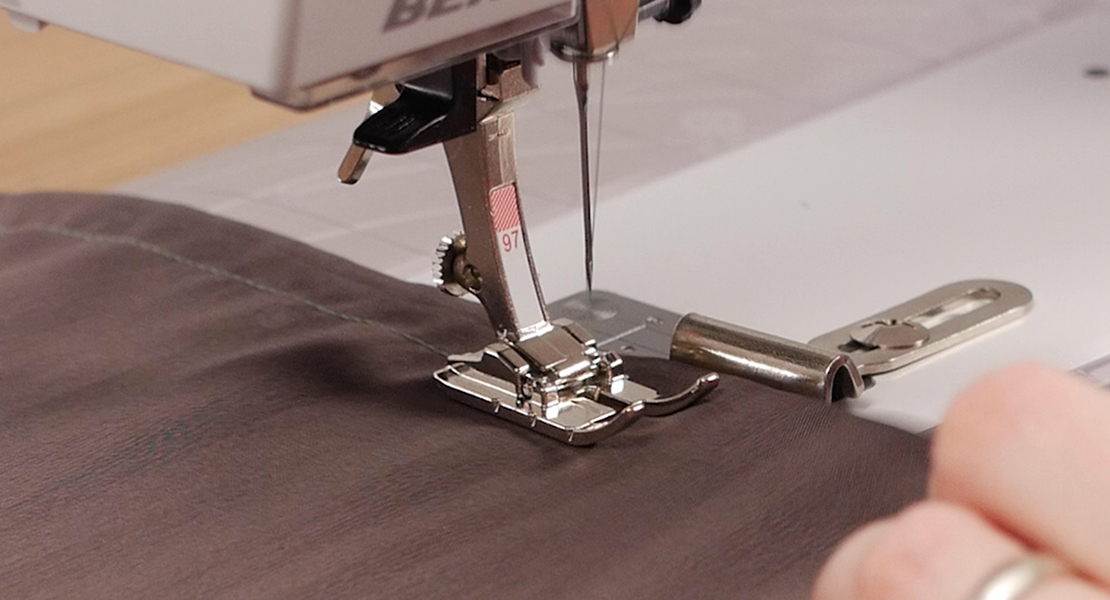
Stitch along each of these lines to create your slots. I backstitch on each one. Using the Reverse pattern foot #1D, I was able to make a perfect stitch line.
Press your piece once you’re done making the slots and set them aside.
Step 3:
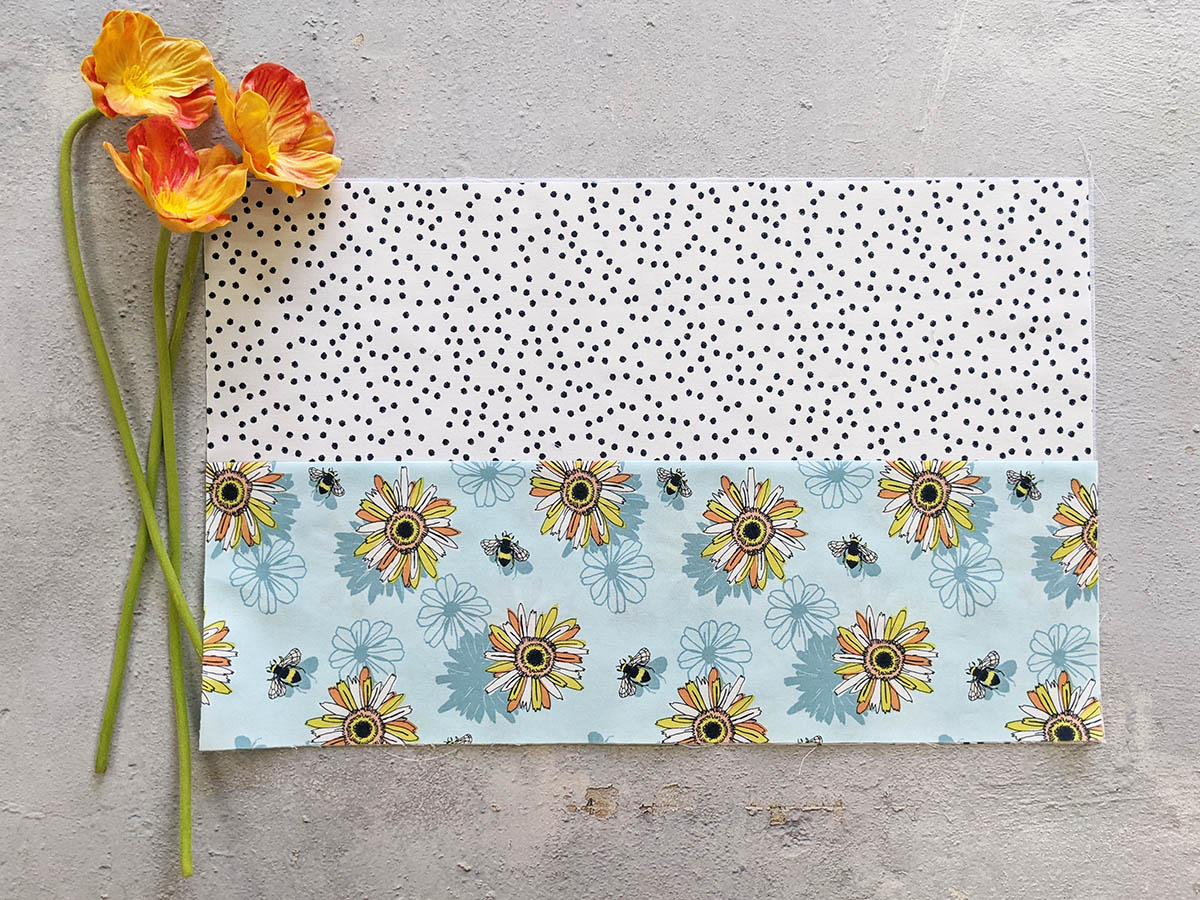
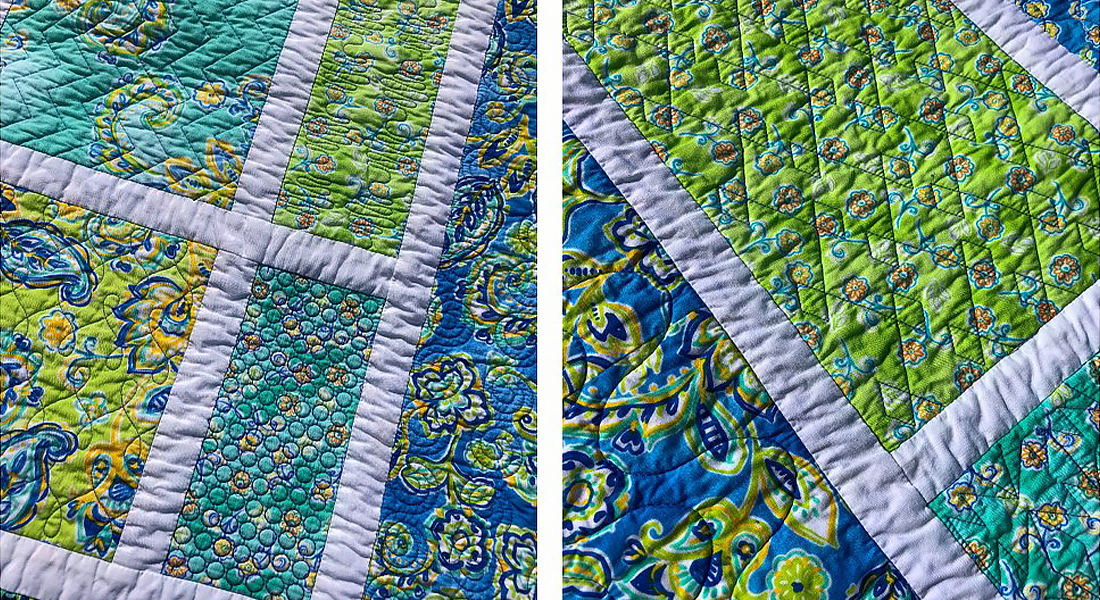
Now, bring two (2) 6 1/2” x 4 1/2” rectangles from fabric A, one (1) 8 1/2” x 4 1/2” rectangle from fabric B, one (1) 6 1/2” x 4 1/2” rectangle from fabric C, two (2) 6 1/2” x 2 1/2” rectangle from fabric C, one (1) 4 1/2” x 2 1/2” rectangle from fabric C, one (1) 6 1/2” x 4 1/2” rectangle from fabric D, one (1) 6 1/2” x 2 1/2” rectangle from fabric D and organize the fabric placement following the picture below.
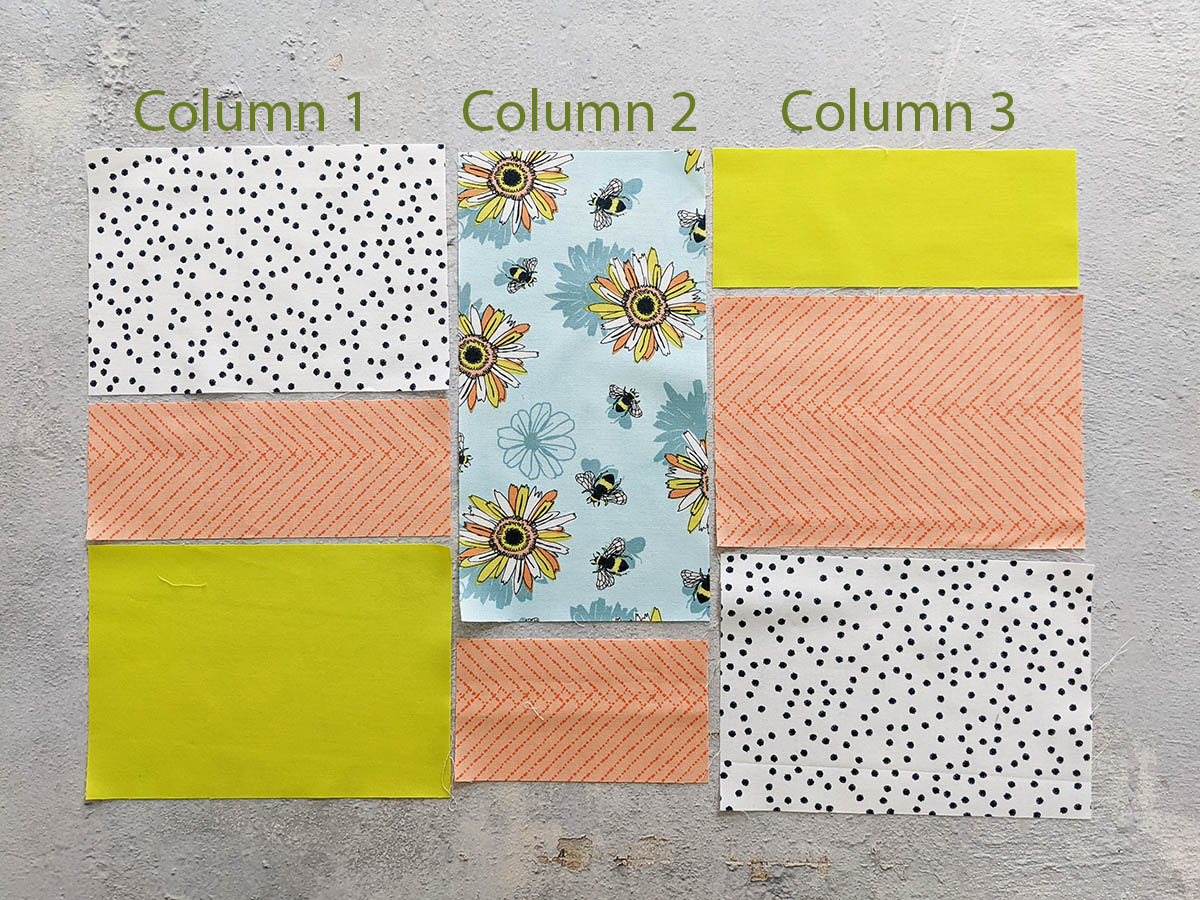
We are going to start by columns, so start sewing the first column at a 1/4” seam allowance.
Step 4:
Sew your three columns together at a 1/4” seam allowance.
Step 5:
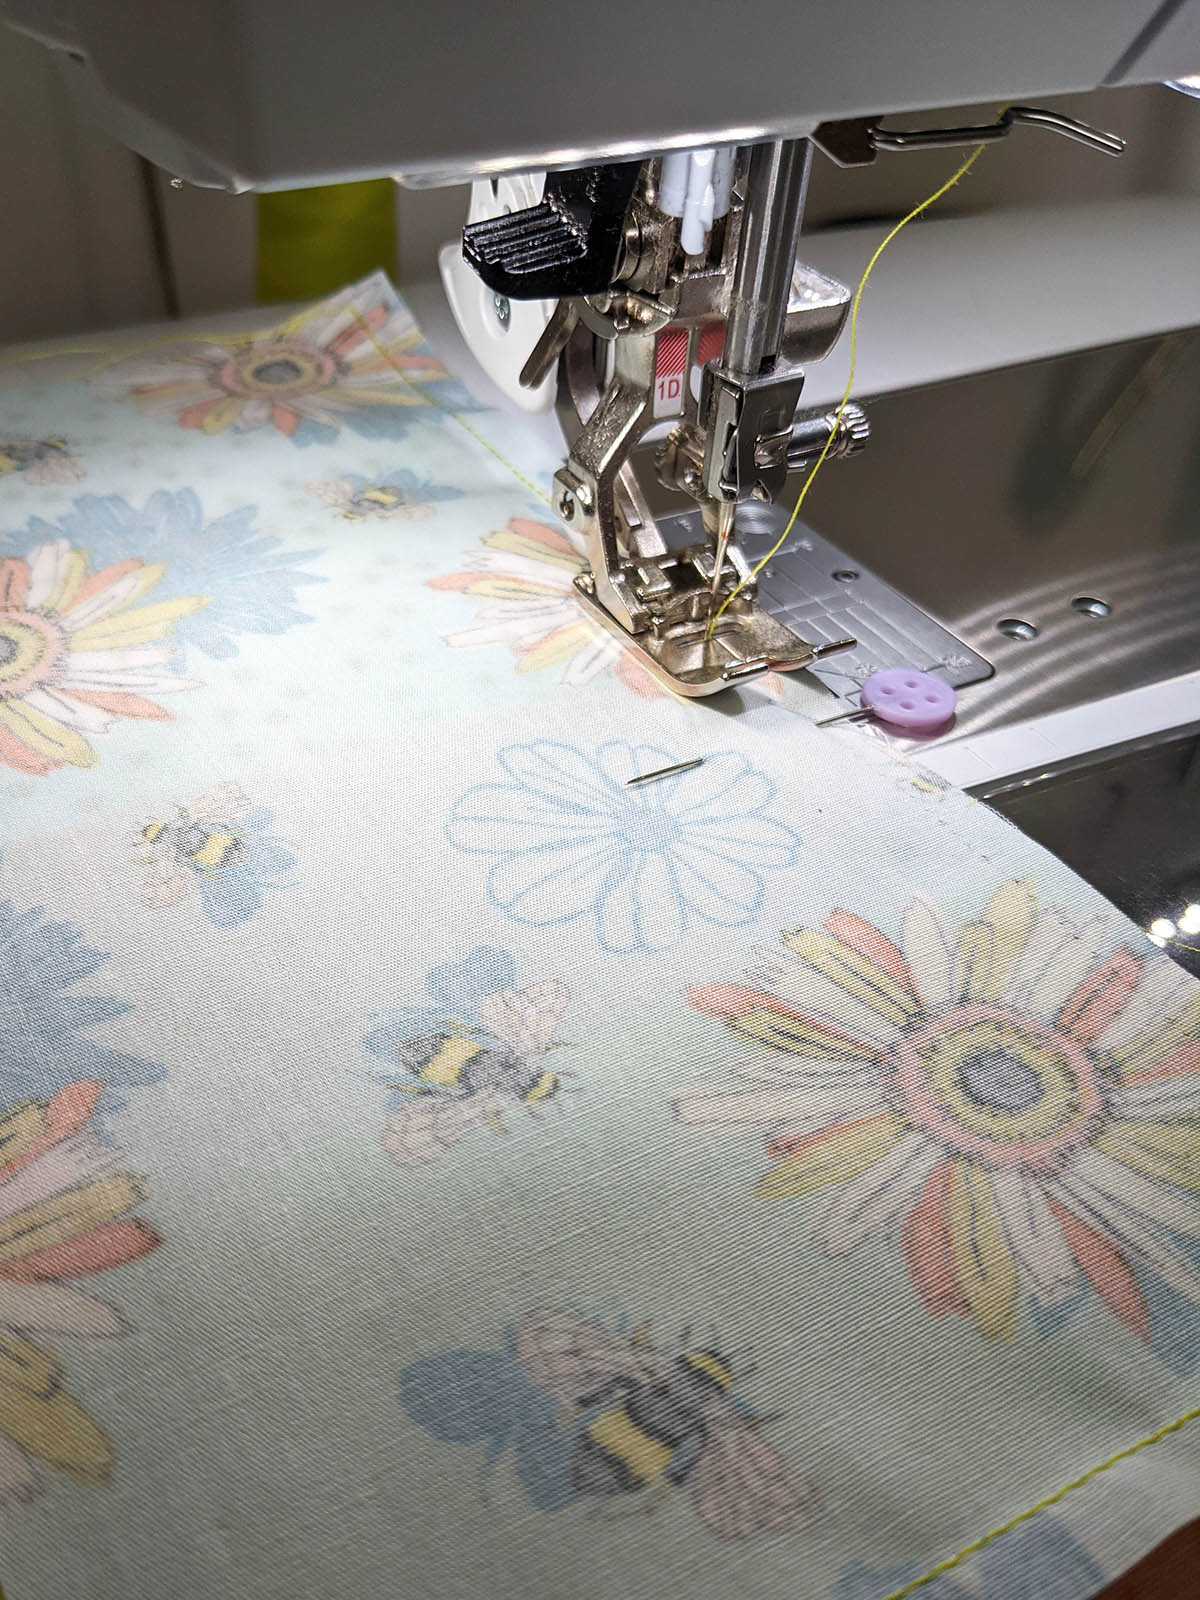
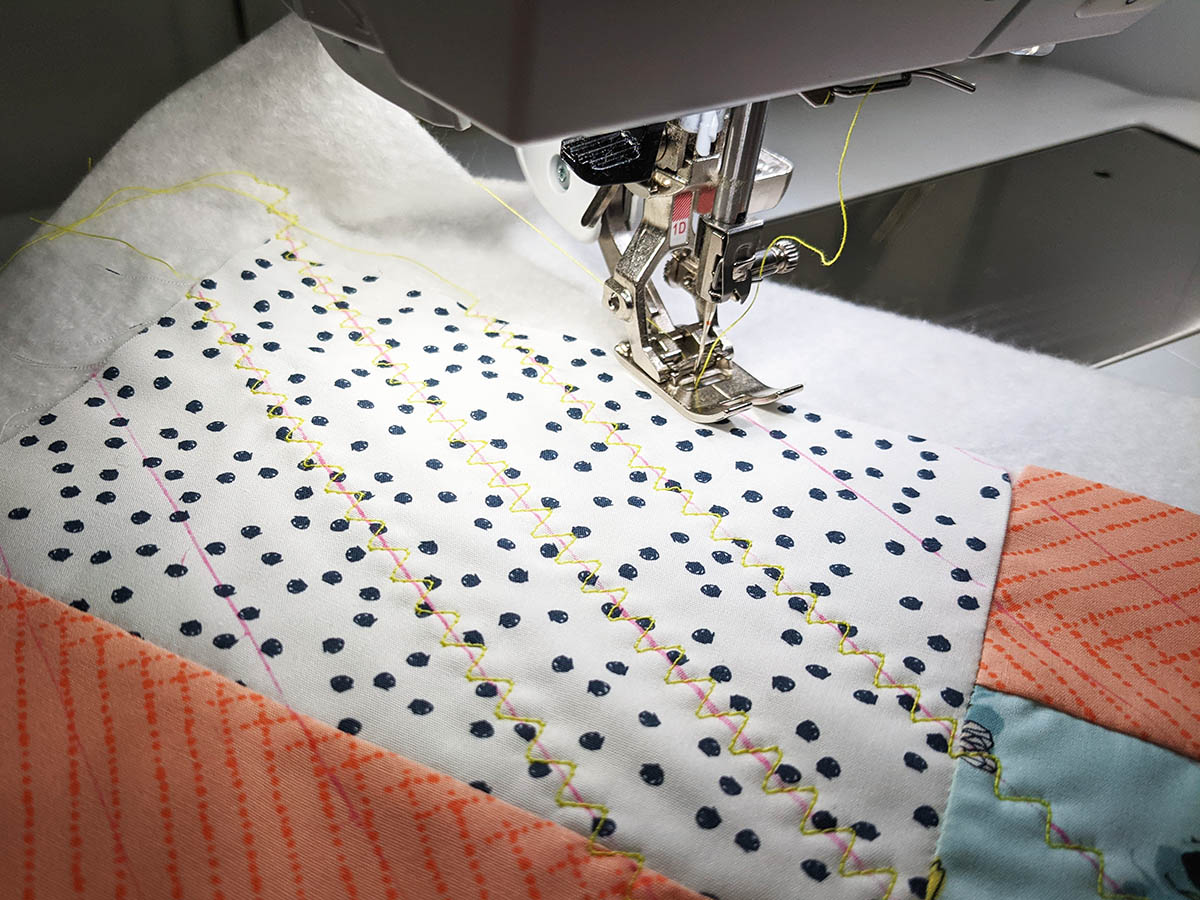
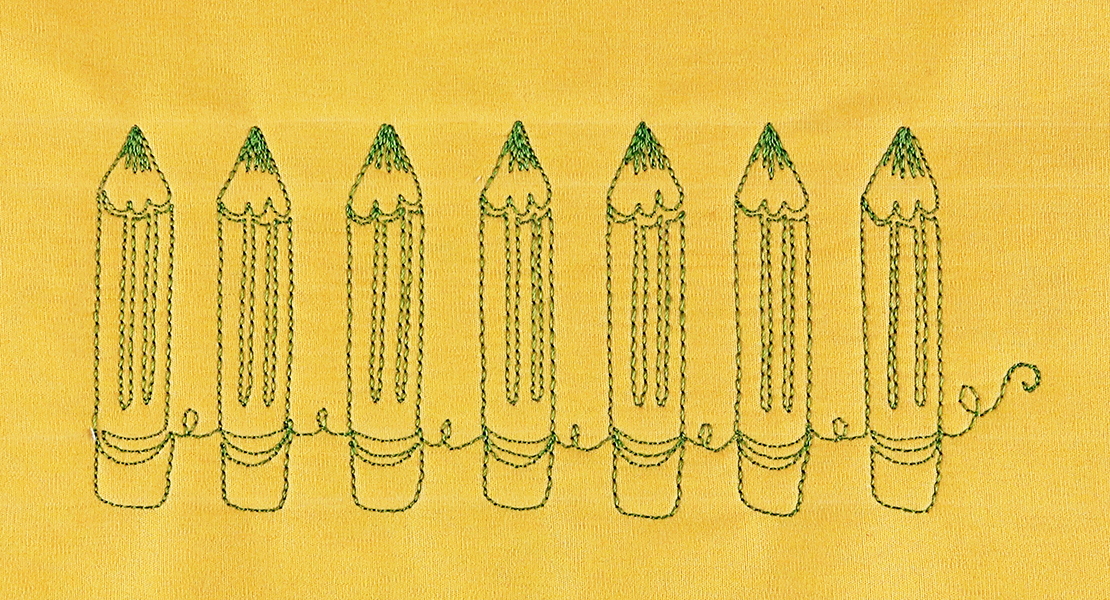
Place batting fabric on the wrong side of the assembled piece. I wanted to quilt something fun, so I decided to use the #4 wavy decorative stitch. I marked diagonal lines at a 1” distance from each.

Step 6:
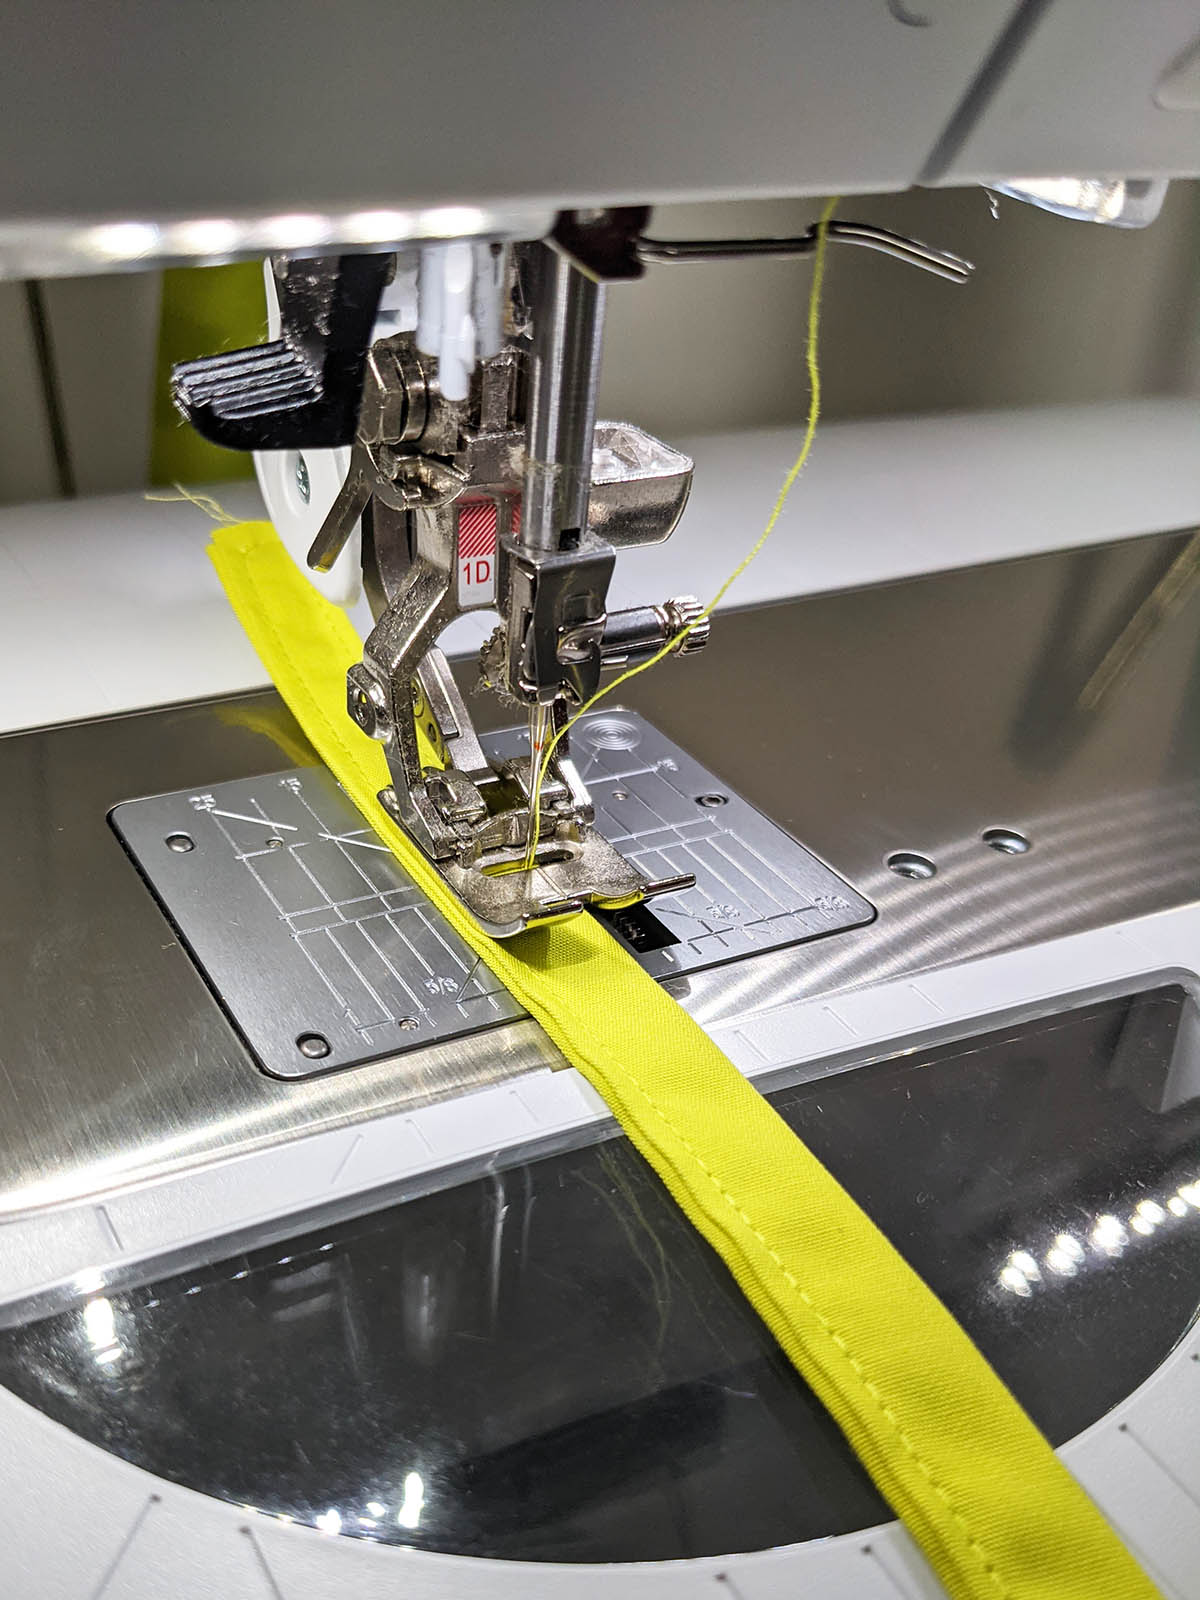
To make the ties, take two (2) 9 1/2” x 3” strips from fabric D.
Take one (1) strip and fold it in half lengthwise to create a crease in the center.
Then, open the strip and fold the edges towards the center crease. Fold the folded edges.

Stitch right on the edge and then sew at the other side of the handle piece. Using the Reverse pattern foot #1D, I was able to make a perfect stitch line.
Fold one of the edges on the strip twice and topstitch to secure it.
Repeat the same for the other strip.
Step 7:
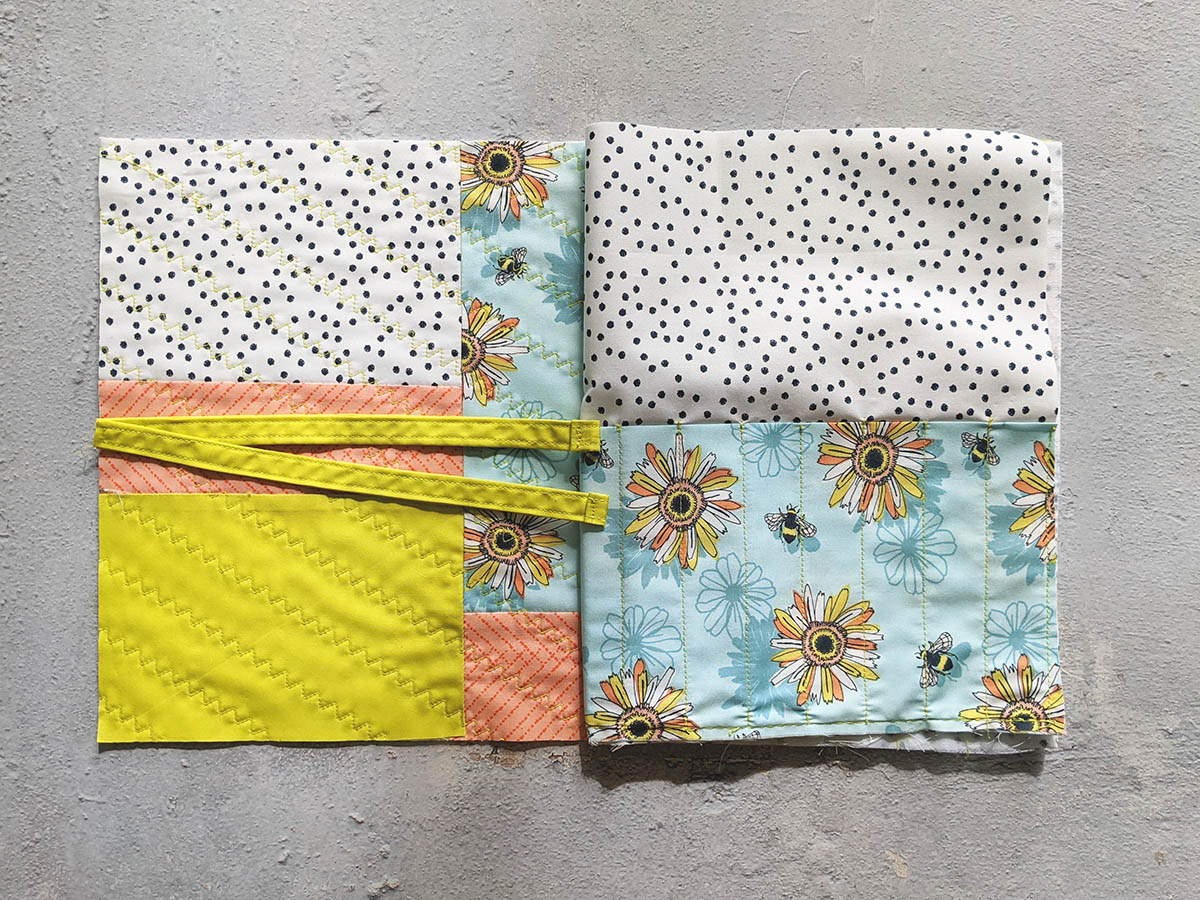
Center the ties on of the edges of the pencil roll case, one on top of the other.
Then place the pencil case slot piece on top of the main piece and ties, right sides facing together.
Step 8:
Pin all around and sew at a 1/4” seam allowance leaving about 3” of opening on one side of the piece.
Step 9:
Trim your corners, turn the piece inside out, and press the edges.
Step 10:
Topstitch the edges making sure you backstitch at the beginning and end of each line.

Now you are ready to add your pencils, roll them up, and you’re done!

Repeat the same process for the other pencil roll and you have a cute set of back-to-school pencil rolls!!!
Used Products


What you might also like


3 comments on “How to Sew Back-to-school Pencil Rolls”
-
-
Certainly knitting needles, but how about crochet also? And if you made it slightly shorter with slightly wider spacing maybe even a great way to travel with threads for other handwork!
-
Good for paint brush organization too, carrying to workshops (might add machine stitched #s before assembly, e.g. #000, or words “flat” “round” “filbert”…
Leave a Reply
You must be logged in to post a comment.

Fun! I use these for knitting needles too!