Machine Embroidered Cherry Valentines on the B 990
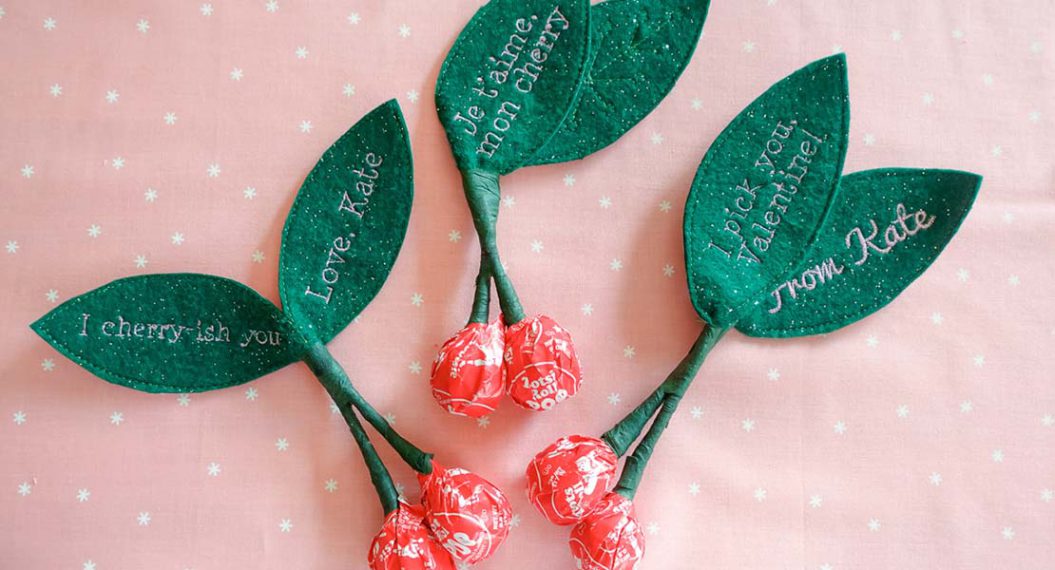
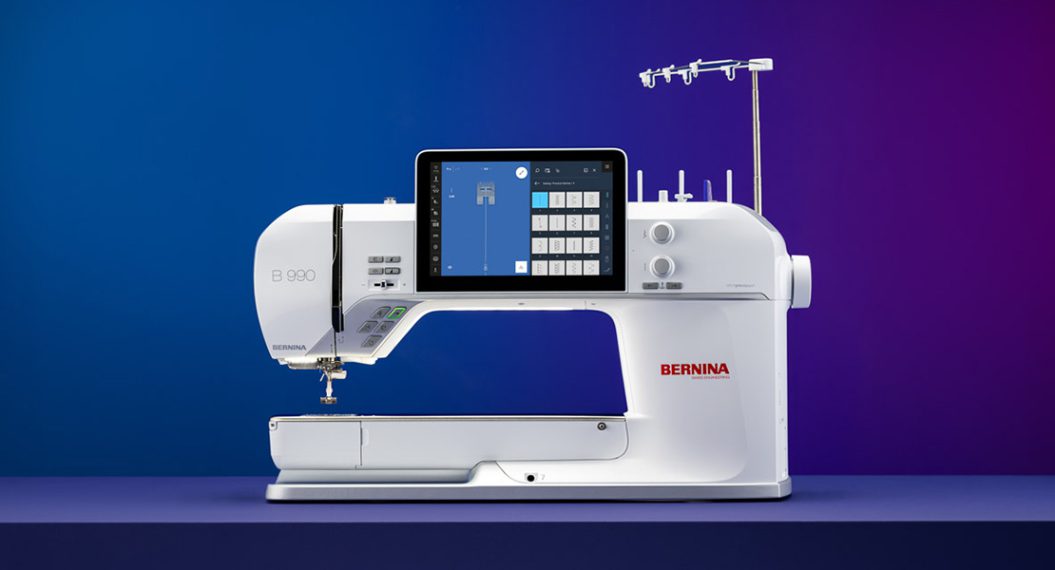
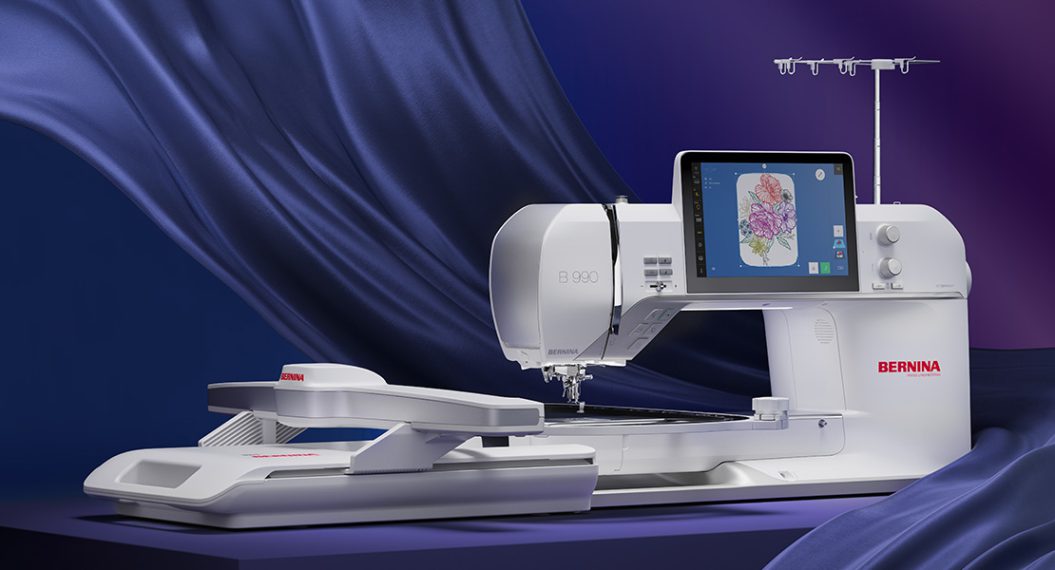
Every holiday is a new excuse for a cute handmade gift! When I need to make a lot of something quickly, I always turn to machine embroidery and the biggest hoop I have so I can make a whole lot of something very fast. It’s the best! Let me show you how I made these super cute machine embroidered cherry valentines on the B 990!
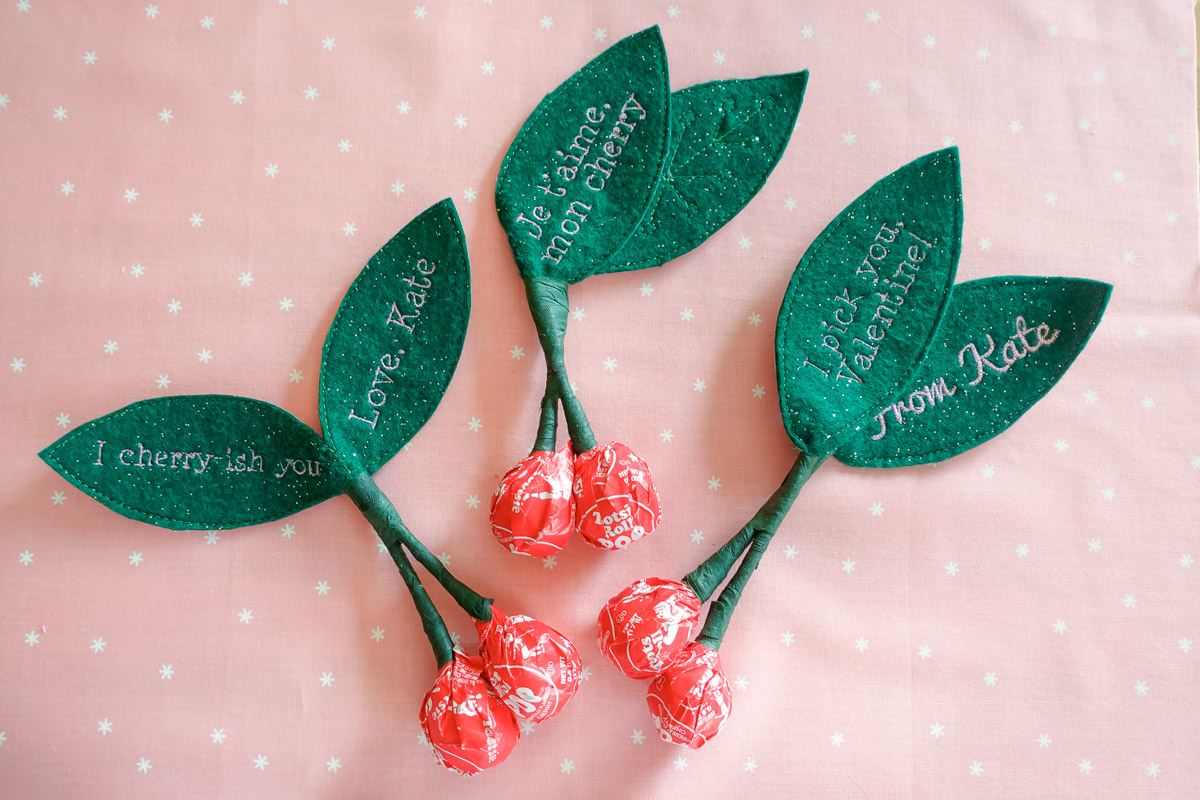
I know I’m not alone when I say some of my best ideas come from browsing on Pinterest. I love turning a cute handmade craft into a fun sewing or embroidery project. Shout out to Brittany from The House that Lars built for the super cute Tootsie Pop Cherry Valentines blog post that led to this embroidered version!
In this tutorial, I’m going to show you how to make one Valentine in a Midi Hoop. Should you need to make more, like for a whole classroom or office, you can easily up the scale by using the Giant Hoop.
Now let’s get embroidering, Valentine.
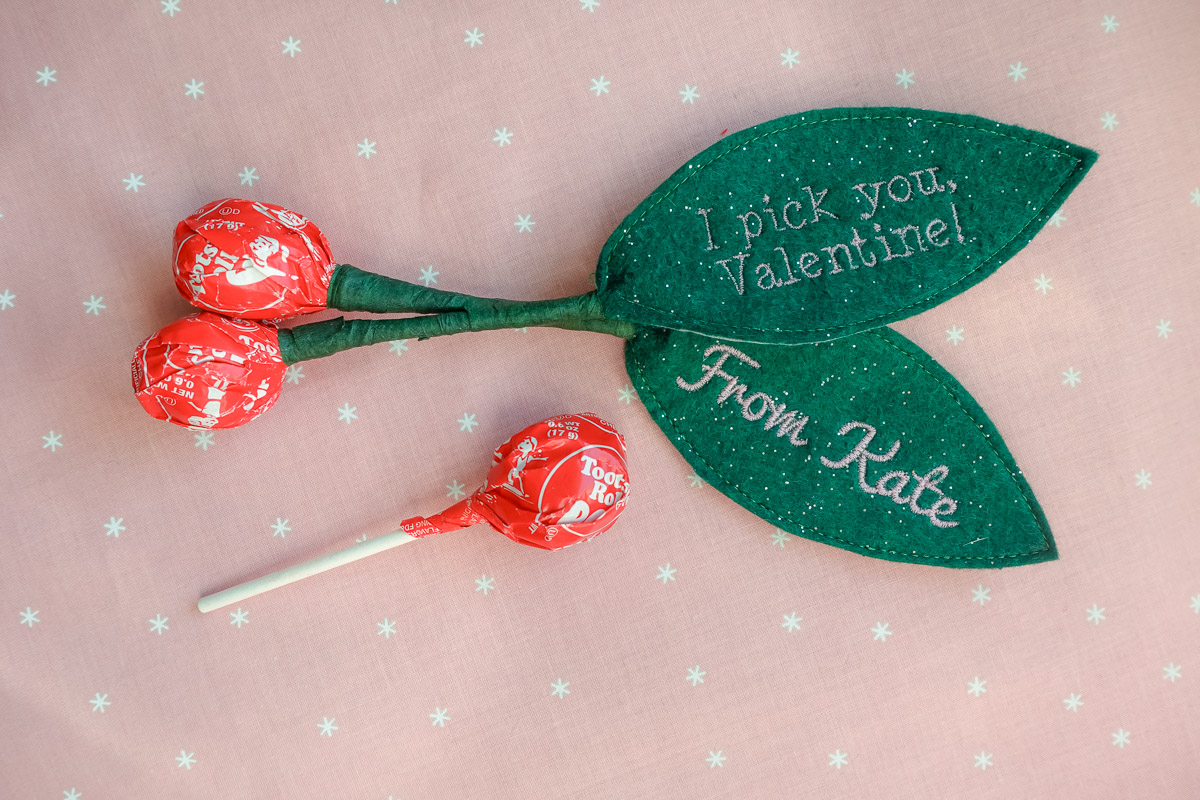
Machine Embroidered Cherry Valentines on the B 990
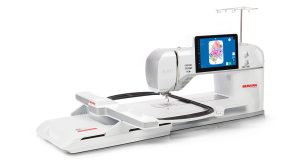
- BERNINA 990
- Embroidery Foot #26L
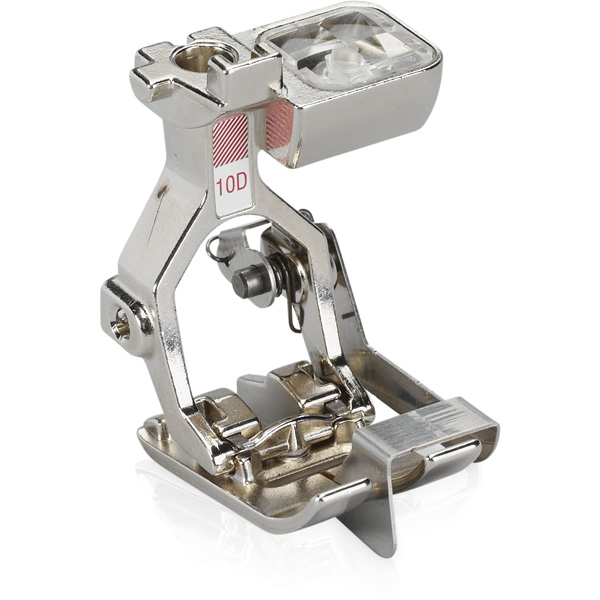
- Edgestitch Foot #10D
- Midi Hoop
- 90/14 Topstitch needle
- Quilting Needle
- 2 Jumbo Bobbins
- 1 wound with embroidery bobbin thread
- 1 wound with thread to match the leaf color
- Green Felt
- Embroidery Thread
- OESD Expert Embroidery Tape Tear Away
- OESD Stabil Stick CutAway
- OESD StitcH20 WashAway
- Cherry Tootsie Pops (Raspberry will work, too, for a black cherry look)
- Green Stem Wrap tape
- (Optional) Fabric or craft glue
If you don’t have your B 990 yet, don’t worry! You can download designs to create your own!
Step 1: Create the Design
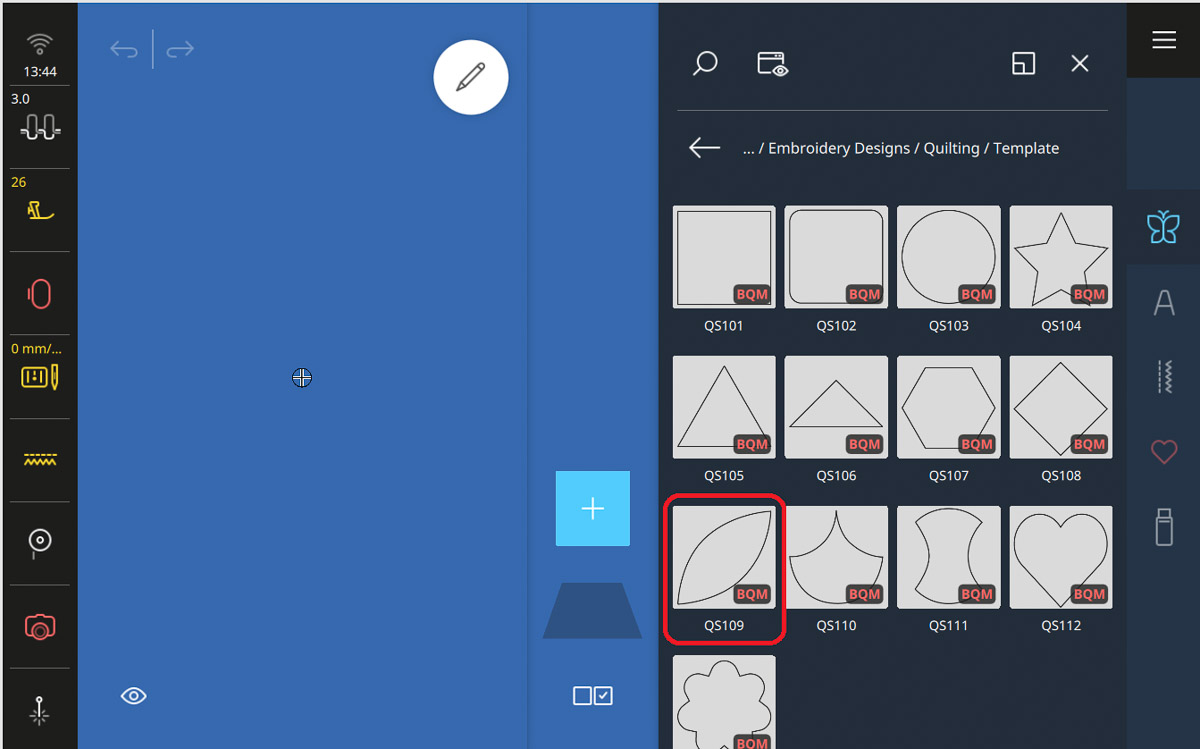
In Embroidery Mode, select Open New Design. Navigate to Embroidery Designs > Quilting > Template. On this screen, choose #QS109.
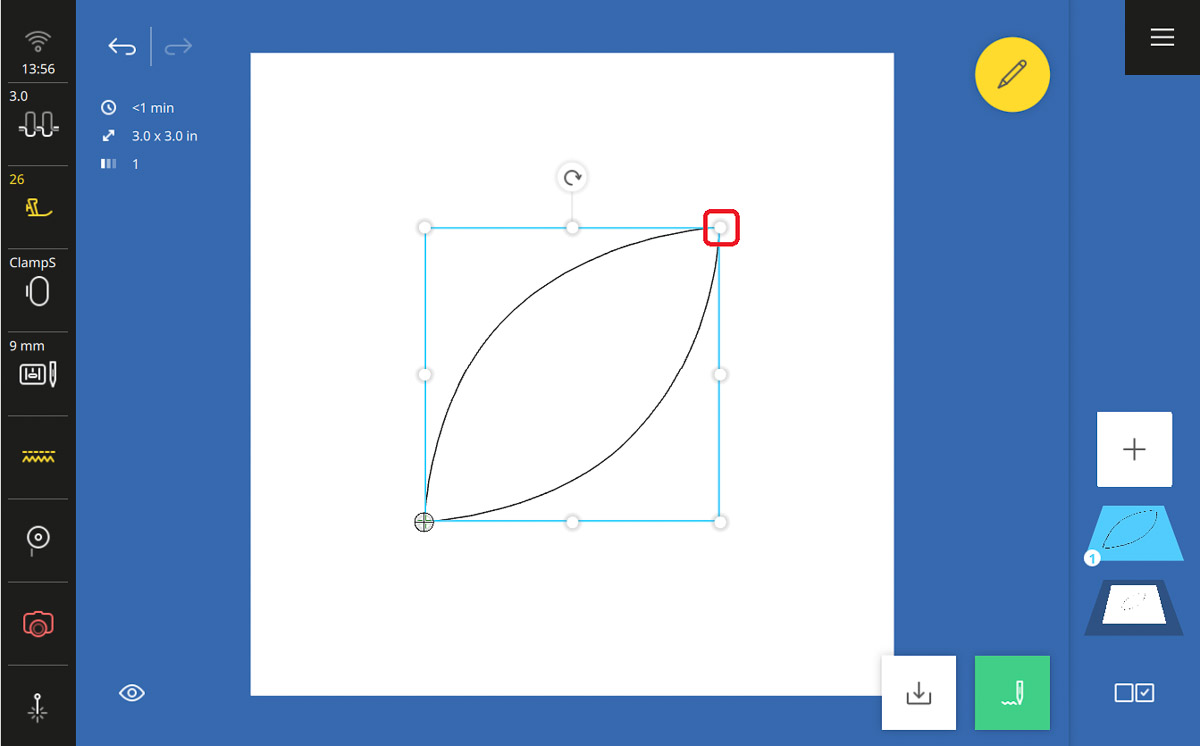
Use the corner nodes on the bounding box to resize the design to 3.5” by 3.5”.
The photo example shows three inches but I found anywhere between 3.5” and 4” looks better with the Tootsie Pops.
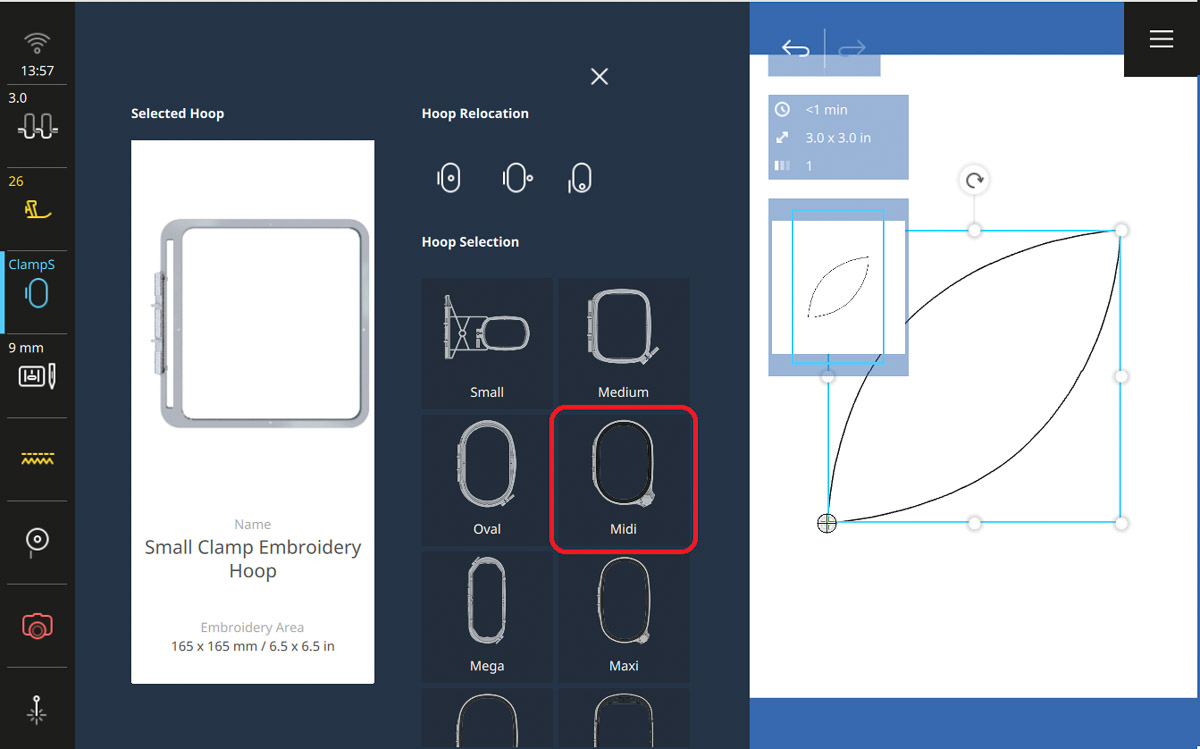
Open the Hoop Selection menu and choose the Midi Hoop. Close the Hoop Selection menu.
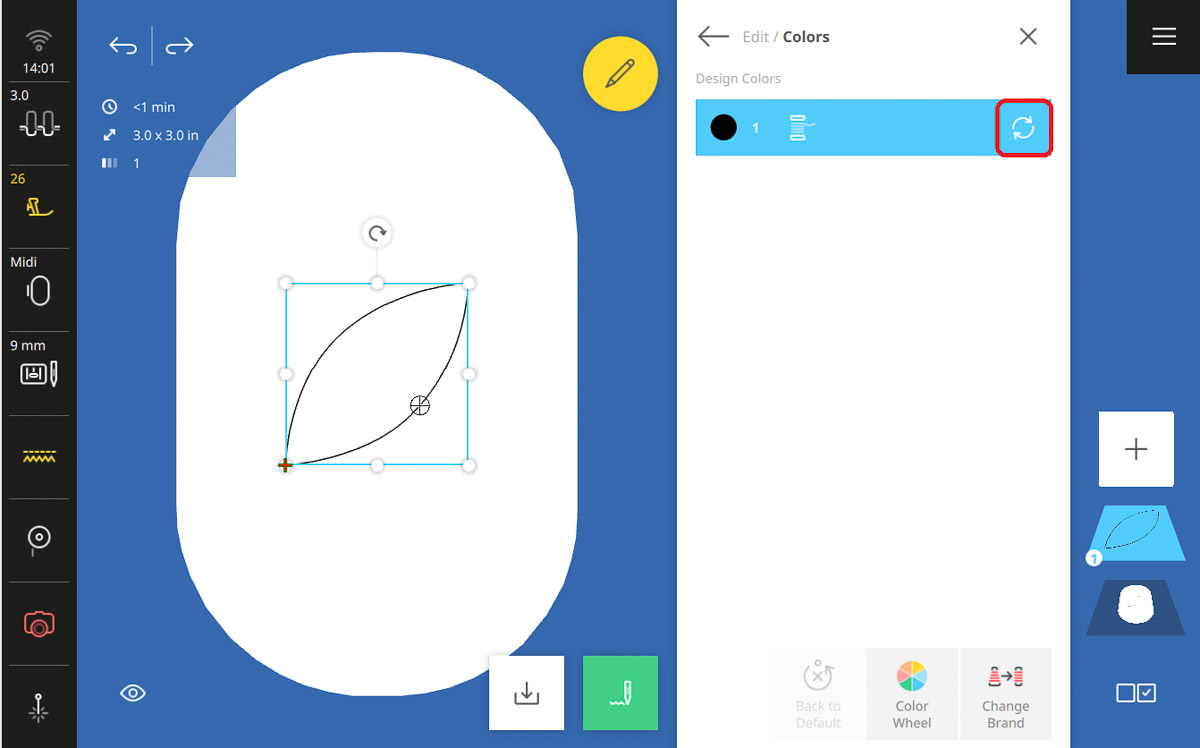
In the Edit Menu, select the Colors icon. Choose the Change Color icon.
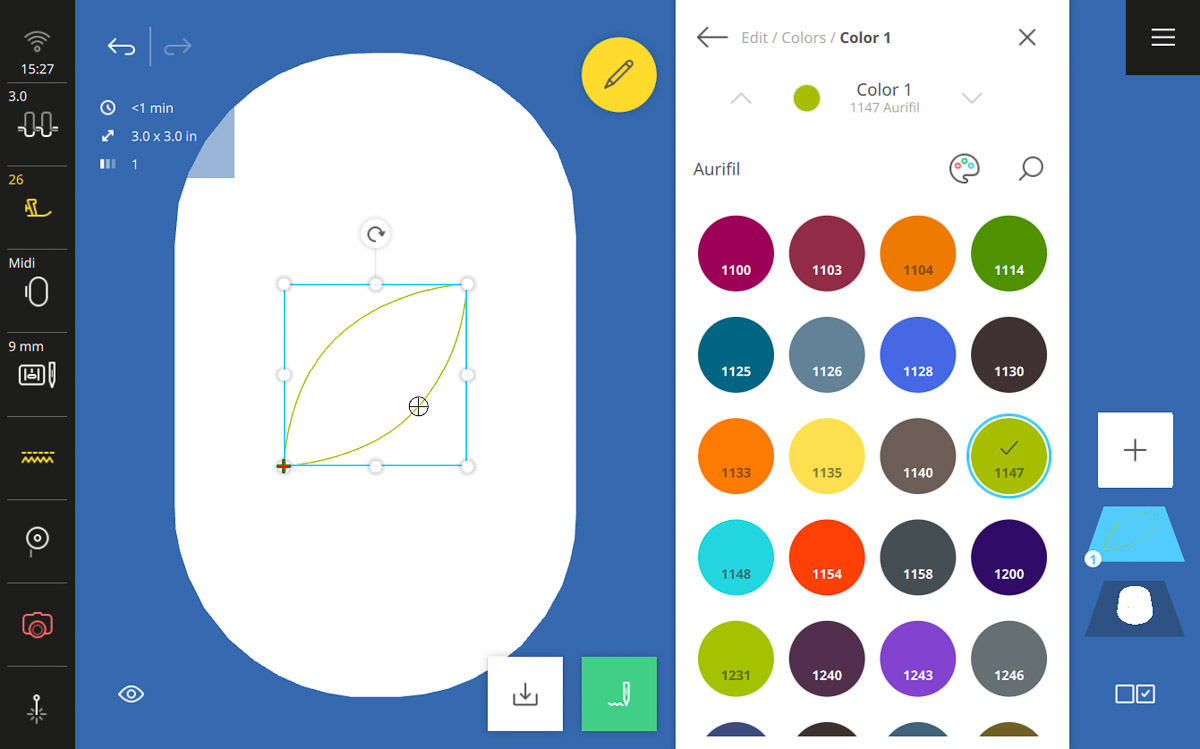
Change your thread to the thread color and brand you will be using for the leaves.
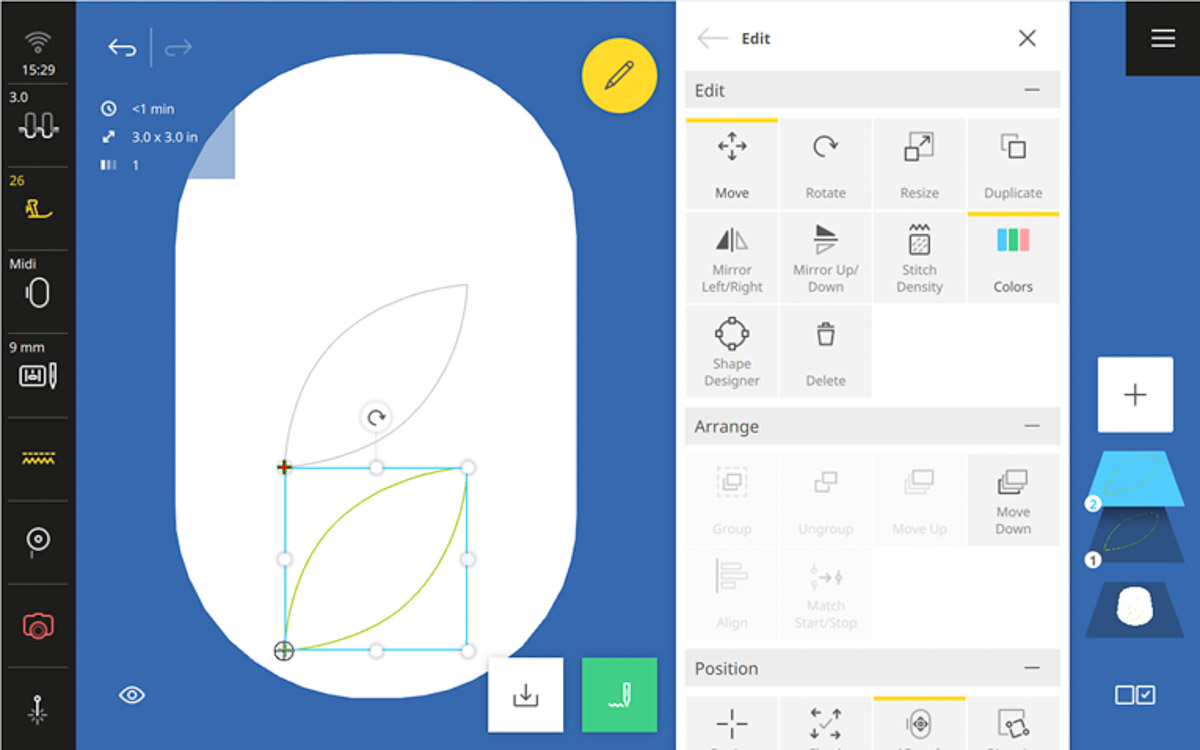
Back in the Edit Menu, duplicate your leaf design.
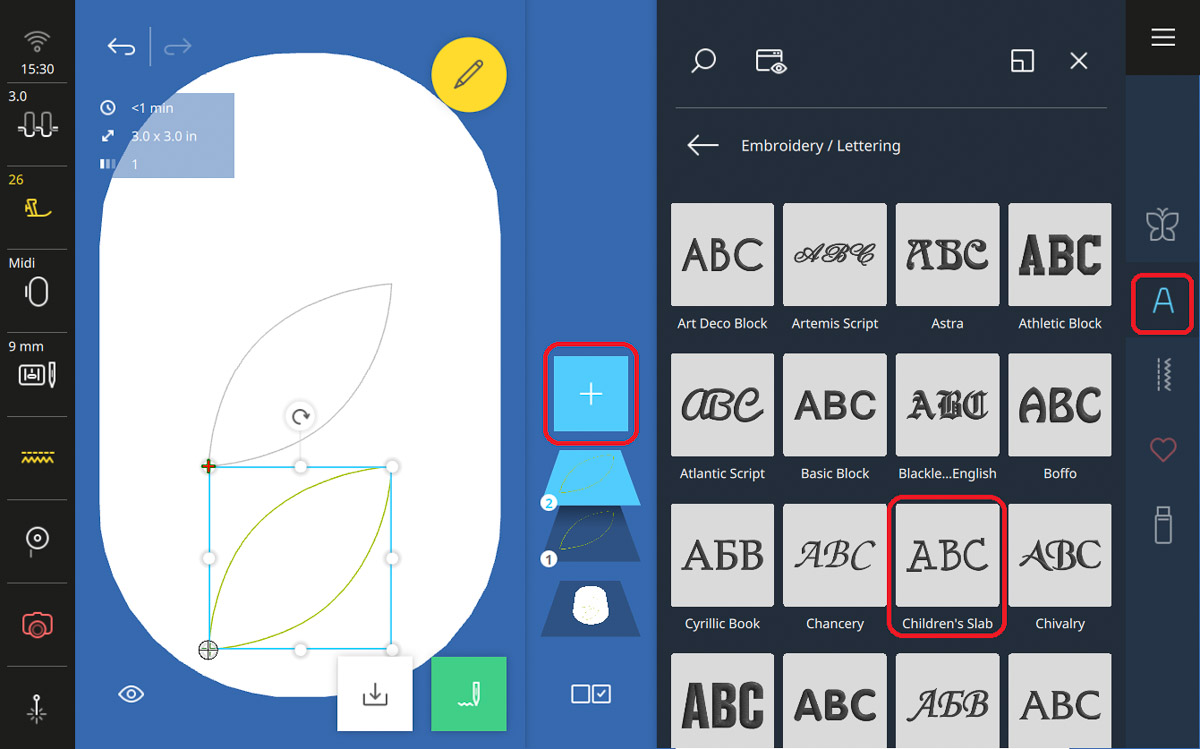
Now select Add Design, choose the Lettering folder and the Children’s Slab font.
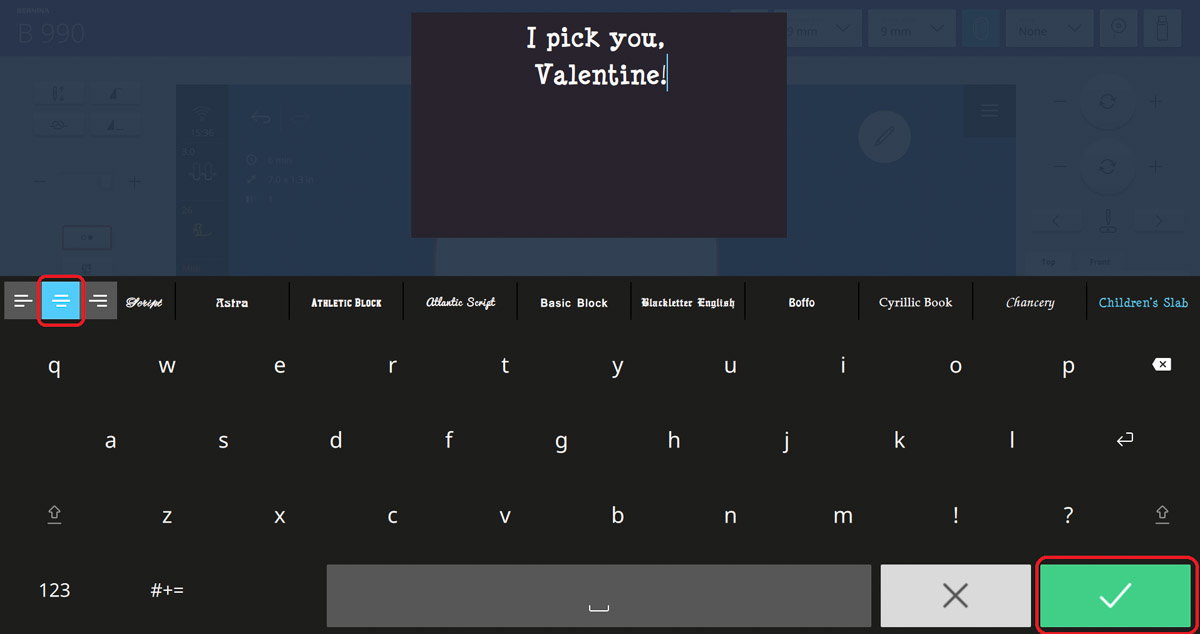
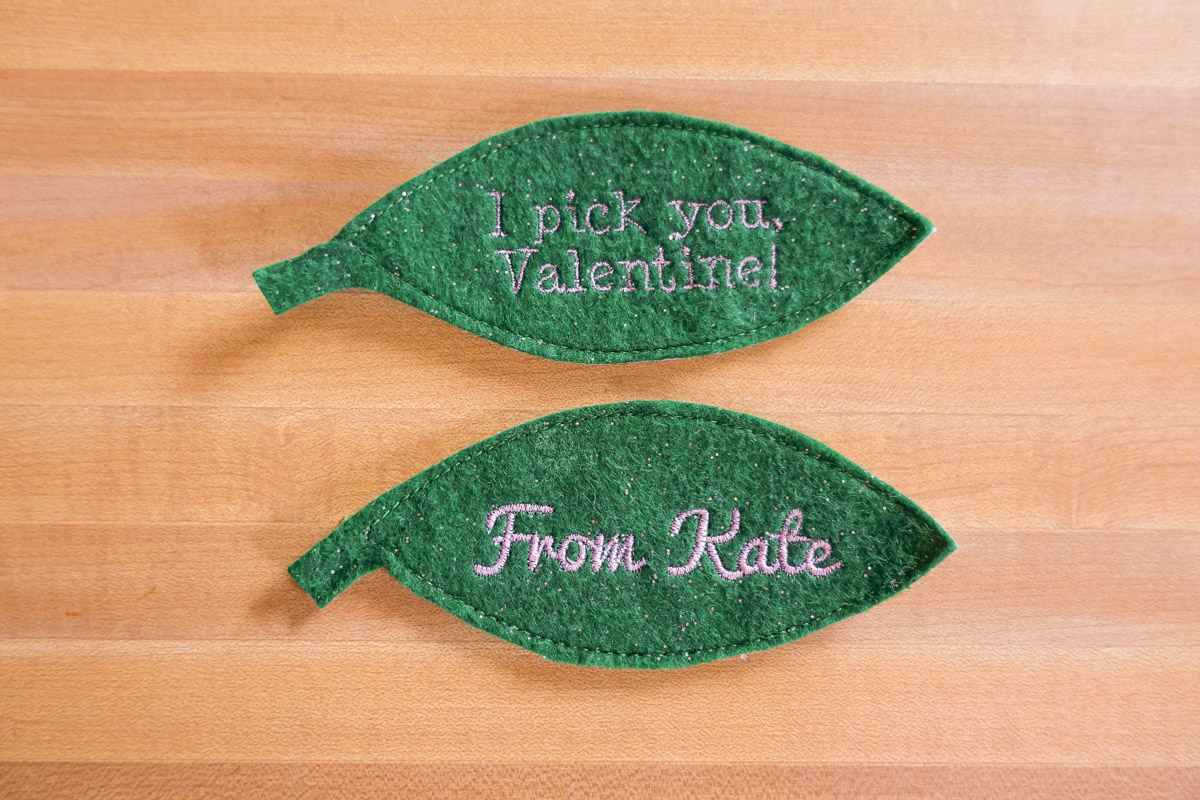
Type “I pick you,” then a line break followed by “Valentine!” Center justify the text and then tap the green checkmark when you’re ready.
Remember, with the B 990, we don’t have to fret over misspelled words because we can always go back and edit the text! I also love that choosing the perfect font is easier than ever with the text preview showing the font choice in real time.
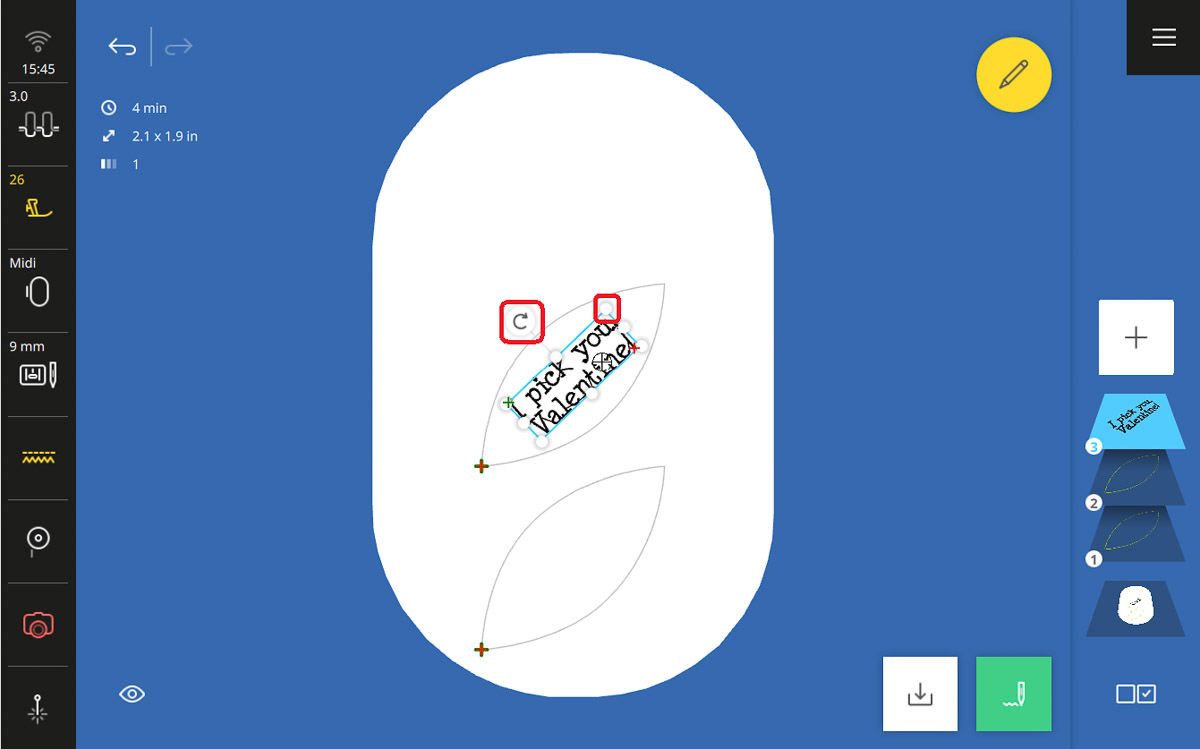
The text will appear as big as the hoop. Fortunately, the B 990 gives us limitless resizing on all fonts! Use the corner nodes to resize your text to fit within the leaf. Use the Rotate handle to rotate the text to 315 degrees, matching the leaf rotation. Drag the design to fit within the leaf shape. Don’t worry about it being perfect; we have a trick for that!
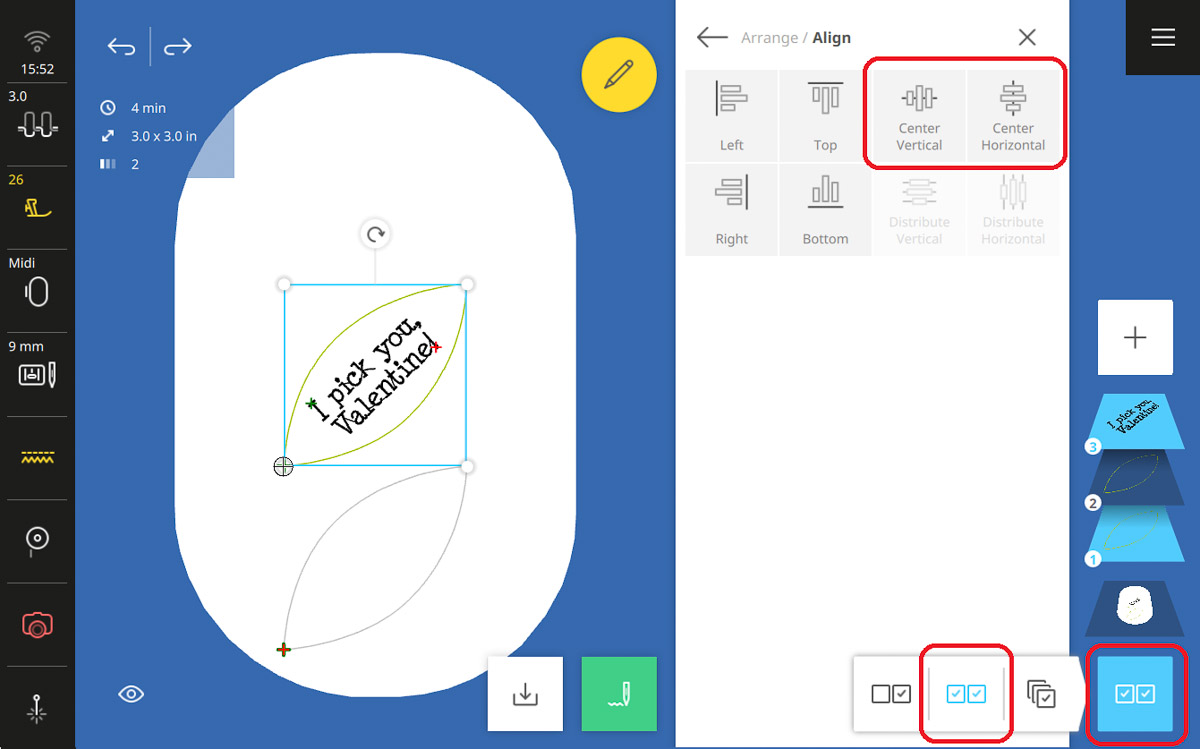
In the Selection Menu, choose Multiple Selection (middle option), then select the leaf layer and the text layer of your current leaf.
Select Align (in the Edit Menu, under the Arrange submenu). Select Center Vertical and Center Horizontal. Now the layers are perfectly aligned.
Go back to the Edit Menu and ensure only the text layer is selected for the next step. Select Styling and with the Edit Menu open, use touch gestures or the View Toolbar to zoom in on your text.
Change the Stitch Density to 80% then hit the green checkmark. The stitches on screen will change to show how the density has changed.
While we don’t have to do this, thanks to the limitless resizing of fonts with the B 990, I love to do this because I like the look of less dense lettering and it will significantly cut down on stitch time. If you are making as many of these valentines as I plan to, this will save you lots of time over the course of the project! I love that my B 990 gives me this fantastic editing option for my lettering.
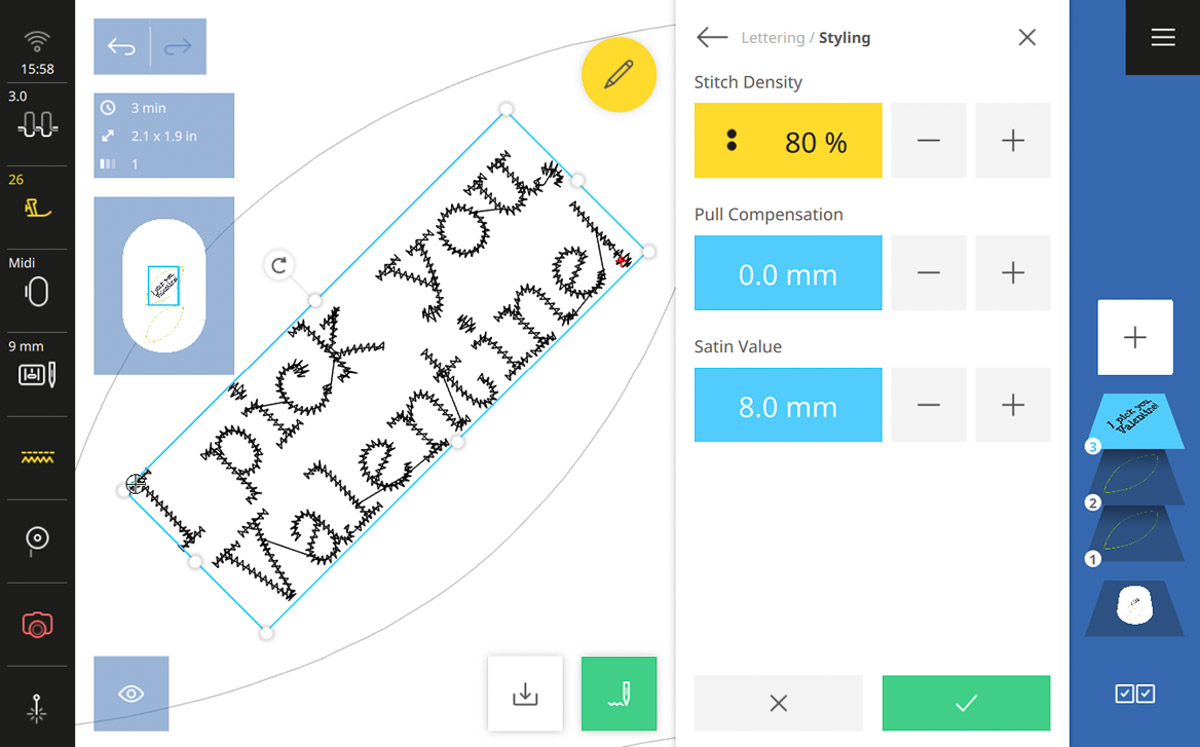
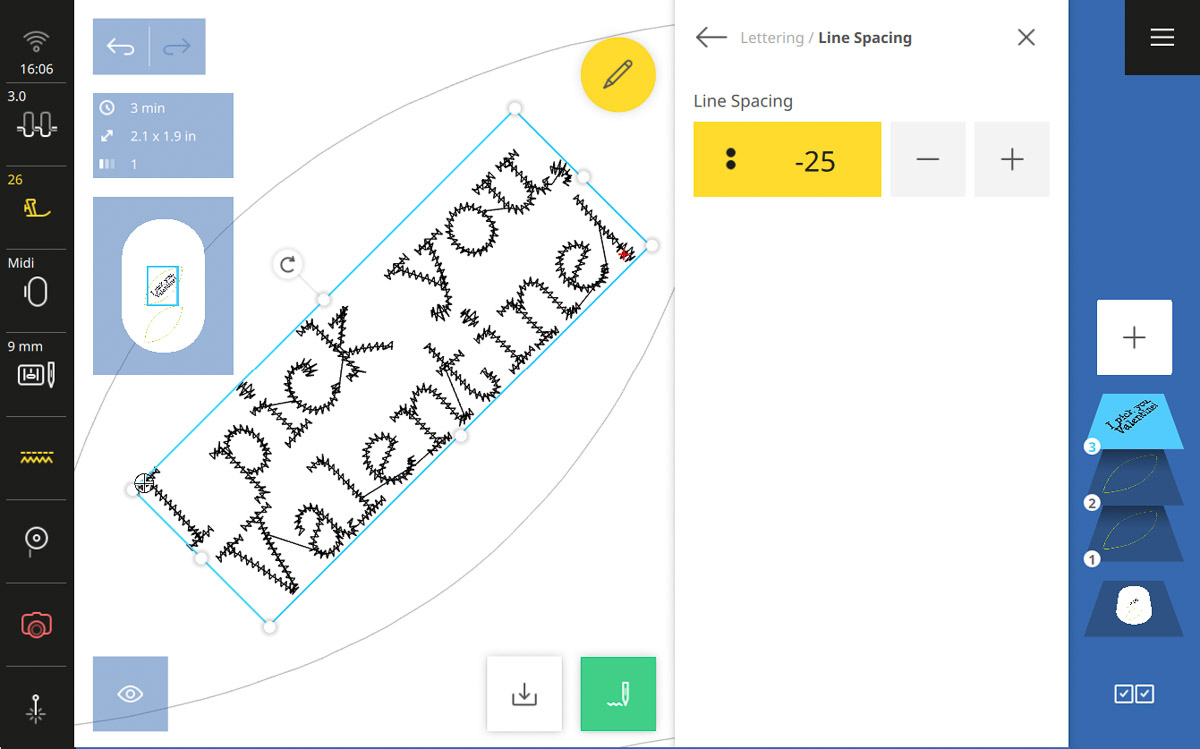
Select Line Spacing (Edit Menu > Lettering submenu). Set the line spacing to -25 to follow this tutorial, or whatever you think looks best and fits within the leaf.
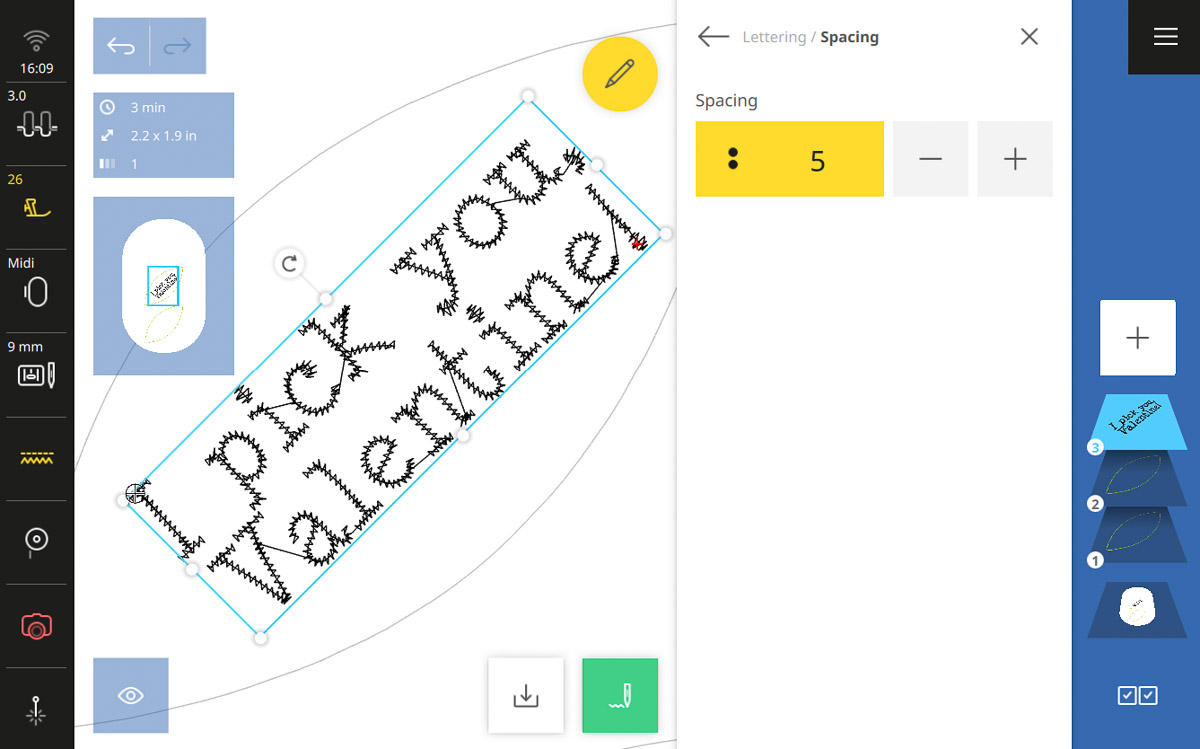
Now we will head back to the Edit Menu and select Spacing. Set your spacing to 5, or whatever you think looks best and fits within the leaf.
How great are these Lettering editing features? Think of all the incredible ways you can add lettering to your project! Making quilt labels will be a breeze!
For the second leaf, branch out and have some fun! I used the “Atlantic Script” font to write out “From Kate.” I then repeated the above tutorial, skipping the spacing and line spacing steps.
This is also a great spot for quilting or light stitching embroidery designs. Have fun and play around. Just be sure to keep the stitching light for best results.
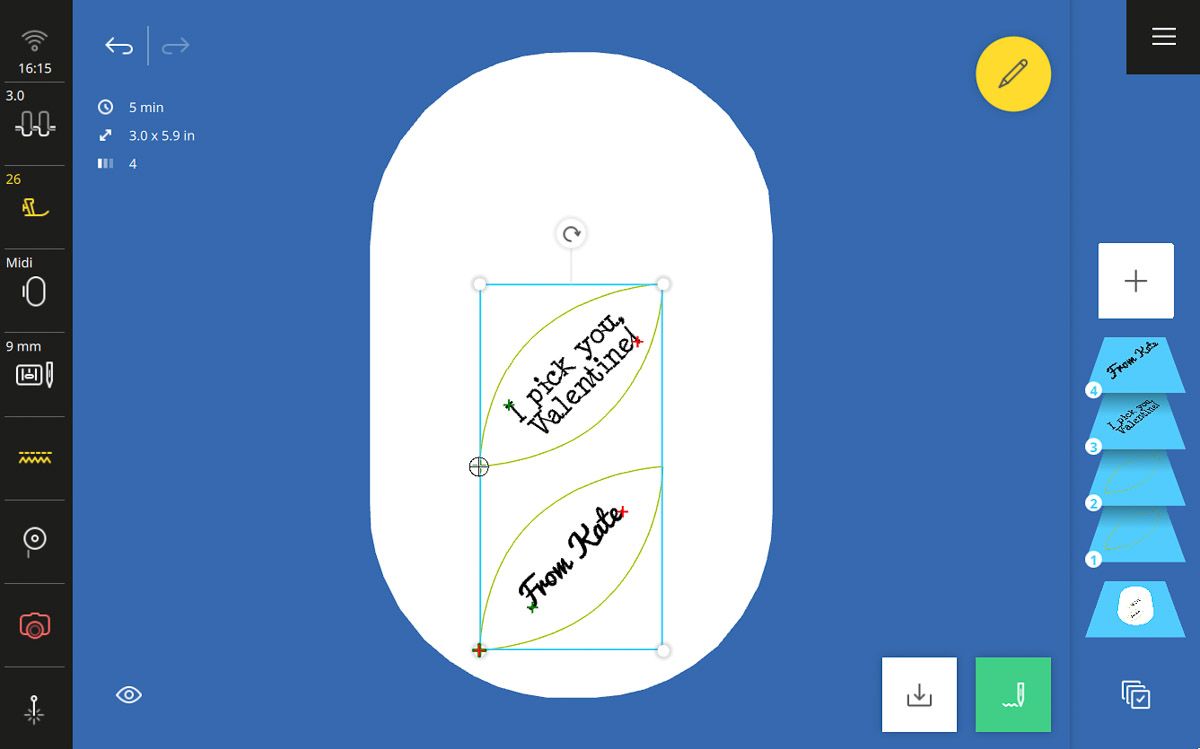
Once the second leaf is finished, select both leaf designs in the layer bar. Open the Edit Menu and select Move Up until the leaf outlines are the 3rd and 4th layer.
Now the lettering will stitch out first, allowing for a backing to be placed on the leaves.
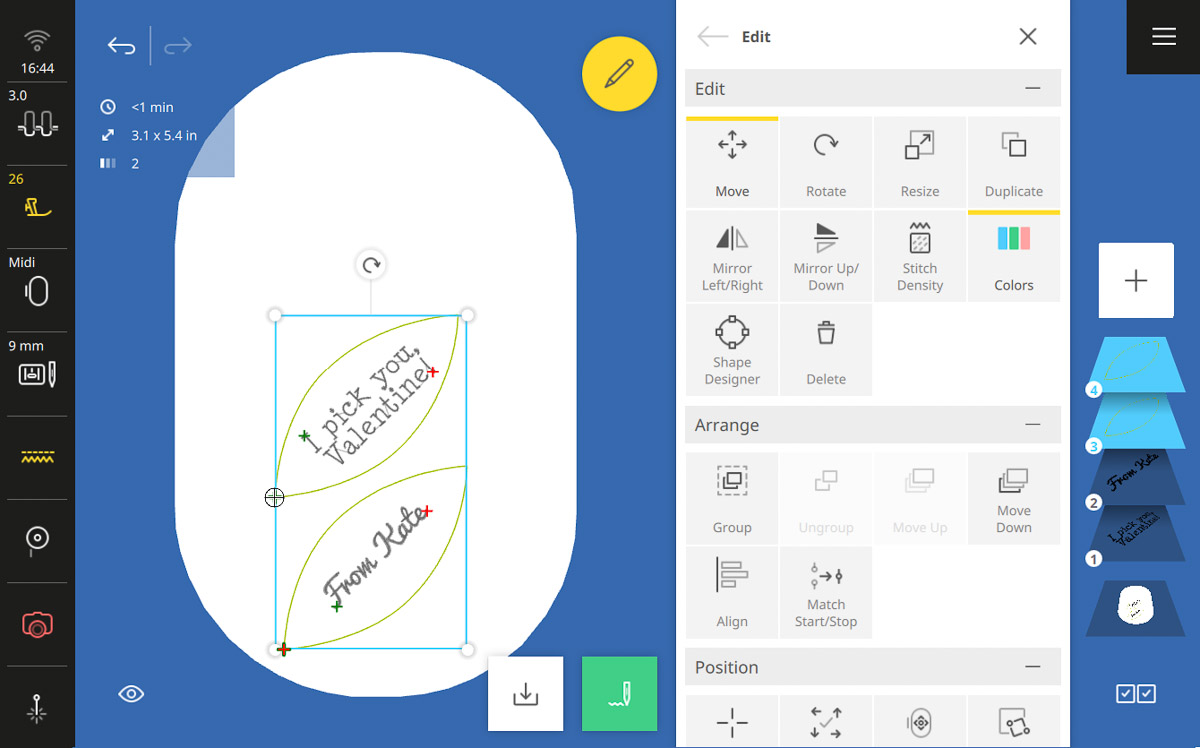
Select the lettering and outline of the top leaf and tap group. Repeat with the bottom leaf and lettering. This will allow you to move the leaves as one design in the next step.
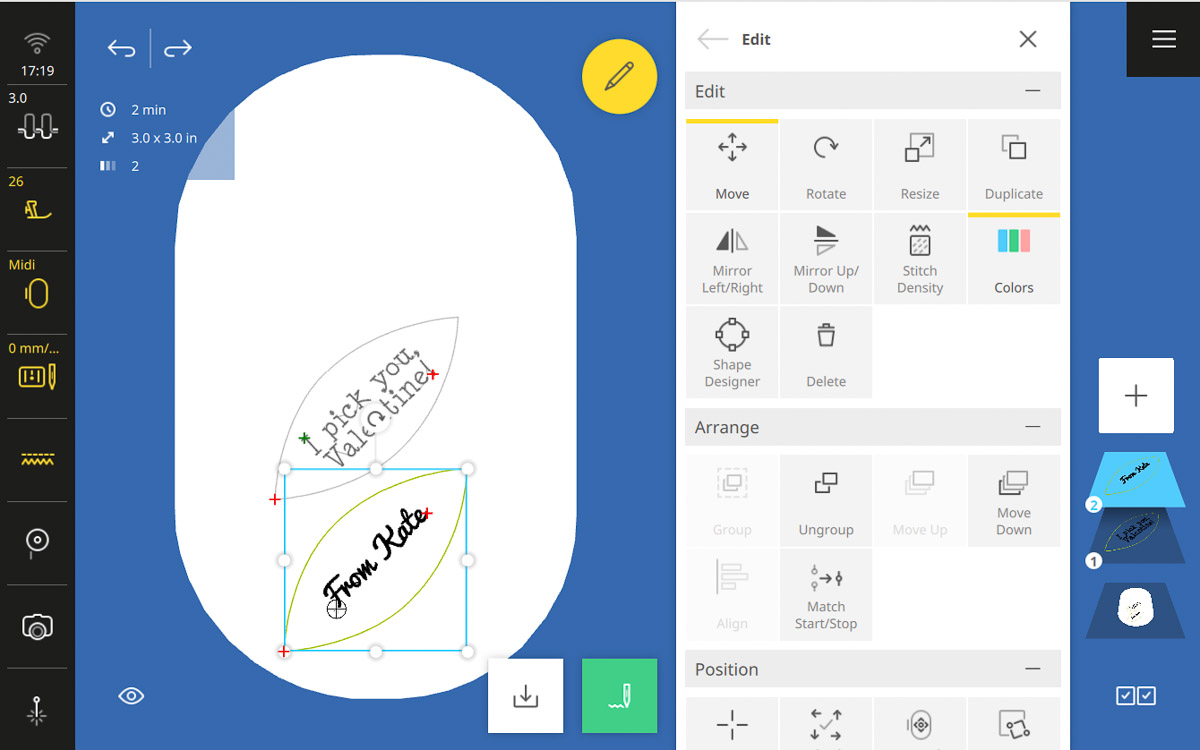
Step 2: Embroider the Leaves
Install the 90/14 Topstitch needle and insert the bobbin with embroidery bobbin thread. Thread the machine with the embroidery thread for the lettering. Attach the 0 mm Straight Stitch plate and Embroidery Foot #26.
Take the Midi Hoop and hoop Stabil Stick Cut Away, sticky side up. Place the felt right-side up in the hoop and press firmly to adhere.
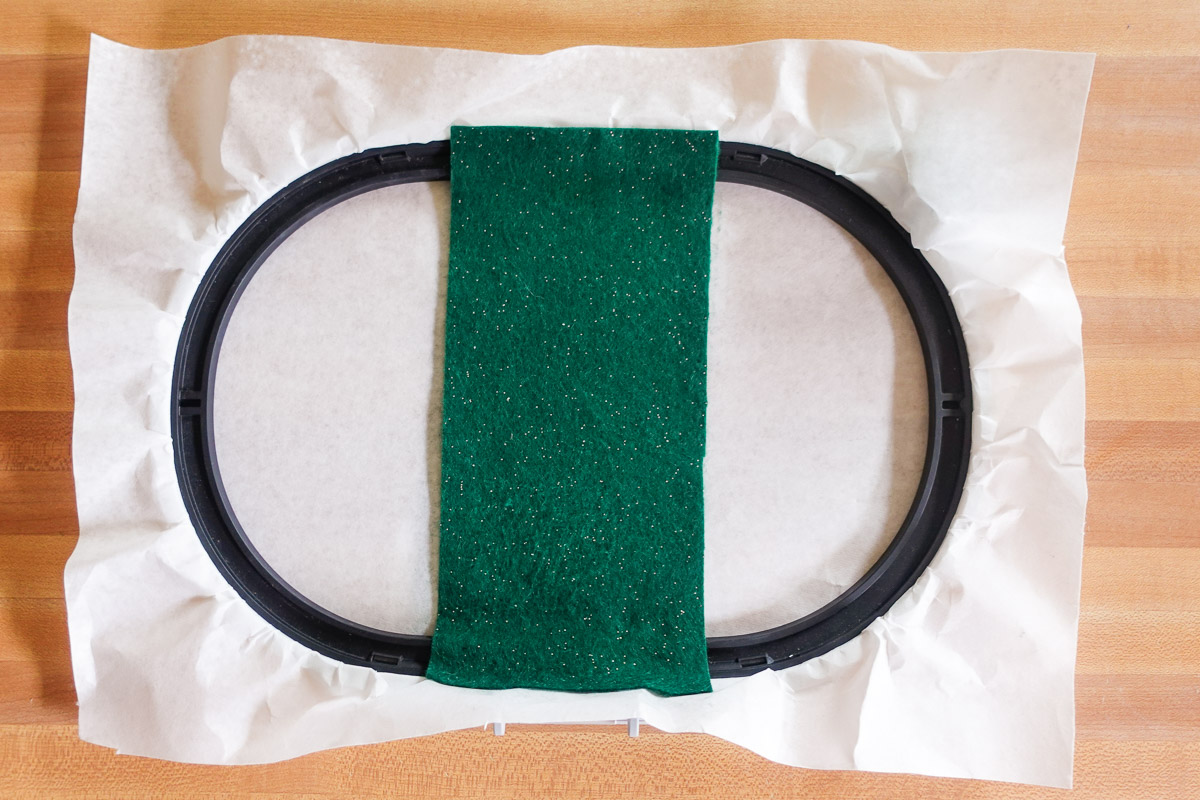
Position the leaf designs on the green felt via one of the many positioning options within the machine: Placement Scanner, Pinpoint Placement, Virtual Positioning, or Check Design. Be sure to leave a little extra room.
Tap the Stitchout icon.
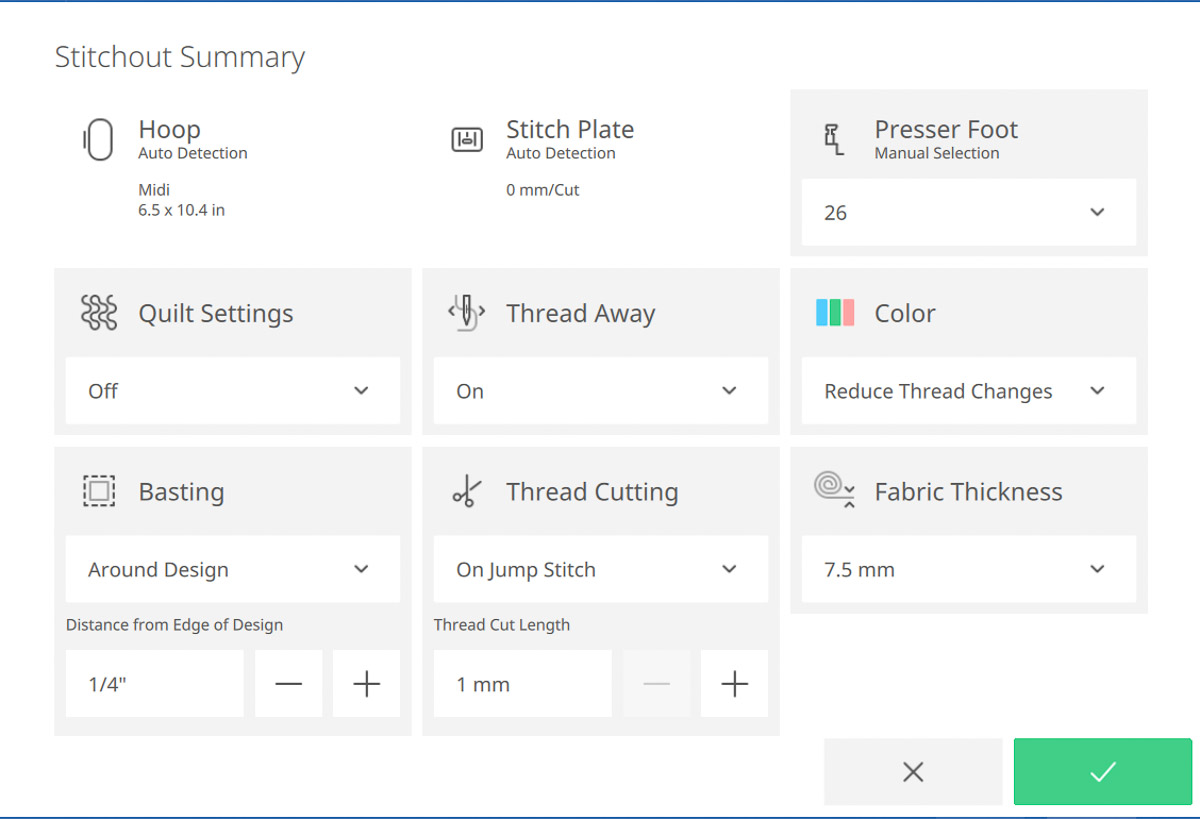
Within the Stitchout Summary select the following:
- Quilt Settings: Off
- Basting: Around Design
- Distance from Edge of Design: 1/4” (6 mm)
- Thread Away Mode: On
- Thread Cutting: On Jump Stitch
- Thread Cut Length: 1 mm
- Presser Foot: 26
- Color: Reduce thread Changes
- Fabric Thickness: 7.5 mm
Tap the green checkmark when ready.
Place StitcH20 over the felt, ensuring it is flat with no bubbles or ripples, and adhere it to the hoop using the sticky stabilizer. Using a topper will give you the best stitching results possible, however, the removal could slow you down a bit which wouldn’t be ideal if your goal is to make many valentines quickly. StitcH20 can be removed with water or torn away from the stitching. I chose to use topper, but you can skip based on your situation. My goal was for this set to look perfect.
The first layer to stitchout will be the basting box.
Use your foot pedal to stitch it out.
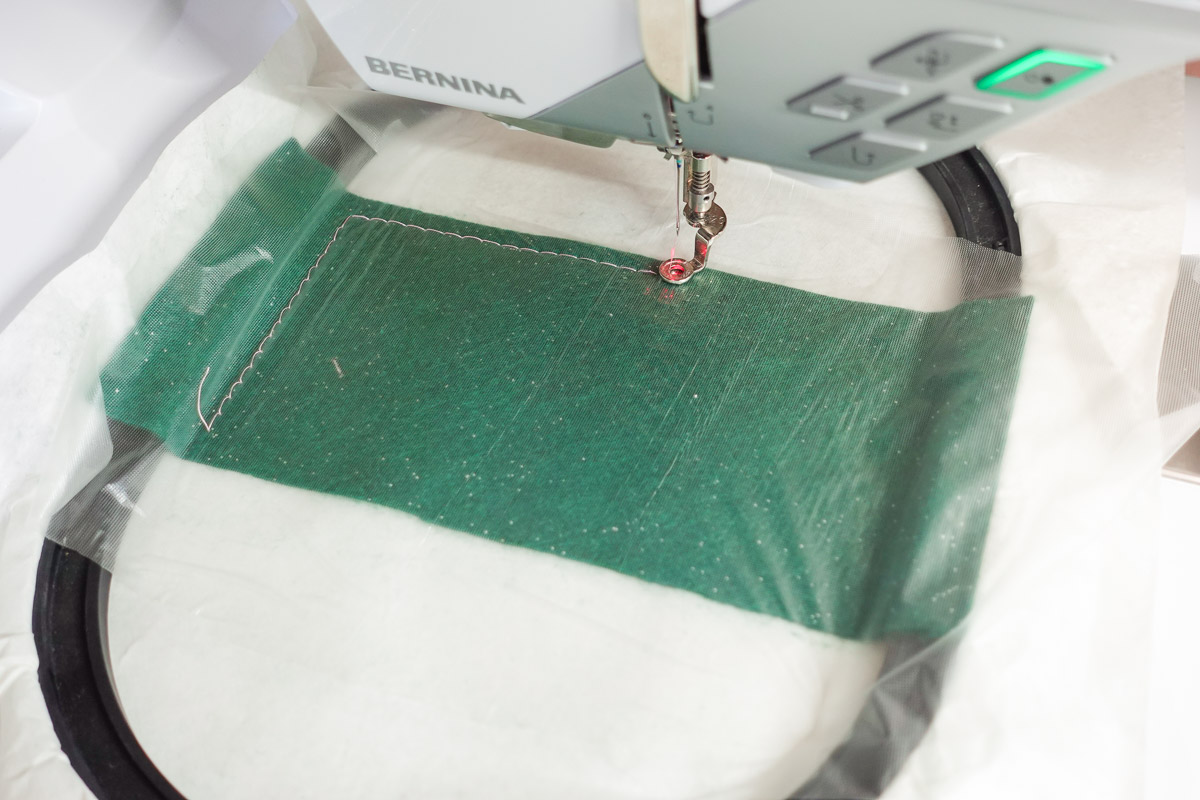
Once the basting box is finished, press and hold the green button on the front of the machine to begin stitching. The lettering will stitch out first, then the machine will stop stitching to allow for thread changes.
You may change to the green thread, but do not start the machine again. Change your thread and bobbin to be the matching threads.
Remove the hoop from the machine, but do not remove the project from the hoop. Using embroidery tape, tape another piece of felt to the back of the basted felt/hoop and return to the machine.
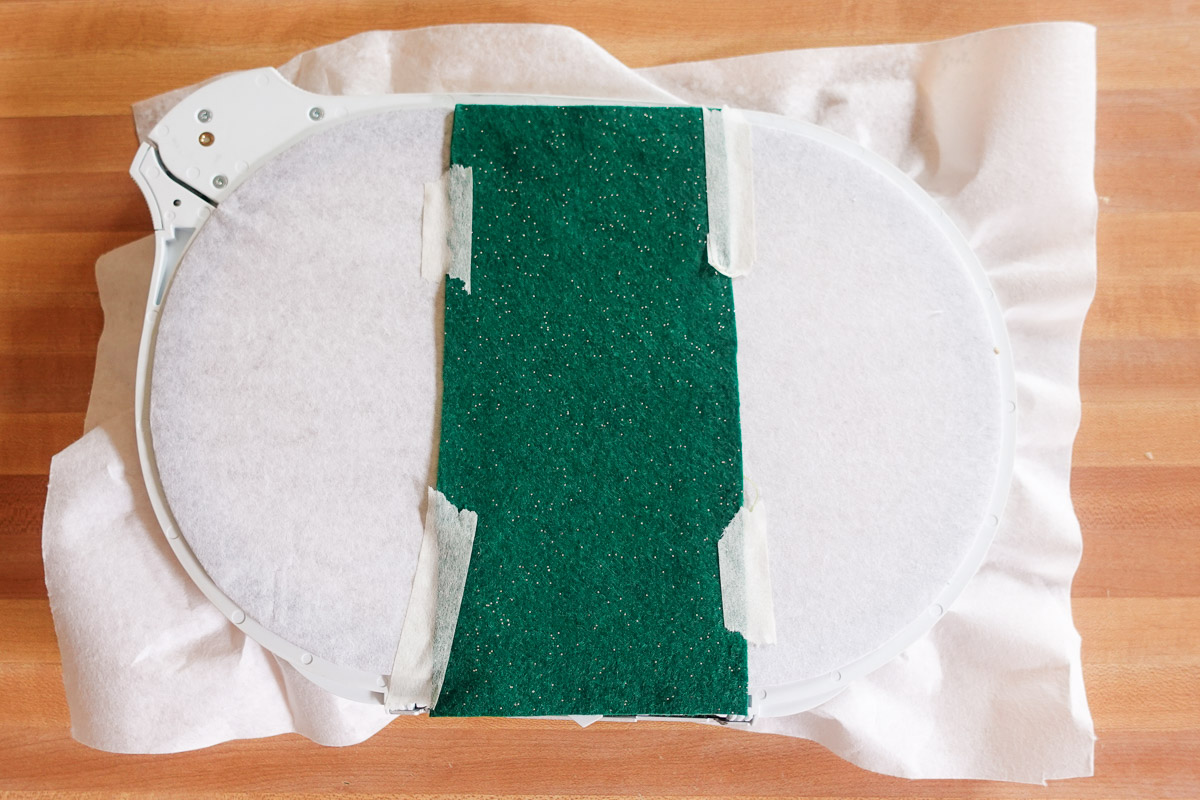
Stitch out the leaf outlines.
Once the stitching is done remove the hoop from the machine and unhoop the project.
Cut down the leaves around the outline, leaving approximately 1/8” of felt around the stitching. Leave a tab at the bottom of the leaf to help attach the leaves to the Tootsie Pop sticks.
Step 3: Create the Cherries
Ensure the Tootsie Pop wrapper is neatly and securely attached to the sucker.
Take the stem wrap tape and wrap the Toostie Pop sticks from the sucker to the end of the stick.
I found it’s easier to start on the white of the stick and not the wrapper. To account for this, I suggest starting the stem tape just past where the wrapper stops, and rolling back down toward the sucker before going back up to cover the white of the stick.
This was my first time ever working with stem wrap tape and after an awkward beginning, I was able to get the hang of it quickly. Stem wrap is crepe paper coated with wax, so as the paper is warmed up in your hands it adheres to itself without any sticky residue; this makes it a little tough to get started but is really great to work with once you get used to it. I wrapped a couple chocolate Tootsie Pops to practice, then had those as a nice treat while I finished wrapping the cherry Tootsie Pops!
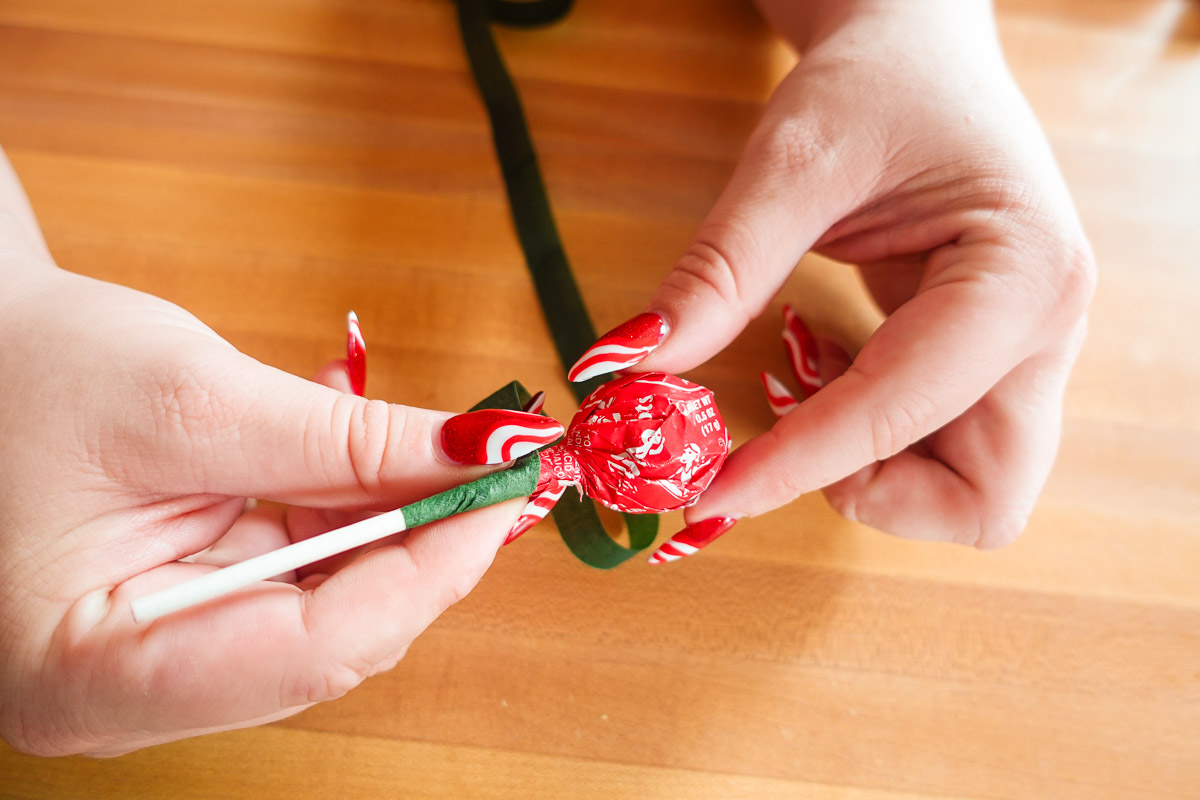
Once the stick is fully wrapped, take the leaves and hold them to the stick so the cut tab goes down the stick. Wrap the cut tab and a small part of the leaf shape to the stick.
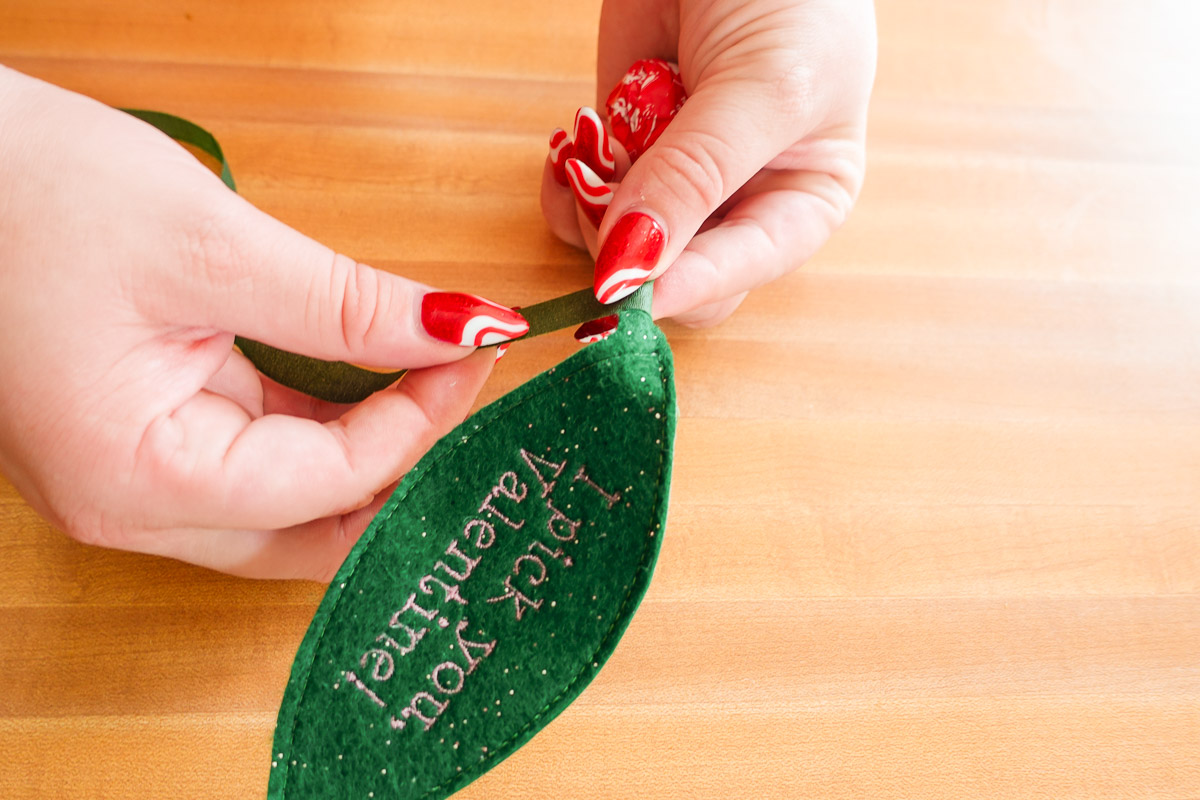
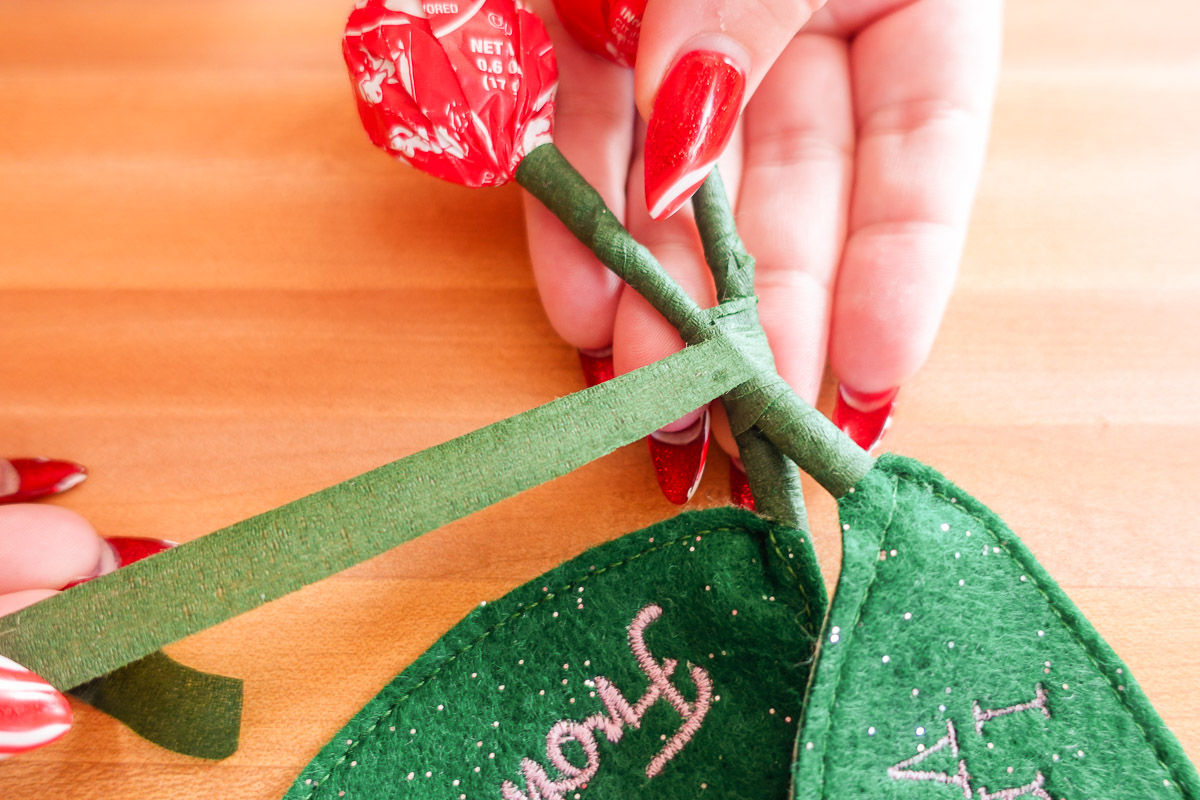
For the final step, cross the Tootsie Pop sticks and secure together with wrap tape. Have fun playing with different configurations.
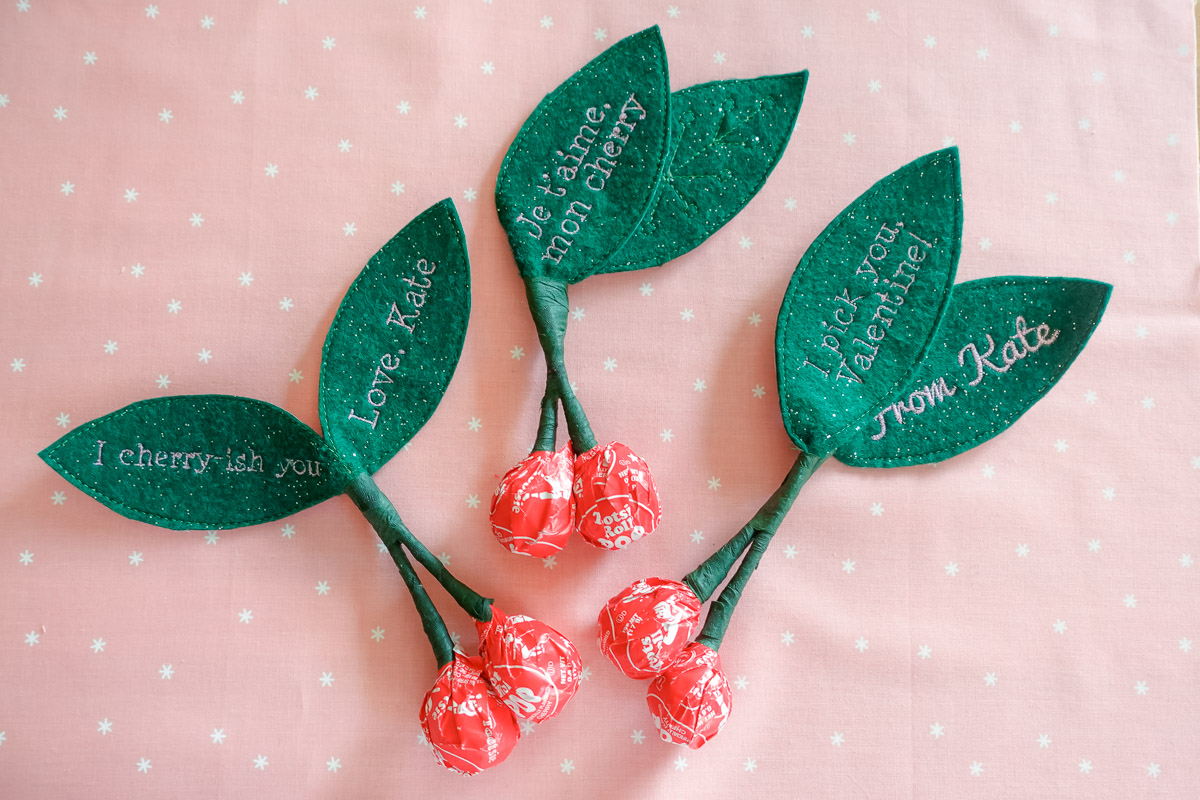
Finished!
How cute are these valentines? And they come together so quick and easy thanks to the BERNINA 990! Think of how many great appliqués and freestanding designs we can make using that awesome Templates folder.
I hope you have as much fun as I did coming up with cherry puns and fun ways to fill both leaves.
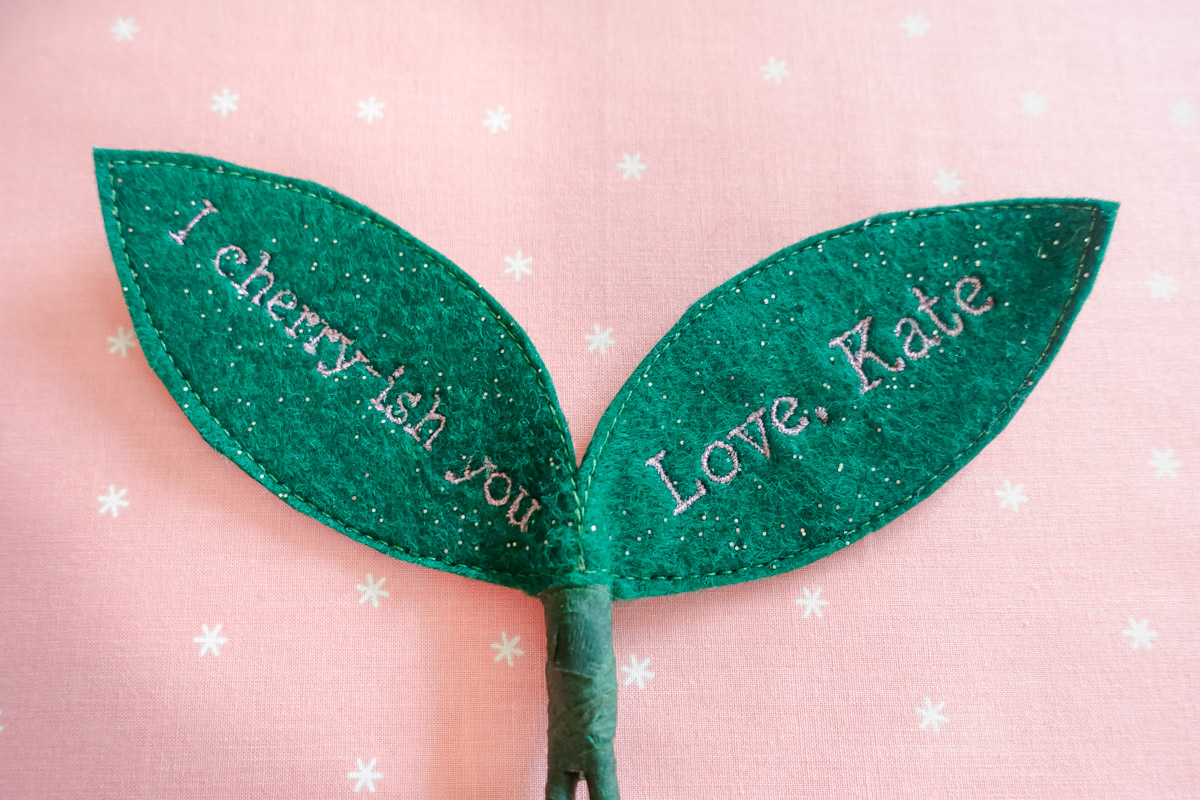
Below is another set of cherry leaves I made using the Q108 quilt design found in the Inspirations > Quilt folders. There’s another design in this folder, Q111, that goes great in a leaf shape.
Want to learn more about the BERNINA 990? Check out the blog post Introducing the B 990: The Ultimate Sewing Machine. This three-part series chronicles all the amazing things that make the B 990 the ultimate in sewing, quilting, and embroidery.
Happy Embroidering!
What you might also like
One comment on “Machine Embroidered Cherry Valentines on the B 990”
Leave a Reply
You must be logged in to post a comment.





Cute idea! Just wondering why you would use the foot pedal; to stitch out the design instead of just pushing the green “go” button to stitch? Thanks!