Machine Embroidery on Organza
I love teaching students how to machine embroider a vast array of fabrics and materials to help them learn the basics in a more fun and interesting way. Machine embroidery on organza is a great way to get started embroidering on sheer fabrics and to experiment with new techniques.
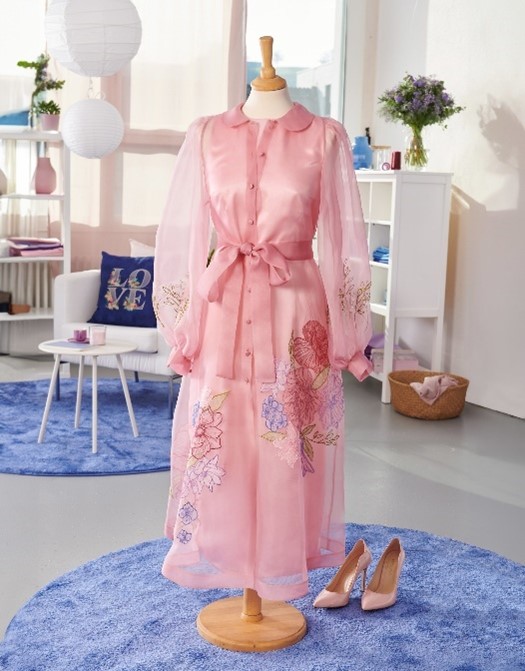
Two of my biggest pieces of advice are:
- One item can usually be embroidered many different ways successfully.
- Know the rules so you can break the rules.
With that said, I’m going to introduce you to two techniques to machine embroider on organza so you have different options for different projects. Let’s jump in!
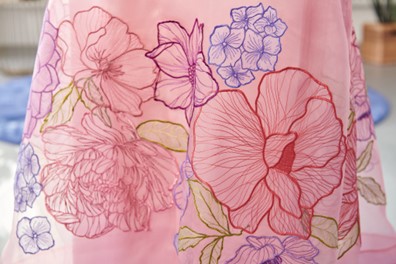
Technique One: Floating the Organza
This technique is the more traditional method for machine embroidery on organza. It allows you to be delicate with the fabric with the use of stabilizer and embroidering directly on the fabric. You may choose this technique when you would like to embroider directly on the organza you will use for the project. For example, embroidering flowers onto a piece of organza for curtains or a ready-to-wear organza garment.
Materials for Floating the Organza
- BERNINA 990
- Embroidery Foot #26
- Giant Hoop (any BERNINA hoop will work)
- Black Bobbin case (avoid using the High Thread Tension bobbins case for less tension on the thread which prevents them from puckering up after stitching)
- Organza fabric
- 75/11 Embroidery Needles
- OESD AquaMesh Plus WashAway
- Embroidery thread (wind bobbin to match top thread(s))
Step 1: Set Up
Install the 75/11 Embroidery needle. Wind as many bobbins as necessary to match your top threads.
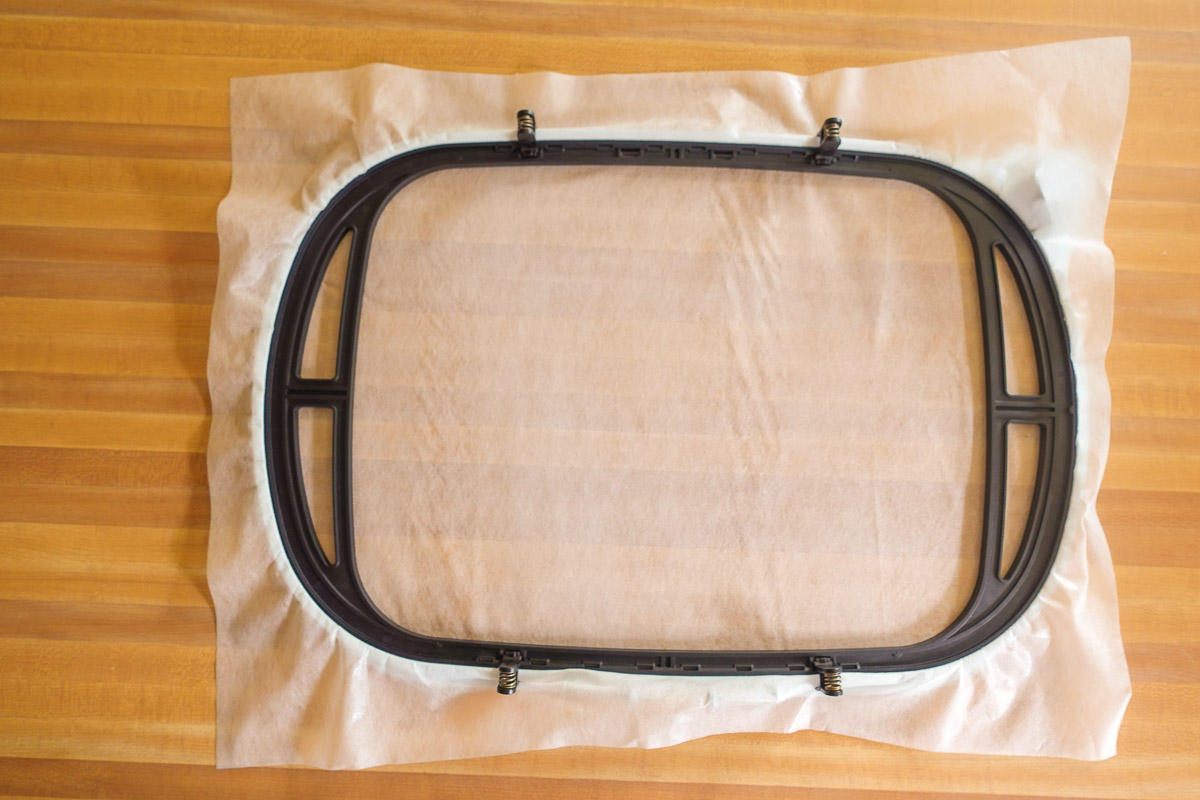
Hoop the AquaMesh Plus WashAway by itself in the hoop, sticky side up.
I like to do this by removing the paper backing entirely before hooping. This gives extra grip to the hoop, which will help keep tension throughout the stitch out (besides making hooping easier). Sure, this technique may leave some residue on your hoops, but the stabilizer and adhesive are both water soluble, making cleanup very simple.
If you’re using the Giant Hoop, use the hoop clamps to ensure even better tension throughout the course of your project. Don’t clamp the organza; just the stabilizer for extra protection against slippage.
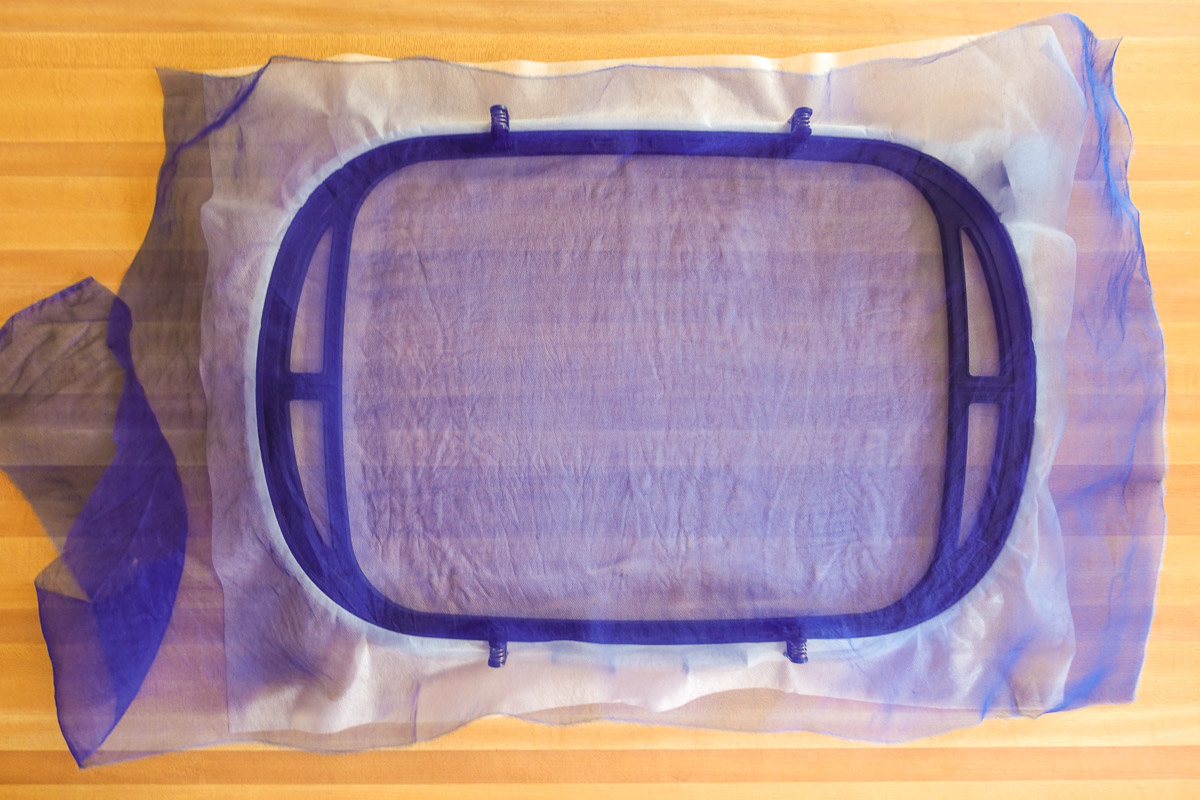
Place organza on top of the stabilizer, making sure the fibers are “at rest.” This means the fabric is not pulled or stretched unnaturally. Smooth organza to the stabilizer, pressing firmly to ensure a strong adhesion.
Step 2: Place Your Design
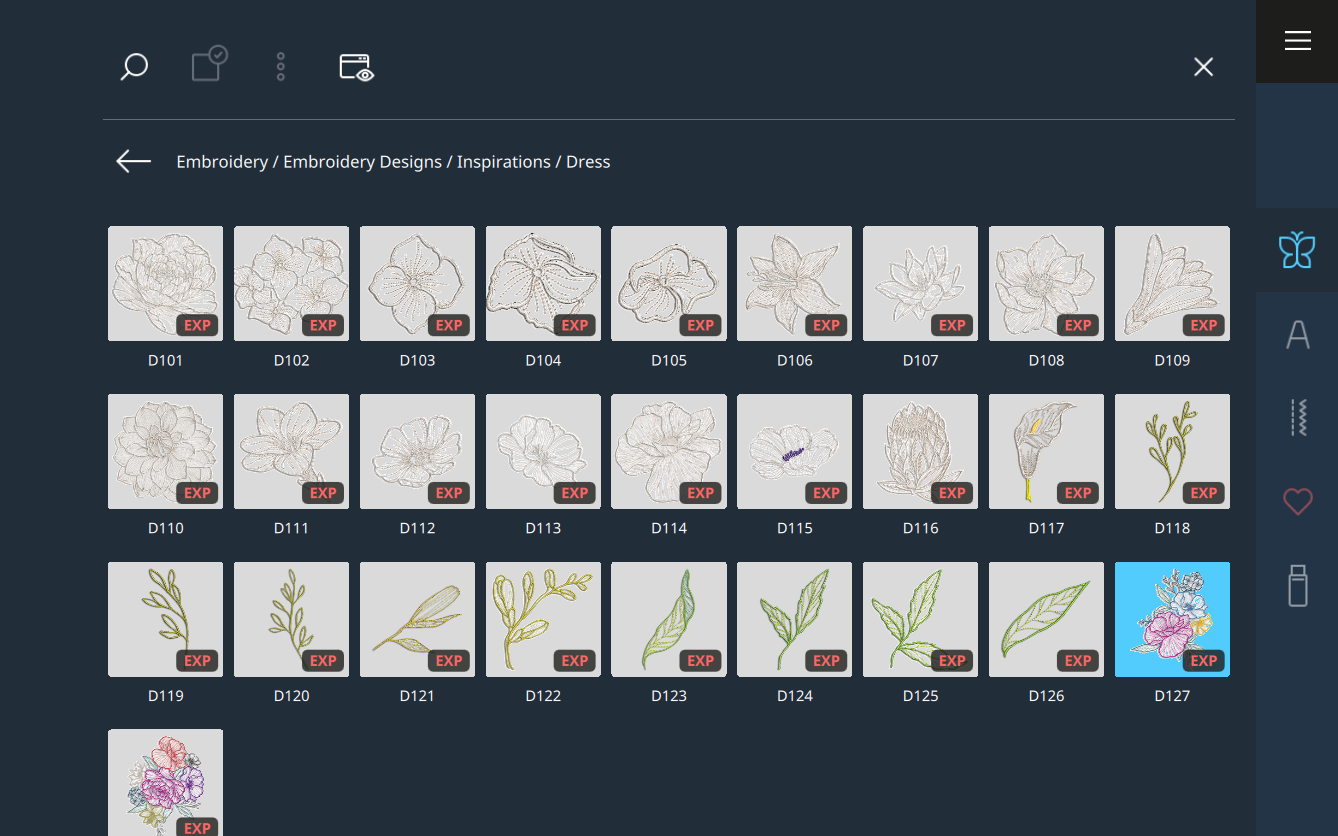
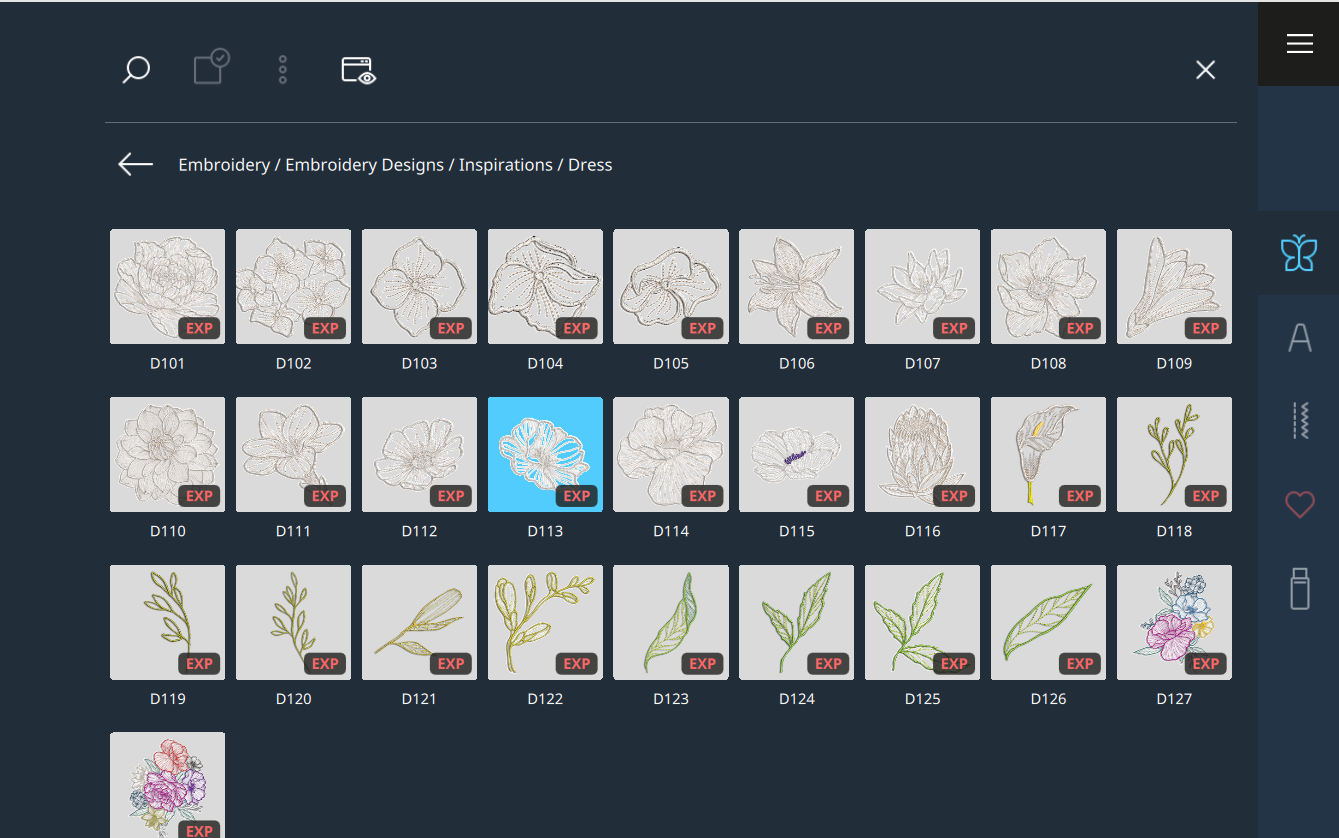
These beautiful flower designs can be found within B 990. To find these motifs, go to the Embroidery Designs folder, then Inspirations, and then Dress. Inside the Dress folder, you will find quite a few floral designs. This tutorial uses design #D127 but feel free to select any design that fits the hoop you are using.
Step 3: Stitch Out
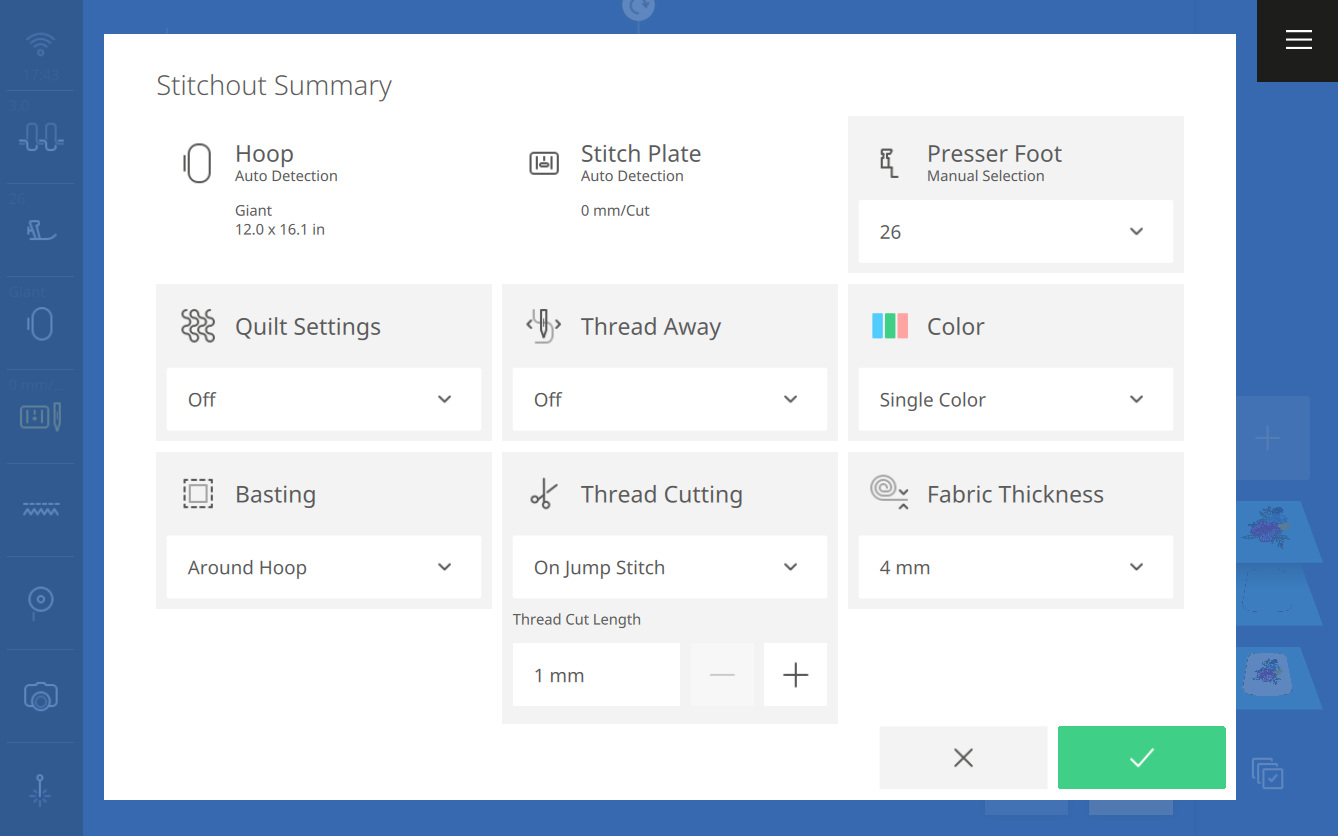
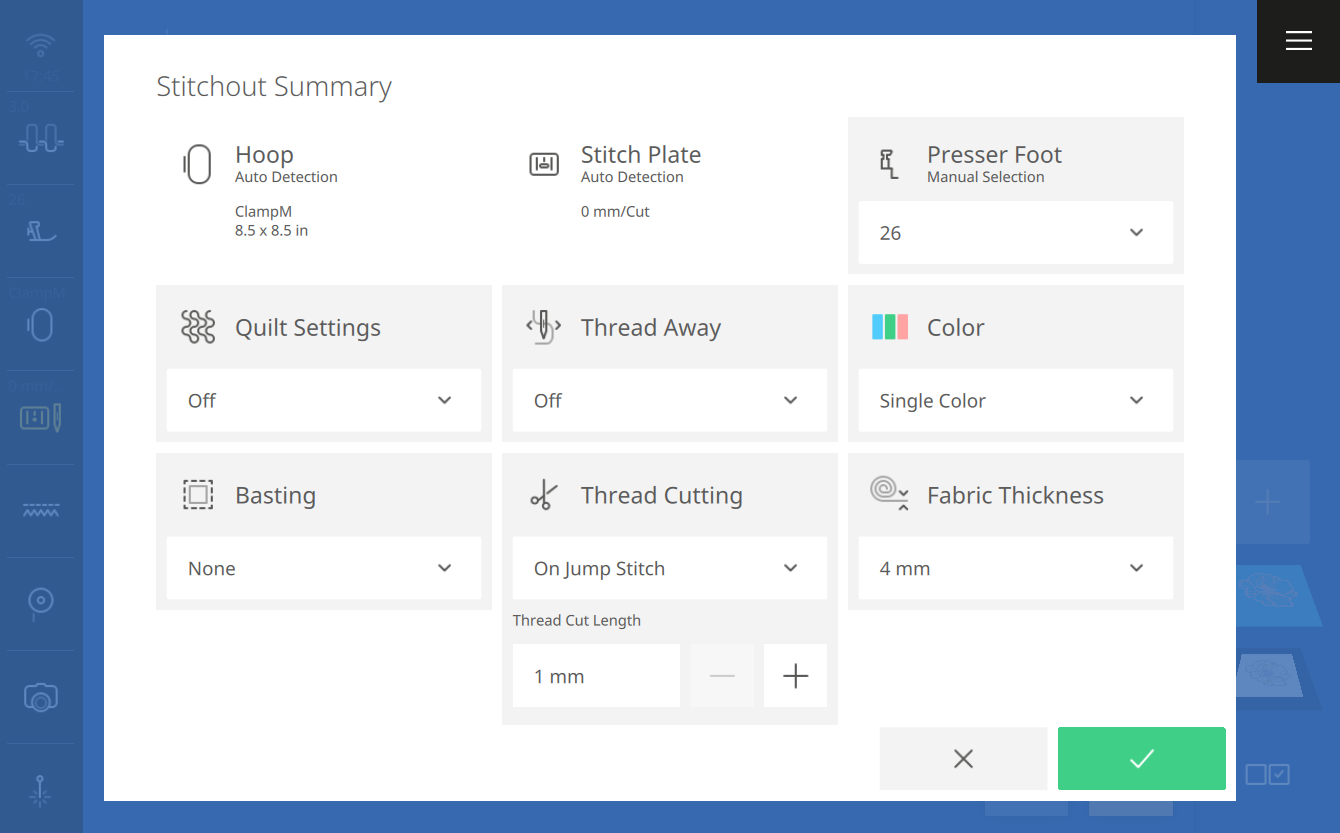
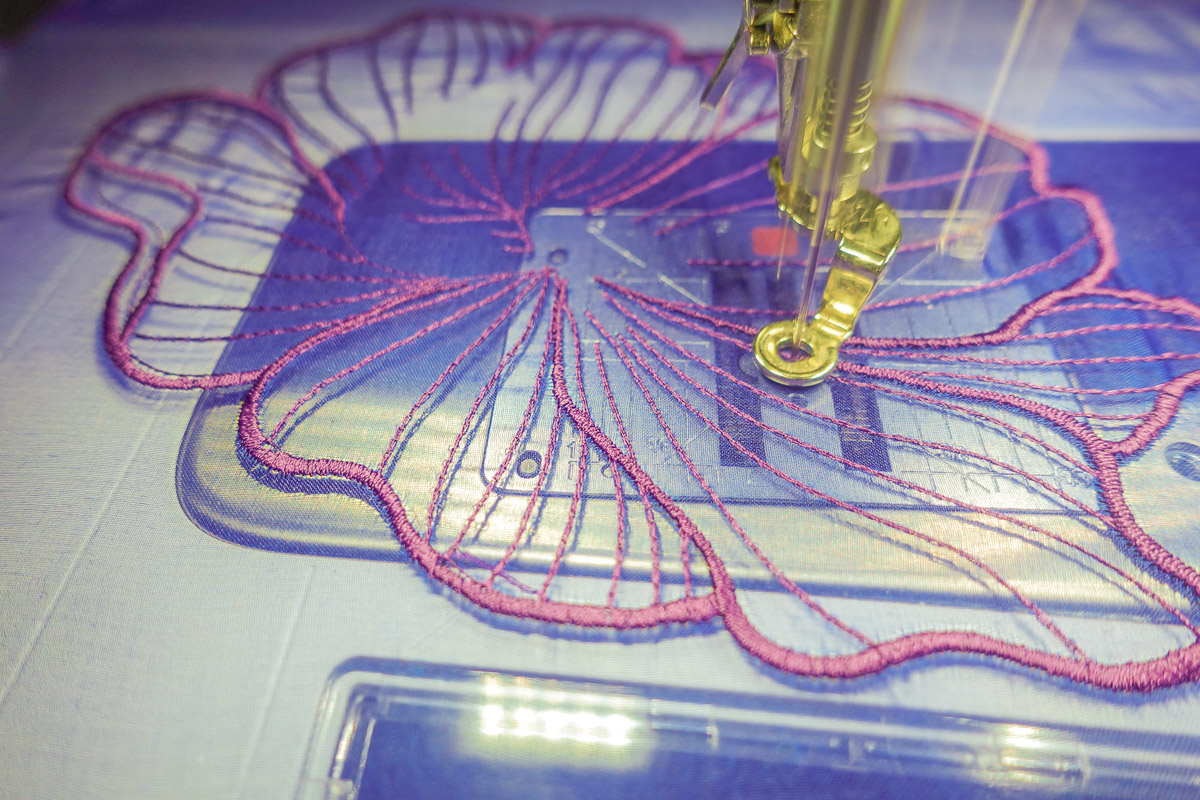
Select a basting box in the Stitchout Summary. This will help guarantee the organza does not shift during stitching. Depending on the project, you may also choose to turn off Thread Away Mode to ensure the back looks as clean as possible. In this tutorial, Single Color was selected in order to make the whole design monochromatic and to stitch without stopping.
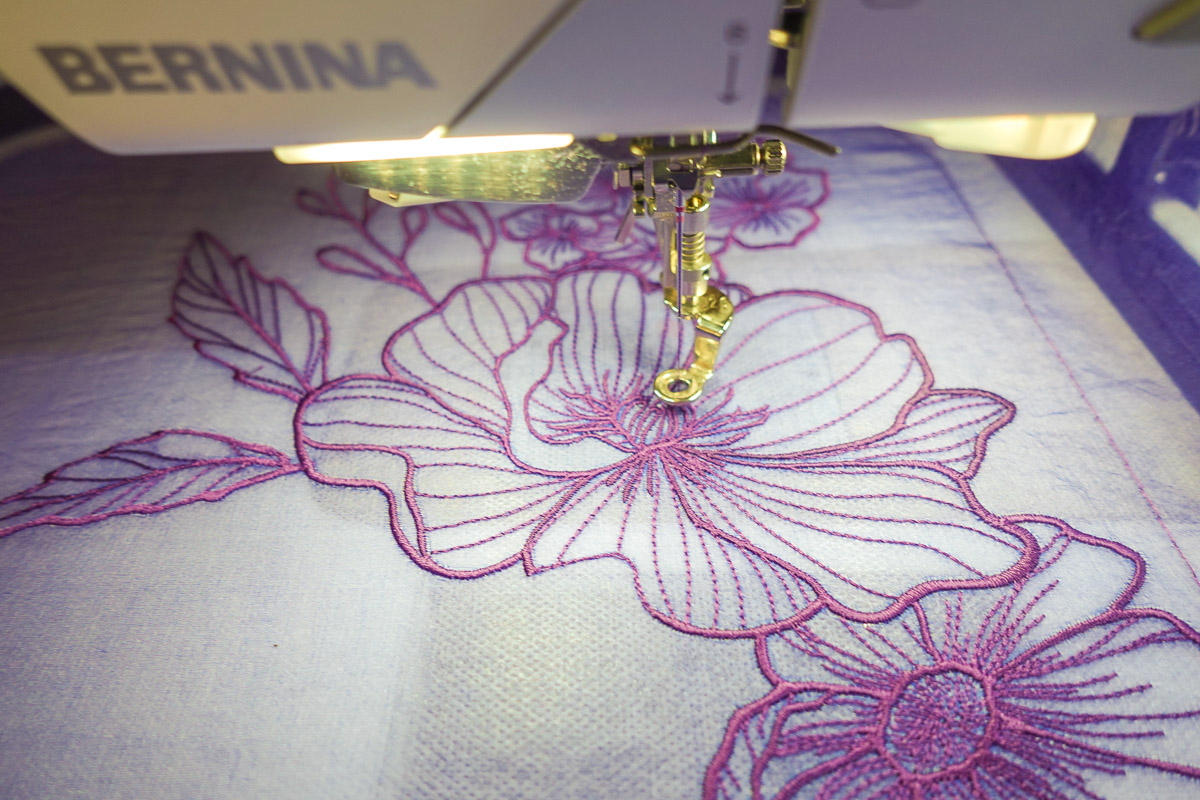
Stitch out the motif.
Step 4: Finishing
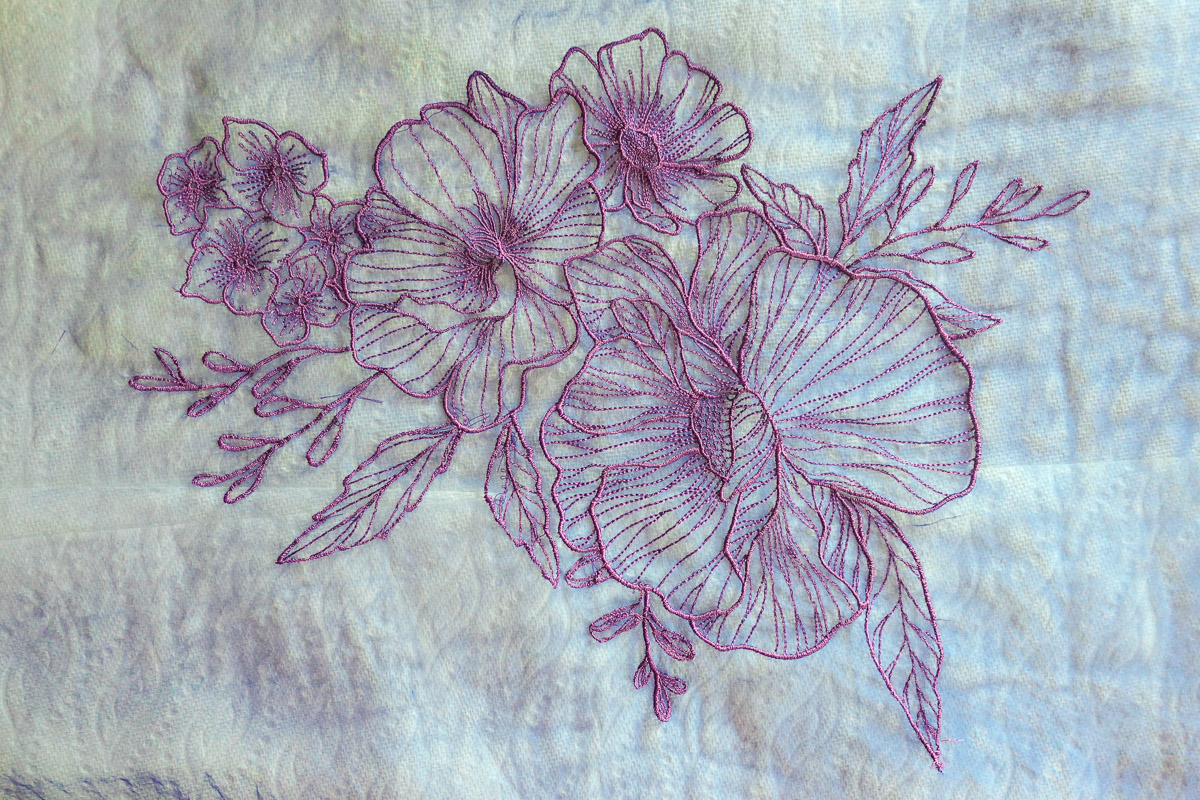
When finished, unhoop the stabilizer. Cut away the excess AquaMesh then submerge the stabilizer and organza in lukewarm water to rinse away all the remaining stabilizer. Ensure the water isn’t too hot as it could damage the organza.
Lay flat to dry.
Technique Two: Organza Appliqués
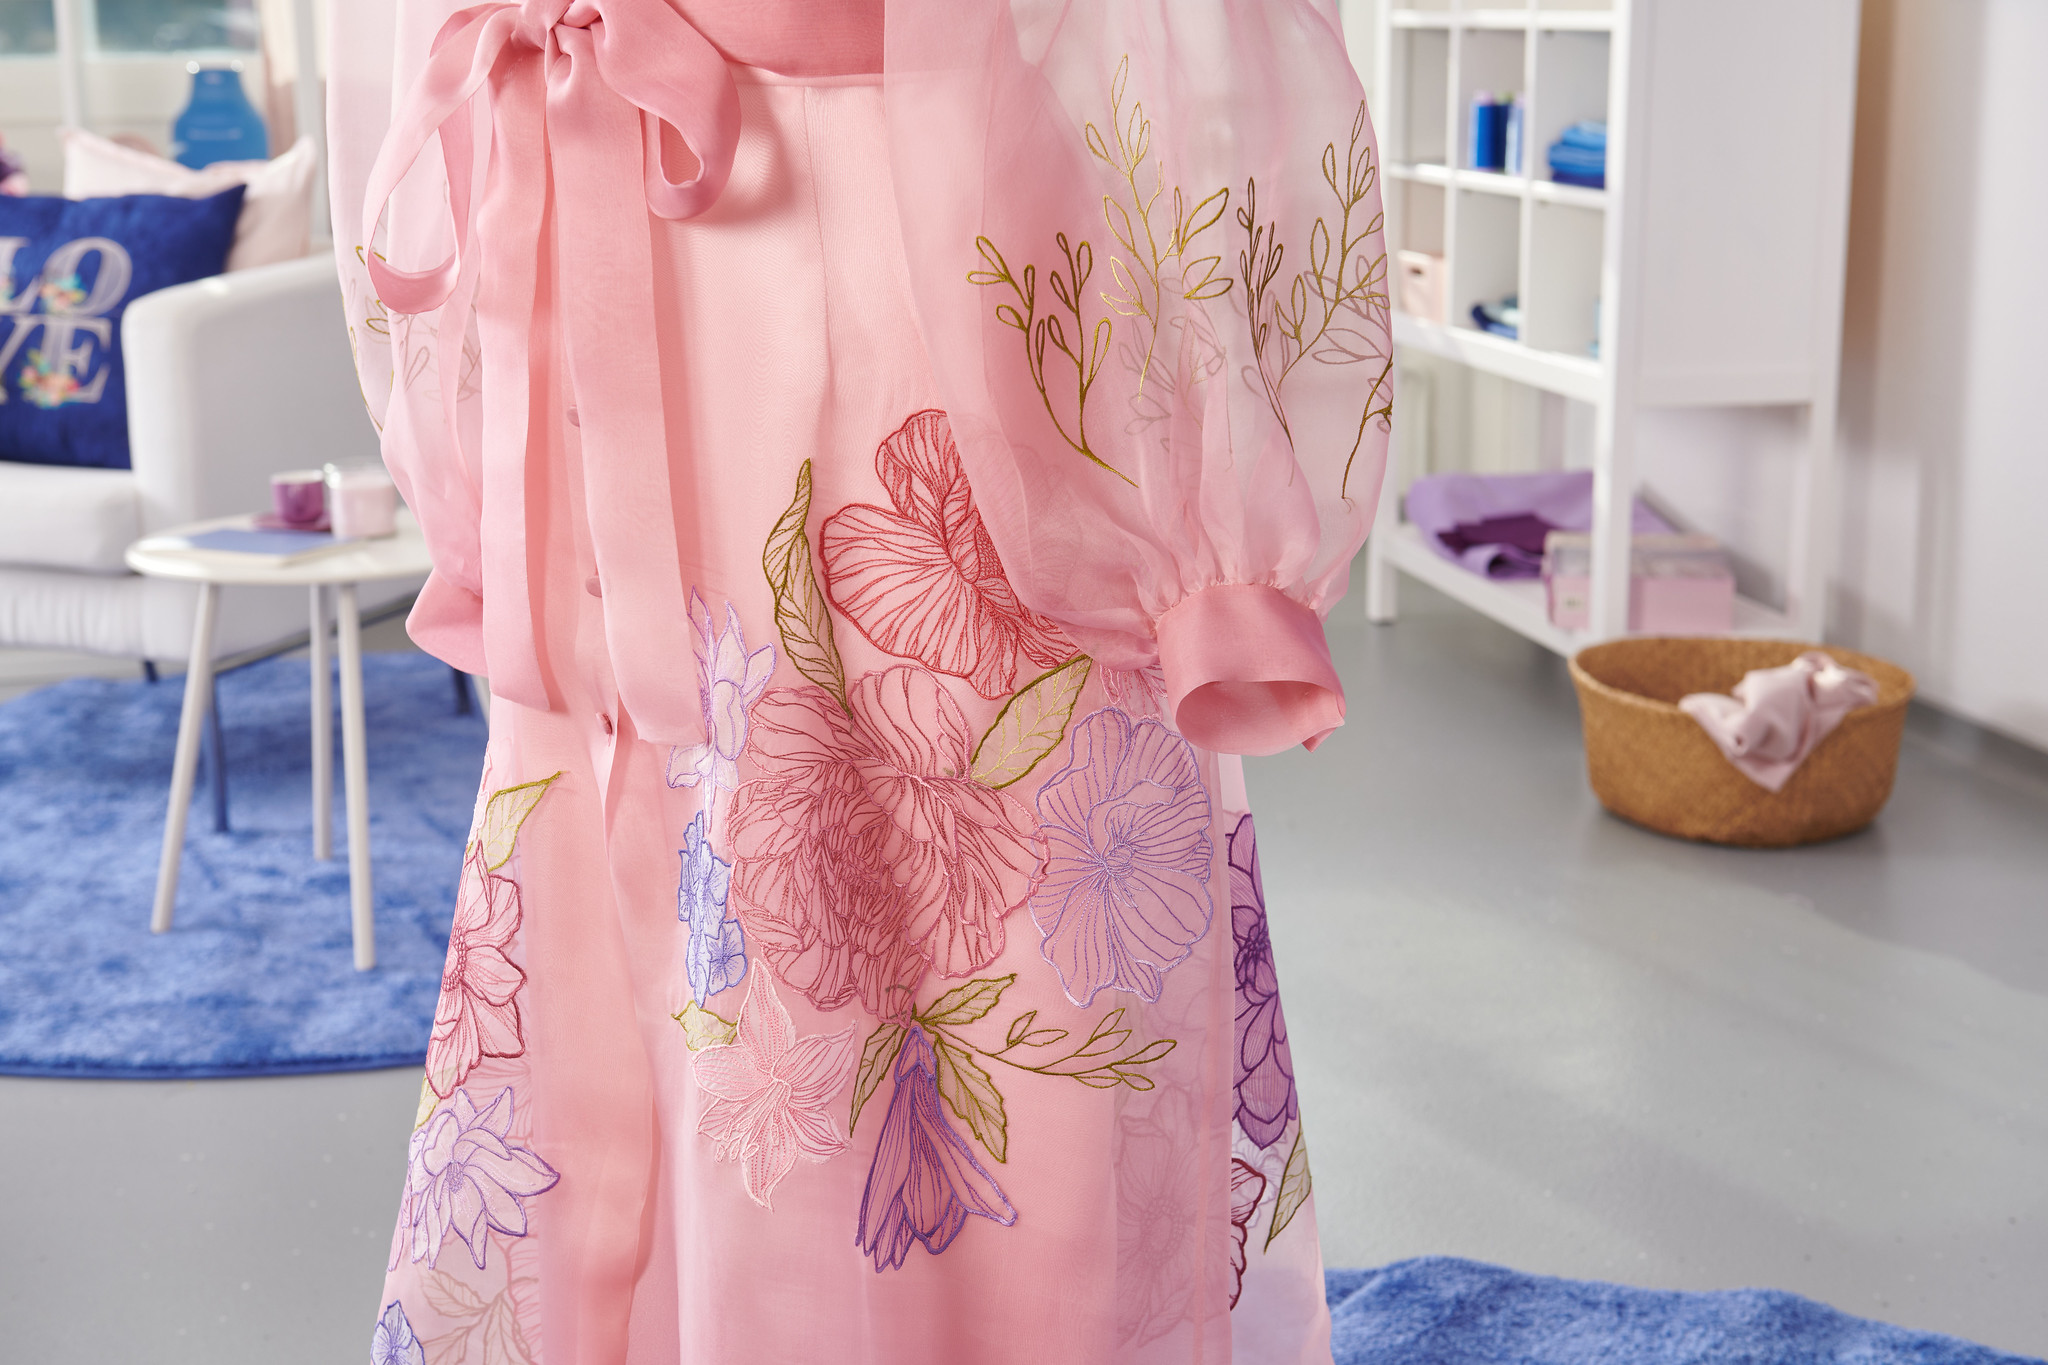
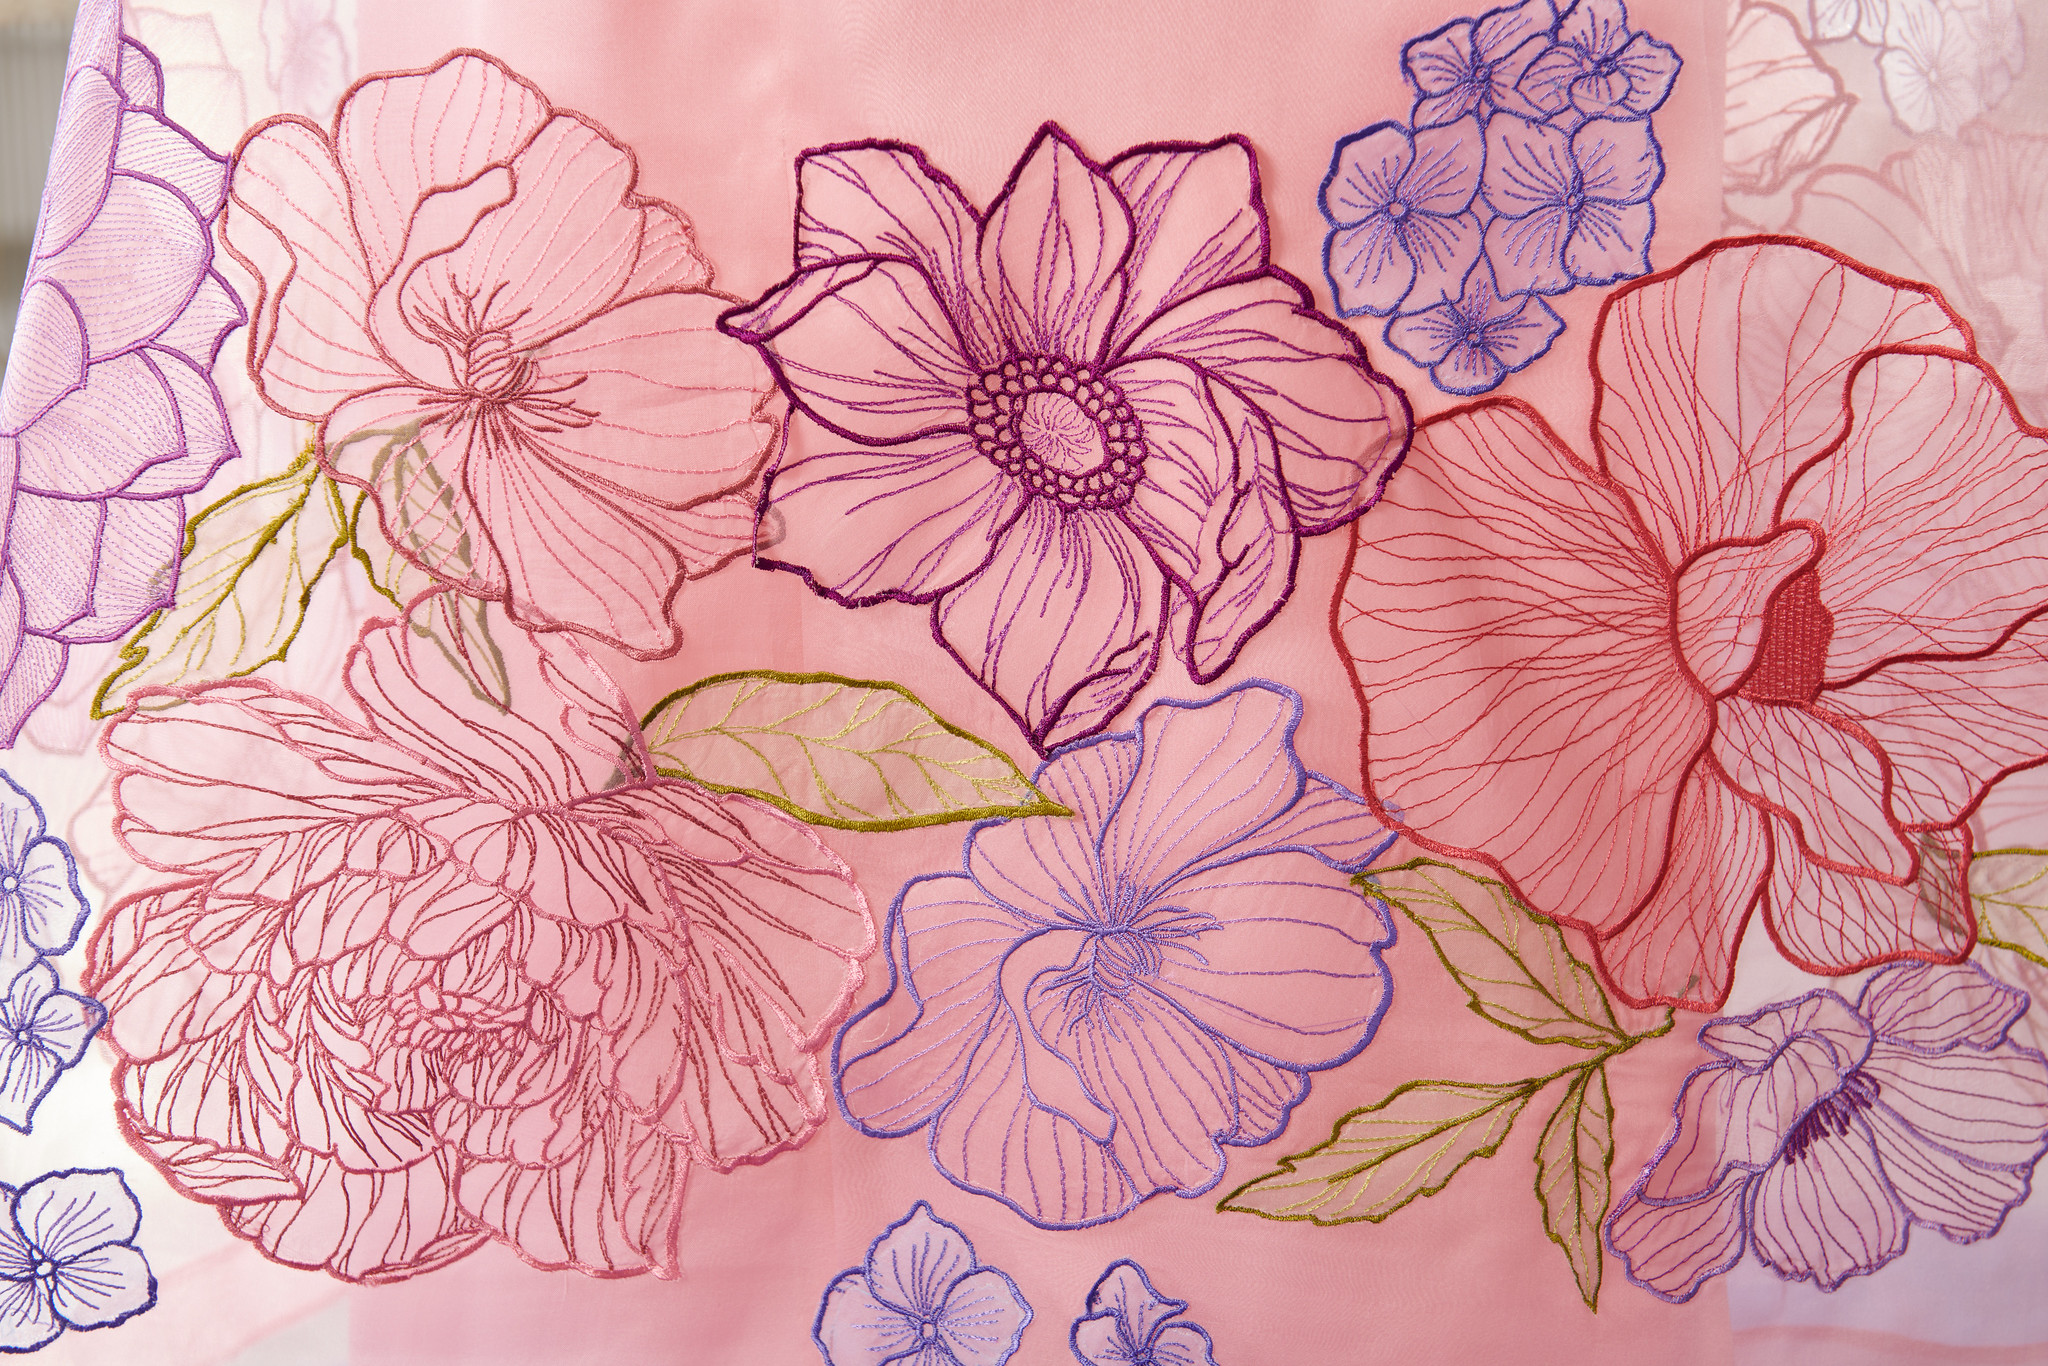
This technique is so fun and utilizes the strength of the clamp hoops to forego any stabilizer at all. When using this method, there will be more fabric waste as the clamp hoop can damage the delicate organza fabric. So, we use this technique to create many appliqués to adhere to the finished project instead of using the clamp hoop on the finished organza piece. his is the technique used to create the gorgeous organza dress you see here. Each flower was embroidered separately and then sewn onto the dress to create the final look.
The benefit to this technique is that it takes much of the pressure off to create perfect embroidery — if a flower doesn’t turn out how you want, that’s okay! It doesn’t affect the final project.
We rarely advocate for embroidery without stabilizer! This technique is made possible because of the delicate nature of the embroidery and the tight hold of the clamp hoops. Have fun playing around with this “rule breaking” technique.
Materials for Machine Embroidery Organza Appliqués
- BERNINA 990
- Embroidery Foot #26
- Medium Clamp Hoop (any BERNINA clamp hoop will work)
- Black Bobbin case (avoid using the High Thread Tension bobbins case for less tension on the thread which prevents them from puckering up after stitching)Organza
- 75/11 Embroidery Needle
- Embroidery thread
- Scissors
Step 1: Set Up
Install the 75/11 Embroidery needle. Wind as many bobbins as necessary to match your top threads. Thread the machine with embroidery thread.
These organza flowers have been made by many members of the BERNINA Education team, not only in the United States but in Switzerland as well. The dress pictured was made using rayon thread to utilize the lightweight and pliable properties not usually found in polyester thread. Many team members have made them in polyester thread, as well, so choose whatever works best for you (or try both to compare results!).
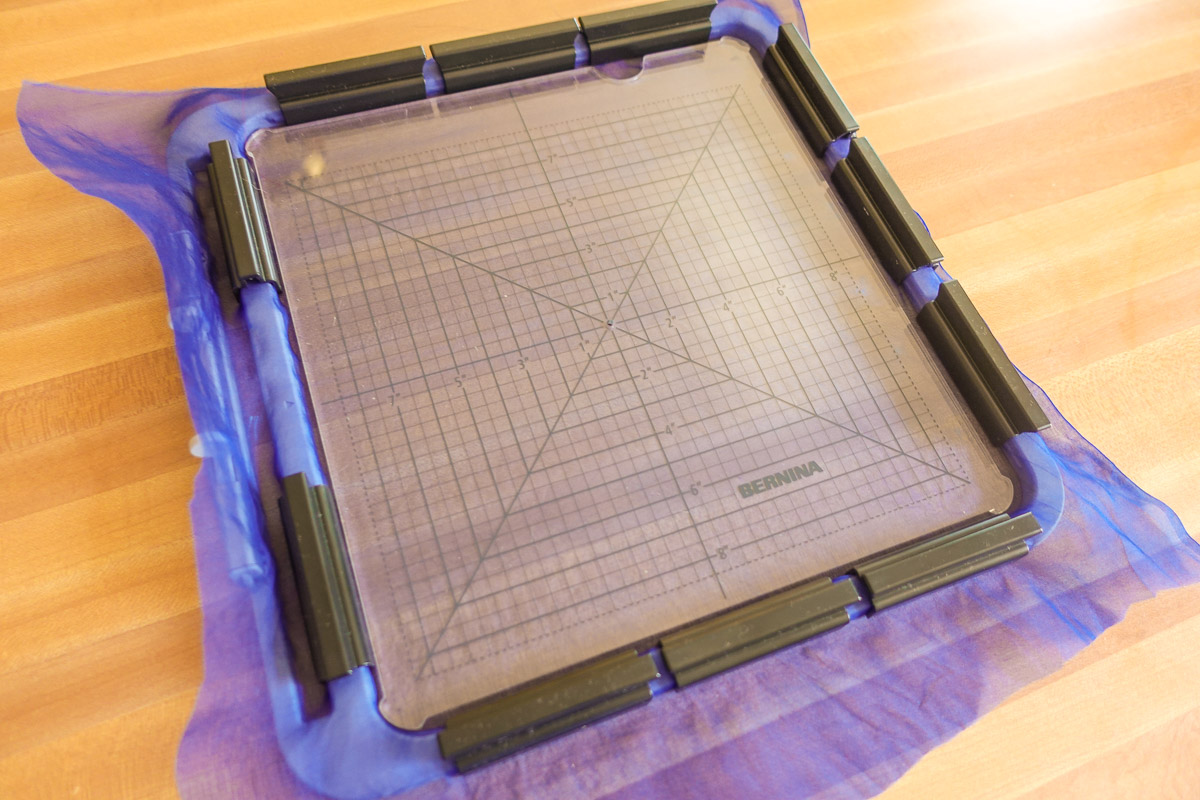
Hoop the organza by itself with the clamp hoop. Be sure the hooping is very secure and tight but not distorting the fabric. Learn how to properly hoop with the clamp hoop in this YouTube video from BERNINA International.
Step 2: Place Your Design
For this technique, choose an individual flower motif such as design #D113 used for the tutorial.
Step 3: Stitch Out
Depending on the project, you may also choose to turn off Thread Away Mode to ensure the back looks as clean as possible. No need to do a basting box for this technique.
Stitch out the motif.
Step 4: Finishing
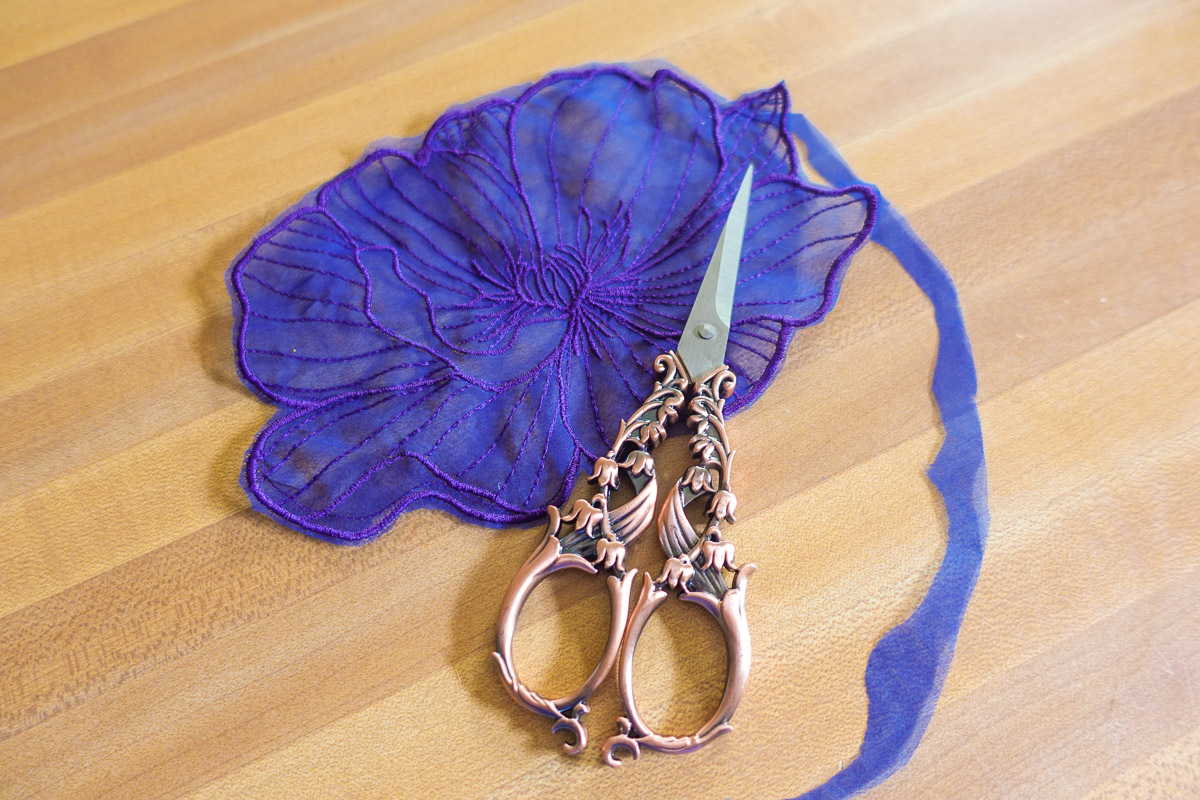
When finished, unhoop the organza. Use small, precision scissors to cut away the organza close to the outer thread line. Be very careful not to cut the threads.
Repeat and make as many flowers as necessary for desired effect.
Tip: Did one or more of your flowers come out wavy or more puckered than you like? Working with a fabric like organza can be strange but don’t sweat it! The appliqué process can hide a multitude of stitching mishaps and hijinks, especially if you are appliquéing to a 3D item like a garment or pillow. Plus, you can always layer the flowers to hide all sorts of goofs. Just have fun and keep on stitching!
Arrange the flowers on the fabric and attach them in place via machine or hand sewing. For the beautiful pink dress, the maker hand sewed the flower to the fabric for invisible and delicate sewing. Another great option is the BERNINA Integrated Stitch Regulator to free motion the flowers onto the fabric.
I hope you have fun playing with the B 990 and creating wonderful machine embroidery on organza.
Want a fun project to try out another machine embroidery on organza technique? Check out this WeAllSew post, Freestanding Lace Tutorial: Butterfly Shadow Box.
What you might also like
One comment on “Machine Embroidery on Organza”
Leave a Reply
You must be logged in to post a comment.


This is an exquisite look on organza. Please tell me embroidery designs offered by OESD I can use. I do not have the machine that contains these designs referred to in this article. I have a 790 Plus. TY for your help.