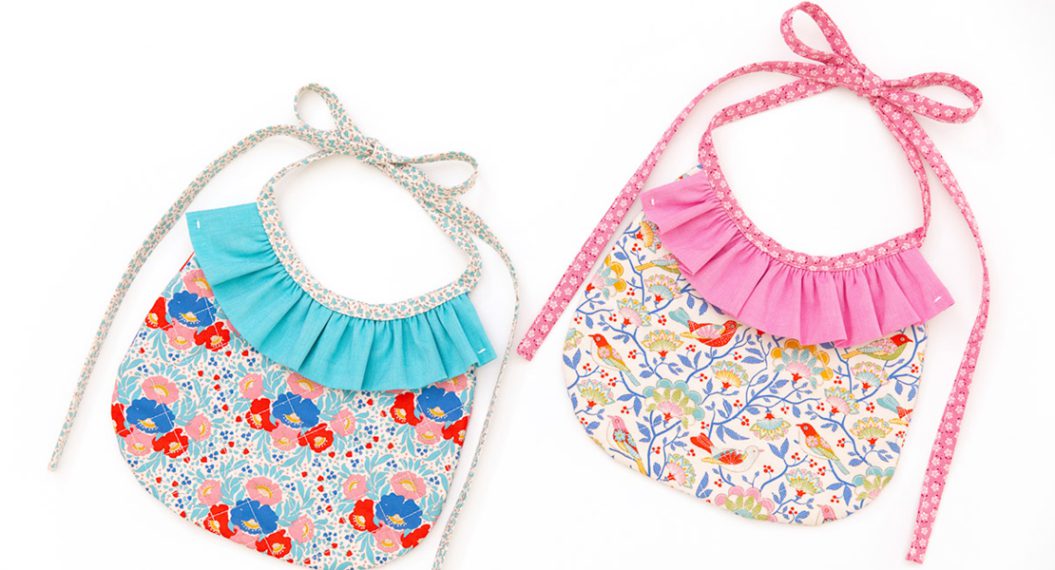
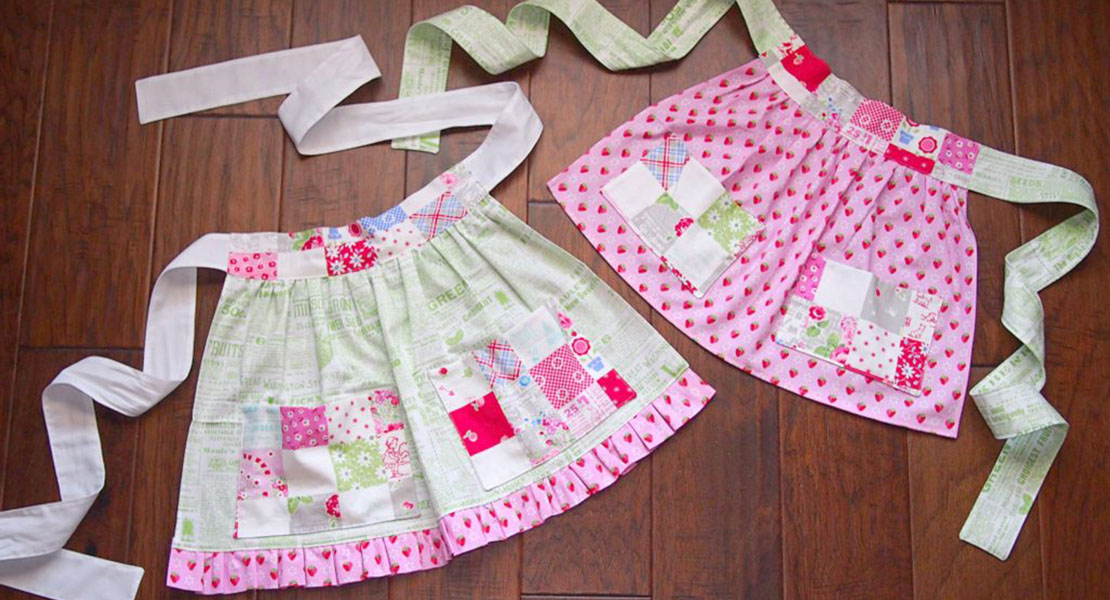
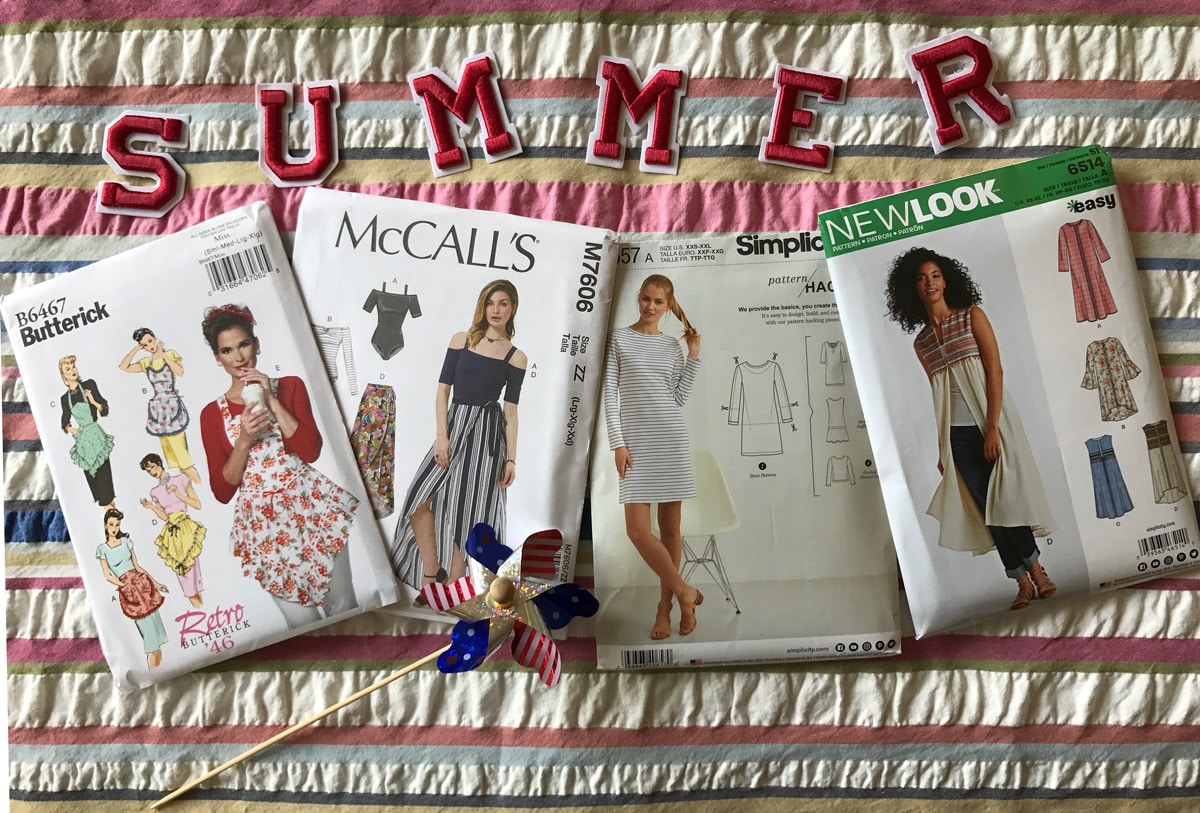
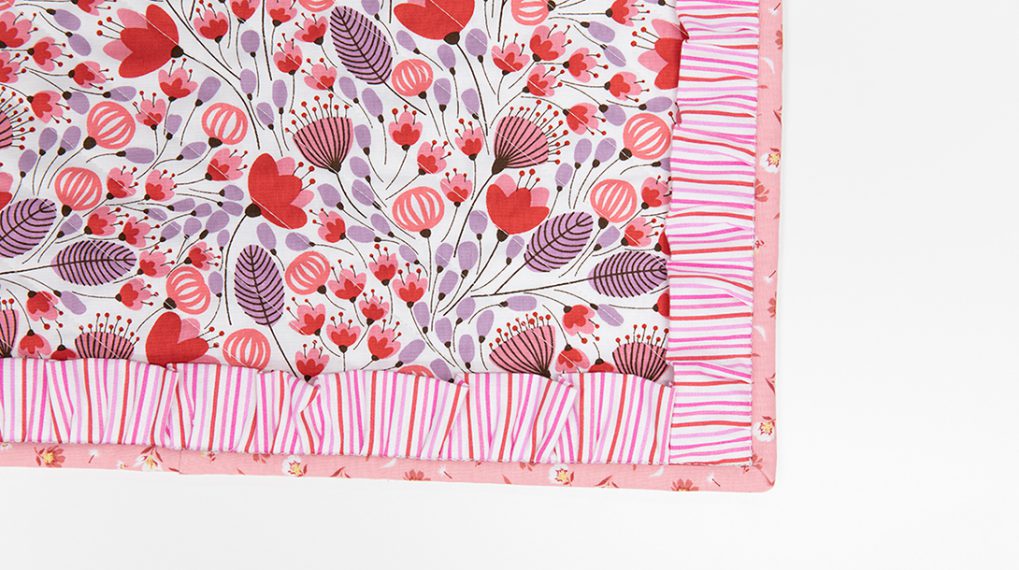
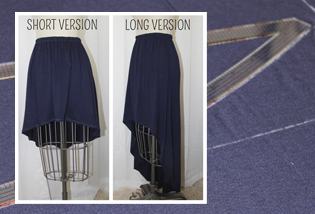
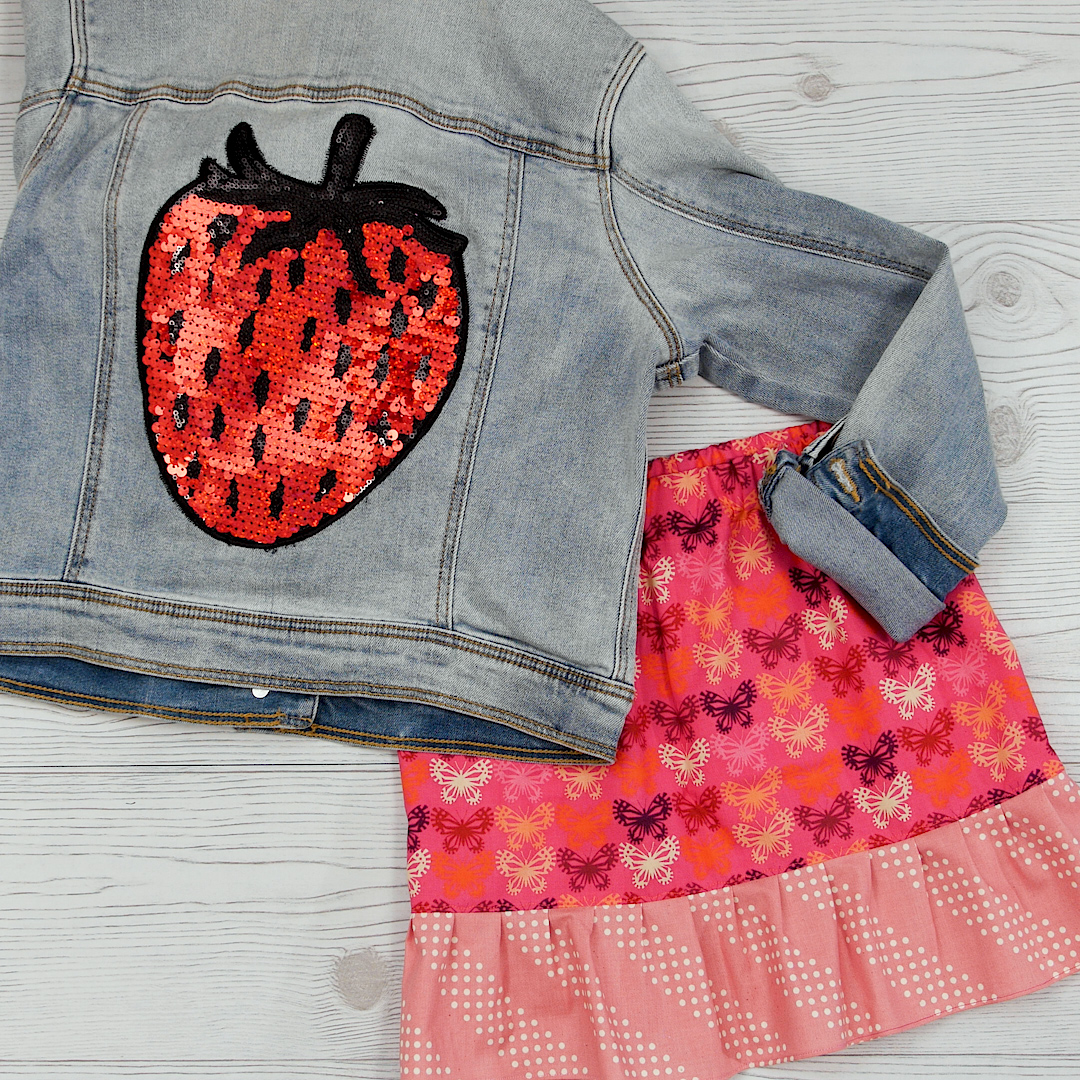
Ruffle Hem Skirt
Sewing for kids is great—there’s no complicated fitting involved and because of their size, they’re usually pretty quick projects to finish. They’re a great way to try your hand at a new technique or play with fun embellishment. For our project today, we’ll add a simple but unique ruffled trim to a basic elastic waist skirt. An elastic waist is easy to construct and is forgiving in sizing. Let’s get stitching!
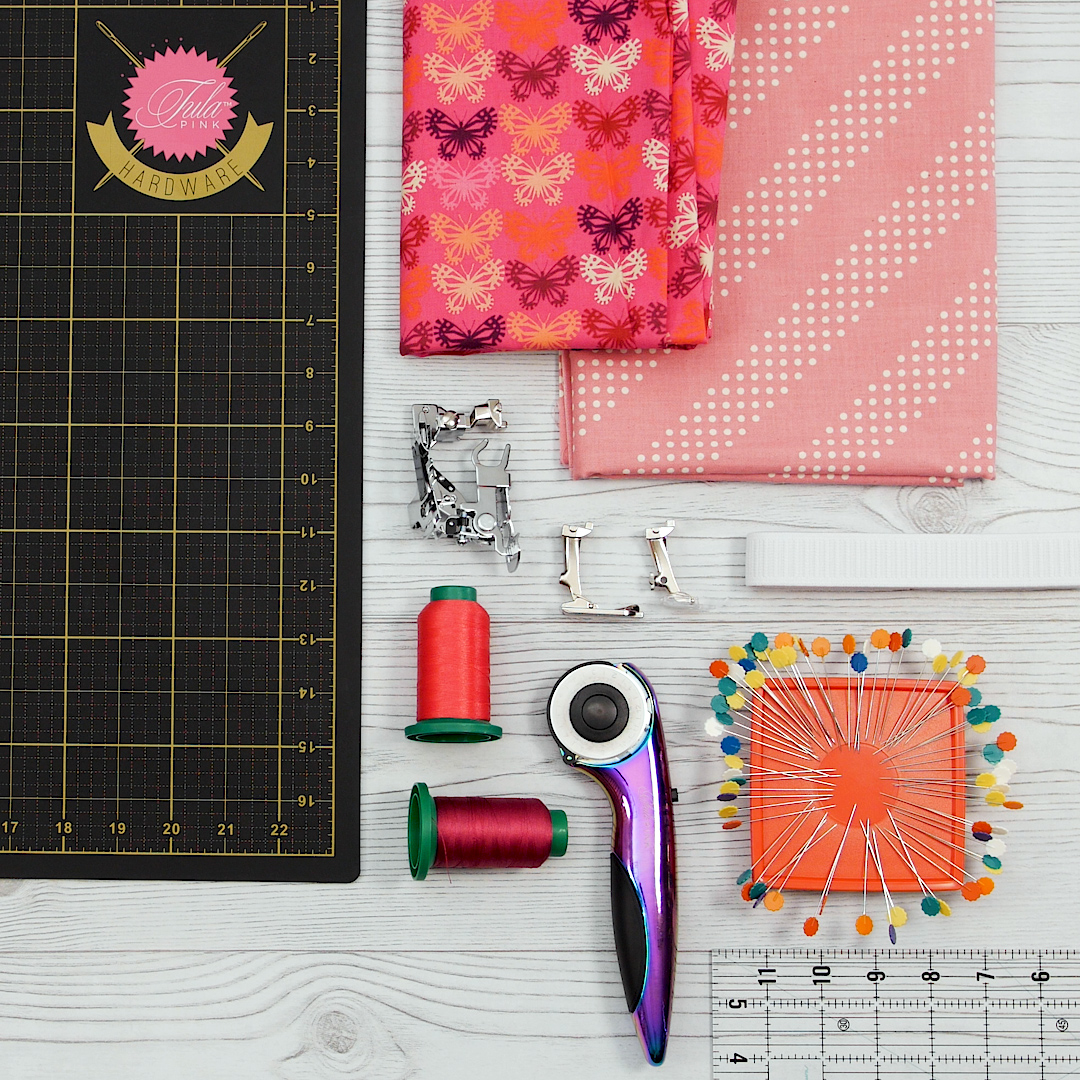
Materials to Sew a Ruffle Hem Skirt
- Main skirt fabric
- Featured print from Panorama Sunrise collection by Cotton + Steel
- Contrast ruffle fabric
- Dottie in Peacock Pink by Cotton + Steel
- Coordinating thread
- 1” woven elastic
- Tula Pink 45 mm Rotary Cutter
- Cutting mat
- Ruler
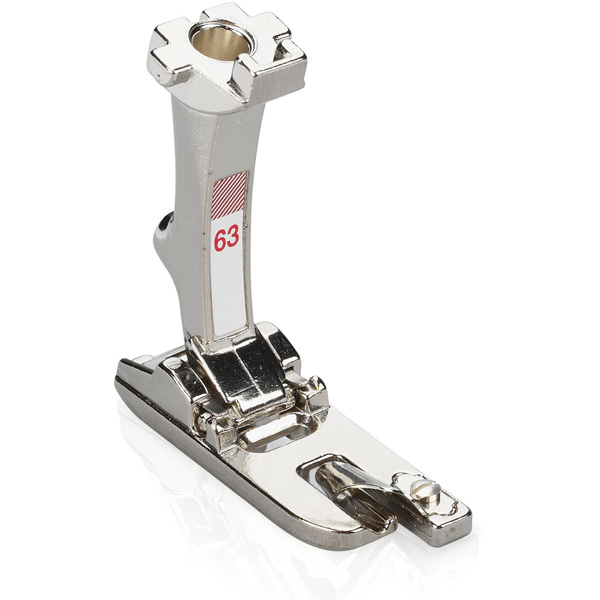
- 3 mm Zigzag Hemmer Foot #63
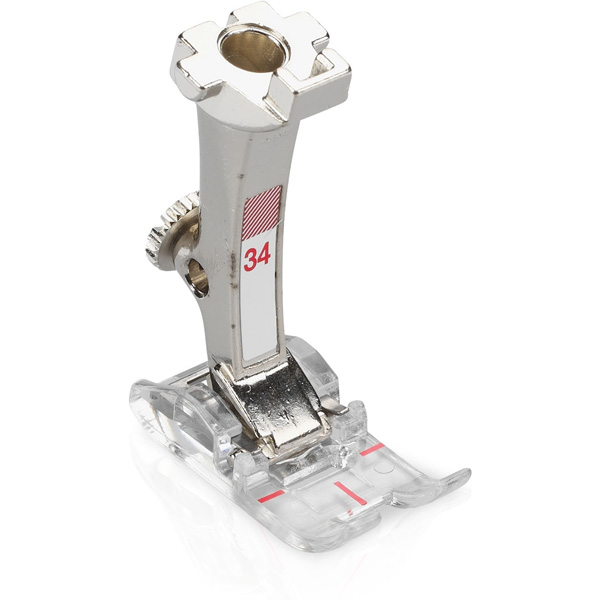
- Clear Foot #34
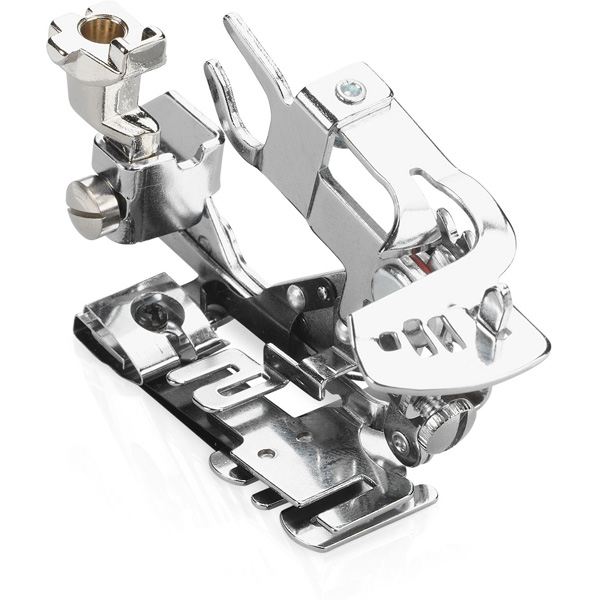
- Ruffler #86
- BERNINA 535
How to Sew a Ruffle Hem Skirt
Step 1. Determine size of skirt
Before we start sewing, we need to know how big to make our skirt! Begin by measuring the waist of your child. Then, add 6 to 8” for gathering and 1” for our seam allowances. For example, the child I am sewing for measures with a 22” waist.
22” + 6” + 1” = 29”
Then cut your length of elastic. Subtract 1” from the waist measurement and cut that length. Having elastic smaller than the waist (also known as negative ease in fitting terms) will ensure the waistband is snug but not overly tight. Thus, for my skirt, I’ll cut my elastic at 21”.
Step 2. Cut fabric
Cut the main panel of the skirt at 15” by the determined size from step one. For example, my main panel will be 15” x 29”. Be mindful of directionality if using a print!
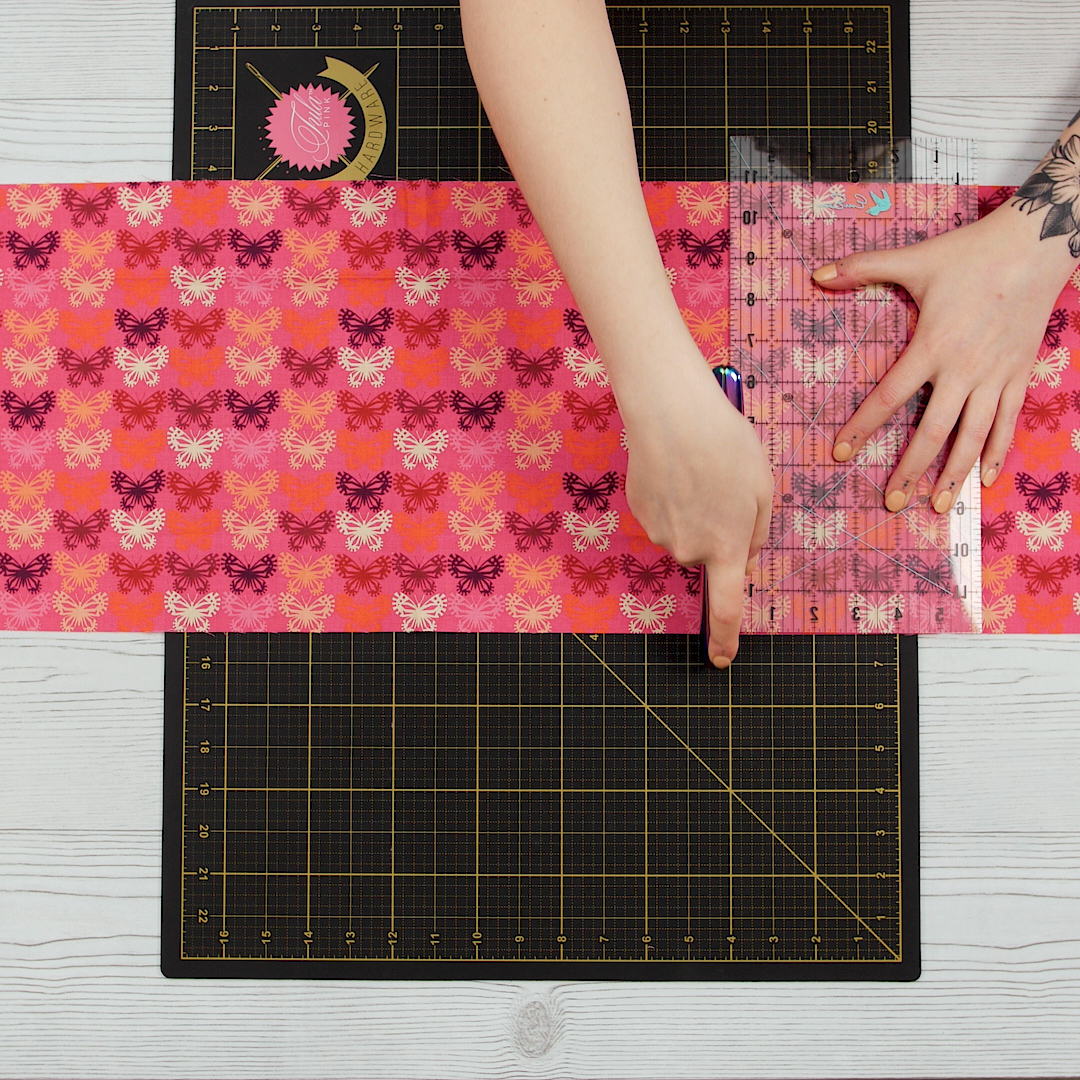
Next, cut a contrast panel for the ruffled hem. To determine how many strips to cut for the contrast panel, multiply the width of the main panel by 1 ½. For example:
29” x 1.5 = 43.5
Conveniently, my ruffle panel will require just about exactly the width of fabric. If your main panel is smaller than 29”, you will only need to cut one strip. If it is larger, you may need to piece multiple strips.
Cut the required number of strips at 5” wide. Do not subcut these strips. Piece together if necessary.

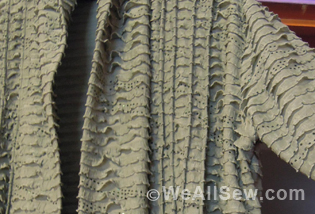
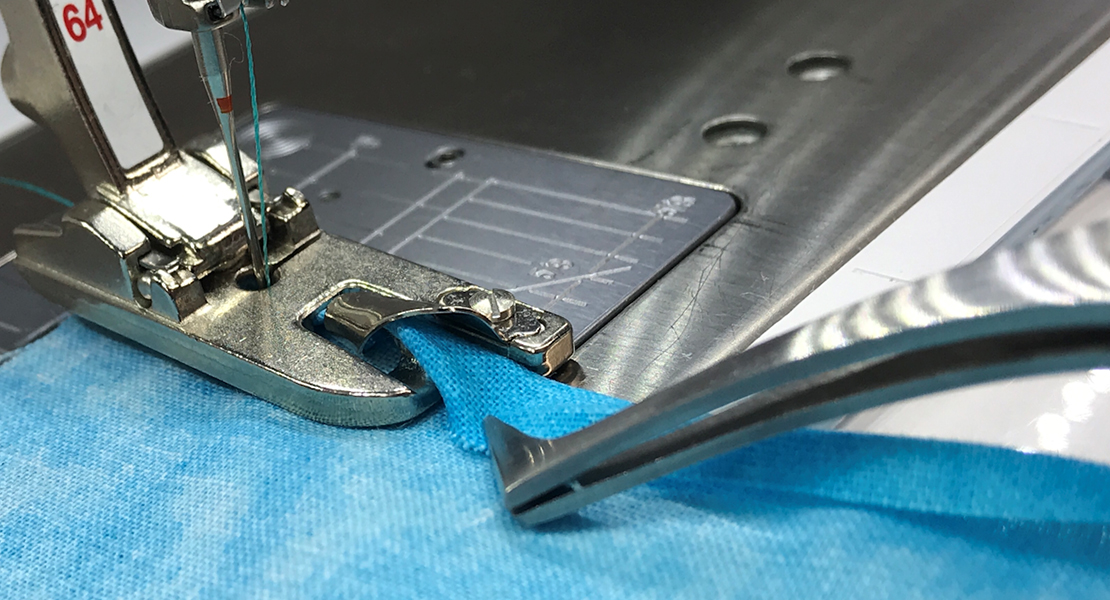
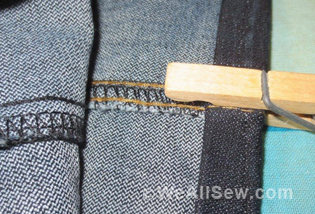
Step 3. Hem contrast panel
Using the Zigzag Hemmer #63, sew a narrow rolled hem along the length of the contrast ruffle panel.
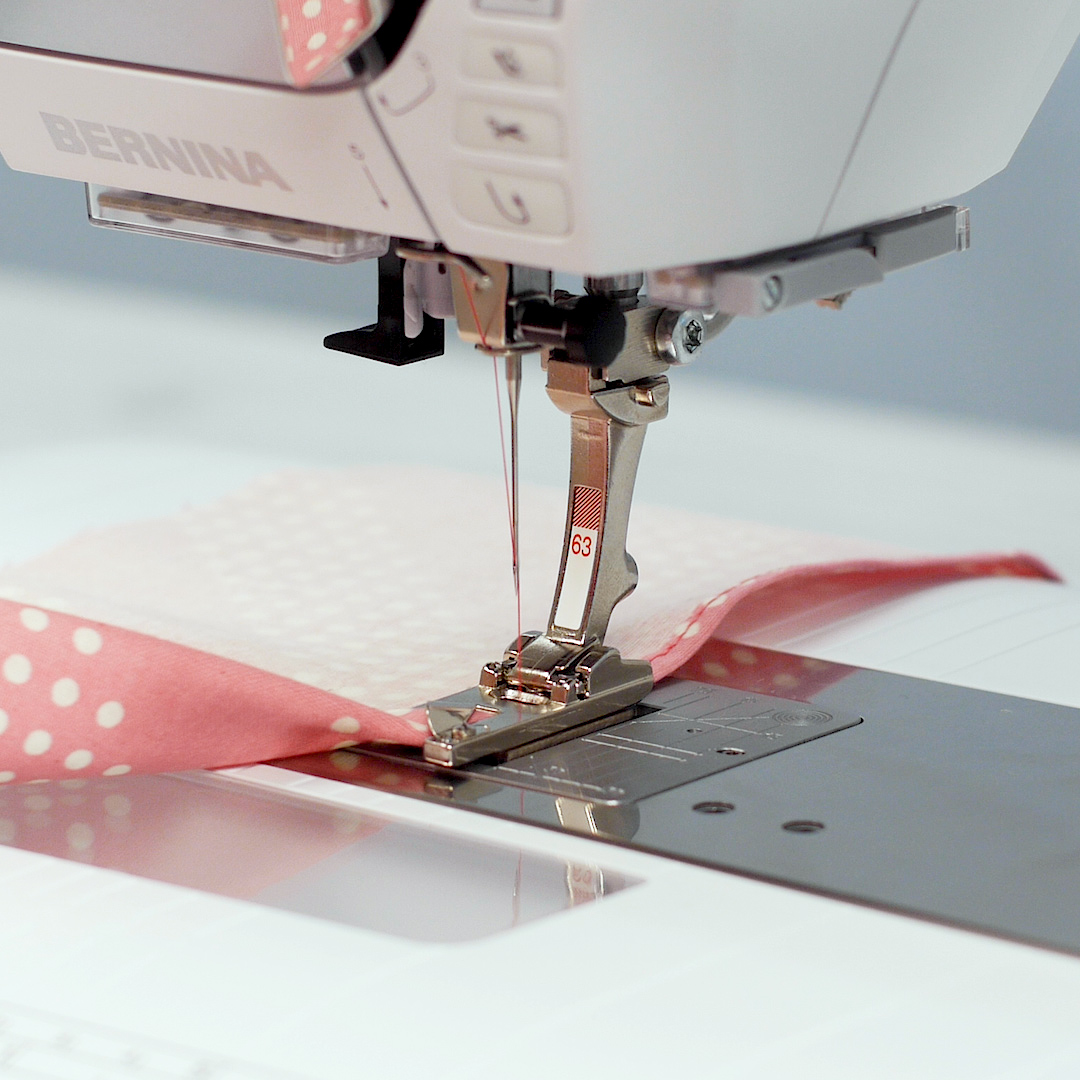
A tip for getting a rolled hem started is to double fold the edge for about ½” along the length and place under the presser foot. Then take four to five stitches, stop with the needle down, slightly raise the presser foot using the Free Hand System, and feed the folded edge into the curve of the rolled hem foot.
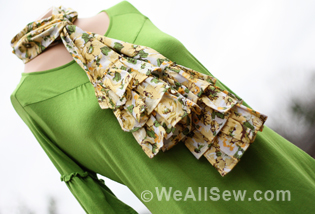
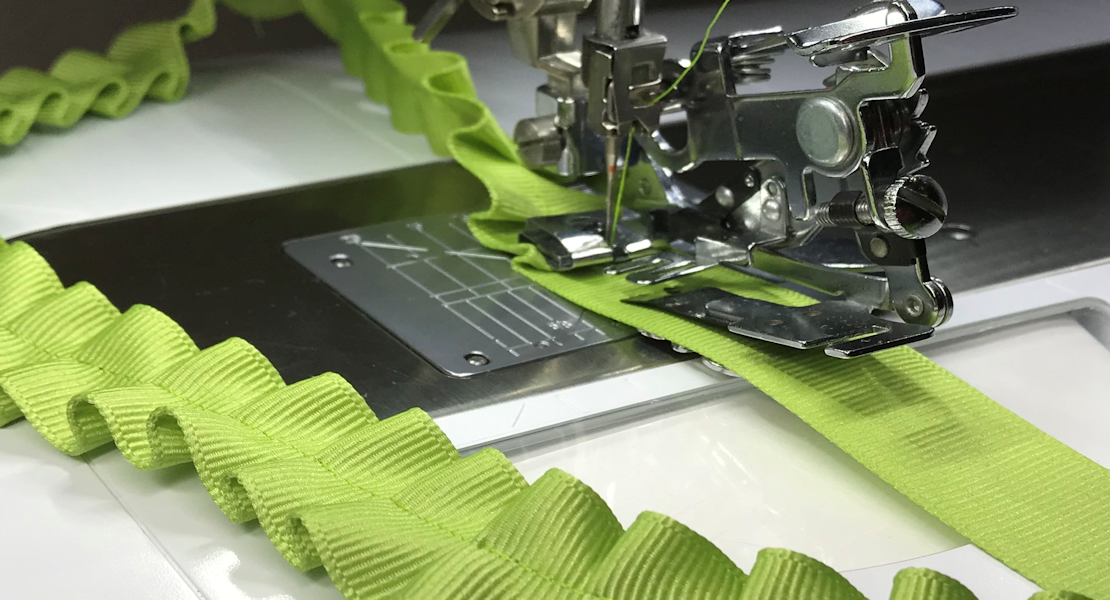
Step 4. Add ruffled panel
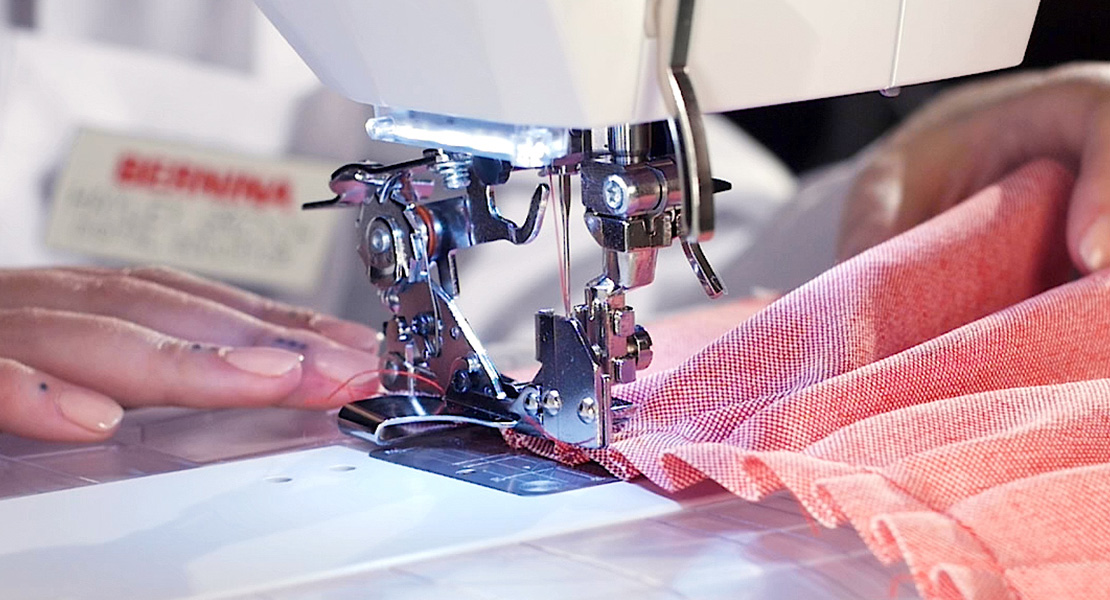
Our next step will ruffle the contrast panel and attach it to the skirt at the same time. It’s important to thread your needle before attaching this presser foot. The automatic needle threader will not work once the foot is on!
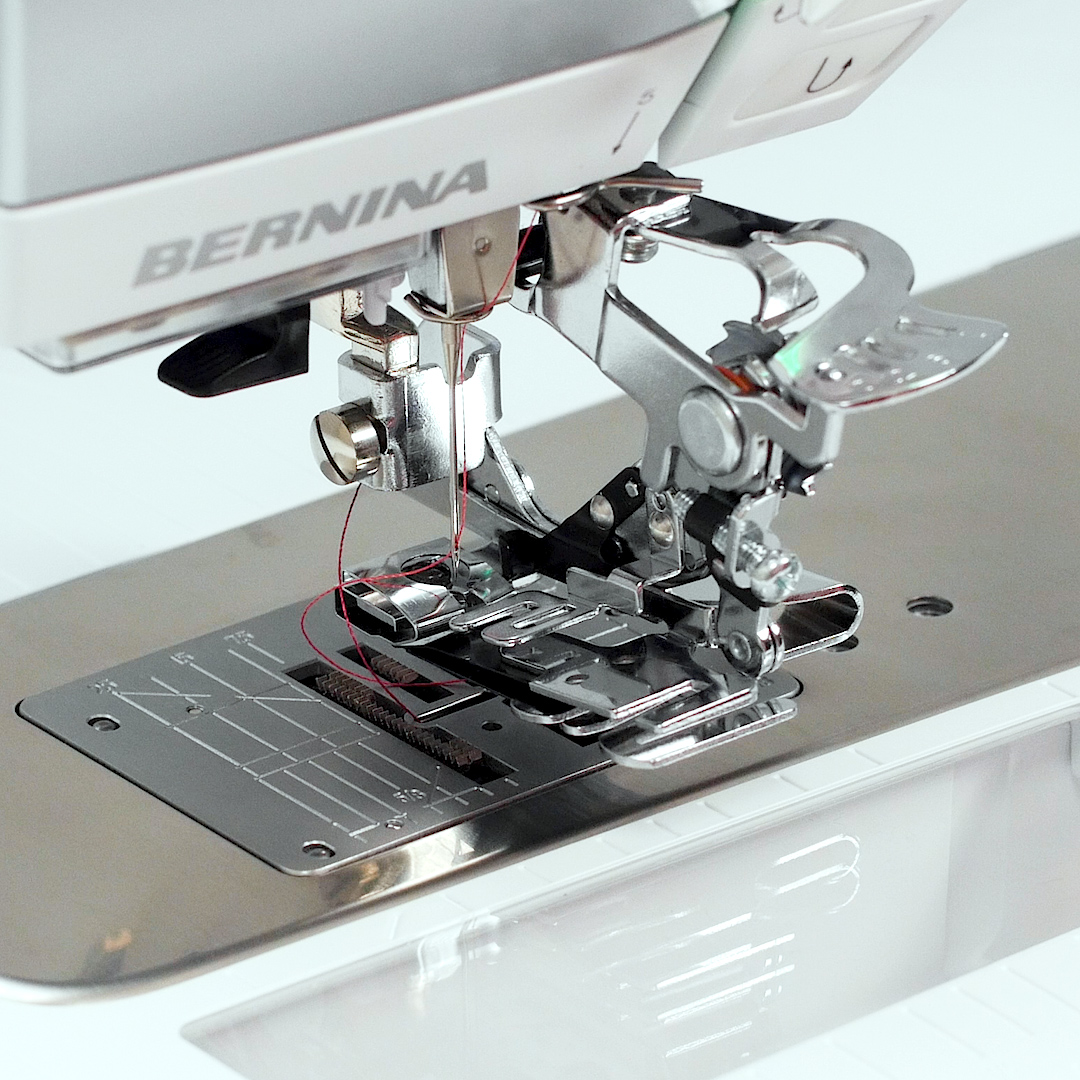
Start by attaching Ruffler #86 to the machine. Place the fork around the needle screw while sliding the shank up onto the cone and securing in place with the lever. The accessory has a small lever at the top with markings noting 0, 12, 6, and 1. These numbers indicate the frequency of pleating. So when the lever is set to 0, it will not pleat at all. At 12, it pleats once every 12 stitches, the six pleats every six stitches, and the one will pleat every stitch.
Set the adjusting lever to 12. Place the unfinished long edge of the contrast panel between the bottom blade and pleating lever, right side down. Place the main skirt panel under the accessory (against the feed dog) with the right side facing up. Be sure to start about half an inch in from the top raw edge.
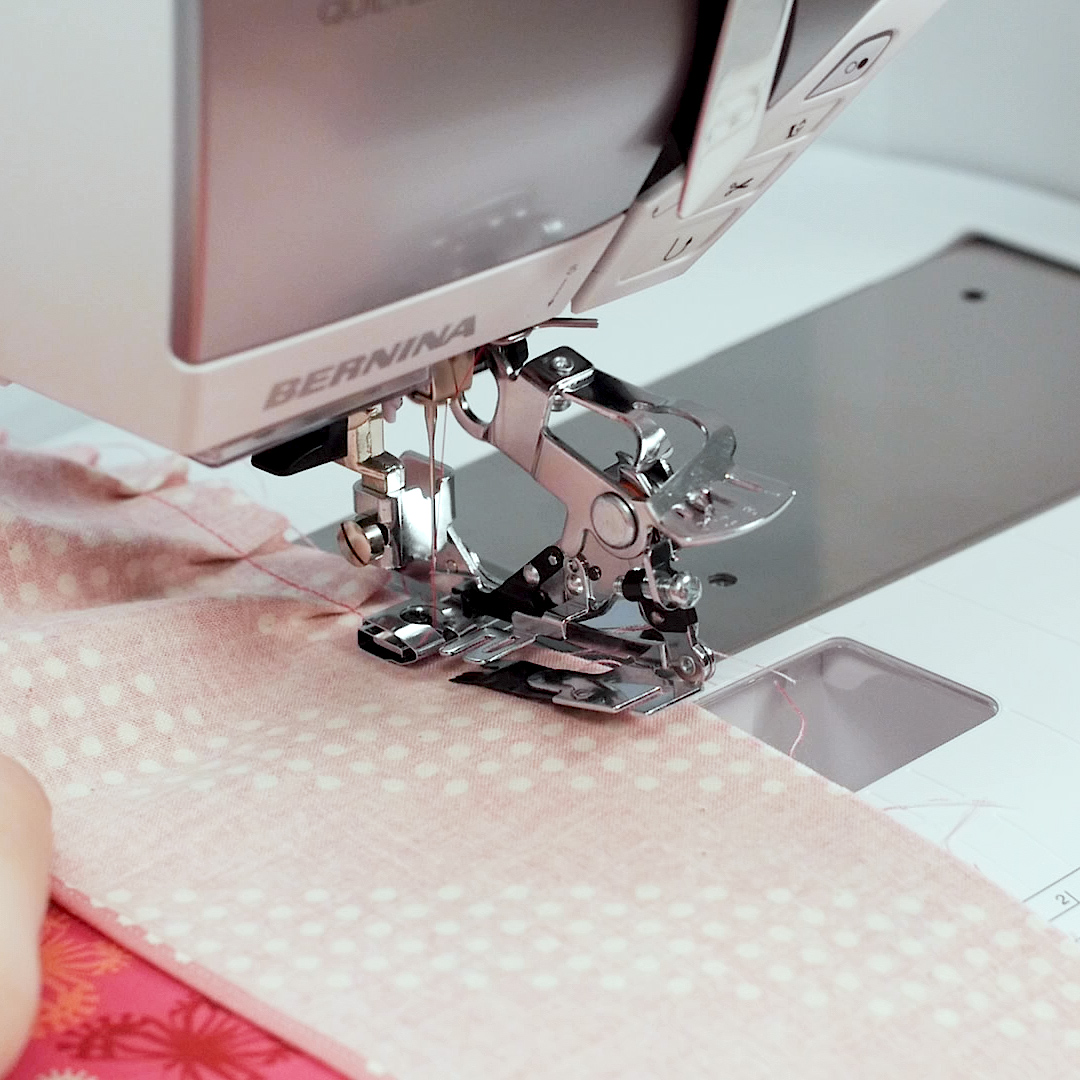
Sew the two pieces together, keeping raw edges on the right aligned. As you sew, the contrast panel will pleat. When you reach the end of the main skirt panel, cut threads and raise the presser foot.
Trim contrast panel to the same width of the main skirt panel, if necessary.
Step 5. Finish raw edge
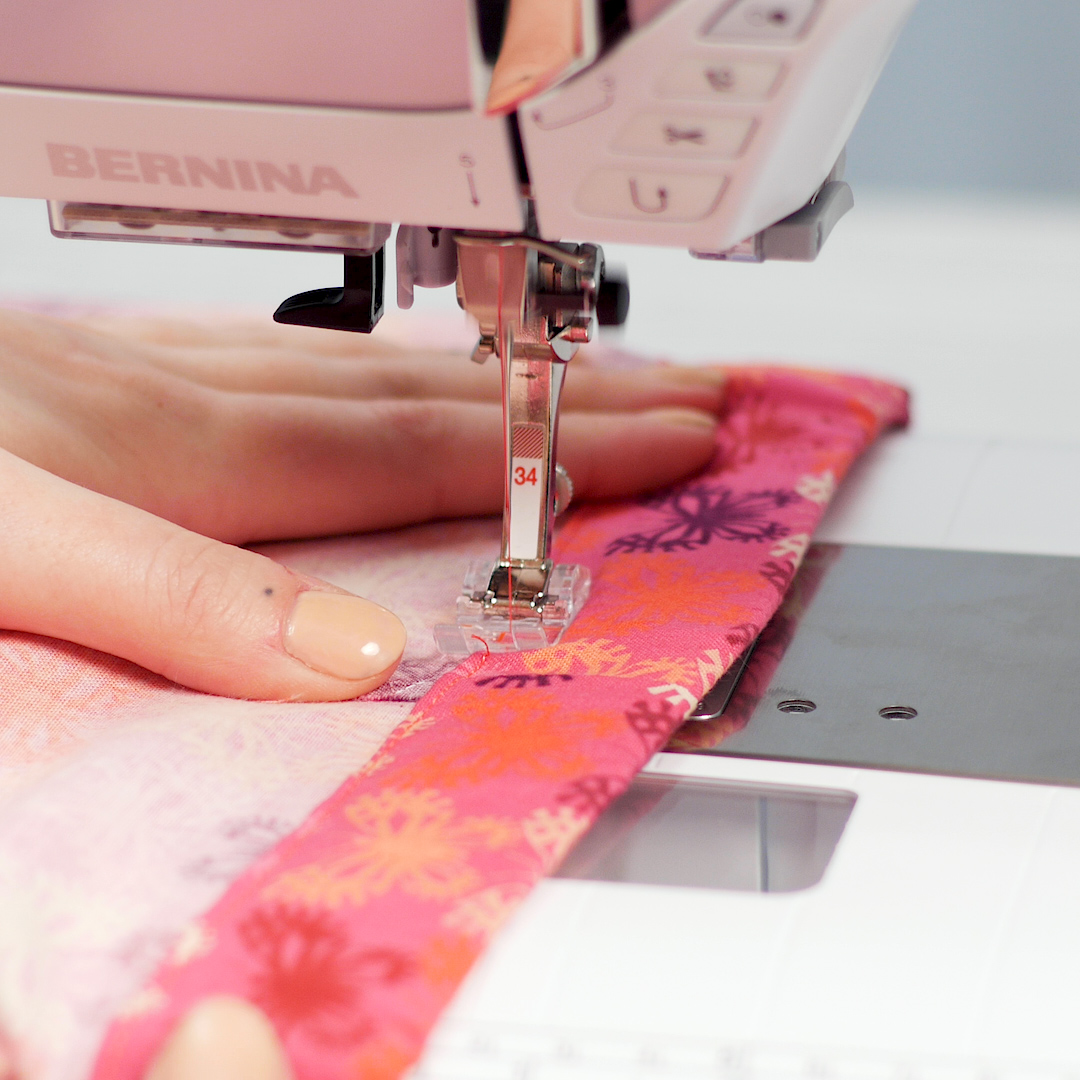
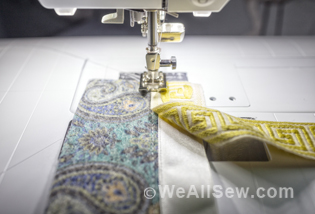
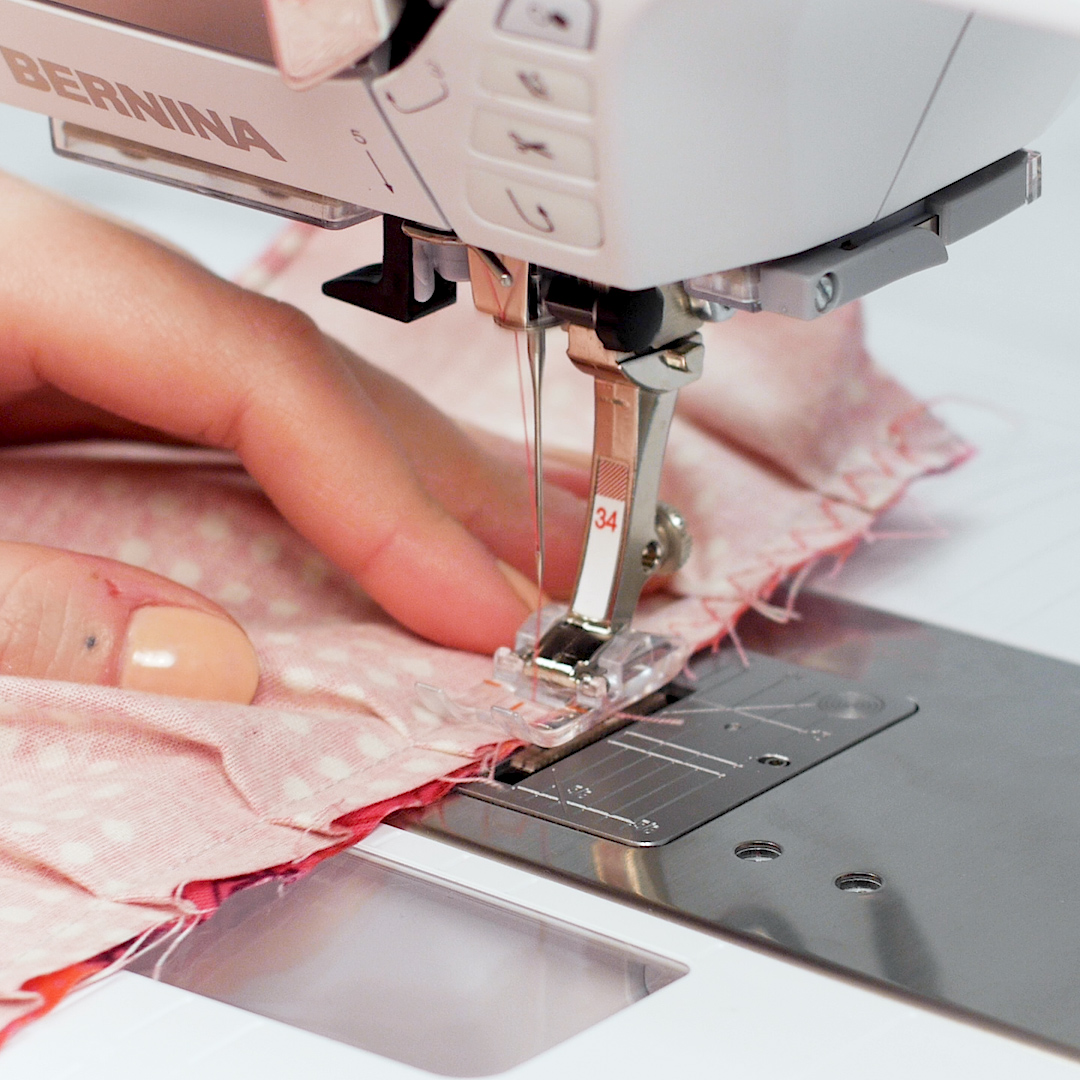
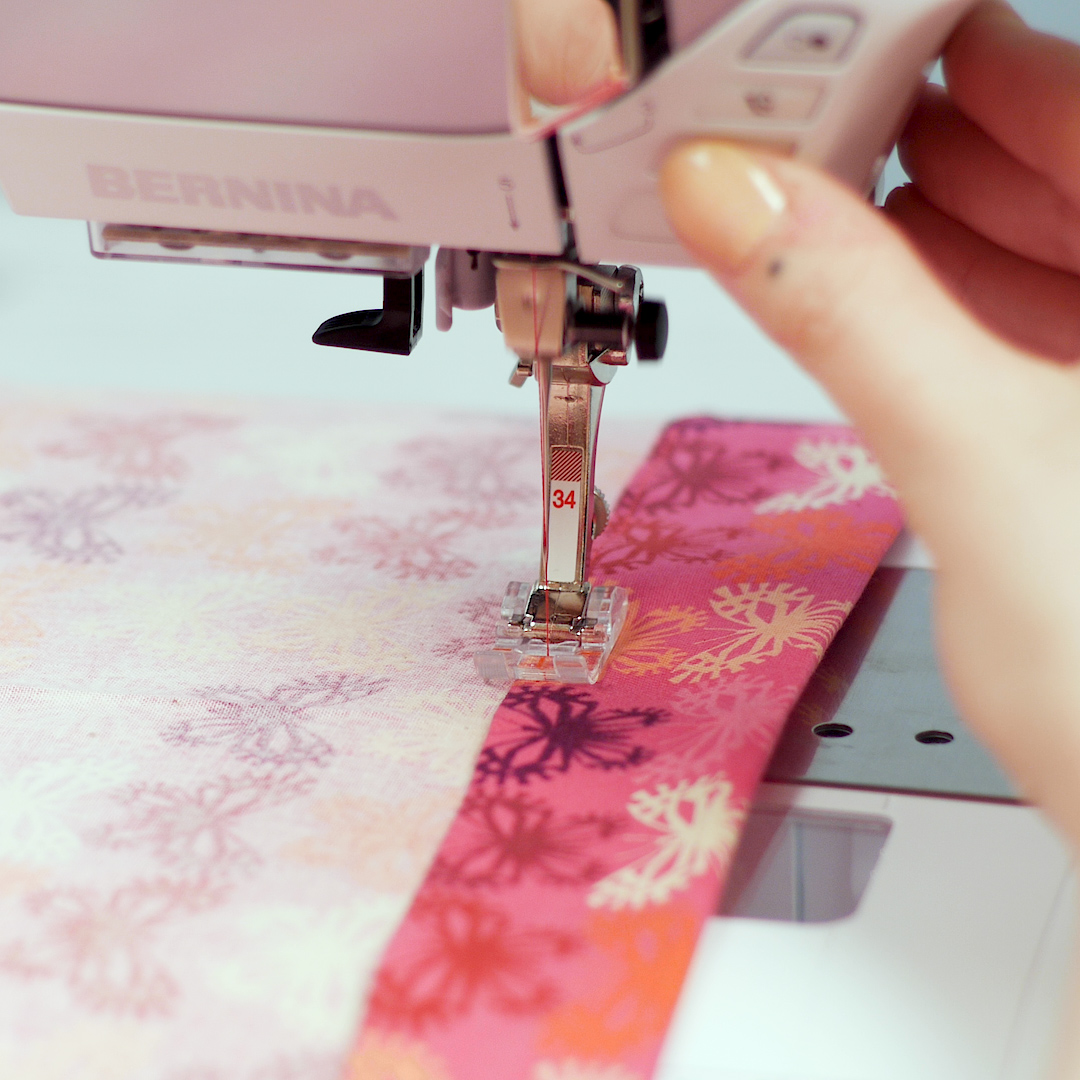
Remove the ruffler from the machine and attach Clear Sole Foot #34.
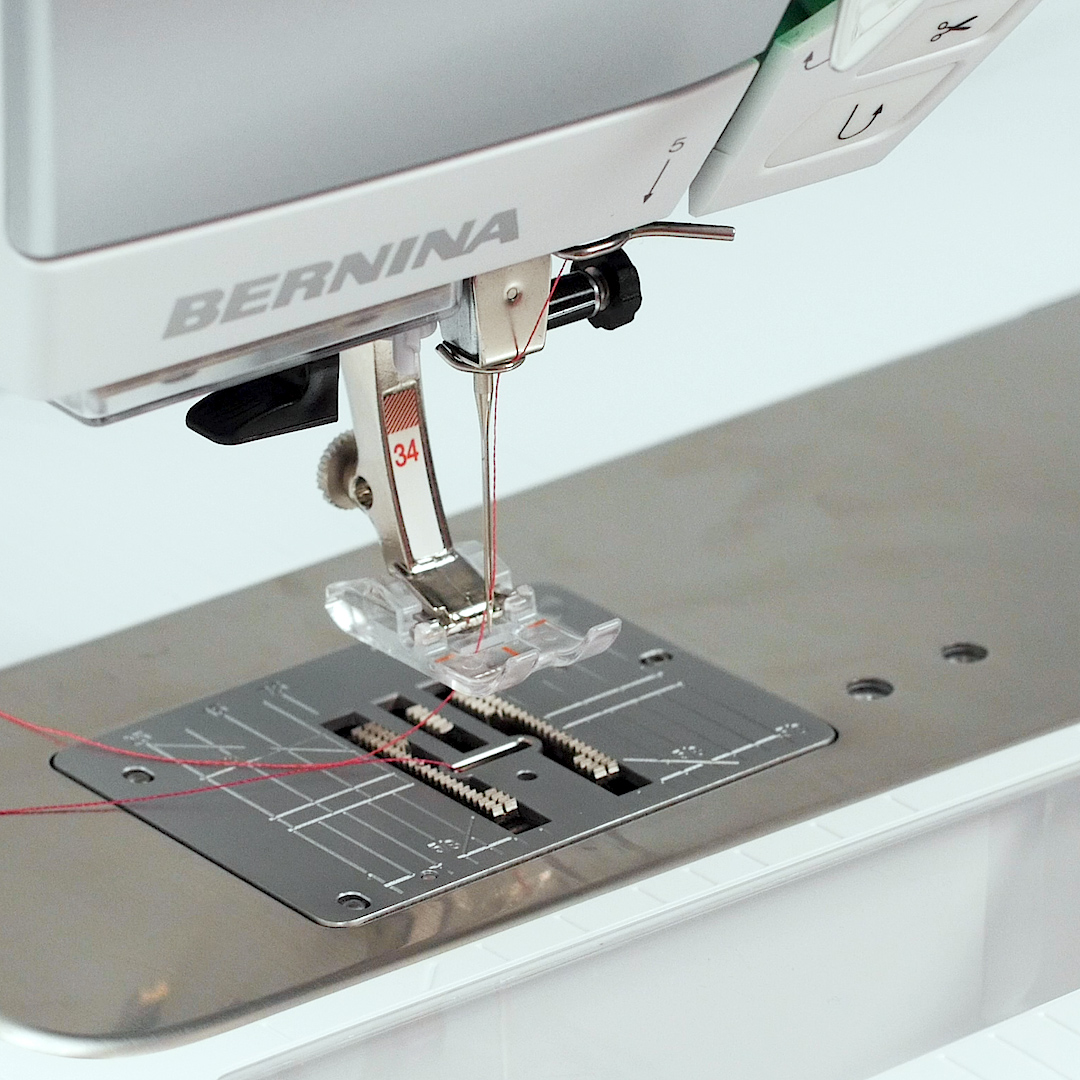
Select a three-step zigzag stitch (#16 in the Practical Stitches display) and increase the stitch length to 1.45 mm.
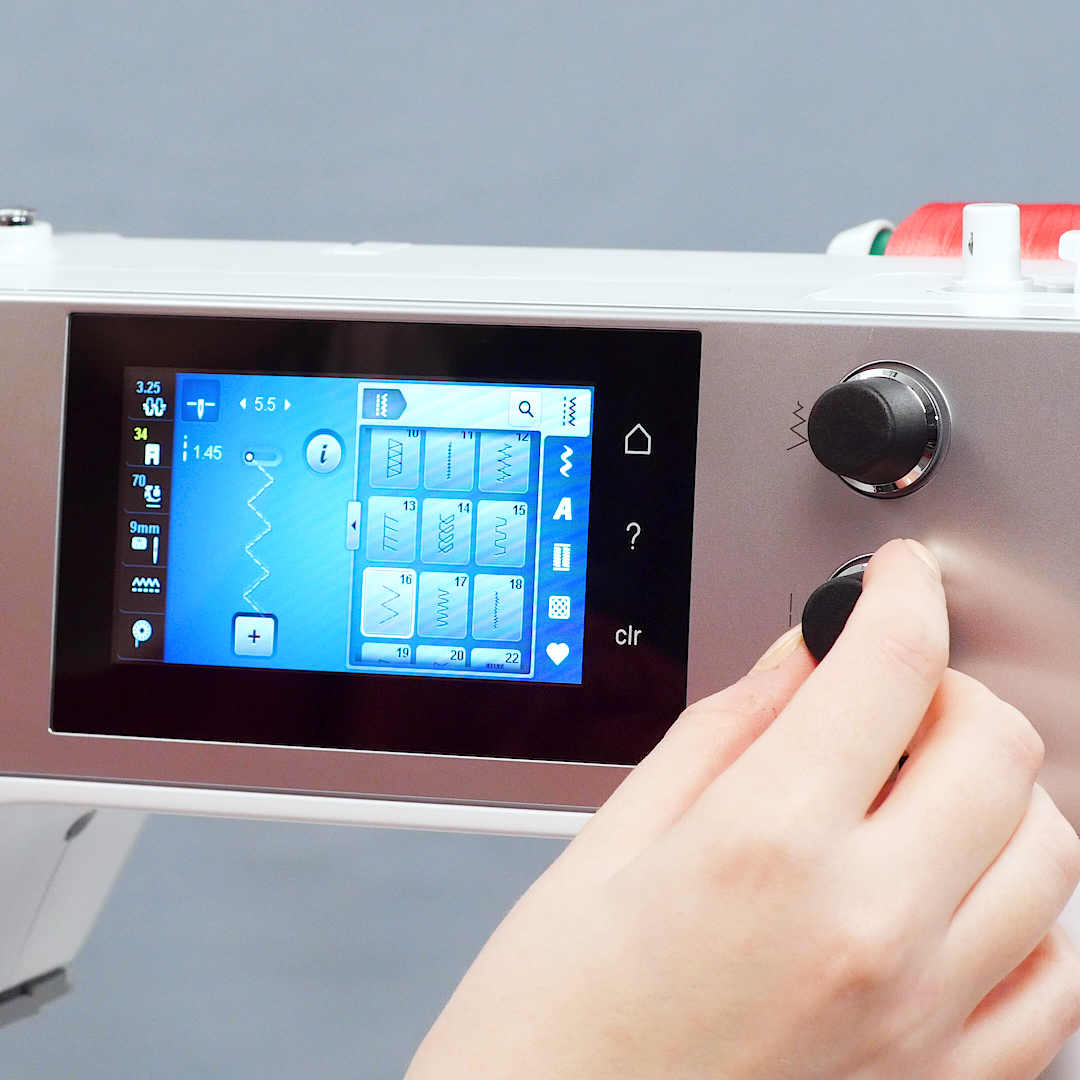
Sew down the length of the seam attaching the ruffle panel to the main skirt panel overcasting the raw edge. This stitch will help keep the raw edge from fraying and will also add strength to the seam.
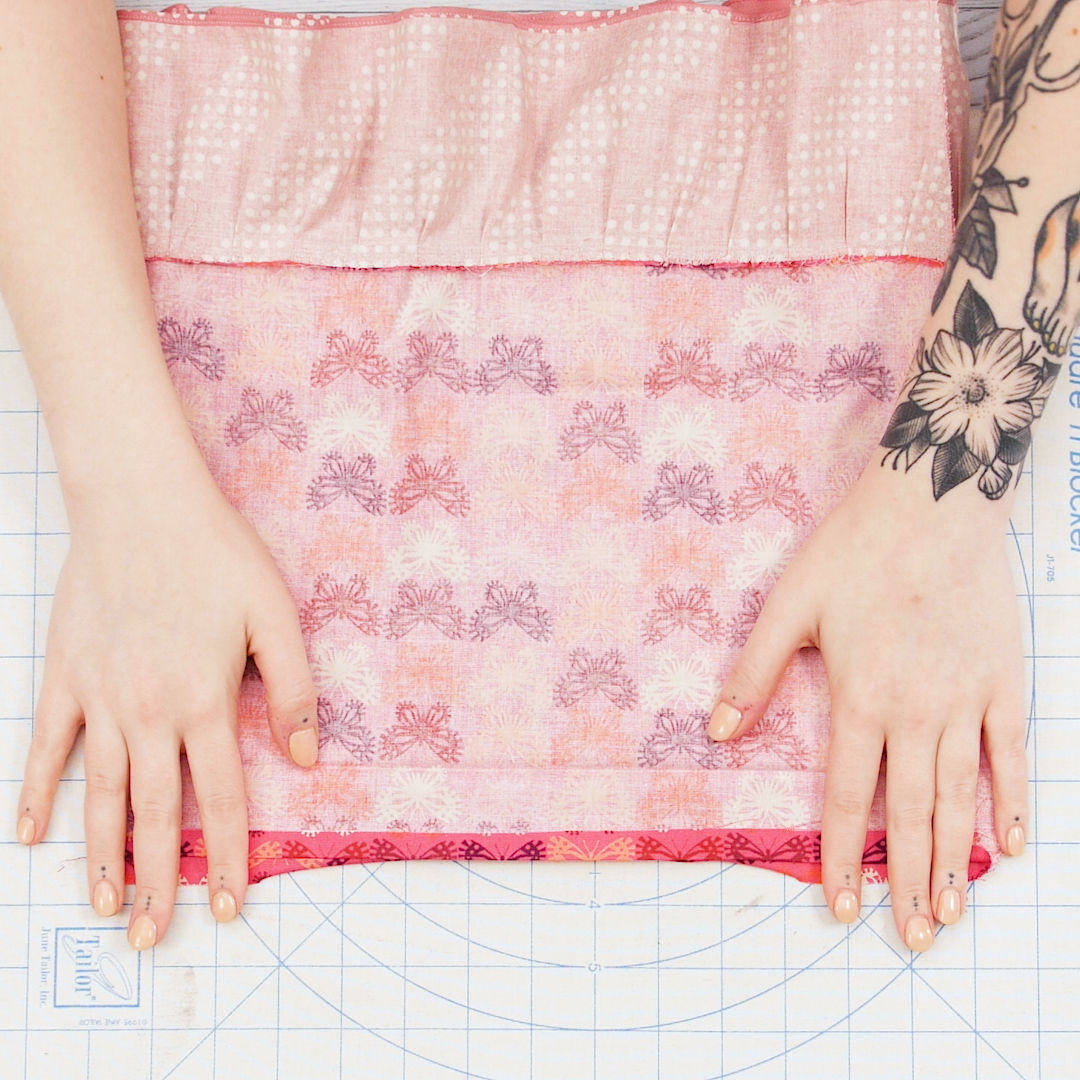
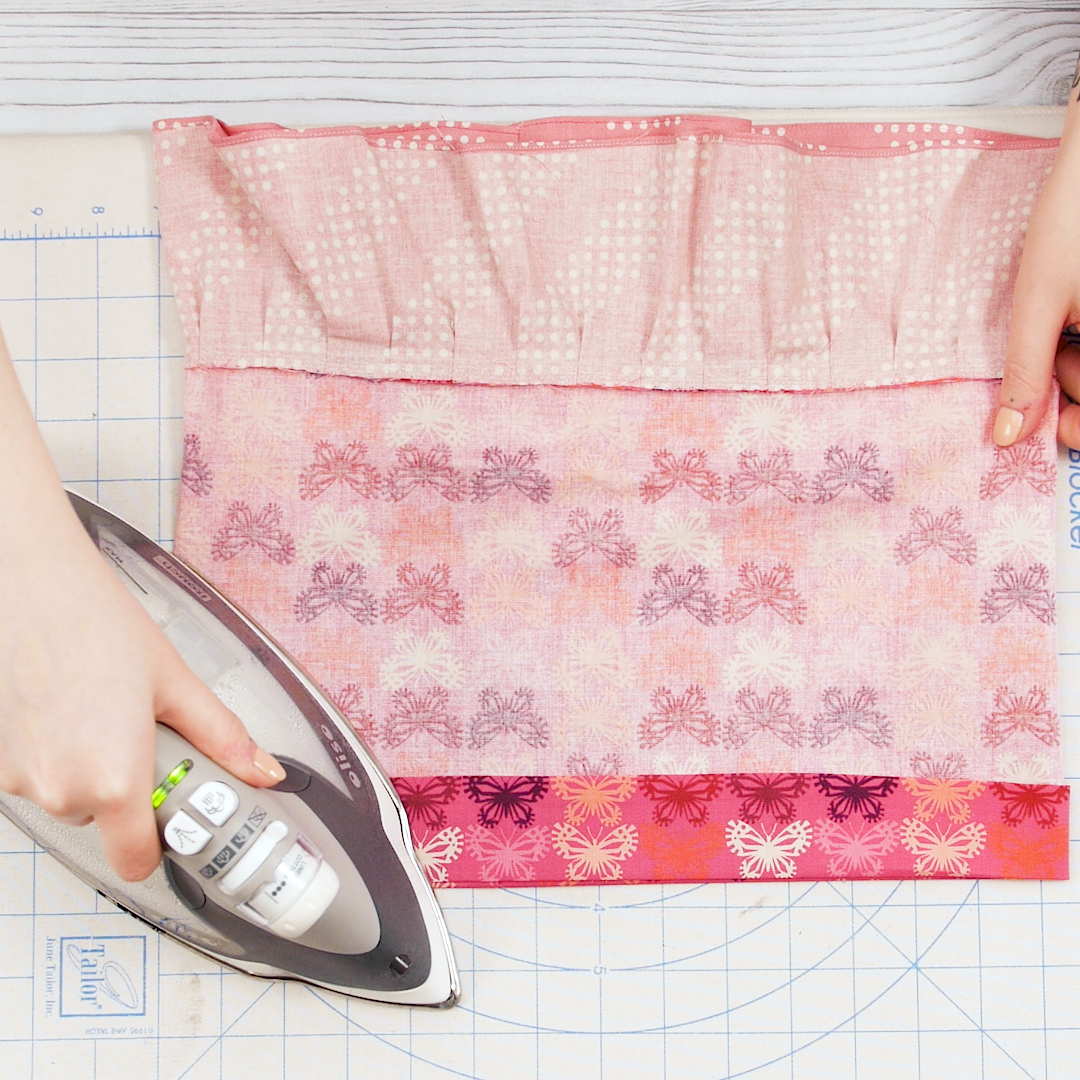
Press the seam allowance toward the main skirt panel.
Step 6. Seam skirt
Fold the skirt in half with right sides together, aligning the edges perpendicular to the ruffle panel, and pin.

Seam together using the three-step zigzag.

Step 7. Press waistband casing
Fold the top raw edge of the skirt in ¼” with wrong sides together and press.
Fold this edge over again, this time 1-1/4” and press. This will create a channel or casing for our elastic waistband.
Step 8. Stitch casing
Select a straight stitch. Beginning with a securing stitch or two to three backstitches, sew down the pressed edge of the elastic casing leaving a four to five inch gap and backstitching or securing at the end.
Step 9. Add elastic
Feed your length of elastic through the sewn casing, using a safety pin or bodkin at the end to help pull it through.
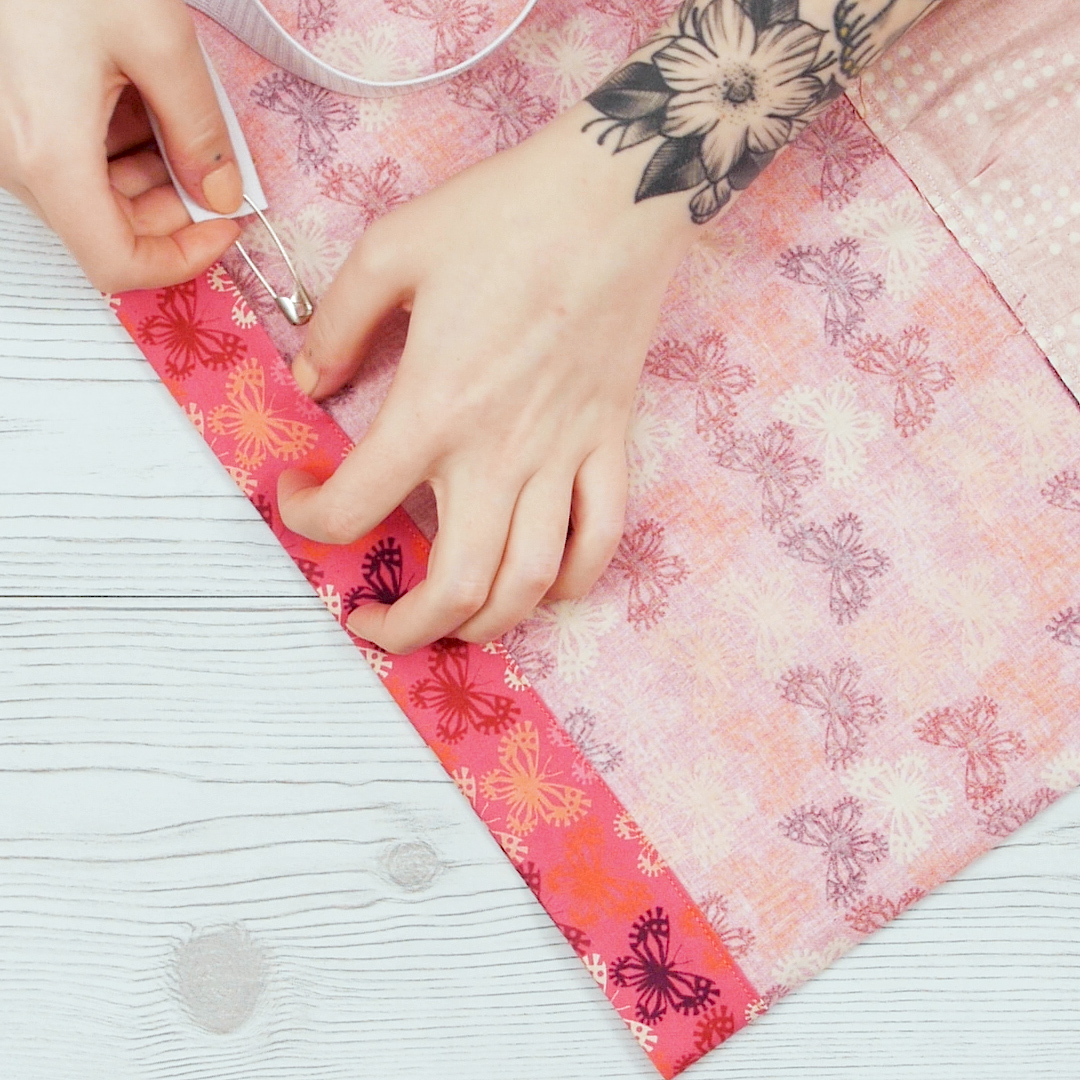
Overlap the ends of the elastic by about ¾” and pin together. Make sure the elastic is not twisted!
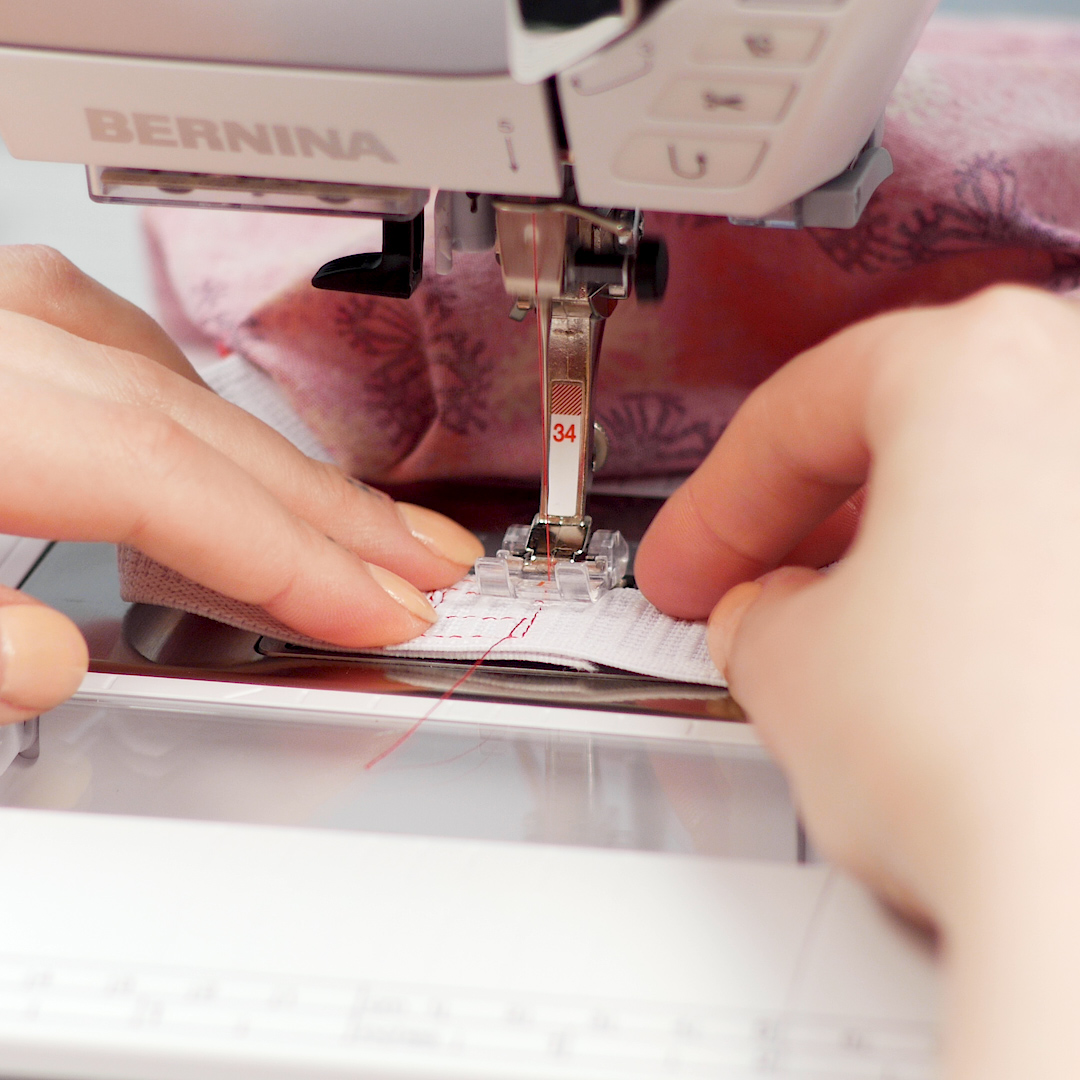
Stitch the ends of the elastic together.
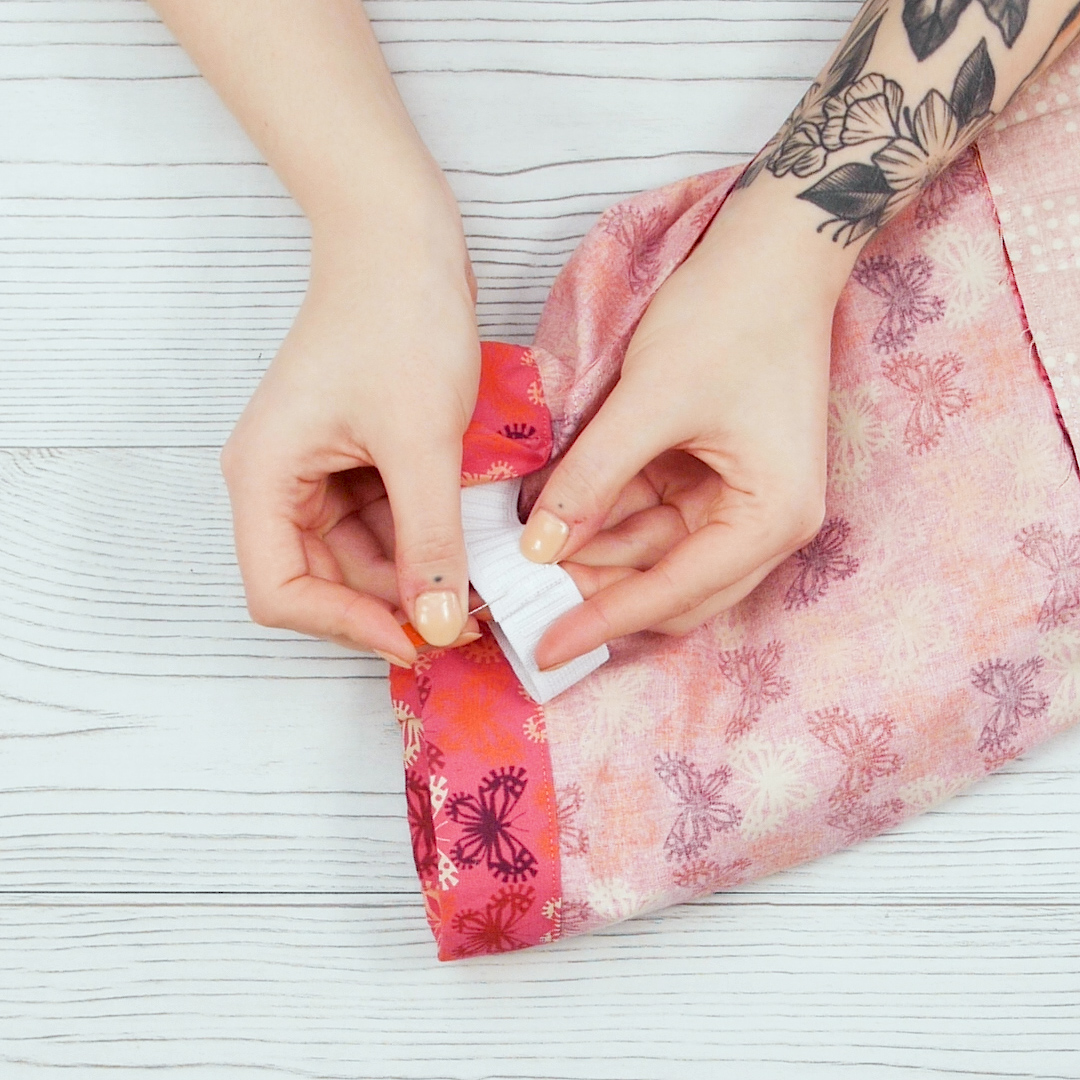
Step 10. Close the gap
With the elastic sewn together, smooth the skirt panel over the elastic where you have left a gap in the casing—the elastic will pull to gather the skirt but we want that area smooth for sewing.
Stitch the opening of casing closed.