Sofa Makeover
Re-upholstery is expensive, so are custom slipcovers. So I have come up with a system that is a little bit of both but different (and easier) than either one. I call it sofa wrapping. I have done it twice for this sofa over the past twenty years, and am about to do it again.
I have a sectional sofa in my family room that has survived two growing boys, two dogs and hundreds of hours of family TV watching, snacking and napping. It is no wonder that even though the frame held up well the fabric did not.
The shape of your sofa will likely be different from mine, but seeing how I wrap mine will give you the general idea so you can customize your own wrapping.
What is the difference between upholstery and slipcover fabric?
Upholstery fabric and slipcover fabric are not the same thing. In upholstery, everything is stripped down to the frame and the fabric required is tacked or stapled in place, so a thick fabric works well. But for a slipcover that fits over the original upholstery, the fabric has to be supple enough to use for the cushions. What I am using is essentially heavy duty slipcover fabric—and I will not be stripping the original fabric from the frame. This is important, as upholstery fabric requires you strip everything down to the frame.
When I can, I always buy my fabric at a store. The advice I get (as I did this time) is invaluable and not something that often comes with online shopping. (If you know me you will know that saving local quilt shops in the country is something about which I have strong feelings. For this project, however, I purchased my fabric at a home dec fabric store, not a quilt shop.)
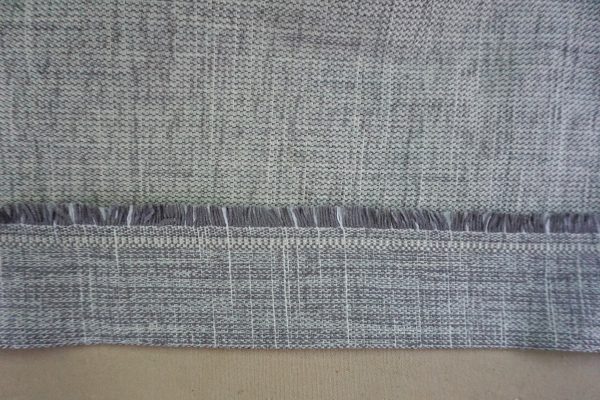
Look for a fabric that has a number of “rubs” higher than 30,000. That tells you it has passed a test for durability. The pretty gray and white tweed I found is 100% polyester, 54″ wide, and has withstood 45,000 rubs.
When wrapping (or upholstering or slipcovering) a sofa, you will undoubtedly need to “railroad” the fabric. That means for some of the cuts of fabric, you will need to use the running yardage rather than cutting pieces selvage to selvage. For other areas cutting selvage to selvage may be your most efficient use of fabric. Keep this in mind when choosing a fabric—one with a print or a strong horizontal or vertical orientation will require more yardage and must work in the railroaded direction.
To figure the yardage for my sofa I considered several things. First, my sofa lives permanently up against a wall so the back never sees the light of day (in fact, the original fabric in the back is still in perfect condition). I simply don’t plan to cover it. That saves me a lot of yardage. The original fabric is still intact so I will pull some of what shows to the back and pin—saving me about five yards of fabric. If your sofa back does show, you need to figure that yardage.
I measure my two sofas (after all, a sectional is essentially two different sofas). One is 78″ wide and the other is 84″ wide. That means I can cover both of the inside backs (just behind the upper cushions) with 4 running yards of fabric—railroaded so there are no seams. To be safe, I plan on five. I will need five yards x about 28″ wide to tuck into the bottom of this area and loop around to the back. If you need to cover your back, plan on that much more fabric.
The easiest way to do the bottom front is with a skirt, even though that isn’t the way the original sofa was upholstered. The skirts on each of the sections of the sofa will require the same number of yards as their backs at a width of about 15″. Lucky for me that means I can get both the skirts and the front backs from one cut of fabric 15″ plus 28″ is still less than 54″). So 5 yards covers me there.
I figure another yard for each of the arms (in my case there are three arms on the two sofas). Each seat cushion is about 30″ deep by about 25″ wide (interestingly, all the cushions are slightly different in size, so later I will show you how I sorted that out and labeled them) but another yard for each one will be more than enough. There are six seat cushions and seven back cushions (in a sectional sofa the corner seat cushion has two corresponding seat back cushions); I planned on a yard for each of those as well, even though they are a bit smaller. It never hurts to have a little extra. That means another 14 yards, which brings me to a total of 22 yards. I don’t trust myself, and want extra in case something stains or rips (plus I may want to make a matching ottoman), so I ordered 30. That is a lot of belt and suspenders, but I like to know I am covered in something goes wrong.
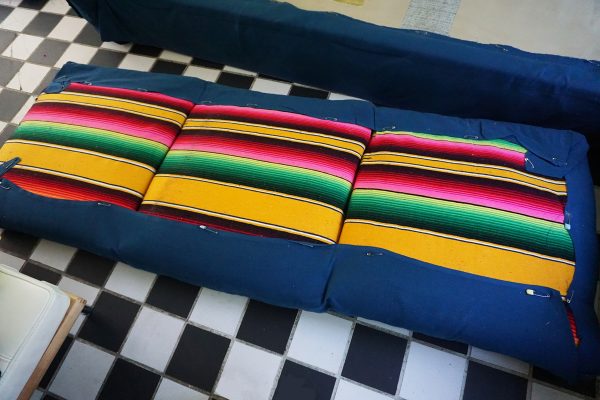
There is another consideration and that is to wrap all three seat cushions for each sofa as a single piece, which is what I did the last time—you can see here I simply laid them on the fabric and pinned them all together as a single piece. That would have saved me quite a bit of fabric (not to mention time), but this time I wanted to do each seat cushion on its own—I just think it looks more finished.
So let’s get started!
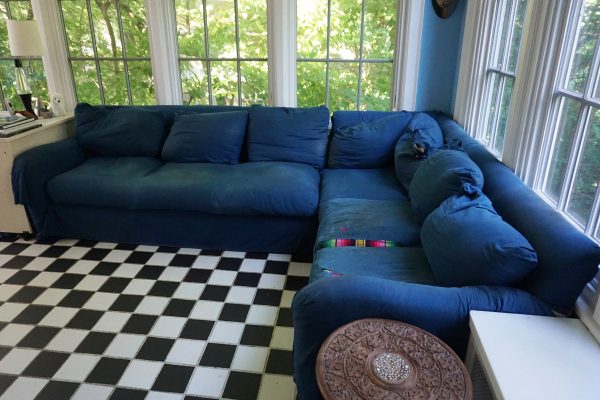
Here is what the sofa looked like when I started.
What a mess, right? Originally, it had a black and cream tweed (not all that different from what I bought this time—I guess our tastes never really change!) followed by Mexican blanket covered pillows and the original fabric on the frame (yes, I had someone buy me eight matching Mexican blankets in Mexico and used them to cover the seat and back cushions—very cute and economical); followed by a fairly plain blue cotton canvas. Looking at the sofa is like seeing an archaeological excavation!
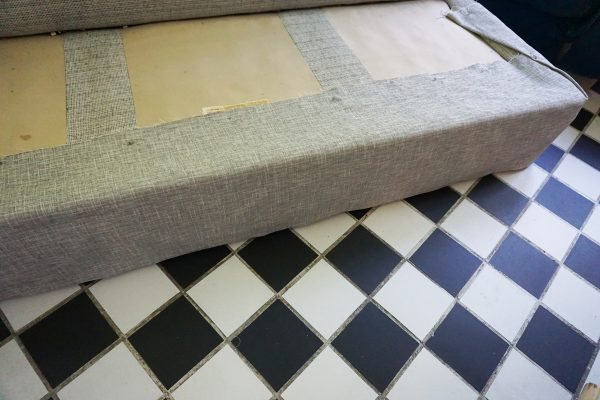
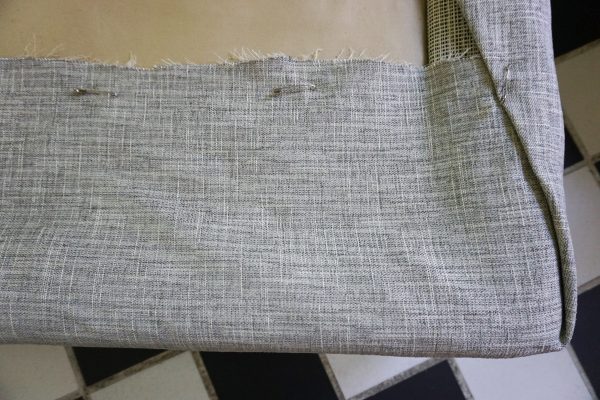
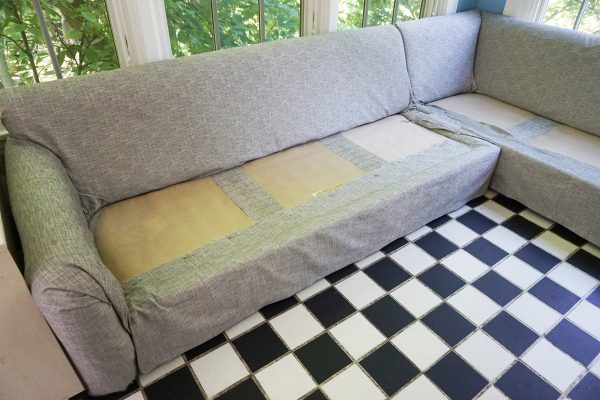
I begin with the skirt since it is the easiest part. I take a strip of fabric as long as the sofa is wide plus a few inches to wrap or fold under on either end. I need to hem the bottom. This could be sewn on the sewing machine, hand sewn, or fused. I choose to fuse so I cut strips of fusible and turned up the selvage edge 1.5″ and fused my hems.
Lining them up even with the floor, I then pinned them to the front of the part of the sofa that will be covered by the seat cushions using quilt pins—which won’t show once the pillows are replaced.
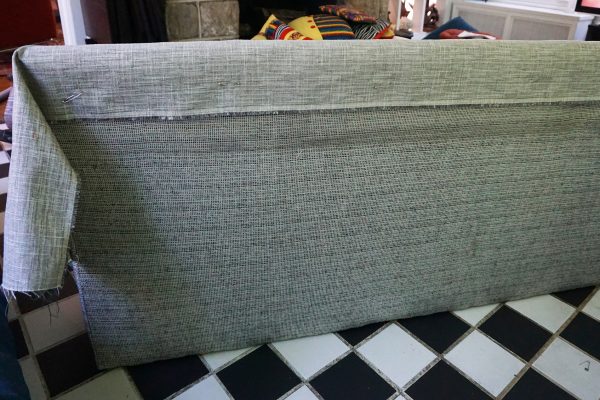
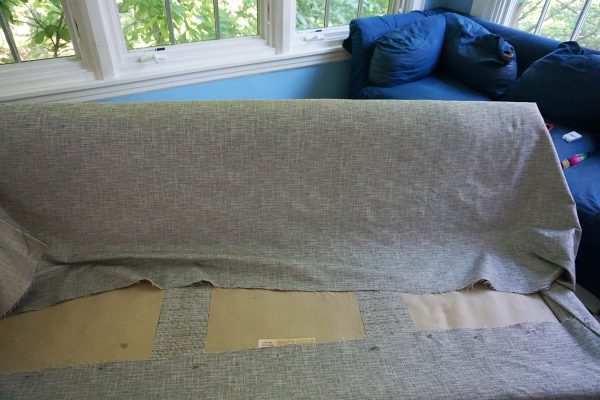
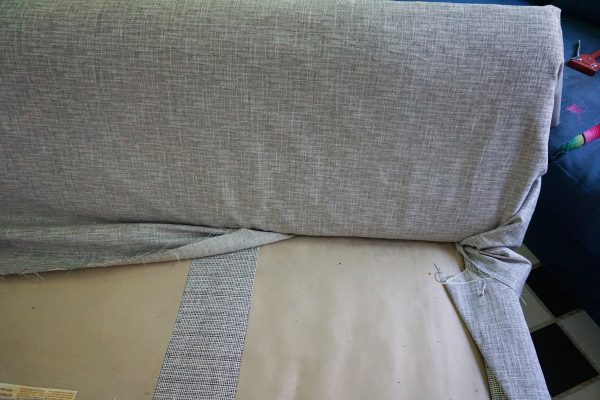
Next I wrap the back of the frame. This really just takes a little patience to figure it out. I take all the blue cotton off, leaving the original layer of fabric. One piece of new fabric covers the back front and pinned along the back.
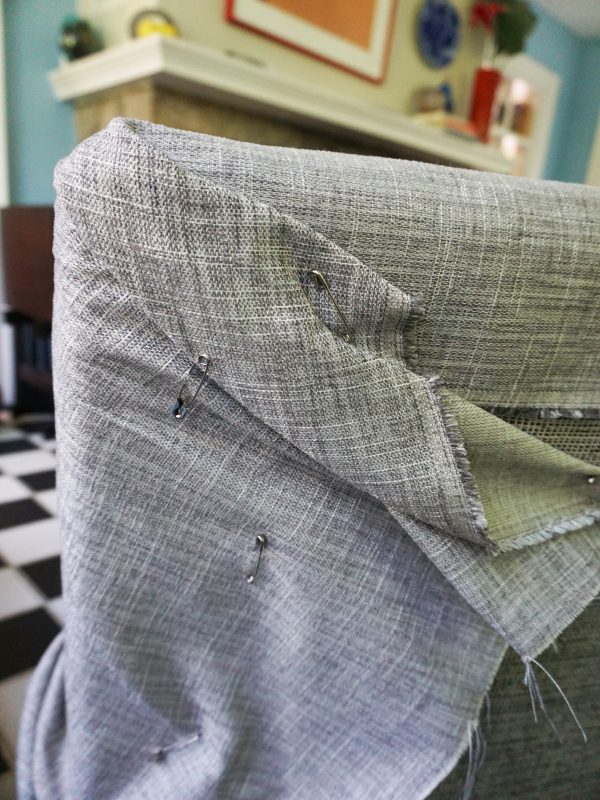
Tucked in at the bottom (underneath where the seat cushions will be) and pinned at the back so it doesn’t show (remember if the back of your sofa shows, either cut a single piece of fabric that will reach all the way around or sew a seam where the original upholstery has one and do it that way). Back is wrapped and pinned. I use quilting pins—since they are stainless steel I know they won’t rust and destroy the fabric. Cheaper safety pins could rust and/or stain over time with moisture and humidity. Here is how it looks from the back—remember my sofa is up against the wall and no one will ever see this.
If the back of your sofa will show, turn under one inch at the top and each of the sides or the piece you cut for the back. From underneath, staple or pin at the fold so the three sides are attached to the frame or hand sew the edges to the old fabric. Then pull the bottom side of your fabric piece under the bottom of the sofa and either staple or pin underneath to hold it taught.
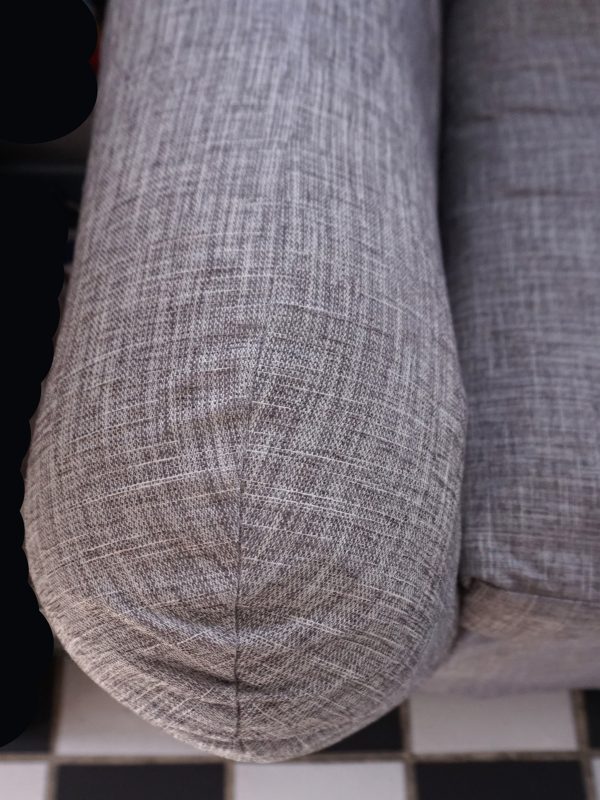
The arms of this sofa are a little strange, and originally had a weird pleating to get around them, so I just played with it until I got something I could live with and pinned where it wouldn’t show. Where it will show I placed straight pins and later I will hand-sew that in place. I am making an arm cover for both arms anyway, since the sofa arms always take a lot of abuse, so in the end this won’t really show anyway.
Now the frame is complete and I can move on to the cushions. I will start with the seat cushions. Originally they had zippers in the back which makes it easier for the upholsterer to close the backs without hand sewing, but I figure it will be actually take me less time to finish the backs by hand.
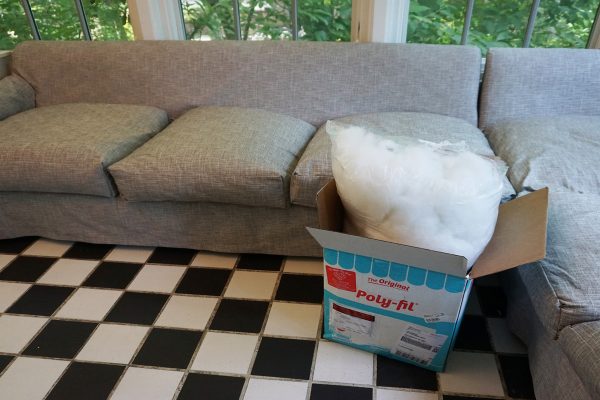
A seat cushion is usually constructed by wrapping a piece of foam with batting, and in this case, then covered with a cheesecloth kind of casing. When I take the first of the original pillow cases off, that cheesecloth layer of the pillow insert is ripped in places and looks pretty dirty. I don’t even want to show you a photo of it, it is so grungy. I carefully cut that layer away to reveal the two layers of batting covering the foam core. Since the pillow has lost its shape in the front (I suppose from all the pressure put on the front of the seat cushion), I put some fiber fill in the area that has been crushed down. I move this around carefully with my hand until it looks nice and even. The rest is in decent shape so there is no reason to replace anything. I lay each pillow onto the right side of my fabric, cut the size I need and pin the seams to fit the pillow with the wrong side showing. I carefully take this off the pillow, sew on the machine as pinned and put them back on the pillow. Once all the pillows are done, I fluff them into their new casings and sew the backs closed.
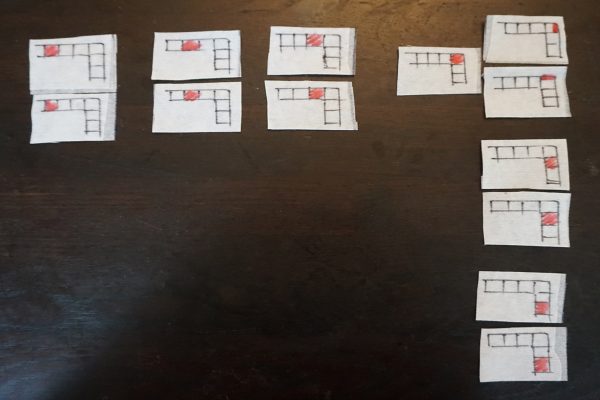
Now the back cushions. Over the years they have completely lost their original shape and look like bags of rocks. I want to restore them and make sure each one fits the seat cushion with which it corresponds. Remember I told you all the cushions are different sizes? Once I figure out where each of the seat cushions belong, I labeled the back with their location—so I will always know where each one belongs. The labels were made from two strips of 2″ fusible interfacing with the two fusible sides pressed together. Then I drew the outline of the sofa in black marker and highlighted the position in red. Each back cushion will be customized to a specific location as well, also labeled the same way so I can remember when they all end up on the floor (as they often seem to do).
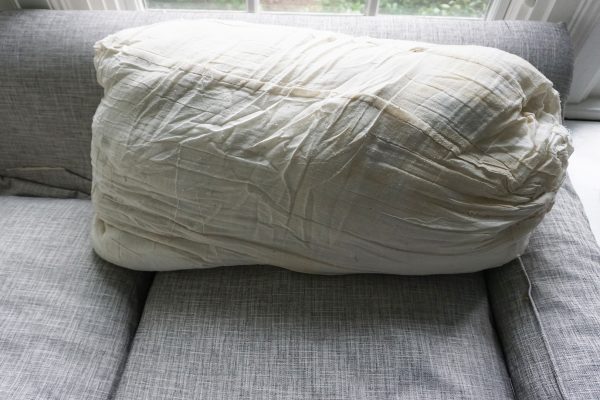
First I get the cushions out of all their layers. Here you can see one in its underwear.
See how misshapen they have gotten. I want to make new casings for them that will coax them into the right size and shape. The same way I did the seat cushions, I pin fabric around them, pushing and pulling the guts of each pillow to the shape I want. Next, I use fiberfill to tuck in and make sure the pillow feels nice and full and even, being careful not to fill them so much that they get too hard. Then so it all looks smooth, I sew these new casings and make sure everything looks good (they are all mismatched since I used up stash fabric I didn’t want anymore).
Now I make the pillow covering in the same way I would make any pillow. A template made from card stock helps me keep the corners consistent.
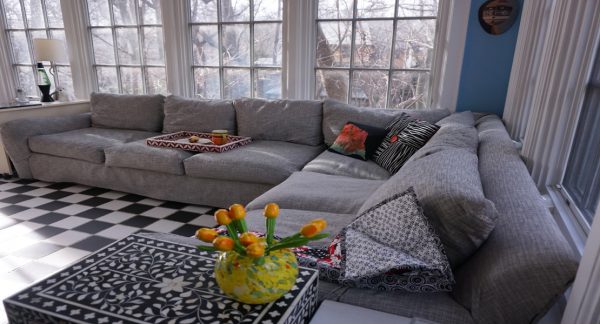
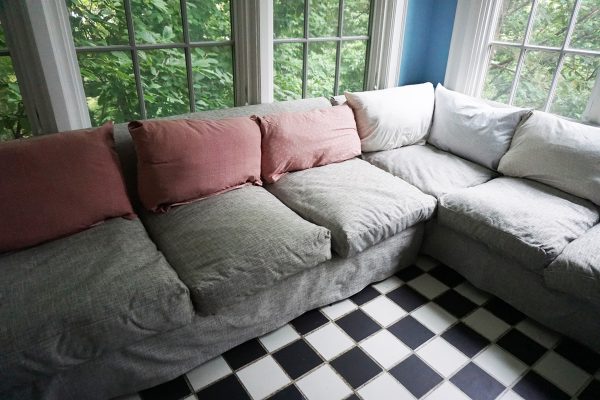
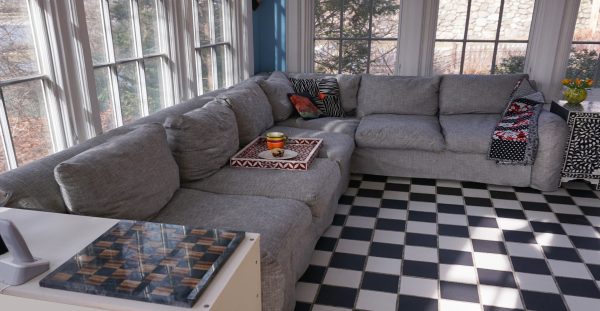
All the bottoms are hand sewn closed and I am done. The wrapping of the frame took about an hour or two, the pillows took several days working a few hours at a time, but it is done and I saved myself a ton of money. You may notice the finished shots are taken in the winter and the wrapping shots were done in the spring; that is because I have been enjoying the sofa for several months. Now, if you will excuse me, I need to take a nap on my refreshed sofa!






Thank you! That sofa looks great! I have two that are reclinable. When it comes time I hope to remember your ideas and put them to good use!